Throughout 007 First Light, you’ll encounter numerous locked safes, keypads, cabinets, lockers, and secured doors that require specific codes to open. This guide collects every safe code and door code in 007 First Light in one place. Whether you’re stuck on a puzzle, searching for a collectible, or simply want quick access to a locked area, you’ll find all the combinations you need to keep progressing through the game.
Laundry Door Code & Manager’s Office Locker Code
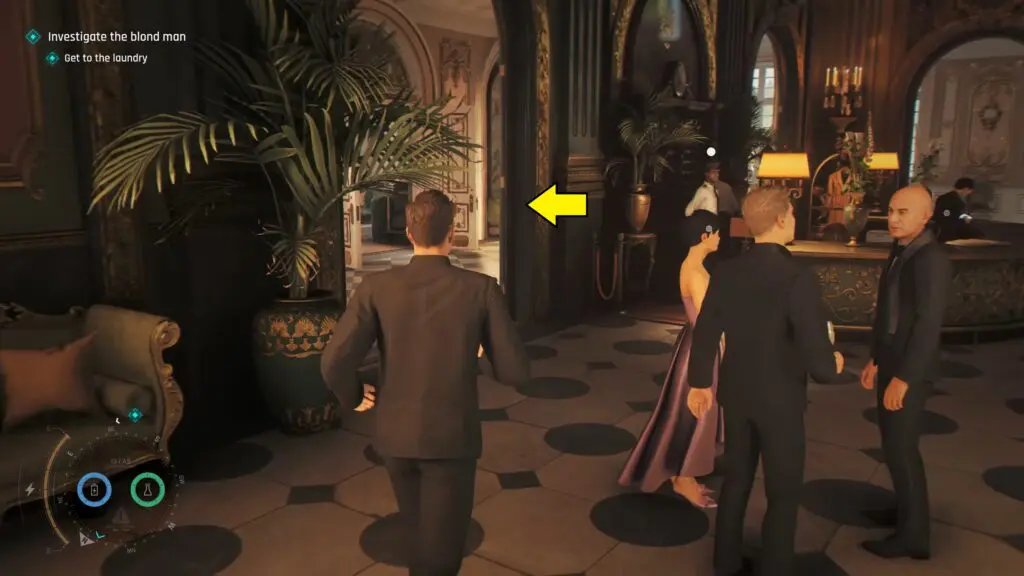
Checkpoint: 03 The game is on
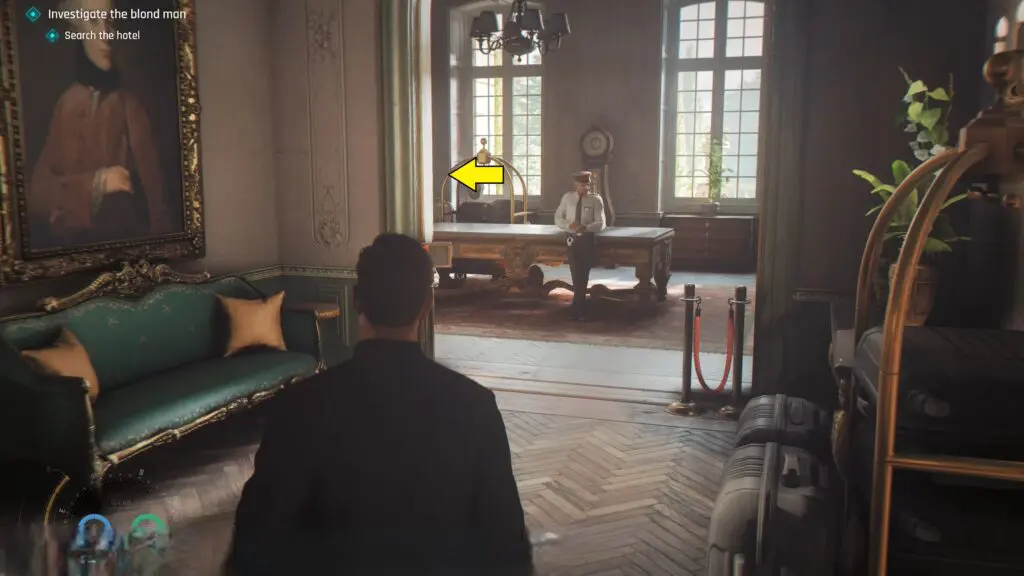
Starting from the checkpoint overlooking the chess tournament, head downstairs to the hotel’s reception area. Once you arrive, move behind the front desk and look for a white door that leads into a restricted staff-only section of the building.
You will find a guard blocking your path to the Manager’s office. Since the guard blocks the only path forward, you’ll need to distract him. An easy way to do this is by using a dart to make him feel ill, causing him to leave his post.
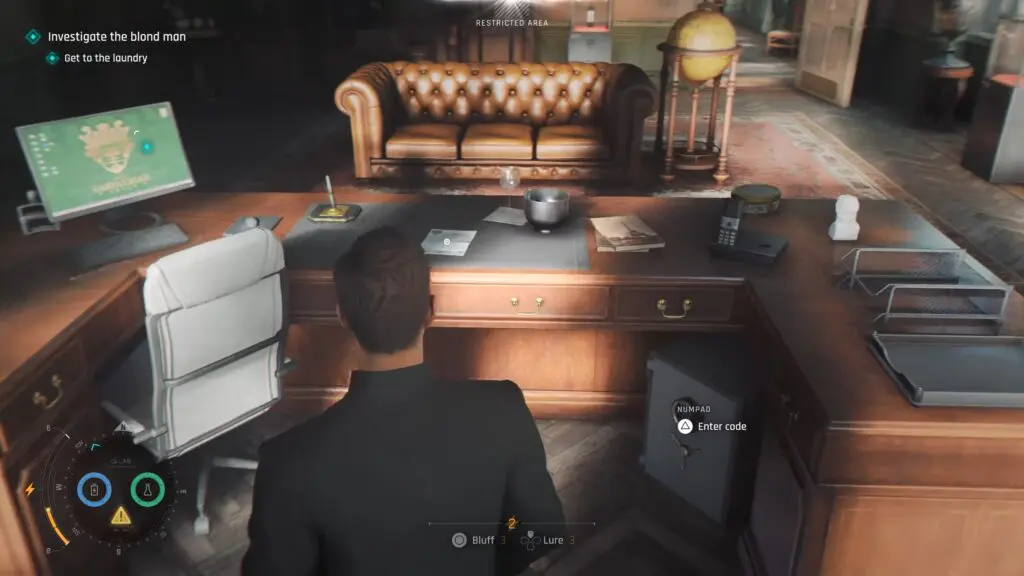
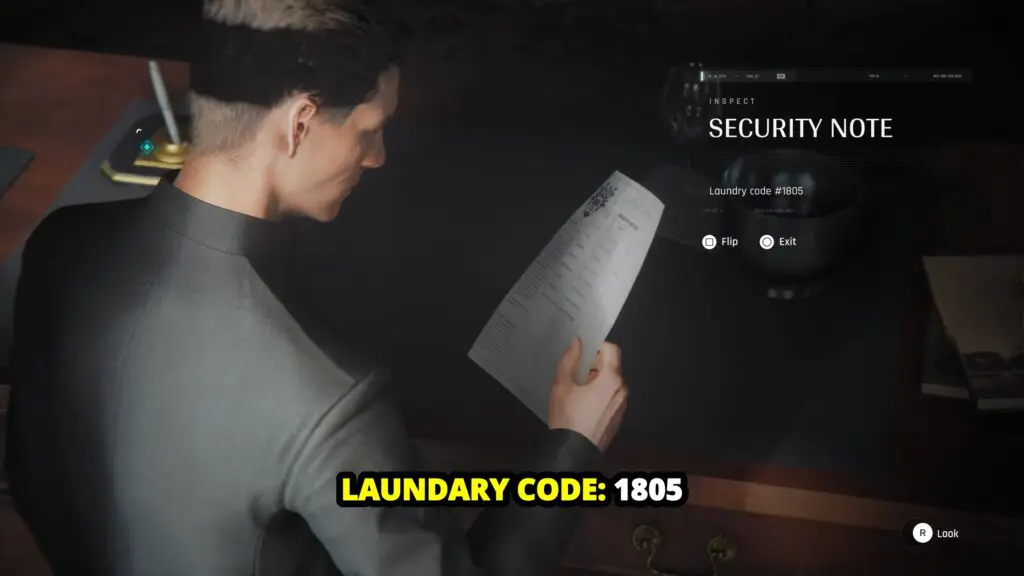
Once past the guard, enter the hotel manager’s office, which is a restricted room on the left. Inside, approach the manager’s desk and inspect the documents on top. You’ll find a Security Note that contains the Laundry Door Code: 1805.
How to Get the Manager’s Safe Code
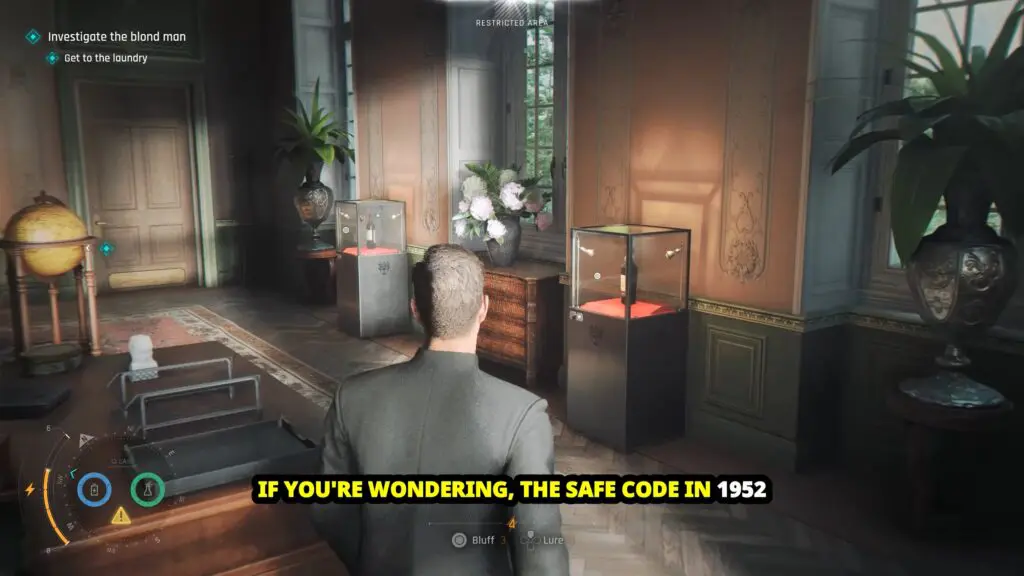
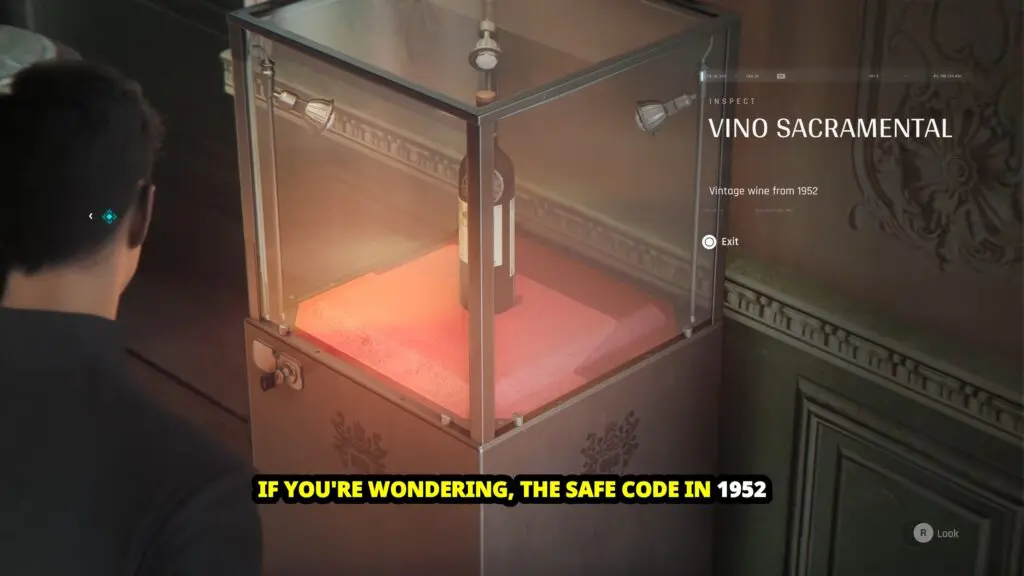
In the Manager’s Office, look at the wine display on the wall across from the manager’s desk. One of the wine bottles has the year 1952 on it. This is the safe code.
Next, go to the manager’s desk and look underneath it. You’ll find a safe in the corner. Enter the code 1952 to open it.
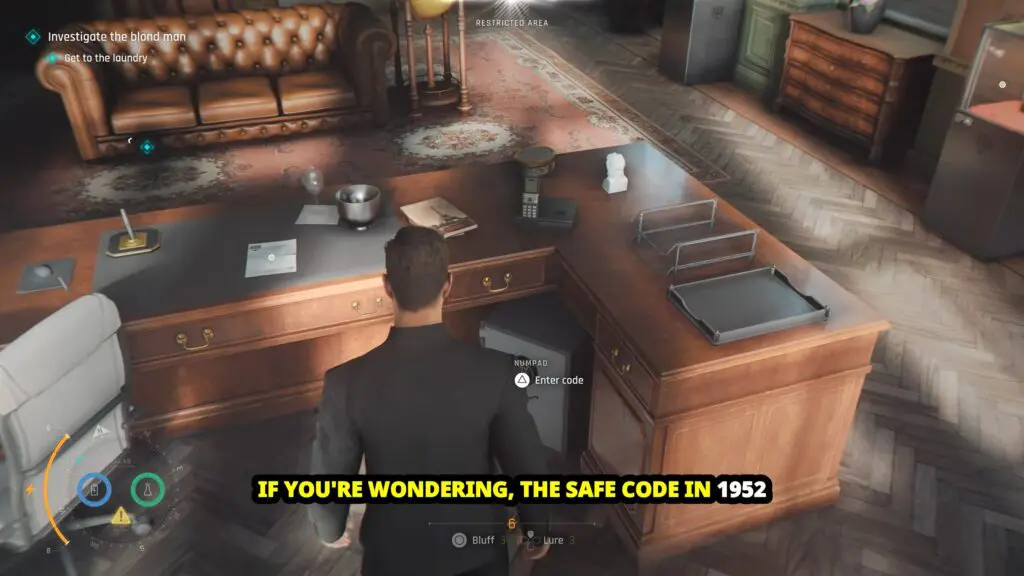
Inside the safe, you’ll find the 6 of Roses Collectible and the Cellar Key.
How to Solve the Fireplace Puzzle
The clue for this puzzle can be found on the wall near the fireplace. Look for the large chimera artwork displayed between the red and blue banners. The image shows a mythical creature made up of three different animals:
- Goat for the head
- Lion for the body
- Snake for the tail

These three animals are the key to solving the puzzle. The puzzle is based entirely on the chimera depicted on the nearby wall. Since the creature is made up of a goat’s head, a lion’s body, and a snake’s tail, those are the three symbols you need to activate on the puzzle panel. Selecting any other animals will not work, so make sure you choose only the Goat, Lion, and Snake symbols.
Which Symbols to Select
Interact with the puzzle above the fireplace and select the following animal symbols:
- Lion (top-left symbol)
- Snake (left-side symbol)
- Goat (bottom-right symbol)

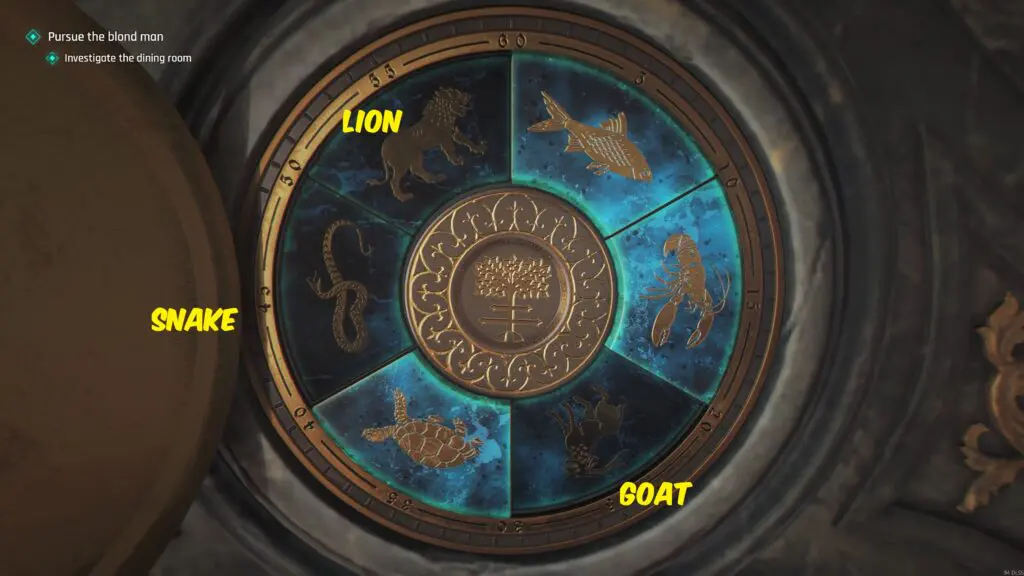
Once all three correct animals are selected, the puzzle will be solved.
Where to Find the Password in Webb’s office
To unlock Webb’s safe, you’ll need to follow a clue provided in a note from Isola. The note contains a password hint that points to four objects found around Webb’s office. This clue not only tells you which objects to inspect, but also the exact order in which their numbers should be entered into the safe.
- Diploma, Painting, Game, Model

Explore Webb’s office and examine the following items carefully. Each one contains a number that forms part of the safe combination.
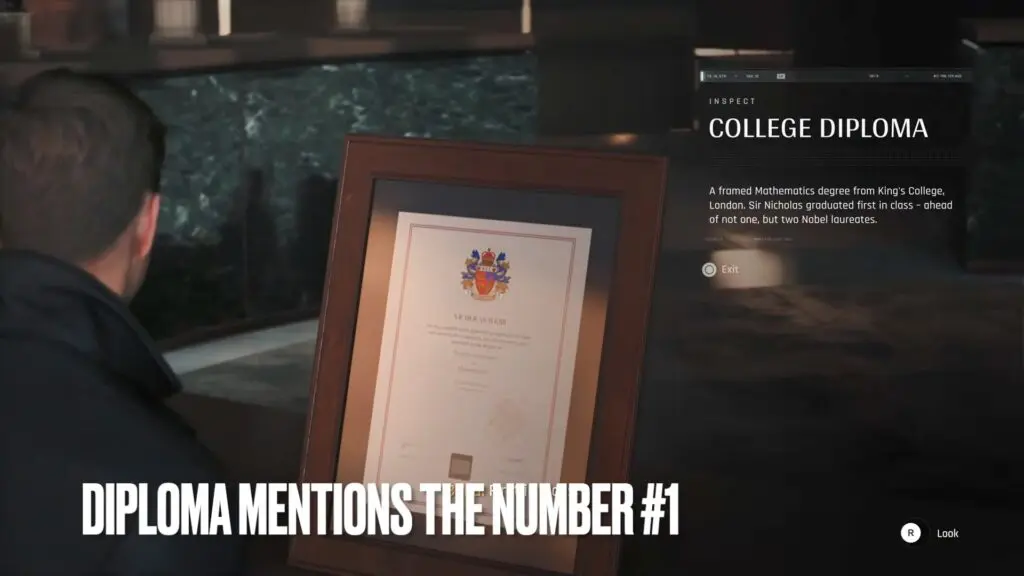
College Diploma
Look for Webb’s diploma displayed on his desk. The description states that he graduated “first in class,” giving you the first number: 1
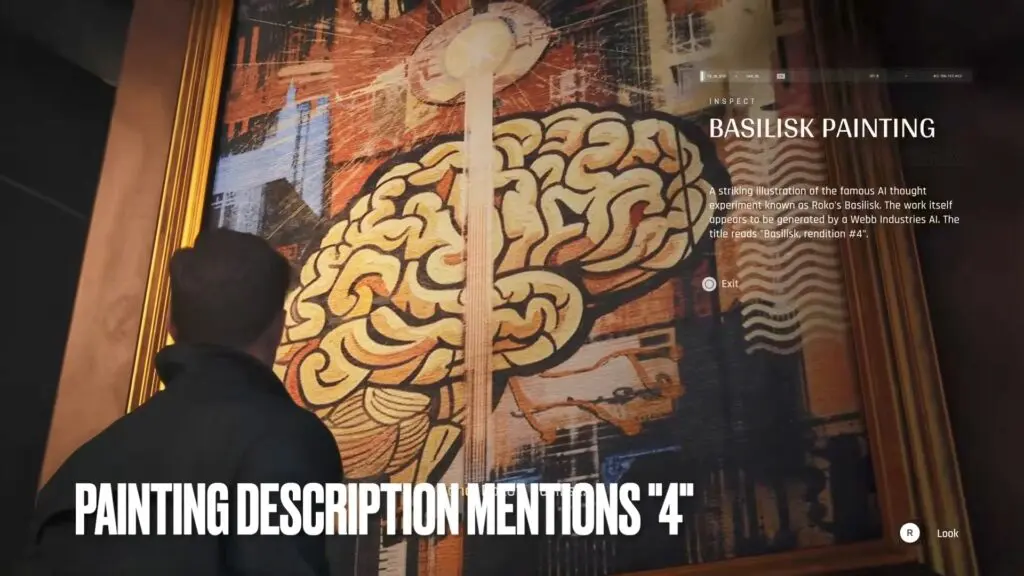
Basilisk Painting
Near the bar area, turn toward the office entrance to find a large painting hanging on the wall. The artwork is titled “Basilisk, rendition #4,” providing the second number: 4
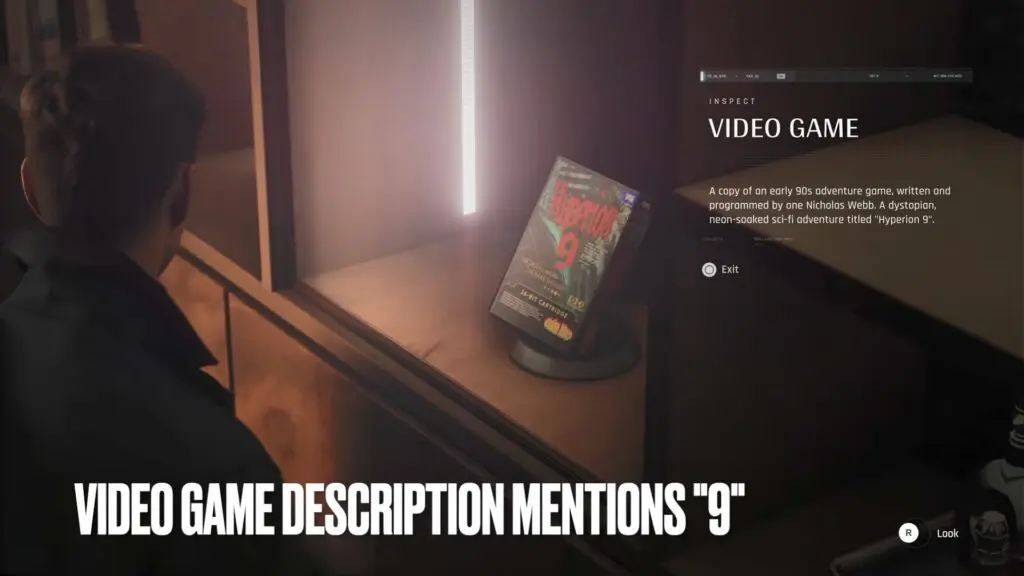
Video Game Case
Inspect the video game case on the shelf. The game is called “Hyperion 9,” revealing the third number: 9
Architecture Model
To the left of Webb’s desk, you’ll find an architectural scale model. Its description identifies it as Site III, which gives the final number:
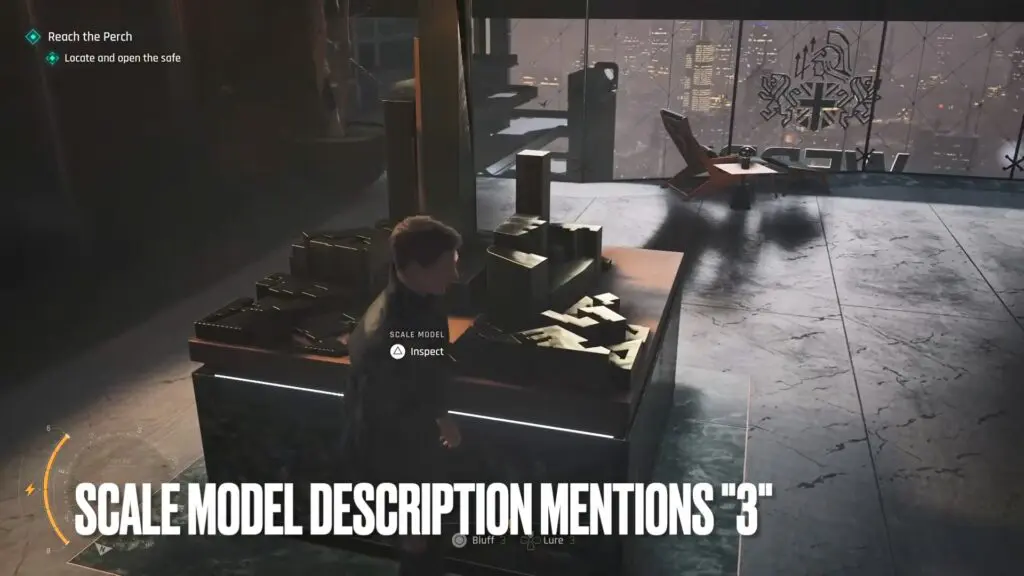
Webb’s Safe Code
Following the order listed in Isola’s note:
- Diploma = 1
- Painting = 4
- Game = 9
- Model = 3
This gives you Webb’s safe code: 1493. Enter the code into the safe to unlock it and collect the items stored inside.

How to Open the Stress Testing Cabinet in 007 First Light – Q-Lab Code Guide
To find the code, head to the blast chamber in the Q-Lab. Inside, you’ll see a vehicle being used as the test subject. Take a close look at the car’s license plate, as it contains the number needed to unlock the cabinet.
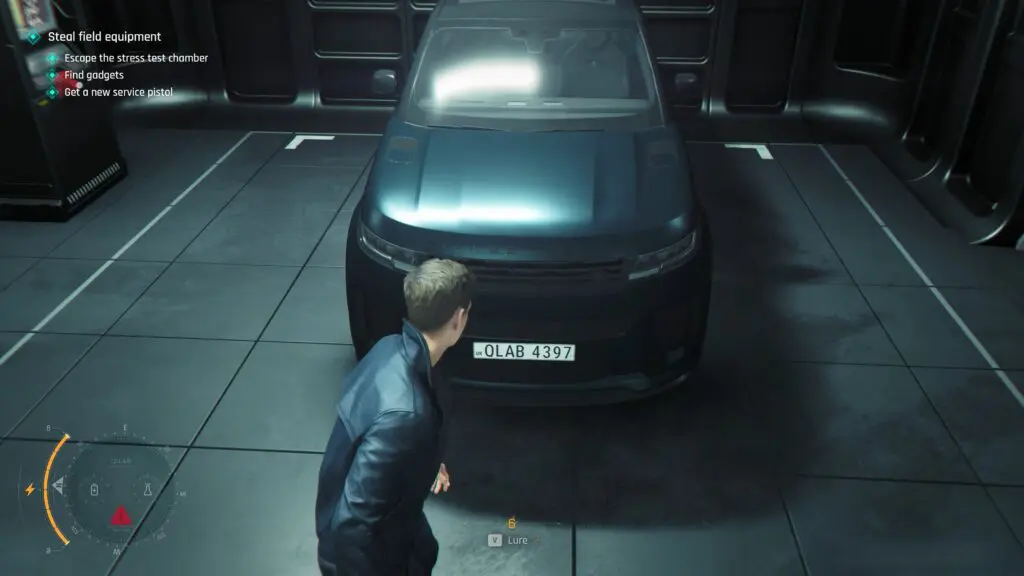
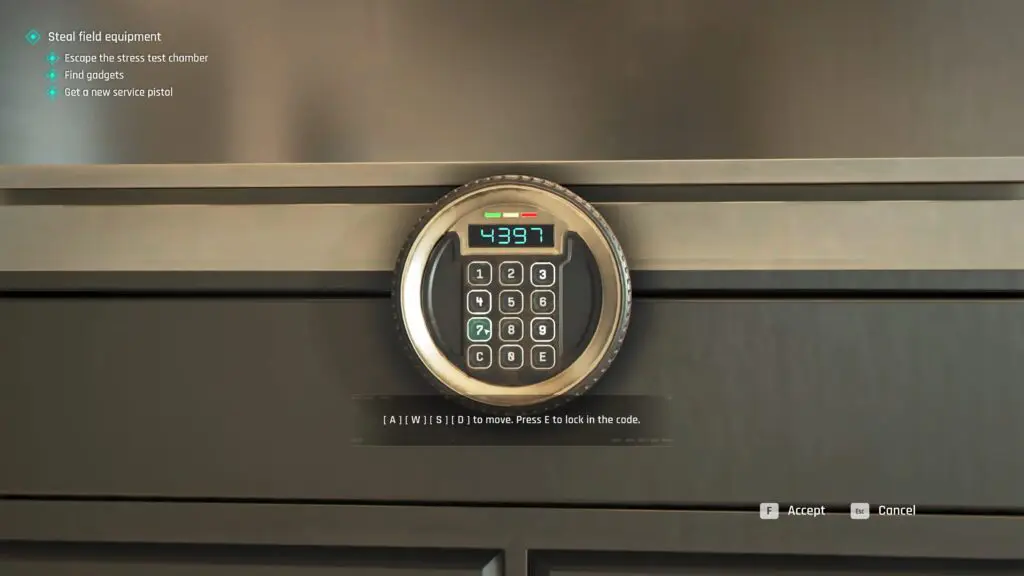
The license plate number is: 4397
Enter 4397 into the keypad on the Stress Testing Cabinet to unlock it.
Stress Testing Cabinet Reward
After entering the correct code, the cabinet will open and reward you with the Q’s Photo Collectible.
How to Get the Q-Lab Armory Door Code in 007 First Light
To find the Armory door code, head to the right side of the Armory door and go through the glass door leading into the Shooting Range.
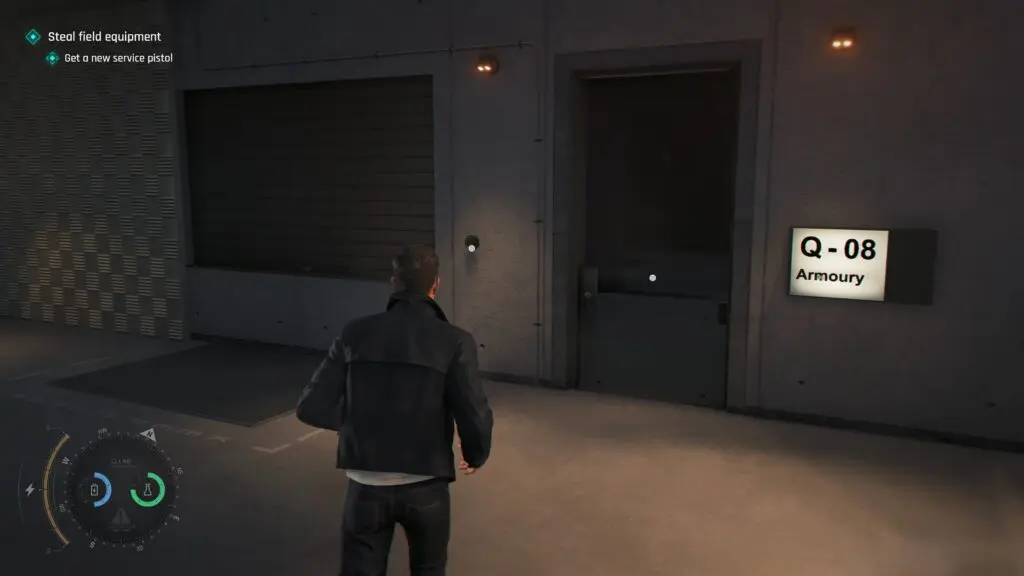
Once inside, look around the room for a large monitor displaying the shooting range leaderboard. The screen lists several high scores achieved by different Q-Lab staff members. Since the Armory is managed by Waters, his score is the one you’re interested in.
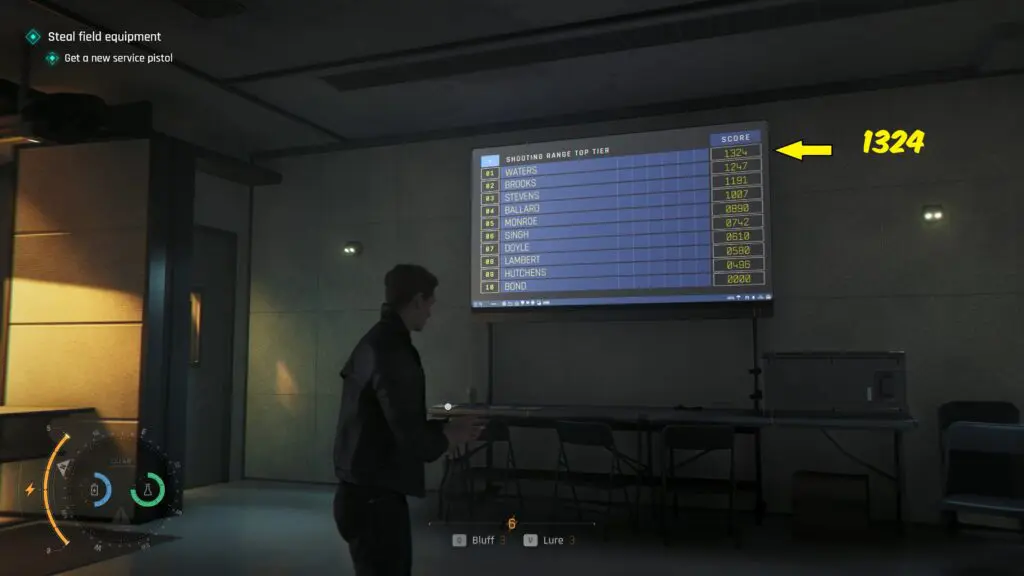
Examine the leaderboard carefully and locate Waters’ name. Next to it, you’ll see a score of 1324. This number serves as the security code for the Armory door. Return to the locked Armory entrance. Interact with the keypad beside the door and enter: 1324

How to Get the Archive Door Code in 007 First Light
Start by heading downstairs and turning left until you reach the guarded Legal Department Office. Wait outside the room and listen to the conversation between the NPCs. After a short time, one of them will leave the area.
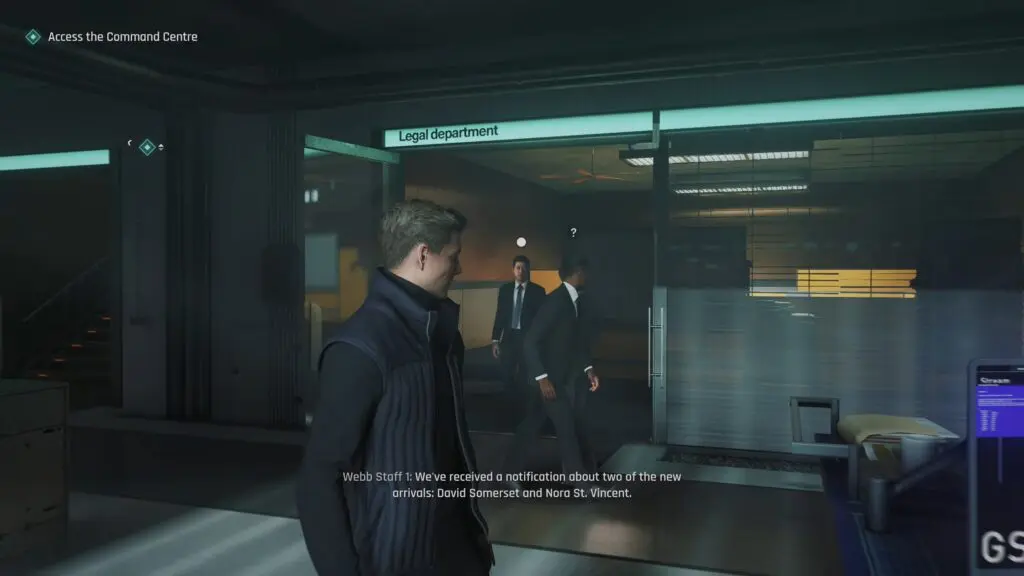
Then, use your Q Watch to remotely hack the photocopier inside the office. The noise will cause the guard to move away from his position, creating an opportunity to sneak inside unnoticed.
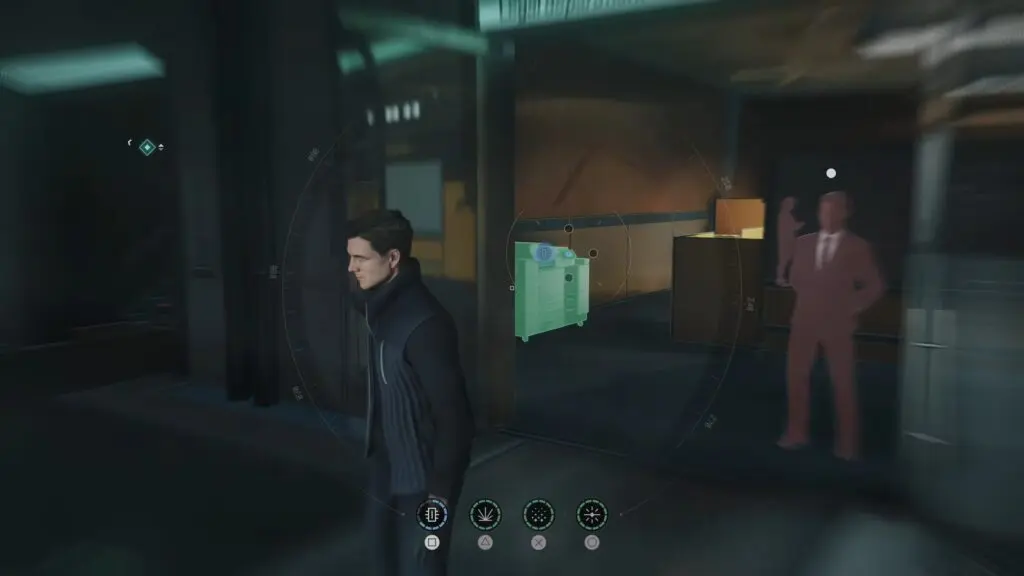
Find the Safe Key
Once inside the Legal Department Office, move to the right side of the room and enter the nearby cubicle. Here, you’ll find the Safe Key needed to unlock the safe later. After collecting the key, leave the office.
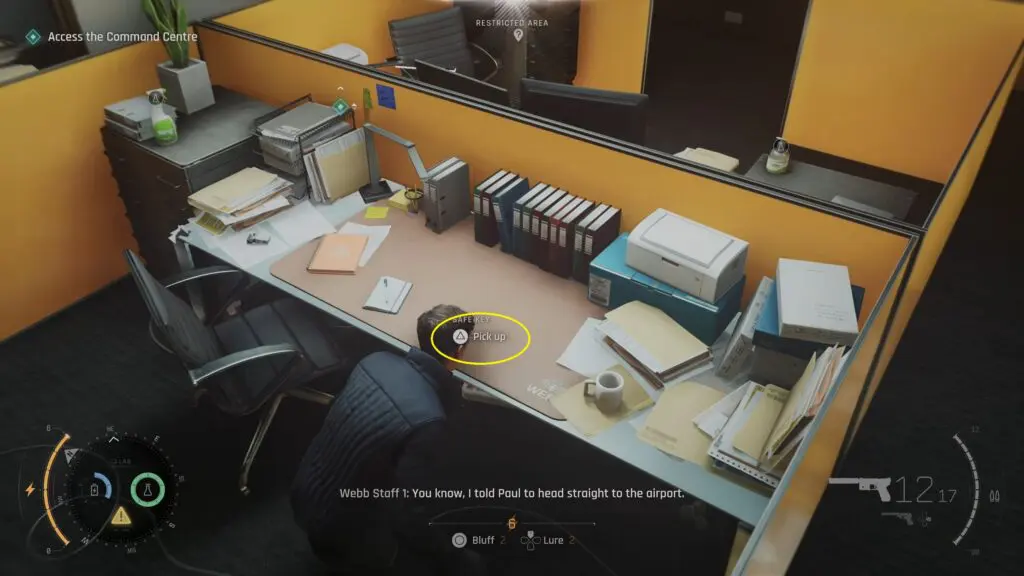
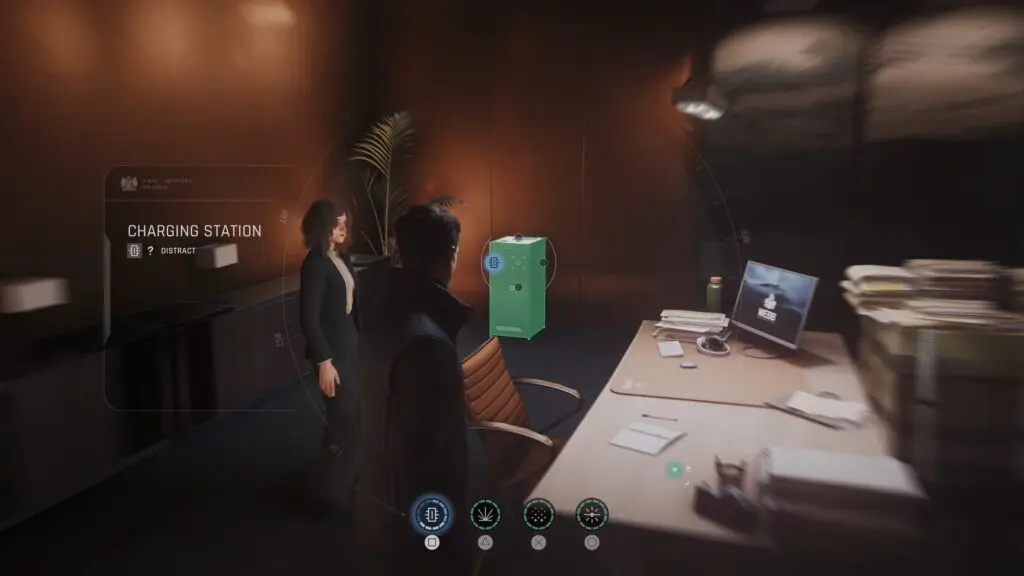
Distract the Office Workers
Make your way to teh opposite end of the hallway and enter teh office where two employees are talking. To gain access to the safe without being spotted, you’ll need to remove both NPCs from the room. You can use a Phone Dart on the male employee to make him leave the office. Activate the photocopier to distract the female employee and lure her away from the desk.
With both workers out of the way, you’ll have free access to the room. Approach the desk and look underneath it to find the safe. Use the Safe Key you collected from the Legal Department Office to unlock it. Inside the safe, you’ll discover a document containing the Archive Door Code: 1864
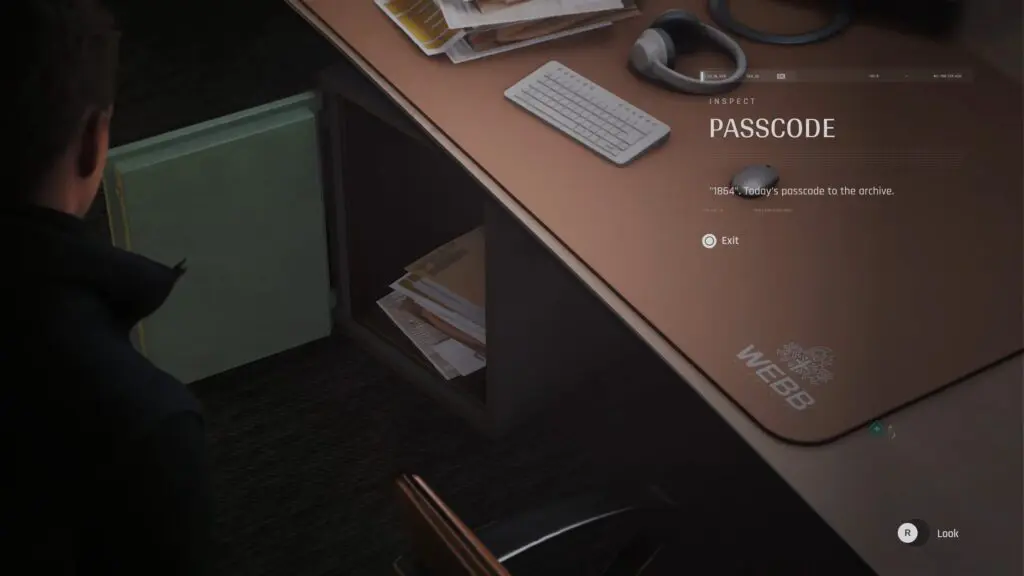
Archive Door Code
Return to the locked Archive door and enter the following code: 1864. The door will unlock, giving you access to the Archives.