Mass Production Array (MPA) is the second sector in Pragmata and has 39 collectible locations in total. This guide will walk you through every single one, including all Safe Boxes, REM, Mods, Mini Cabins, and Pure Lunum scattered across the region.
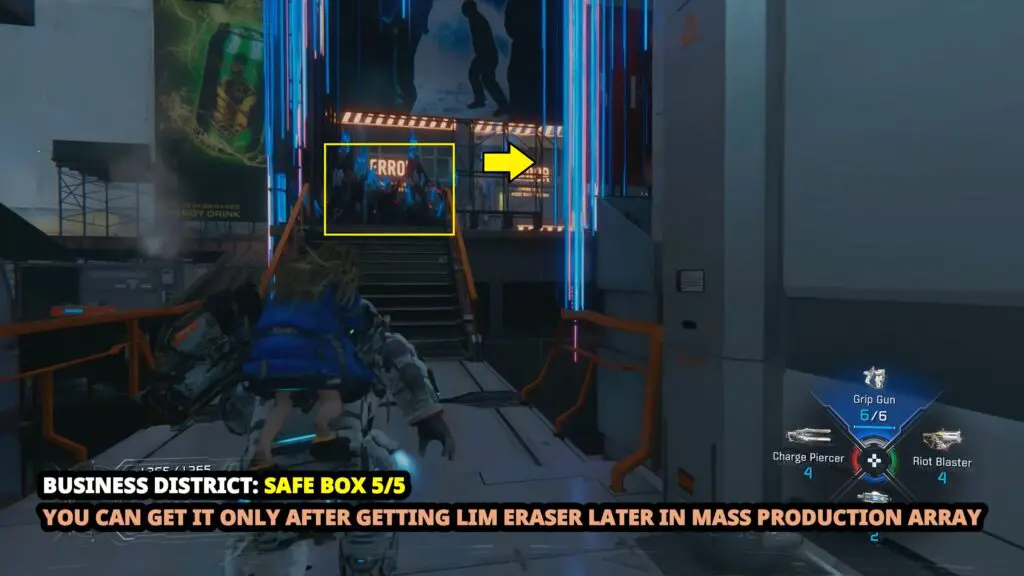
Note: Some of the Safe boxes are only available after you’ve picked up the Lim Eraser, which unlocks automatically as part of the story in Mass Production Array.
Mass Production Array 01 – Test Site Entrance
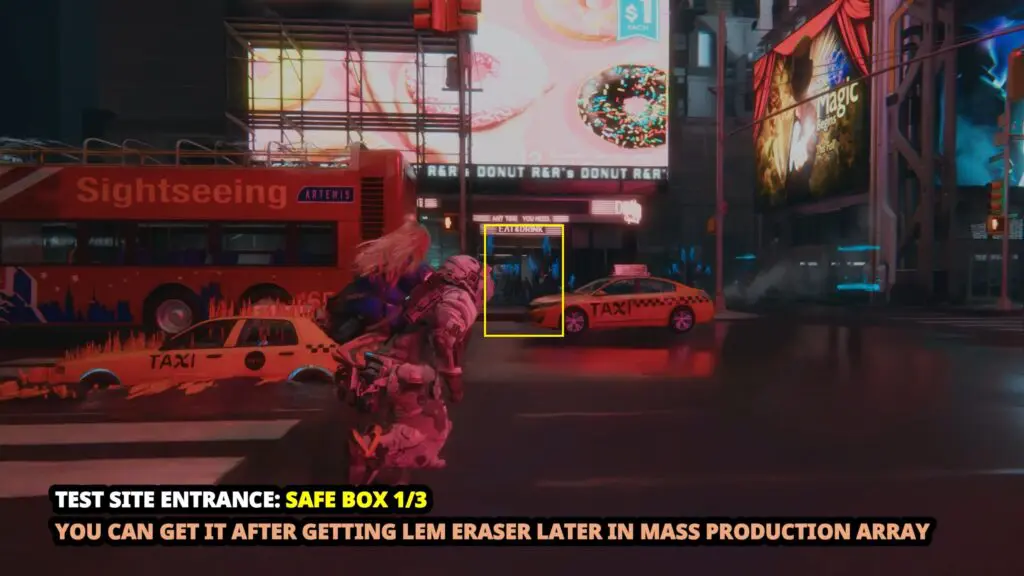
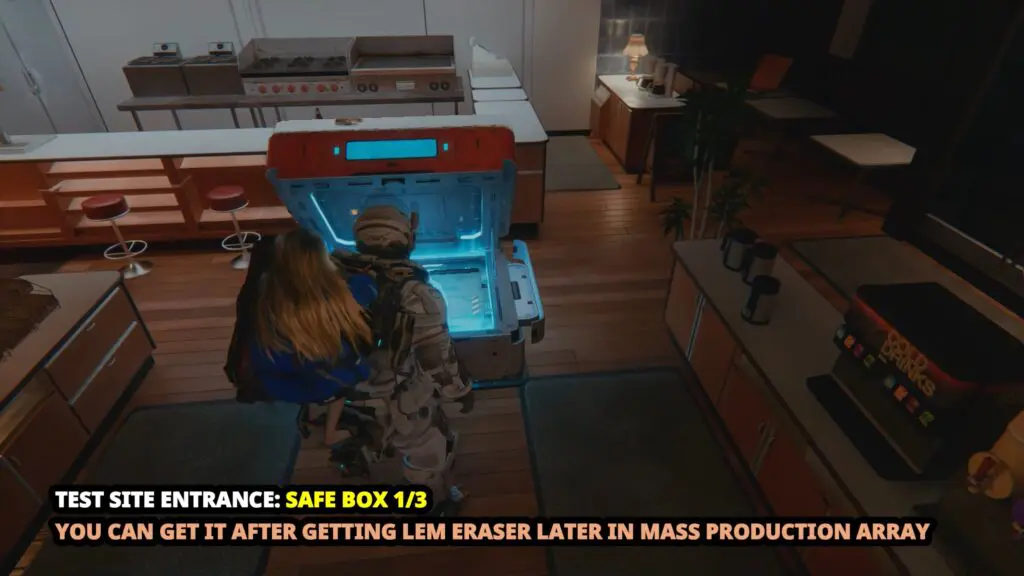
Safe Box 1
This Safe Box is in the R&R’s Donut diner restaurant on the streets of the Test Site Entrance. You must have the Lim Eraser to go inside. Use the Lim Eraser to clear the blockade at the door of the restaurant. Head inside to find the first safe box.
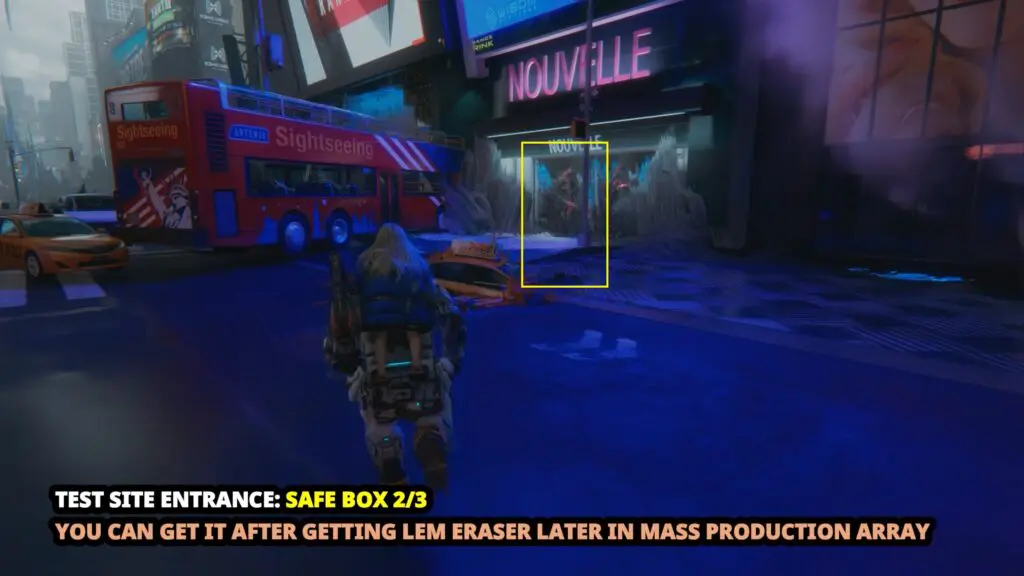
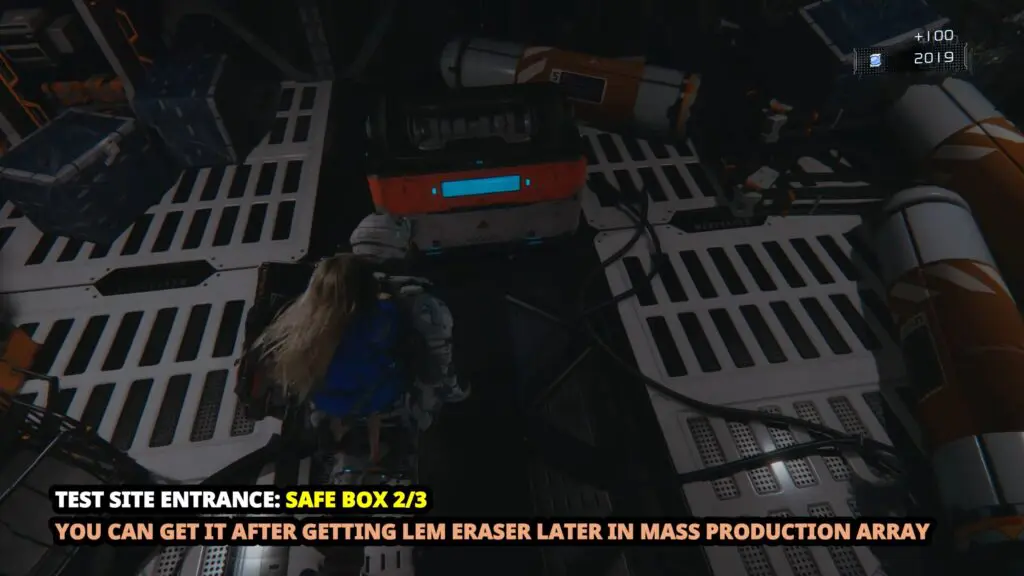
Safe Box 2
Use Lim Eraser to clear the blockade at the door of the Nouvelle store. You will find the Safe Box inside.
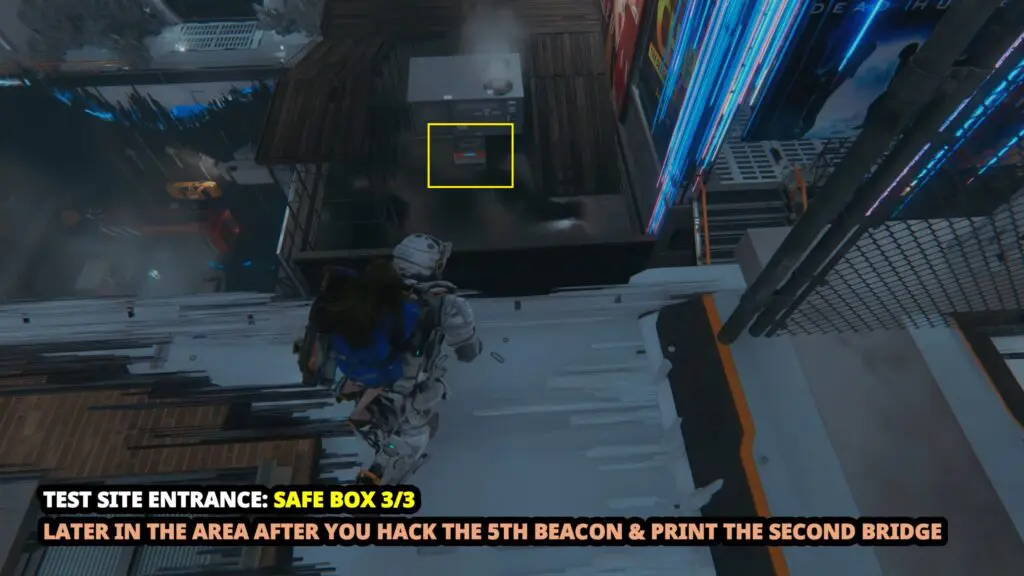
Safe Box 3
This Safe Box becomes available later in the area once you’ve hacked the 5th Beacon and printed the second bridge. Once the bridge is printed, don’t cross it just yet.
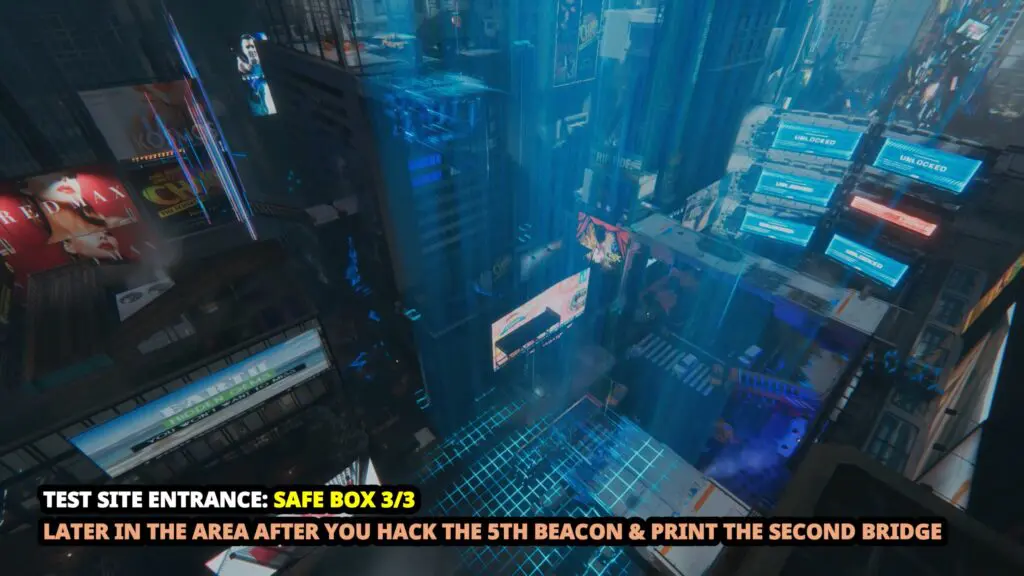
Stop right at the start of the bridge and look down to your right. You’ll see a Safe Box is sitting right in the center of that rooftop.
Mass Production Array 02 – Shopping District
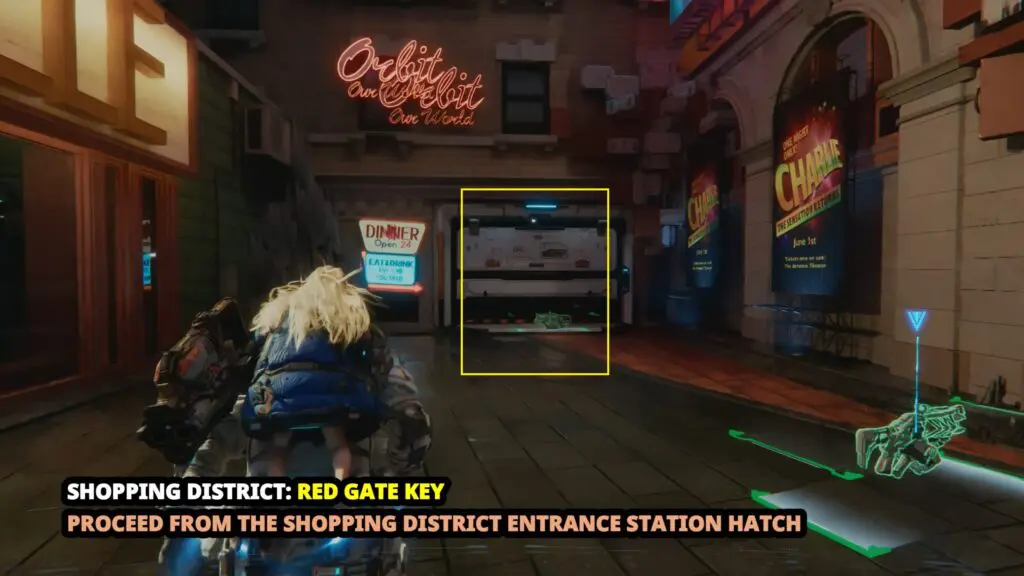
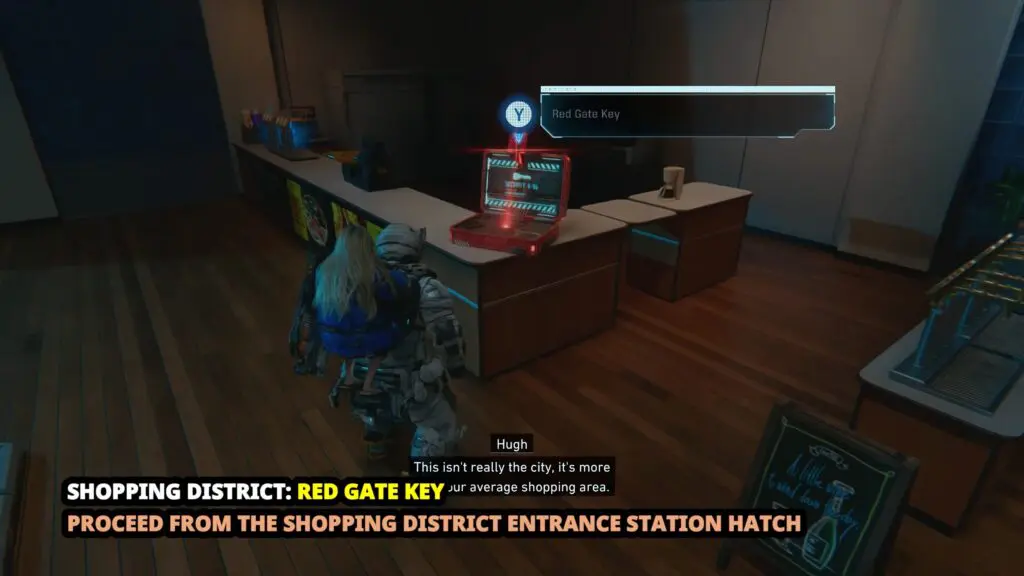
Red Gate Key
Start at the Shopping District Station Hatch and head forward. Climb up the box and go through the door on the right to get outside. Once you’re out in the open, walk into the shop called “Orbit Our World.” Head to the counter inside, and you’ll find the Red Gate Key sitting right there.
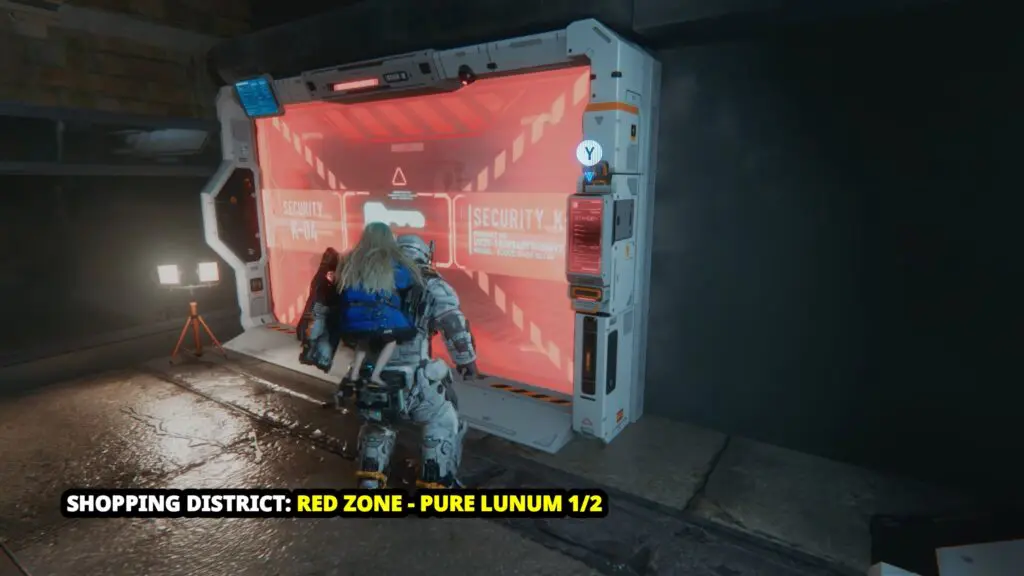
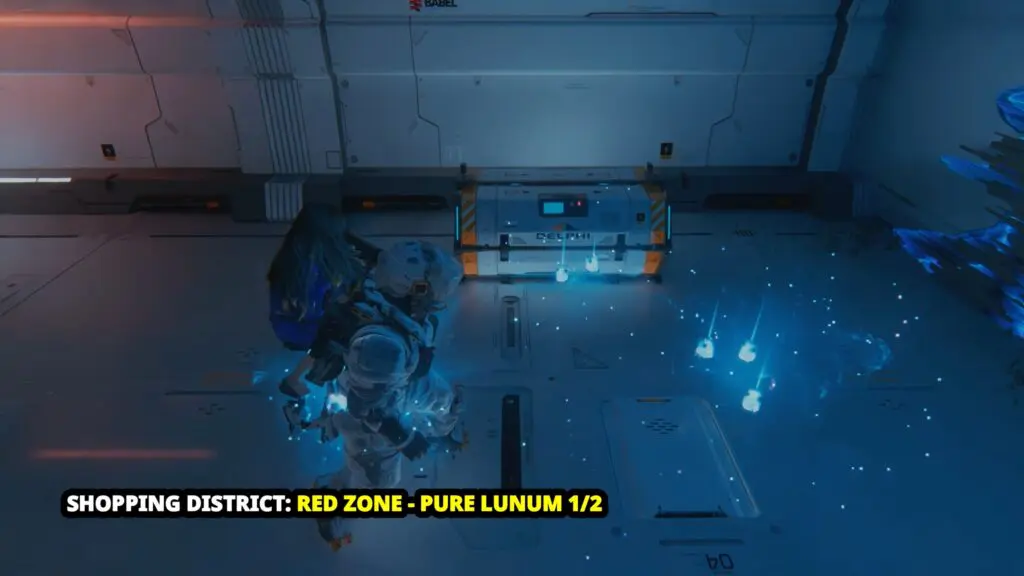
Pure Lunum 1/2
Head back the way you came to get back inside. You’ll come across a locked Red Zone along the way. Use the Red Gate Key to open it and go in. Inside the Red Zone, you’ll find a Pure Lunum in a chest on the right side.
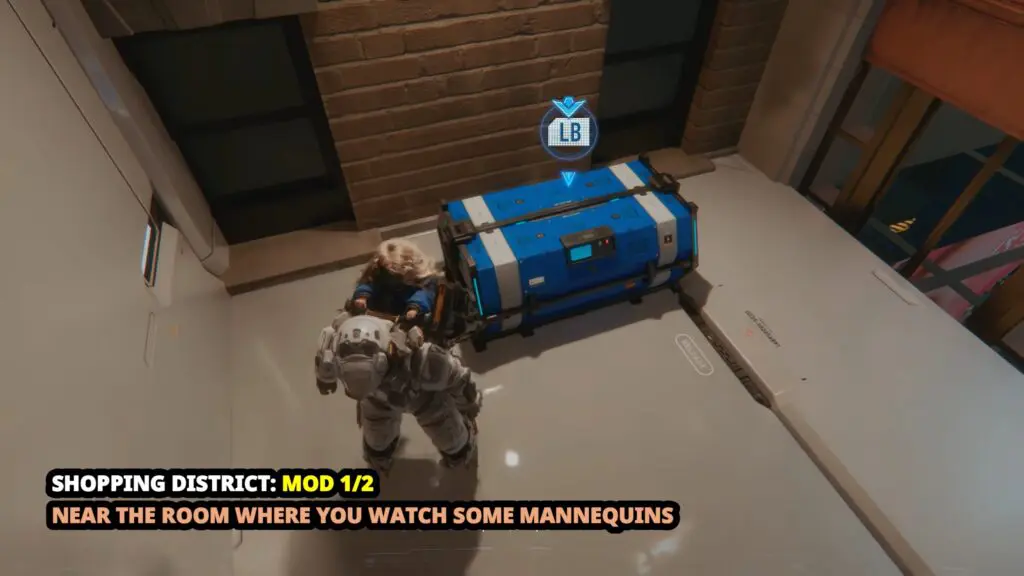
Mod 1/2
Go to the room with the mannequins behind the glass. From here, turn around and climb up the ledge behind you. This leads into a laser corridor, where you’ll spot a chest containing Mid #1 sitting behind a glass window.
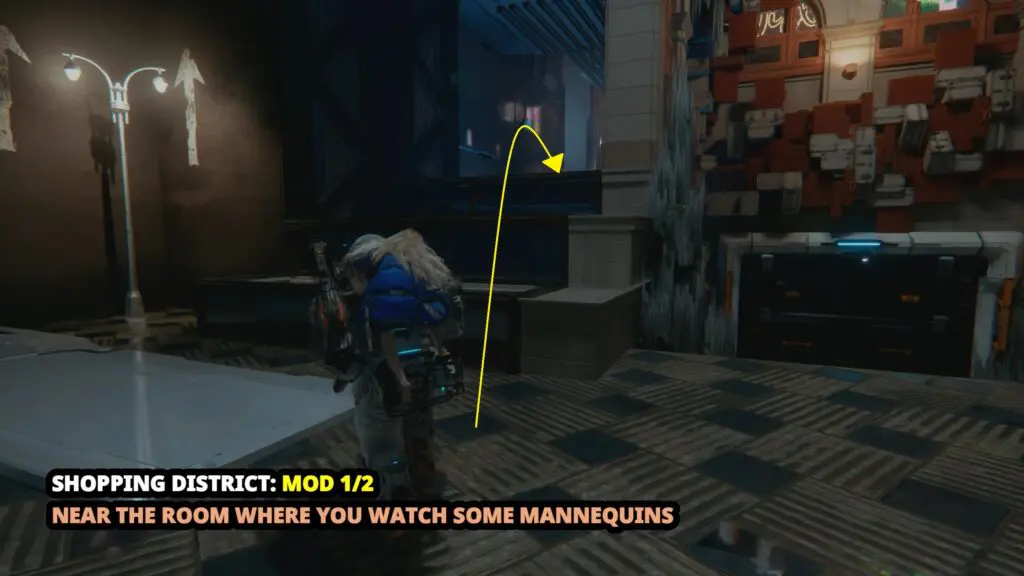
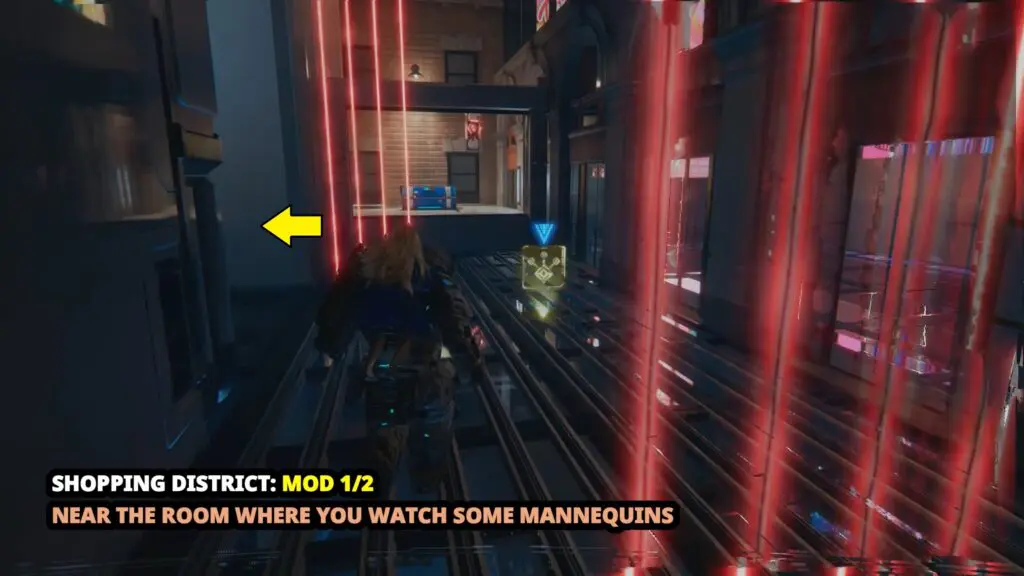
To reach it, take the zipline on the left side of the laser to get up to the upper level, then drop down on the other side to grab the chest.
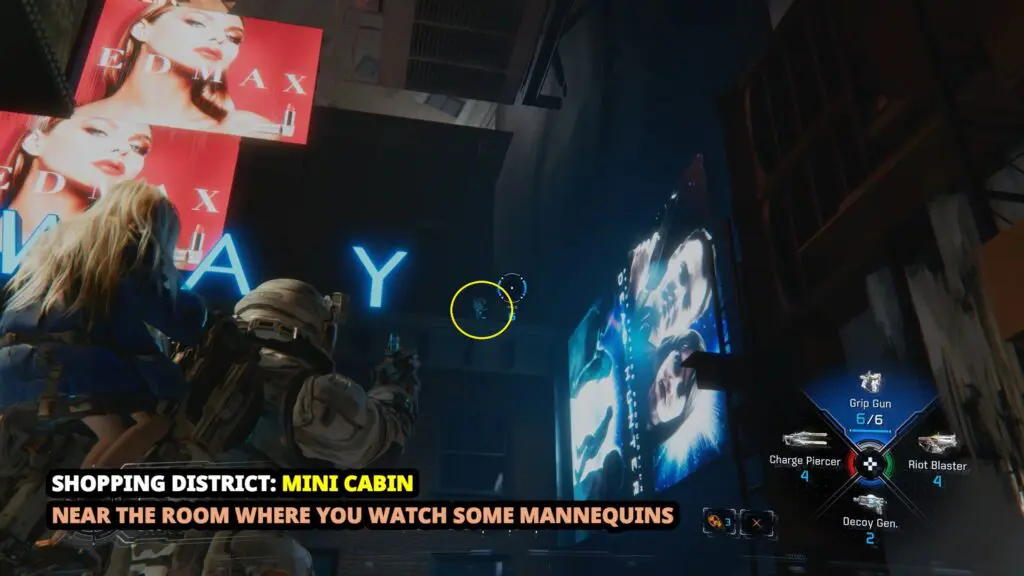
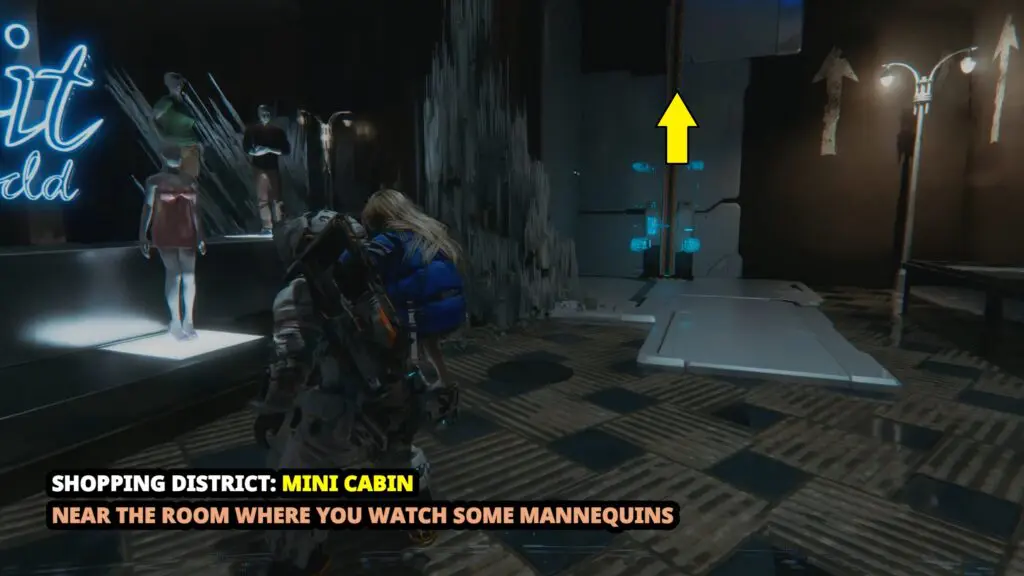
Mini Cabin
From the mannequins, look to your right to find a Zipline. Use it to reach the top. Then, turn around and check the roof next to the “ED MAX” billboard.
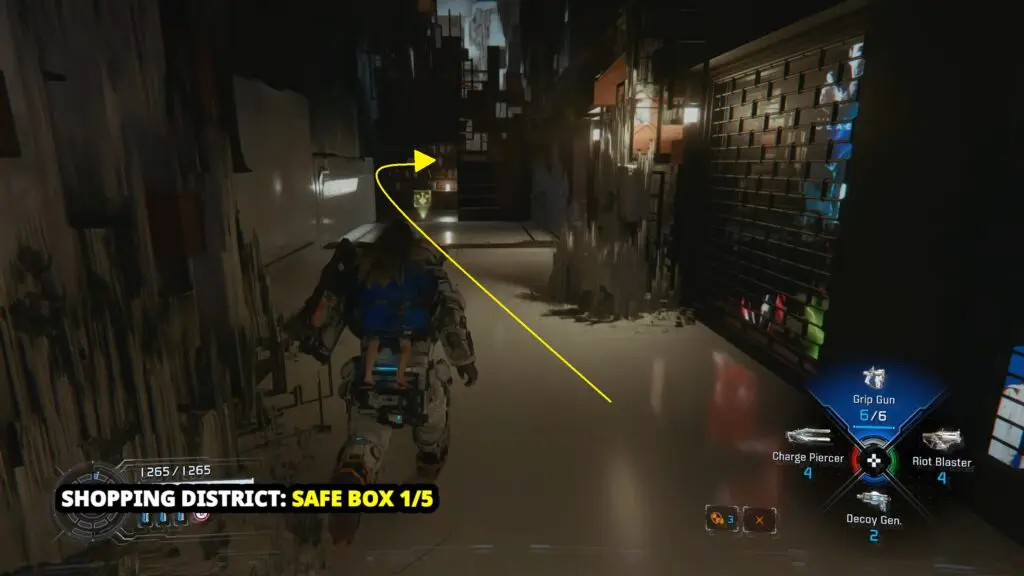
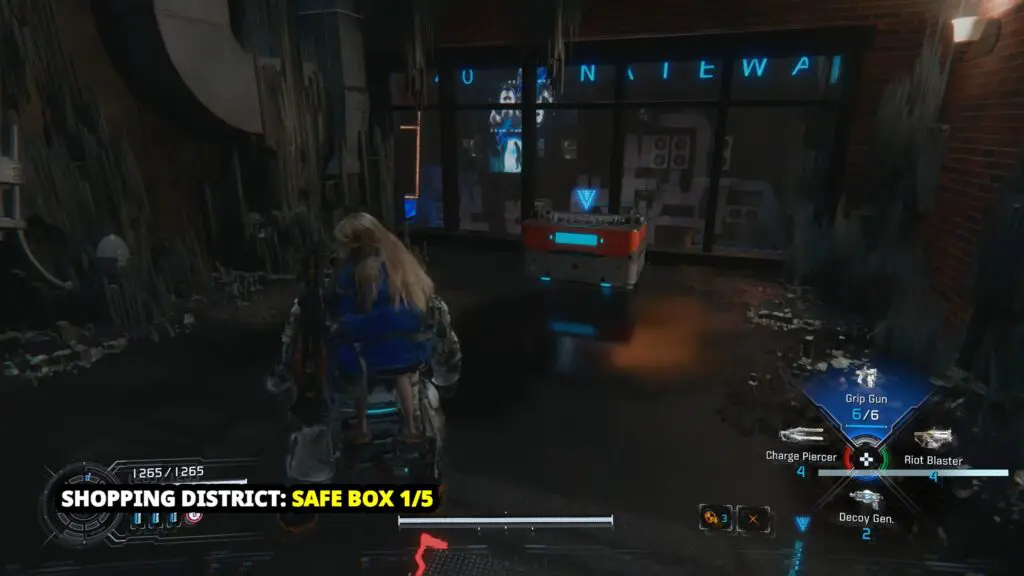
Safe Box 1/5
After grabbing the first Mini Cabin, turn around and follow the path behind you. Keep going until you reach the end of the path, where Safe Box #1 will be waiting for you.
Safe Box 2/5
Head back the way you came from the previous location and turn left. Start making your way down to the lower level. As you head down, look to your left, and you’ll spot a container-like building near Rip Tide Billboard.
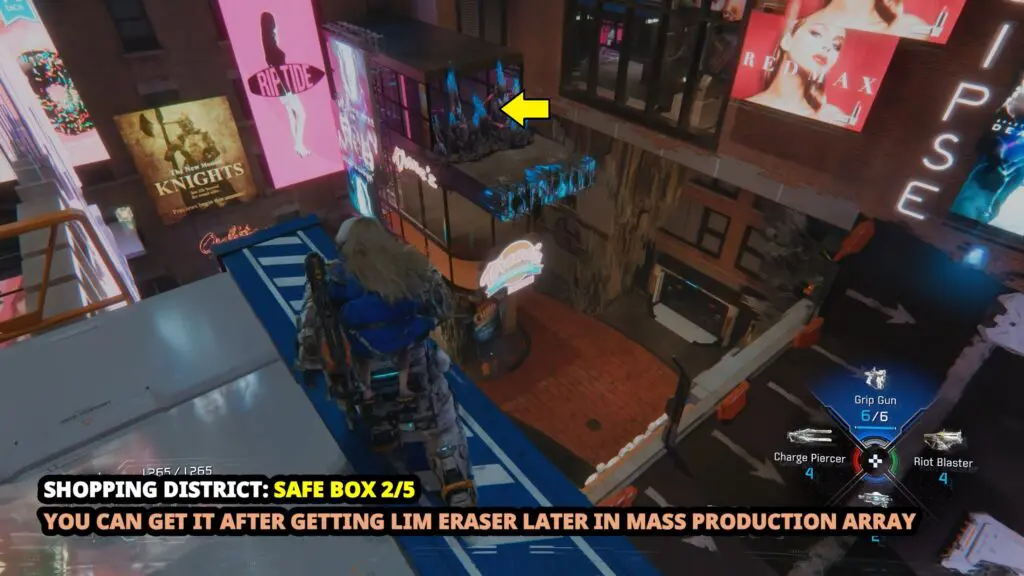
Clear the blockage in front of the entrance, head inside, and you’ll find the Safe Box waiting there.

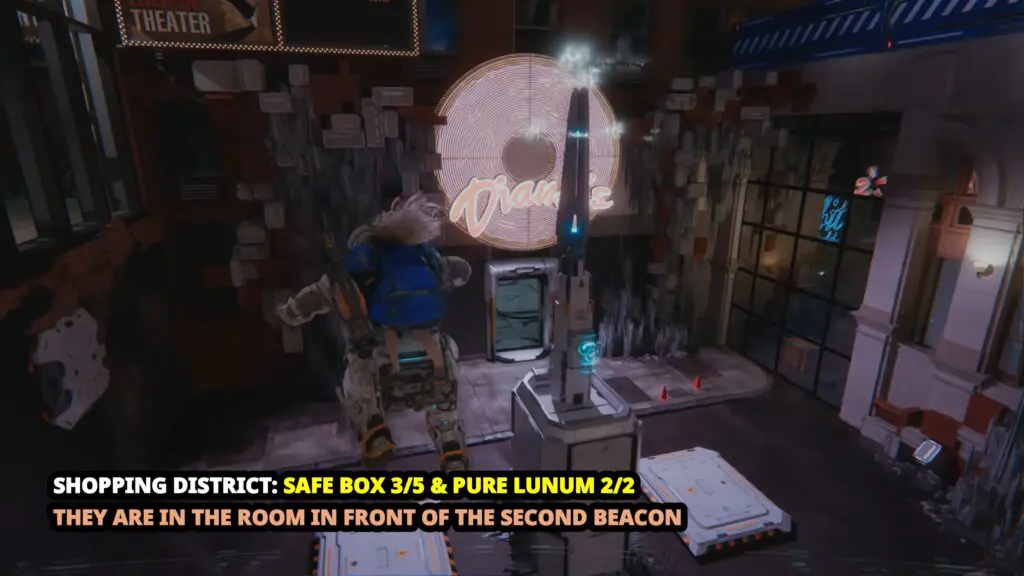
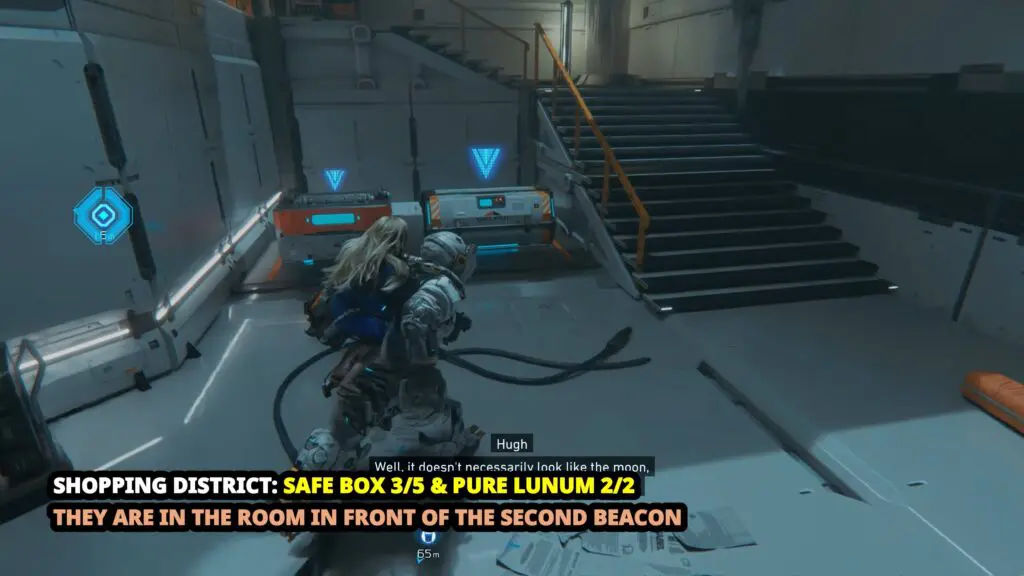
Safe Box 3/5 & Pure Lunum 2/2
Drop down to the lowest level and head into the shop called “Diana’s.” You’ll find both items inside.
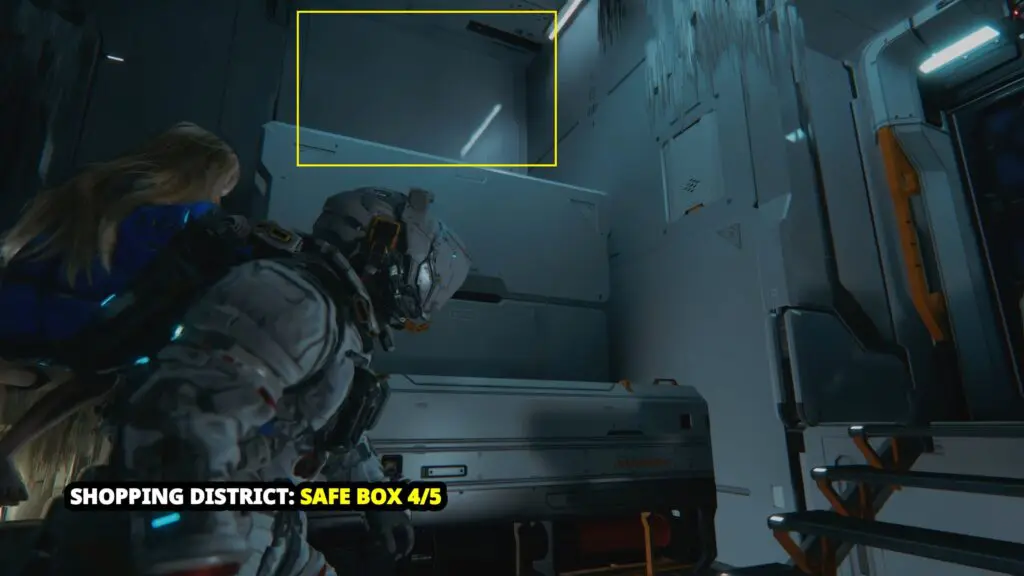
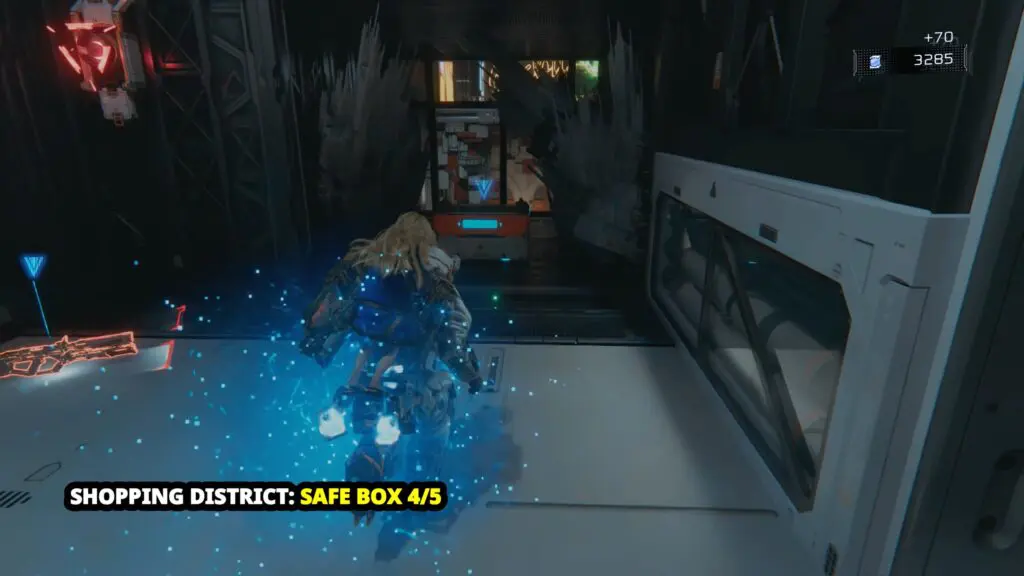
Safe Box 4/5
Head up the stairs until you reach a locked door. Instead of waiting for it to open, climb up the ledge right next to it. You’ll notice a Holo Wall nearby, so pass through it and follow the path to the end to find a Safe Box.
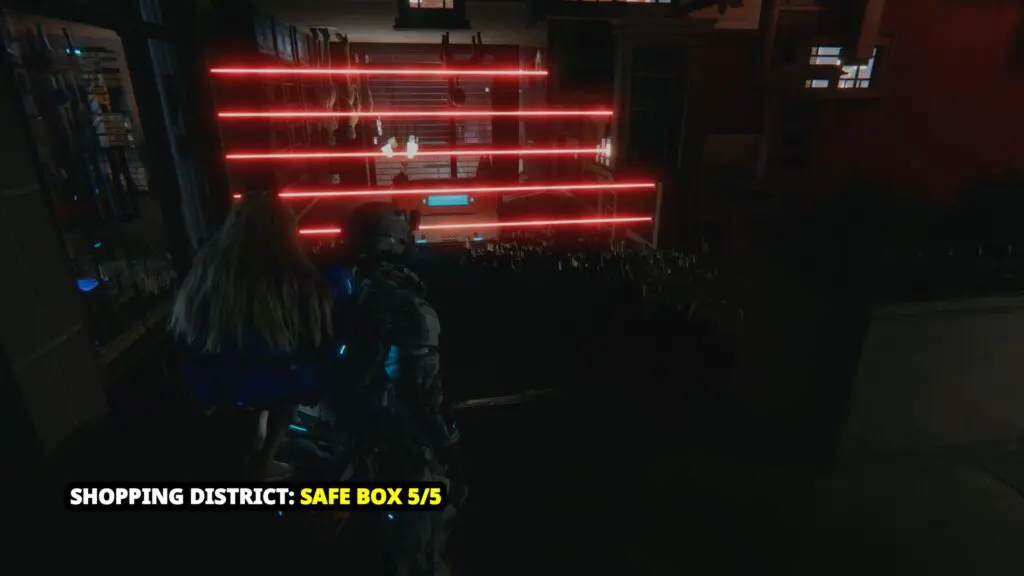
Safe Box 5/5
Once the locked door opens, head inside and follow the path until you reach the Safe Box locked behind a laser. You’ll need to hack the laser to get through and grab the box.
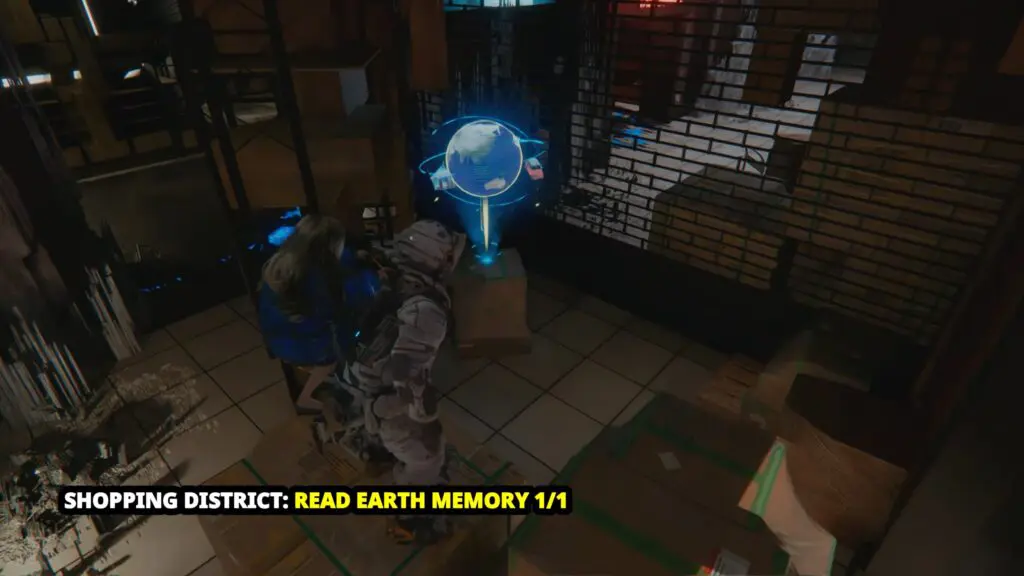
Read Earth Memory 1/1
From the previous location, head right until you reach a room filled with crates. The Read Earth Memory is tucked behind some of the crates near the glass window.
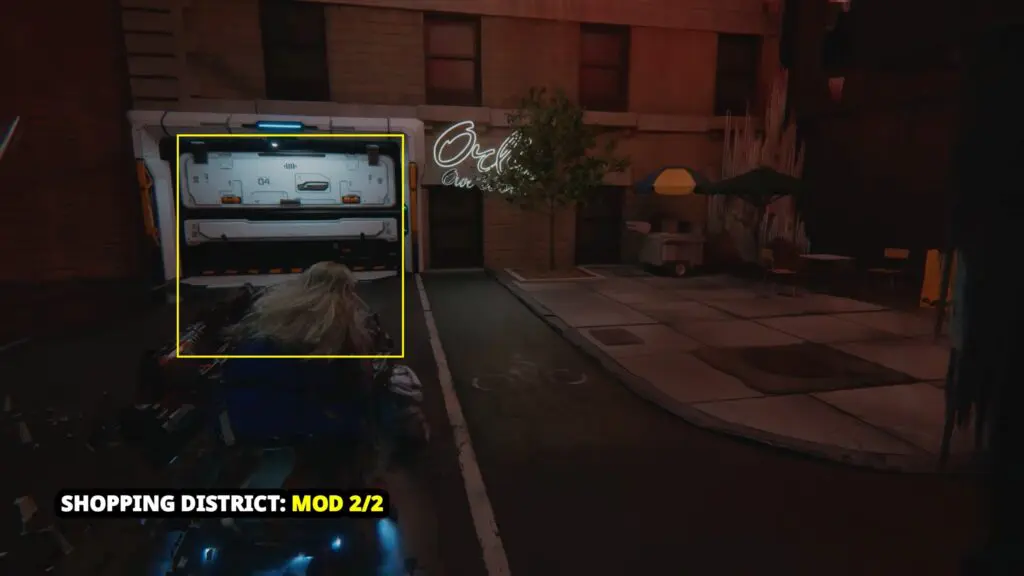
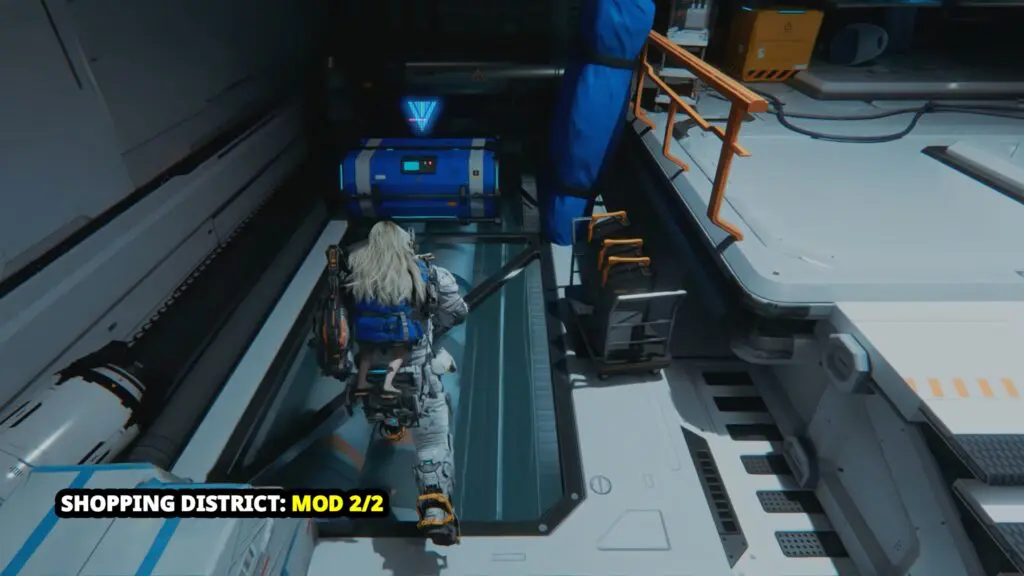
Mod 2/2
Head out of the building and follow the path until you reach the “Orbit Our World” shop. Once inside, look to the left side of the room, and you’ll find the item inside a blue chest.
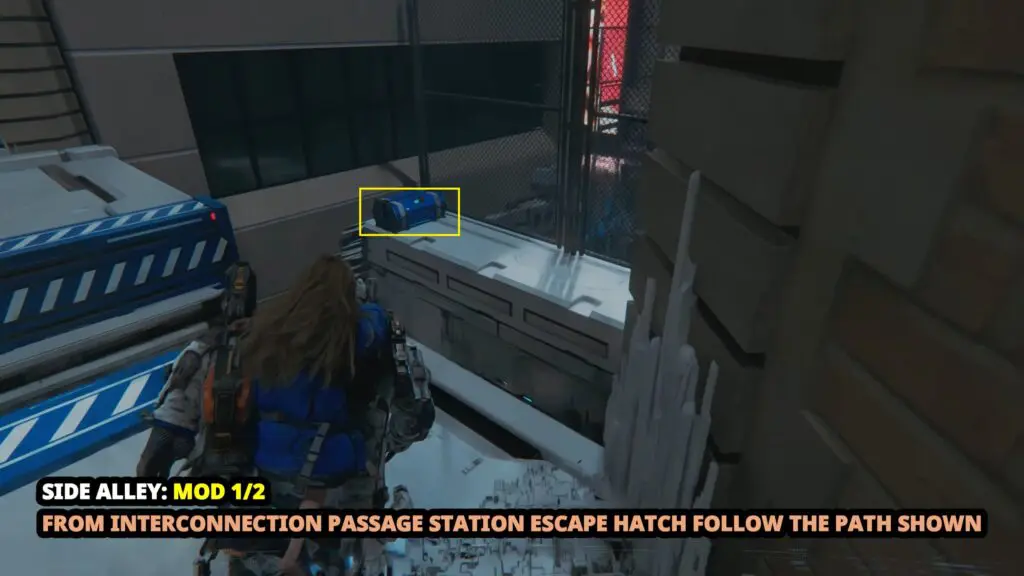
Mass Production Array 03 – Side Alley
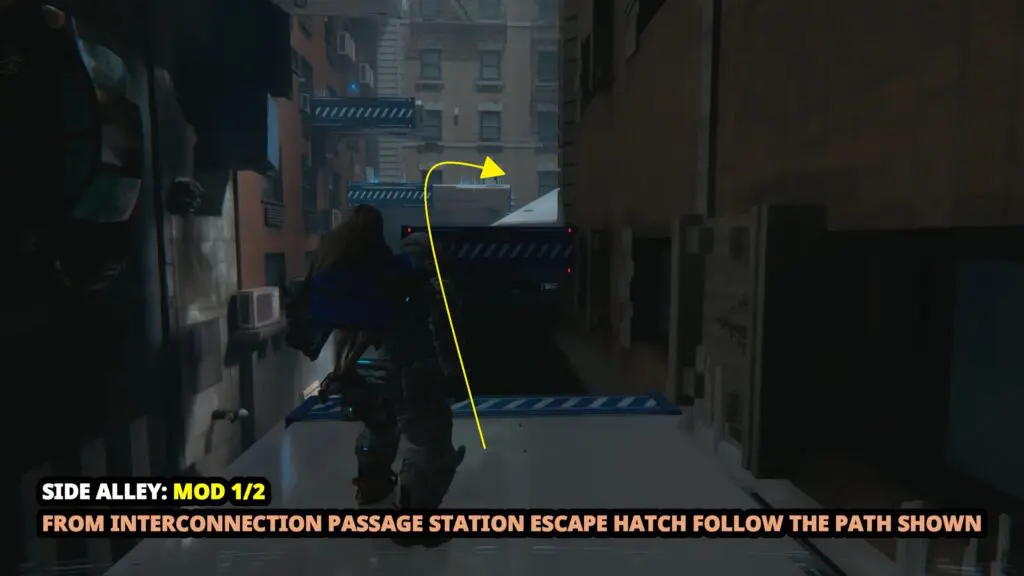
Mod 1/2
From the Interconnection Passage Station Escape Hatch, drop down to the bottom and exit the building. Then follow the path to the end, then climb up the blue platforms. The chest is on the right side, near the fence.
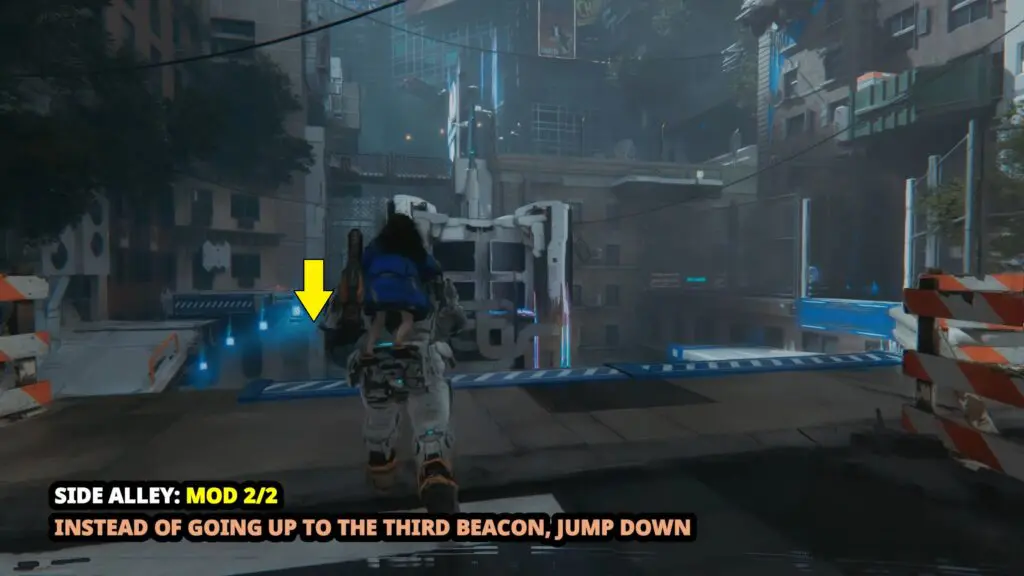
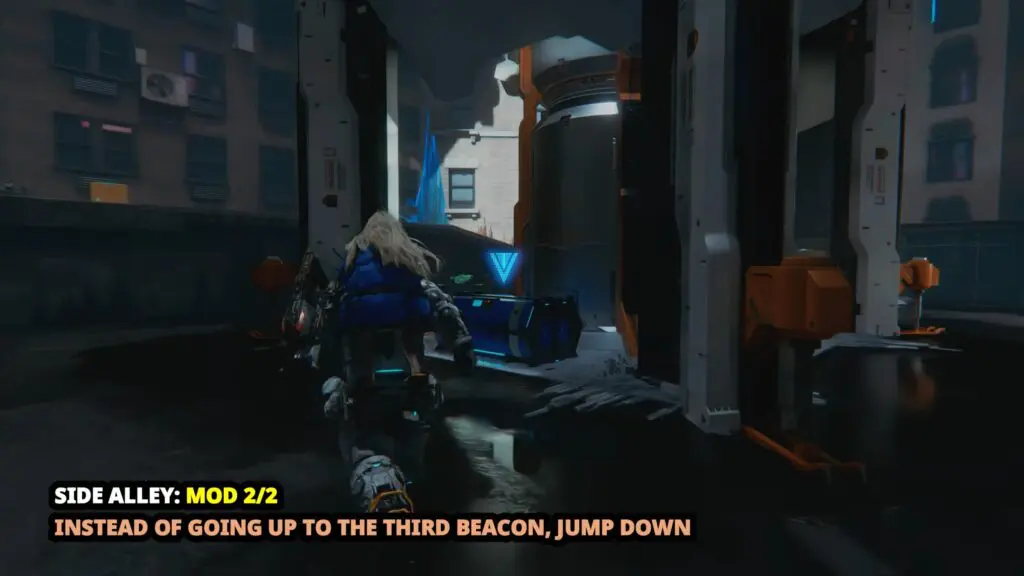
Mod 2/2
Keep climbing the blue platforms until you reach the top. Before activating the Beacon, drop down instead. You will find some enemies in the area, along with a chest containing the mod.
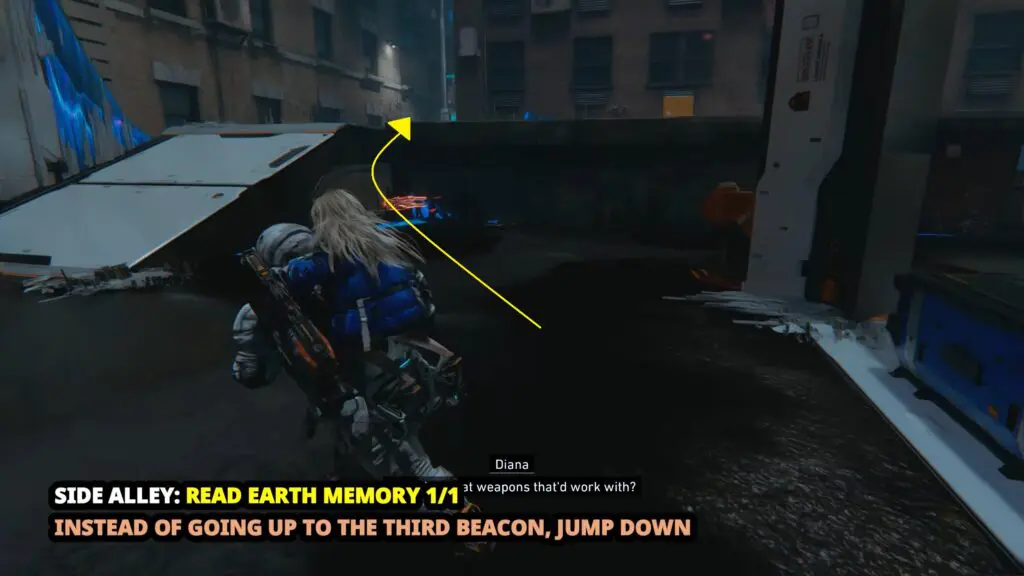
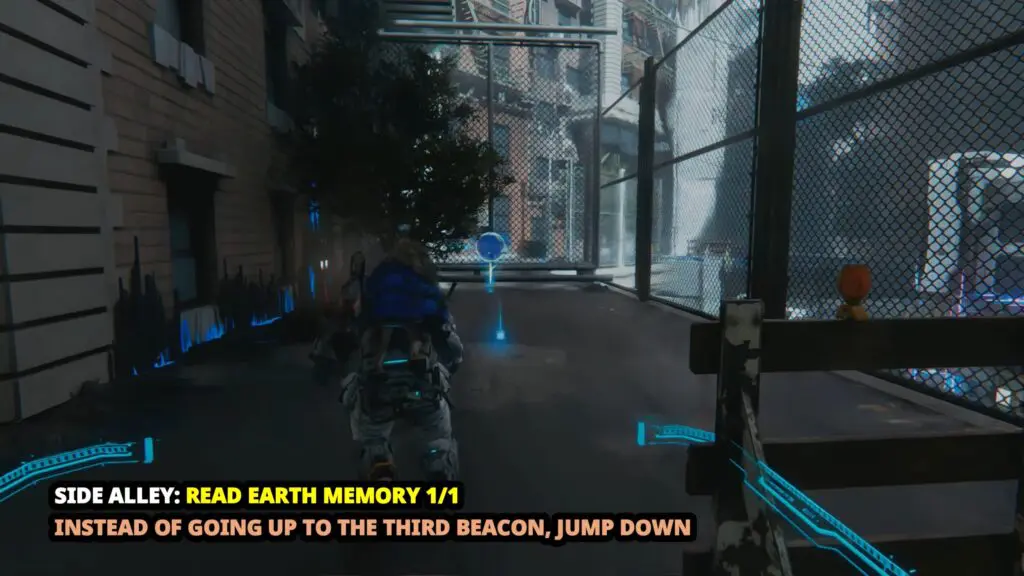
Read Earth Memory 1/1
From the previous collectible location, head up the ramp on the left and take the zipline to the top. The REM is waiting for you there.
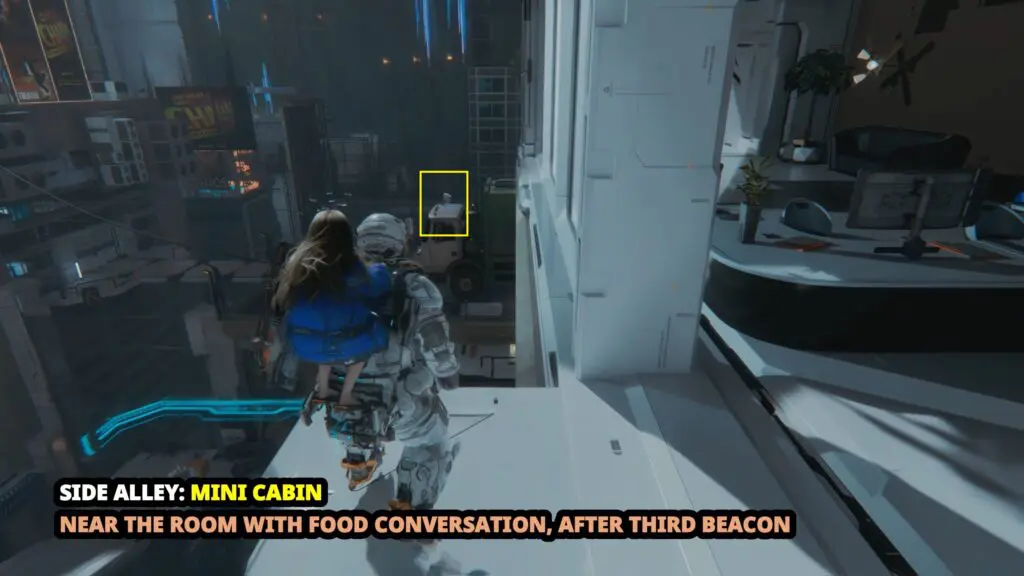
Mini Cabin
Take the zipline up two levels and look for a vehicle sticking out of the side of the building. You will spot a Mini Cabin attached to it.
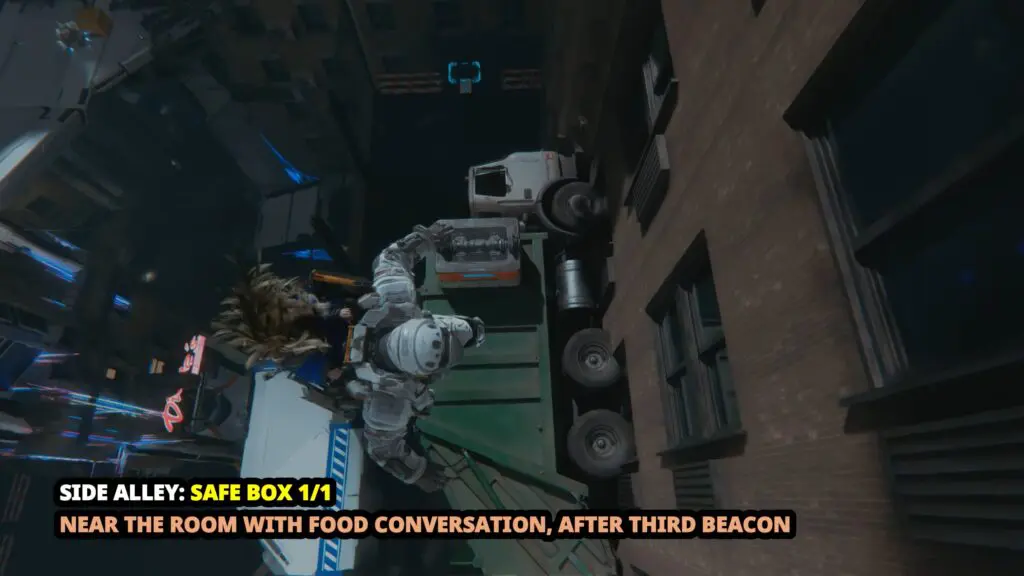
Safe Box 1/1
Drop directly below the Mini Cabin to find a Safe Box on the side of another vehicle.
Mass Production Array 04 – Business District
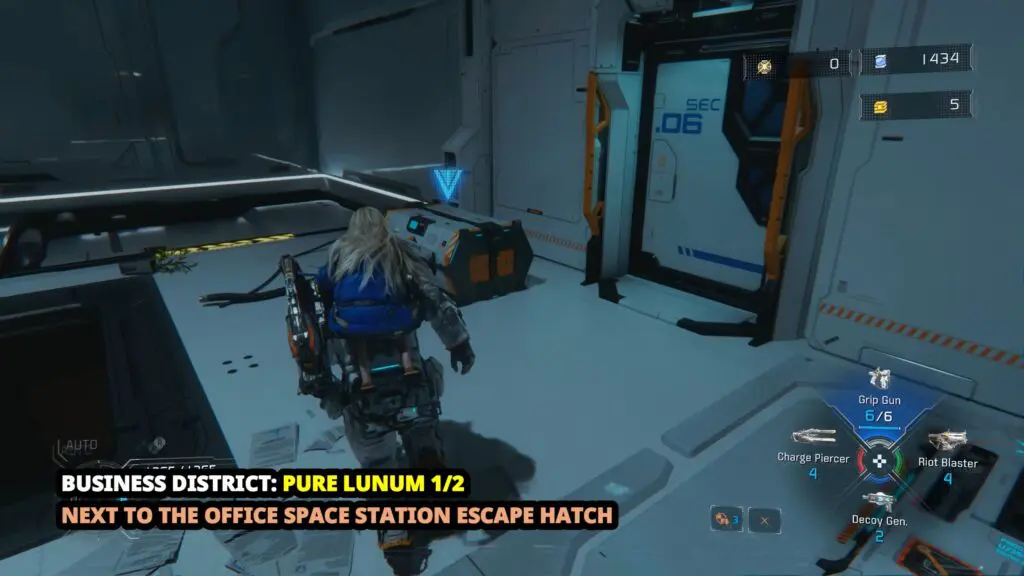
Pure Lunum 1/2
It is located right next to the Space Office Station Escape Hatch.
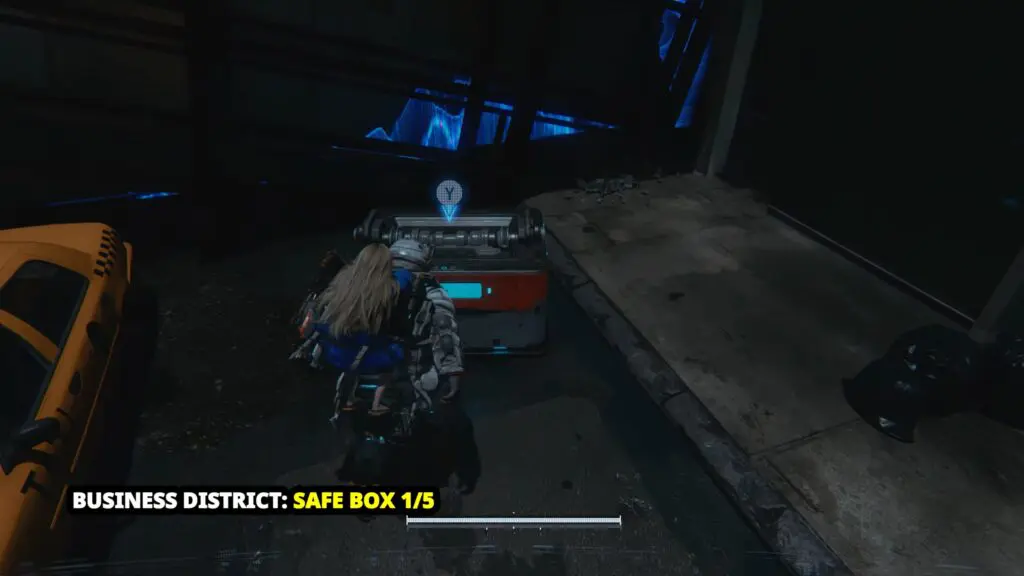
Safe Box 1/5
Go through the door next to the Space Office Station Escape Hatch and head to the right. The path ahead will be blocked just after the stairs.
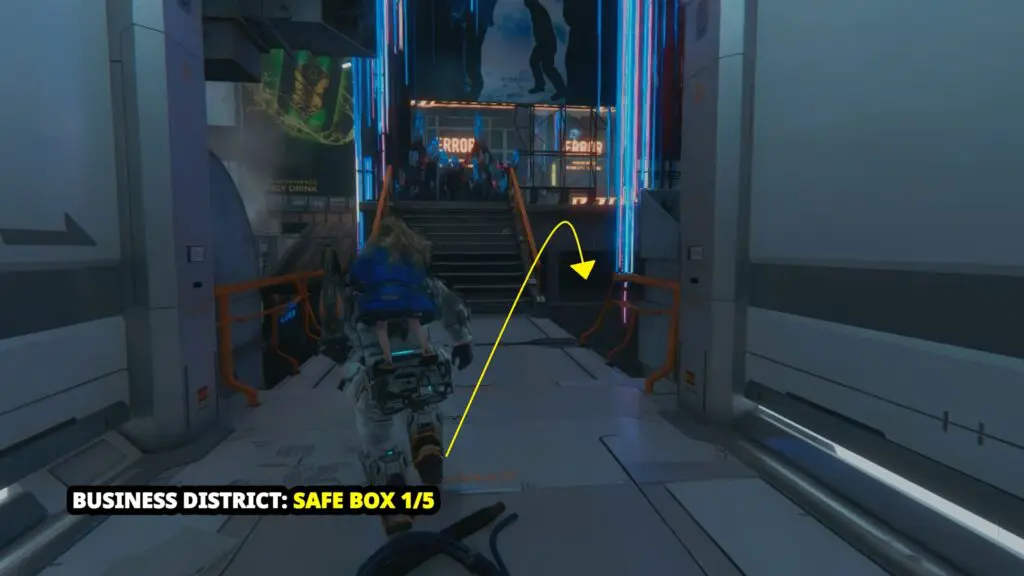
Before pushing through, look to the right and drop down to the street below to find a Safe Box.
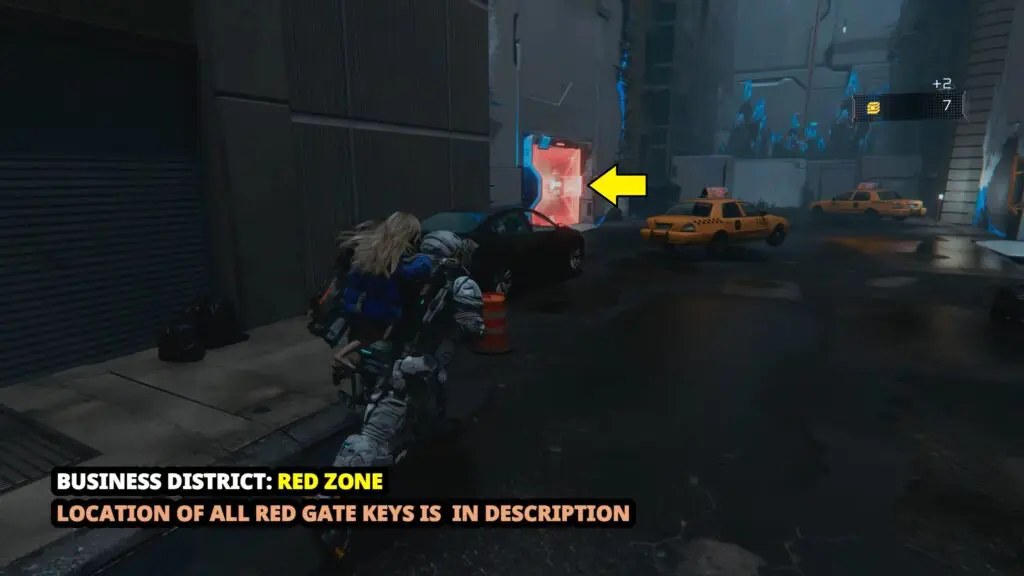
Red Zone
It is in the same area as Safe Box 1/5.
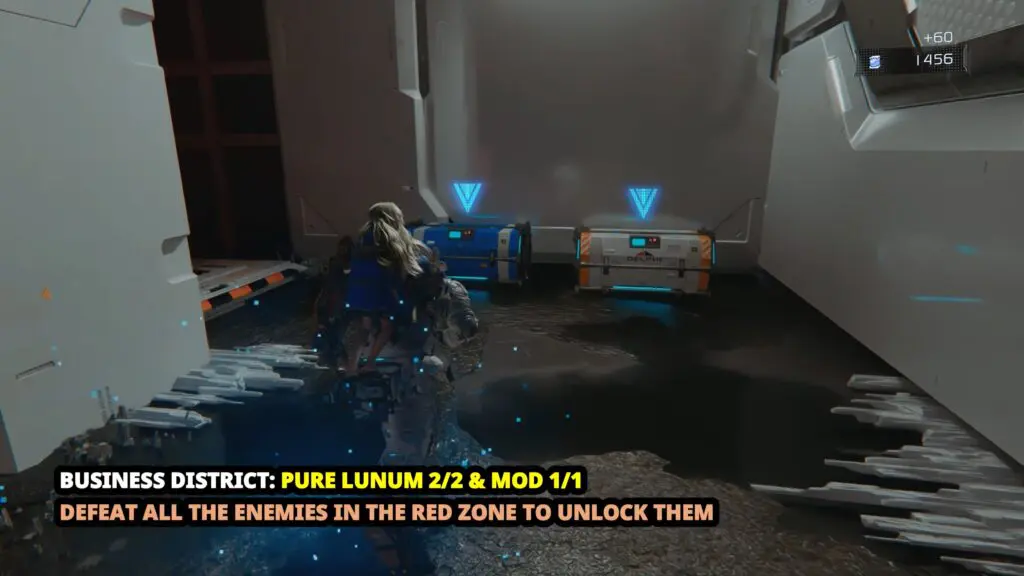
Pure Lunum 2/2 & Mod 1/1
Clear out all the enemies in the Red Zone to unlock these two items.
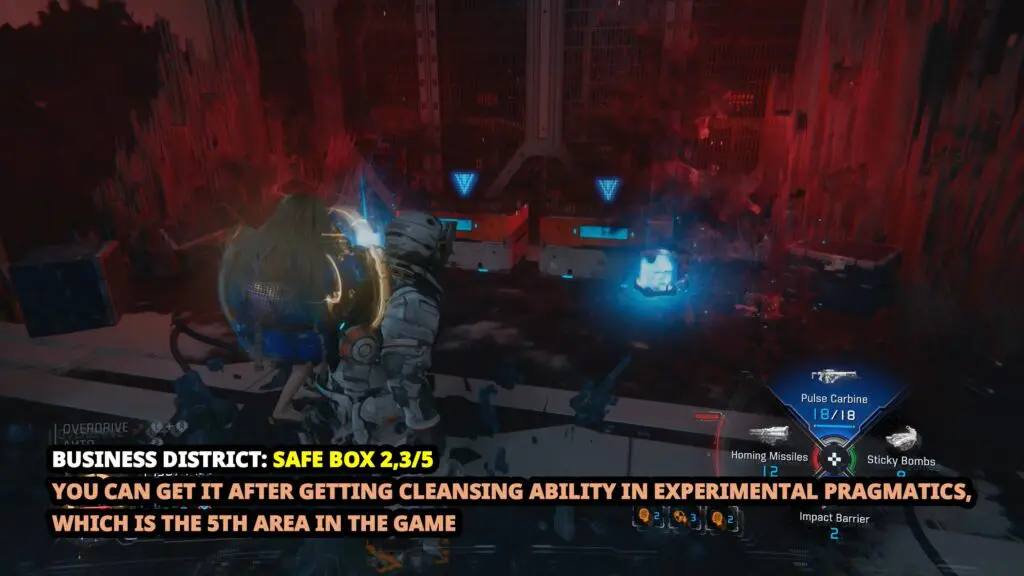
Safe Box 2-3/5
Safe Boxes 2 and 3 out of 5 can only be accessed after you unlock the Cleansing Ability in Experimental Pragmatics, which is the fifth area in the game.
Safe Box 4/5
Drop down from the previous collectible location and go through the door opposite the Red Zone. This leads to a room with a taxi on spikes. The Safe Box is behind the spiked taxi.
Cartridge Holder 1/1
Take the zipline near Safe Box 4/5 to reach the top and find the Cartridge Holder 1/1.

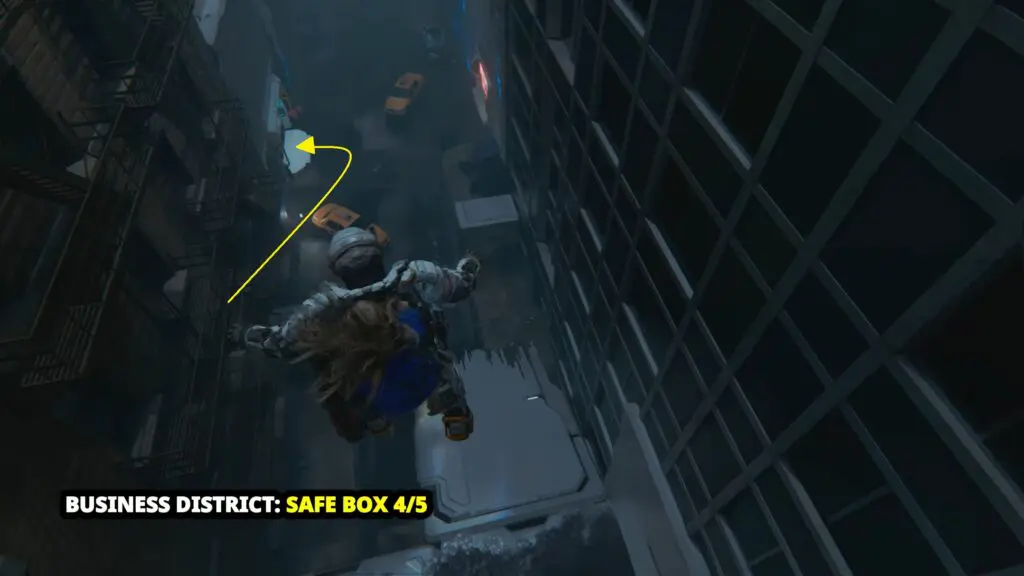
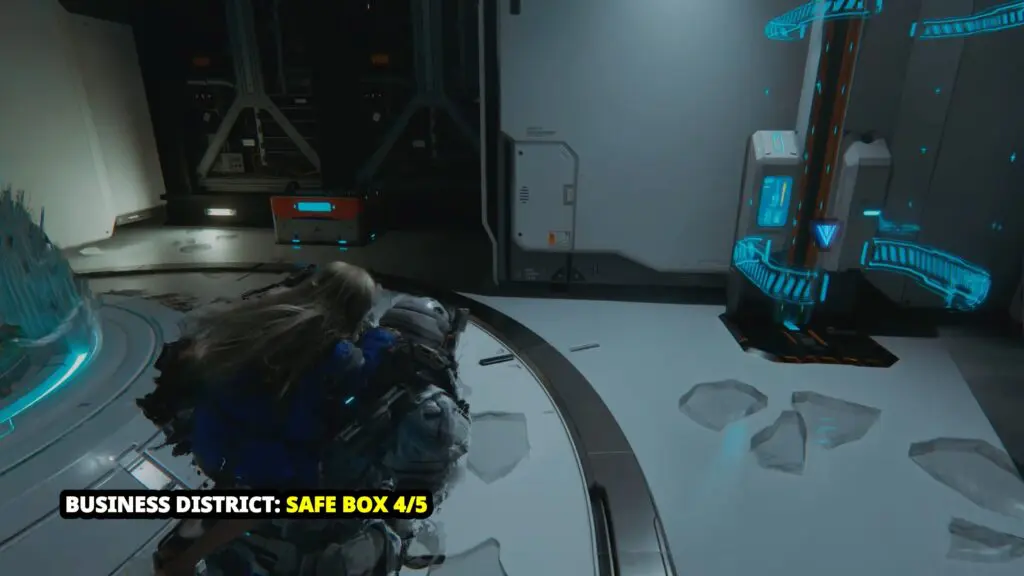
Safe Box 5/5
Starting again from the Space Office Station Escape Hatch. Go through the door next to the Space Office Station Escape Hatch and head to the right. Go up the stairs and clear the blockage.
Take the elevator down, then make your way up from platform to platform until you spot the box on a side platform.

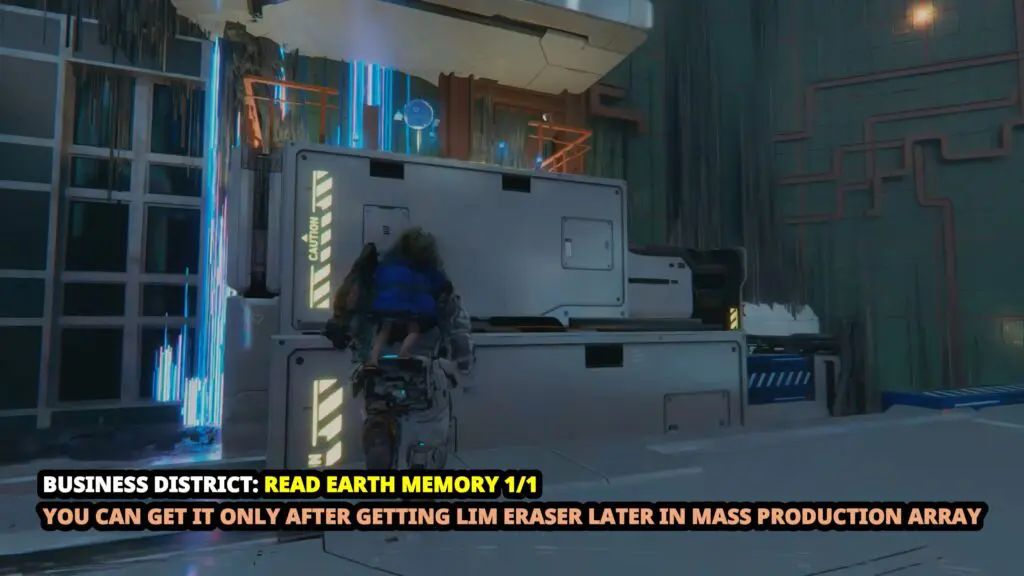
Read Earth Memory 1/1
It is located at the top of the area.
Mass Production Array 05 – Lim Recycling Facility
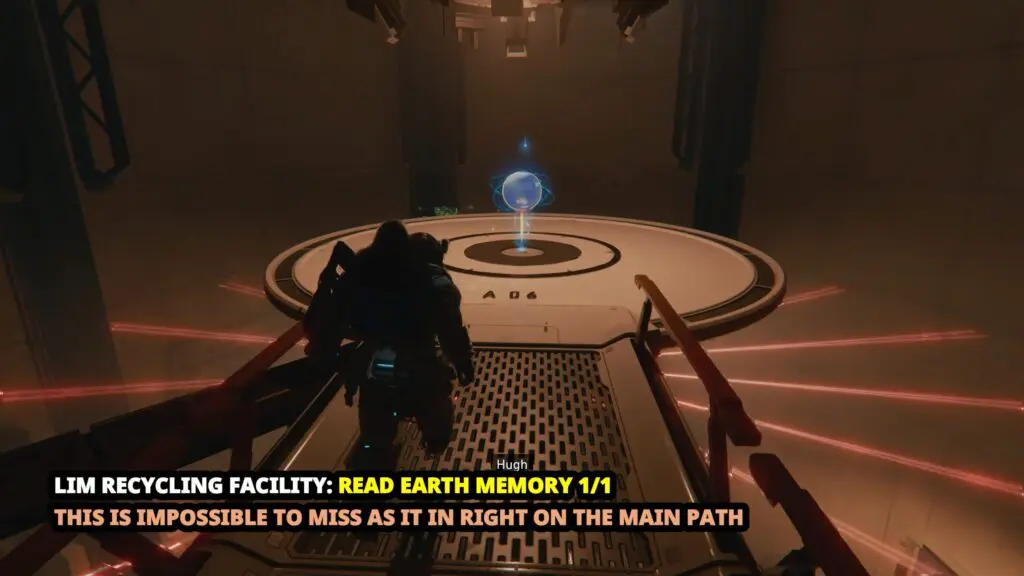
Read Earth memory 1/1
This one is found inside a circular room filled with lasers. You won’t miss it since the main story takes you directly through this area.
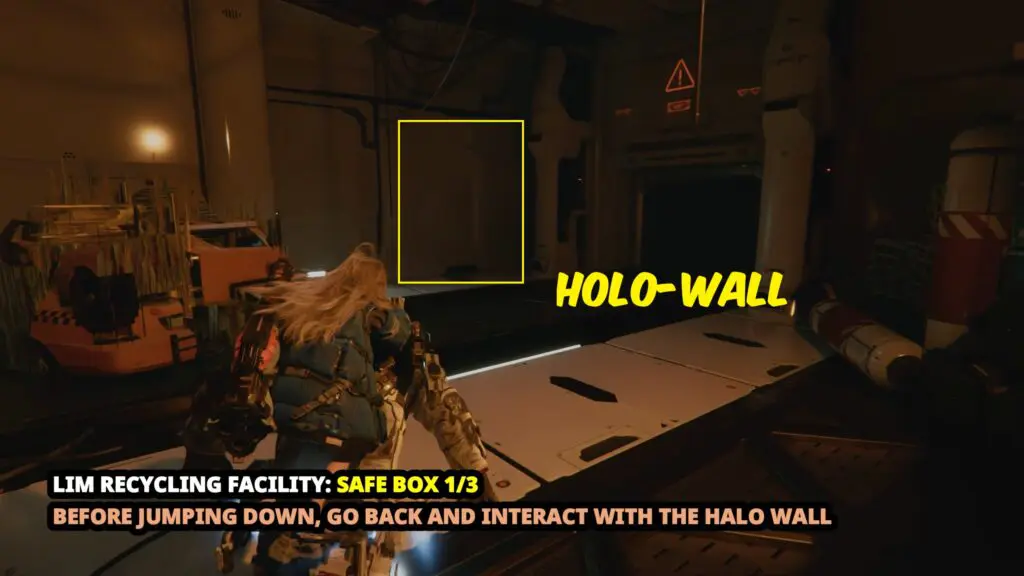
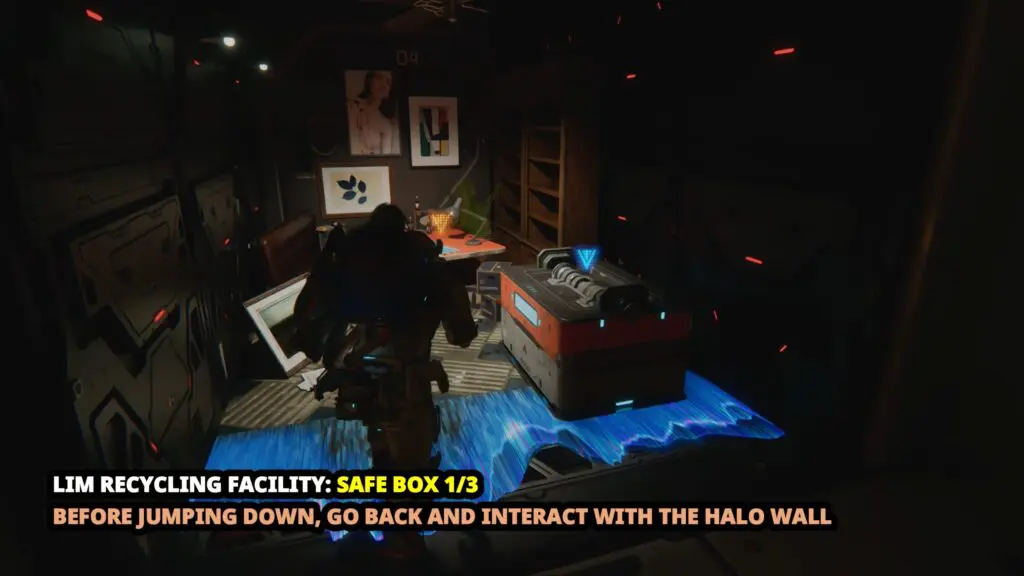
Safe Box 1/3
Exit the circular room with lasers, and head toward the wall on the right side. You’ll find a Holo-Wall there. Interact with it to reveal the Safe Box.
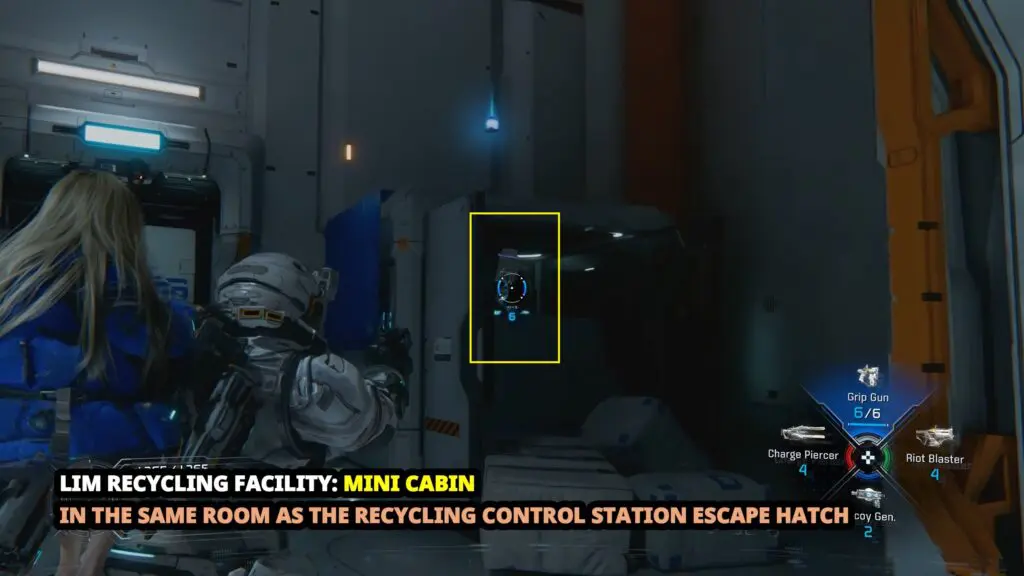
Mini Cabin
This is found in the same room as the Recycling Control Station Escape Hatch. Look directly across from the Escape Hatch to find the Mini Cabin inside a container.
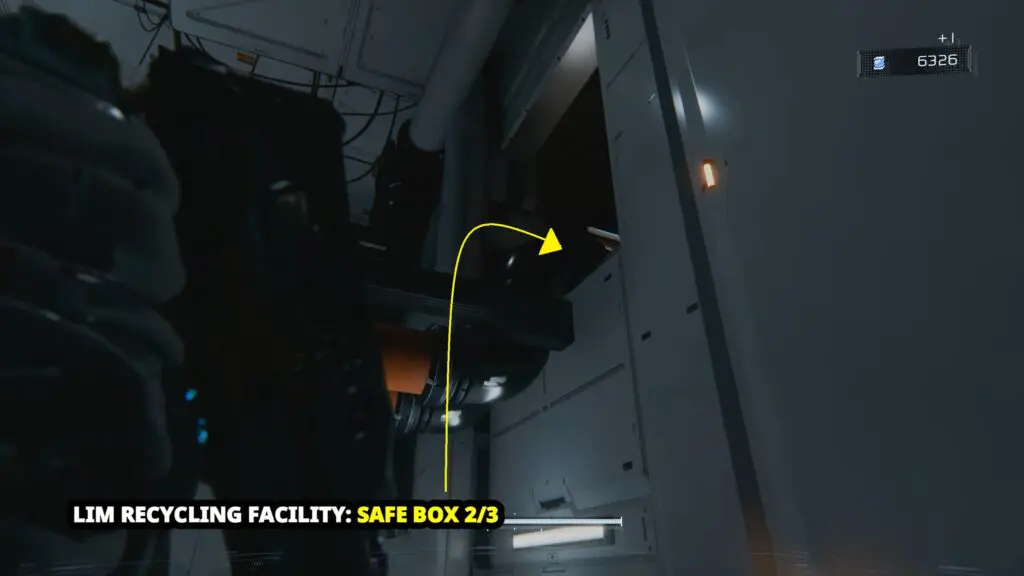
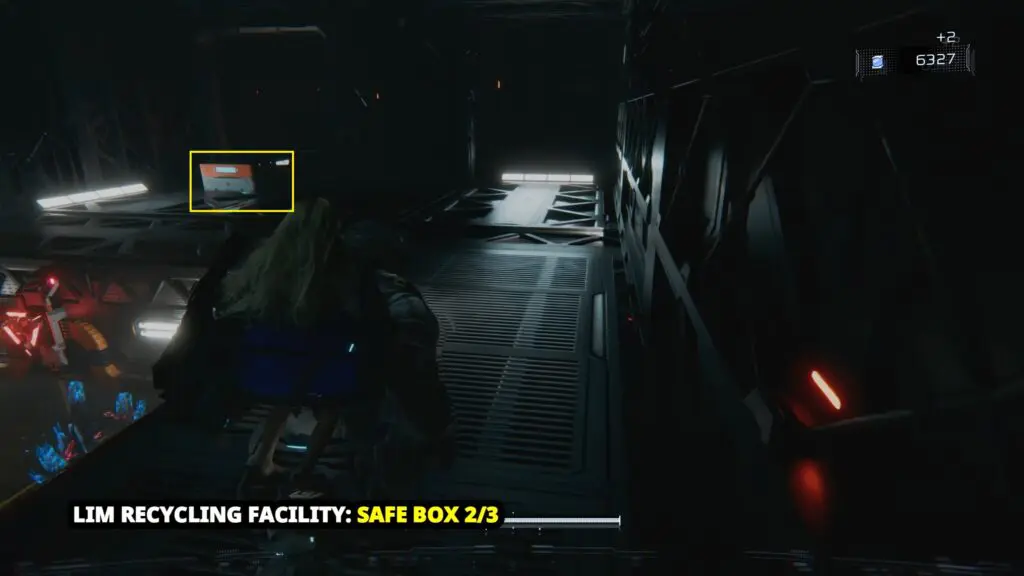
Safe Box 2/3
Climb up the box where you found the Mini Cabin, then climb up to the pipe above it. This will lead you to the Safe Box.
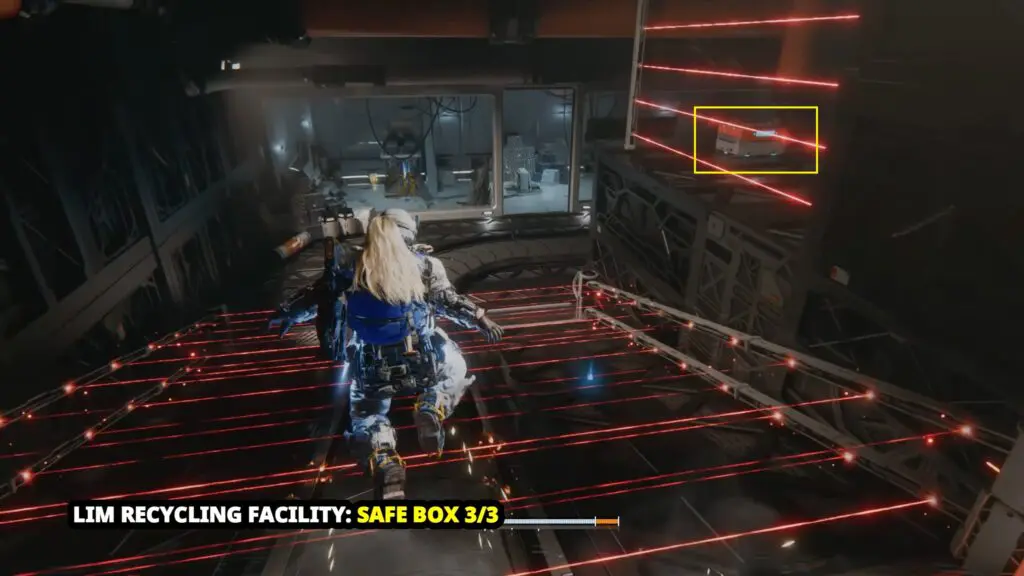
Safe Box 3/3
This Safe Box is on a ledge to the right, above the slope with the lasers. Cross the lasers first, then deactivate them to clear the path and reach the ledge.