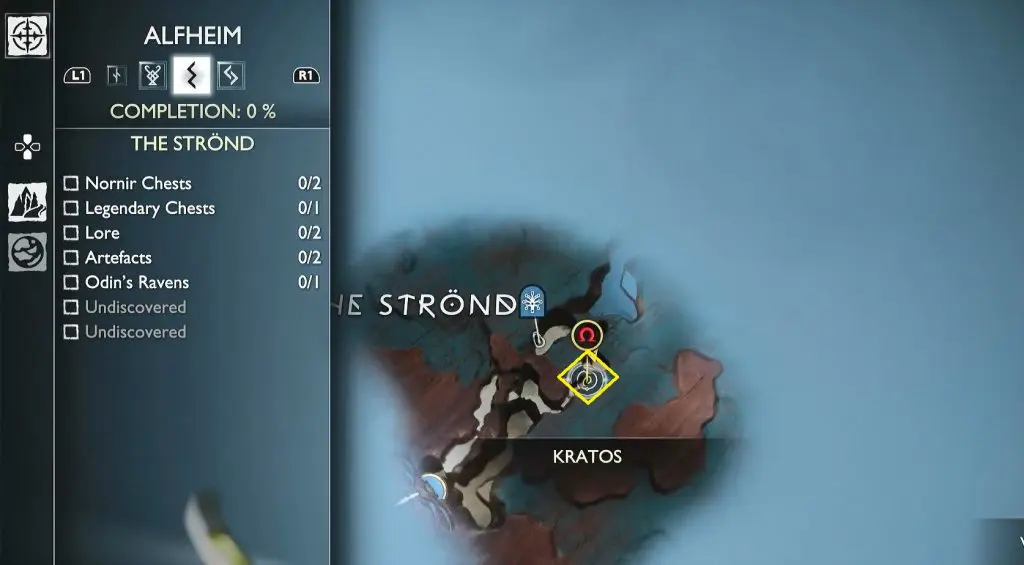
This guide shows the location of all Nornir Chests and how to solve the puzzles to open these chests in the Alfheim area of God of War Ragnarok. There is a total of 7 Nornir Chests in the area.
1) The Strond Nornir Chest 1/2
From the Mystic Gateway, go up the path to the left, and at the end of the path squeeze through the gap in the wall. Then go to the left and drop down the ledge to find the Nornir Chest.
To unlock the Nornir Chest You must light 3 braziers/torches with the Chaos Blades
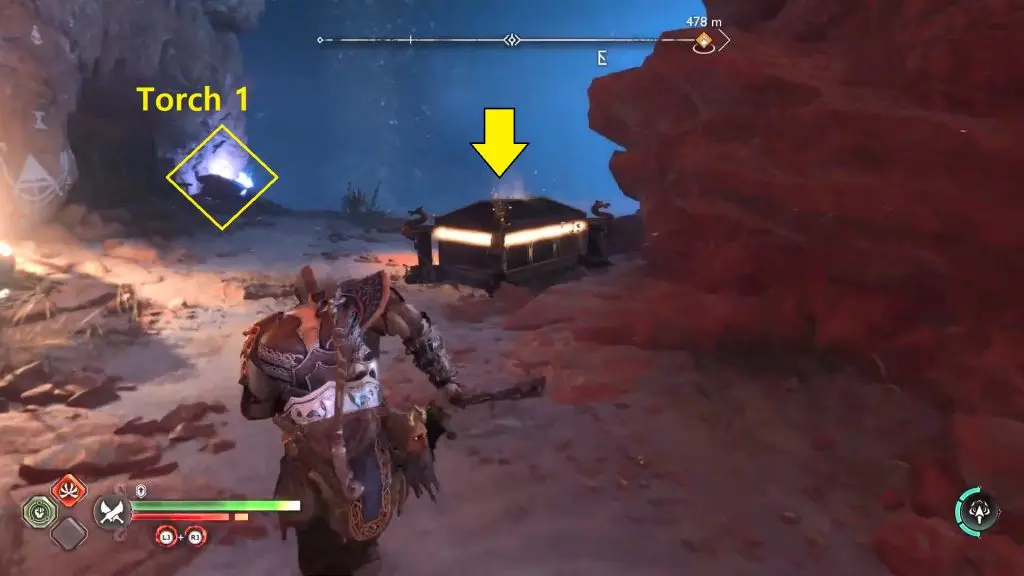
#1 Torch
The first is to the left of the Chest on the cliffs. Use the Blades of Chaos to light it
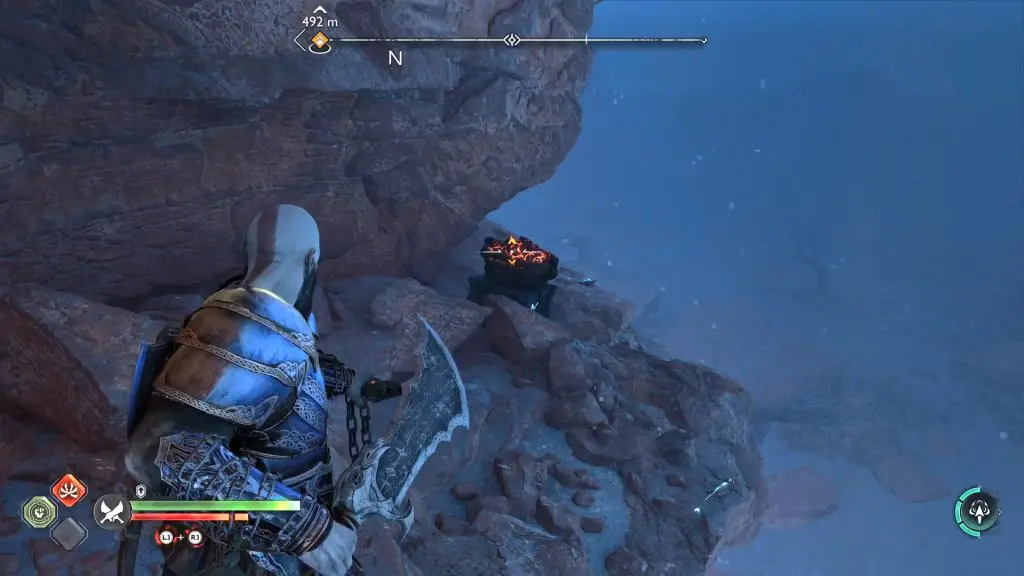
#2 Torch
The second is to the right of the Chest, You can find Touch #2 just a bit below the edge of the cliff near a wooden scaffolding.
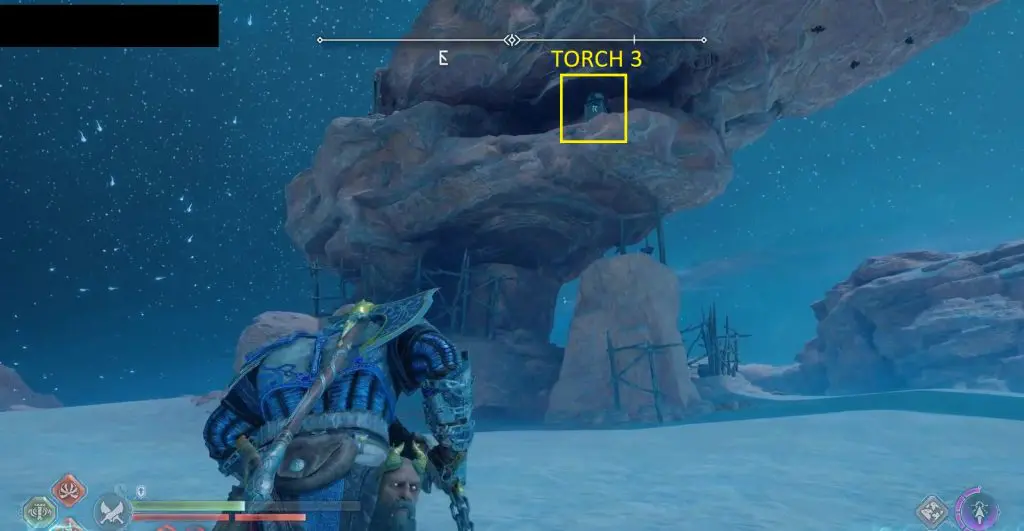
#3 Torch
The third requires you to climb back up the ledge. Then go to the left to climb up the ledge twice again. Then drop down on the left to find the third torch.
2) The Strond Nornir Chest 2/2
Note: You need the Spear for this chest. The Spear weapon can be obtained by completing Main Mission 10: Forging Destiny.
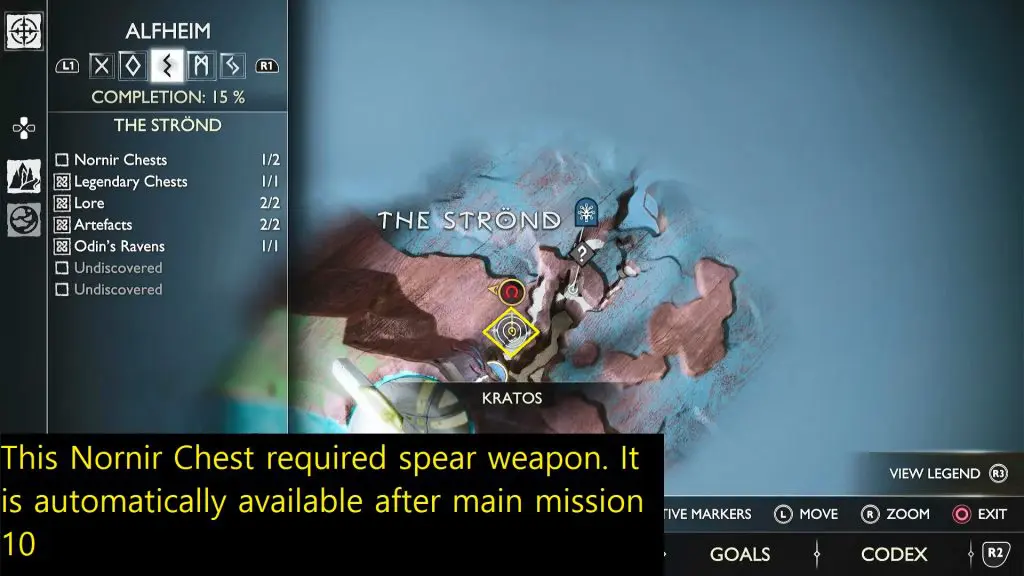
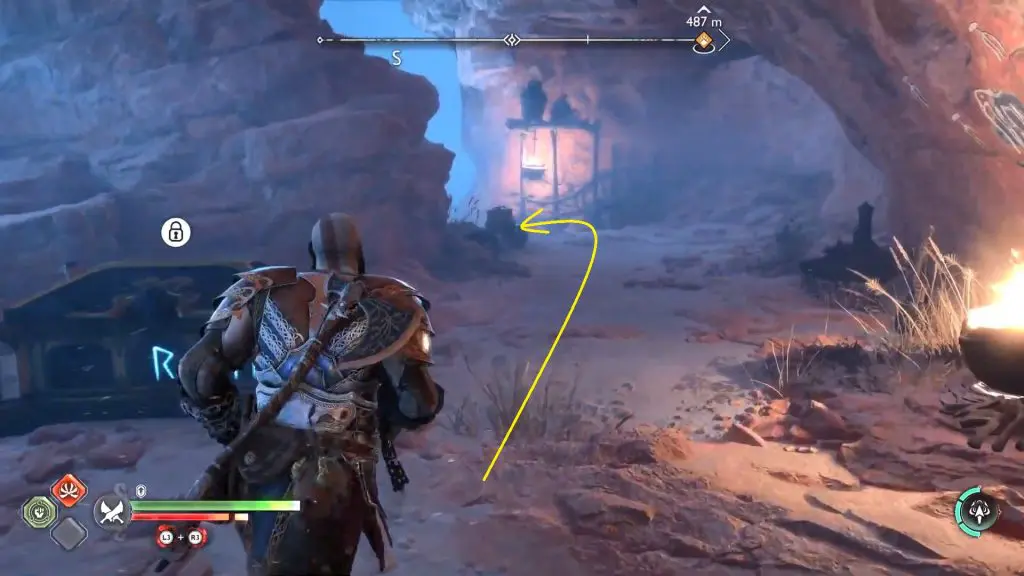
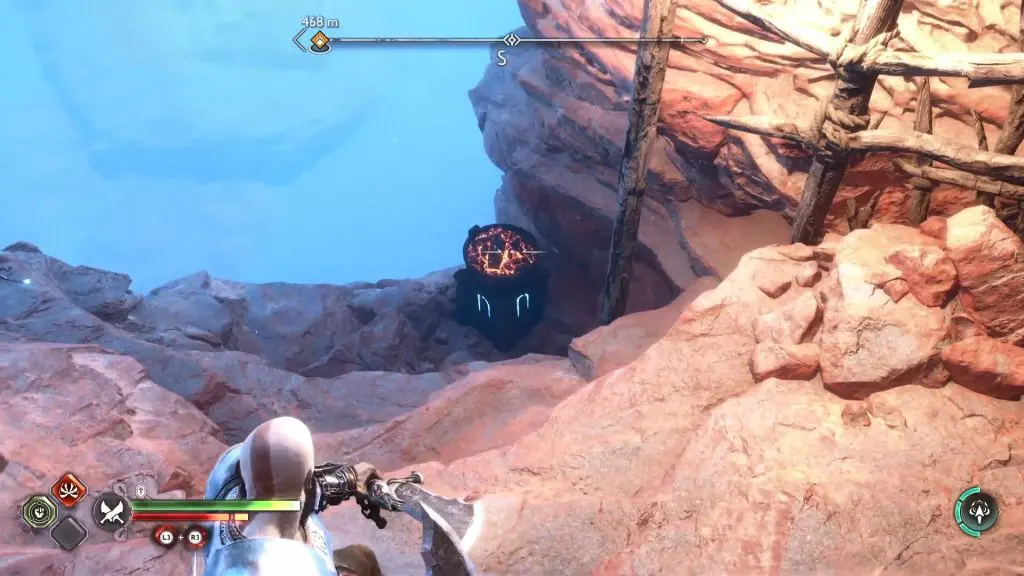
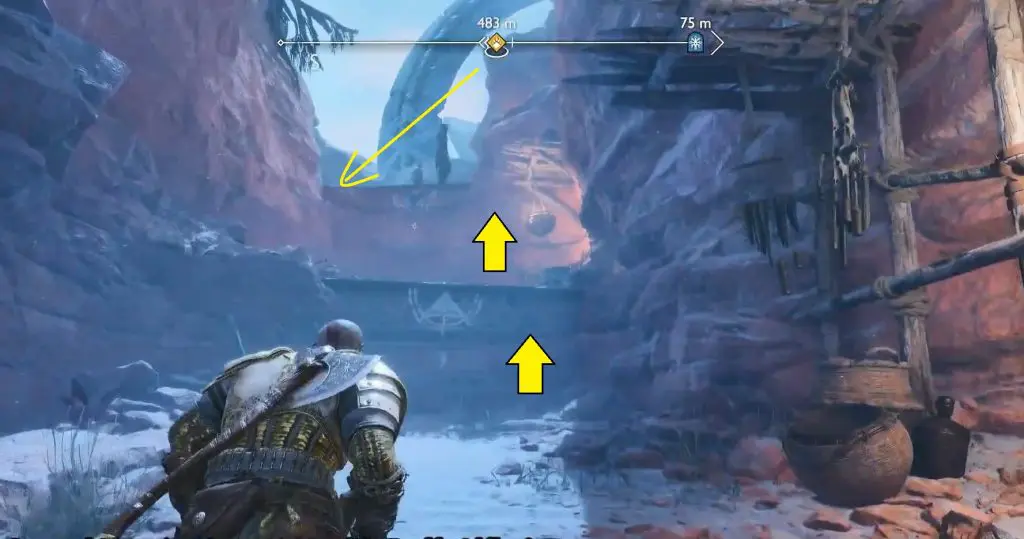
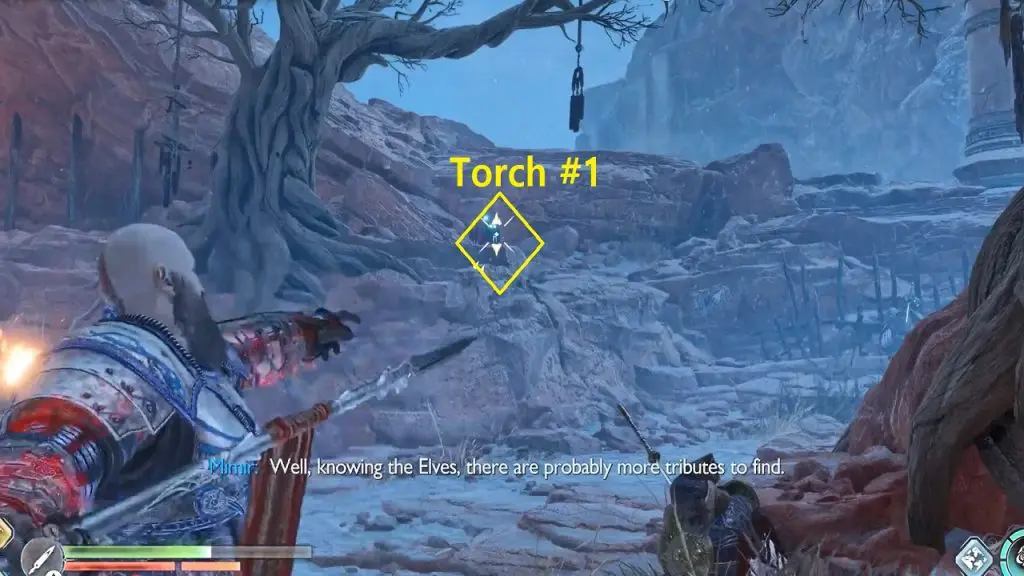
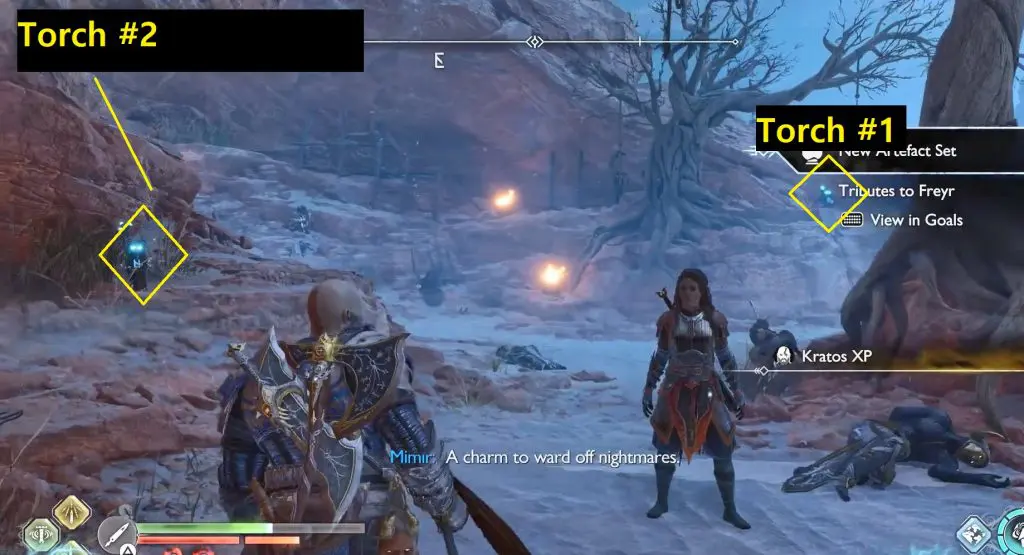
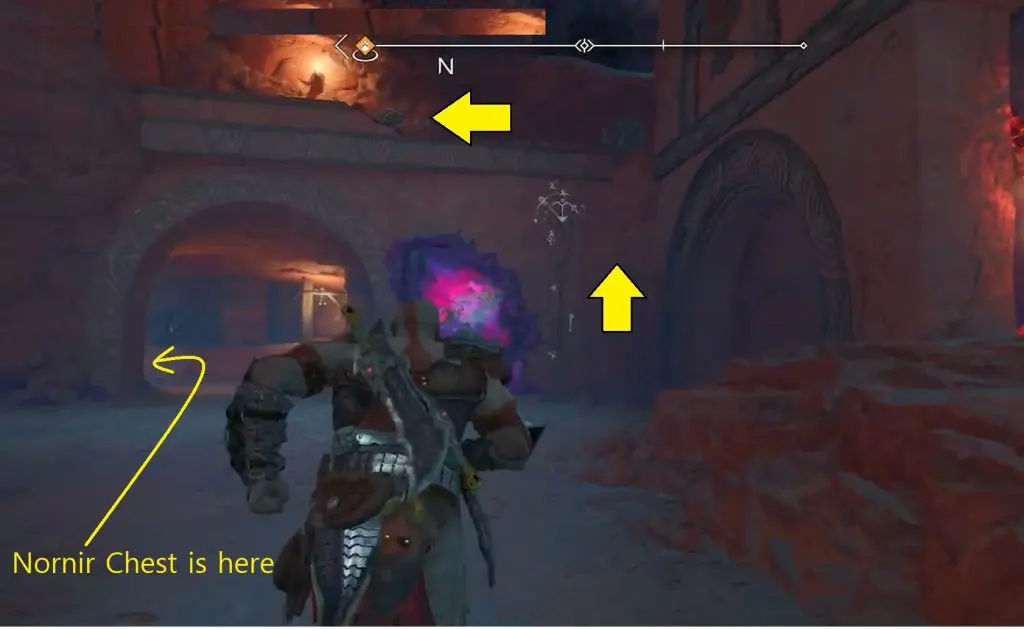
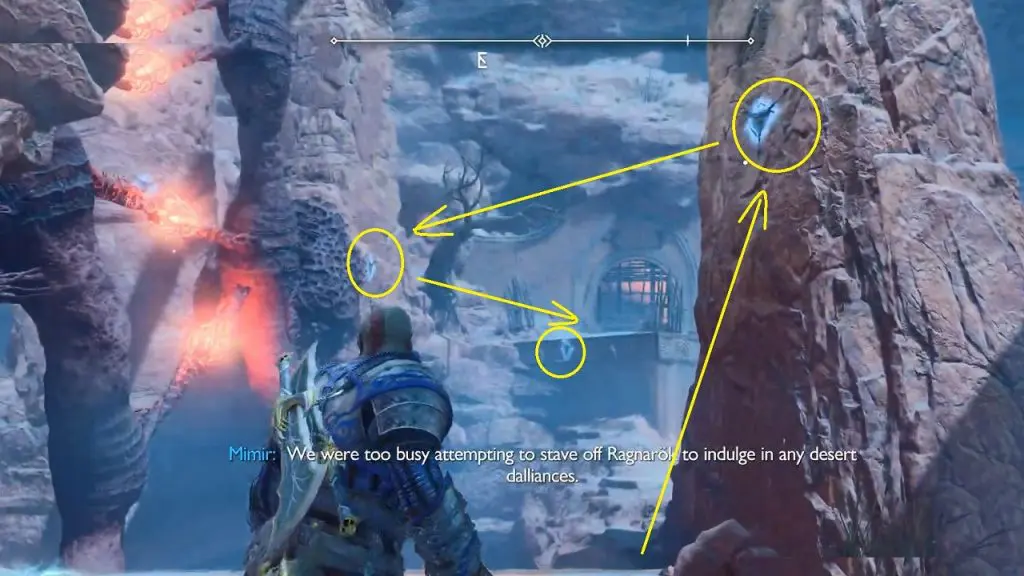
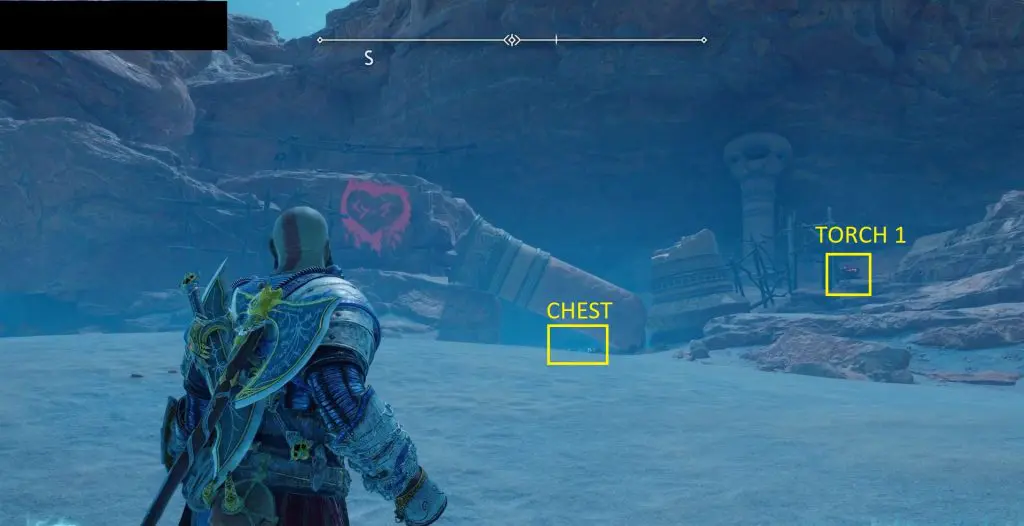
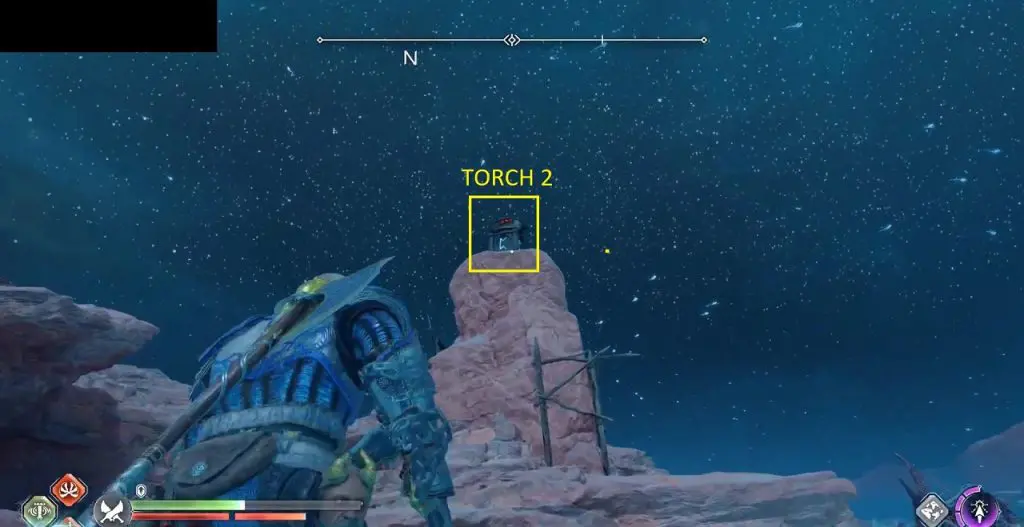
For this chest, you must hurl the Spear at three torches and have them all explode at the same time. Turn around from the chest and look for the first two touches in front of you.
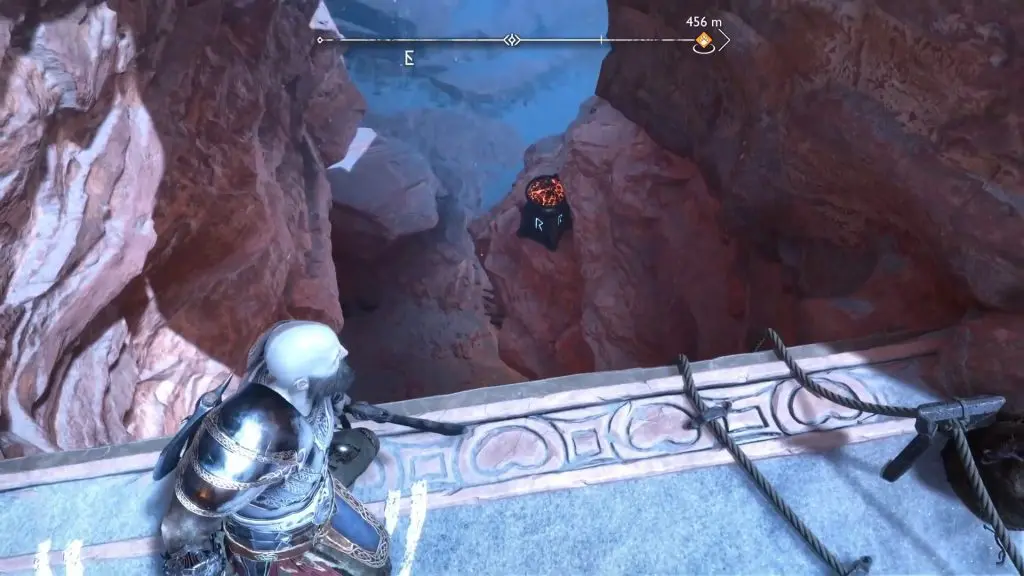
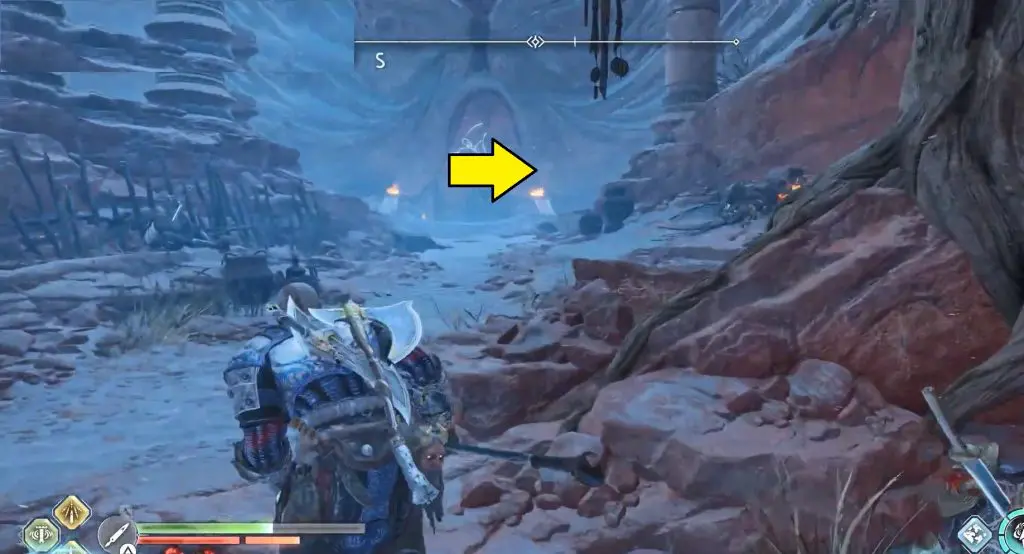
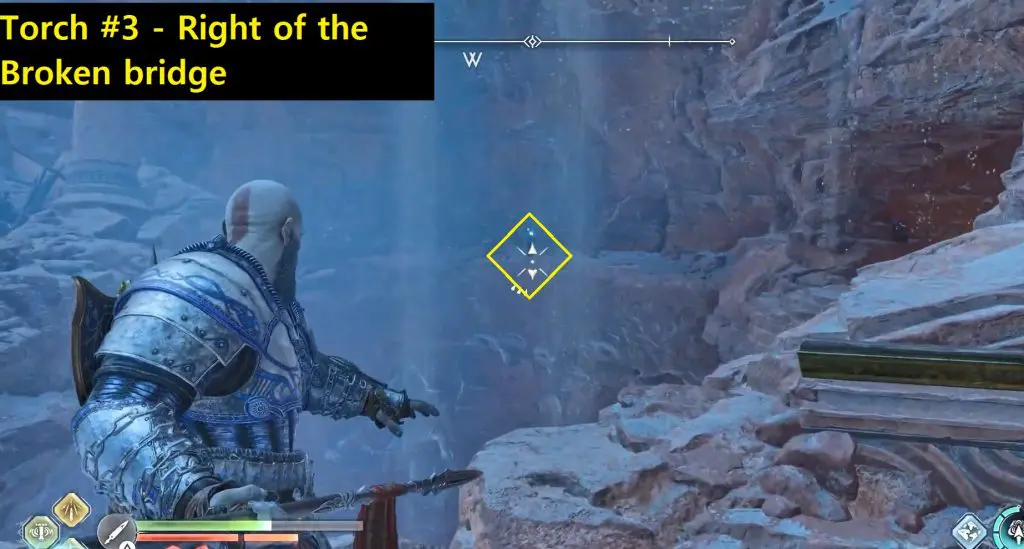
From the chest, head southwest. The third torch can be found to the right of the fallen bridge.
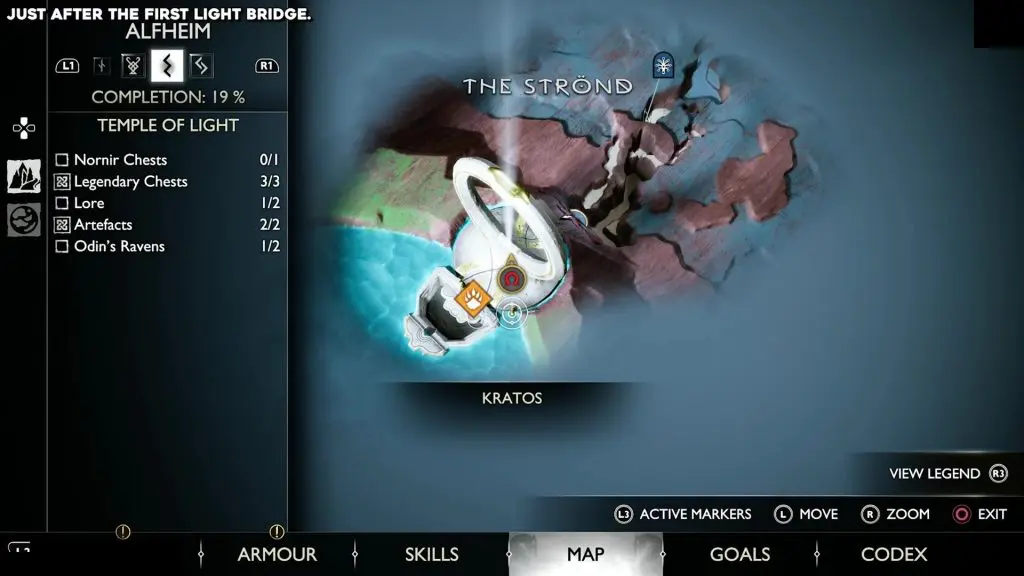
3) Temple of Light Nornir Chest
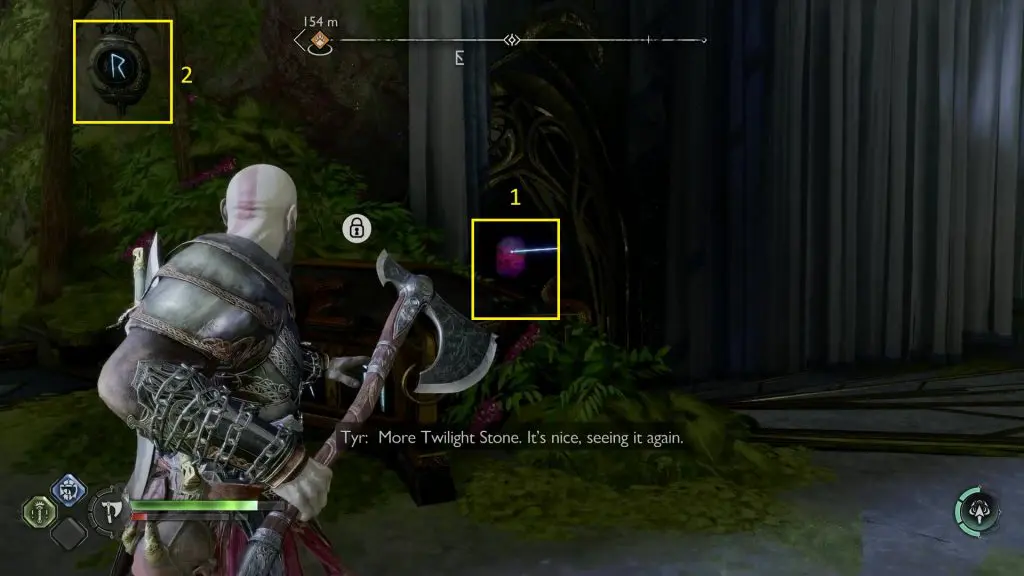
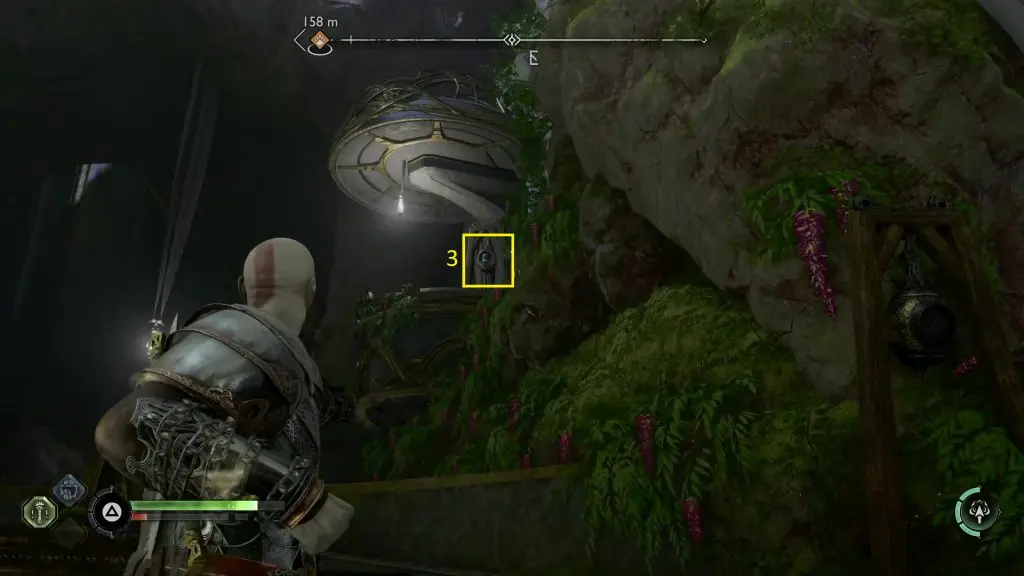
The Nornir chest in the Temple of Light is just after the first light bridge at the location shown in the picture below. To unlock the chest, you need to hit three seals in quick succession. Location of the seals is shown in the second and third pictures below. Seal #1 is down the stairs on the right side of the chest. Seal #2 is on the wall behind the chest. Seal #3 is far behind on the left side of the chest. Unlock the chest and then open it to get an Idunn Apple.
4) The Below Nornir Chest
The Nornir Chest is located behind a closed gate at the location shown in the pictures below and you need to unlock the gate first. Climb up the ledge directly before the Nornir Chest area and turn left.
Note: You will reach this location while doing a favor – Secret of the Sands Guide
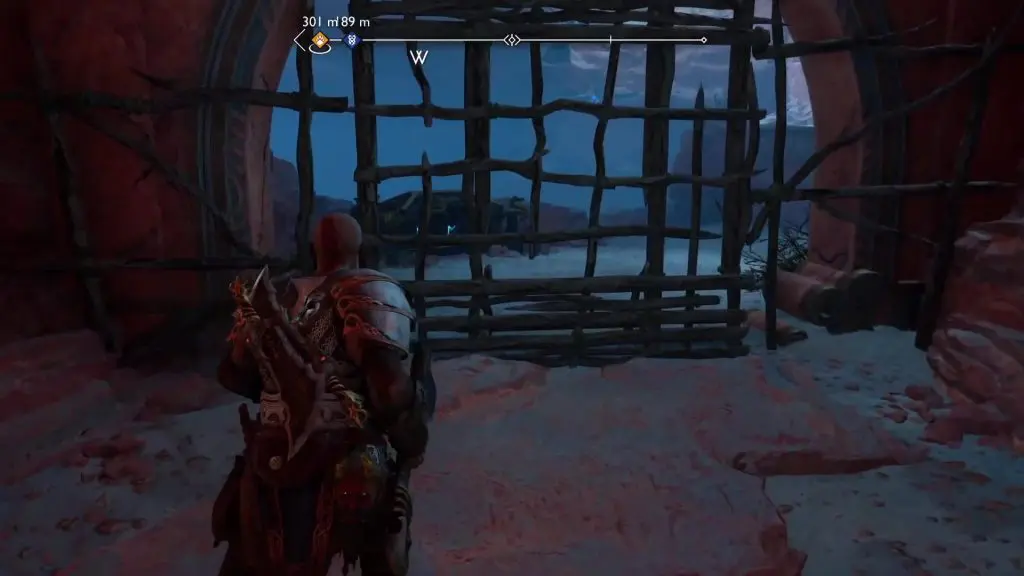
Use the zip line to cross the gap. See the pictures below for reference.
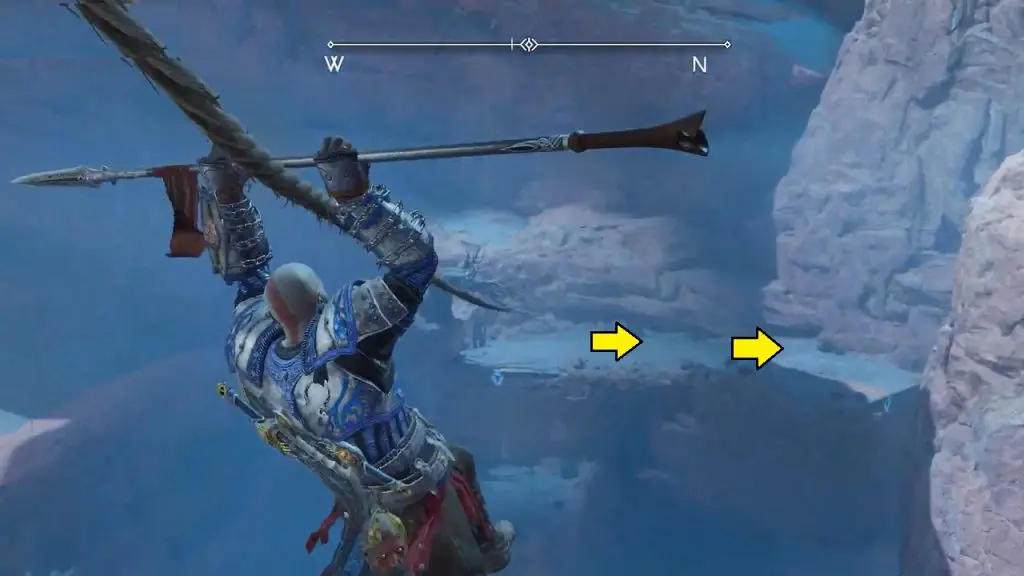
Once on the other side, turn right to locate a climbing section on the mountain wall. There are two gates on the other side of the gap that you must unlock. Please see the image below.
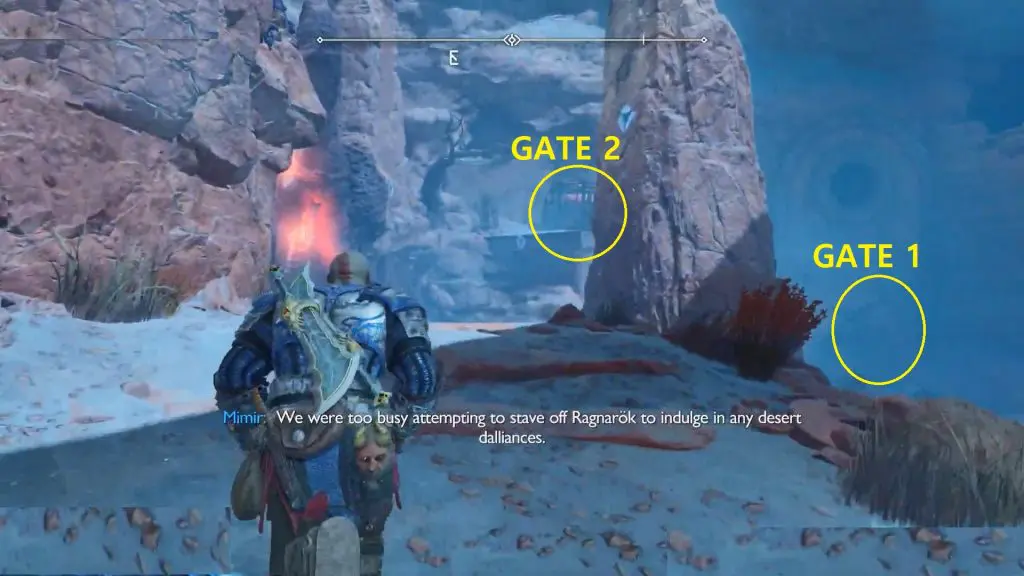
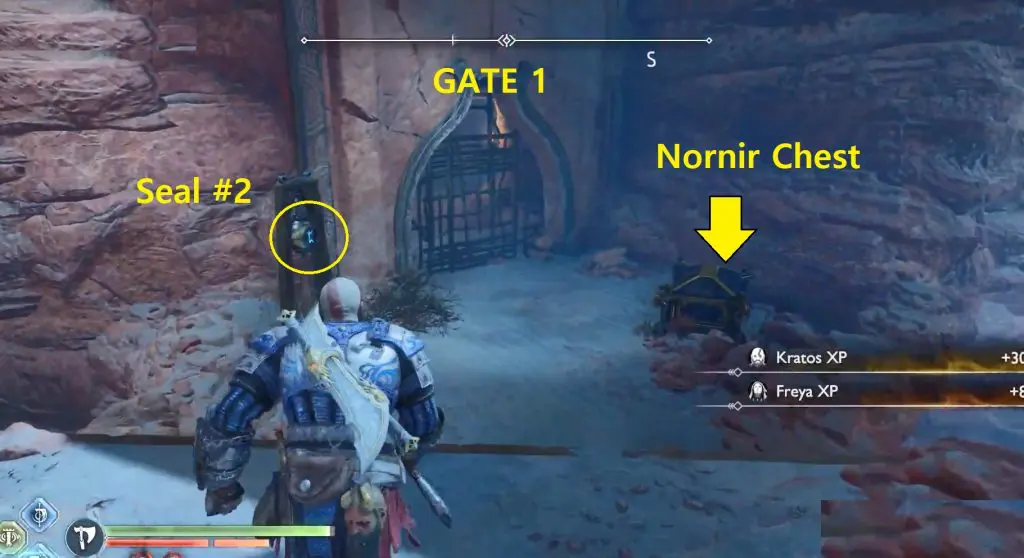
Gate #1
Climb this stretch to get to the other side of the mountain and then open it
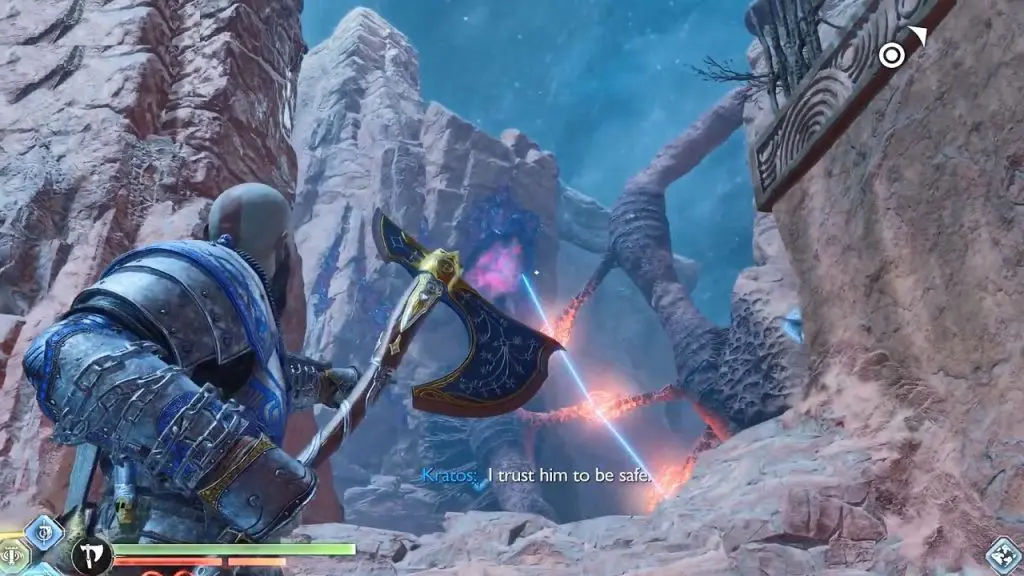
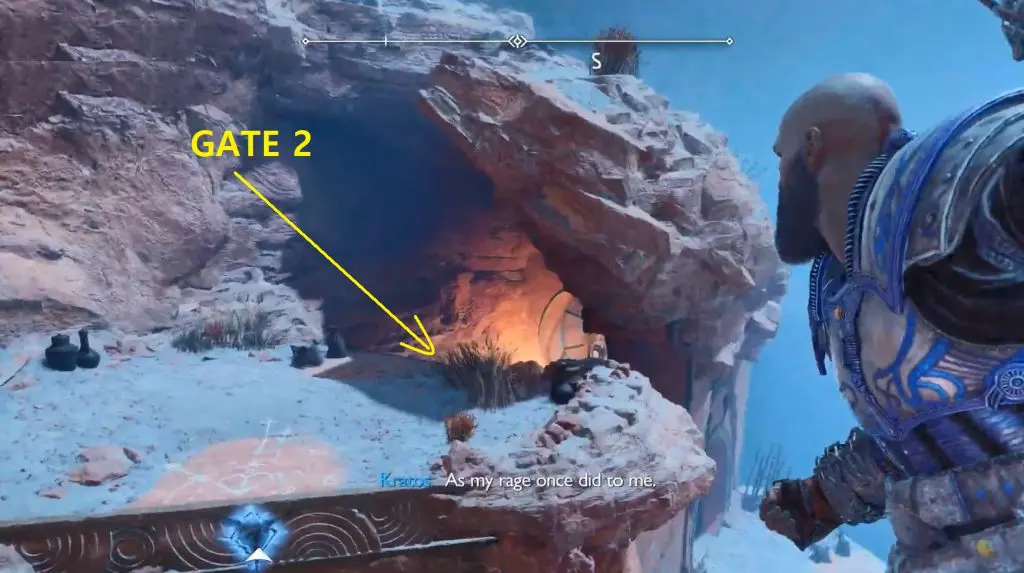
Gate #2
Climb the mountain after breaking the three seals with your axe.
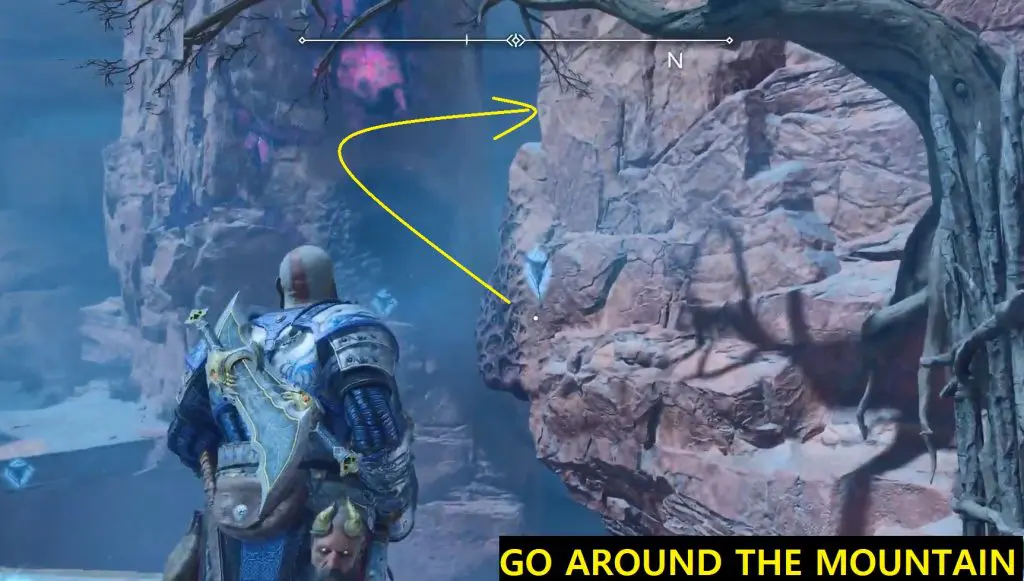
Go around the mountain to reach the back side of Gate #2 and open it.
With both gates open now, you need to hit the 3 seals with your axe. You must hit them in quick succession before they turn back on.
Seal #1
The first is upstairs in a window (inside) near Gate #2
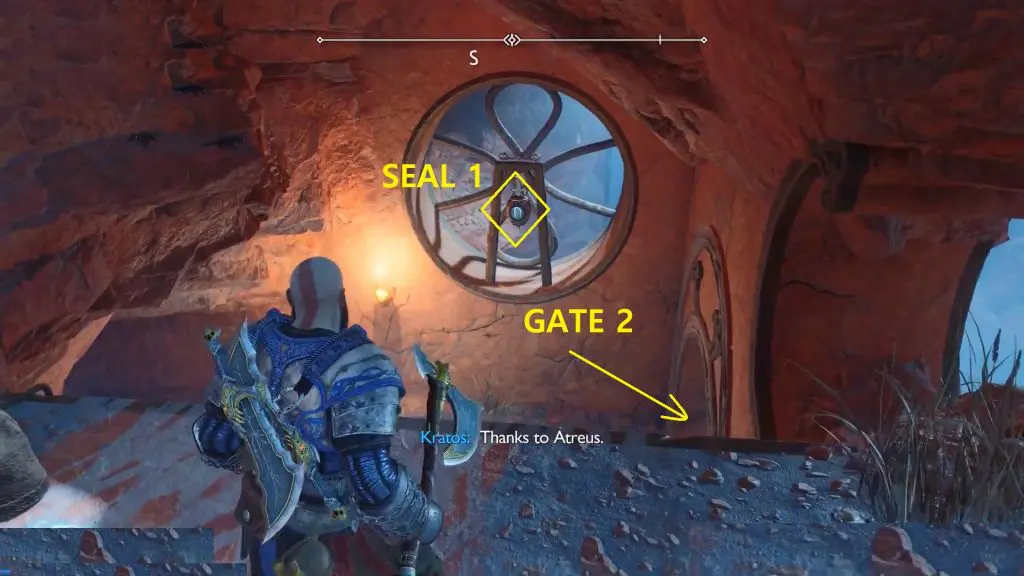
Seal #2-#3
The second seal is in front of the Nornir Chest, and the third is in the tunnel next to the Nornir Chest.
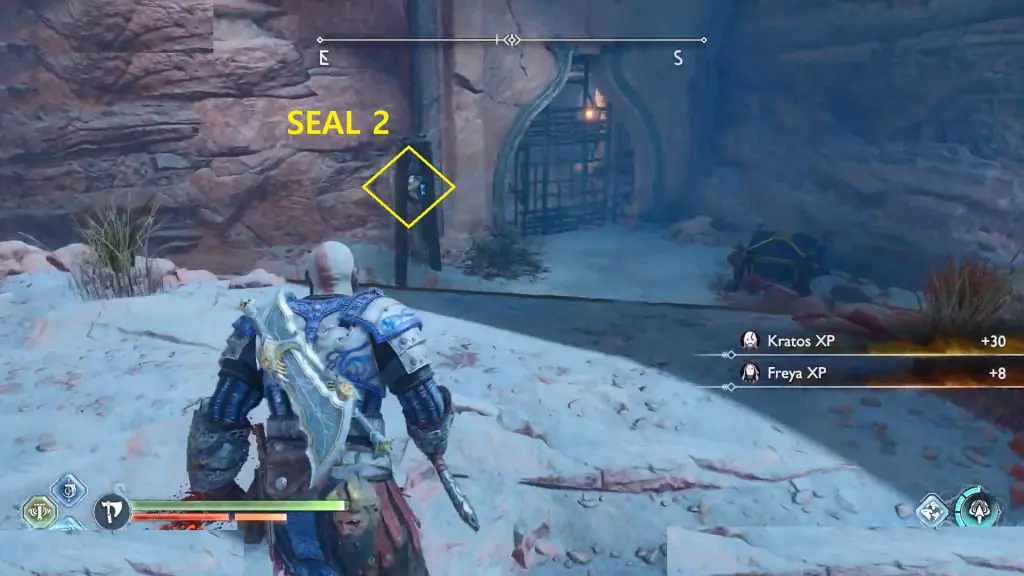
Hit them in that order with the axe quickly. You can retry if the seals turn back on.

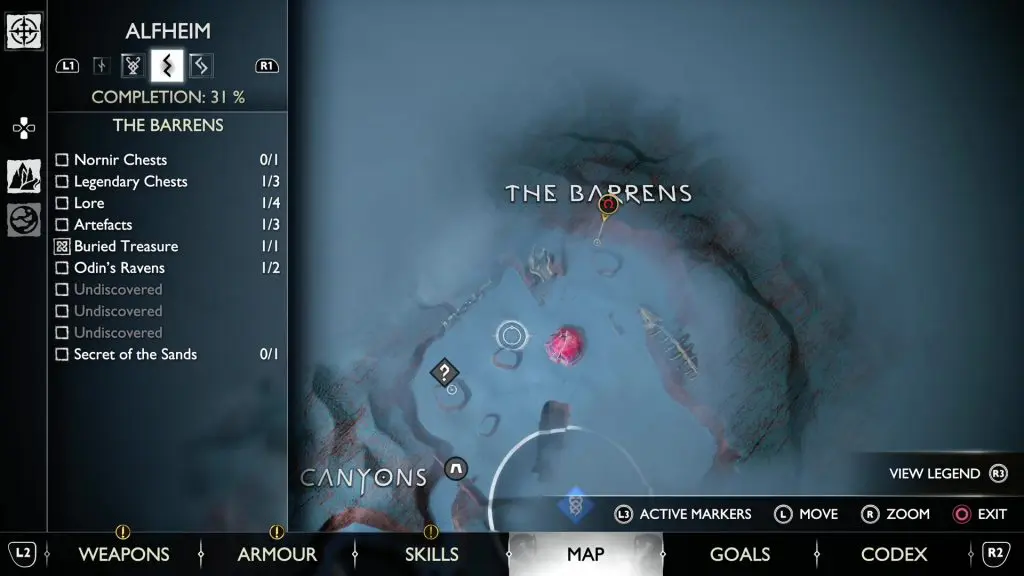
5) The Barrens Nornir Chest
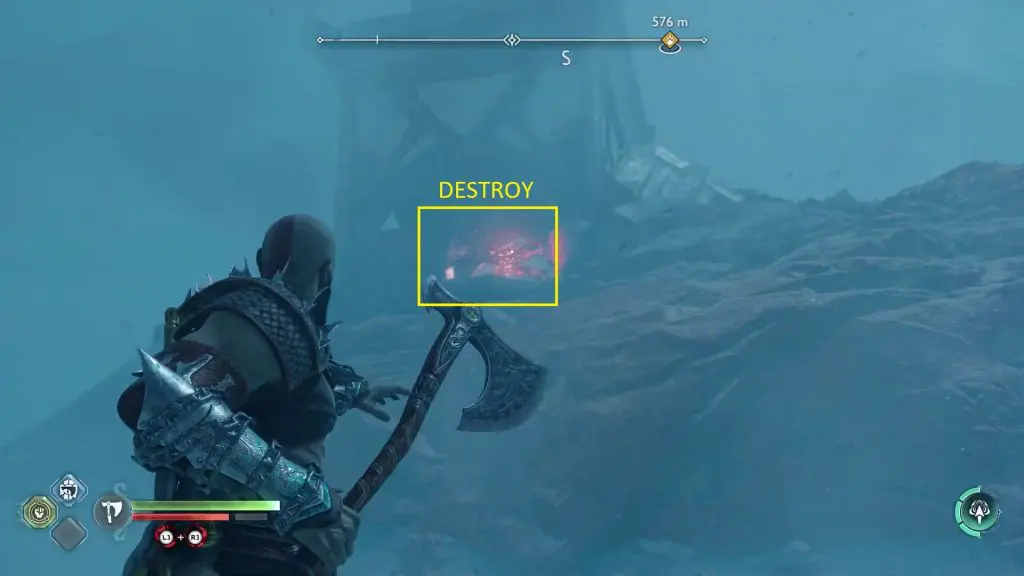
The Nornir chest is on the north side of the area inside a structure as shown in the pictures below. To reveal the chest, you will need to first destroy the red glowing sap inside the building as shown in the second picture below. After that, ignite 3 torches above the seals to unlock the chest.
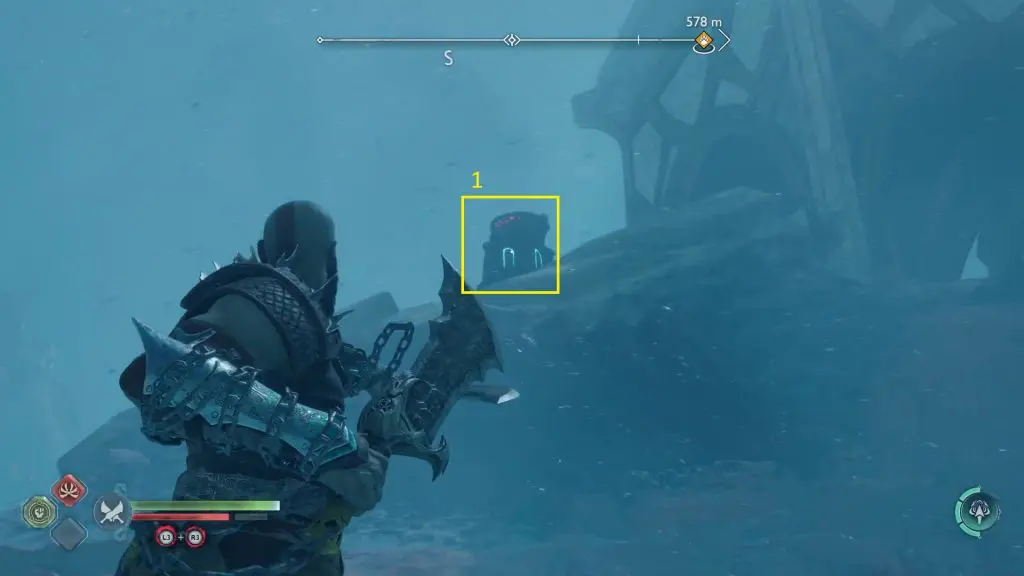
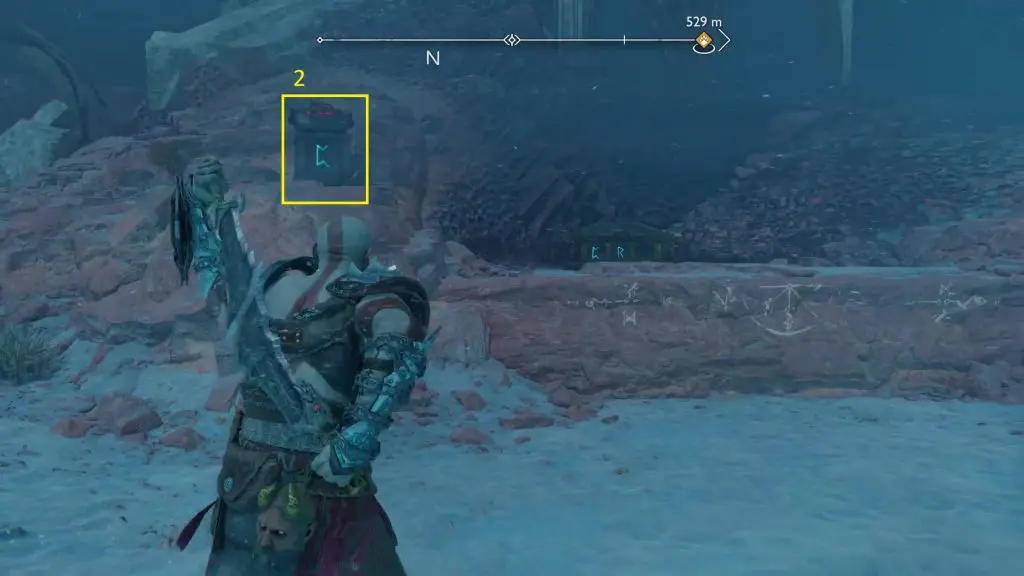
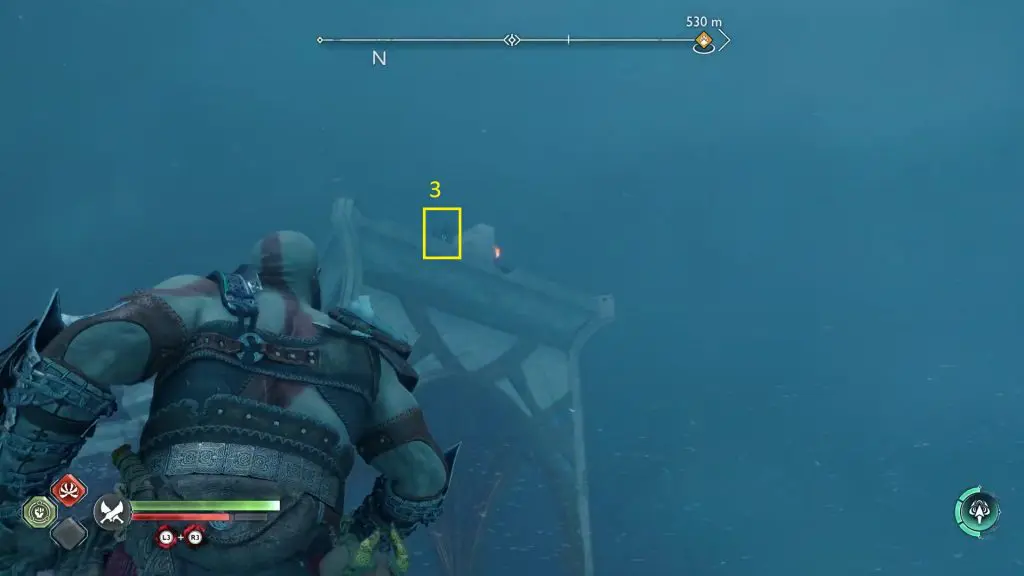
The location of the three torches is shown in the pictures below. Torch #1 is on the north side of the structure. Torch #2 is on the left side of the structure. Torch #3 is at the top of the structure. Torch 1 & 2 can be ignited using your blade. To ignite Torch #3, glow the explosive barrel next to it. This will unlock the chest. Open the chest to get a Horm of Blood Mead.
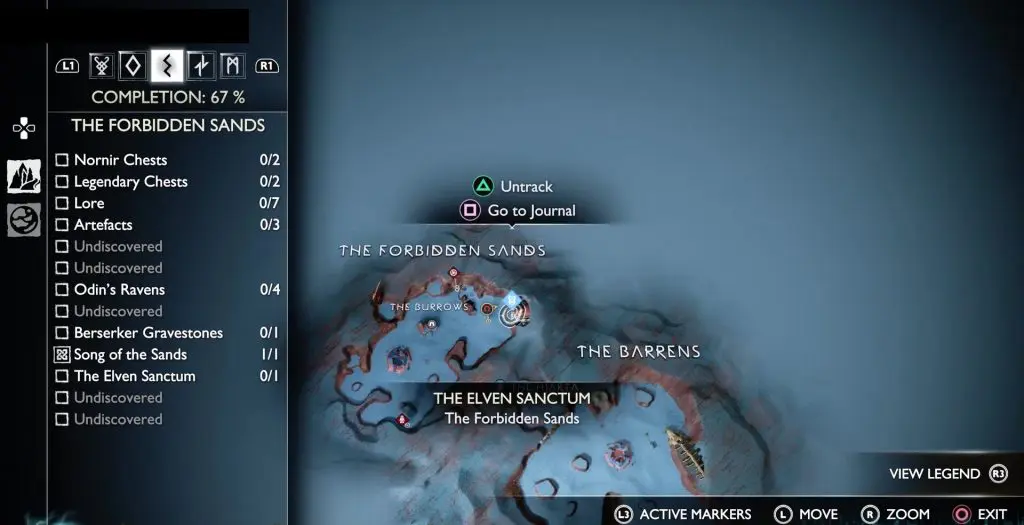
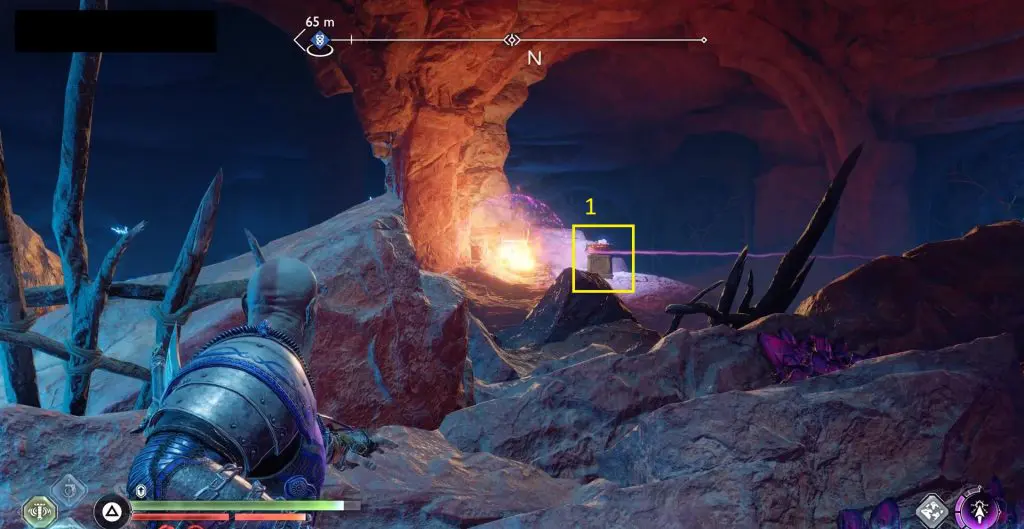
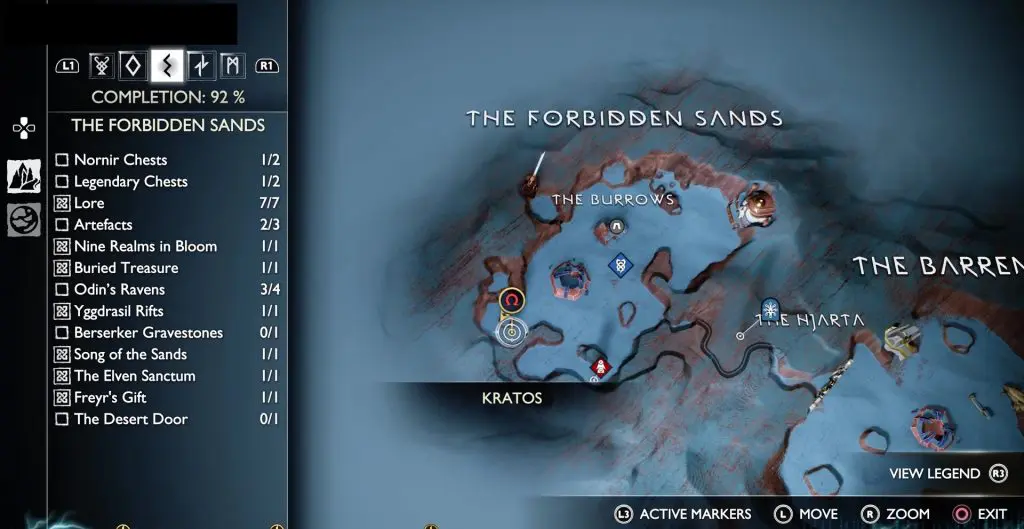
6) The Forbidden Sands Nornir Chest 1
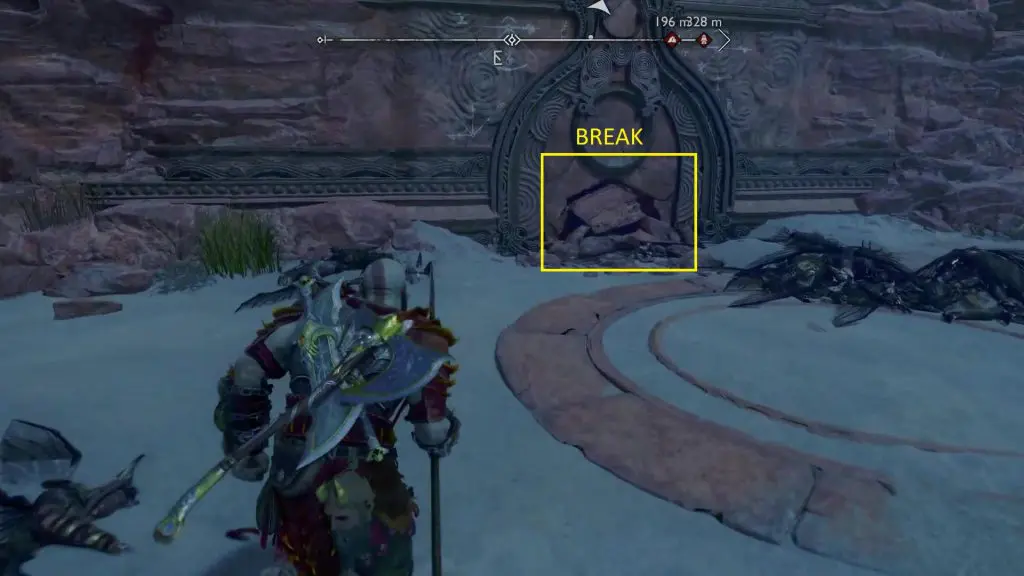
On the northeast side of The Burrows, you will see a cracked wall as shown in the pictures below. Break the wall and then go inside to find the Nornir Chest.
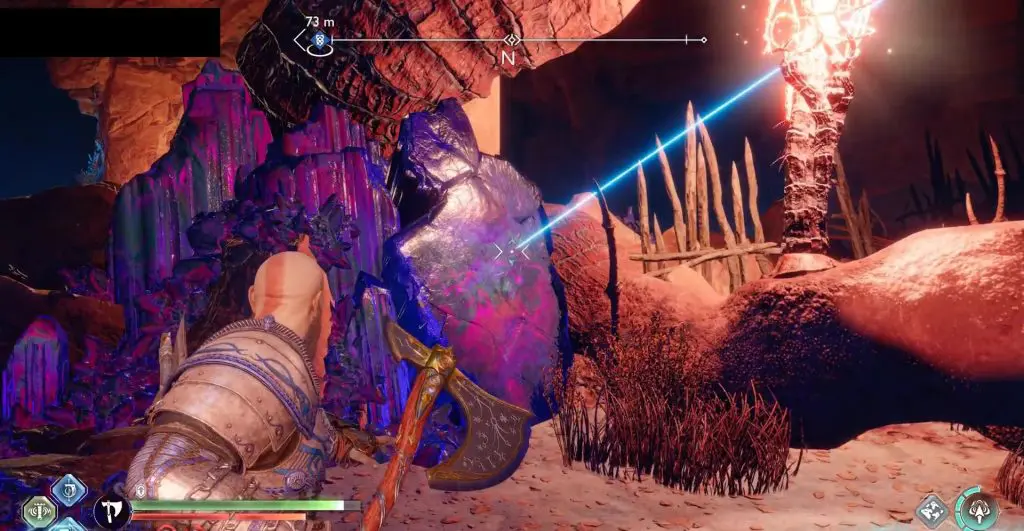
You will find the best inaccessible. Throw your axe at the purple twilight stone on the left side of the chest at an appropriate angle to destroy the saps, which fill free the chest as shown in the pictures below. Now you will need to light three torches to unlock the chest.
The first torch is on the left side of the chest as shown in the picture below. Throw purple arrows between the torch and the campfire. Then hit the campfire with a purple arrow, to make it explode and light up the torch.
The second torch is on the right side of the chest as shown in the picture below. Throw purple arrows between the torch and the campfire. Then hit the campfire with a purple arrow, to make it explode and light up the torch.
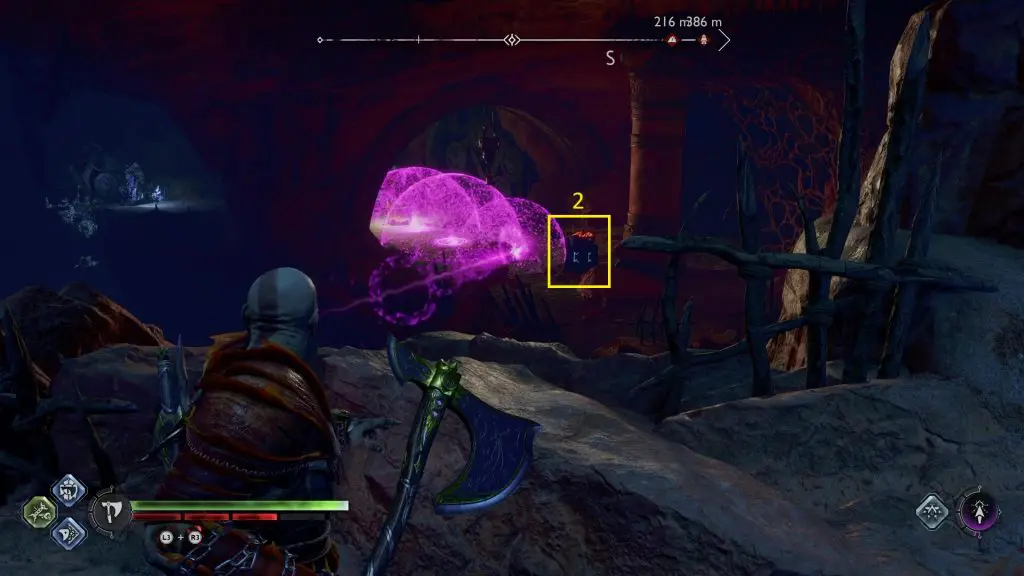
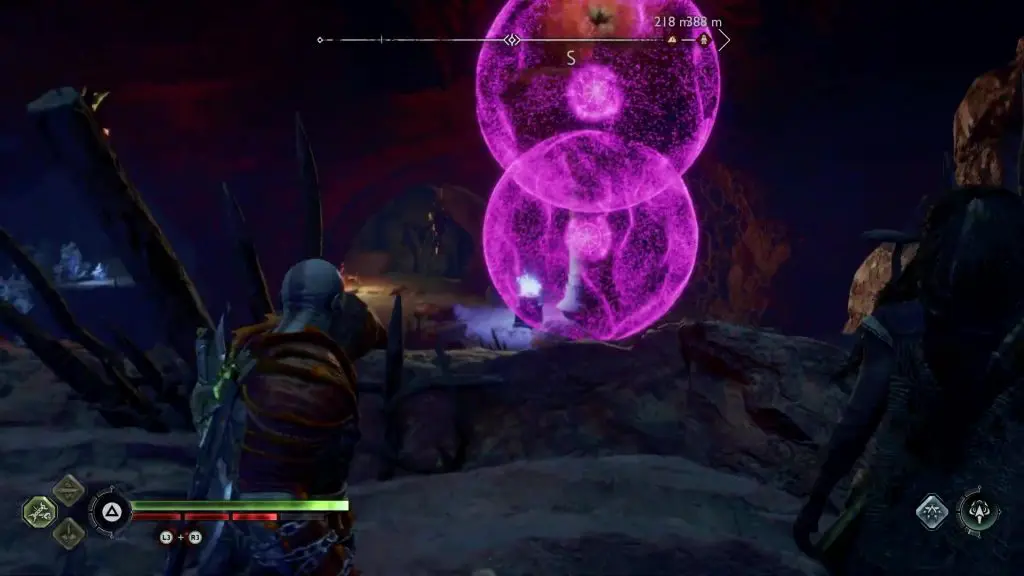
You will find a closed door above Torch #2 as shown in the picture below. This door opens when you hit it. Throw purple arrows between Torch #2 and the door. Then shoot an arrow at the door to make it open. Then quickly shoot another purple arrow at Torch #2, to make it explode and light up Torch #3. This will unlock the chest. open it to get a Horn of Blood Mead.

7) The Forbidden Sands Nornir Chest 2
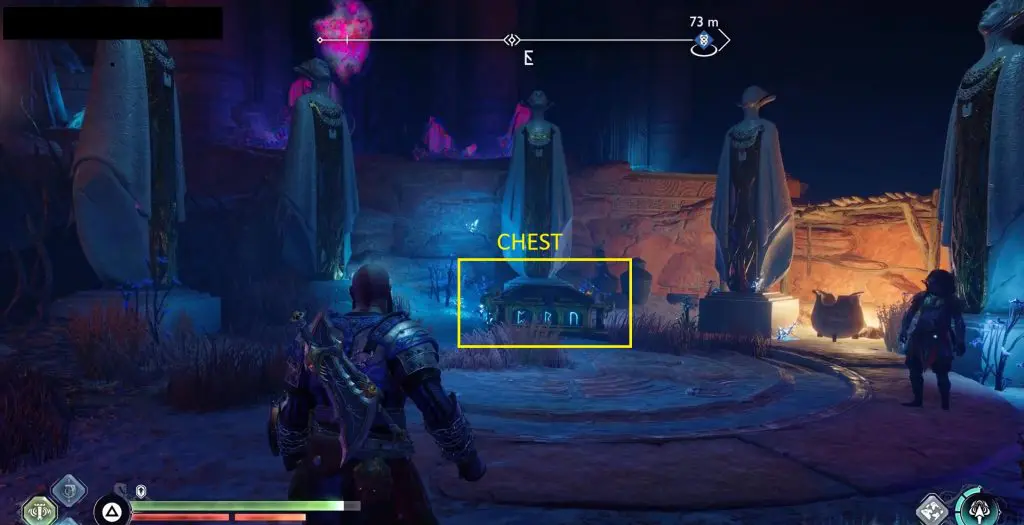
This Nornir Chest is on the southwest end of the area as shown in the pictures below. You will have to crouch under a broken pillar to get to the chest. To unlock the chest, you will have to light up three torches.
Torch #1 is on the right side of the chest as shown in the picture above. Light it up by using your blade. Then crouch under the broken pillar and come out. You will see Torch #2 up ahead on a rock as shown in the picture below. Then shoot purple arrows between the torch and the foot of the rock. Use your blade to cause an explosion with the purple arrow, which will light up the torch.
Now turn right and you will see Torch #3 up ahead on a rock under the arch as shown in the picture below. Then shoot purple arrows between the torch and the foot of the rock. Use your blade to cause an explosion with the purple arrow, which will light up the torch. This will unlock the chest. open it to get a Horn of Mead.