This step-by-step guide will show where to find all 68 “Memos “ in the game Silent Hill 2 Remake. Collecting all 26 Strange Photos will award you the Archivist Trophy.
East South Vale (18 Memos)
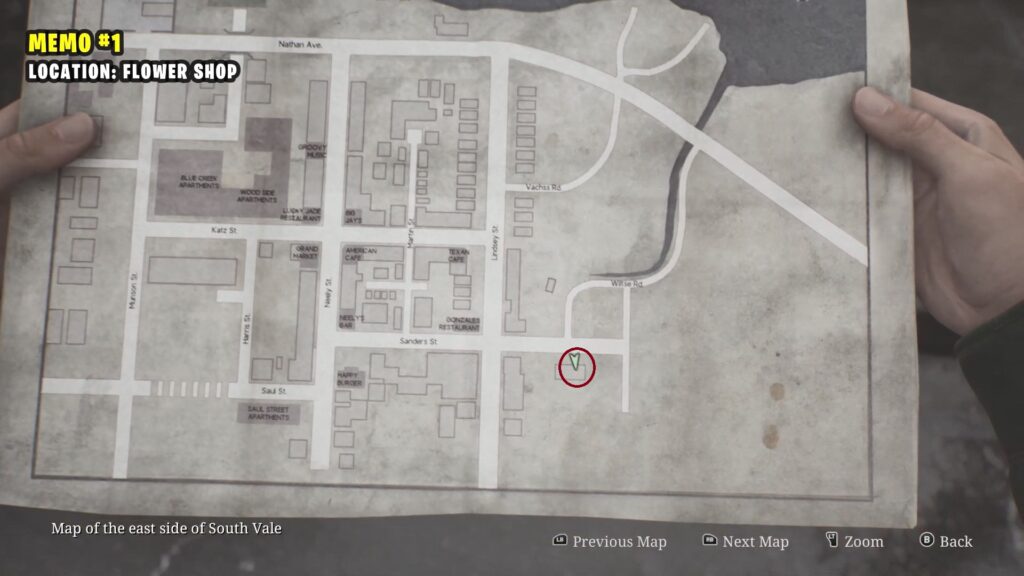
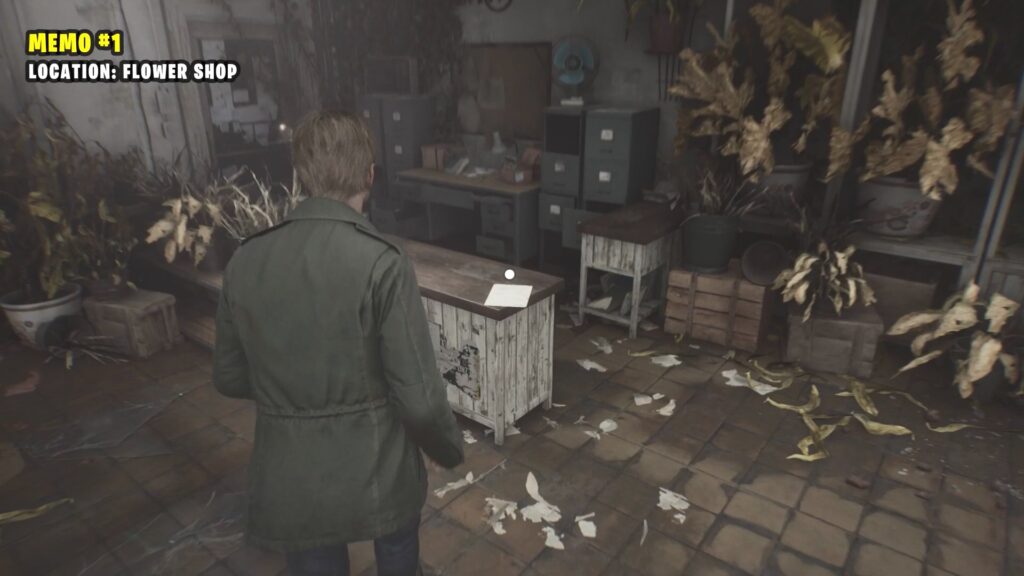
1) Memo: Flower Shop Message
Enter the flower shop and grab the memo from the table.
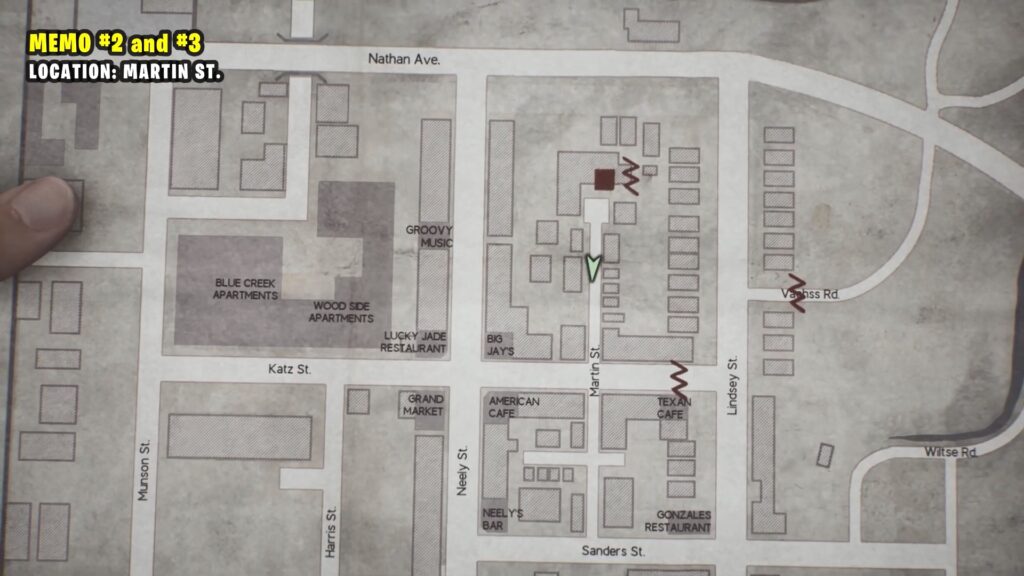
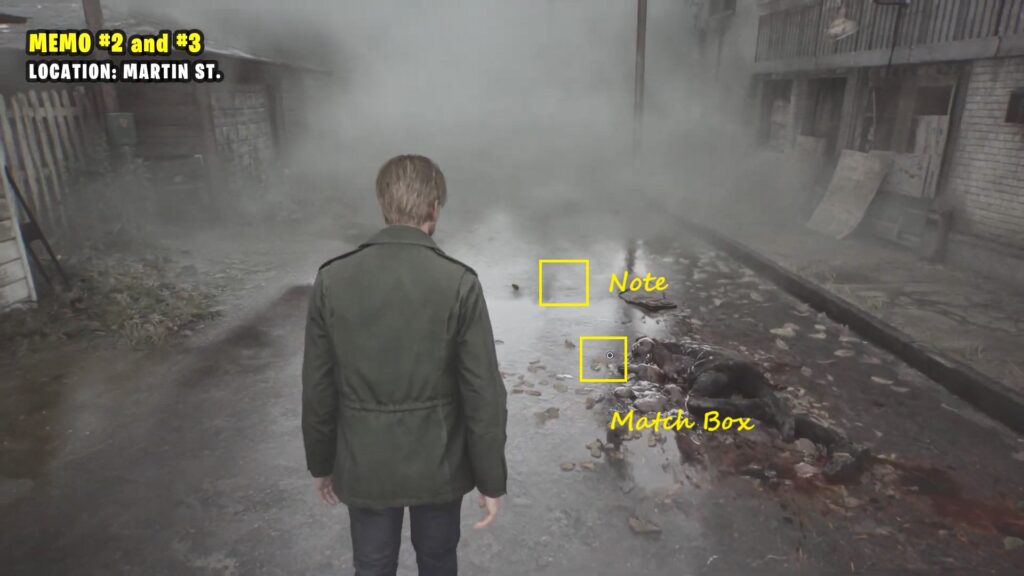
2-3) Memo: Match Box and Martin Street Note
Interact with the corpse on the floor of Martin St. Nearby, you’ll find two memos: a note and a matchbox.
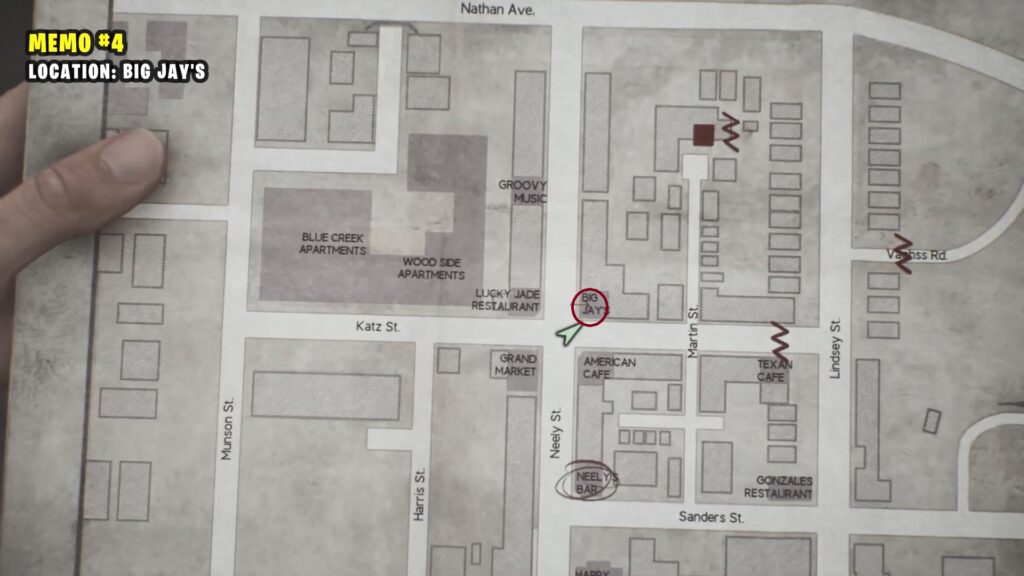
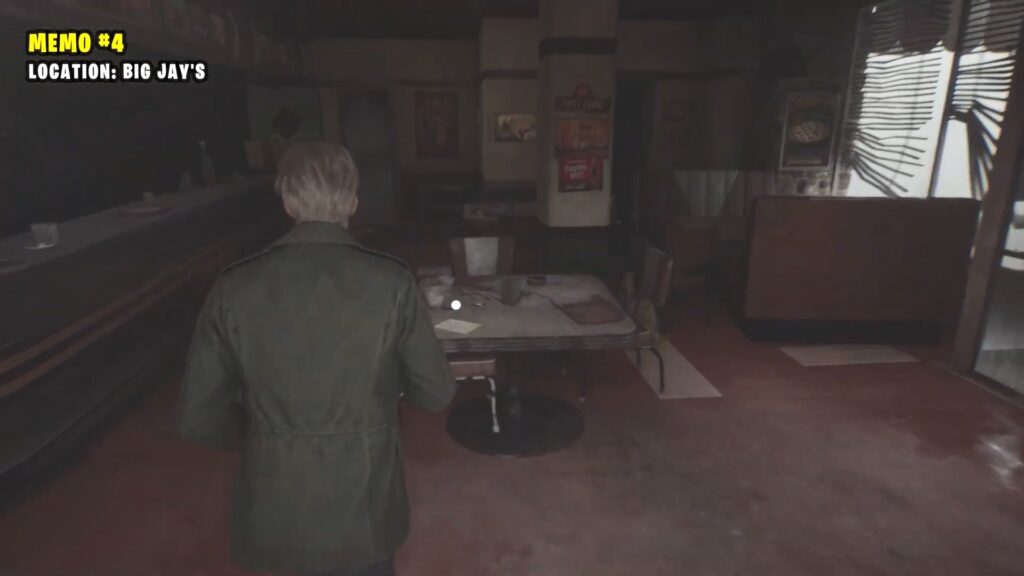
4) Memo: Big Jay’s Note
This memo is located on a table in Big Jay’s Cafe.
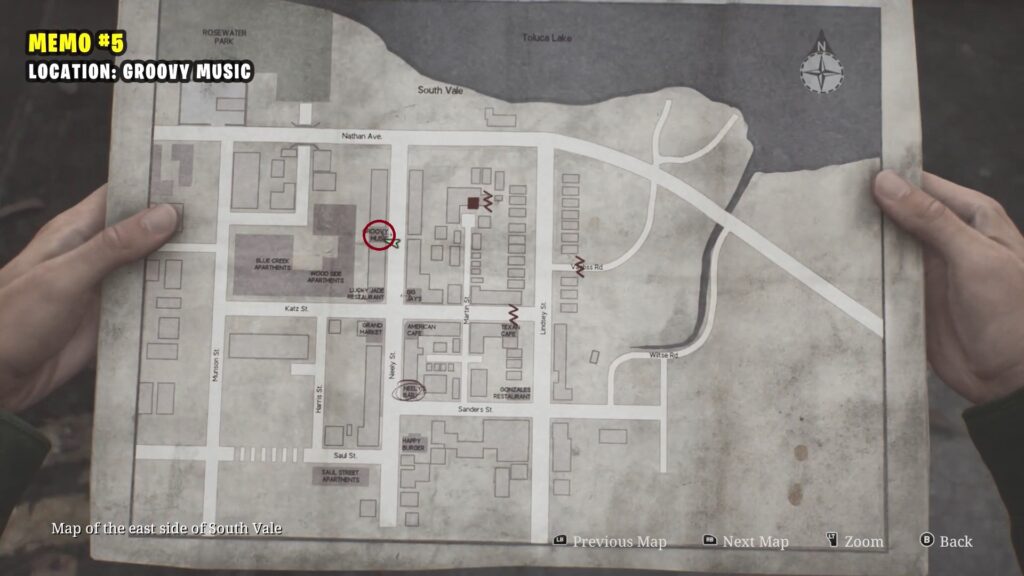
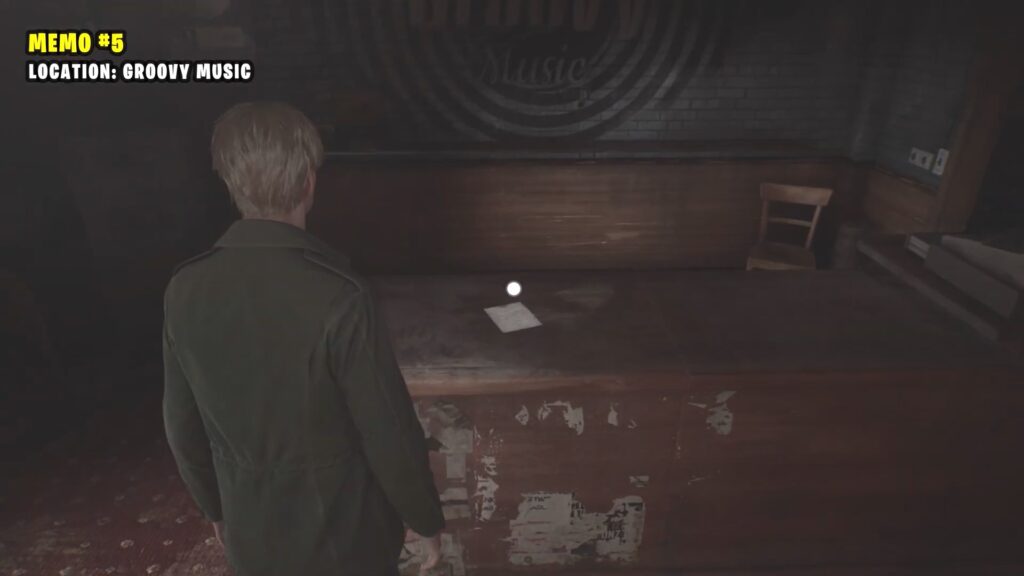
5) Memo: Record Store Note
It is located on the reception counter inside the Groovy Music shop.
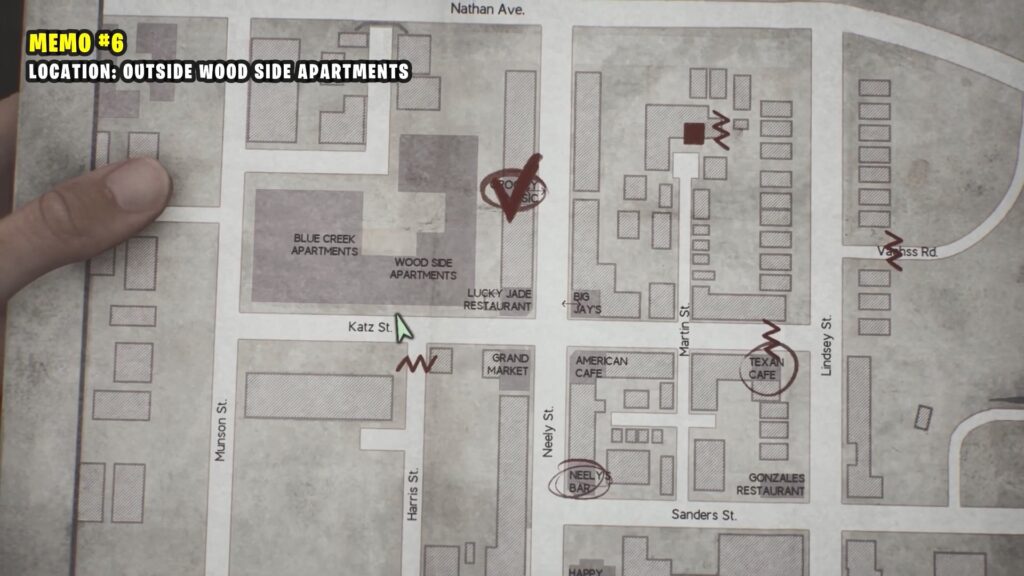
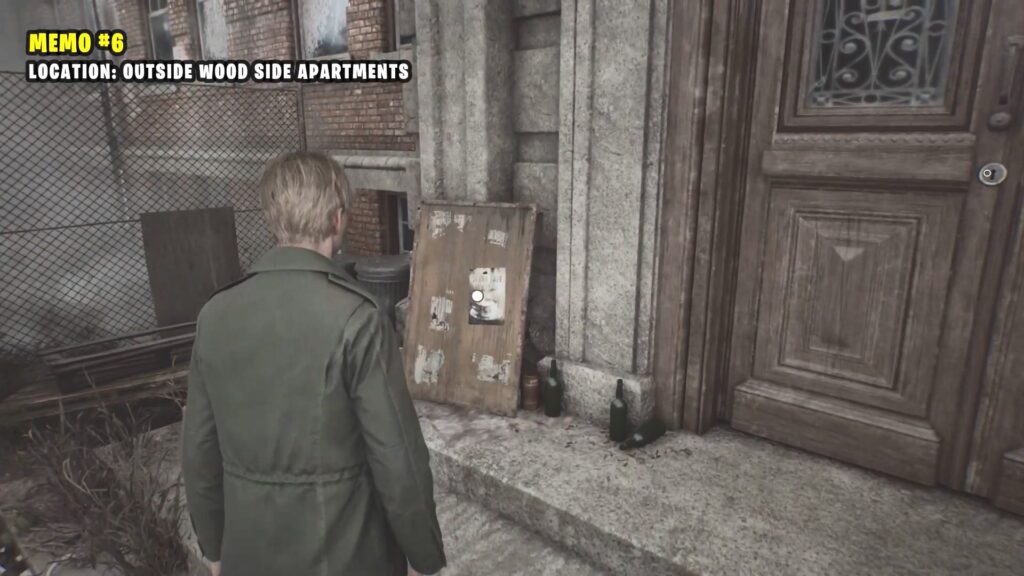
6) Memo: Texan Cafe Flyer
You’ll find a memo in front of the door of Apartments on Katz St.
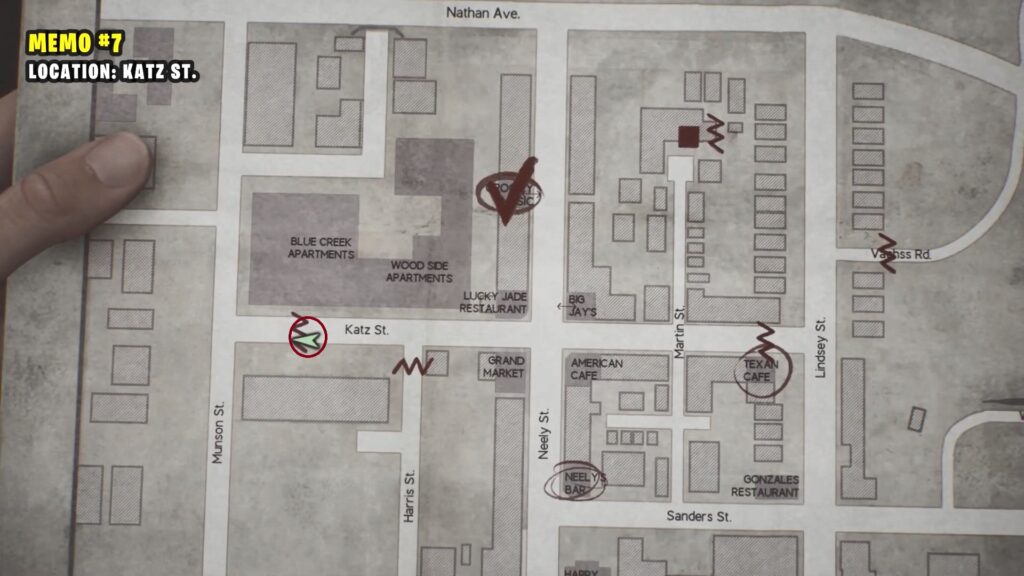
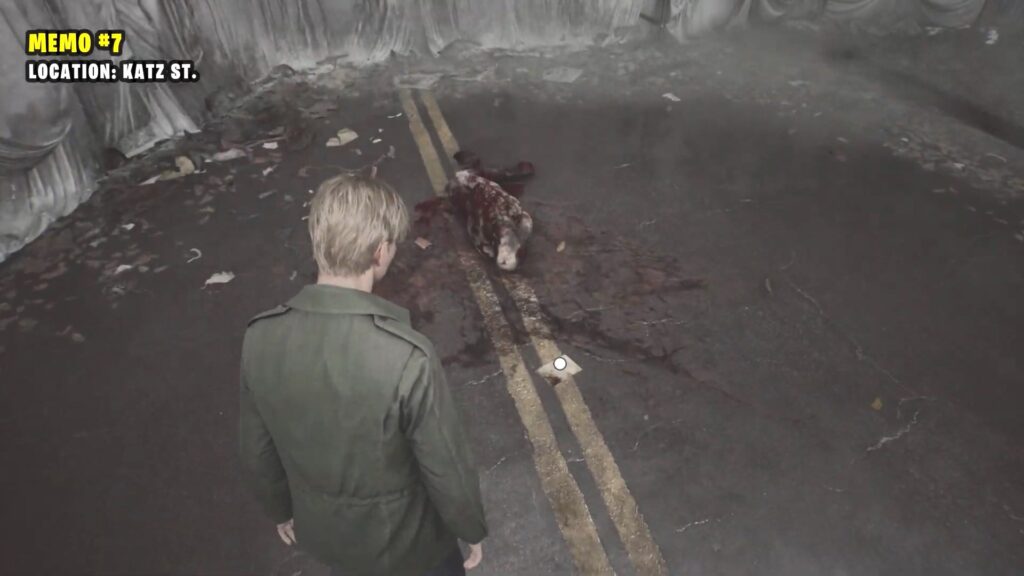
7) Memo: Barrier Note
You’ll find the memo on the ground in front of the barricade at the end of Katz St
8) Memo: Old Map
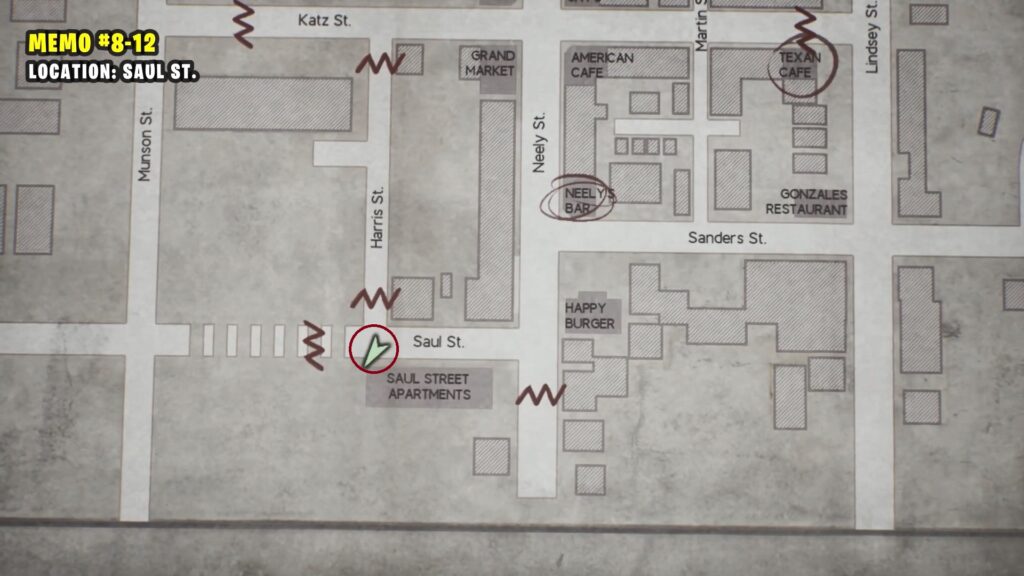
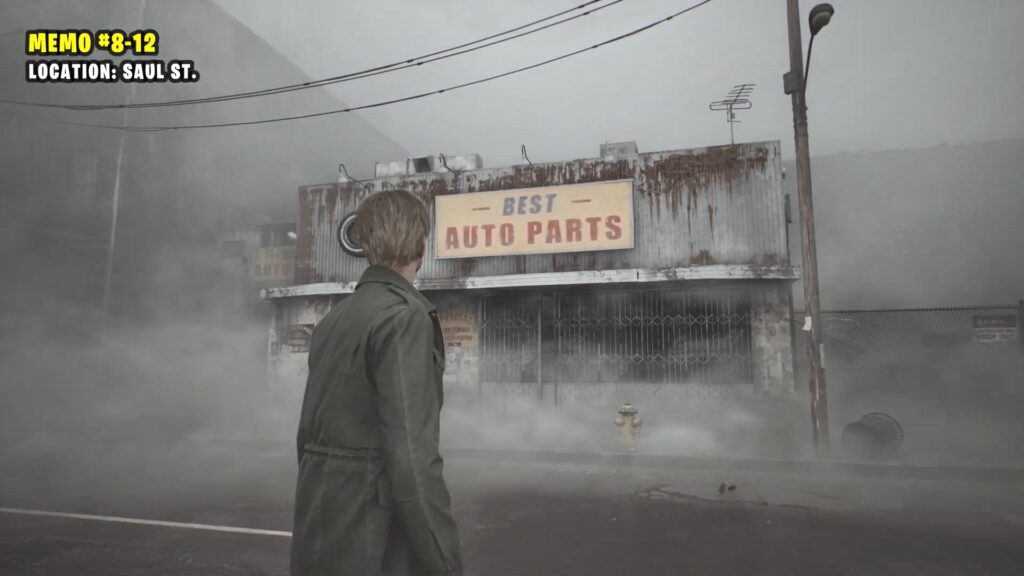
This memo can be found on a corpse on Saul St., just outside an auto repair shop.
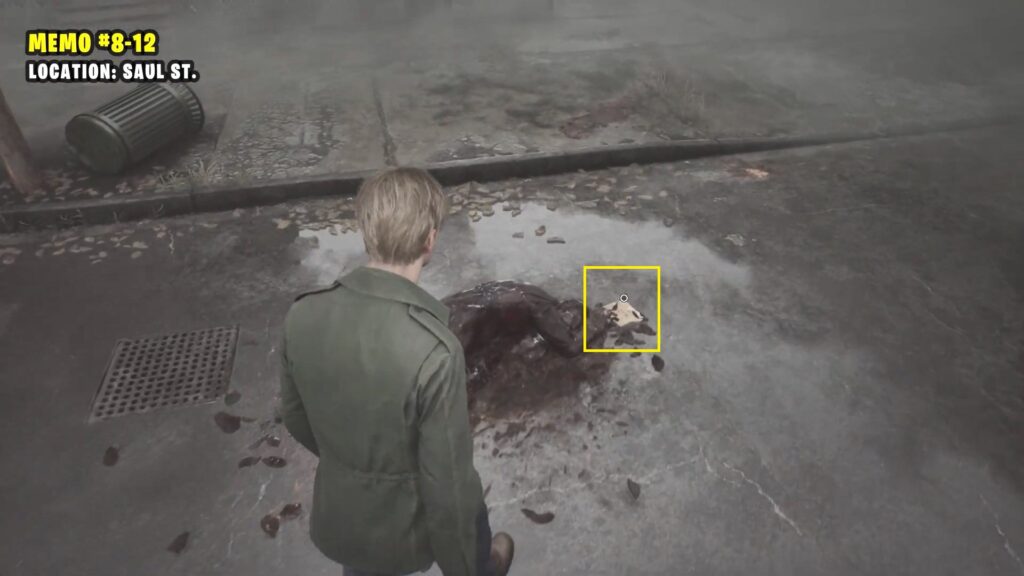
9) Memo: Saul Street Note (1)
This memo is located directly in front of the previous corpse near the pavement.
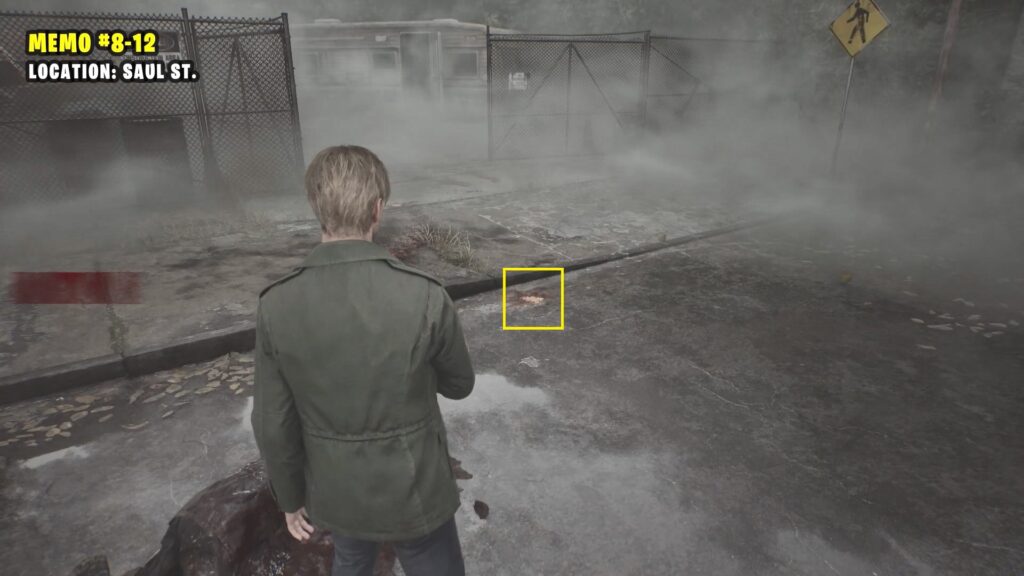
10) Memo: Saul Street Note (2)
Follow the blood trail from the previous memo to find this memo located on the pavement next to the gate.
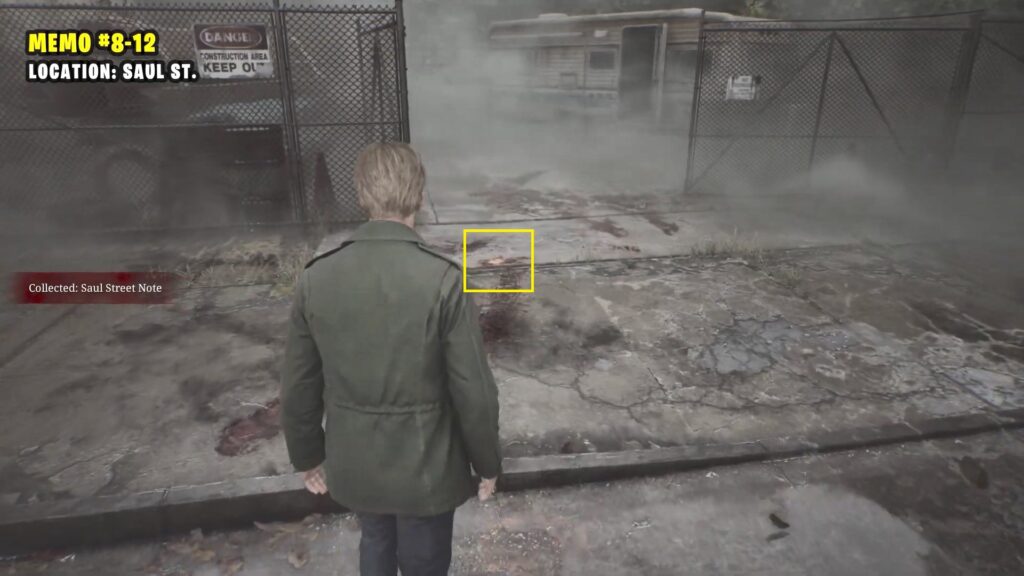
11) Memo: Saul Street Note (3)
This memo is in front of the camper truck.
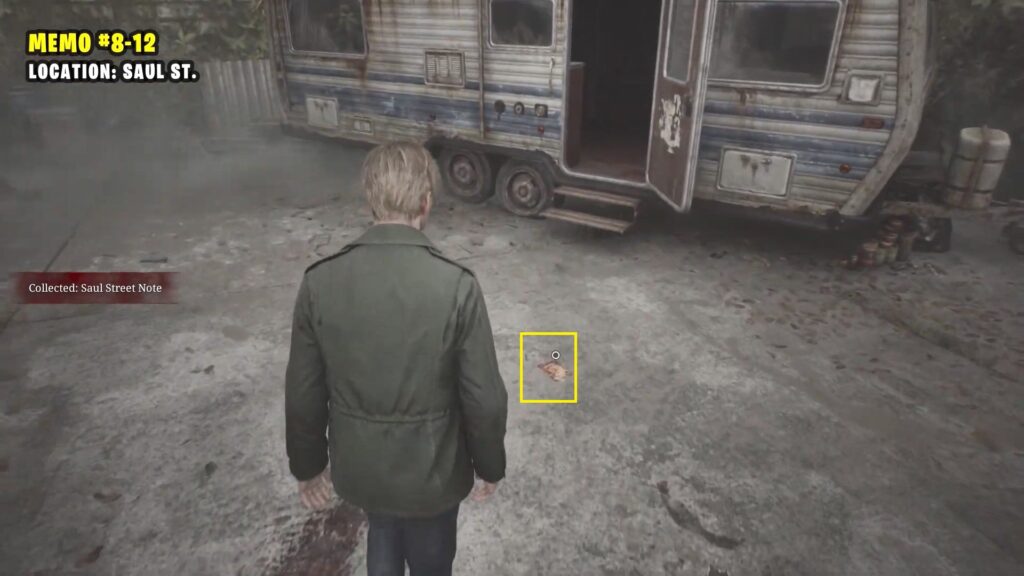
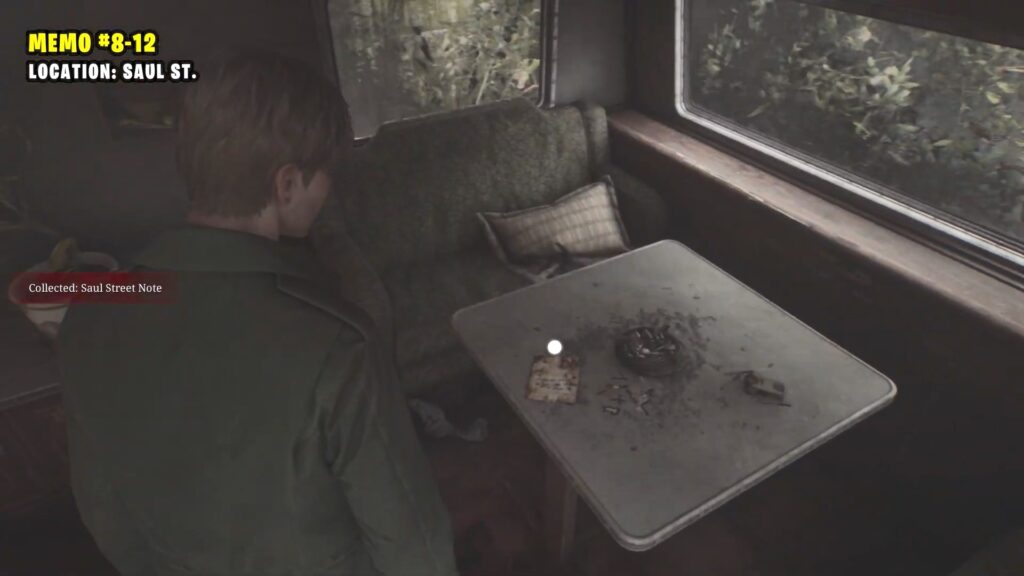
12) Memo: Motor Home Note
On a table inside the camper truck.
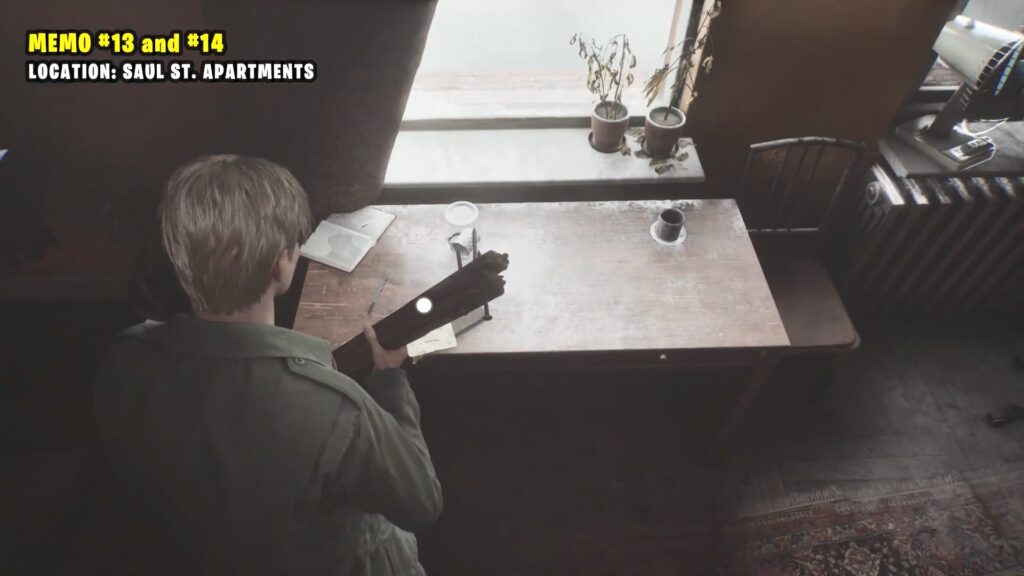
13) Memo: Small Note
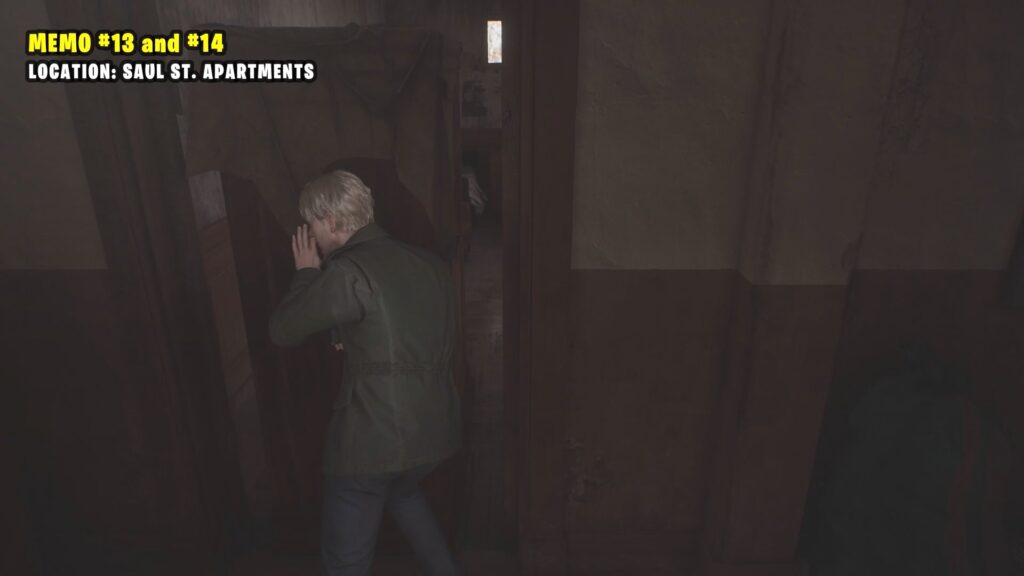
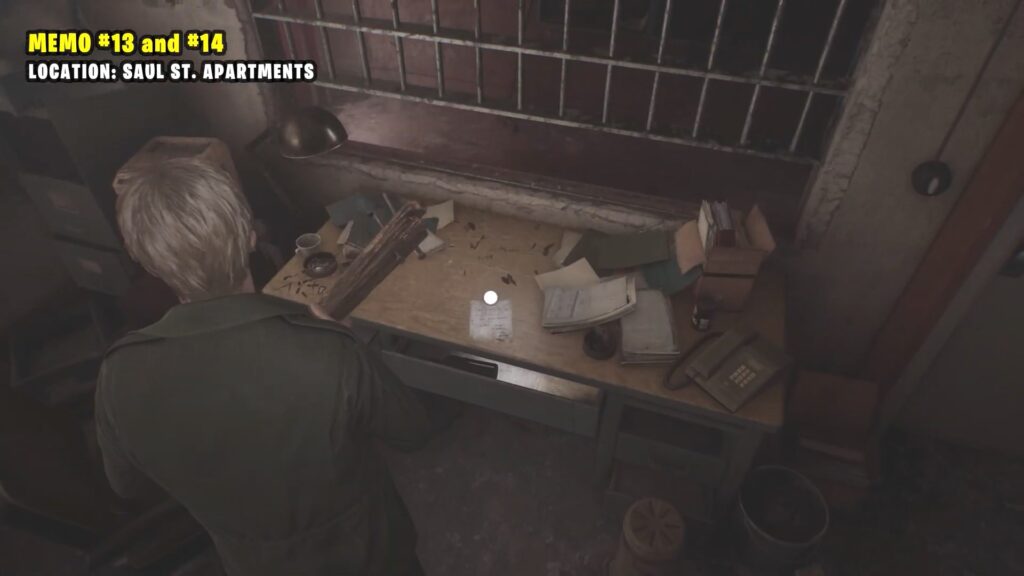
Enter the Saul Street Apartments through the front door. Push aside the shelf blocking the second door on the right. Once inside, head to the adjacent room where you’ll find the memo on the table.

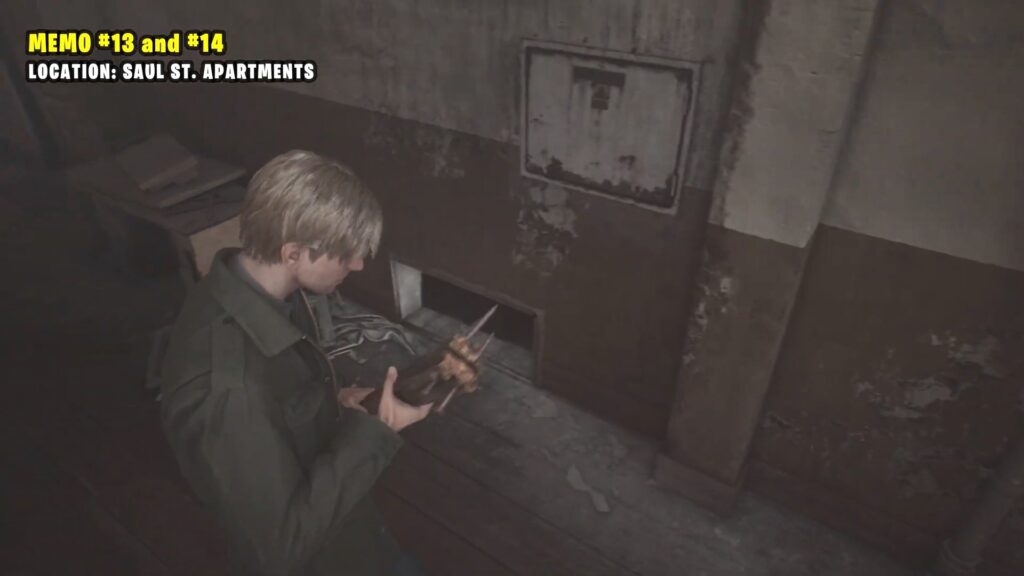
14) Memo: Tenant’s Note
Go upstairs and crawl through the open vent on the floor to enter Apartment 7. You’ll find the memo on the table.
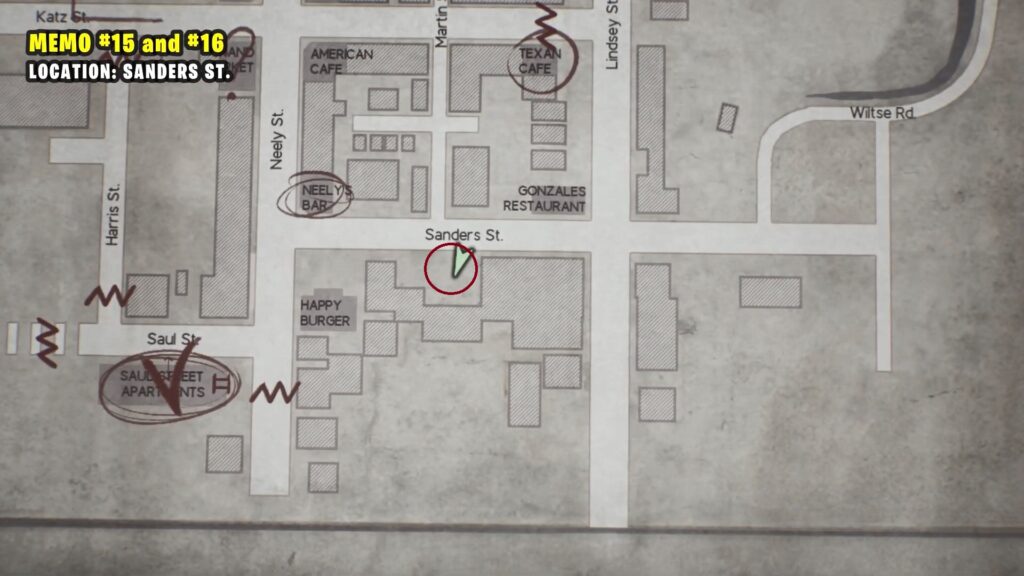
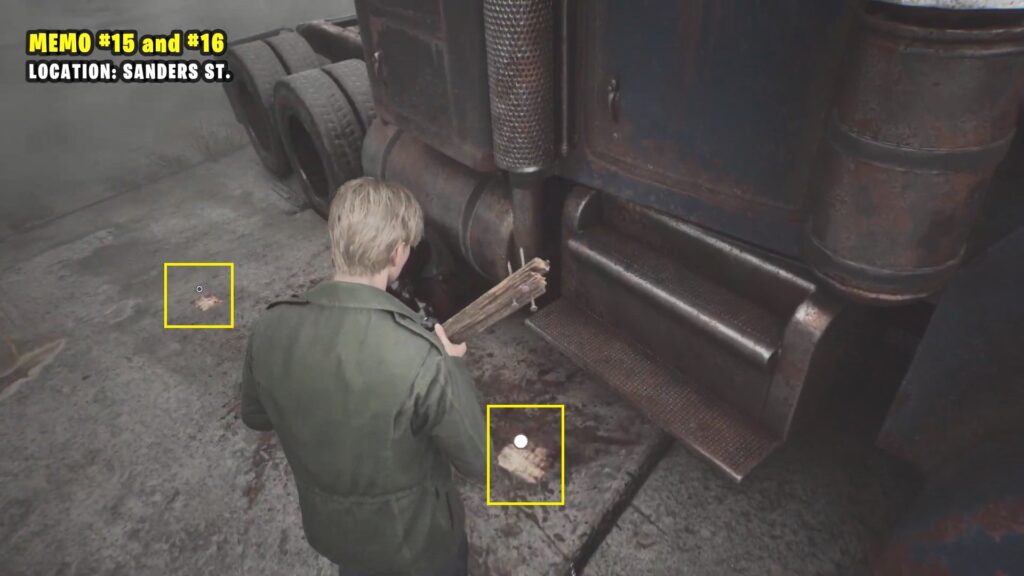
15-16) Memo: Code Note & Memo: Sanders Street Note
Head to Sanders Street and look for a truck. Next to it, you’ll find a corpse with two memos.
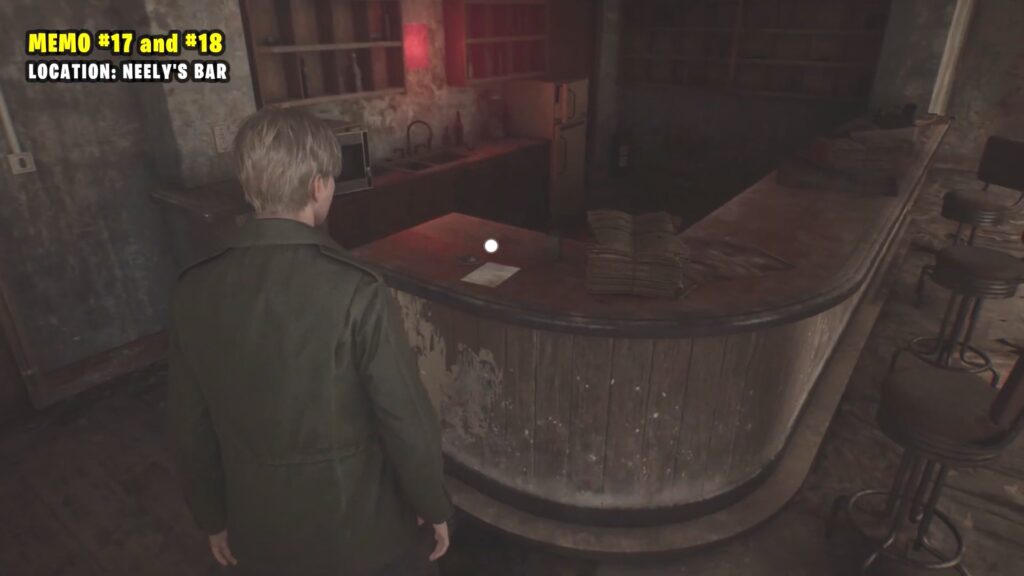
17) Memo: Neely’s Bar Note
Go inside Neely’s Bar to find the memo on the counter.
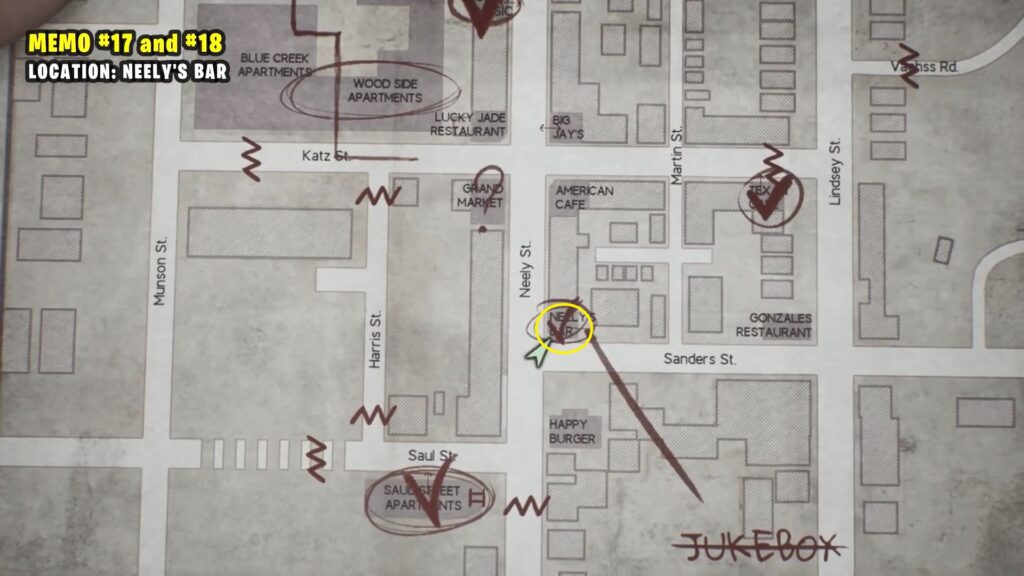
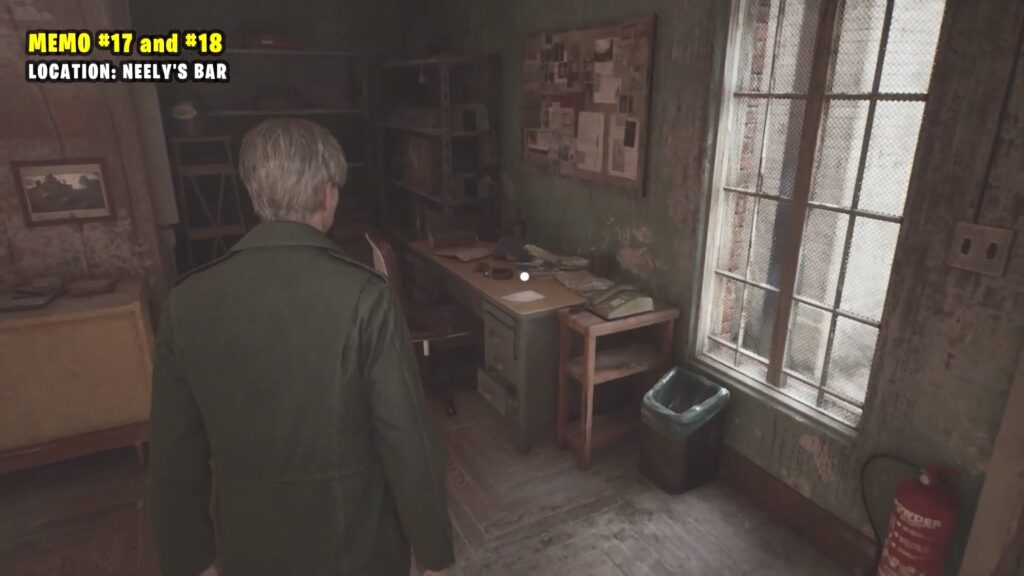
18) Memo: Back Room Letter
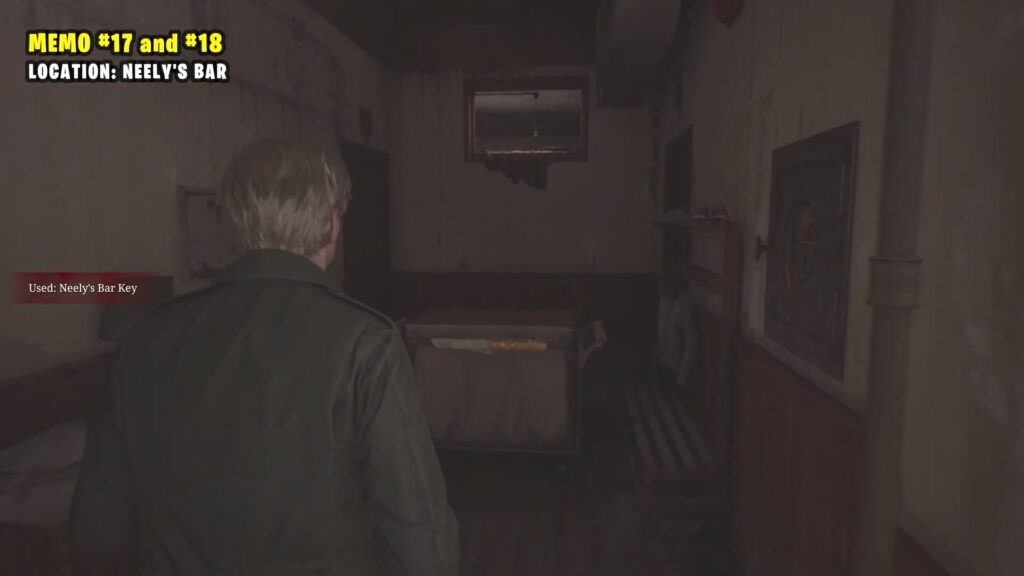
Inside the Neely’s Bar go through the locked door. Push the cart to the side and climb through the hatch at the top. In the room, you’ll see the memo on the table.
Wood Side Apartments (3 Memos)
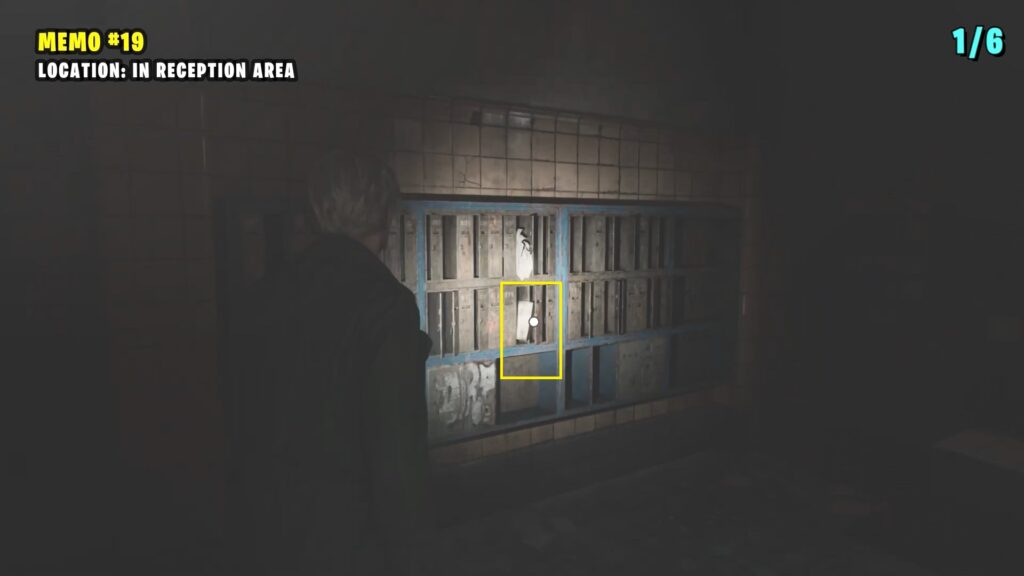
19) Memo: Administration Note
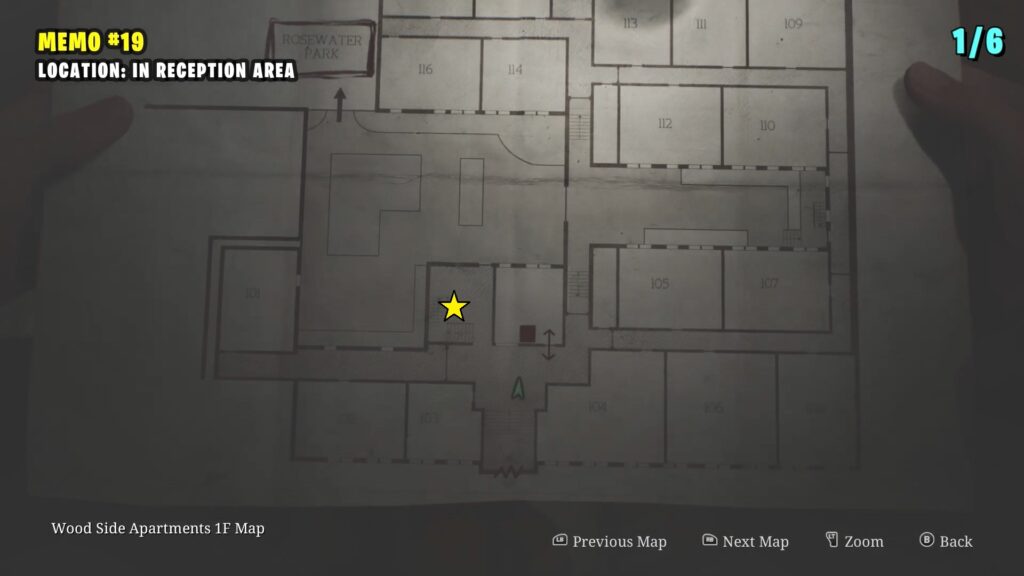
Location: In reception area
Head left from the reception and look at the locker under the stairs to find the Memo – Administration Note.
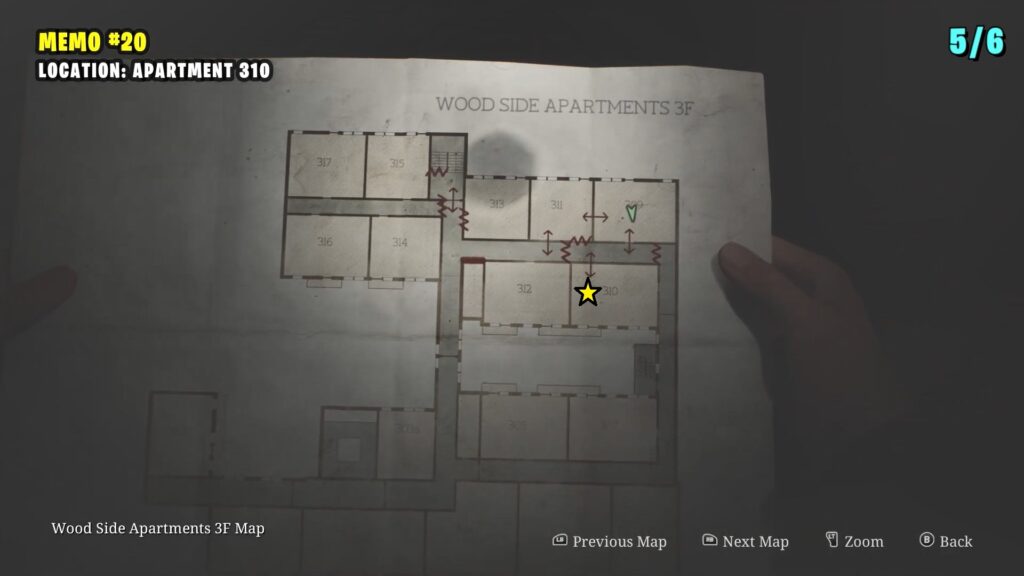
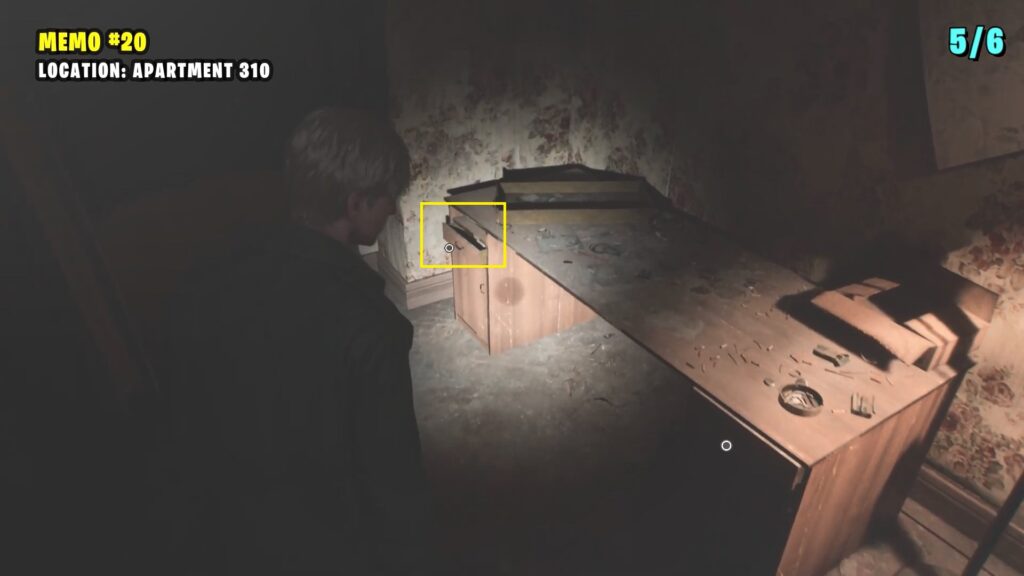
20) Memo: Strange Note
Location: Apartments 310
In Apartment 310, open the drawer to find the strange note.
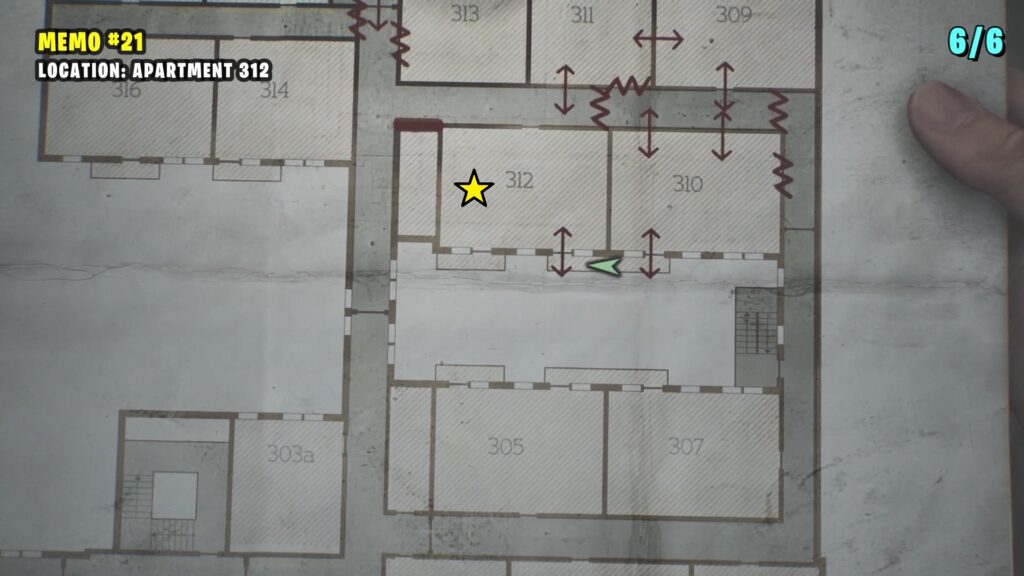
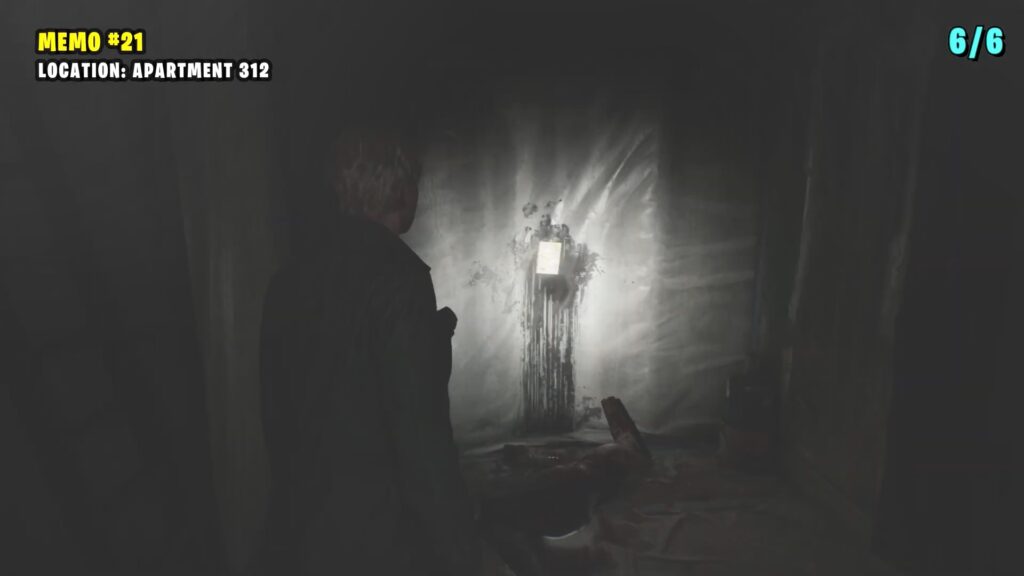
21) Memo: Sinister Note
Location: Apartments 312
Sinister Note is on the wall of Apartment 312
West South Vale (4 Memos)
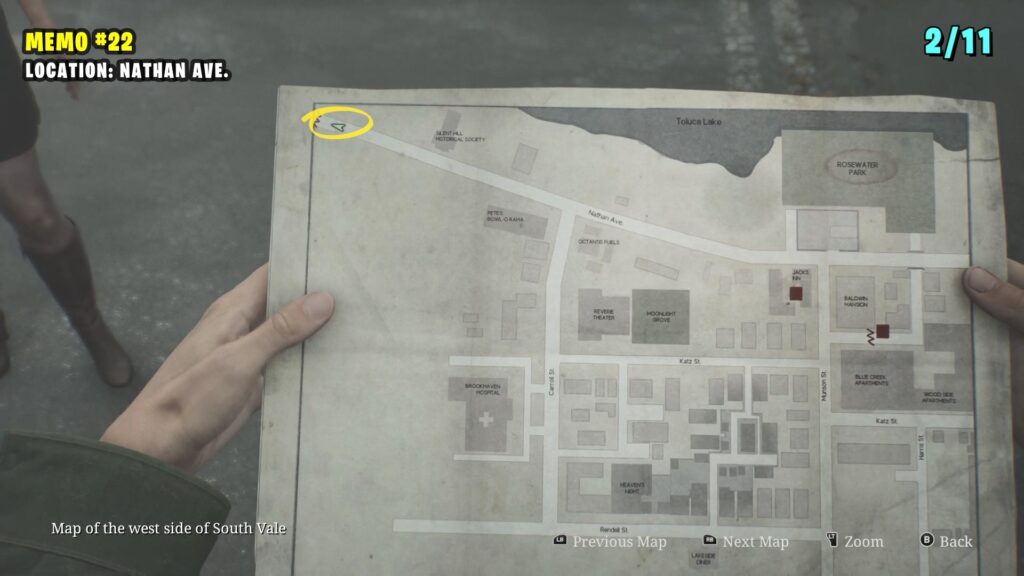
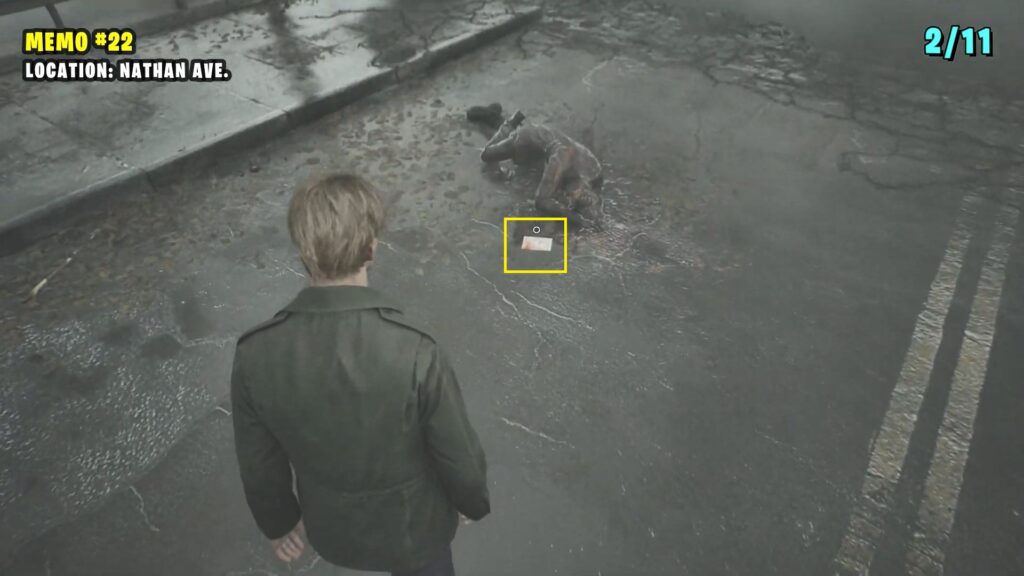
22) Memo: Bloody Note
Walk to the far end of Nathan Avenue to find the memo near a corpse.
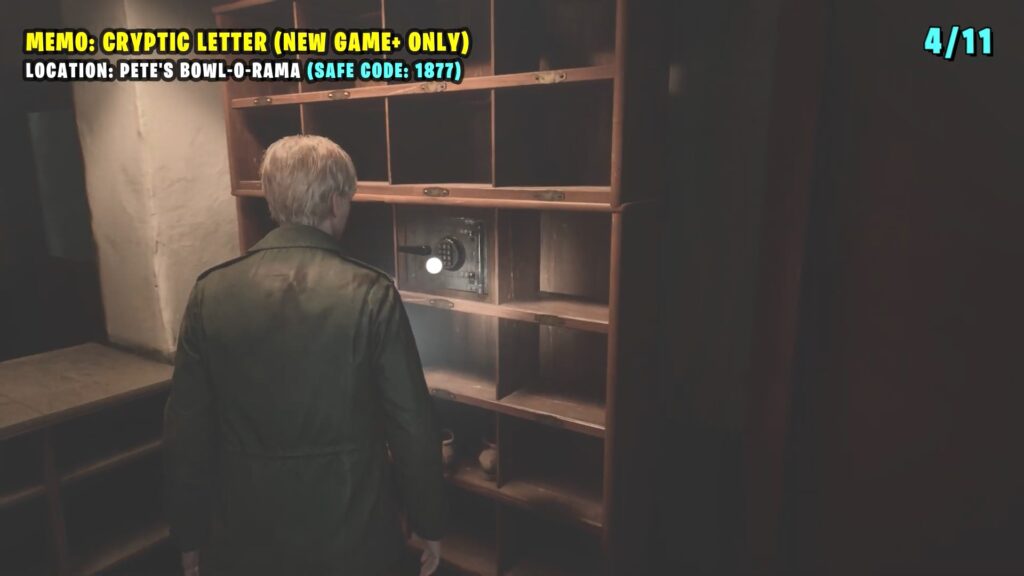
Memo: Cryptic Letter (New game +)
It is inside a locked safe at the counter in Bowl-O-Rama. Open the safe with code 1887. Note: You can only find this memo during a New Game+.
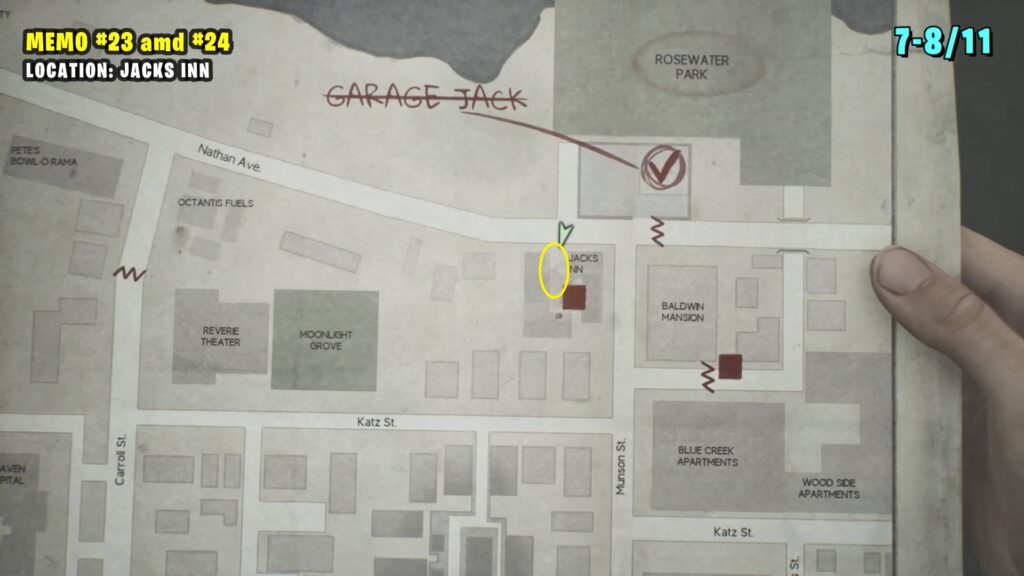
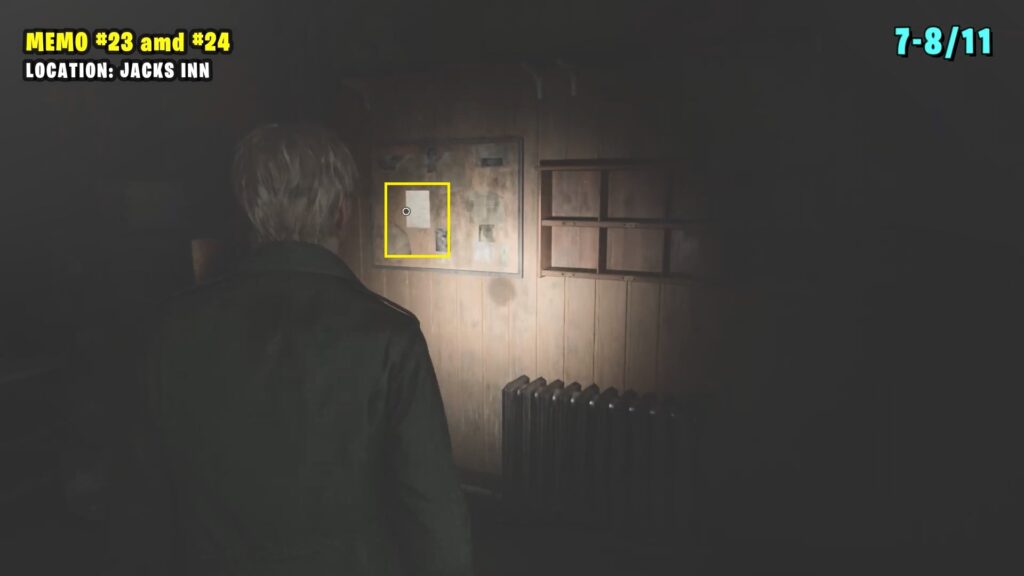
23) Memo: Reception Desk Note
On the bulletin board inside the reception area of Jack’s Inn.
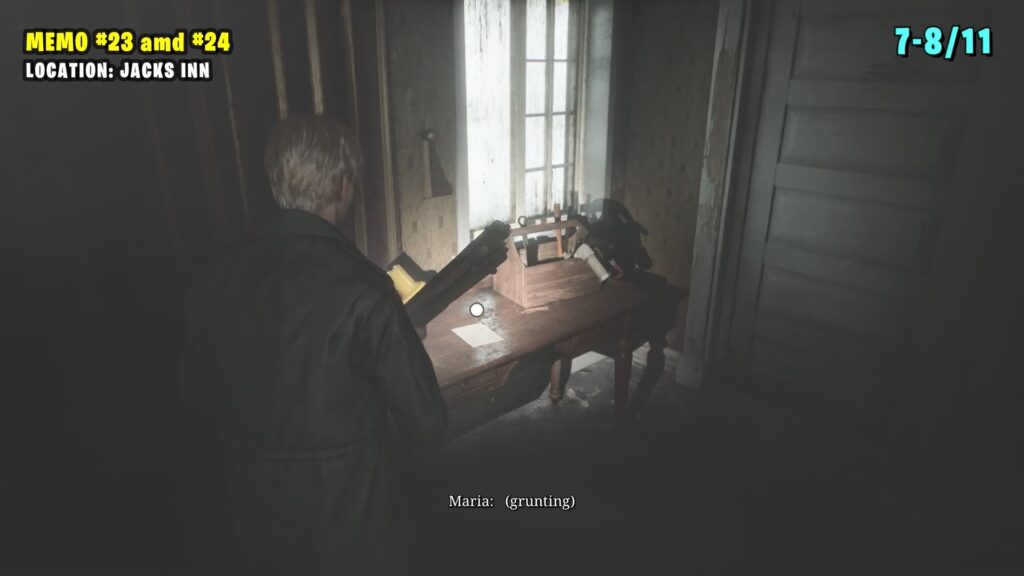
24) Memo: Toolbox Memo
Head upstairs at Jack’s Inn and enter Room 108 by breaking the window.
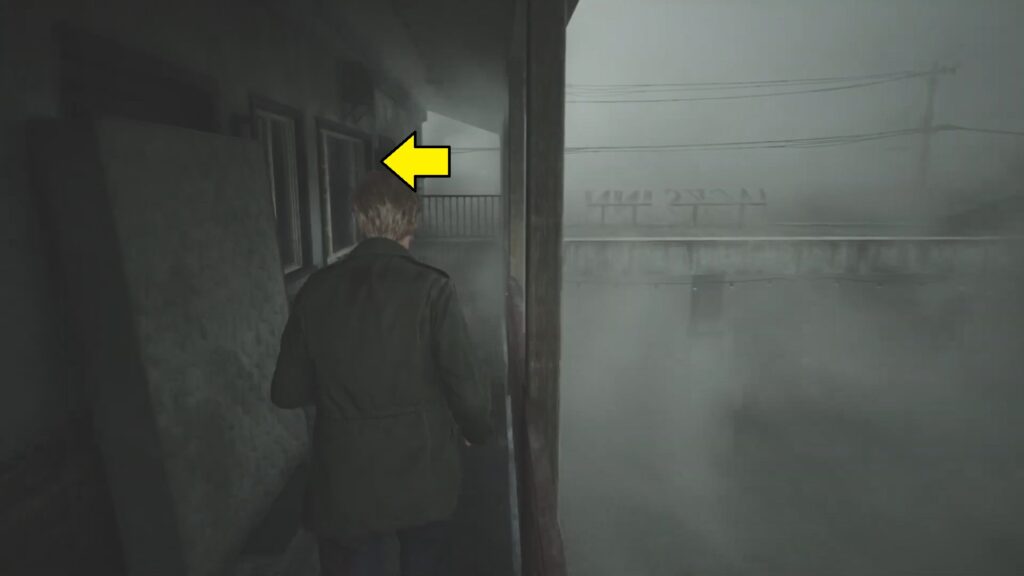
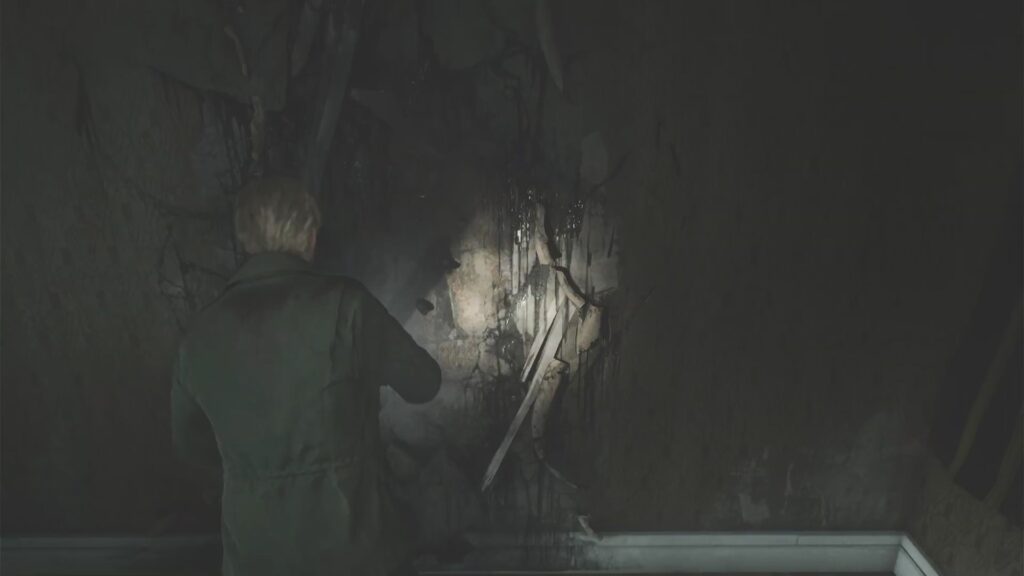
Once inside, break through the damaged wall to reach Room 107. You’ll find a memo on the table.
Brookhaven Hospital (13 Memos)
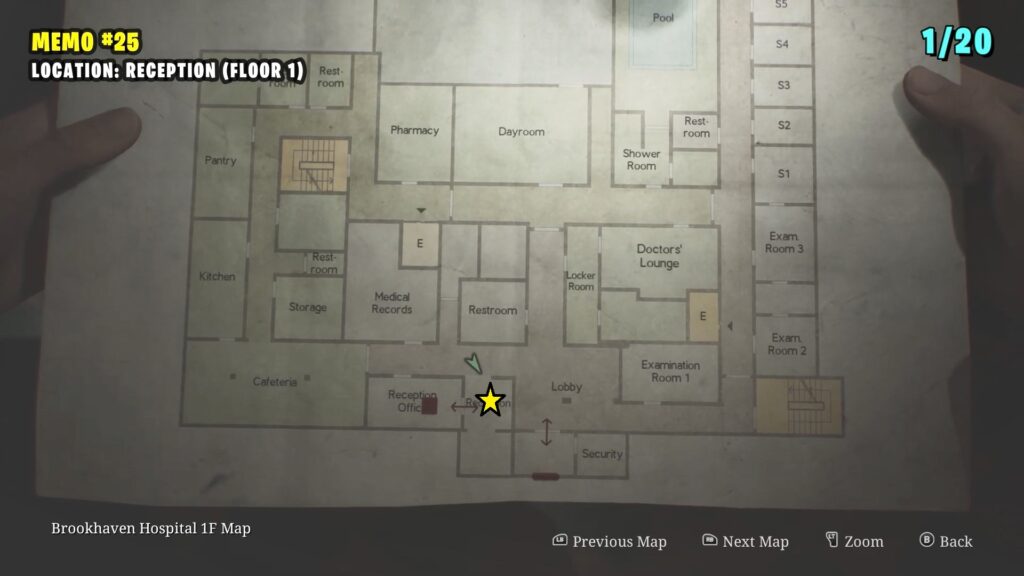
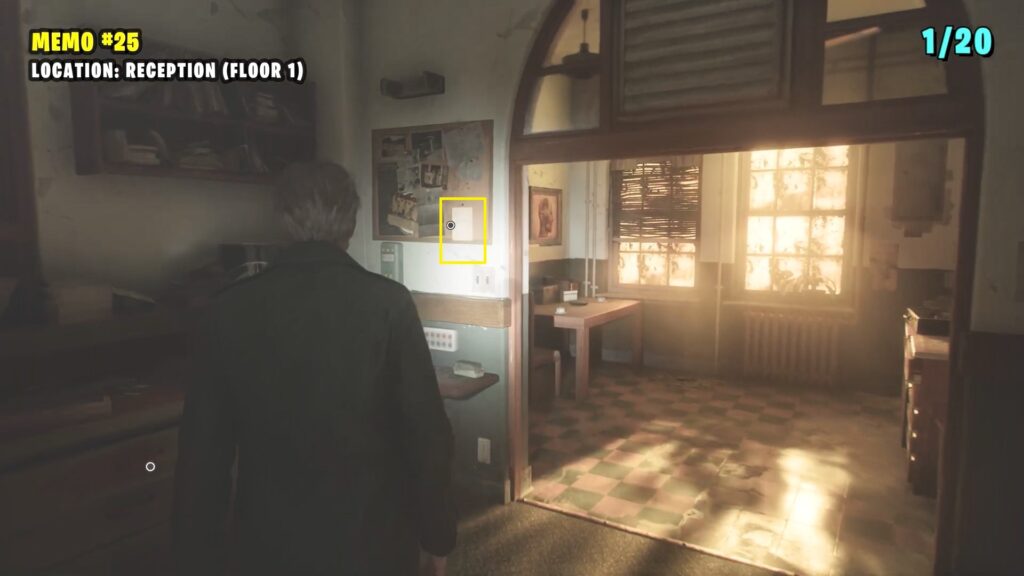
25) Memo: Key Locker Note
The first memo note is on the bulletin board inside the Reception area.
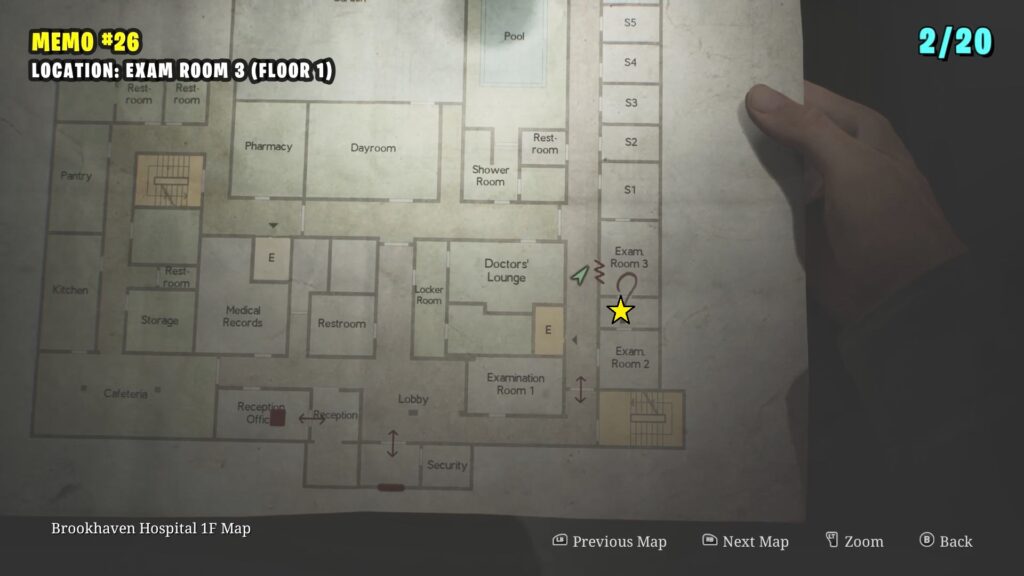
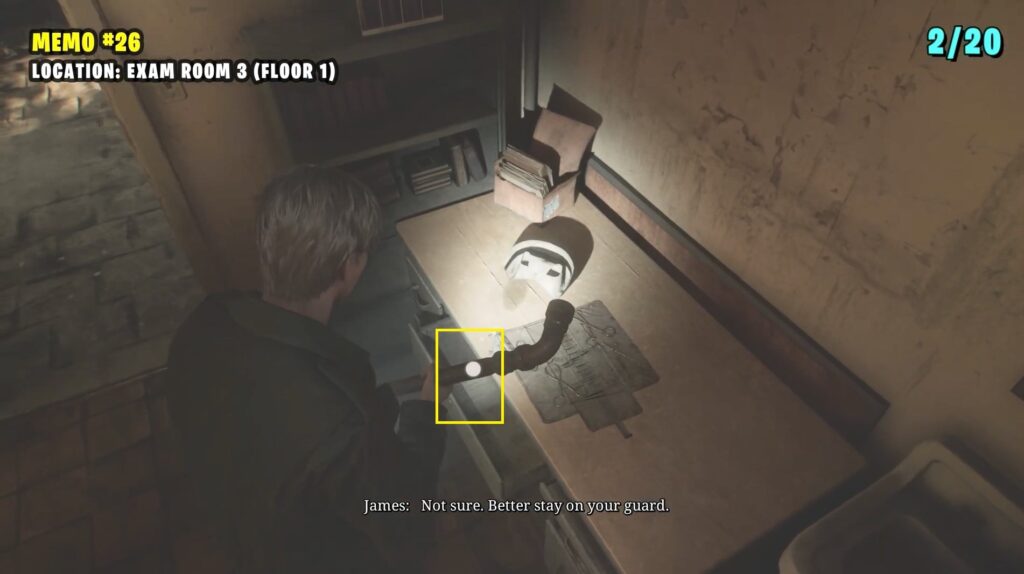
26) Memo: Nurse’s Memo
Inside Exam Room 3, break the window to climb in and go into the next room to find the memo inside a desk drawer.
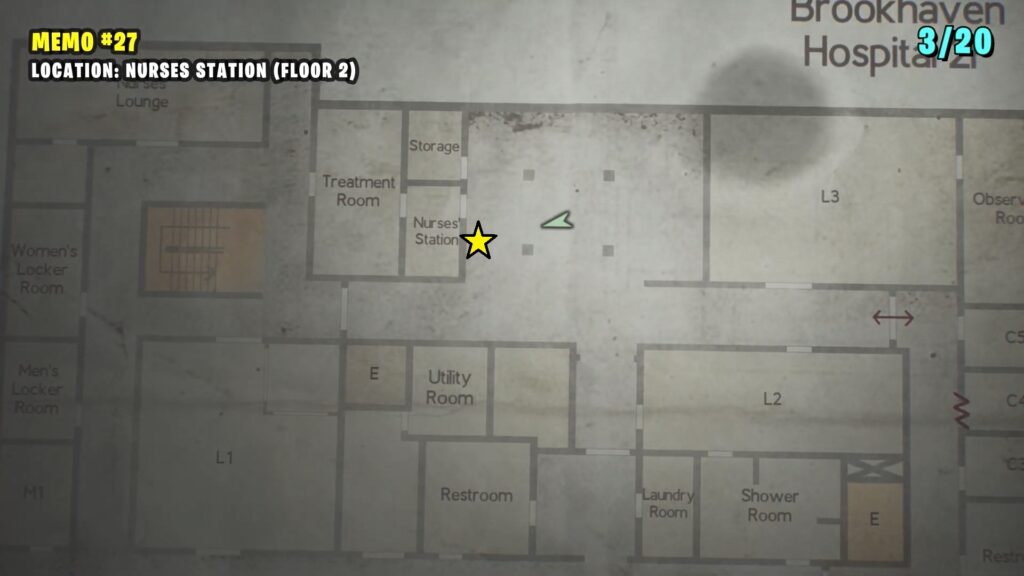
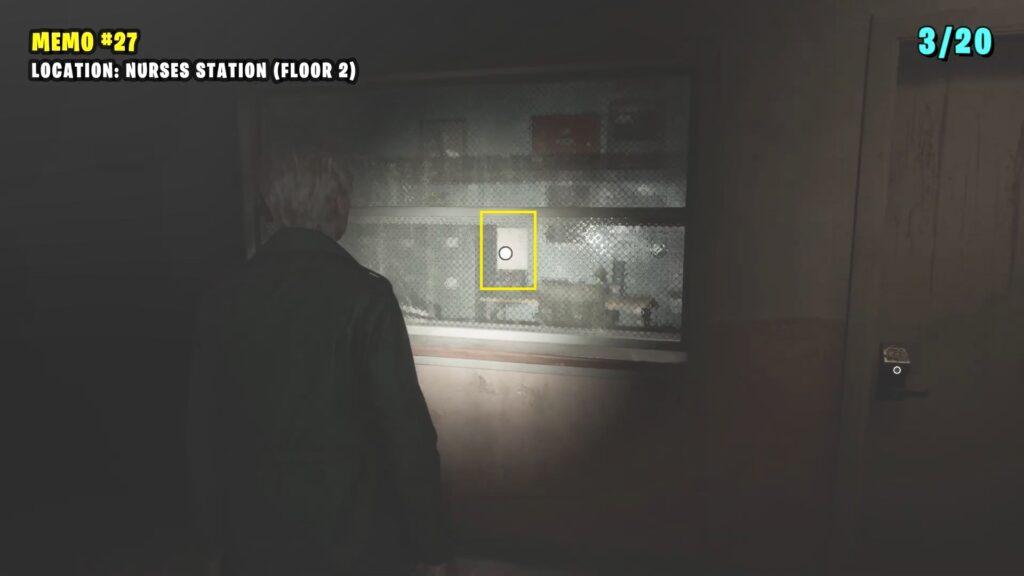
27) Memo: Staff Memo
You’ll find this in the window of the Nurses’ Station on the second floor.
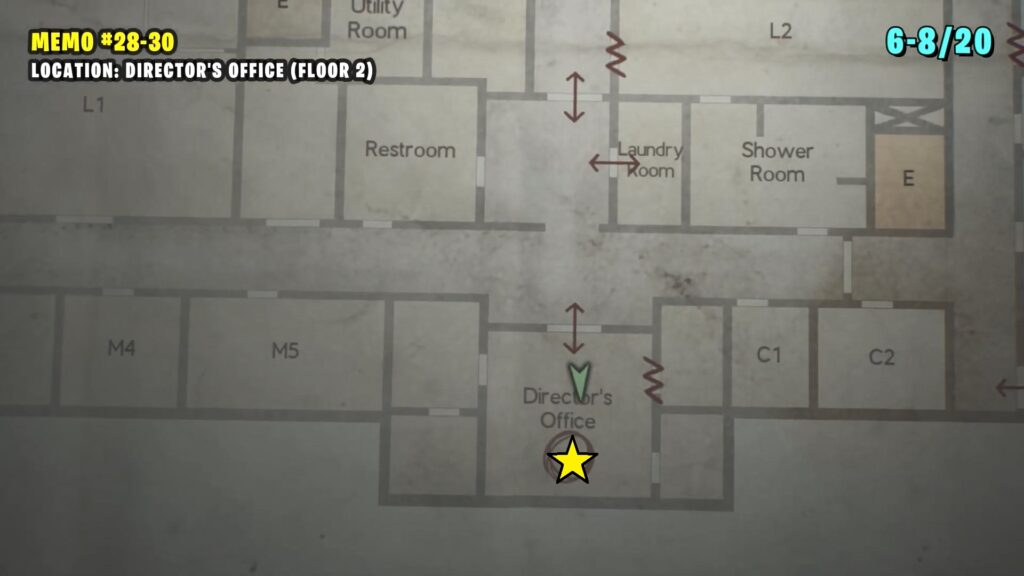
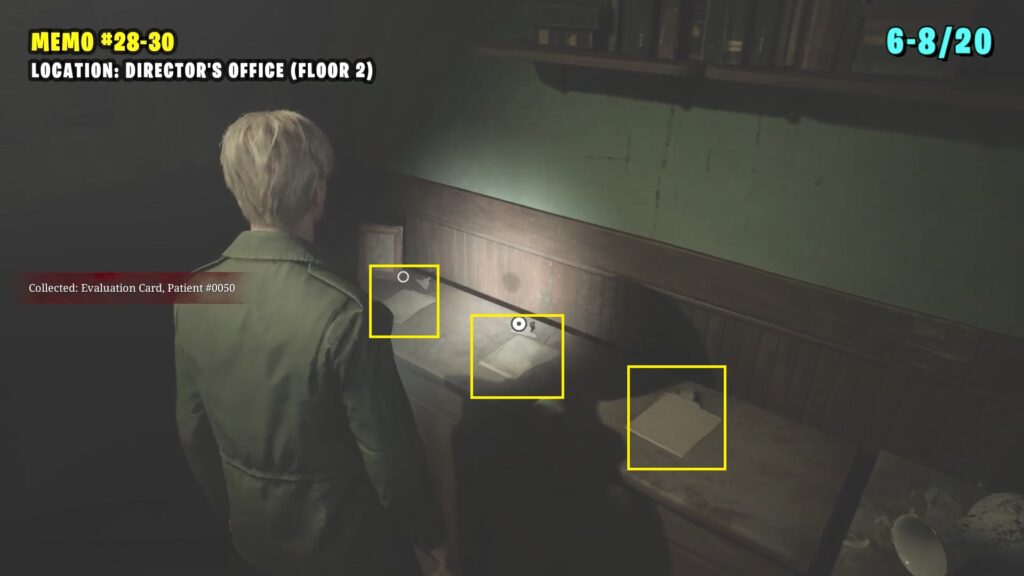
28-30) Memo #28-30 Evaluation Card, Patient #0050, Patient #0090, Patient #0130
Three memos are located inside the Director’s Office.
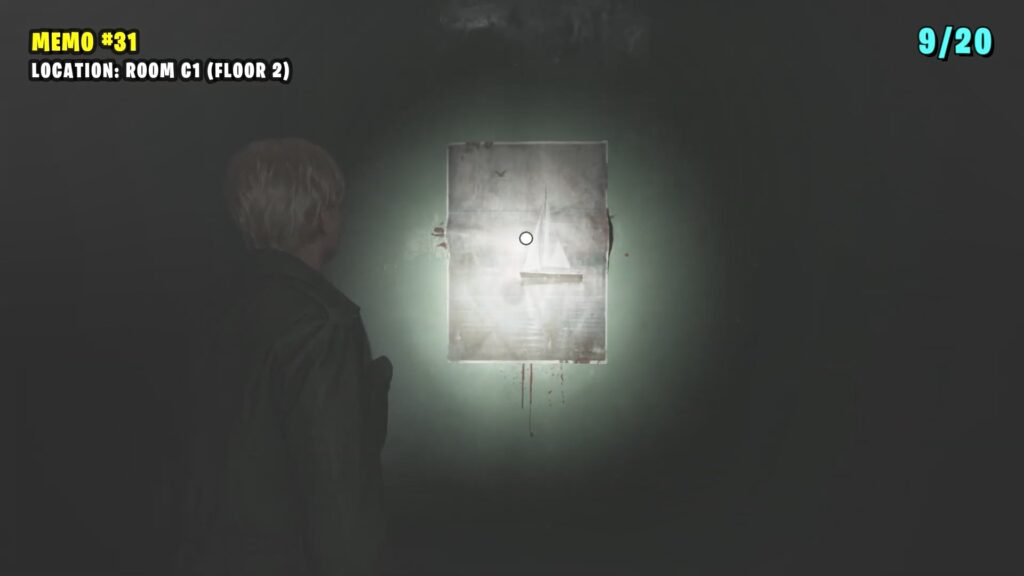
31) Memo: Interview Transcript
Examine the poster in C1 to find the memo behind it.

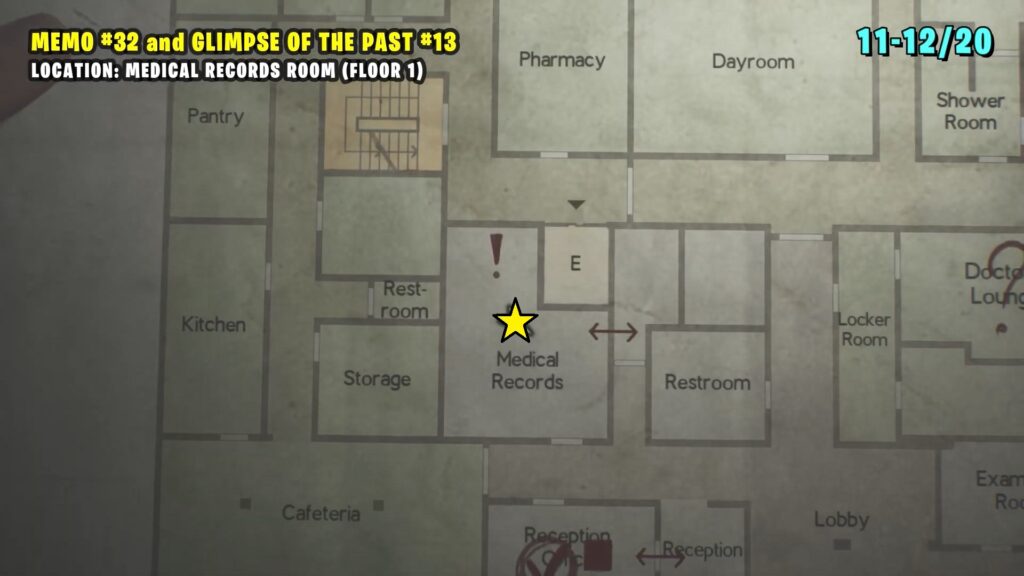
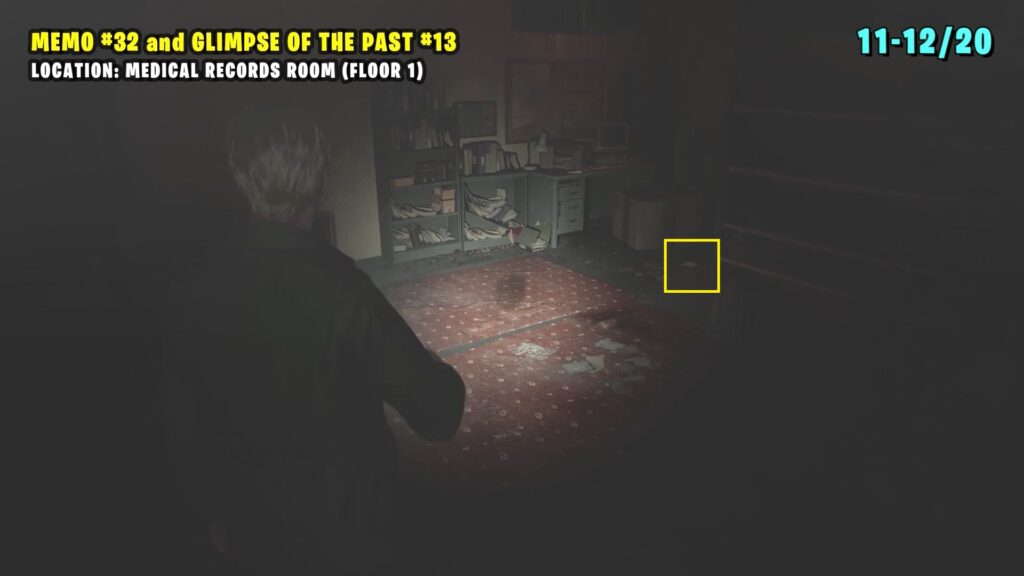
32) Memo: Scribbled Note
Memo #32 is on the ground inside the Medical Records
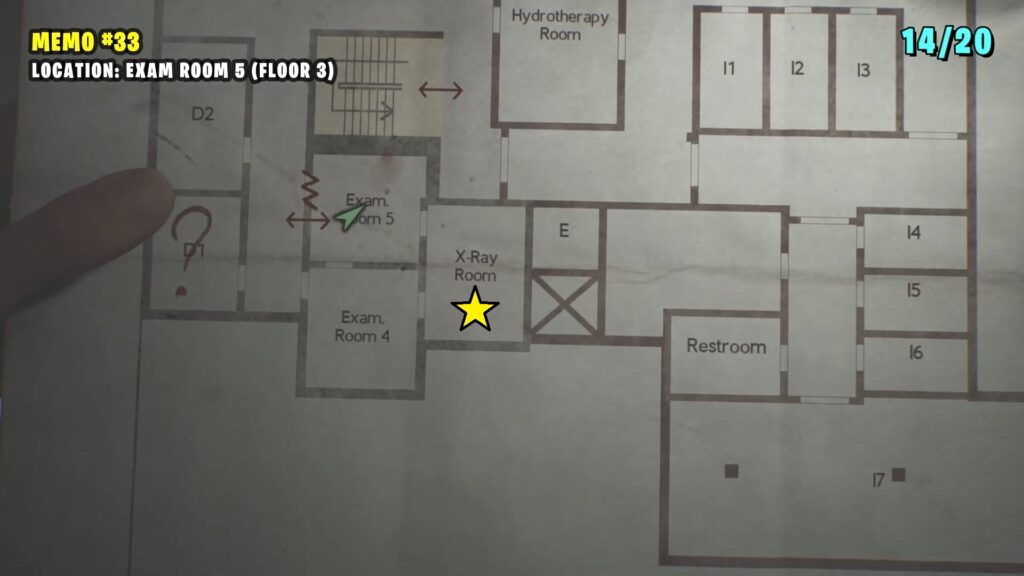
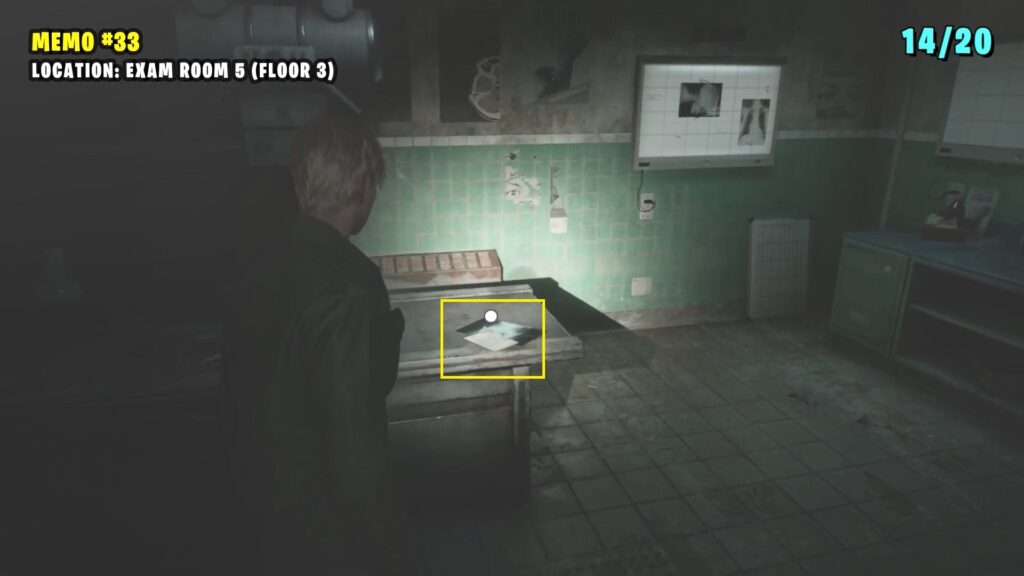
33) Memo: X-ray Memo
On a bench in the X-Ray Room
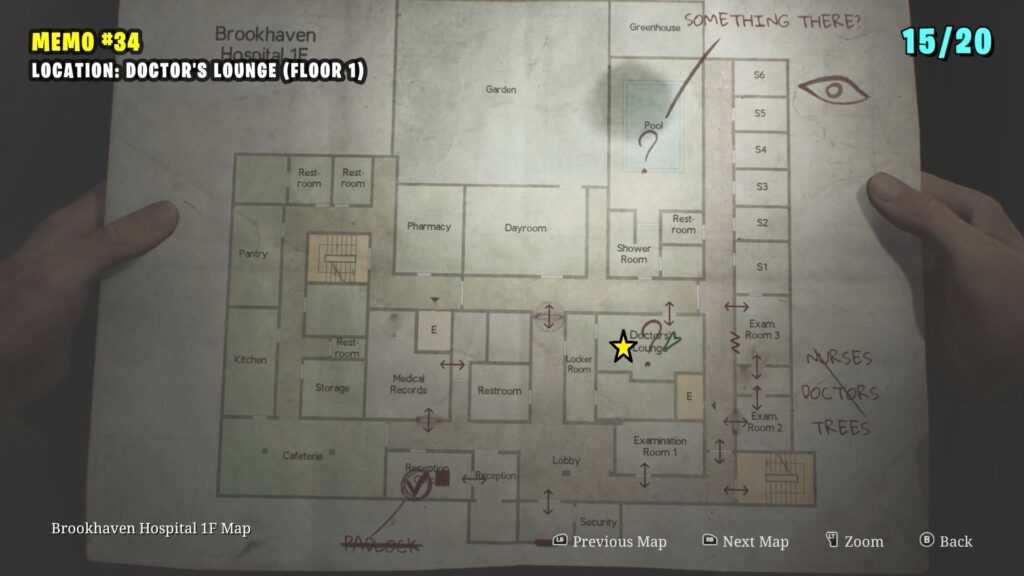
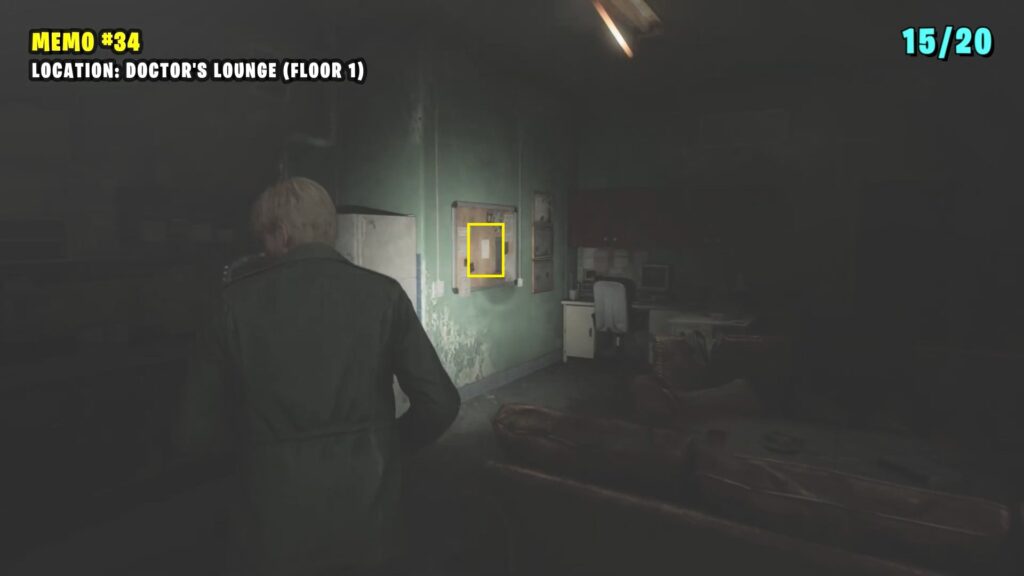
34) Memo: Keypad Combination Note
Interact with the Bulletin board in the Doctors’ Lounge
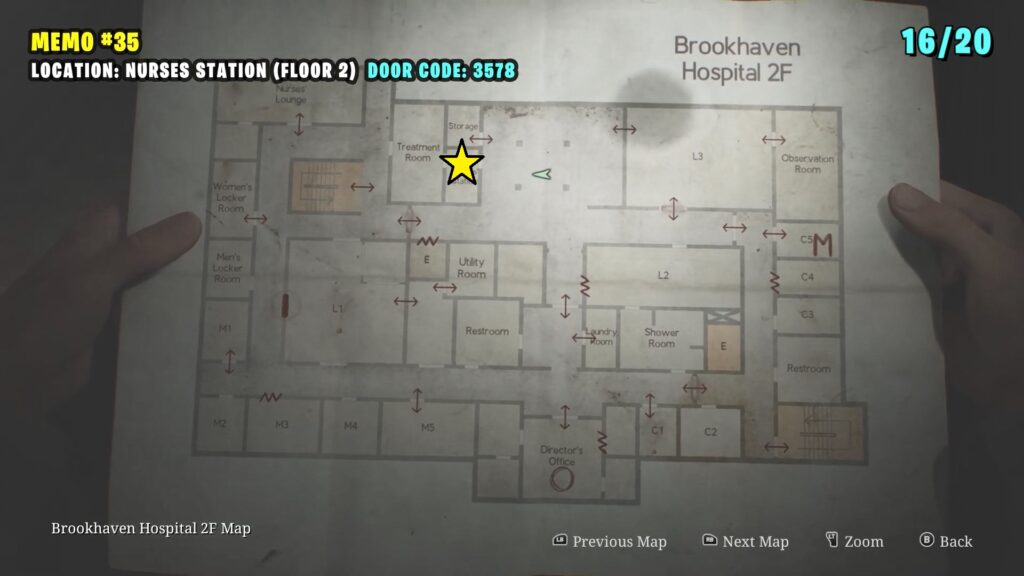
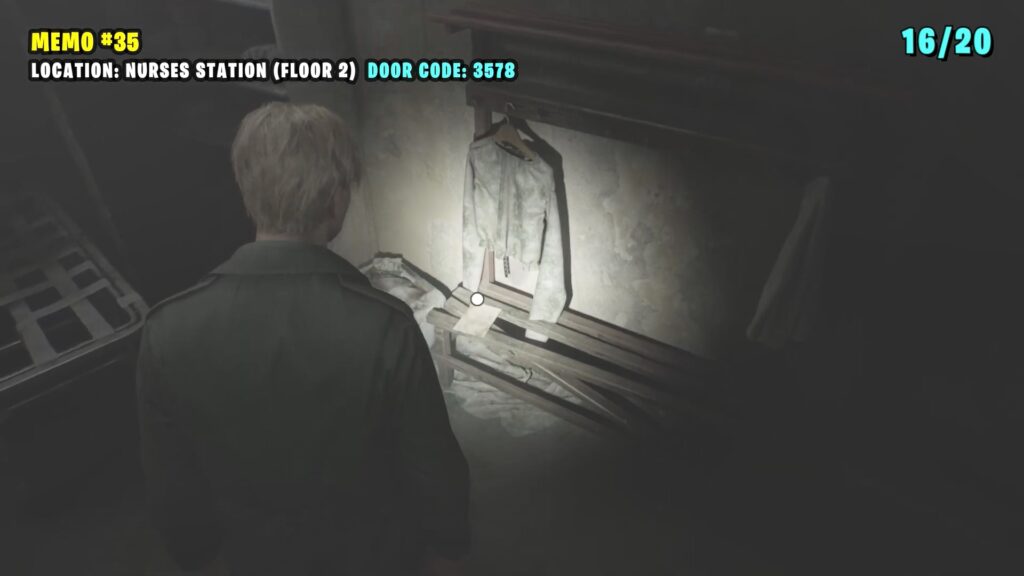
35) Memo: Treatment Room Note
Inside the Nurses’ Station. The player can unlock the Nurses’ Station with the code 3578
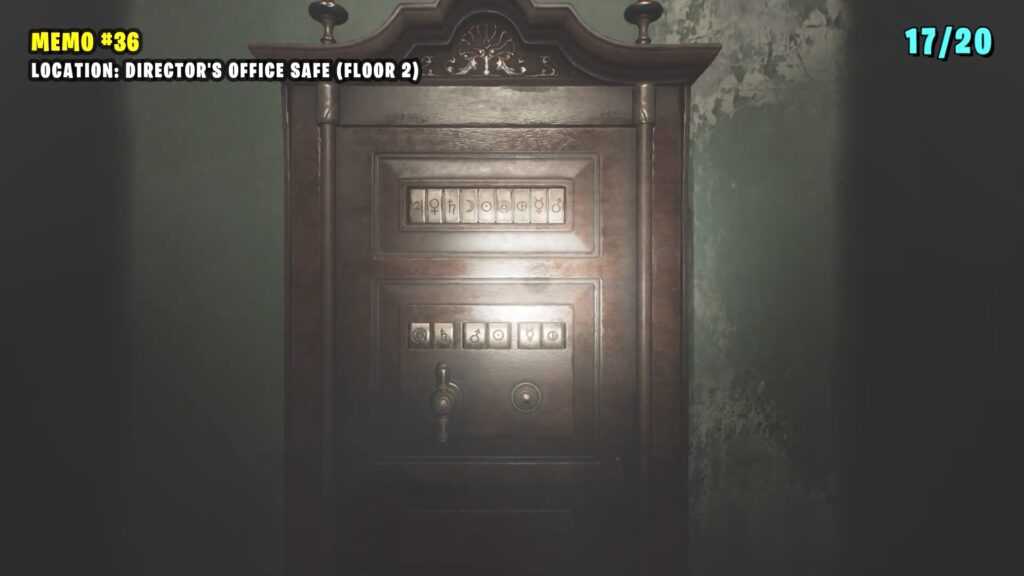
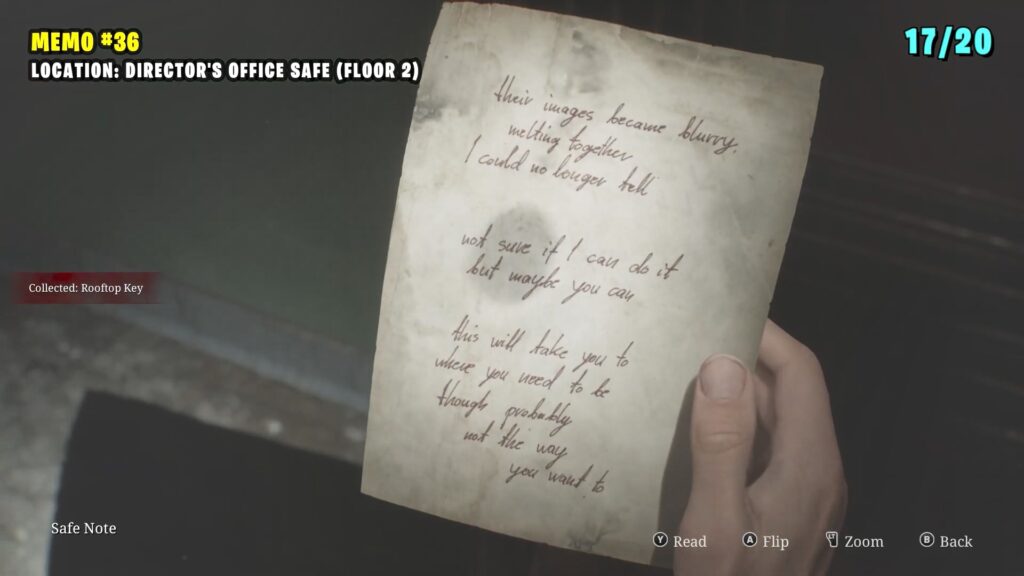
36) Memo: Safe Note
Inside a safe in the Director’s Office.
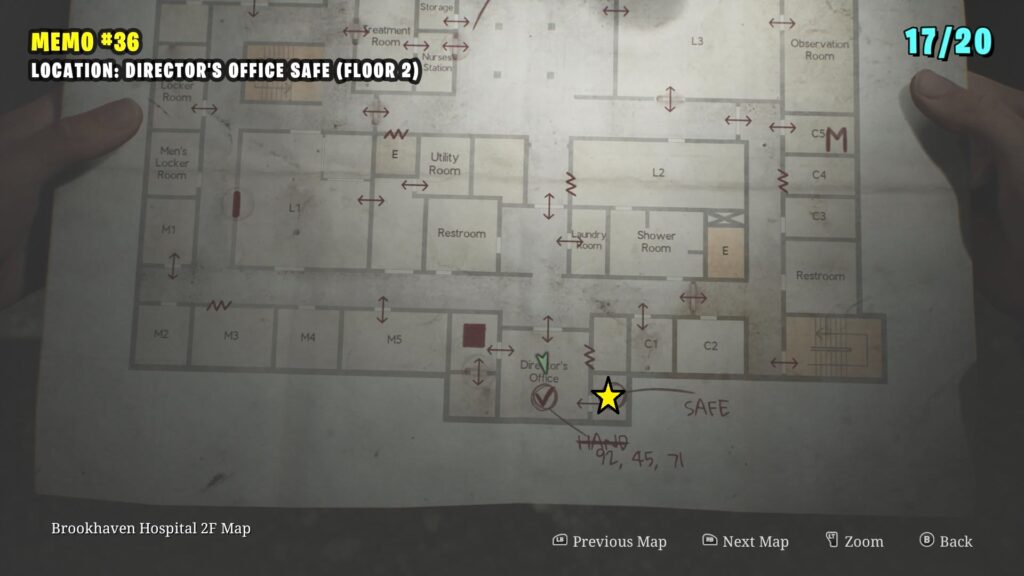
The safe code is shown in the below image.
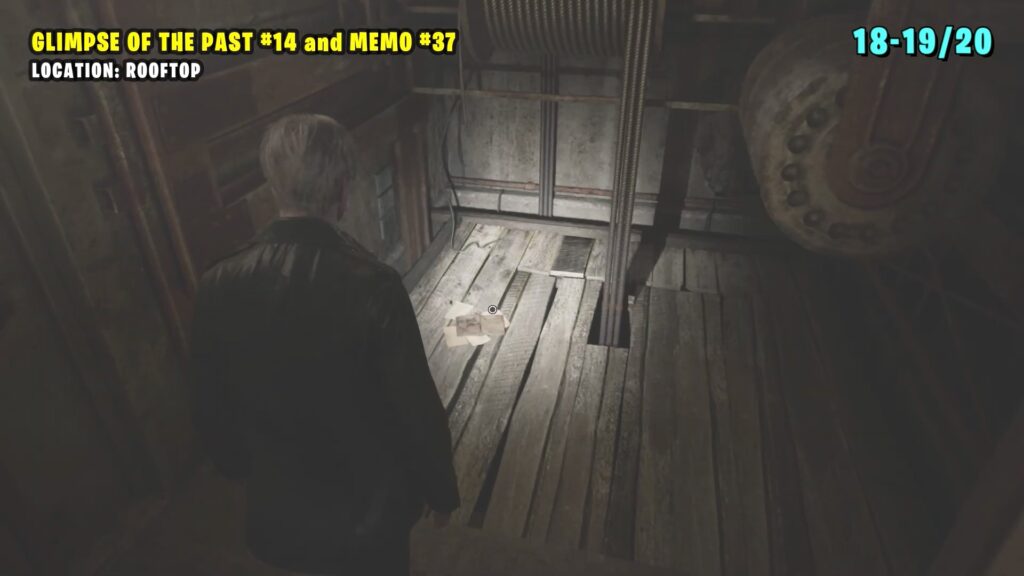
37) Memo: Page From A Diary
On the floor right as you re-enter from the rooftop.
Brookhaven Hospital (Otherworld) (9 Memos)
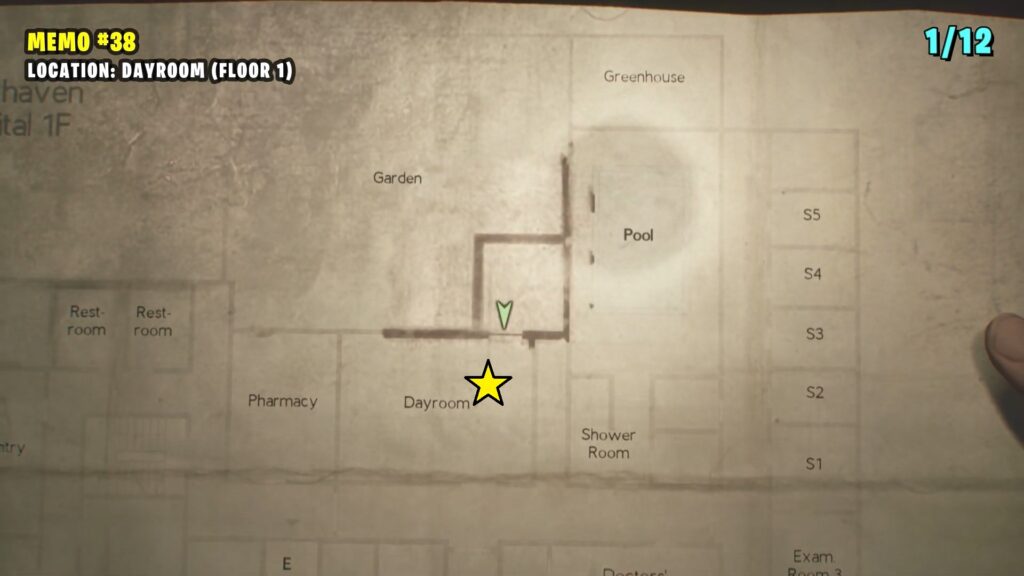
38) Memo: Evaluation Card, Patient #3141
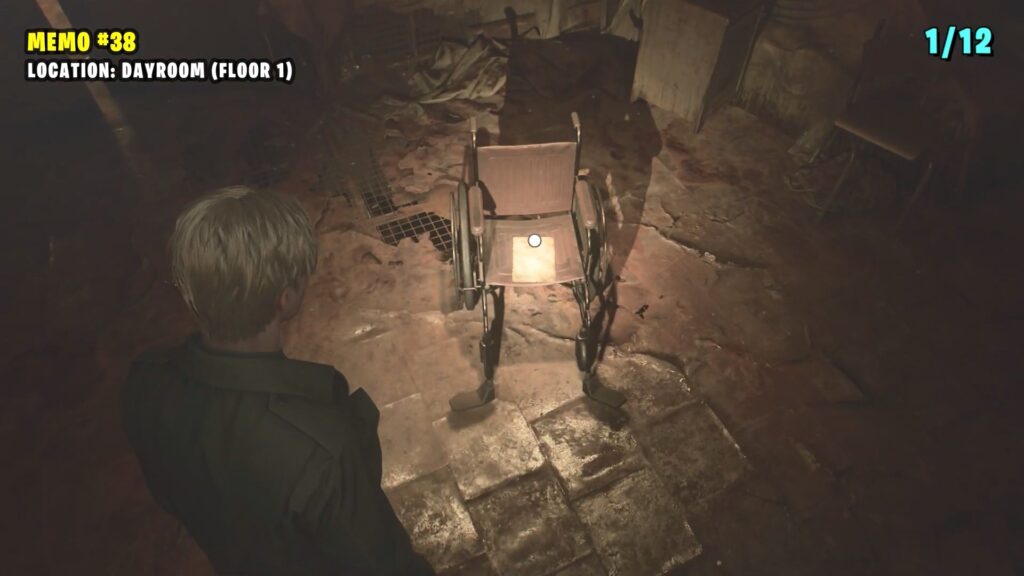
Enter the Dayroom and go through the first door to find this memo on a wheelchair.
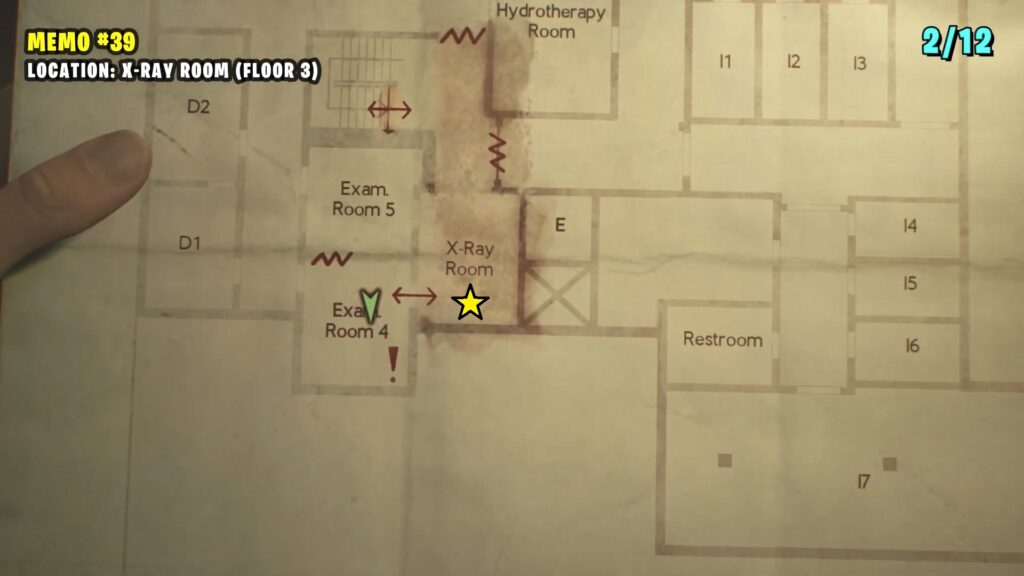
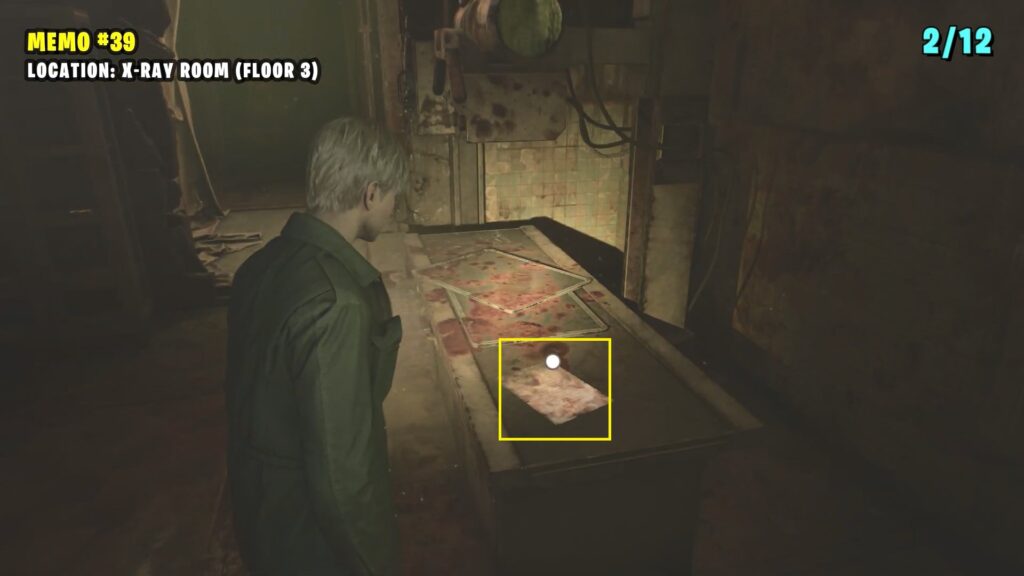
39) Memo: The Procedure
It is in the X-Ray Room on the 3F level. To reach here follow the path west of the Chained Box and go up the stairs.
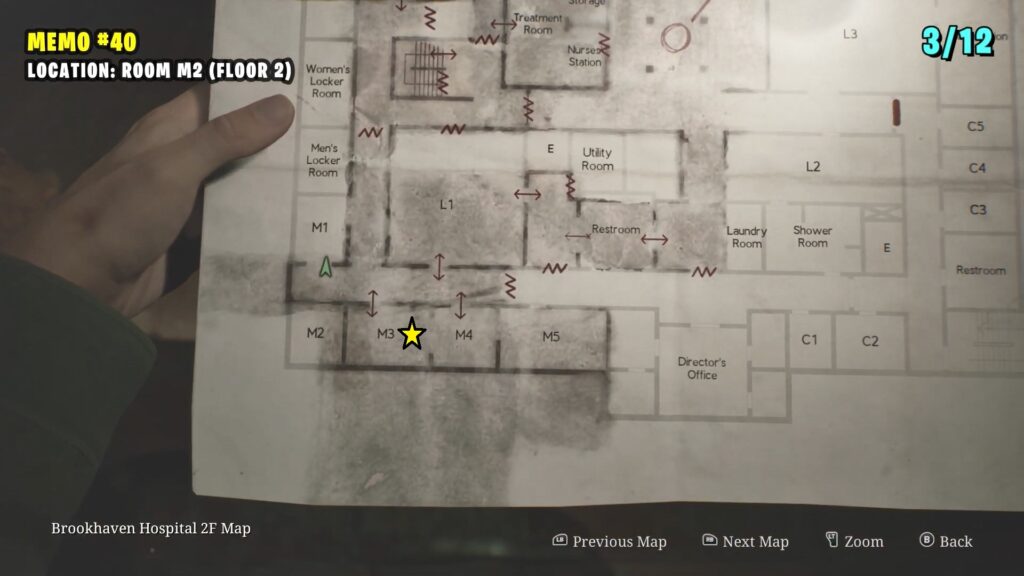
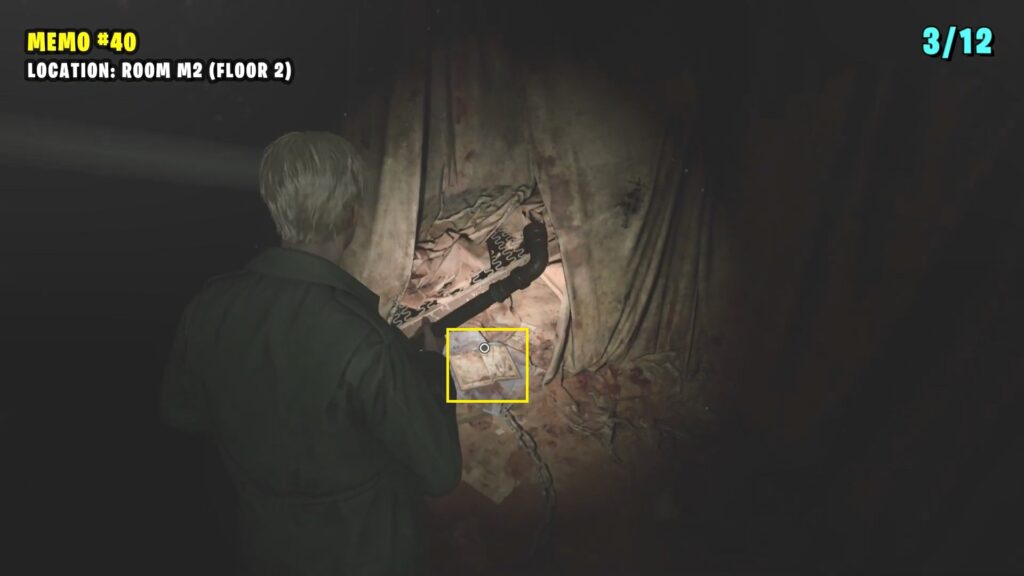
40) Memo: Calendar Page
Go to the Chained Box on the 2F level and then go south to reach Room M3. Inside break the wall to find the memo on the floor.
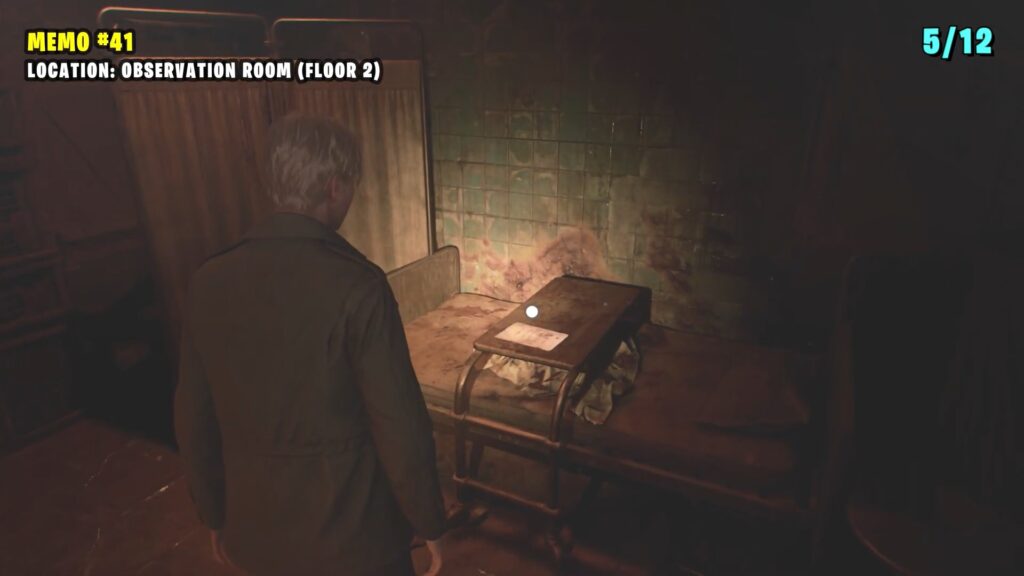
41) Memo: Patient’s Note
The patient’s Note is in the Observation Room, the player can retrieve a climbable box from Room L2. Follow the path shown on the map below to enter the Laundry room by breaking the Wall. Enter the L2 Room.
In the L2 Room, move the wardrobe that is blocking the hallway access.
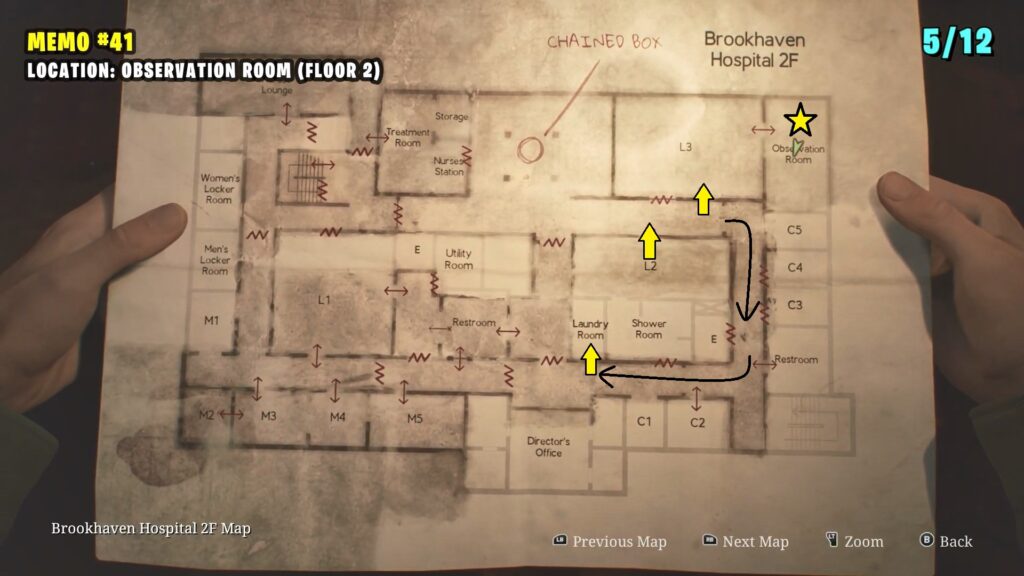
Move the box from the corner of the L2 Room and position it beneath the vent in the hallway, then climb up to access the L3 Room. Refer to below image and map below.
Enter the L3 room to access the Observation room to find Memo #41: Patient’s Note on a bed.
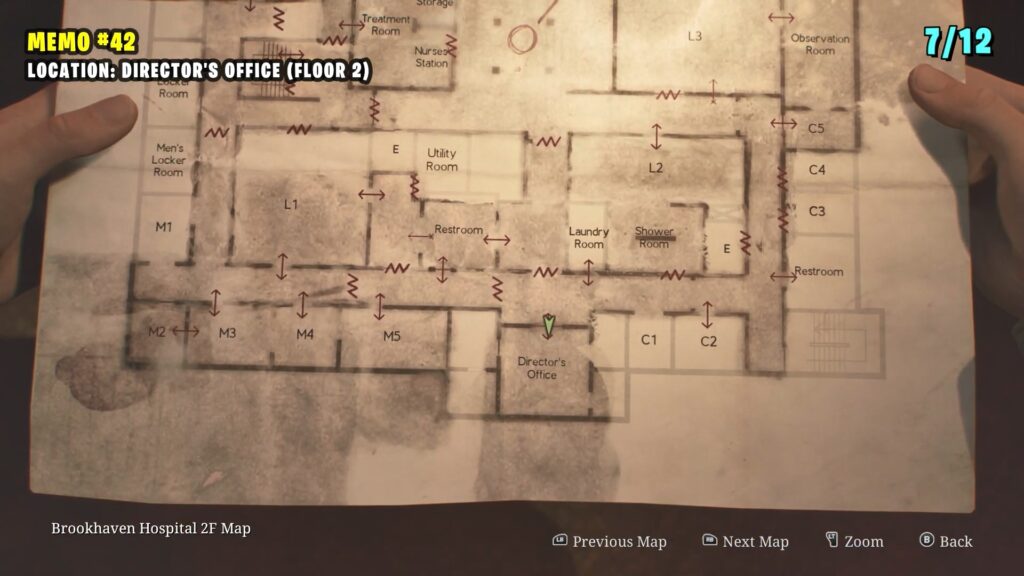
42) Memo: Manic Scribble
Memo: Manic Scribble is on the bench inside the Director’s Office.
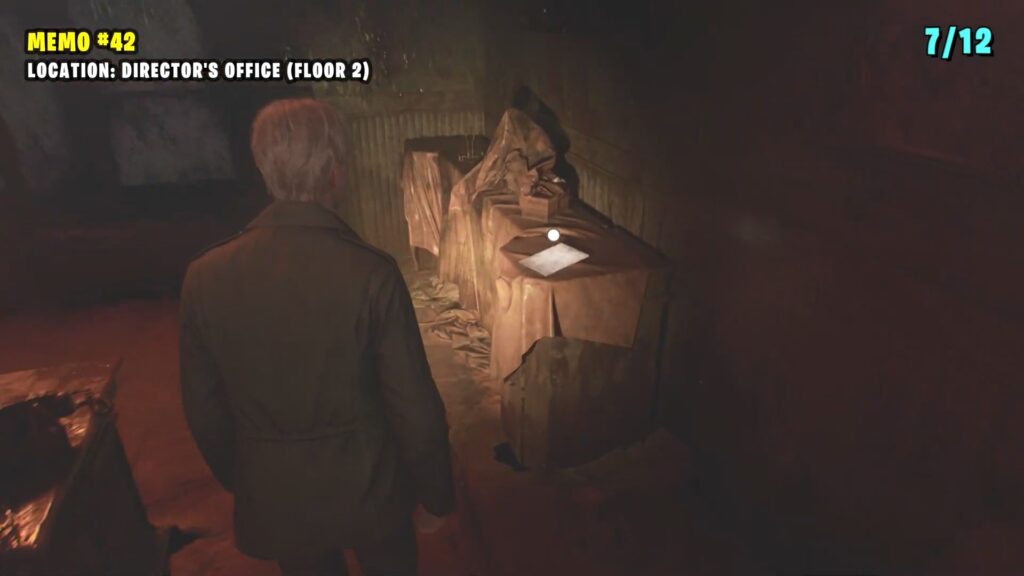
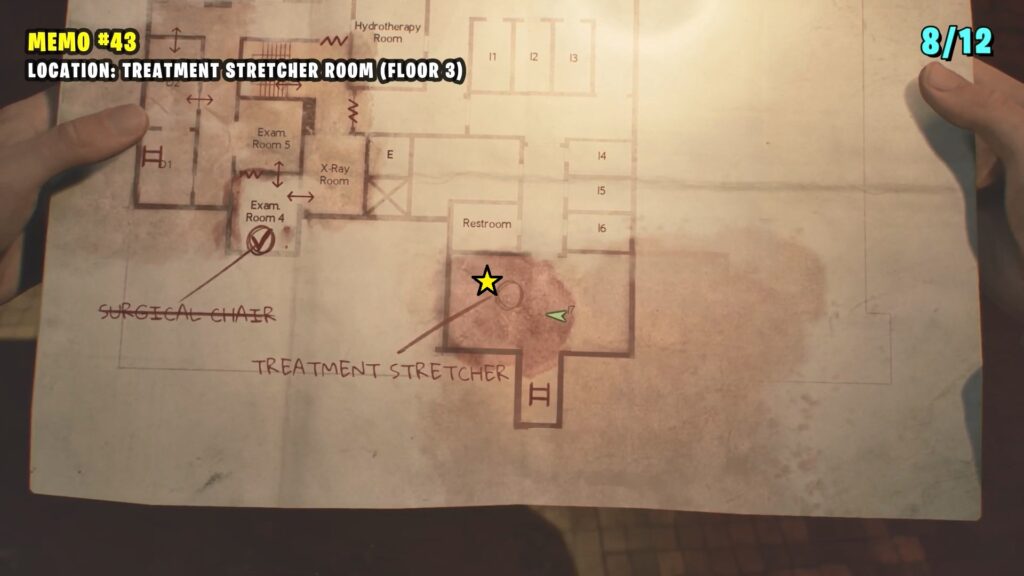
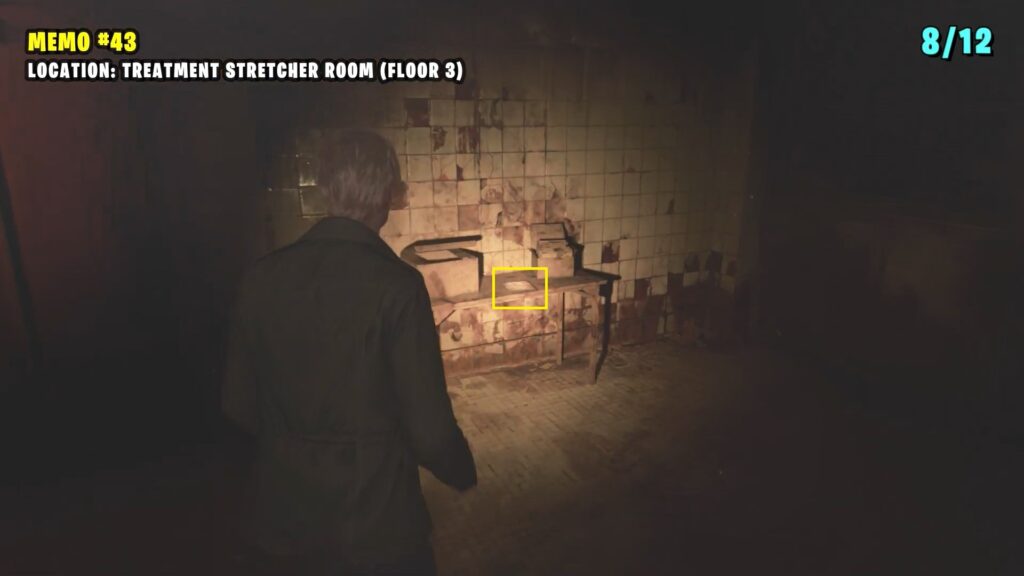
43) Memo: Nurse’s Note
Go up the ladder in the Director’s Office to Room I7 on the 3F level. Players can find the Nurse’s Note on a small table in the corner.
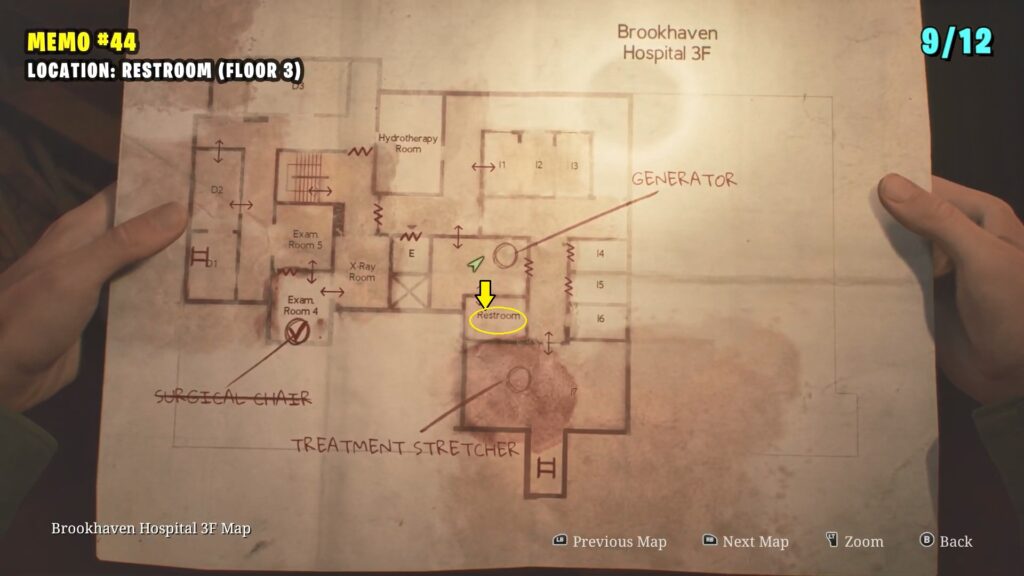
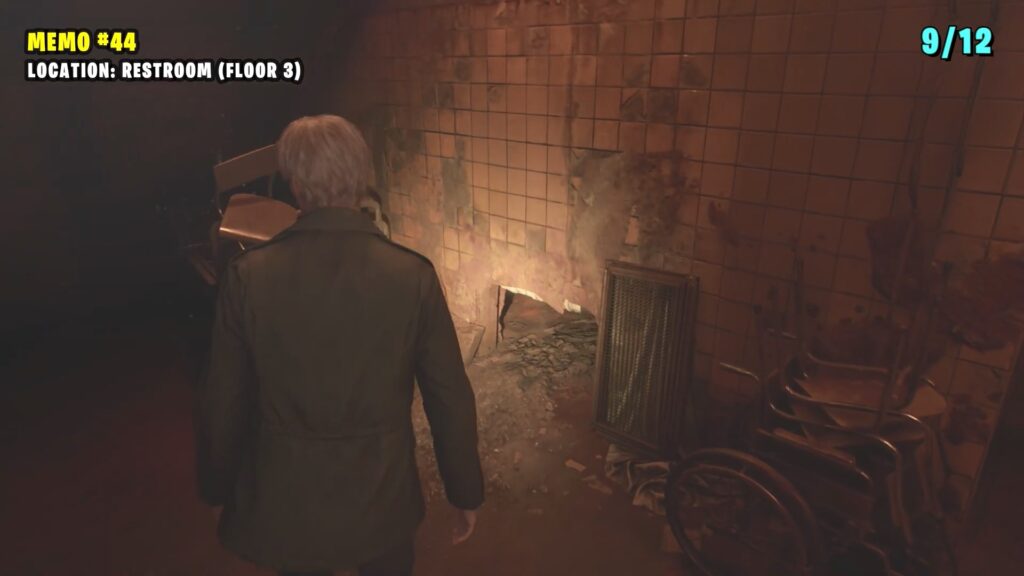
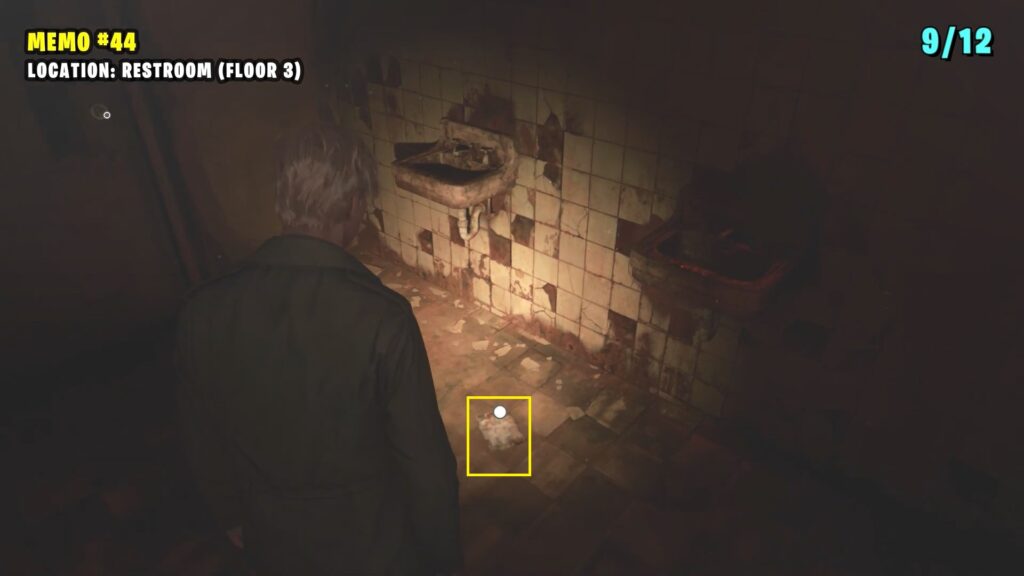
44) Memo: Director’s Note
It’s in a locked restroom between the Generator and the Director’s Office. You can access it by crawling through the hole in the Generator room.
South Vale (Otherworld) (2 Memos)
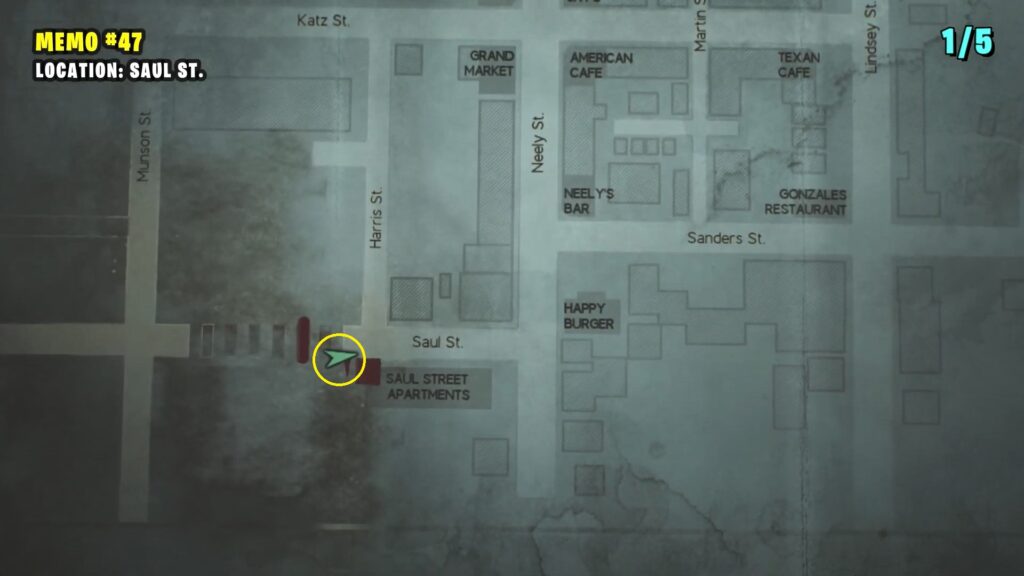
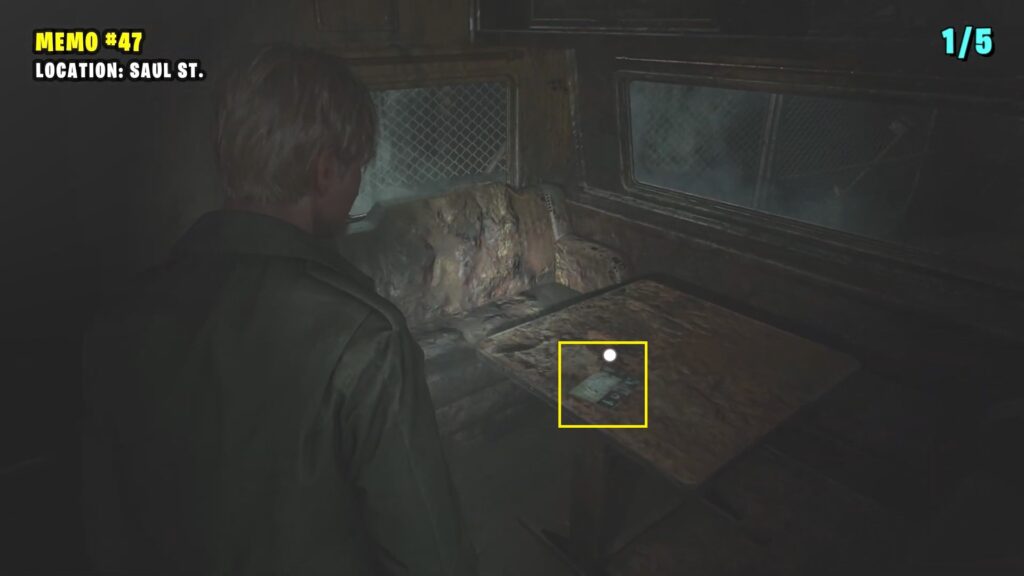
47) Memo: Note on a Map
It is on the table inside a camper van at Saul St.
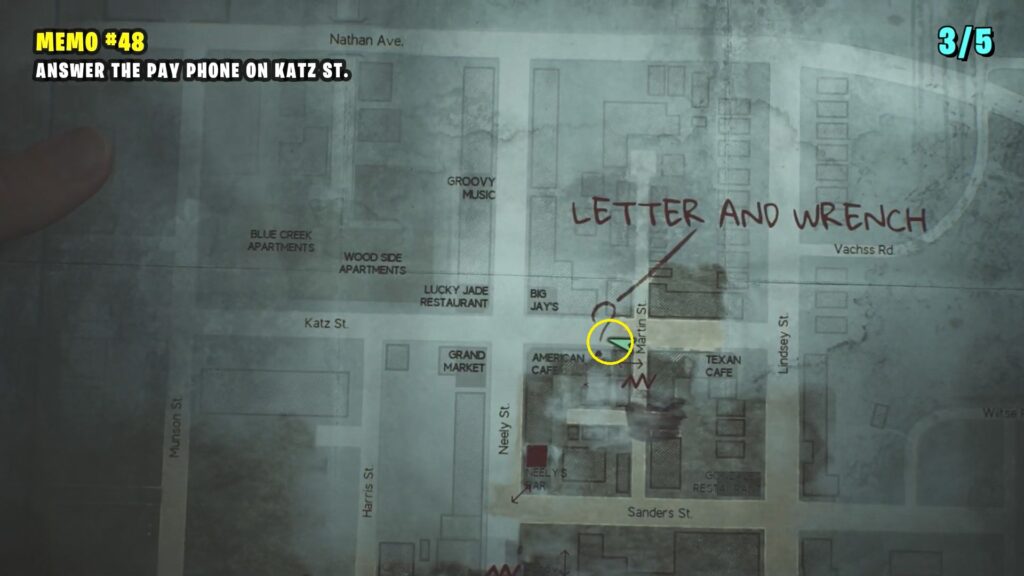
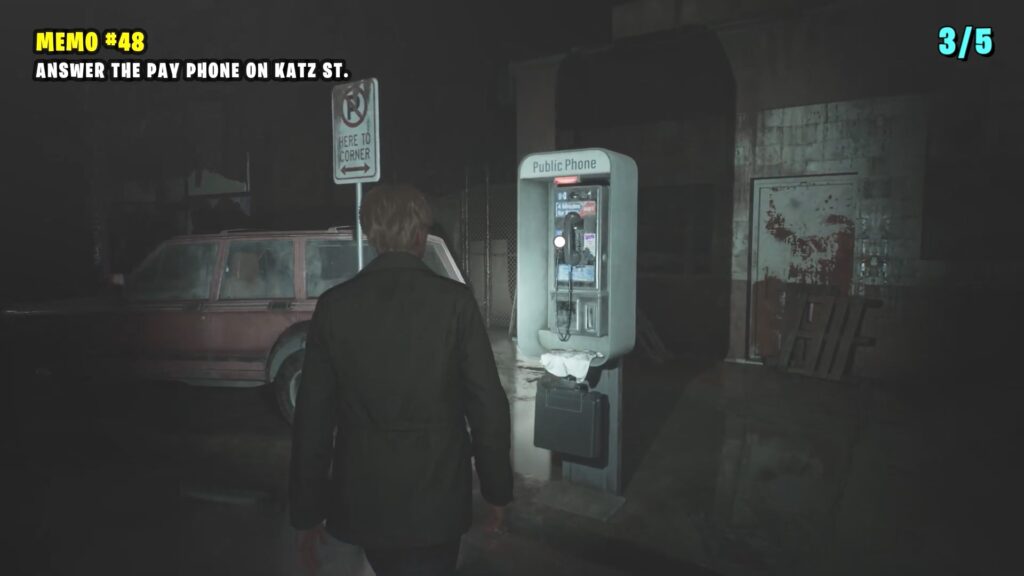
48) Memo (South Vale): Letter
The memo is on the payphone in Martin St.
Toluca Prison (9 Memos)
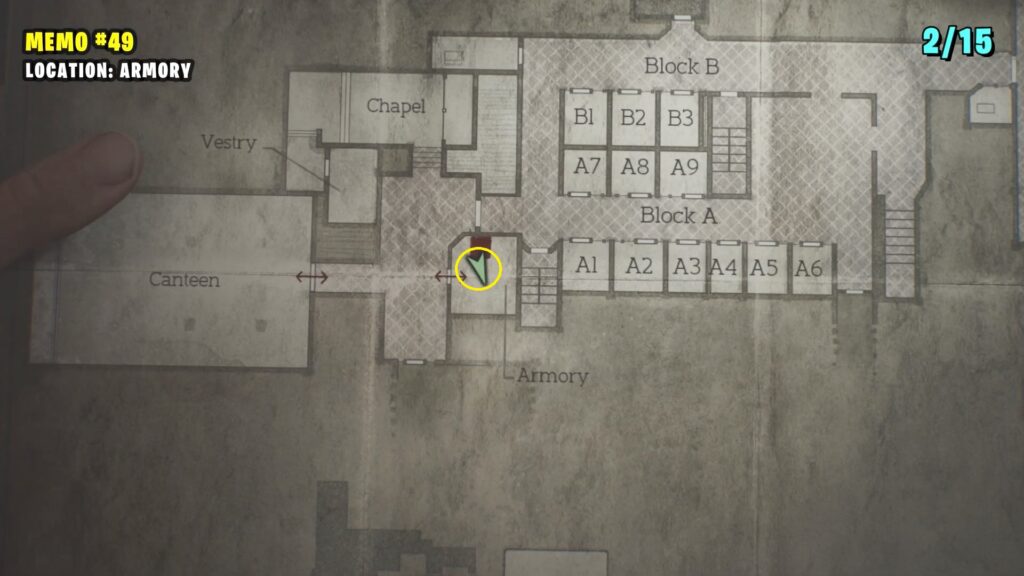
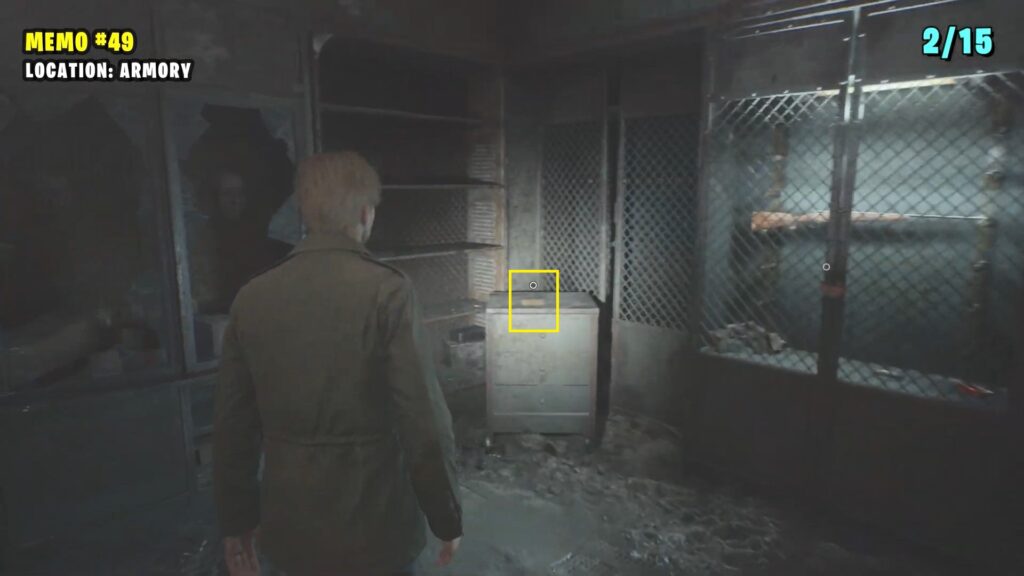
49) Memo: Gun Cabinet Notice
This memo is located inside the Armory, near the gun cabinet.
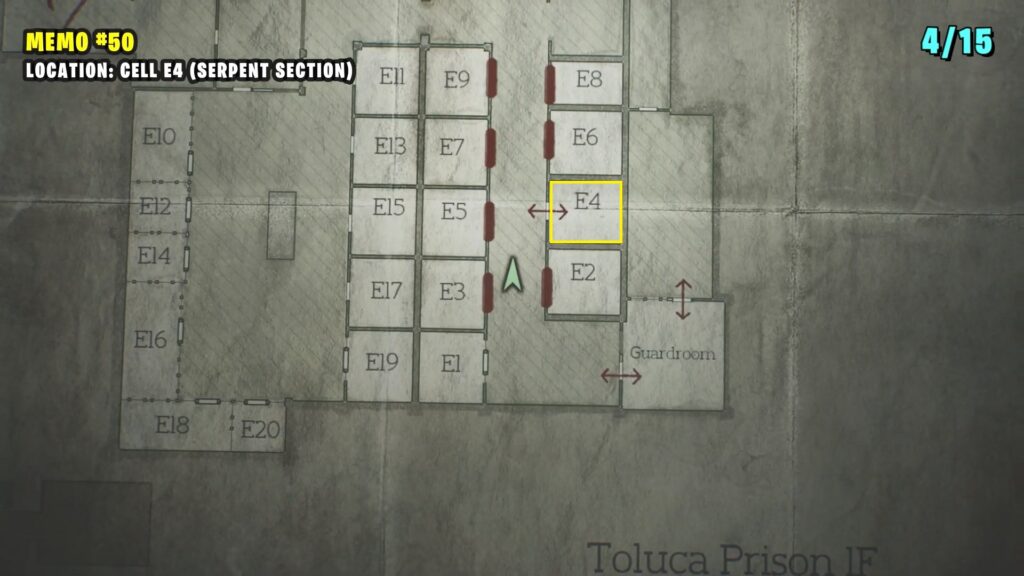
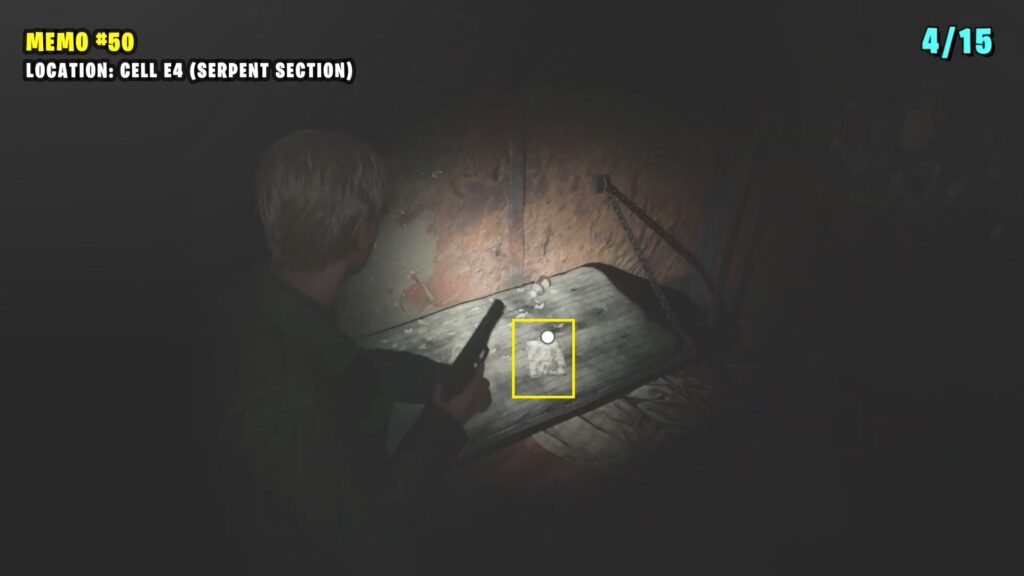
50) Memo: Family Photo
Enter the Serpent Door to find the memo on the bed in Cell E4.
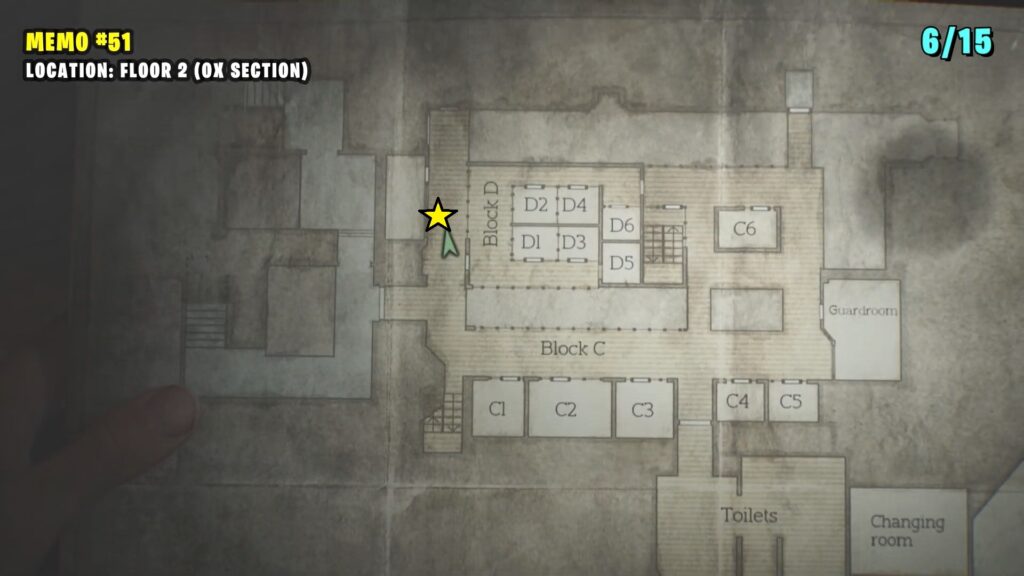
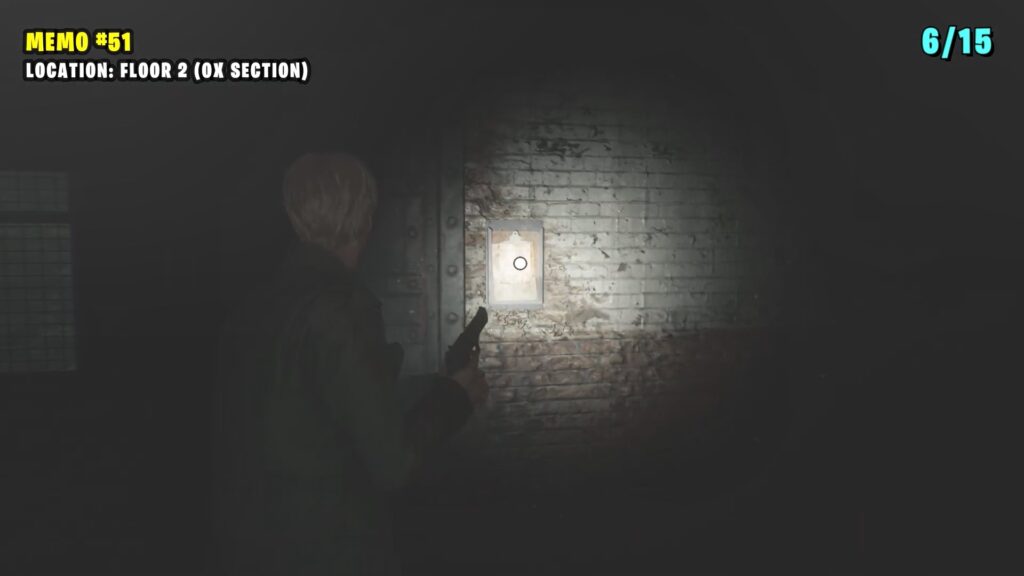
51) Memo: Guard’s Letter
Enter the Ox Door and then go upstairs to find the Guard’s letter posted next to a locked door.
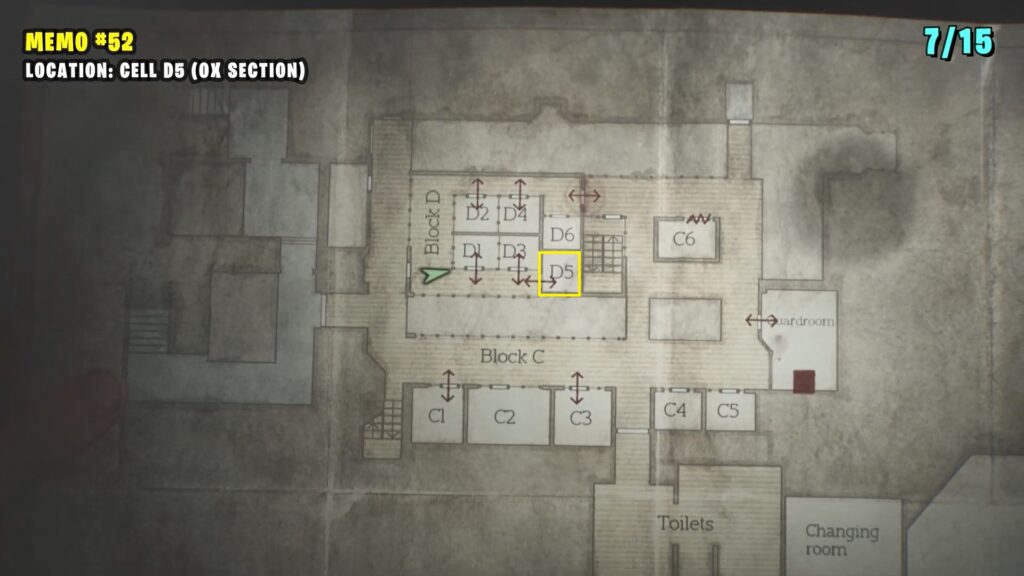
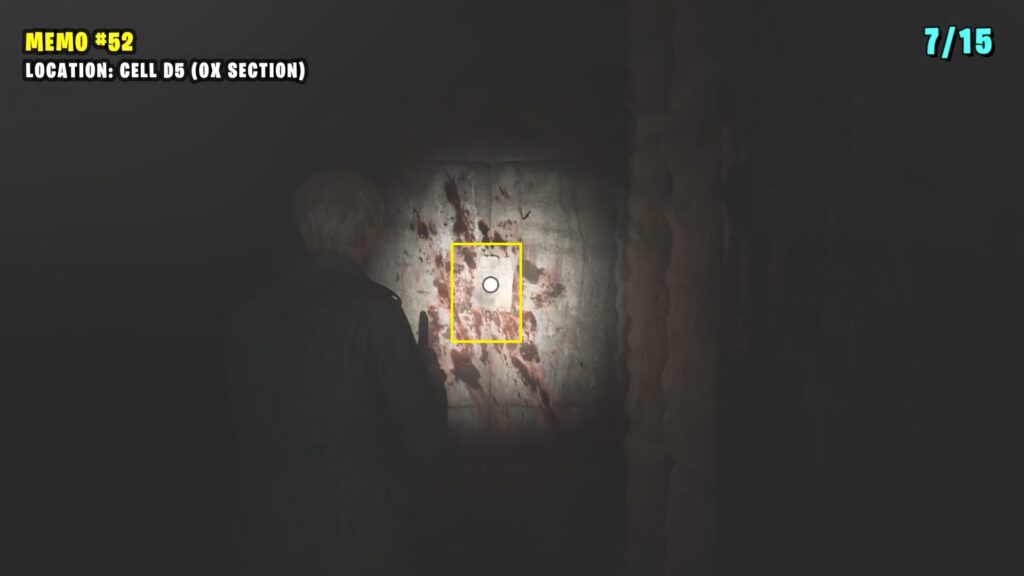
52) Memo: Threatening Note
It is inside the Cell D5 of Block D
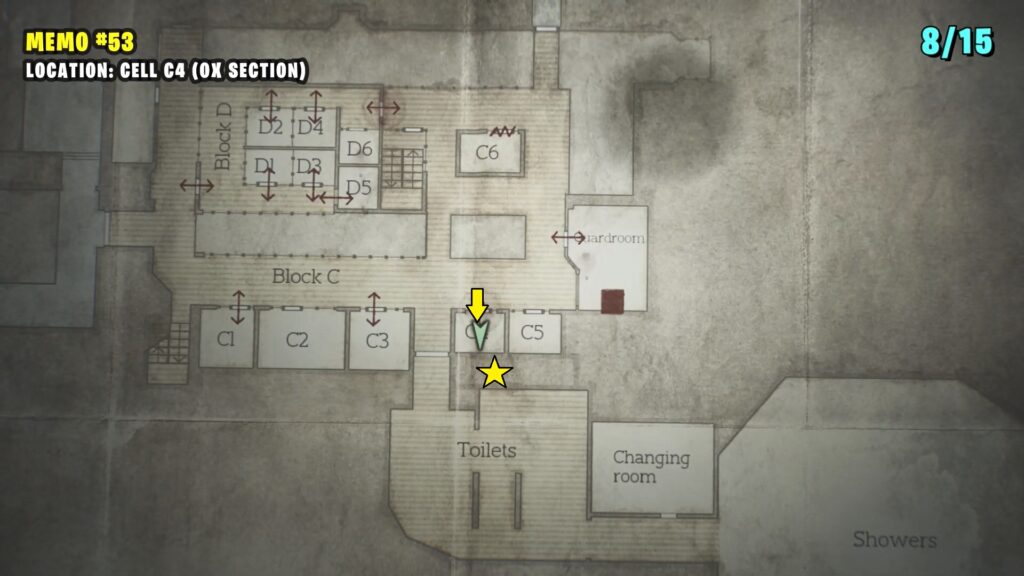
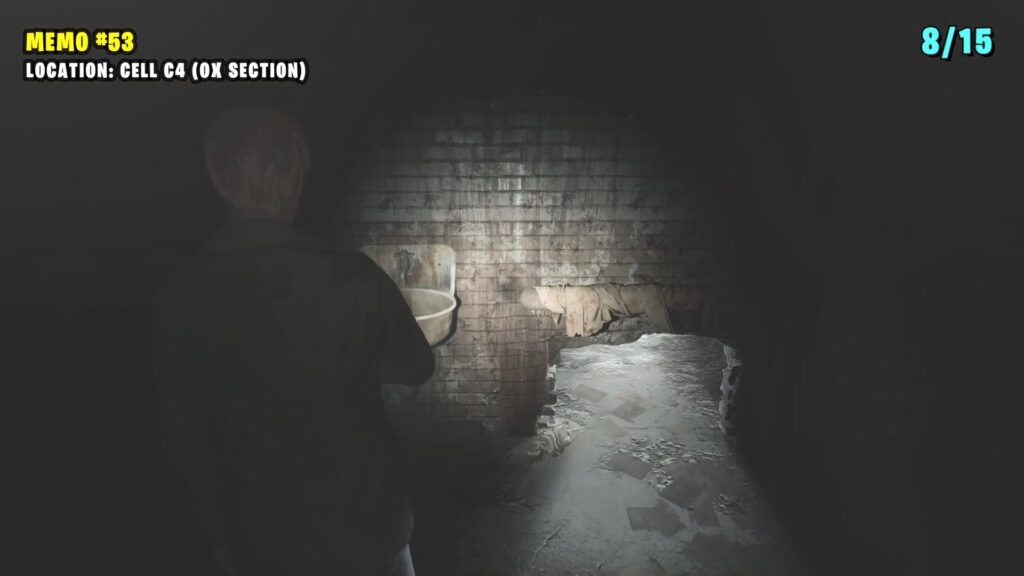
53) Memo: Paranoid Note
Use the Shiv Key to unlock Cell C4, then crawl through the hole to find the note on the big pipes.
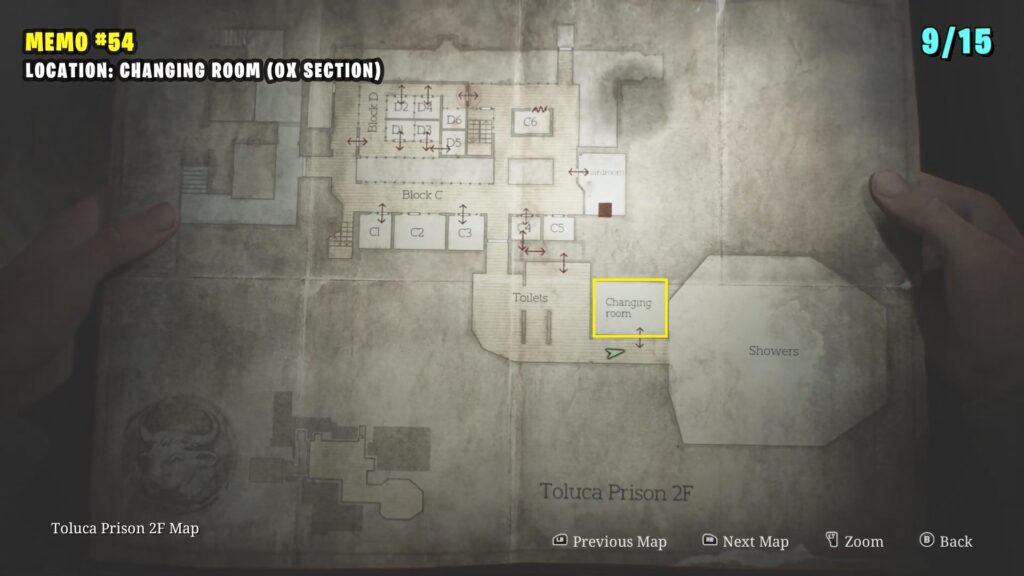
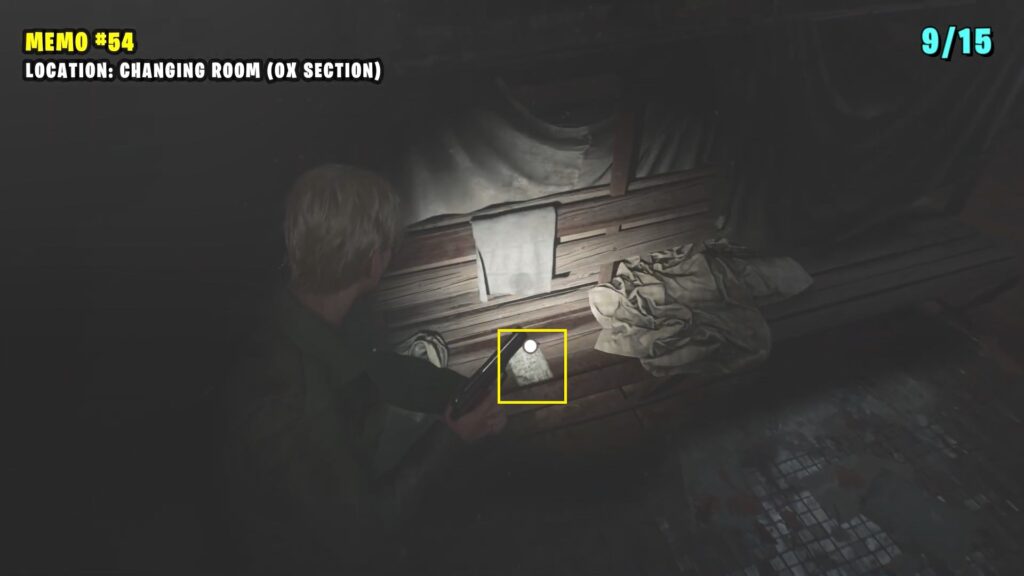
54) Memo: Crumpled Note
It is on a bench inside the Changing Room.
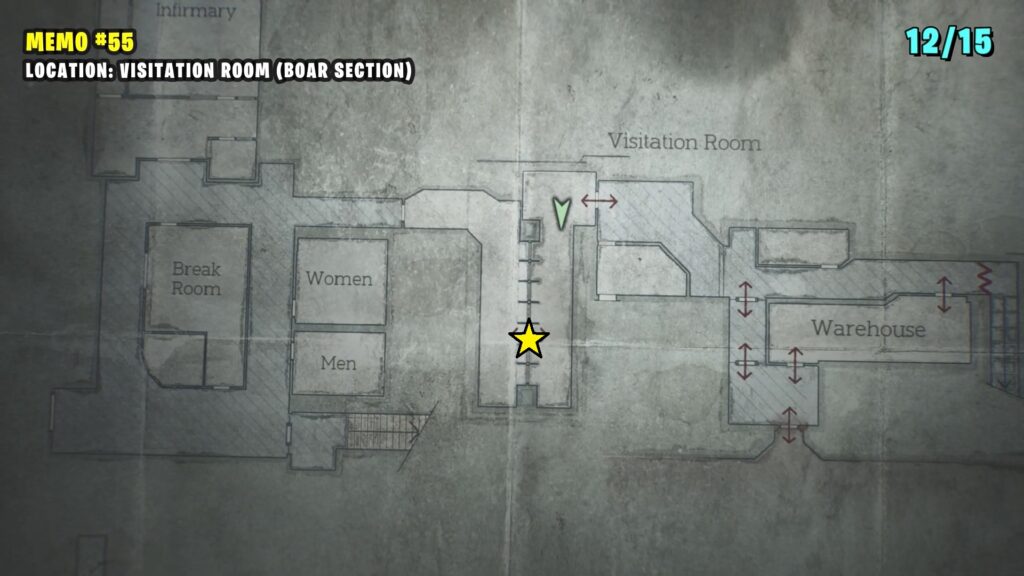
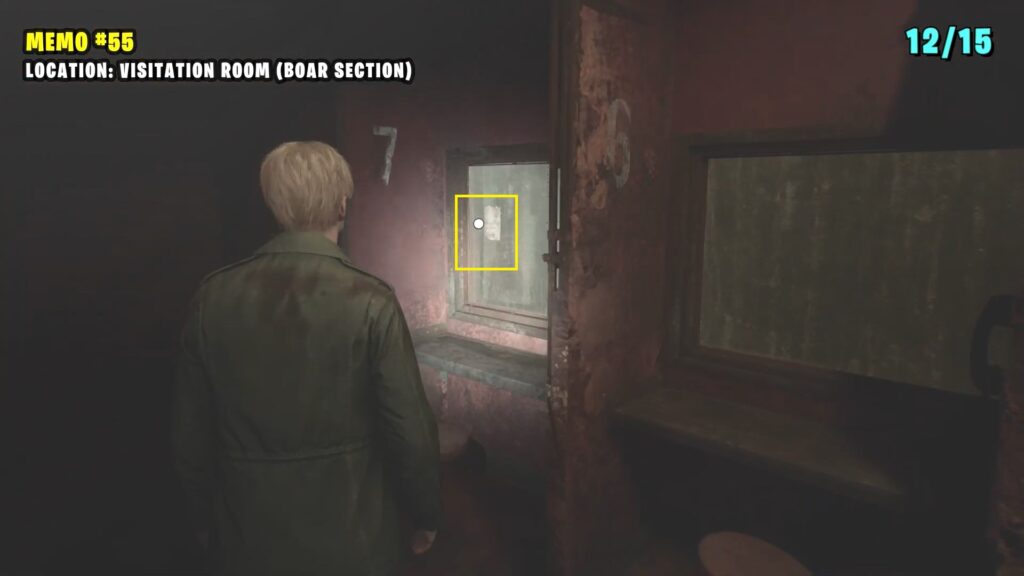
55) Memo: Prisoner’s Letter
It is in the cubicle 7 in the Visitation Room.
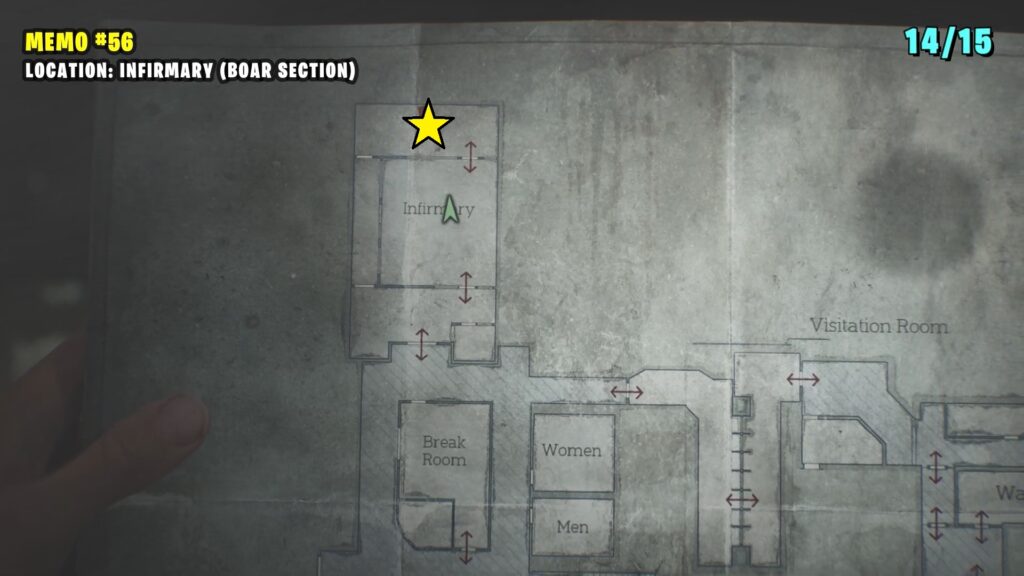
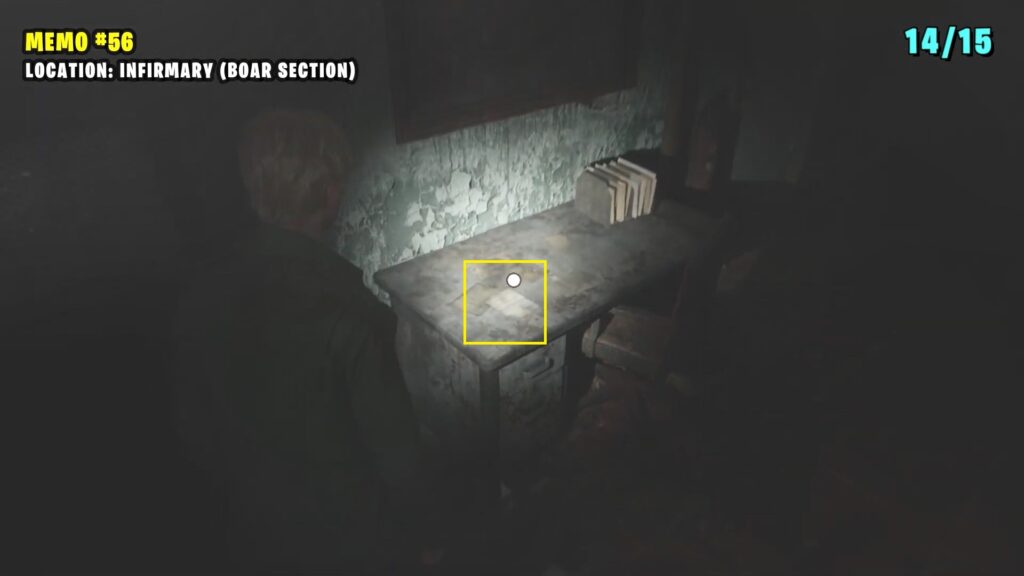
56) Memo: Unfinished Report
Go to the room behind the Infirmary to find this item on a desk.
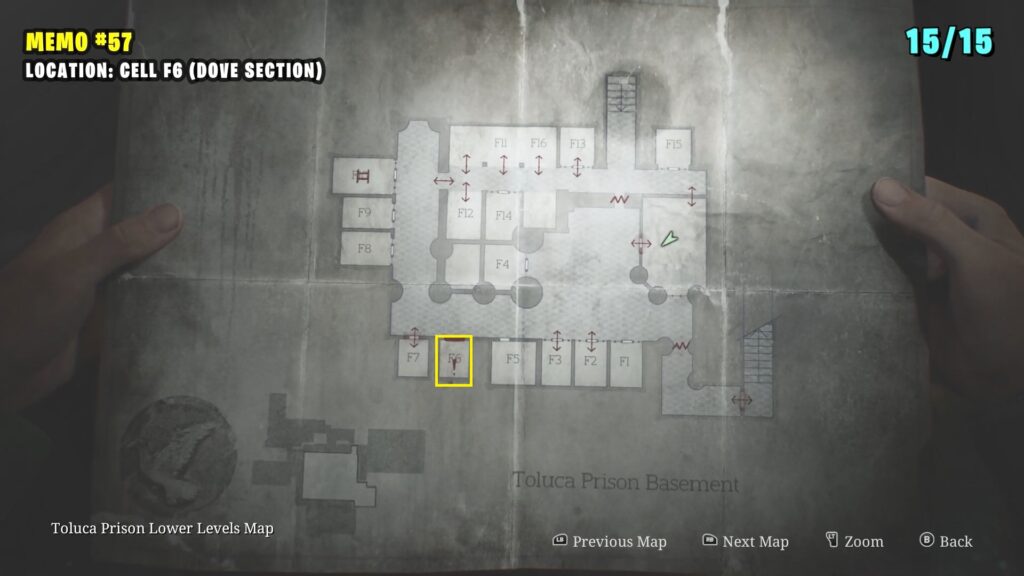
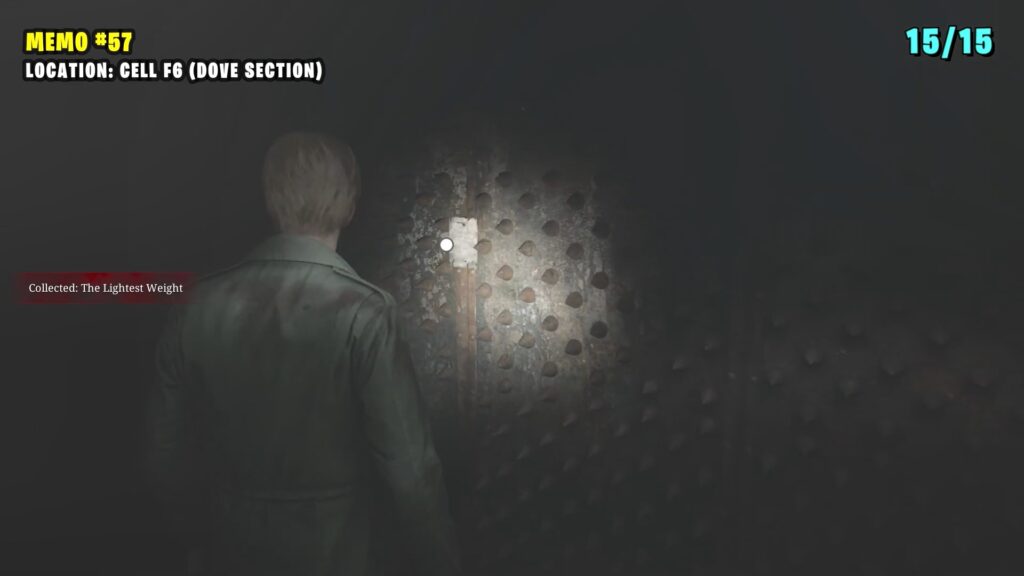
57) Memo: Confession
Pass through the Dove Door and descend into the Basement. Continue until you reach Cell F6, then enter the cell to find it on the wall.
Lakeview Hotel (10 Memos)
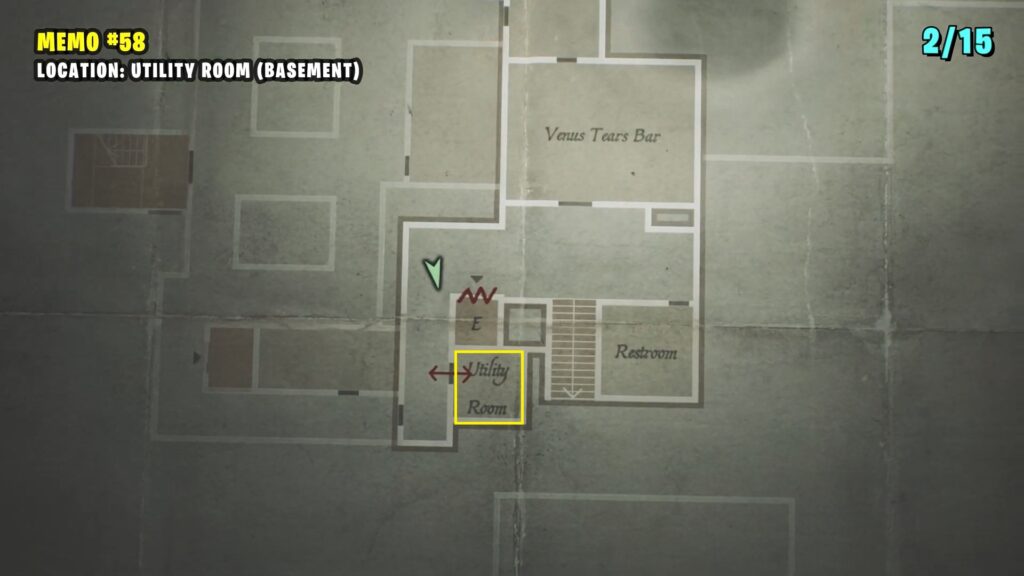
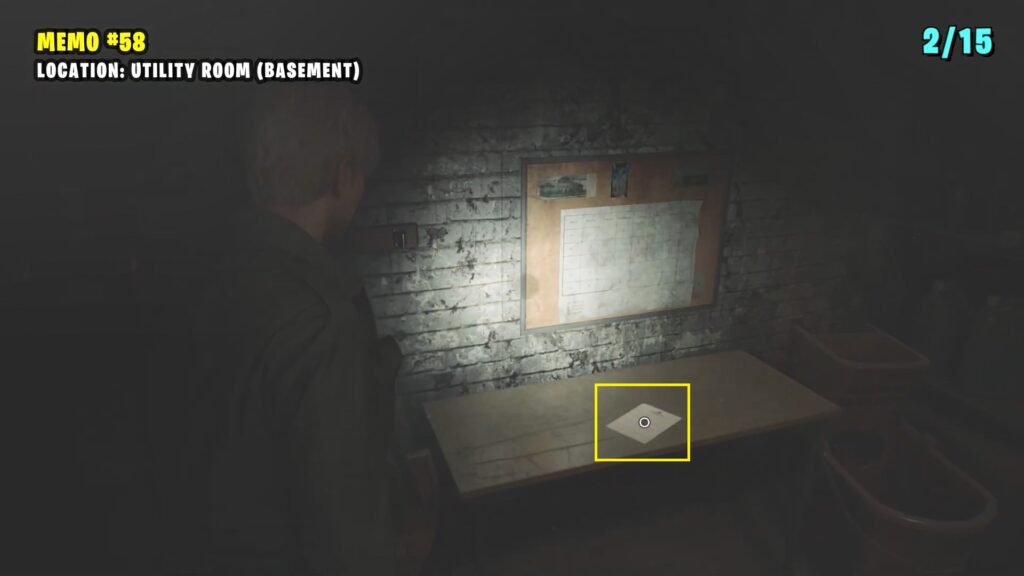
58) Memo: Cleaning Staff Memo #1
Enter the hotel and head downstairs to the basement. In the Utility Room, you’ll find a memo on the table.
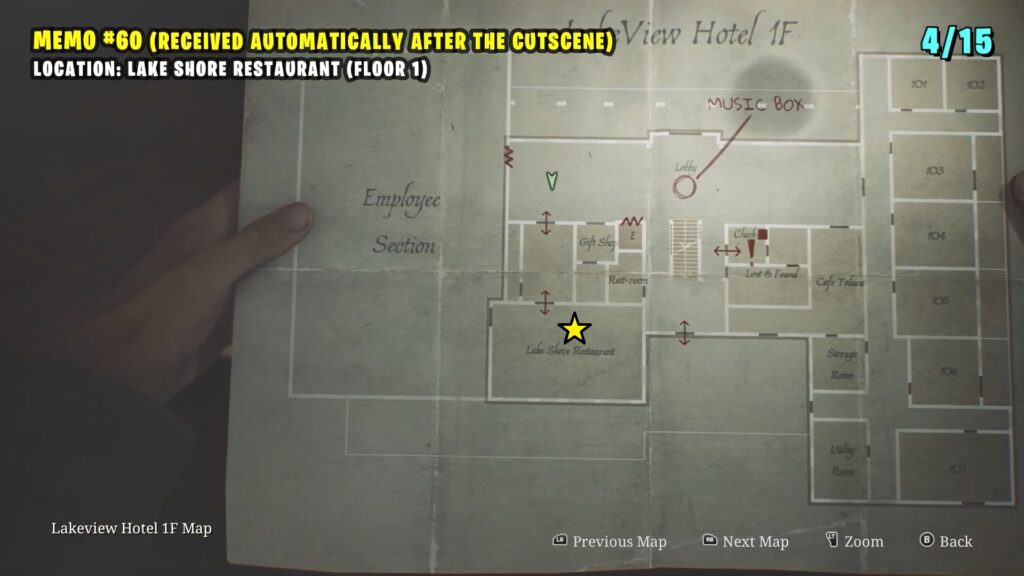
59) Memo: Laura’s Letter
You will automatically receive it after the cutscene in the Lake Shore Restaurant.
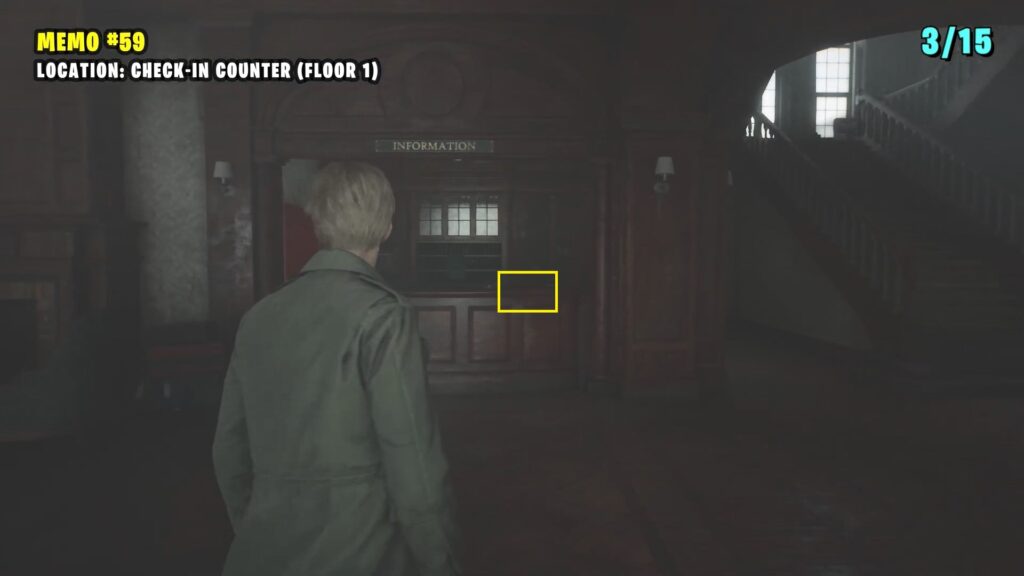
60) Memo: Receptionist Memo
Return to the 1st floor and inspect the counter in the Check-in Room.
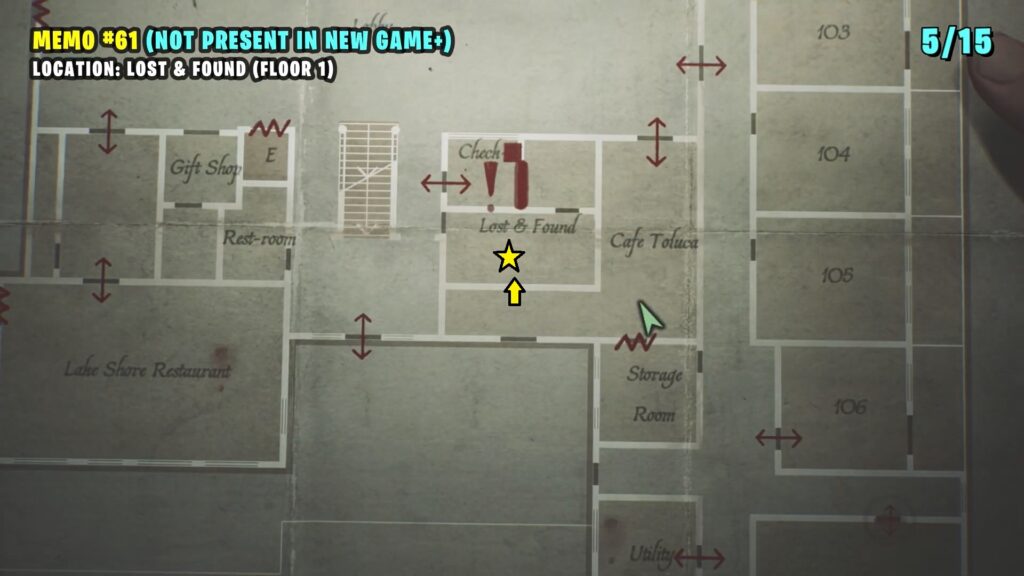
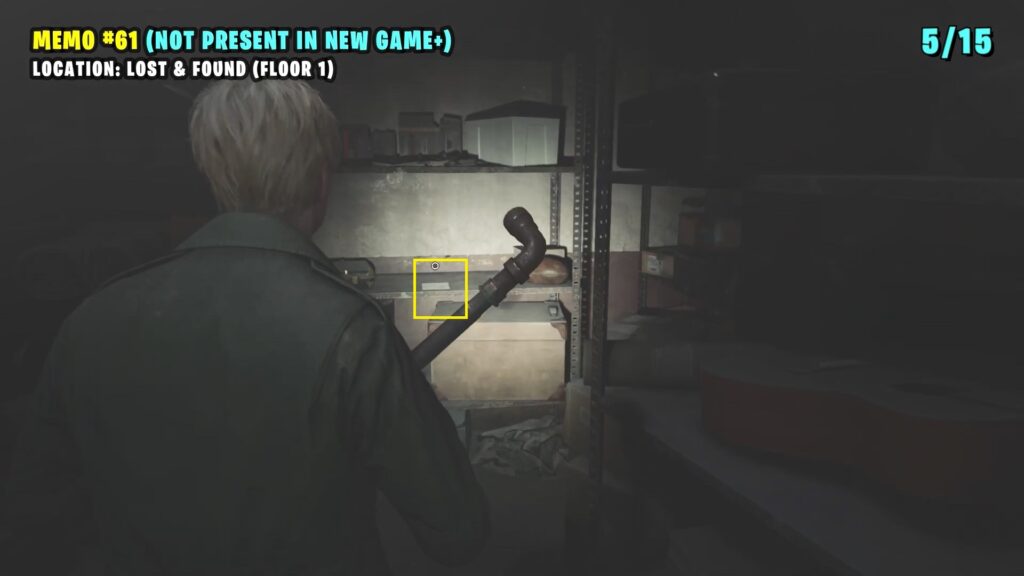
61) Memo: Lost & Found Note – New Game Only!
Note: This memo is only available in a New Game. You can find it on a shelf inside the Lost & Found Room.
To access the Lost & Found, you need to break through the wall in Cafe Toluca.
6) Strange Photo #23: “aftermath…”
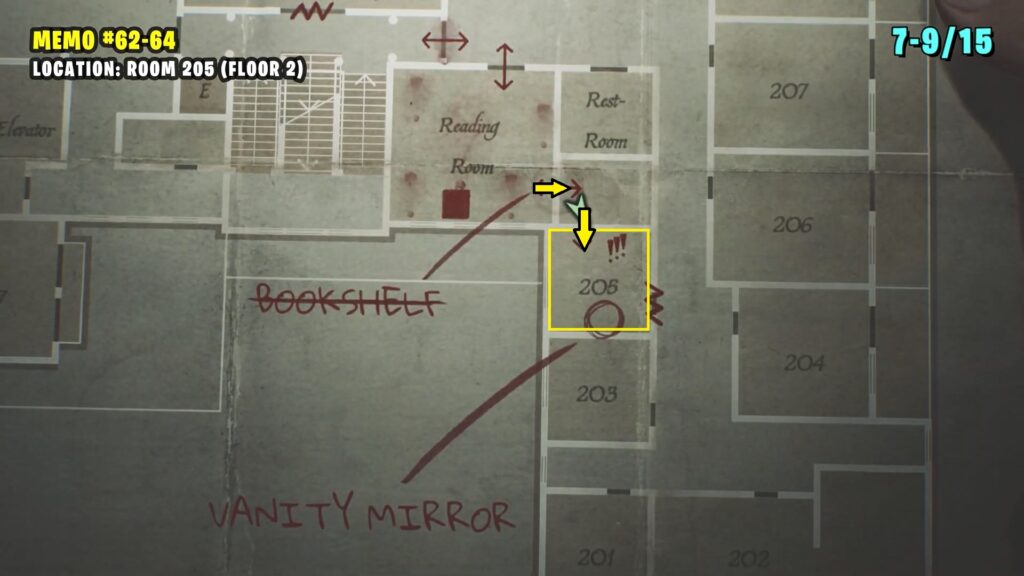
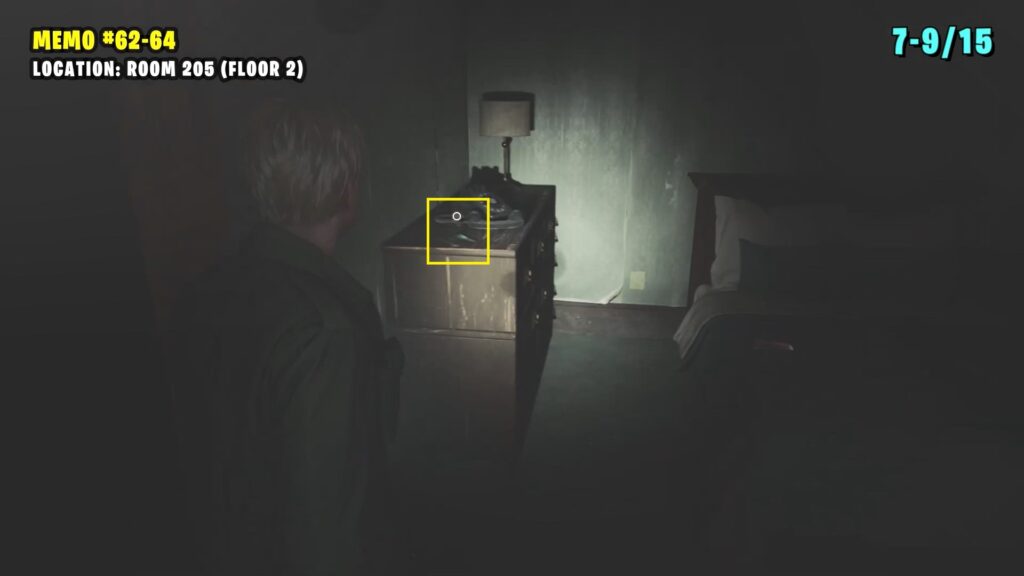
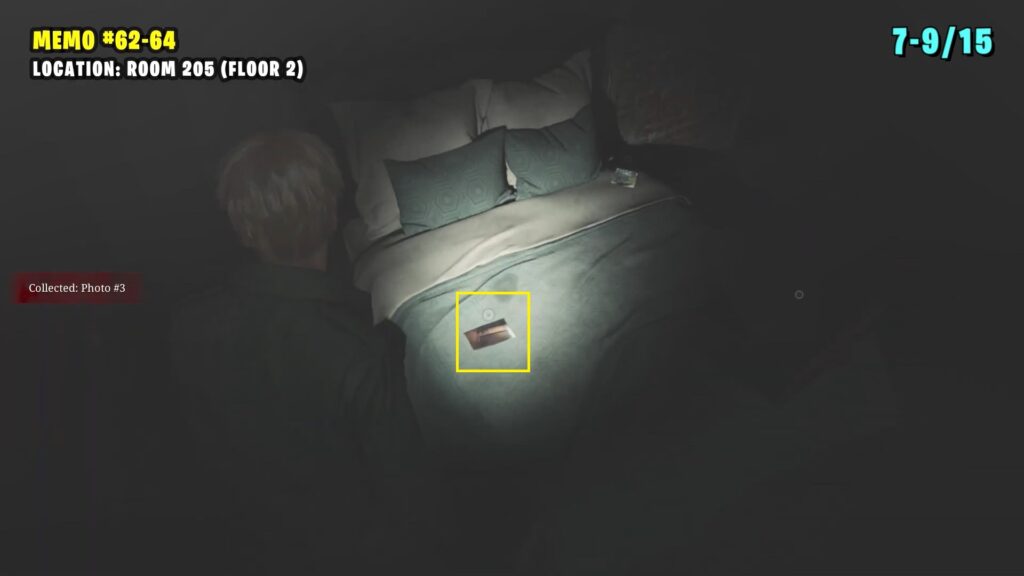
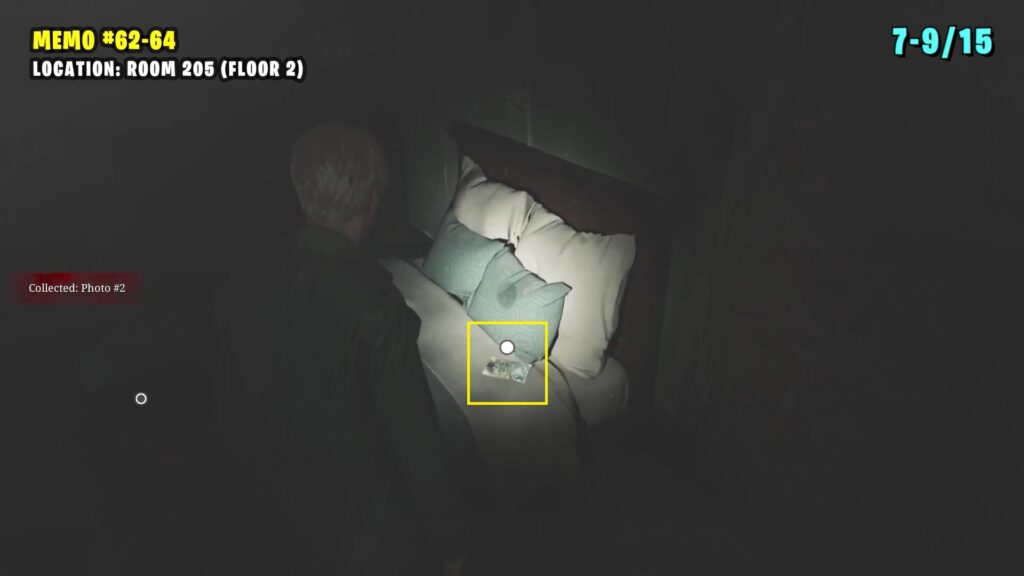
62-64) Memos: Door Photo + Stain Photo + Gate Photo
Make your way to the Reading Room on the second floor and solve the bookshelf puzzle to reveal a secret door leading to Room 205. Inside, you’ll find three photos near the bed.
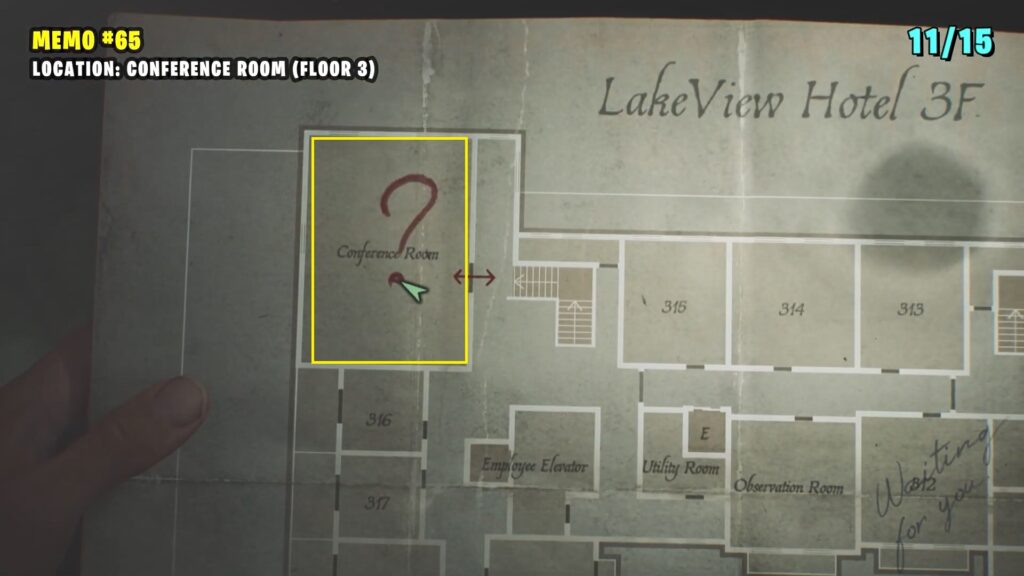
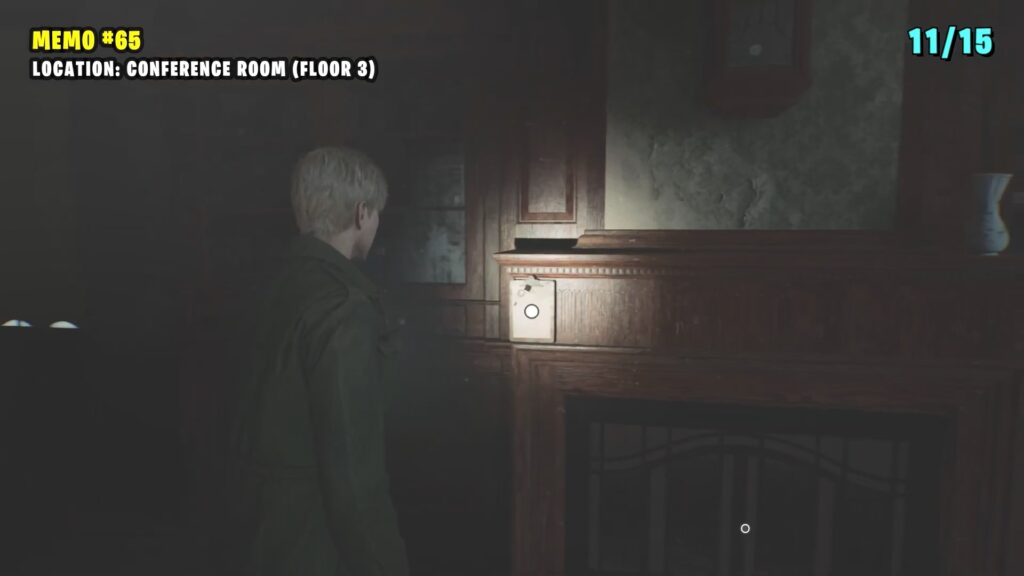
65) Memo: Cleaning Staff Note #2
Go to the Conference Room on the third floor to locate the memo near the fireplace.
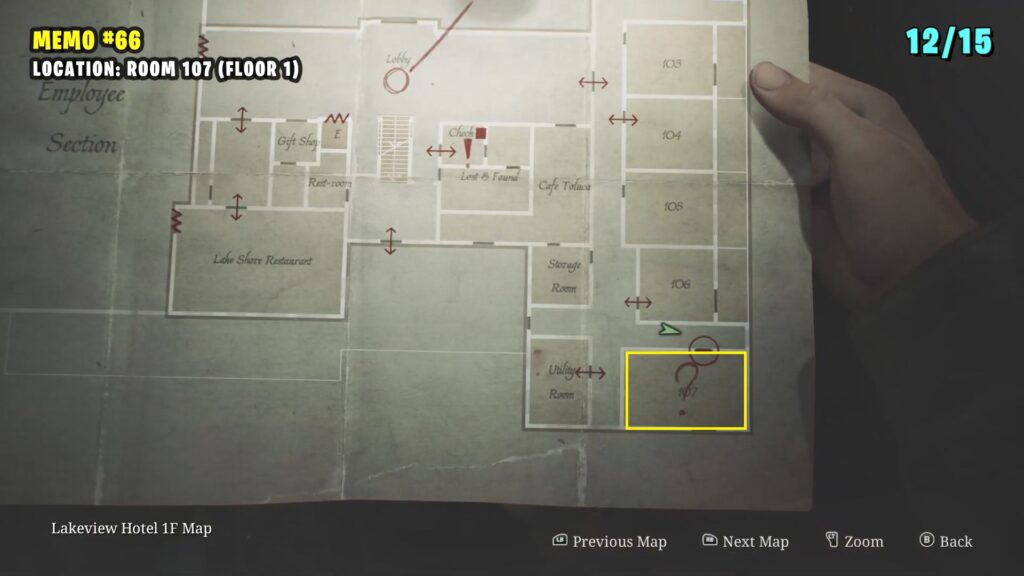
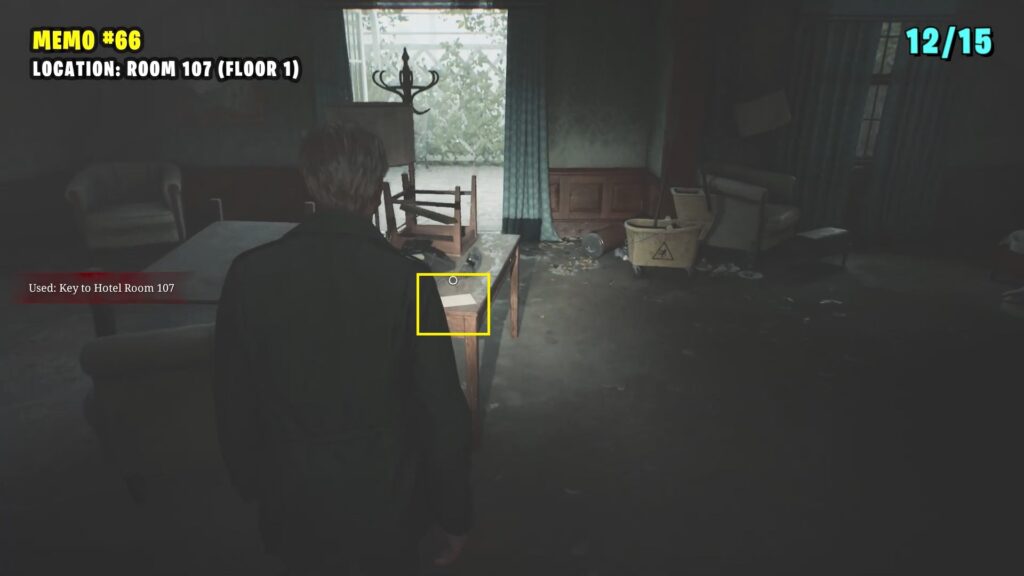
66) Memo: Cleaning Staff Note #3
Head to Room 107 to find it directly in front of you on a table.
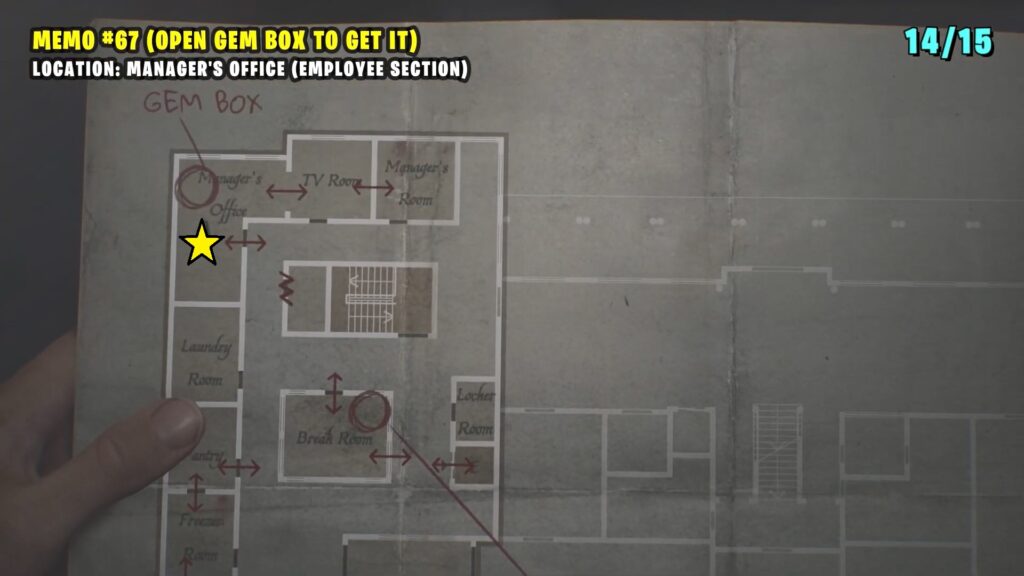
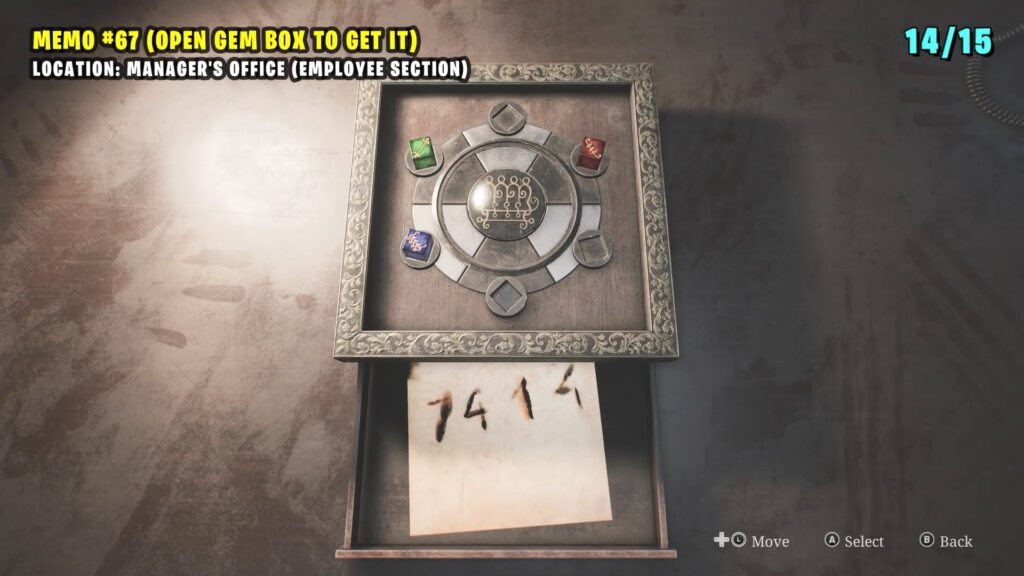
67) Memo: Keypad Numbers Memo
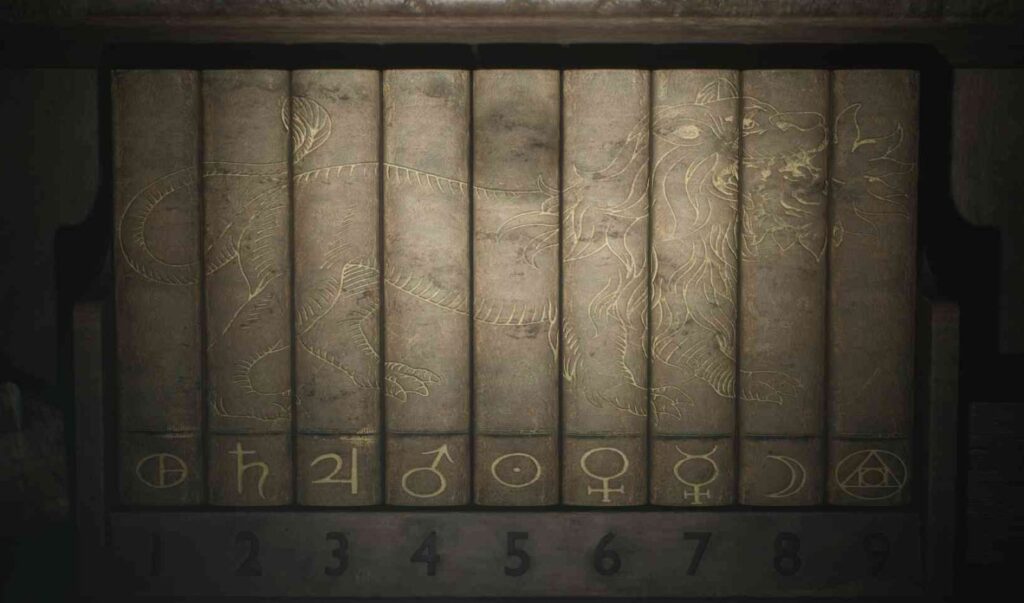
Solve gemstone puzzle in the Manager’s Office to get Memo #67: Keypad Numbers Memo
Lakeview Hotel (Otherworld) (1 Memo)
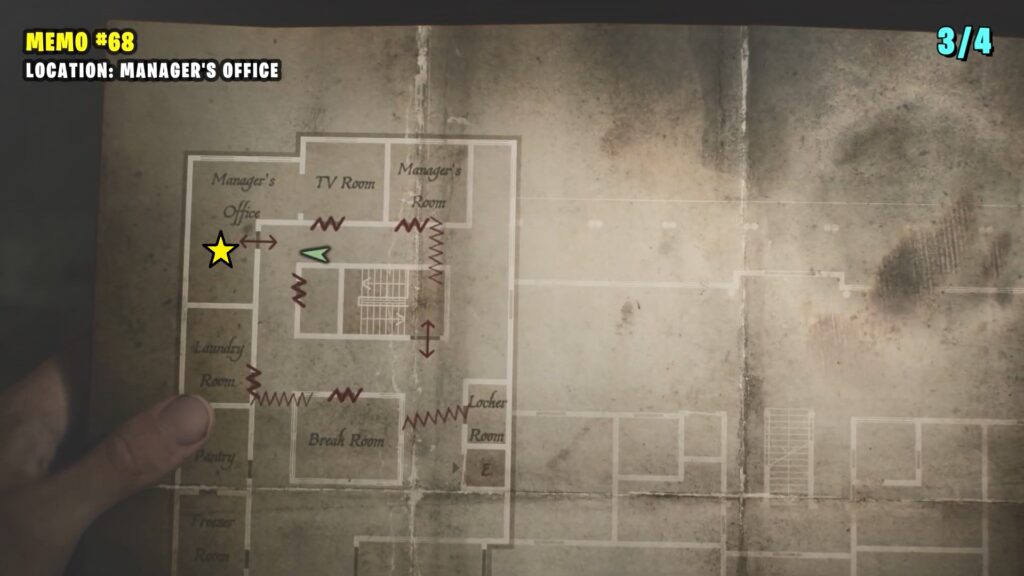
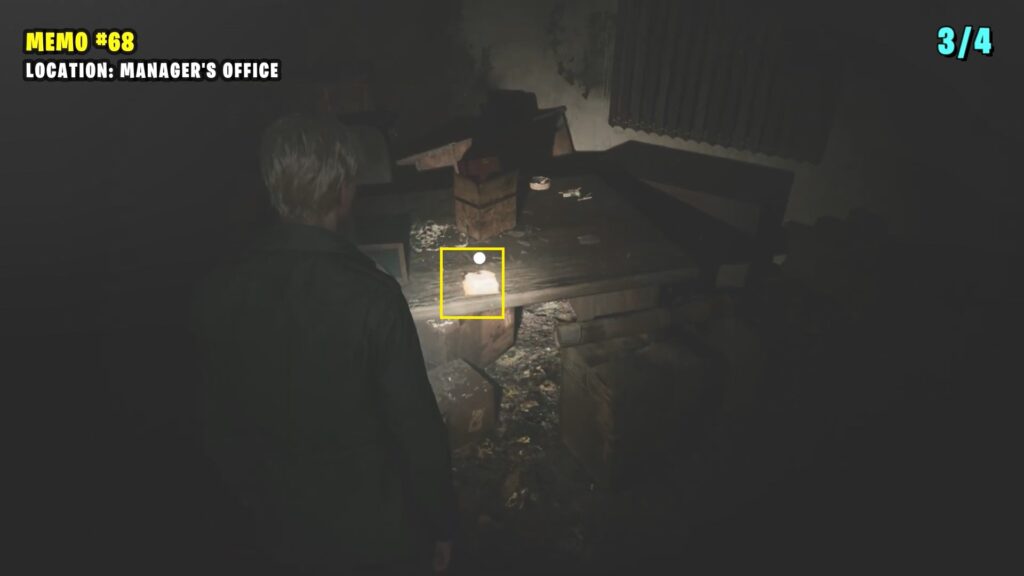
68) Memo: Burned Note
Pick up this item from the desk in the Manager’s Office located in the basement.
