This article will guide you through all the Dream Ticker puzzles in Honkai Star Rail 2.3
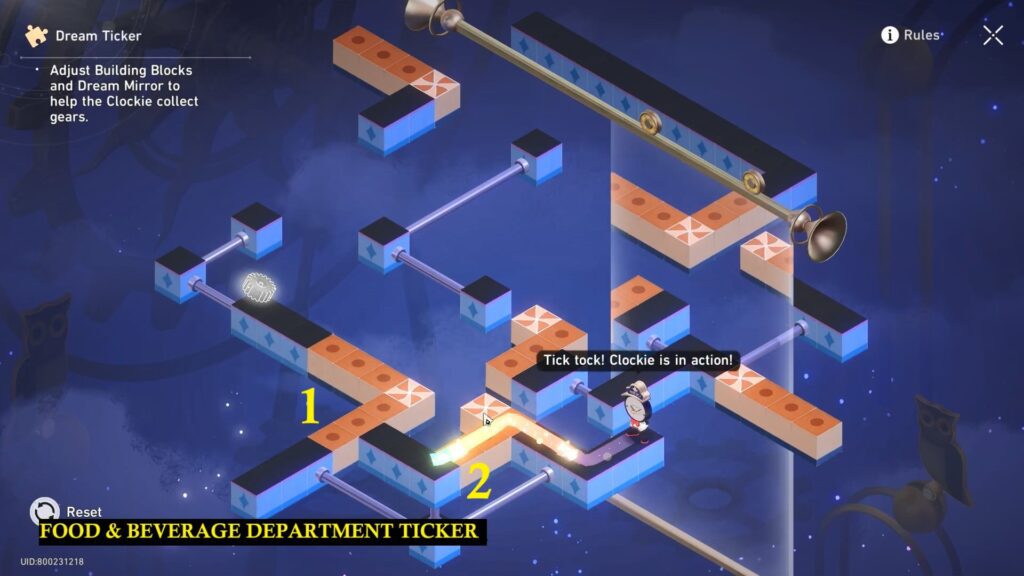
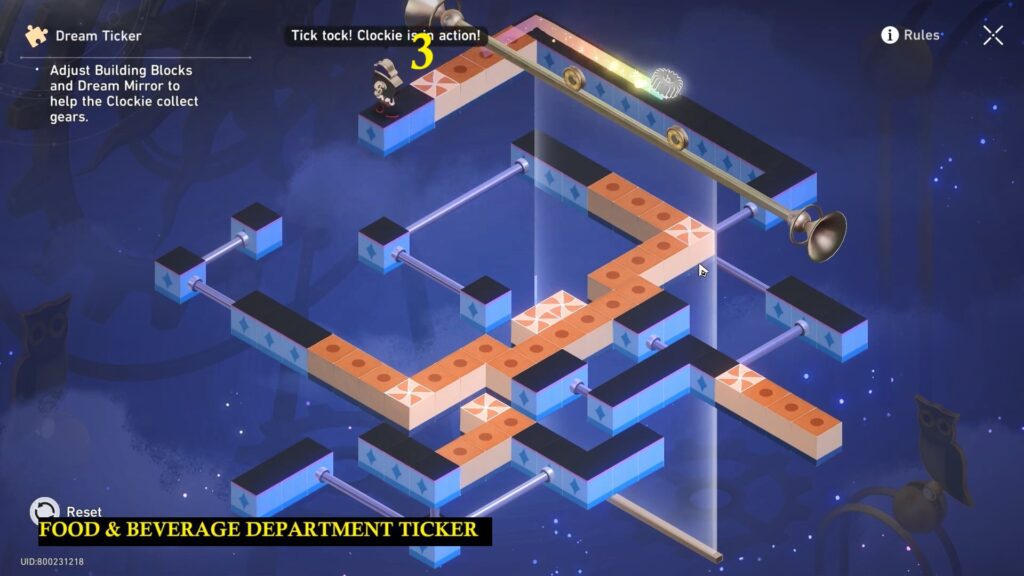
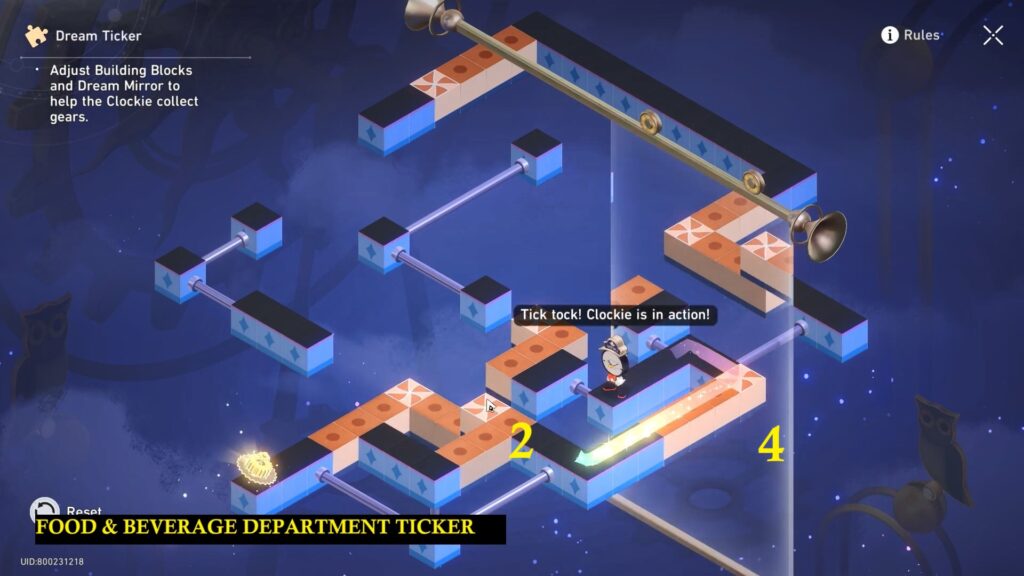
Food & Beverage Department Ticker Puzzle
Gear 1: Rotate the large orange block (1) and L-shaped block (2) on the lower right.
Gear 2:Rotate the large orange block (1) on the right side and block (3) on the top.
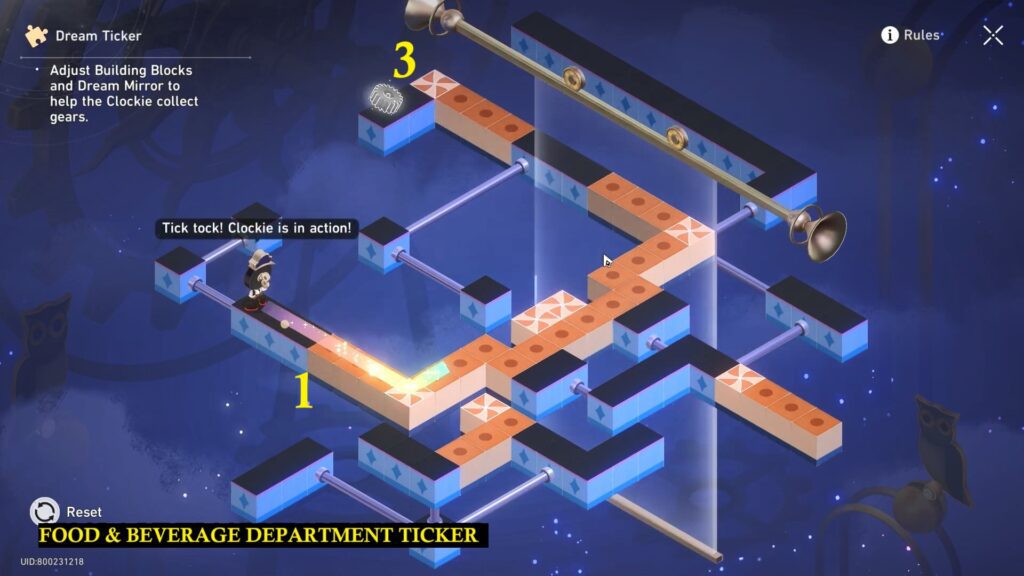
Gear 3: Rotate the orange block marked as 3, on top.
Gear 4: Rotate the orange block marked as 1,2,4,5
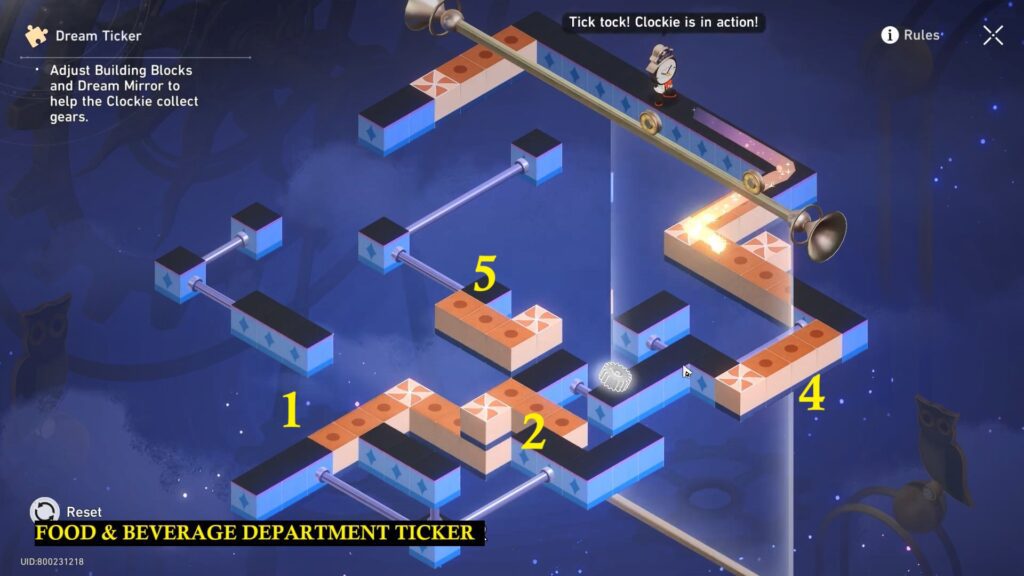
Gear 5: Rotate the orange block marked 2 and 4.
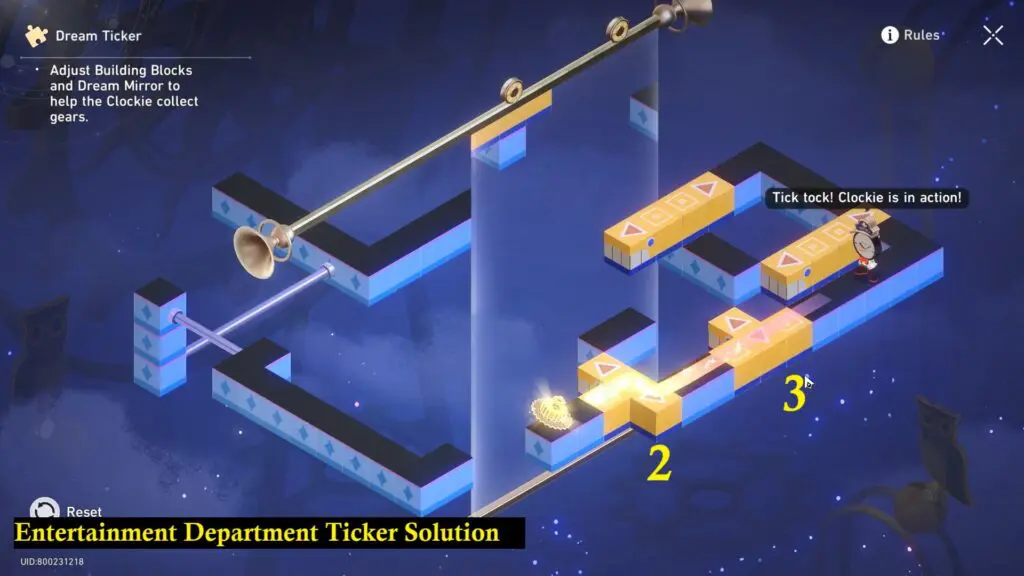
Entertainment Department Ticker Puzzle
Gear 1: Shift the vertical yellow block labeled as (1) to the bottom. Then, move the other two T-shaped blocks marked as (2) and (3) to the right.
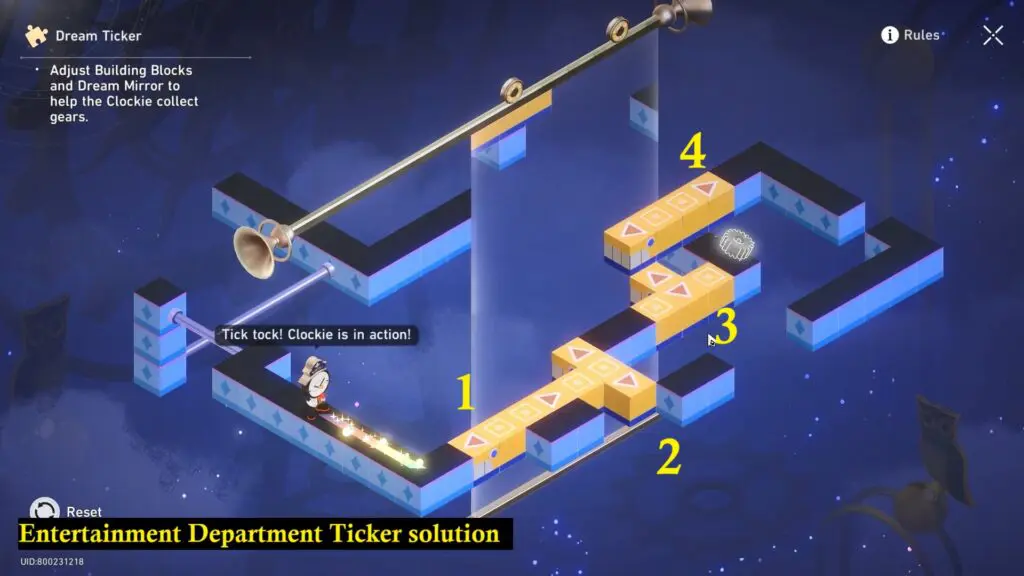
Gear 2: Shift T-shaped block (2) to the far left end, move another T-shaped block (3) one step to the left, and then shift the vertical block (4) to the left as well.
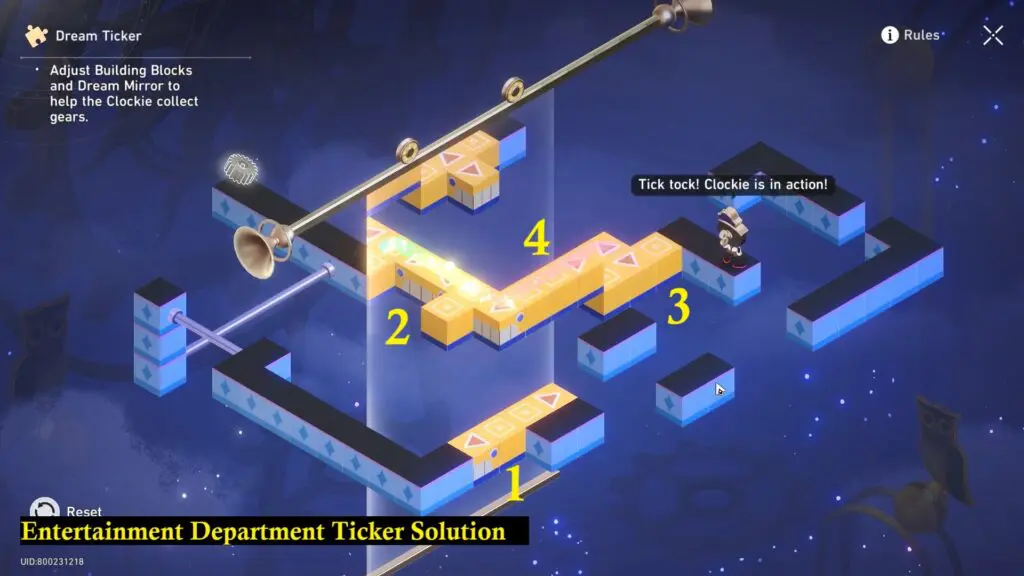
Gear 3: Shift the vertical yellow block labeled as (1 n 4) to the extreme right. Shift the T-shaped block (3) to the top.
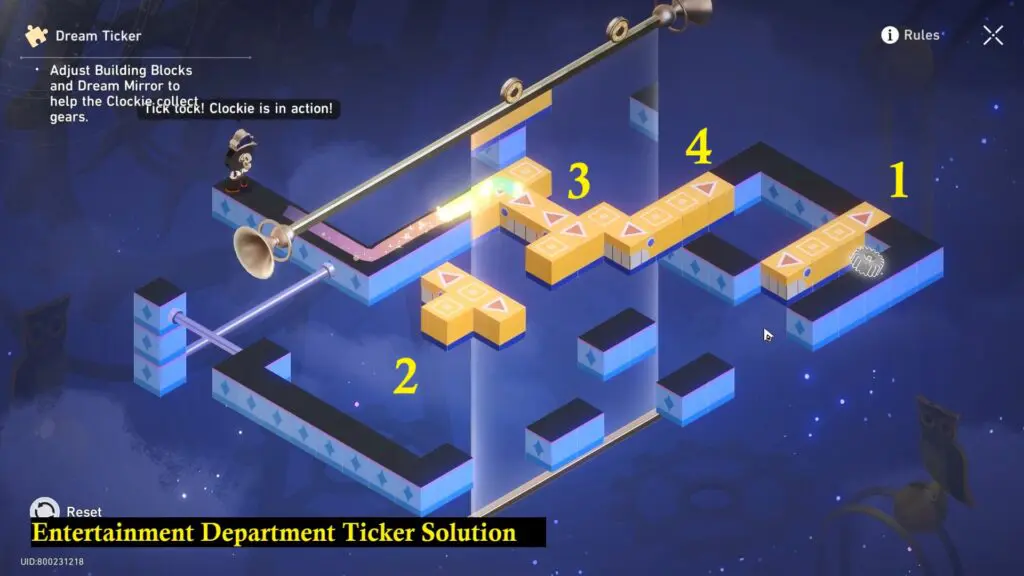
Gear 4: Move both T-shaped blocks to the bottom.
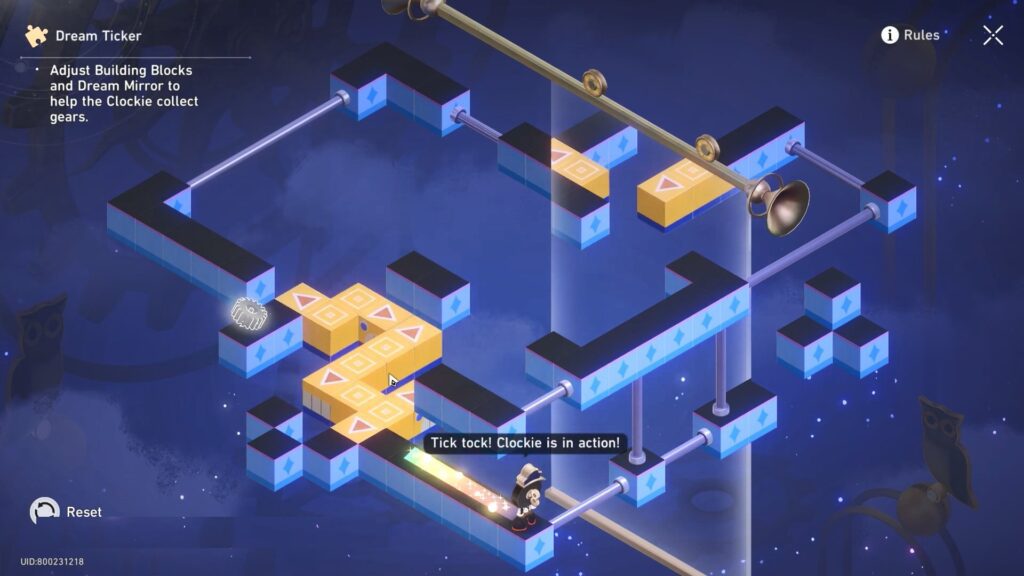
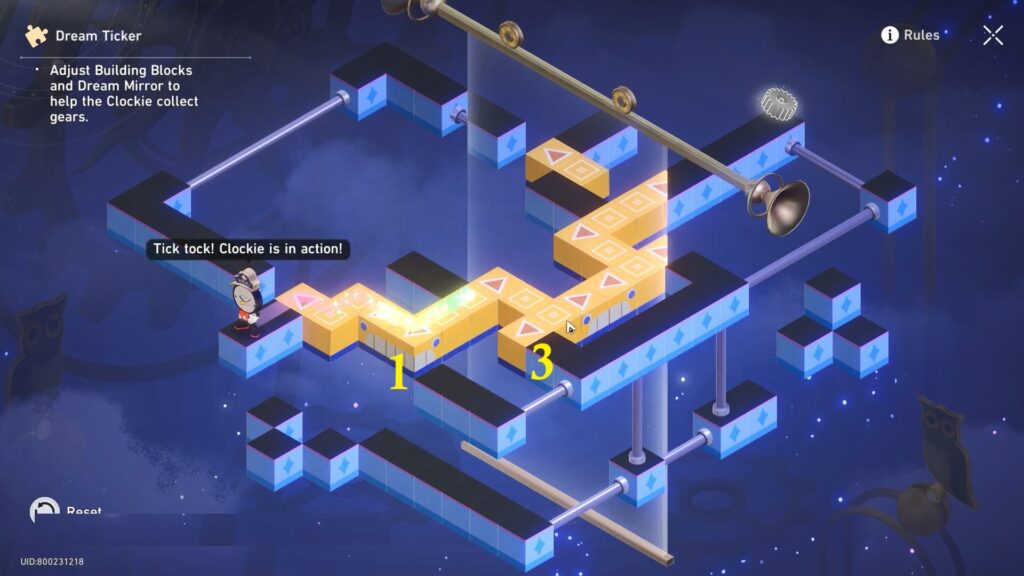
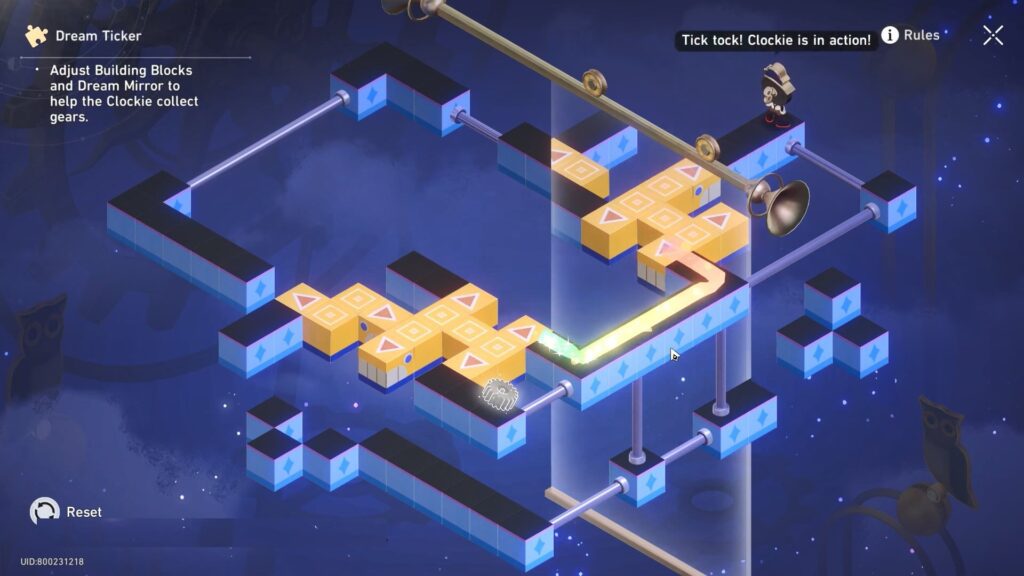
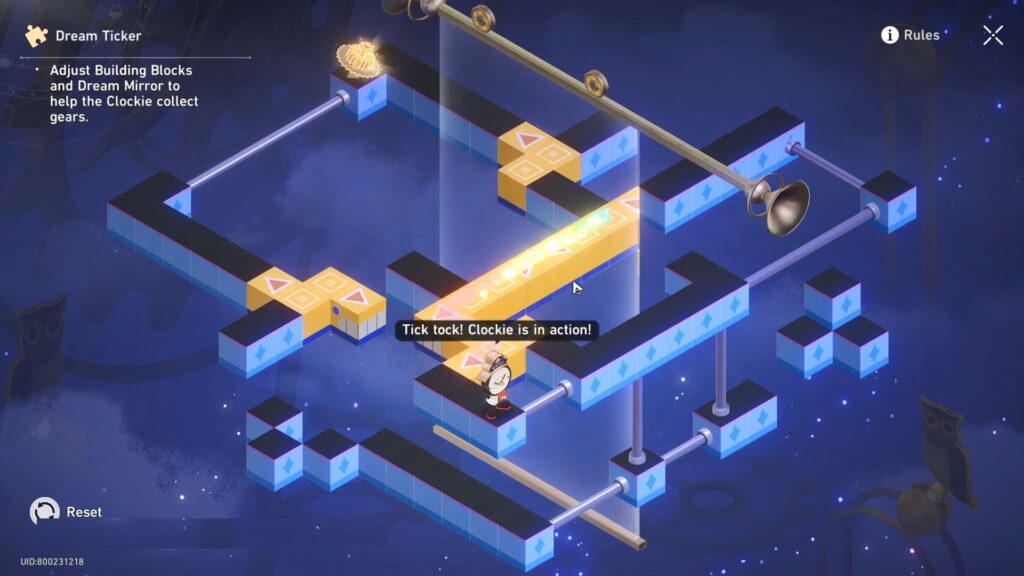
Housekeeping Department Ticker Puzzle
Rotate the block 1 and 2. Refer to the image below.
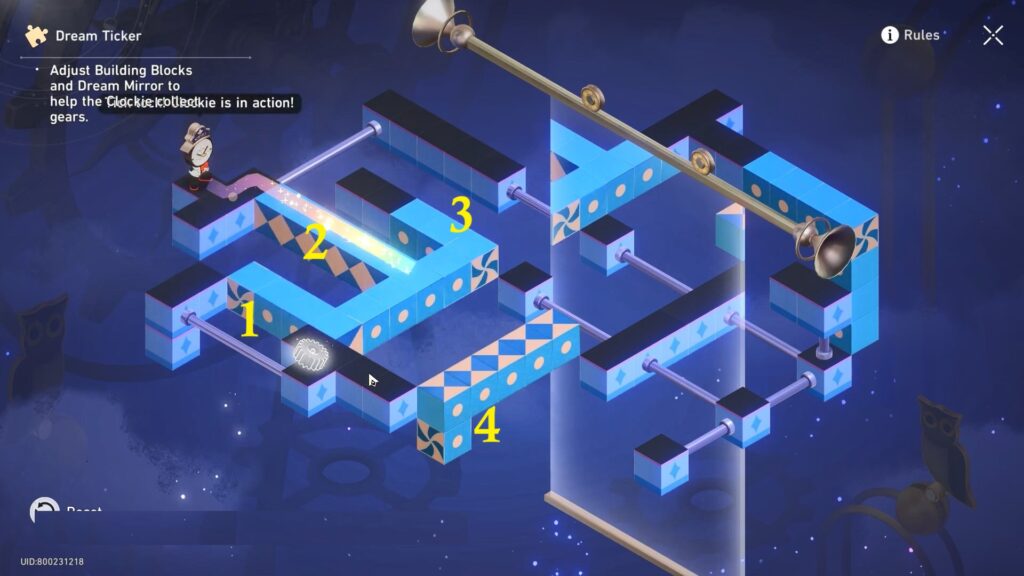
Rotate the block 2,4, and 5 to create the path as shown below image.
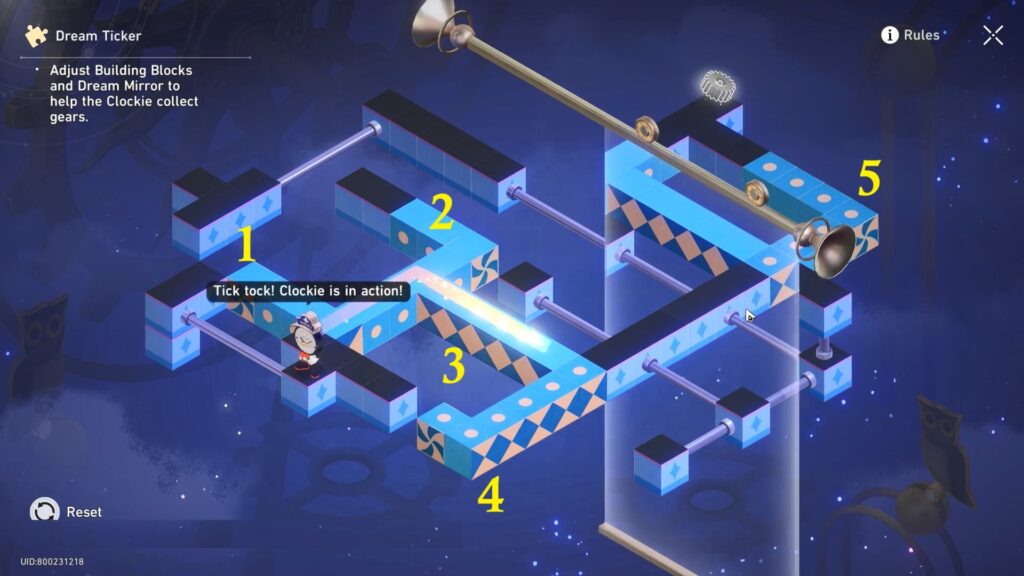
Move the mirror to the left.
Rotate the block (3)
Rotate the block 1,2,3 and shown in the image below to complete the puzzle.
Medical Department Ticker
Initial Position
Gear 1:
Move blocks 1 and 3 to the bottom and block 2 to the left.
Gear 2: Move blocks 1 and 3 to the right as shown in the figure and adjust the mirror.
Gear 3: Move blocks 1 and 3 to the left as shown in the figure and adjust the mirror.
Gear 4: Move block 2 to the left and move block 1 to the right.
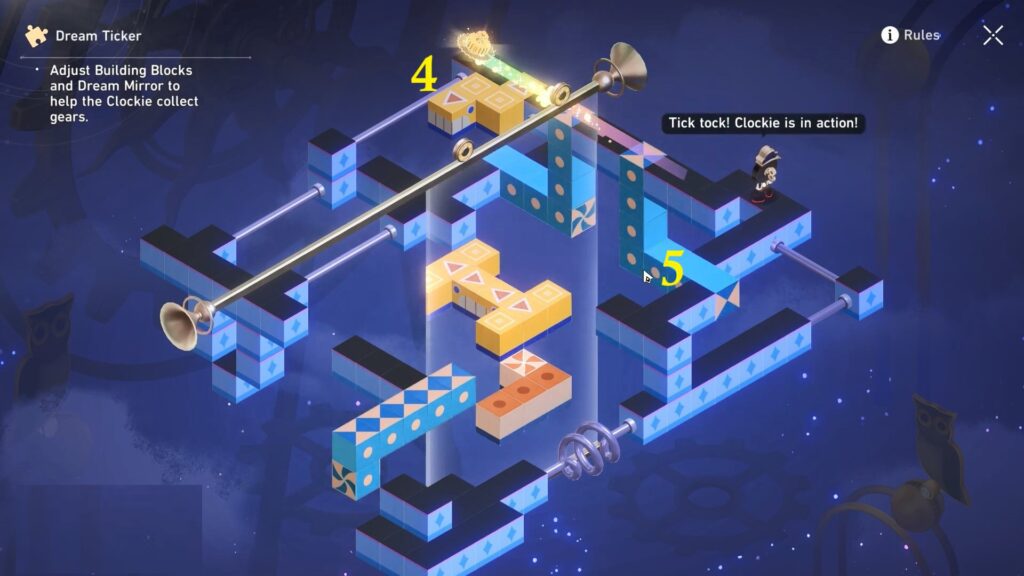
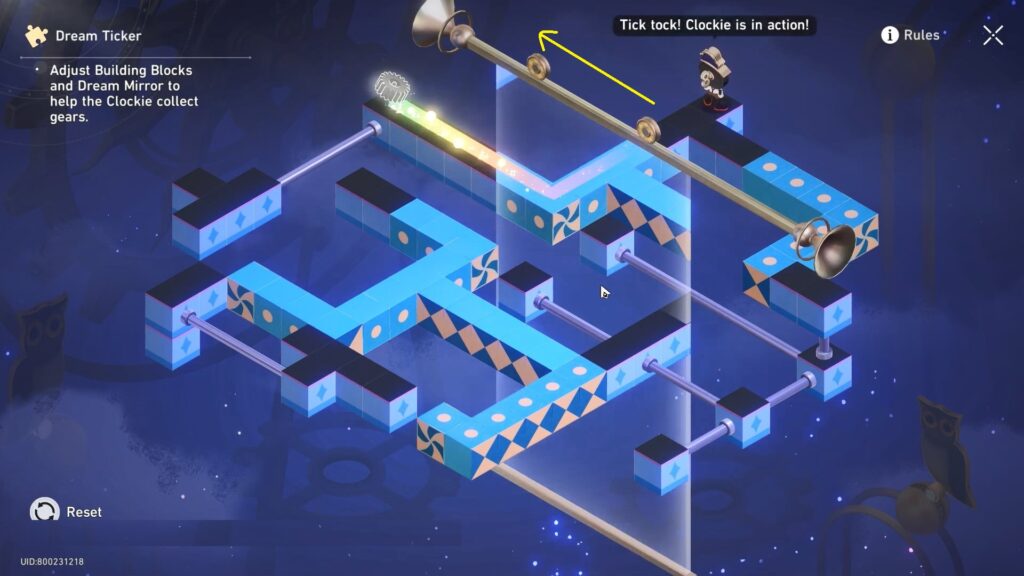
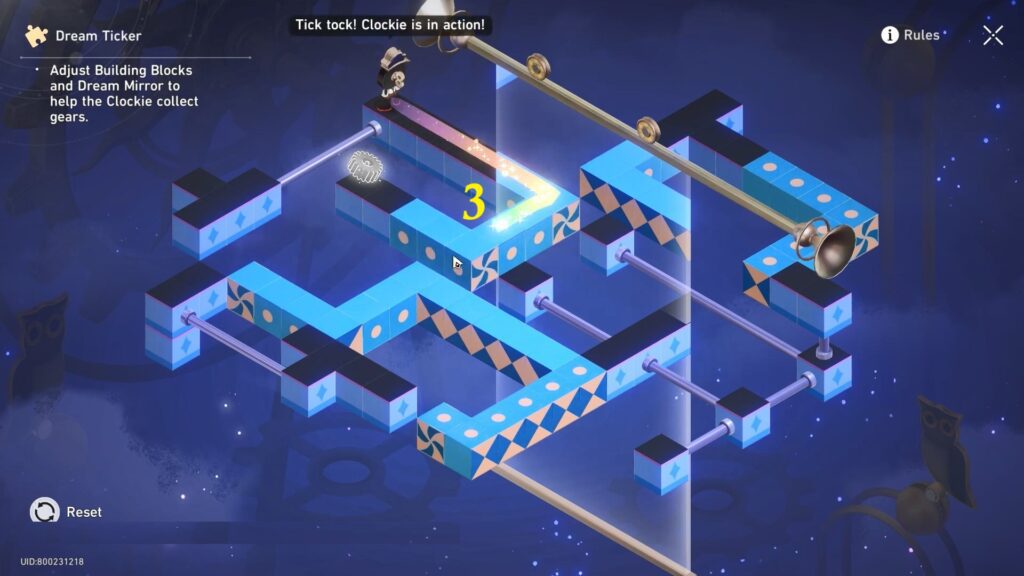
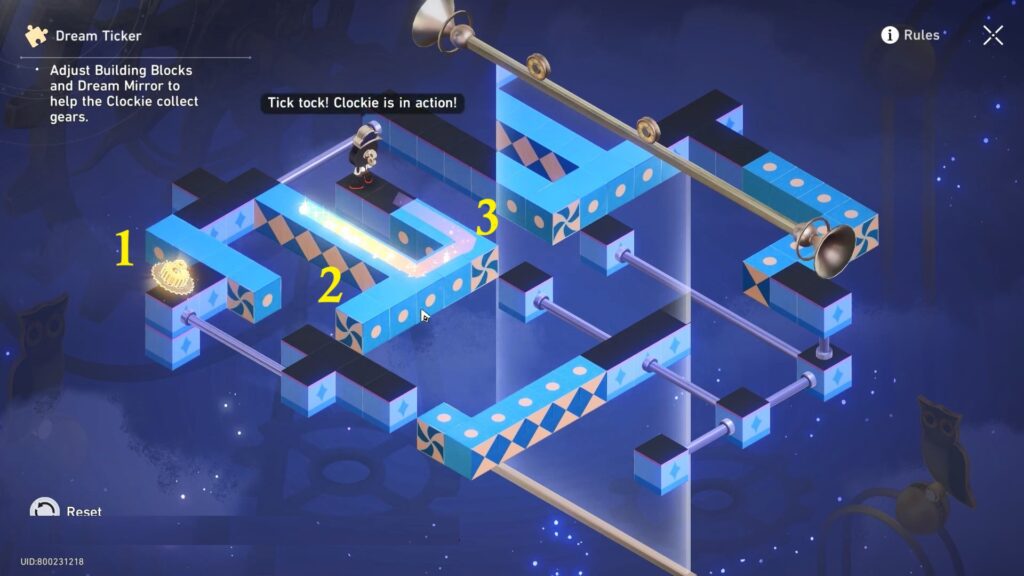
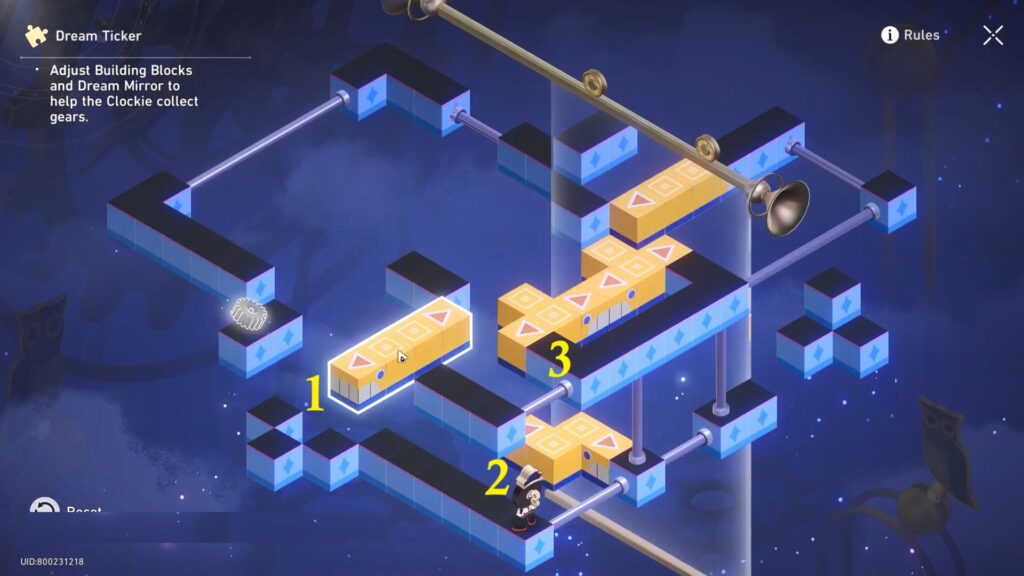
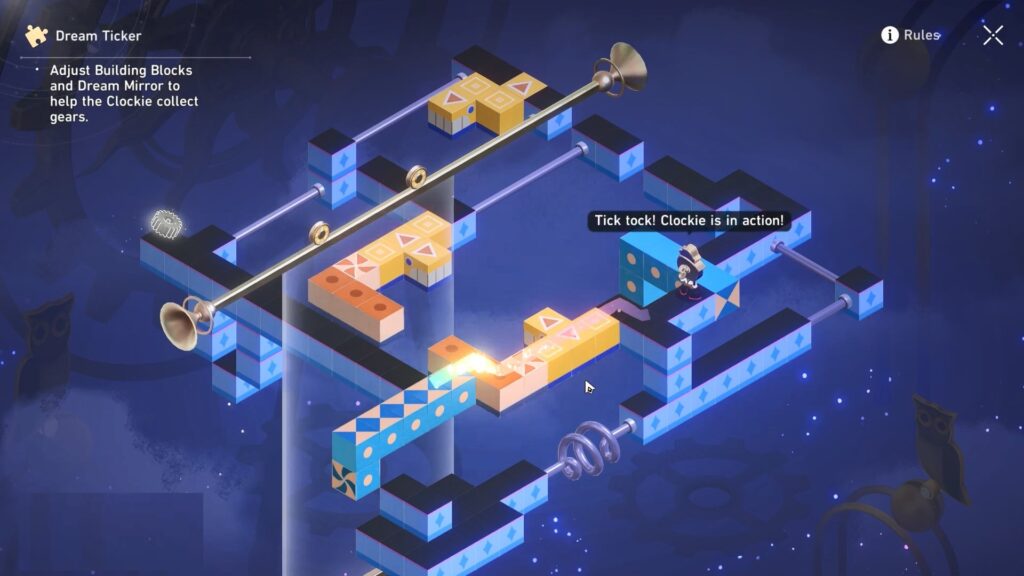
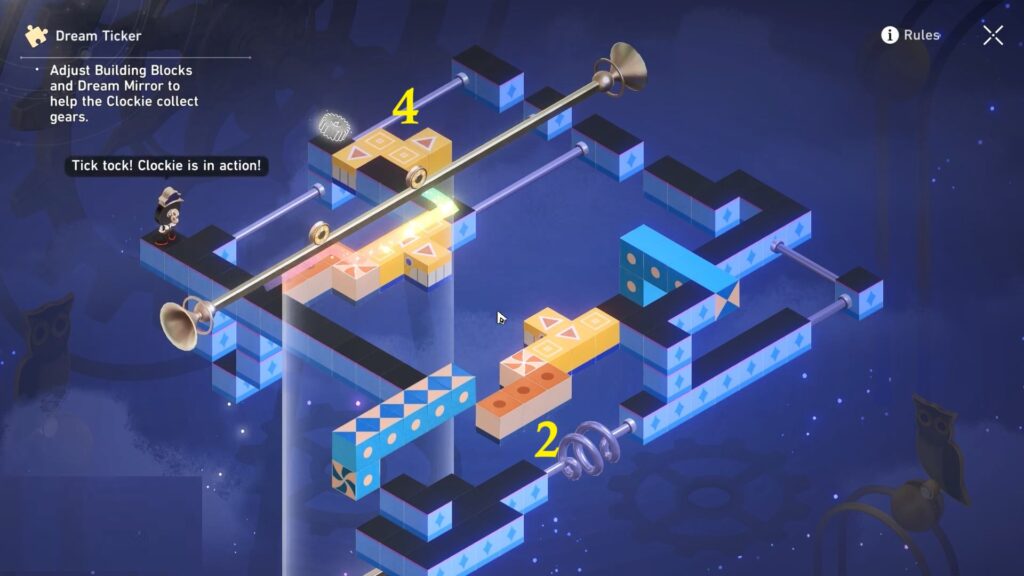
Boss Ticker
Turn the blue L-shaped building block in front of Clockie two times. Rotate the orange L-shaped building block twice. Move the yellow building block from the right to the left. Refer to the below image.

Turn the orange L-shaped building block once. Rotate the blue L-shaped building block below Clockie two times. Shift the yellow block slightly to the left. Refer to the below image.
Move the mirror downward. Move the Block 4 to the left and rotate block 2.
Move the yellow block (3) back and rotate the blue block.
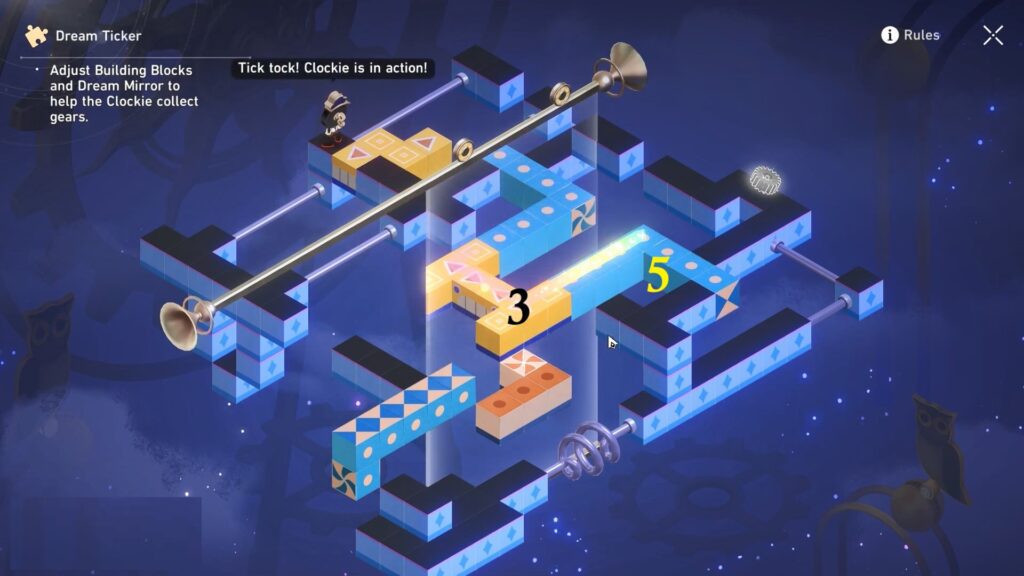
Move the Block 4 to the right and rotate the block 5