This step-by-step collectibles guide will show you the locations of all Lorestangir in Senua’s Saga Hellblade II (2024) to collect Glimpses of the Gods Achievement.
Also Read: Senua’s Saga Hellblade 2: All Chapter and Collectables Guide
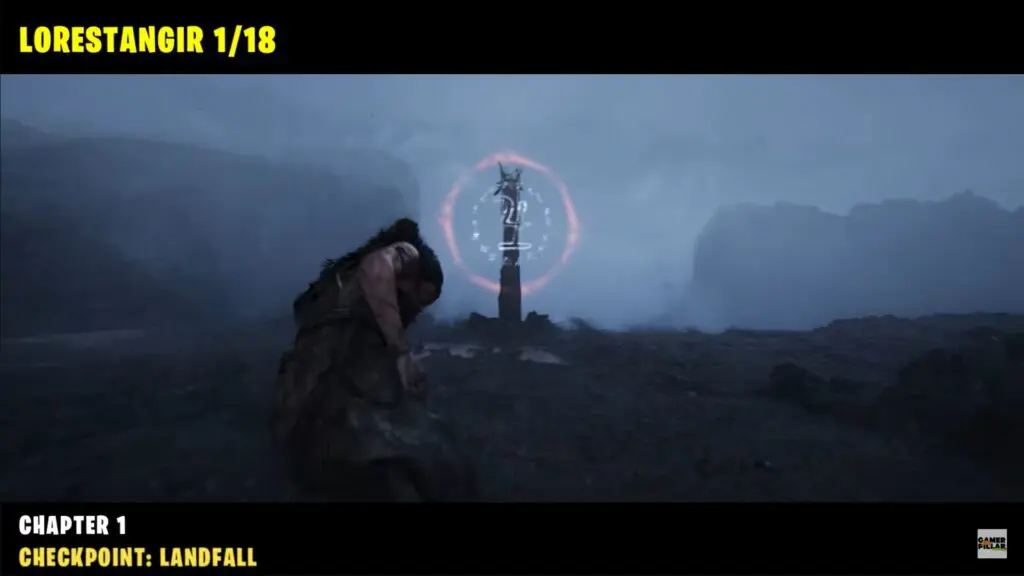
Chapter 1
1) Lorestangir
This is available along the main path in plain sight During the Prologue.
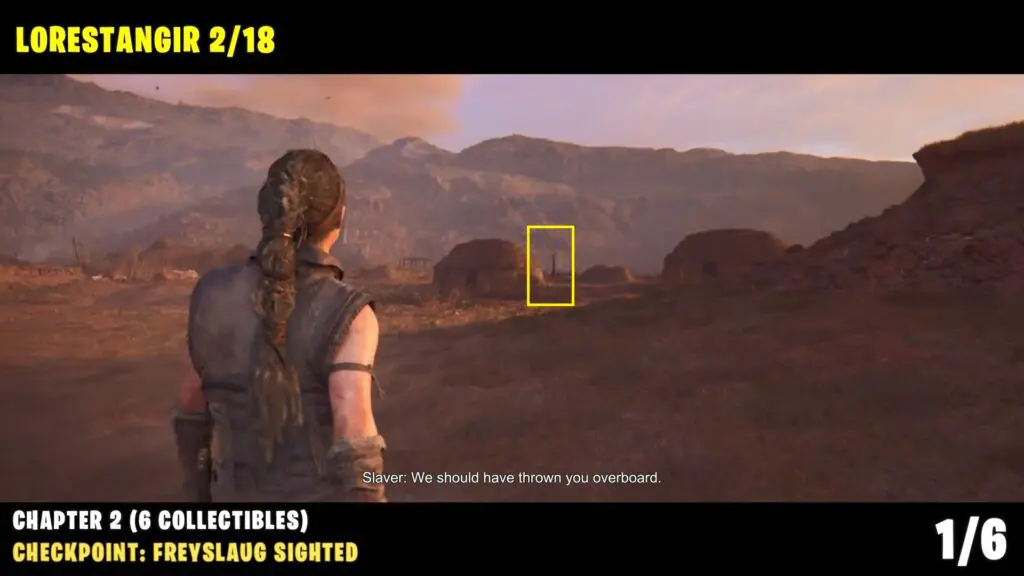
Chapter 2
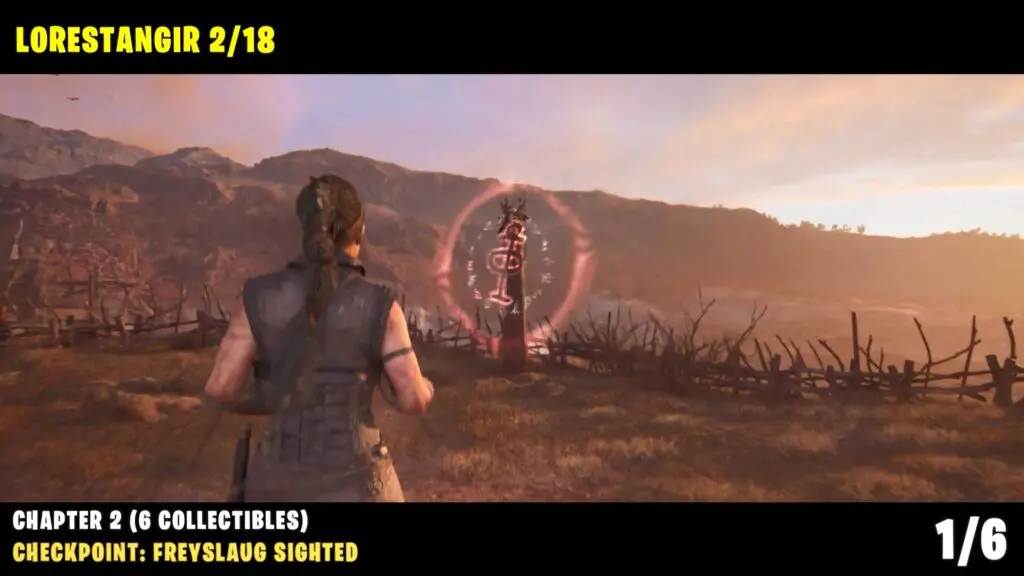
2) Lorestangir
Checkpoint: Freyslaug Sighted
This Lorestangir is available at the start of chapter 2. Lorestangir totem is located behind two straw huts as shown below image.
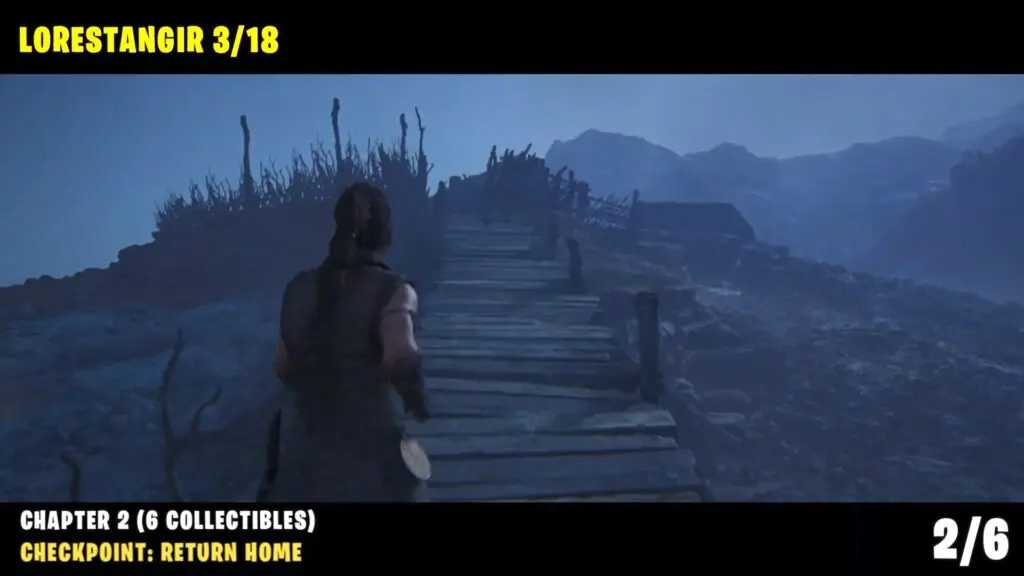
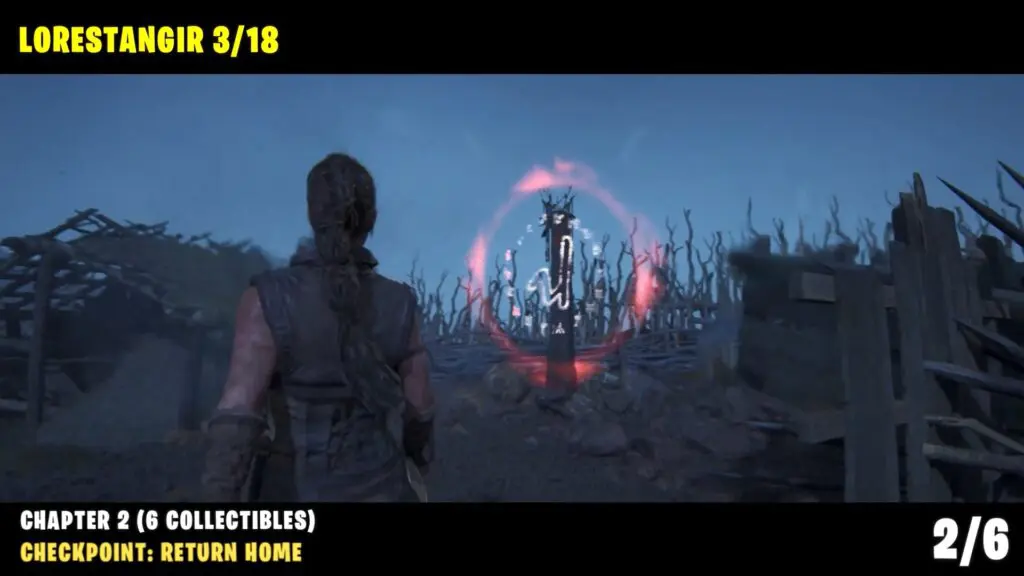
3) Lorestangir
Checkpoint: Return Home
Continue to follow the path after obtaining the mirror weapon until it is nighttime. After crossing the hanging wooden bridge, enter the barn on your right.
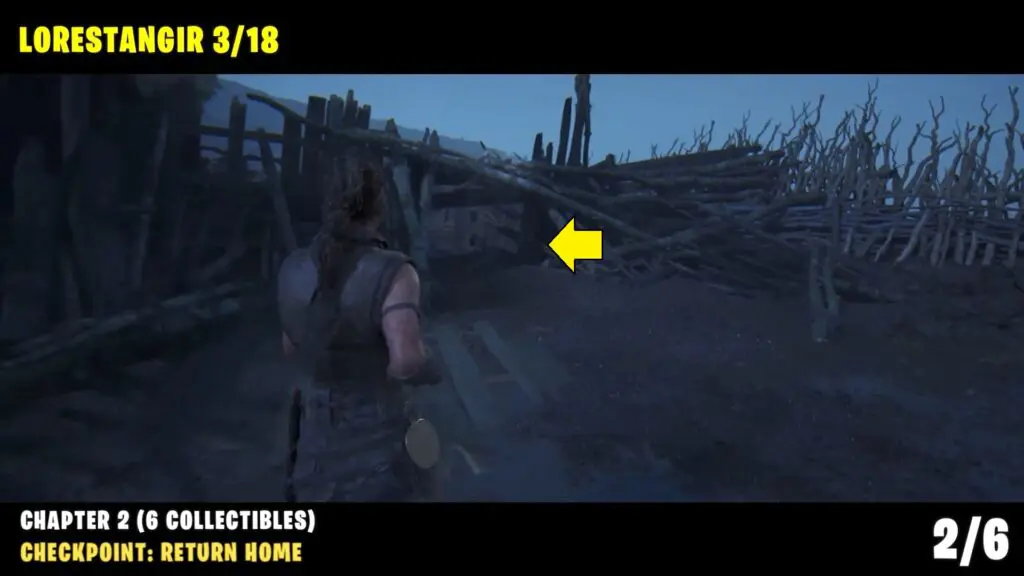
Exit the barn from the other end and take the first left turn to reach a round area.
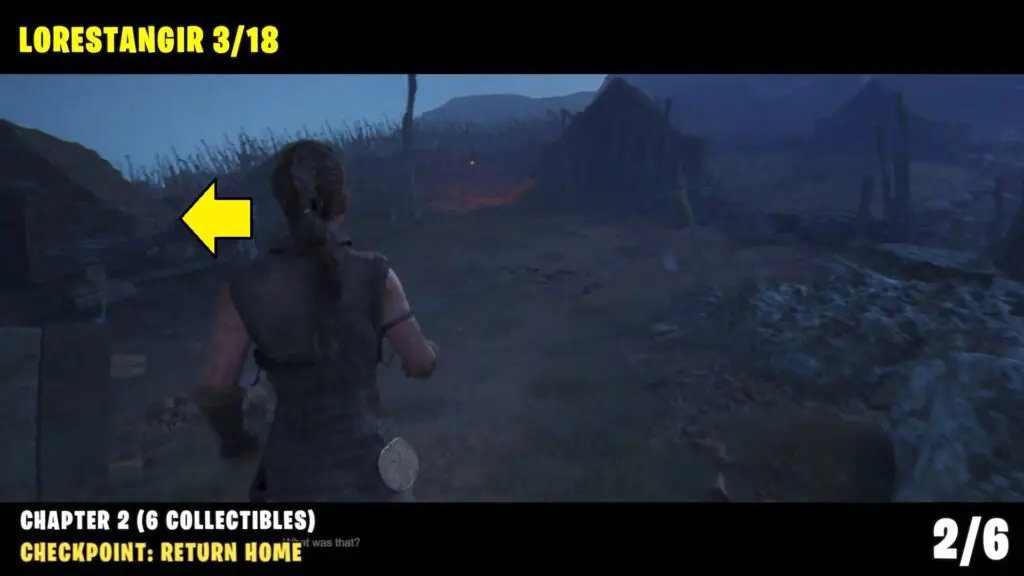
Crawl through the hole under the wooden rubble. In the next area, you will find a Lorestangir totem.
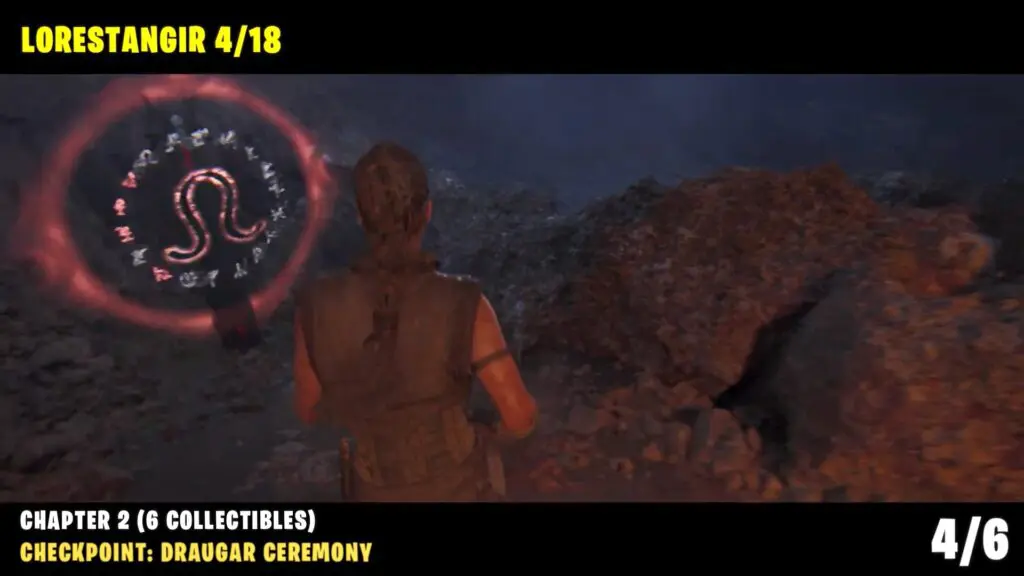
4) Lorestangir
Checkpoint: Draugar Ceremony
As the chapter progresses, you will reach a mountain area where the player needs to cross a narrow ledge while the monsters attack the villagers below.
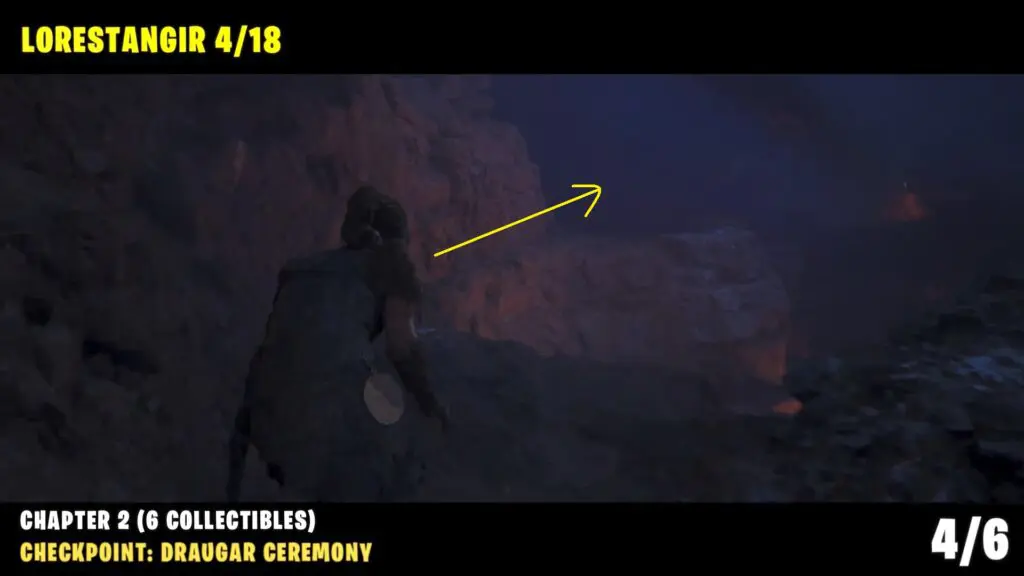
Drop down the ledge and follow the path, turn left, and climb up the ladder.
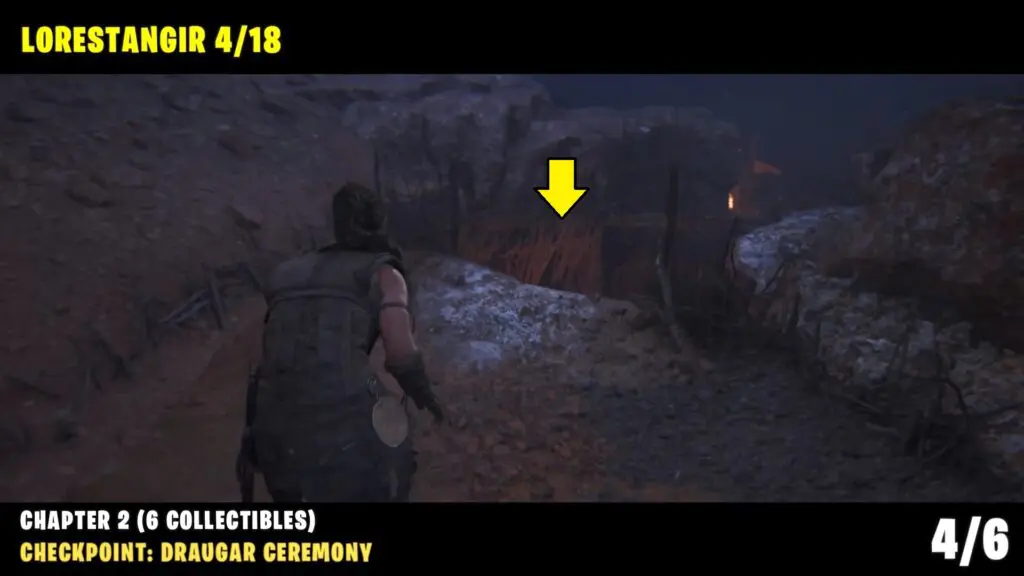
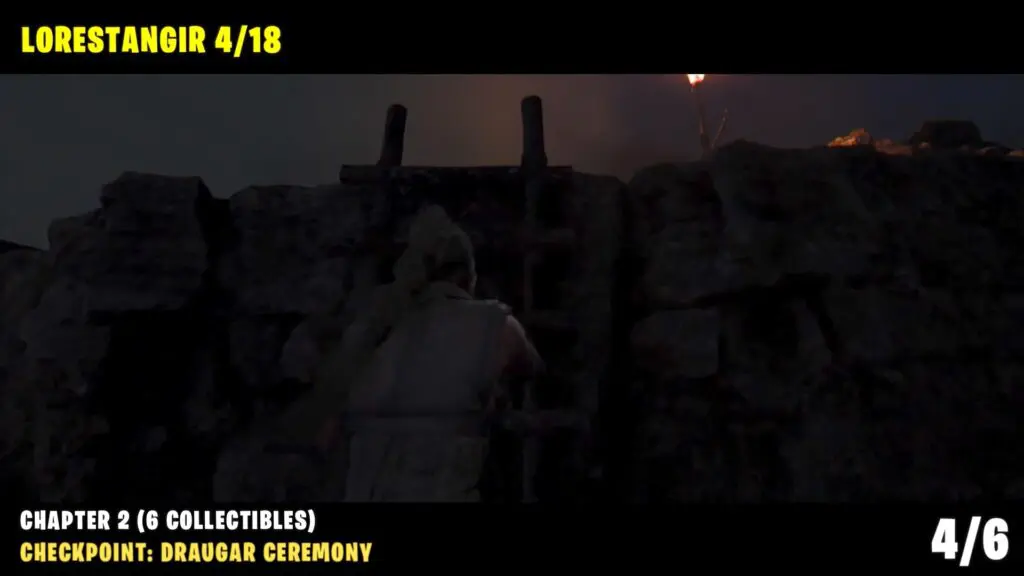
Follow the path and hop over the little wall to find a Lorestangir totem.
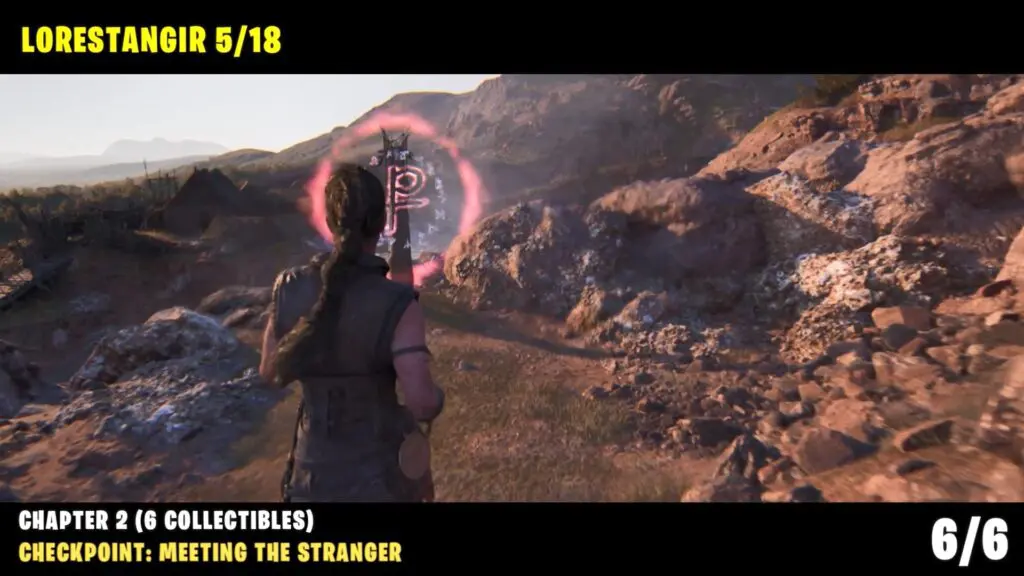
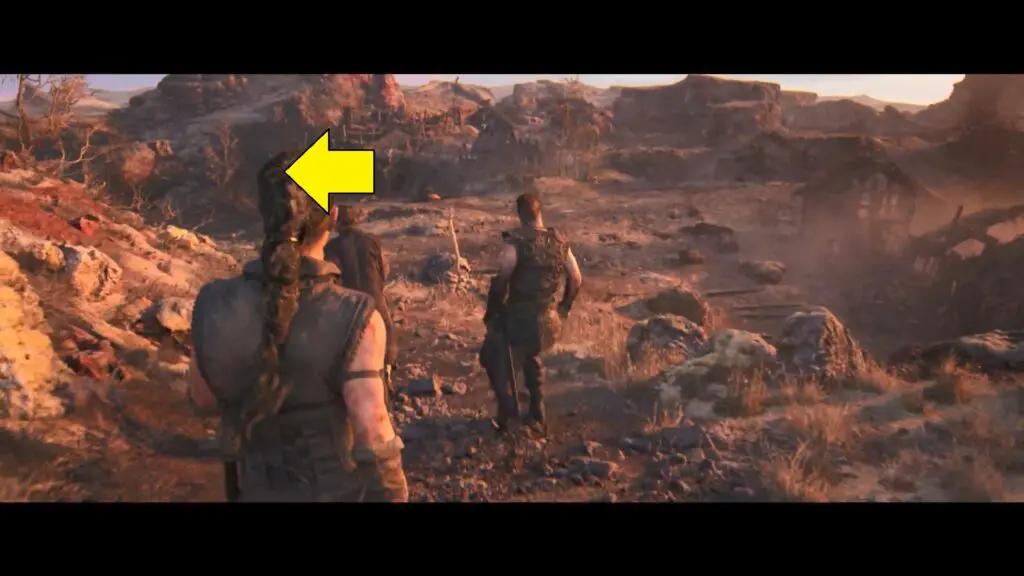
5) Lorestangir
Checkpoint: Meeting the Stranger
After you’ve rescued the man, walk with him during the day until you reach a destroyed bridge. Continue to follow him downhill.
Turn left at the fork instead of following the Fargrimr.
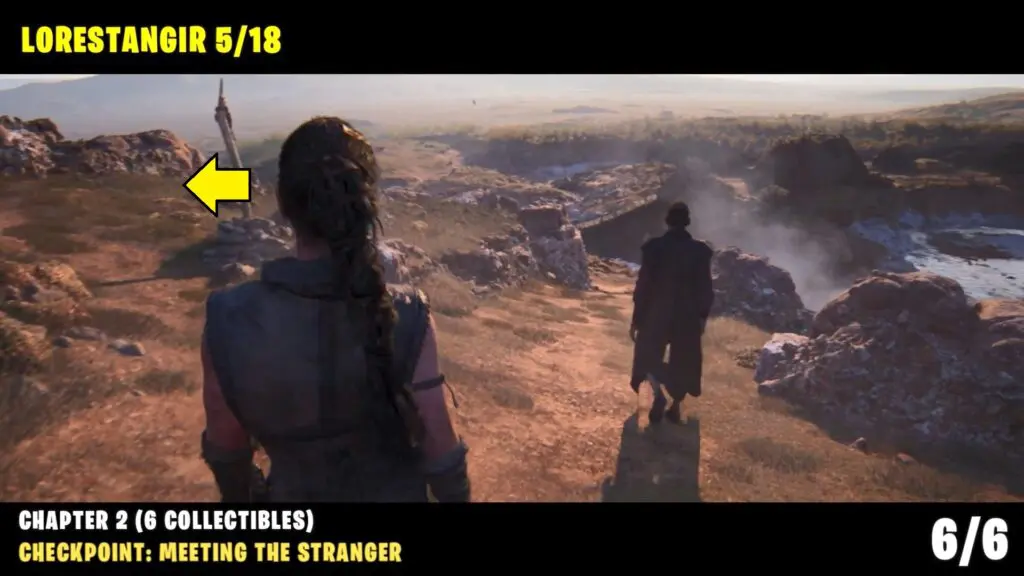
Follow the dirt path to the end to find the Lorestang totem.
Chapter 3
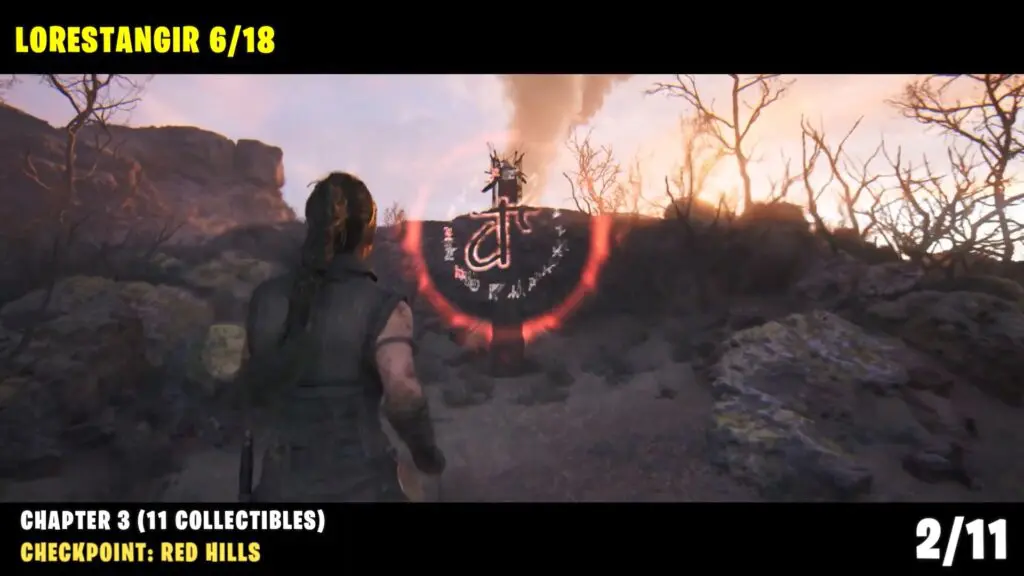
6) Lorestangir
Checkpoint: Red Hills
At the very start of chapter 3, the player will reach a destroyed village. After going down the hill, go in the left direction and then go behind the broken house
Lorestangir Totem is behind the broken house.
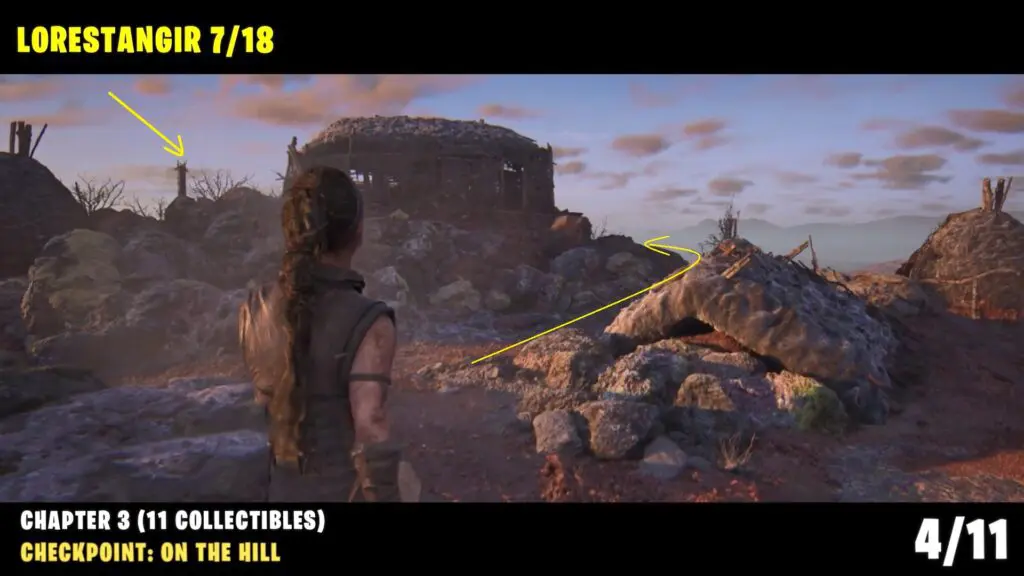
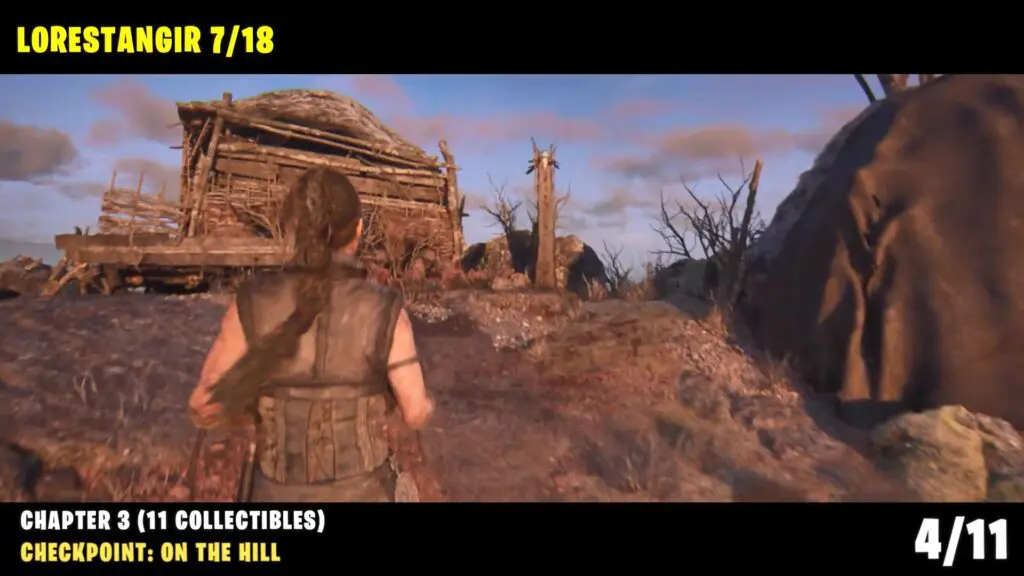
7) Lorestangir
Checkpoint: On the Hill
As the chapter progresses, players should reach a hill during the day. Circle around the hilltop and climb to the highest point to find the Lorestangir totem near some huts.
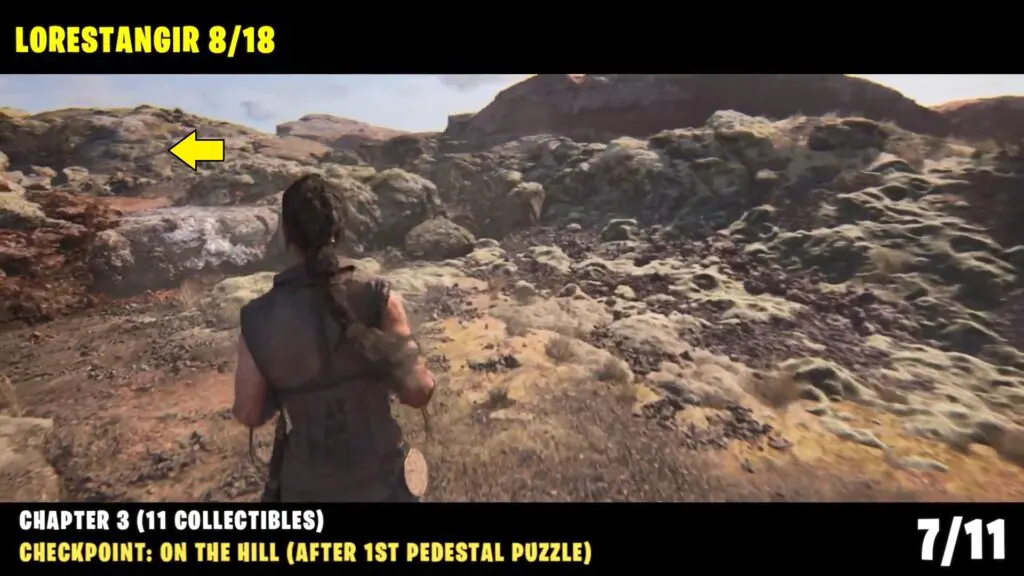
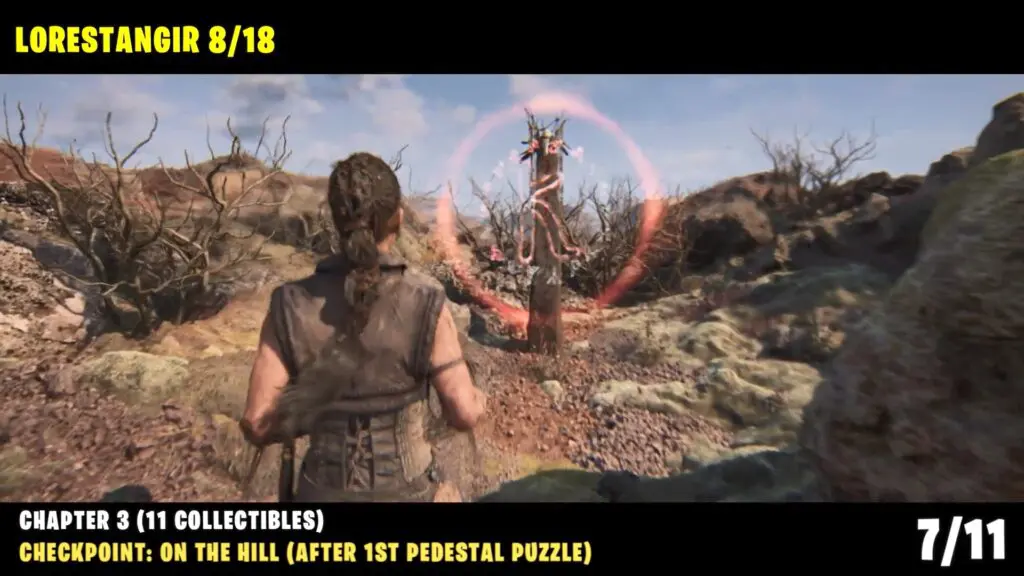
8) Lorestangir
Checkpoint: On the Hill
After solving the first pedestal puzzle, follow the newly unblocked path and look to your left to see the Lorestang totem on a hill in the distance.
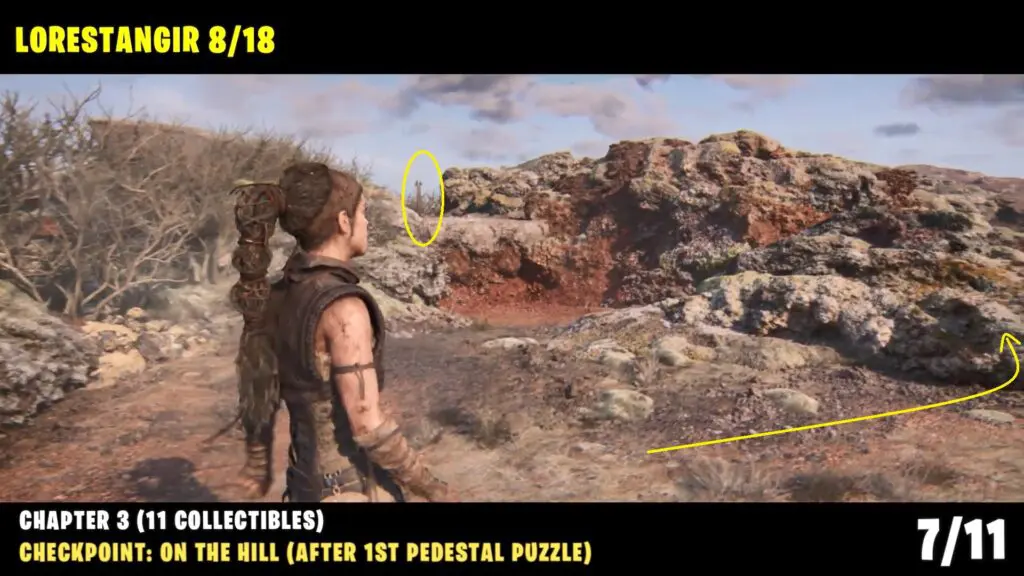
Continue along the main path, then climb up the ledge on the left.
Squeeze between the rocks to reach the Lorestang totem.
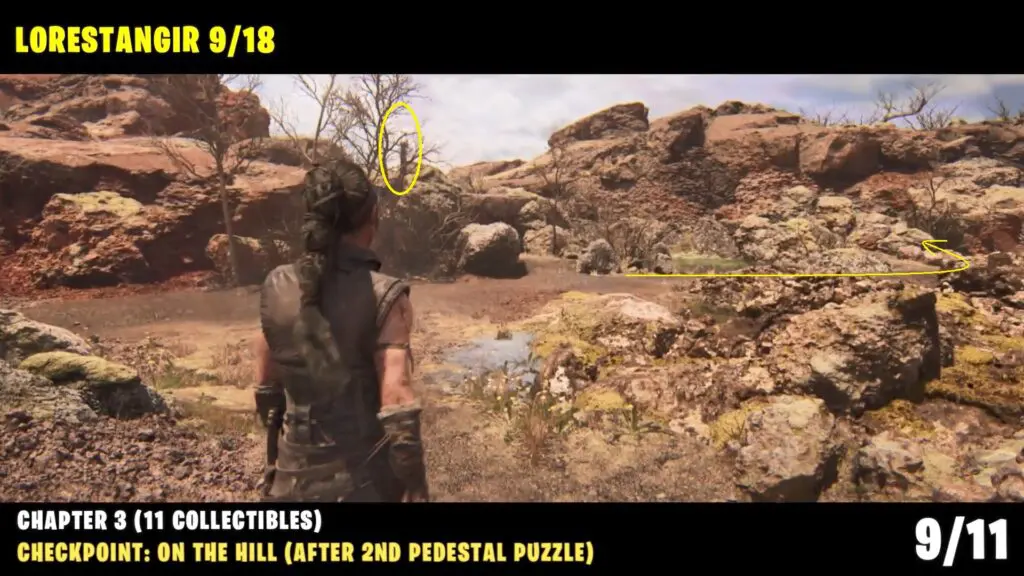
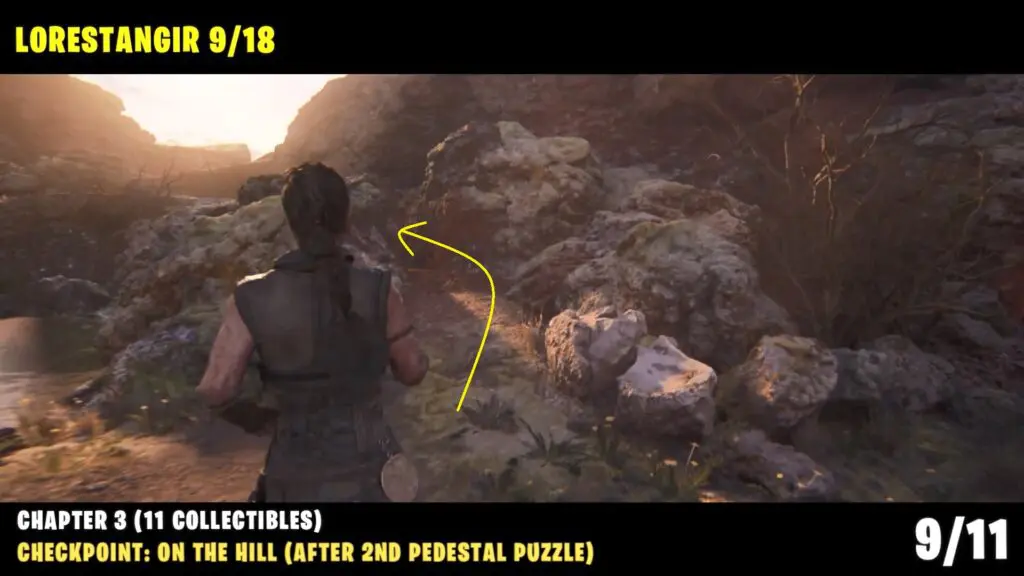
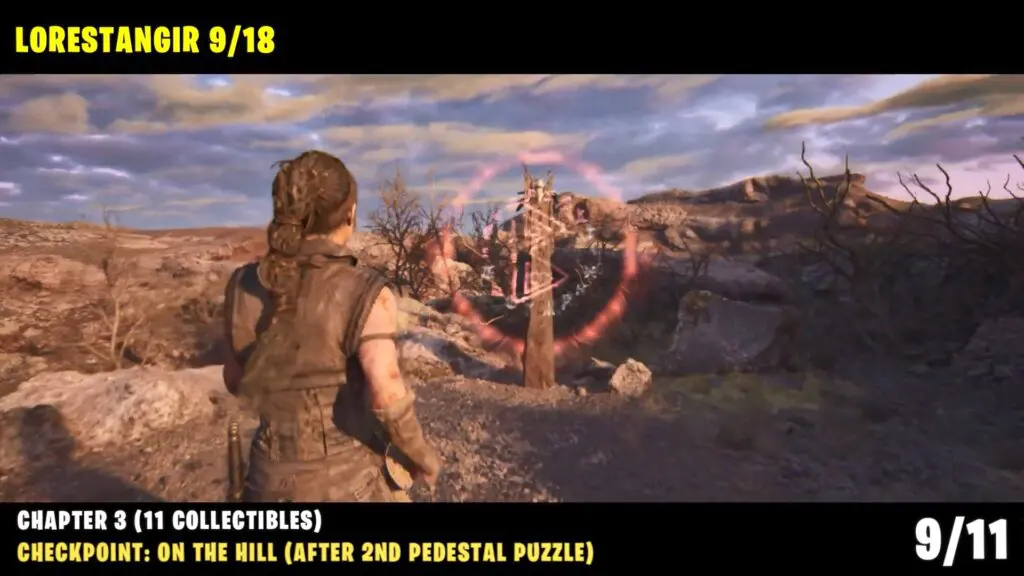
9) Lorestangir
Checkpoint: On the Hill
After solving the second pedestal puzzle, follow the main and go down the hill.Go past two puddles of water, then turn left and squeeze through a gap. You’ll find the Lorestangir totem at the end of the path.
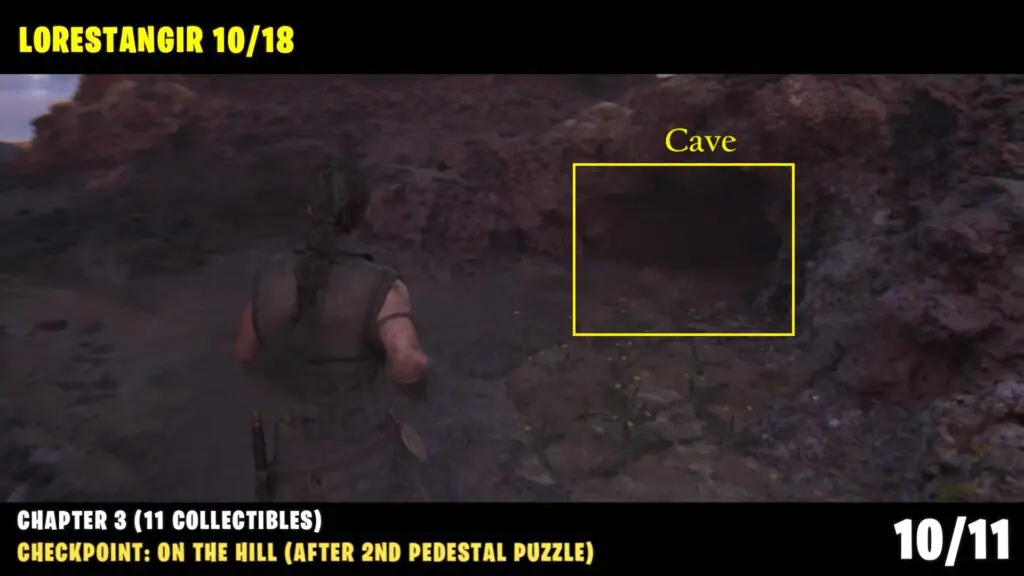
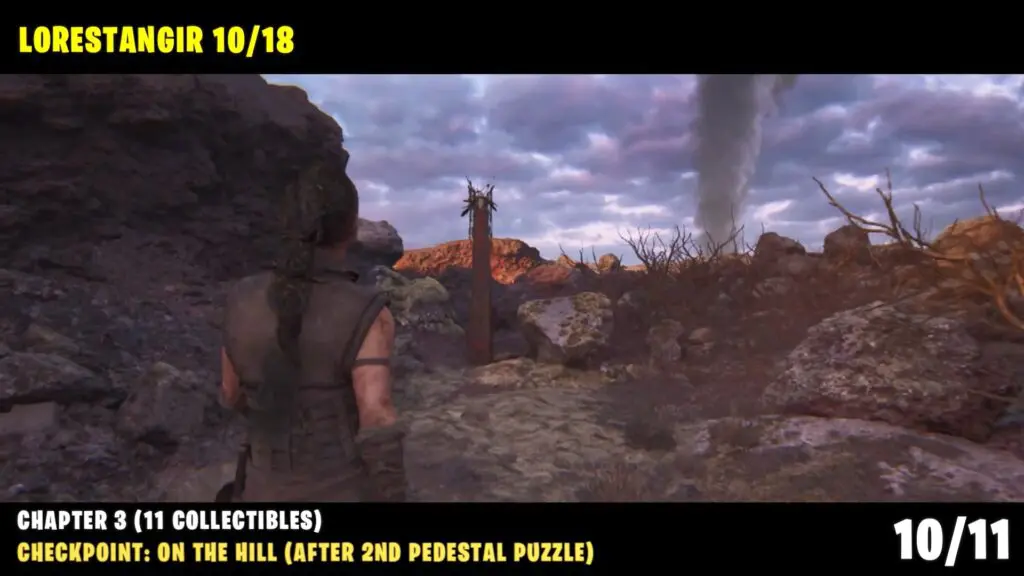
10) Lorestangir
Checkpoint: On the Hill
From the previous location, drop down the ledge on the left and return to the main path.
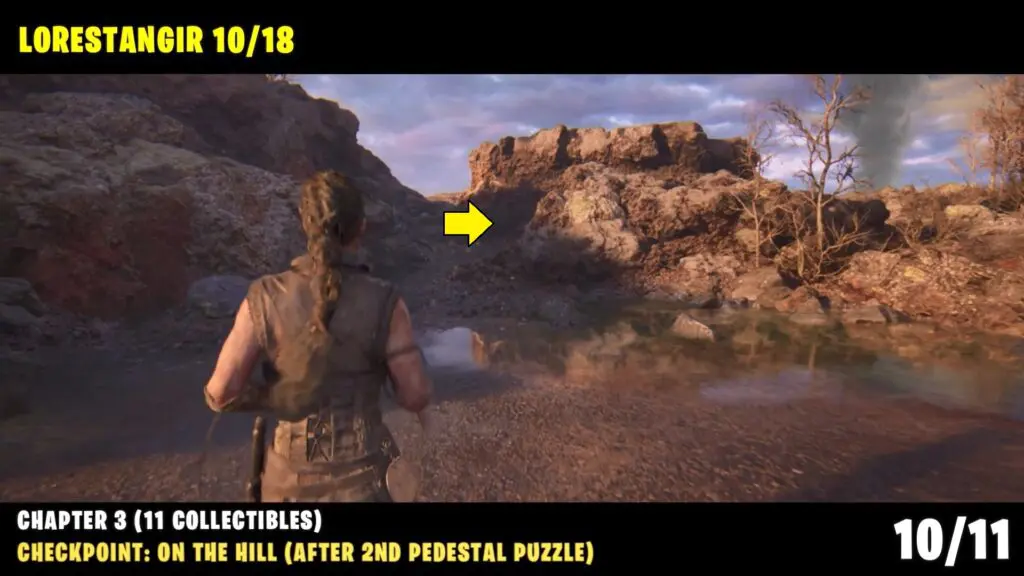
Look for a small cave on the right side. Enter the cave and follow the path to the end to find the Lorestangir totem.
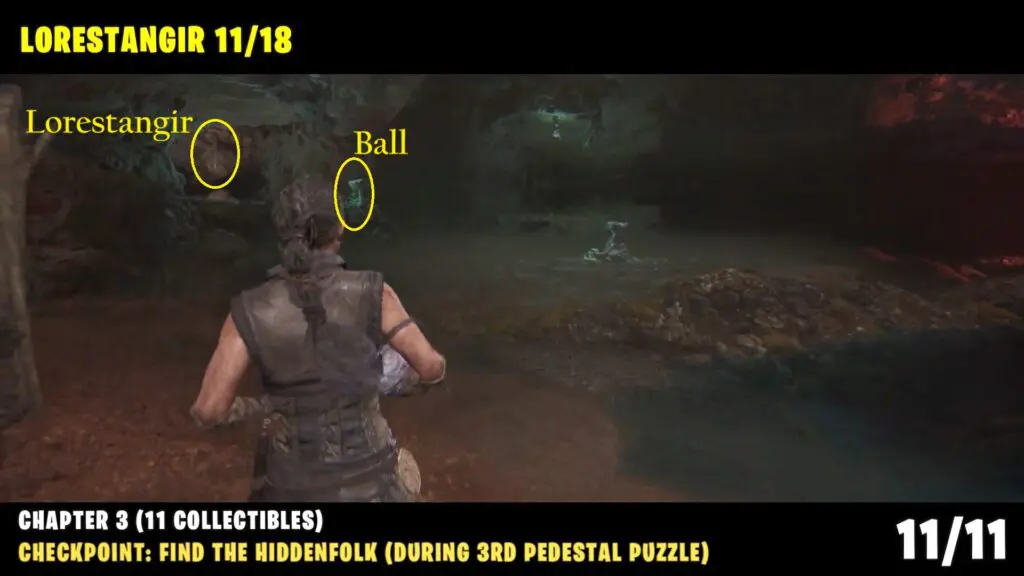
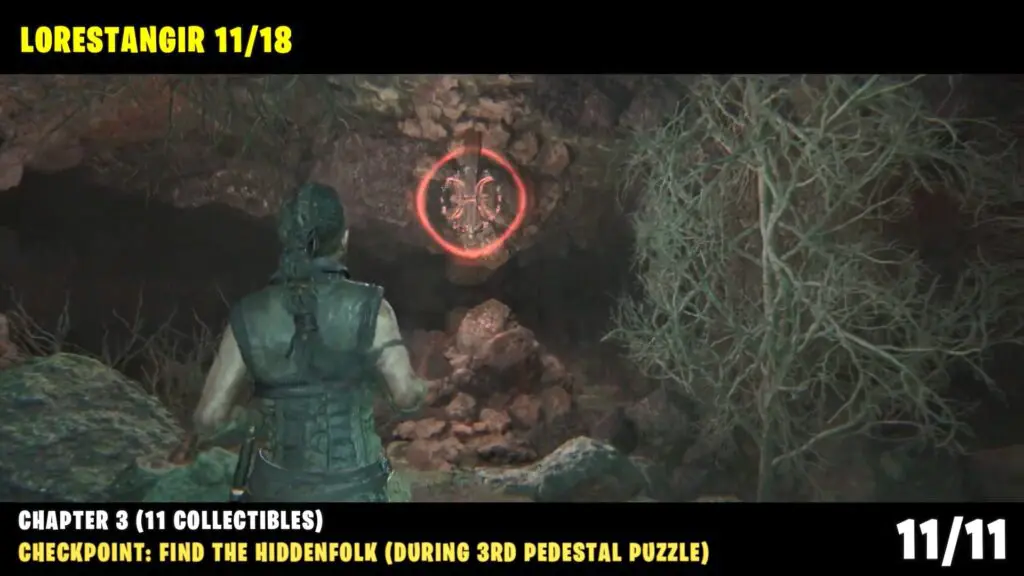
11) Lorestangir
Checkpoint: Find the Hiddenfolk
Available during the third pedestal puzzle, the Lorestangir totem is located opposite the third ball. Turn around to find it hanging from the ceiling.
Chapter 4
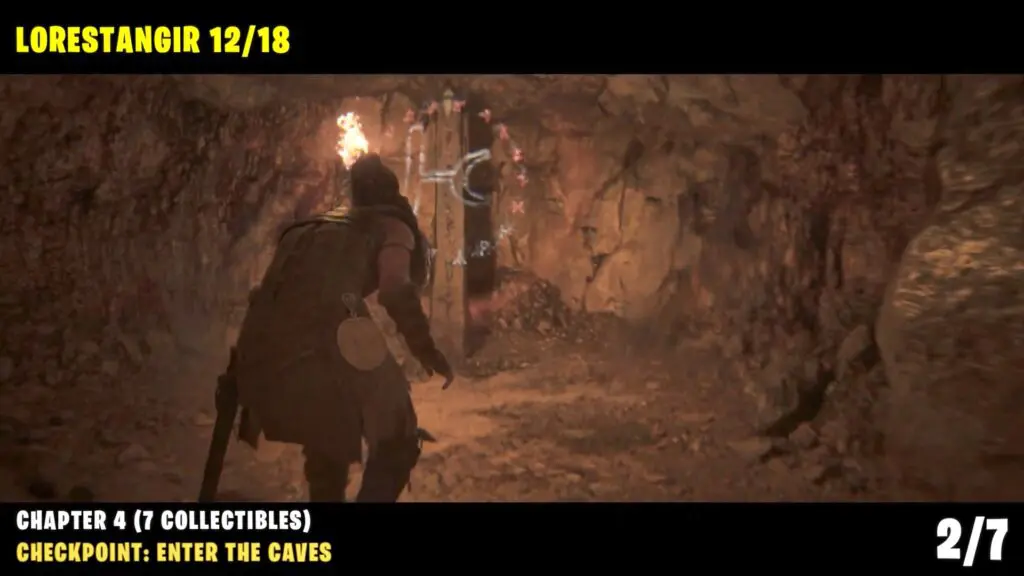
12) Lorestangir
Continue to follow the main path until you drop down into a larger area with a small puddle of water.
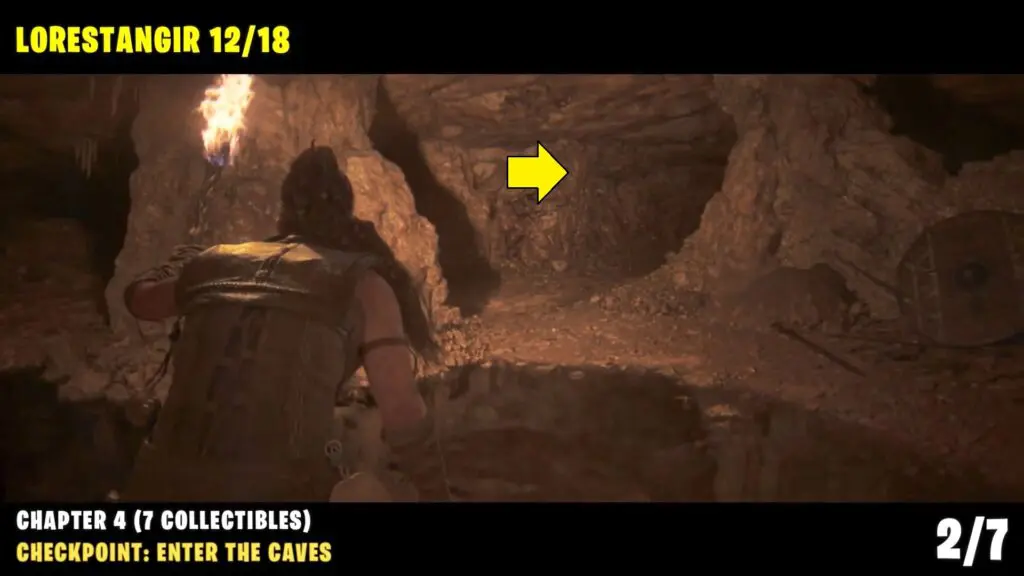
Head to the right side and climb up another ledge to reach the Lorestangir totem.
13) Lorestangir
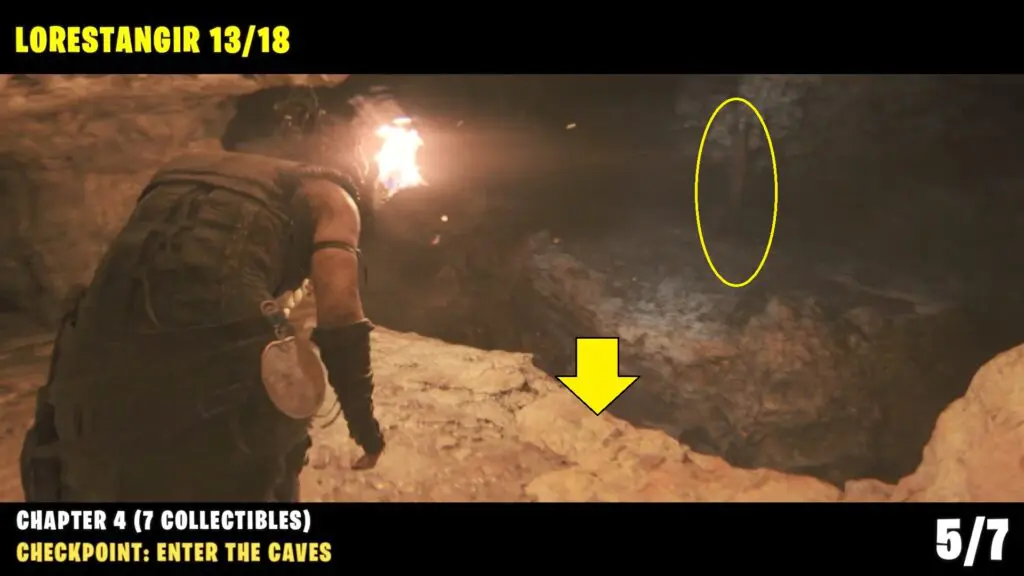
Follow the main story, until you need to light a brazier after the waterfall. Cross over the bridge and enter the low-ceiling cave.
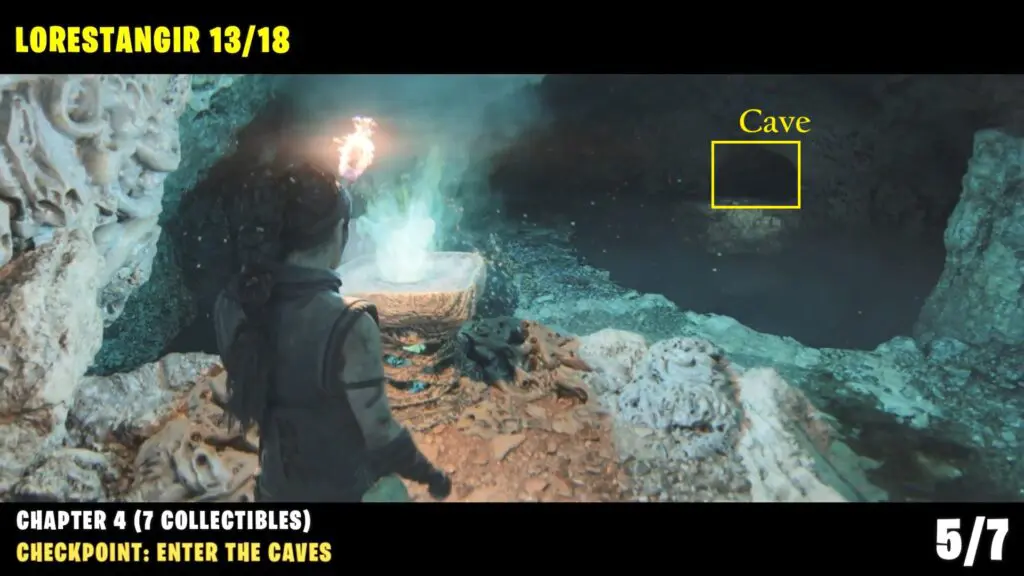
As you progress further, look to the right side for a place where you can drop down to reach the Lorestang totem.
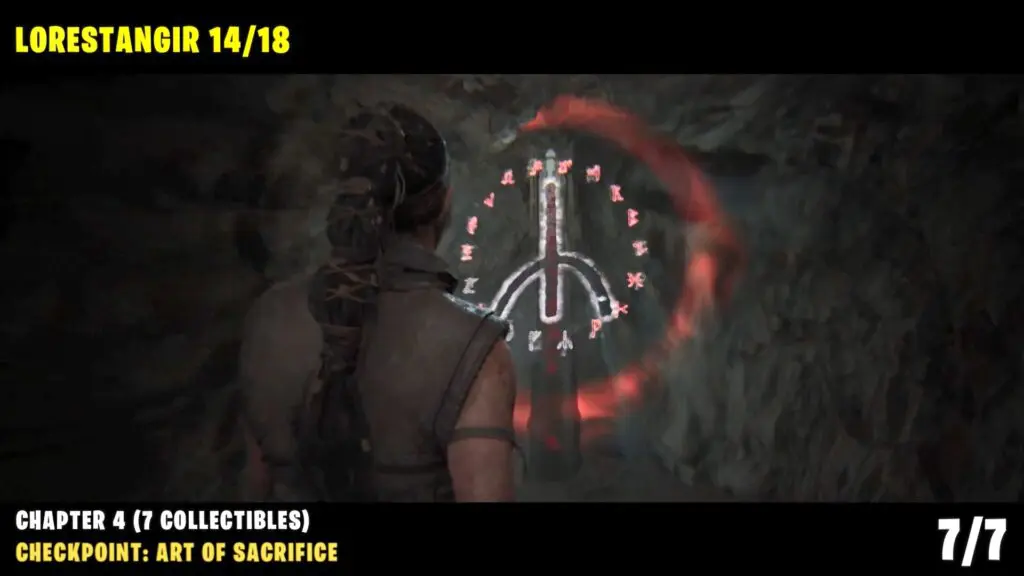
14) Lorestangir
Checkpoint: Act of Sacrifice
Available much later in the chapter when you are forced to navigate without your sword. Walk over the think ledge and squeeze through a gap. Follow the linear path till the fork.
Follow the path to the right until you drop down from the ledge.
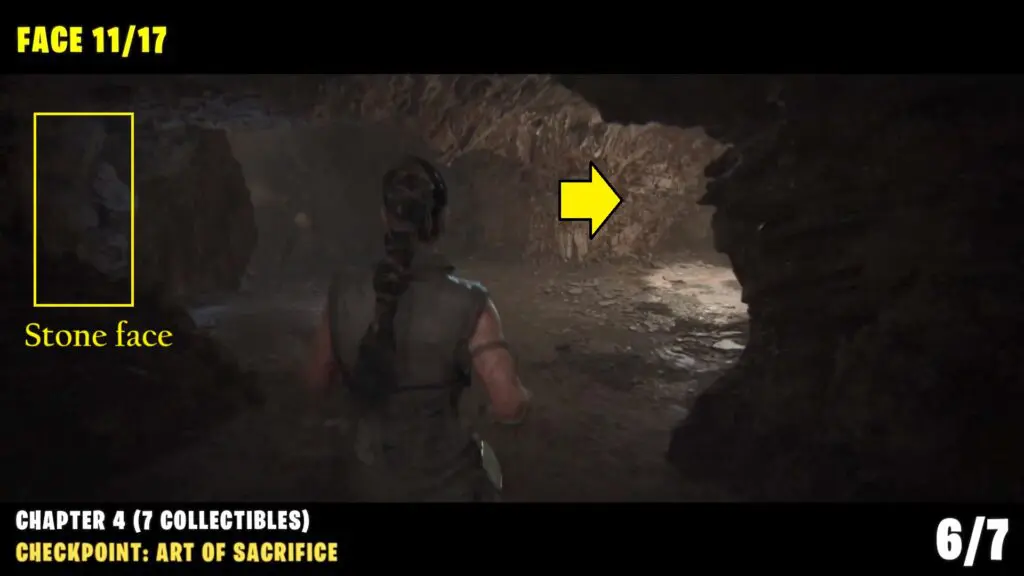
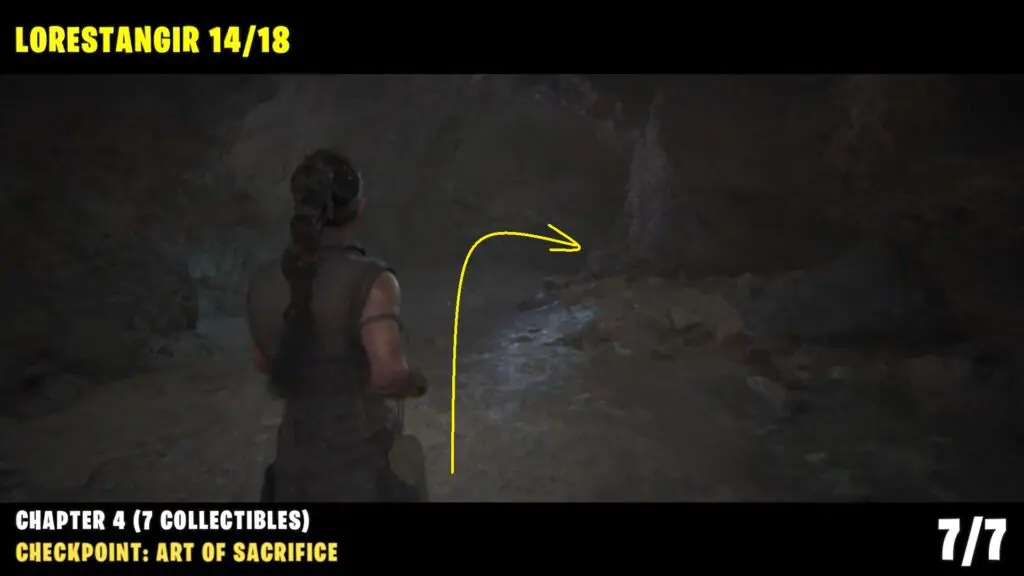
Go straight and take the right path to reach the Lorestangir totem.
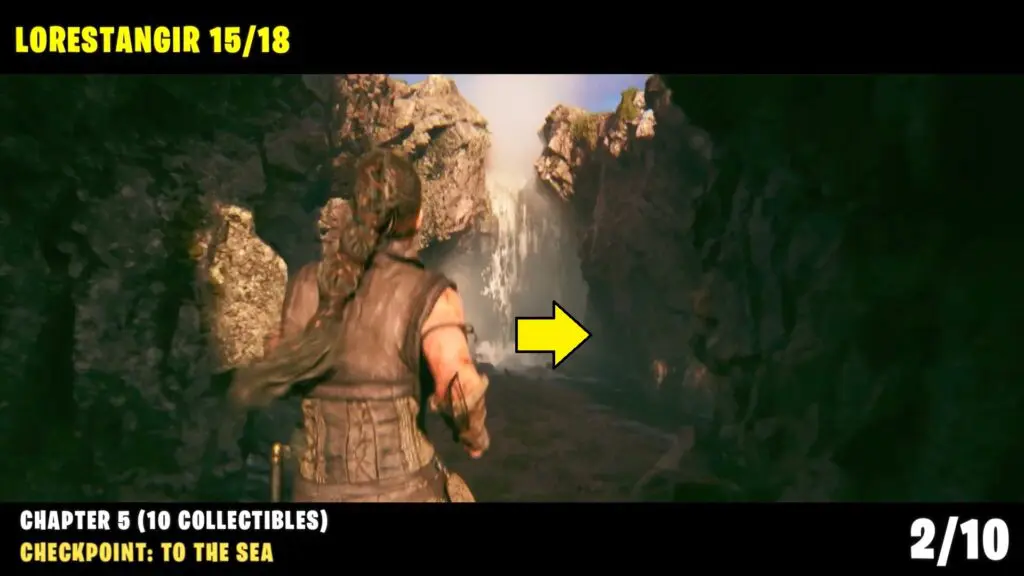
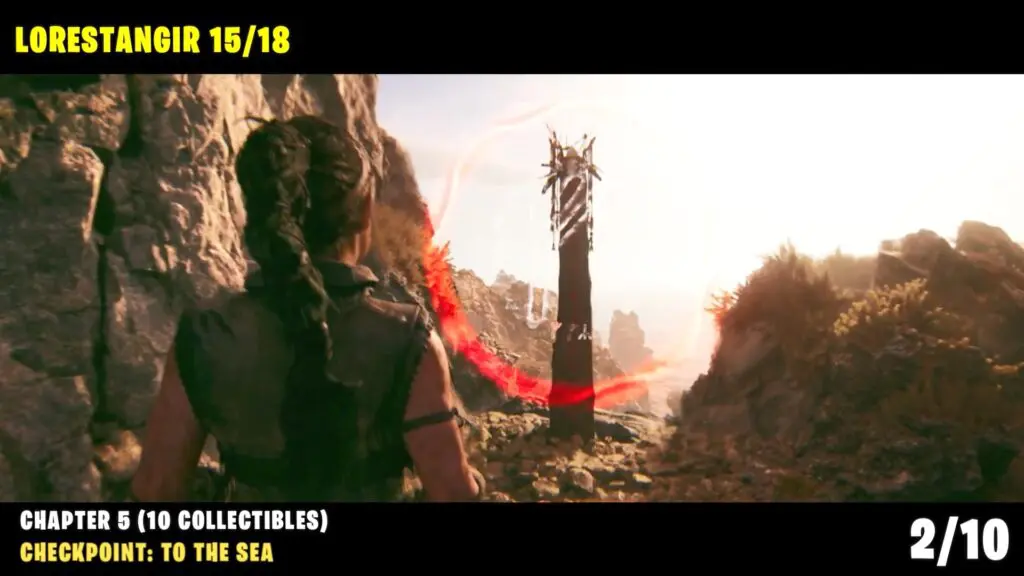
15) Lorestangir
Checkpoint: To the Sea
After the start of the chapter, continue to follow the path downhill until you reach a small stream. Proceed further along the main uphill.
Turn right at the first available option.
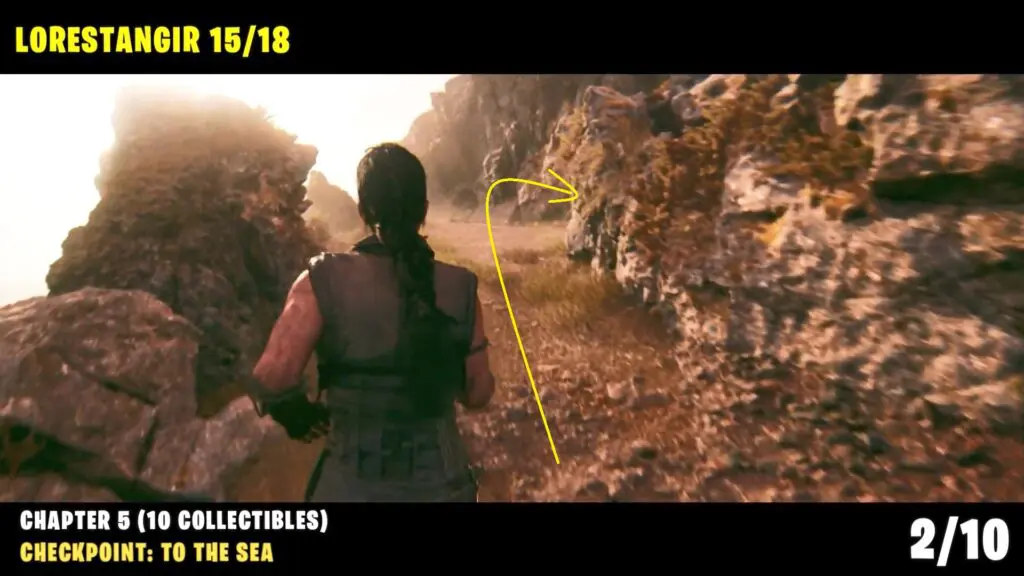
Continue along the path and take a right turn before the waterfall to find the Lorestangir totem.
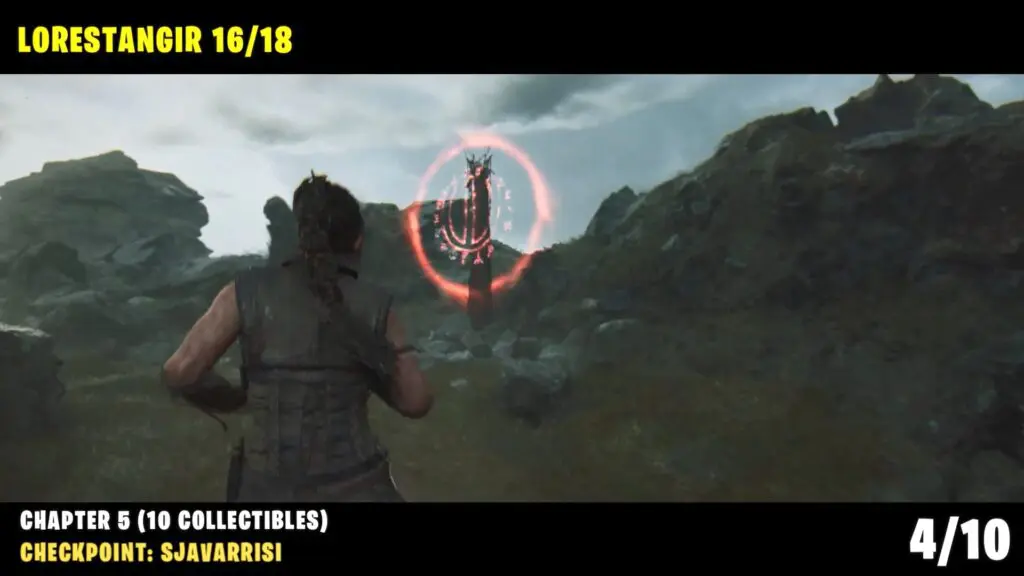
16) Lorestangir
Checkpoint: Sjávarrisi
As the game progresses, you will be walking with a woman named Astrior. Continue to walk along with the woman until you need to hop over a small wall to reach an open area with grass.
Look to your right to see the Lorestang totem at a distance.

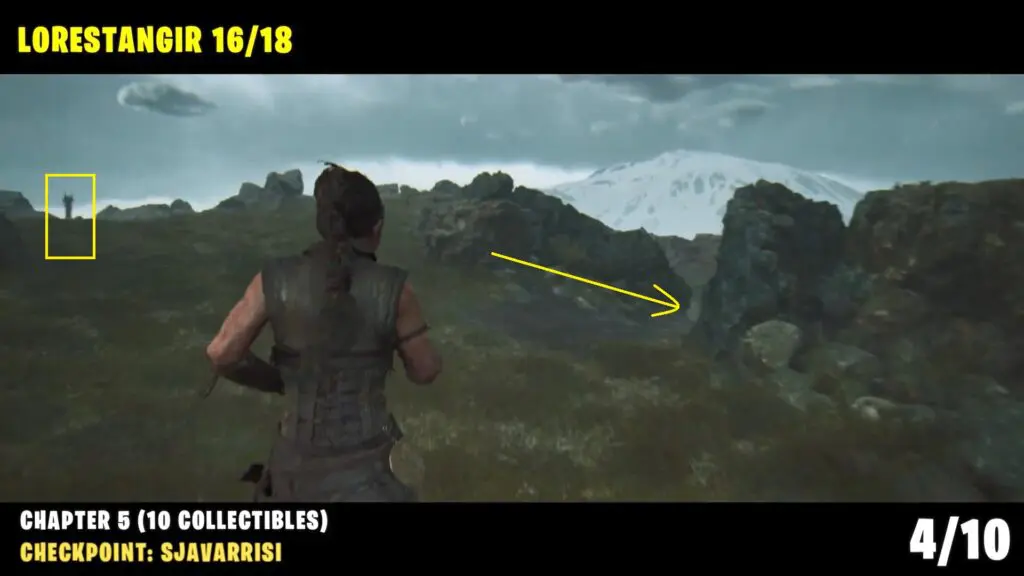
Follow the path on the right side, and crouch through the small opening in the rock to reach the Lorestang totem.
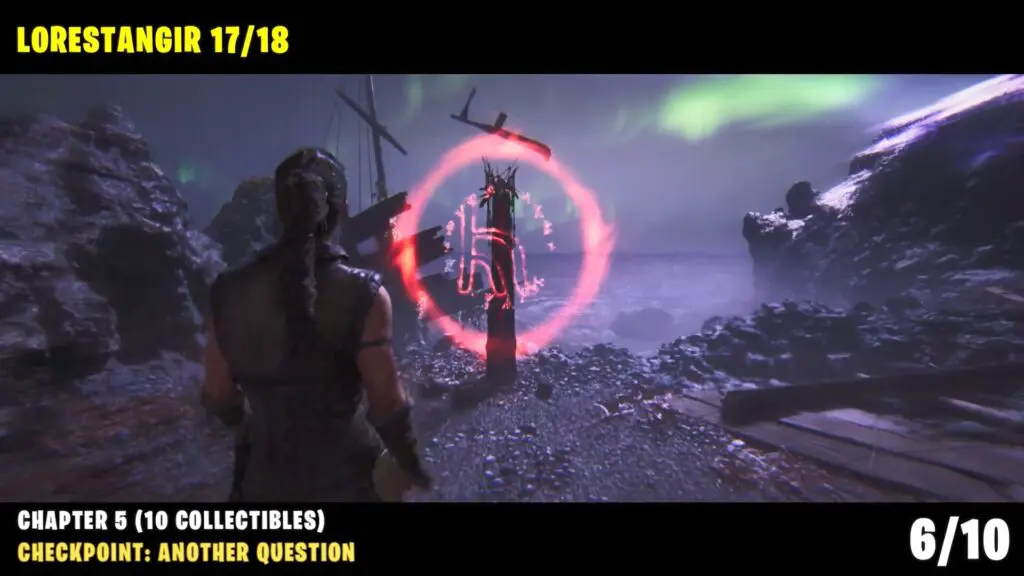
17) Lorestangir
Checkpoint: Another Question
Reach the beach area where you need to find 3 glyphs to open a locked path.
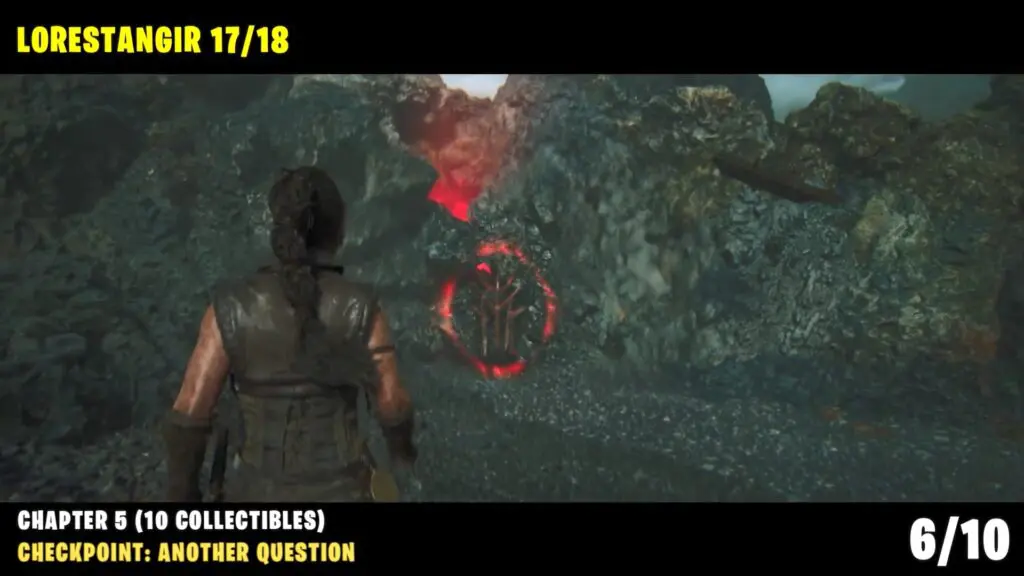
While looking toward the sea follow the path on the right side until you reach a shipwreck and turquoise-colored dust in the corner.
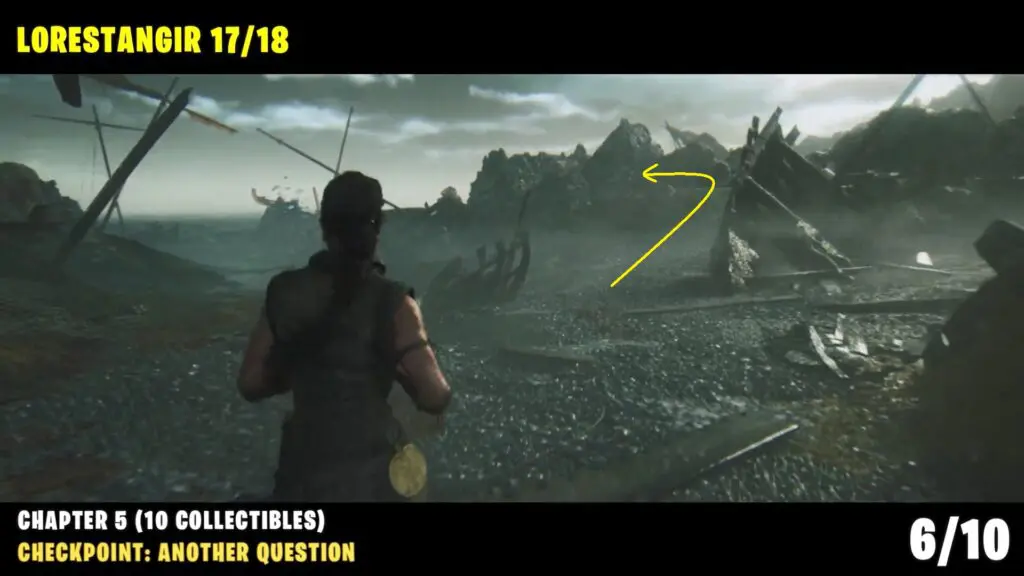
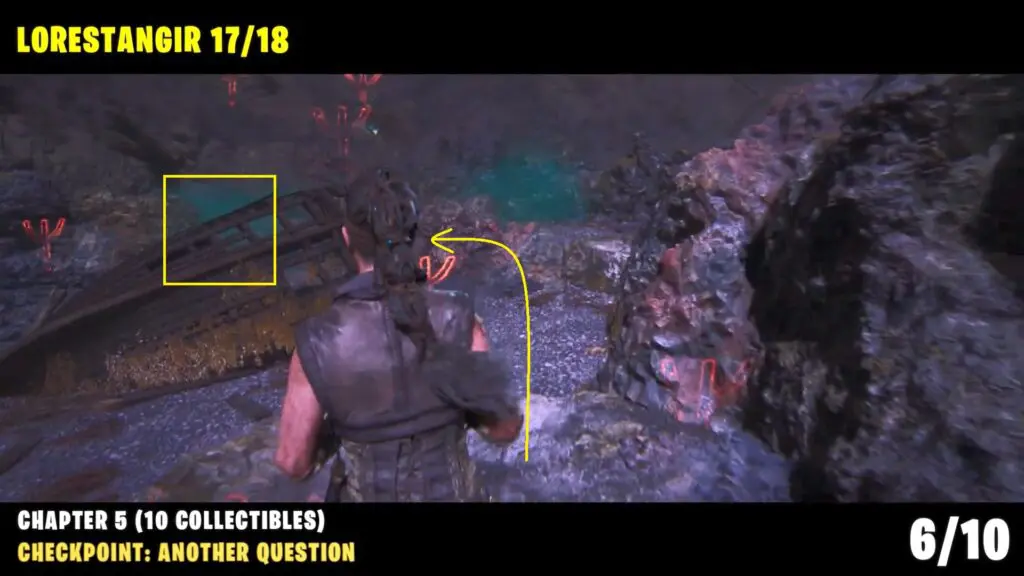
Go through it and follow the path to find the Lorestang totem.

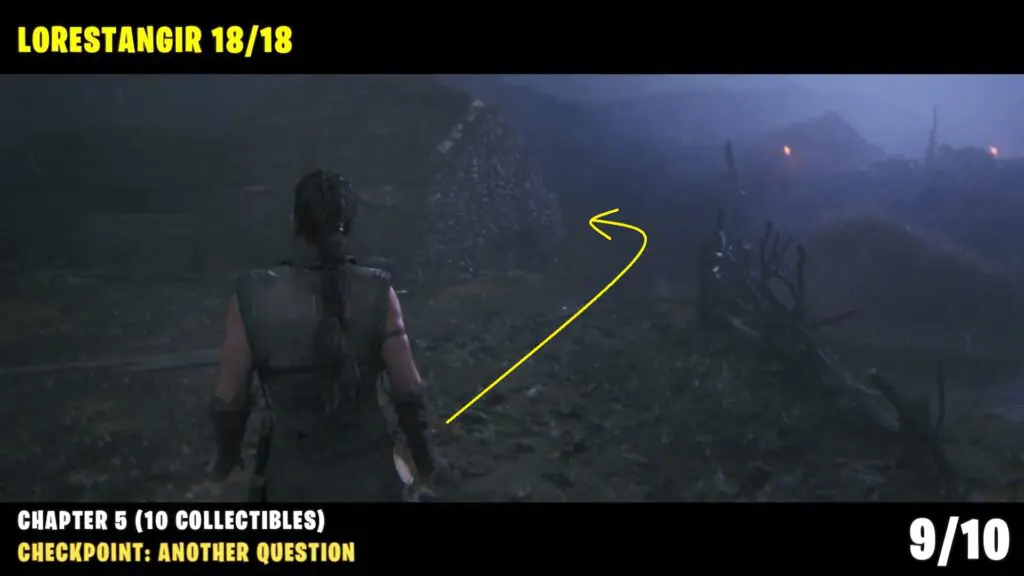
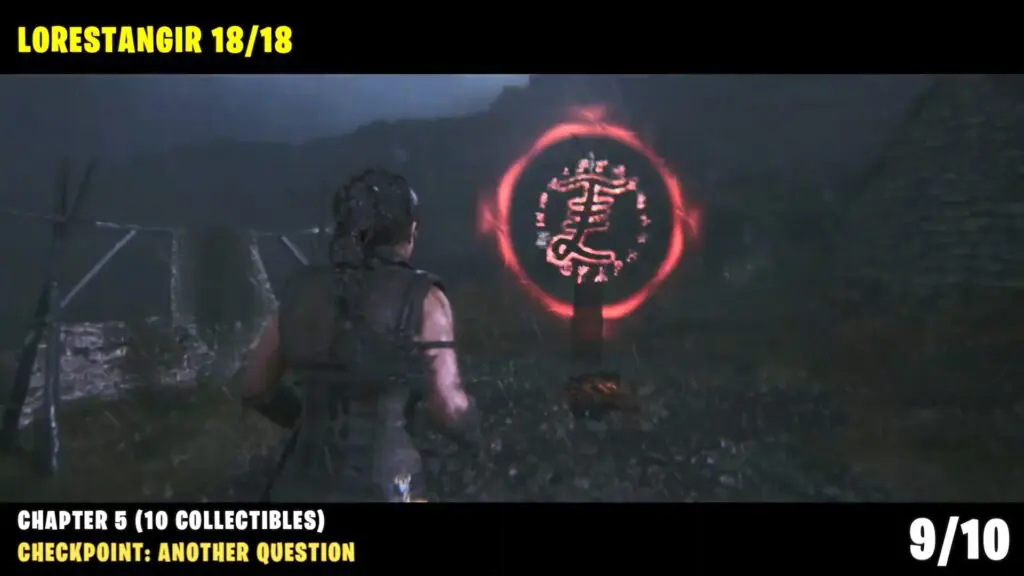
#4 Lorestangir
Checkpoint: Another Question
After the underwater section, you will be in a village. Follow the main path on the right. Continue till end end and then go up the hill until you see small stone walls. Lorestangir is behind the stone walls.