This article will guide the player on where to find all the fragment pieces of Totem in the game of Avowed.
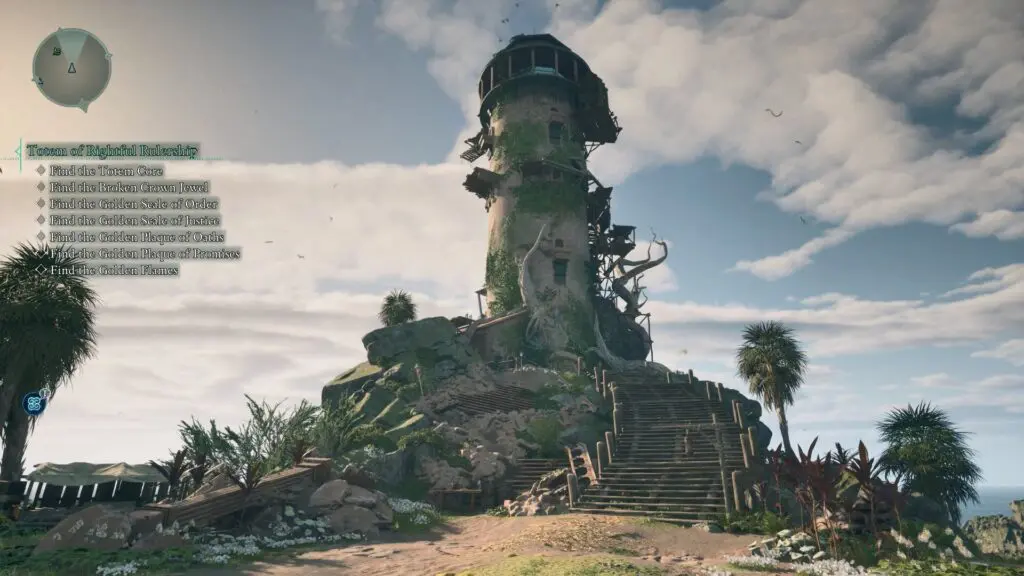
Totem of Rightful Rulership
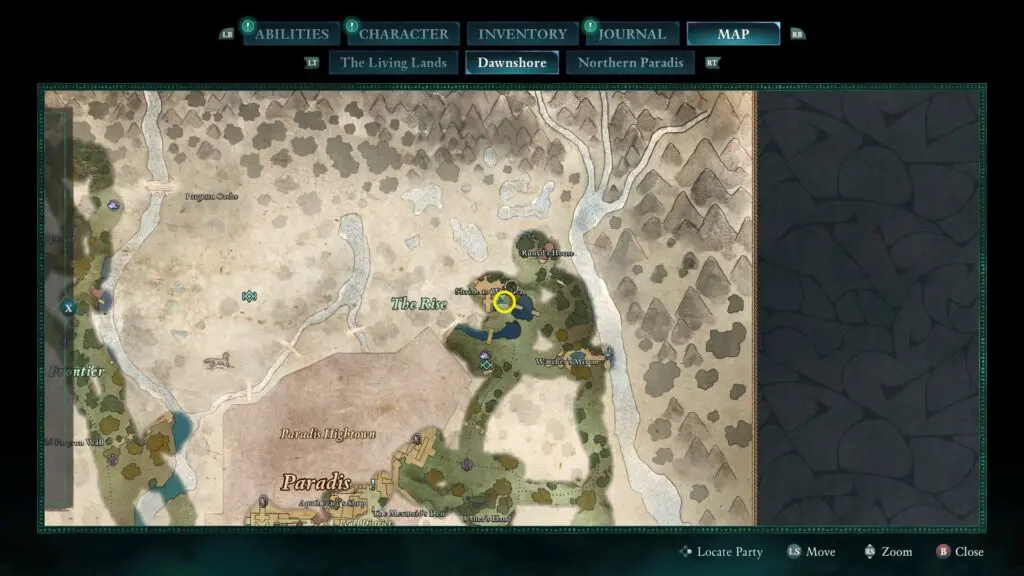
All seven fragments of the Totem of Rightful Rulership are hidden throughout Dawnshore and its capital, Paradis.
Totem Fragments Clue Map
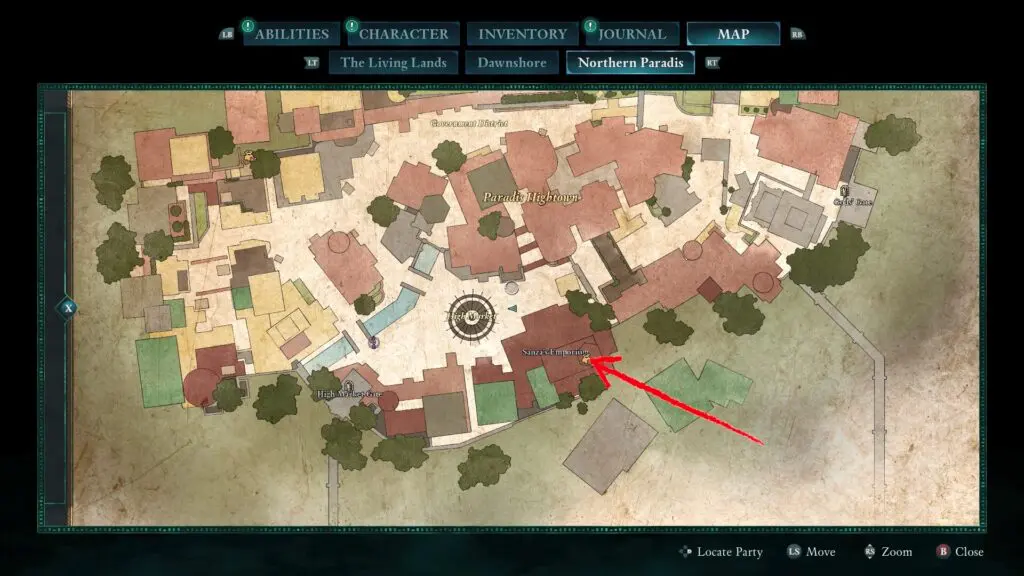
You can buy a map of all Totem of Rightful Rulership locations from NPC Sanza in Northern Paradise.

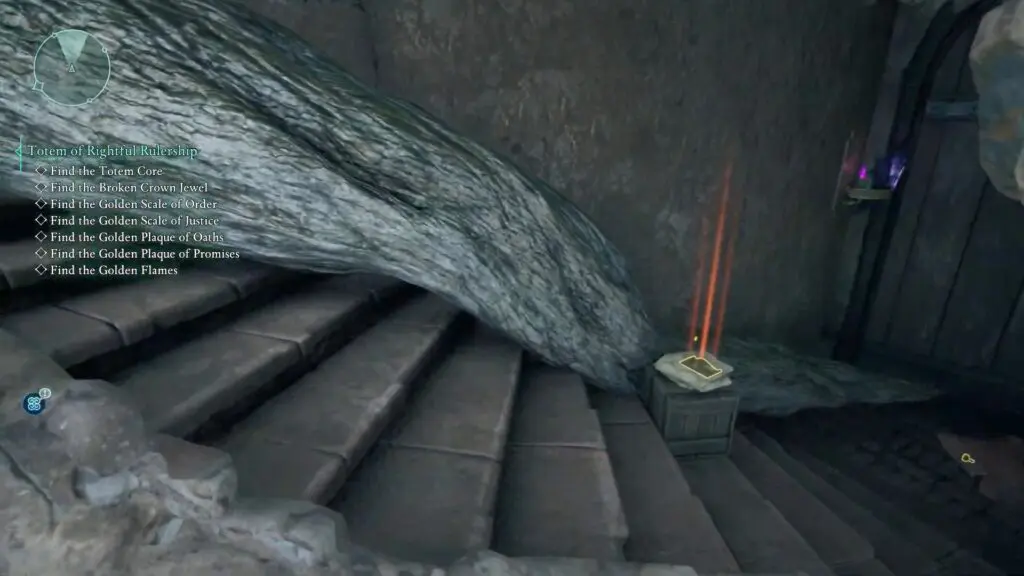
Find the Totem Core
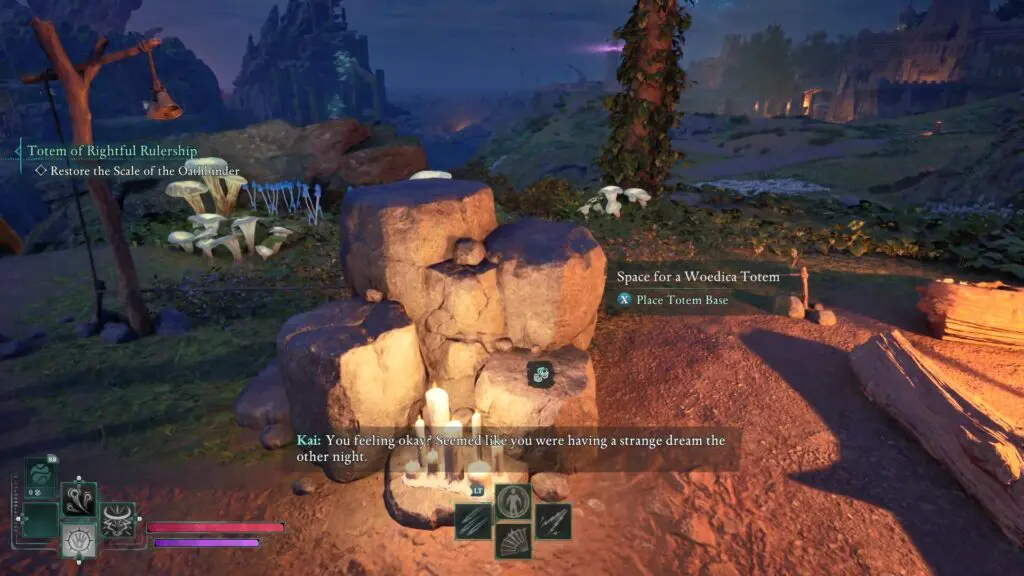
The Totem Core of Rightful Rulership is located at the Shrine to Woedica, northeast of Paradis.

Find the Broken Crown Jewel
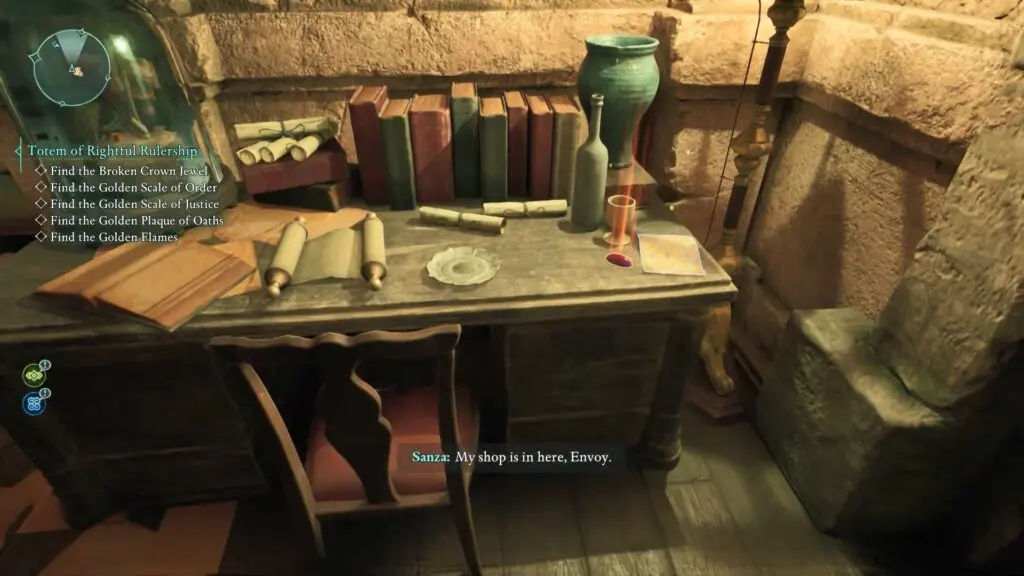
The Broken Crown Jewel is located on a desk in the backroom of Sanza’s Emporium in Northern Paradis.
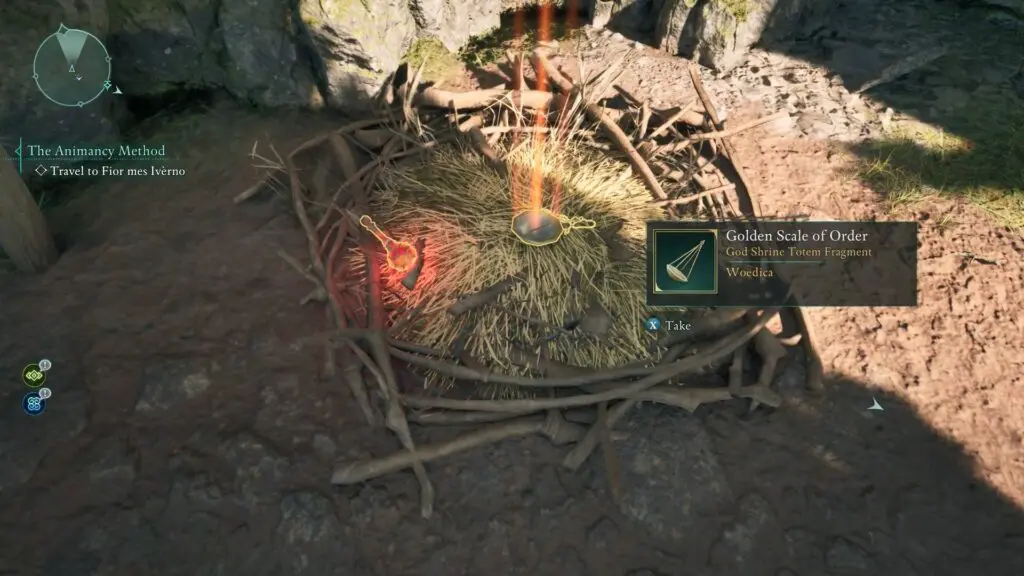
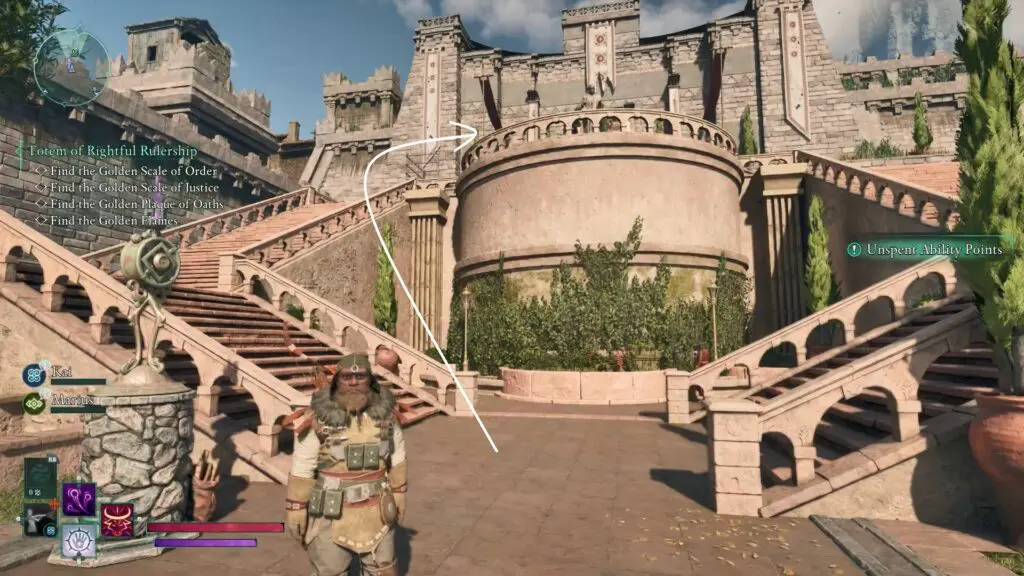
Find the Golden Scale of Order
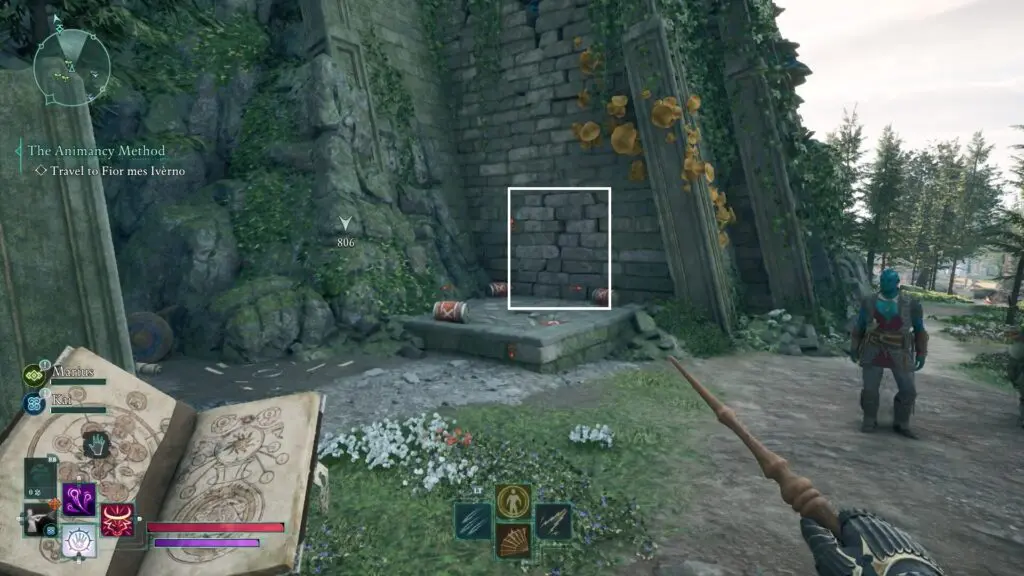
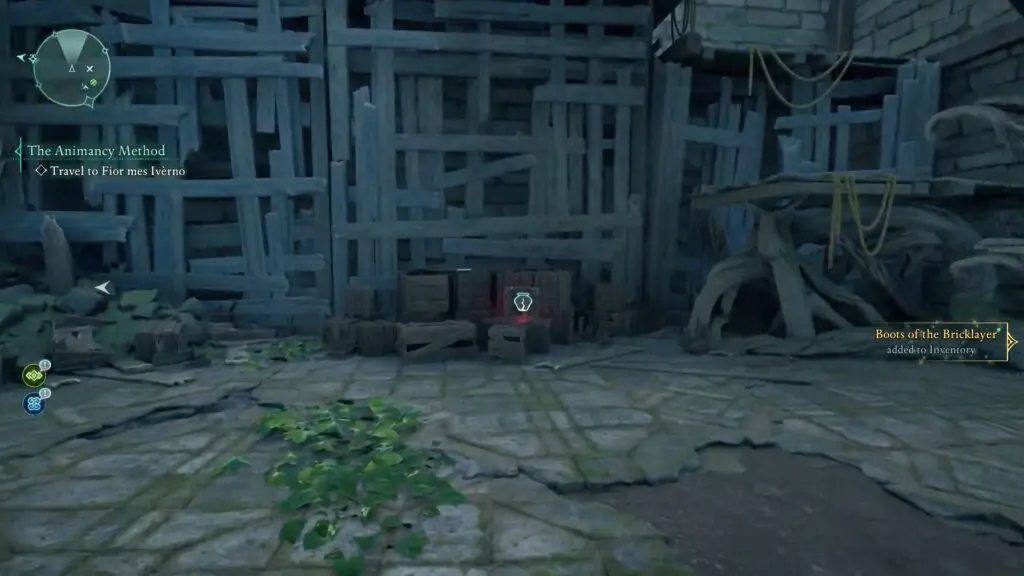
The Golden Scale of Order is located inside the Pargrun Cache.
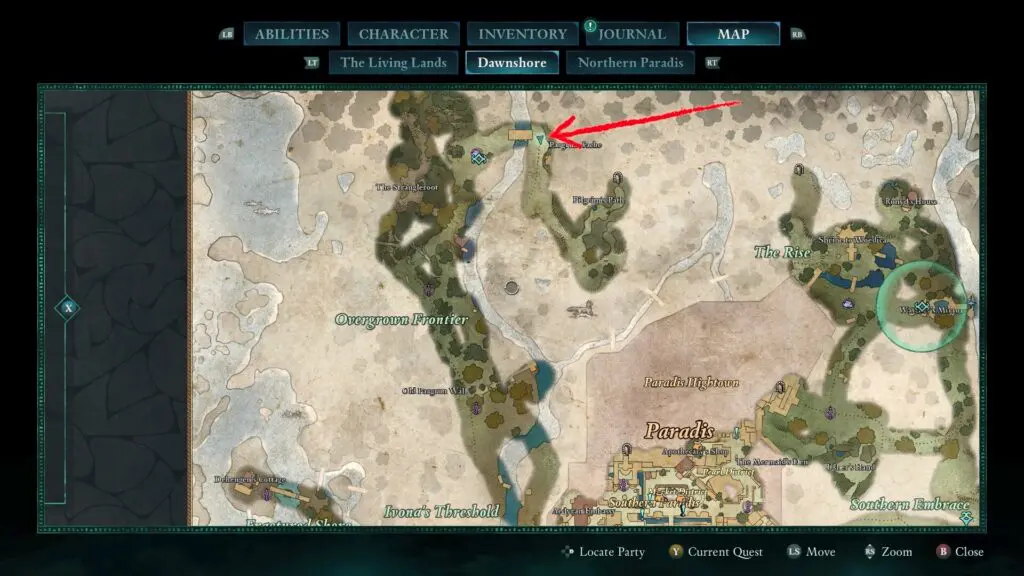
Destroy the destructible wall and enter the Pargrun Cache.
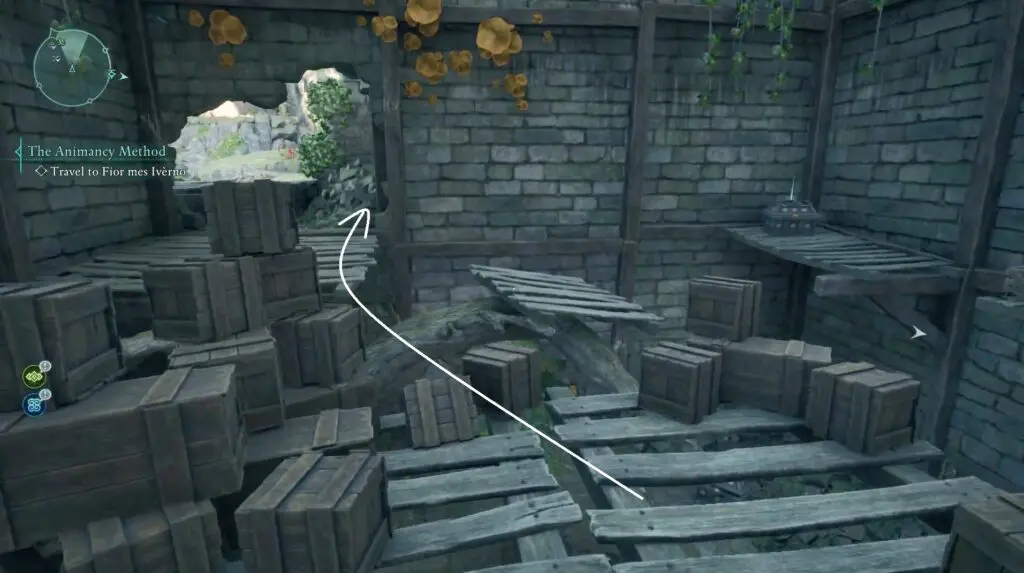
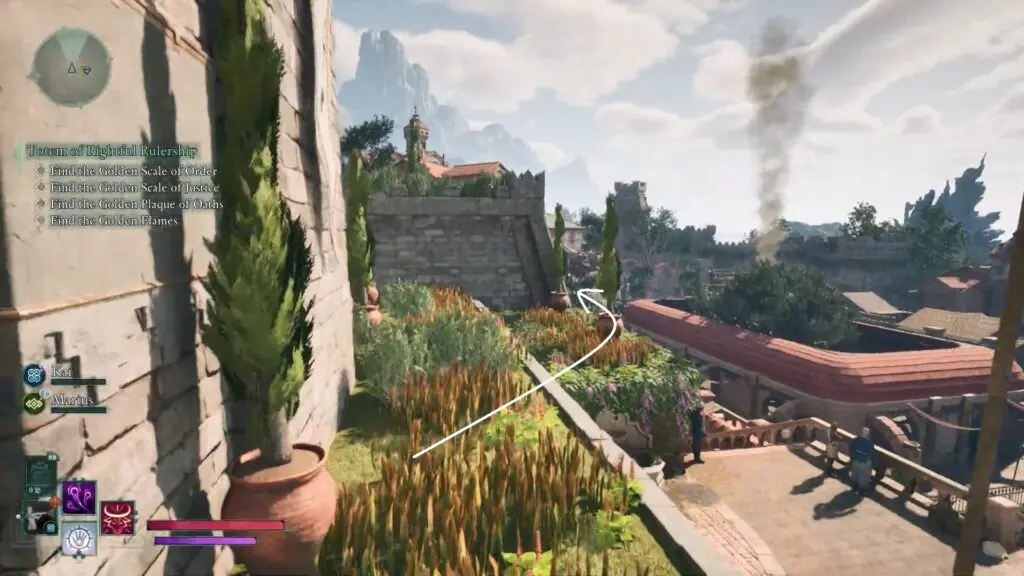
Climb up the wooden platforms to reach the stone balcony.
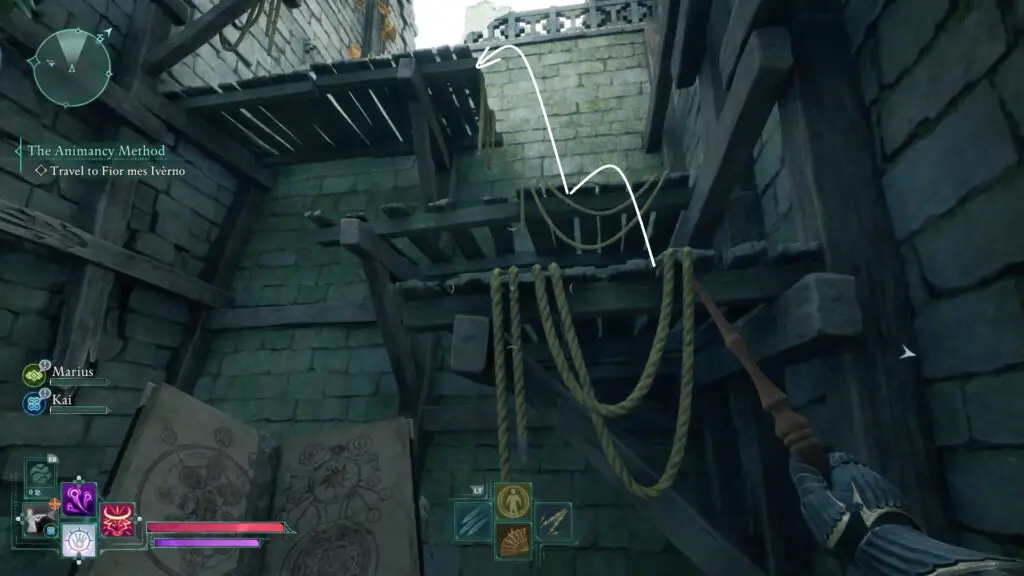
Head to your left and go up the stairs. Jump across the gap to the other set of stairs.
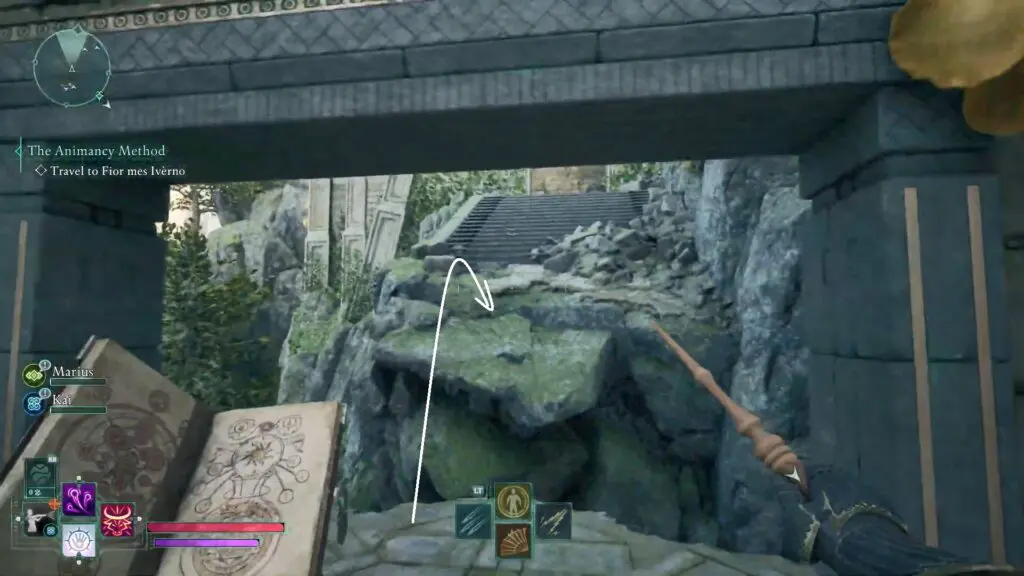
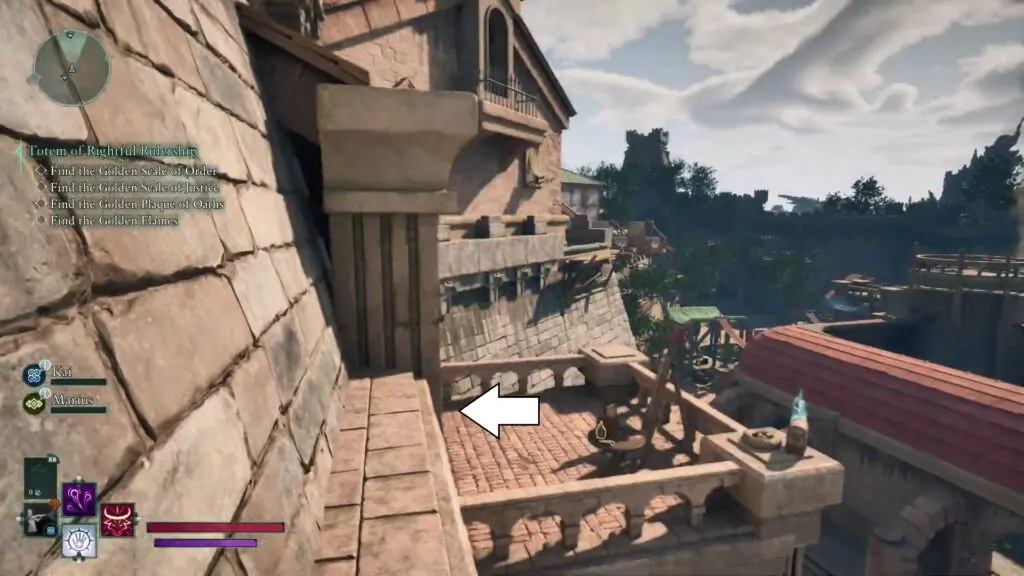
Climb the stairs and pass through the swinging blade. Follow the path to the next building, then go up the small set of stairs.

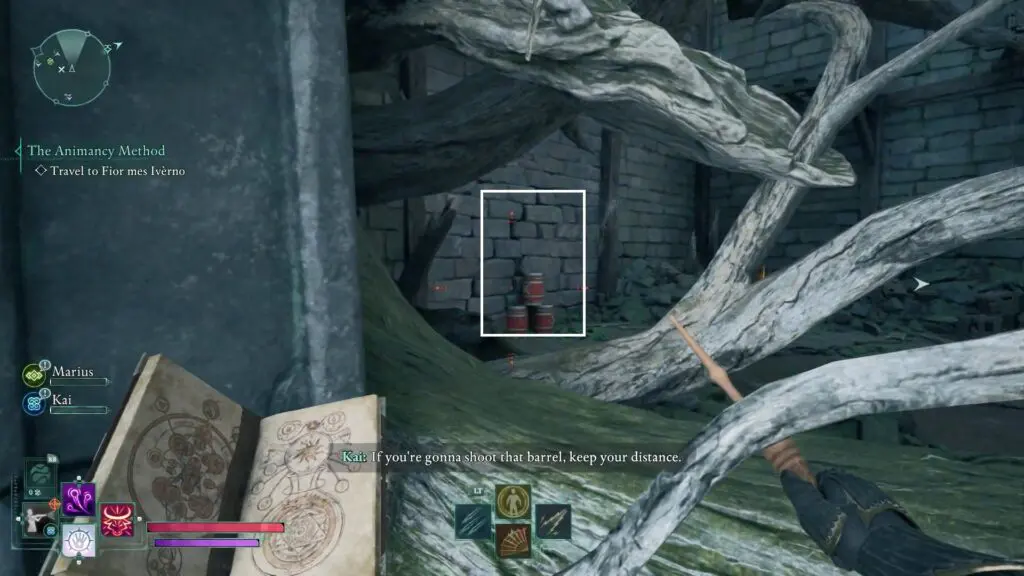
Look through the roots to find a breakable wall inside the room. Destroy it, then take the path to your left to go around and enter the building.
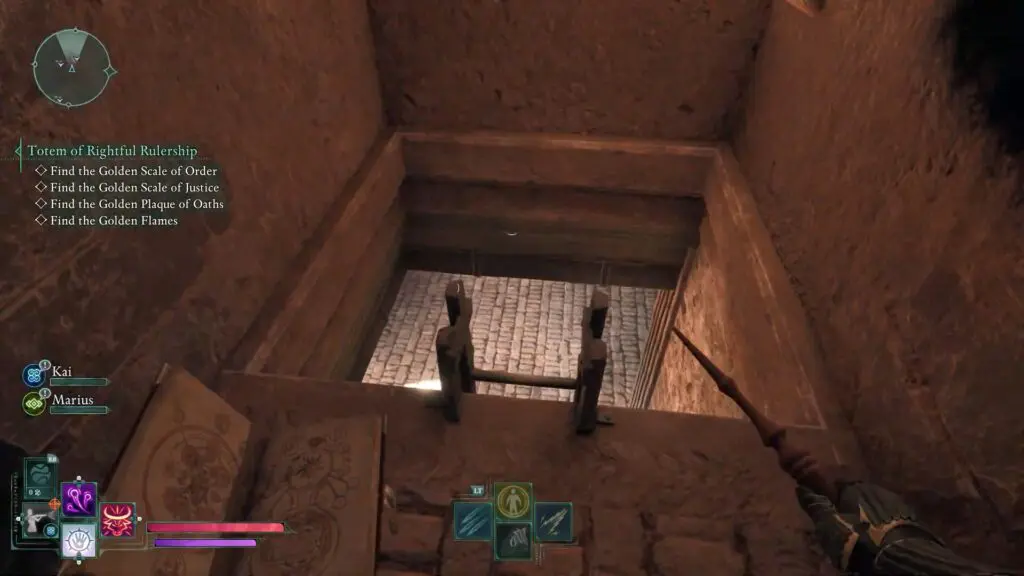
Climb the wooden platforms in the corner, and exit the building through the hole in the wall.
Climb up the ledges on the other side to find the Golden Scale of Order in a bird’s nest.
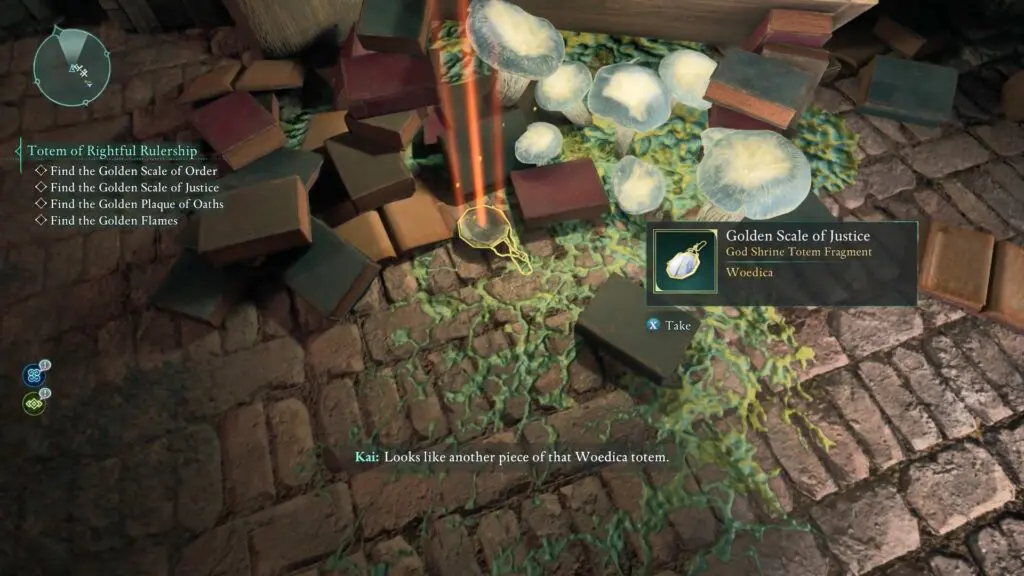
Find the Golden Scale of Justice
The Golden Scale of Justice is in a building north of Paradis’ Market District.
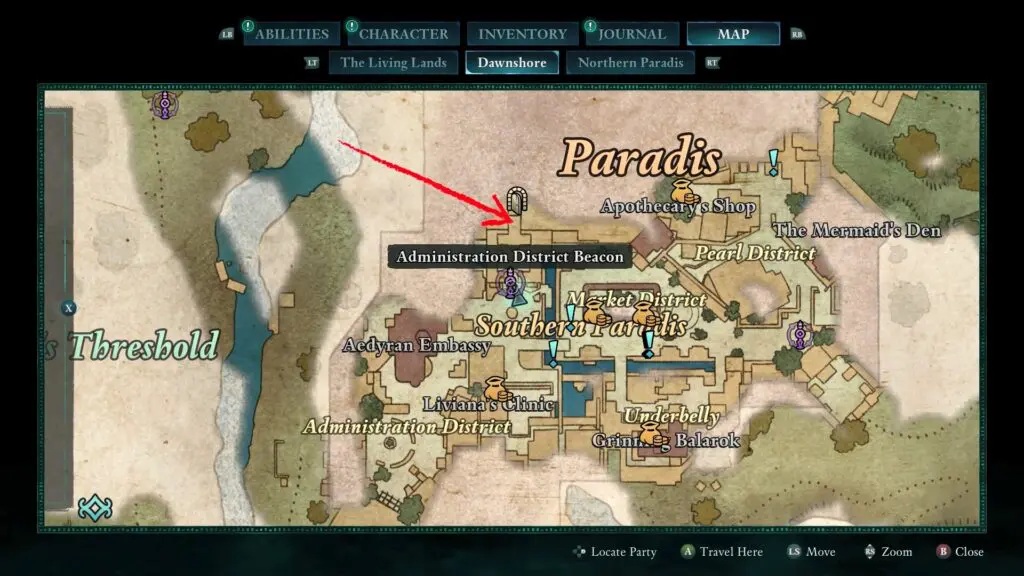
From the Administration District Beacon in Paradis, go upstairs to the Paradis Hightown entrance, but it will be locked.
To get around it, follow the grassy path on the right and carefully walk along the narrow ledge by the wall to reach the balcony.
Once inside, clear the spider webs and climb down the ladder. You’ll find the Golden Scale of Justice on the floor next to the bookshelf.
Find the Golden Plaque of Oaths
Go to the User’s Hand in the Southern Embrace, where you’ll find a small pond.
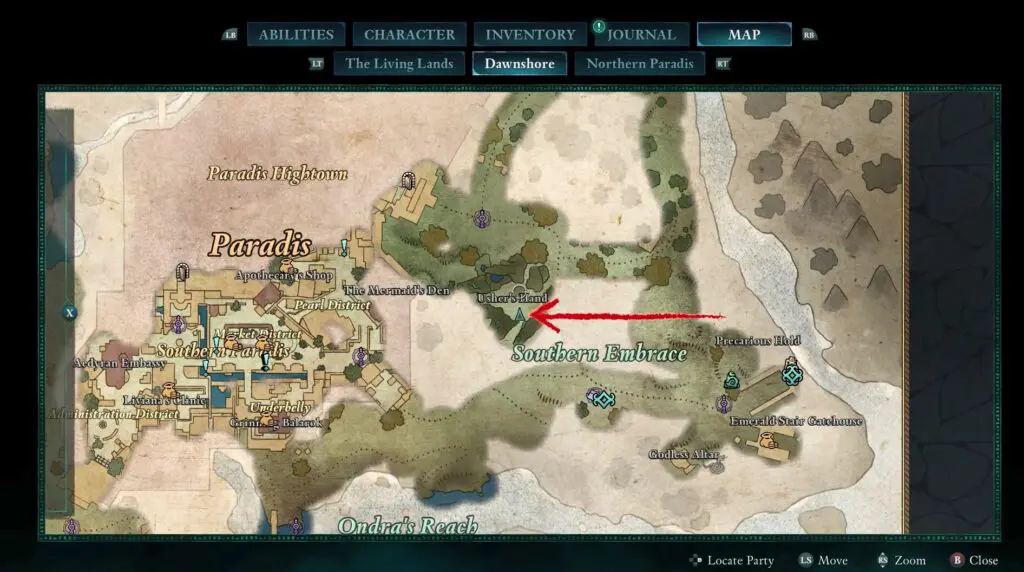
Dive in to enter an underwater cave, then follow the waterway to the end to find the Golden Plaque of Oaths.

Find the Golden Plaque of Promises
Head to the lighthouse west of Claviger’s Landing in Dawnshore.
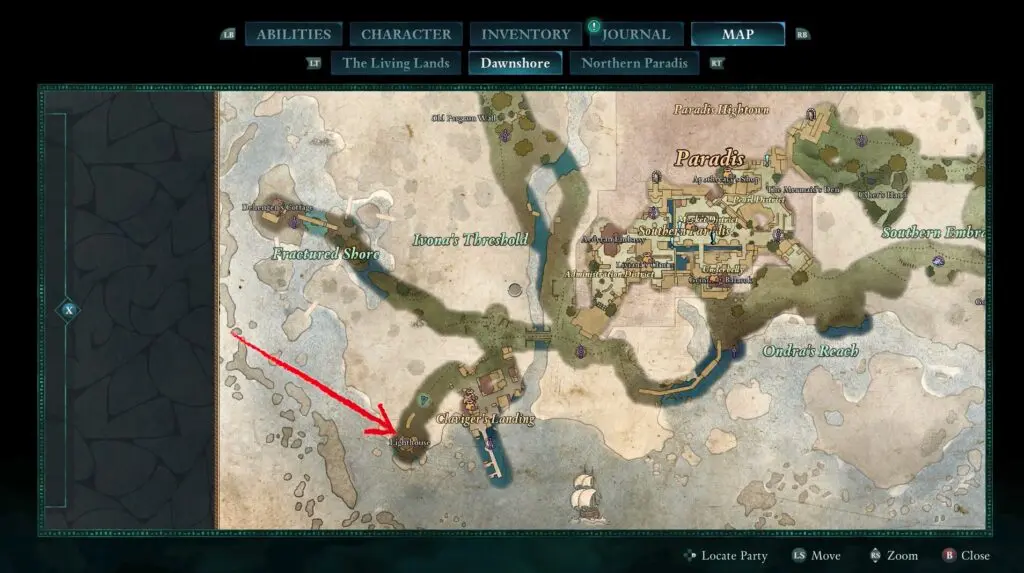
Climb to the top to find the Golden Plaque of Promises on the wooden crate on the broken stairs.
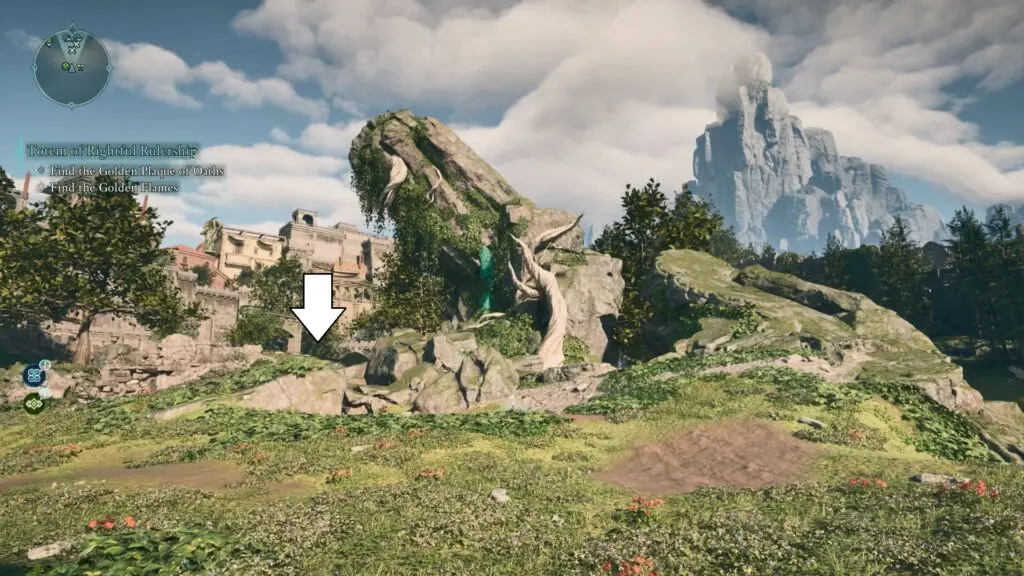
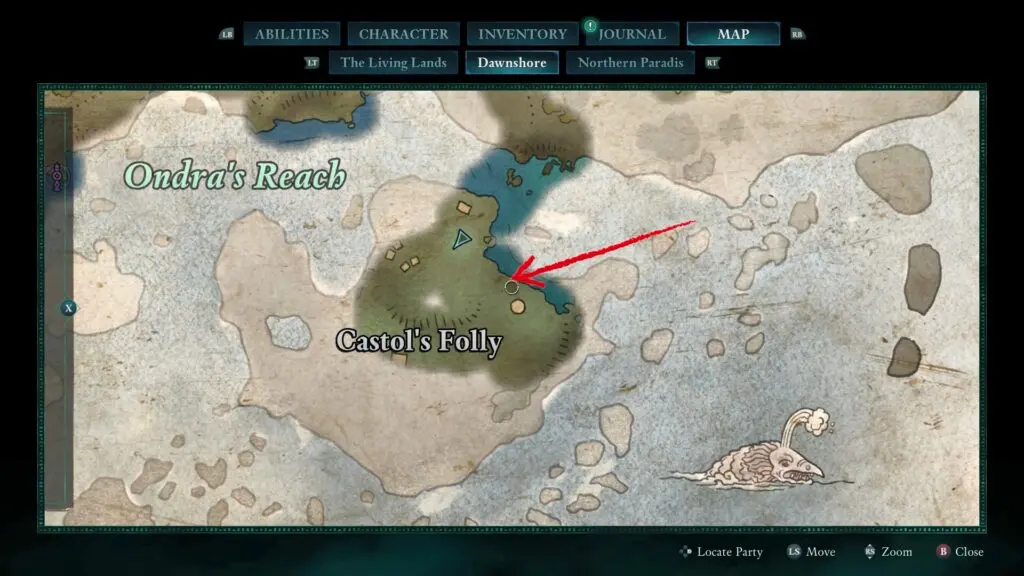
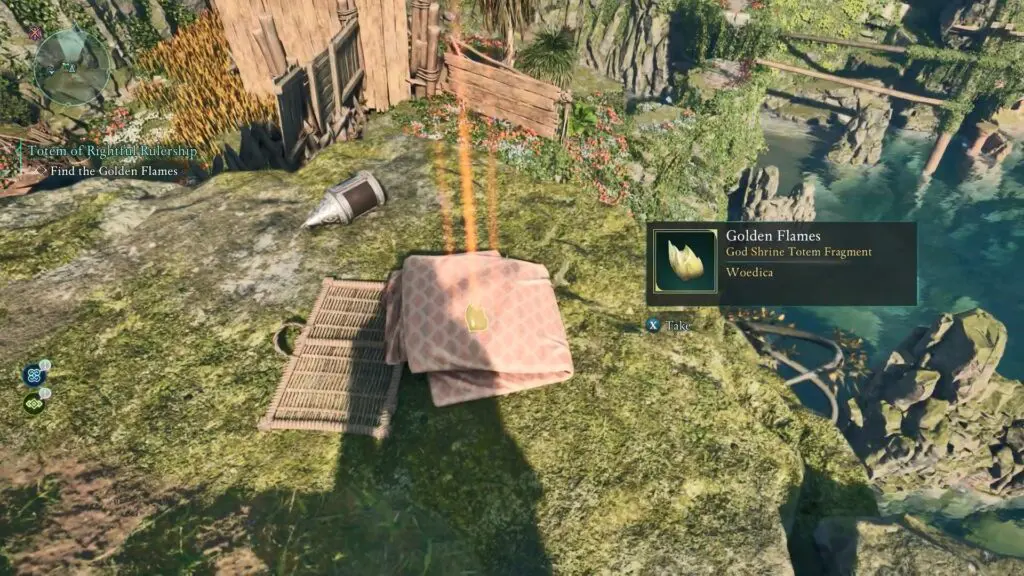
Find the Golden Flames
The Golden Flames is located on the edge of the eastern cliffs of Castol’s Folly.
Restore the Scales of the Oathbinder
The Scales of the Oathbinder is located on a cap northeast of Castol’s Folly.
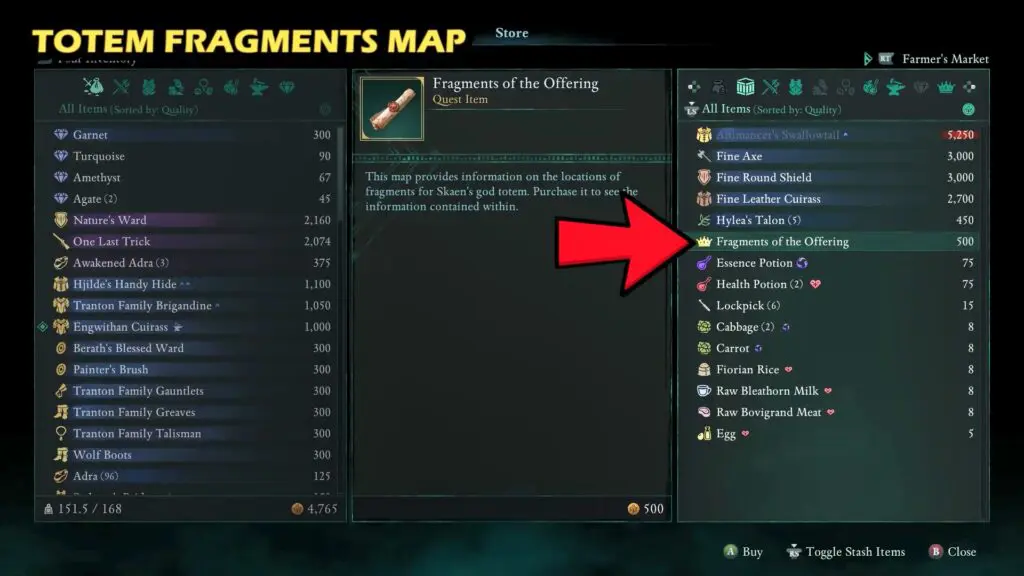
Totem of Defiance
All seven fragments of the Totem of Defiance are hidden around Emerald Stair and its capital, Fior mes Ivérno.
Totem Fragments Clue Map
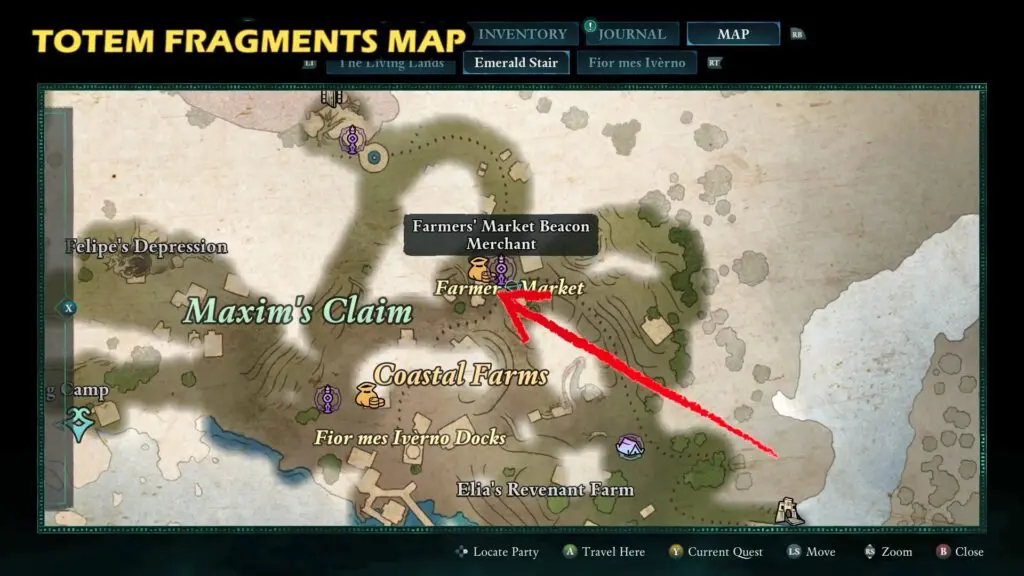
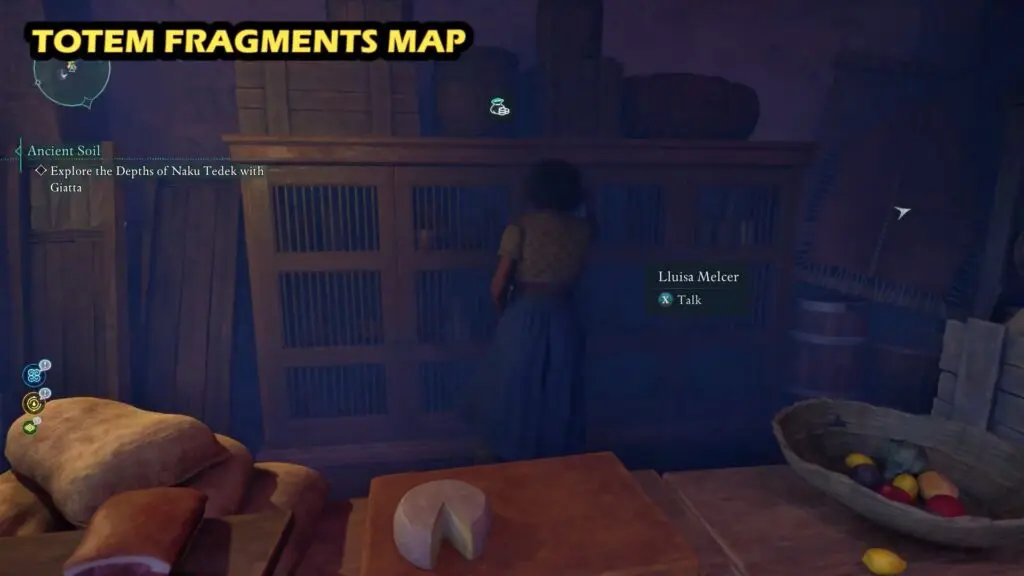
You can buy a map of all Totem of Defiance locations from NPC Lluisa in Farmer Market.
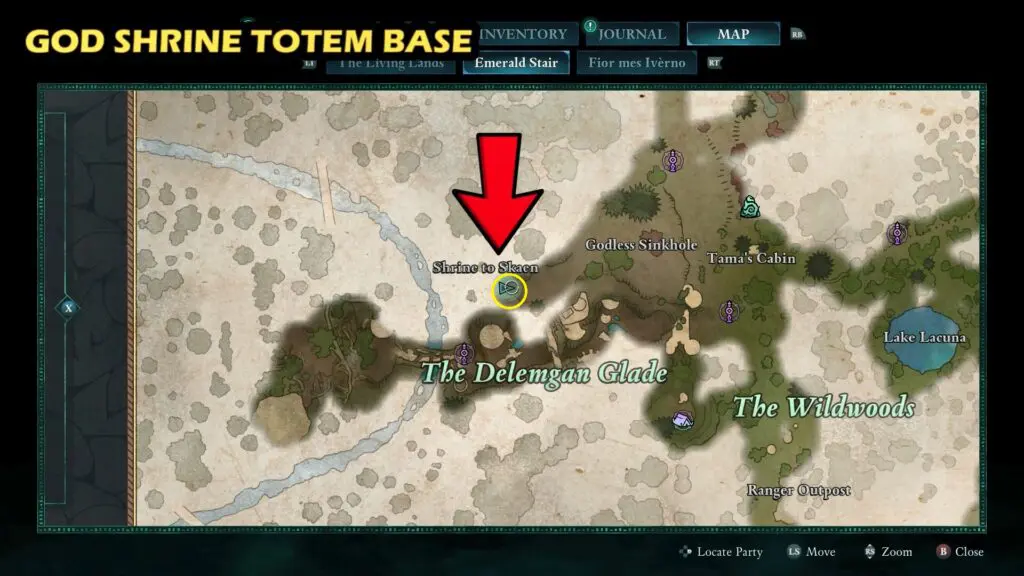
GOD SHRINE TOTEM BASE
The Totem Core of Defiance is located at the top of the Shrine to Skaen on the western side of Emerald Stair.
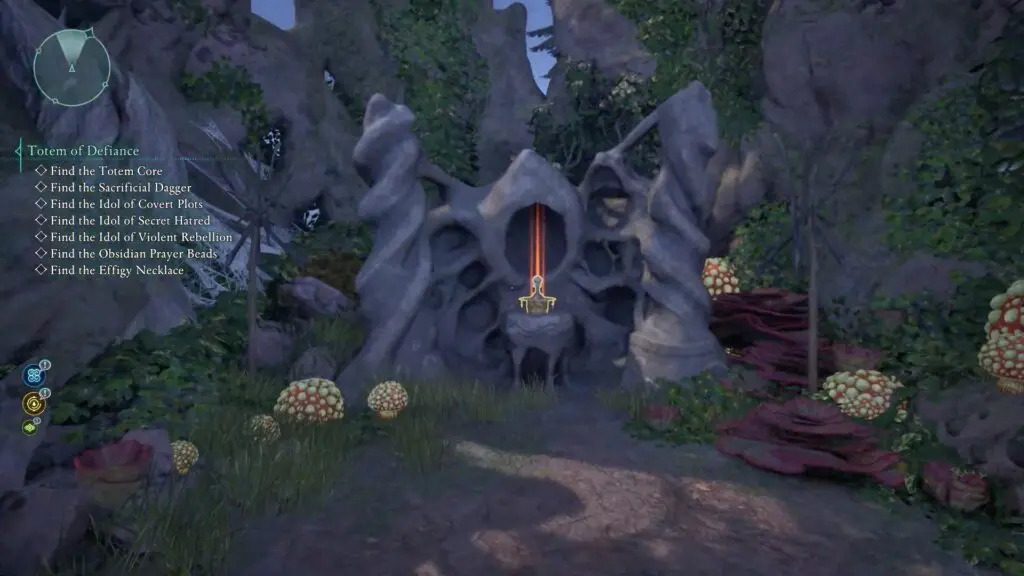
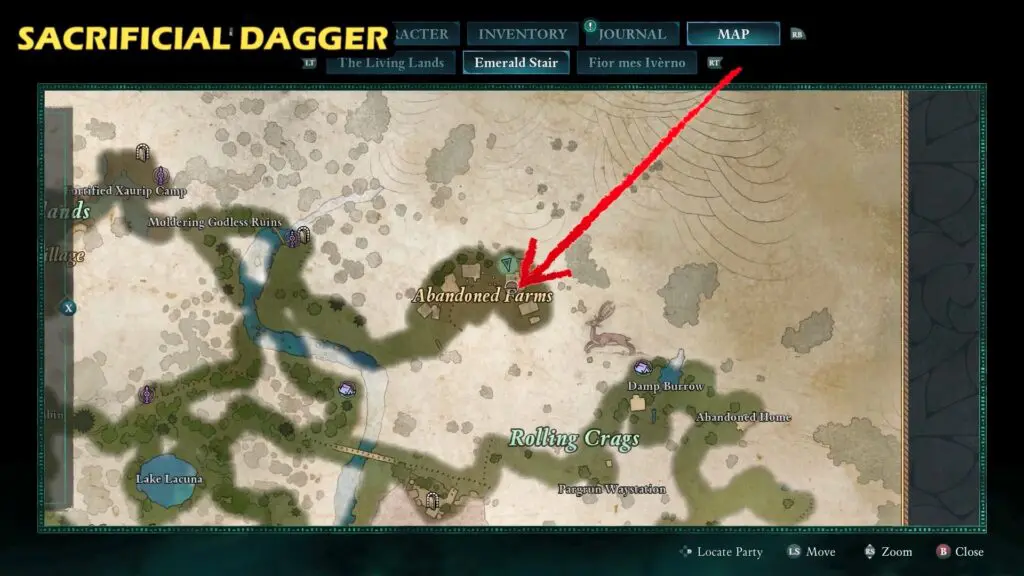
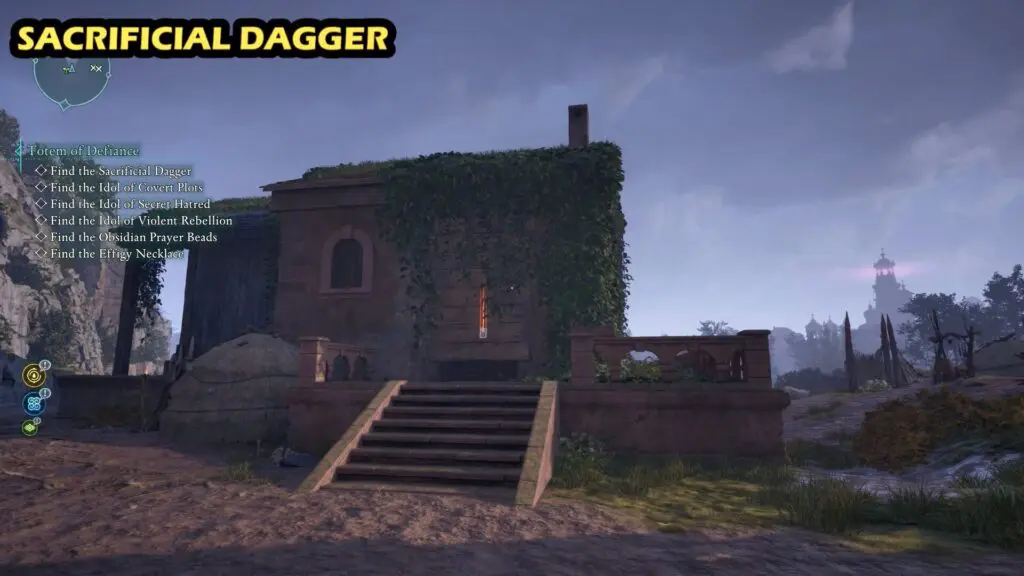
SACRIFICIAL DAGGER
The Sacrificial Dagger is hidden on a barricaded doorway at the Abandoned Farms on the northeastern side of Emerald Stair.
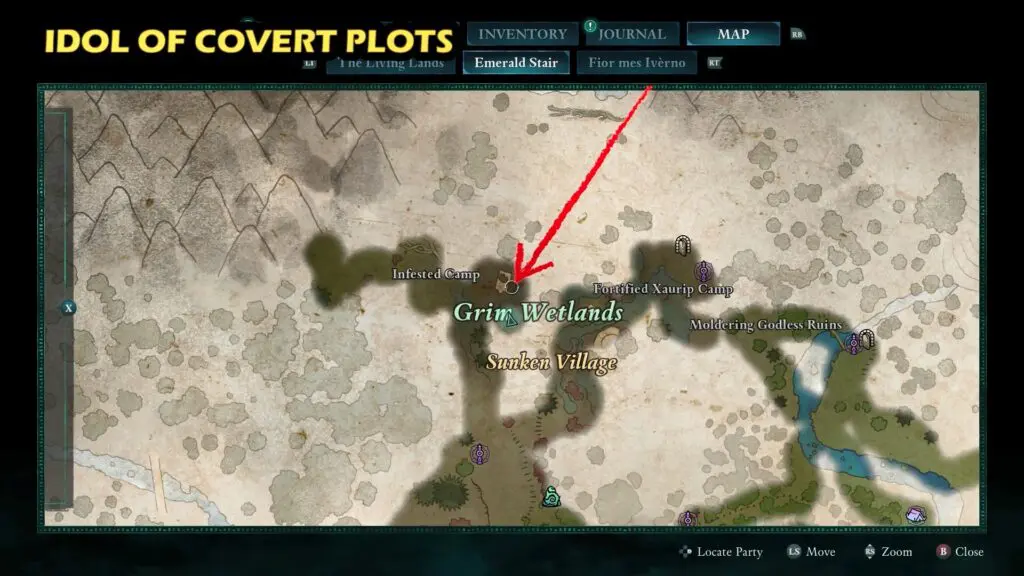
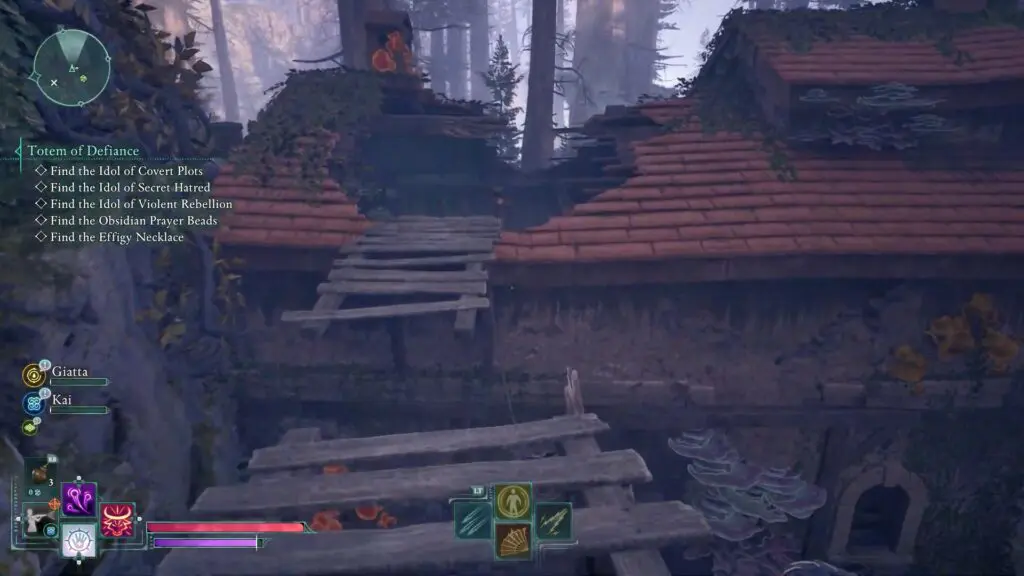
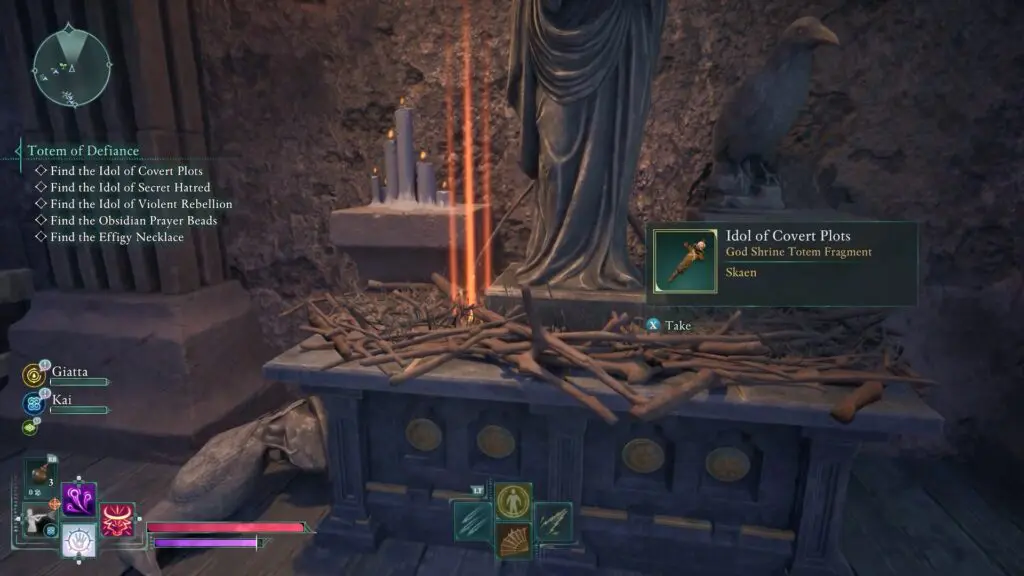
IDOL OF COVERT PLOTS
The Idol of Covert Plots is inside a building with a collapsed roof in the Grim Wetlands, north of Sunken Village
IDOL OF SECRET HATRED
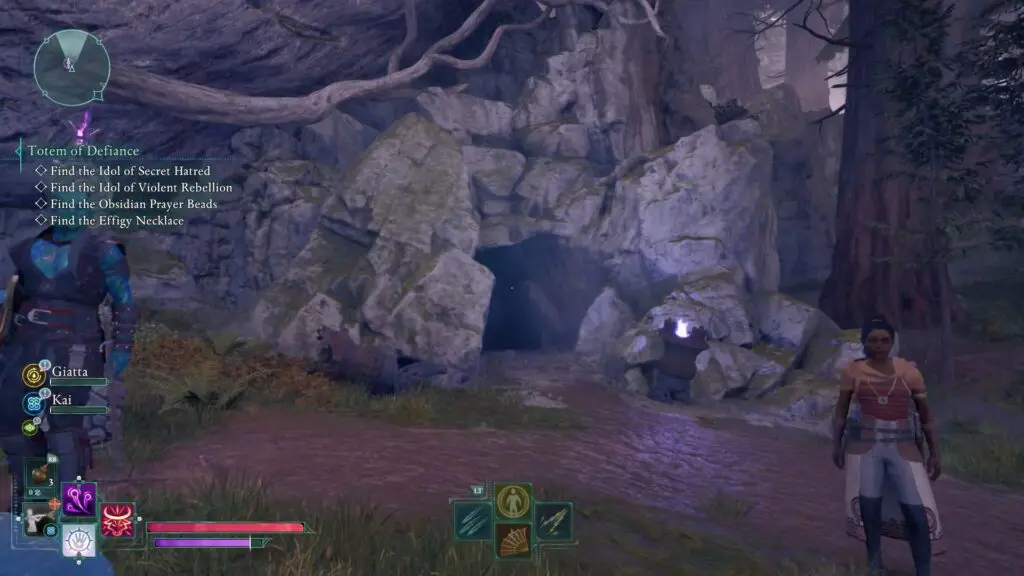
The Idol of Secret Hatred is located inside the Ancient Grotto dungeon.

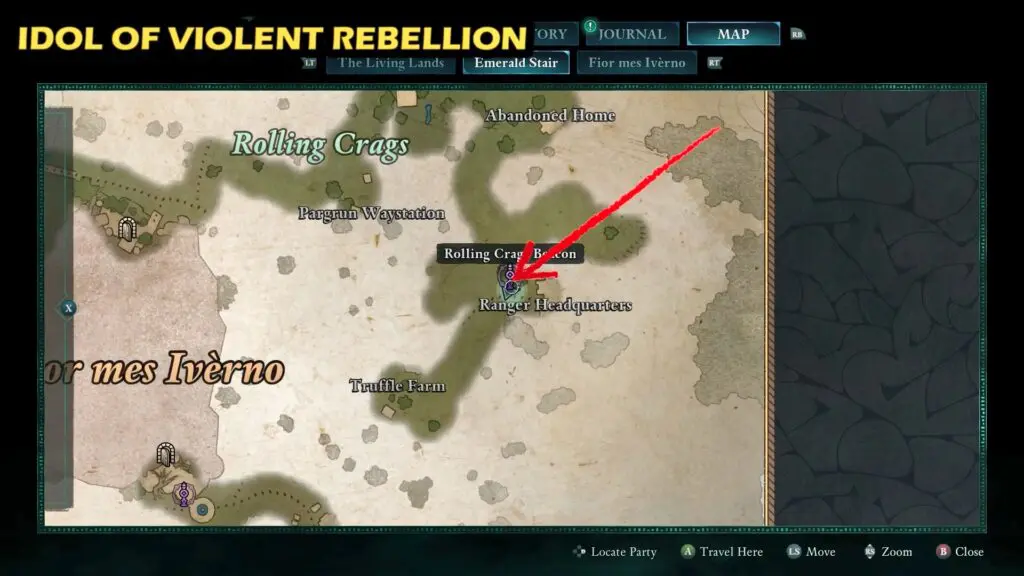
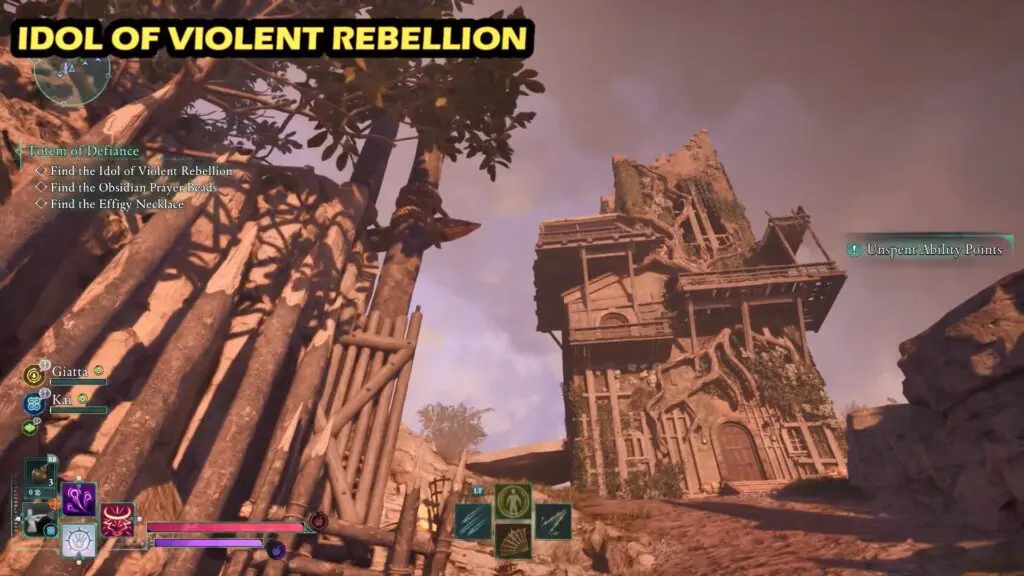
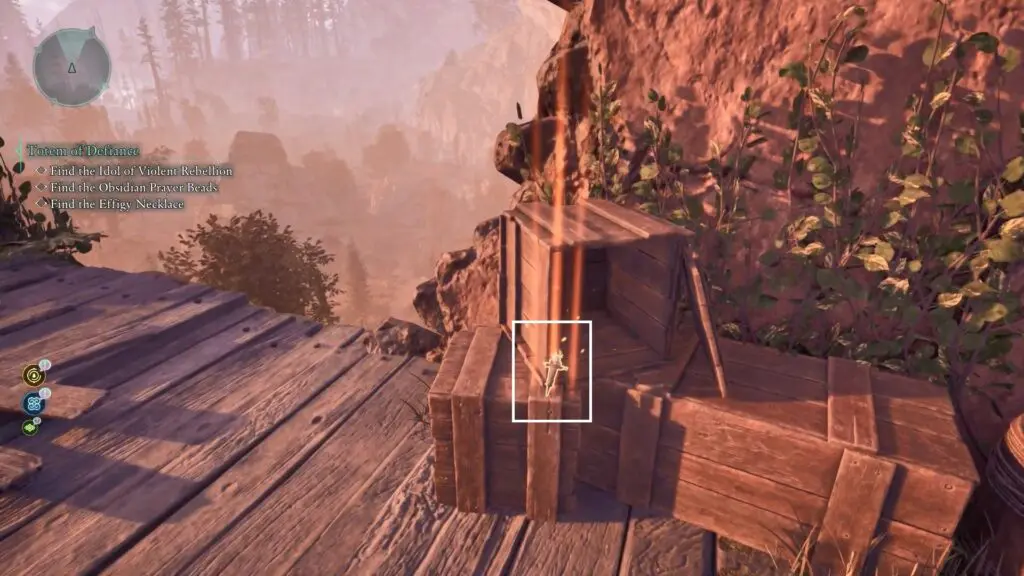
IDOL OF VIOLENT REBELLION
The Idol of Violent Rebellion is located at the top of the Ranger Headquarters.
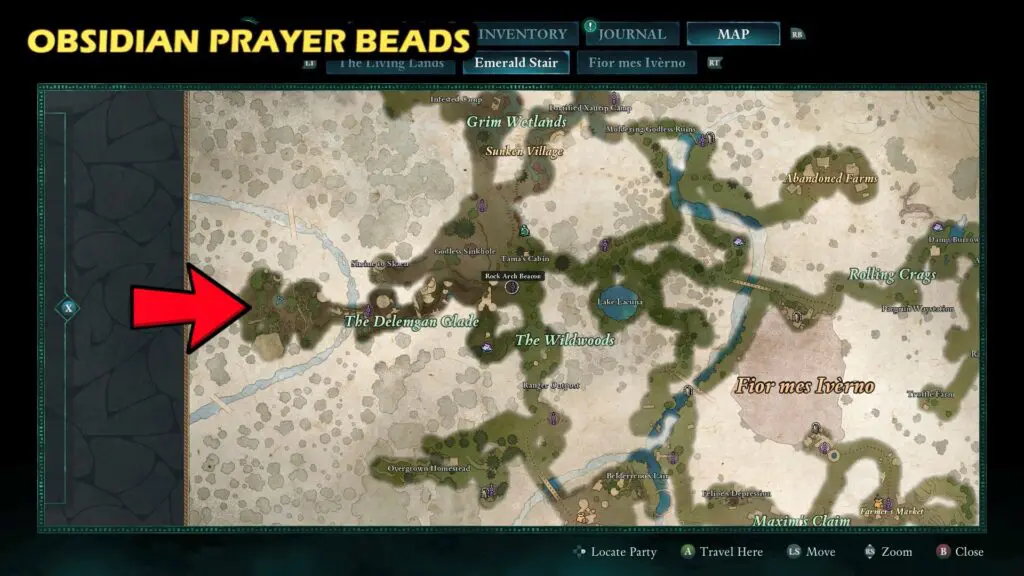
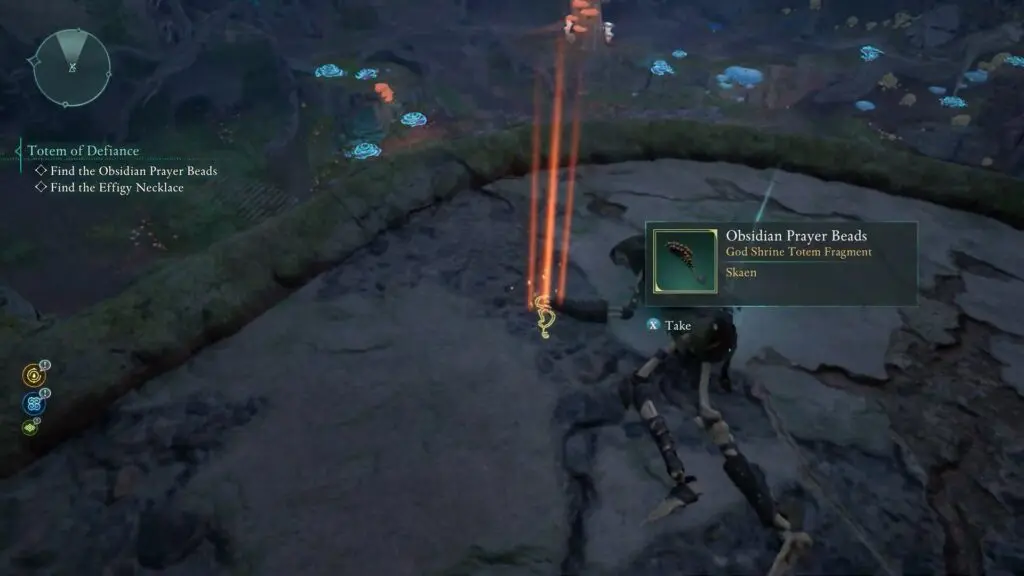
OBSIDIAN PRAYER BEADS
The Obsidian Prayer Beads are located next to a skeleton on the western side of the Delemgan Glade.
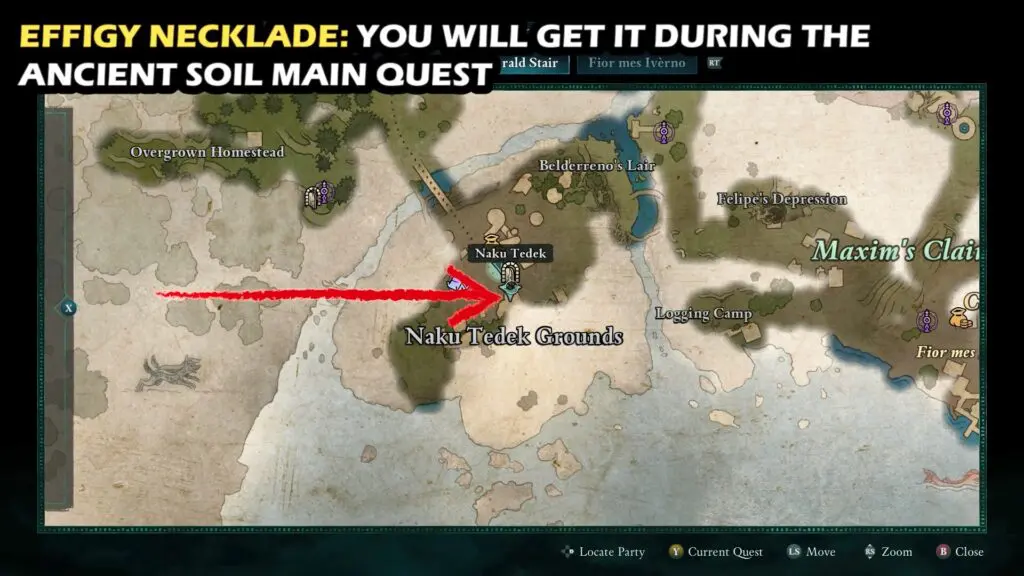
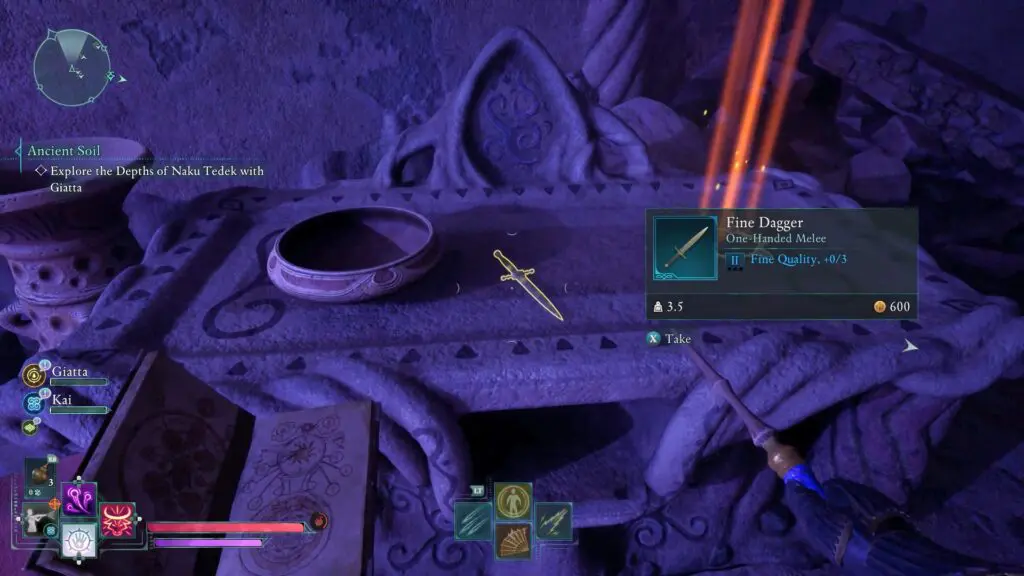
EFFIGY NECKLACE
The Effigy Necklace can be found on a stone table inside Naku Tedek. It can be obtained during the “Ancient Soil” main story quest
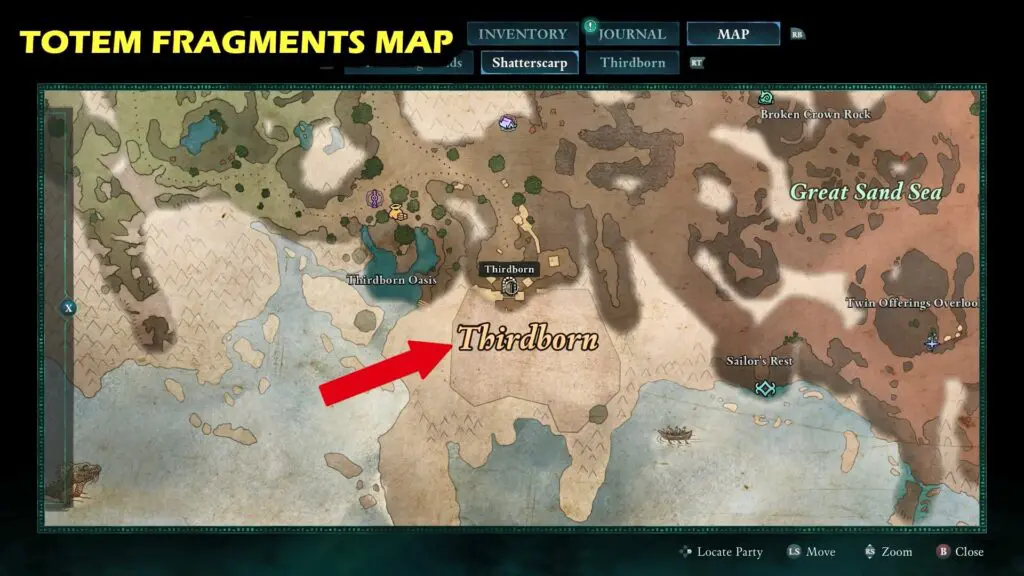
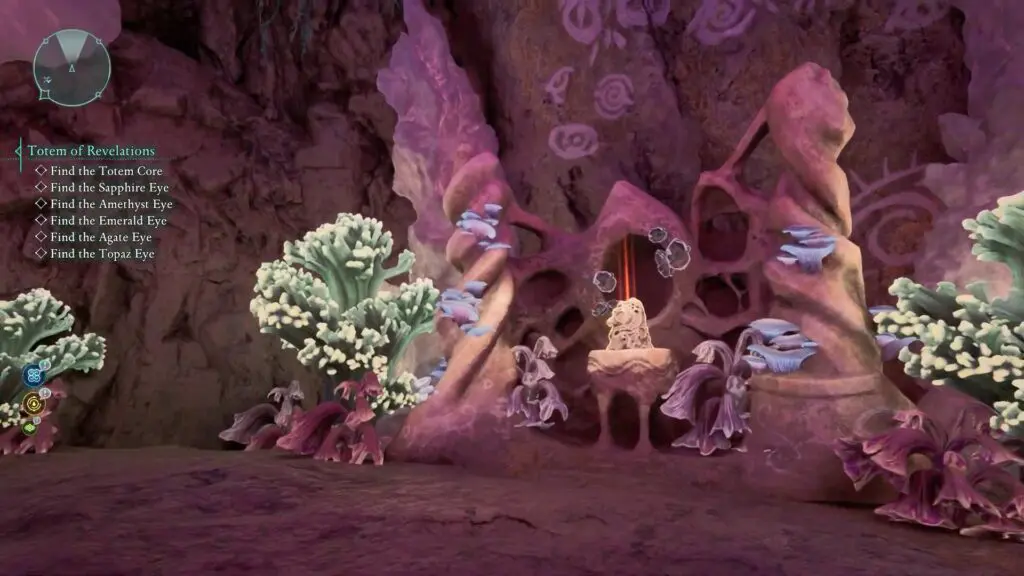
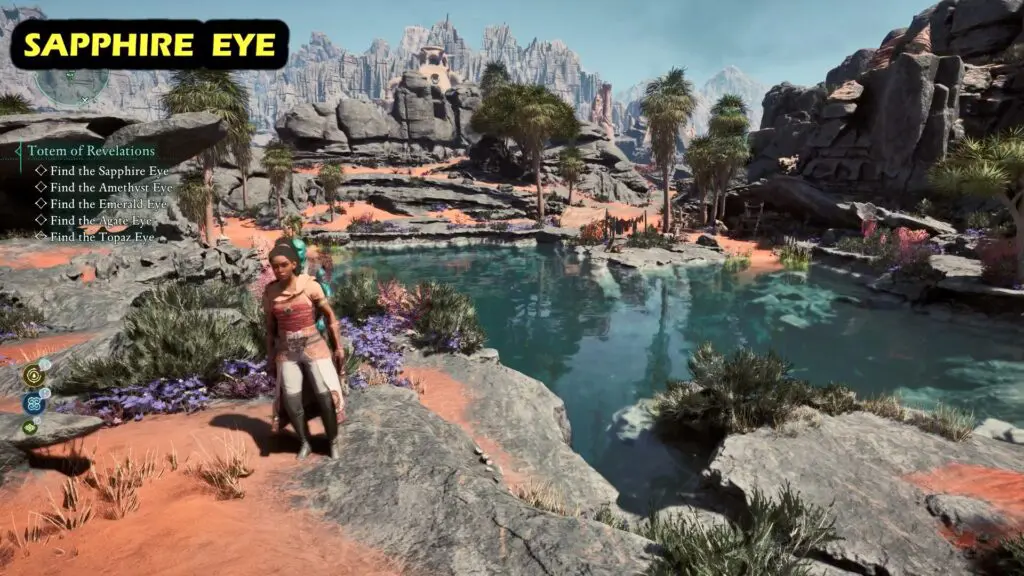
Totem of Revelations
All seven fragments of the Totem of Revelations are hidden throughout Thirdbornand.
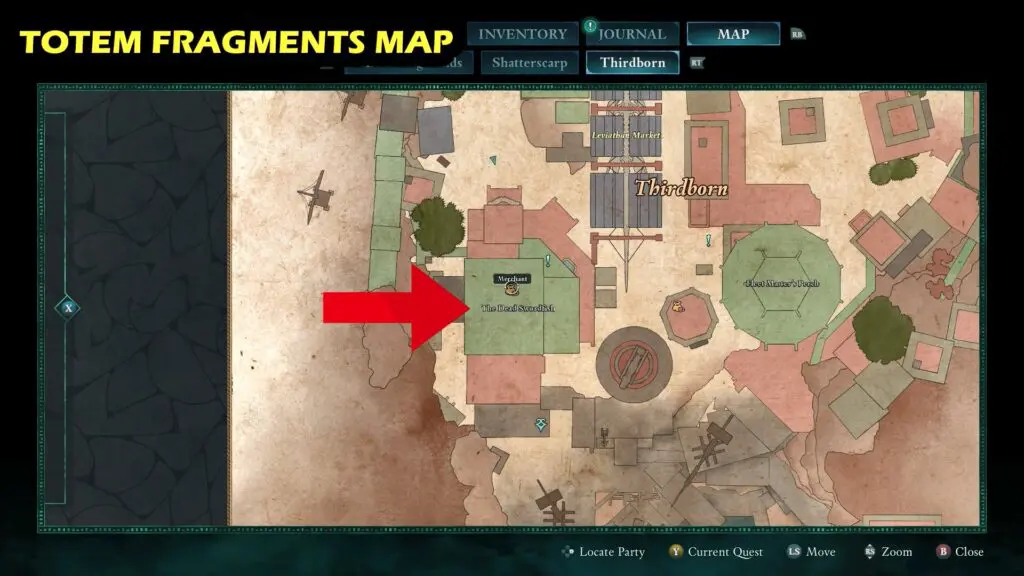
Totem Fragments Clues Map
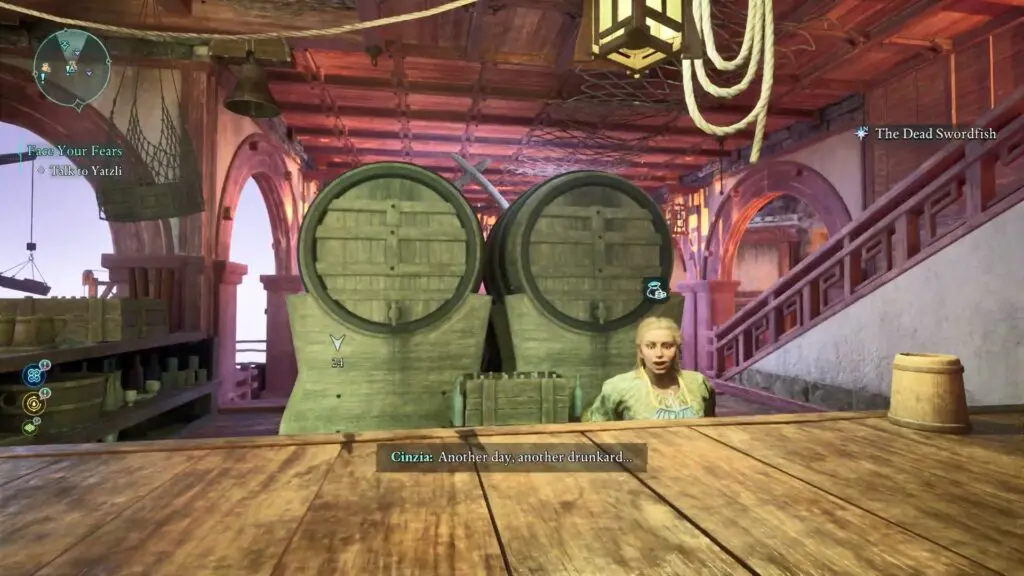
You can buy a map of all Totem of Revelations locations from NPC Cinzia in Thirdborn.
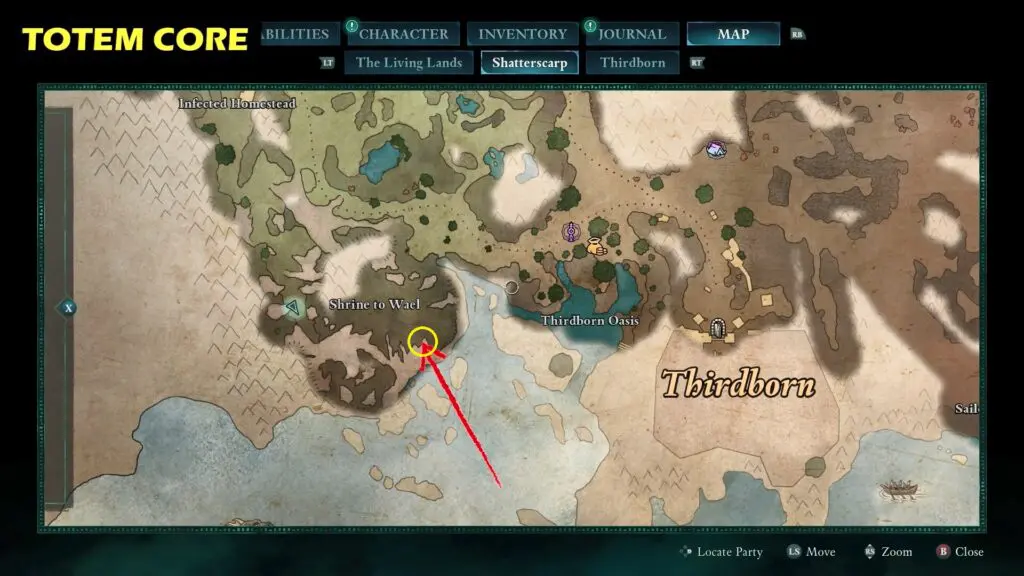
Eyes of the Obscured Totem Base
Eyes of the Obscured Totem Base is located in the Shrine to Wael.
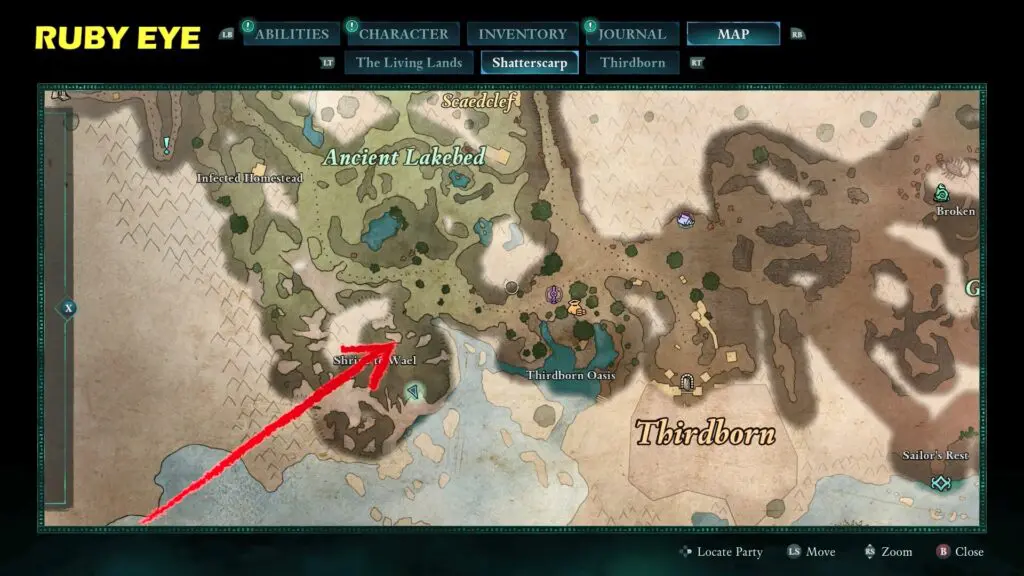
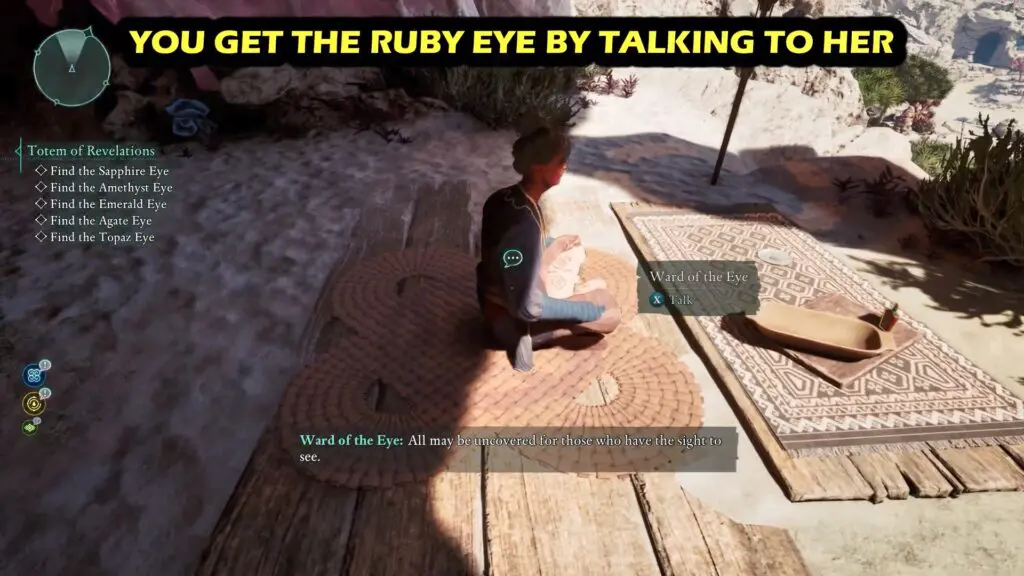
RUBY EYE
Follow the narrow tunnel opposite the Eyes of the Obscured Totem Base. You can get RUBY EYE by taking to NPC Ward of the Eye.
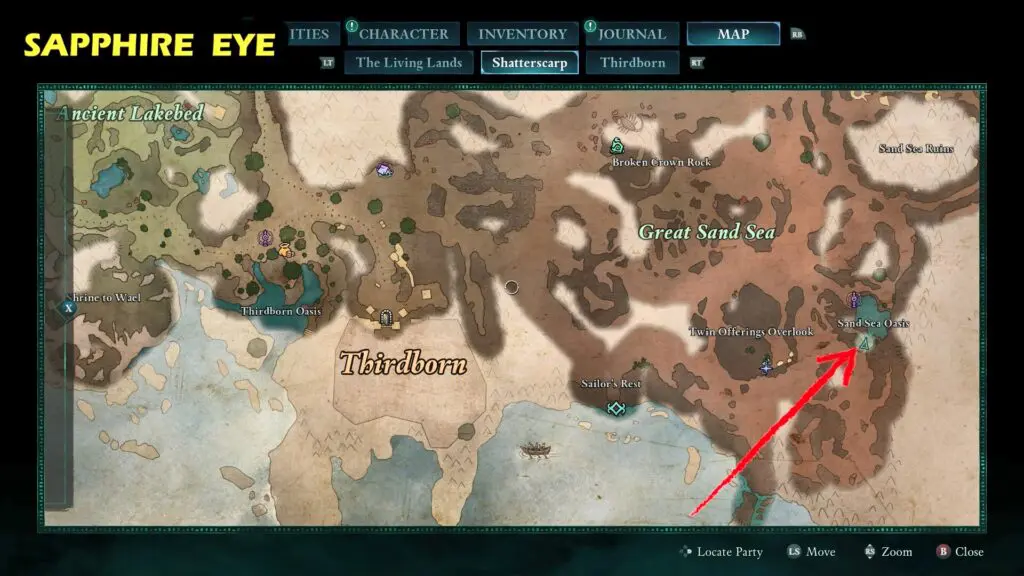
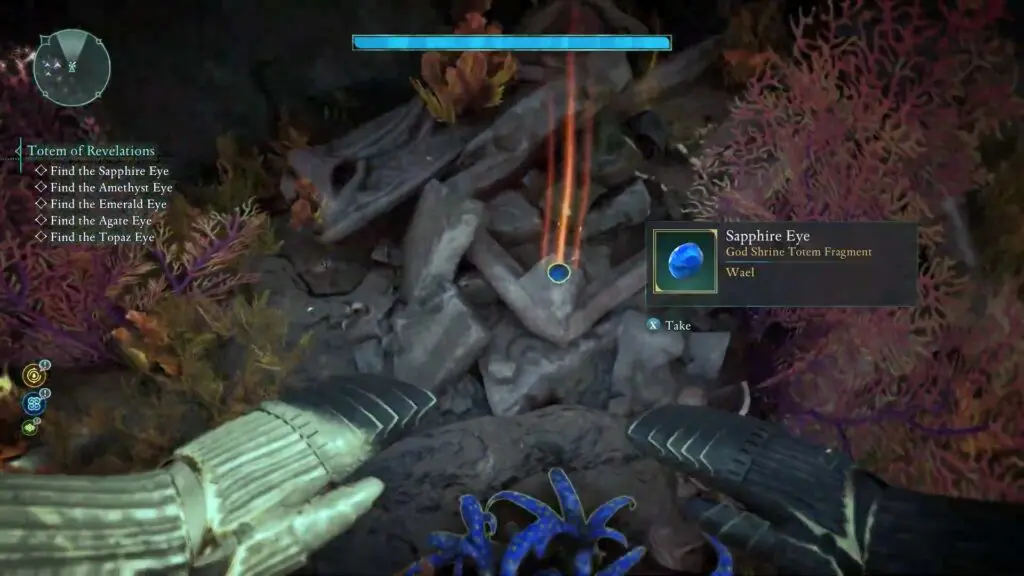
SAPPHIRE EYE
It is located underwater in the Sand Sea Oasis.
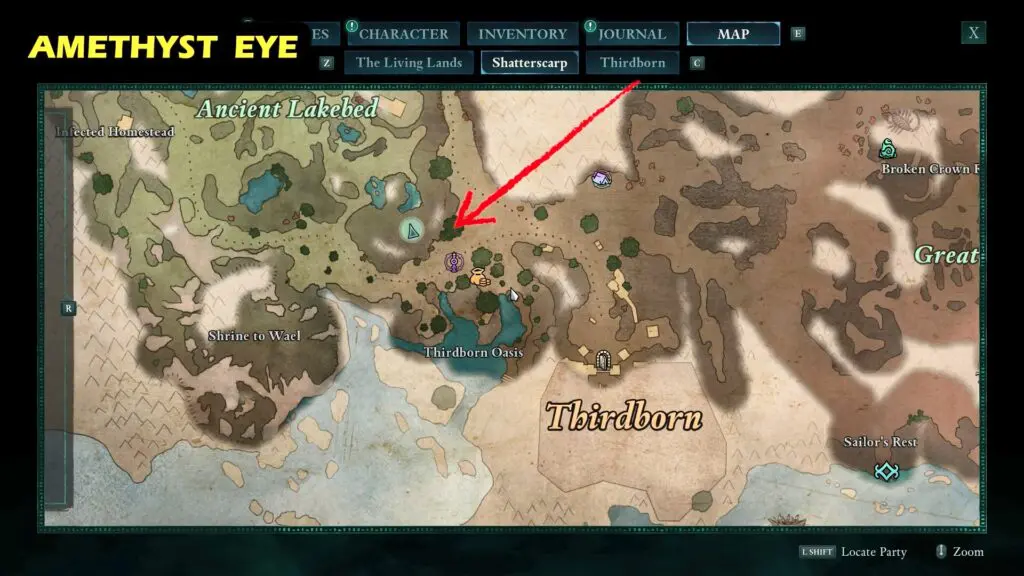
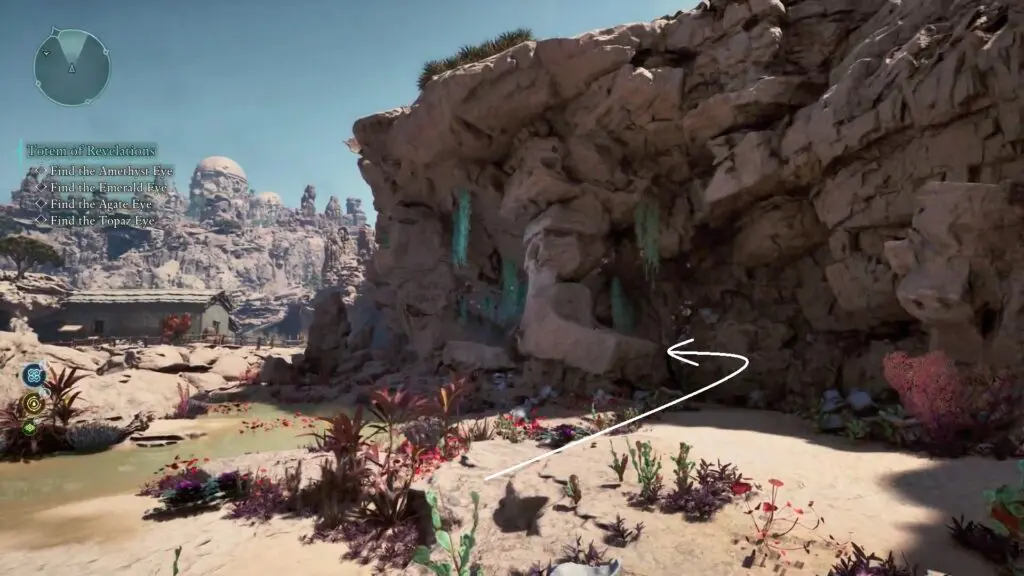
AMETHYST EYE
AMETHYST EYE is located southeast of the Ancient Lakebed, under the cliff.
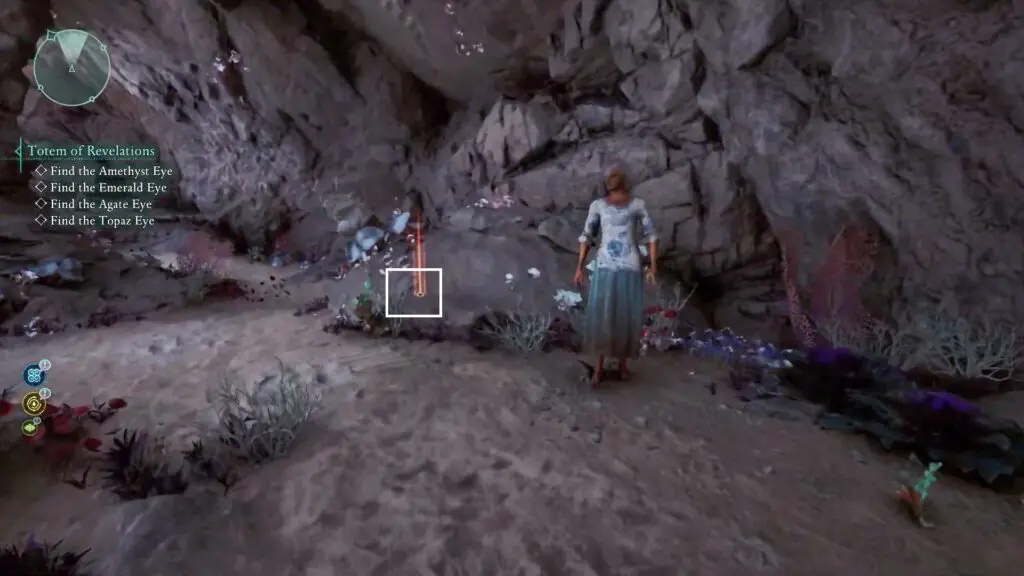
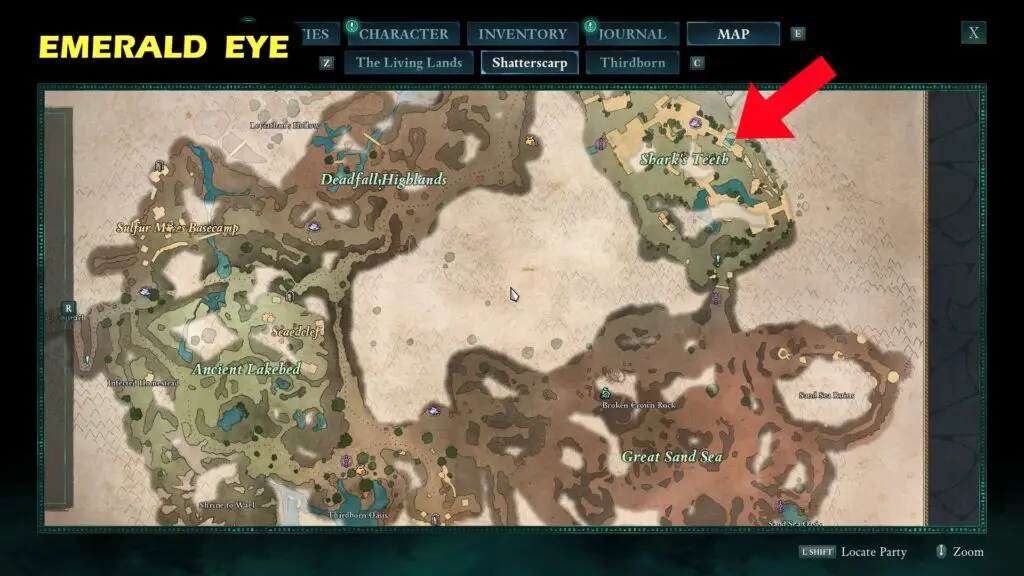
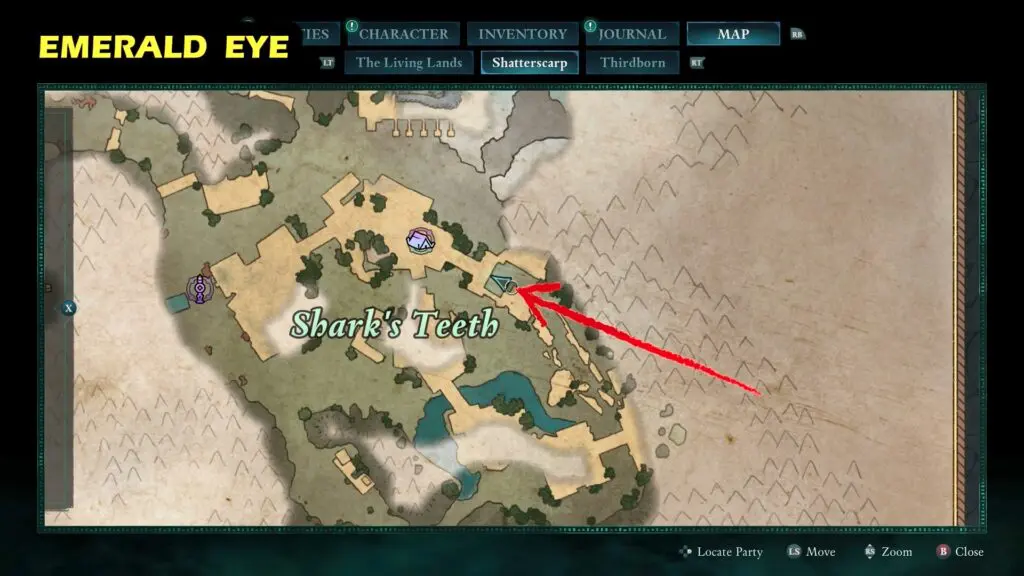
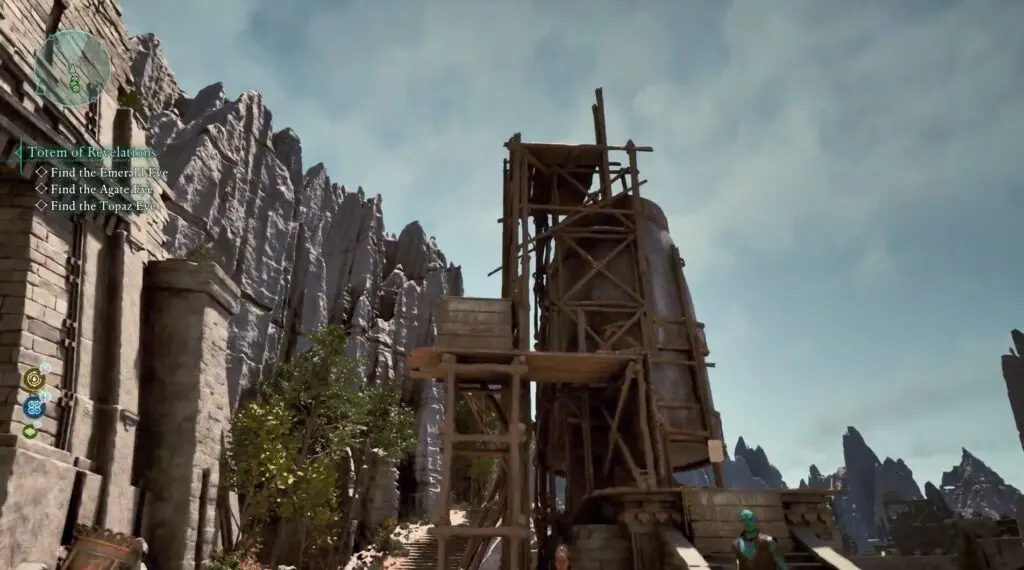
EMERALD EYE
It is on top of a tower in Shark’s Teeth.
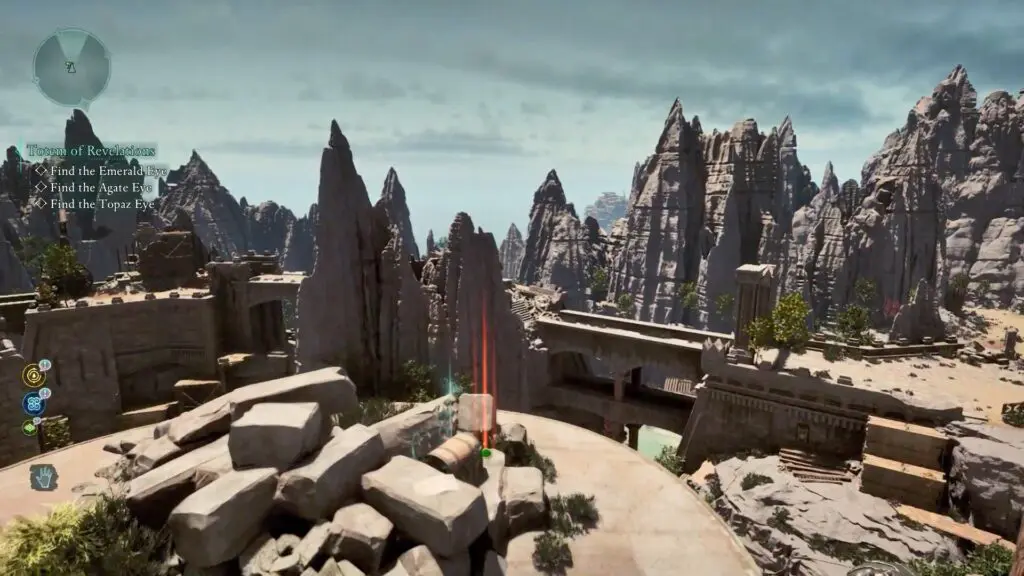
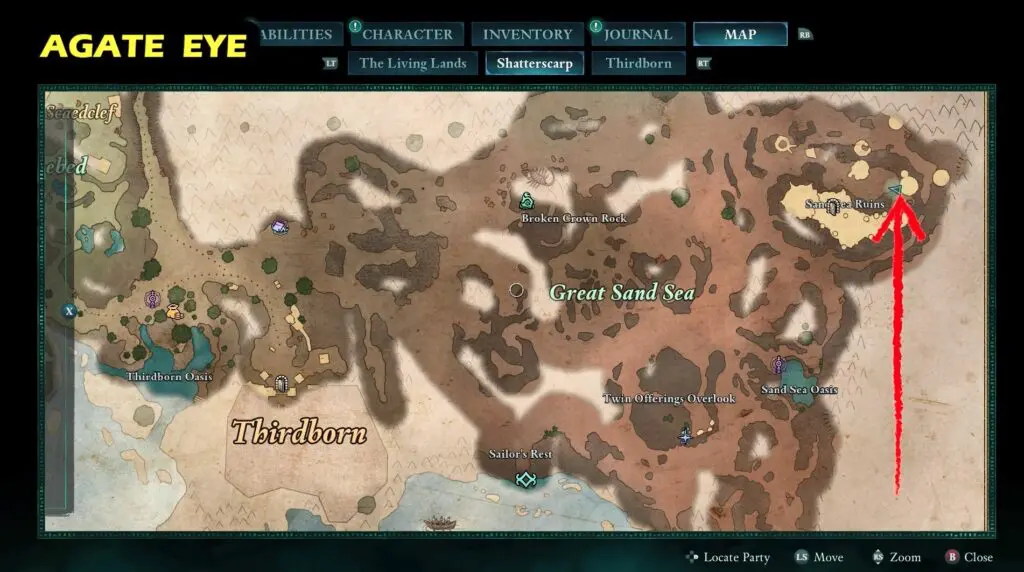
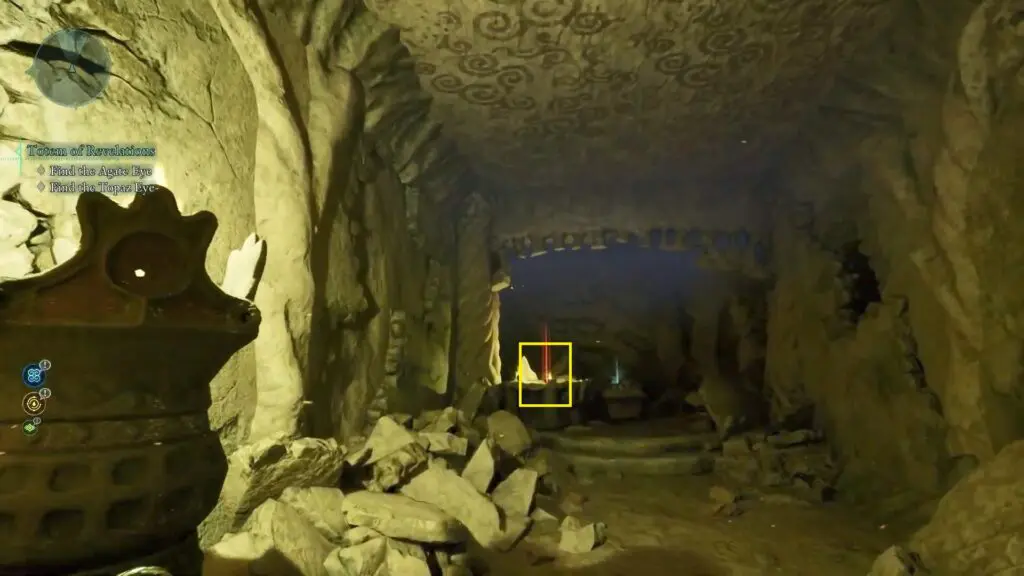
AGATE EYE
It is located inside a building in Sand Sea Ruins.
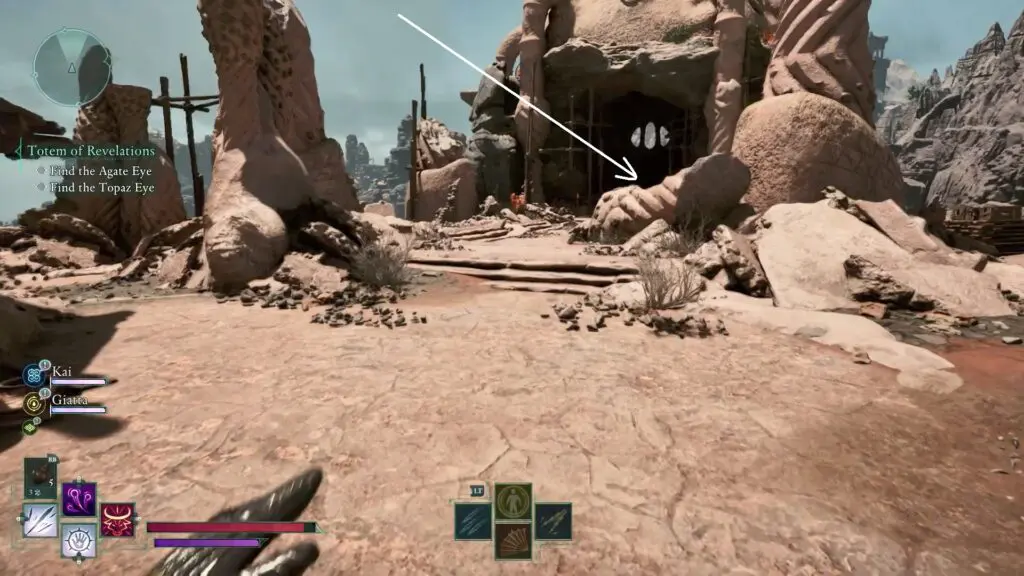
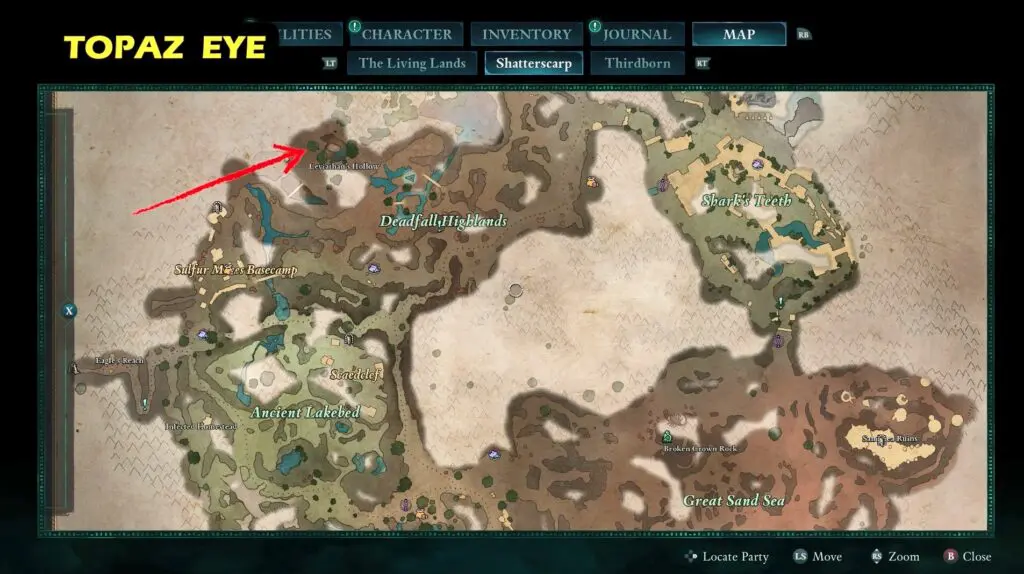
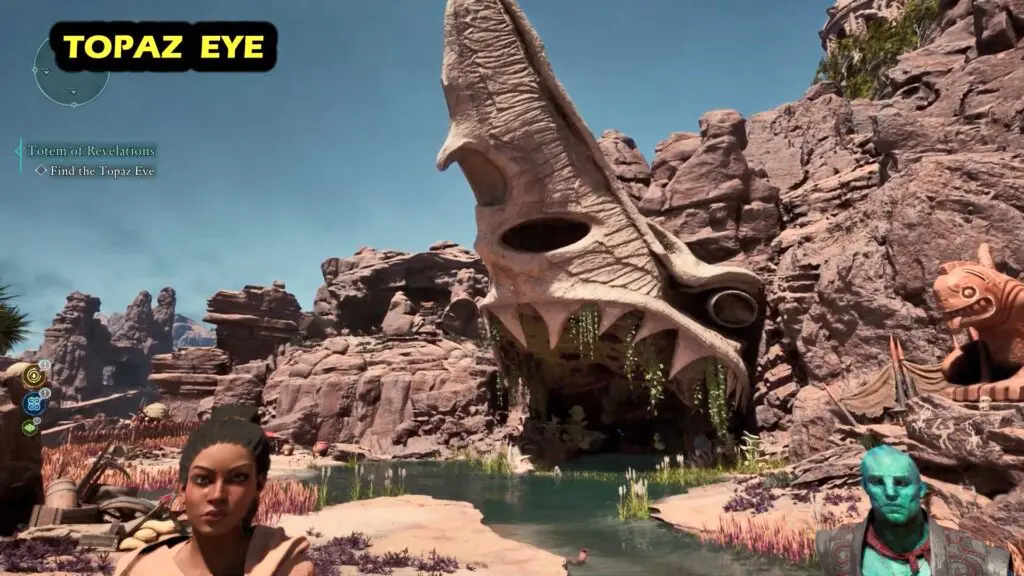
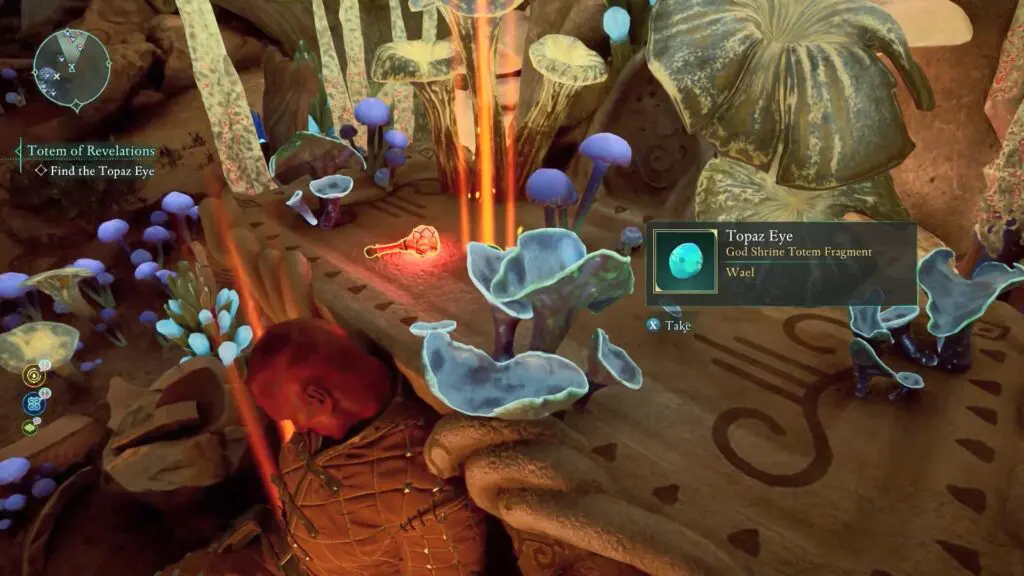
TOPAZ EYE
It is located in Leviathan’s Hollow. Enter inside the skeleton-shaped cave to find Topaz eye.
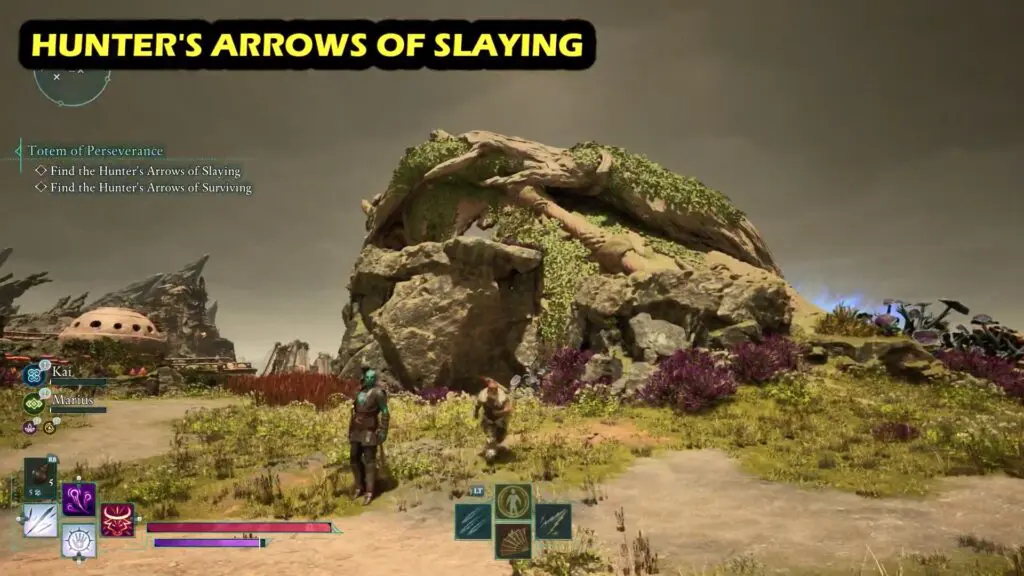
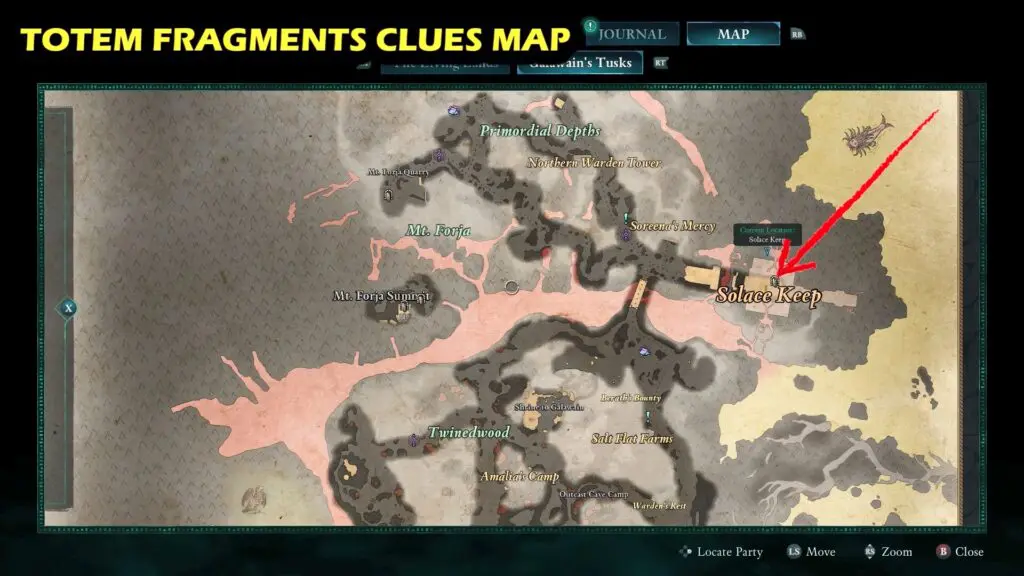
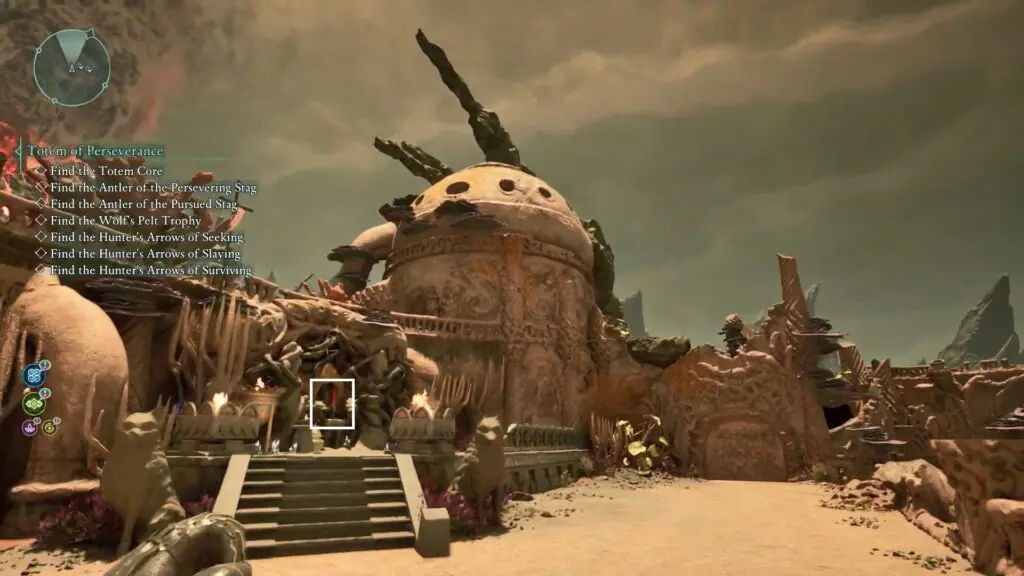
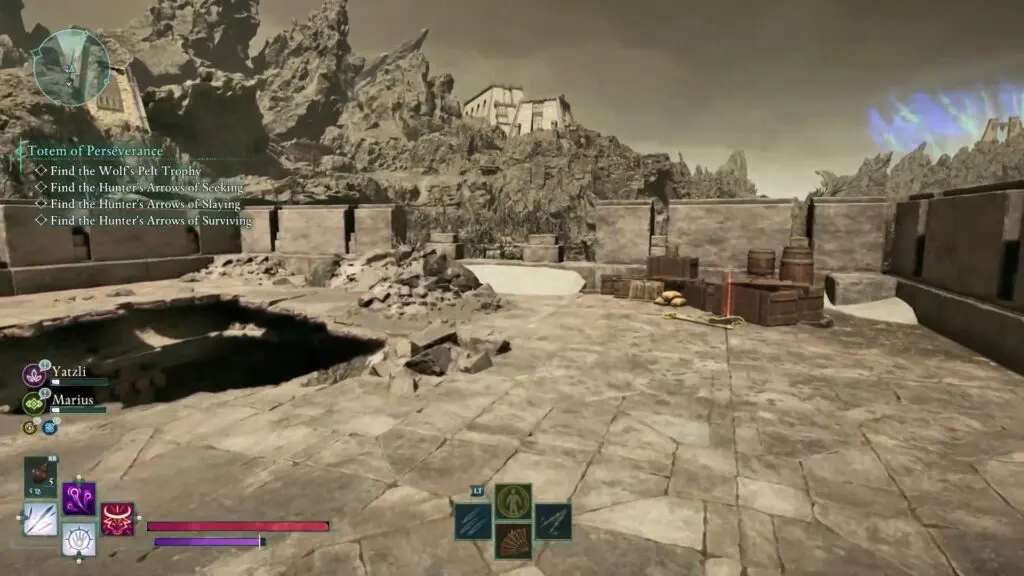
Totem of Perseverance
All seven fragments of the Totem of Perseverance are hidden throughout Solace Keep.
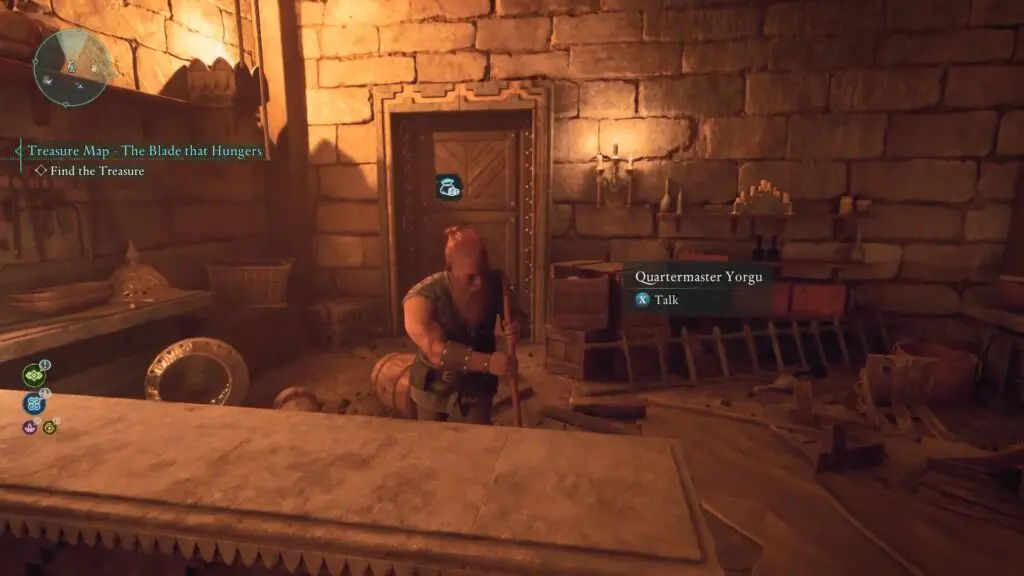
TOTEM FRAGMENTS CLUES MAP
You can buy a map of all Totem of Perseverance locations from NPC Yorgu in Solace Keep.
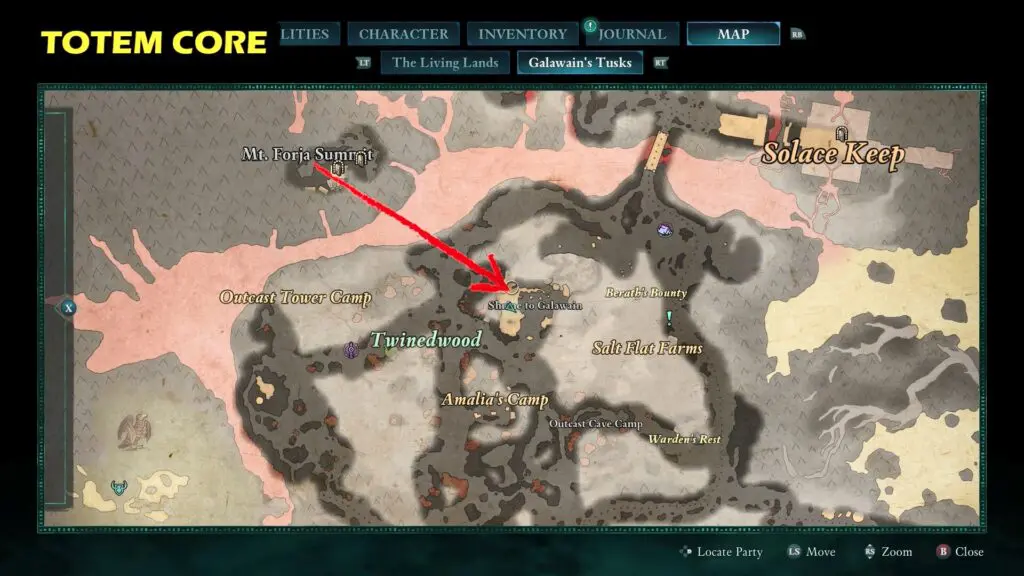
TOTEM CORE (The Huntmaster’s Spoil)
The Totem Core can be found on an altar in the Shrine to Galawain.
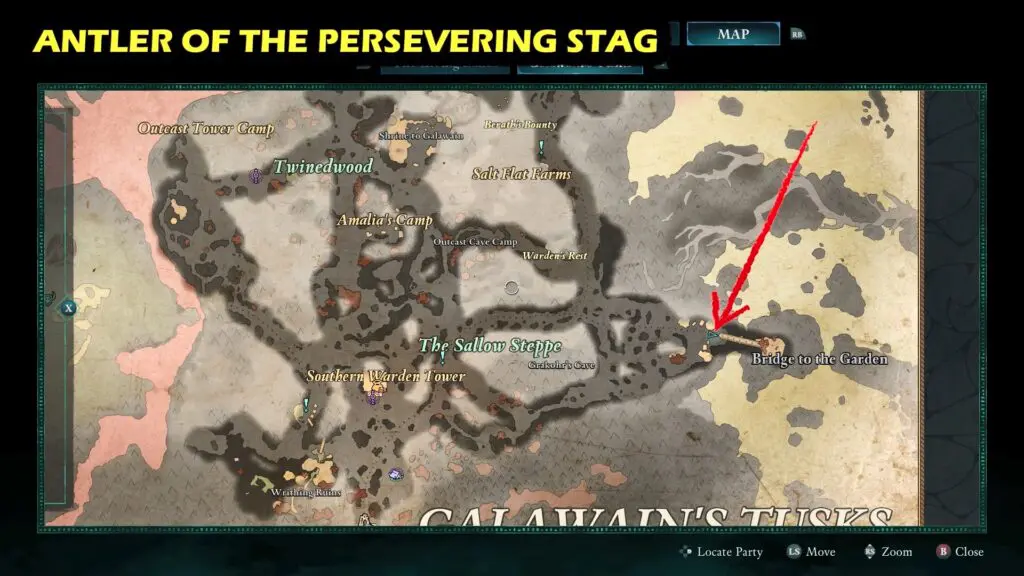
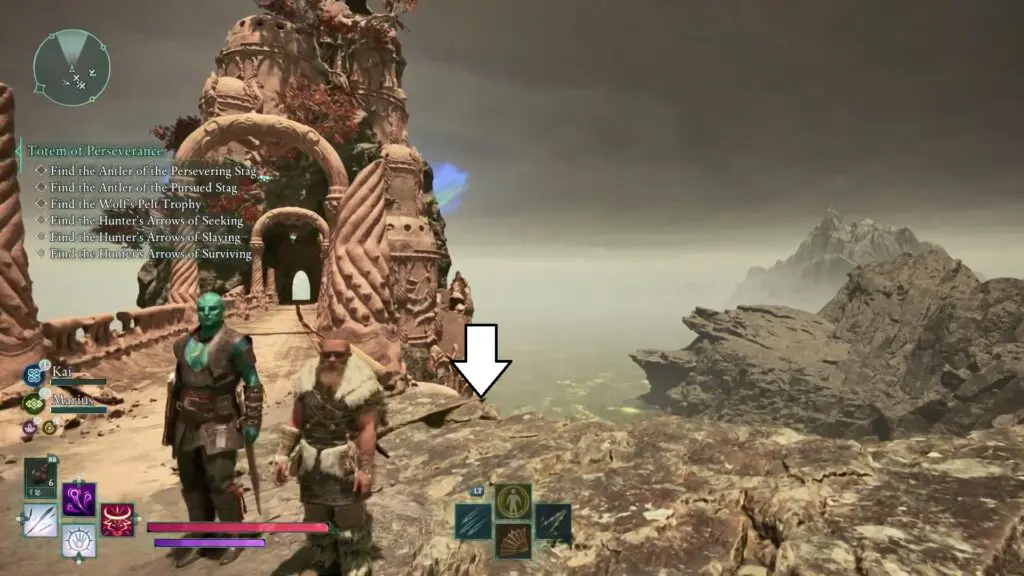
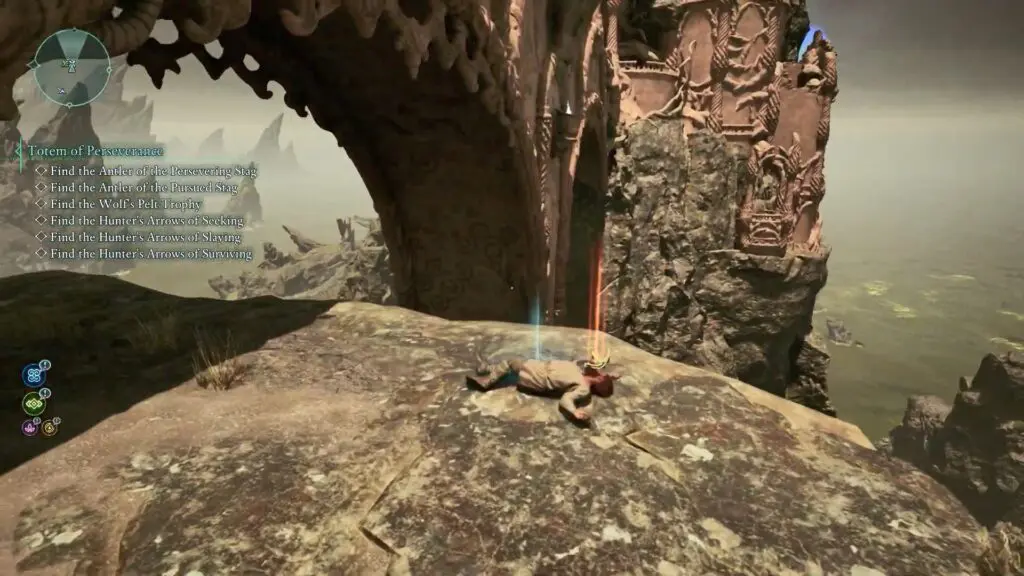
ANTLER OF THE PERSEVERING STAG
The Antler of the Persevering Stag is near the Bridge to the Garden. At the start of the bridge, drop down on the right side to find the totem piece on a corpse beneath the bridge.
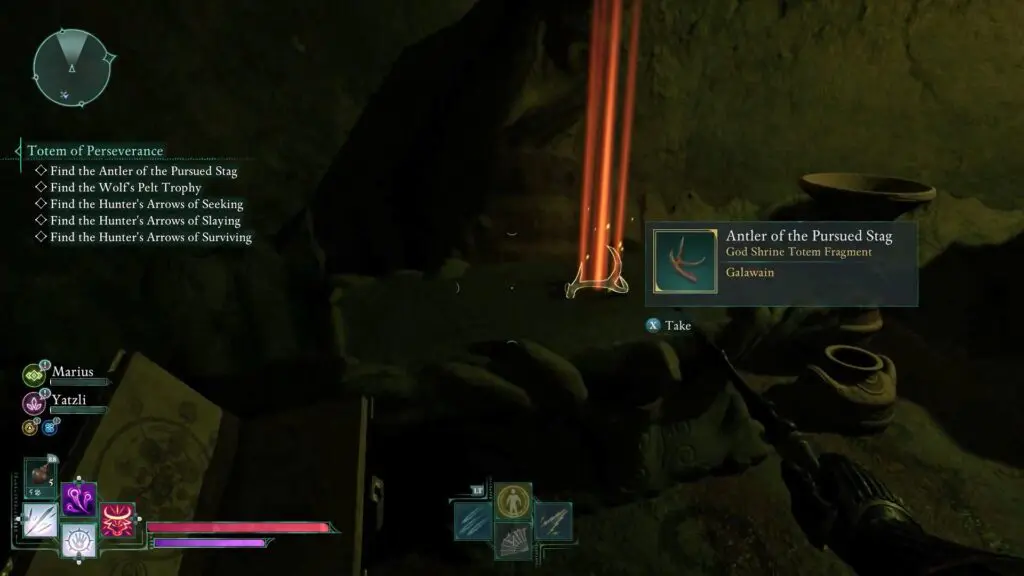
ANTLER OF THE PURSUED STAG
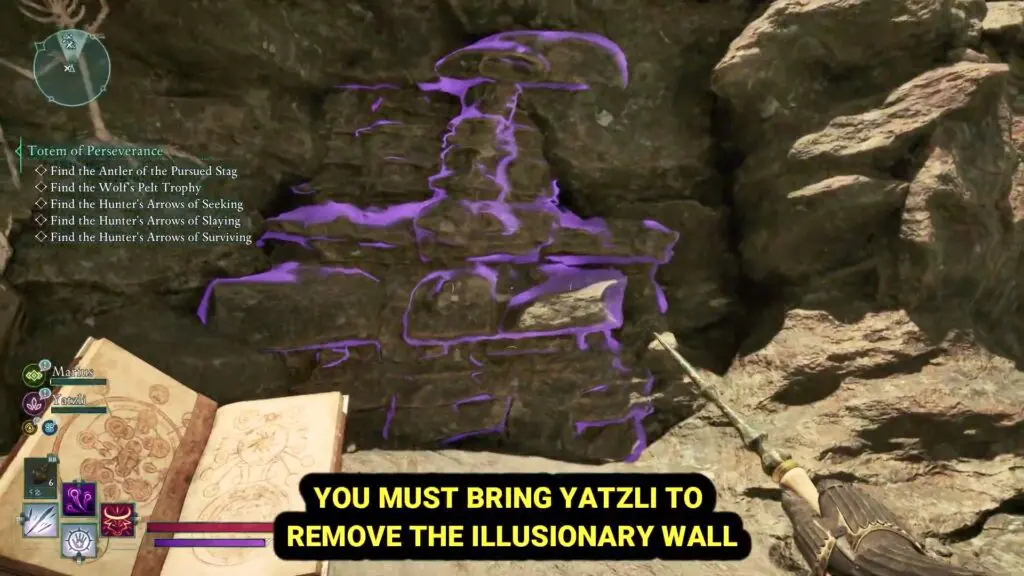
The Antler of the Pursued Stag is north of the Lost Village and requires Yatzli to remove the illusory wall.
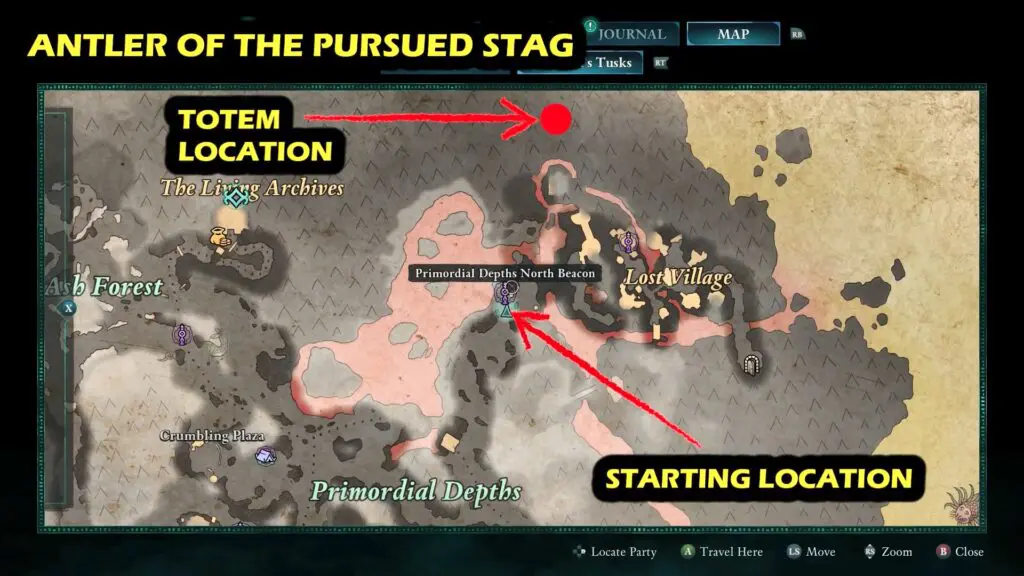
Go to the marked location on the map and head north to find a cave in the lava. Enter the cave and follow the path until you emerge on the other side.

After exiting, turn left to find an illusory wall, which Yatzli must reveal. Once inside, head left again and use fire to burn the vines blocking a doorway. The Antler is inside, resting on a table.
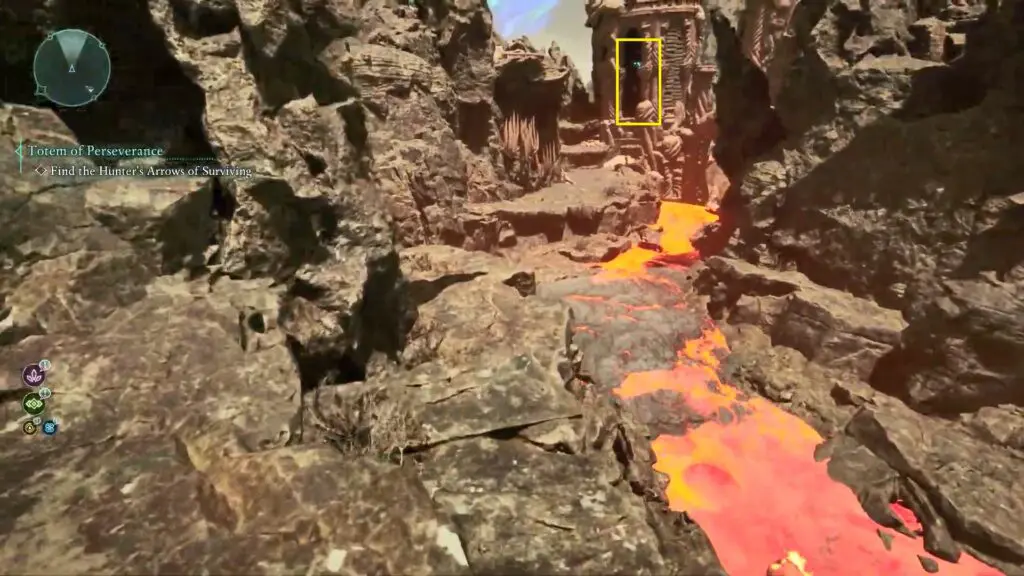
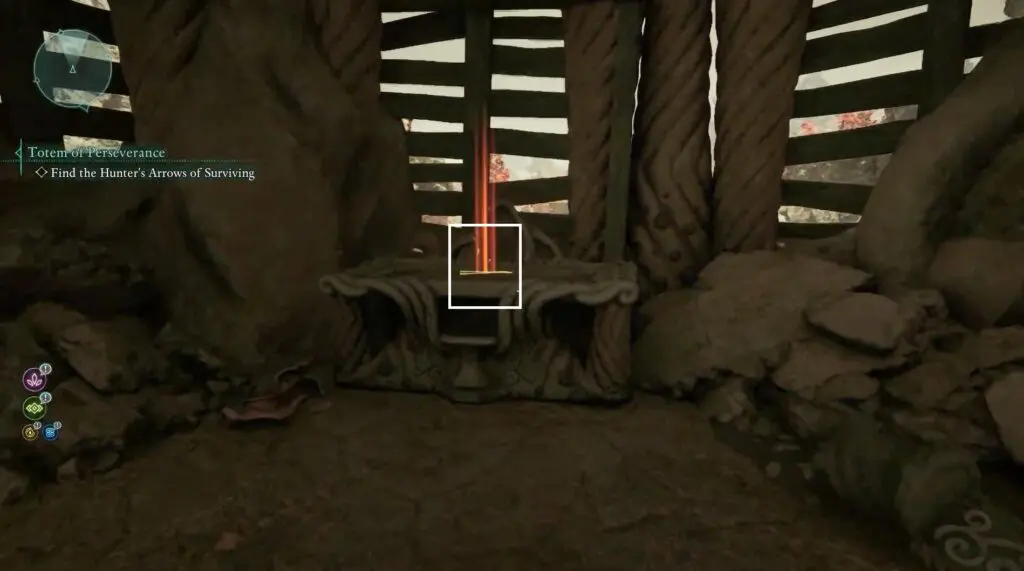
HUNTER’S ARROWS OF SURVIVING
Return to the spot where you exited the cave for the previous totem piece.
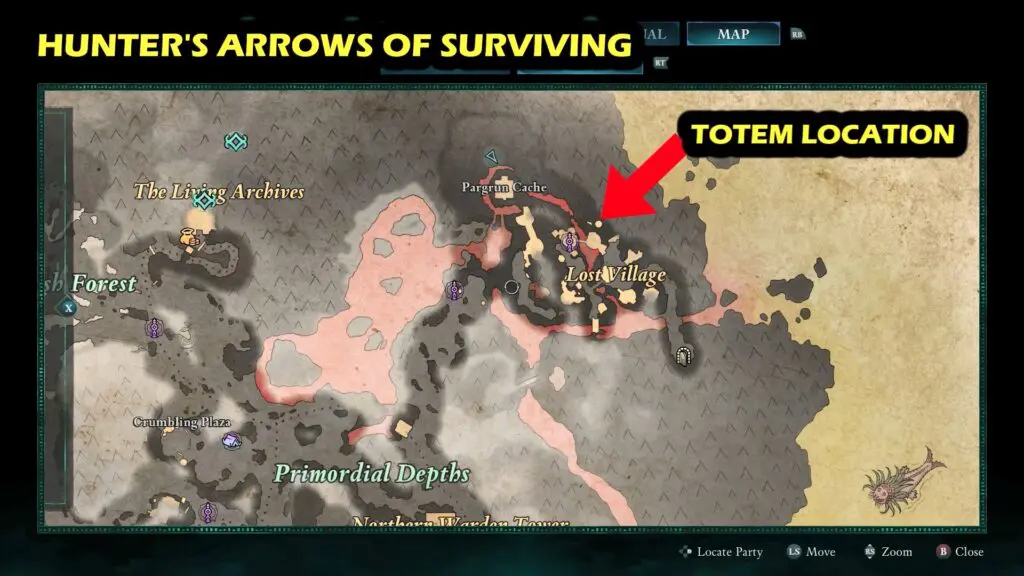
This time, head left and follow the path along the lava river.
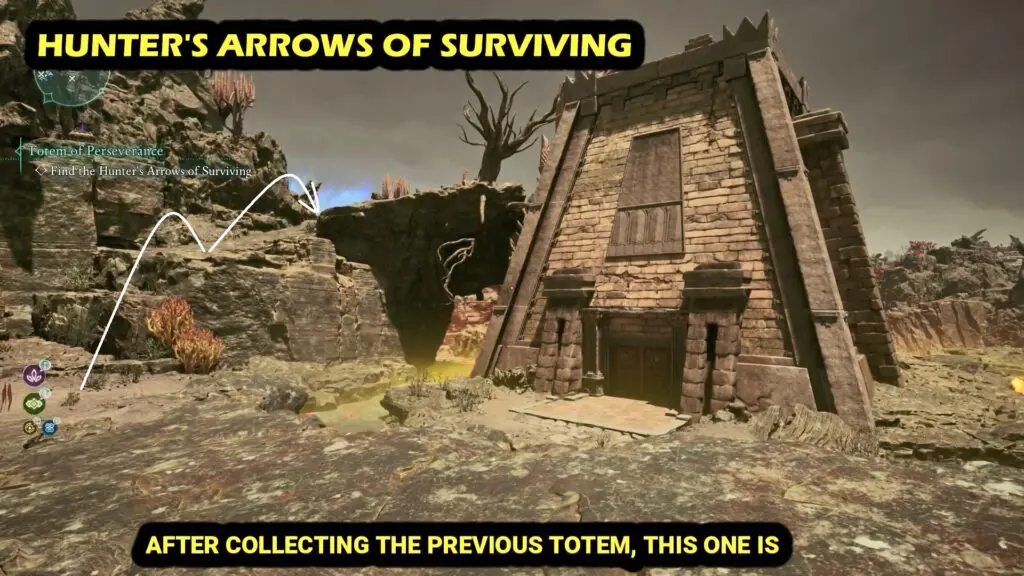
You’ll find the Hunter’s Arrows of Surviving inside a tower.
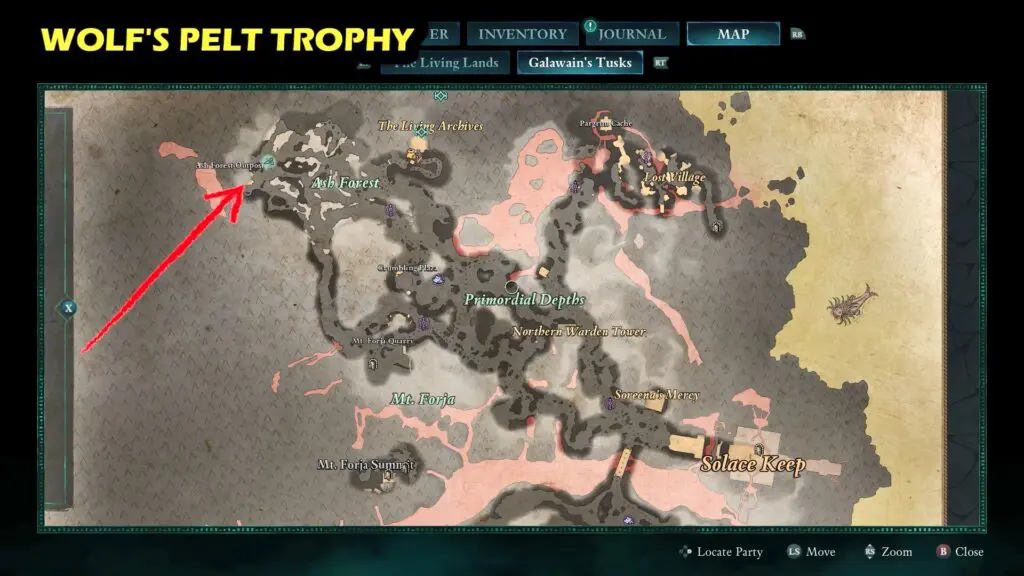
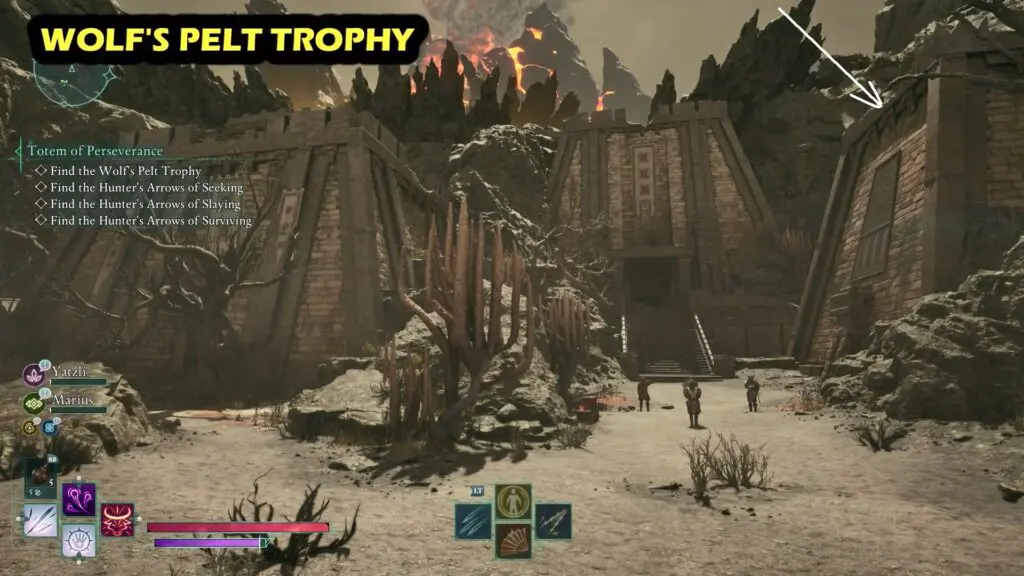
WOLF’S PELT TROPHY
The Wolf’s Pelt Trophy can be found in the Ash Forest, on top of the pyramid.
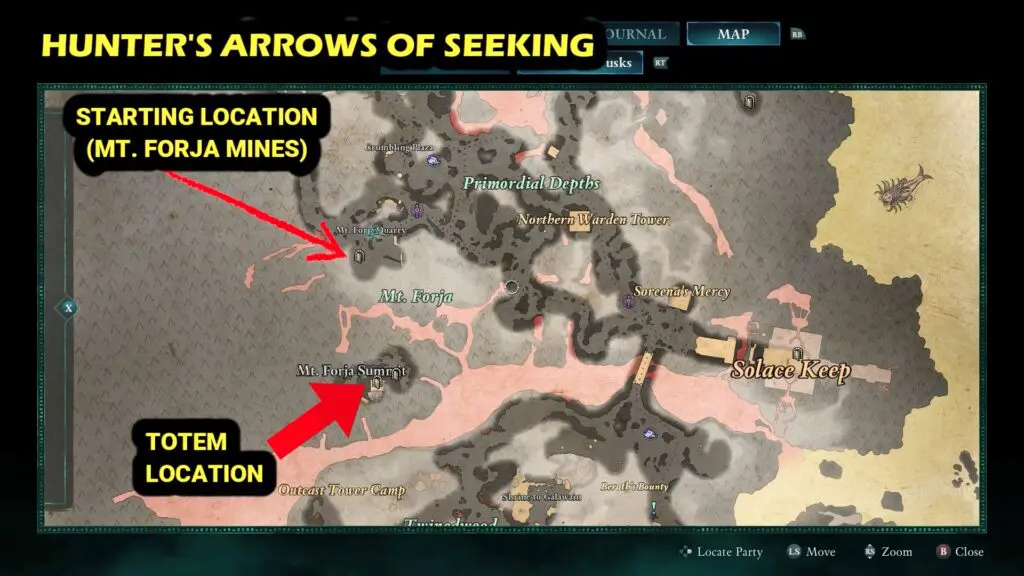
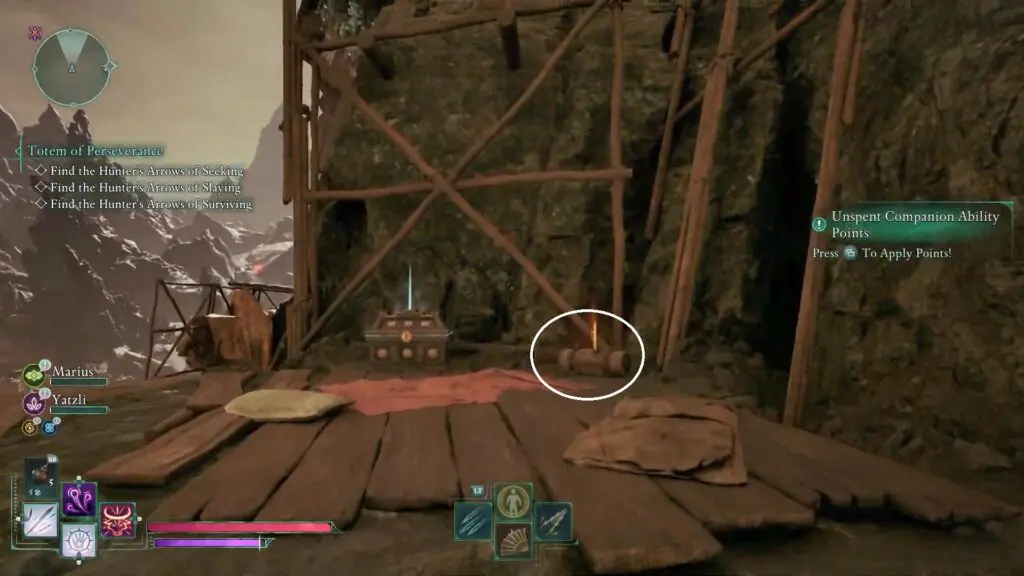
HUNTER’S ARROWS OF SEEKING
The Hunter’s Arrows of Seeking can be found on the top of Mt. Forja Summit. This place you will visit during the main quest.
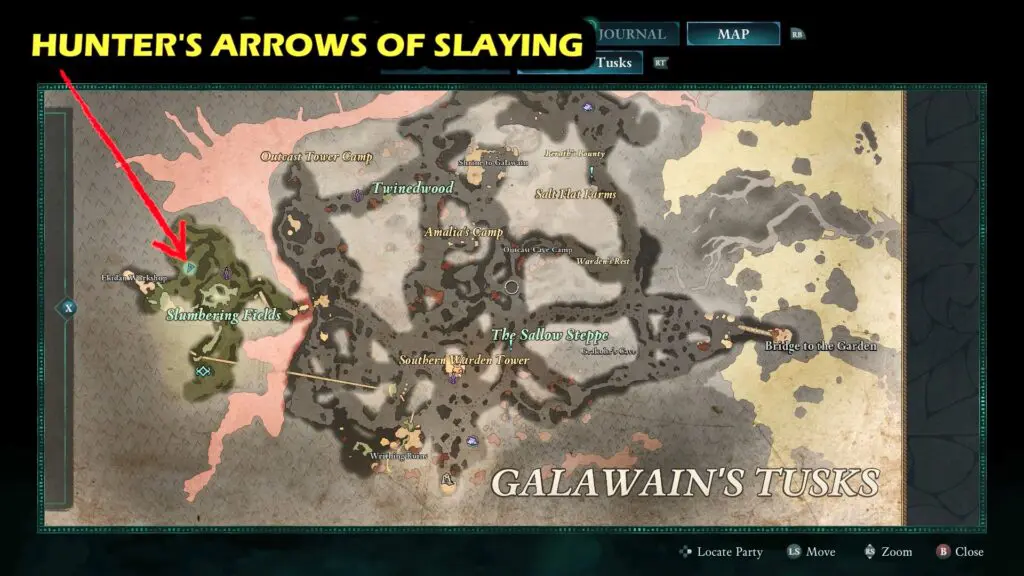
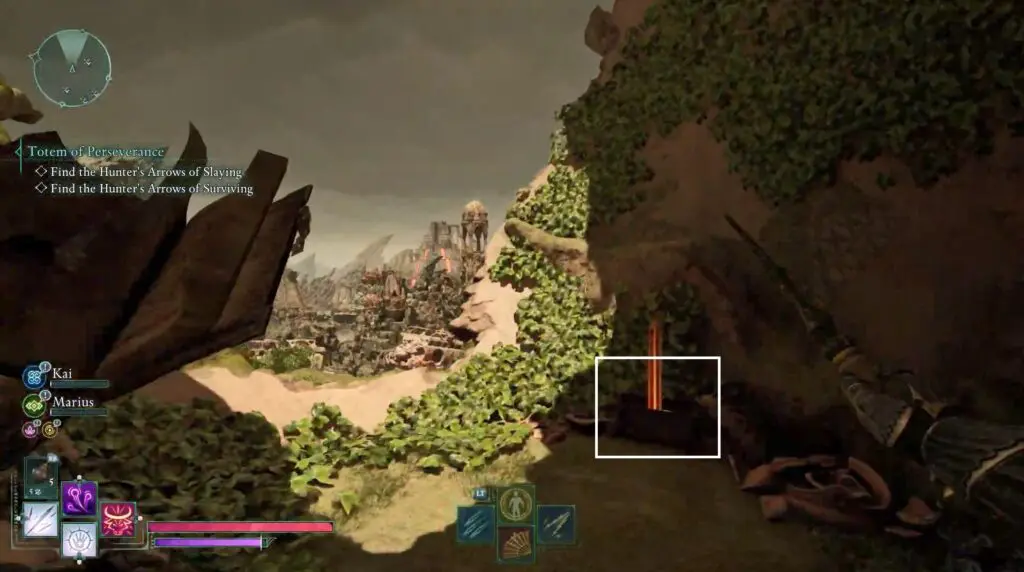
HUNTER’S ARROWS OF SLAYING
The Hunter’s Arrows of Slaying can be found in the Slumbering Fields. It is located inside an arc structure.