This guide shows the complete walkthrough of the “Broadcast” main quest in Dying Light 2.
Wait for Matt’s Summons
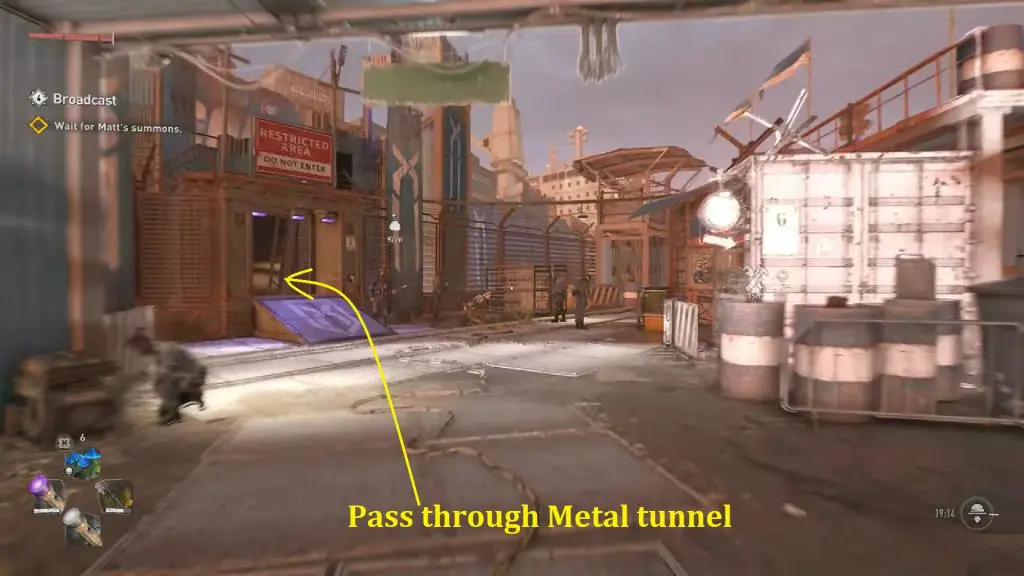
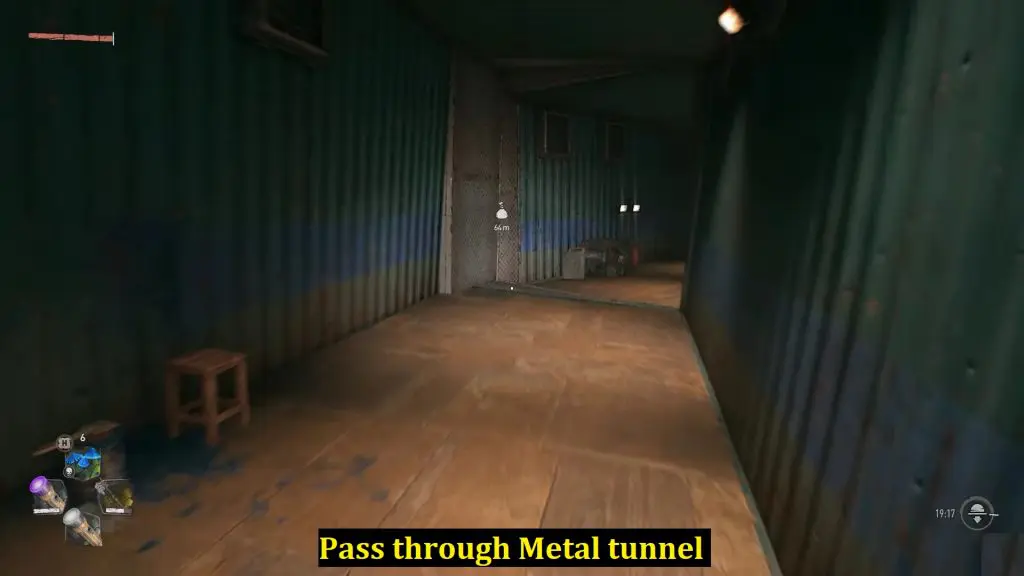
To get Matt’s summon, get the player rank of 4 or more, 260+ stamina, and then go to a bed and sleep. Once you have done these things, go to the long corridor through metal containers at the entrance into the Peacekeeper headquarters. In the corridors, the objective will be updated and you will get the objective to Meet with Jack and Juan at the Fish Eye.
Meet with Jack and Juan at the Fish Eye
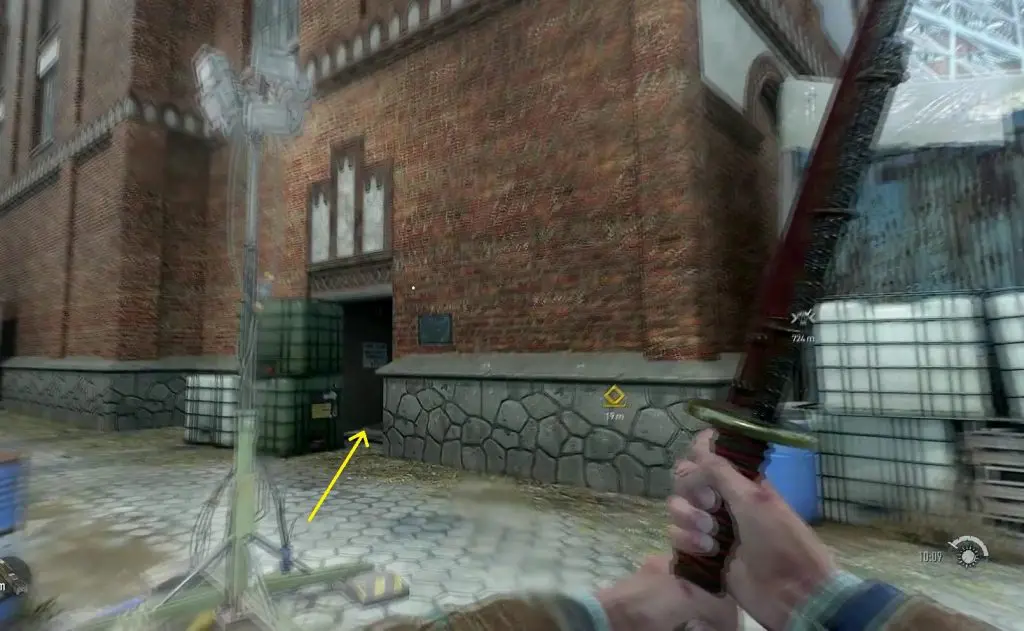
Go to the location marked in the picture and talk to Jack and Juan.

Find out what is going on at the electrical substation
Go to the electrical substation in the southern portion of Garrison as shown in the picture below. Eliminate the Renegades inside the substation compound.

Get the Substation Running
Enter the substation building by squeezing through the crates as shown below. Inside, you will have to solve the electrical generator puzzle to get the Substation Running
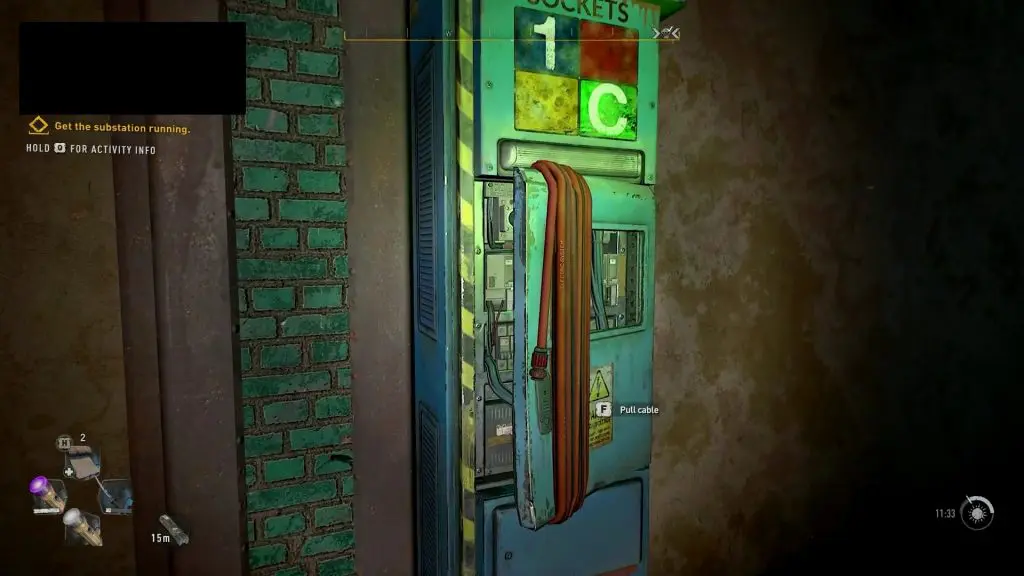
Electrical generator Puzzle Explained
The green terminal has numbers written on it (Ex 1/C in the picture below). Pull the cable from the green terminal and connect it with the red terminal with one of the corresponding numbers on it (Ex C in the picture below). This powers up the system connected to the red terminal (Ex Gate C in the picture below).

How to solve the Garrison Electrical Station Puzzle
As you enter the station, you will see a Green Terminal with A & B on it as shown below.
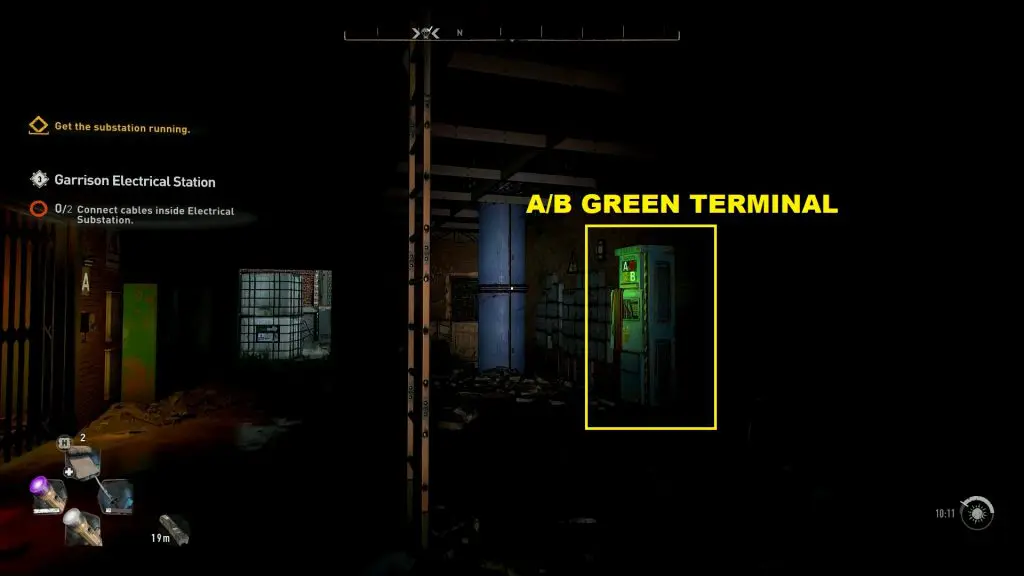
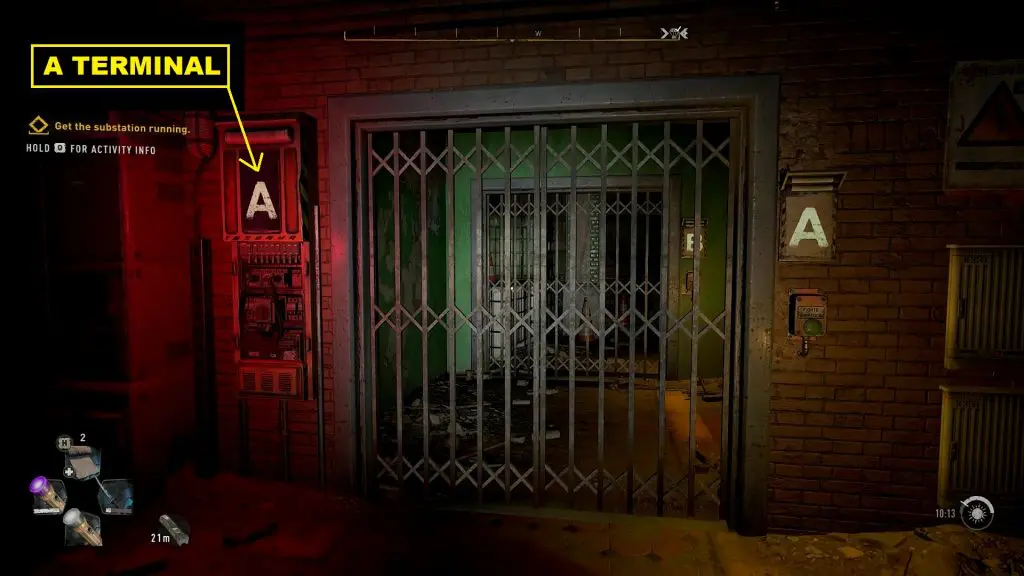
Pull the cable from the green terminal and connect to the Red Terminal with ‘A’ as shown below. Then press the button to open Gate A. Then pull out the cable from the ‘A’ terminal and connect it to the Red Terminal with ‘B’. They press the button for Gate ‘B’ to open it.
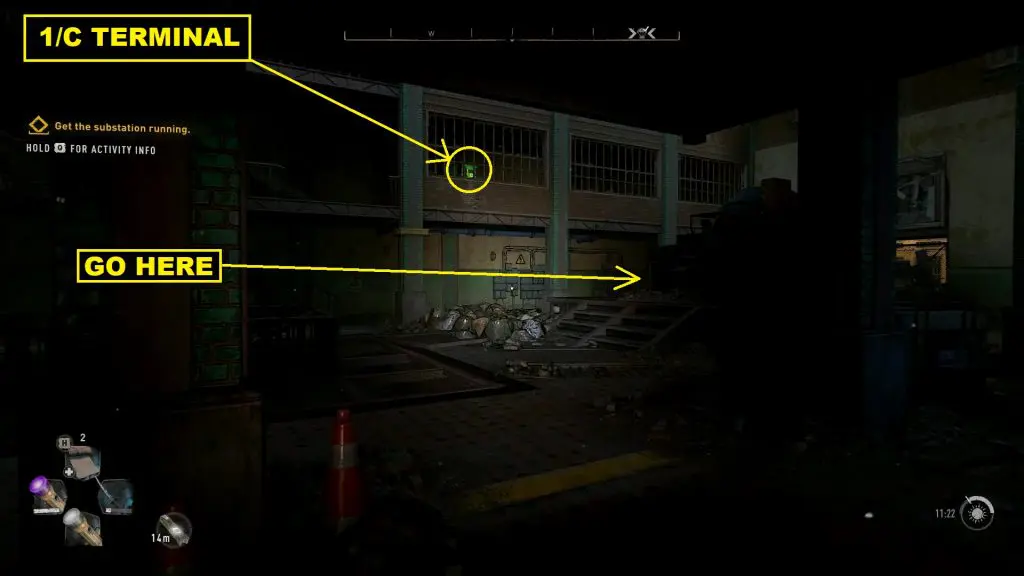
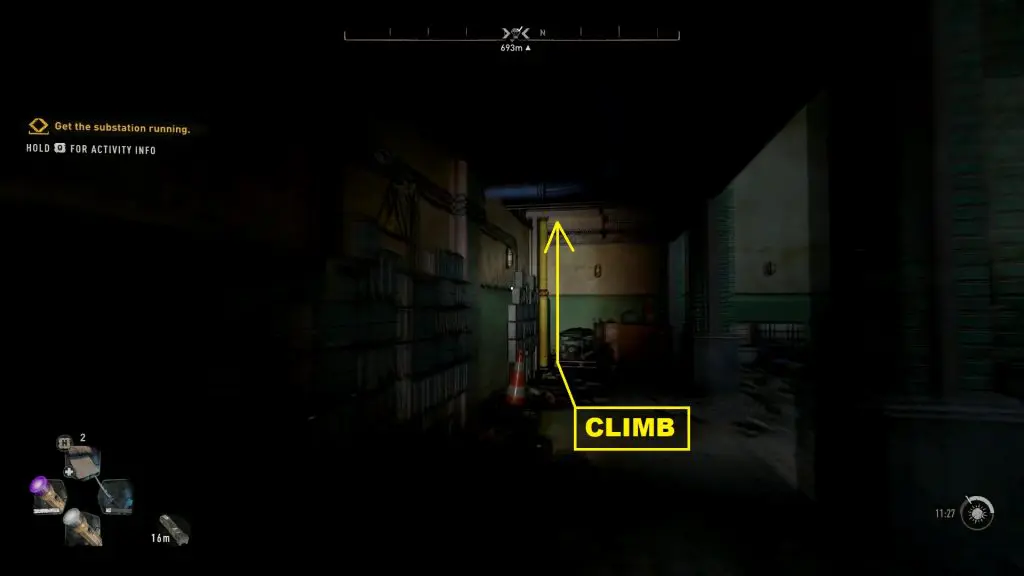
Now you will come to the main area. Here you will see a 1/C green terminal on the first floor as shown in the picture below. In the corner of this room, you will see a yellow pipe. Climb to the first floor using the pipe to reach the green terminal as shown below.
Pull the cable from the 1/C green terminal, then open the yellow gate next to it. Now jump down to the main hall and climb up to the second floor on the opposite side as shown in the picture below.

Connect the cable to the red terminal with ‘C’.
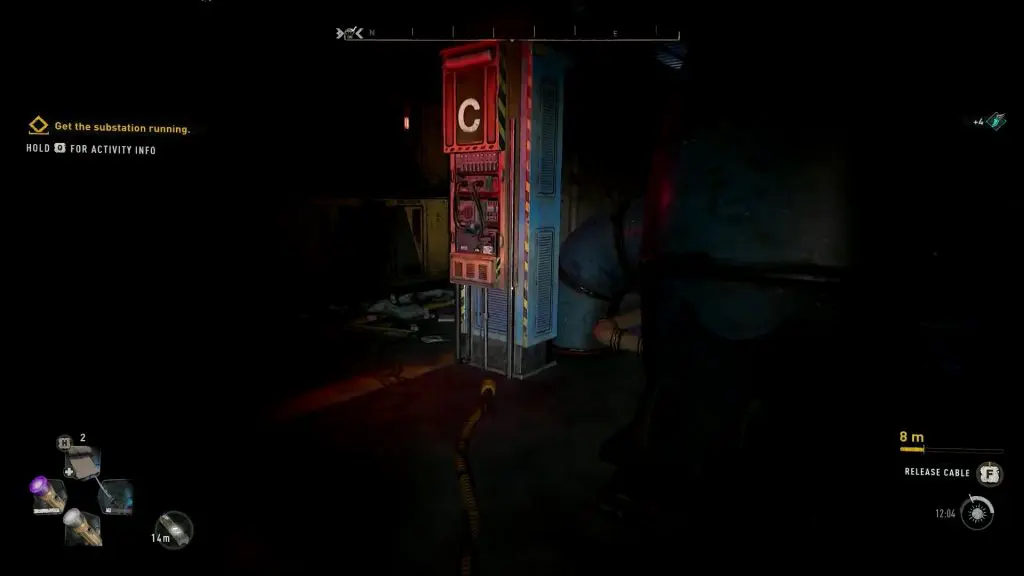
This will power up the ‘C’ gate. Go and open the ‘C’ gate. Then go inside. Here you will see a safe. The safe code is 314.

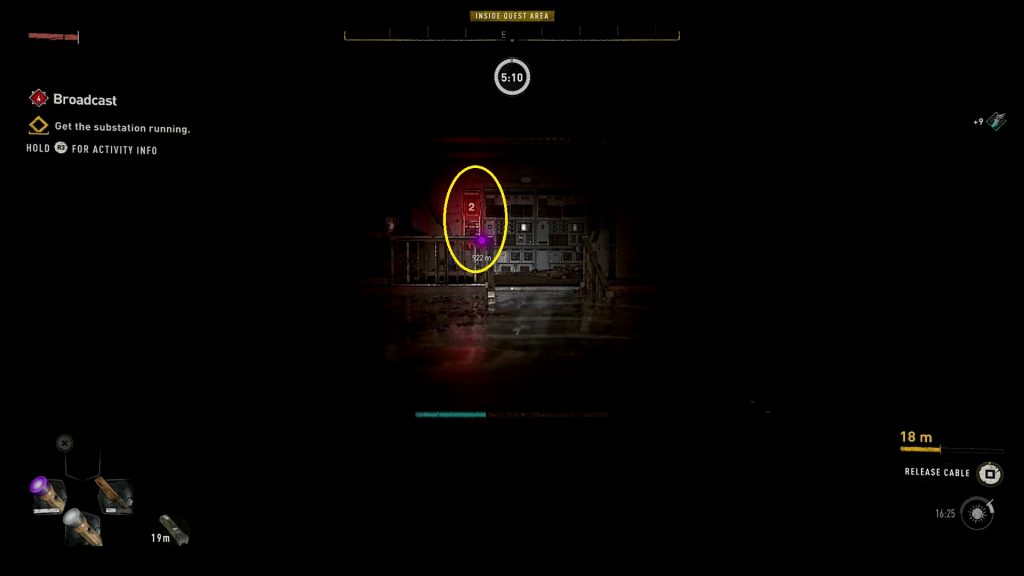
Inside this room, you will see a Green Terminal with ‘2’ on it. Pull the cable from the green terminal. Then come out from the room and jump down to the main hall. Then go to the flooded basement as shown in the second picture below.
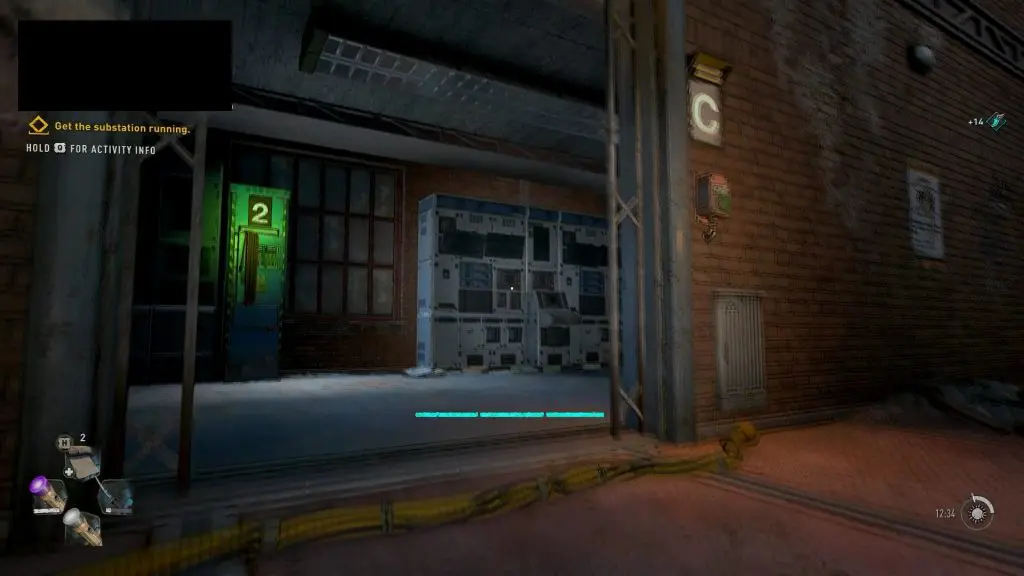
In the flooded basement, you will see a red terminal with ‘2’ on it. Connect the cable to the red terminal.
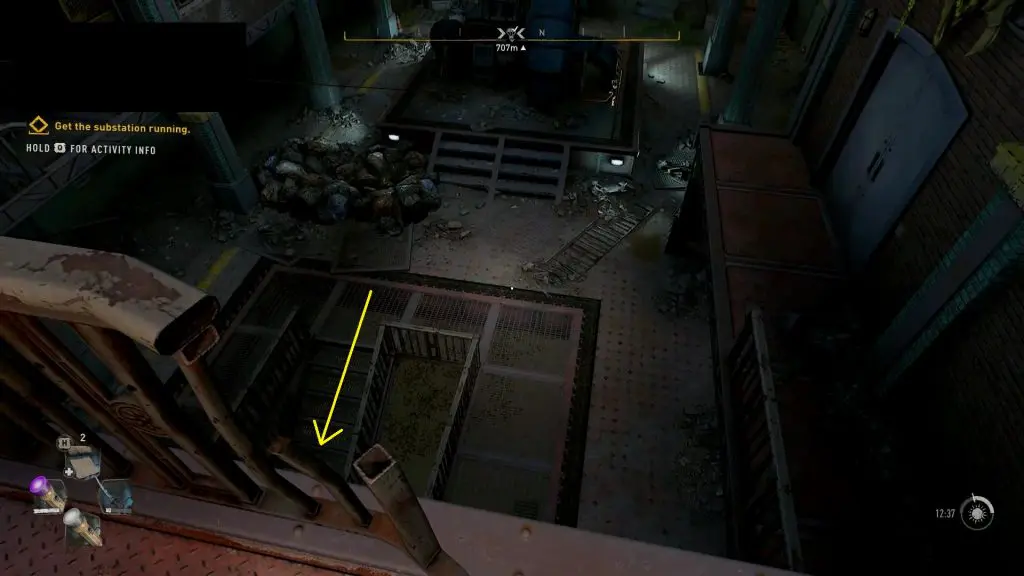
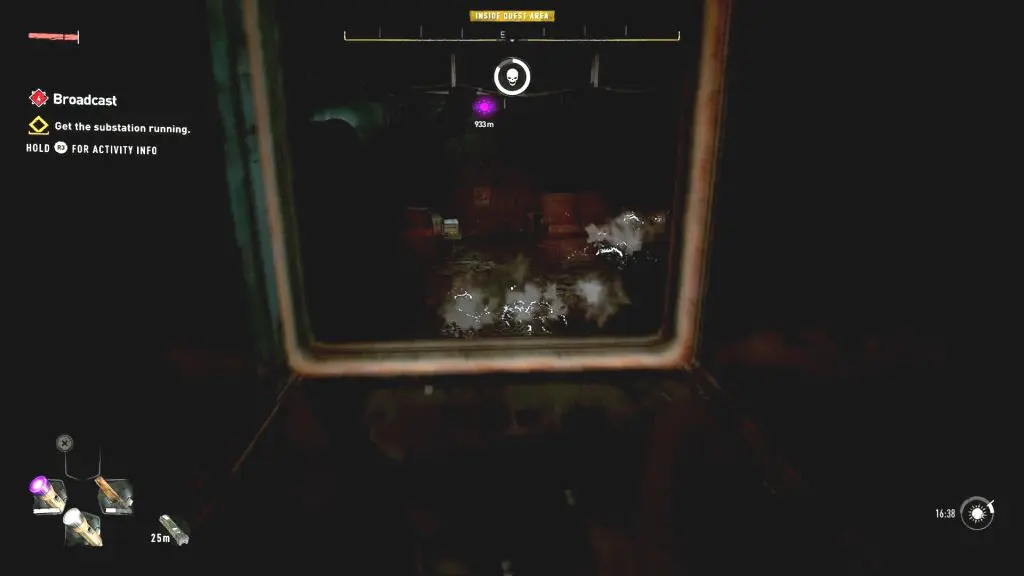
This will electrify the water in the basement. Jump on the wooden crates to reach the vent as shown in the picture below.
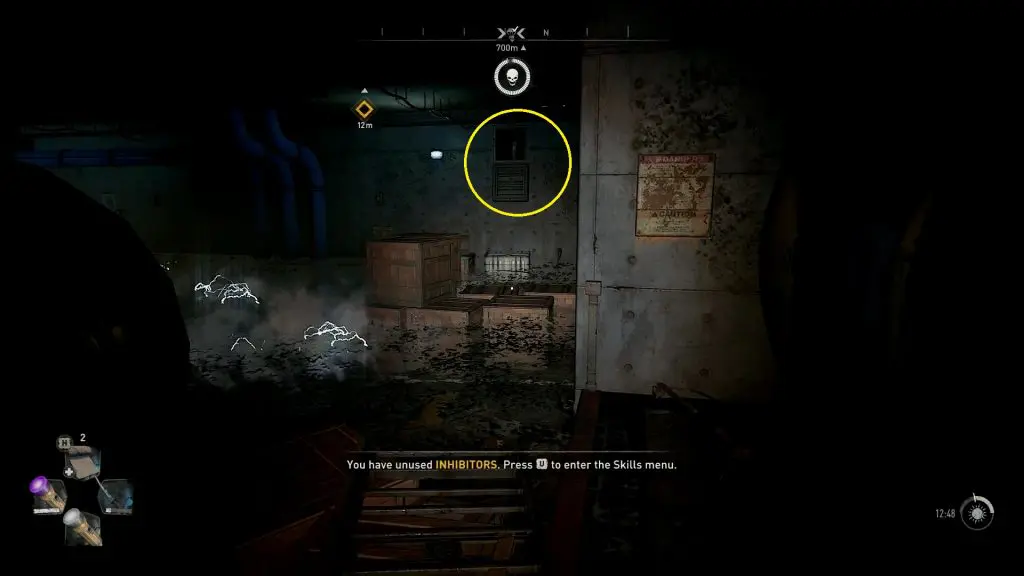
After entering the vent, turn left and keep going straight. Take the first left and jump down from the vent to come out to the basement with electrified water as shown in the picture below. Then jump on the crates to return back to the main hall.
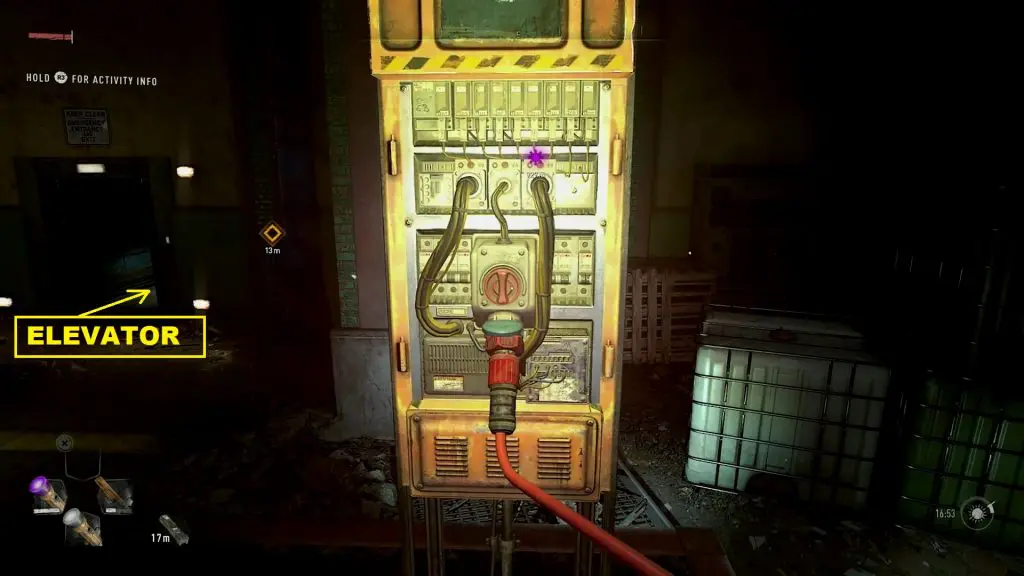
Now go back to the 1/C Green terminal. Pull the cable from the green terminal. Then jump down to the main hall and connect the cable to the Red Terminal with ‘1’ as shown in the picture below.
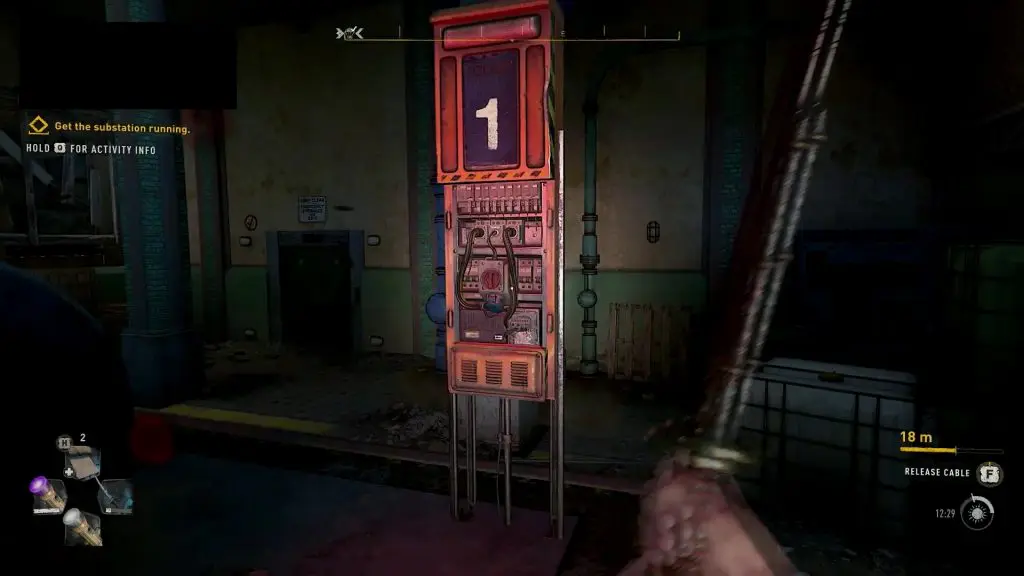
This will activate the elevator behind the terminal as shown below. Take the elevator to reach the top. Then assign power to the faction of your choice to complete the objective.
Talk to Rowe at the VNC Tower
Now go and talk to Rowe in the VNC Tower in the Garrison Territory at the location shown in the picture below.

Go to the other tower
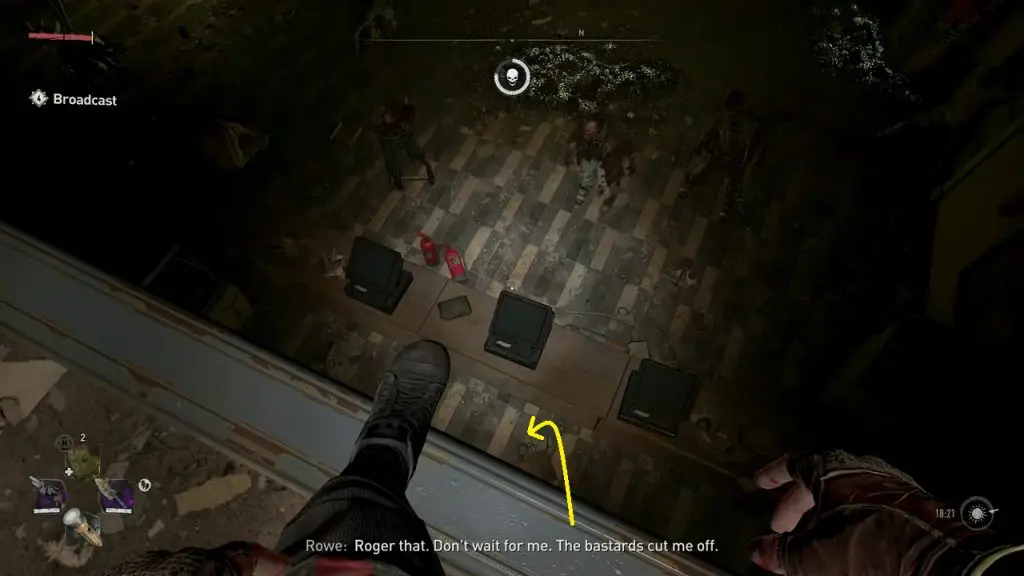
Enter the elevator and climb up through the opening on the top of the elevator. Then climb up the wall of the elevator shaft to reach the upper level. Proceed ahead and you will reach a room full of infected. You have to go through the door at the opposite end of this room as shown in the picture below. The easiest way to do so is to climb on the wooden walls as shown below. Then walk on them to reach the door at the opposite end and go to the next room.

Proceed ahead and go down the stairs. Then drop down to the floor below as shown below. After dropping down, turn right and climb up the vent as shown in the second picture below.
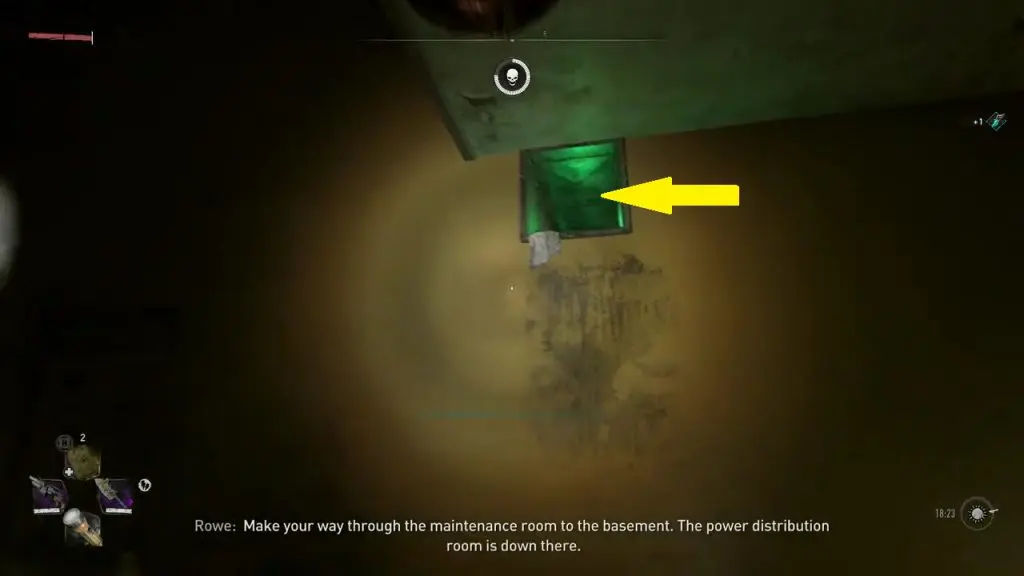
Go to the power distribution room
Crawl through the vent and drop down in the power distribution room. Here you will find injured Leon. Talk to him
Restore the power
After talking to Leon, go through the door behind him till you reach the room with the power switch. The power won’t come back, so you will have to check the fuses. Go to the room on the right side of the power switch and turn on the three fuses on the wall. After that, go back and turn on the power. Now go back to Leon. He won’t be there anymore.
Pull the cable through the basement
Go to the room where you switch on the power. Then pull the cable from the green terminal as shown below. Now go to the stair lobby and go down to the basement. Insert the cable in the red terminal and open the door to proceed ahead.

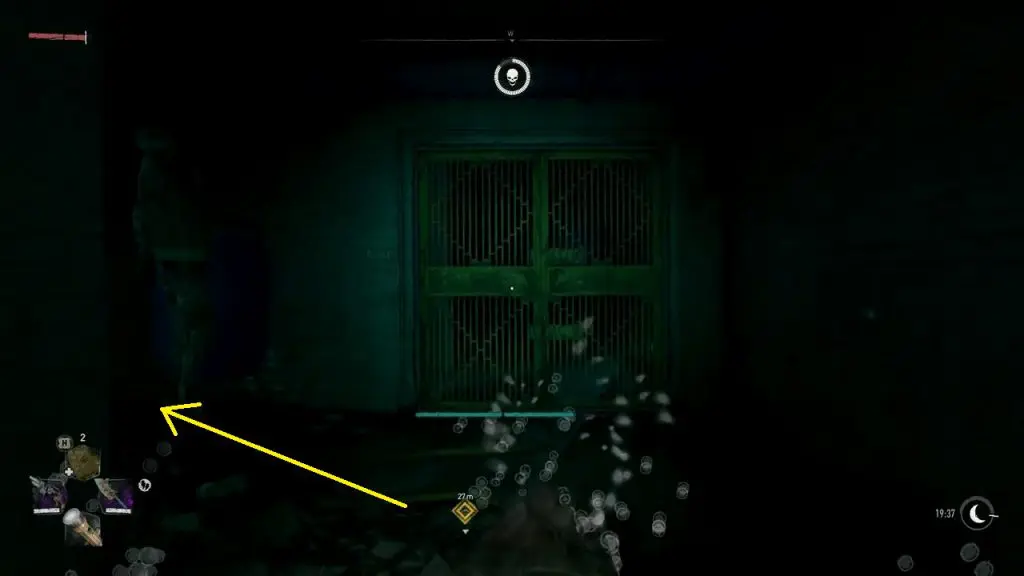
As you proceed, you will see a Green Terminal ‘B’. Don’t pull out the cable from the green terminal yet. Dive into the flooded area of the basement and go straight ahead until you reach a yellow gate as shown below. This gate will be locked from the back side. From the gate, go left and then swim clockwise to reach the backside of the gate. Unlock the gate and swim back to the green terminal ‘B’. Now pull the cable from the green terminal. Then dive into the water. Swim straight ahead, pass through the yellow gate and keep swimming straight ahead until you come out from the water on the other side. Here you will see the red terminal ‘B’. Insert cable in the red terminal to bring back the power. Then take the elevator and meet Rowe at the camp on the 8th floor. After that wait with the squad until Matt arrives.
Talk to Matt
After the cutscene, talk to Matt. Then take the elevator with the squad. As the squad reached the upper floor, it will be attacked by the infected.
Check for Survivors
Clear the area from the infected and then inspect the squad member bodies.
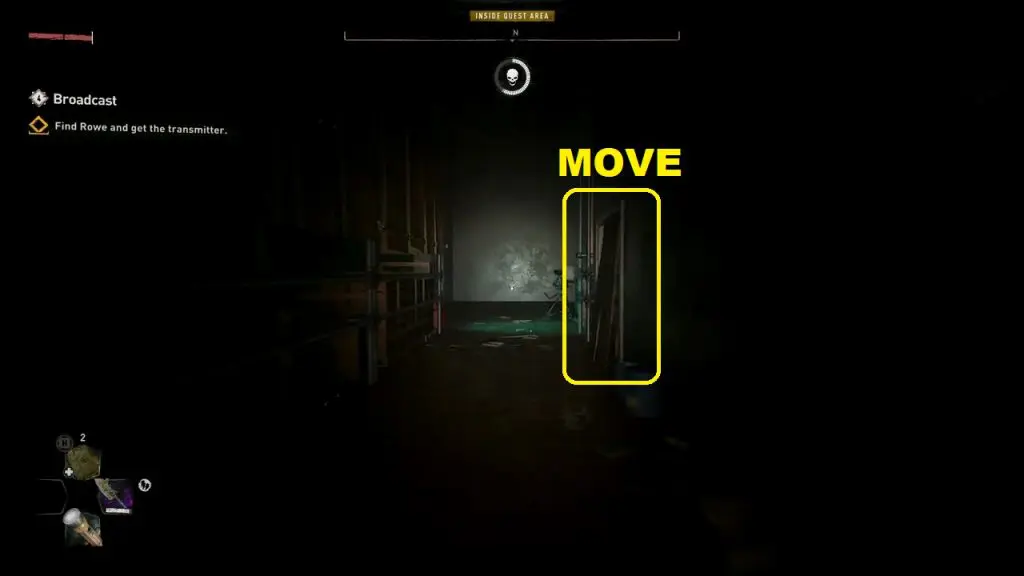
Find Rowe and get the transmitter
Move the wooden board blocking the room Rowe is in as shown below. Then go inside and get the transmitter. As you try to try to find a way out, you will see that the door is locked. At this point, you will be attacked by the infected. Clear out the enemies.
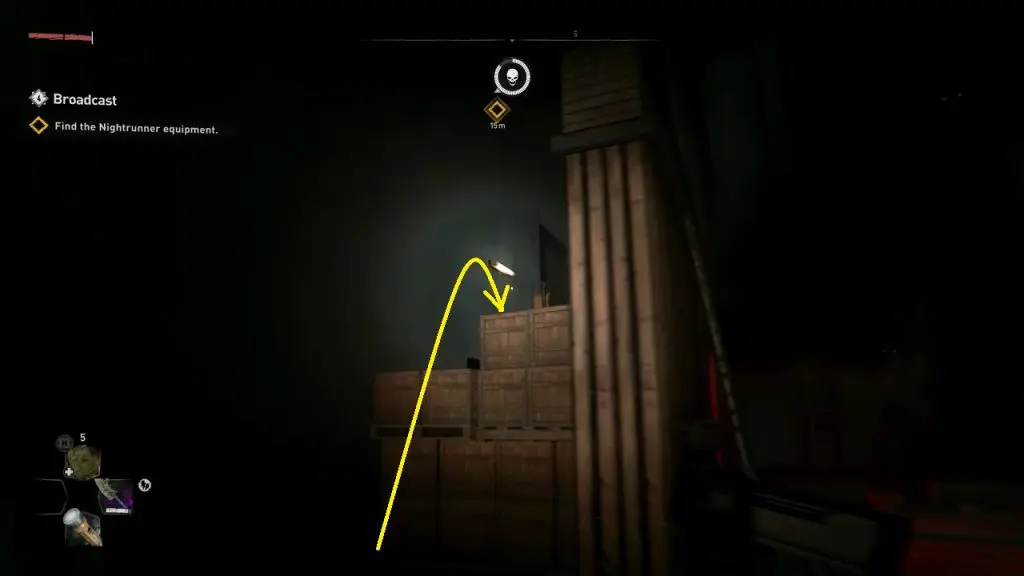
Find the Nightrunner equipment.
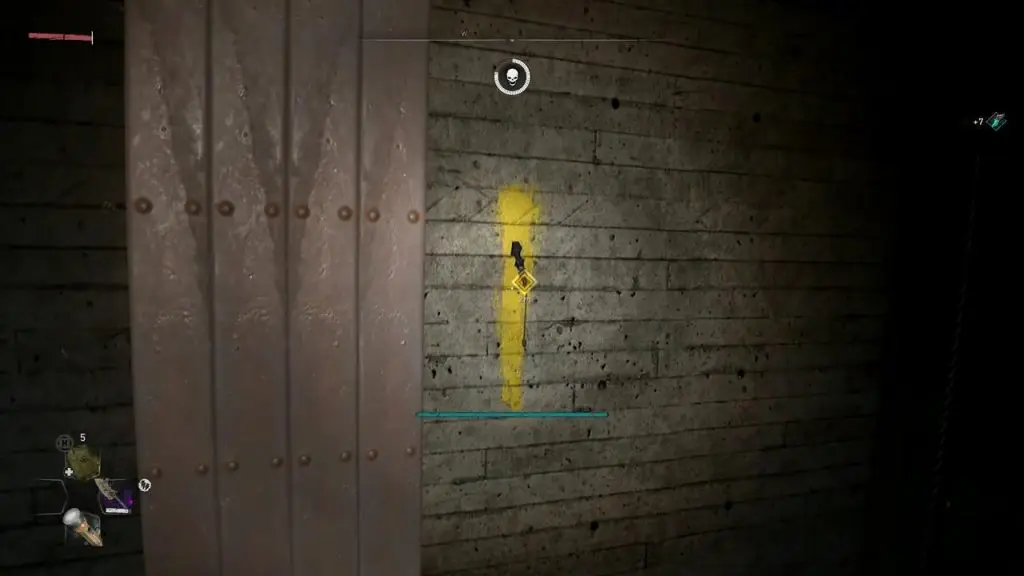
Jump up the crates as shown below to reach the elevator. Force open the elevator. Then go inside and climb up through the opening at the top of the elevator. Climb up the wall of the elevator shaft to reach the upper level. Then take the grappling hook from the wall of the elevator shaft as shown in the second picture below.
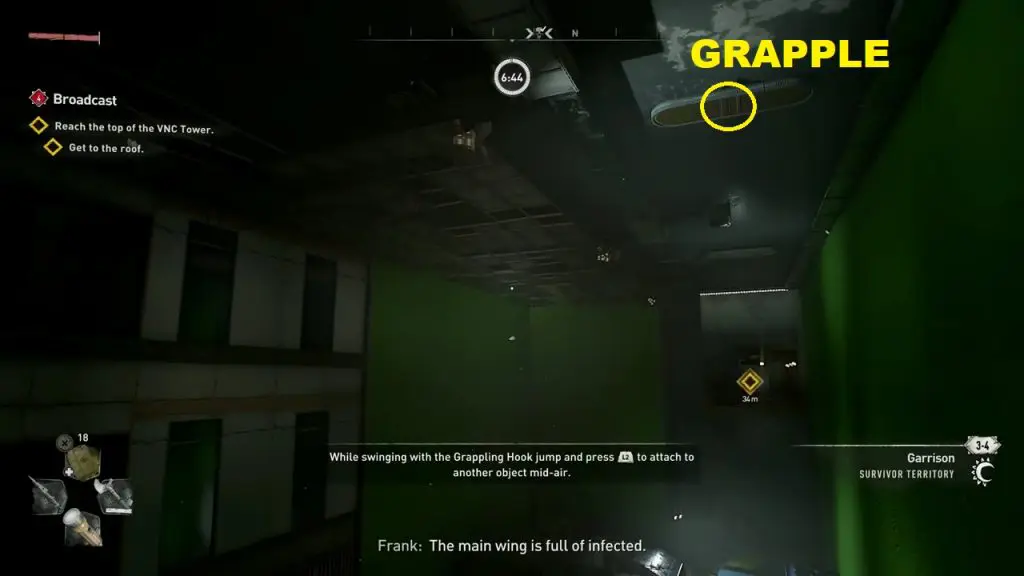
Reach the top of the VNC Tower
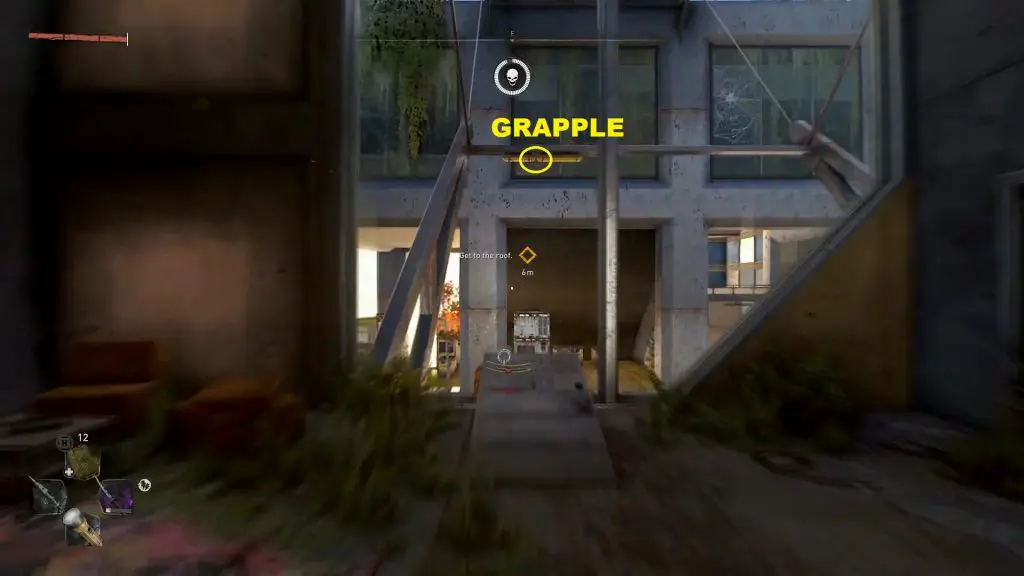
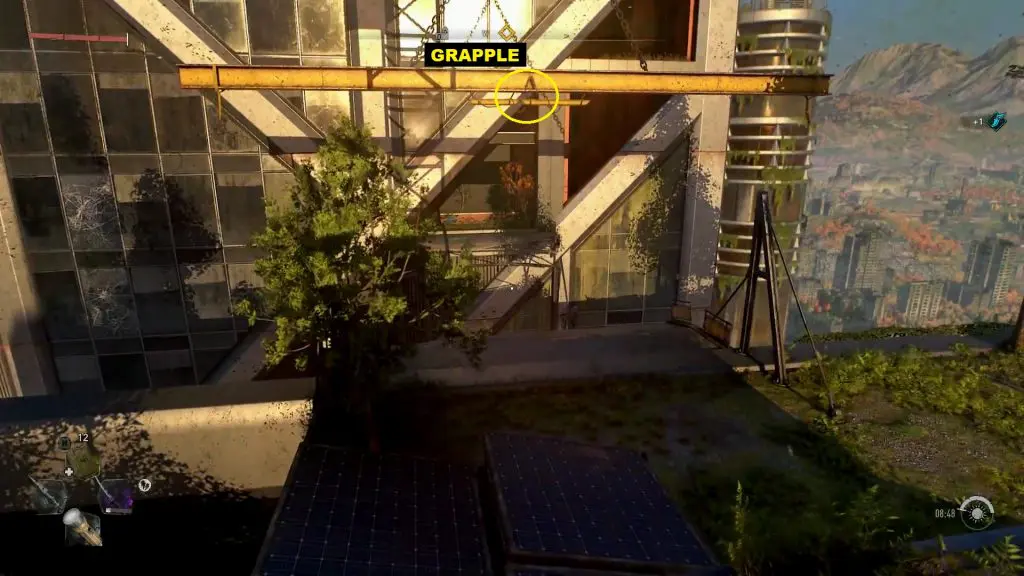
Use the grappling hook to reach the room where the door will be blocked by a barricade. Move the barricade and move to the next area. Here, you will have to grapple to the other side as shown in the picture below.
Then climb the stairs and follow the objective markers to proceed in a linear path. Eventually, you will come to an area, where you will need to grapple to proceed as shown below.
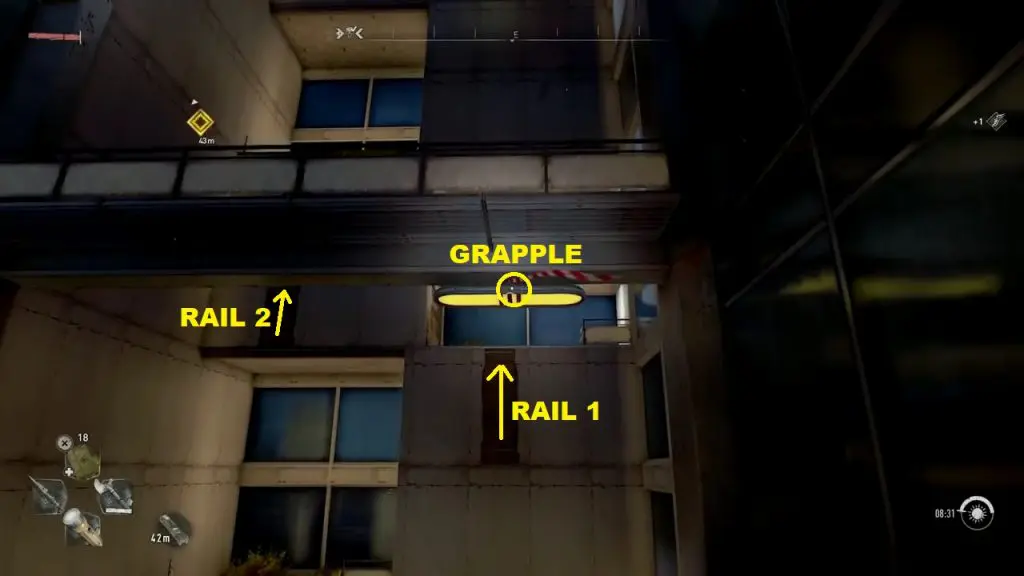
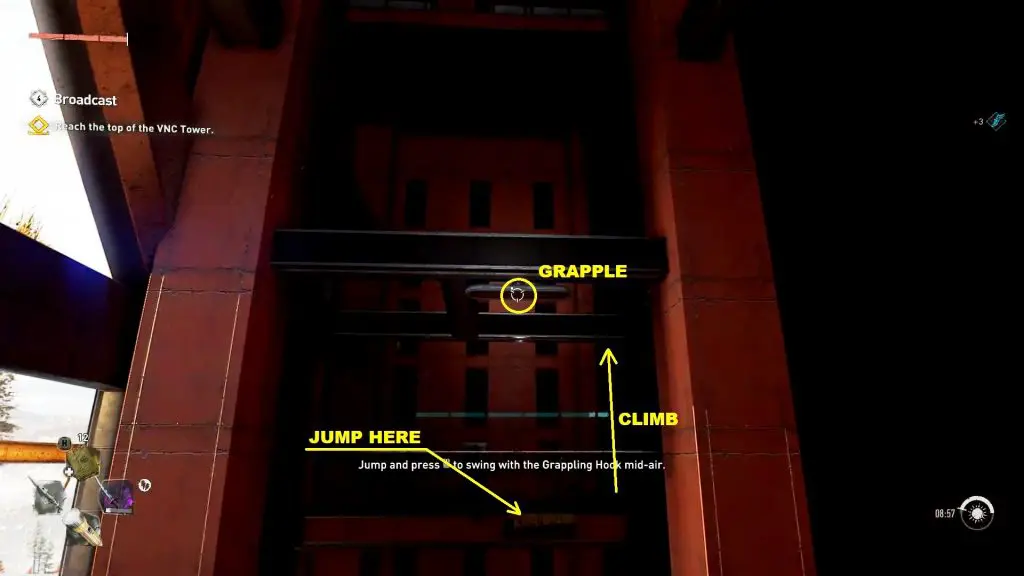
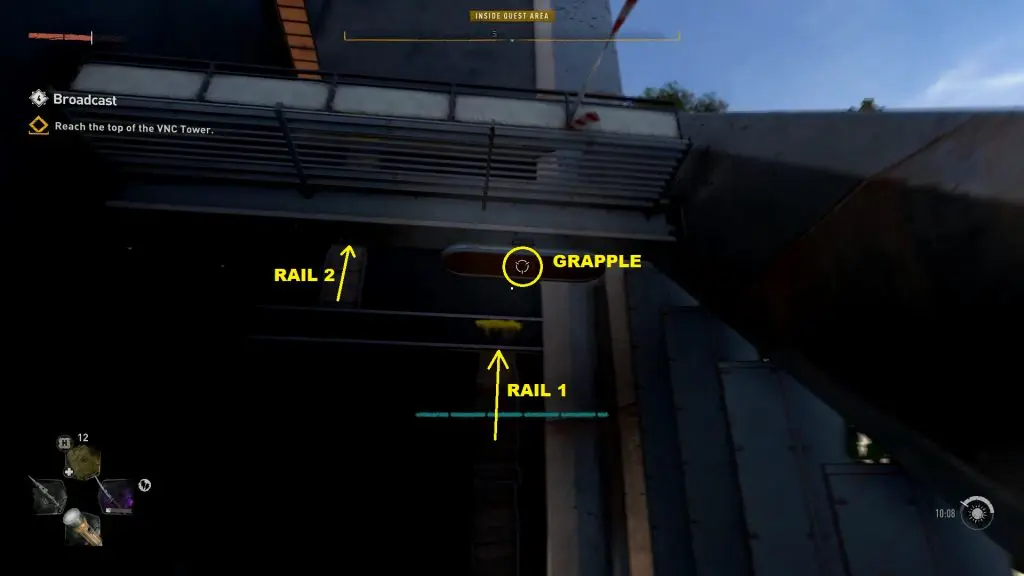
Now grapple to reach Rail 1 as shown in the picture below. Climb Rail 1, then turn back and jump to the platform above the grapple. Then jump to Rail 2 and climb up.
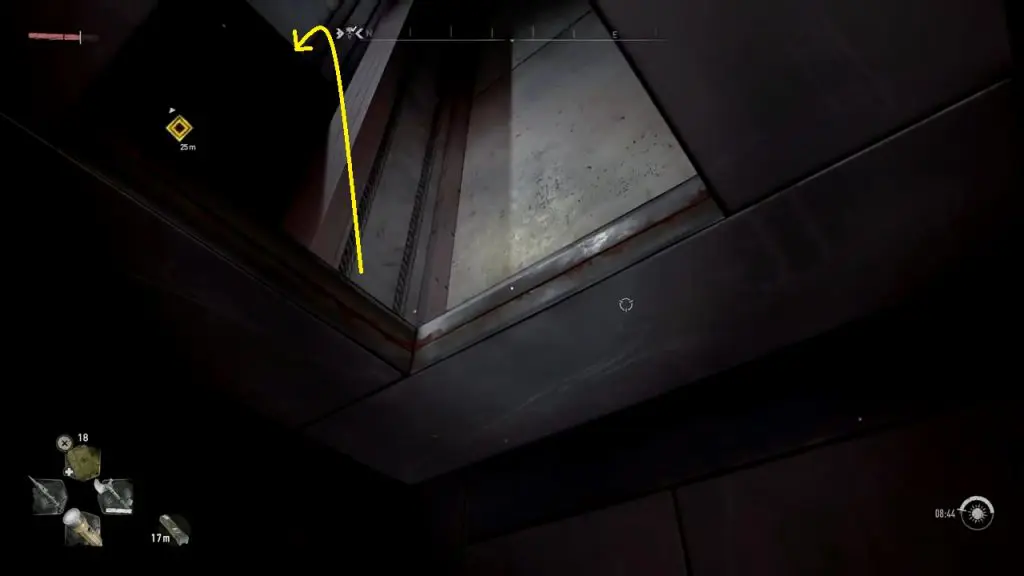
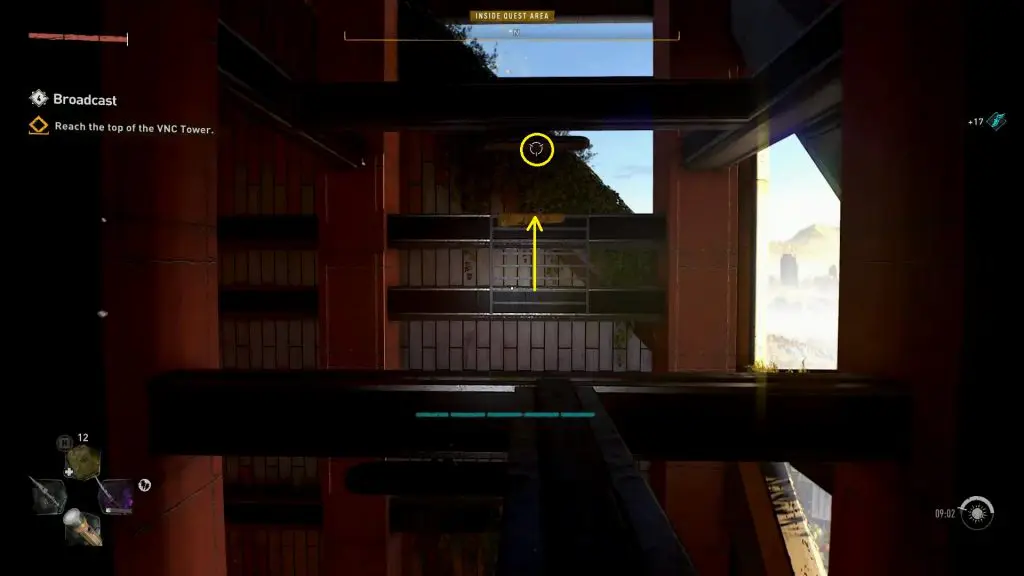
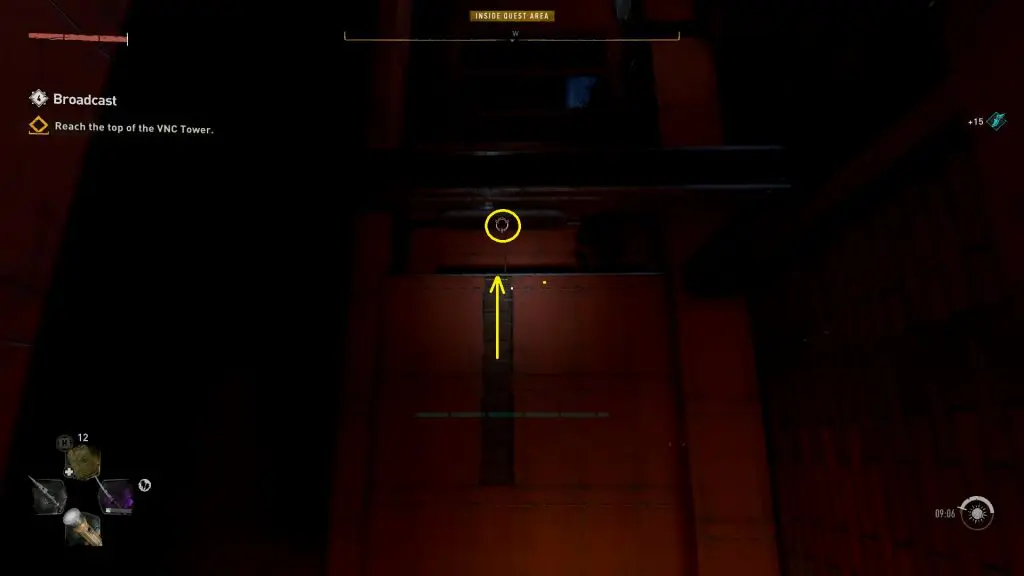
Continue ahead to reach an elevator shaft. There is an opening on top of the elevator. Climb up through the opening to reach the upper level as shown below.
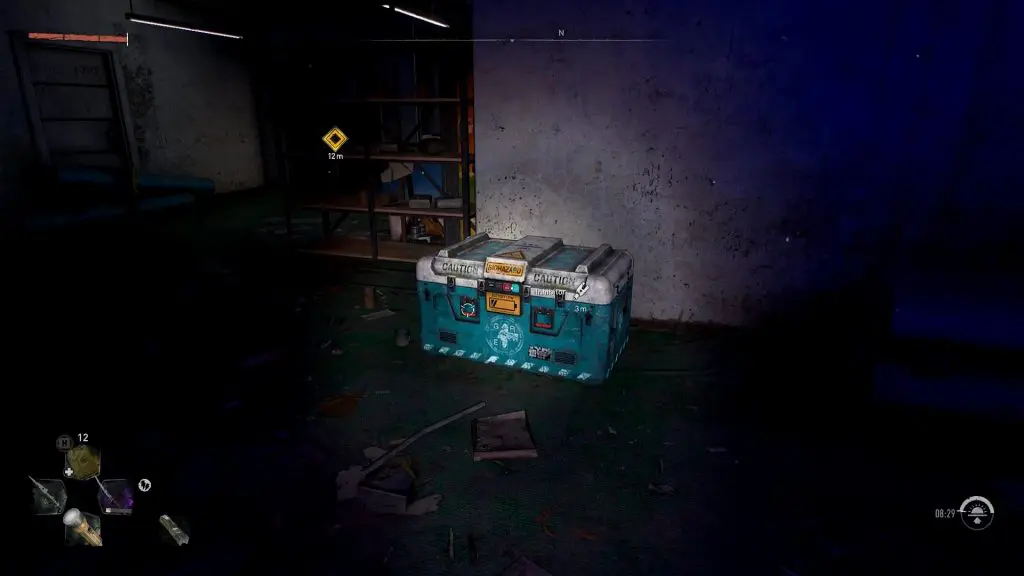
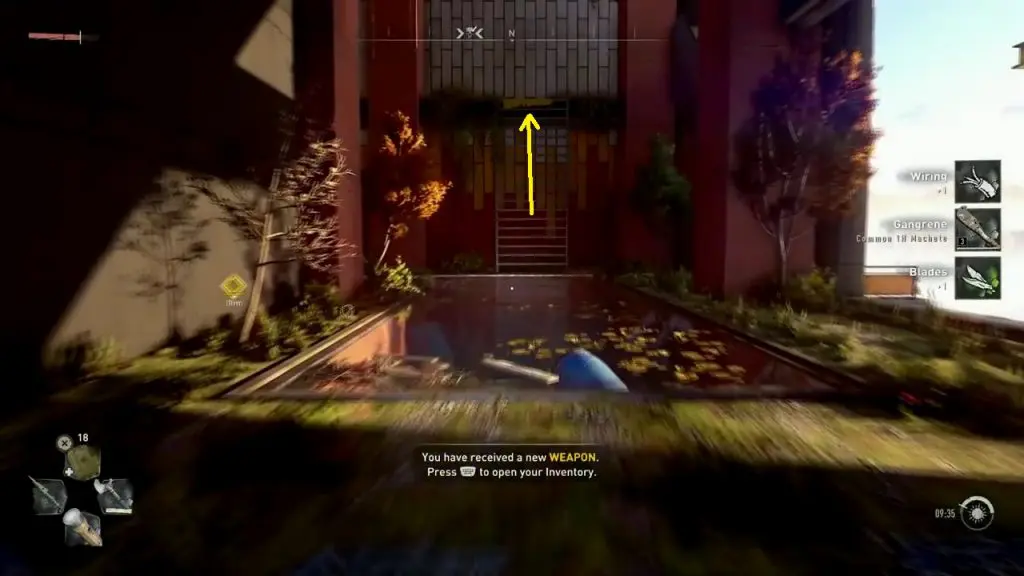
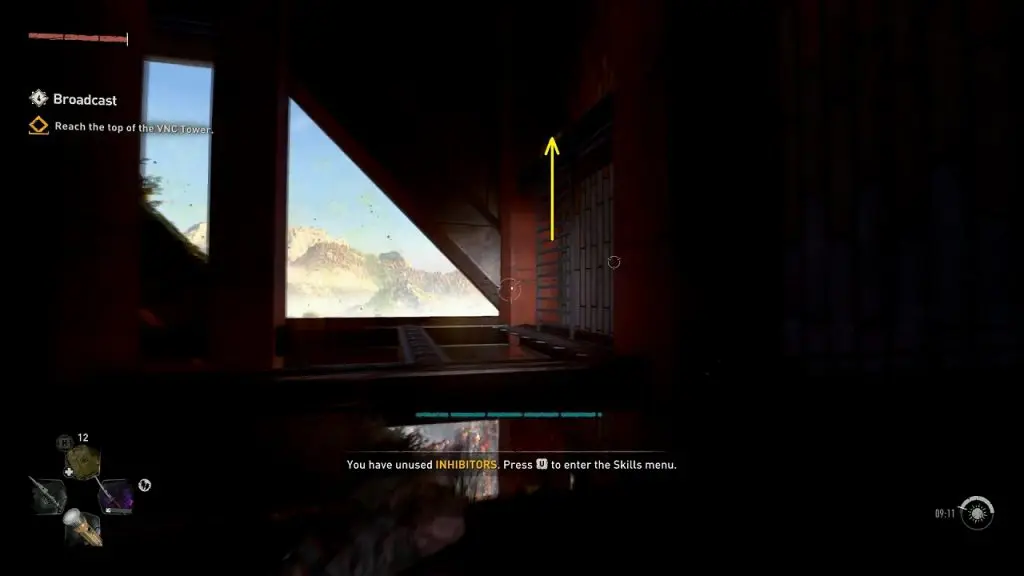
Now climb up the stairs and you will reach a crate with Inhibitors inside as shown below.
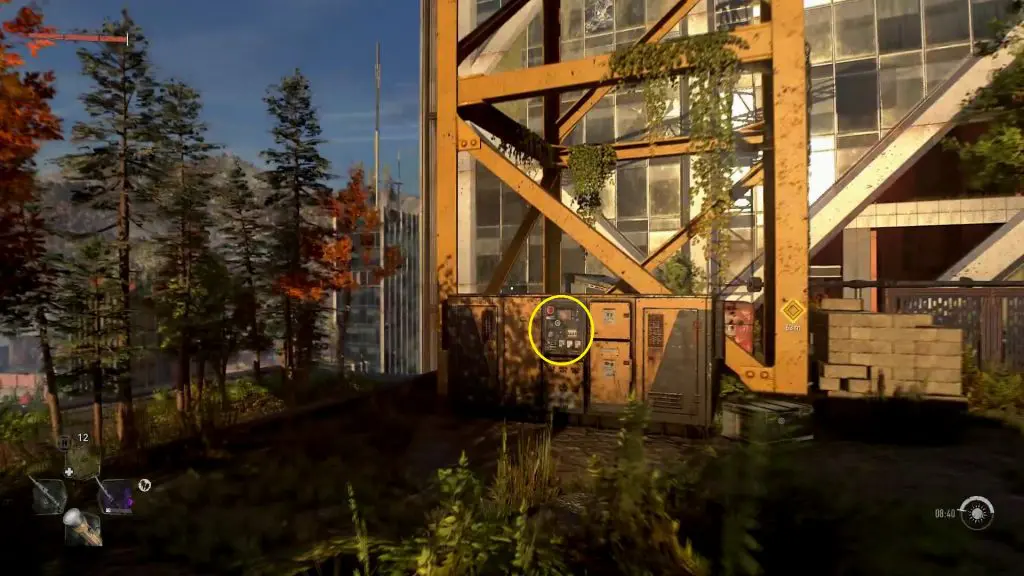
Then open the door ahead and you will reach a terrace. Climb up to the upper level of the terrace and turn on the crane switch as shown in the picture below. This will move the crane, creating a path to move forward.
With the crane rotated, grapple to the building ahead of you as shown below.
Enter the building, then turn right and climb up the rail as shown below.
Turn around and grapple to the platform ahead as shown below. Then climb up the ladder on the right side. At the top of the ladder, turn right and jump on the beam above.
Now grapple your way to the ladder ahead of you and then climb up as shown below.
Then turn around and jump on the beam up ahead as shown below. Then go right.

Now grapple your way to the ladder ahead of you and then climb up as shown below.
After climbing up, take the path on the left side and soon you will reach an area as shown below. Climb up the ladder as shown in the picture below.
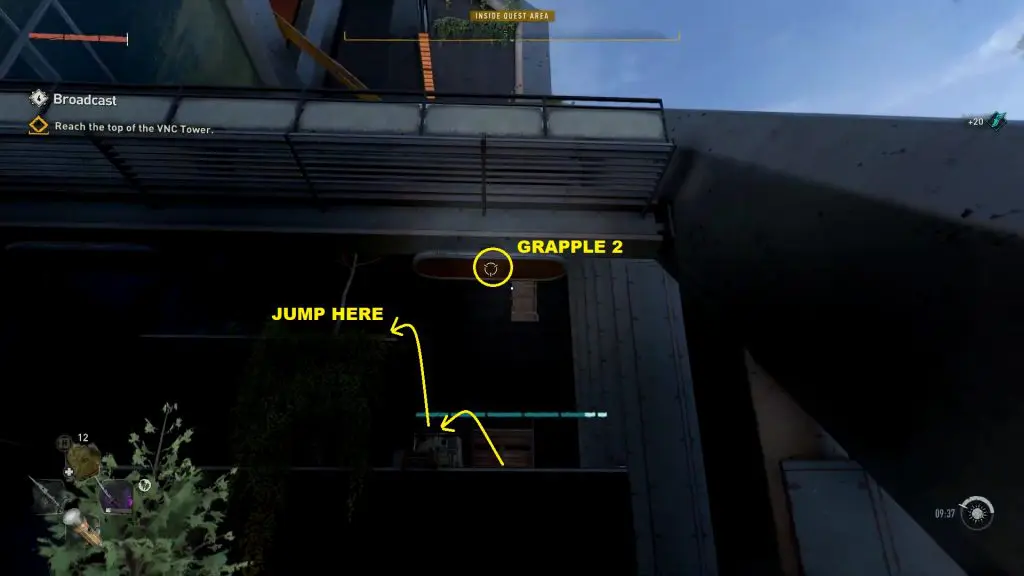
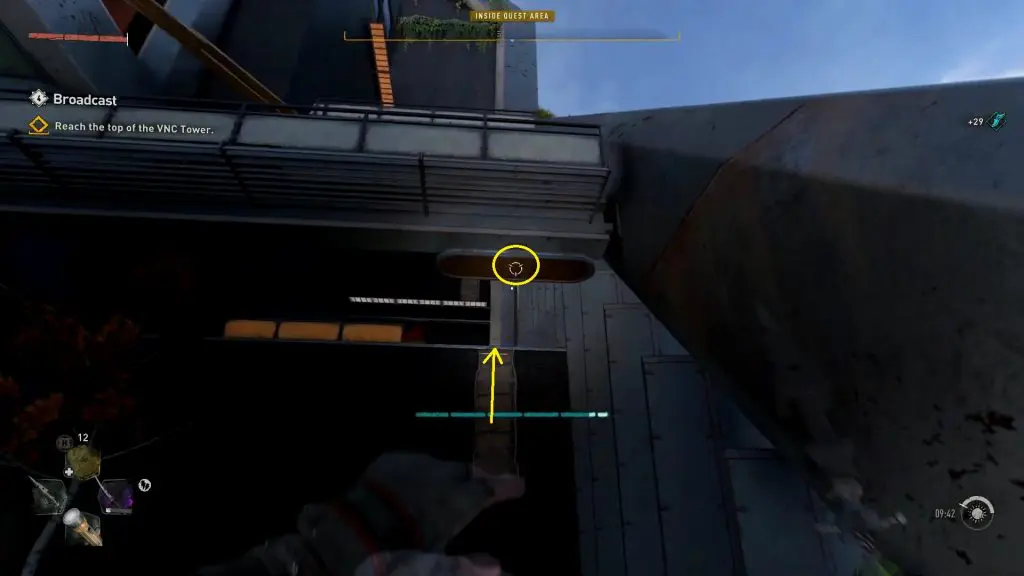
Now, you will see two Grapples ahead of you as shown below. Use both the grapples to reach the other side. Then climb the wall ahead of you.
Then jump on the beam ahead of you as shown below. Then jump on the left side.
Next, jump on the beam ahead of you and go to the right side as shown below.
Then again jump on the beam ahead of you and go to the right side as shown below. This will lead you to another terrace.
On the terrace, climb up the ladder as shown below.

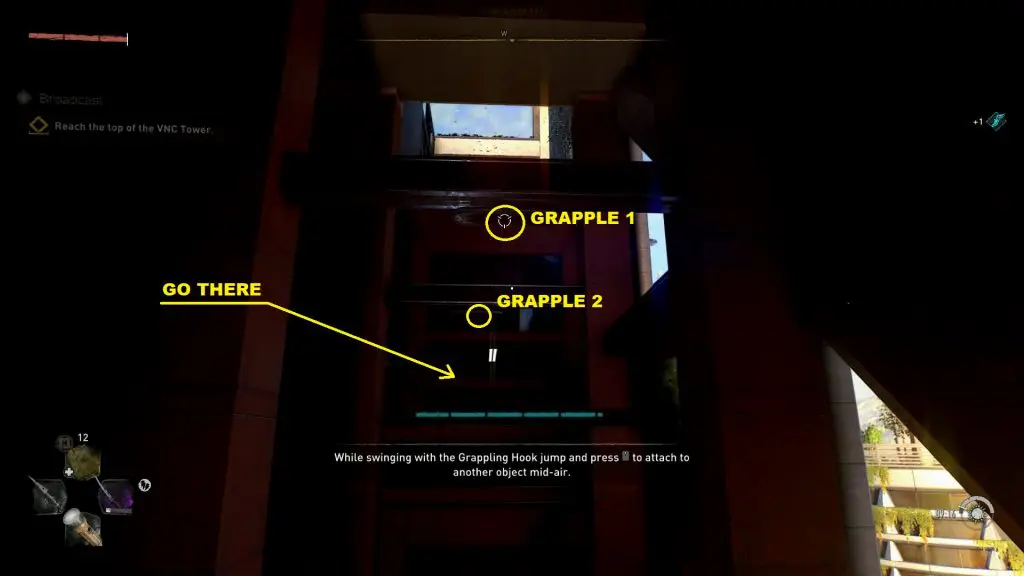
When you are at the top of the ladder, turn around and use Grapple 1 to reach the platform on the other side as shown below. Then use Grapple 2 to jump on the platform ahead as shown in the second picture below. Then climb up the wall on the left side.
Now turn around and jump on the beam above the grapples that you used before. then move to the left side of the beam.

Then turn around and use the grapple to reach the ladder ahead of you. Climb the ladder to reach the upper level.
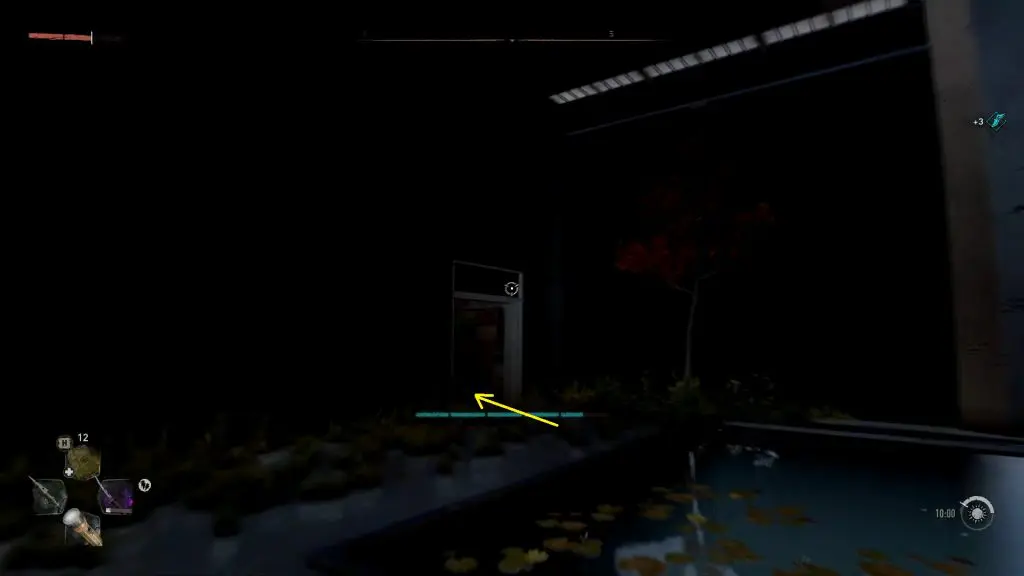
At the upper level, you will see a small pool ahead of you and a door on the left side as shown below. Go through the door.
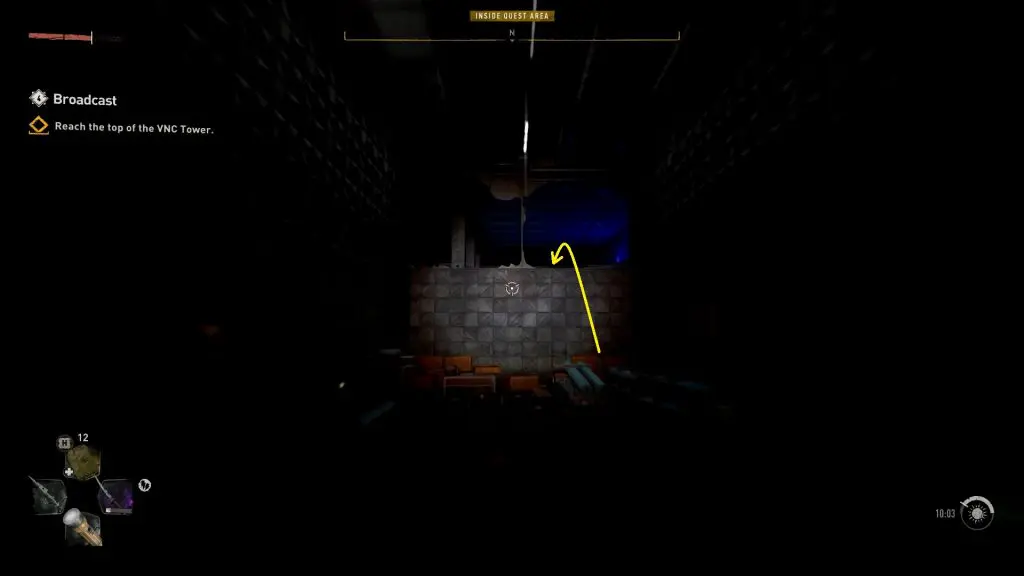
Proceed in a linear path and eventually, you will reach the room as shown below. Climb up the wall ahead of you and you will again come to a terrace.
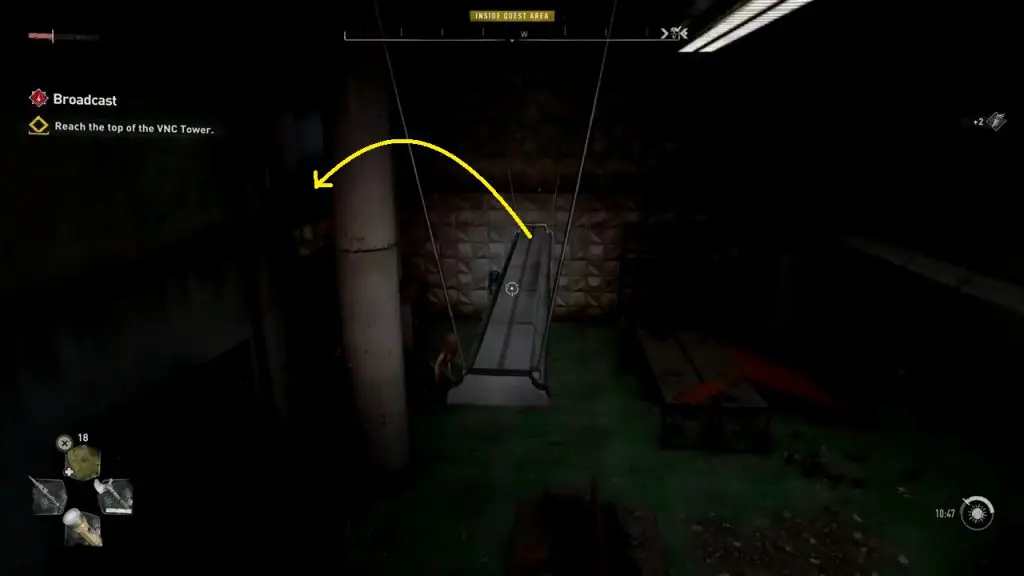
After reaching the terrace, turn around and walk over the wooden plank as shown below.

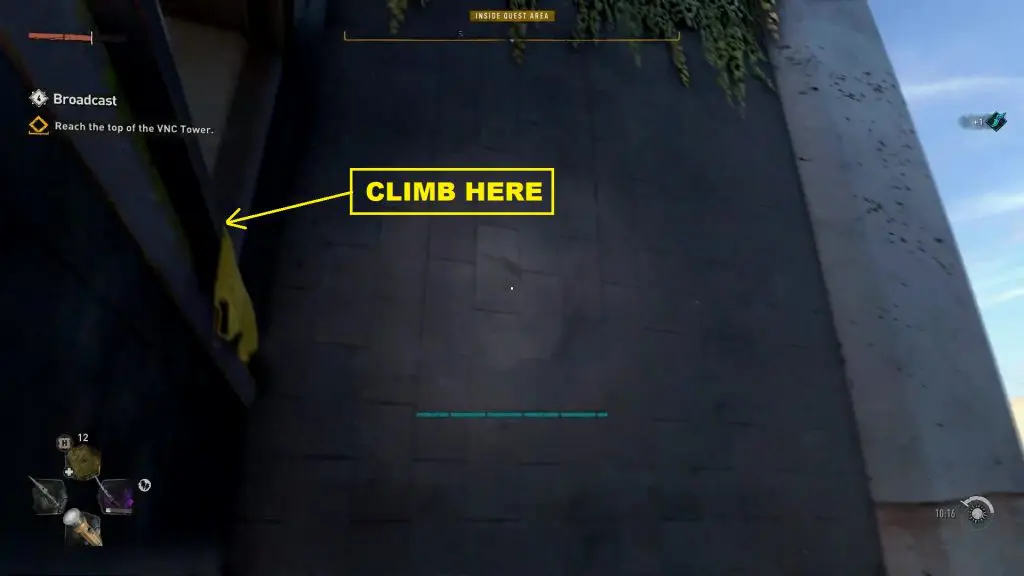
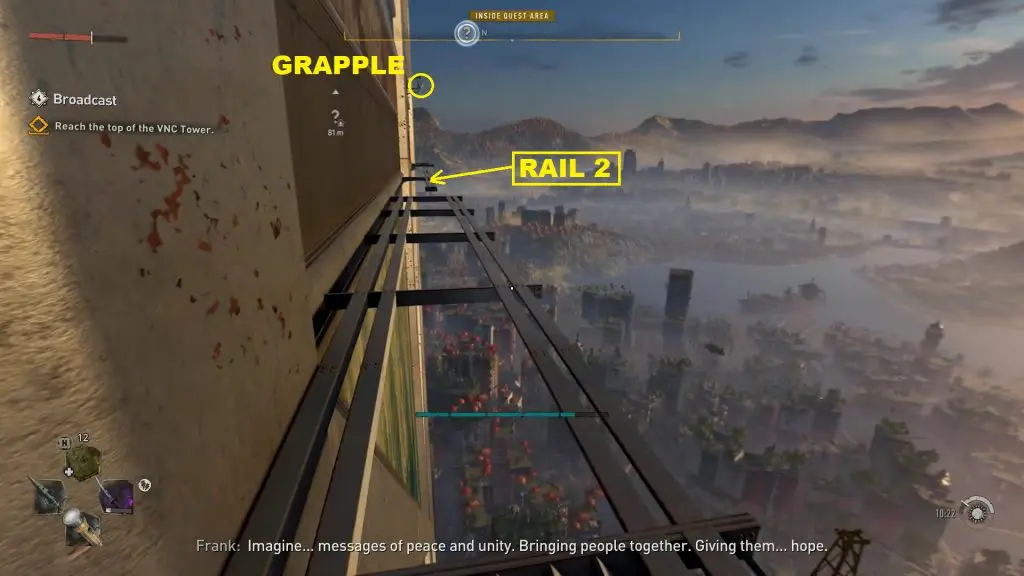
Then use the grapple to reach Rail 1 ahead of you as shown below. Climb Rail 1, and when you are at the top, turn around and jump on top of the platform above the grapple. Then jump to reach Rail 2 and climb up. Then climb up the rail as shown in the second picture below.
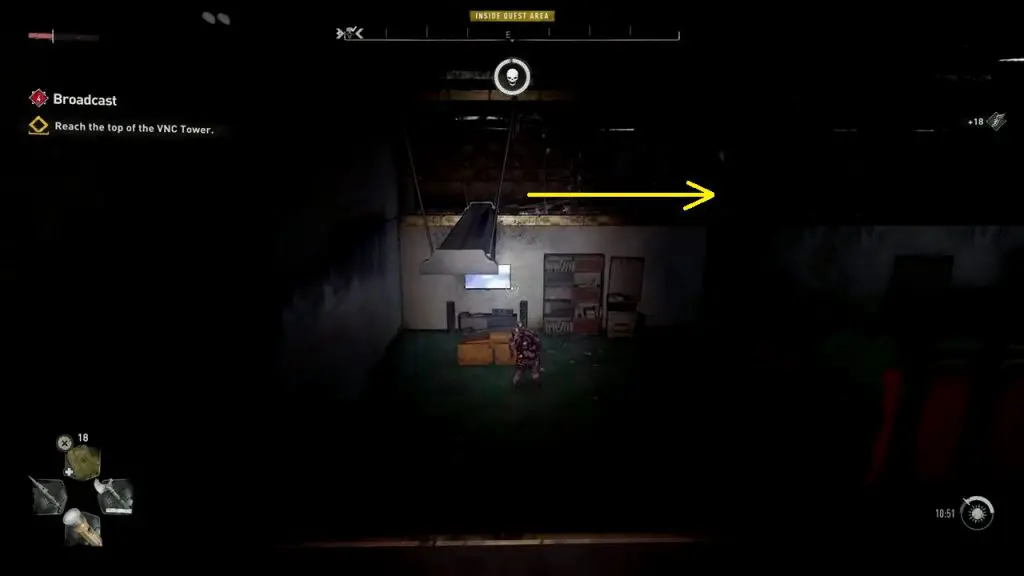
Proceed ahead and you will reach the platform as shown below. Use the grapple to jump to the platform ahead and then use the rail ahead..

Proceed on the rail shown below. When you are on Rail 2 as shown below, use the grapple to reach the platform ahead.
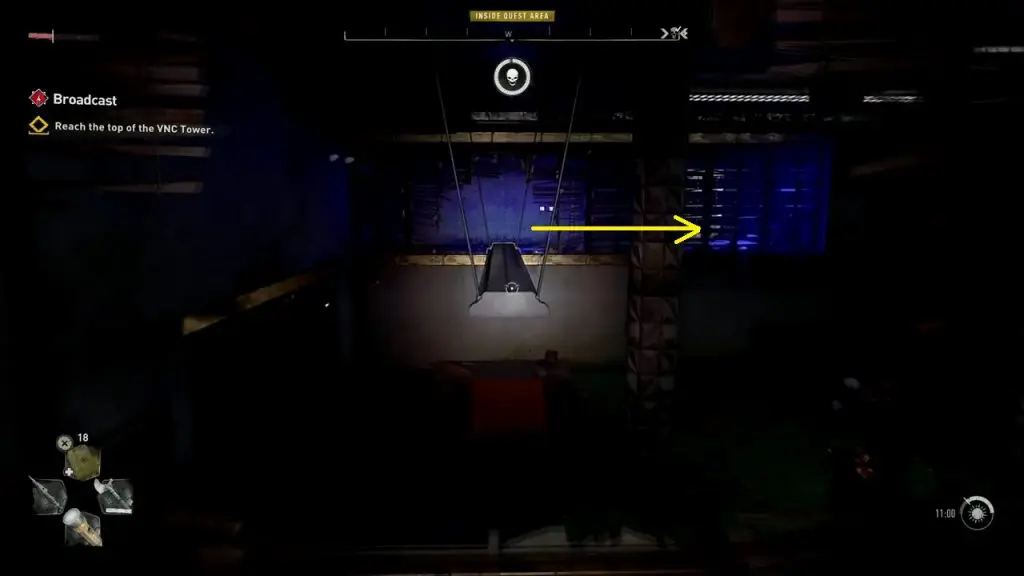
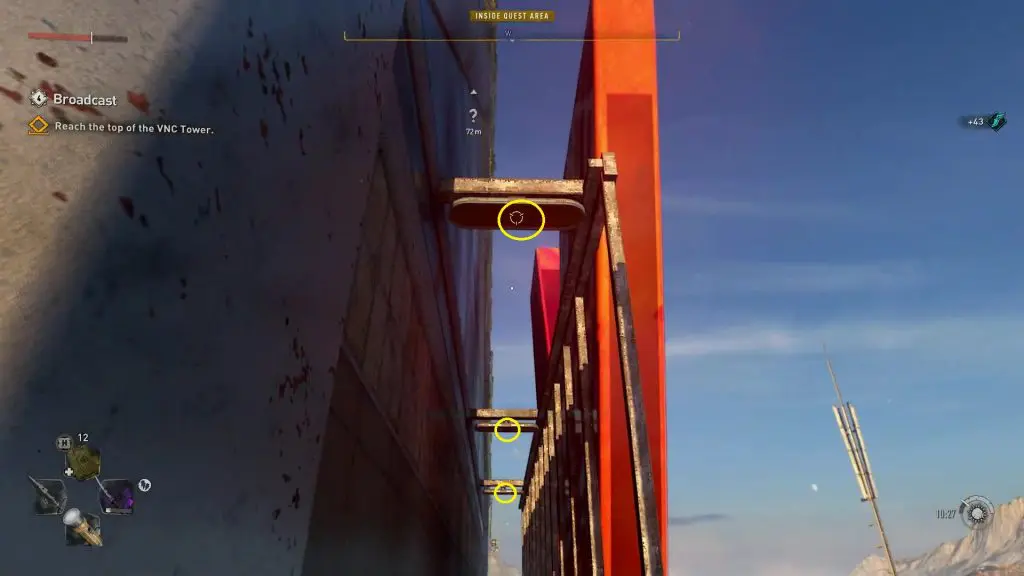
Then use the three grapple points shown below to reach the platform ahead.
On this platform, use the grapple point shown below and jump to the platform on the left side.
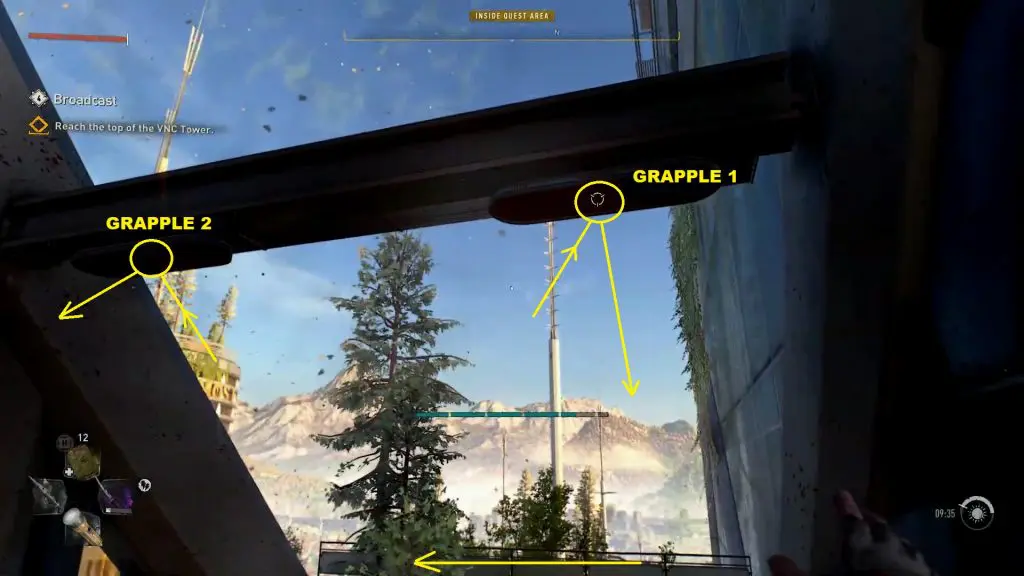
Use the two grapple points ahead of you as shown below to reach the ladder. Then climb up the ladder to reach the terrace.
On the terrace, climb the rails to reach the platform shown below.
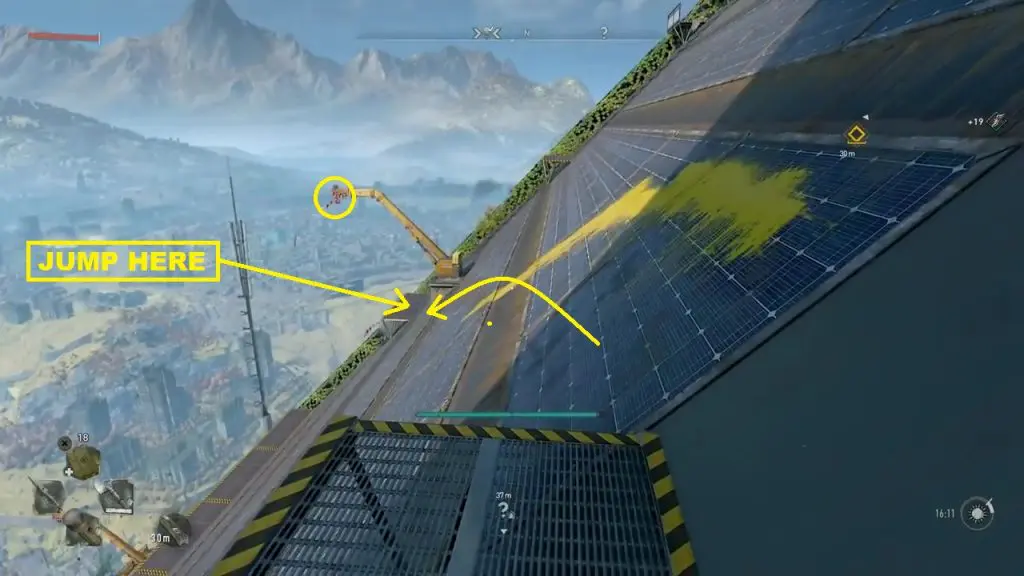
Then jump down to the platform shown below and jump through two platforms to reach the platform marked in the picture below.

Use the two grappling points to reach the platform marked in the picture below. Then climb up the rails to reach the platform above.
Now, grapple to the platform ahead and then climb up the rails to reach the platform two levels above.

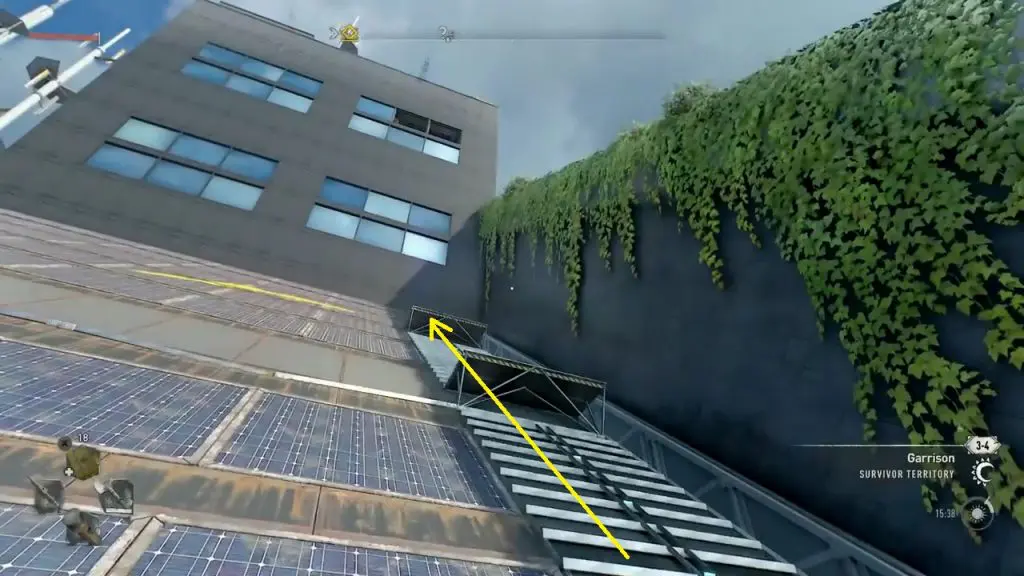
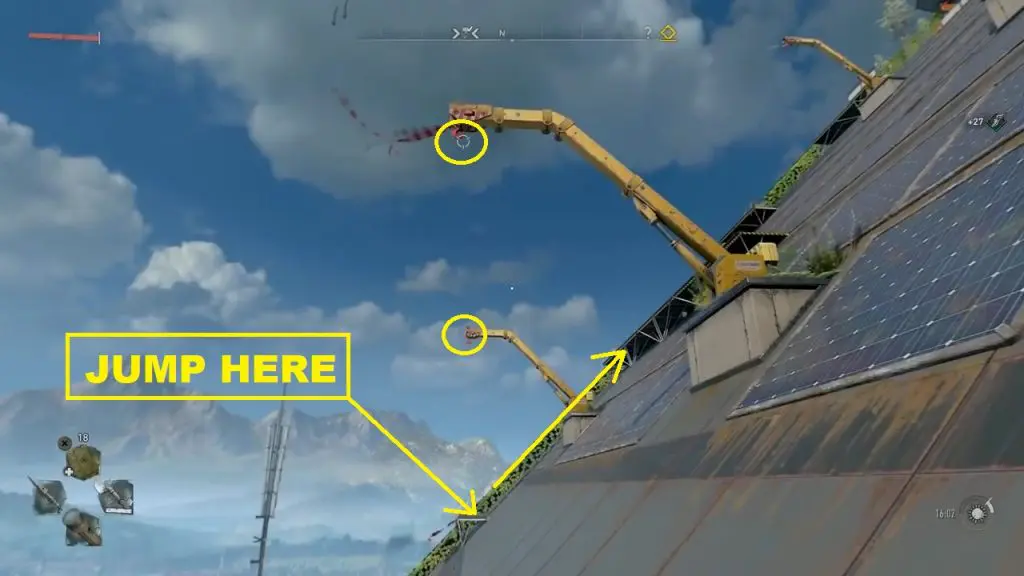
Next, run on the slope and use the grapple point to reach the platform shown below. Then climb up the rails to reach the roof.
Turn on the Transmitter and Mount the device
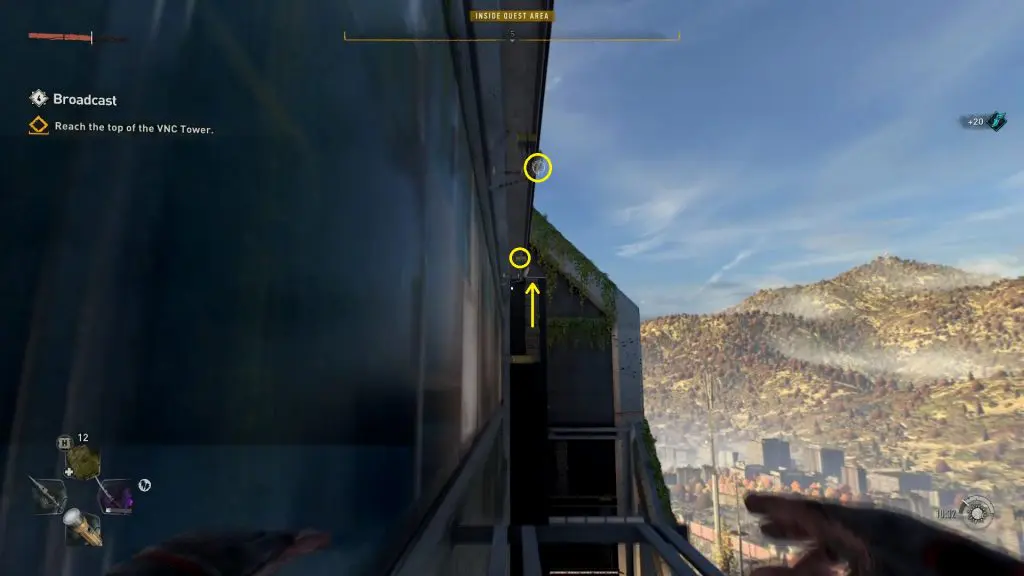
On reaching the roof, the objective will be updated. Climb the ladder, then use the grapple to reach the other platform. Then climb the ladder to the top platform.

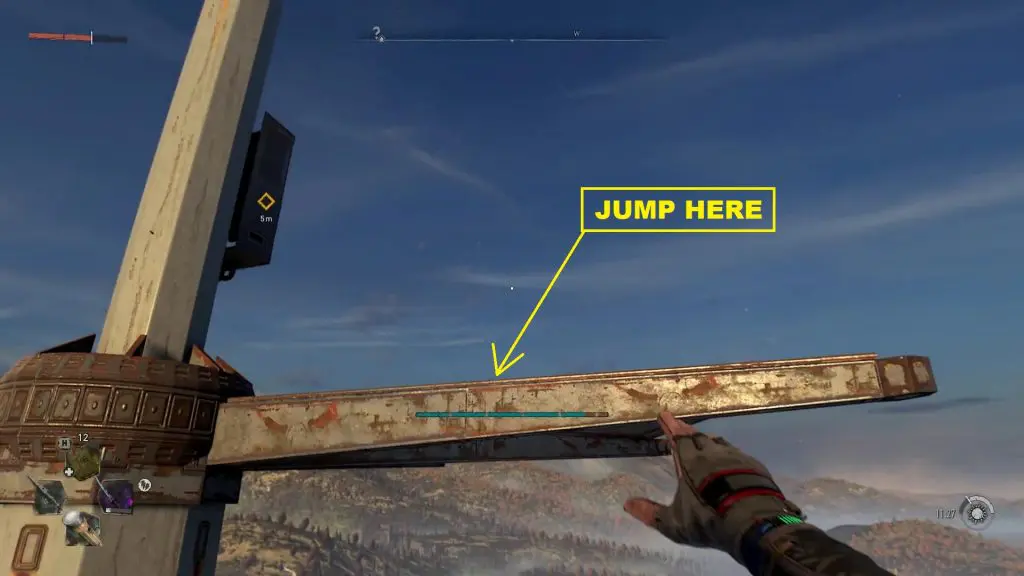
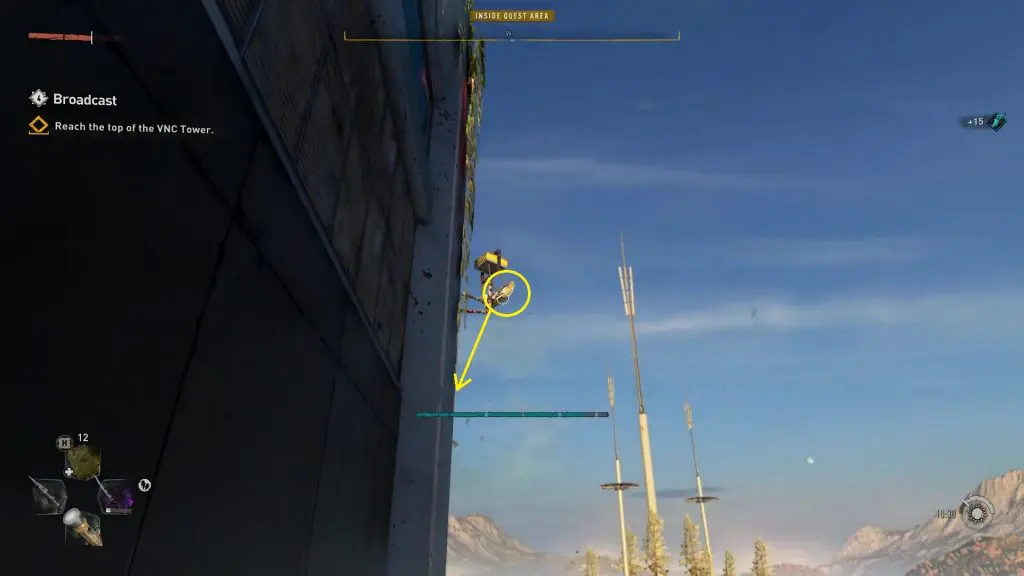
Eventually, you will reach a dead-end and won’t be able to climb further above. Jump and grab the pole as shown below and climb up the pole.
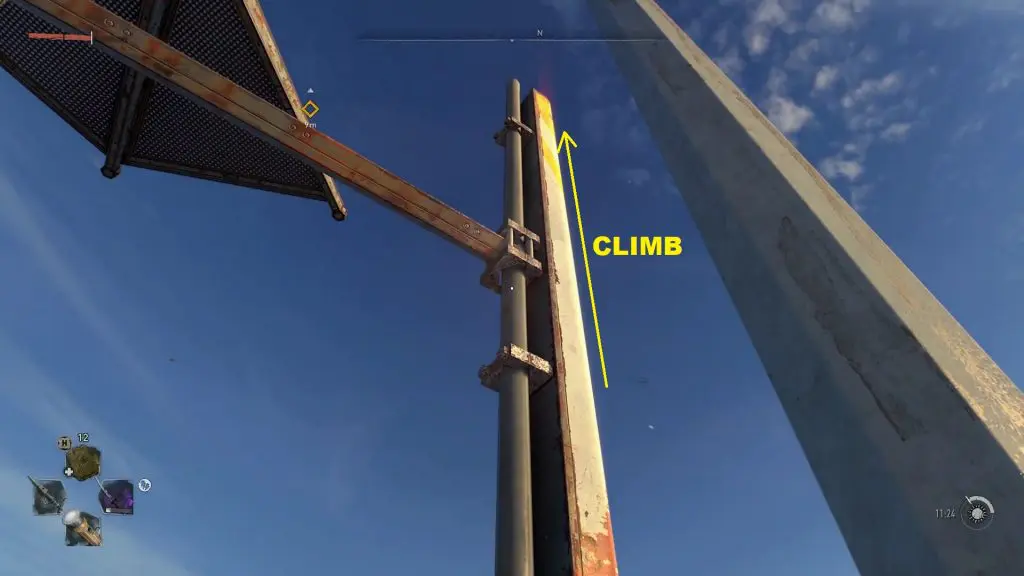
When you are at the top of the pole, look right and jump on the platform as shown below. Then turn on the transmitter and mount the device. This will complete the quest.