Confront Dagan at Koboh Observatory
This guide shows how to complete the “Confront Dagan at Koboh Observatory” objective in Star Wars Jedi: Survivor game, released on 28th April 2023. The objective starts after Pursue Rayvis ends. The video walkthrough is also posted below.
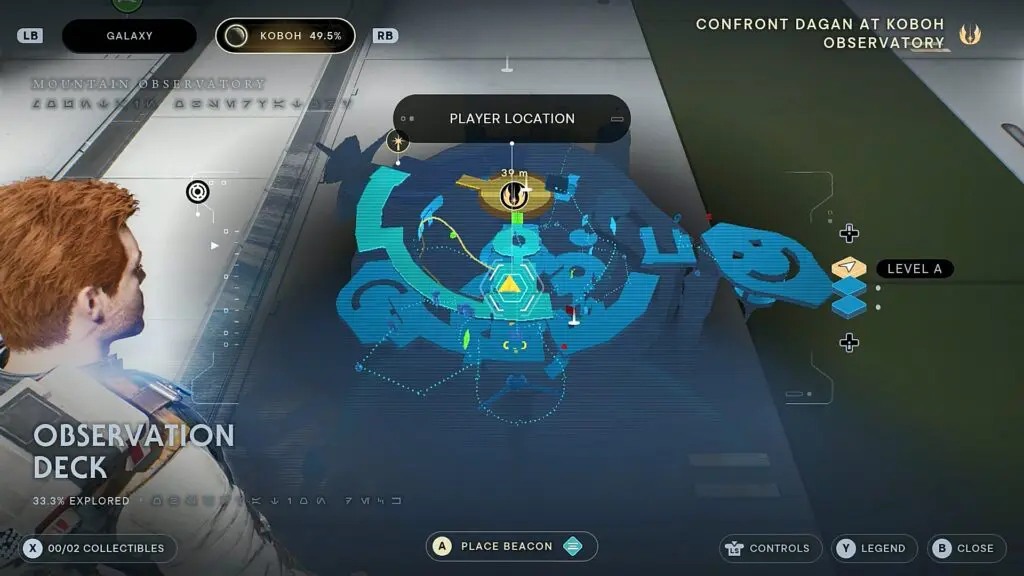
Republic Research Laboratory (Reach Mantis)
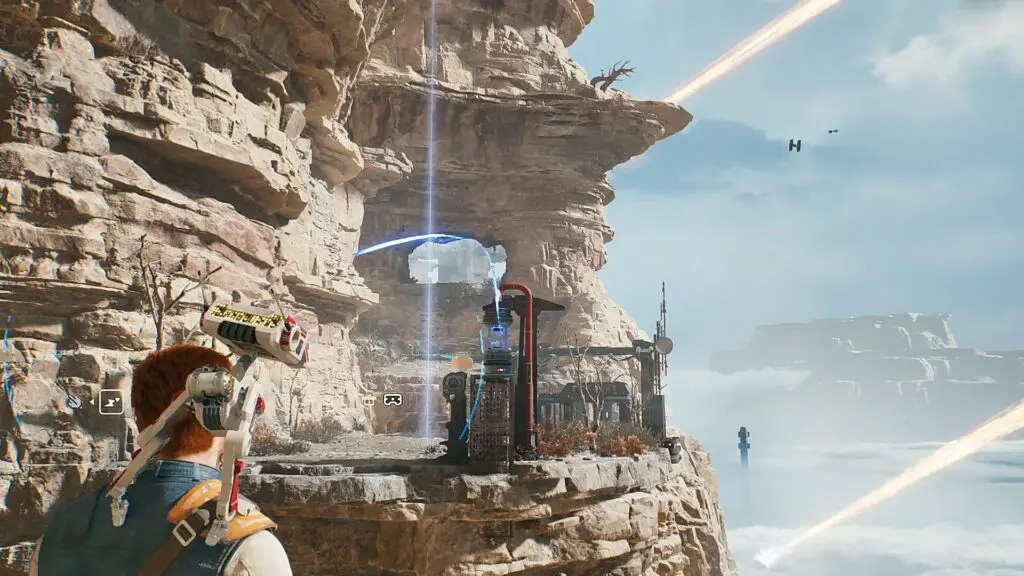
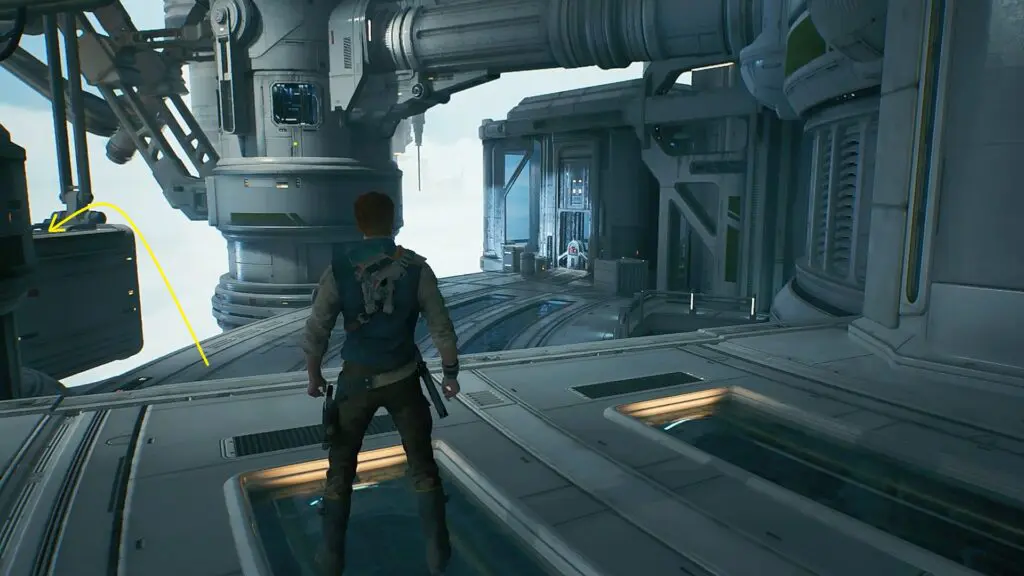
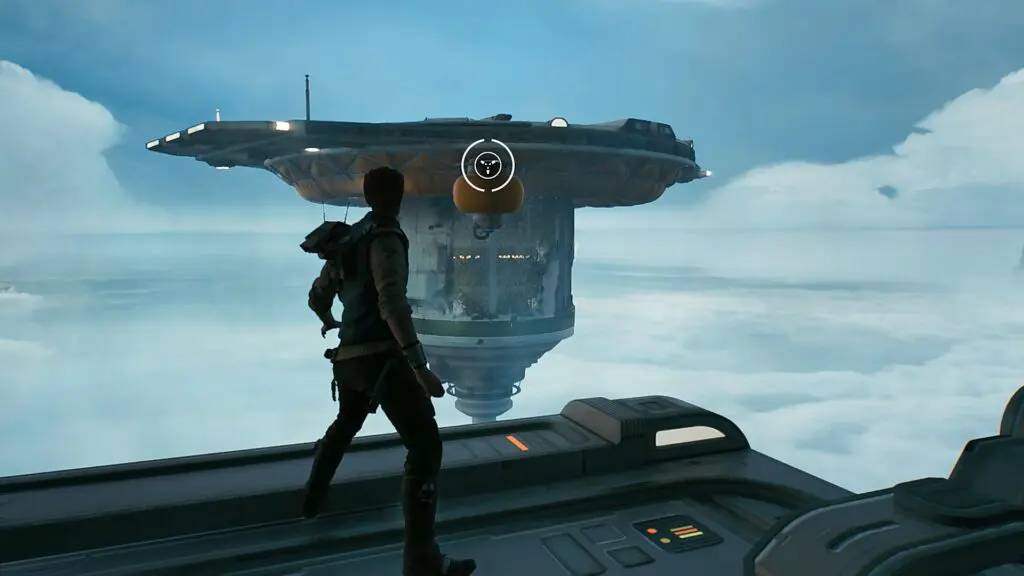
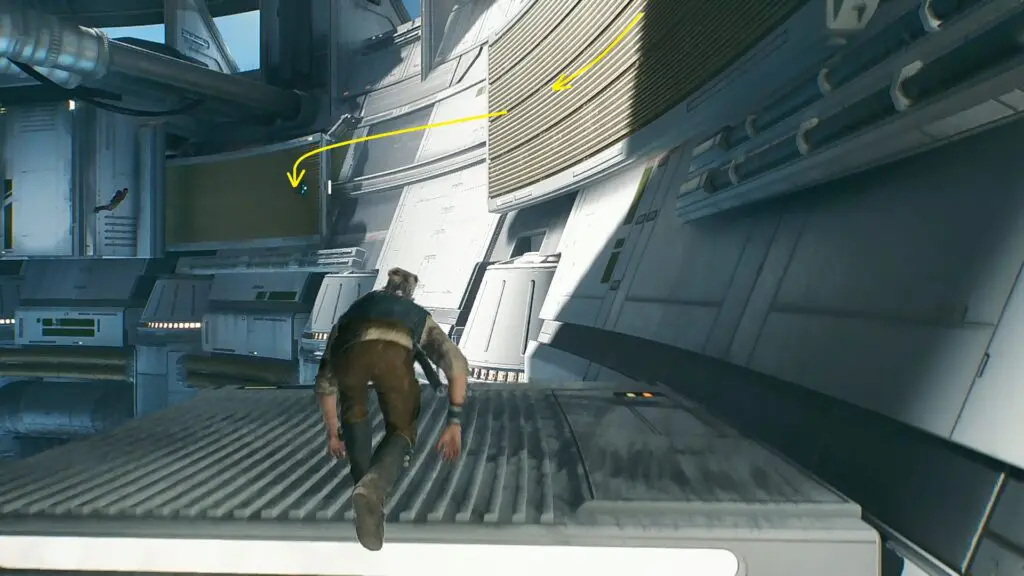
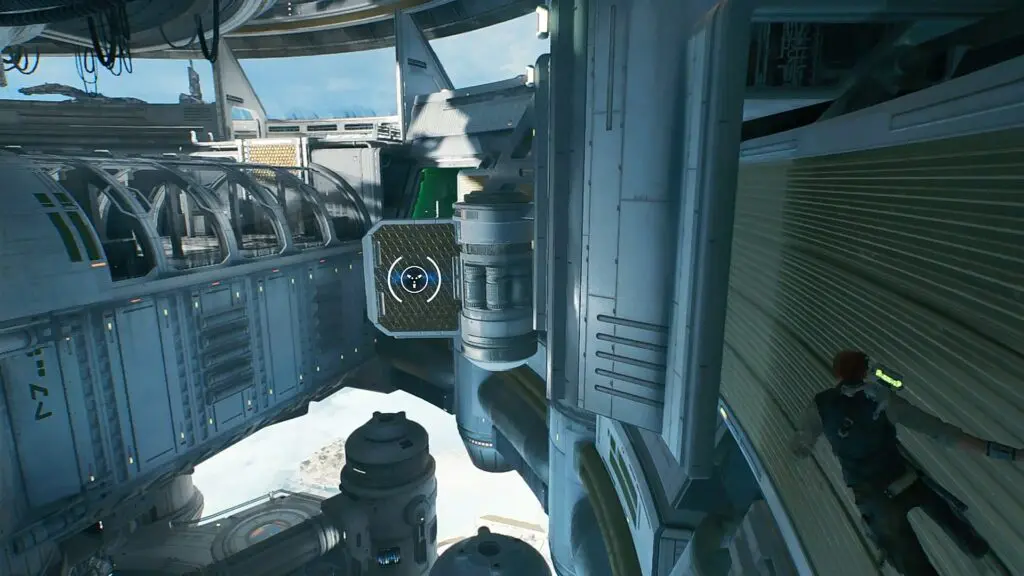
After the objective starts, go straight ahead and use the zipline. When the zipline ends, use the two grapple balloons to jump to the floating board ahead as shown in the second picture below. Then jump to the next floating board and the zipline ahead at the end. When the zipline ends, run on the floating board ahead, then use the grapple balloon to reach the next board. then jump to the surface ahead to reach the Array Channel meditation point as shown in the third picture below.
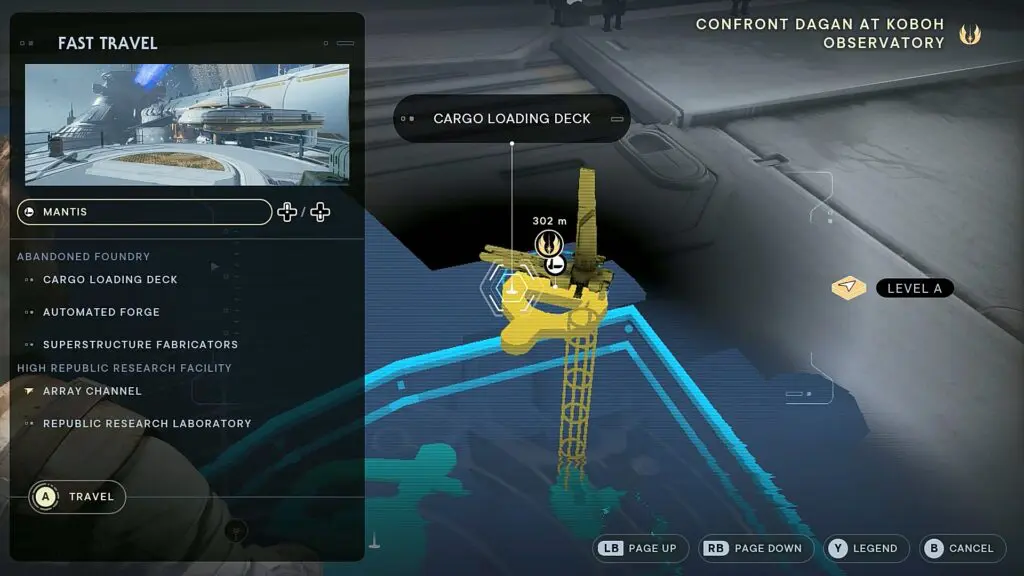
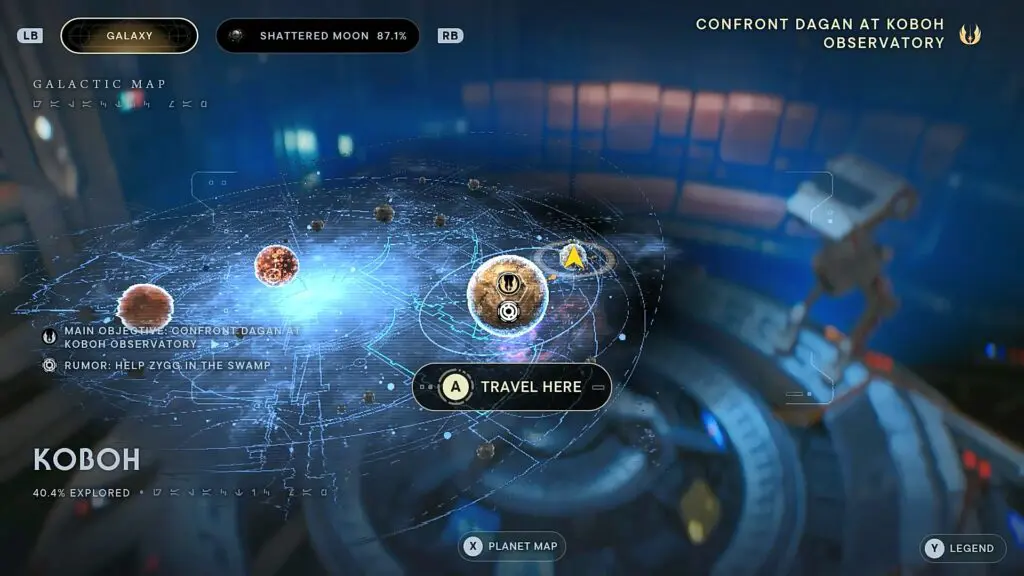
Fast travel to Cargo Loading Deck and enter Mantis. Interact with the Holtable and travel to Koboh. You will have to interact with the Holotable again for a cutscene and then you will reach Koboh.
Rambler’s Reach Outpost
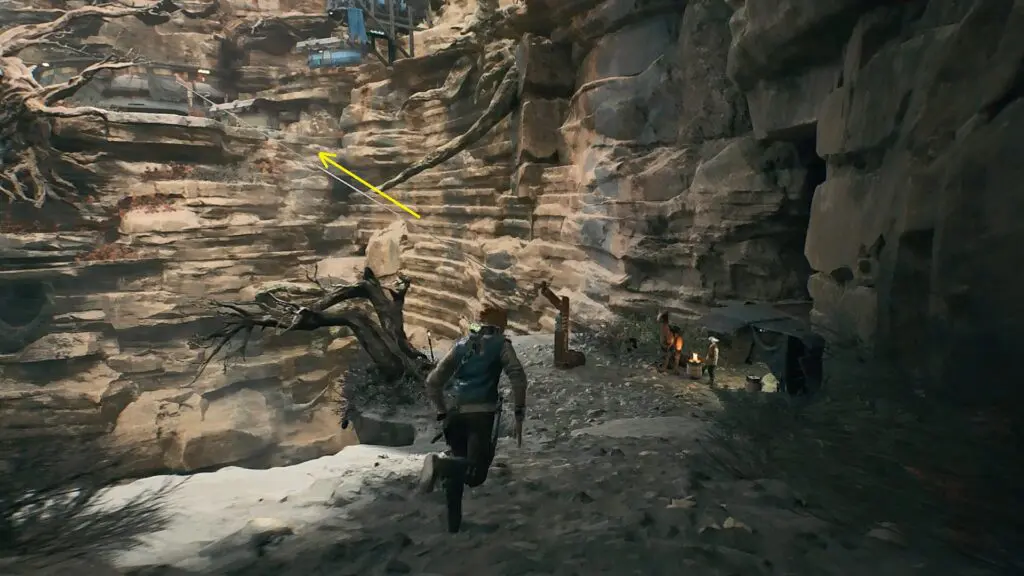
Hop off the Mantis and go up the slope near Pyloon’s Saloon main entrance as shown in the picture below. Proceed ahead then go right and take the zipline at the end as shown in the second picture below.

After reaching the top, grapple on the vines head as shown in the picture below, and climb up. Then enter the cave on the right side to reach the Mountain Ascent meditation point as shown in the second picture below.
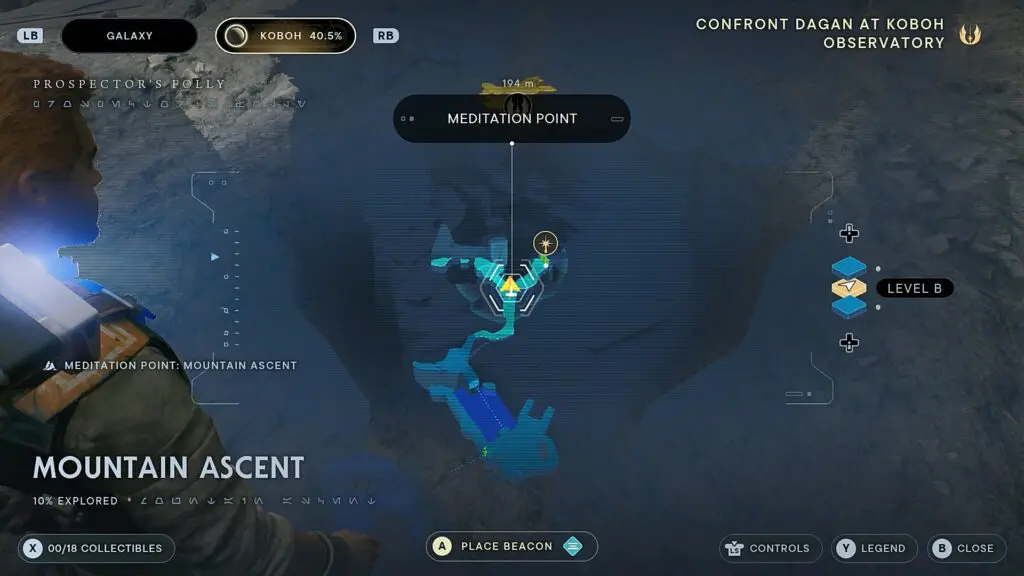
Mountain Ascent
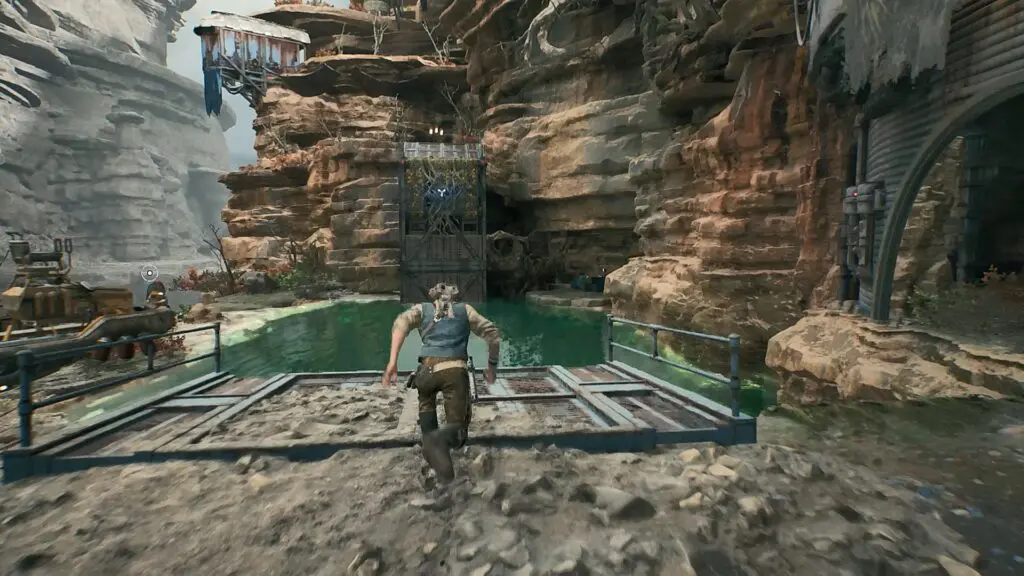
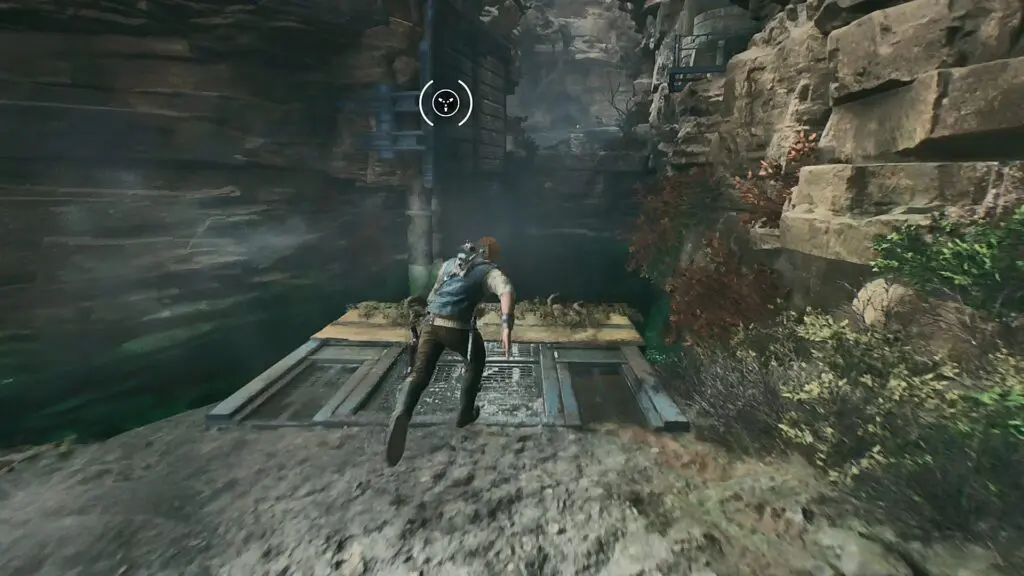
Dash through the green barrier on the right side of the meditation point. Proceed ahead and run on the wall to reach the other side as shown in the picture below.
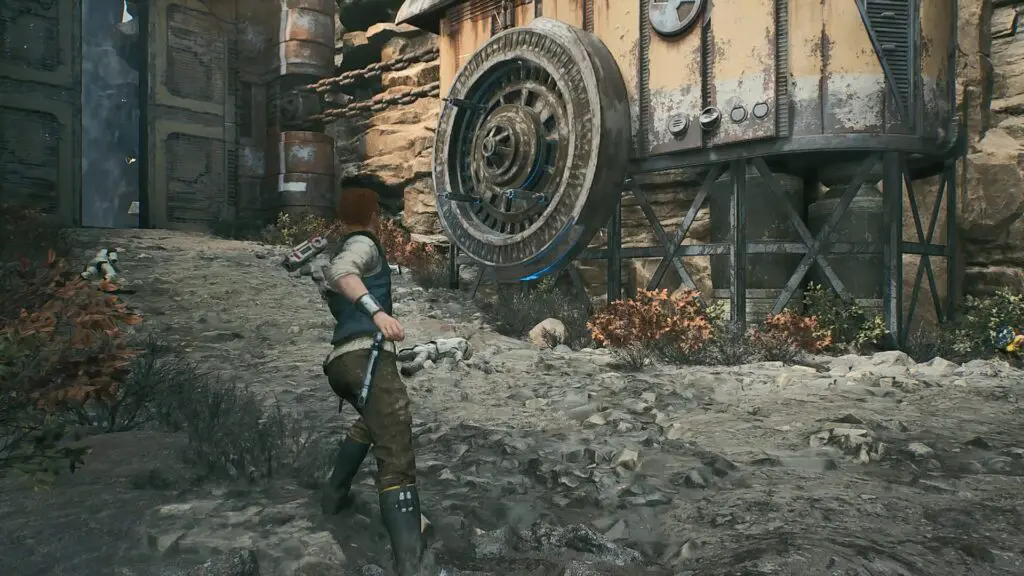
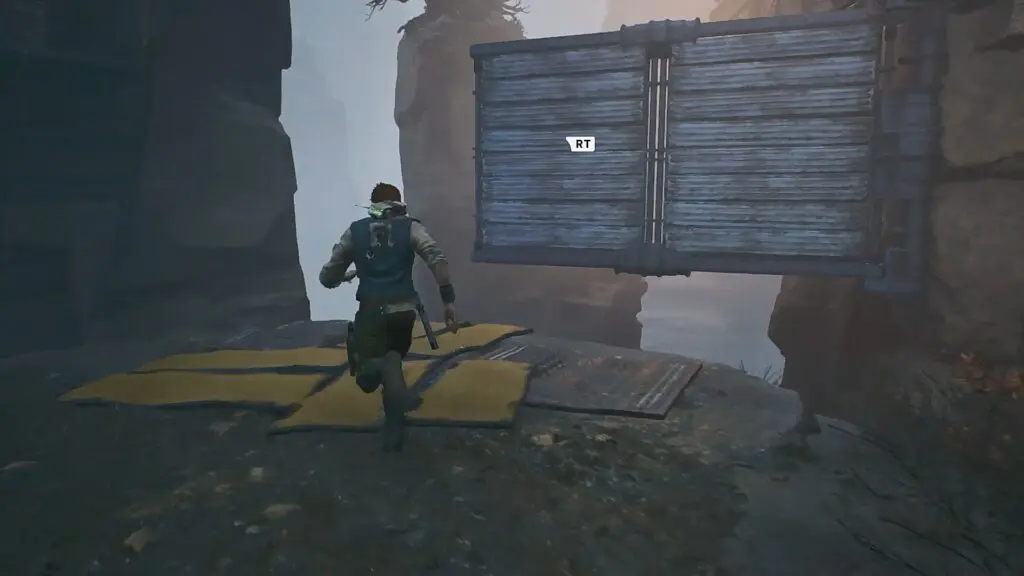
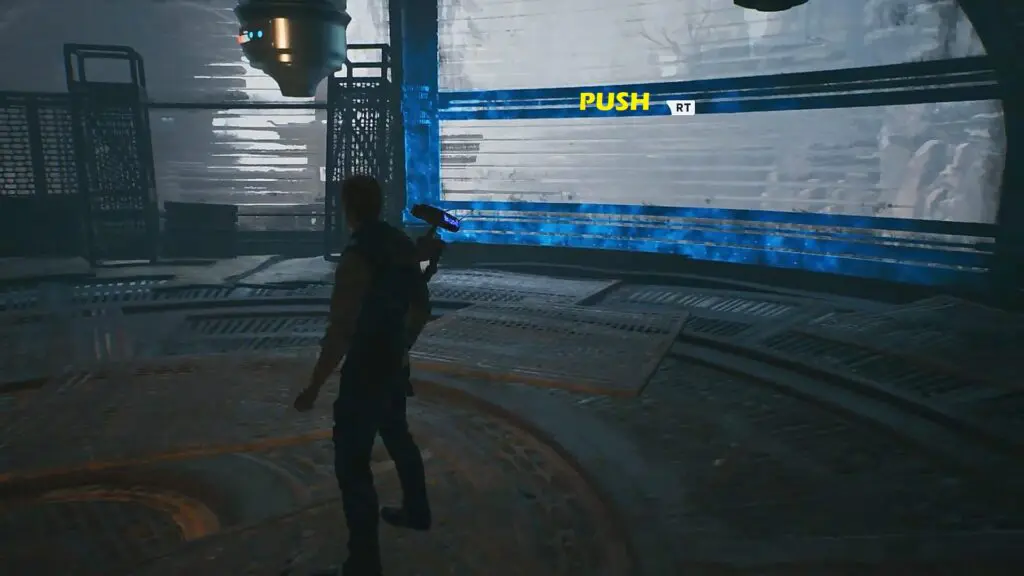
Continue ahead until you reach the location shown below. Climb up the wall ahead, then continue and jump across the gap as shown in the picture below. This will take you to a giant iron gate. Push the wheel as shown in the second picture below to open the gate.

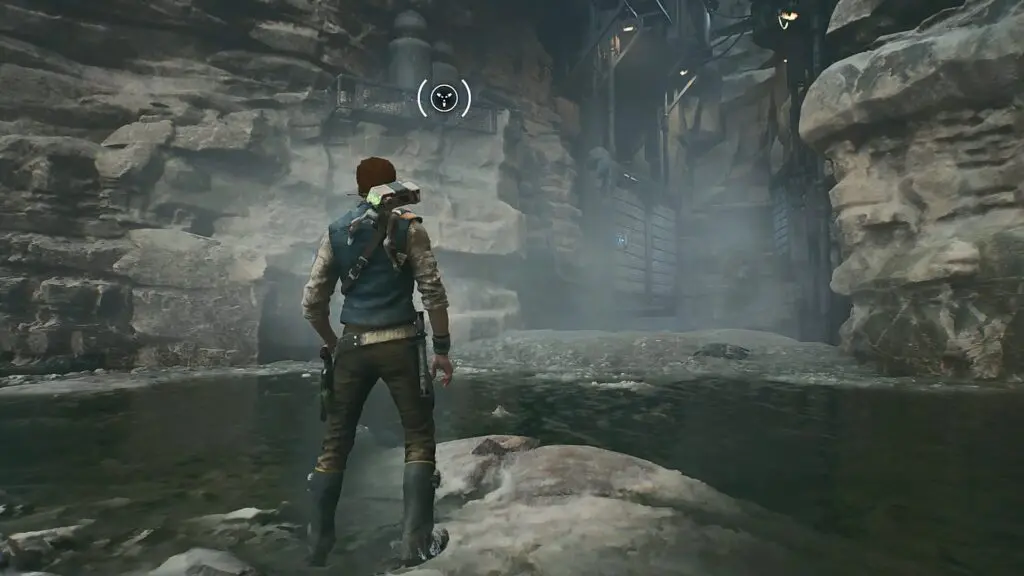
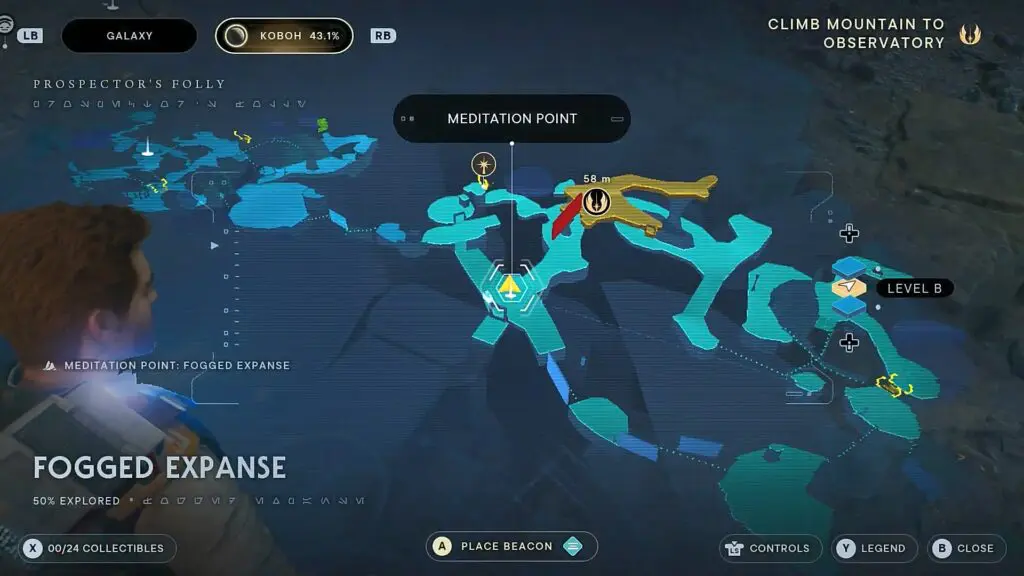
Continue ahead and jump down. Defeat the giant monsters there. Then run on the walls to reach the other side as shown in the picture below. Squeeze through the walls and jump down on the right side to reach Fogged Expanse meditation point as shown in the second picture below.
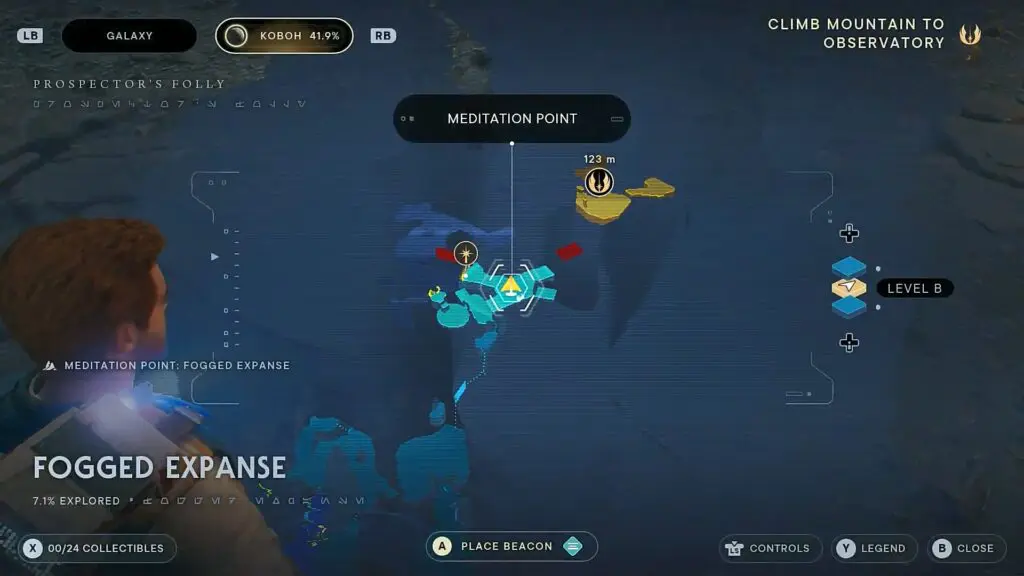
Fogged Expanse
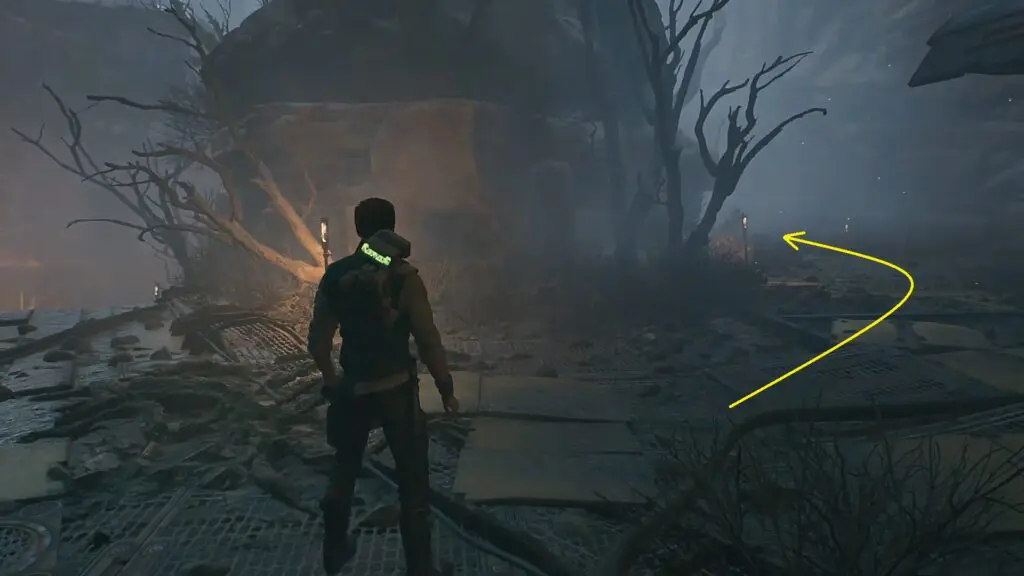
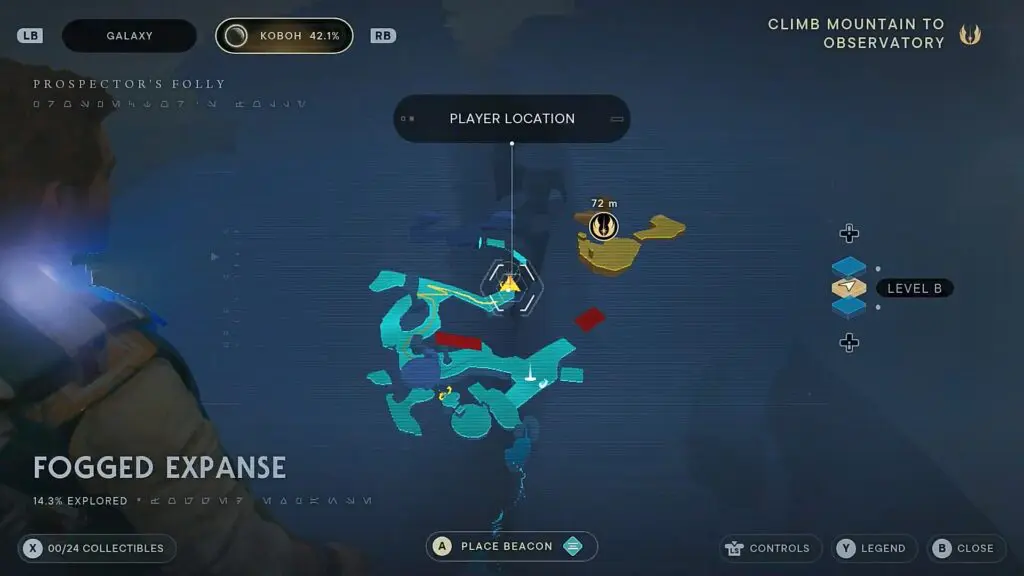
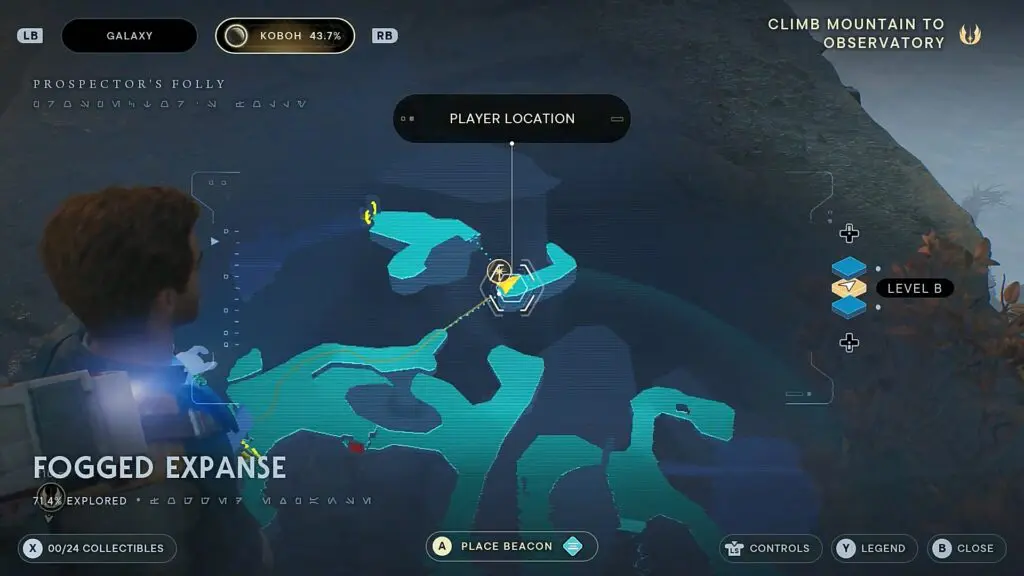
From the meditation point, proceed ahead and when you reach the fork on the path, take the path going right as shown in the second picture below.
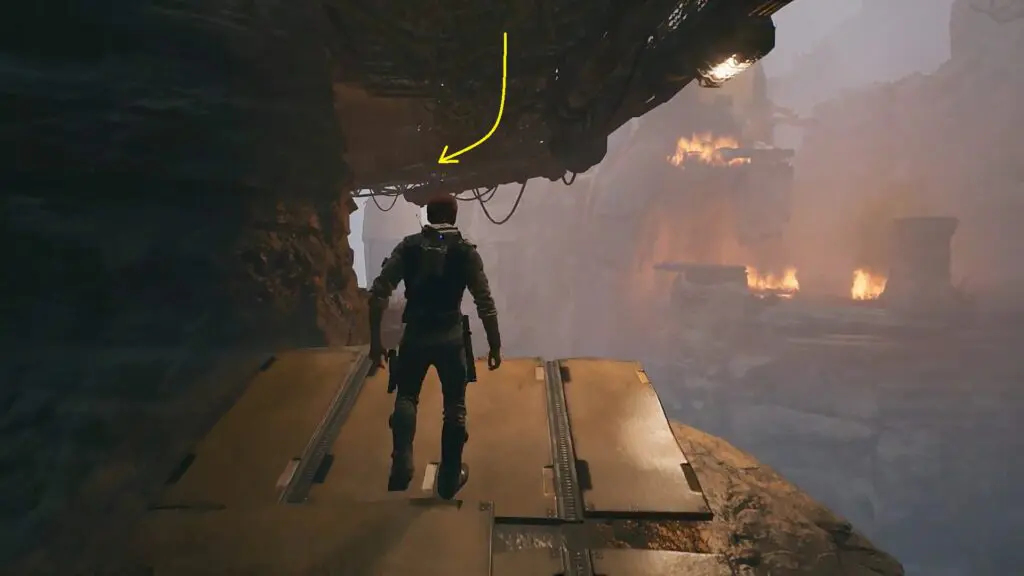
Proceed in the linear path until you reach the location shown in the picture below. Grapple on the wall ahead and run on the walls to reach the other side. Open the door on the other side and continue ahead until you reach the location shown in the second picture below. Grab the vines on the roof and move forward to reach the other side.
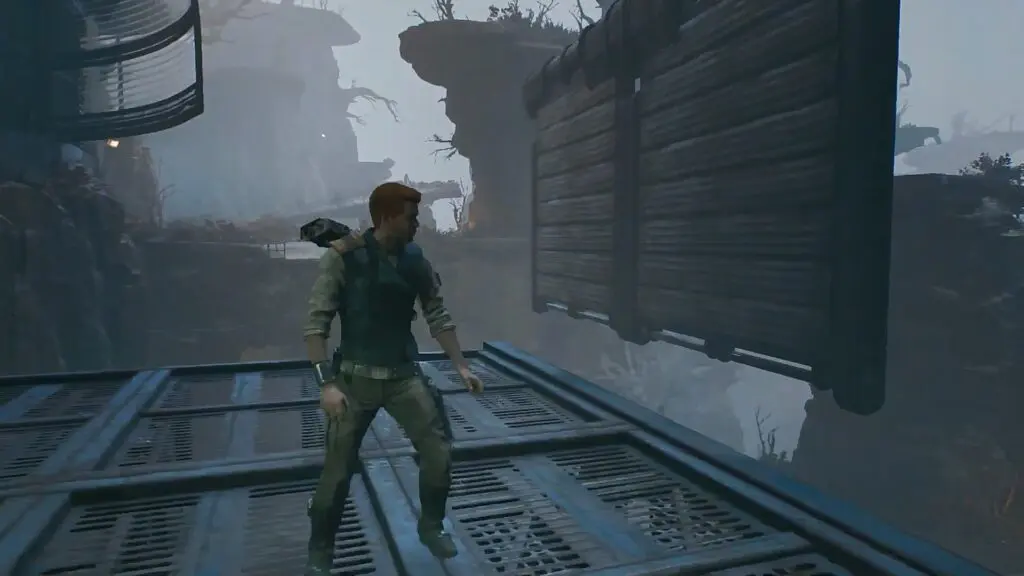
Then turn right and push the board as shown in the picture below. Run on the board and grapple the surface ahead to reach there. Use the zipline there to reach the other side. Go up the slope there to reach the wreckage site as shown in the second picture below.
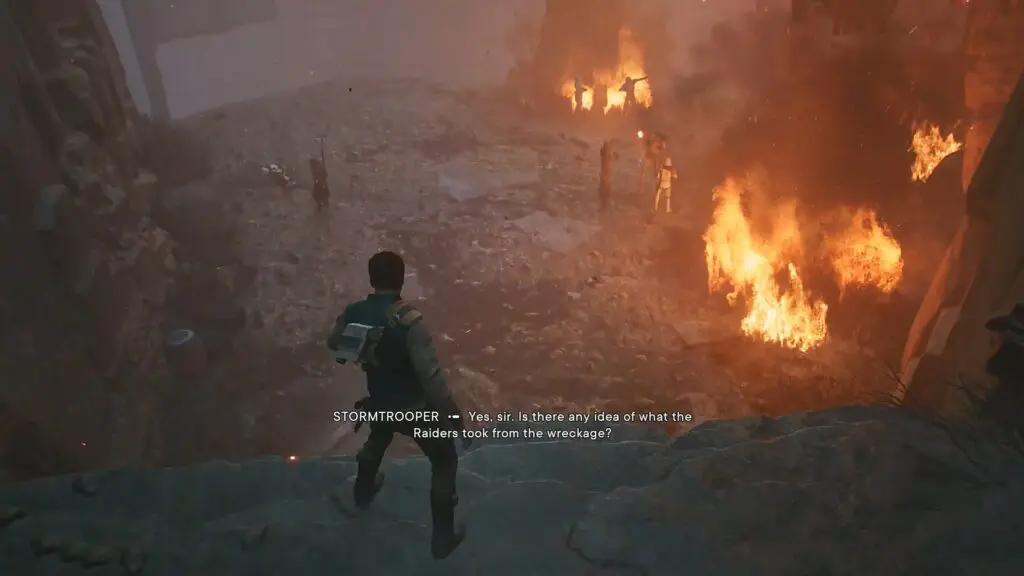
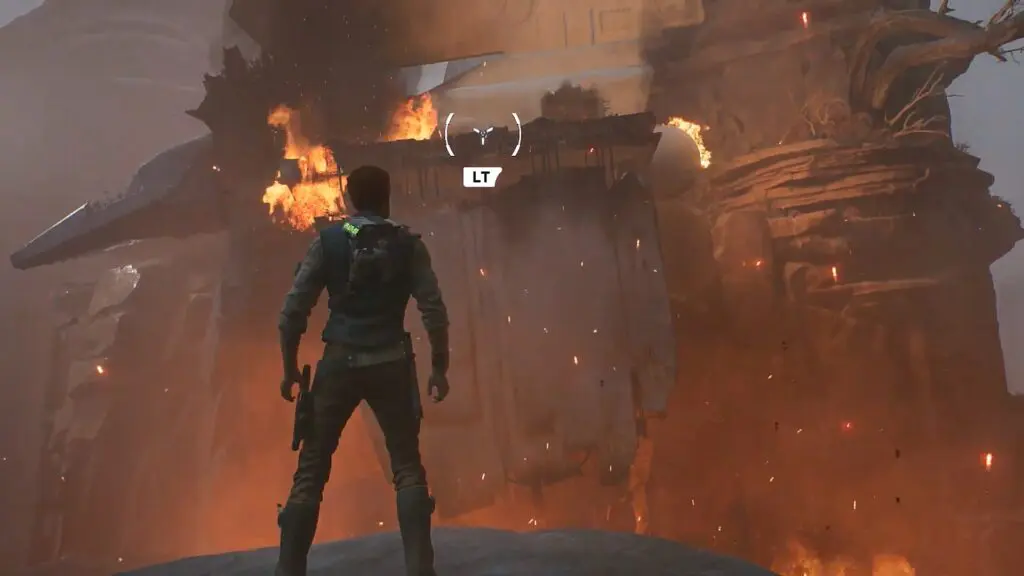
Defeat the enemies at the wreckage site. Then climb up to the wreckage location as shown in the picture below. Squeeze inside the wreckage and make your way to the cockpit. When the wreckage starts falling, grapple your way down. Here BD1 will learn Electro Dart ability.
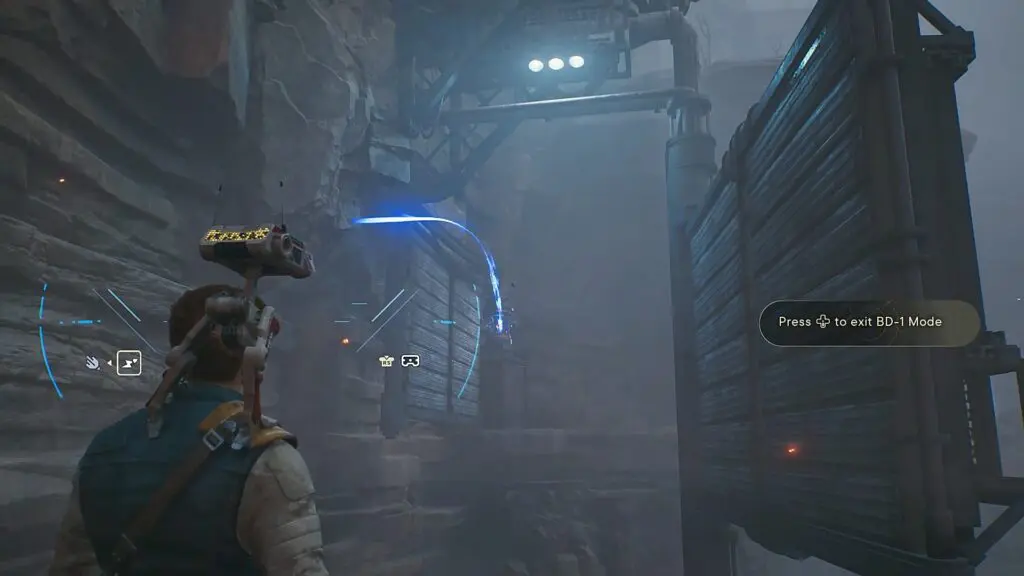
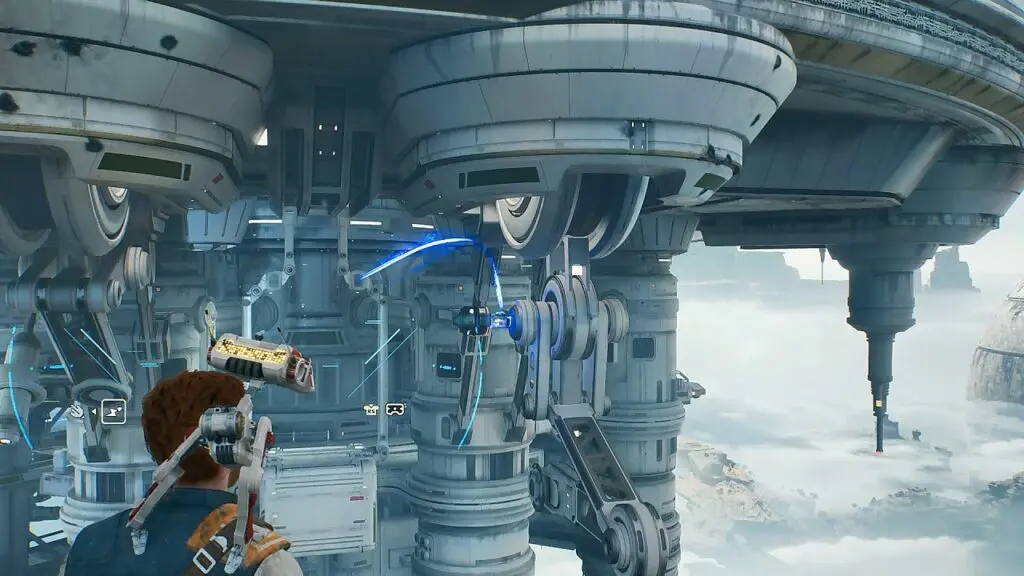
Now hit the electrical source with Electro Dart as shown in the picture below, this will make the board align properly. Now run on the boards to reach the other side.
Use the electro dart again to align another board. Then run on it to reach the meditation point as shown in the picture below.
From the meditation point, take the path going left and climb up the wall ahead. Enter the structure there. Then climb up the wall on the right side and jump to the other structure straight ahead. Push open the door there as shown in the picture below. Then jump to the platform ahead. Use Electro Dart on the electrical source as shown in the second picture below. This will make a board move as shown in the third picture below. Run on the moving board to reach the other side.

Proceed ahead and use the grapple to cross the gap to reach the location shown in the picture below. Then turn left and use the grapple to climb up.
Proceed ahead and enter the cave. Use Electro Dart there to drop a board. Then run on the boards to reach the other side. Now turn around and run on another board to cross the gap ahead. Then climb up the stairs to reach the location shown in the picture below. Use the zipline thee to reach the other side.
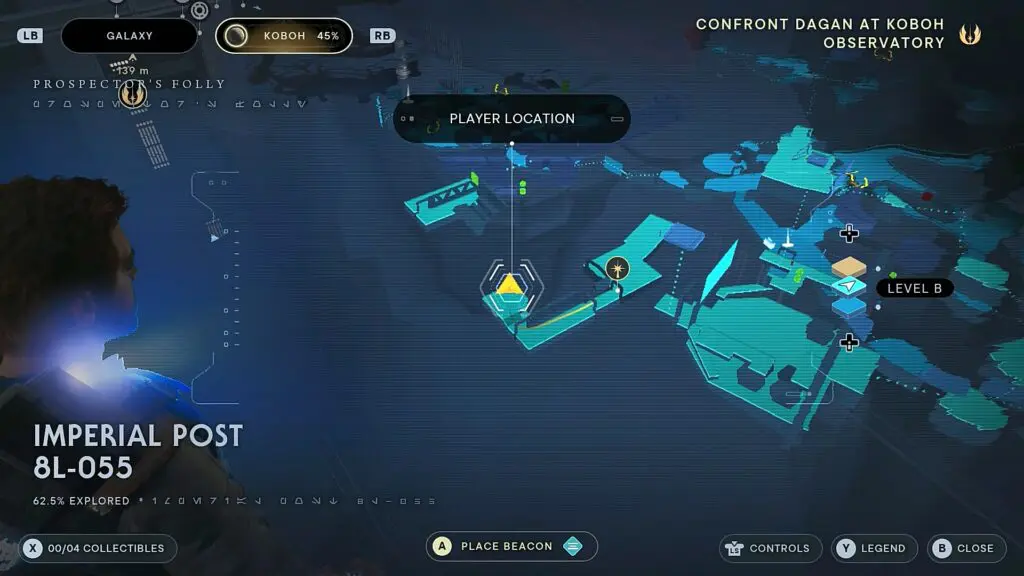
Proceed ahead and use grapple and wall run to reach Imperial Post 8L-055 meditation point as shown in the picture below.

Imperial Post 8L-055
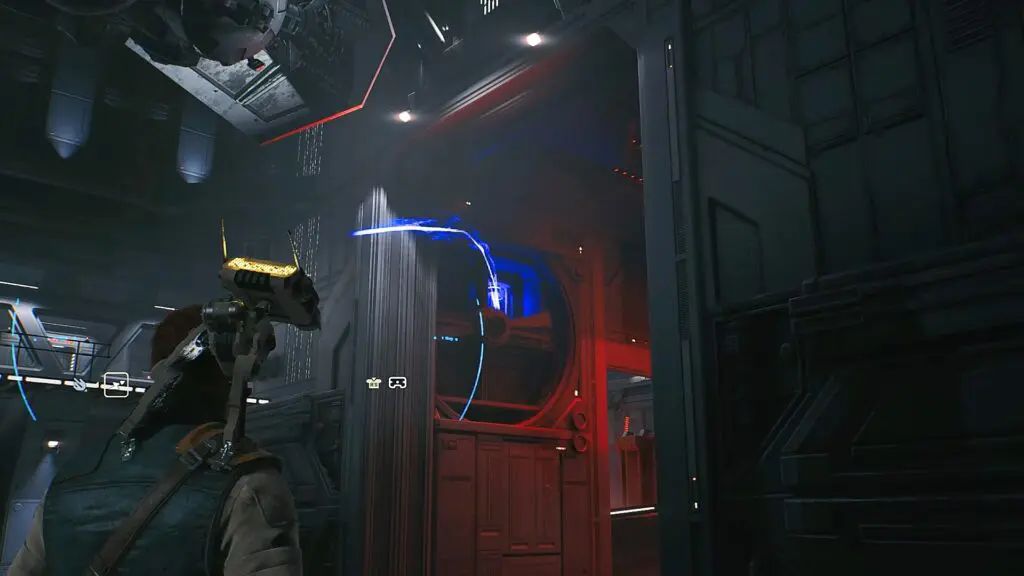
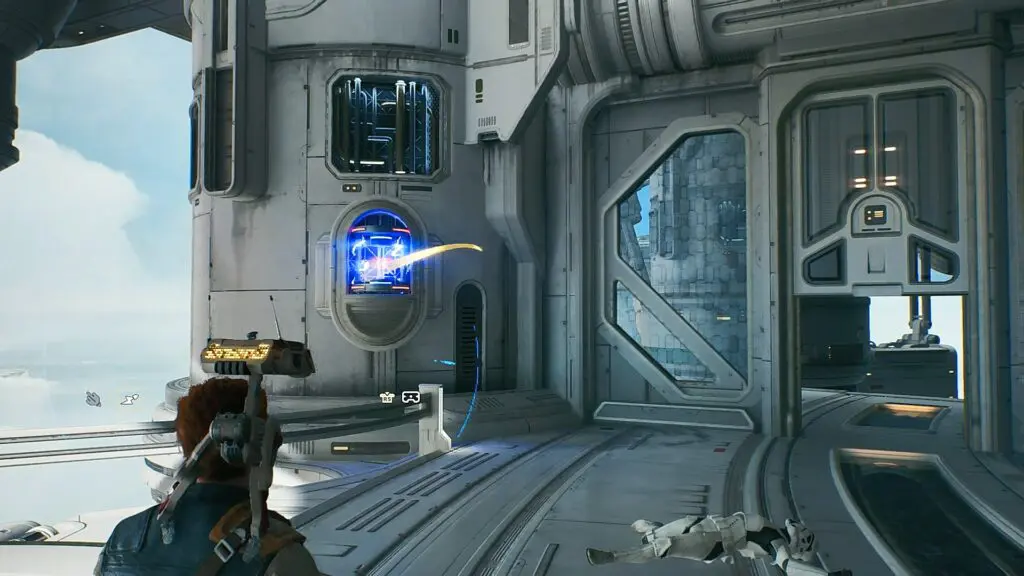
Enter the building and defeat the enemies there. Then take the elevator up. Talk to the stormtrooper there and he will open the door. Go inside and turn right to reach the location shown in the pictures below. Shoot the Electro Darts on the energy source to close the door. Then run on the wall to reach the other side.
Proceed ahead and defeat Rick the Door Technician. Then take the elevator to the top and use the zipline to reach the surface above as shown in the picture below.
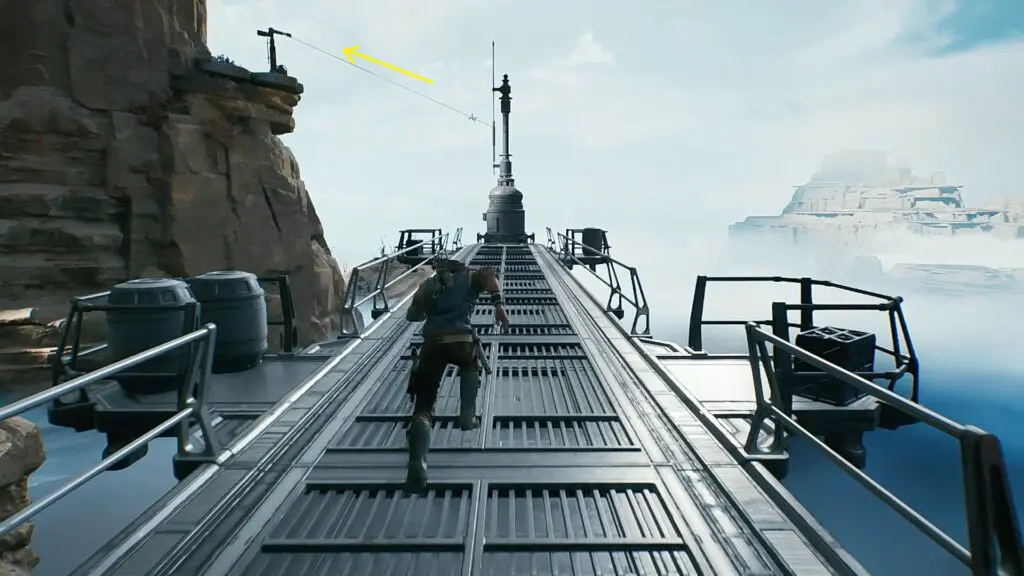
Keep moving up the slope. Then use electro darts to activate the zipline as shown in the picture below. Use the zipline to reach the Summit Ridge meditation point as shown in the second picture below.
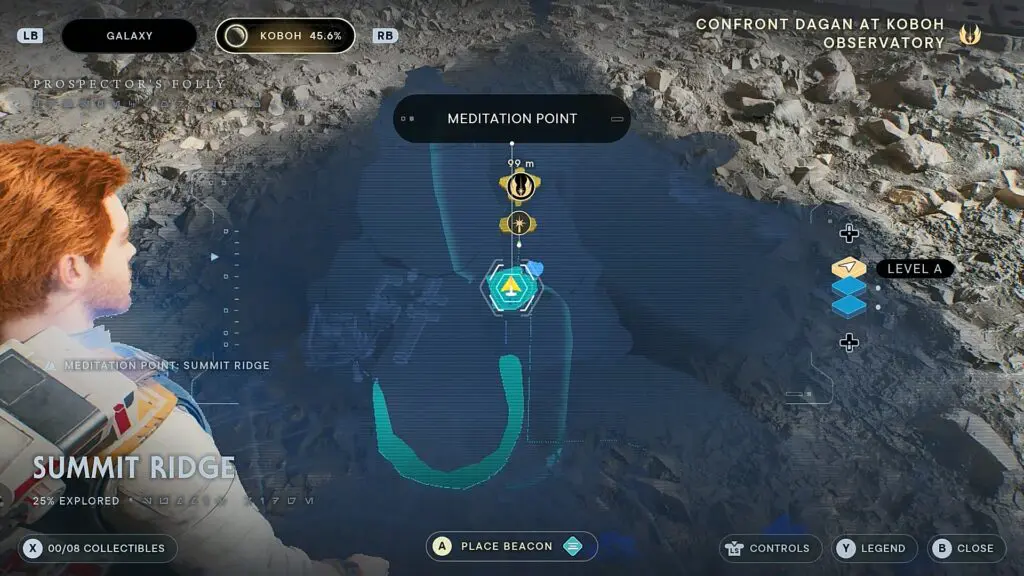
Summit Ridge
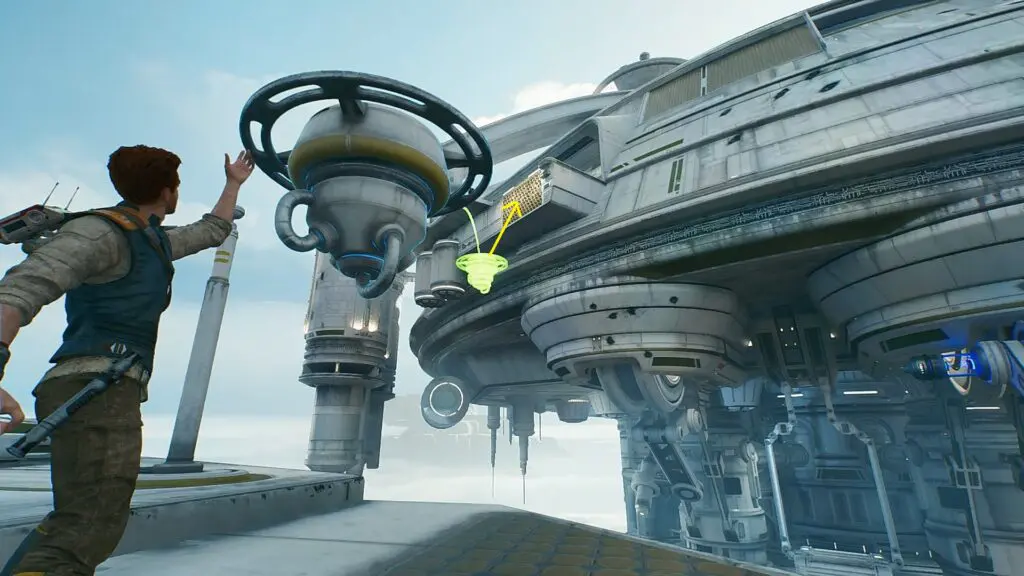
From the meditation point, proceed ahead and use the grapple balloon to cross the gap. then proceed ahead till you reach the edge of the ground. Use the terminal there to get a grapple ballon and place it as shown in the picture below. Then use it to reach the surface ahead. Use the terminal there to get another grapple ballon and use it to climb the cliff next to it.
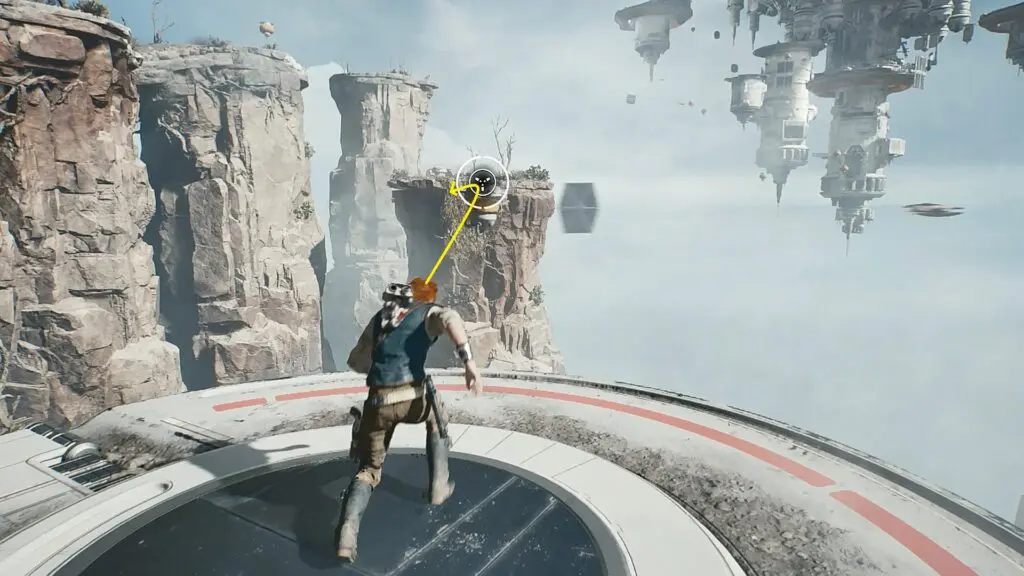
Use the terminal from the previous cliff to get a grapple balloon. Place it as shown in the picture below. Then use it to reach the cliff ahead. Ride the Relter there to reach the grapple balloon ahead. Then use the grapple balloons to reach Observatory Understructure as shown in the third picture below.

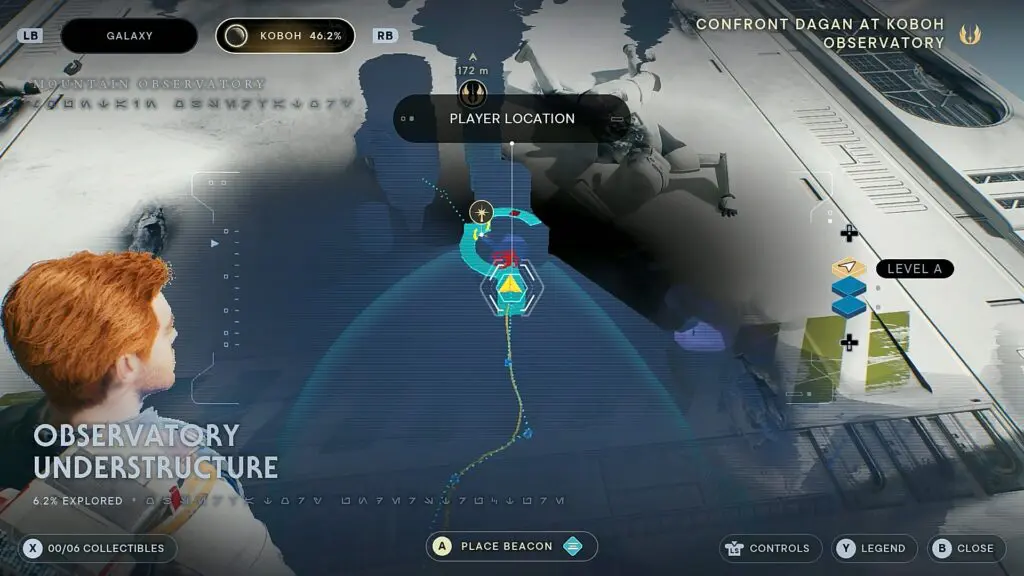
Observatory Understructure
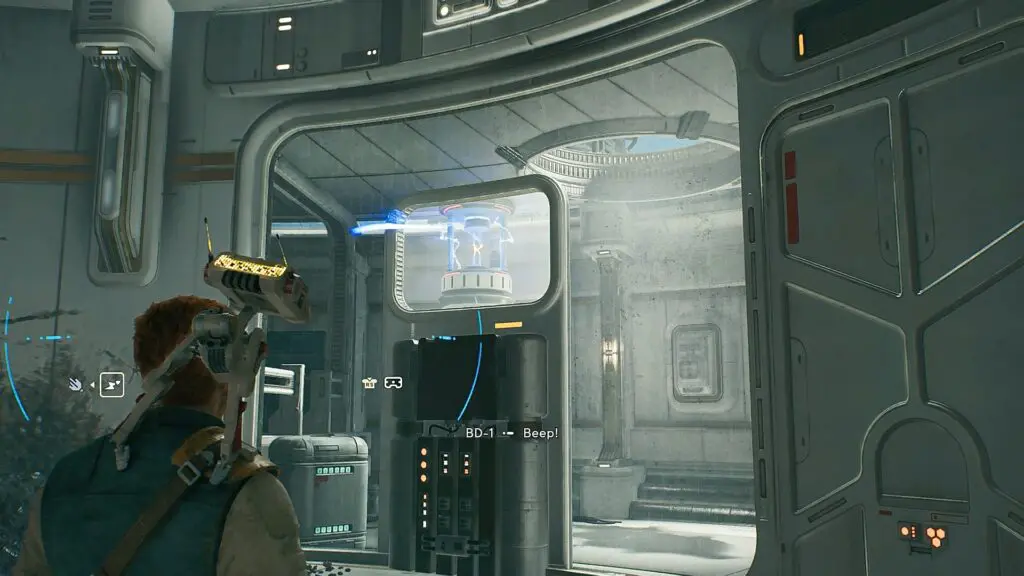
Squeeze through the walls to go inside. Use the electro darts on the energy source to open the hatch next to it as shown in the picture below. Now go back outside and jump down through the hatch.
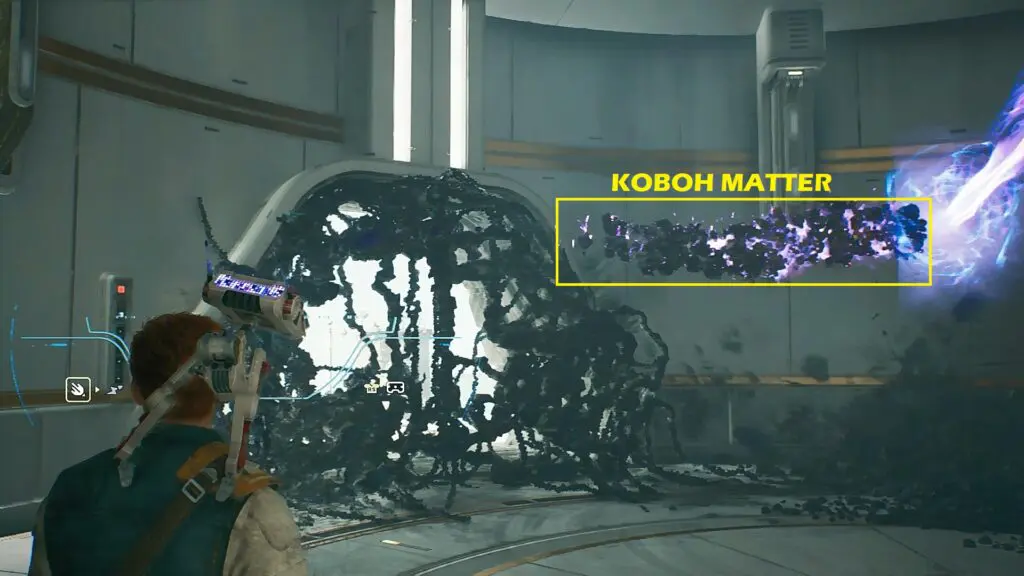
After dropping down, open the door ahead. Then use Koboh Grinder to throw Kogoh Matters such that the Koboh Matters blocking the door get connected with the flame and burn as shown in the picture below.
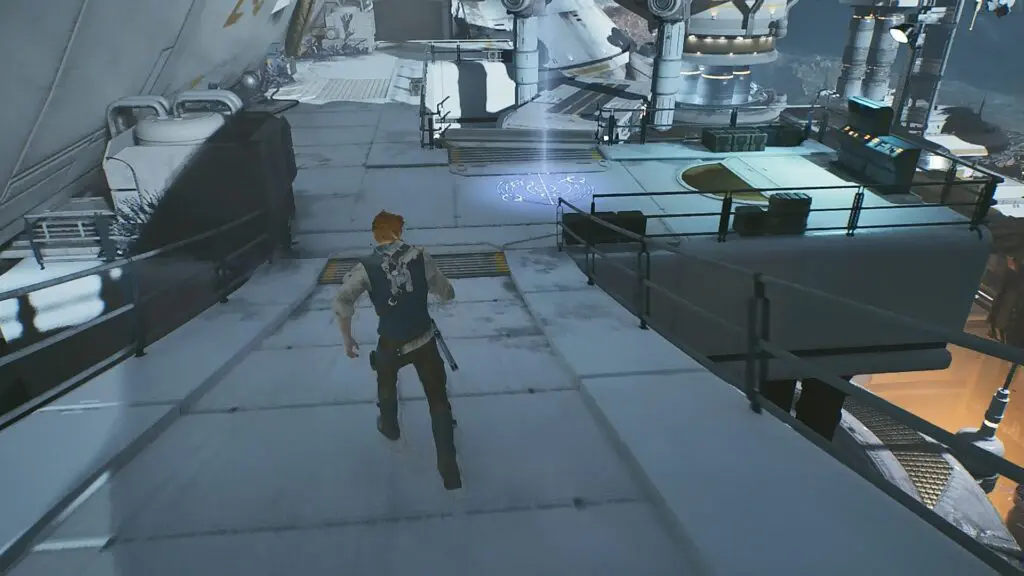
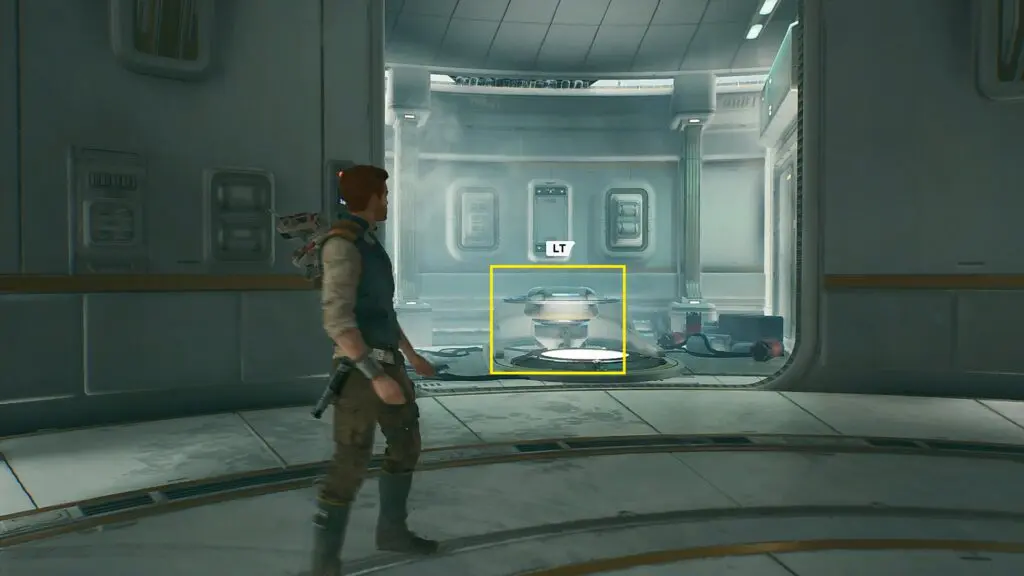
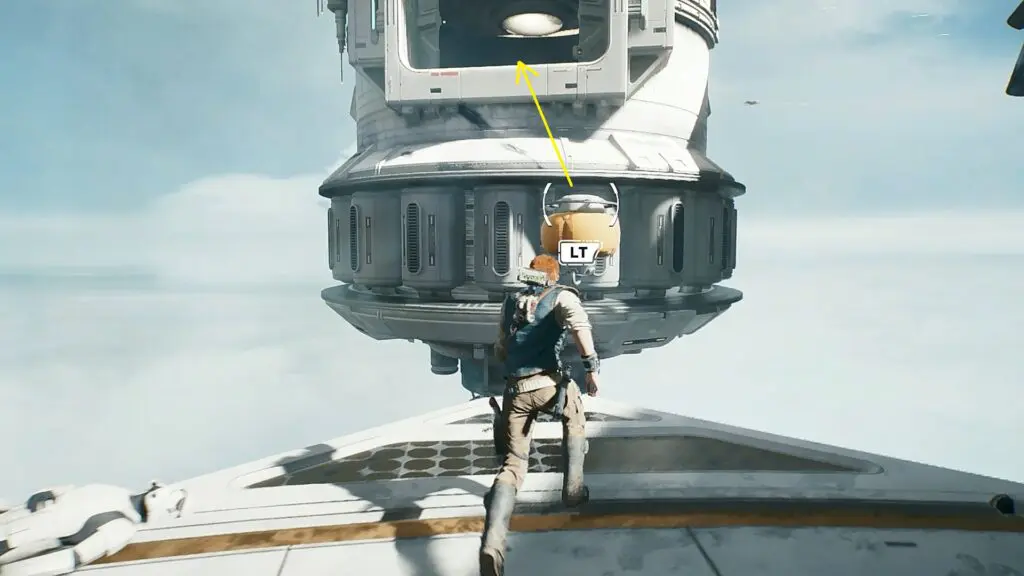
Now pick up a grapple balloon as shown in the picture below and take it outside. Place it as shown in the second picture below. Then use the grapple balloon to reach the surface above.
Climb up the stairs to reach the meditation point. Then climb up the wall to go outside. Use the grapple balloons there to reach the wall grating as shown in the picture below. Then move right and climb up to the top. Then use another grapple balloon to reach the structure ahead.

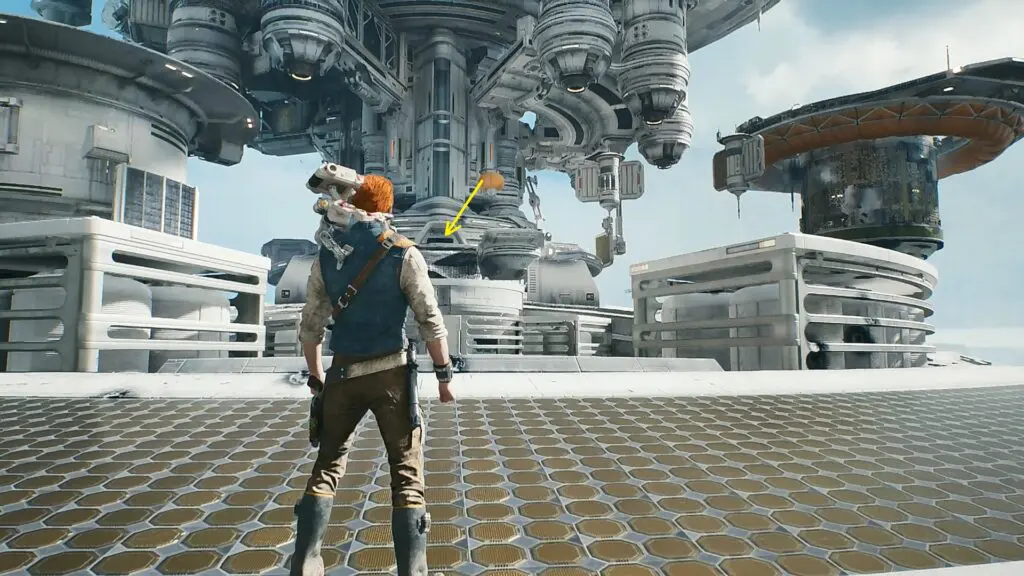
Defeat the enemies there and then use the grapple ballon to go to the surface above as shown in the picture below. Then go right and climb up the room at the end of the path.
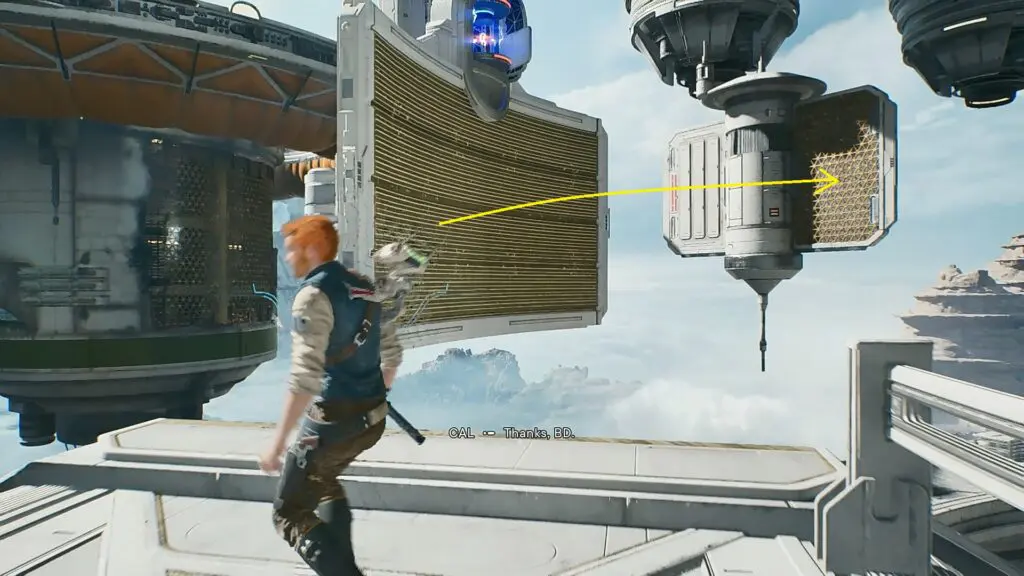
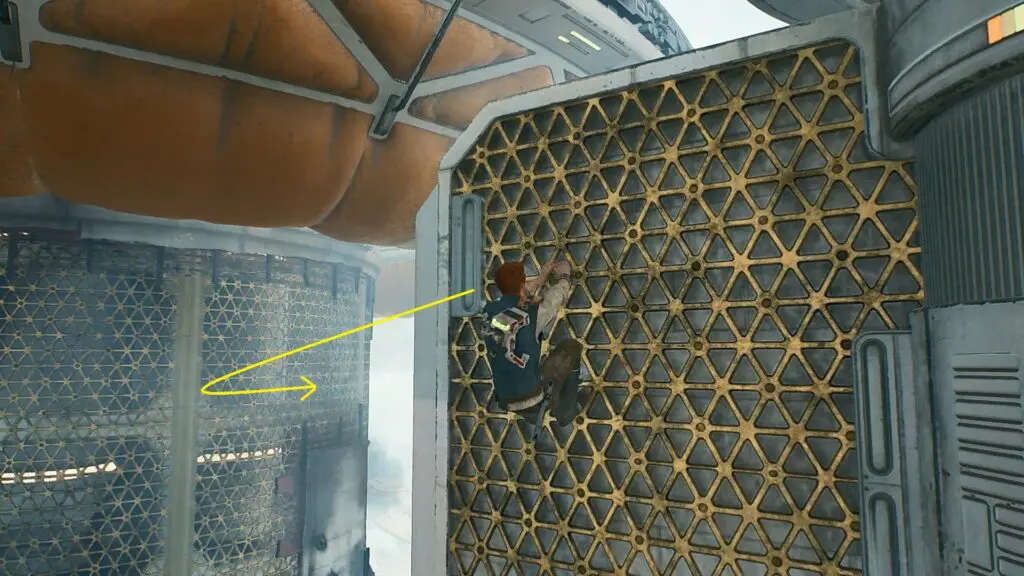
Now use electro darts to move the board up. Run on the board to reach the wall grating ahead as shown in the picture below. This will rotate the board it is on. Then jump to the next wall grating. From there, jump to the wall grating as shown in the second picture below. Then move right and climb up to the top.
Defeat the enemies there and then use the wall grating to climb up to the structure ahead as shown in the picture below.
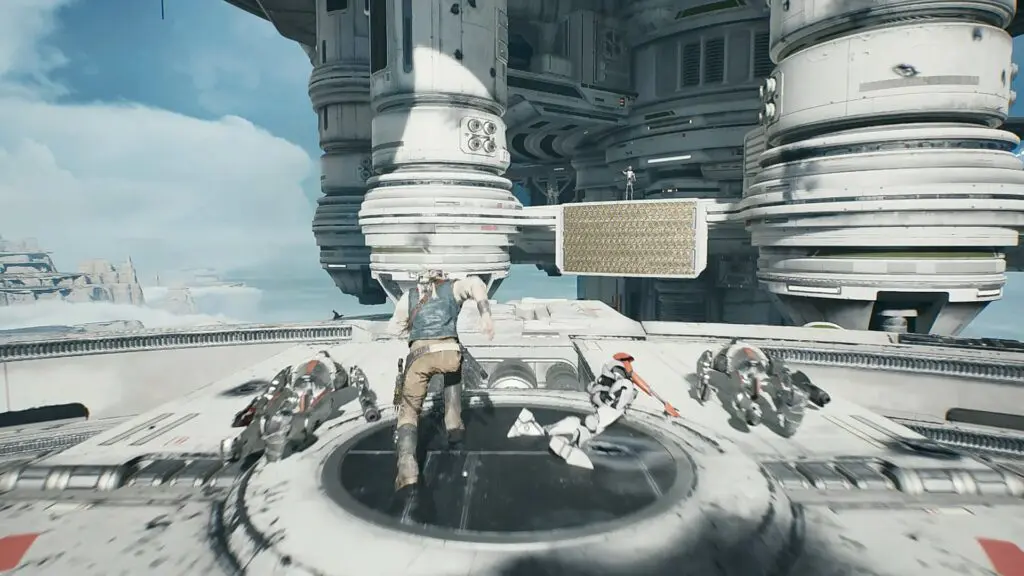
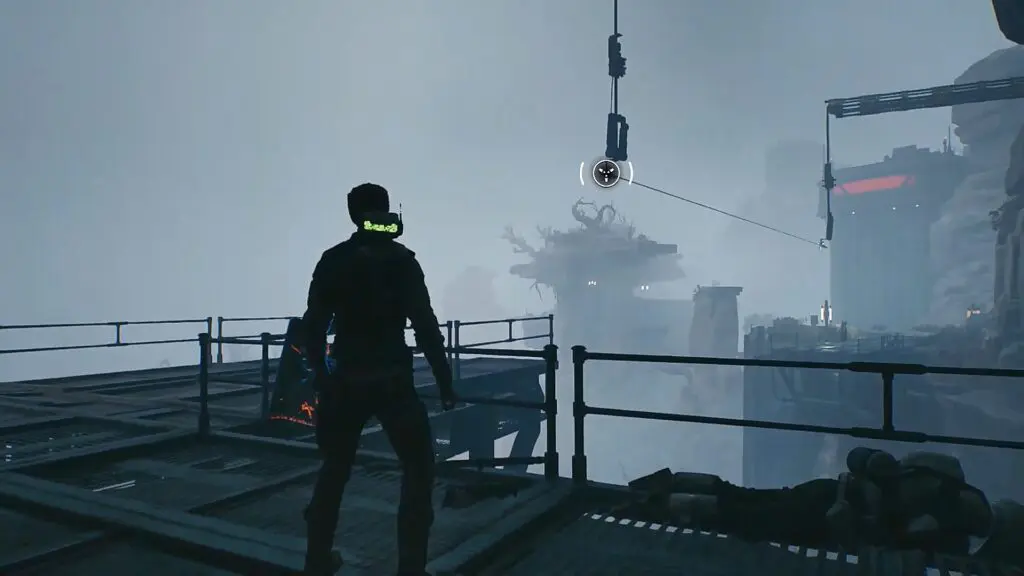
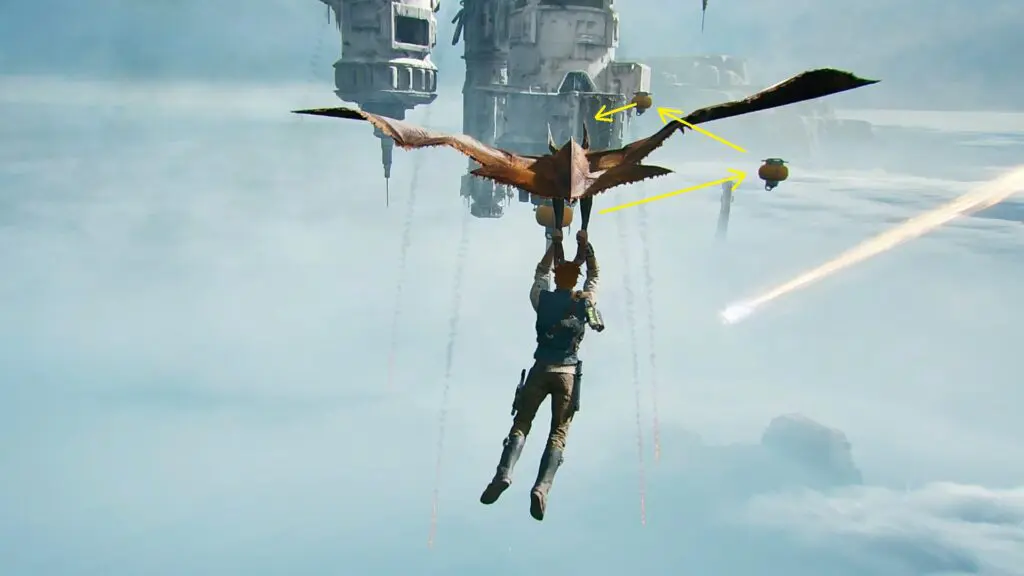
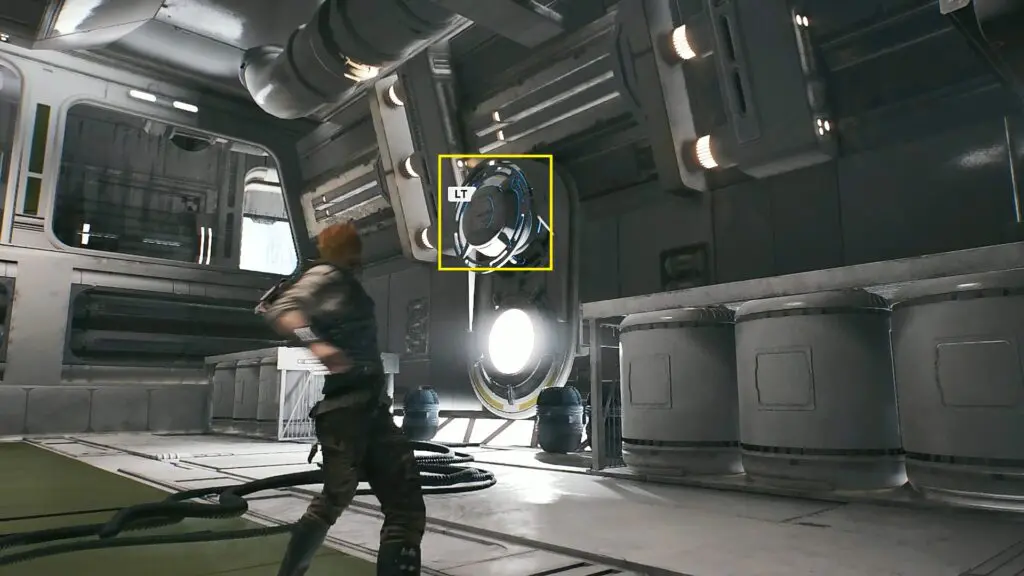
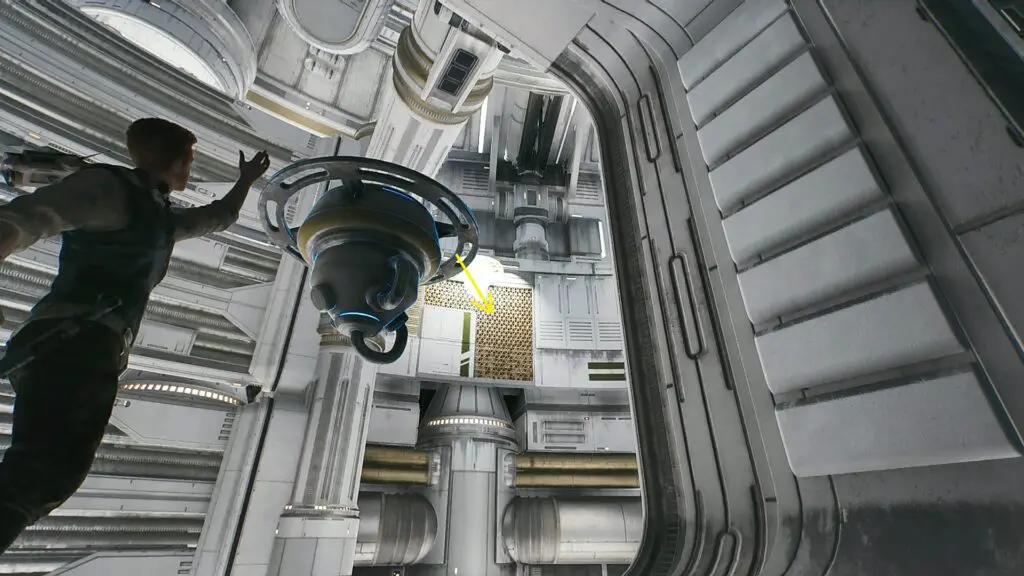
Go right and grapple on the hooks on the wings as shown in the picture below. Grapple in the anticlockwise fashion and finally grapple to the wall grating at the end as shown in the second picture below. Then climb up and jump to the platform on the left side.
Defeat Bedlam Raider there and proceed ahead. Open the door then defeat Urgost. Then use electro darts to open the door as shown in the picture below. Proceed ahead and climb up the crate on the left side as shown in the second picture below.
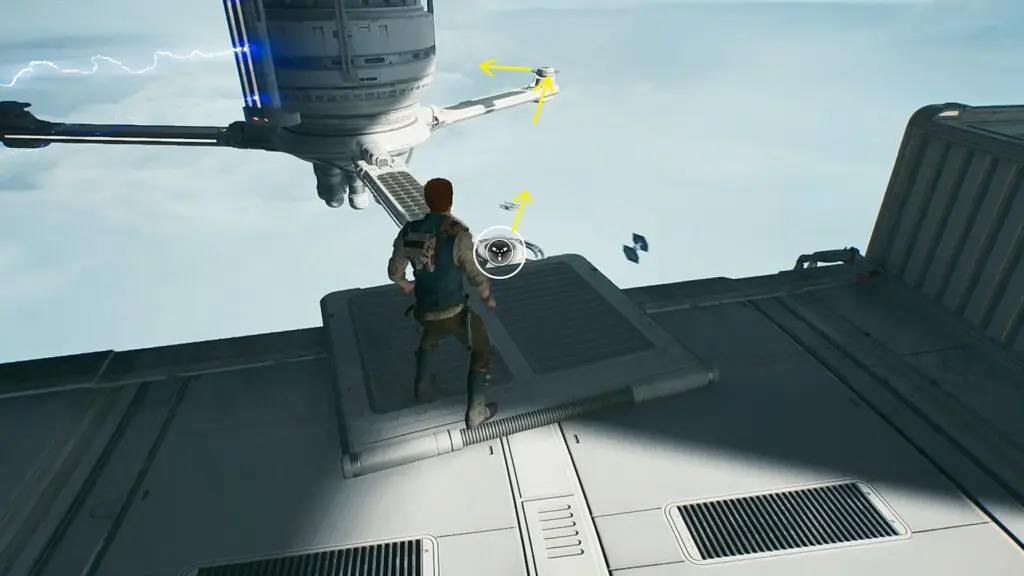
Use electro darts on the energy source on the left side. This will make the robotic arm come down. Take a grapple balloon from it and place it as shown in the picture below. Now use it to reach the platform on the other side.
Now face the structure and use the electro darts on the source as shown in the picture below. This will make the robotic arm come up. Take a grapple balloon from it and place it as shown in the second picture below. Use the grapple balloons to reach the grapple wall up ahead. Then climb up.
Open the door there. Go inside and drop down to the left side. Proceed ahead until you reach a circular area. Run on the moving boards there as shown in the picture below. Then grapple to the wall grating as shown in the second picture below. From there, jump on the moving board and dash into the green barrier ahead to reach the Diagnostics Corridor meditation point as shown in the third picture below.
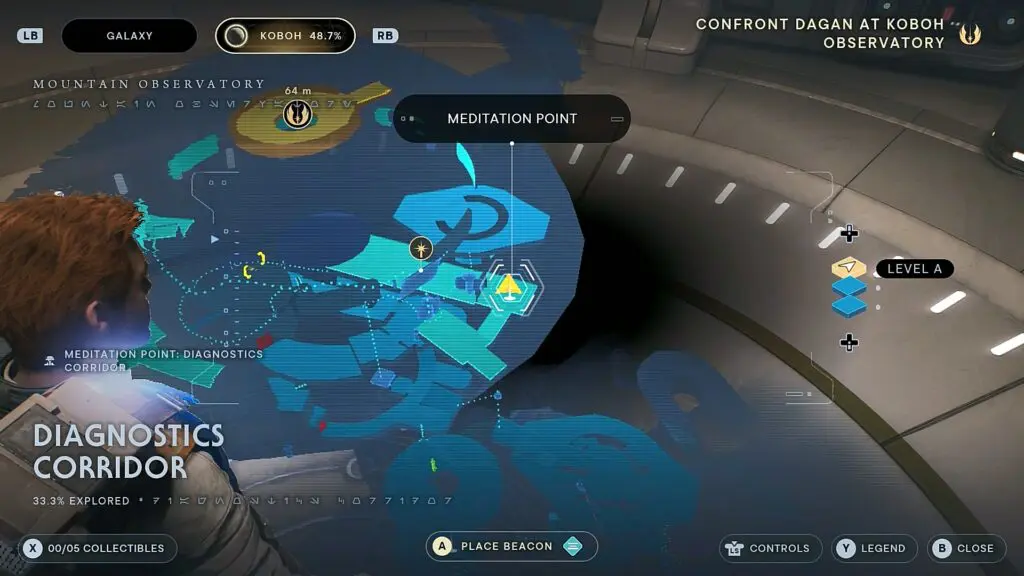
Diagnostics Corridor
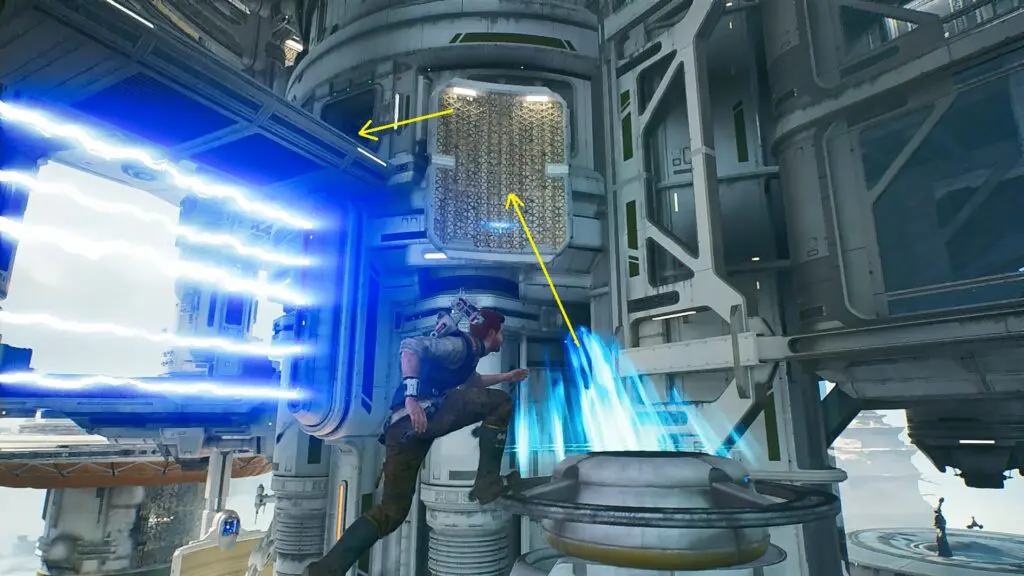
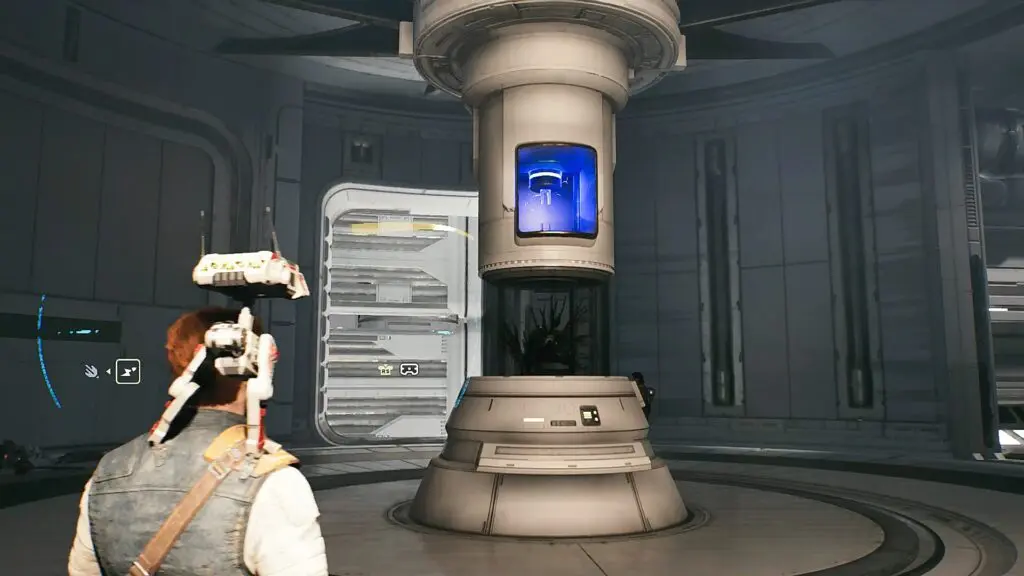
Use the terminal ahead to open the rotating door. Use electro darts as shown in the picture below to rotate the door again. This will make some enemies come. Defeat them then hit the energy source with electro darts again. This will make the door rotate further and a new path will open up. Few more enemies will come from there. Defeat them and hit the energy source with electro darts again. This will make the door rotate further and a new door leading outside will open. Go to the path that opened previously and collect a grapple balloon as shown in the second picture below. Place it outside and use it to reach the wall grating up ahead as shown in the third picture below.
Move left while holding the wall grating. Then run on the moving boards to reach the surface ahead as shown in the pictures below. Now climb up the wall grating and follow the path going up. When the path ends, grapple the wall there to reach the top level. Go inside the room there to complete the objective.