Crimson Desert is packed with hidden challenges, and one of the more intriguing side puzzles is the Azure Moon Labyrinth Puzzle found in Phoniel Ranch, Alfonso Estate. If you’ve reached this area and are unsure how to solve it, you’re not alone. In this guide, I’ll walk you through exactly how to complete the Azure Moon Labyrinth Puzzle in Crimson Desert.
Note: Before entering the Labyrinth, it’s best to know the solution beforehand. Leaving the puzzle area to find the answer is tedious, and the solution is not located inside.
Solution: Azure Moon Labyrinth Puzzle
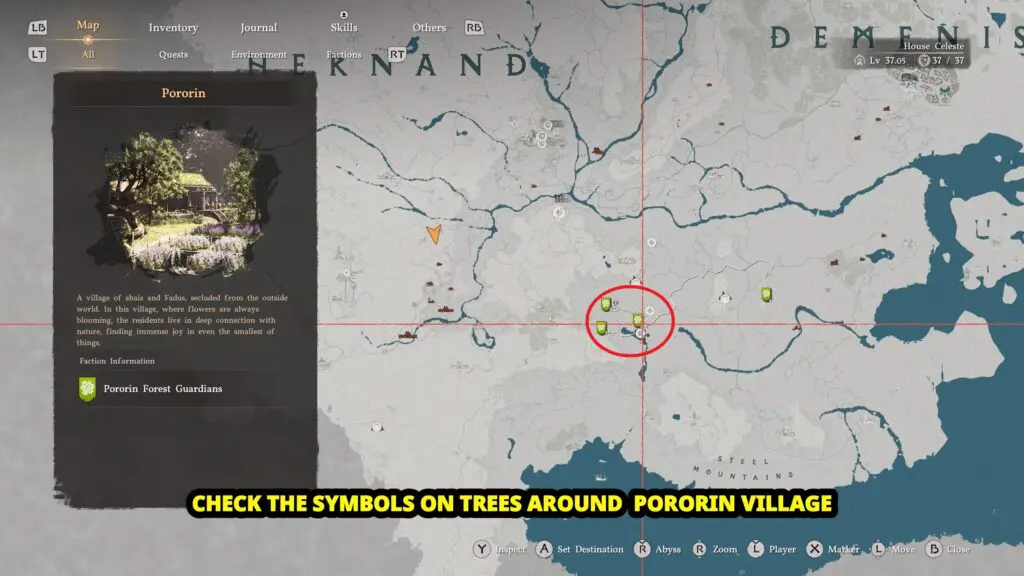
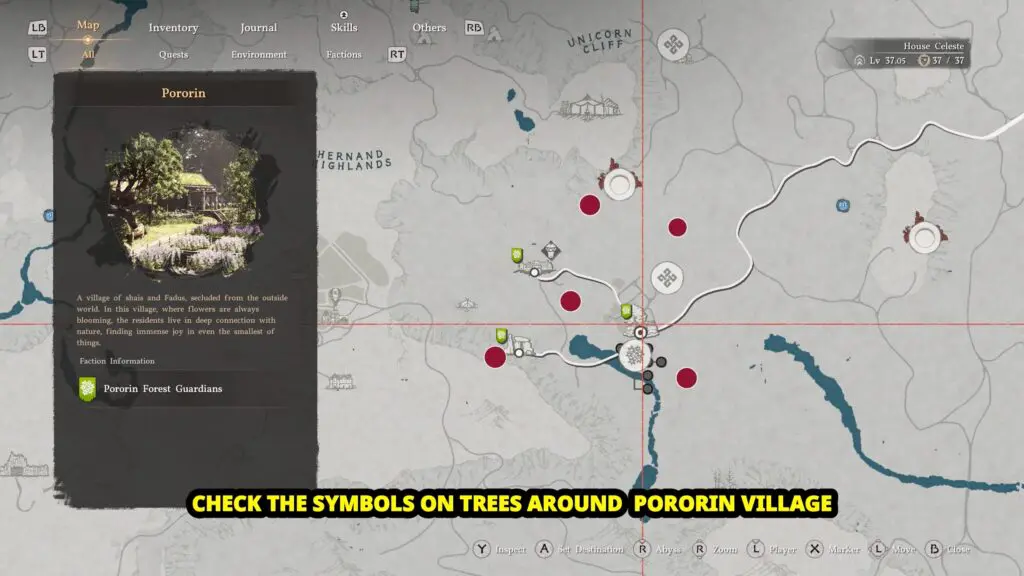
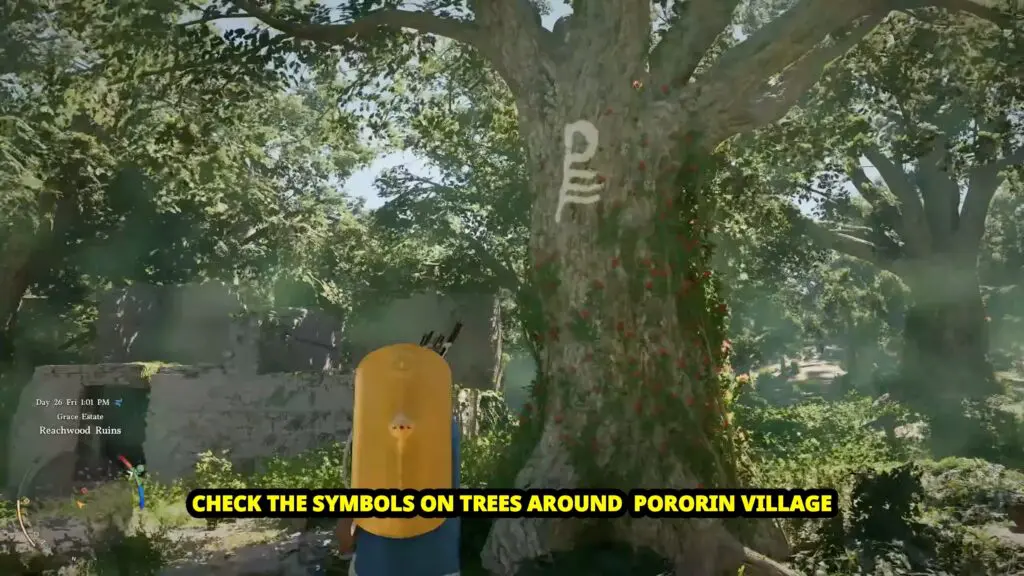
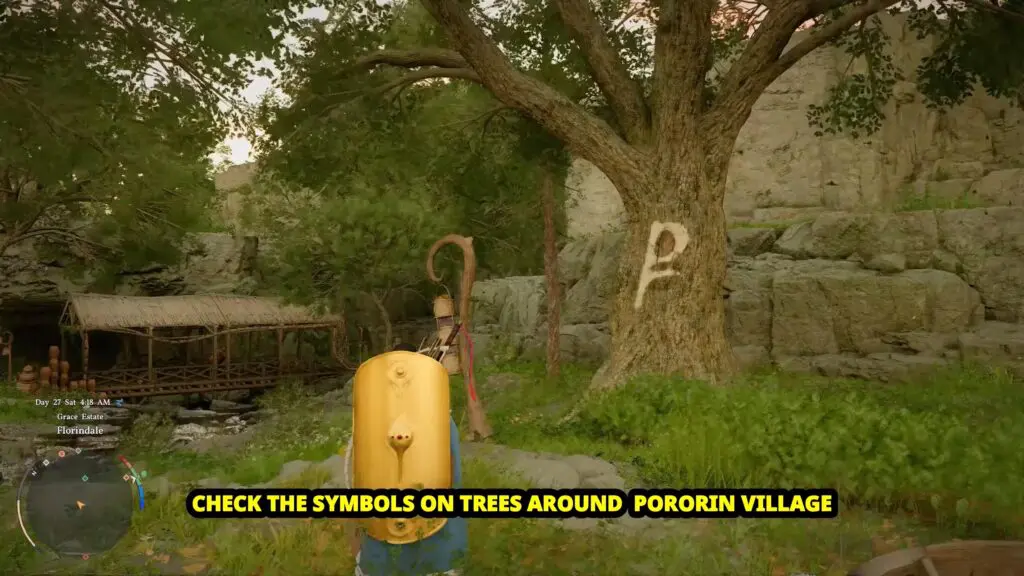
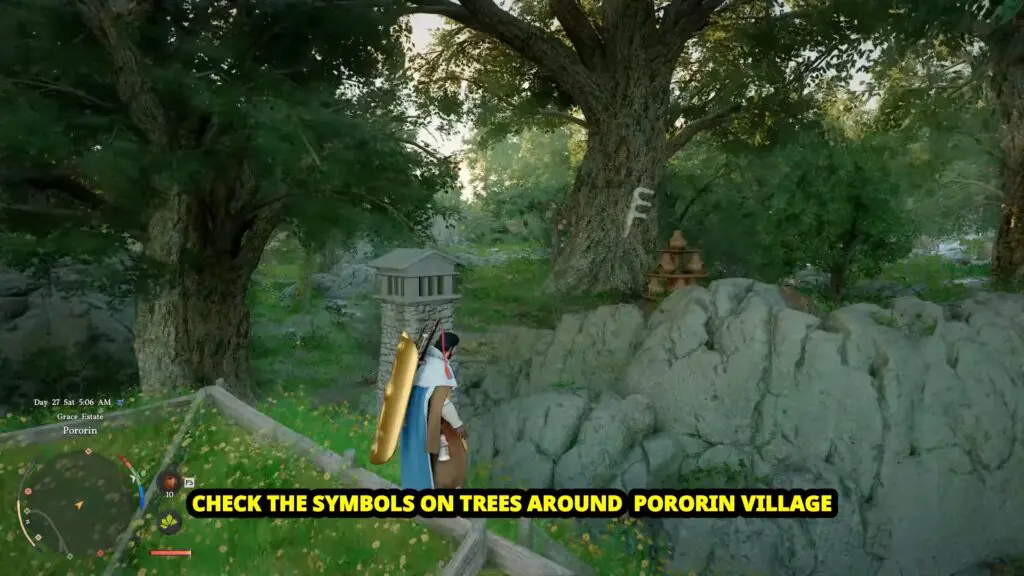
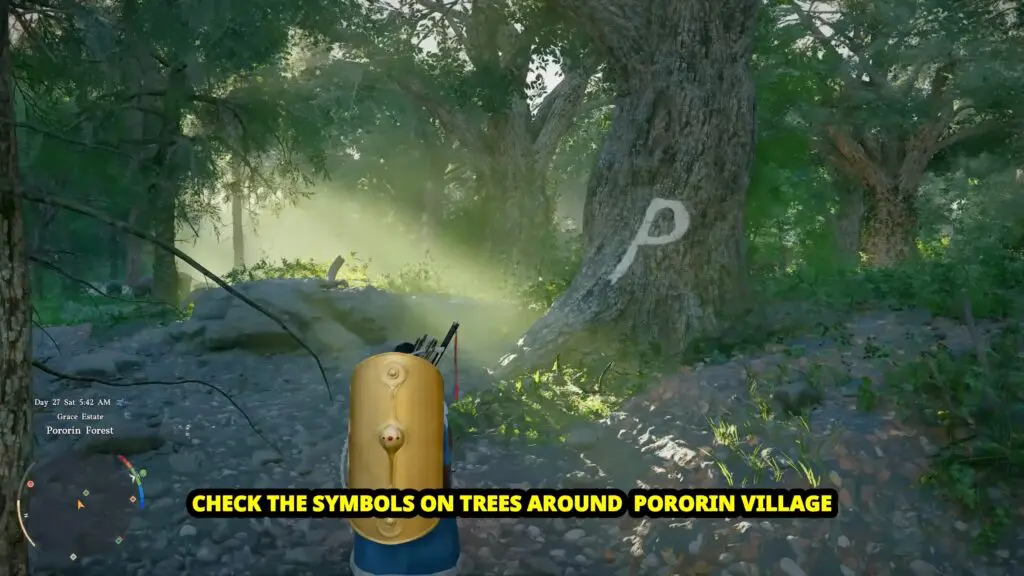
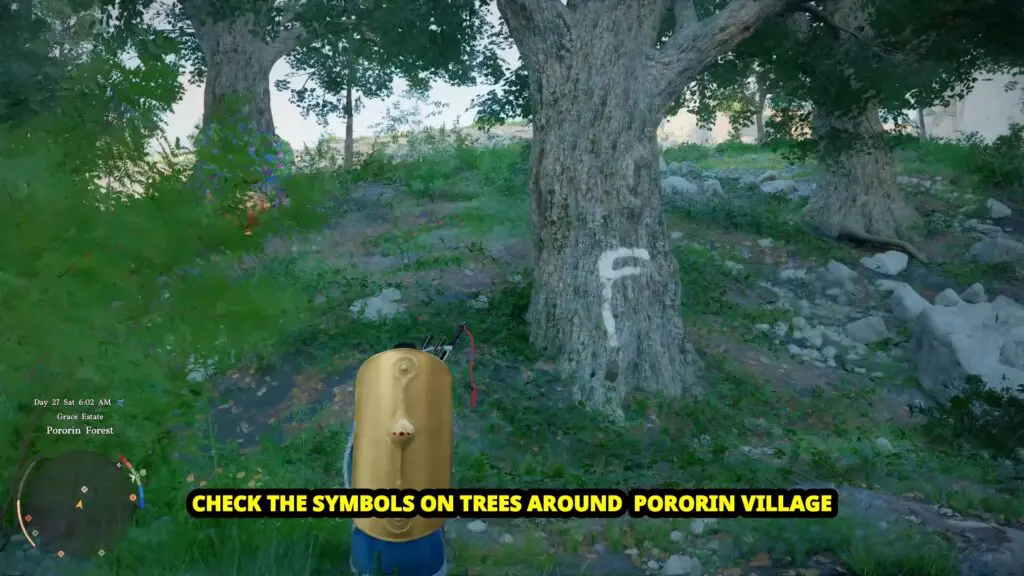
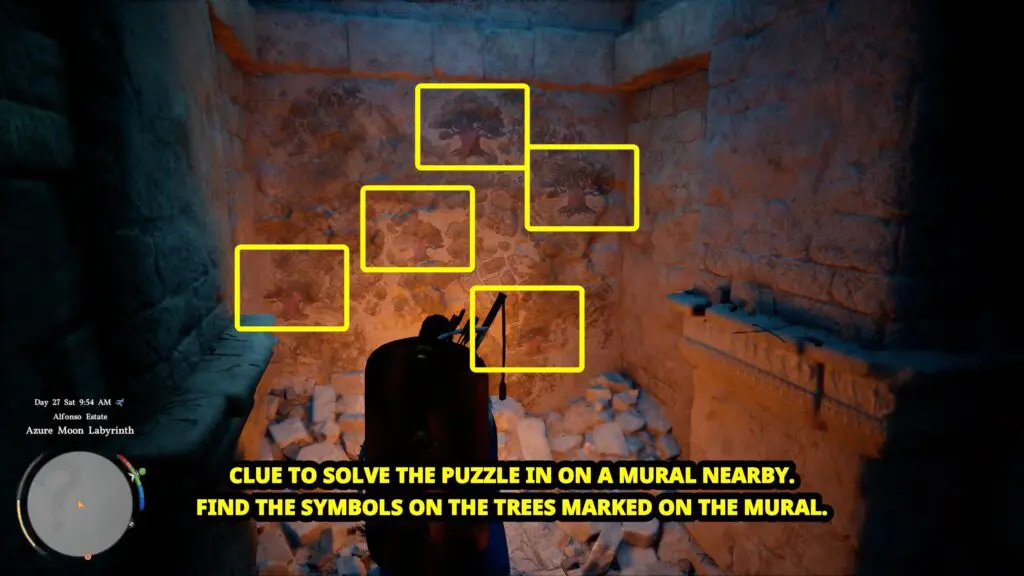
The key to solving this puzzle lies outside the labyrinth entirely. You need to travel to Pororin Village, where five trees in the surrounding area are each marked with a unique symbol. I have marked all five tree locations on the map below. Visit each one, and note down the symbol carved or painted on it.
These are the symbols you are looking for. Take note of all the symbols.
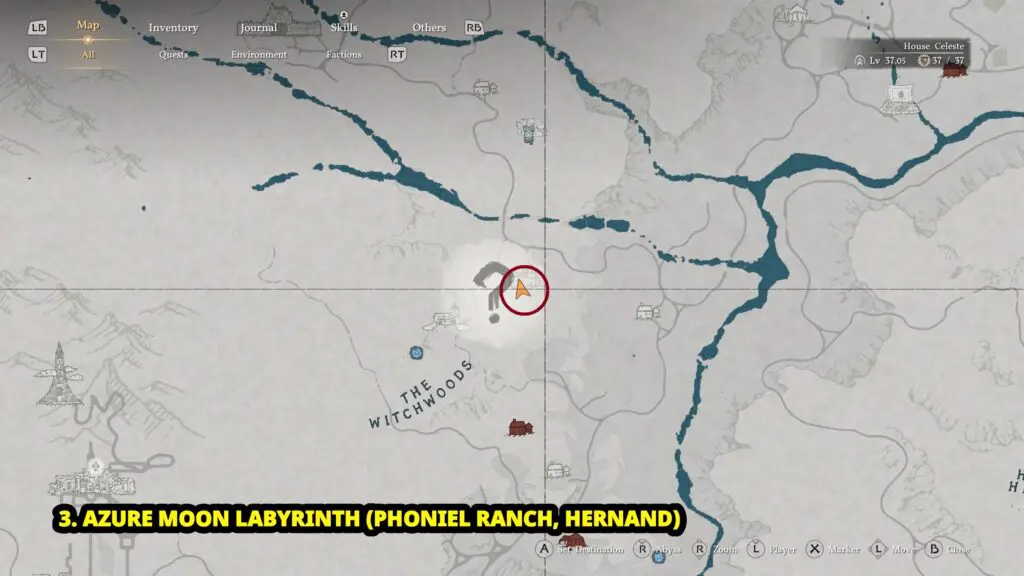
Location: Azure Moon Labyrinth Puzzle
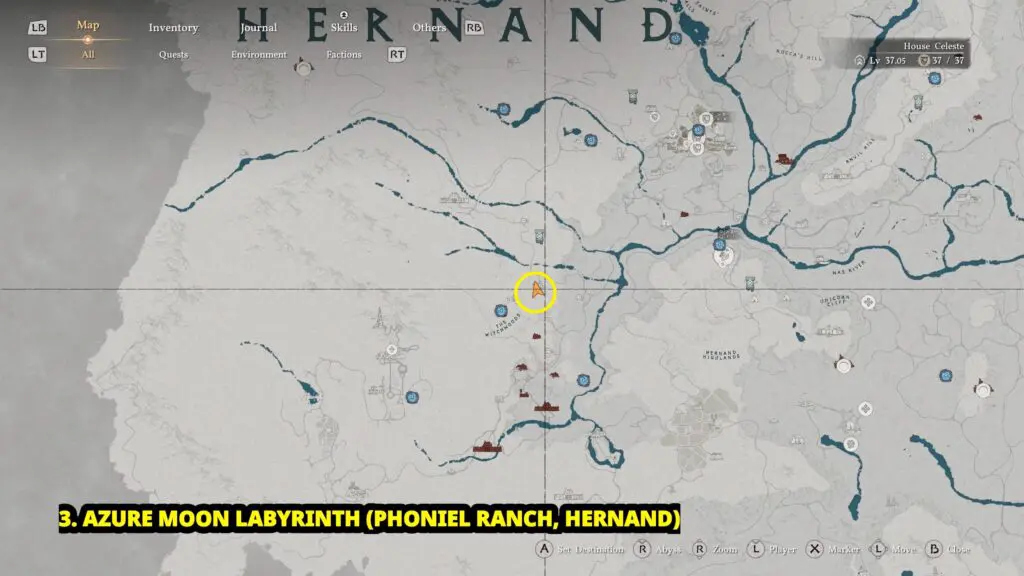
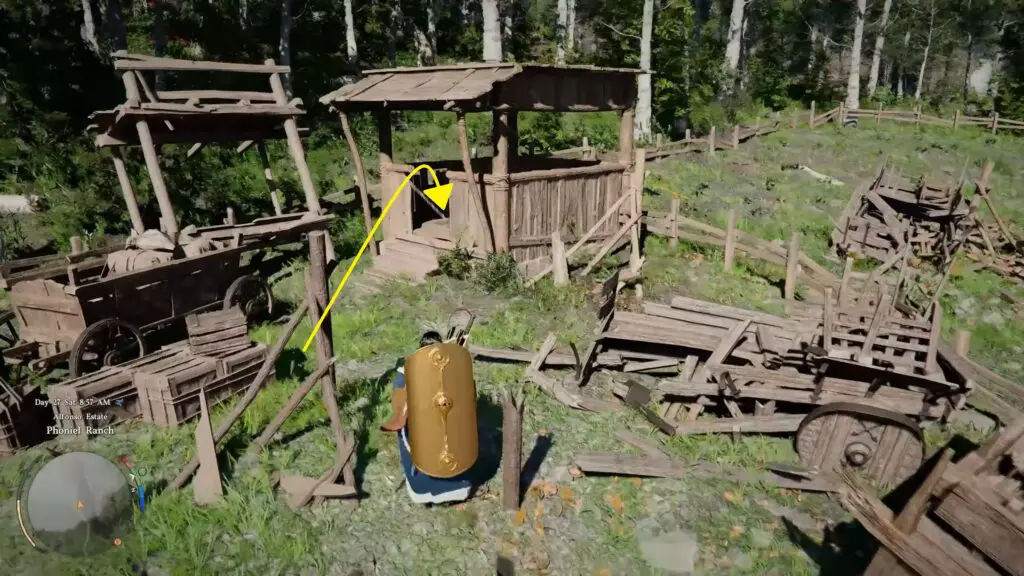
Make your way to Phoniel Ranch, located south of Hernand near The Witchwoods. Once you reach there, look for a small wooden building in the area. Refer to the map below.
This wooden hut has an entryway that leads directly down into the labyrinth.
How to Solve the Azure Moon Labyrinth Puzzle in Crimson Desert
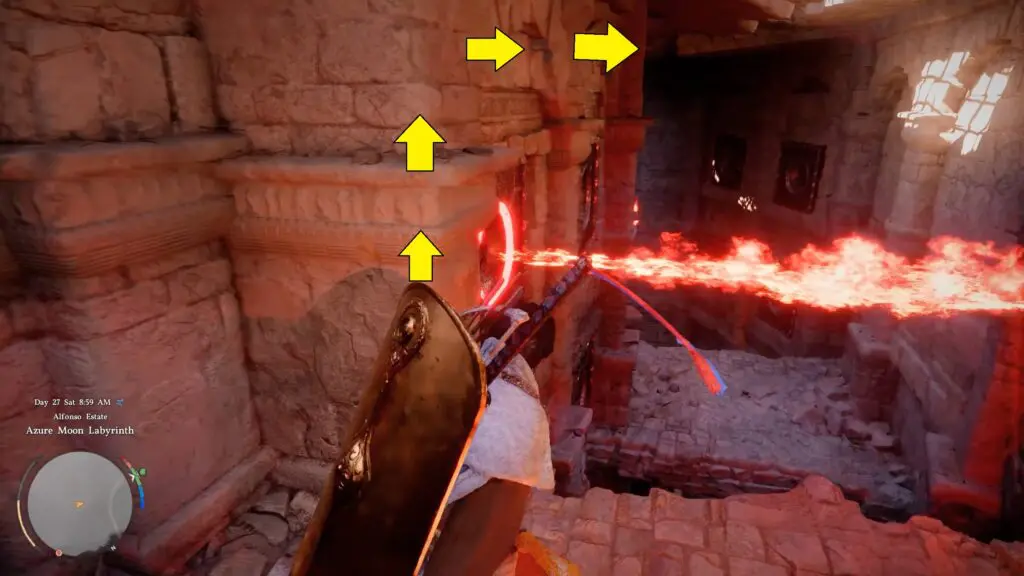
As you move through the labyrinth, you will eventually come across a section blocked by fire. To pass these fires, climb onto the wall beside it and move across the entire section above the flames. Once you clear the fire section, let go and drop down on the other side.
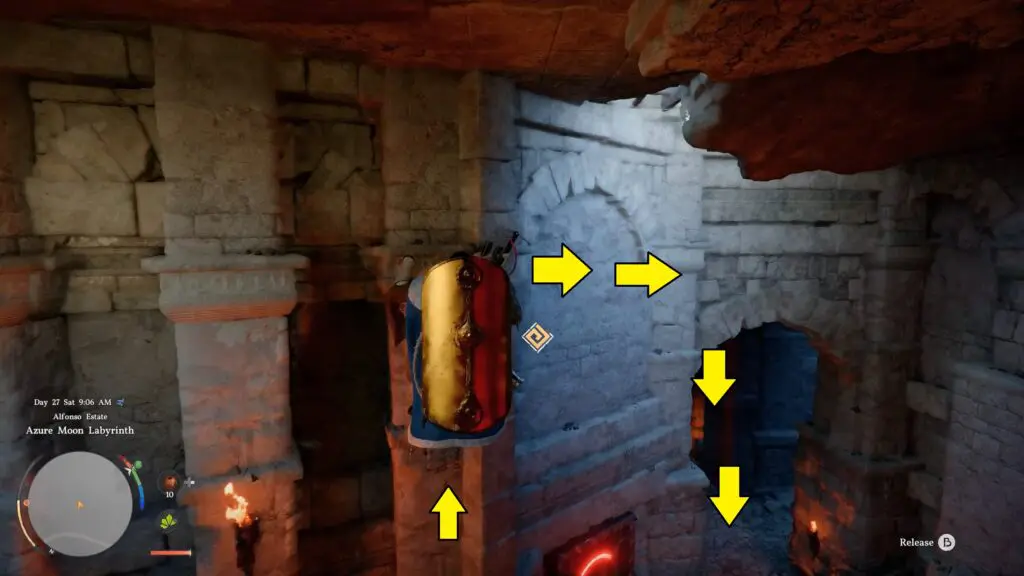
Once past the fire, check the small room just before the puzzle area on the right side. Inside, you will find a map painted on the wall that contains the clues you need to identify the correct symbols. It points you toward the locations (Pororin Village) you need to visit before you can solve the puzzle.
Now, go down the stairs, and you will find a lever. Interact with it to open a gate, which reveals the puzzle area.

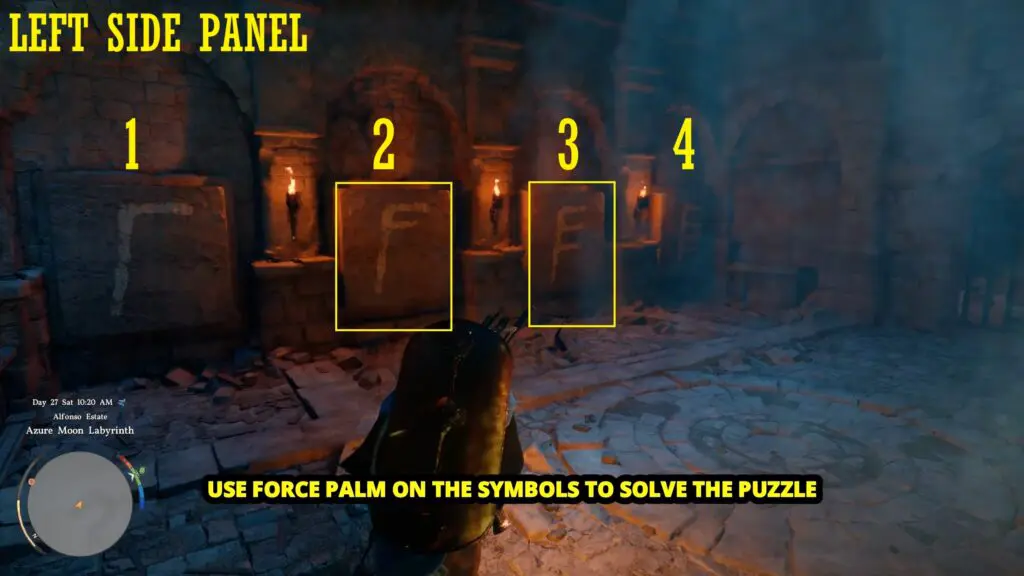
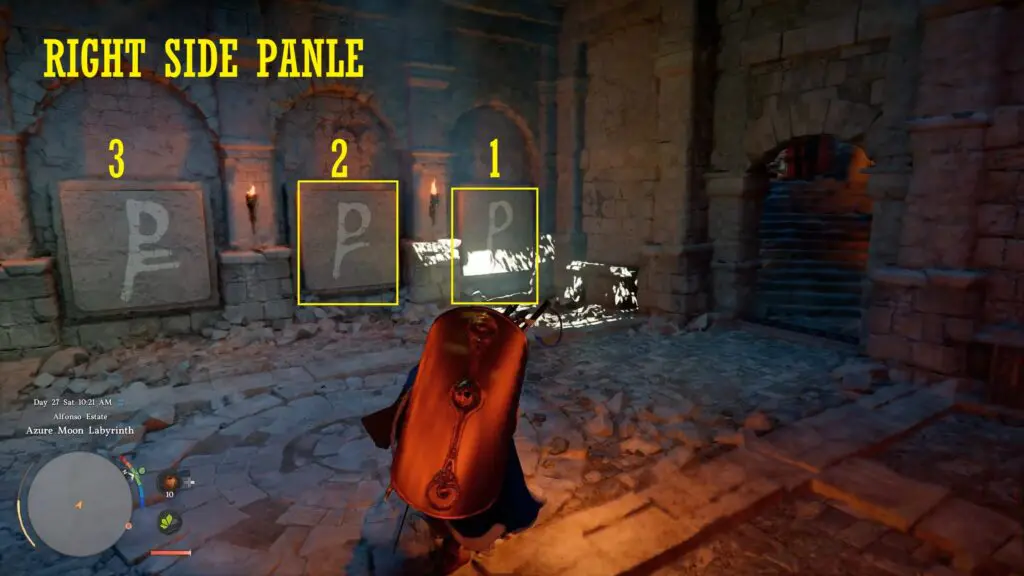
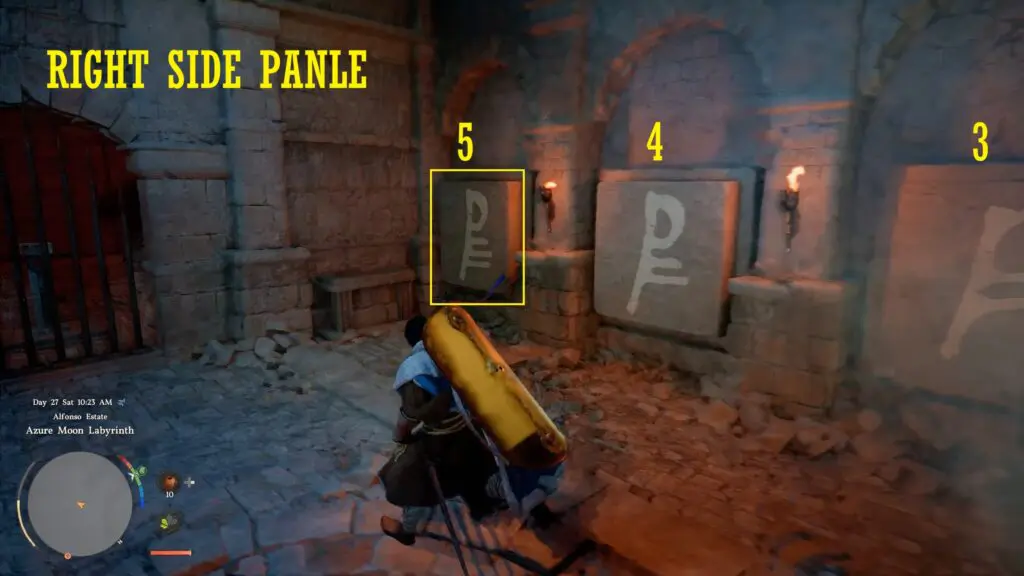
Inside the puzzle room, you will see a row of panels on both sides of the wall, each displaying a different symbol. The order in which you hit them does not matter here. What matters is that you hit only the correct panels and leave the wrong ones alone.
Use your False Palm ability to strike each of the correct panels. Work through them one by one and make sure you are selecting only the symbols that match what you found at Pororin Village. On the left side, hit the panels marked 2 and 3.
On the right side, hit the panels marked 1, 2 & 5.
Once all the correct panels have been activated, the gate at the far end of the Azure Moon Labyrinth will unlock, and you can collect your reward.