This article will guide you through all Puzzles, Secrets, Find Evidence & Identify the Traitor in Endaira’s End of the game Remnant 2.
Endaira’s End
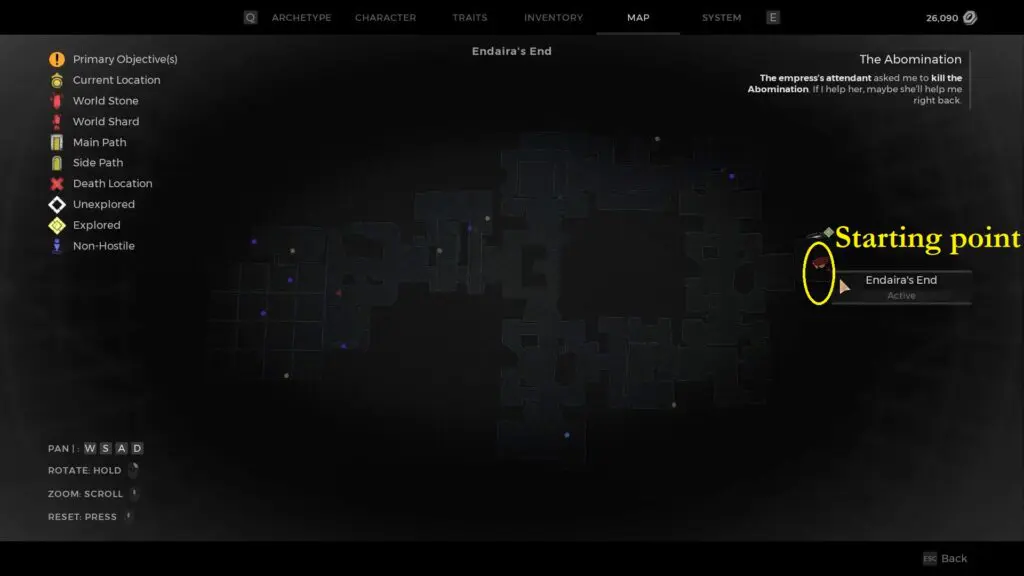
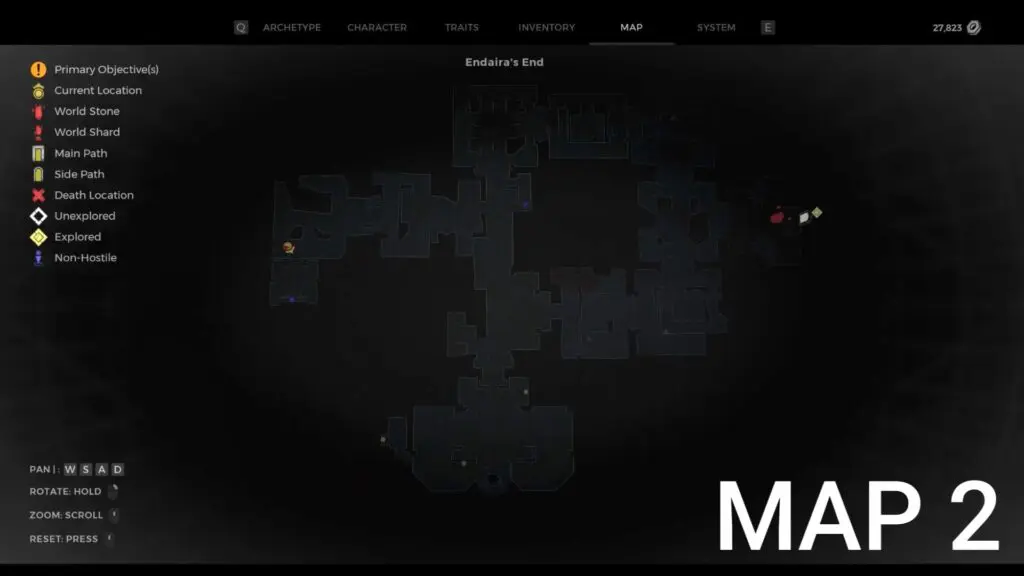
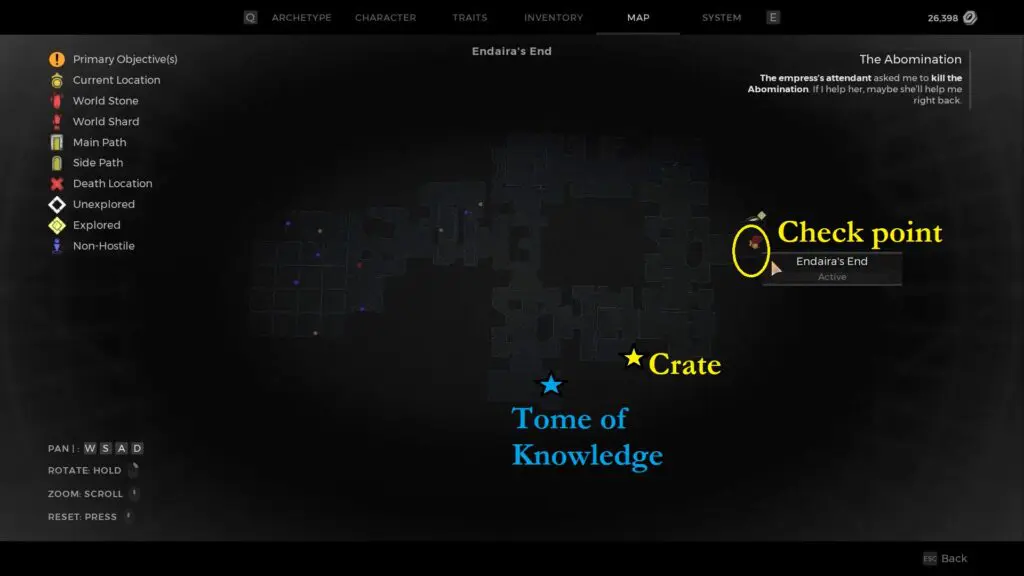
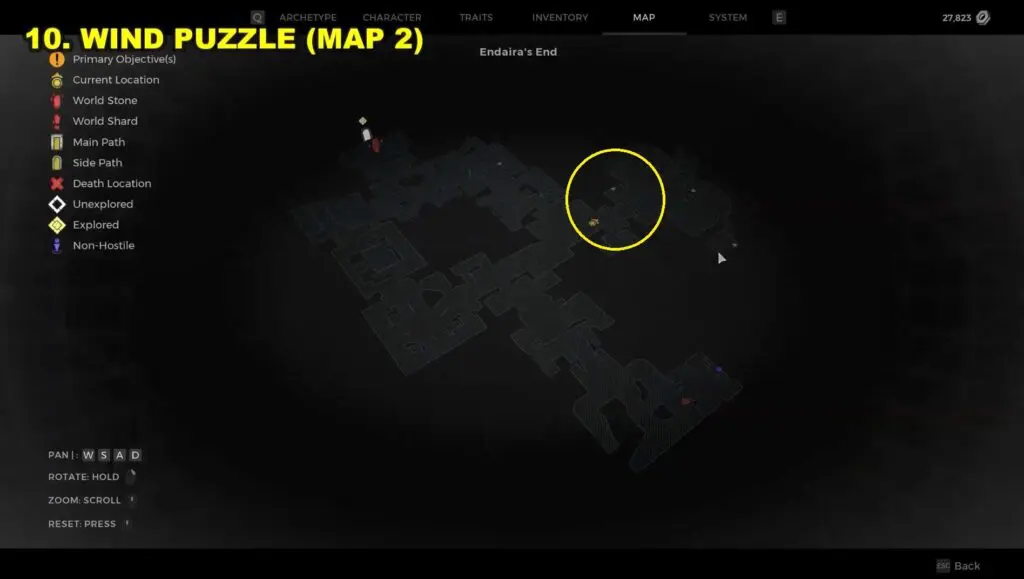
Endaira’s End is a dungeon in Yaesha and it has two maps. Reroll the area to get both the maps. Below is the screenshot of both the maps.
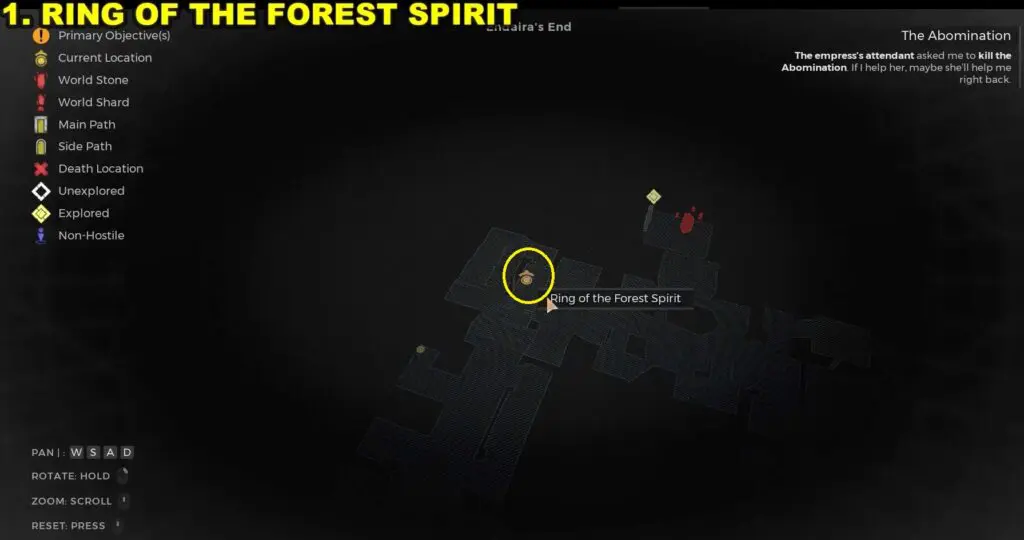
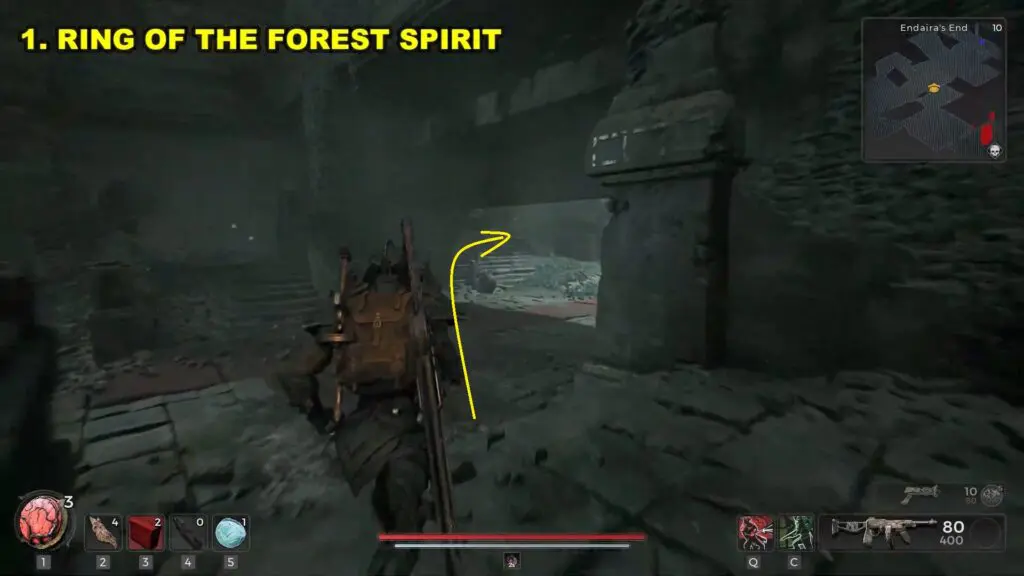
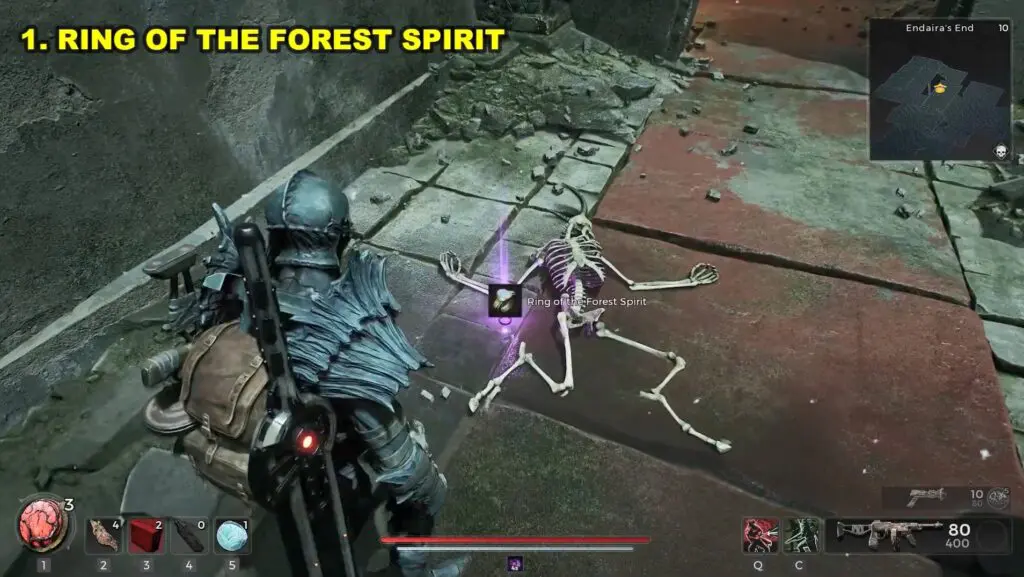
Ring of the Forest Spirit
I’m starting the walkthrough of the area from Map-1. From the first checkpoint of Map-1, head to the right side and then go up the stairs as shown below image to find a skeleton on the ground. Interact with it to find the Ring of the Forest Spirit.
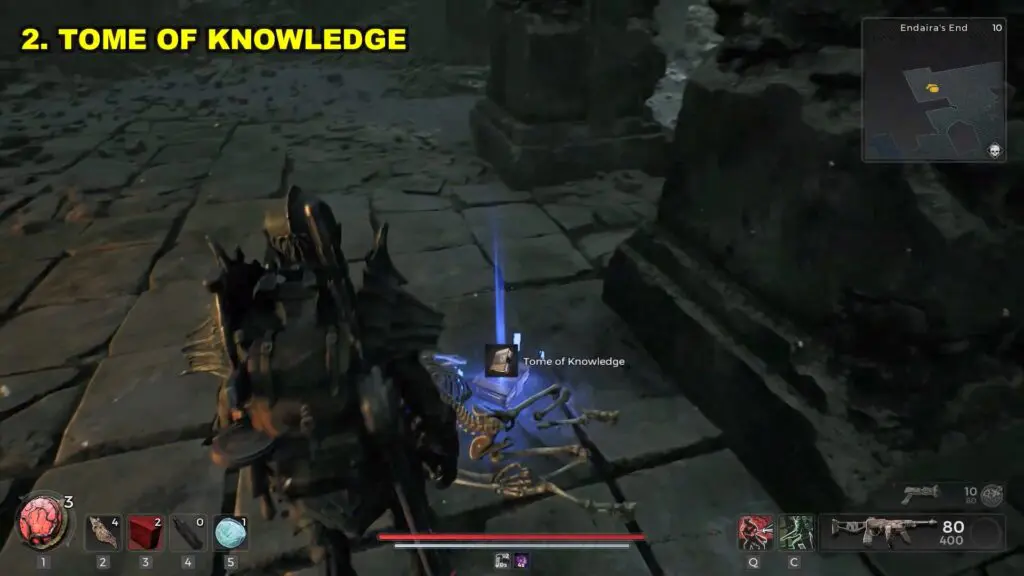
Tome of Knowledge
From the first checkpoint of Map-1, head to the left side to find a skeleton on the ground. Interact with it to find the Tome of Knowledge. Refer to the map below.

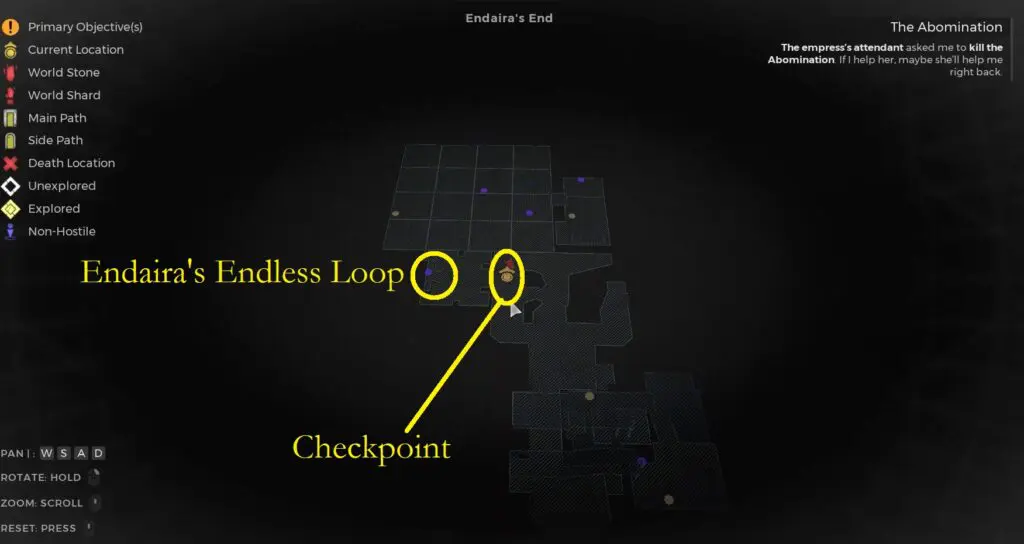
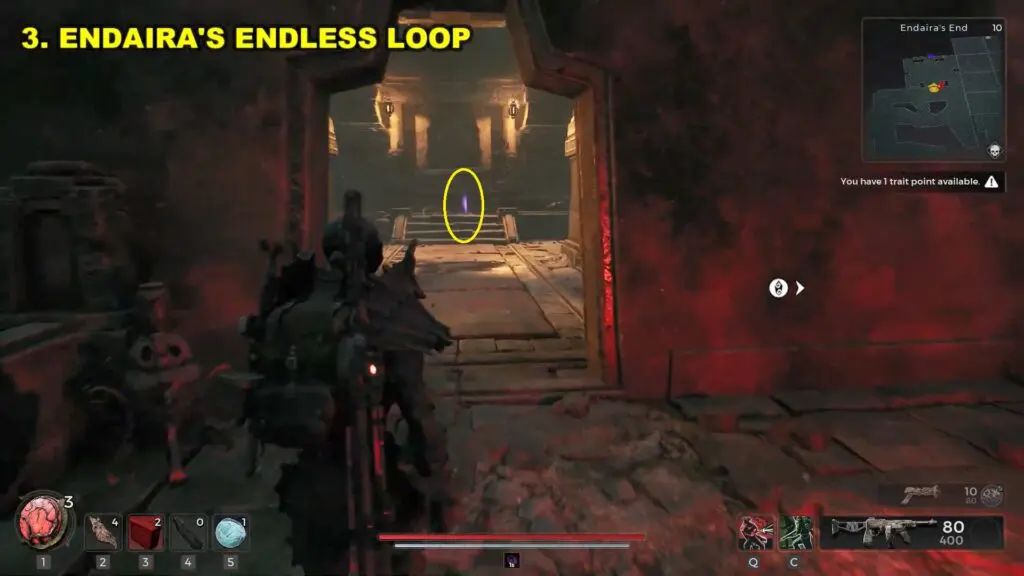
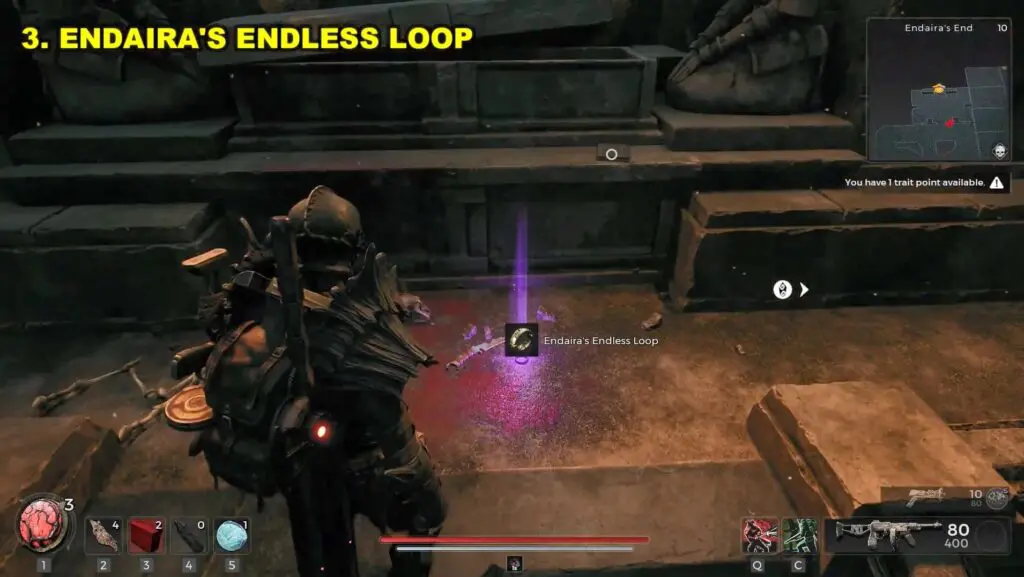
Endaira’s Endless Loop
Endaira’s Endless Loop is available after the second checkpoint in Endaira’s End. Enter the room to the left of the second checkpoint to find the Ring lying on the ground.
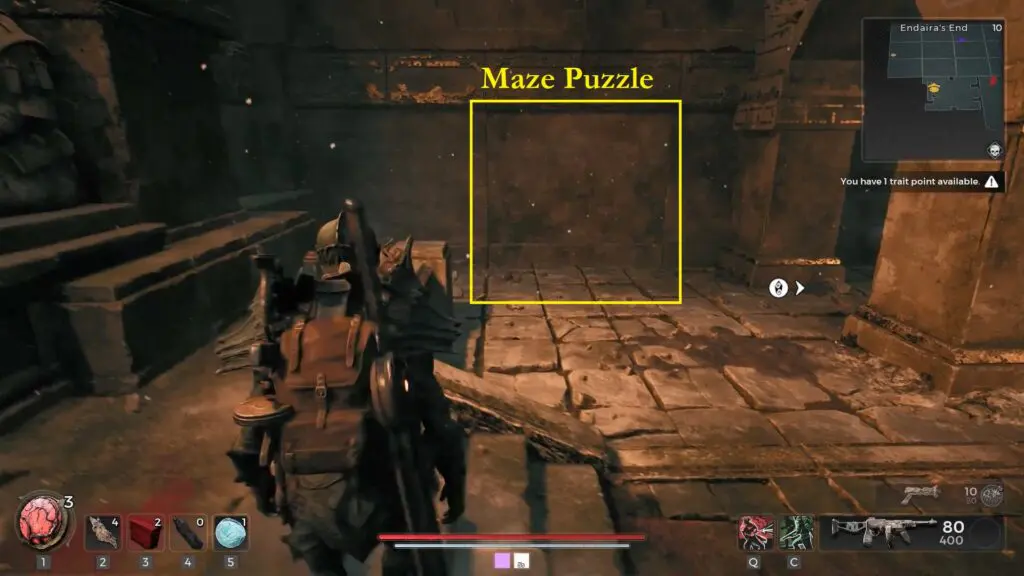
Maze Puzzle
Once you’ve obtained Endaira’s Endless Loop, head towards the right side wall. As you draw near, the wall will automatically open, revealing the next area with a maze-like room. In this puzzle, your objective is to swiftly enter the room before the door closes, ensuring you navigate through the maze successfully.
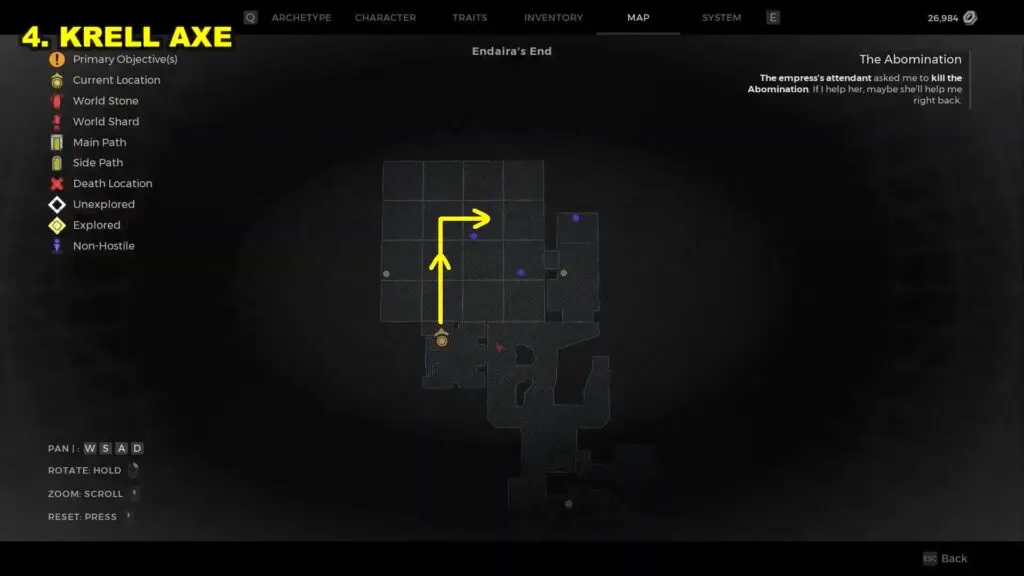
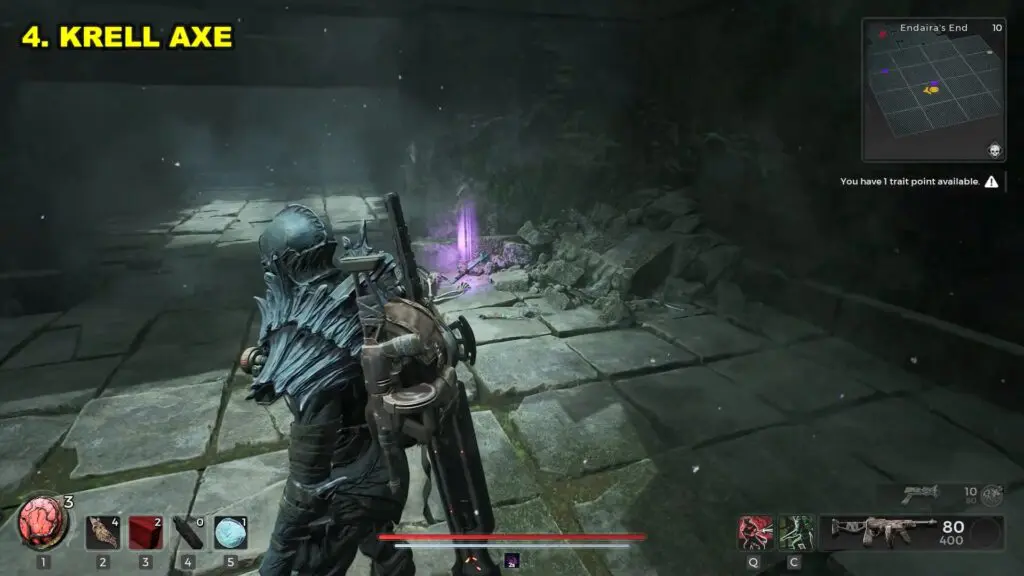
Krell Axe
Within the maze puzzle area, you’ll find several collectibles, including the Krell Axe. To acquire the Krell Axe, simply follow the path indicated on the map below.
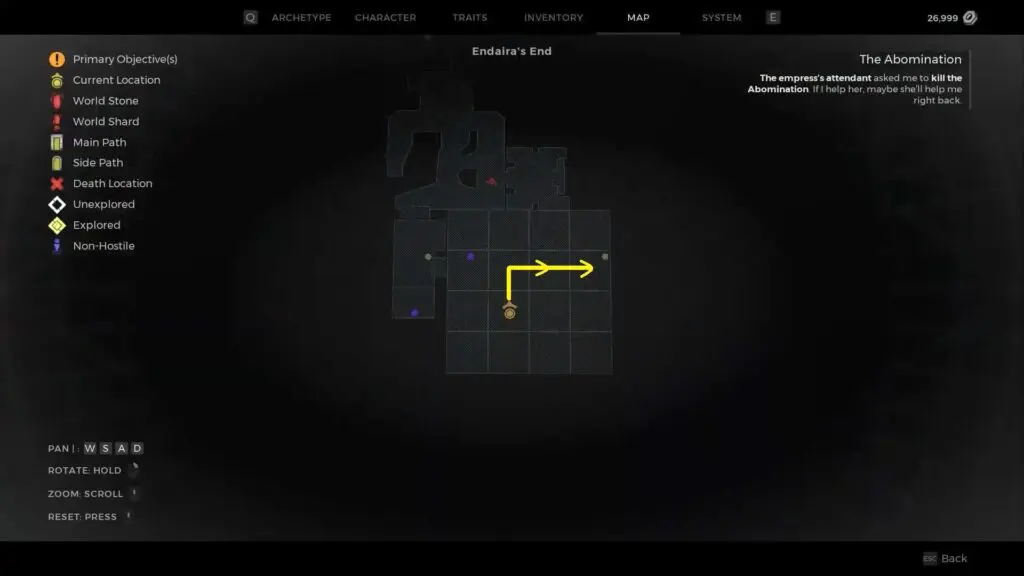
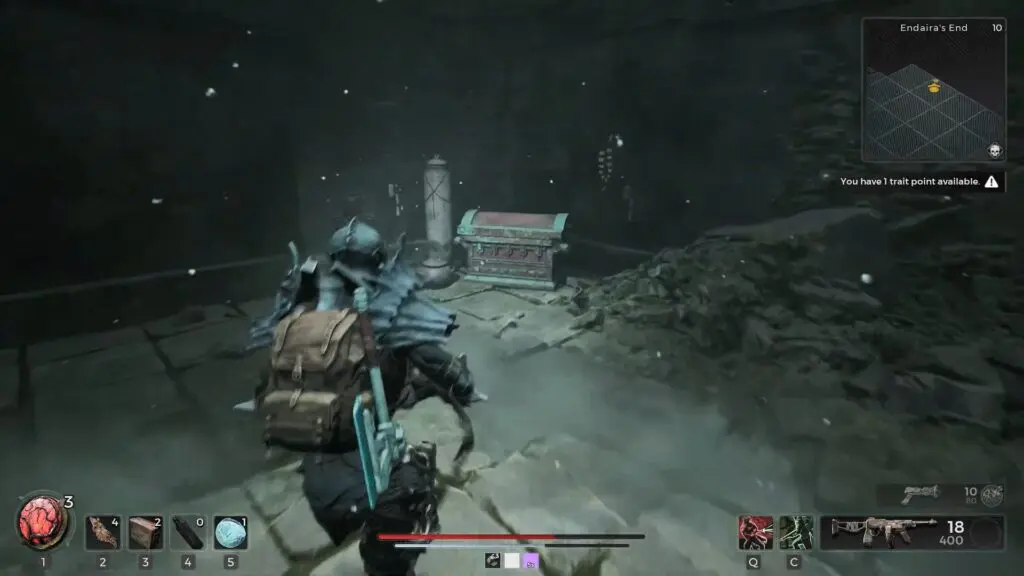
Crate
There is another item located within the maze puzzle area is a crate. I have provided the location of the crate inside the maze, along with the path you should follow to reach it.
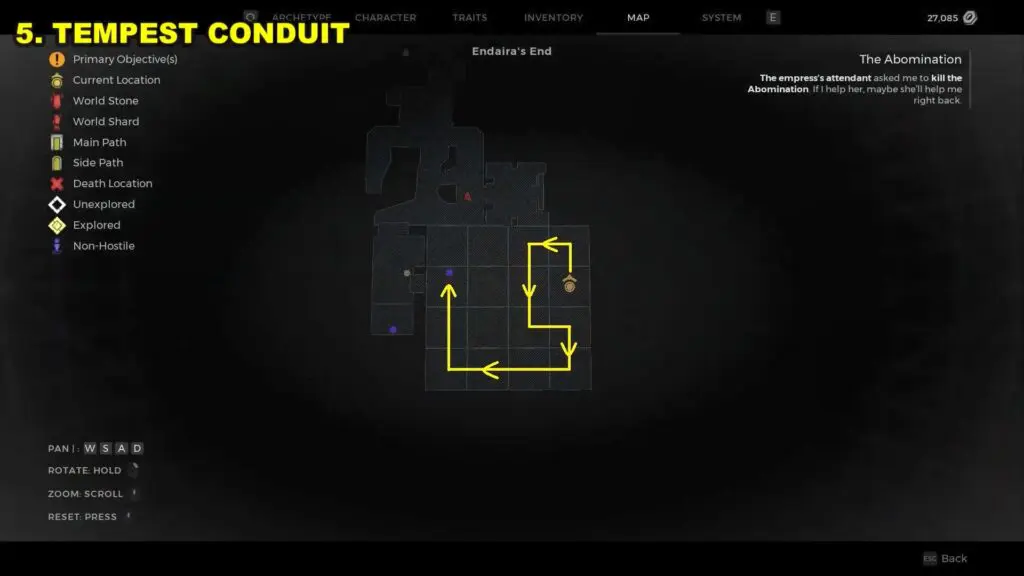
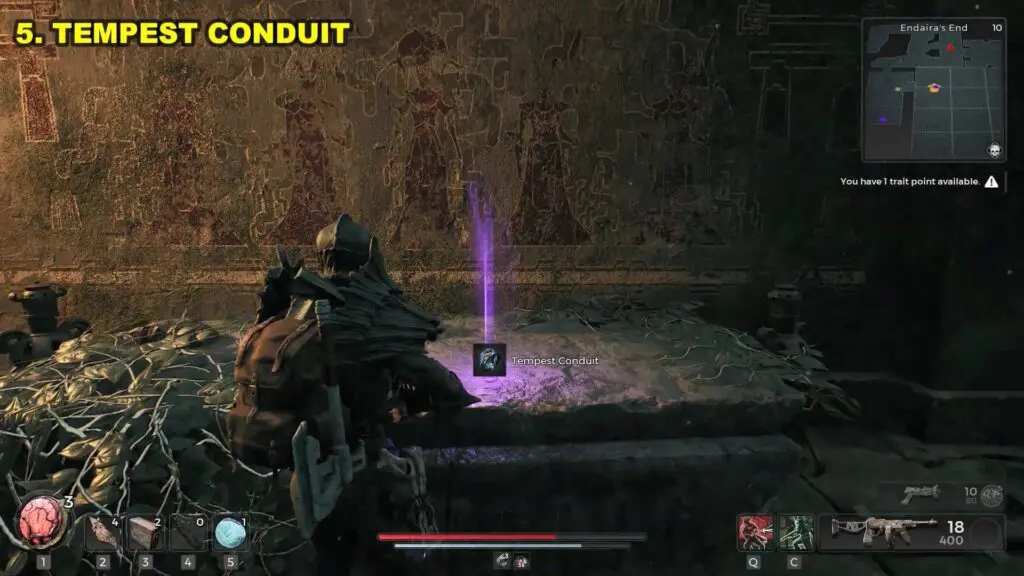
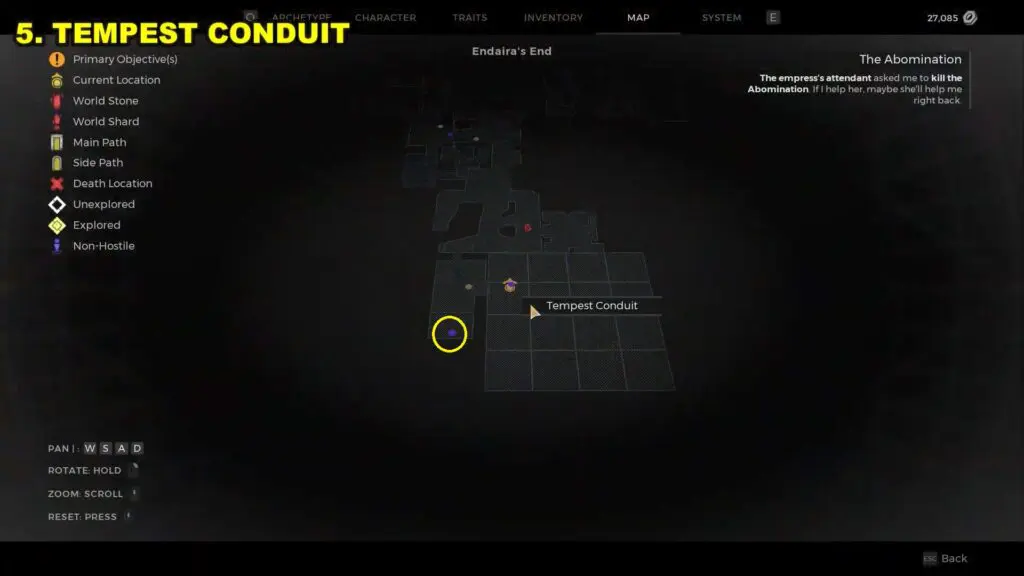
Tempest Conduit
The final item located within the maze puzzle area is the Tempest Conduit. To reach it, simply follow the path illustrated in the image below, starting from your previous location and leading to the spot where the Tempest Conduit is located.
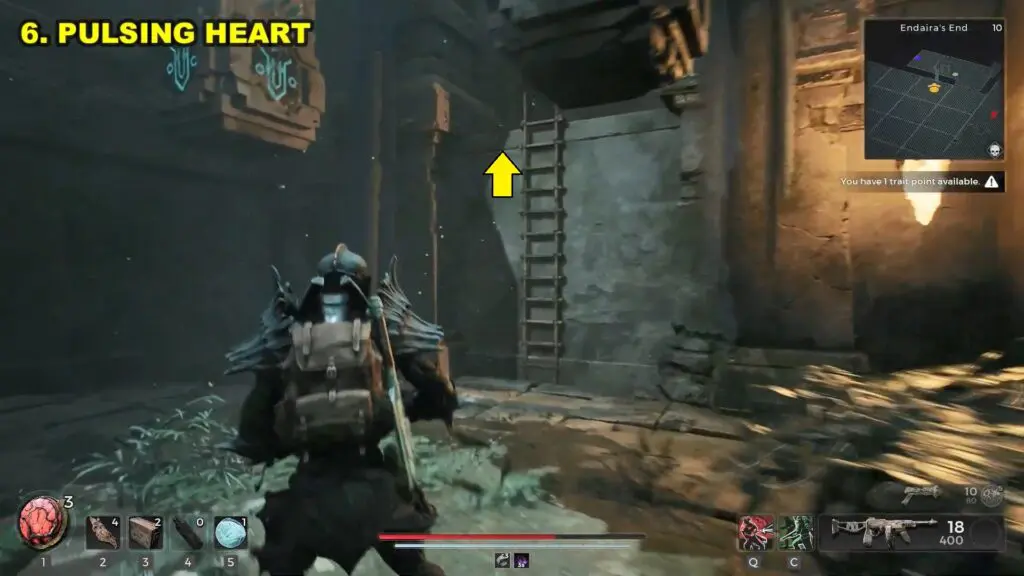
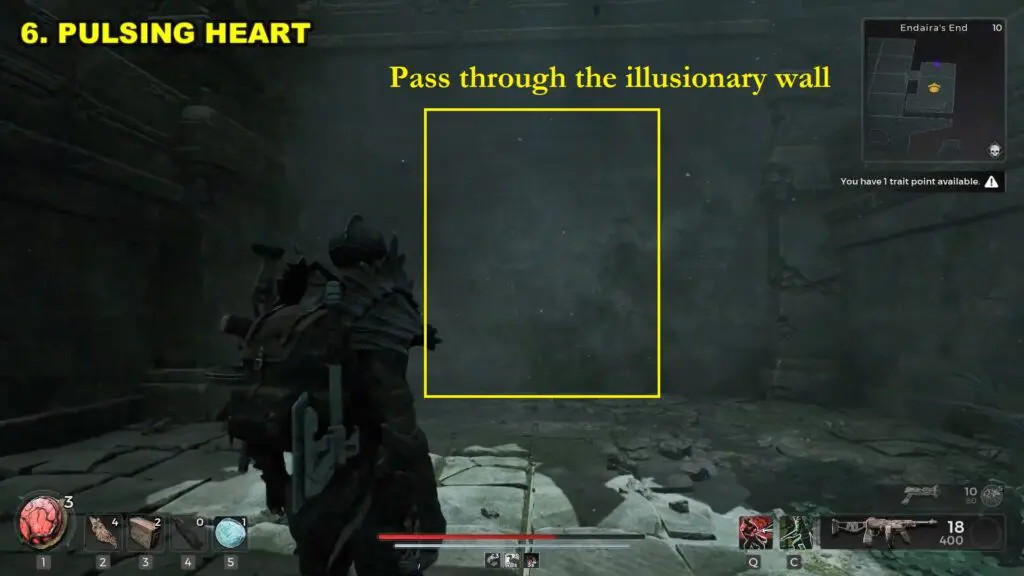
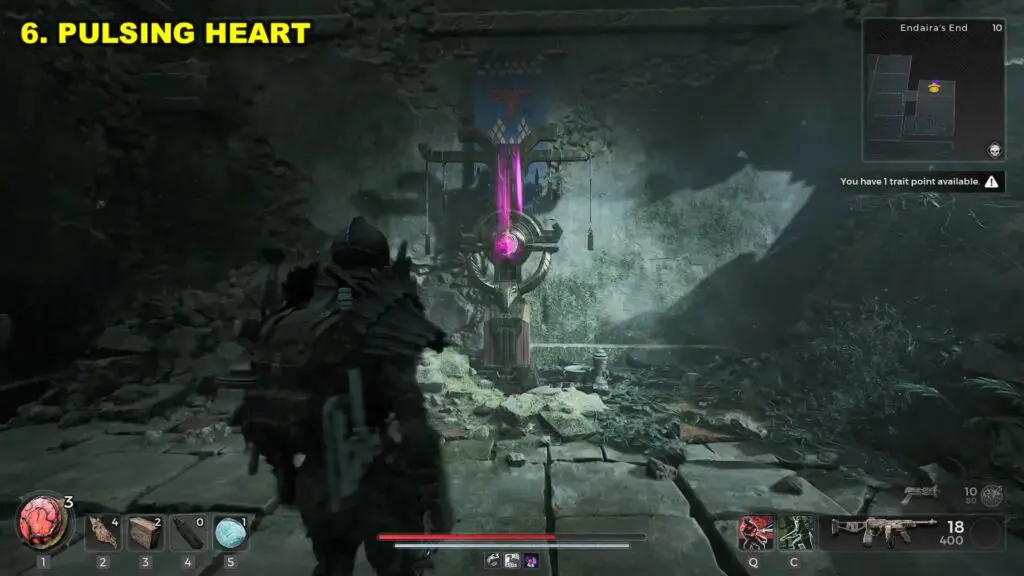
Pulsing Heart (behind the illusionary wall)
Once you have obtained the Tempest Conduit, proceed to climb the ladder in the same room. From there, you can descend to the other side. Pass through the illusionary wall on the left to obtain the Pulsing Heart relic inside a room.
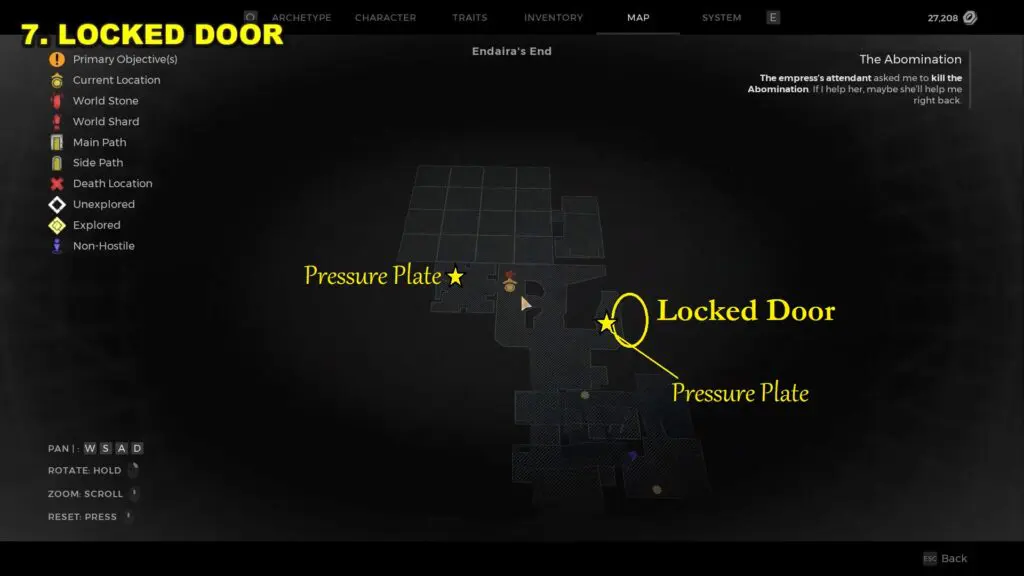
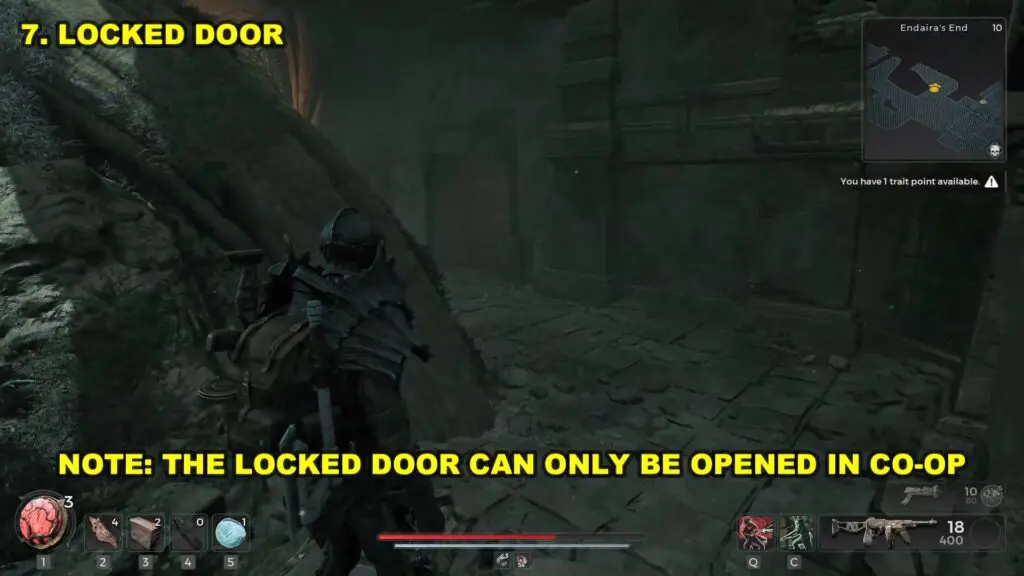
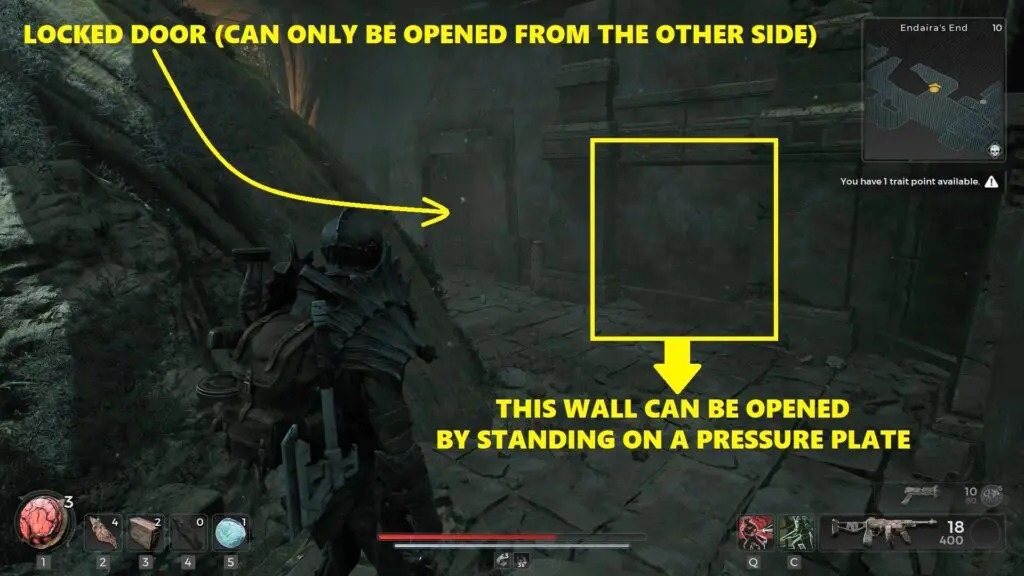
Locked Red Door
Starting from the second checkpoint, if you move towards the right, you will come across a locked door accessible only in Co-op mode. To open it, both players need to stand on two separate pressure plates simultaneously. The location is marked on the map.
There are two pressure plates required to unlock the door. One is located in front of the locked door itself, and the other can be found inside a room to the left of the second checkpoint, where you initially began the Maze Puzzle.
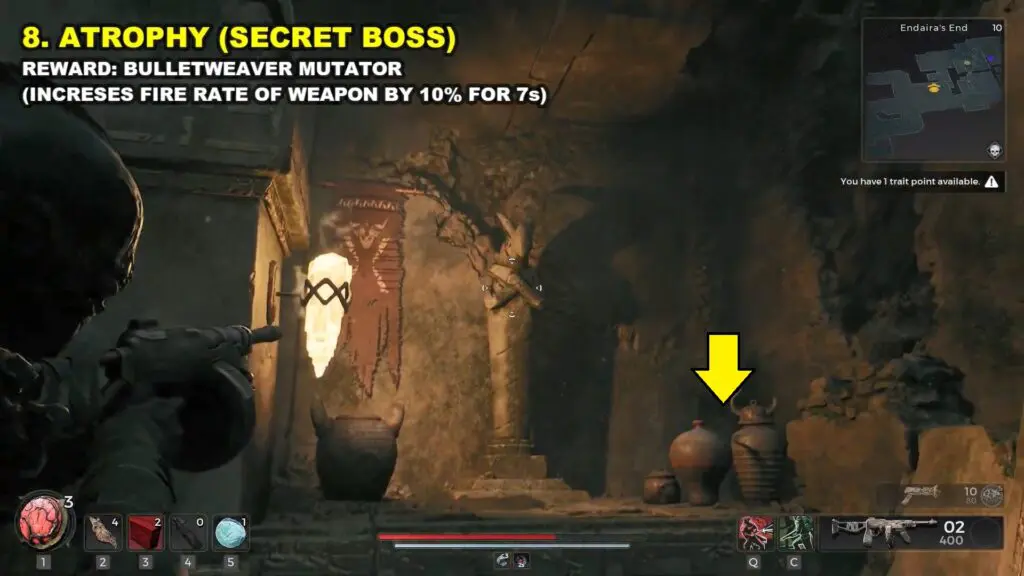
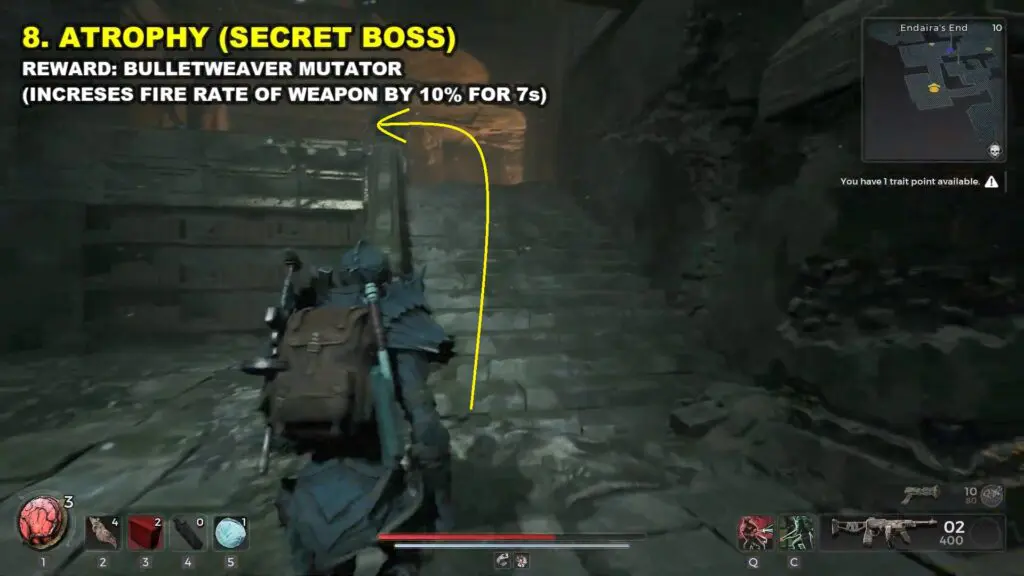
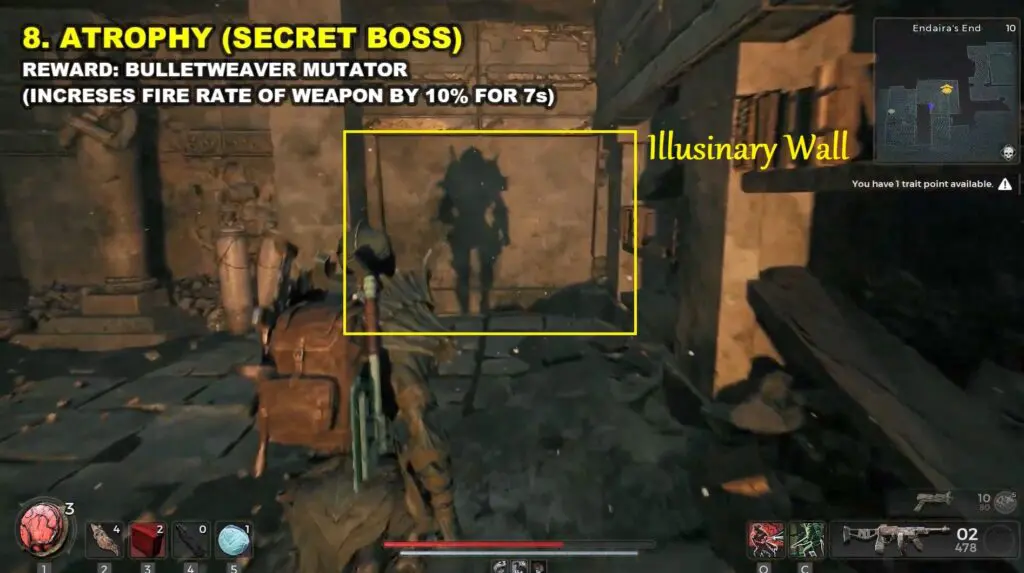
Atrophy (Secret Boss)
Retrace your steps down the hallway from the checkpoint, and you’ll notice statues embedded in the walls, with a hidden hole on follow behind the vase. Please refer to the map for the exact location.

Entering the hole near the statue will lead you underground, where you’ll find a dim and gloomy library. Proceed to the upper floor.
Pass through the illusory wall on the left side. Head inside to find the secret boss Atrophy.
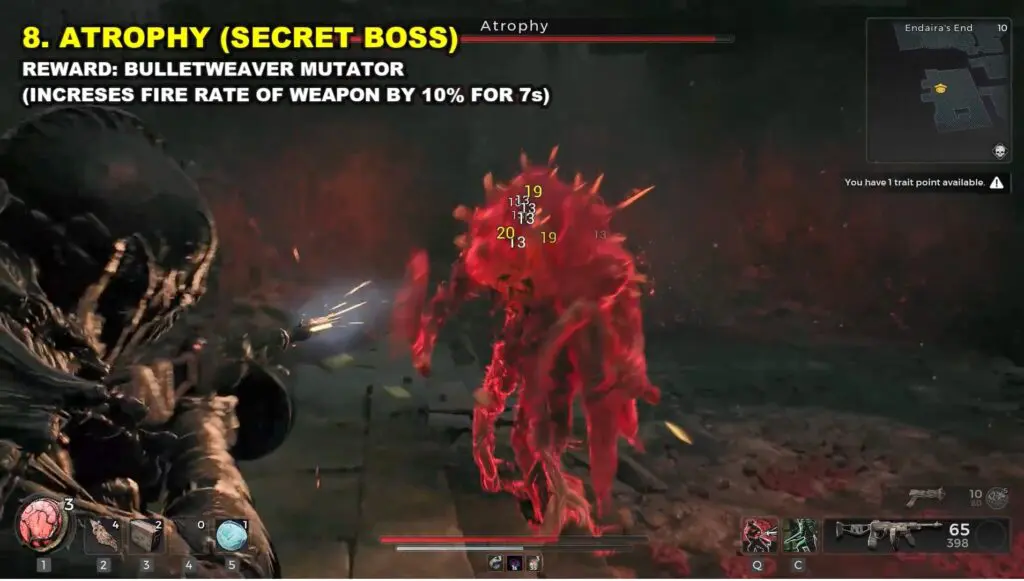
Once you have defeated the boss, position yourself on the pressure plate located in the nook of the room. This will activate and open the door, allowing you to exit the room.
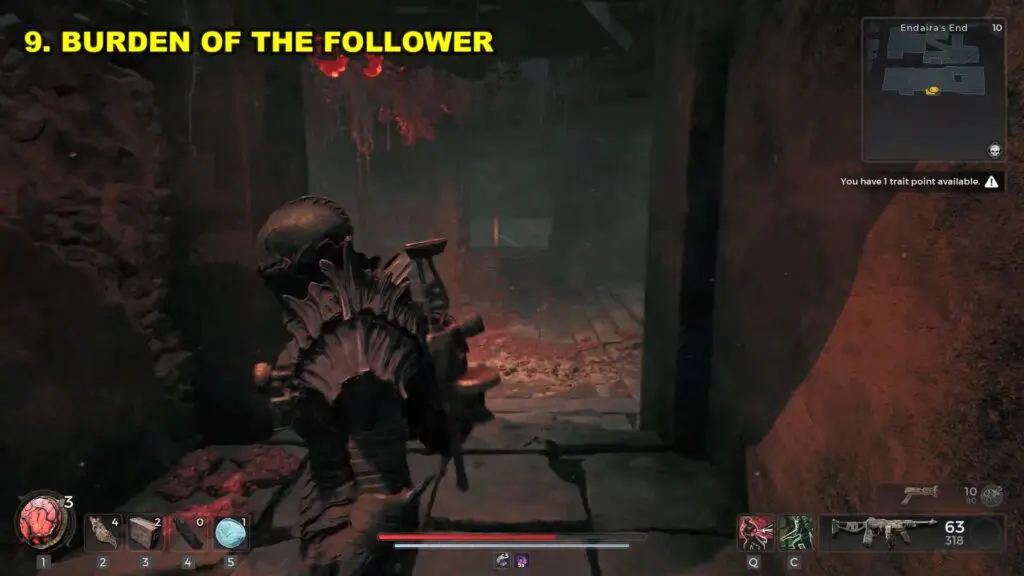
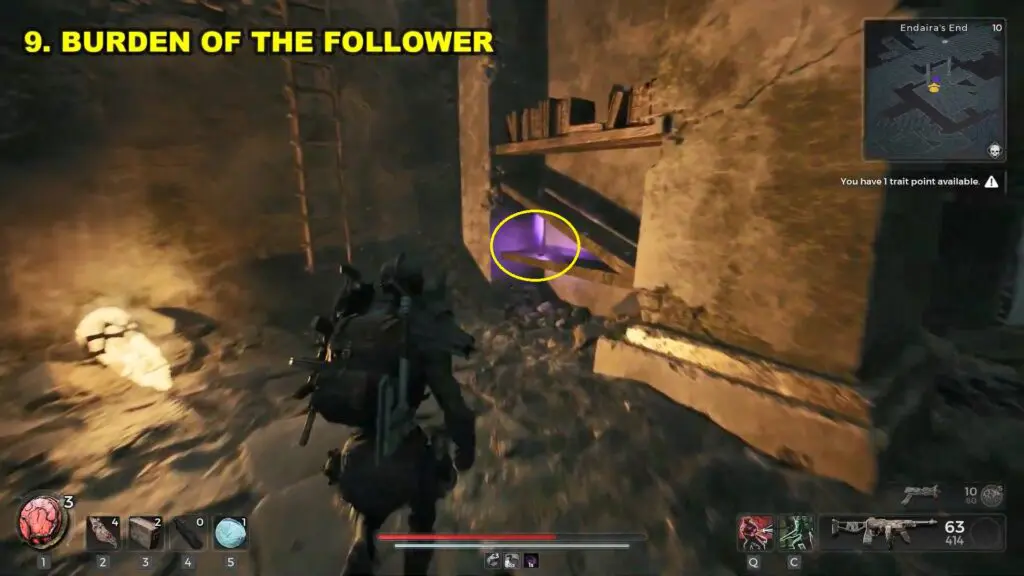
Burden of the Follower
Exit the boss room and proceed to the upper floor.
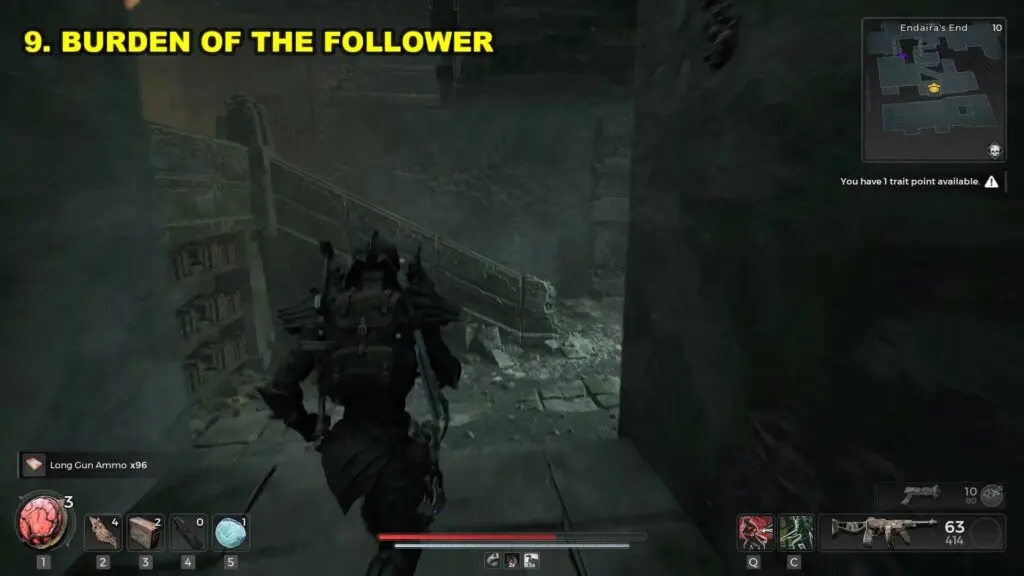
Look to your right to find “Burden of the Follower” on the rack near the ladder.
Wind Puzzle
The location of the Wind Puzzle area is marked below on the map.
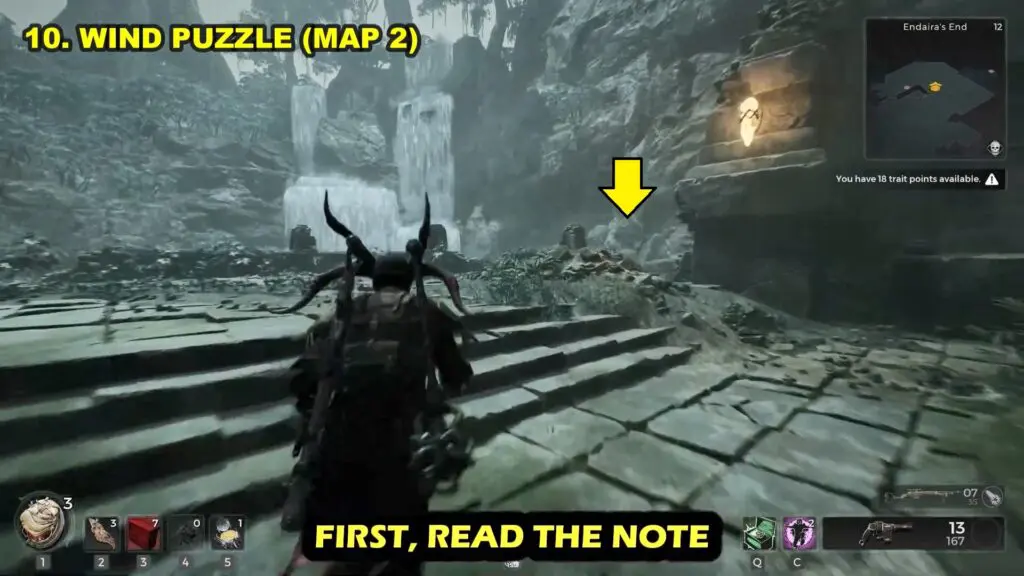
Upon approaching the Tower, take notice of the slight updraft in the middle. Here you need to strengthen this updraft by standing on correct symbols with correct sequences that are part of the puzzle.
To discover a crucial clue, look for a ledge on one side of the wind cave that you can jump onto. Adjacent to this ledge, there will be a hole you can crouch through, leading to a small cave. Inside the cave, you’ll find a chest and a book. The book will display notes or symbols that are part of the puzzle.

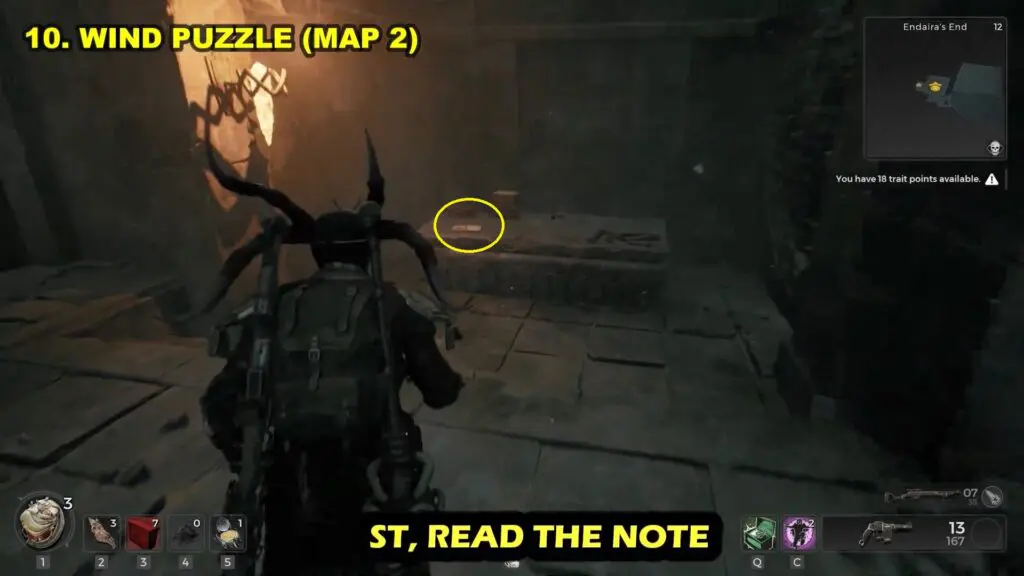
Memorize the four-note symbols shown in the book. Return to the tower and start climbing it from the bottom, making your way to the top.
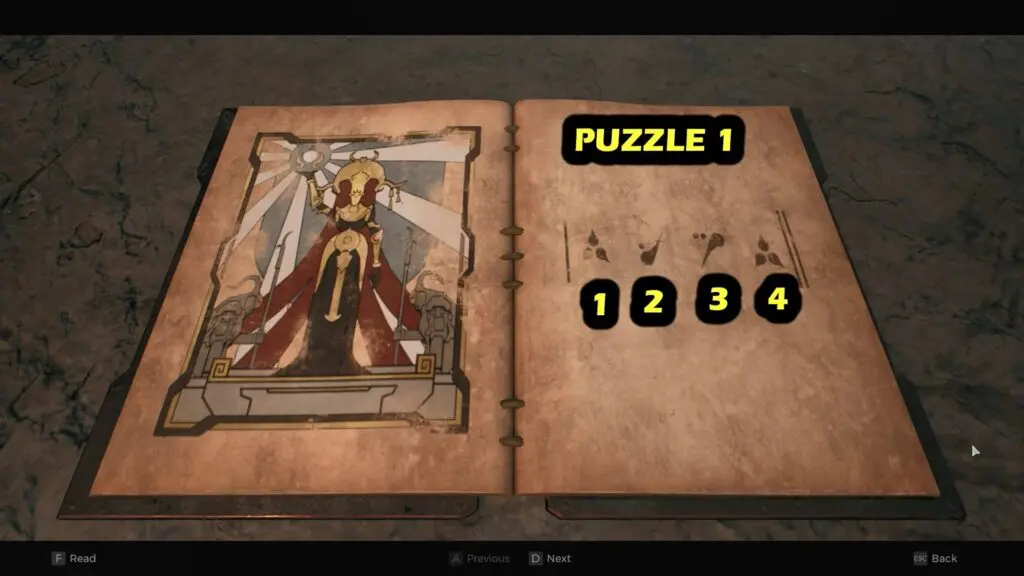
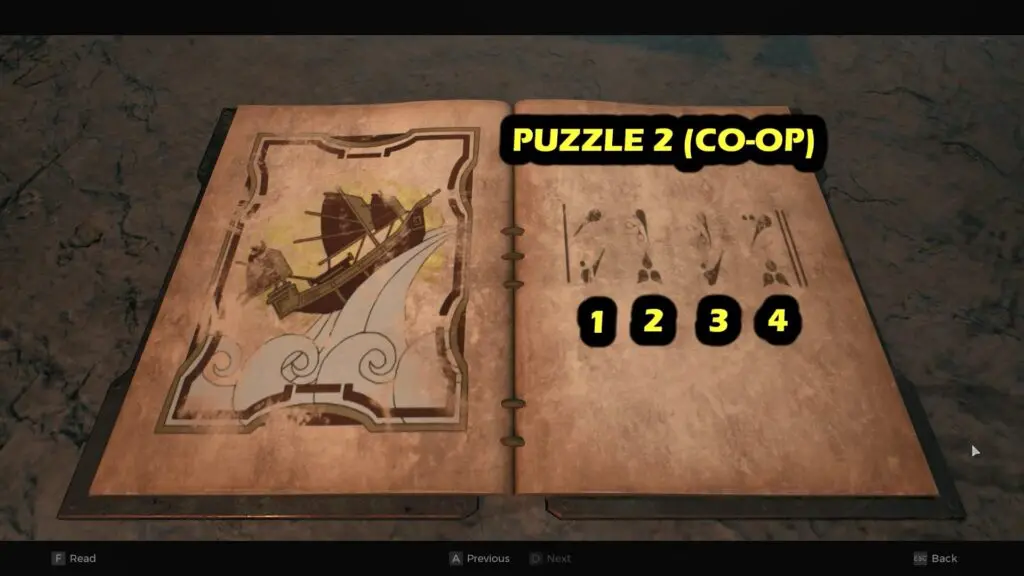
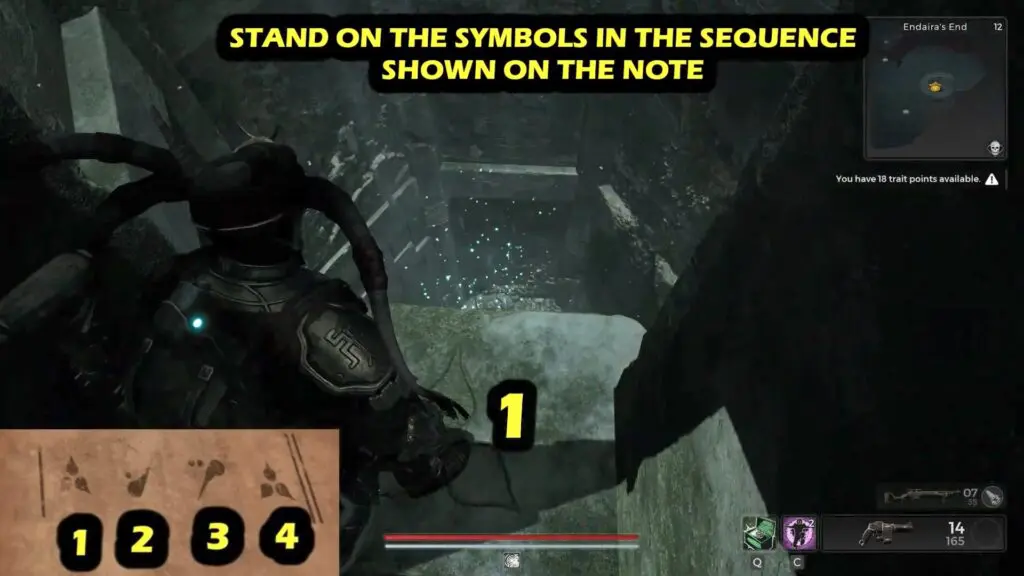
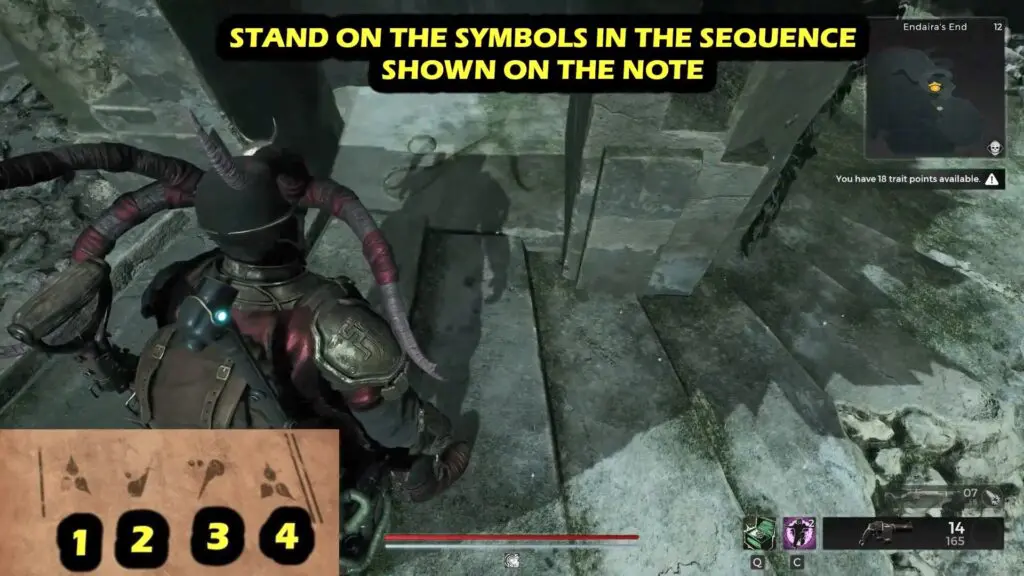
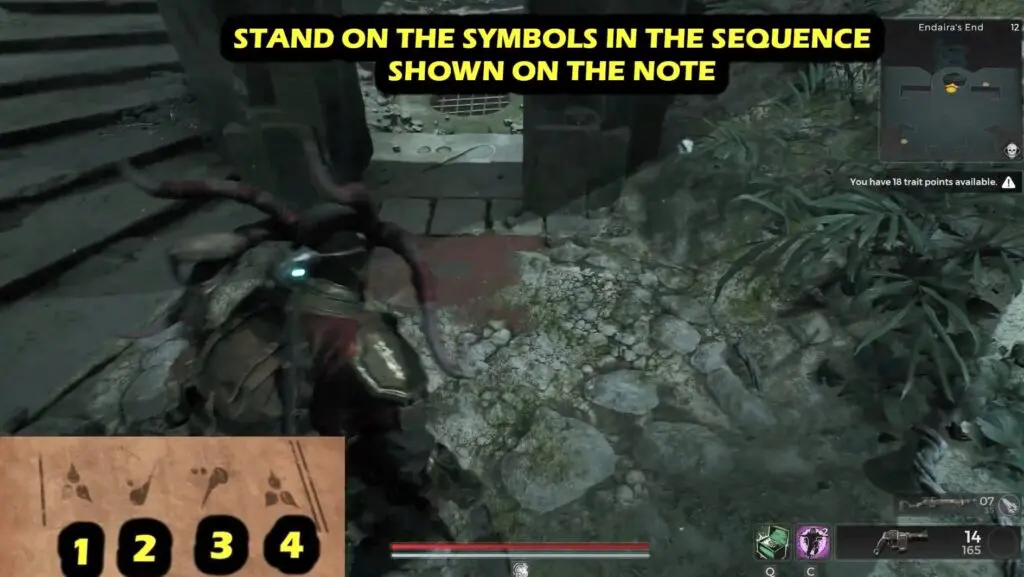
To activate the puzzle, ascend the various floors of the tower and carefully locate the symbols in the alcoves. Step on these symbols in the correct sequence to progress further.
To activate the puzzle, follow this sequence: start on the 3rd floor, then move to the 2nd floor, proceed to the 1st floor, and finally return to the 3rd floor again. Step on the symbols in the alcoves on each of these floors in this specific order to successfully activate the puzzle.
If you successfully step on the symbols in the right order, a pedestal will appear near the tower and you pick the Ring of the Wind Cave from it.