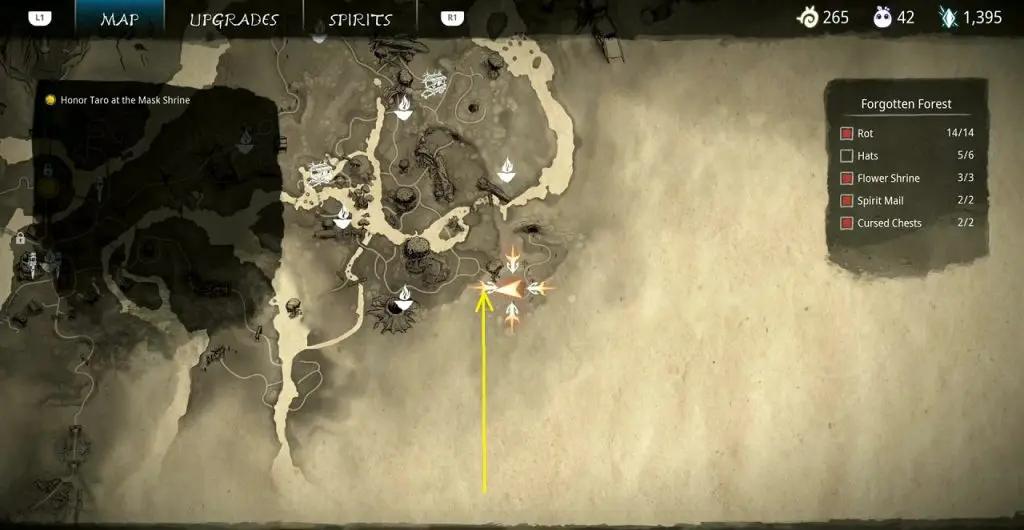
This guide shows how to get all the collectibles in the Forgotten Forest area in ‘Kena: Bridge of Spirits’. There are a total of 27 collectibles in Forgotten Forest (14 Rots, 6 Hats, 3 Flower Shrines, 2 Spirit Mail, 2 Cursed Chests).
#1. Rot 1/14
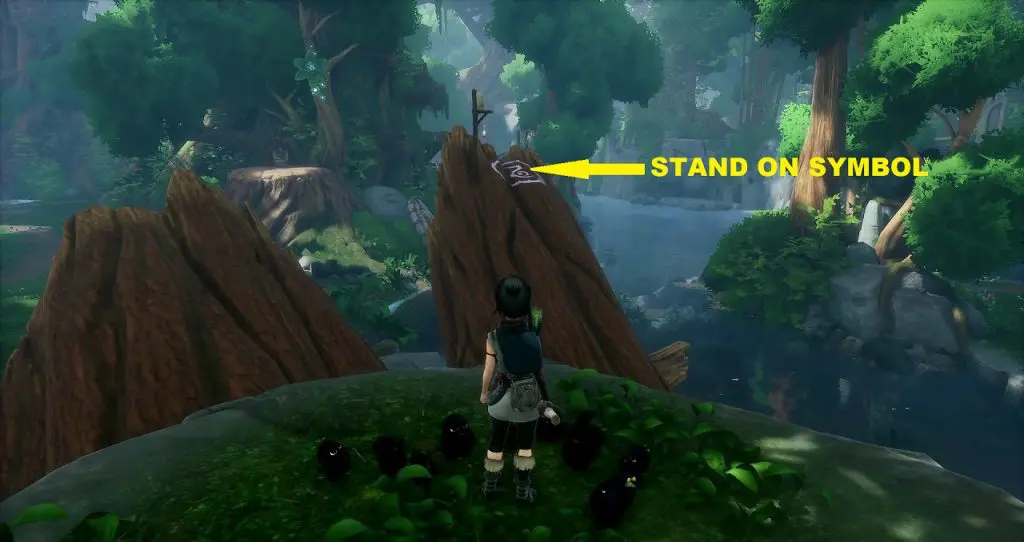
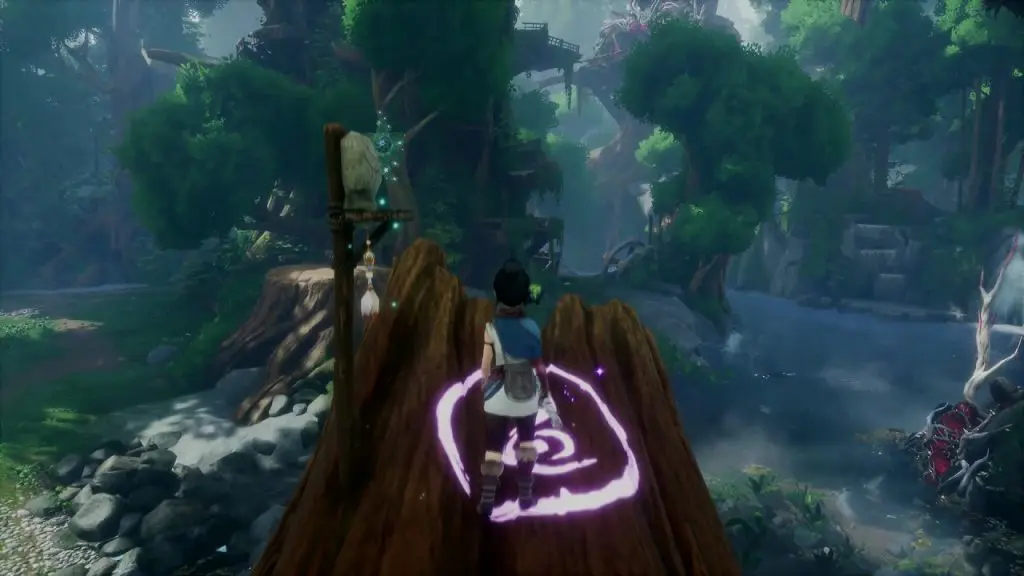
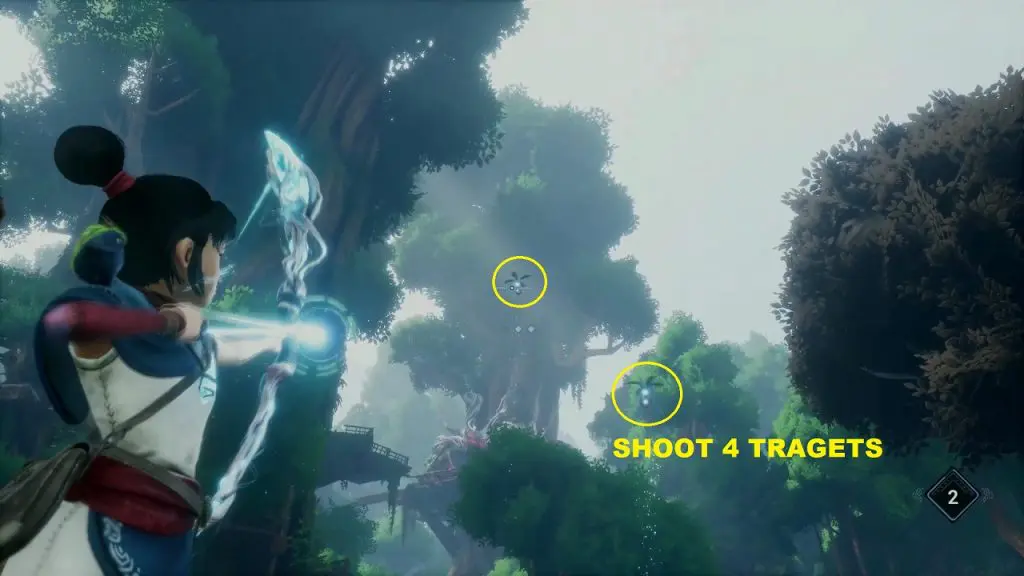
This rot is in Wood Shrine. Stand on the purple symbol on top of a wooden symbol as shown below and use pulse. This will make 4 targets emerge. Shoot the four targets and the rot will drop on the wooden log.

#2. Rot 2/14
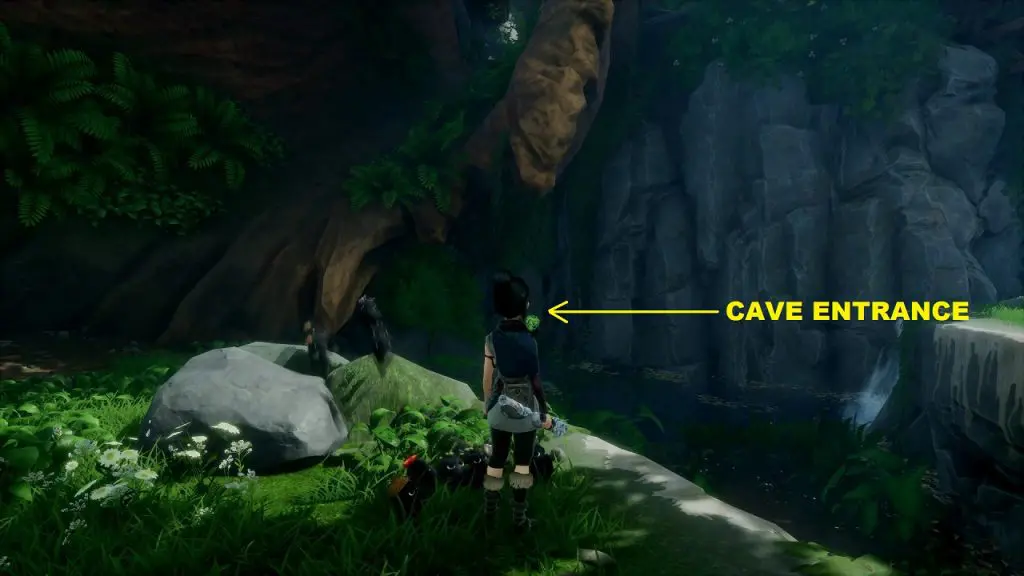
Go inside the little cavern at the highlighted location and pulse the rock to get the rot.
#3. Rot 3/14
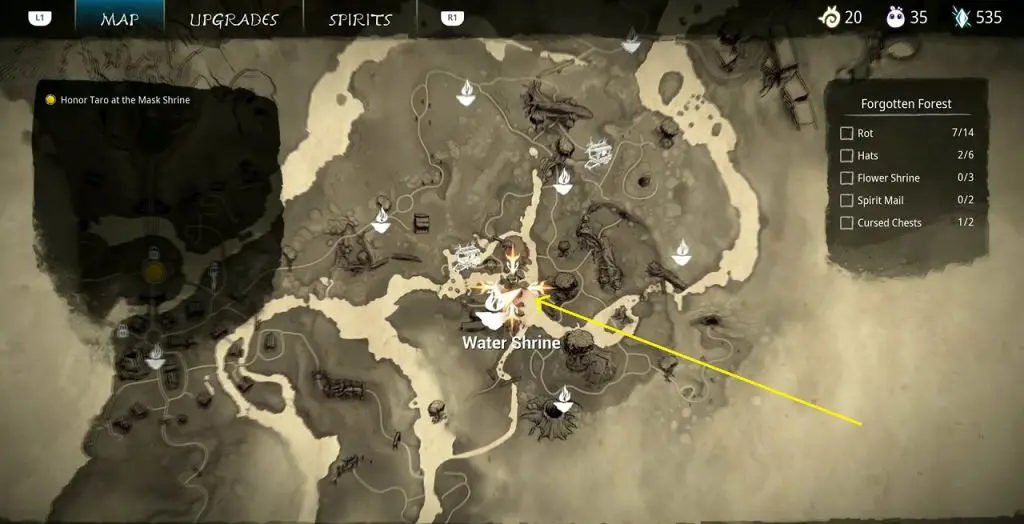
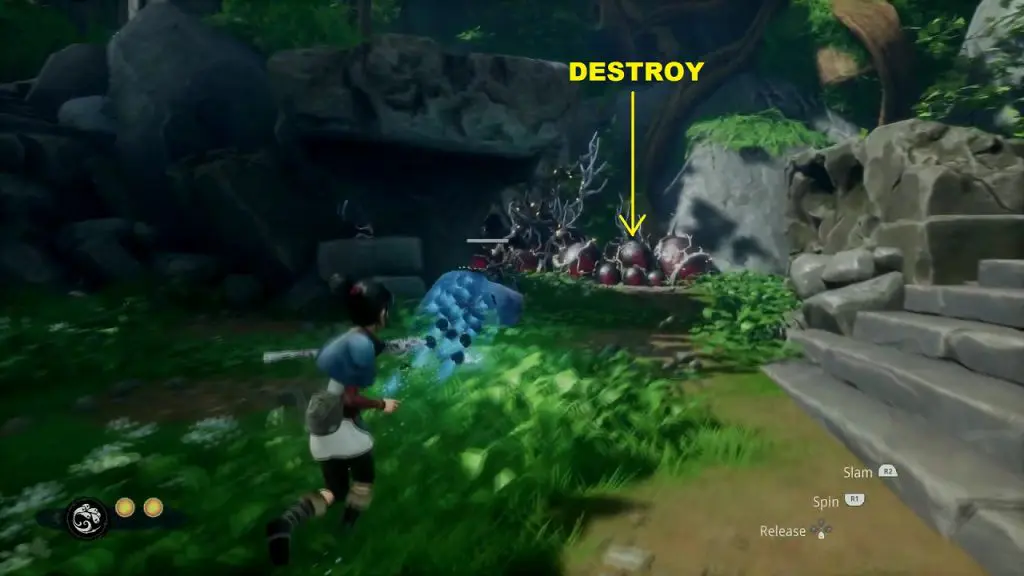
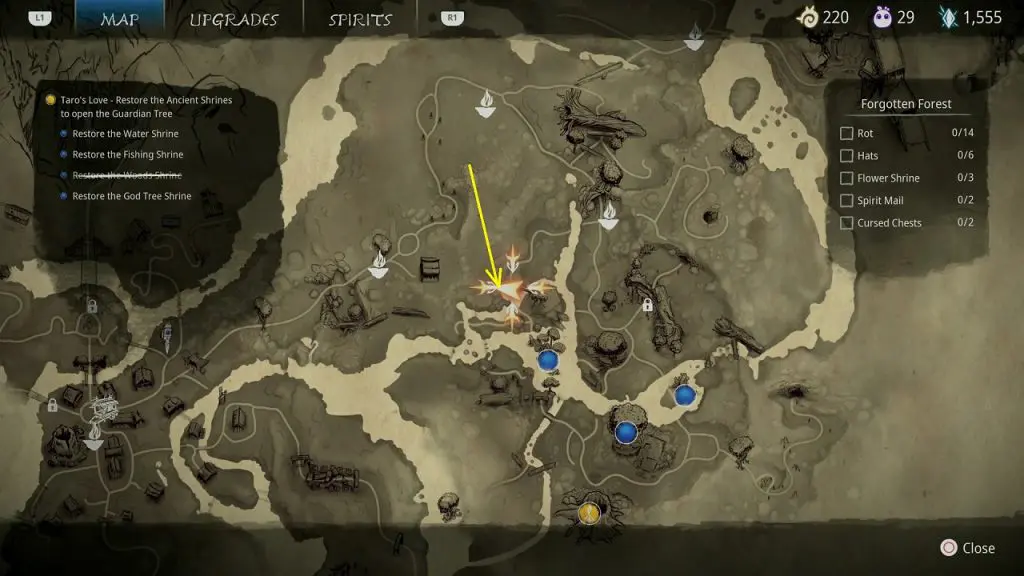
This rot is quite complicated and will take a lot of work to get it. Go to the water shrine and use the forest tear to destroy the corruption on the right side as shown below.

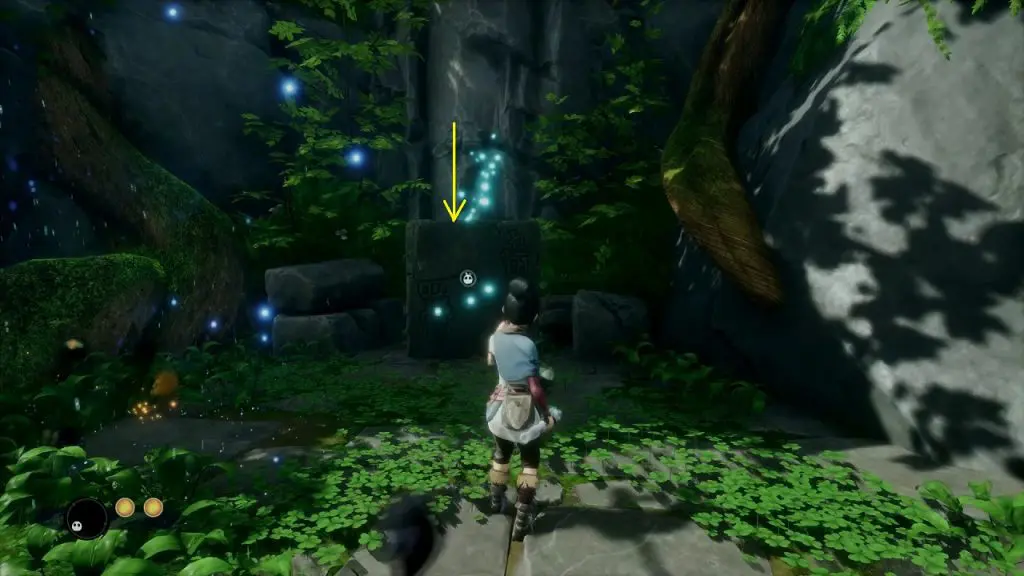
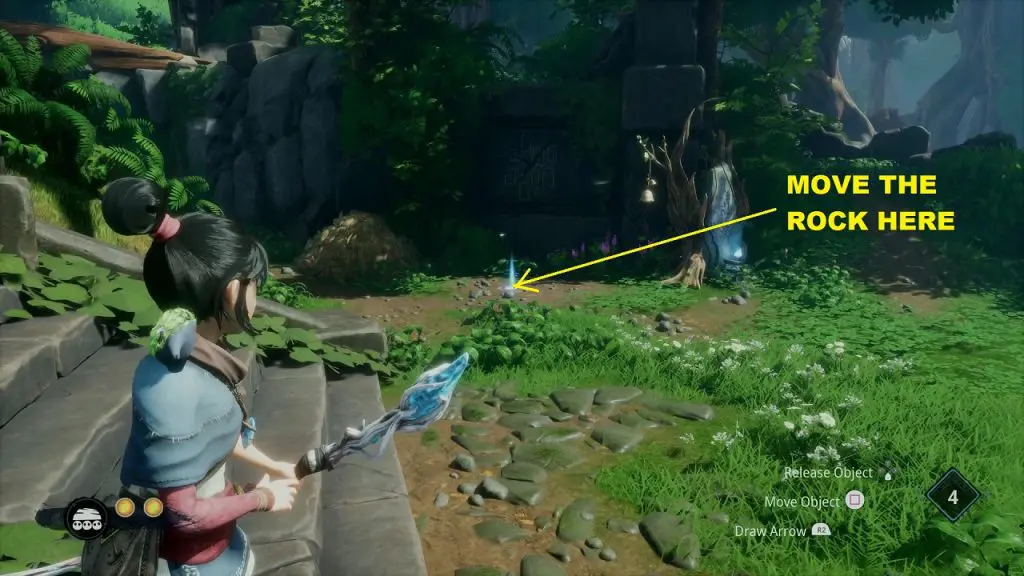
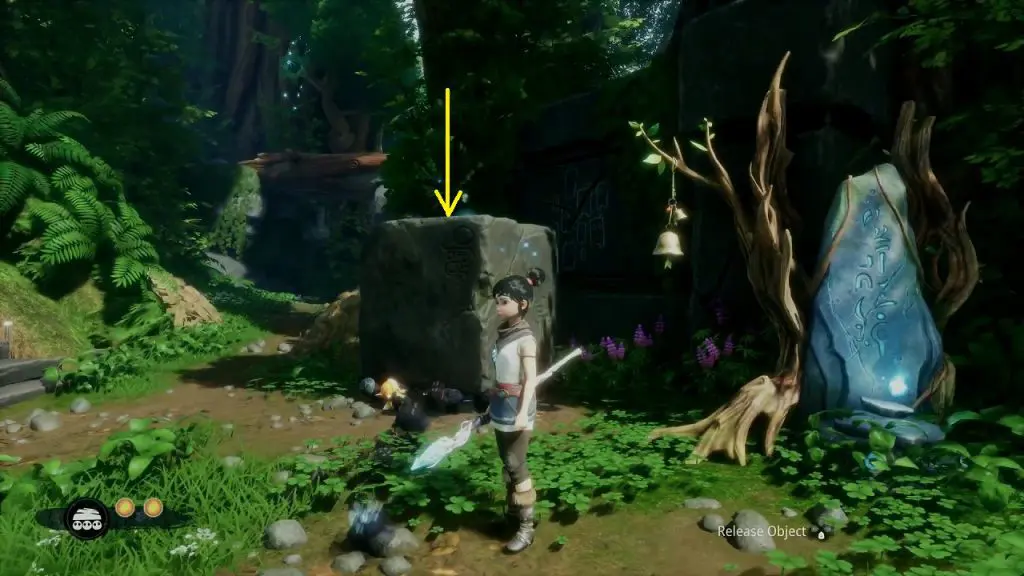
After destroying the corruption, you will see a big block of rock. Use rot to move the rock in front of a small wall opposite to it as shown below. Now, use the rock to climb up.
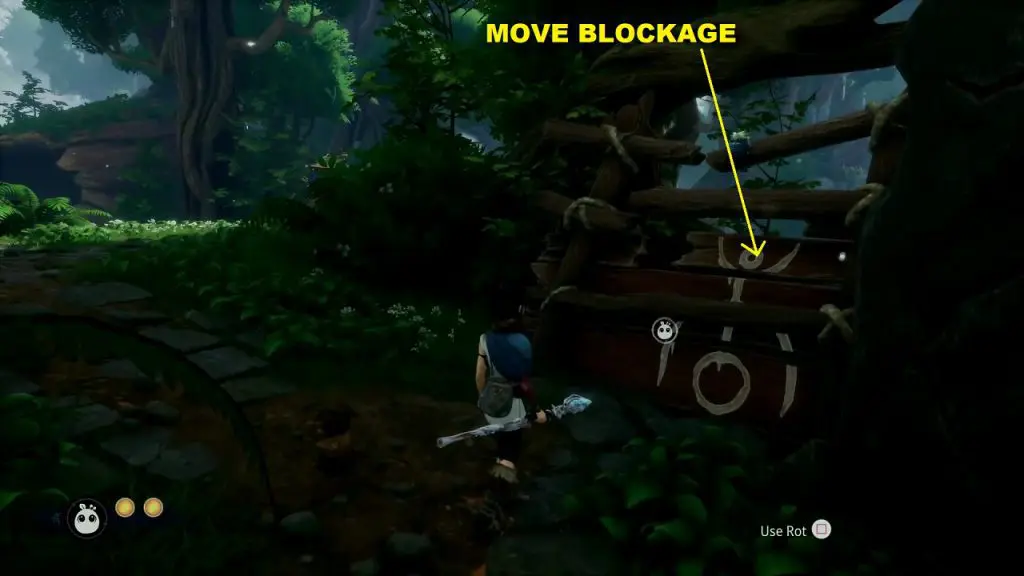
After climbing up, use rot to move the wooden blockage as shown below. This will open a new path to the water shrine.
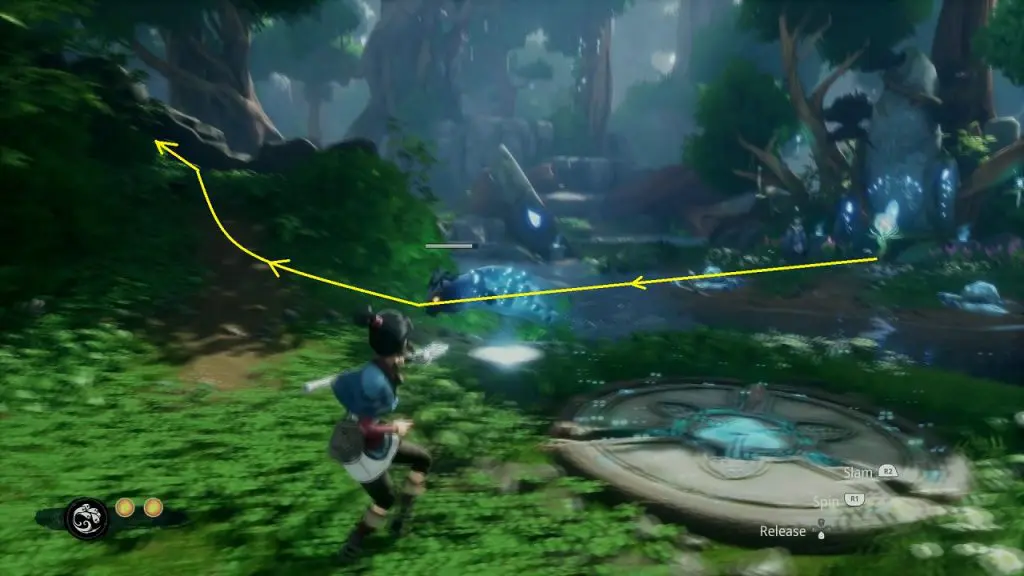
Go back to the water shrine and summon the forest tear and move it up the ramp on the left side on the newly opened path.
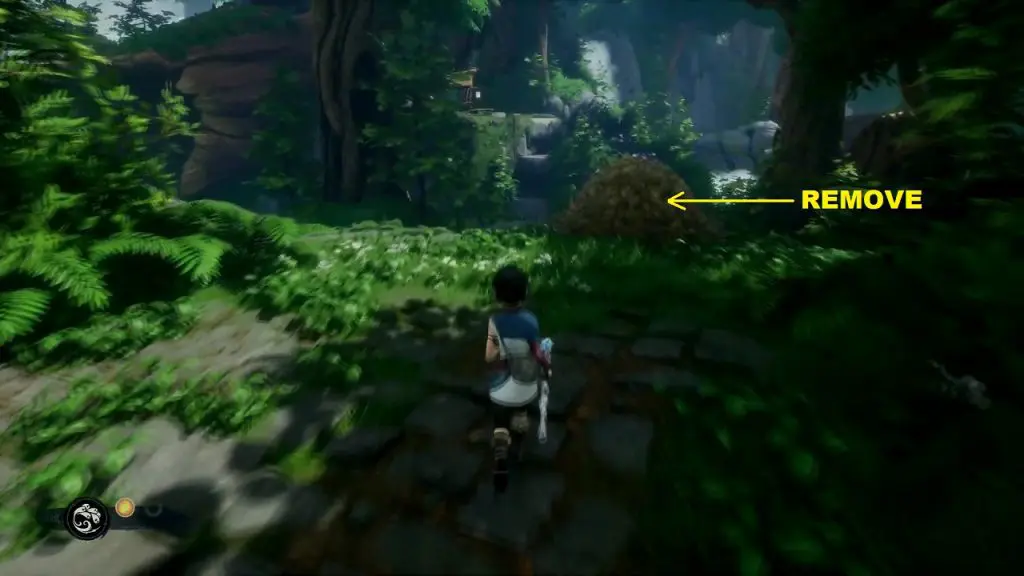
Use the forest tear to remove the pile of leaves as shown below to get the rot.
#4. Flower Shrine 1/3
This flower shrine is near the water shrine. Summon forest tear from the water shrine and move it up the ramp on the left side on the path opened while getting the previous rot. Then send it over the log bridge. The tear can fall off so you will have to carefully guide it over the log. After crossing the log, use the tear to clean the flower shrine.
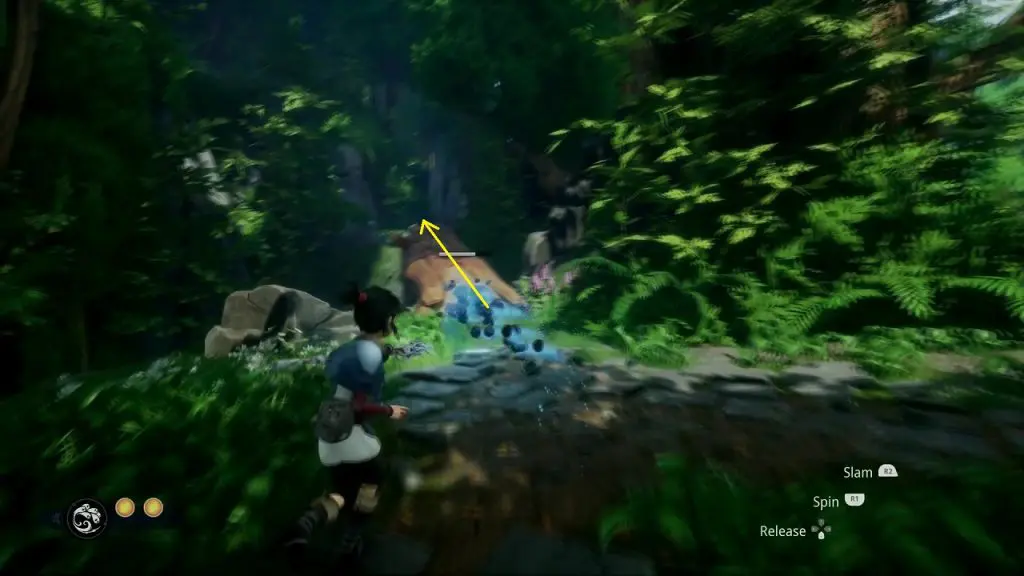
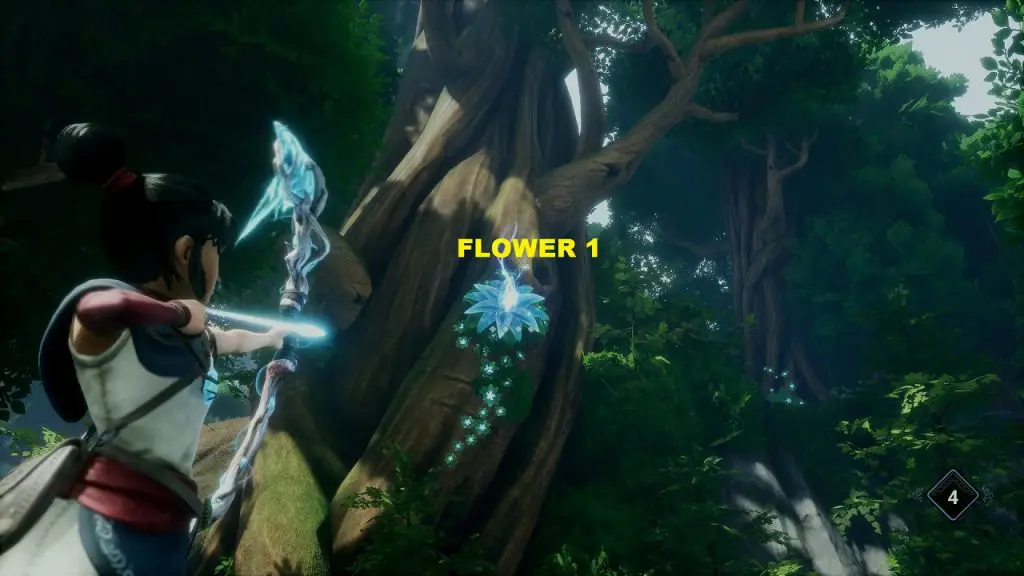
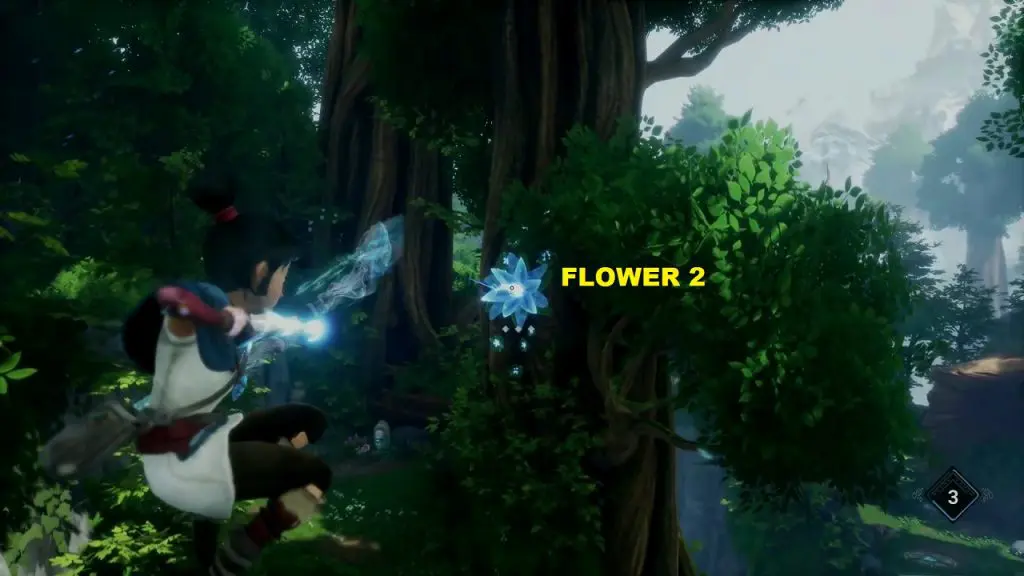
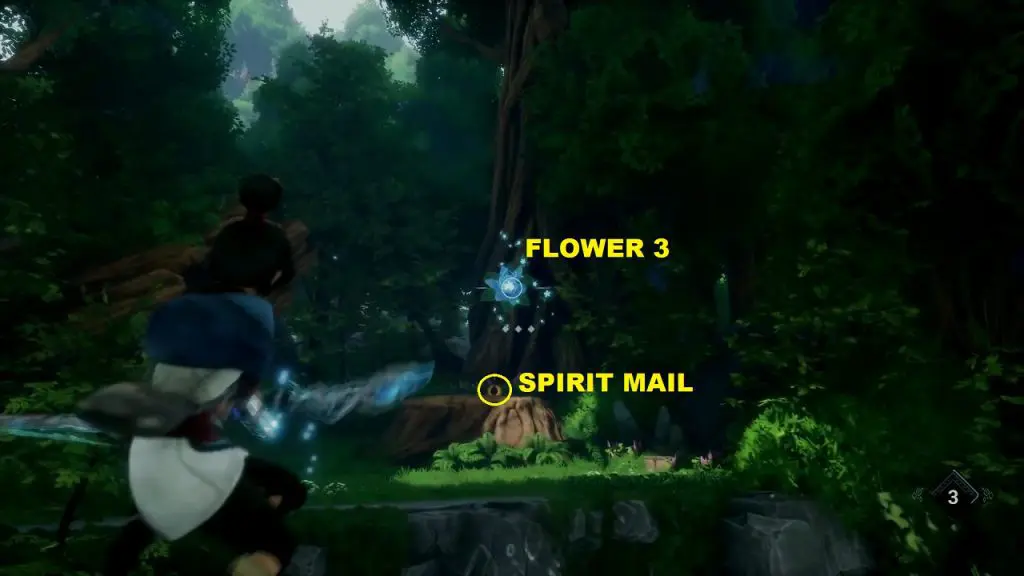
#5. Spirit Mail 1/2
This Spirit Mail is near the water shrine. Go to the log bridge as described in the flower shrine above. On the left of the log bridge, you will see a crystal flower on the tree. Use the bow to grapple to it and while on air, grapple to the second crystal flower on the right side of the log bridge. Then grapple to the third crystal flower on the left side to reach the spirit mail underneath it.
#6. Rot 4/14
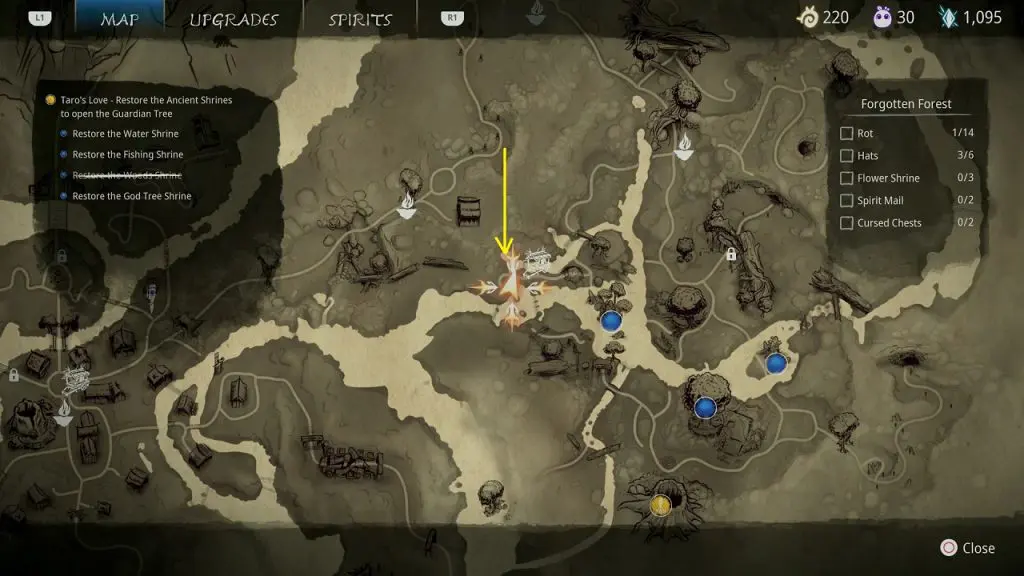
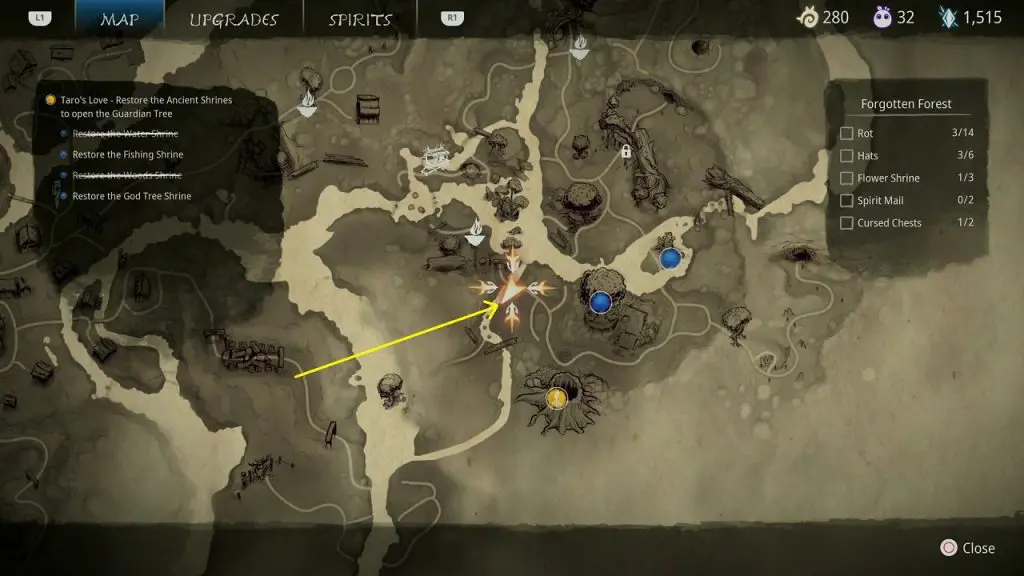
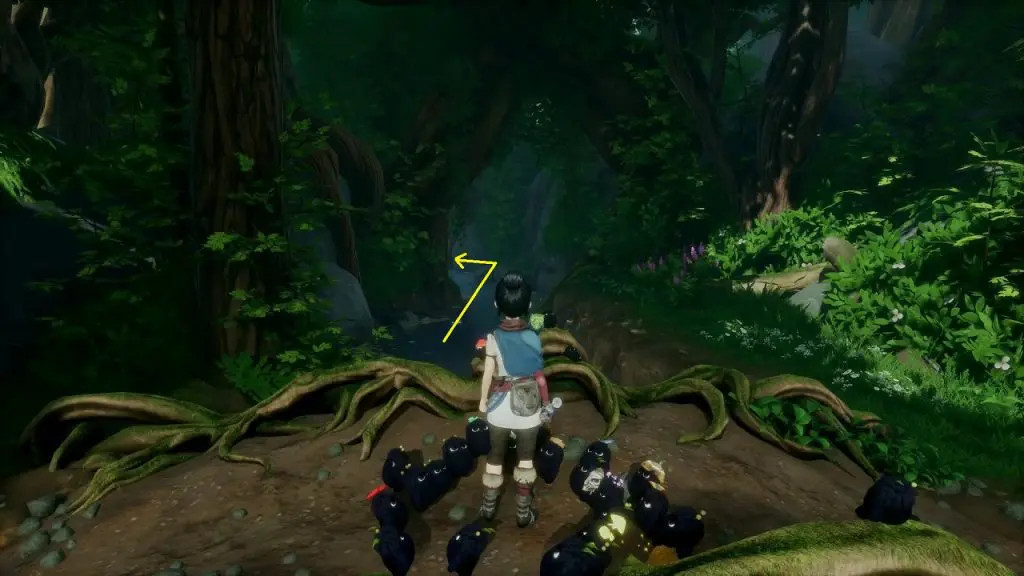
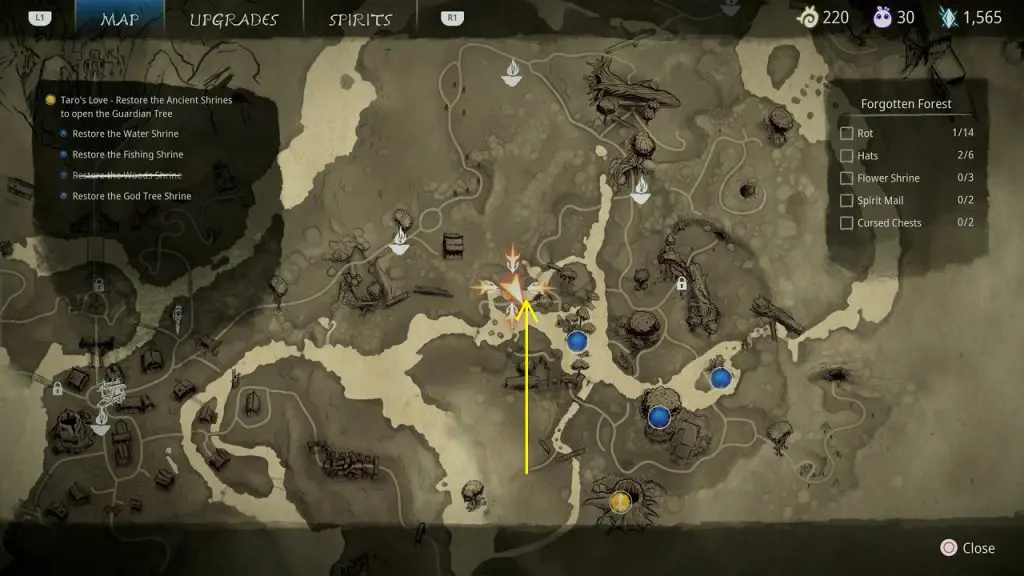
This rot is near the meditation spot. To reach there, go to the location as shown in the map below and then follow the water stream inside the tunnel.
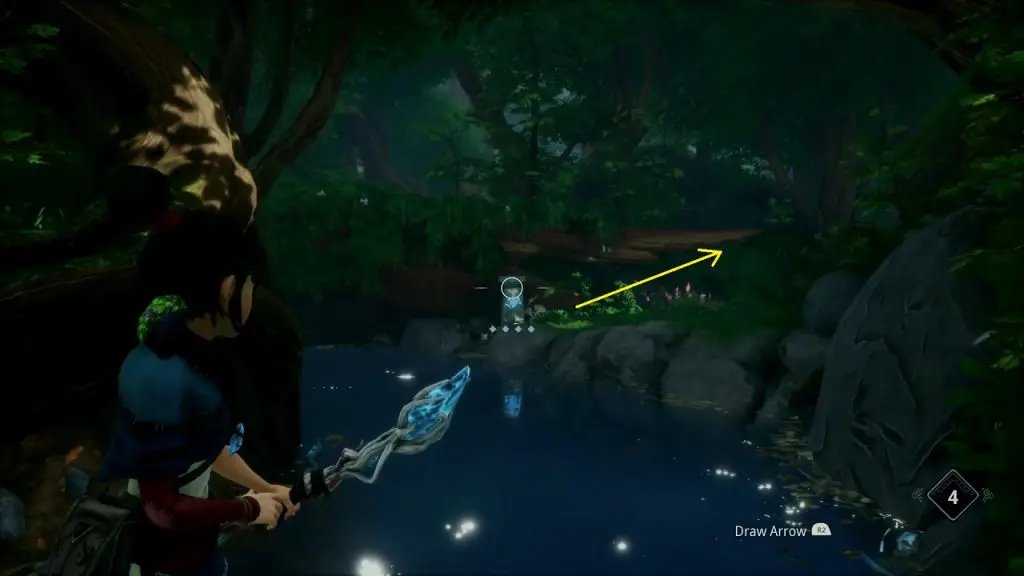
Shoot the pillar as shown in the picture below. This will make two stones appear on the water. Jump on the stones to cross the water and reach the other side leading to the meditation spot.
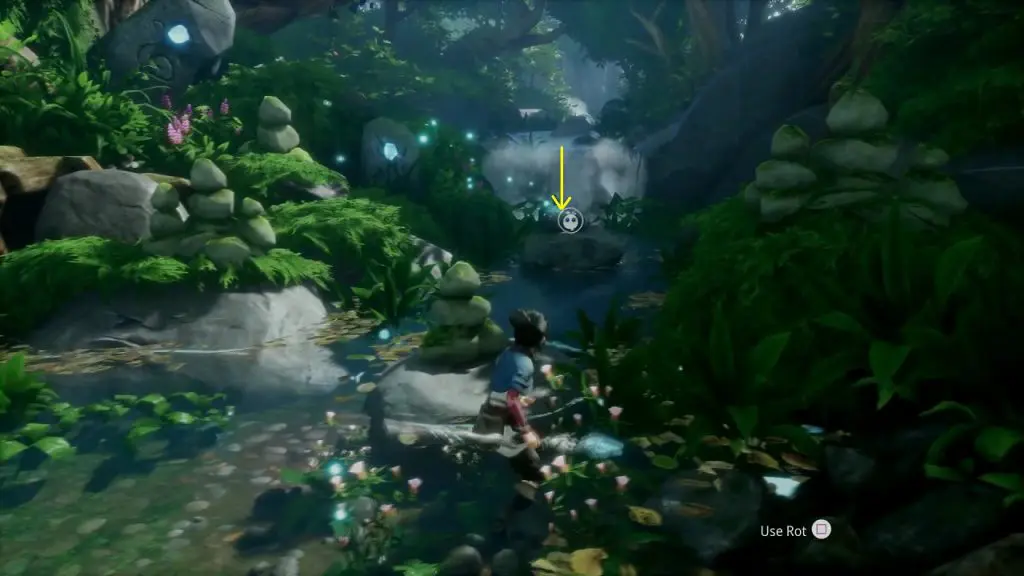
On the right side of the meditation spot, you will find the rot underneath a stone as shown below.
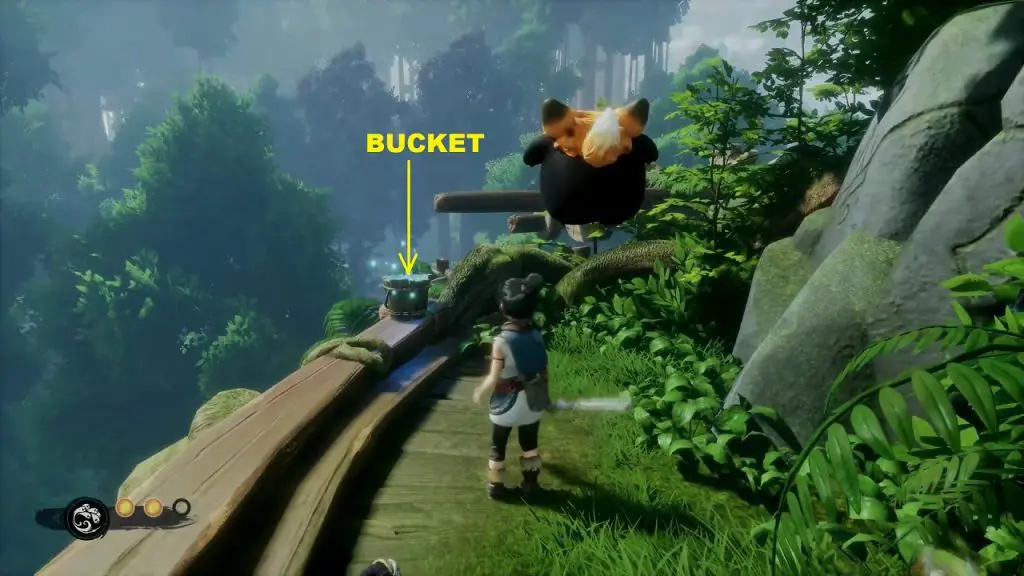
#7. Rot 5/14
Near the God Tree Shrine, you will find a pot hanging from a tree as shown below. Shoot the pot and rot will dropdown.
#8. Rot 6/14
This one is at the top of the God Tree Shrine. After clearing the God Tree Shrine, zip-up using the bow. Then jump across the platforms to reach the rot.
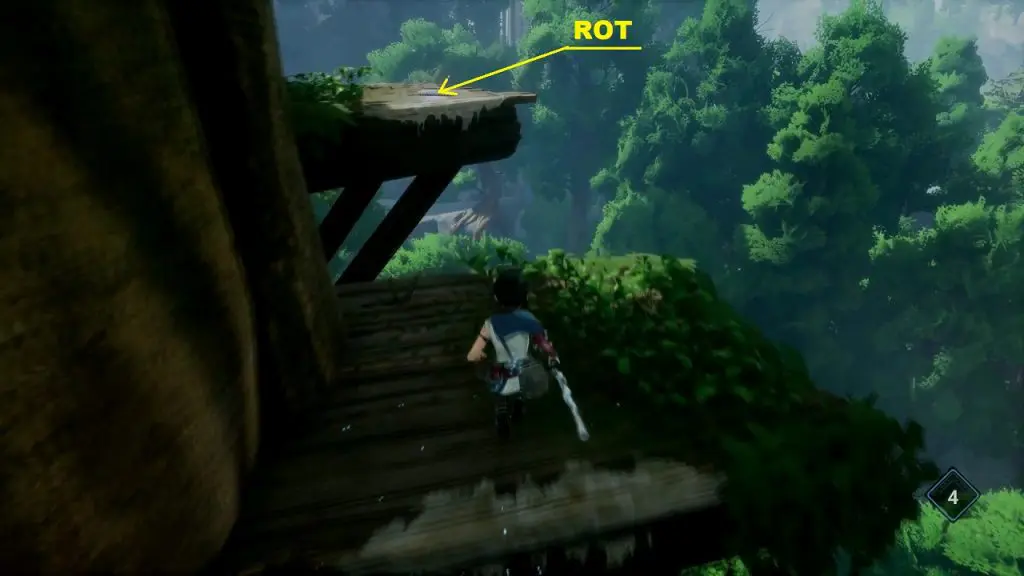
#9. Flower Shrine 2/3
This flower shrine is at the top of the God Tree Shrine. After clearing the God Tree Shrine, zip up using the bow as shown below.
Then turn around and jump across the gap to the other side as shown below.
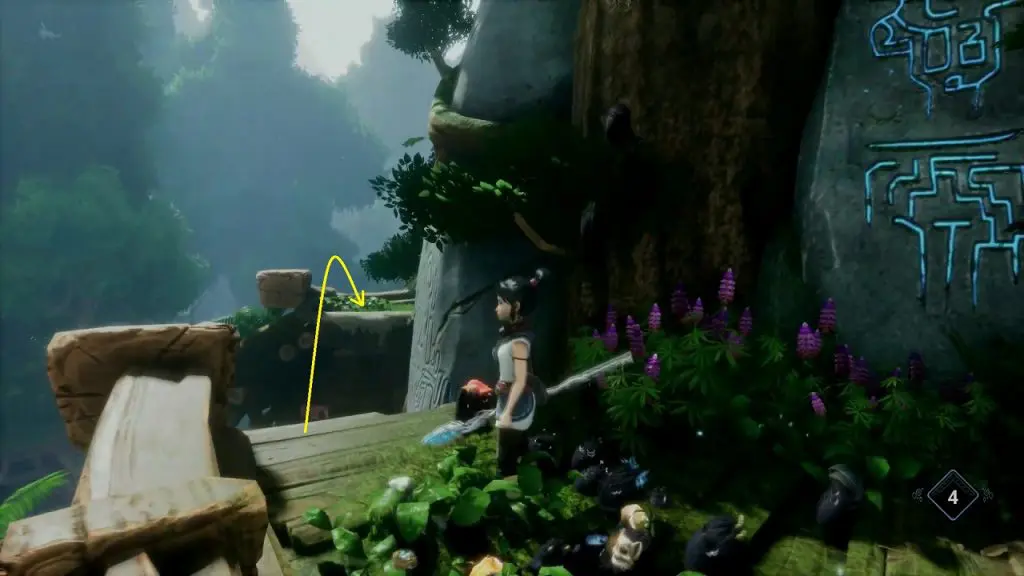
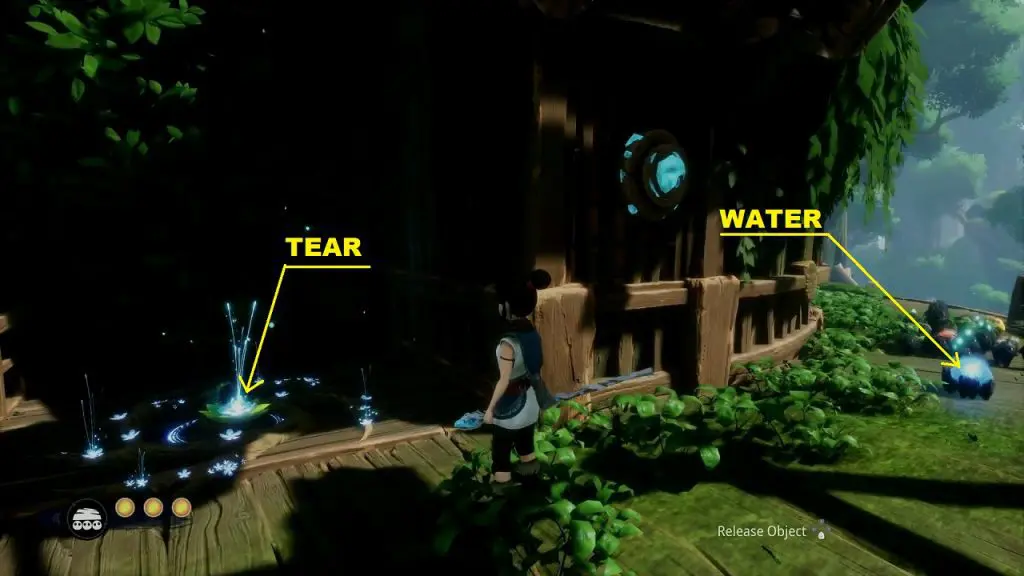
Here you will find a water bucket. Tilt it to from the water.
Then jump down and use the rot to carry the water droplet to the tear. This will make the plant sprout.
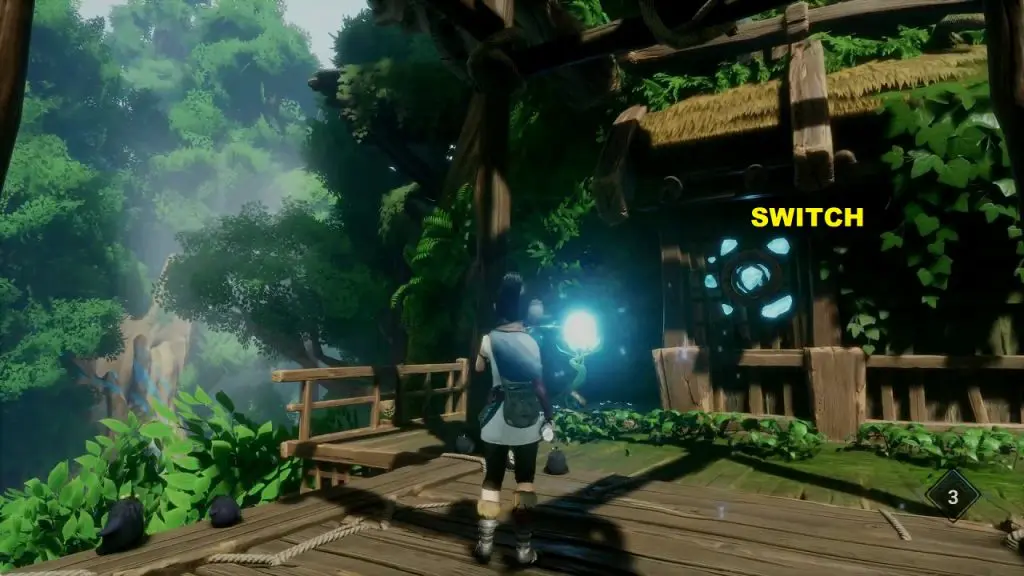
Now go and stand on the elevator. Shoot the switch as shown below and then quickly summon the forest tear and bring it to the elevator. After hitting the switch the elevator will start moving down after few seconds. You will need to bring the forest tear to it during that time. The tear will go down with the elevator. Do not drop off the tear on the elevator, otherwise, it will break when it hits the ground.
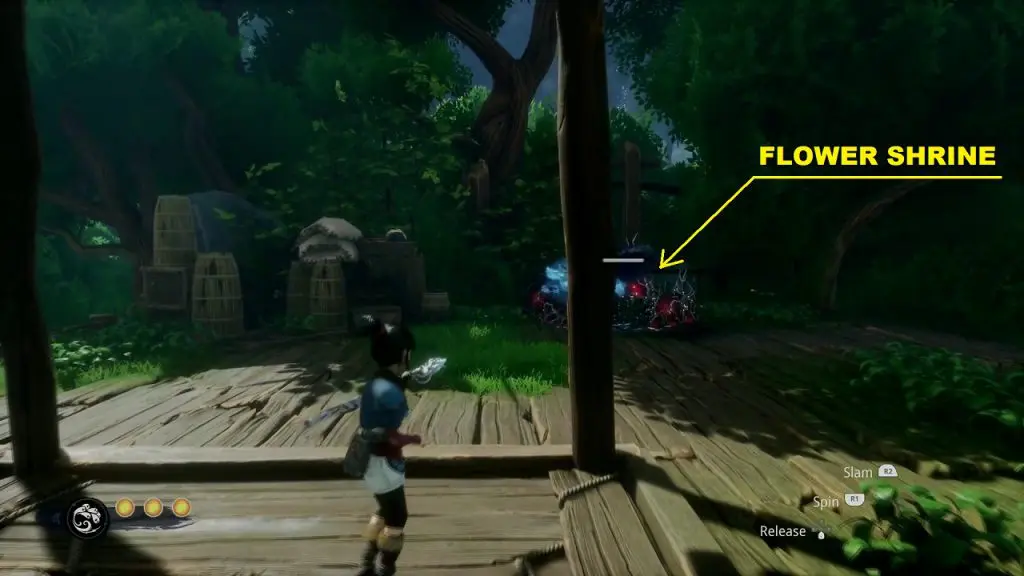
When the elevator reaches the bottom, guide the tear to the flower shrine to clean it from the corruption.
#10,11,12. Rot 7,8,9/14
You will get three rots after finding the ‘Food Offering’ relic. This is story-related and cannot be missed.
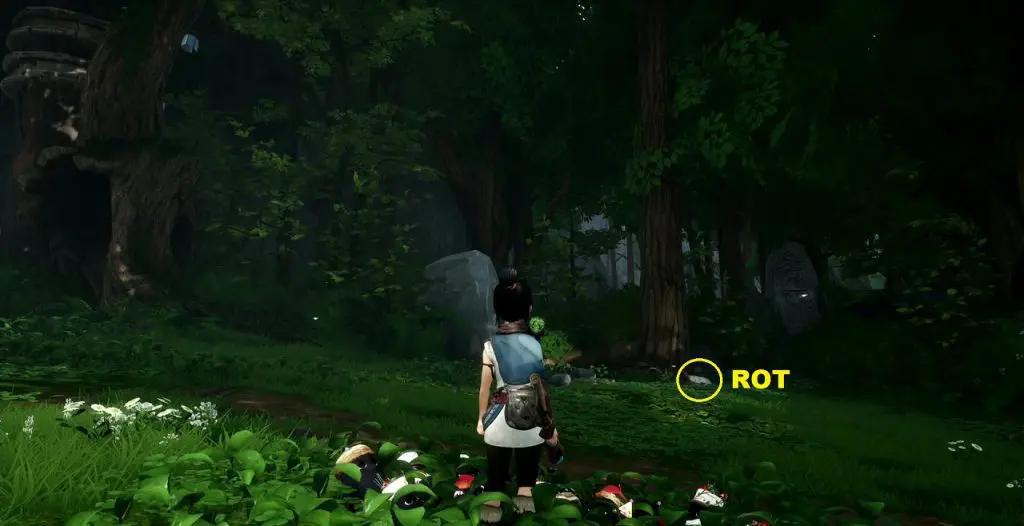
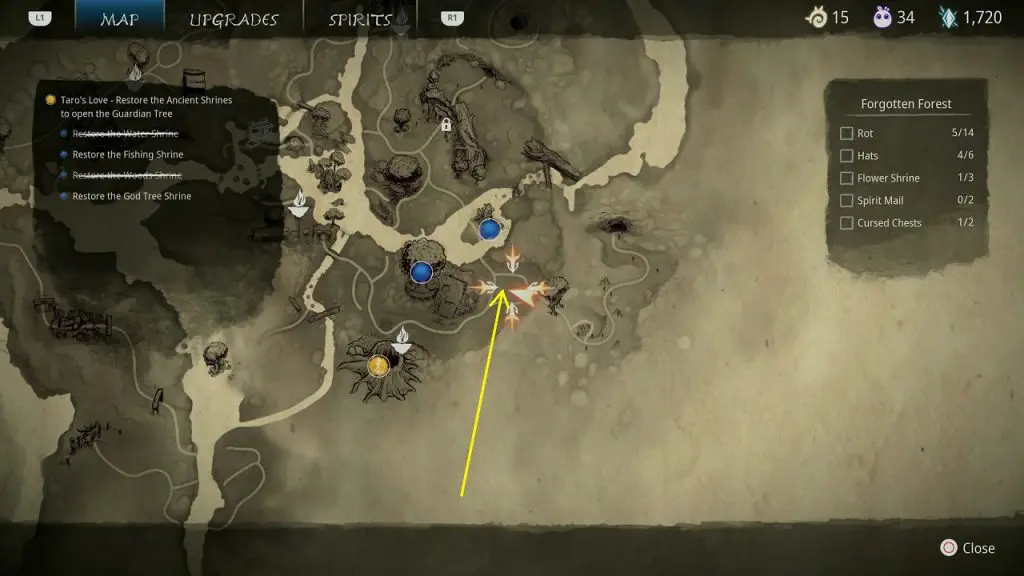
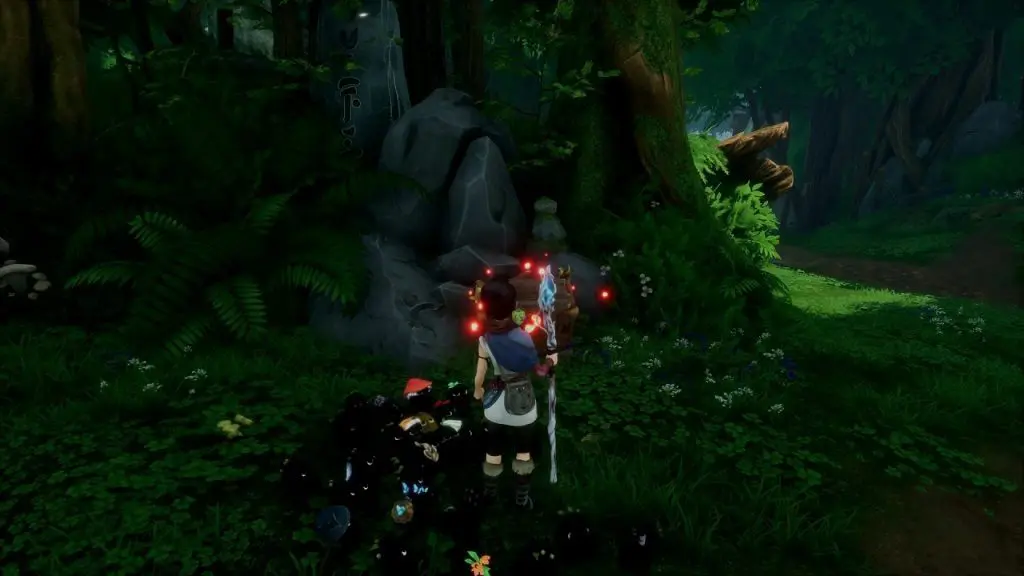
#13. Rot 10/14
This one is in the Lantern cave area. You will get access to this area after cleansing all four shrines. Go past the entrance gate and turn right. You will find the rot underneath a rock as shown below.
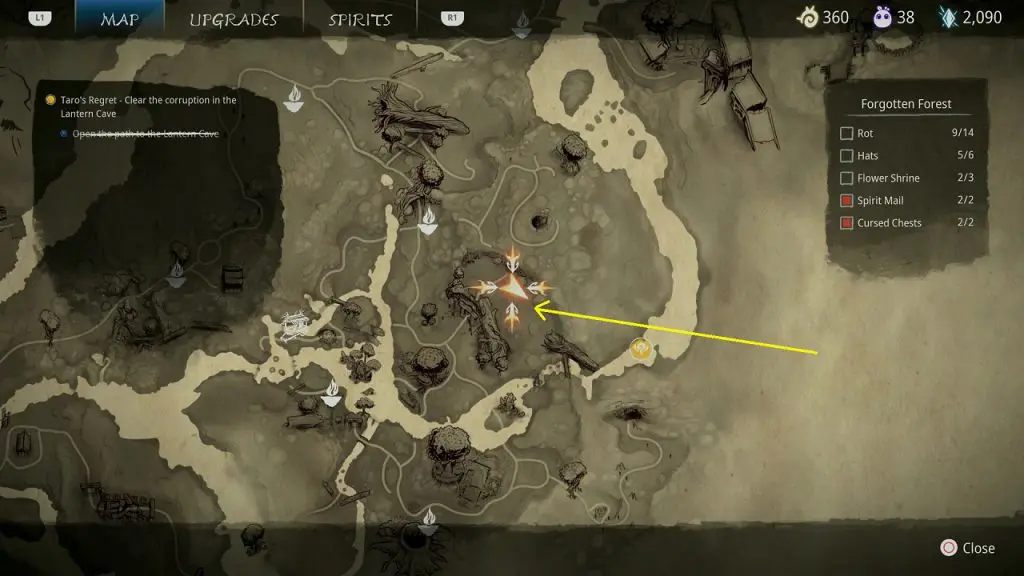
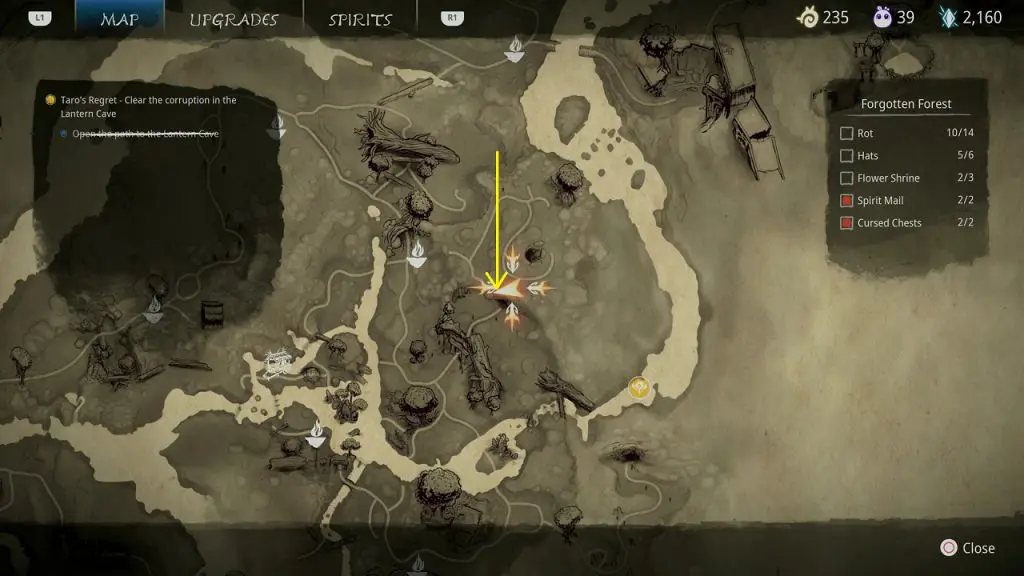
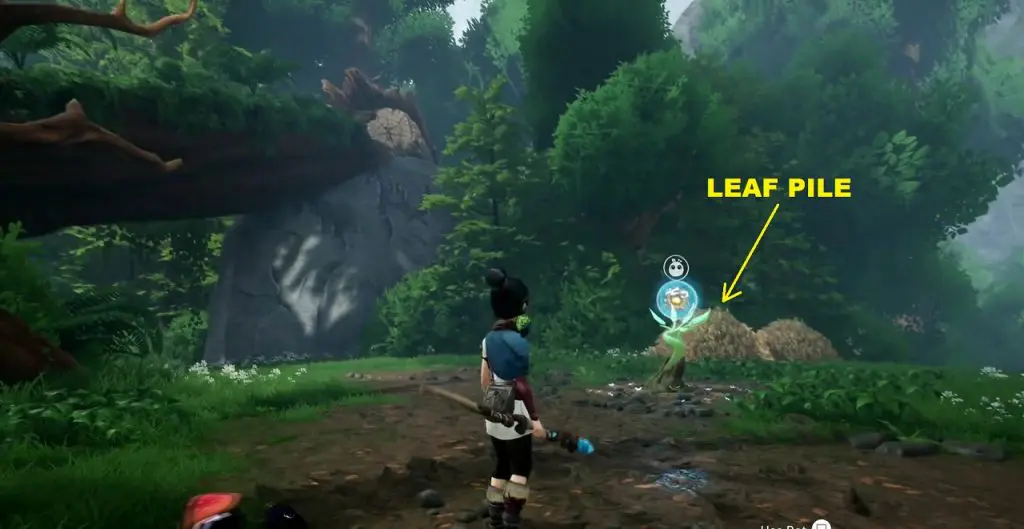
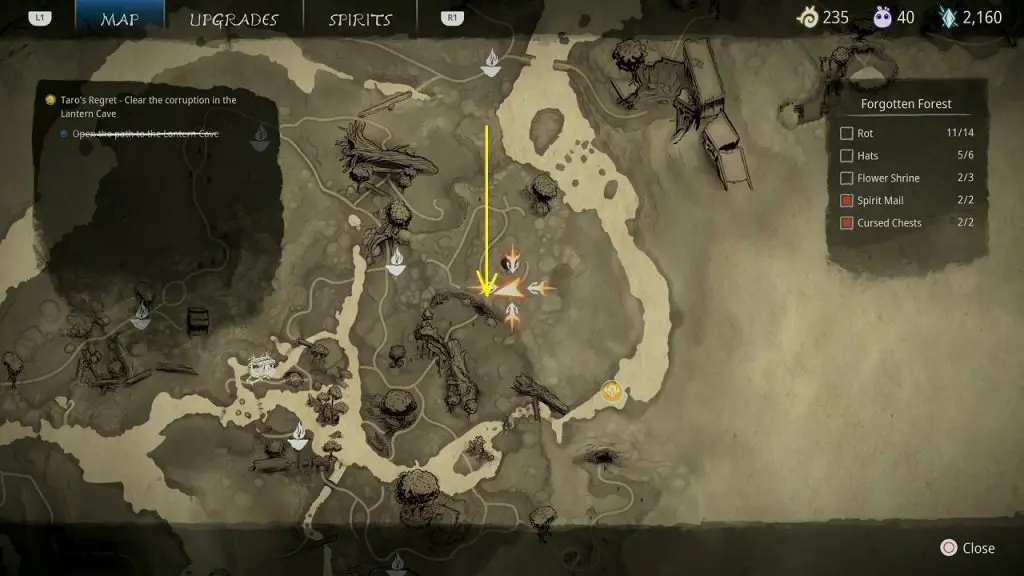
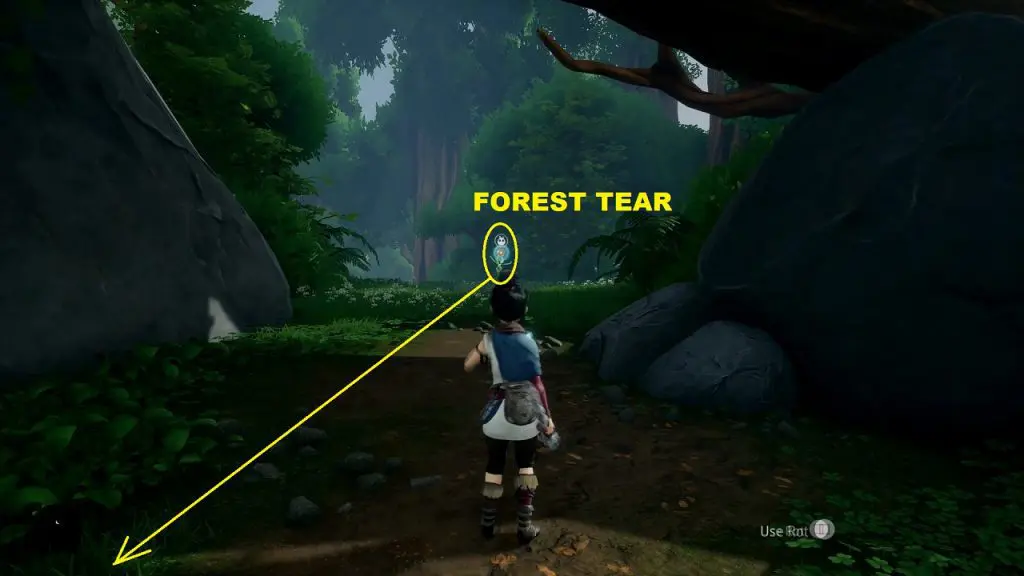
#14. Rot 11/14
This rot is also in the Lantern cave area. You will be able to get this one after clearing all the corruption in the area. Go to the highlighted location and remove the pile of leaves using forest tear as shown below. Underneath the pile of leaves, you will find a log. The rot is underneath the log.
#15,16,17. Rot 12,13,14/14
You will get three rots after finding the Lantern Relic. This is story-related and cannot be missed.
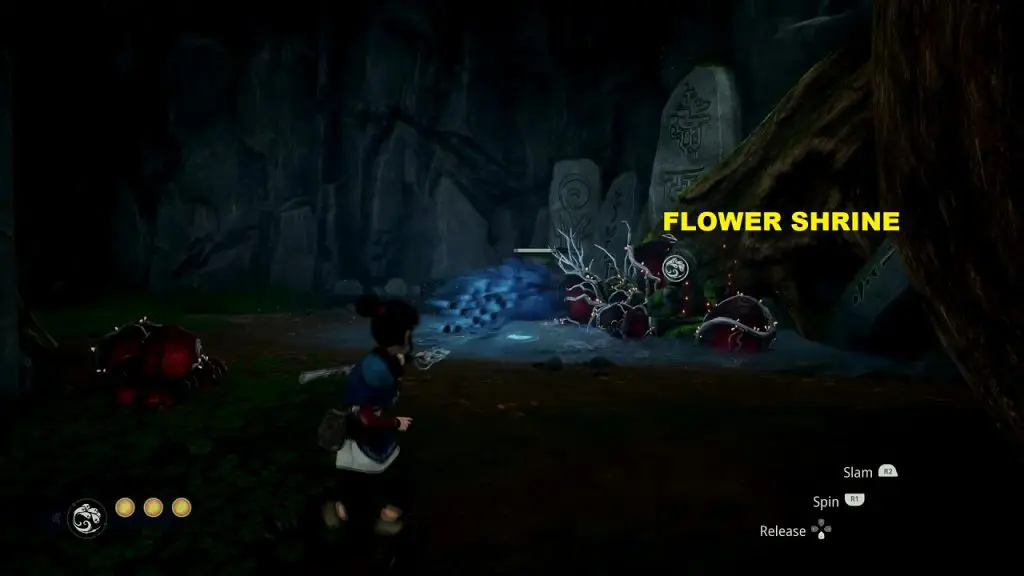
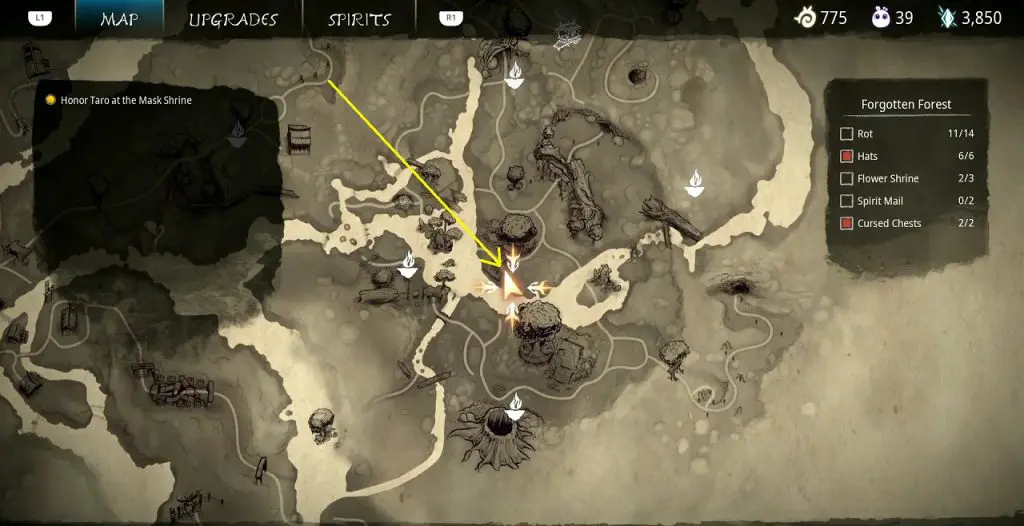
#18. Flower Shrine 3/3
This flower shrine is in the lantern cave area. You can get this before you fight the boss here. Make sure to clear all the corruption in the area. Summon forest tear from the plant as shown below. Then bring the tear to the small cavern at the back. The flower shrine is on a puddle of water inside the cavern. Use the tear to cleanse the shrine.
#19. Spirit Mail 2/2
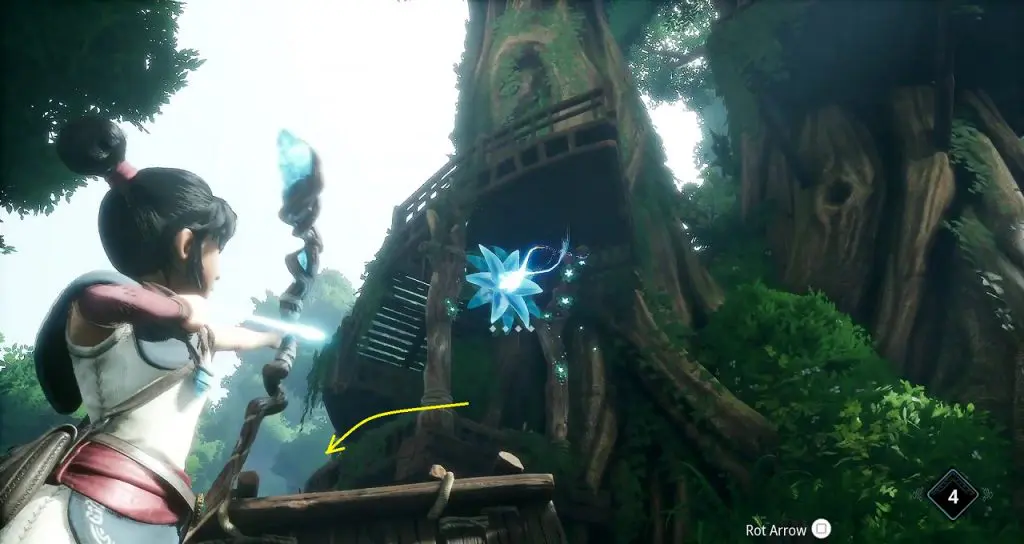
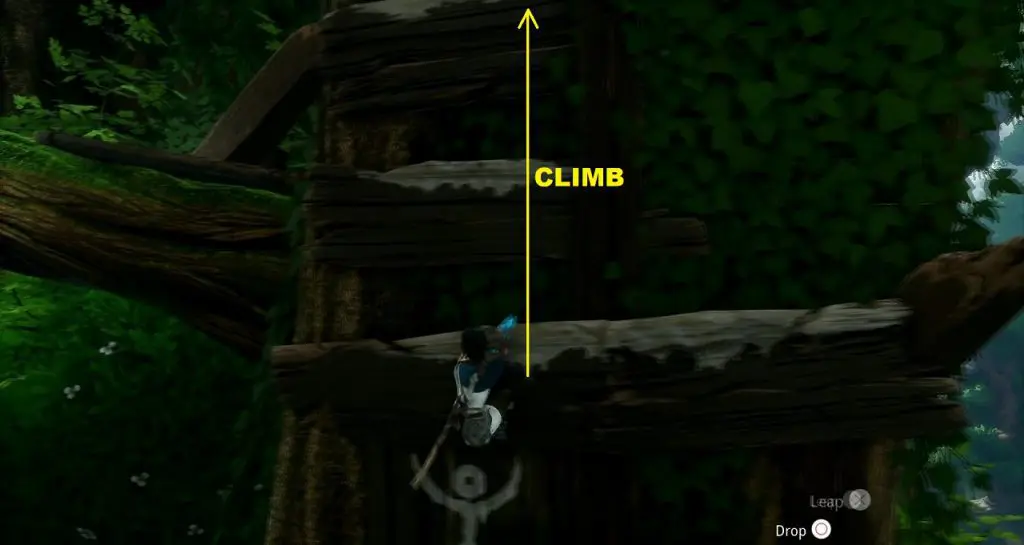
This Spirit Mail is in God Tree Shrine Area. Go to the location shown below and shoot on the blue crystal flower to grapple your way up. Then move to the end of the platform and jump up to get to the platform above it.
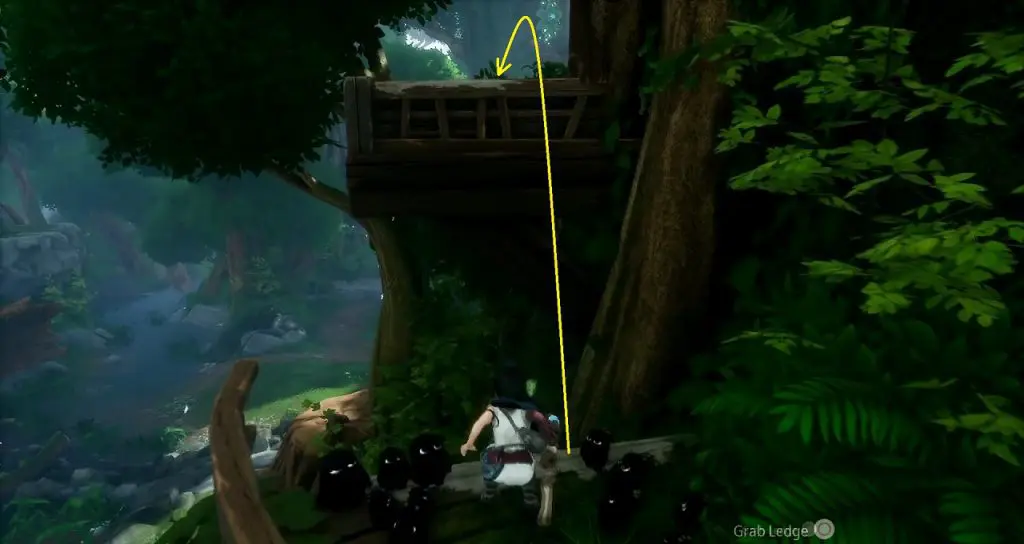
Don’t take the staircase here. Instead, turn around and double jump to reach the platform up above across the gap as shown below.
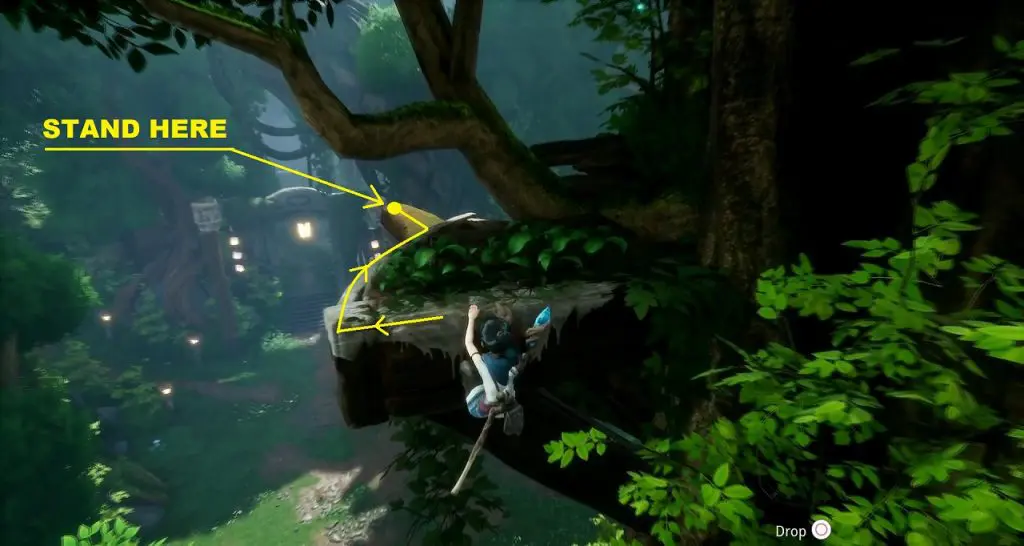
Then climb up as shown below and drop down on a small platform above.
From the small platform, jump to the ledge as shown below. Move on the ledge to reach a wood log. Then go and stand at the edge of the wood log as highlighted below.
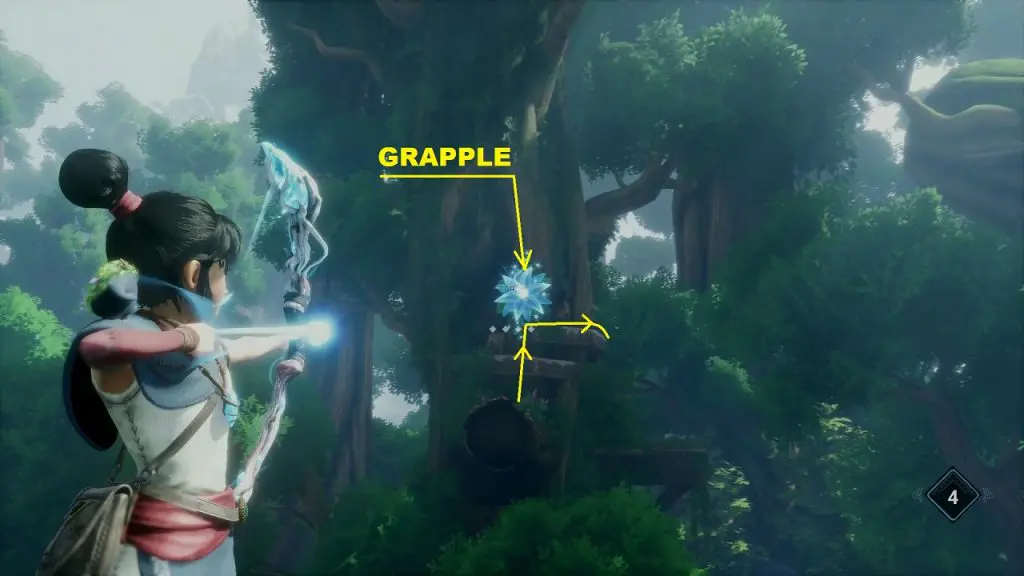
While standing on the wood log, you will see a blue crystal flower on your left. Shoot it to grapple there. Then climb up the ledge and go to the right as shown below.
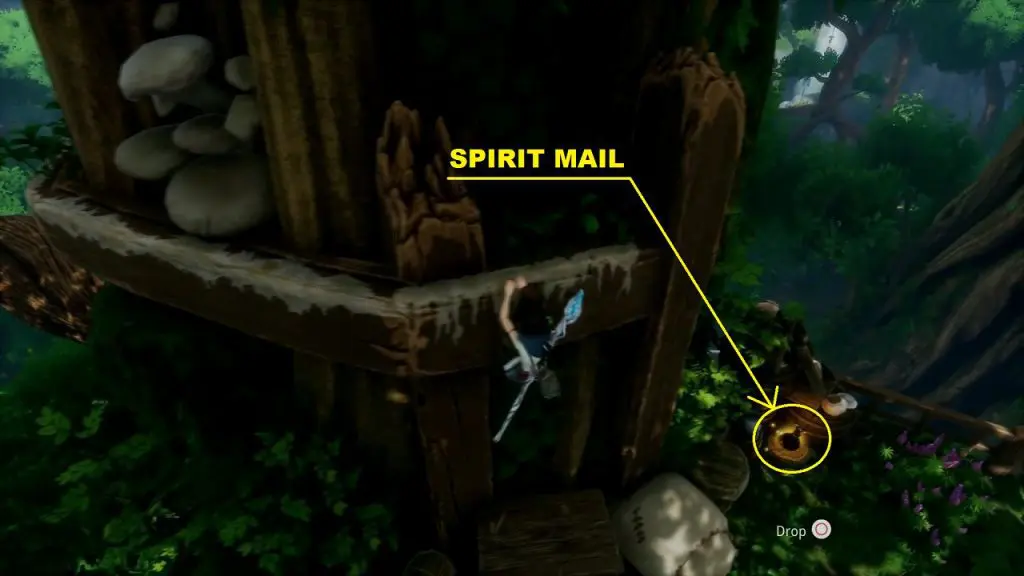
At the end of the ledge, drop down on the small platform to collect the spirit mail.
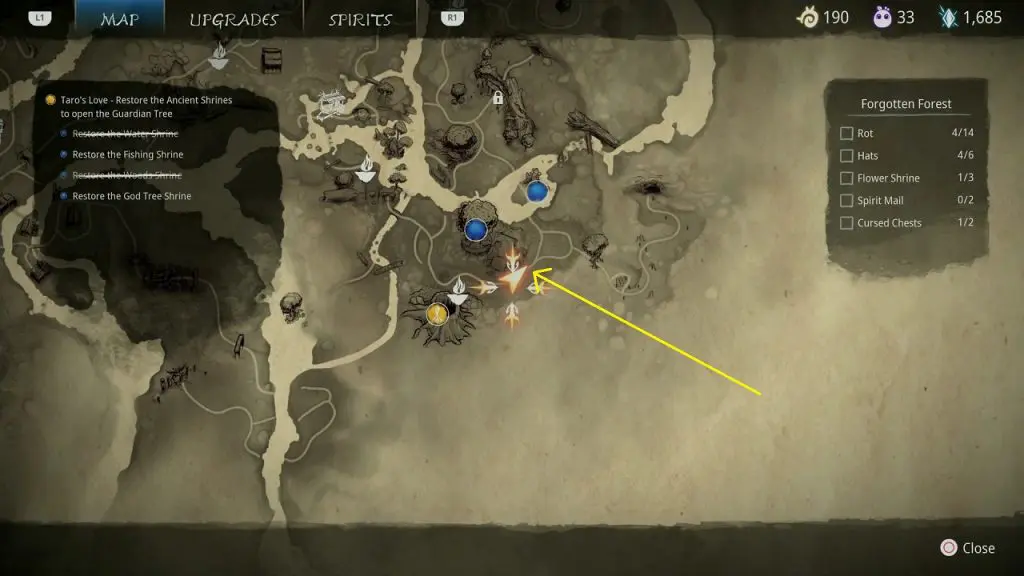
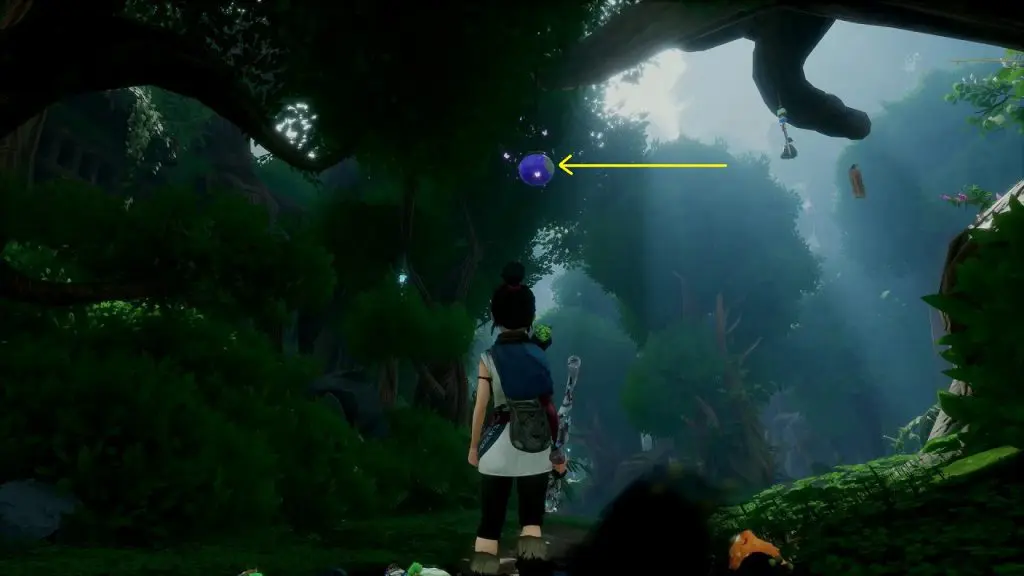
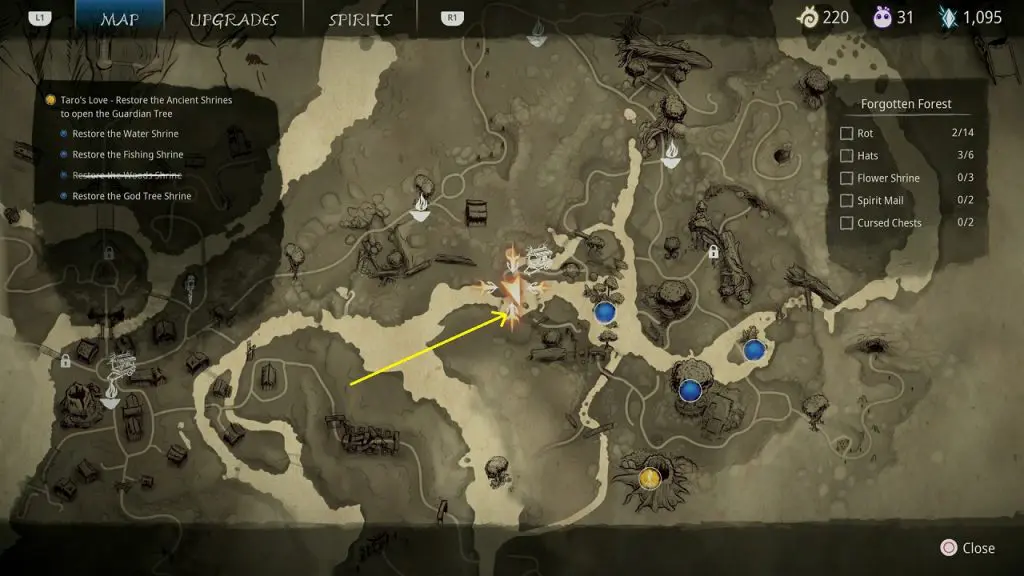
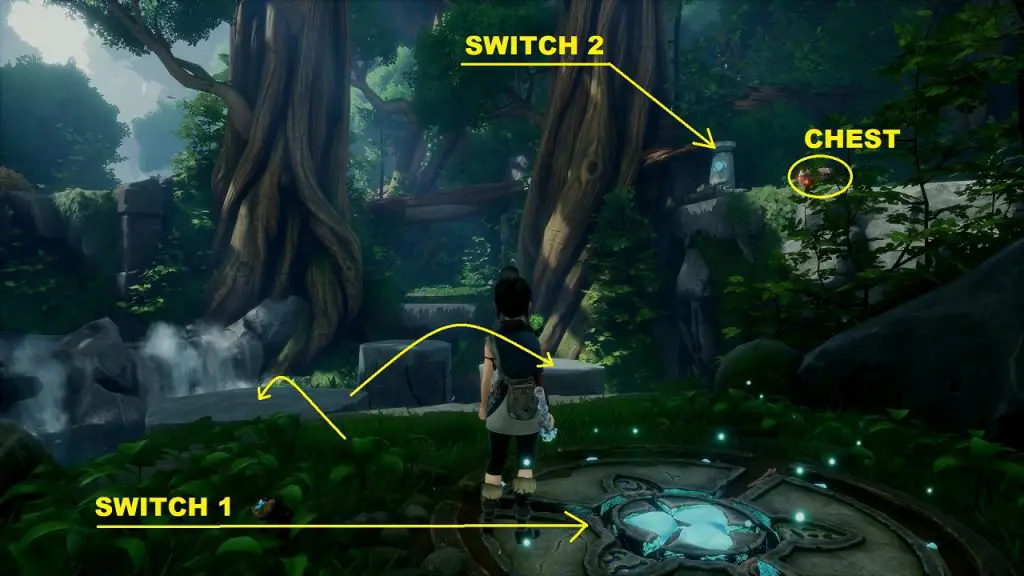
#20. Cursed Chest 1/2
The first cursed chest is on the way from the wood shrine to the water shrine. At the location highlighted below, turn on the switch for three stone pillars to appear from the water. Then jump to the stone pillar on the right side. Up above on your right, you will see a second switch with a blue crystal at its center (see the second picture below). Hit the blue crystal to turn on the switch. This will make the stone pillar move up and down. When the stone pillar is at the top, jump across to reach the cursed chest. You will have to carefully time your jump because the stone pillar comes down very quickly. Interact with the chest and then defeat seven enemies within 40 seconds to complete the challenge.
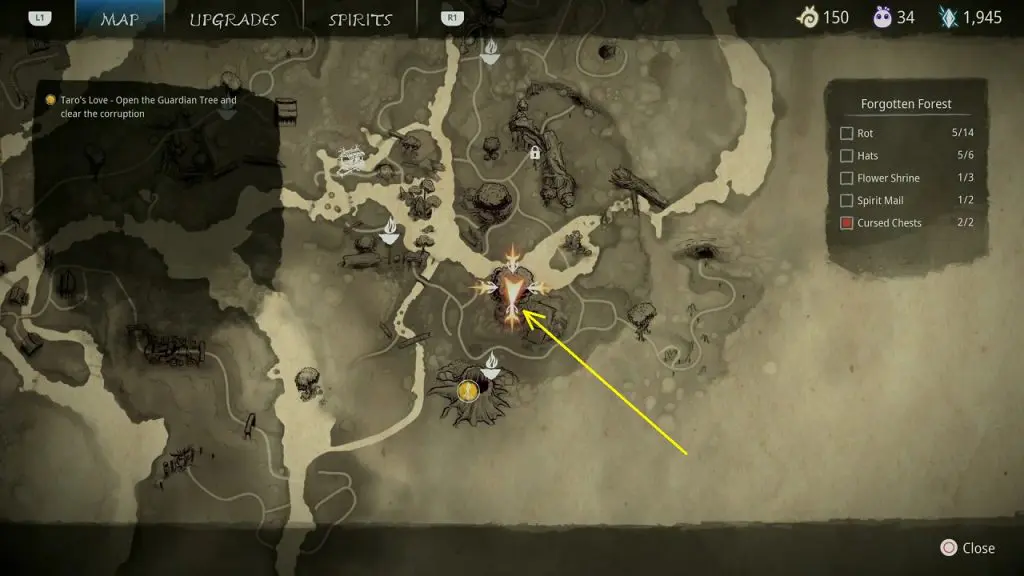
#21,22. Cursed Chest 2/2, Hat 1/6 (Taro)
The cursed chest is at the location shown below. Interact with the chest then defeat 5 enemies within 40 seconds to complete the challenge. Then open the chest to get Taro’s hat.
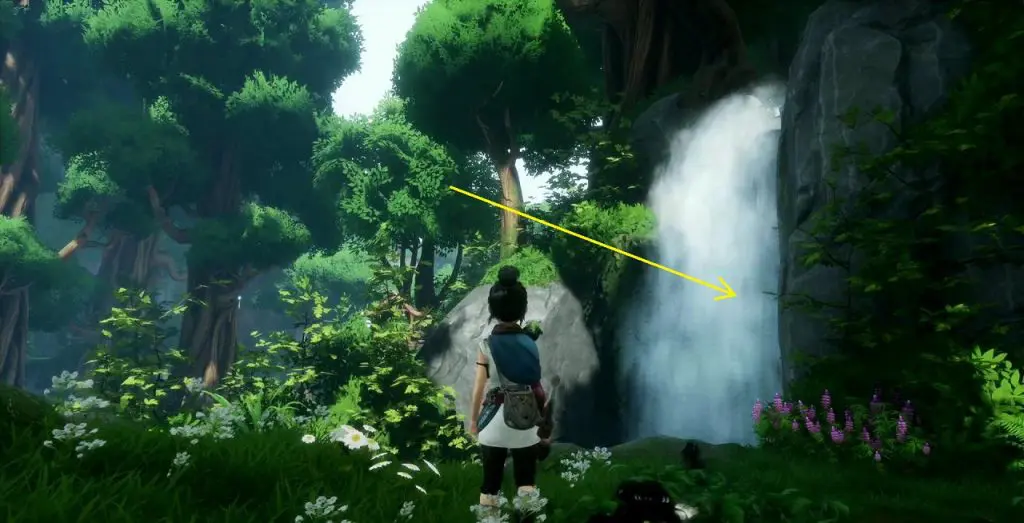
#23. Hat 2/6 (Purple Mushroom)
Go behind the waterfall near the wood shrine to get the hat as shown in the pictures below.
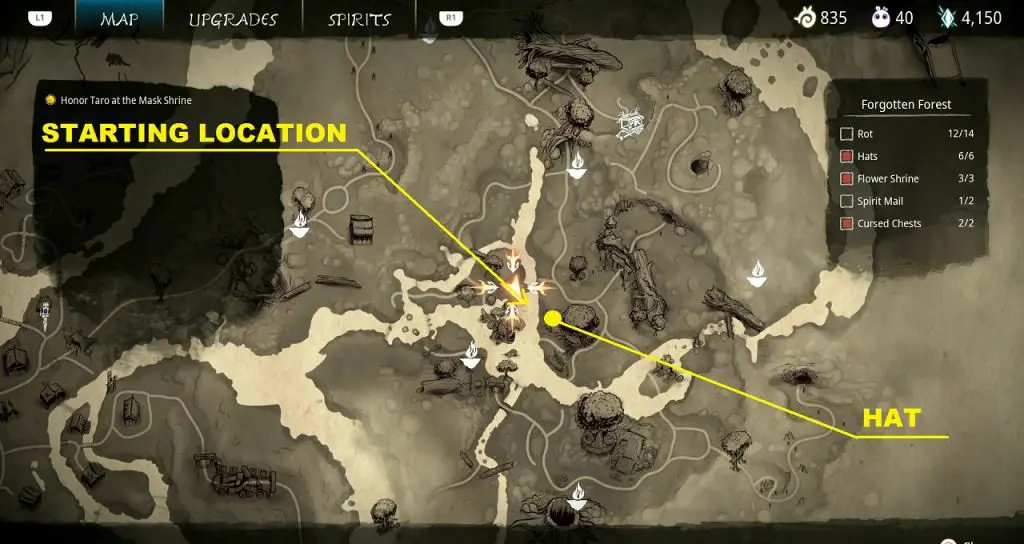
#24. Hat 3/6 (Sibling’s Mask)
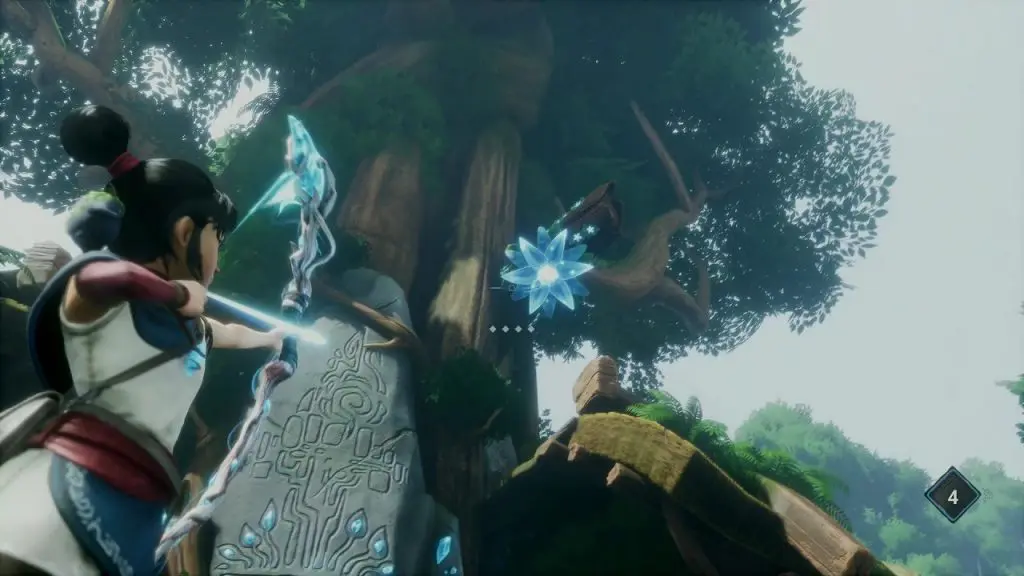
Go to the ‘Starting Location’ shown in the picture below. Stand on the wood log there and shoot the blue crystal flower on the other side of the river (See the second picture below), to grapple to the chest containing the hat.

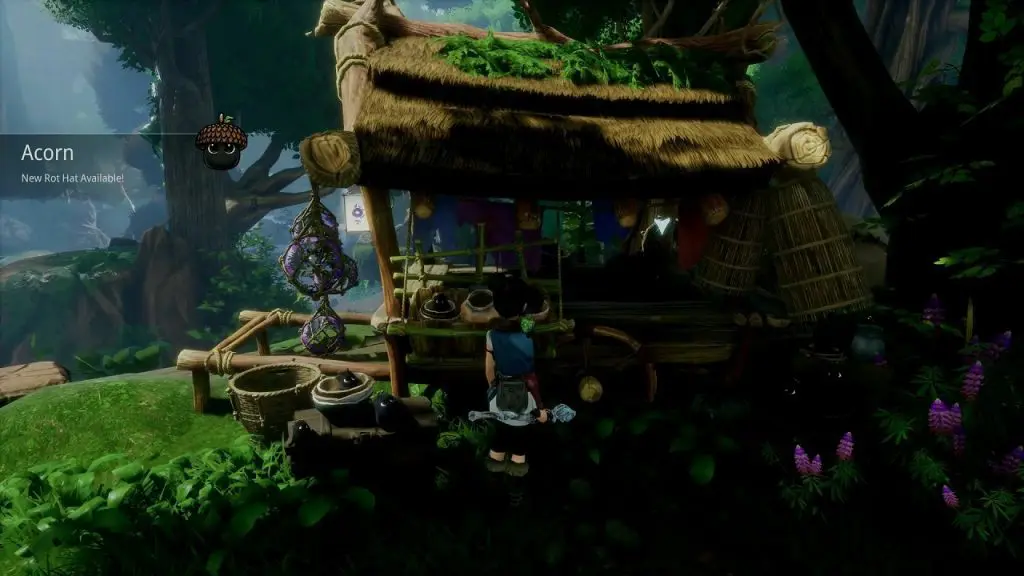
#25. Hat 4/6 (Acorn)
Approach the hat cart at the highlighted location to get the hat.
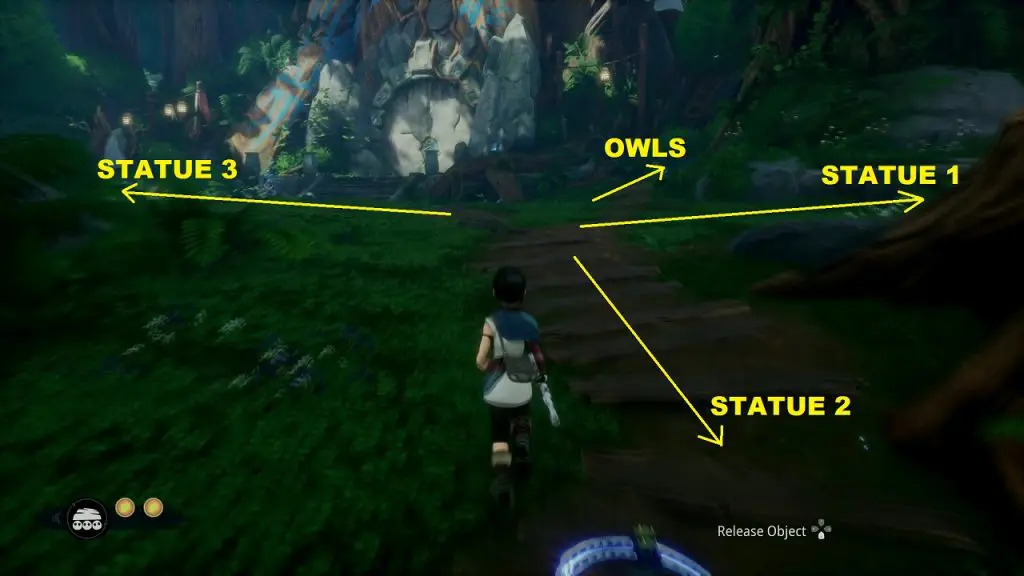
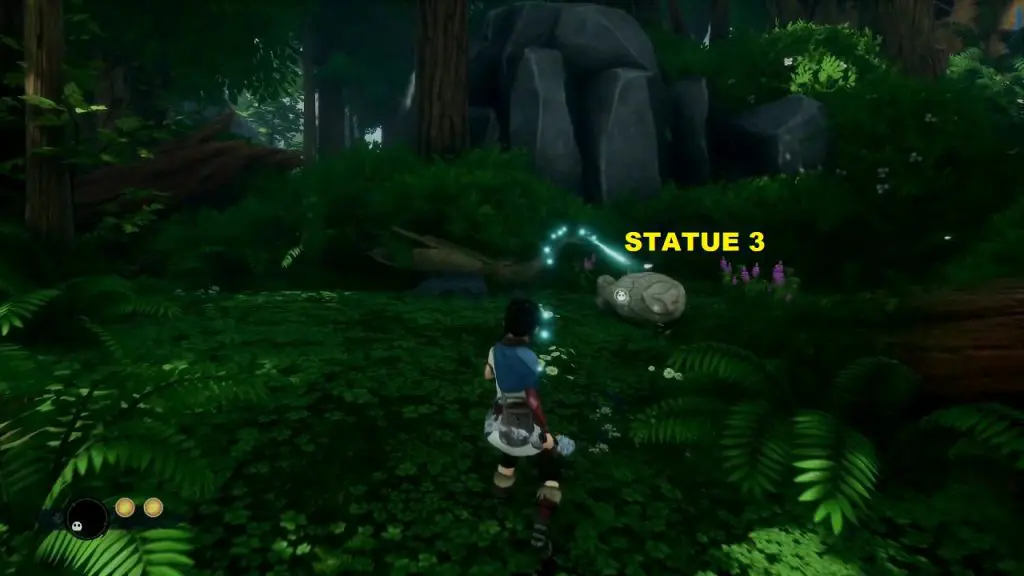
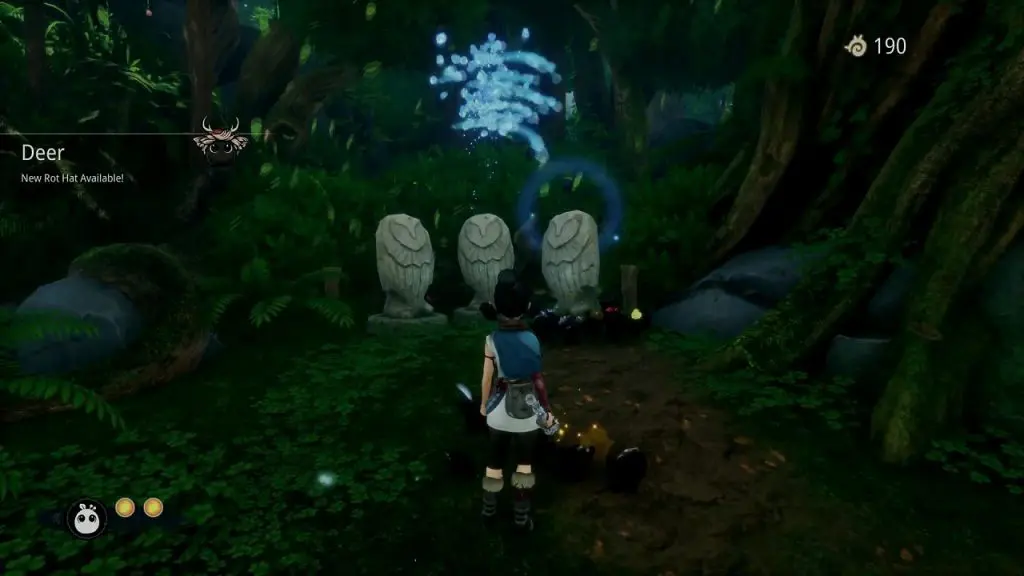
#26. Hat 5/6 (Deer)
At the right side of the sacred tree, you will find three circular stones with owls sitting on top of them. You will need to find three owl statues and guide them to the top of the stones to get the hat. The first statue is on the small path right of the door as shown below.

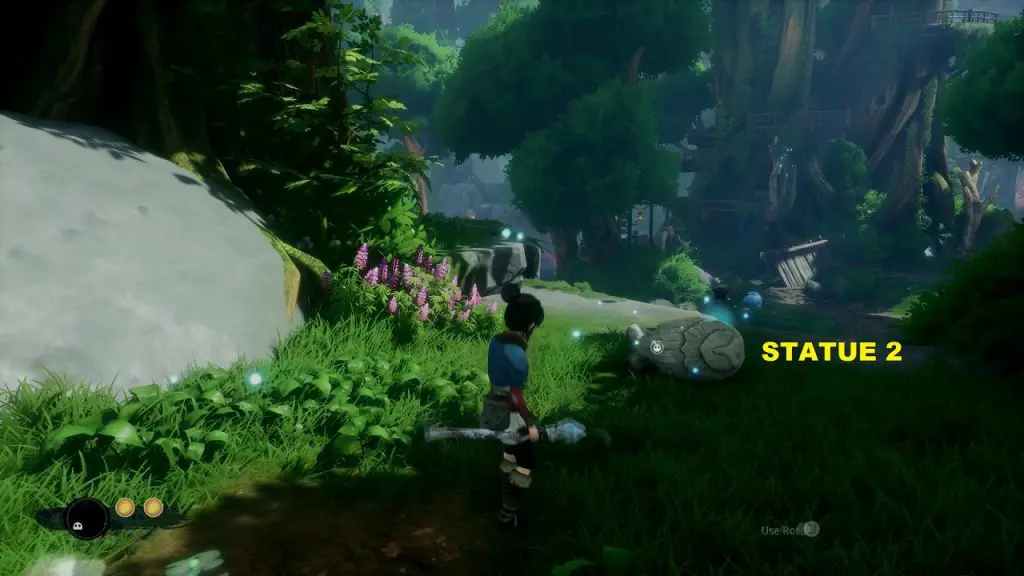
The second tree is at the end of the path in front of the door as shown below. Guide the statue to the stone.
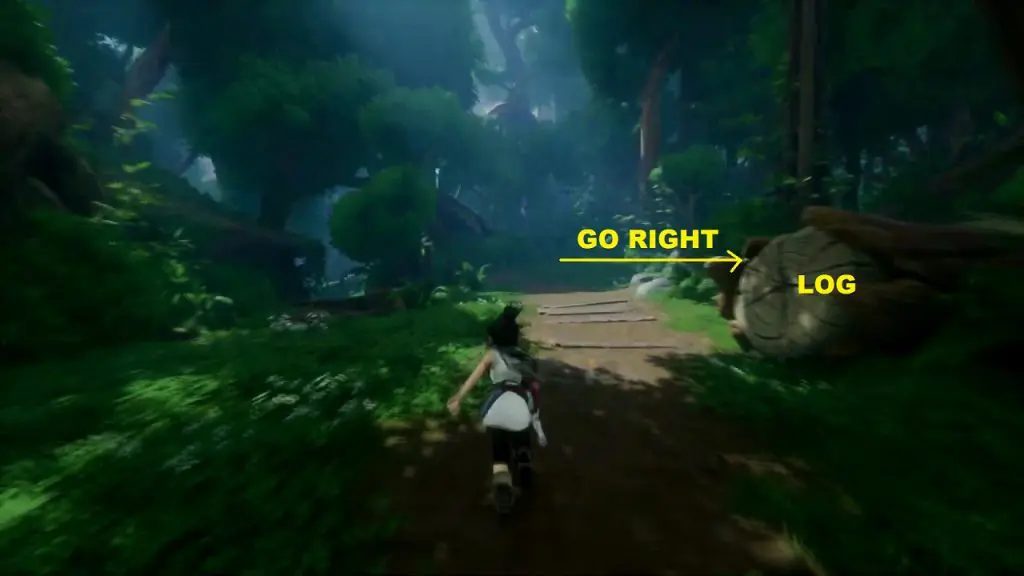
The third owl statue is on the path left of the door. You will find a big log on the path. Turn right behind the log to get the statue as shown below.
After you have guided all the three statues to the top of the three stones you will get the deer hat.
#27. Hat 6/6 (Pinecone)
The final hat is inside a chest in the lantern cave area as shown below. You will get this after you have cleared the final storm.