Great Sky Island Walkthrough
This guide shows the main story walkthrough for the Great Sky Island in the Legend of Zelda: Tears of the Kingdom, released on 12th May 2023. To complete the area, you will have to complete four Shrines and then open the Temple of Time Door.
The First Shrine (Ukouh Shrine Location & Solution)
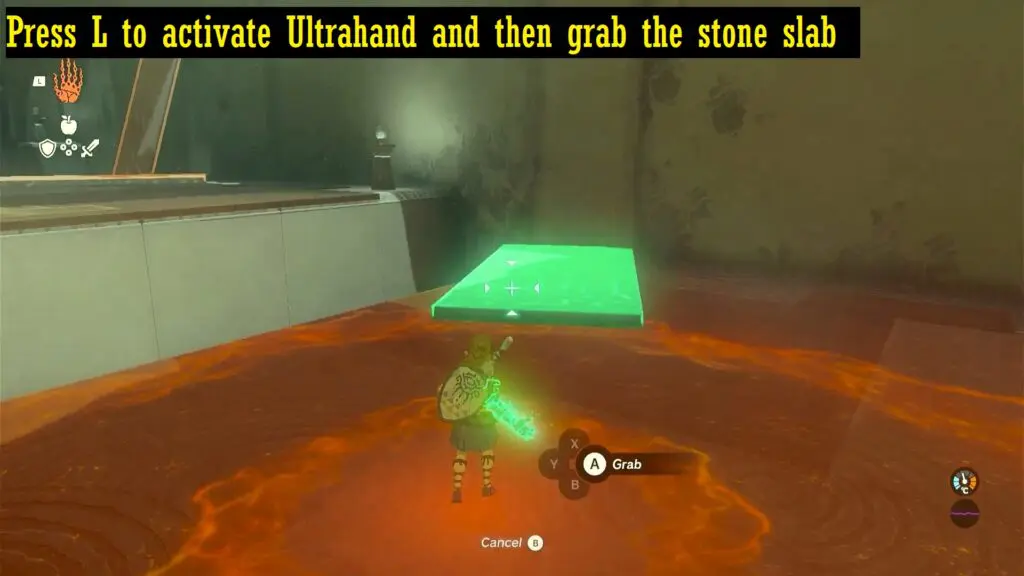
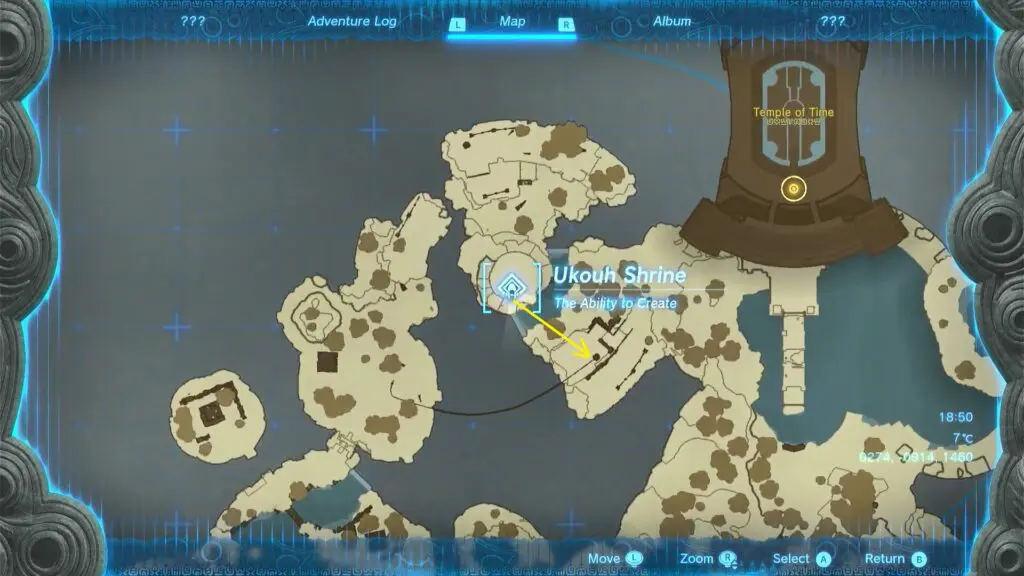
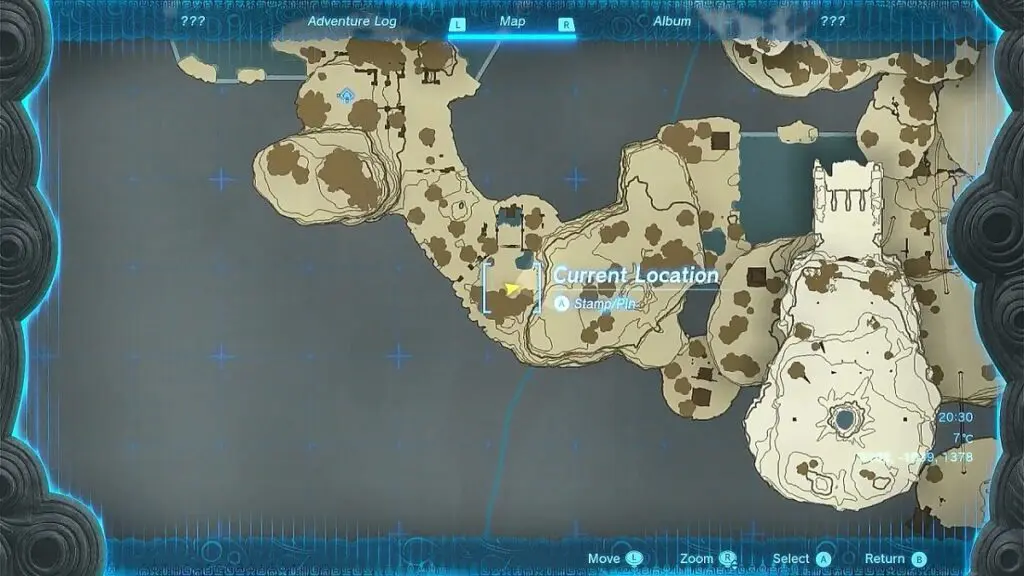
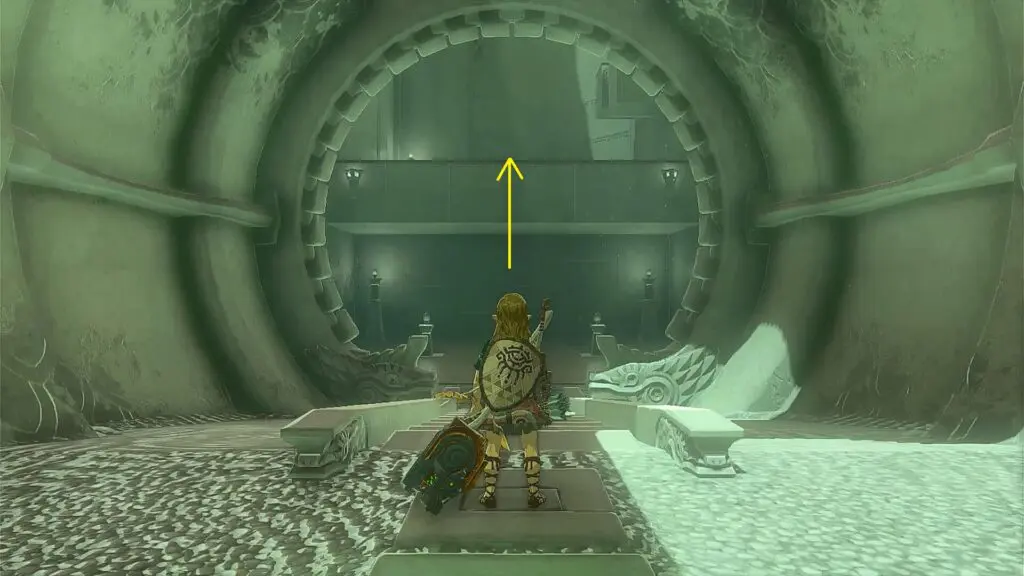
The quest starts when you are at the Temple of Time entrance. First, you have to make your way to the Ukouh Shrine, which is located near the Temple of Time as shown in the picture below. To reach there, players need to head southwest from the Temple of Time. Upon entering the shrine, players will gain access to the Ultrahand ability which enables grabbing, rotating, moving, and sticking them together.

Here is a guide on how to use the Ultrahand ability:
- Activate the Ultrahand ability by using the L button, and then drag the item to move it.
- Press the A button to attach one object to another.
- To rotate an object, use the R button, and then adjust its orientation by using the arrow keys.
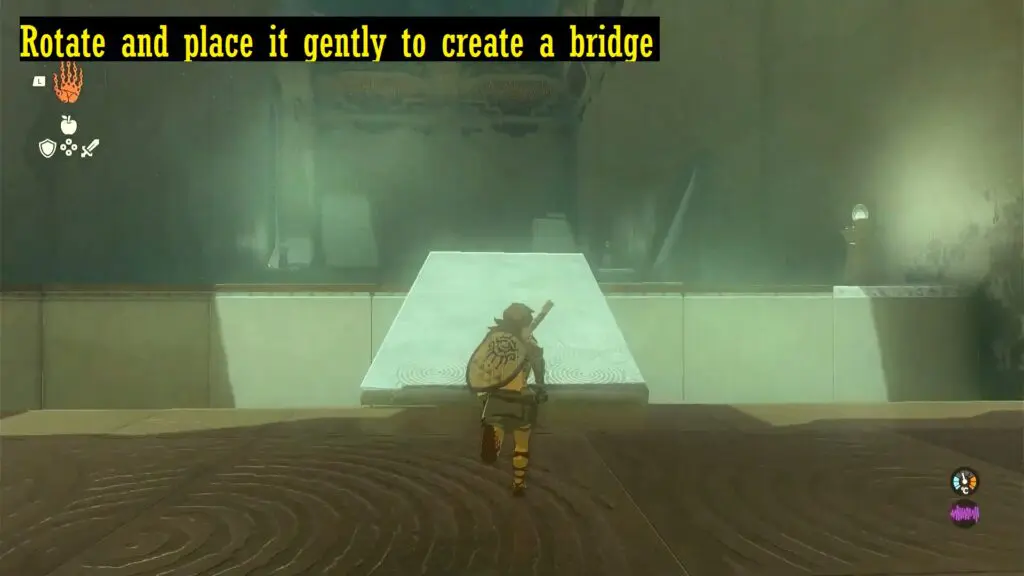
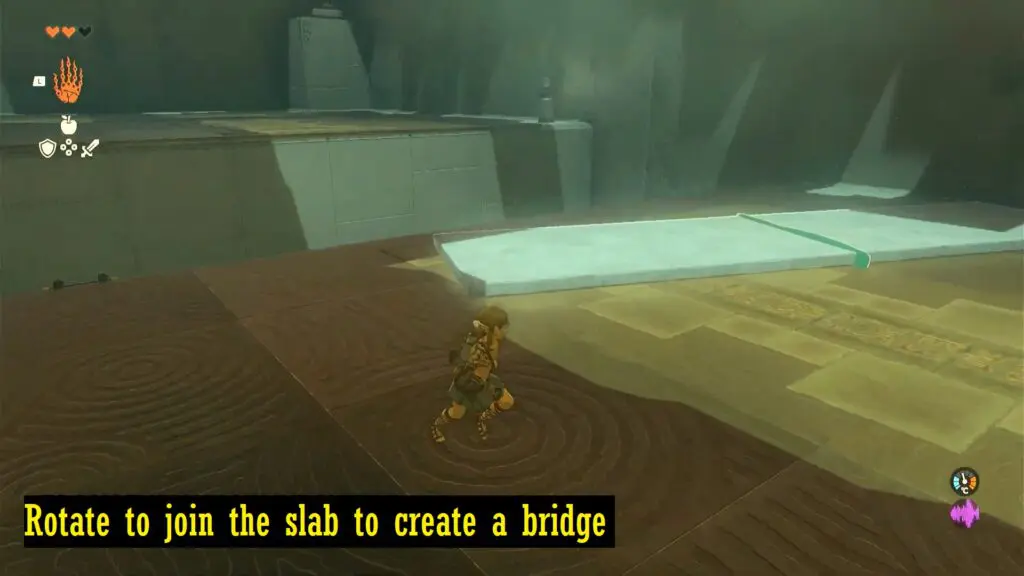
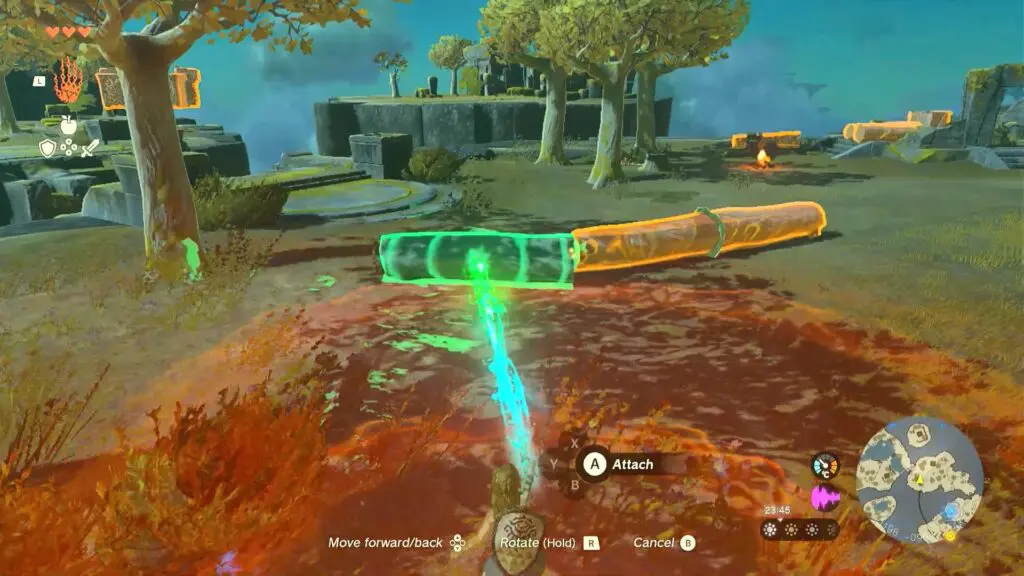
Head inside to find a stone slab lying on the ground. Here you need to create a bridge to go to the other side of the room. In order to build a bridge to the opposite side of the room, press L to activate Ultrahand and then grab the stone slab. Hold R to rotate the bridge, and then place it down.
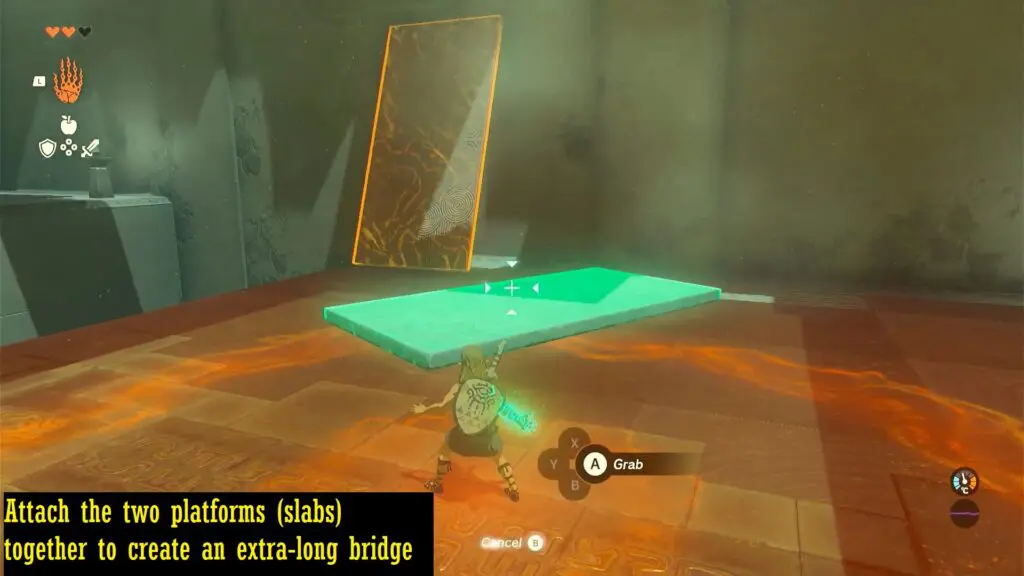
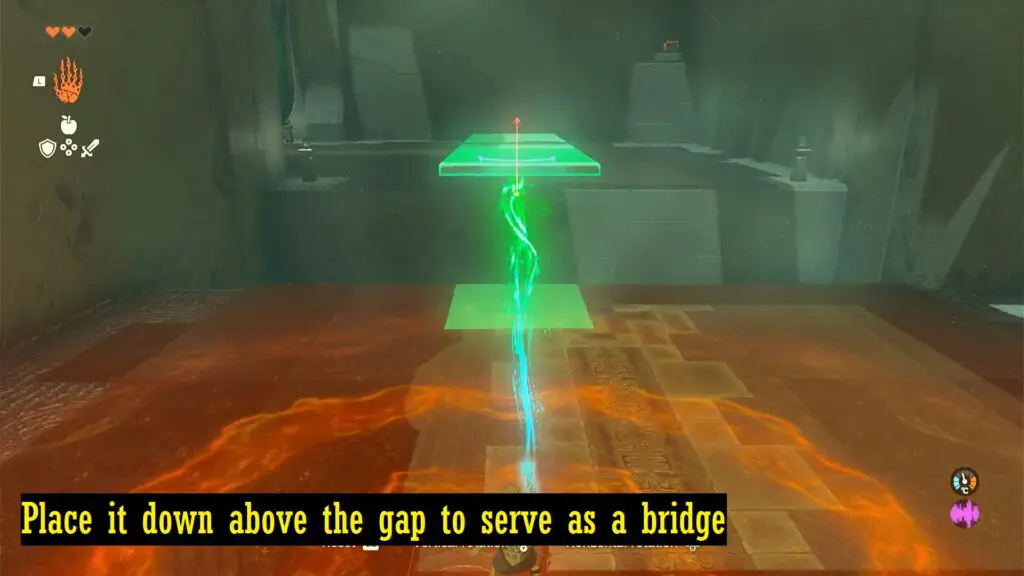
For the next section, you have to attach the two platforms (slabs) together using Ultrahand to create an extra-long bridge. Place it down above the gap to serve as a bridge.
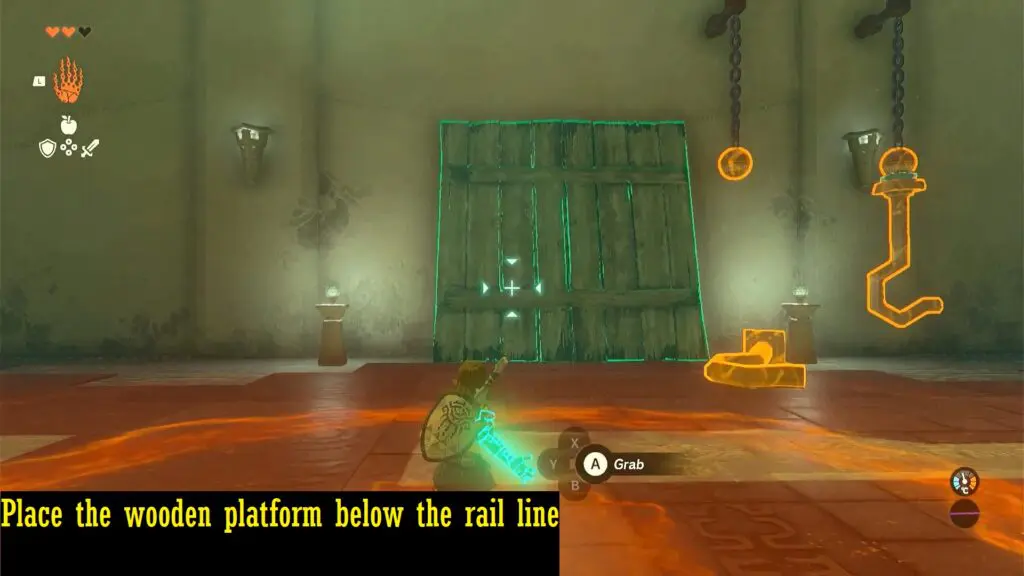
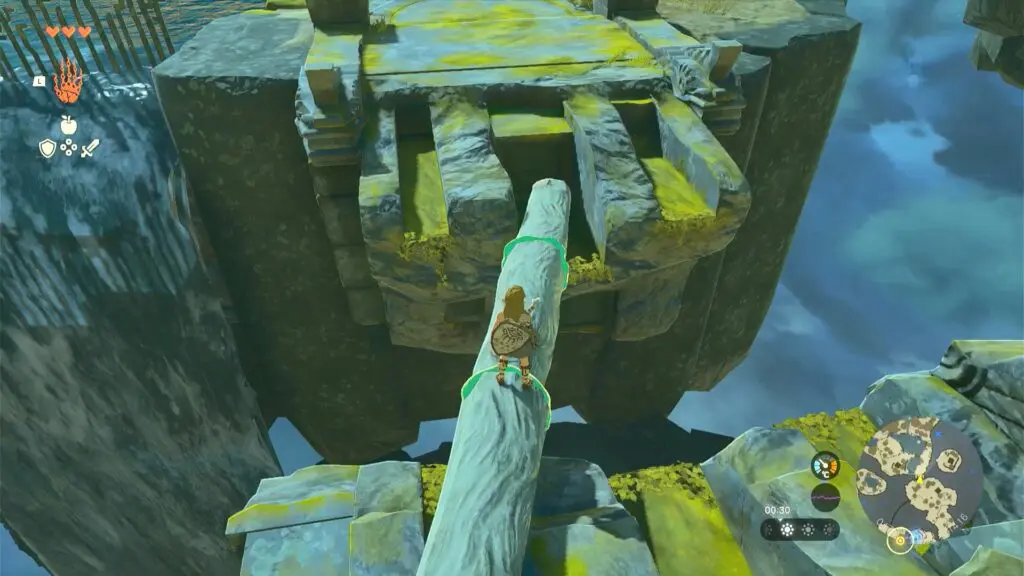
In the next area, players will come across a rail line that leads to the end of the shrine. Place the wooden platform below the rail line. Take one of the metal hooks, mount it on the rail and attach it to the wooden platform.
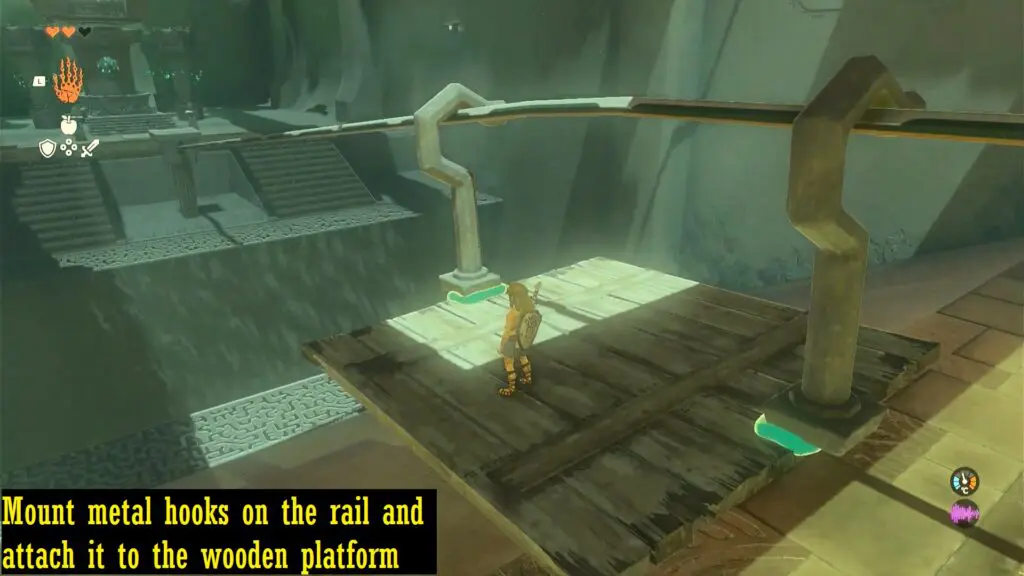
Similarly, attach a second metal hook also. Stand on the platform to reach the other side.
Reach the Second Shrine (In-Isa Shrine)
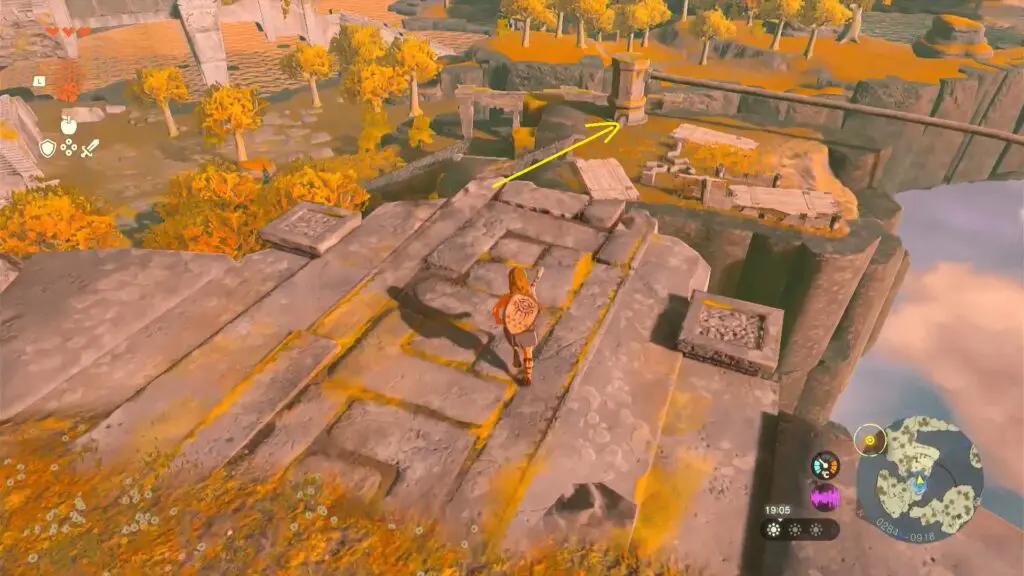
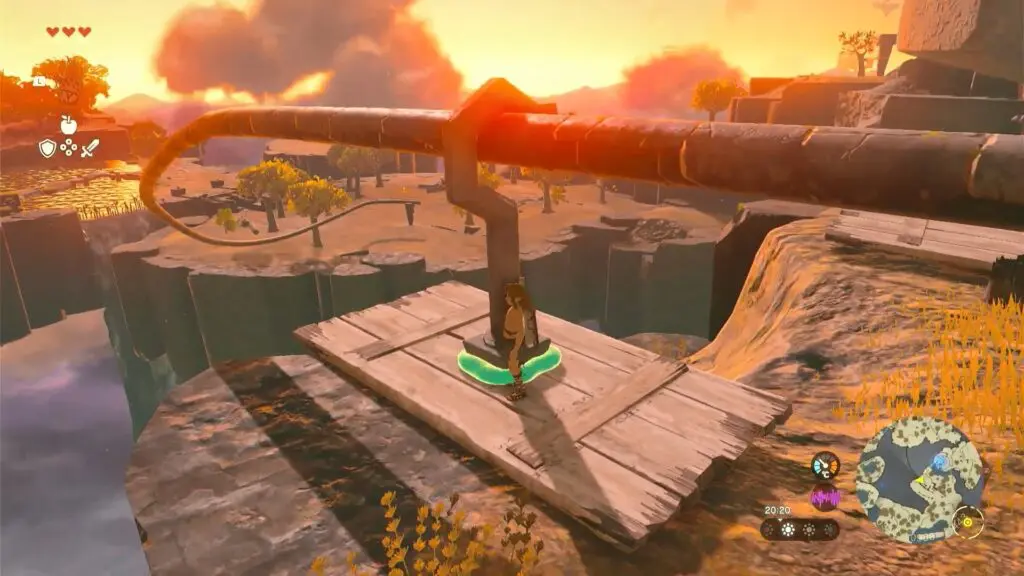
Go to the floating island located southeast of the first shrine having rail with platforms and hooks.
Use Ultrahand ability to combine these into a wooden board and hook to make a makeshift cable car. Place the makeshift cablecar on the rail, and climb on it to slide down to the other side.
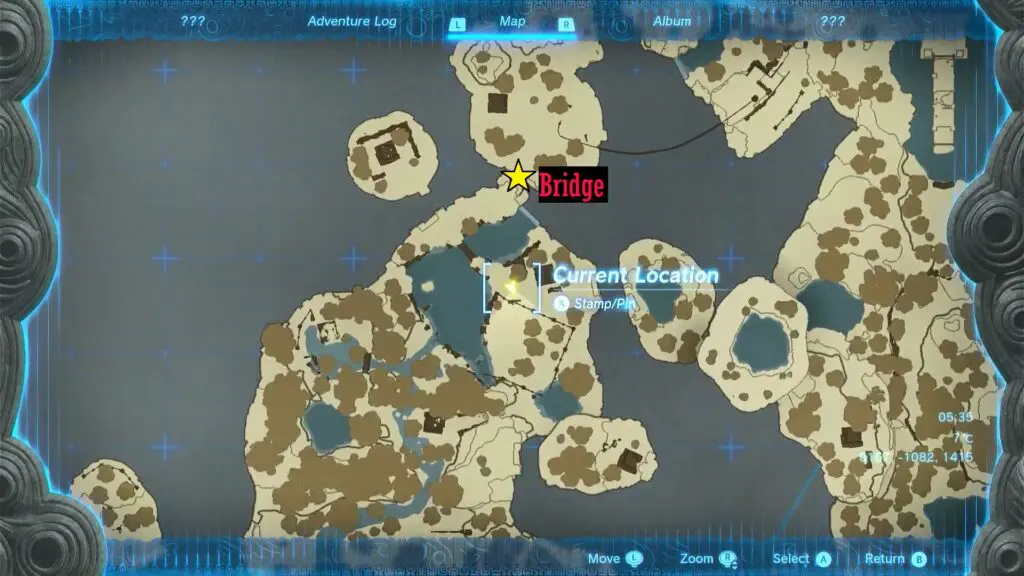
Head southwest to find a broken bridge. Here you must join 3 wooden logs into a long log. Then place the log over the broken bridge to cross it.
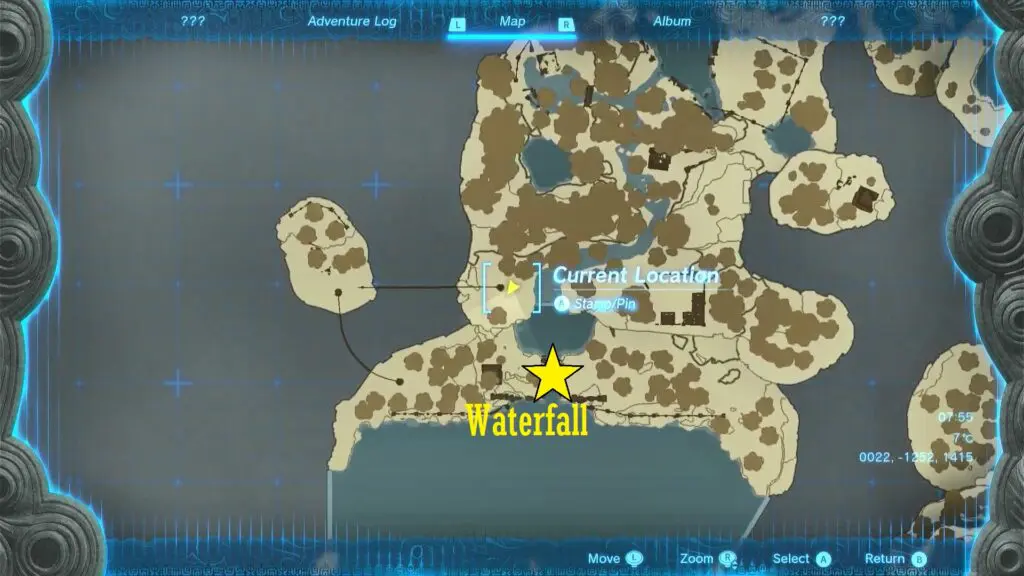
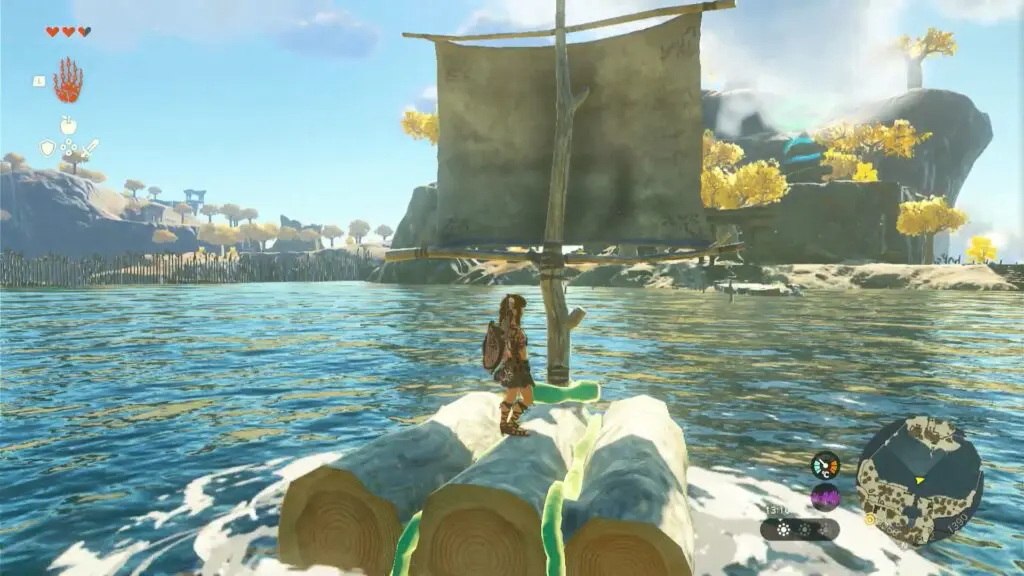
Continue traveling south after crossing the bridge until you get to a waterfall. Drop down near the waterfall. The next step is to construct a temporary boat by horizontally joining at least two trunks and placing a vertical sail in the center.
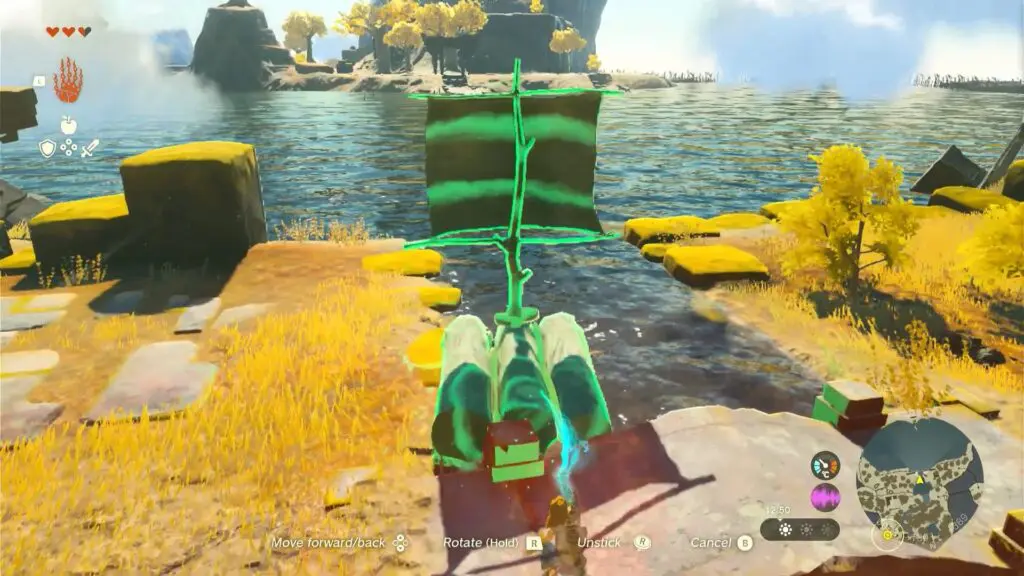
Carefully place the boat on the shore and jump onto the boat before the wind pushes it away. Just stand on the boat across the lake.
On the island go up the stairs to find the shrine.
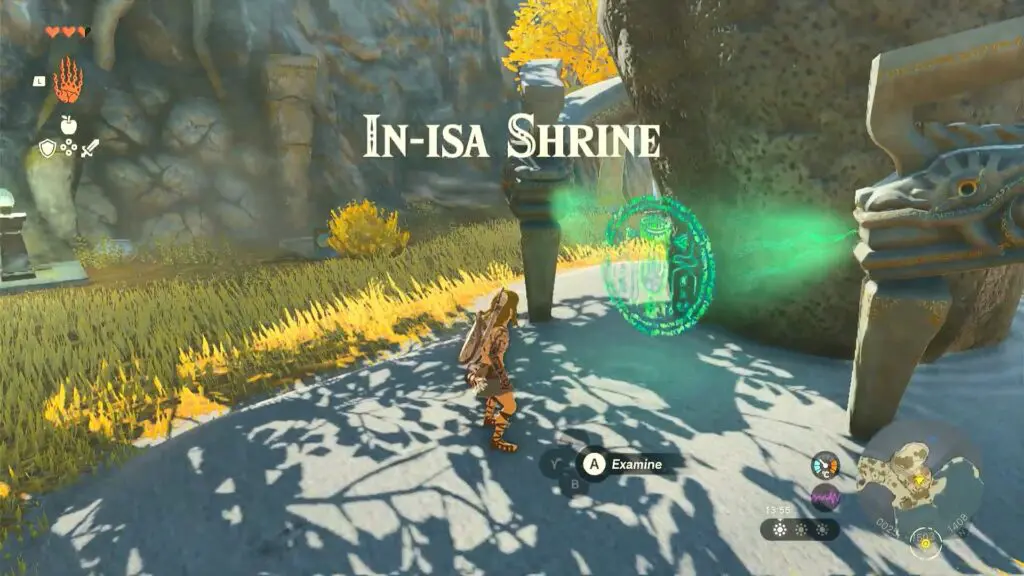
The Second Shrine (In-Isa Shrine Solution)
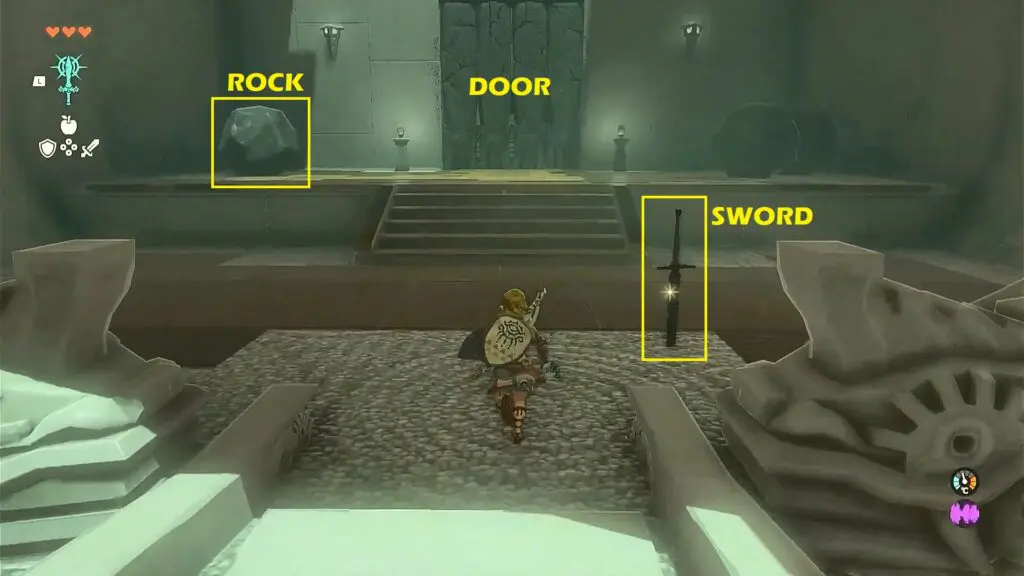
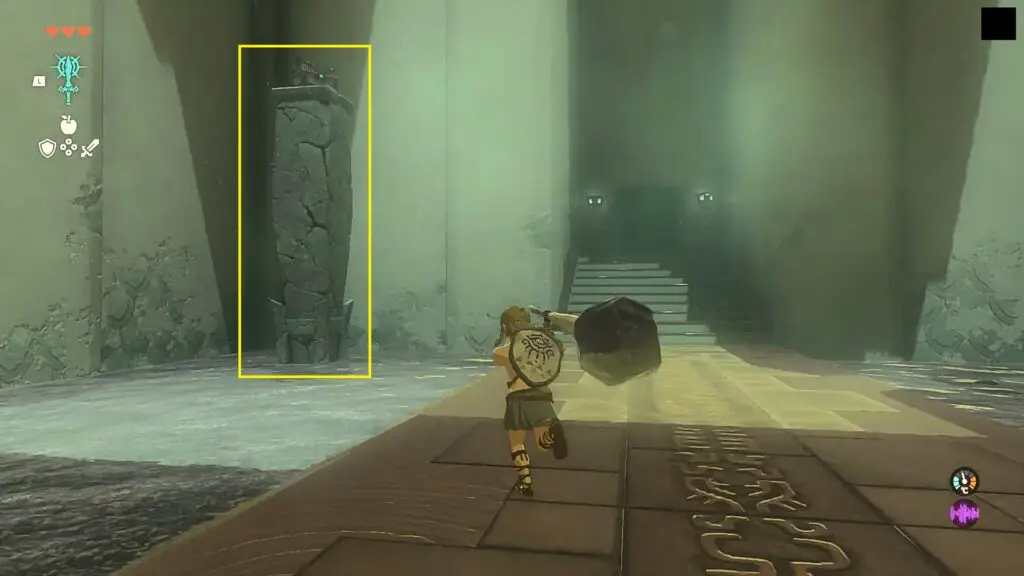
As you enter the shrine, you get the ability to combine (Fuse). Proceed ahead and pick up the sword in the next room as shown in the picture below. Fuse the sword with the rock in the room to make a hammer. Now use the hammer to break the stone door.
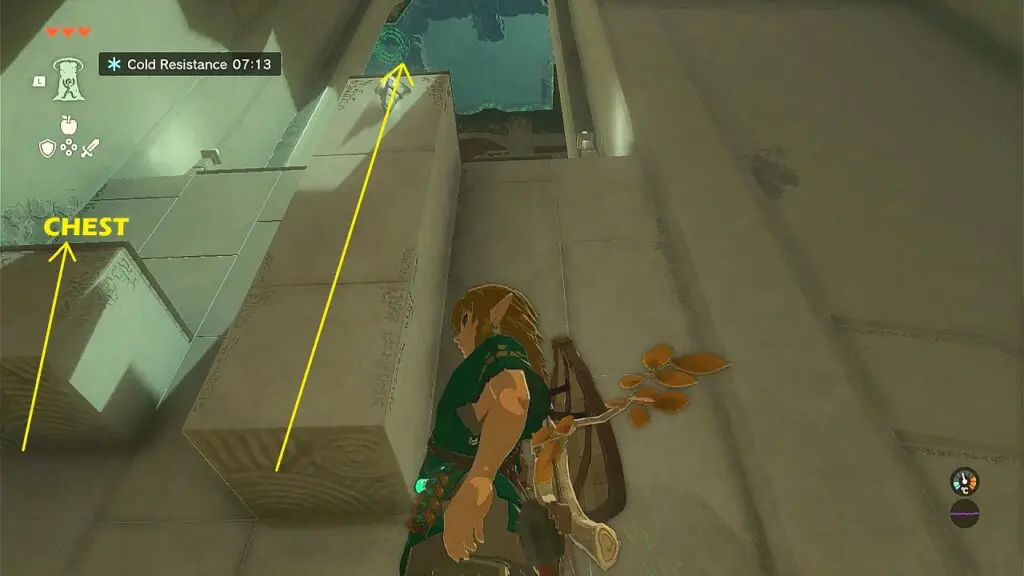
Proceed ahead into the next room and break the rock on the left side as shown in the picture below. Now open the chest to get Arrow x 5.
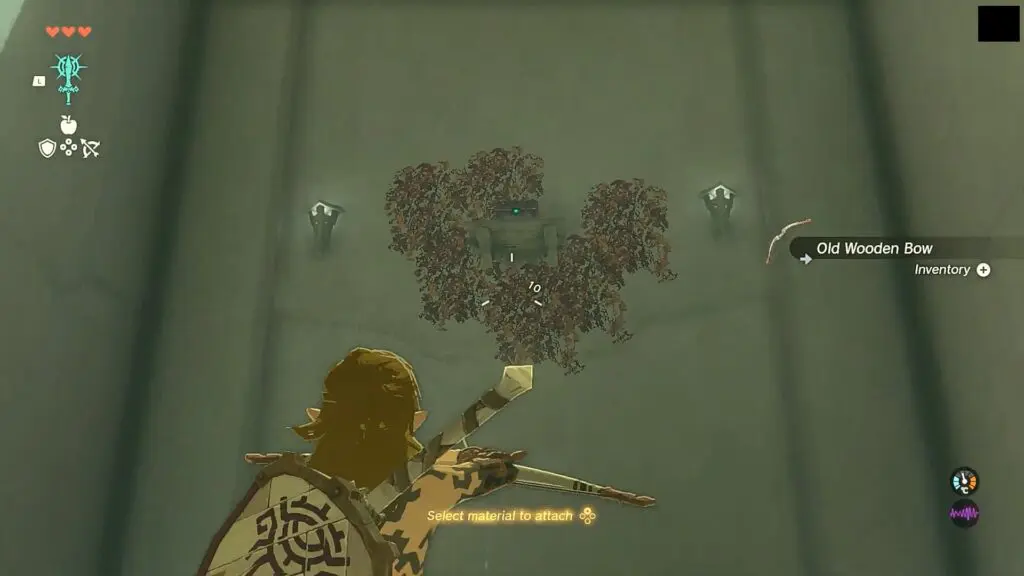
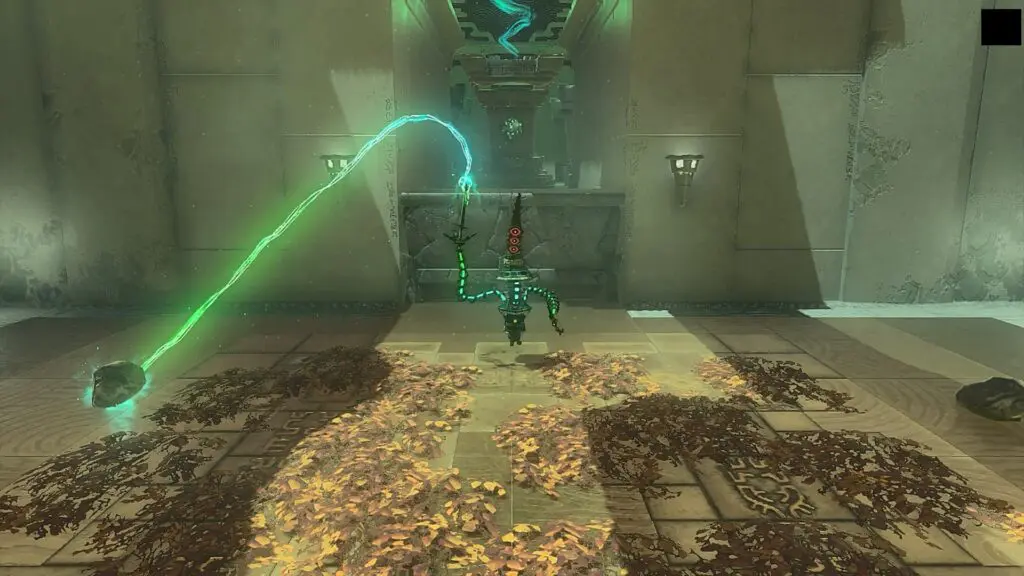
Now go right and collect Firefruit and Bow in the next room. Then keep the bow drawn and attach a Firefruit to the arrow. Use it to burn the vines on the wall on the other side of the room as shown in the pictures below. This will make the chest fall down. Open it to get the Small Key.
Go back to the previous room and climb up the stairs. Then use the key to open the green door there. Proceed ahead and defeat the enemy there as shown in the picture below. Use your rock hammer to break the rock wall ahead. Now proceed ahead to complete the shrine.
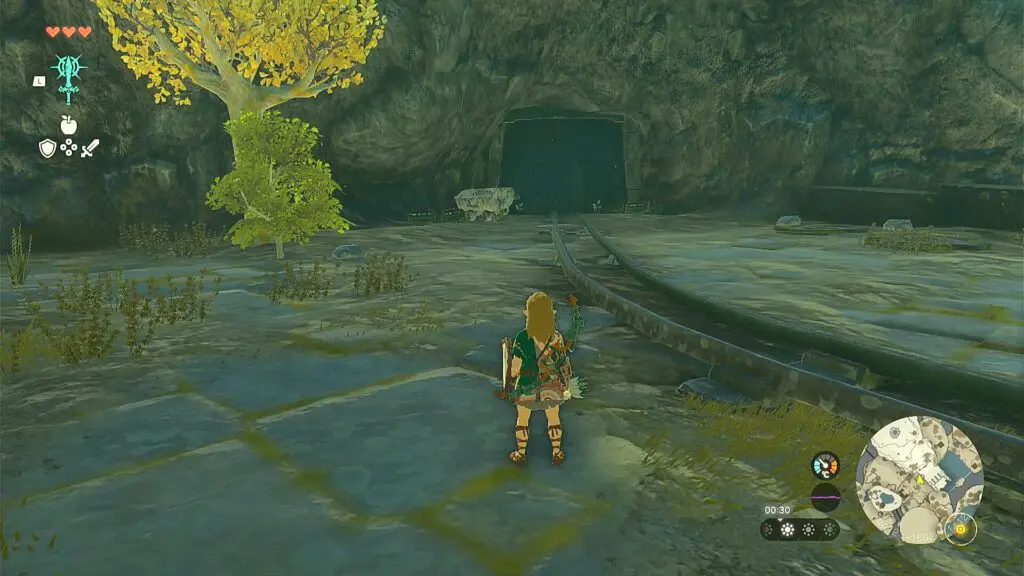
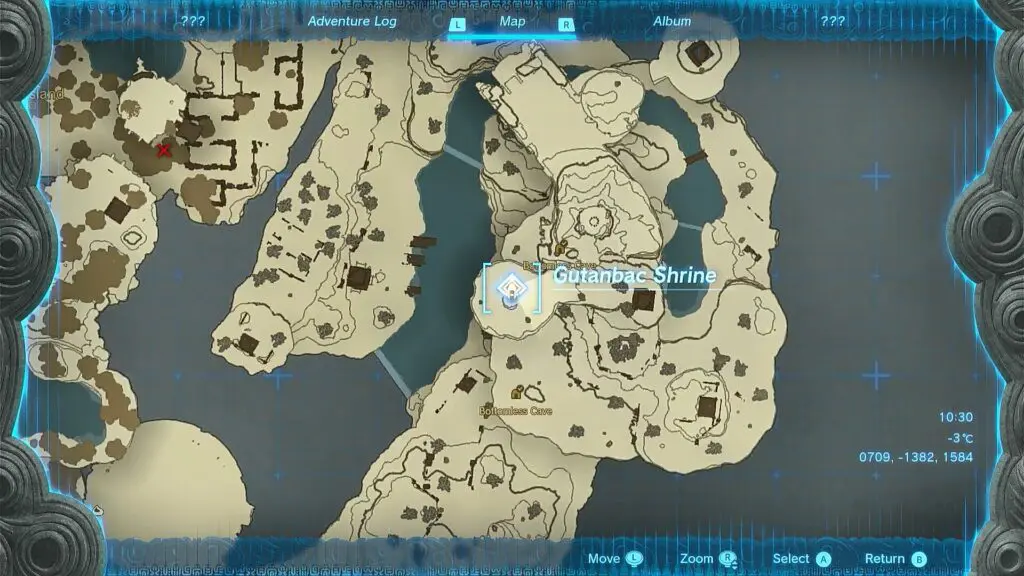
Reach the Third Shrine (Gutanbac Shrine)
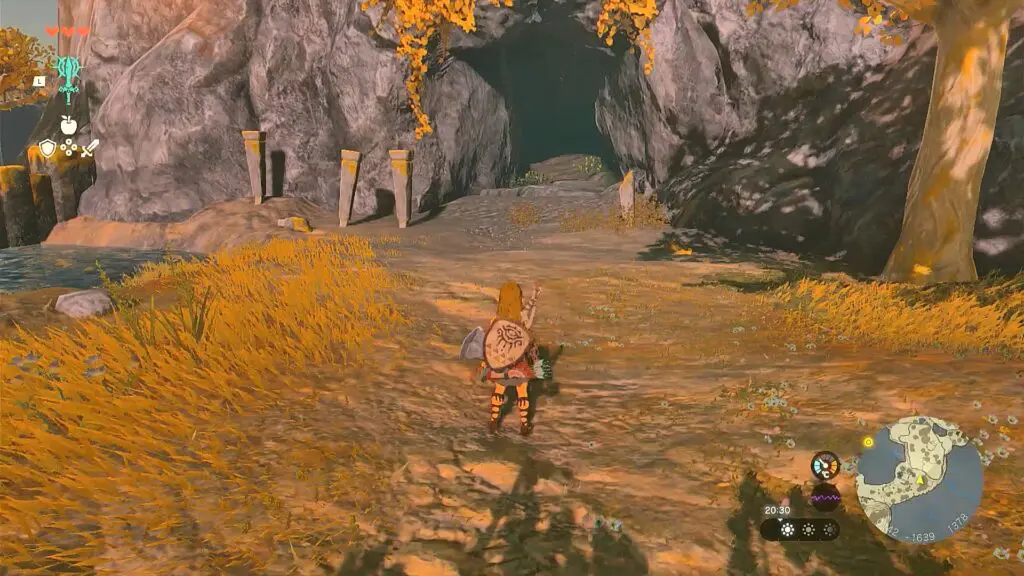
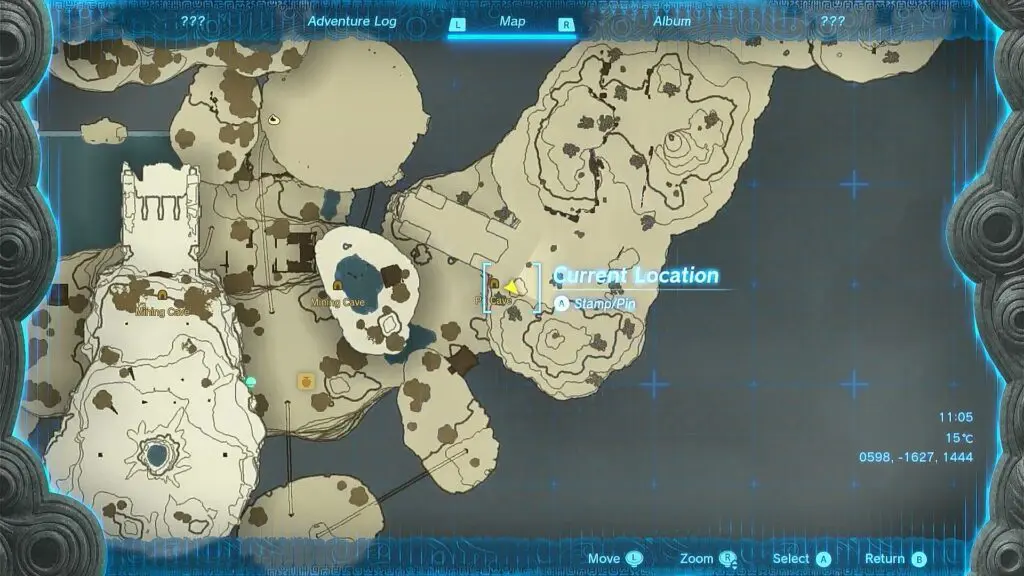
After completing the In-Isha shrine, go down the stairs in front of it. Then turn right and continue until you reach the Ponside Cave as shown in the pictures below.
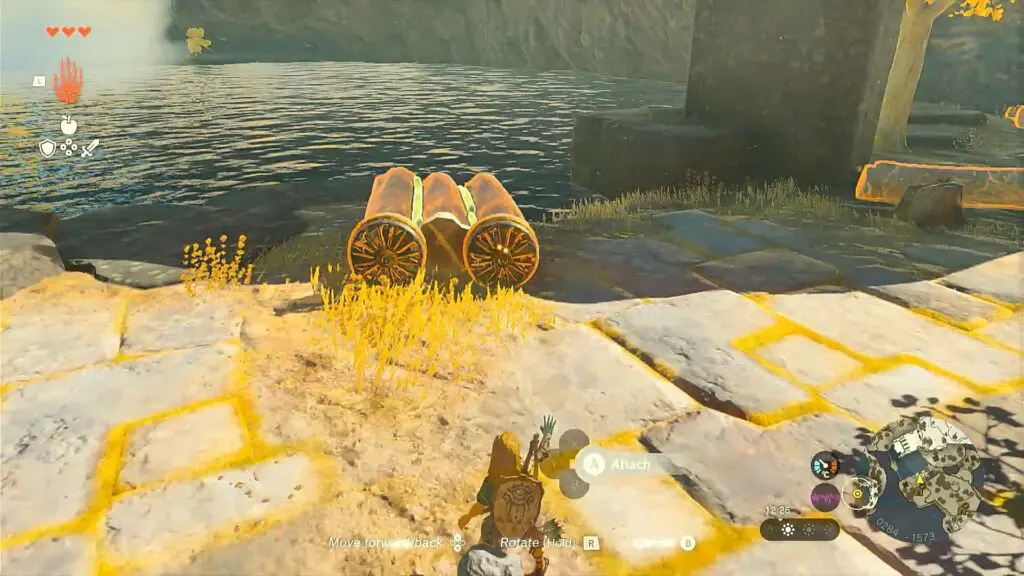
Enter the Ponside Cave and come out from the north side as shown in the pictures below. After coming out, use the Ultrahand ability to combine three logs and two fans to form a boat as shown in the second picture below. Place the boat into the water. Hop onto the boat. Then hit the fan with a sword. This will make the fan rotate and propel the boat forward, taking you to the other side.

Hop off the boat and climb up the stairs there to the top until you reach the Ponside Cave as shown in the pictures below.
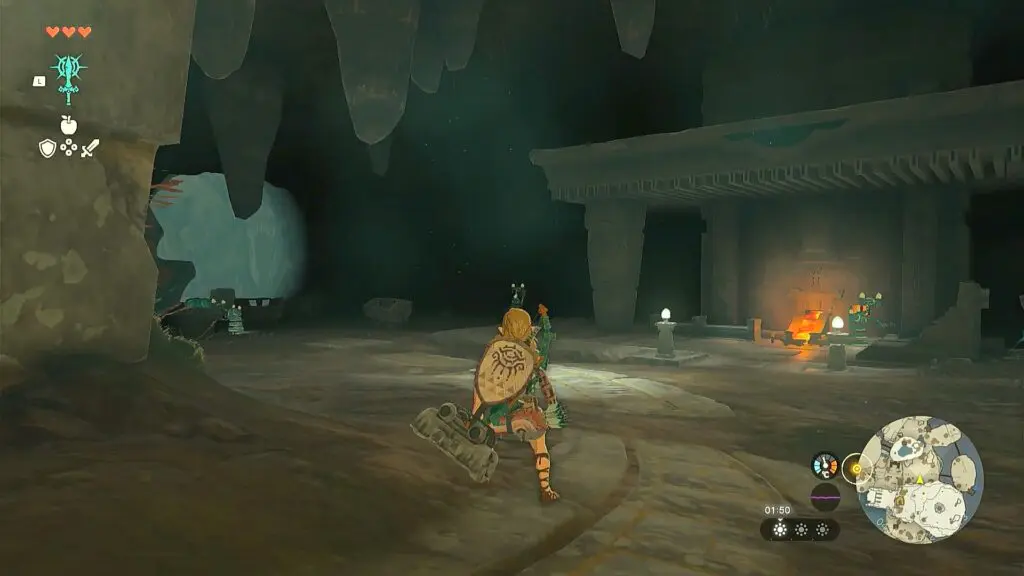
Proceed inside the cave. It will be completely dark inside the cave. Use Giant Brightbloom Seed to light up the cave. Keep going ahead until you reach the forge as shown in the picture below. You can use the forge to process Zonaite ore into Zonai Charges and Crystallized Charges.
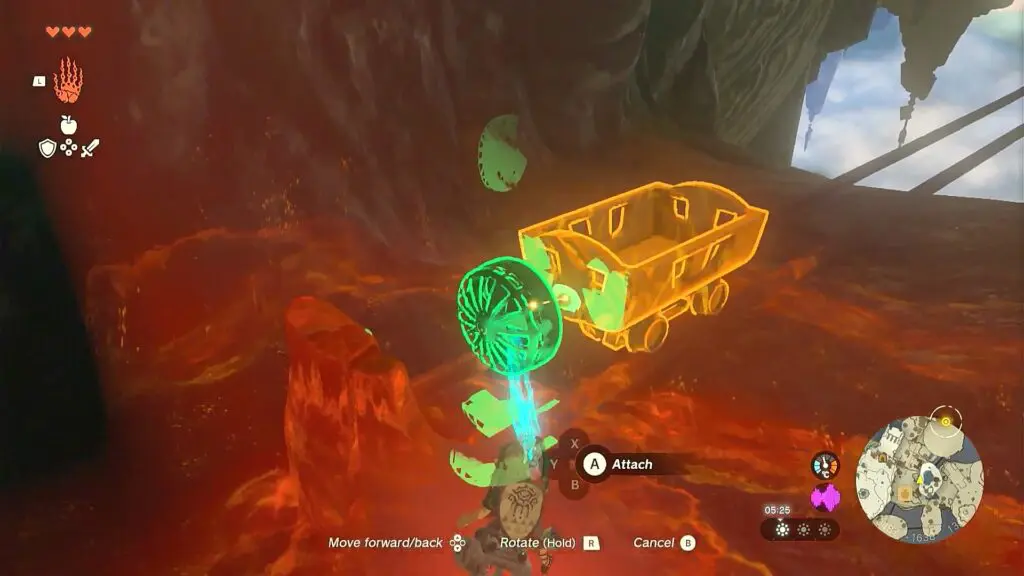
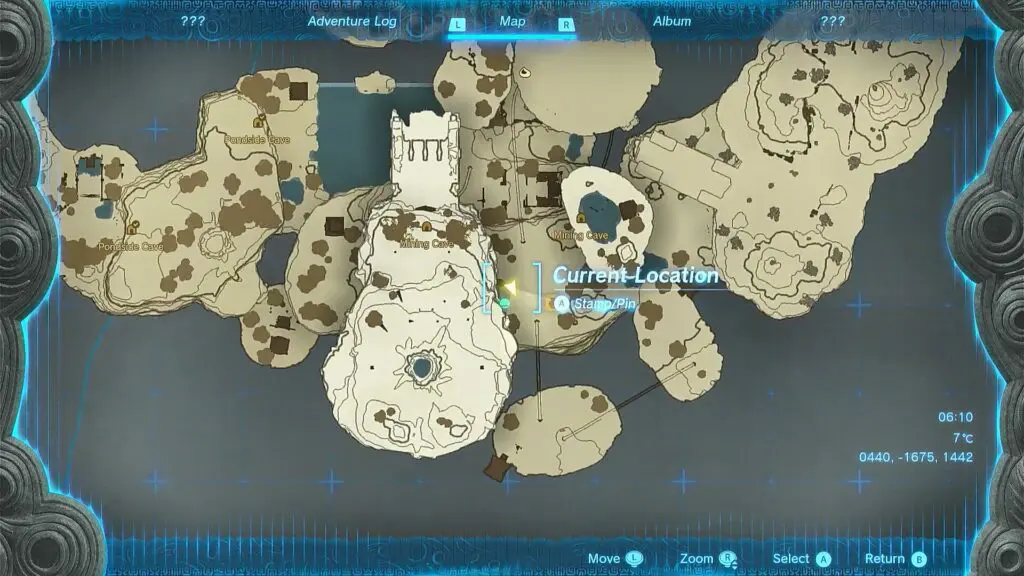
Now go to the opening near the forge. Talk to the Mining Construct there and he will give you three fans. Now use the Ultrahand ability to place a Mine Cart on the rails as shown in the picture below. Then attach a fan to the mine cart. Now climb up the Mine Cart and hit the fan with a sword. This will make the fan rotate, propelling the cart forward. The cart will take you to the top of the mountain at the location shown in the second picture below.
Hop off the cart. Proceed ahead and enter the Pit Cave as shown in the pictures below.

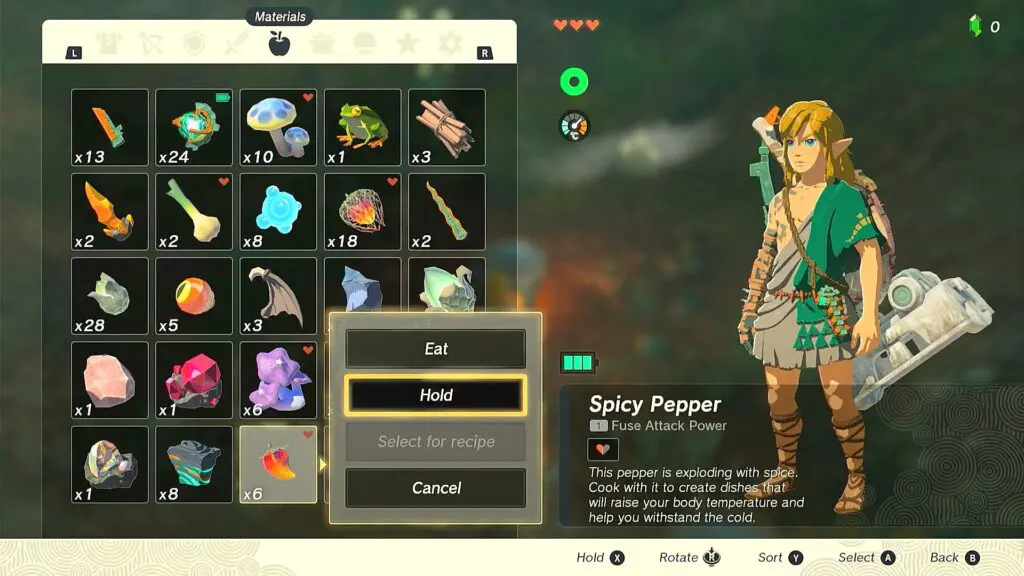
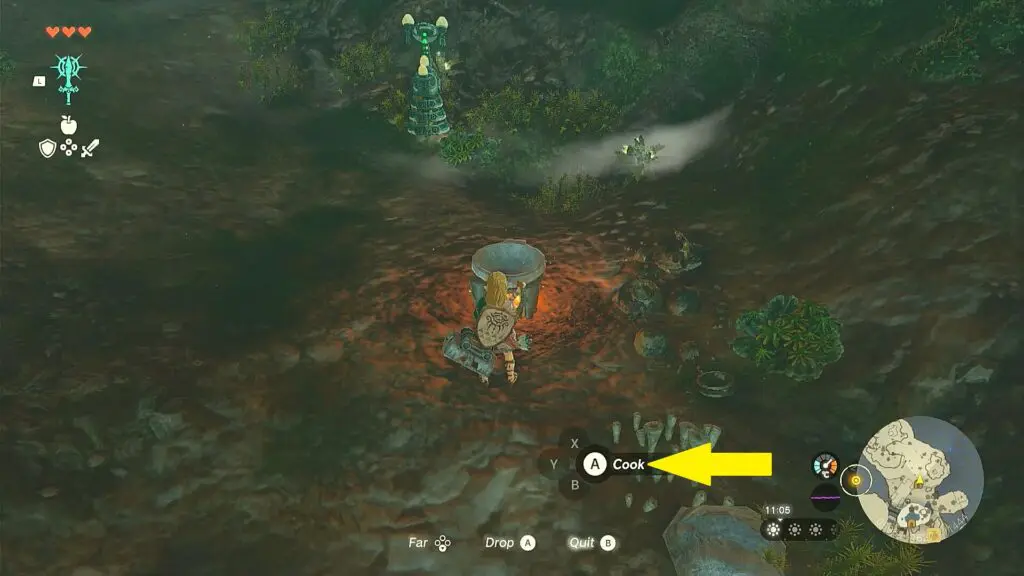
Before entering the cave, pick up Spicy Pepper at the entrance. Enter the cave and then hold the Spicy Pepper in your hand. Then go near the fire and cook Spicy Sauteed Peppers as shown in the pictures below.
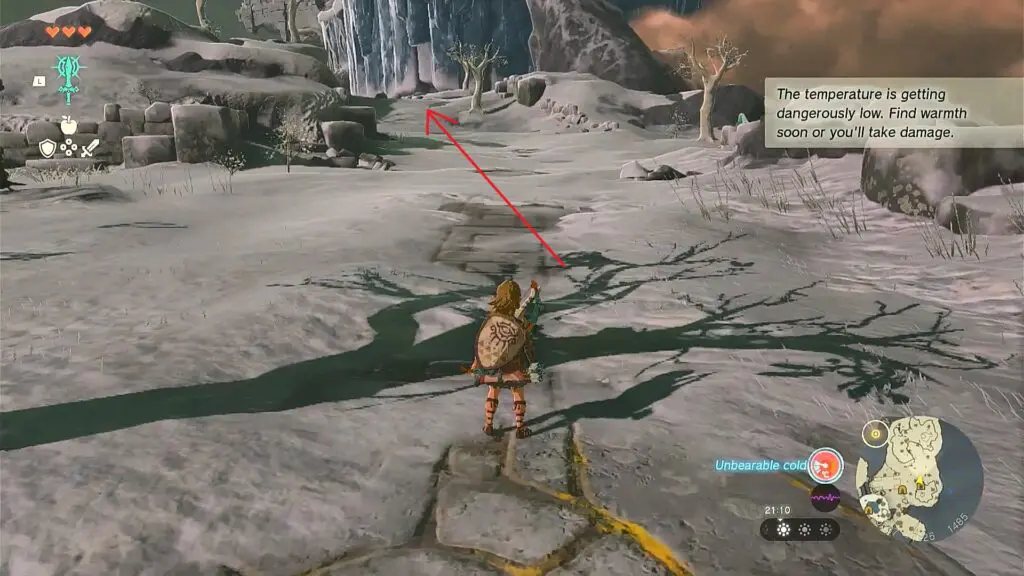
Proceed ahead into the cave and when you come out from the other side, you will find yourself in a freezing area as shown in the picture below. Eat Spicy Sauteed Pepper to get some cold resistance.
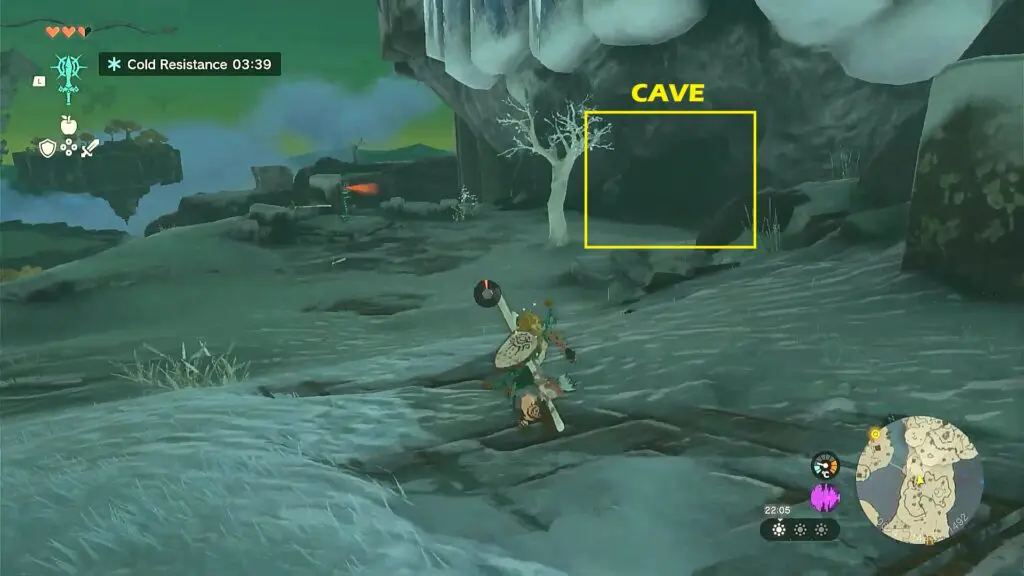
After coming out from the cave, turn right and continue straight until you reach the Bottomless Cave as shown in the pictures below.

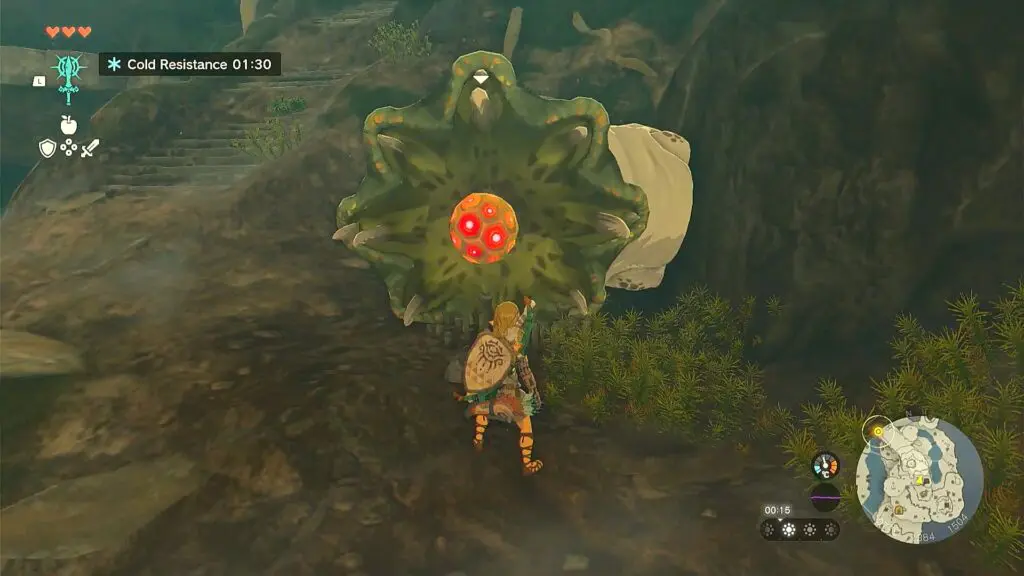
Proceed ahead in the cave. As you are going up the stairs, you will come across a plant as shown in the picture below. Defeat it and then open the chest behind it to get an Opal. Climb further up and you will come across another plant. Defeat it and open the chest there to get a Flame Emitter.
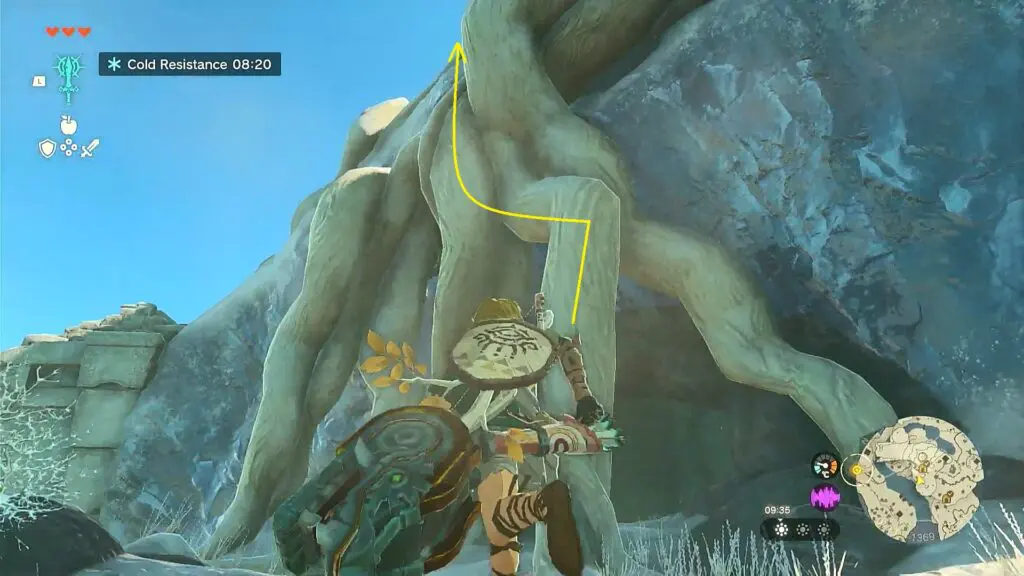
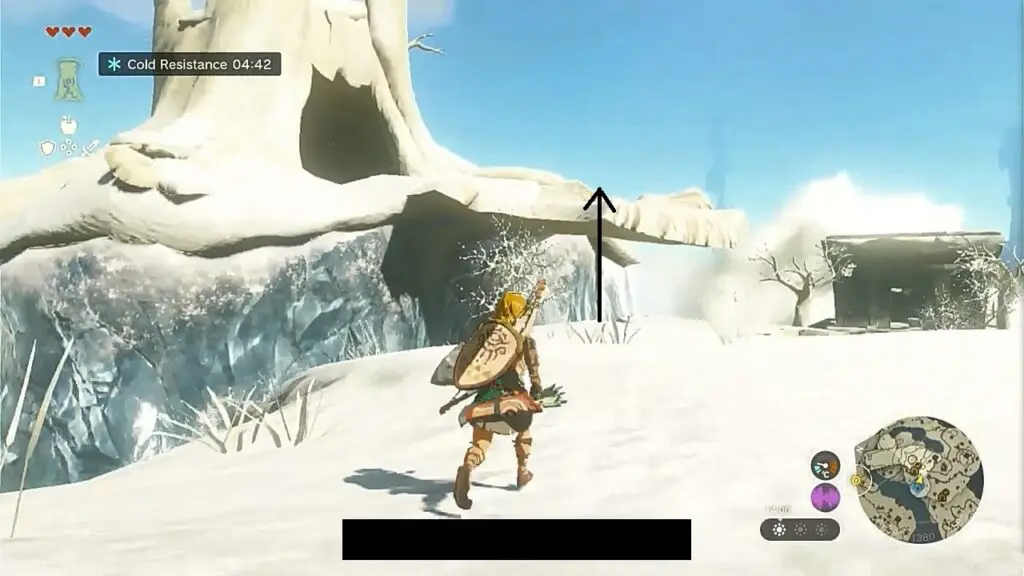
Exit the cave and climb up the roots as shown in the picture below to reach the top of the mountain.
Proceed ahead and you will find the Gutanbac Shrine on the right side as shown in the pictures below. Interact with the giant stone at the marked location to enter the shrine.

The Third Shrine (Gutanbac Shrine Solution)
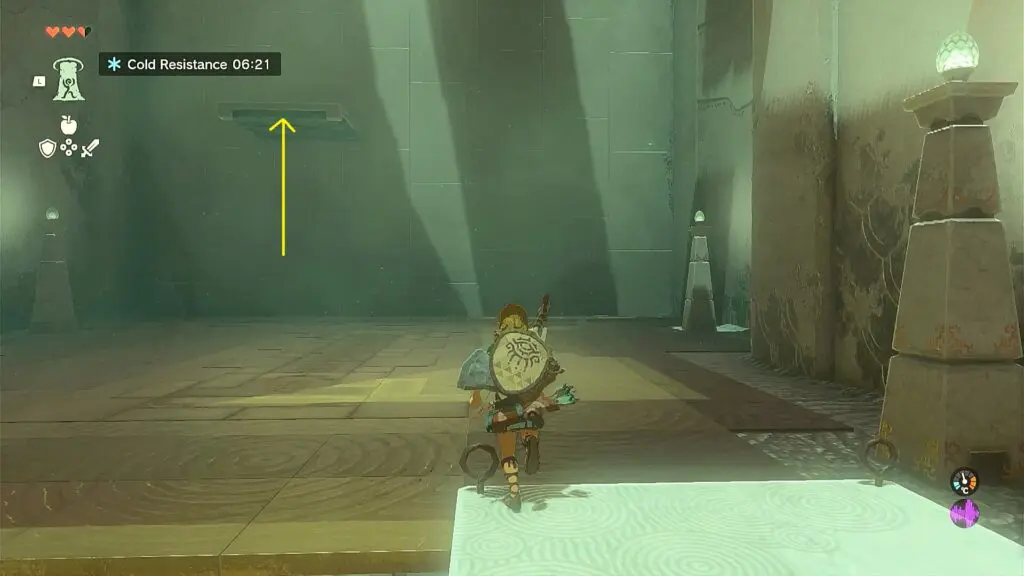
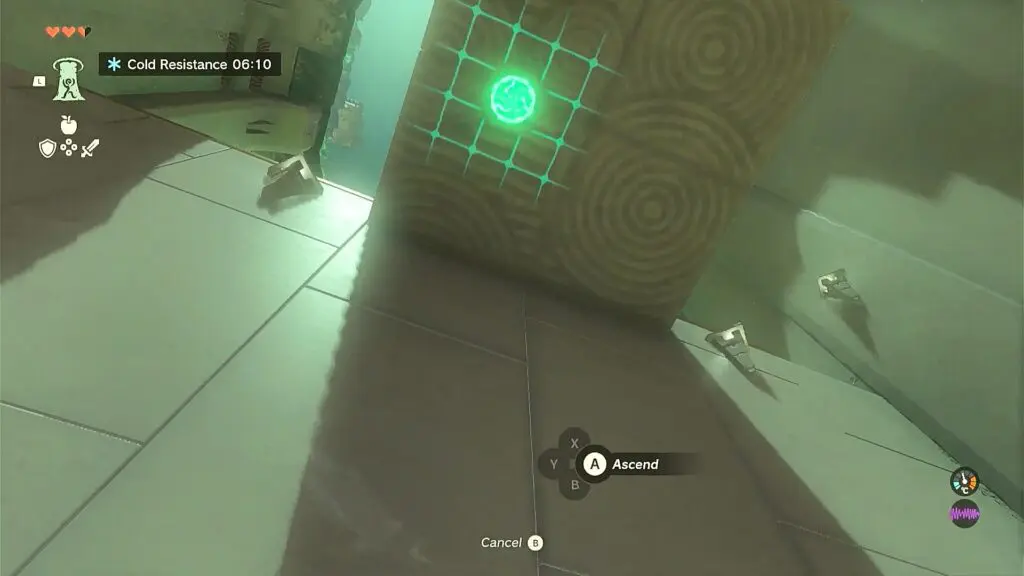
As you enter the shrine, you will get the Ascend ability. Go straight ahead and Ascend through the platform as shown in the picture below.
As you reach up, you will see two pillars through which you can ascend as shown in the picture below. Ascend through the thin pillar to reach a chest. Open it to get a Stone Axe. Then jump down and ascend through the thick pillar to reach up.
Defeat the enemy there. Then break the wooden blockage on the right side wall as shown in the picture below. Now ascend up to reach a chest. Open it to get a Bow.

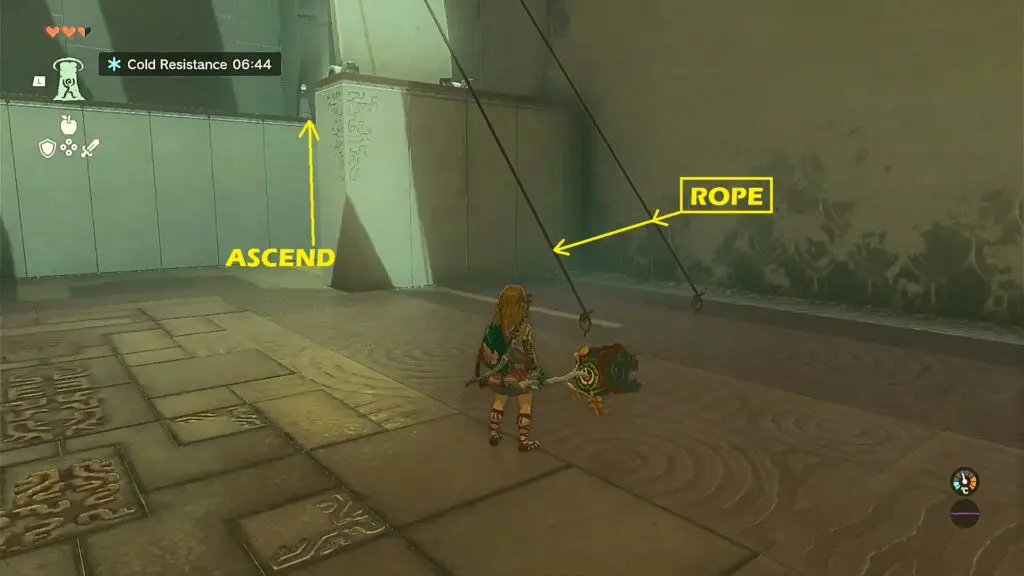
Jump down and cut the two ropes holding up a platform as shown in the picture below. This will make the platform fall down. Now ascend up through the platform.
There you will see a moving platform as shown in the picture below. Ascend through the platform. When the moving platform moves under the platform above as shown in the second picture below ascend through it to complete the shrine.
Reach the Fourth Shrine (Nachoyah Shrine)
After completing the third shrine, ascend through the root as shown in the picture below. Then enter the tree trunk and open the chest there to get the Cold Resistance Gear and wear it.
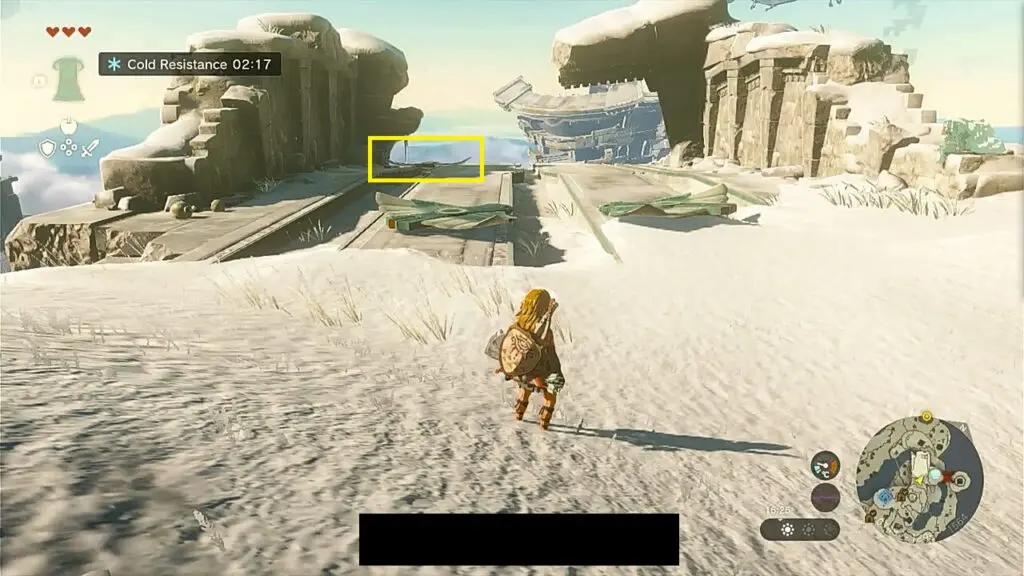
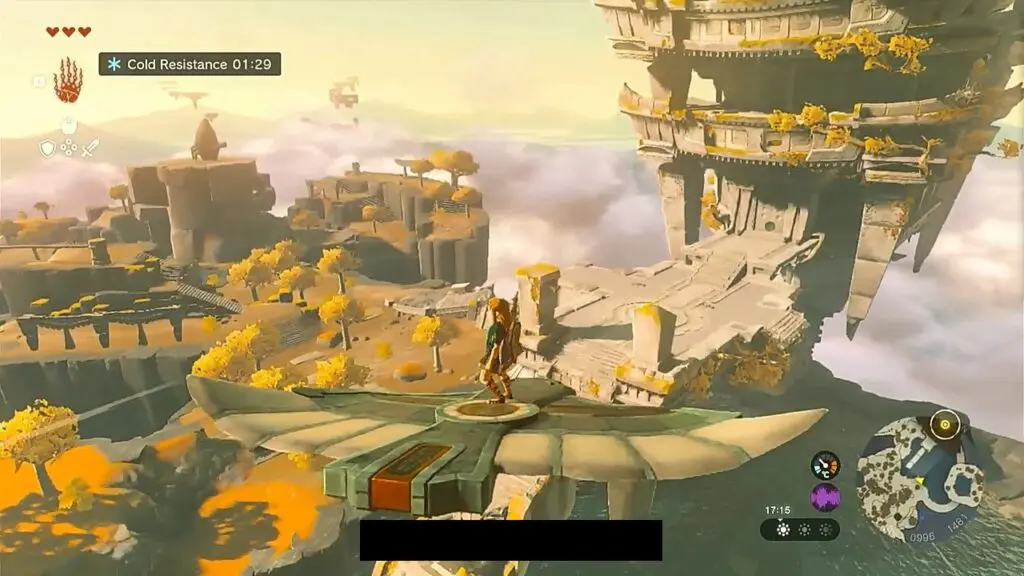
Go out from the other side of the tree trunk to reach the Wing Device as shown in the pictures below. Climb to its top and ride it to the Temple of Time as shown in the third picture below. Hop off the wing device and examine the door to open it.
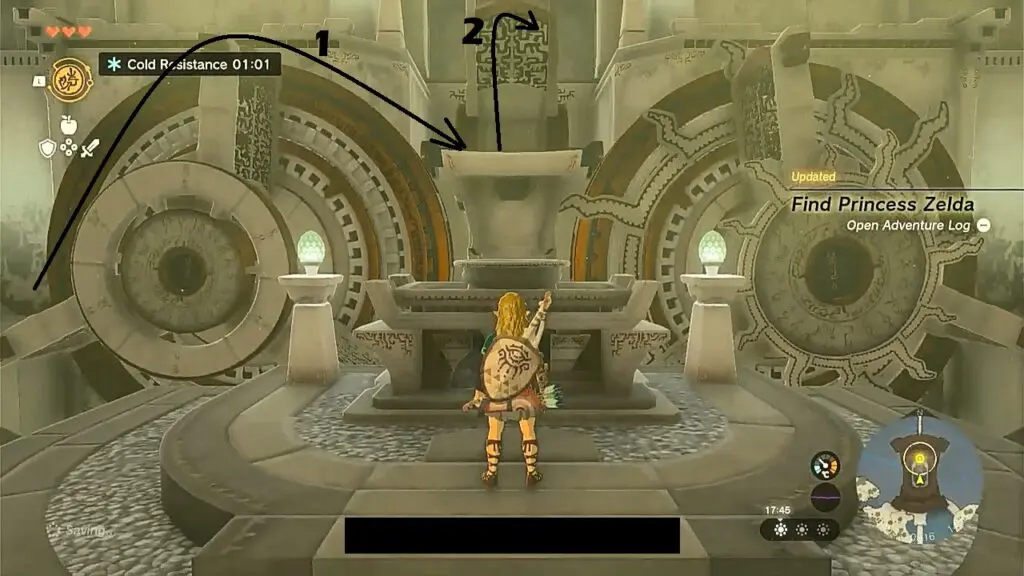
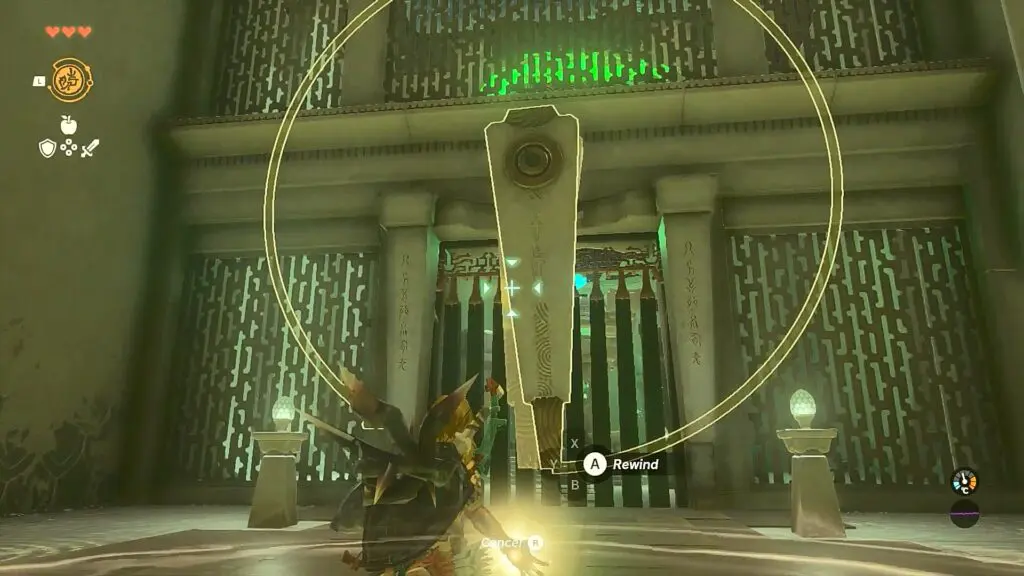
Enter the Temple of Time and interact with the altar in the front to get the Rewind ability. Once you have the Rewind ability, use it on the wheel as shown in the picture below. Then quickly jump on the wheel to reach the pedestal at the center. Now use the rewind ability on the wheel behind the pedestal as shown in the picture below and use it to reach the platform ahead.
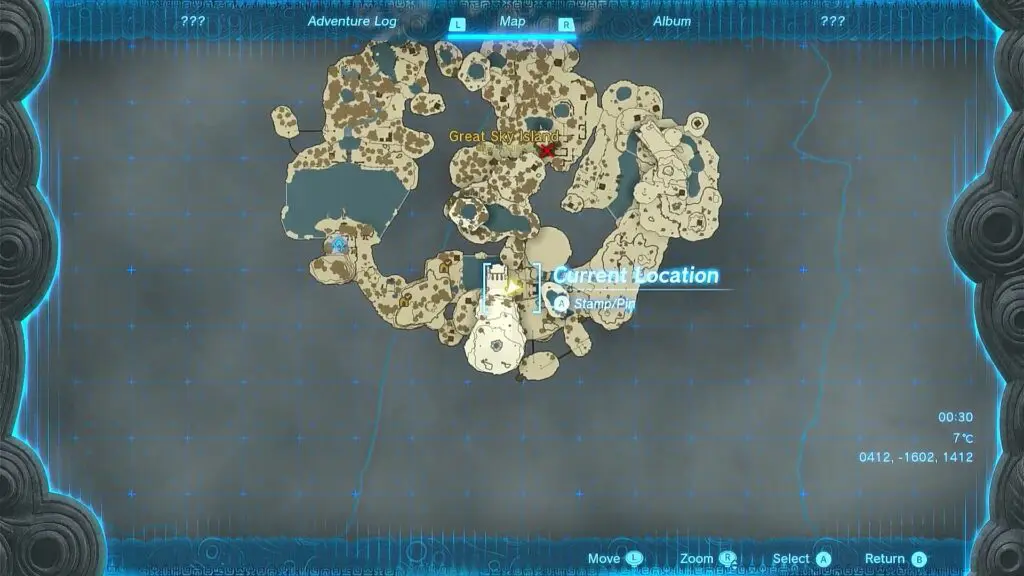
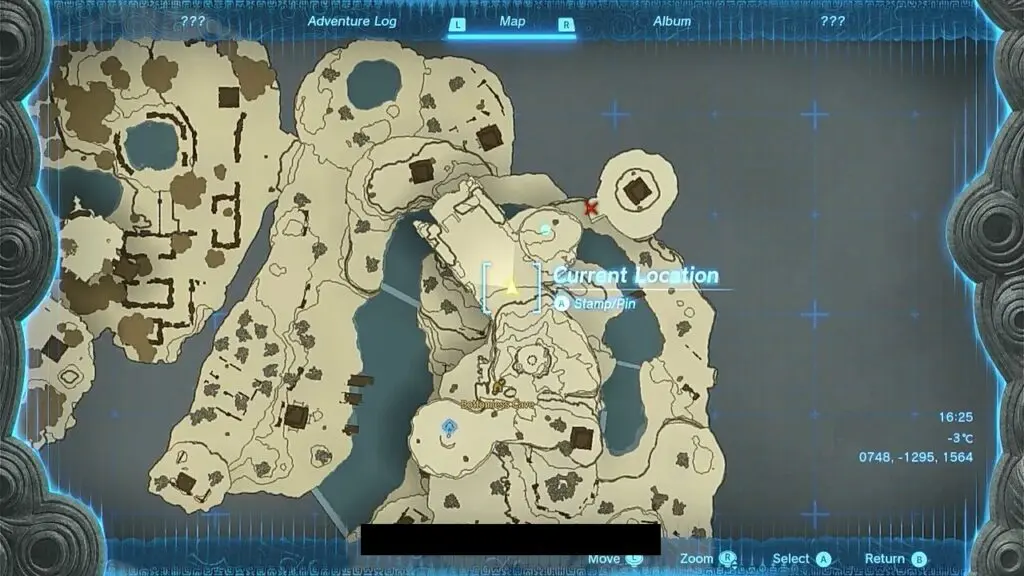
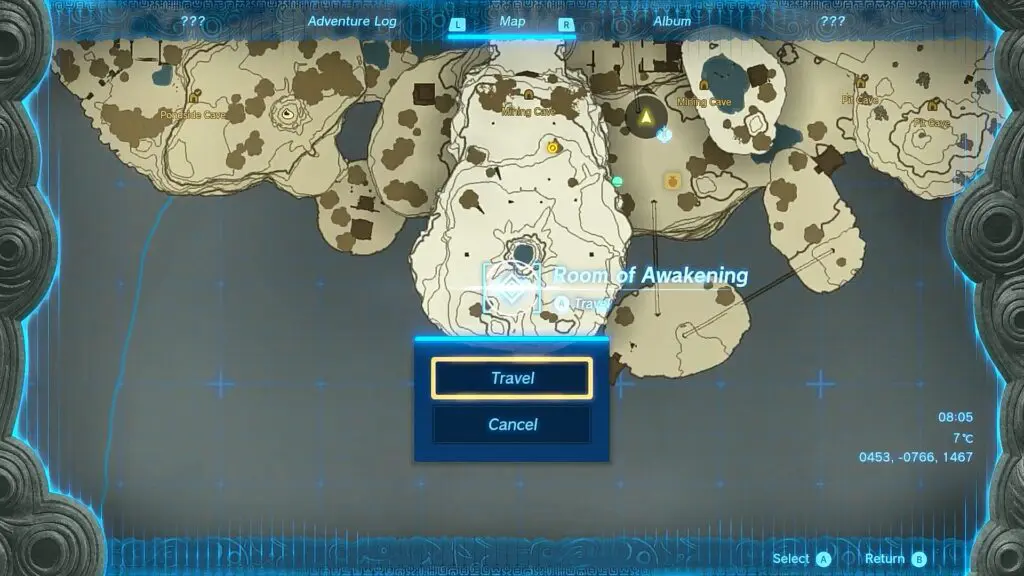
Proceed ahead and interact with the door there and the game will tell you to get one more Light of Blessing. Now fast travel to the Room of Awakening at the southern edge of the map as shown in the picture below.
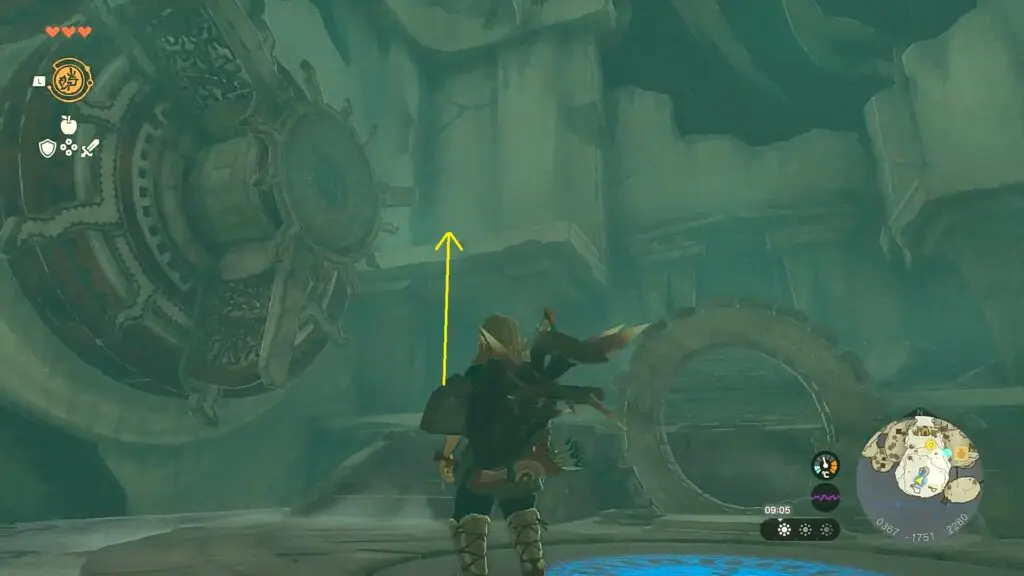
After reaching the Room of Awakening, use ascend ability to climb up the platform as shown in the picture below.
Now use the rewind ability on the wheel and ride it to the other wheel. Then use the rewind ability on the other wheel and ride it to the opposite side as shown in the picture below. Proceed ahead in the tunnel and it will take you to the Nachoyah Shrine.
The Fourth Shrine (Nachoyah Shrine Solution)
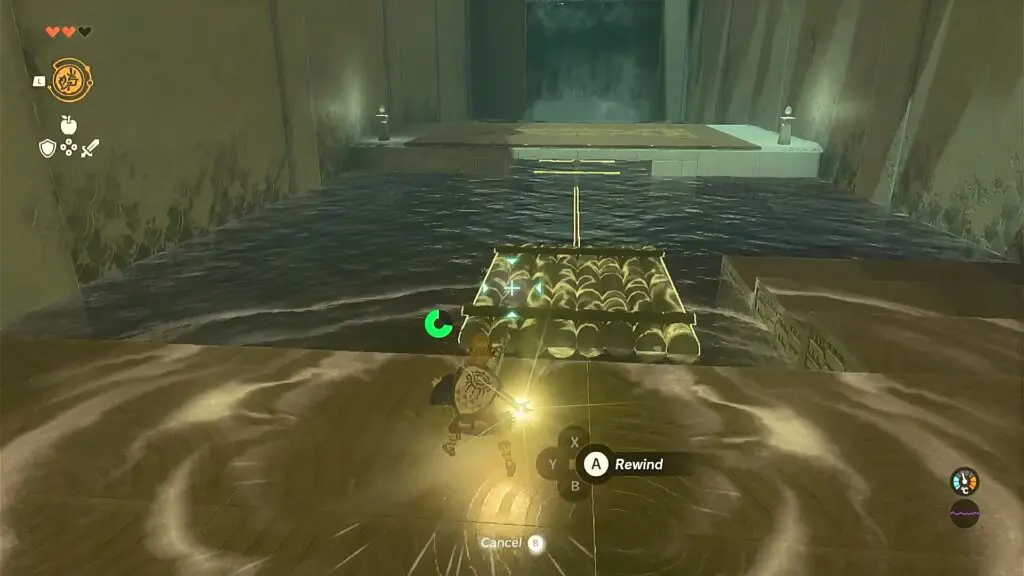
As soon as you enter the shrine, proceed ahead and use the rewind ability on the raft as shown in the picture below. Then jump on the raft to reach the other side.
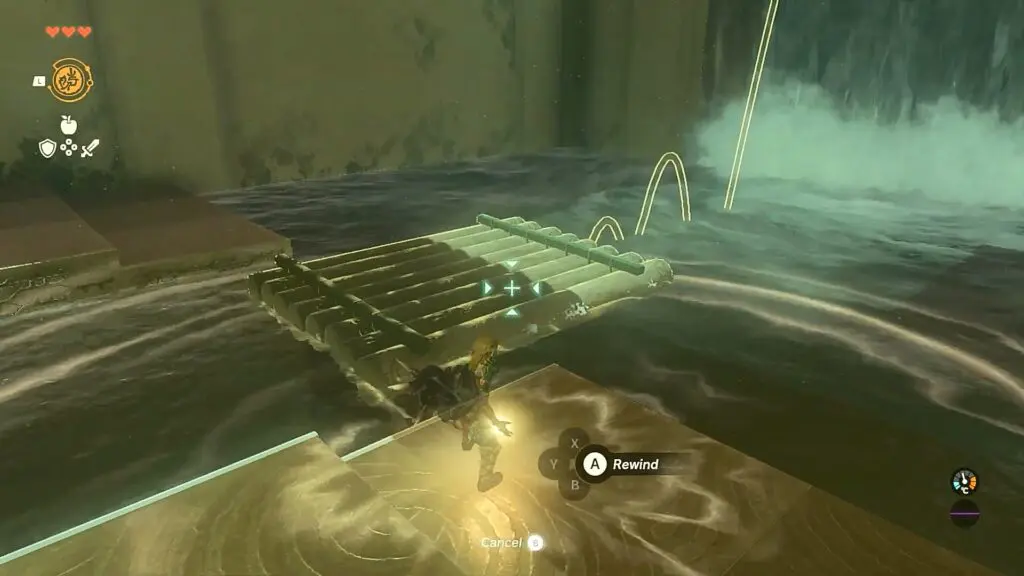
Use the rewind ability on the raft falling down from the waterfall and quickly jump on it to climb up the waterfall as shown in the picture below.
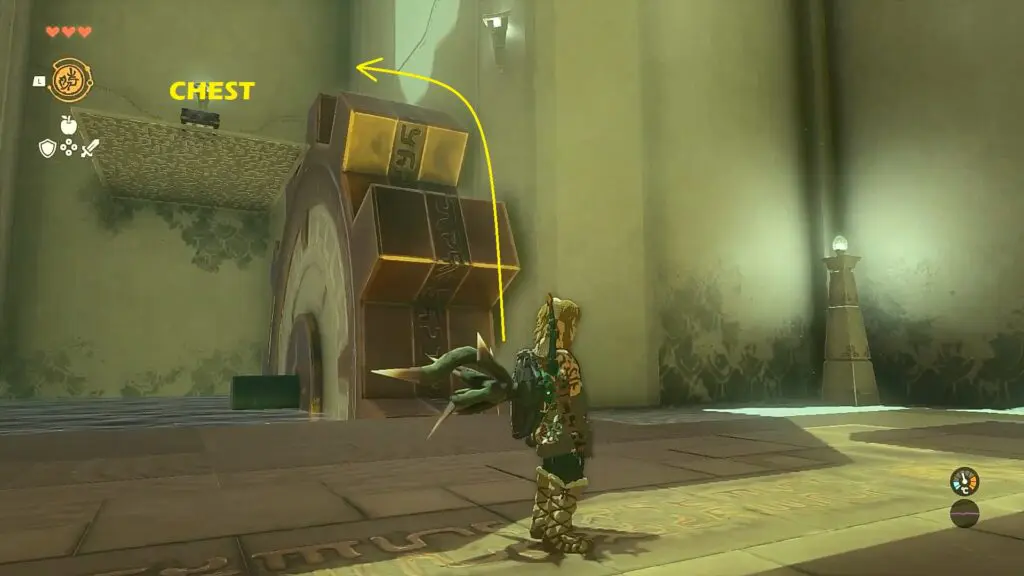
At the top, use the rewind ability on the wheel as shown in the picture below, and use it to reach the platform above. Open the chest there to get Arrow x10.
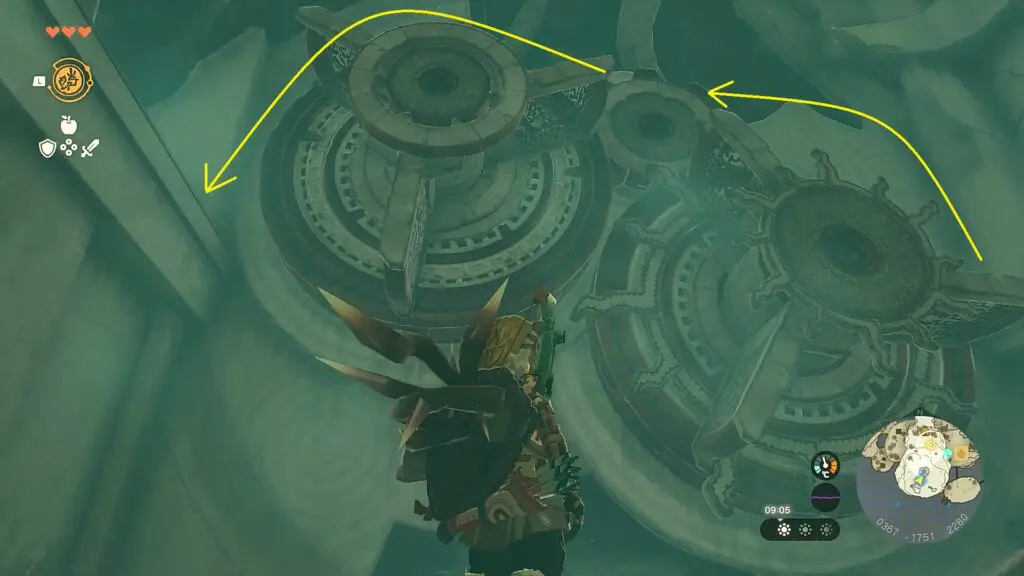
Now jump down to the main platform and go near the rotating dials. Wait until both the dials overlap as shown in the picture below. As soon as the dials overlap, use the rewind ability on one of the dials and it will rotate in the opposite direction, taking the other dial along with it. This will open the door behind the dials. Go across and interact with the symbol there to complete the shrine.
Open the Temple of Time Door
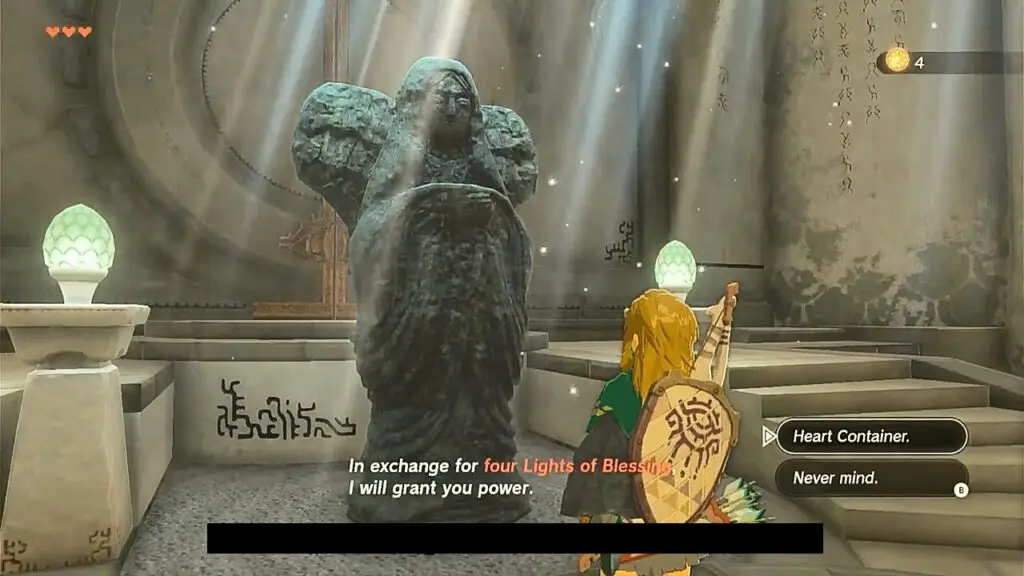
Fast travel to the Ukouh Shrine and make your way to the Temple of Time. Enter inside and go to the locked door. Interact with the statue in front of the locked door as shown in the picture below and you will receive a Heart Container. Now you can interact with the locked door and open it. Go outside and jump down to complete the area.