Halo: Combat Evolved hides 42 Skulls throughout its campaign. Many of these collectibles are easy to miss without knowing exactly where to look. In this guide, we’ll show you the location of all 42 Skulls in Halo: Combat Evolved, with clear directions to help you collect every one without wasting time searching.
Main Missions
The Pillar of Autumn
Skull 1
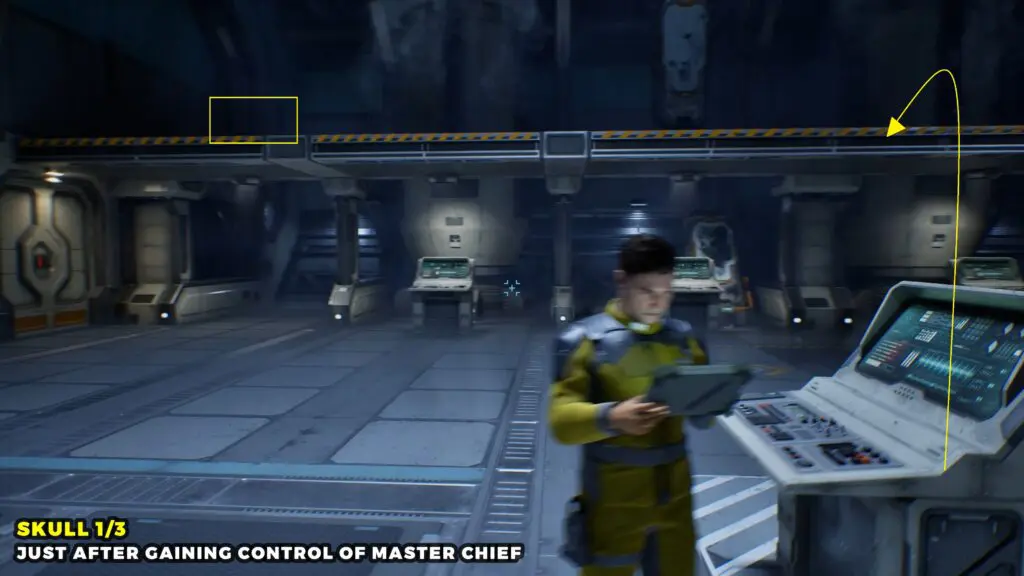
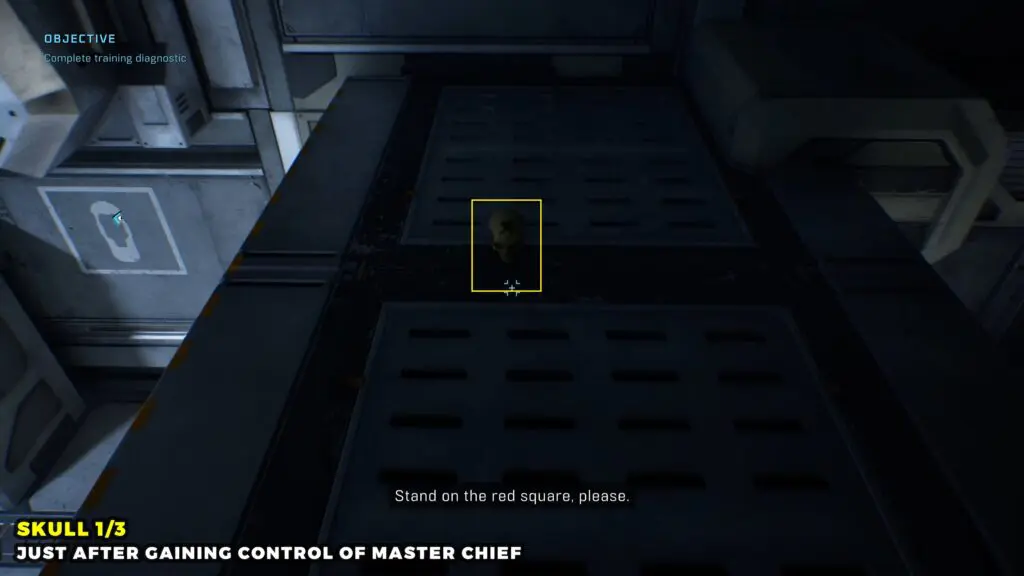
Once you gain control of Master Chief, turn around and head to the back wall toward the catwalk. Jump onto the containers on the left, then climb up to the nearby catwalk. Follow the catwalk to the end to find the Skull.
Skull 2
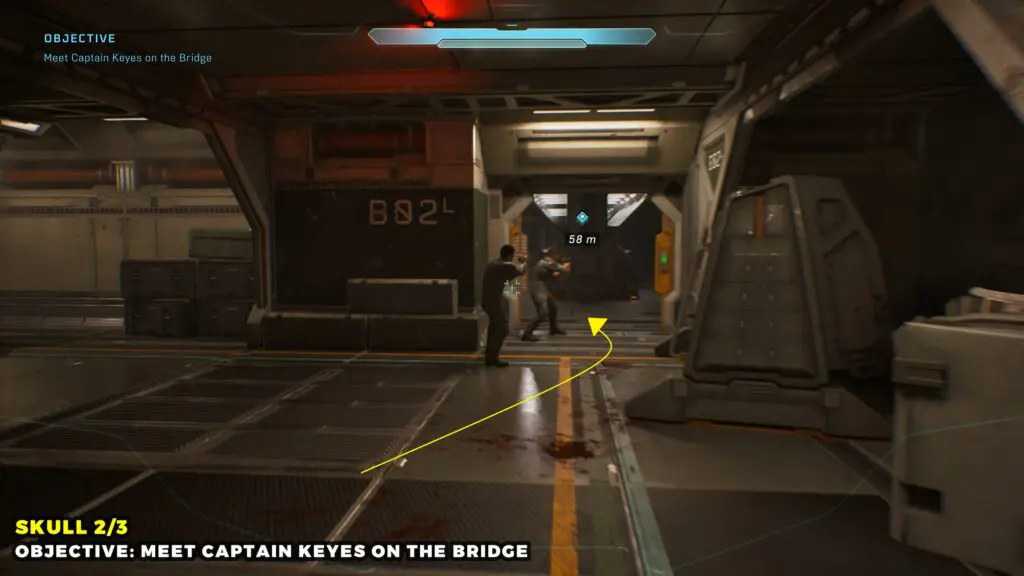
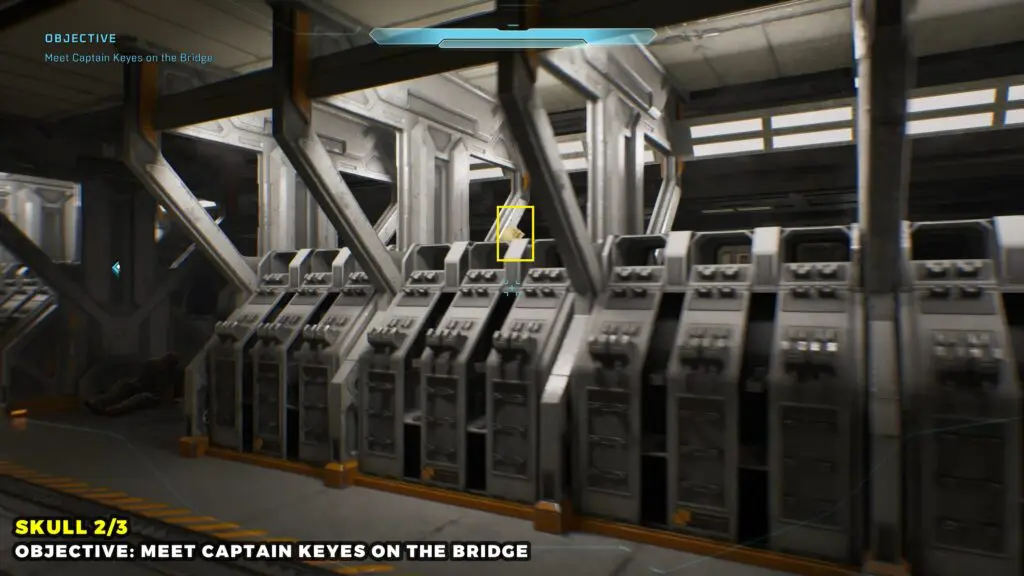
Objective: Meet Captain Keyes on The Bridge.
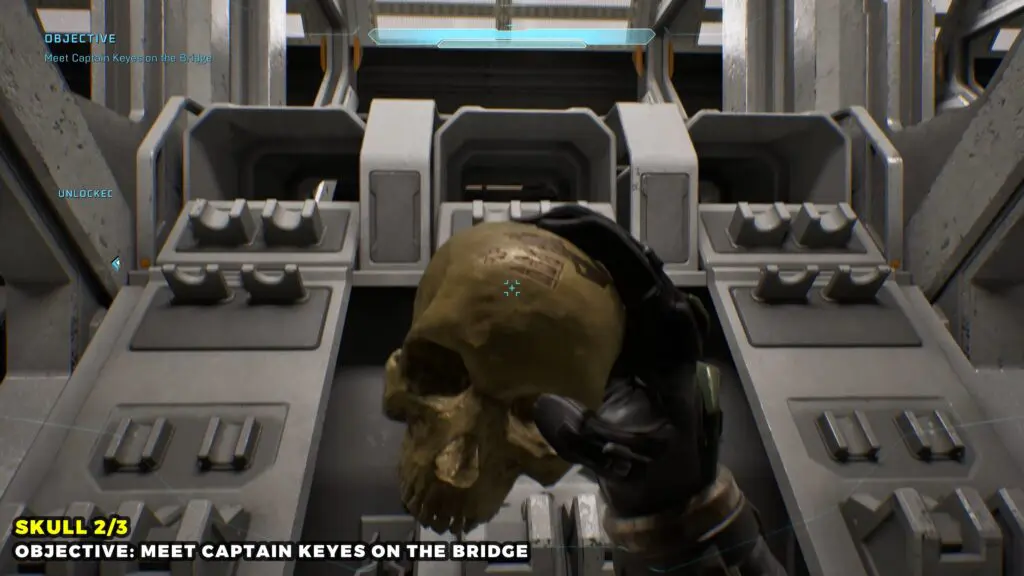
As you’re escorted through the ship, enter the room labeled B02. Go to the weapon racks in the center of the room and look on top of the first rack to spot the Skull.
Skull 3
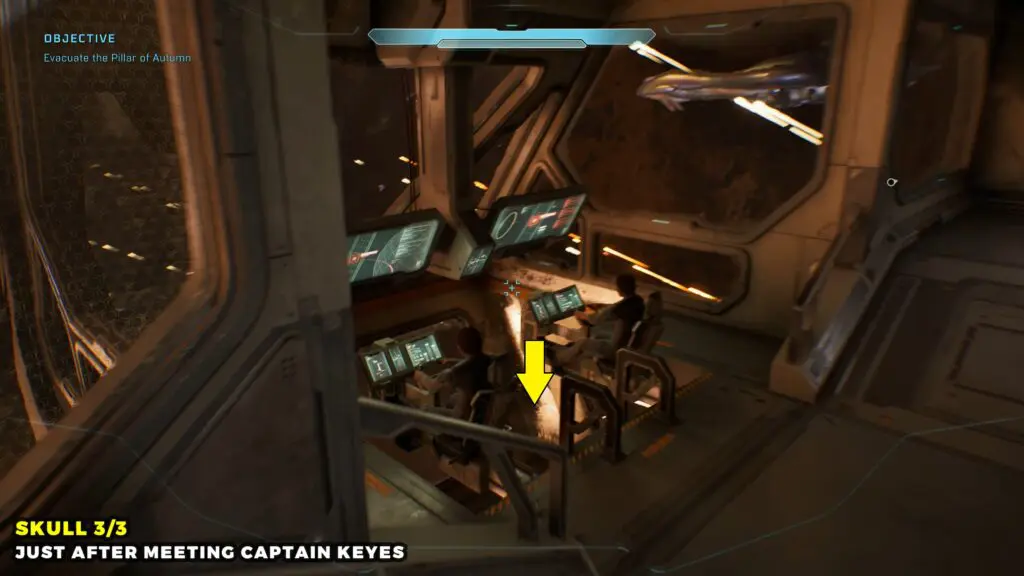
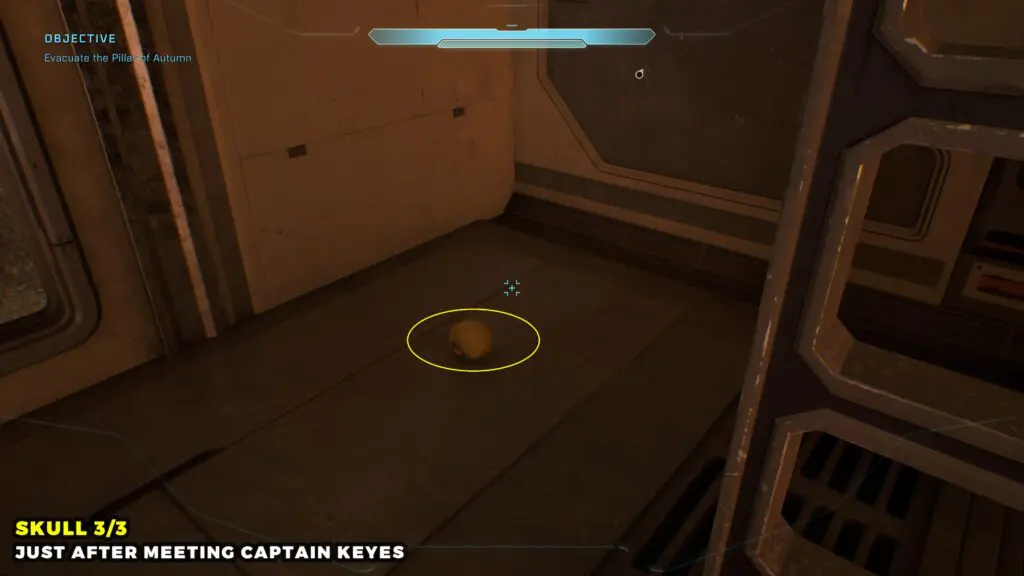
After meeting Captain Keyes. Go to the side of the room with the large viewing windows, where two crew members are standing at computer consoles. Drop down to the lower platform beneath them to find the Skull.
Halo
Skull 1
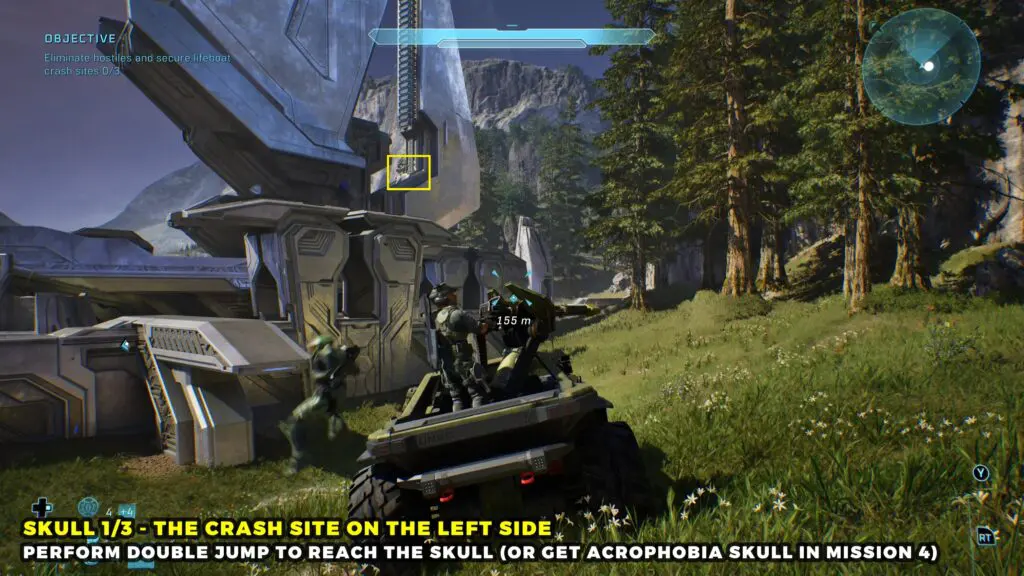
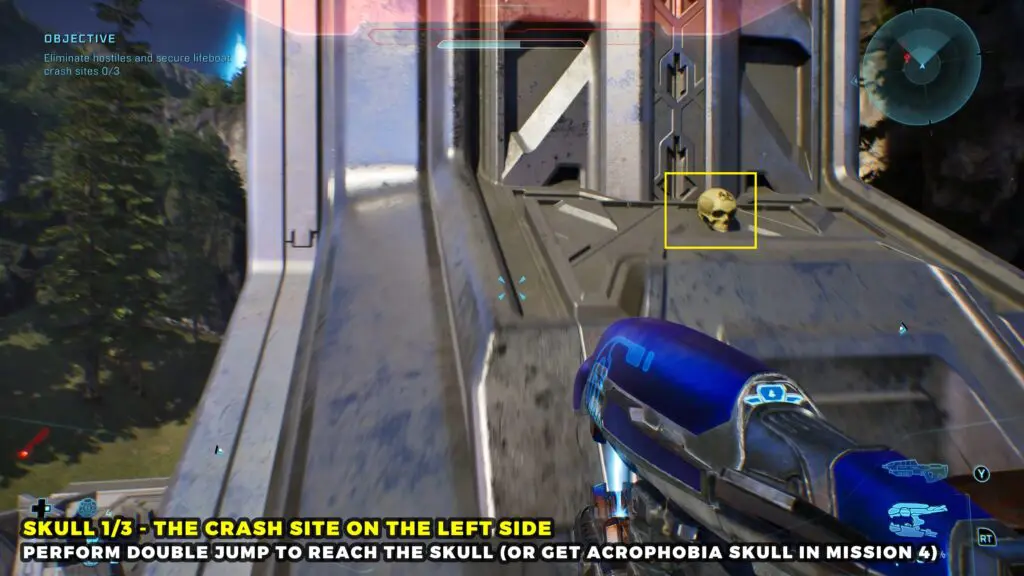
Head onto the main structure in the centre of the area. Then use the double jump ability to reach the platform where the blue light is coming from. Then jump up and get to the other side of the structure, where the Skull is waiting.
Skull 2
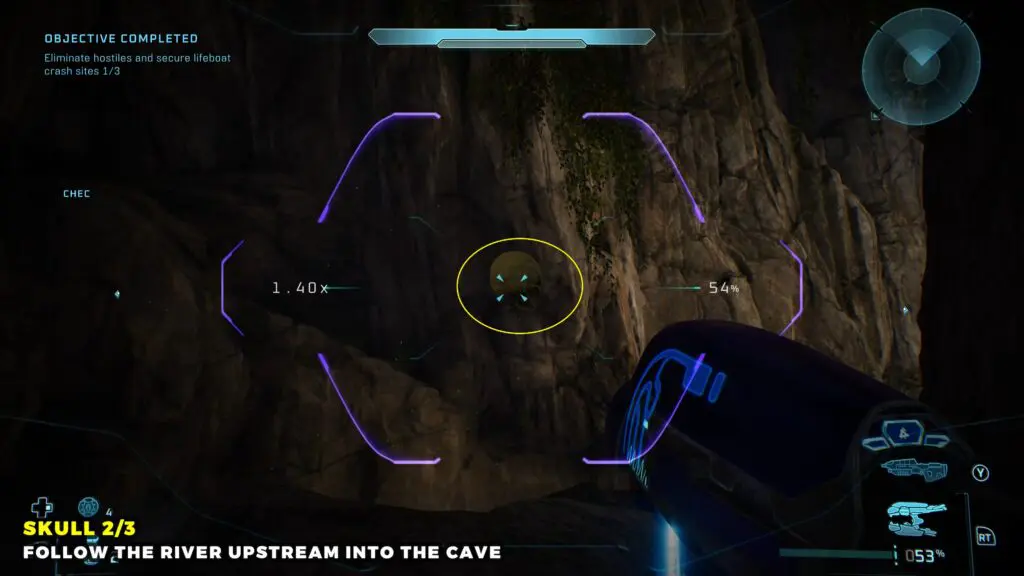
After leaving the underground area, stick to the right side until you reach a river. Follow it upstream into a cave.
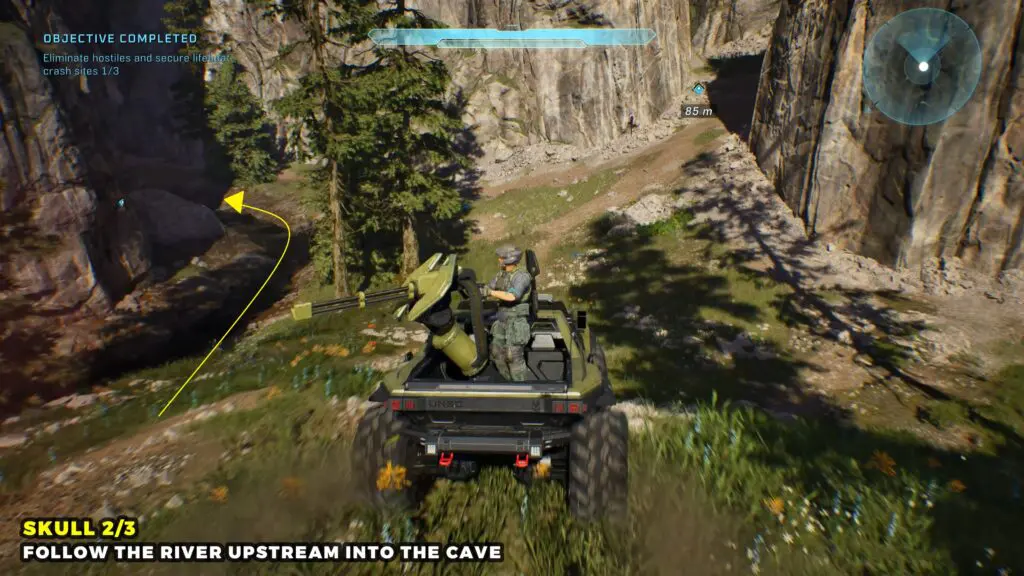
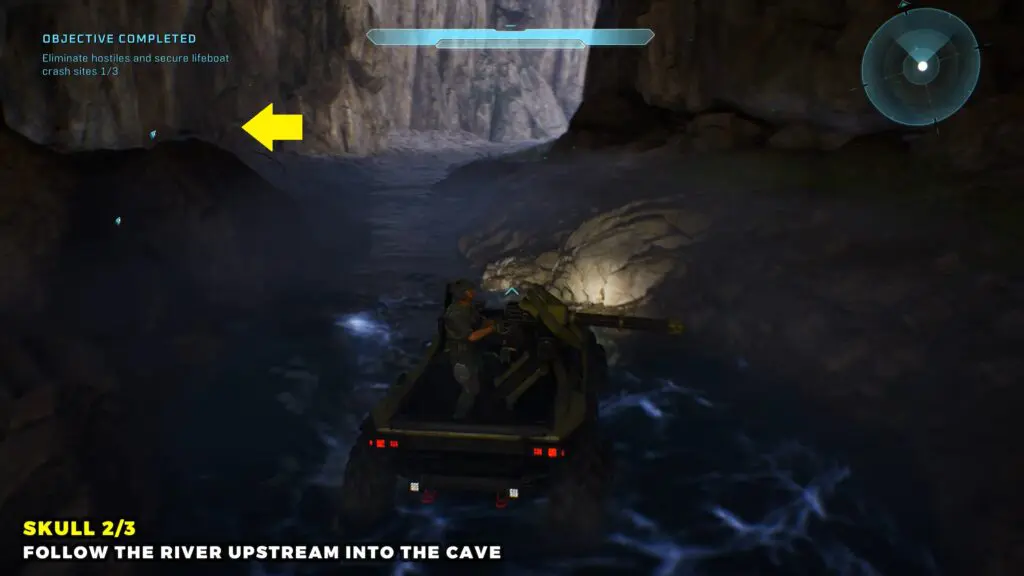
Once you spot the green flies buzzing in the air, search the rock right next to them. That’s where you’ll find the Skull, just floating in mid-air.

Skull 3
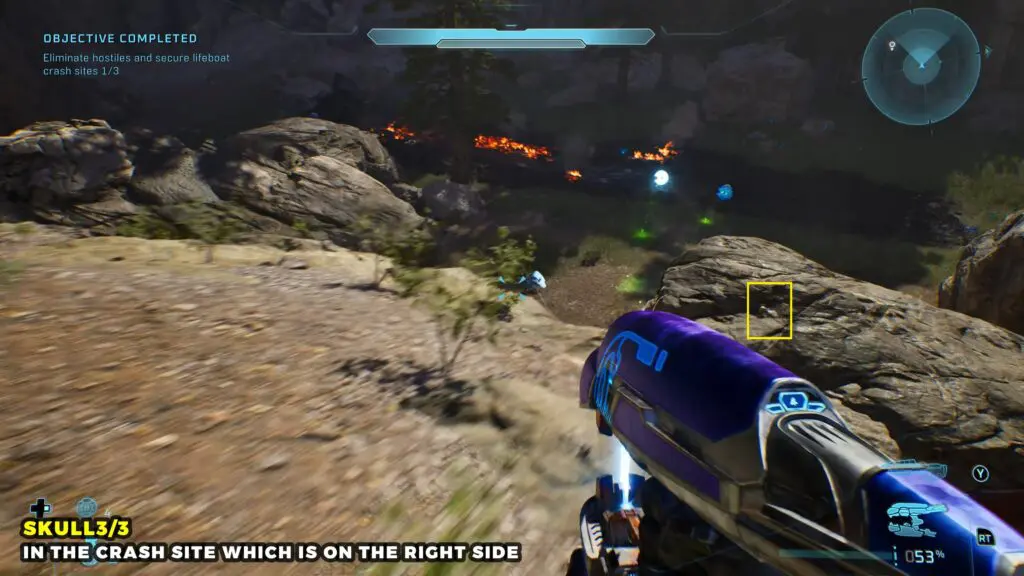
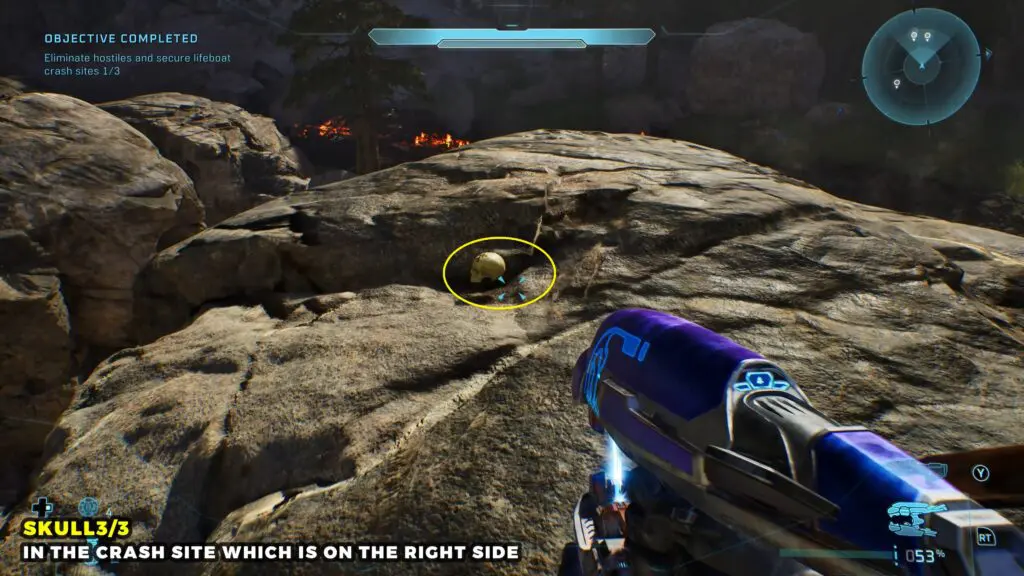
The Skull is on the right side of the crash site. Once you reach the area, climb on top of the rocks and make your way over to the ones on the right. You’ll spot the Skull sitting on a rock just below you.
The Truth and Reconciliation
Skull 1
It is available before boarding the Covenant Battle Cruiser. Once the area is clear, go to the cliff edge on the left side near the cactus-like tree and look down. The Skull will be just below you on a small ledge
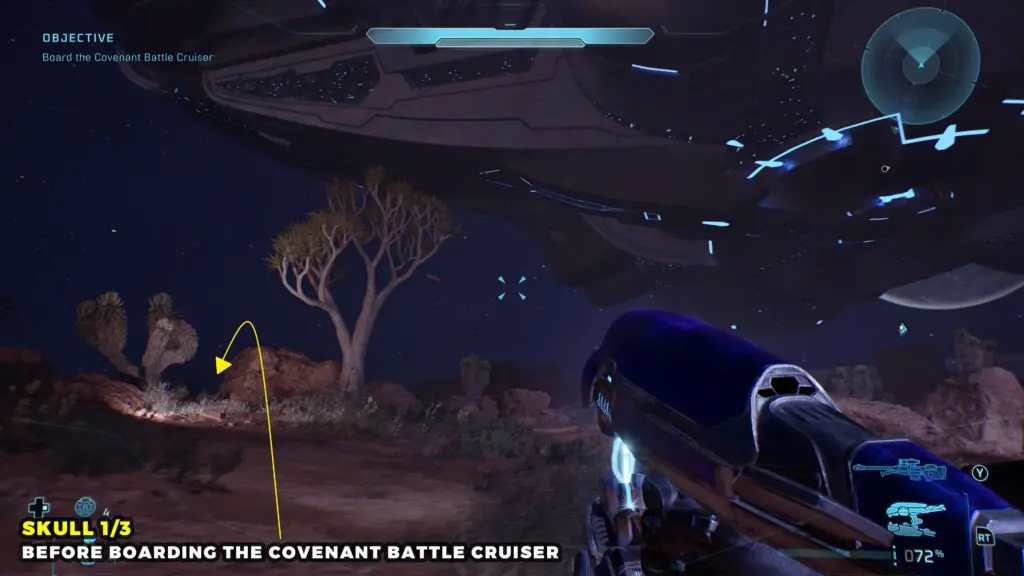
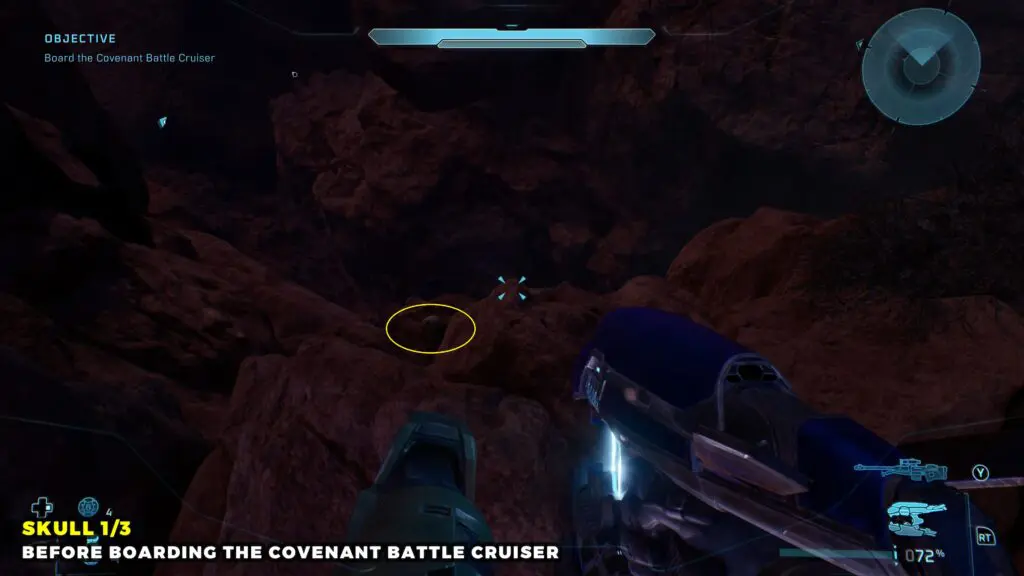
Skull 2
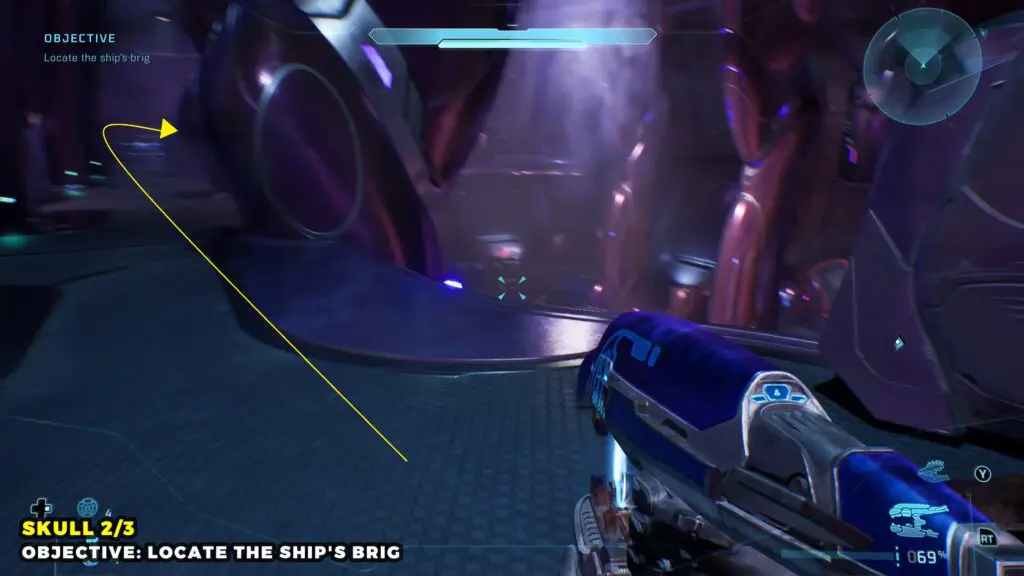
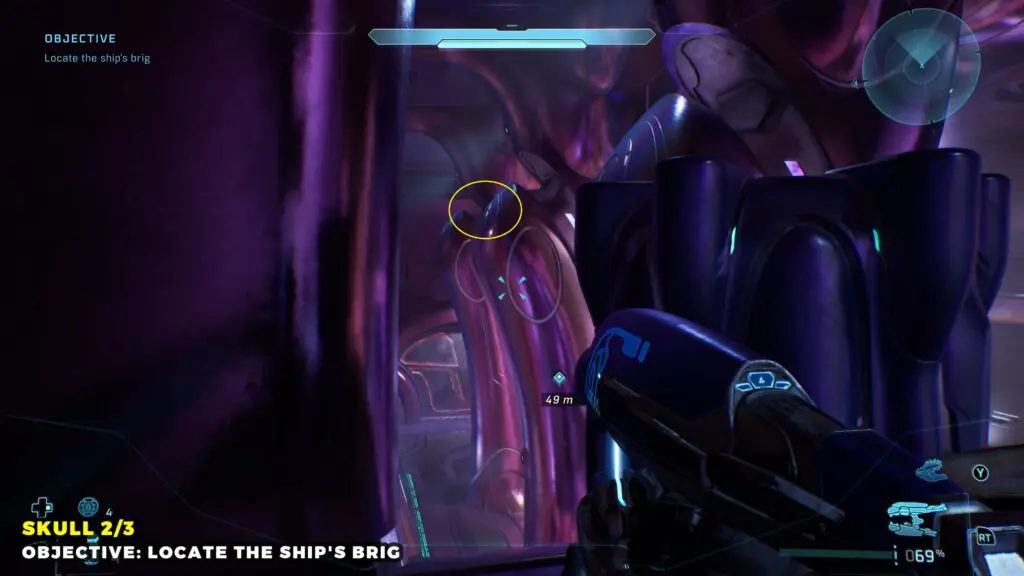
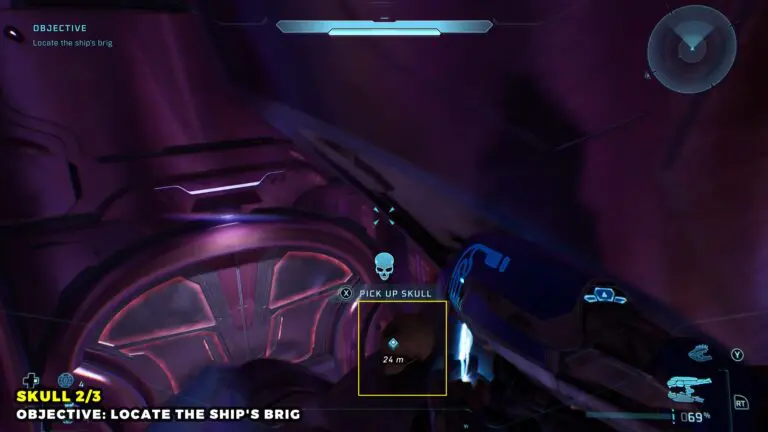
Objective: Locate the Ship’s Brig
Inside the ship, go to the larger room from the upper level. In this room, go to the opposite corner, where you’ll see a series of tall purple structures. The Skull is at the end of the final platform.
Skull 3
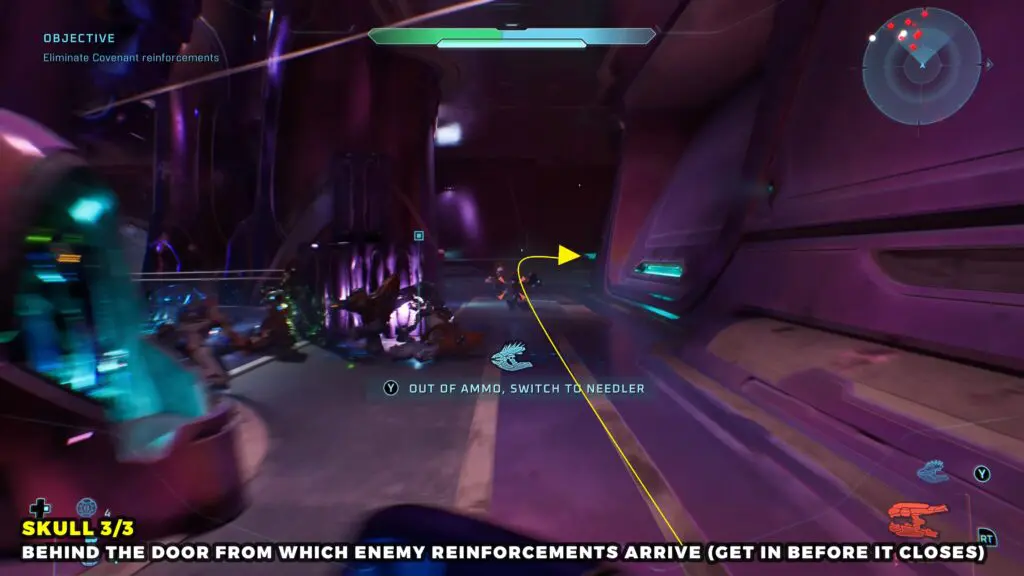
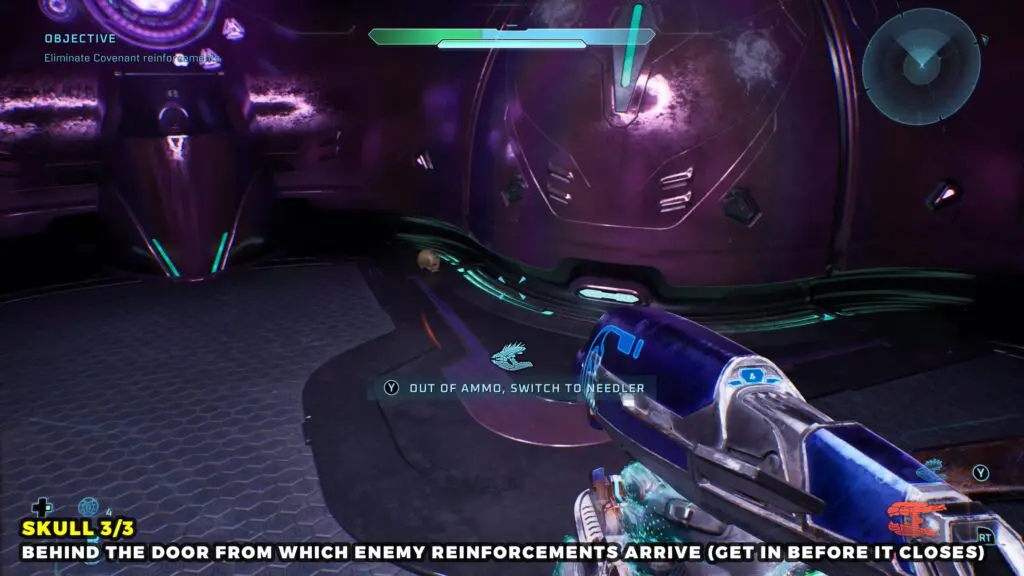
Checkpoint: Rally Point Bravo
After unlocking the door and reuniting with your teammates, enemy reinforcements will arrive through the locked door. Head through that door as soon as it opens, then look to the left to find the Skull.
The Silent Cartographer
Skull 1
Objective: Find the entrance to the Map Room
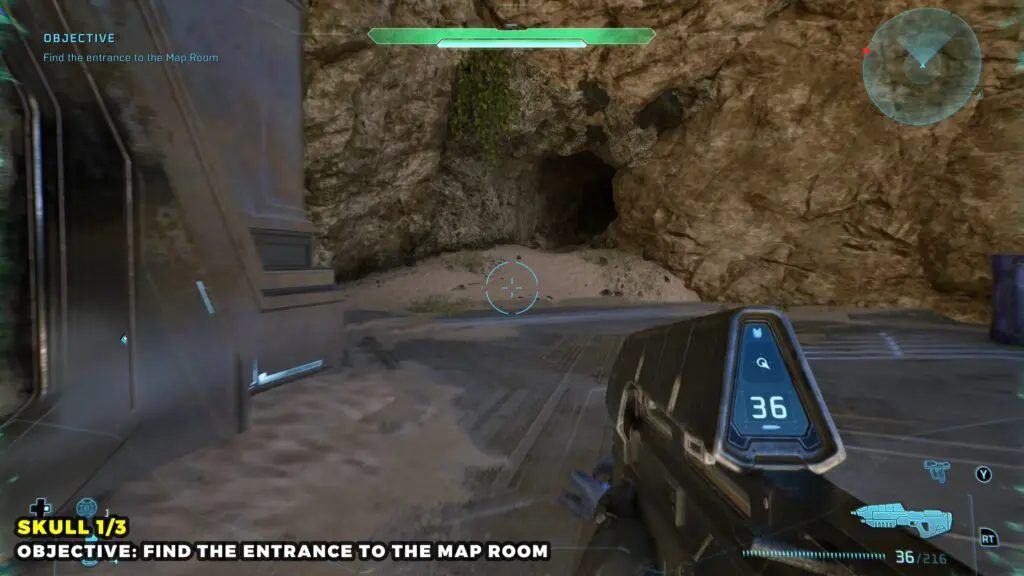
At the start of the mission, you will reach a structure that leads underground. Instead of entering, turn right at the entrance and look for a small cave.
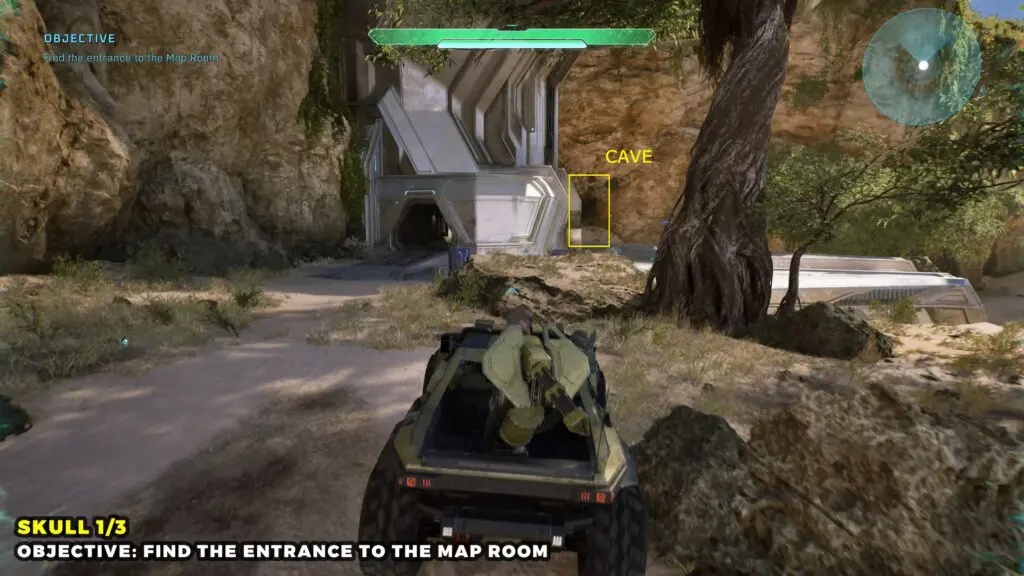
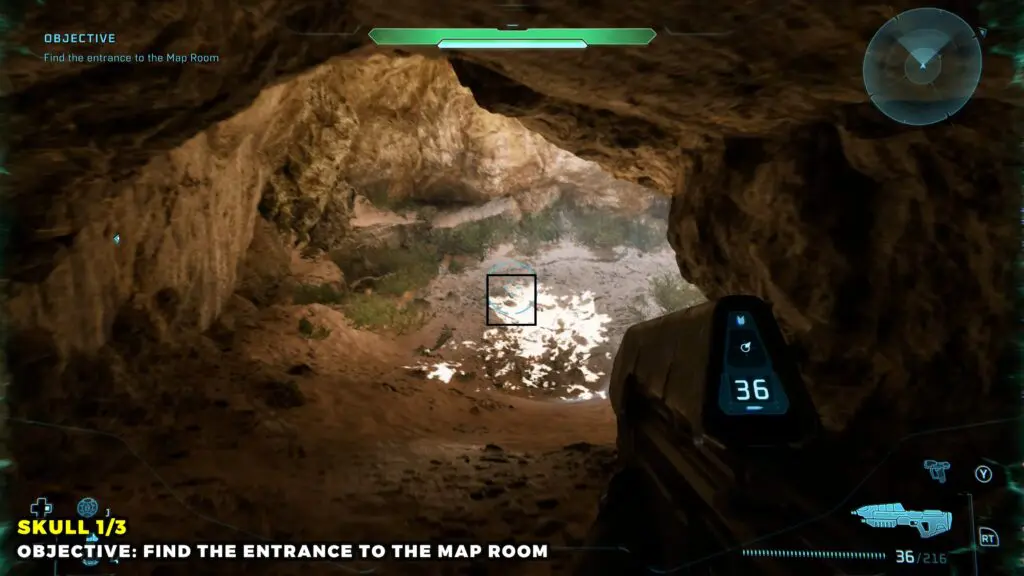
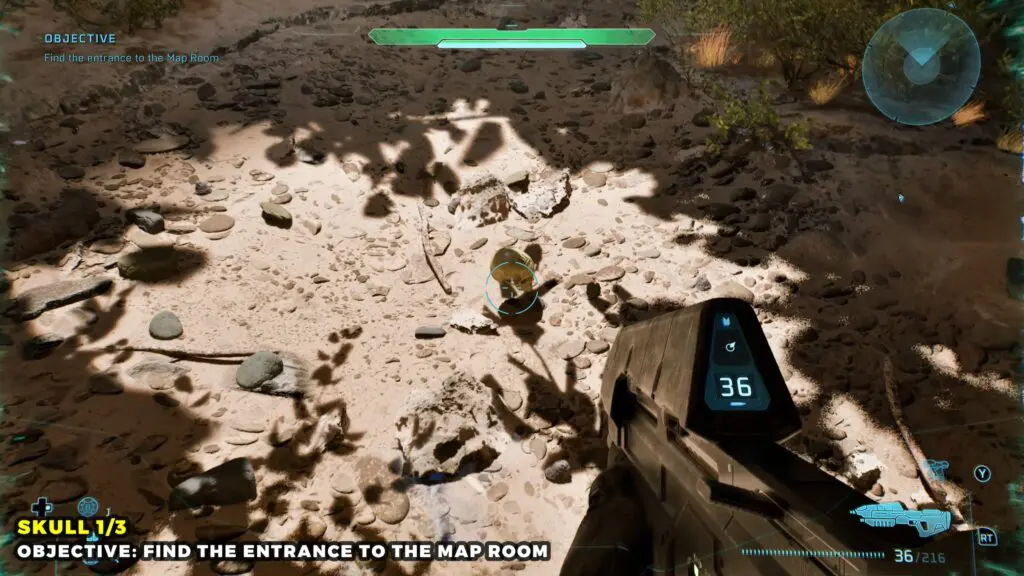
Follow the path inside to find the Skull lying on the ground.
Skull 2
Objective: Locate the Security System’s Override substation
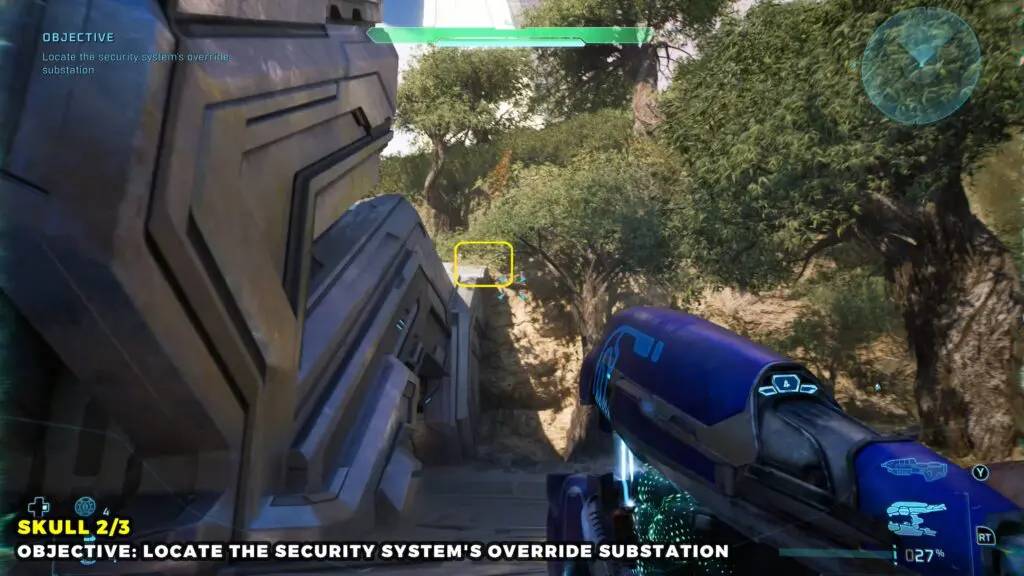
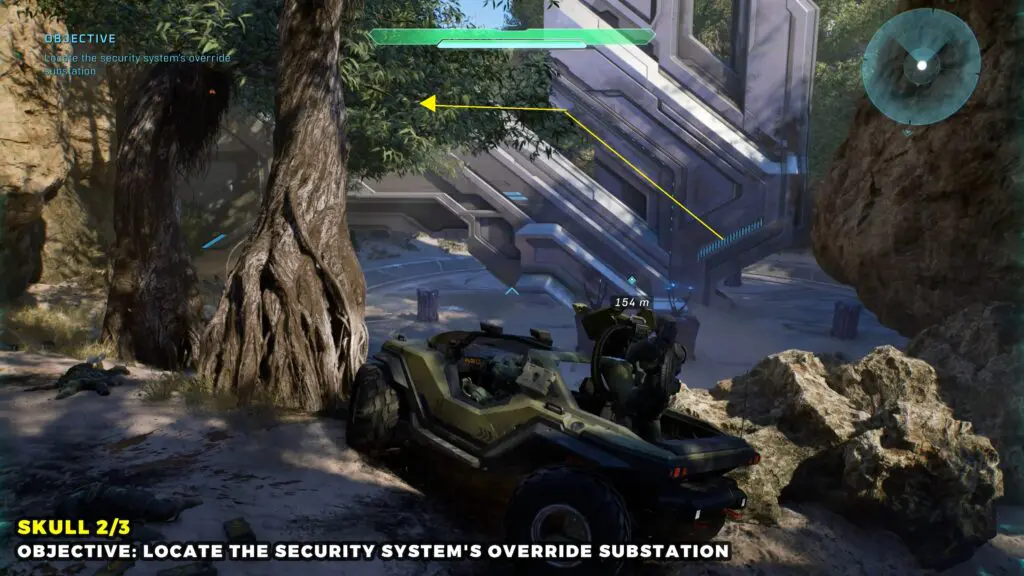
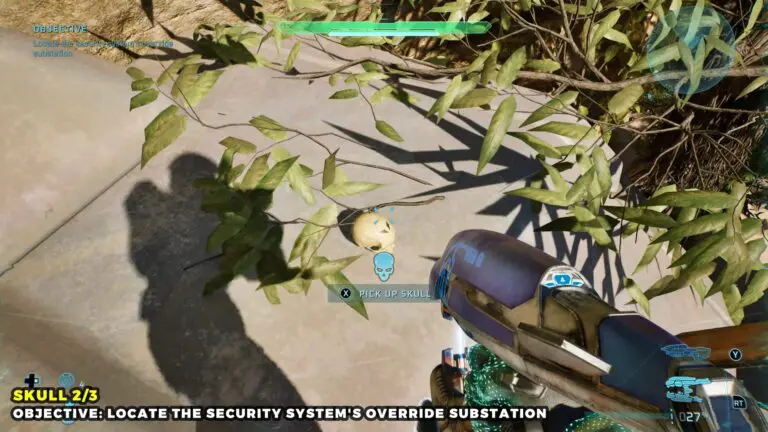
Once you reach the circular area with two Hunters, defeat them and head to the slanted side behind the pillar. Climb to the top of teh pillar, then walk toward the rocky wall. You’ll find the Skull hidden behind the tree.
Skull 3
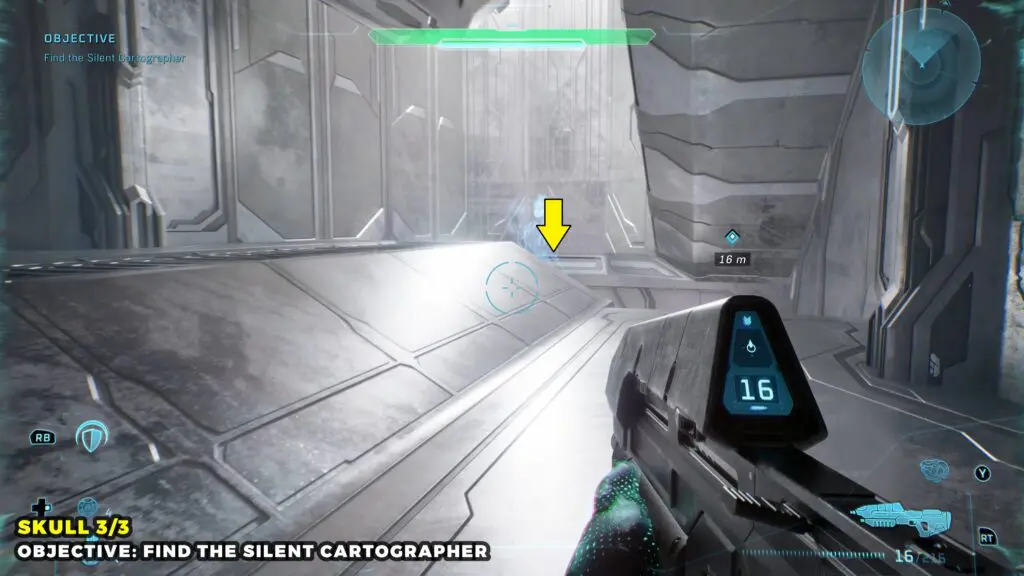
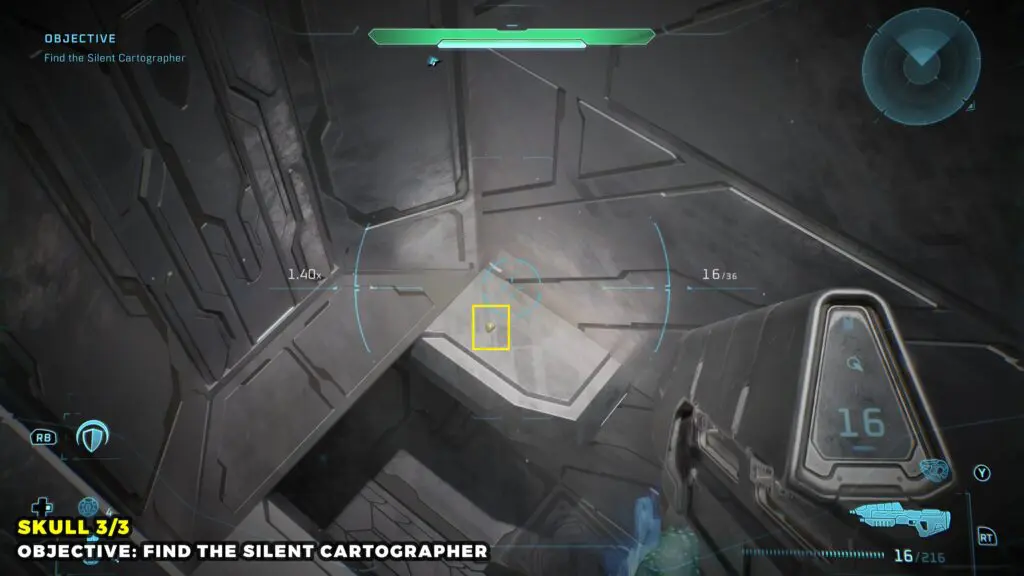
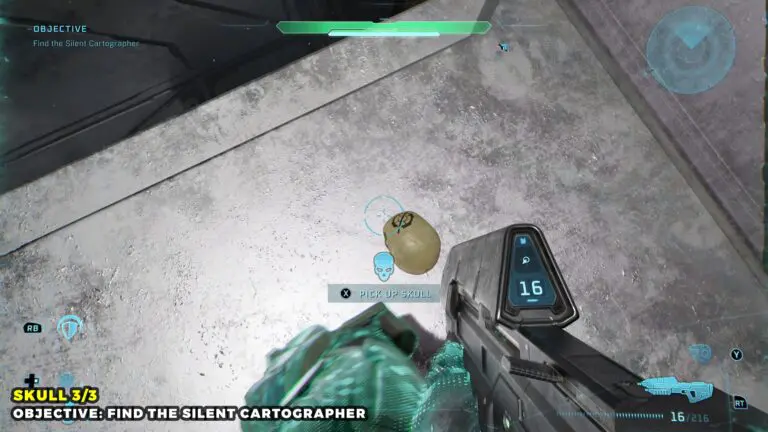
Follow the mission until you need to go down the stairwell with the blue light in the center. Look down the stairwell. You’ll spot the Skull on a ledge below. Drop down to collect it.
Assault on the Control Room
Skull 1
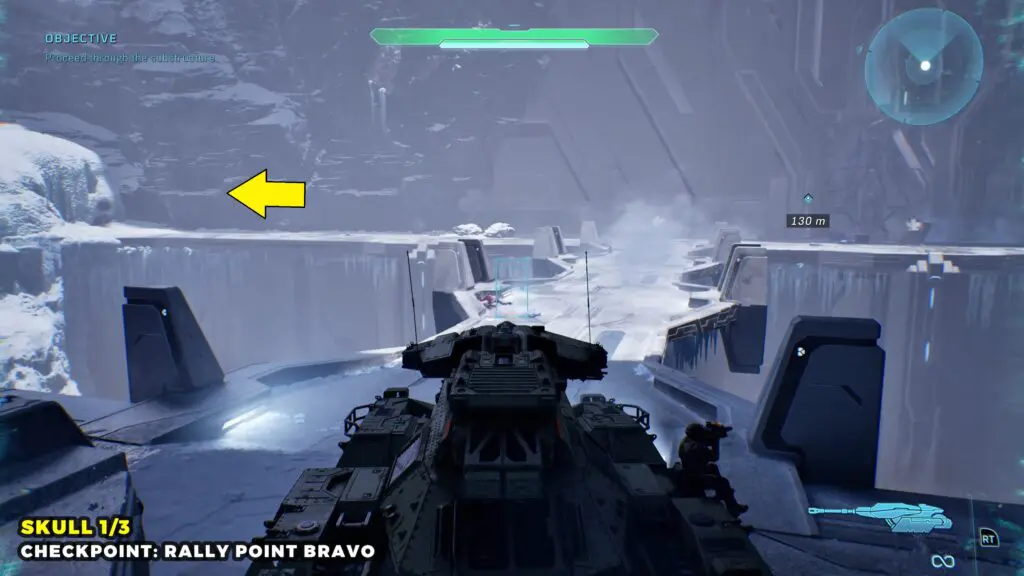
Ride the tank until you reach an icy bridge crossing. Cross the bridge, then turn left and drive the tank to the end of the path. Look for a hole in the rock.
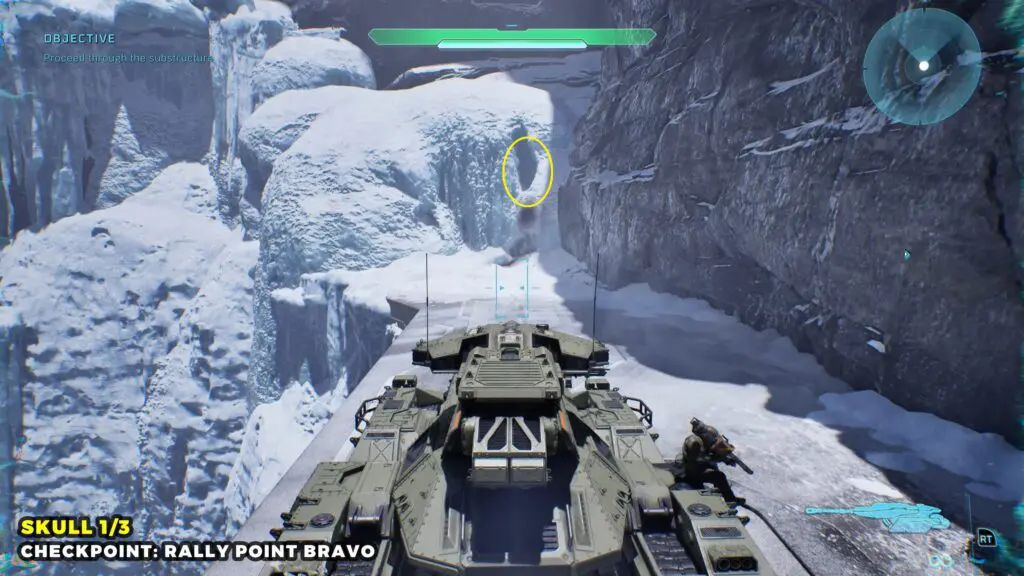
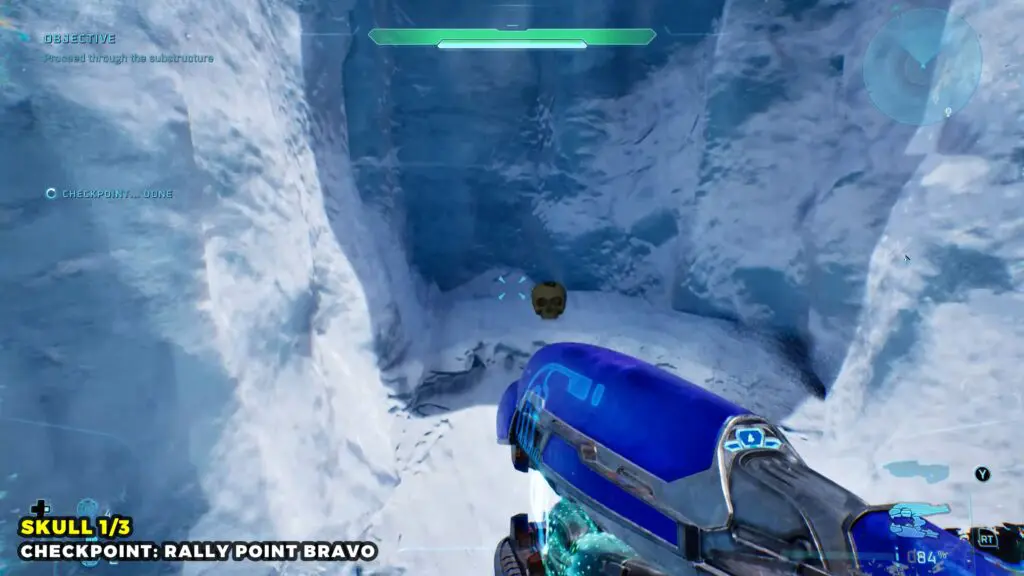
Climb onto the tank and look inside the hole to find the Skull.
Skull 2
Progress through the mission until you reach a cave. Leave the tank and head inside the cave, and exit on the other side.
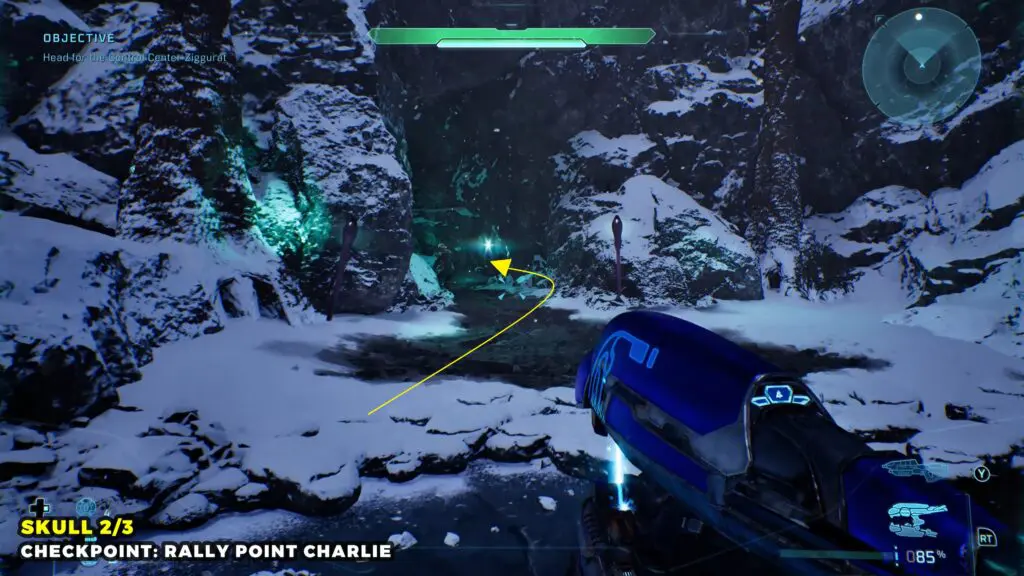
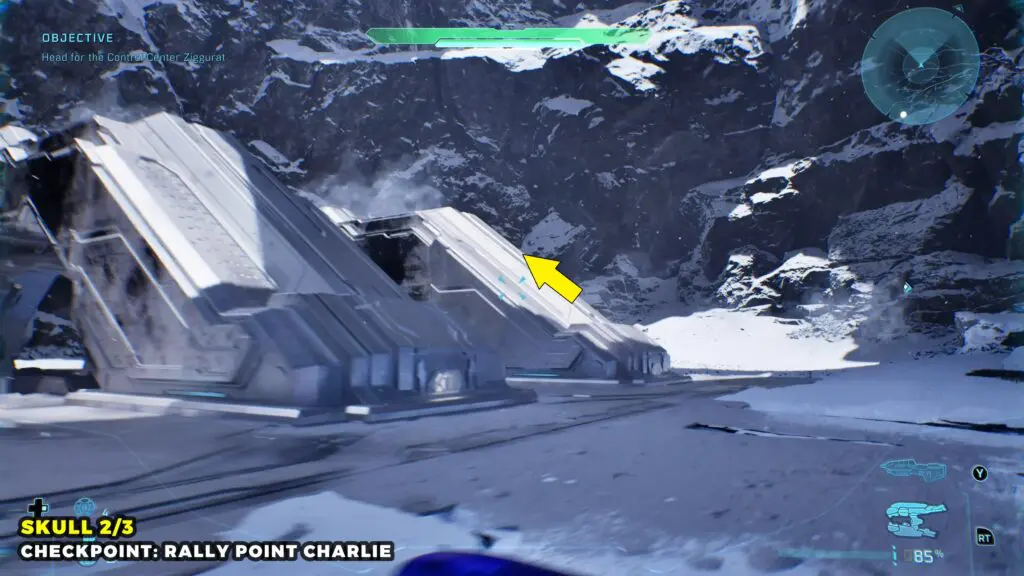
Continue straight until you see three large horizontal structures. Jump onto the one at the back to find the Skull.
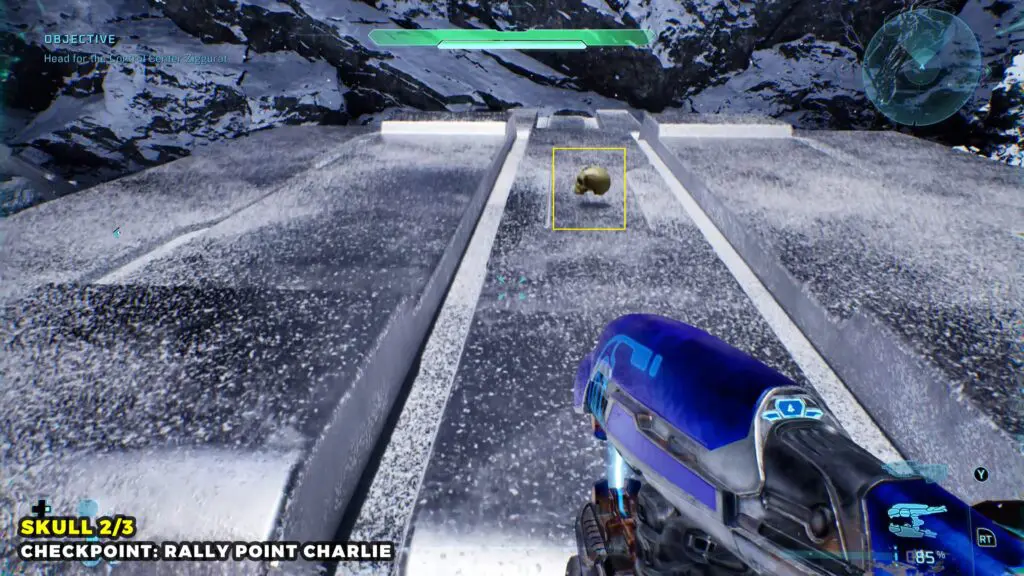
Skull 3
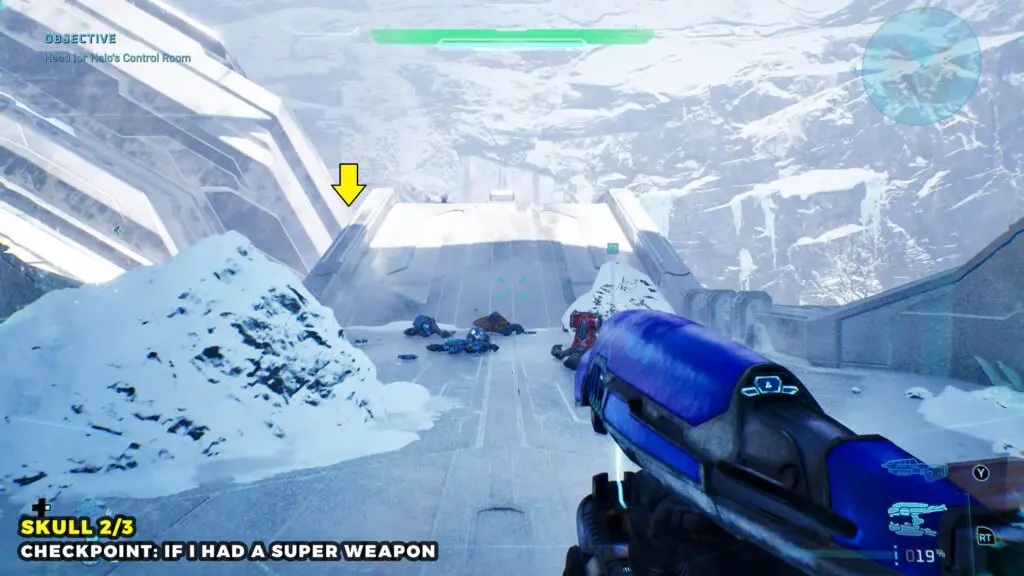
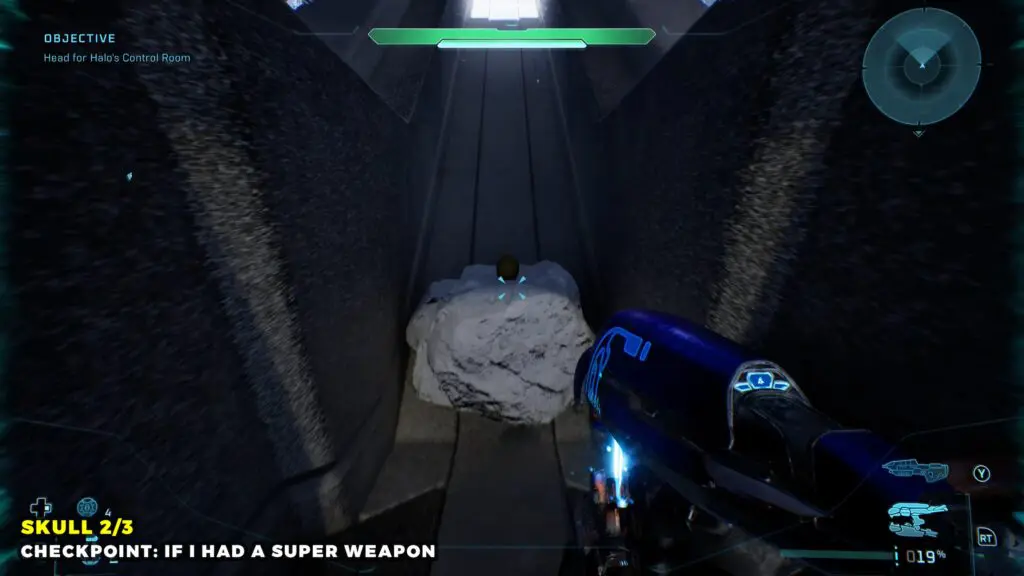
Near the end of the mission, you’ll exit outside and be tasked with reaching the Halo Control Room. Stay on the bridge and walk up to where the large central structure passes underneath the bridge.
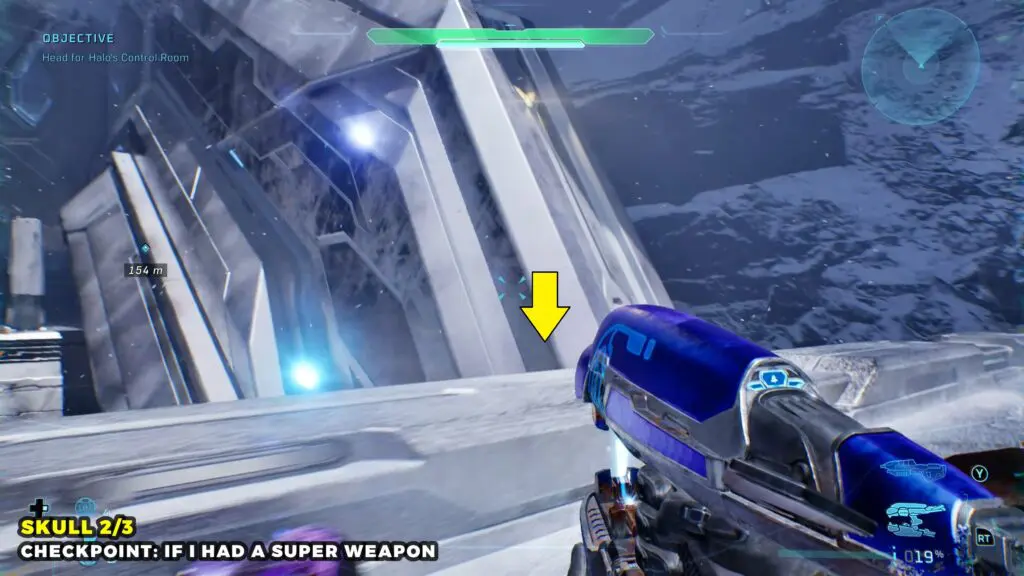
Then carefully drop onto the ledge below. Turn around, and you’ll find the Skull.
343 Guilty Spark
Skull 1
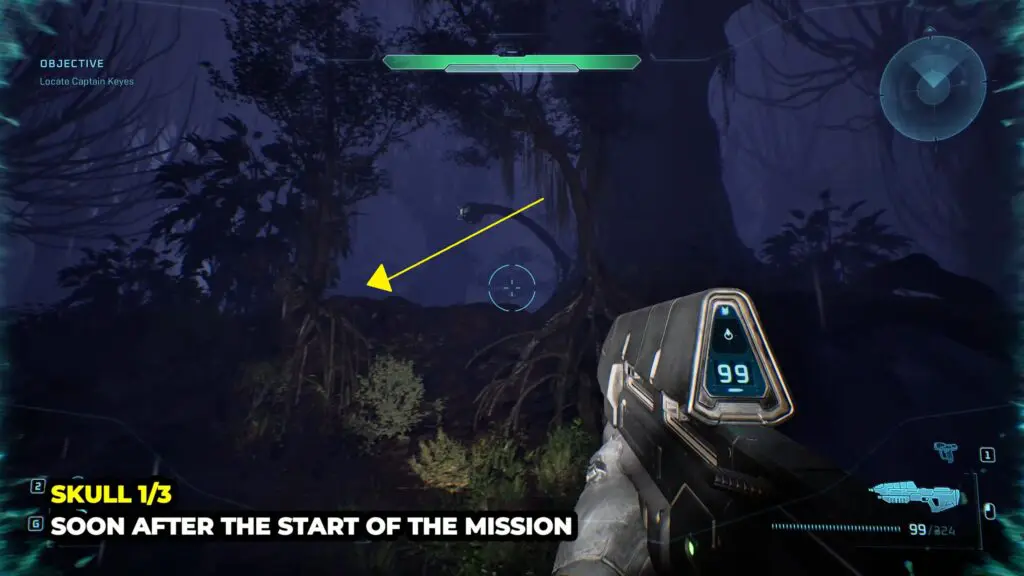
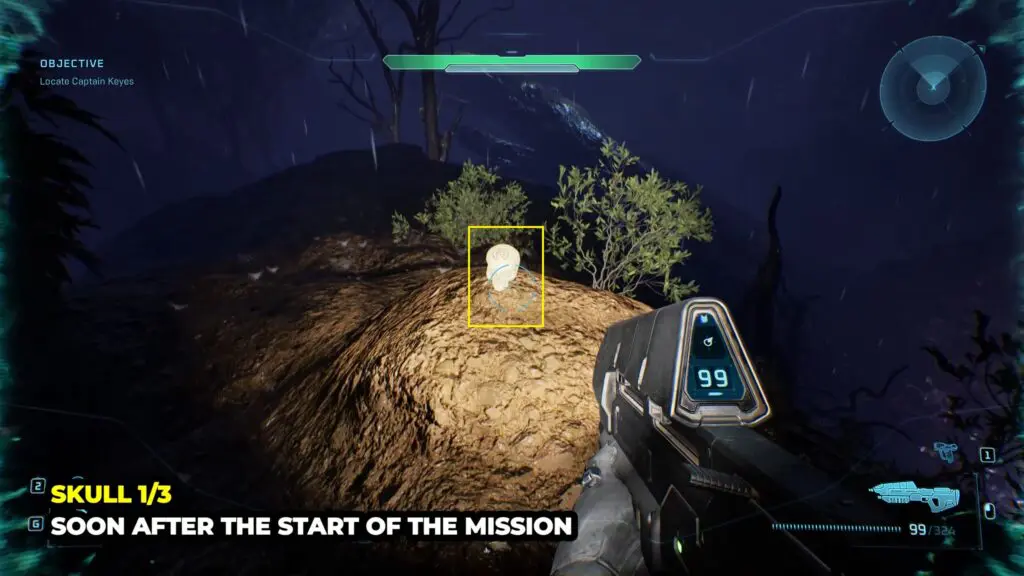
At the start of the mission, face the giant ship that’s crashed into a massive tree. Turn around and head up the small hill on your right.
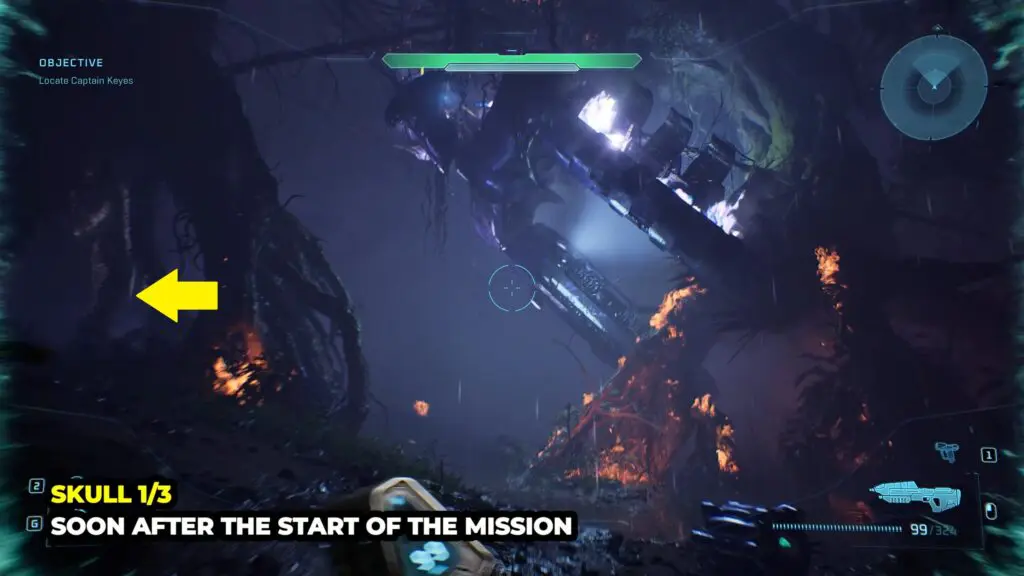
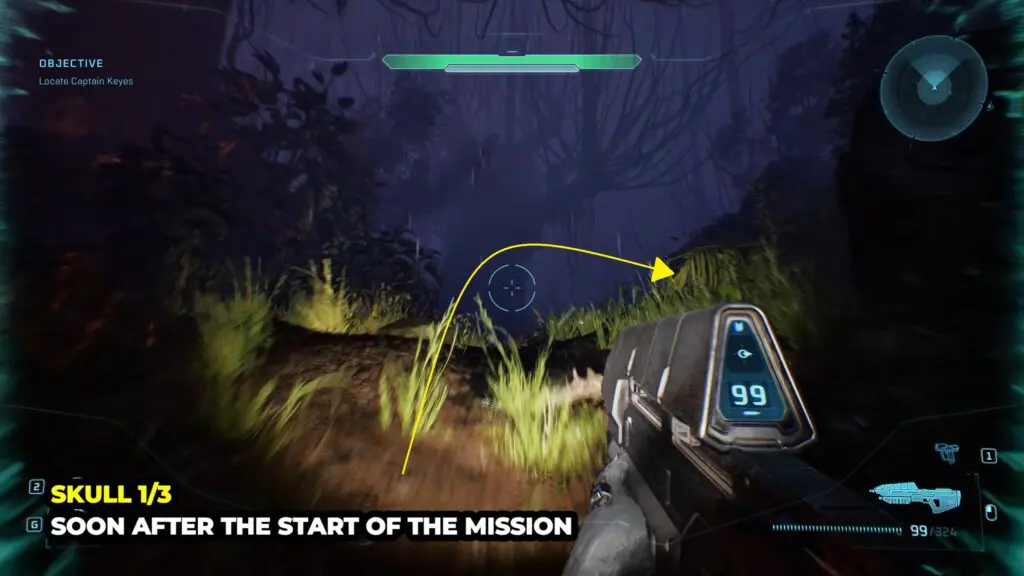
Once you reach the top, start walking downhill and look to your right for a group of small trees with exposed roots. Go behind the trees and look on the muddy ground to your left to find the Skull.
Skull 2
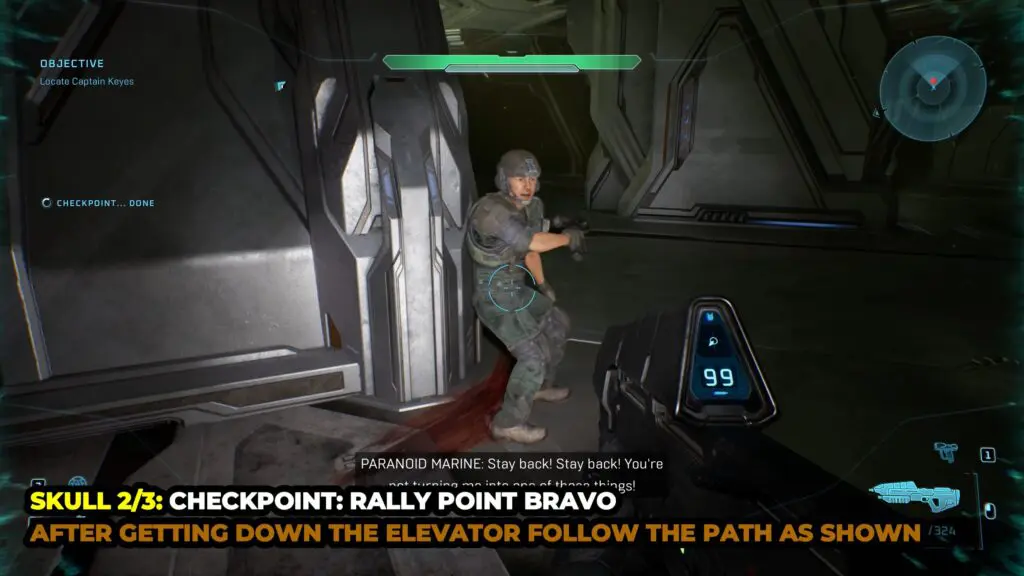
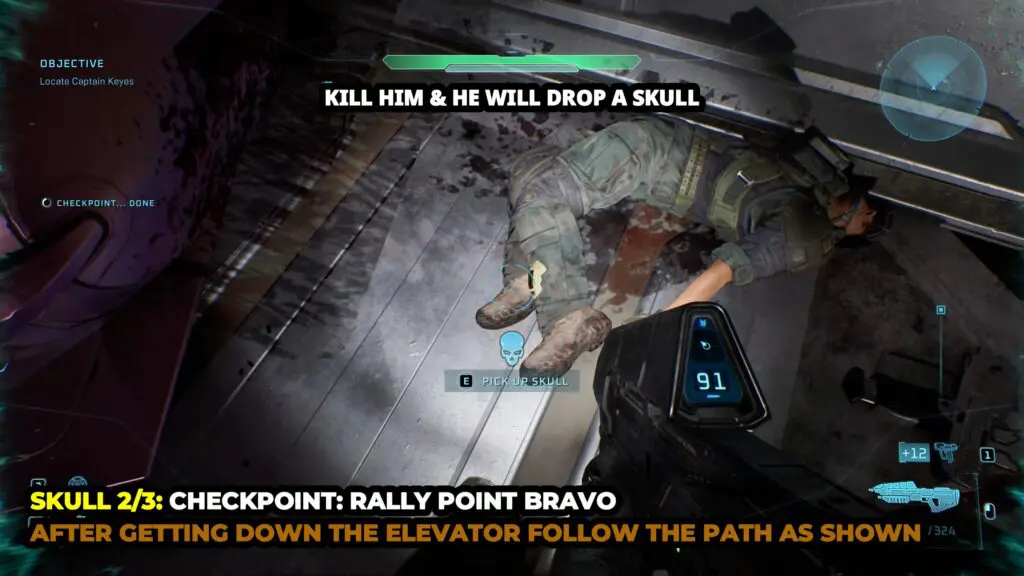
While searching the facility for Captain Keyes, ride the elevator down. Then, continue through the main mission path until you reach an area with multiple dead Covenant.
Keep moving toward the objective until you encounter a lone human Marine. Instead of helping you, he’ll panic and start shooting at you. Kill the Marine, then loot his body to pick up the Skull.
Skull 3
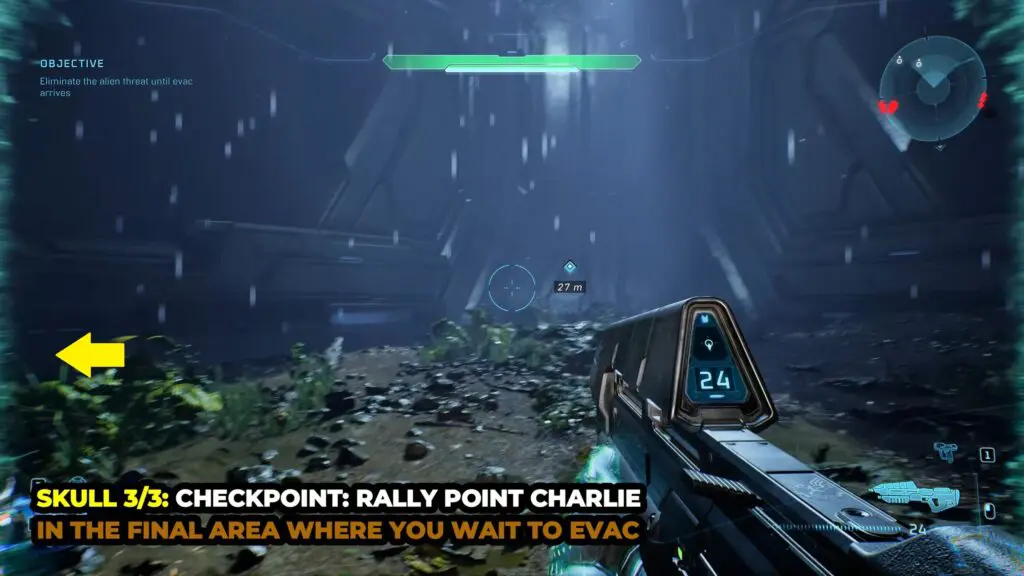
In the final area of the mission, where you need to wait for evacuation, leave the main combat area and head to the left side of the structure. Stay close to the outer wall and make your way behind it. Look for a fallen tree branch that’s leaning against the structure and use it as a ramp to climb up.
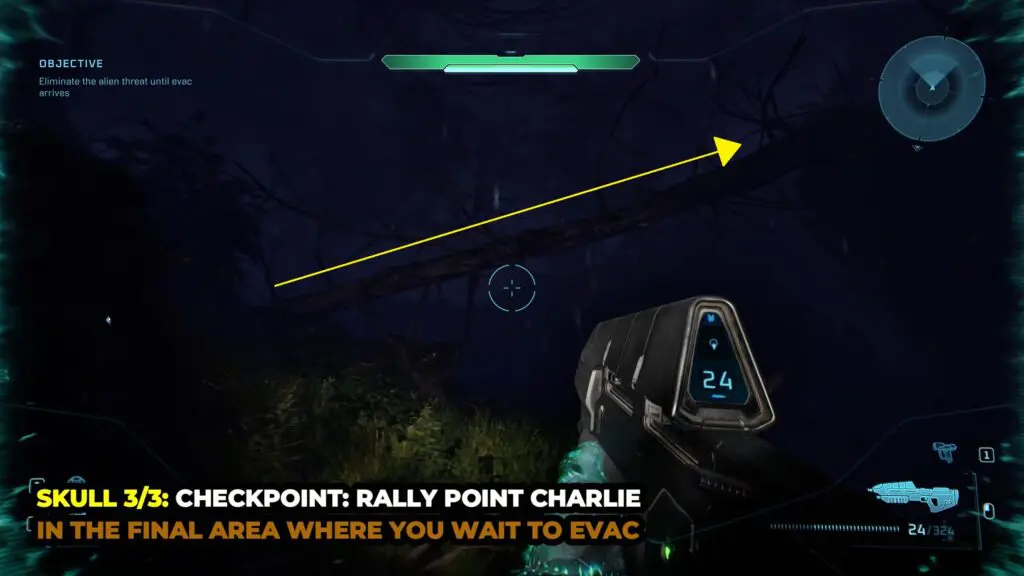
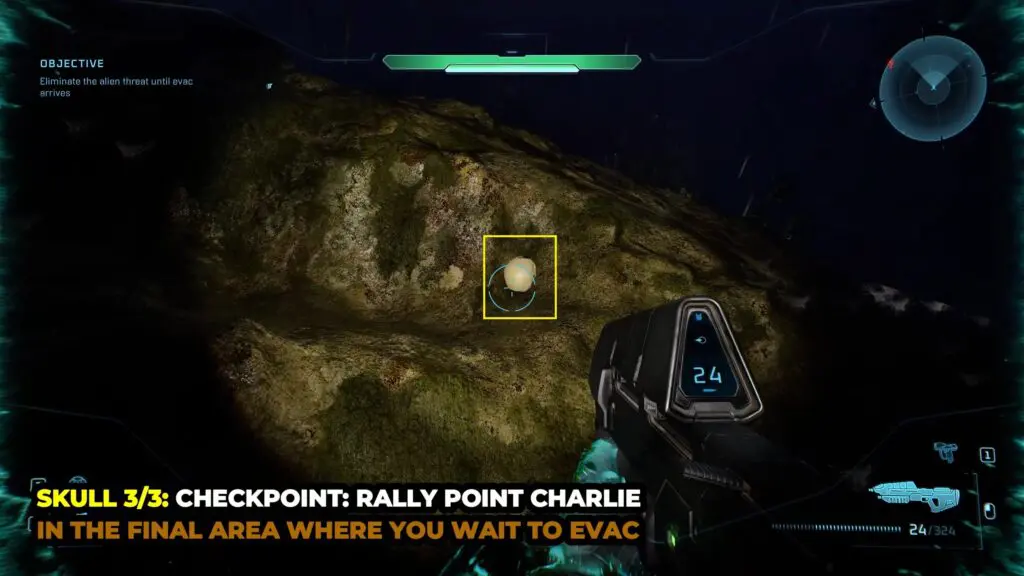
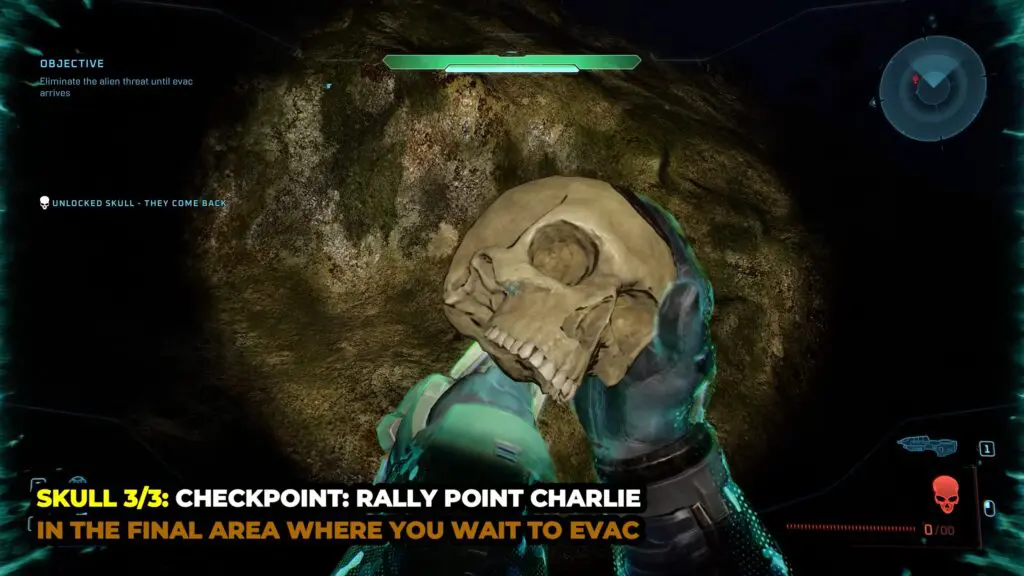
At the end of the branch, look to your left to find the Skull on the ground.
The Library
Skull 1
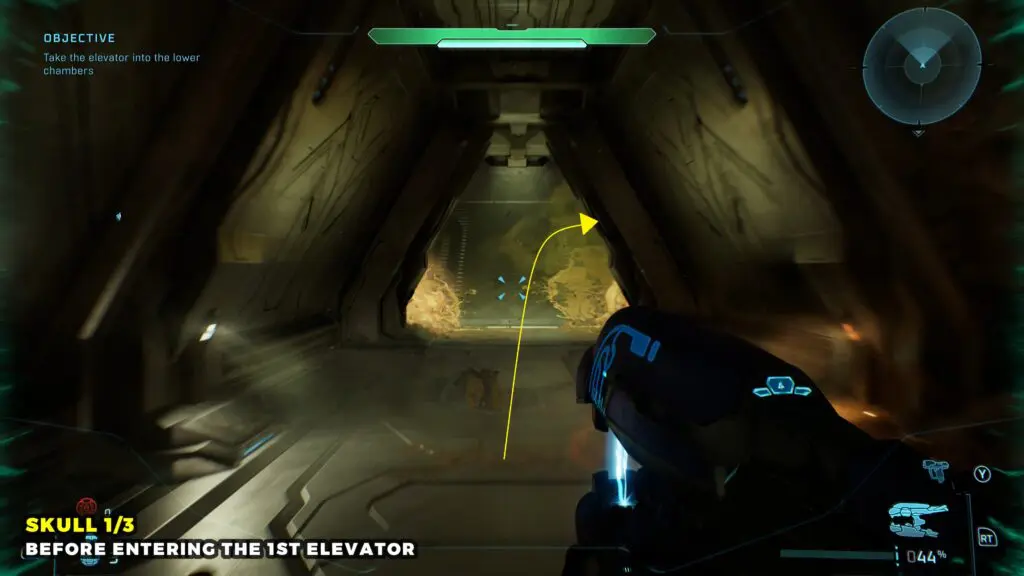
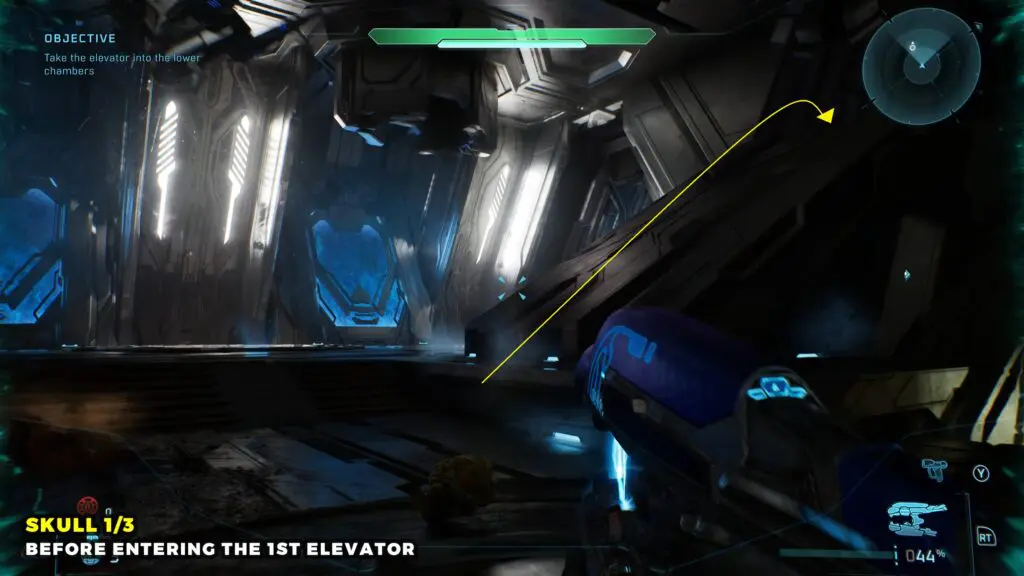
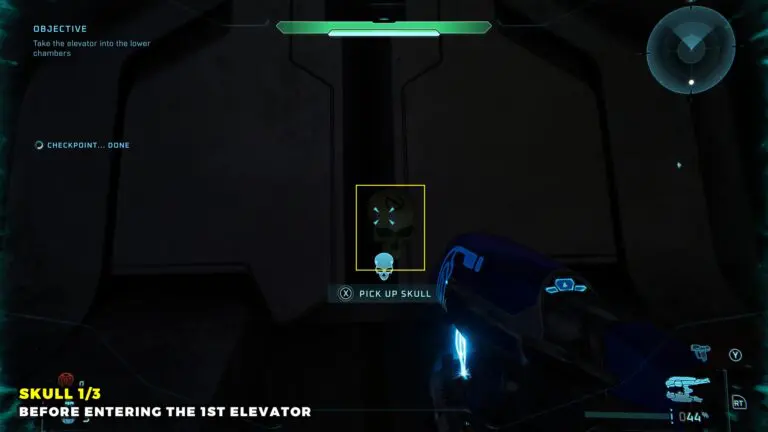
Progress through the mission until you reach the tunnel. After exiting the tunnel, don’t go to the elevator directly. Instead, turn around and jump onto the ramp along the left side of the tunnel entrance. Climb to the top to find the Skull.
Skull 2
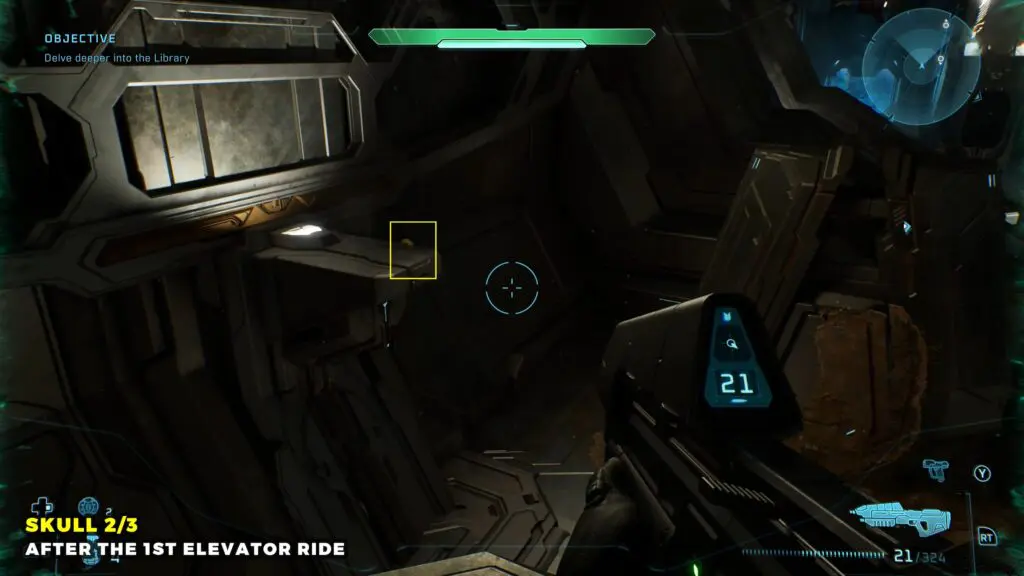
After taking the first elevator down, continue until you reach the locked door where 343 Guilty Spark is waiting. Climb one of the nearby ramps across the locked door.
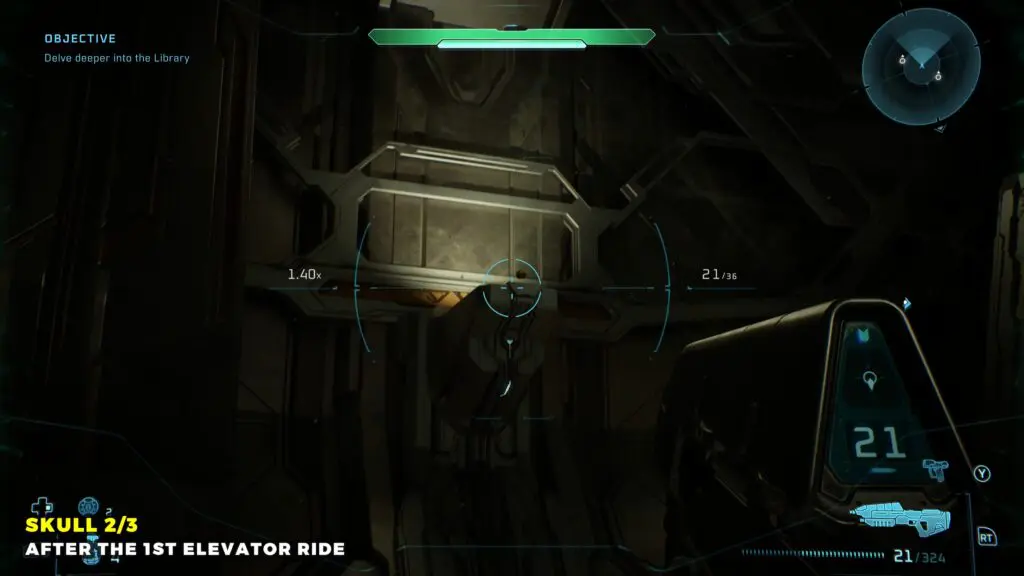
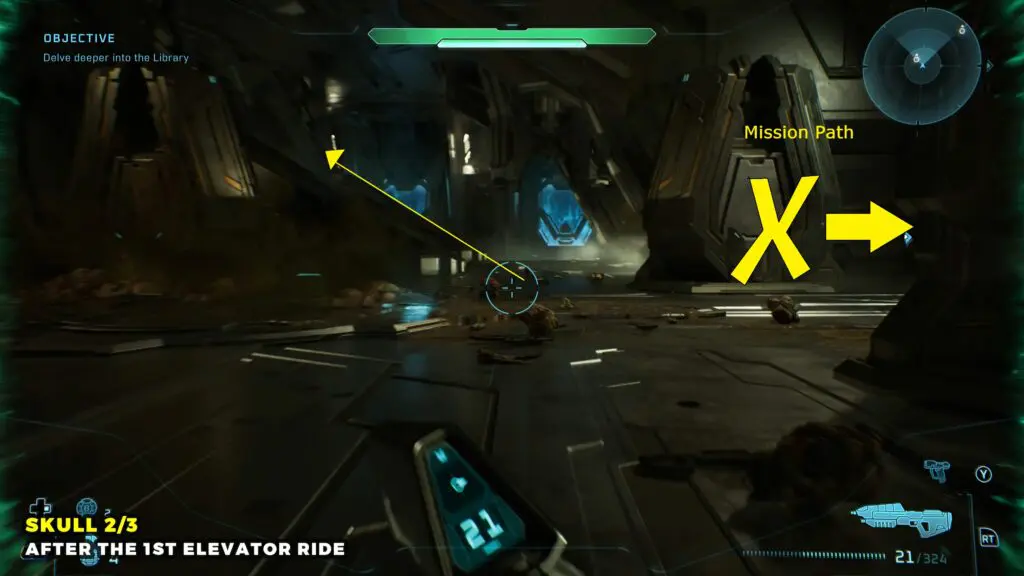
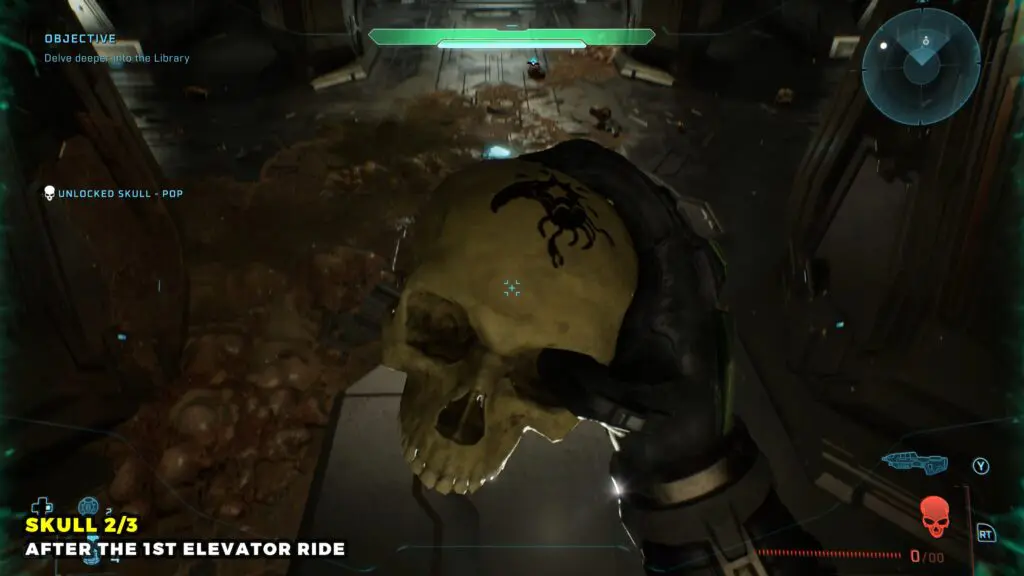
Jump across to the opposite platform, where you’ll find the Skull on a small ledge against the wall.
Skull 3
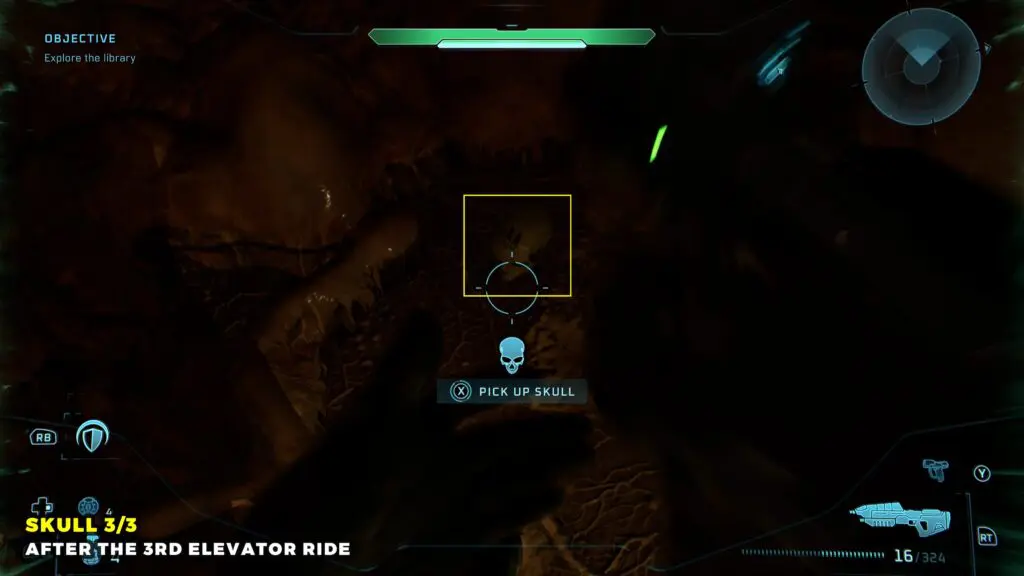
After the third elevator ride down, follow the ramp straight ahead and go down.
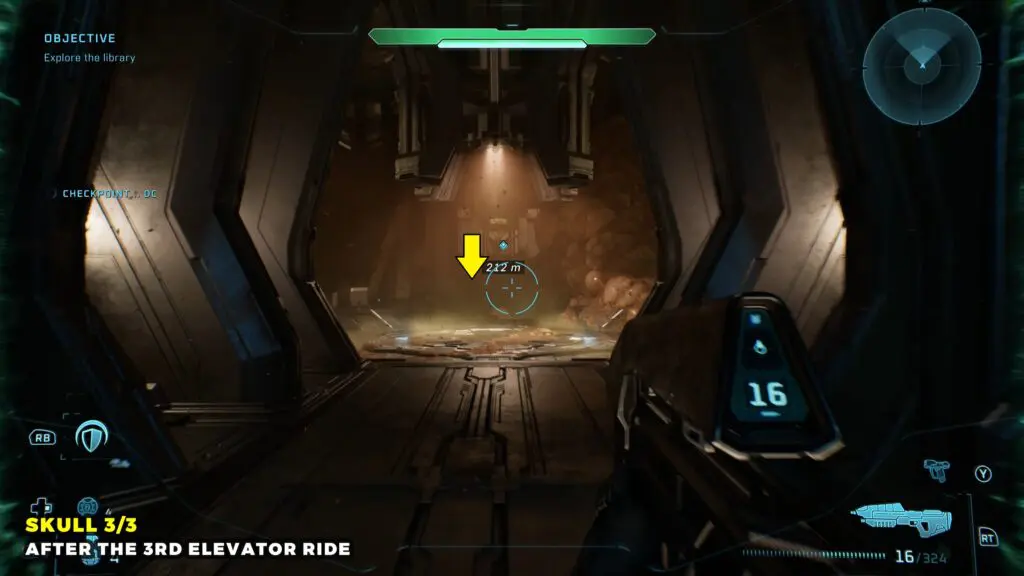
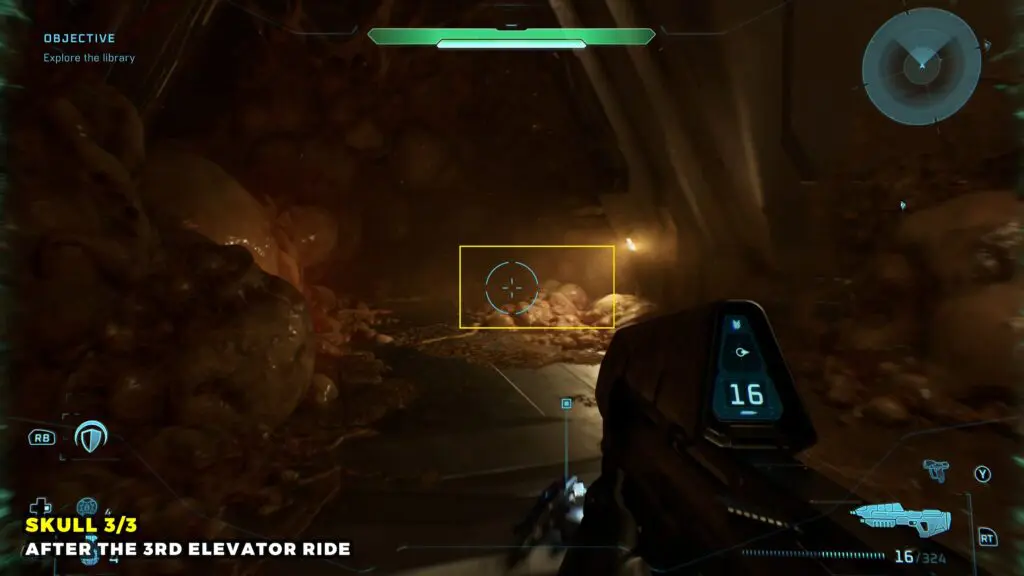
As you pass through the doorway at the bottom, check the left corner to find the Skull on the ground.
Two Betrayals
Skull 1
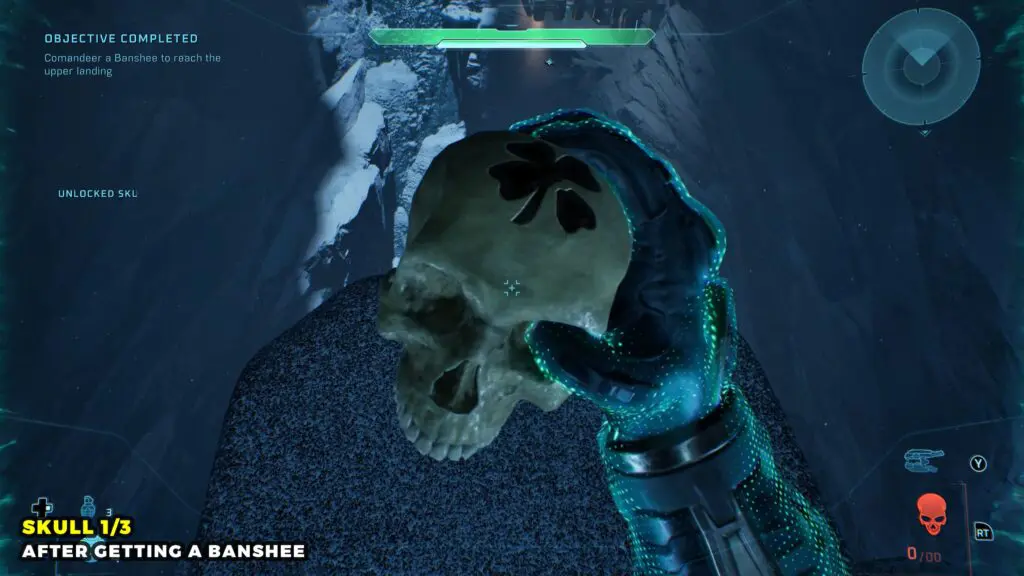
Once you get outside, take a Banshee and fly back toward the building you just exited. Head straight for the glowing blue light in the center of the structure.
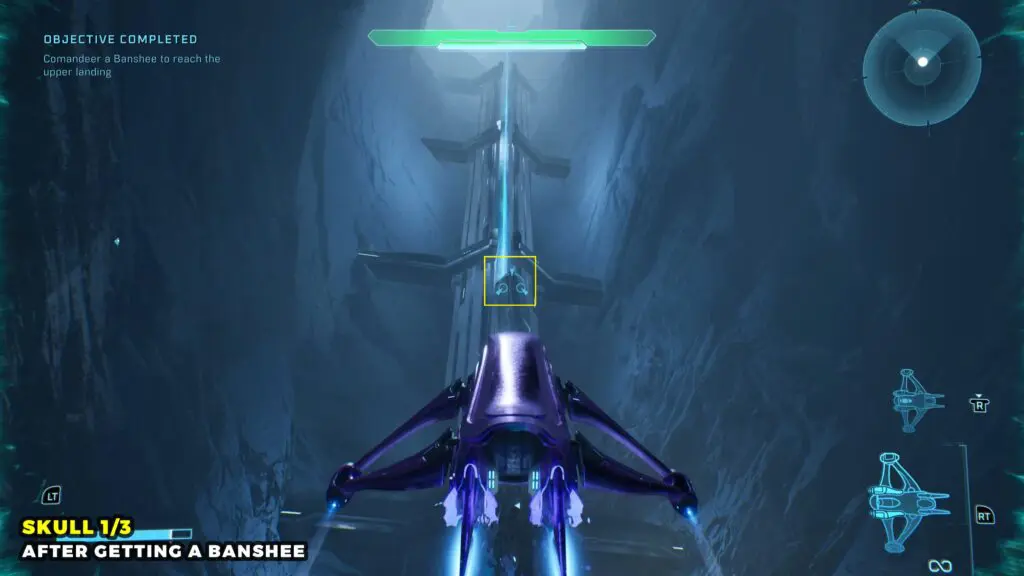
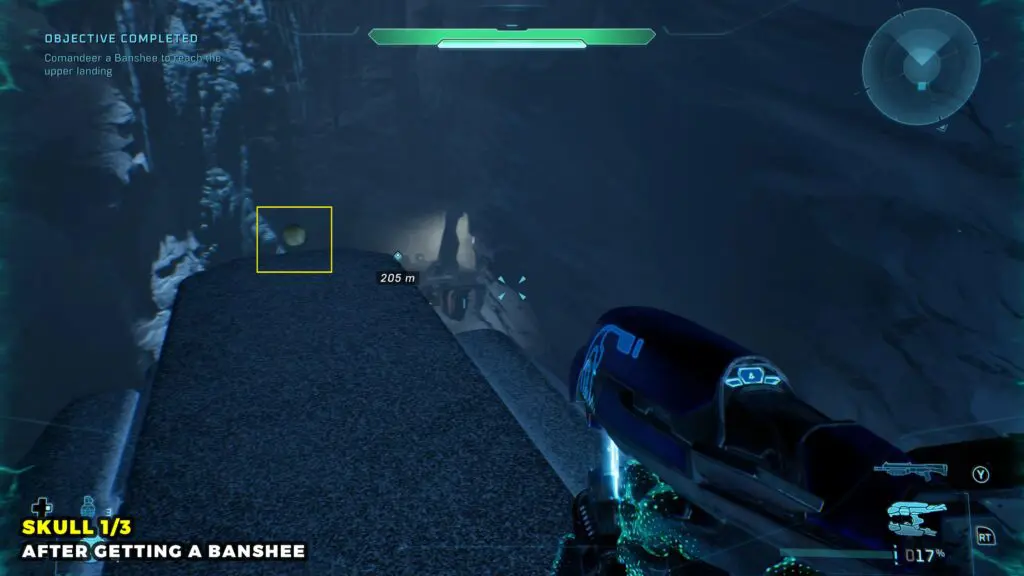
Just in front of the blue light is a platform. Land the Banshee there to find the Skull.
Skull 2
This Skull is available on your way to the second pulse generator. Once you get outside, you’ll see three large ramp-like structures directly ahead.
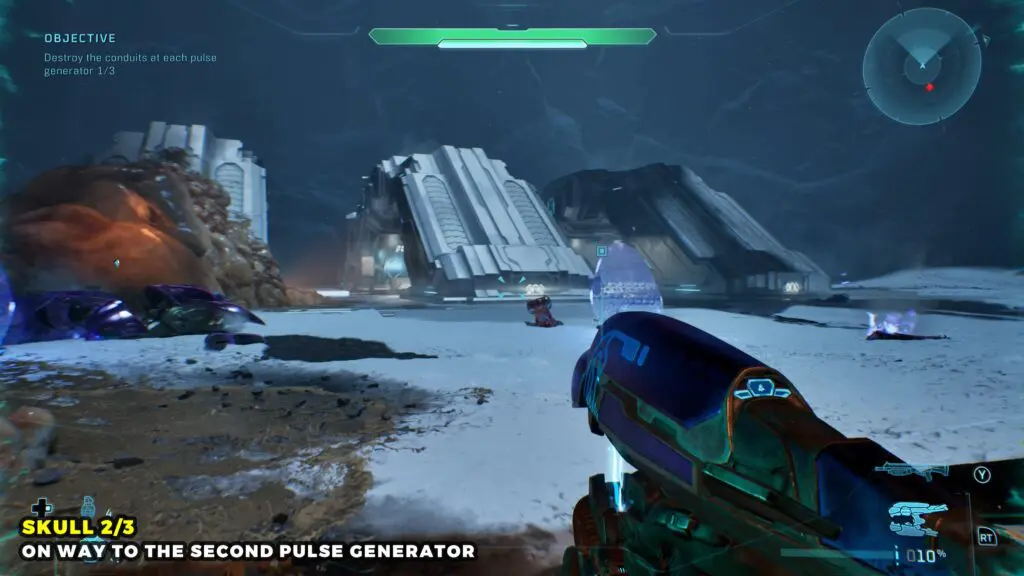
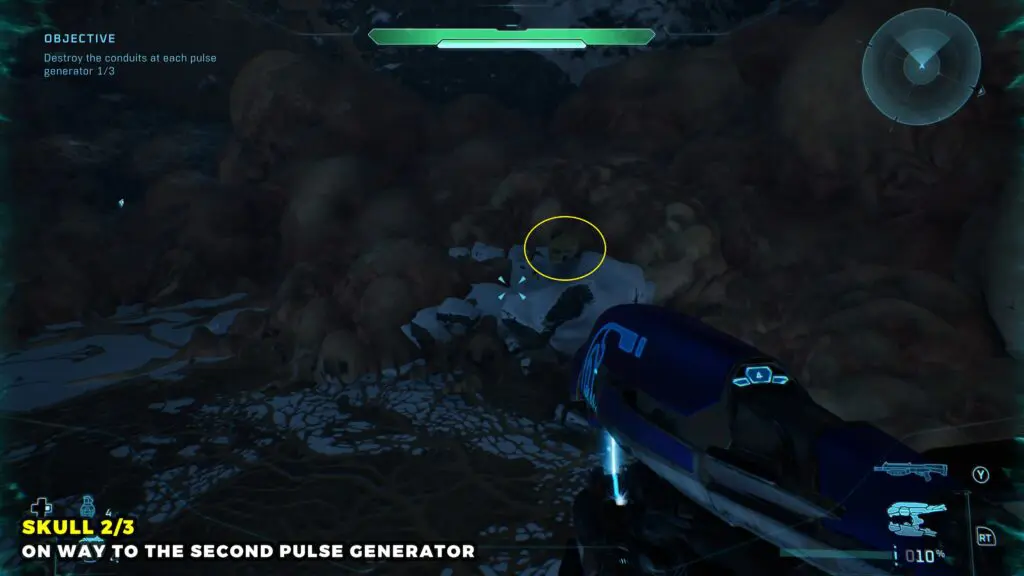
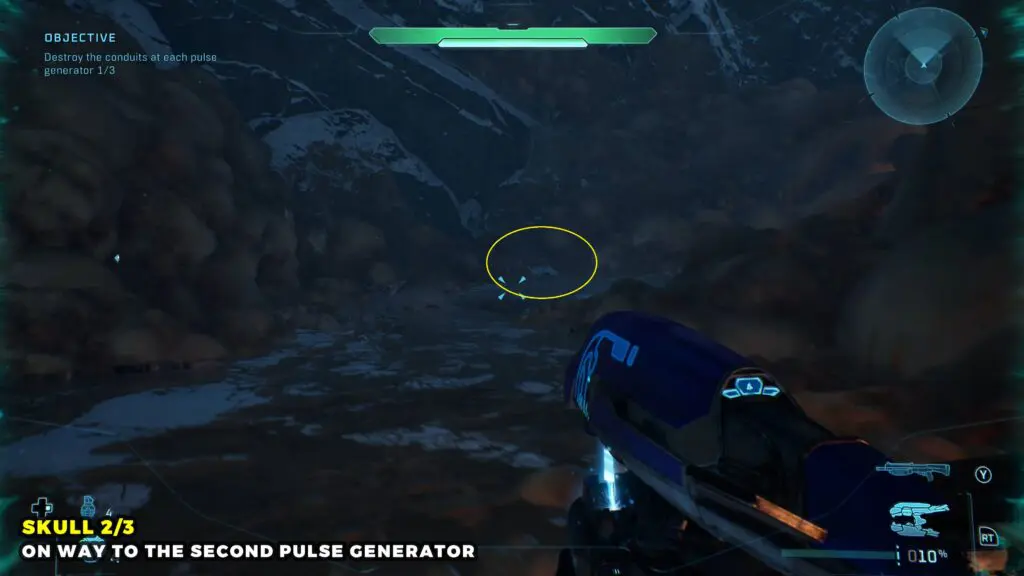
Head behind them and search among the Flood growths to find the Skull.
Skull 3
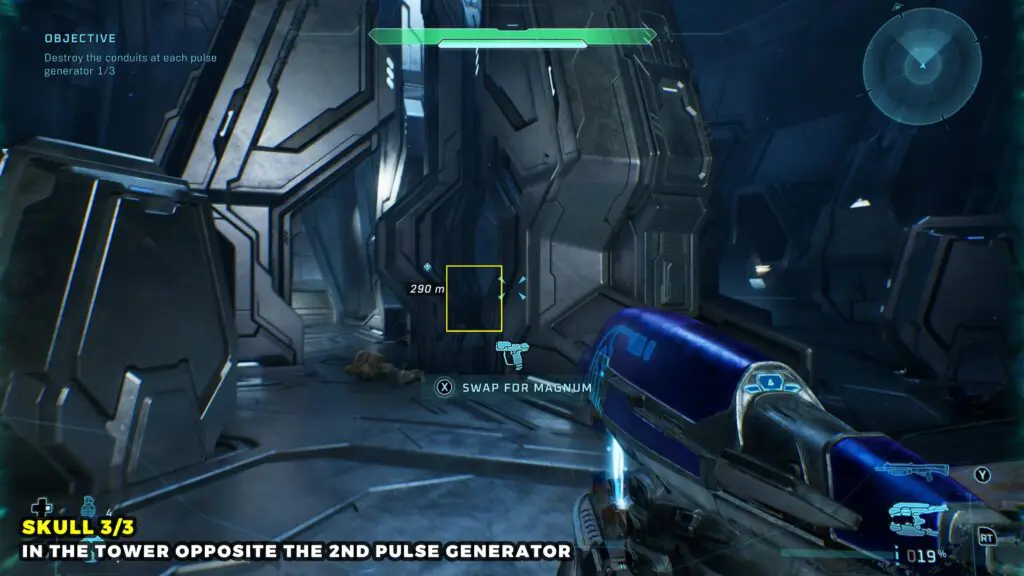
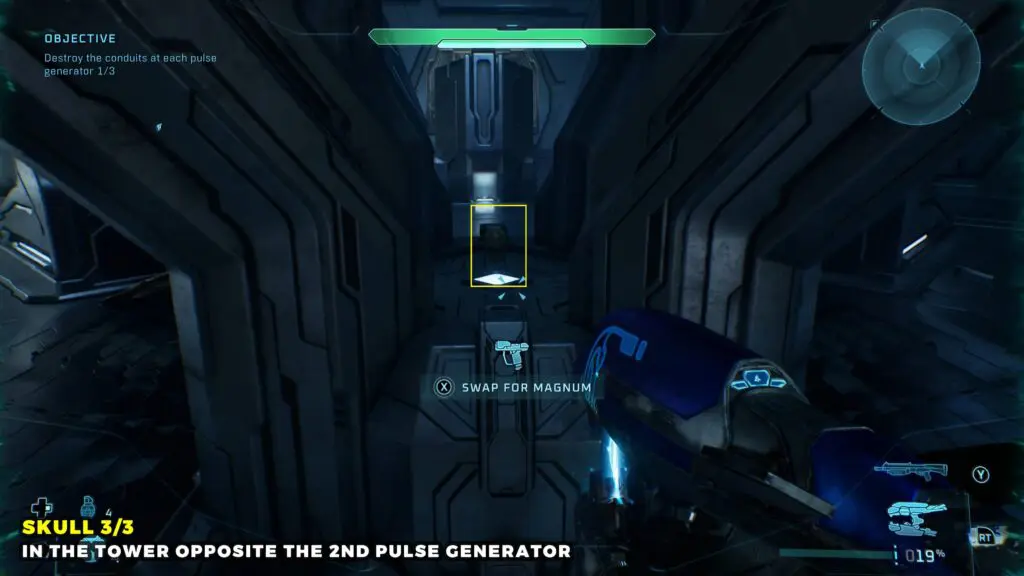
The Skull is inside the tower directly opposite the second pulse generator. Steal a Banshee and fly to the top of the tower.
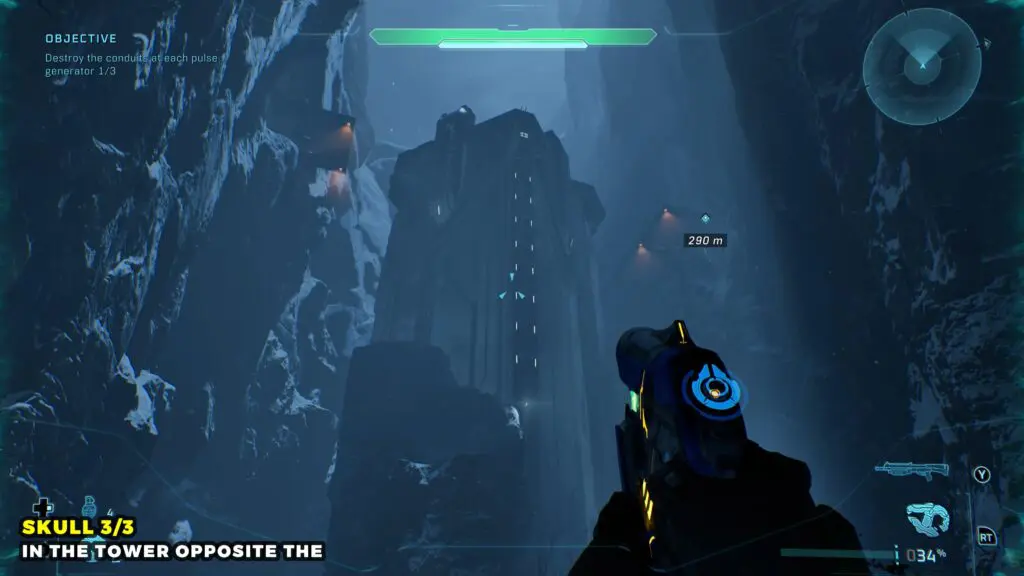
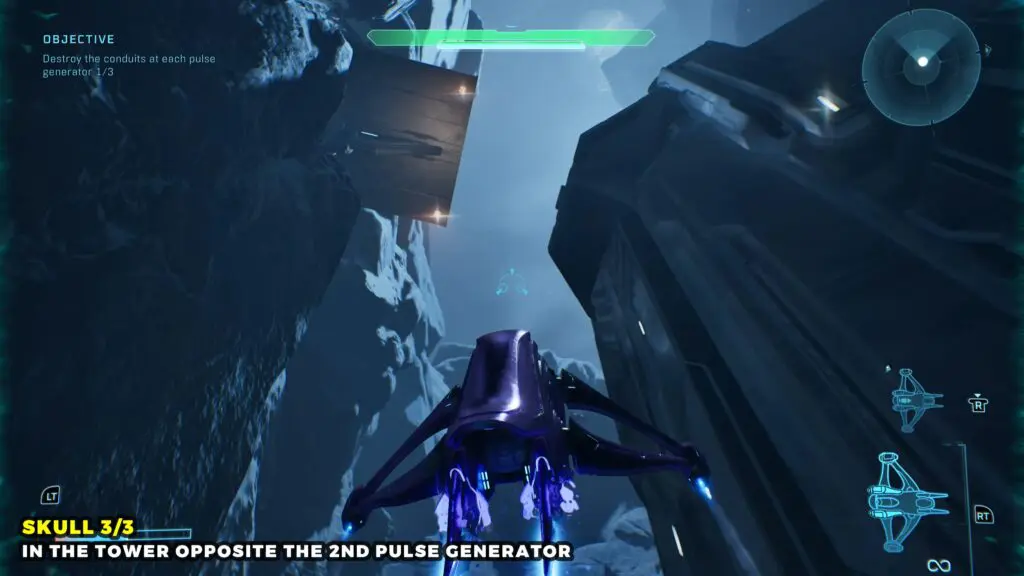
Interact with the control panel to unlock a door on a higher platform to the right. Fly the Banshee over to the newly opened platform and enter the tower.
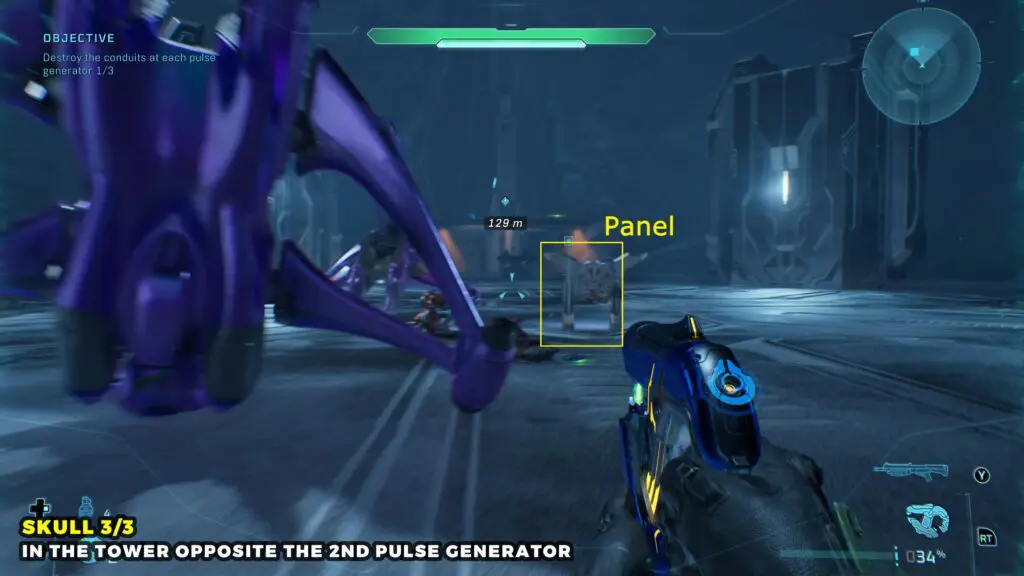
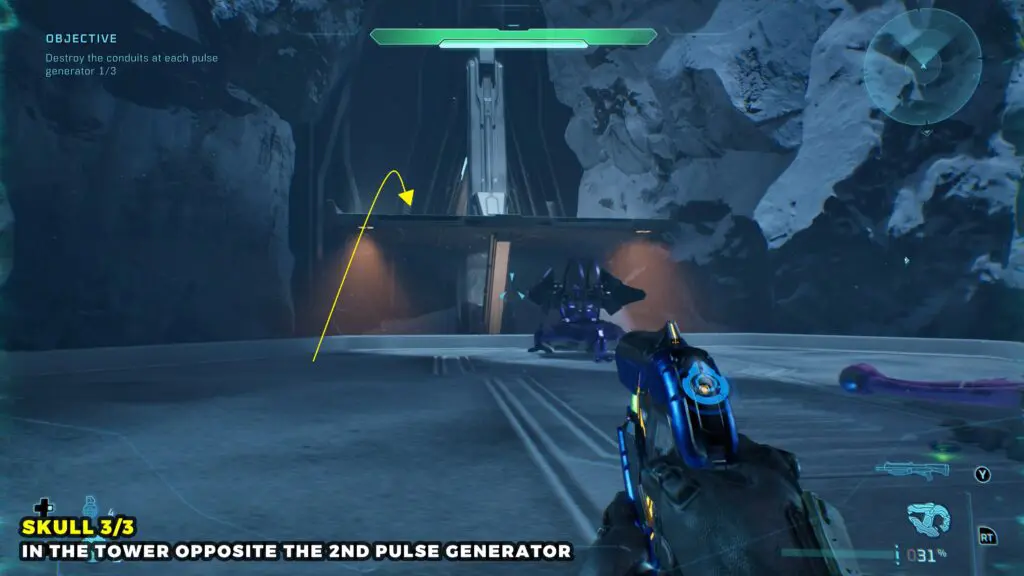
Defeat all the enemies and follow the tunnel to the second control panel. Activate it to unlock another room, then head inside. Then open another door.
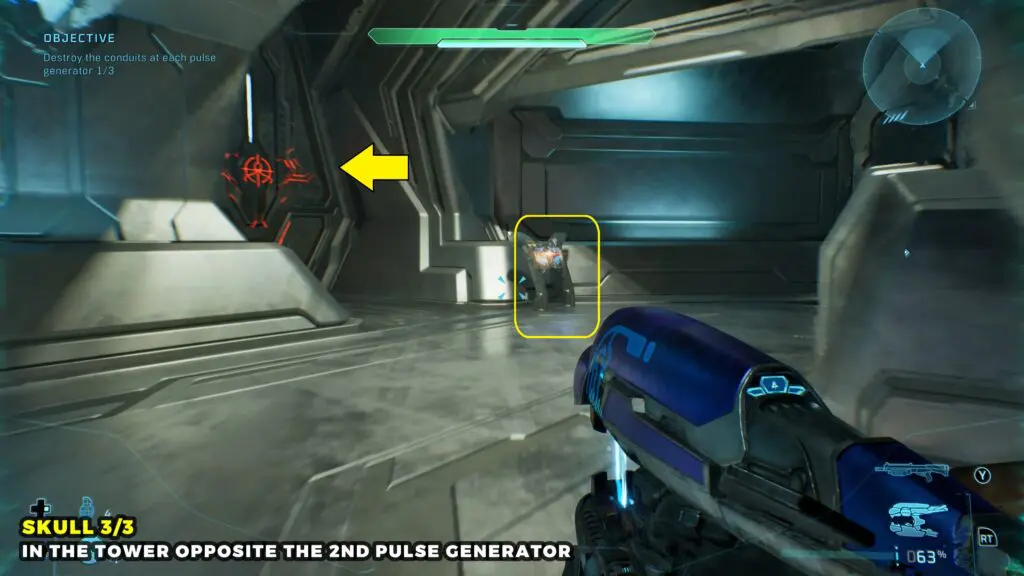
Defeat all the enemies in this room, and the Skull will appear inside the structure in the center.
Keyes
Skull 1
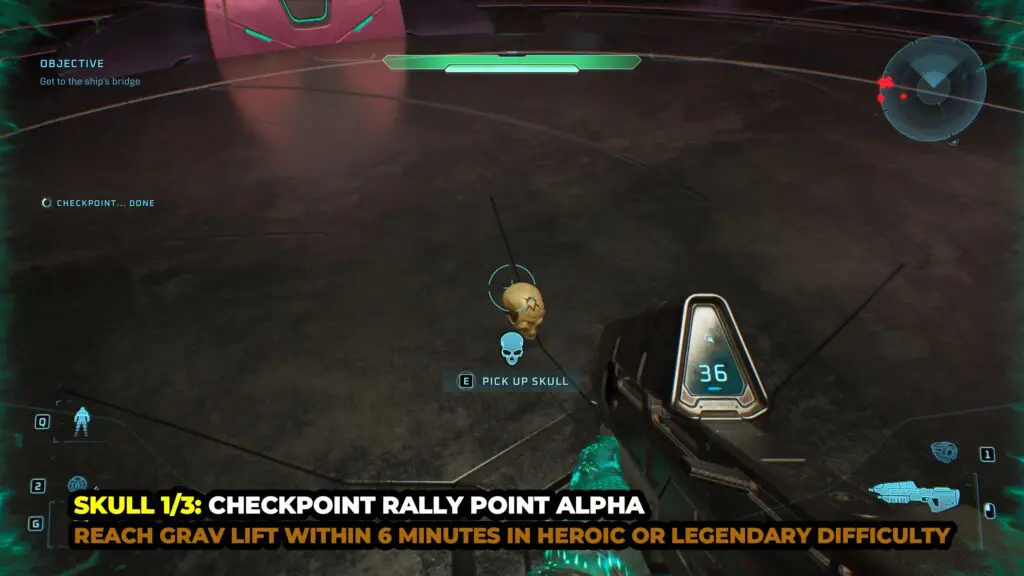
To get the skull, you need to reach the top of the Grav lift within 6 minutes on the Heroic/Legendary level.
Skull 2
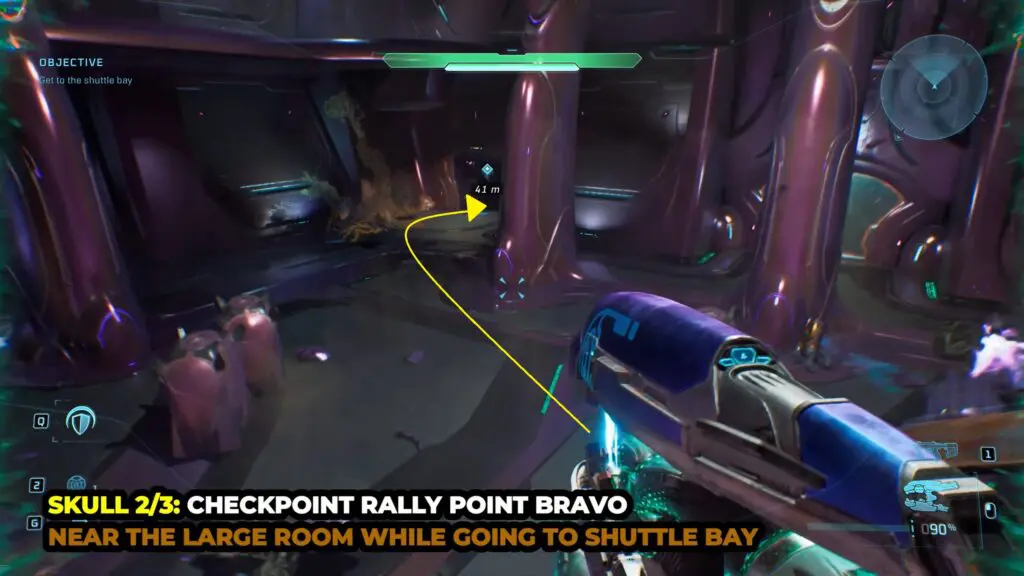
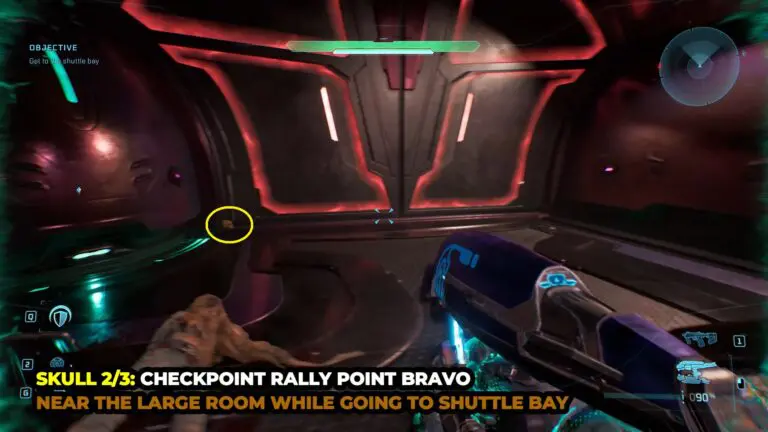
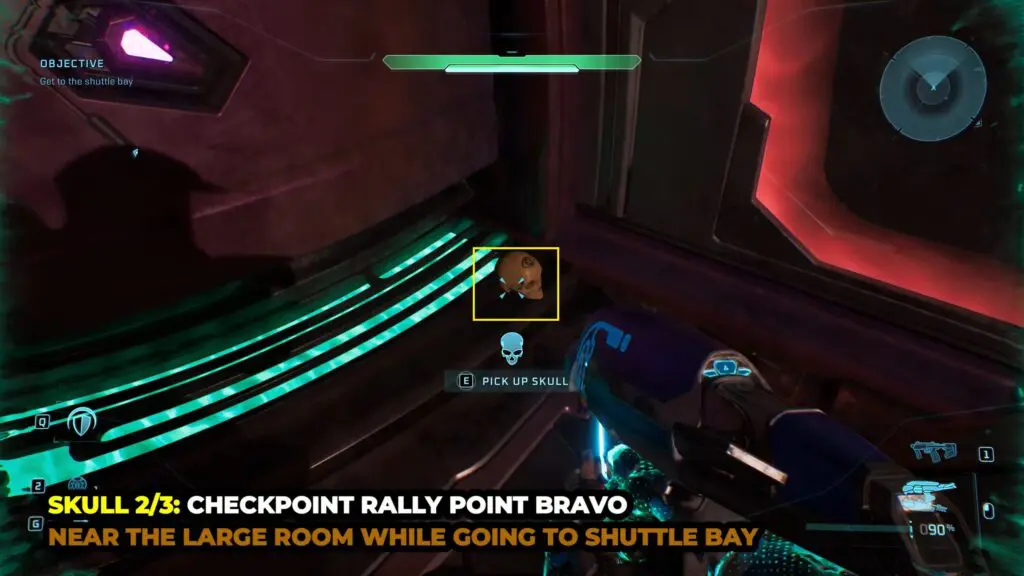
While making your way to the shuttle bay, you’ll reach a larger room filled with Flood and other enemies. Follow the corridor on the left to reach a locked door. The skull is beside this locked door.
Skull 3
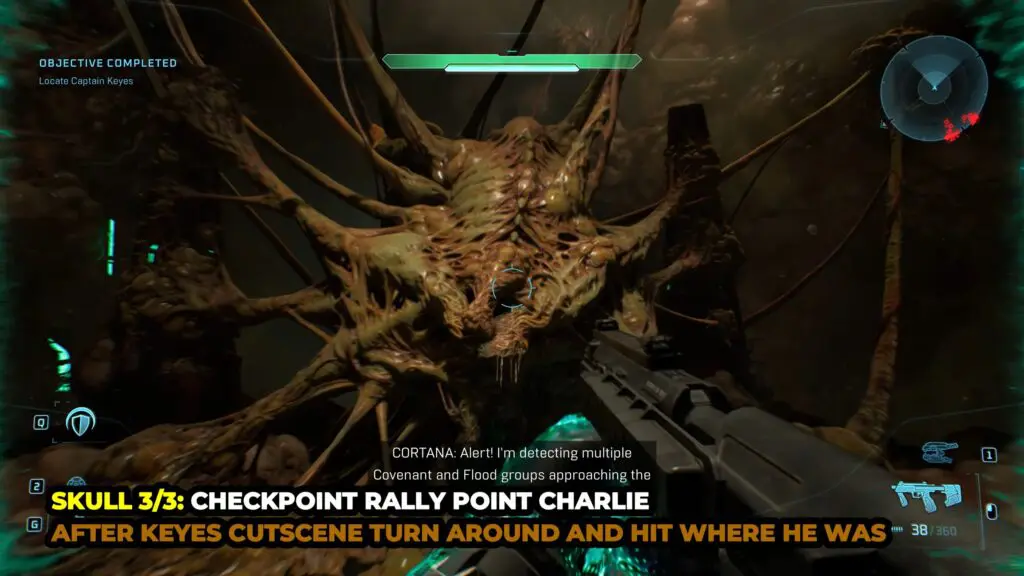
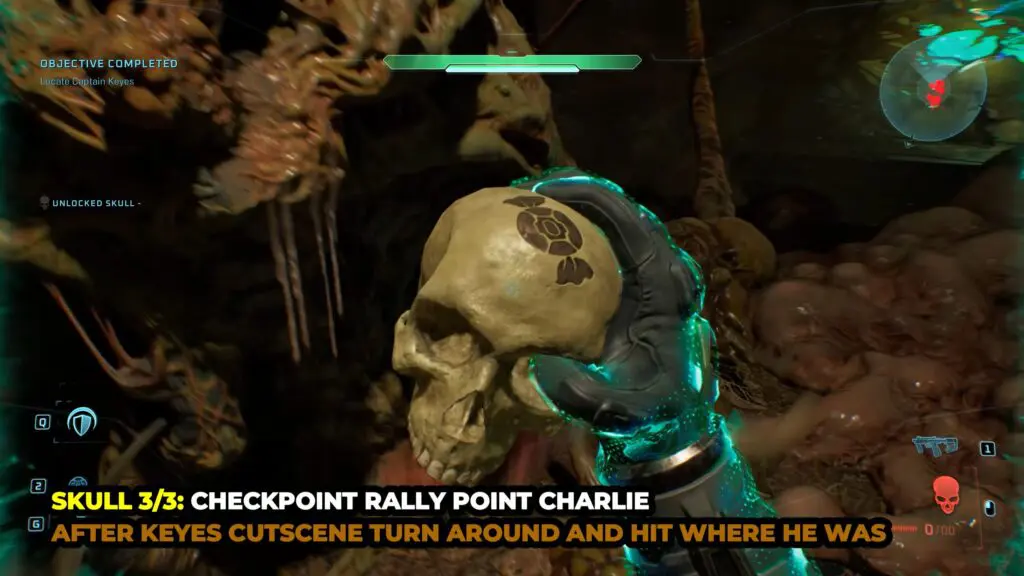
After the cutscene where you find Captain Keyes, regain control and turn around. Melee the Flood growth where he was standing three to four times, and the Skull will appear.
The Maw
Skull 1
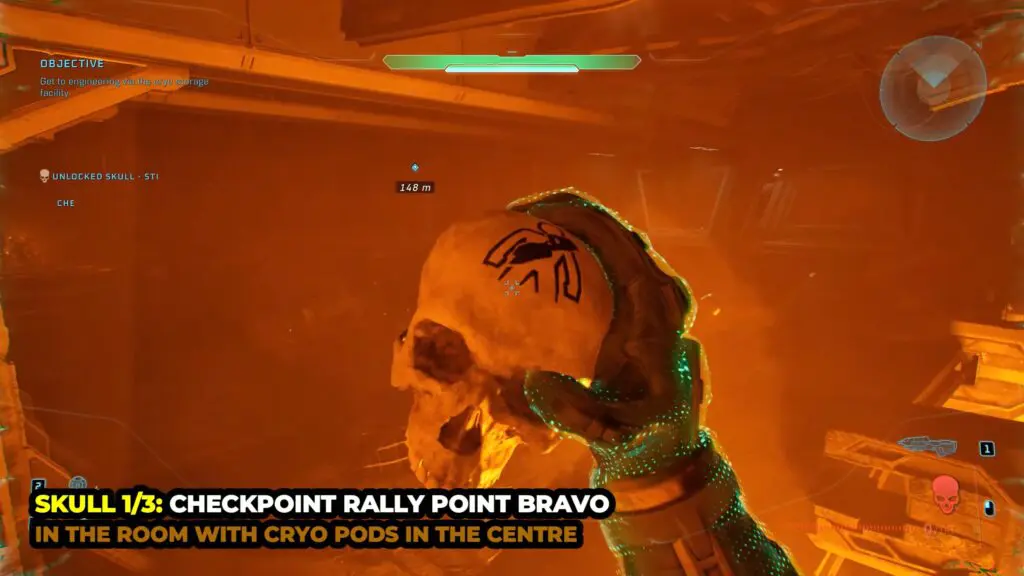
As you progress toward the cryo storage facility. On the way, you’ll enter a large room with cryo pods in the center.
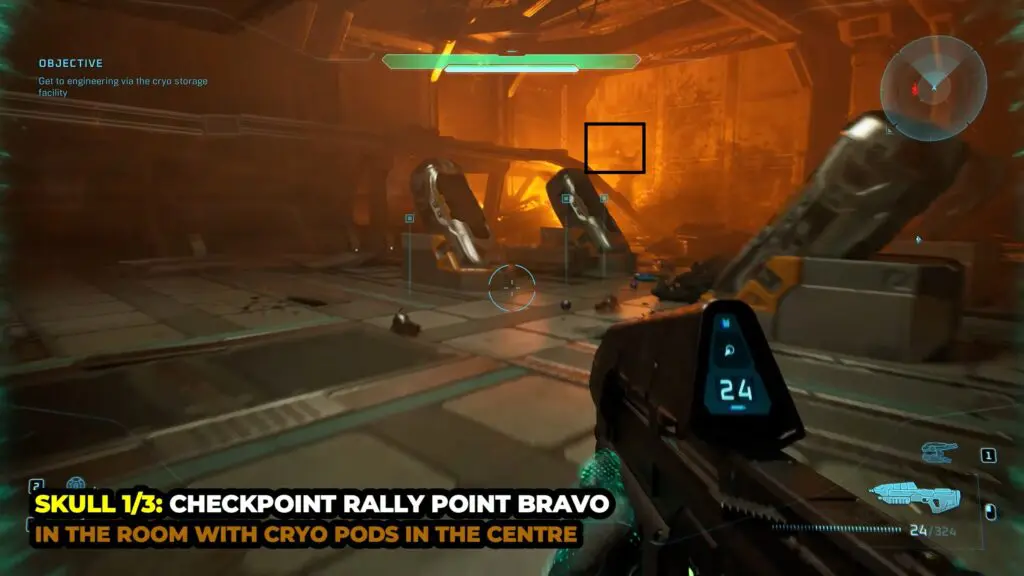
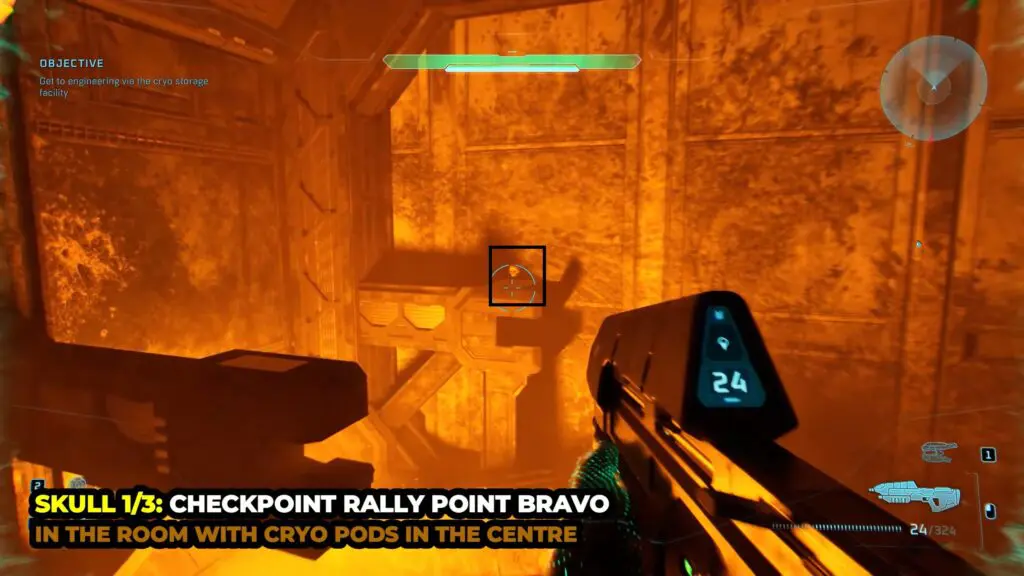
From the entrance, head to the back-left corner of the room to find the Skull on a small ledge.
Skull 2
While progressing through the mission, you’ll reach a large hangar where your objective is to destroy the cores. Make your way up to Floor 3 and head toward the gate marked Exit on the left, but don’t go through it.
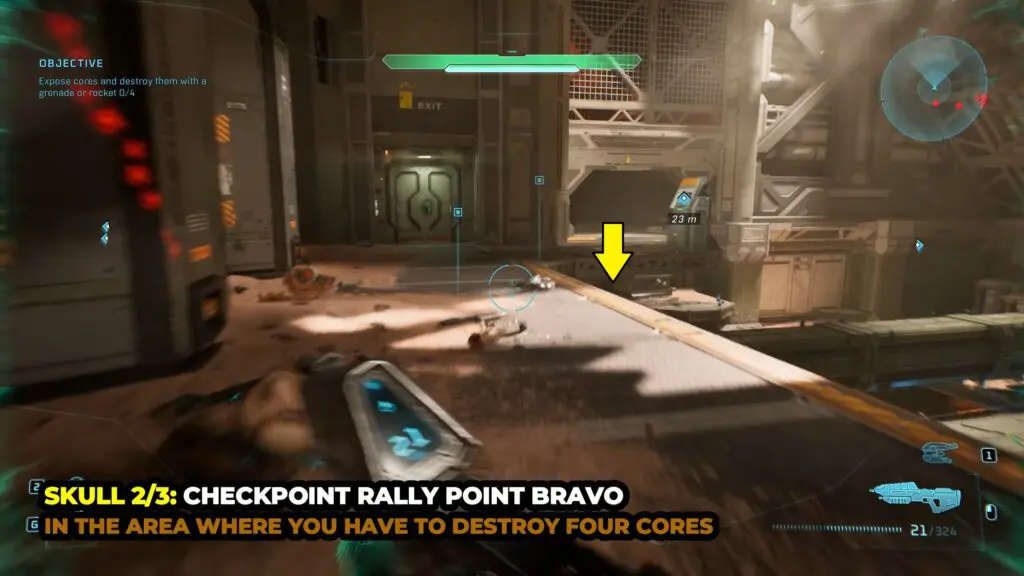
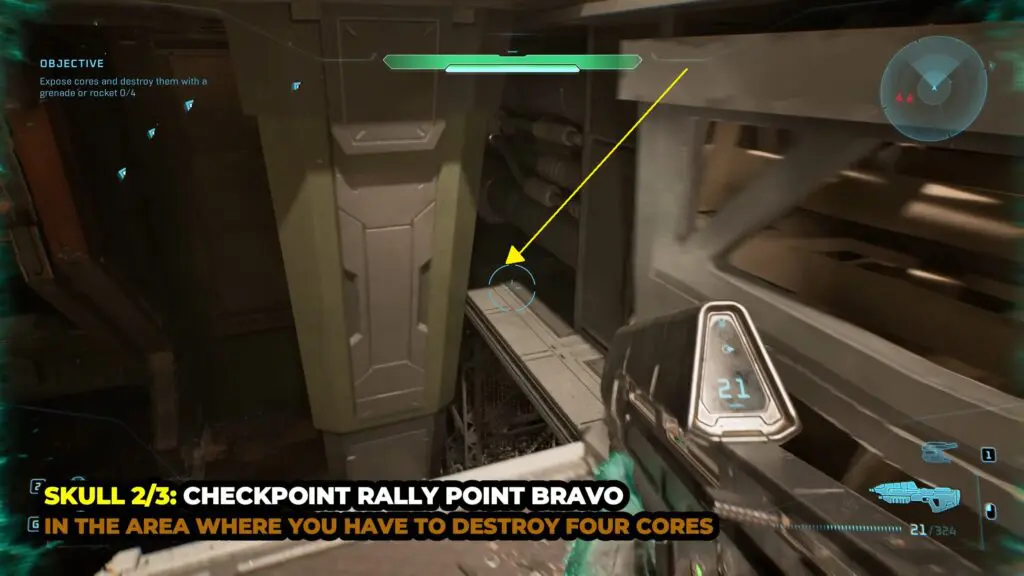
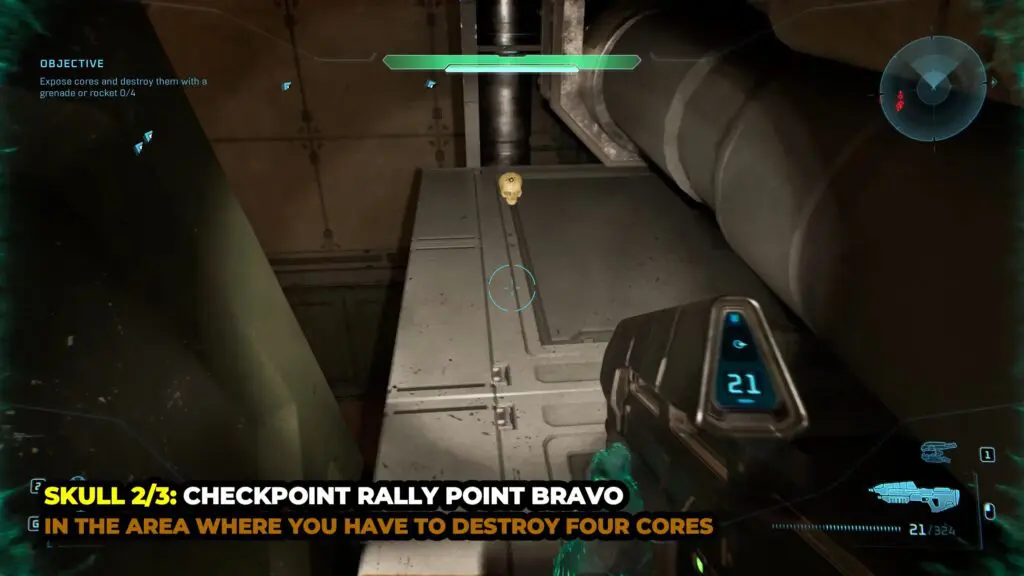
Instead, jump to the open doorway on the right. From the ledge, look down and slightly to the right to spot a narrow platform below. Drop onto it and follow the path to find the Skull at the end.
Skull 3
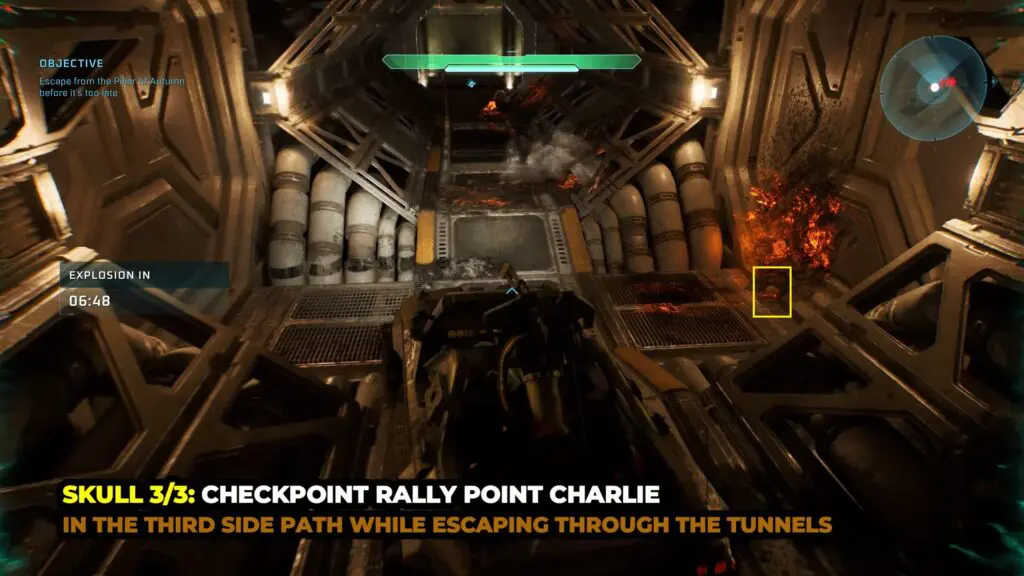
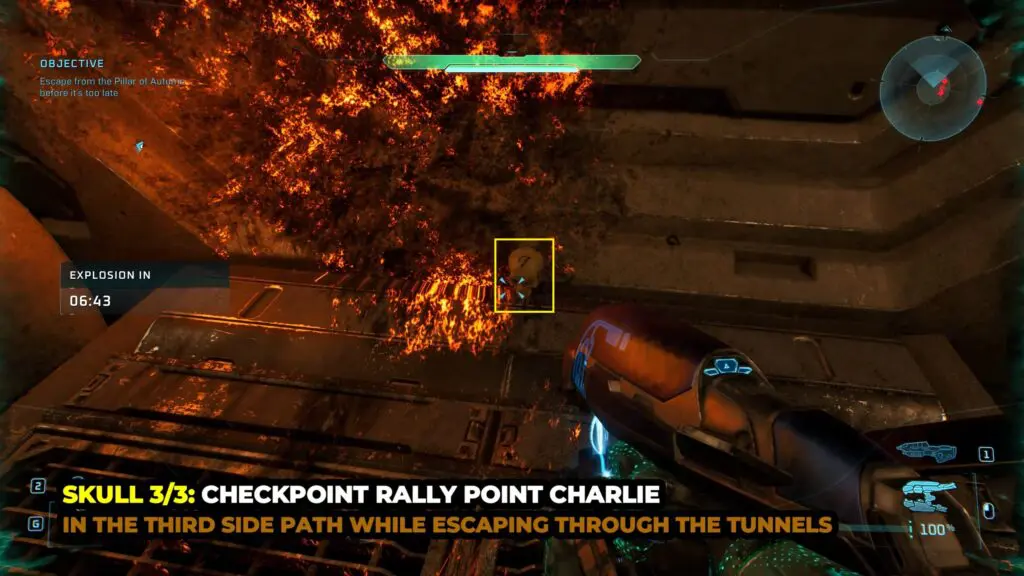
While escaping through the tunnel, watch for the third side tunnel on teh right side.
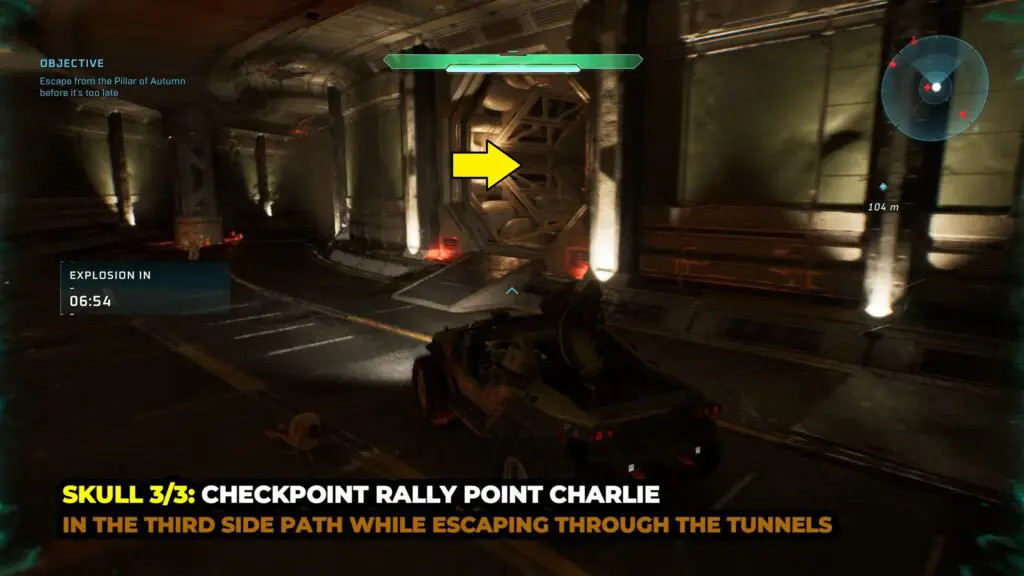
Drive into this side path, and you’ll find the Skull resting on the wreckage in the middle of the tunnel.
Bonus Missions
Boarding Action
Skull 1
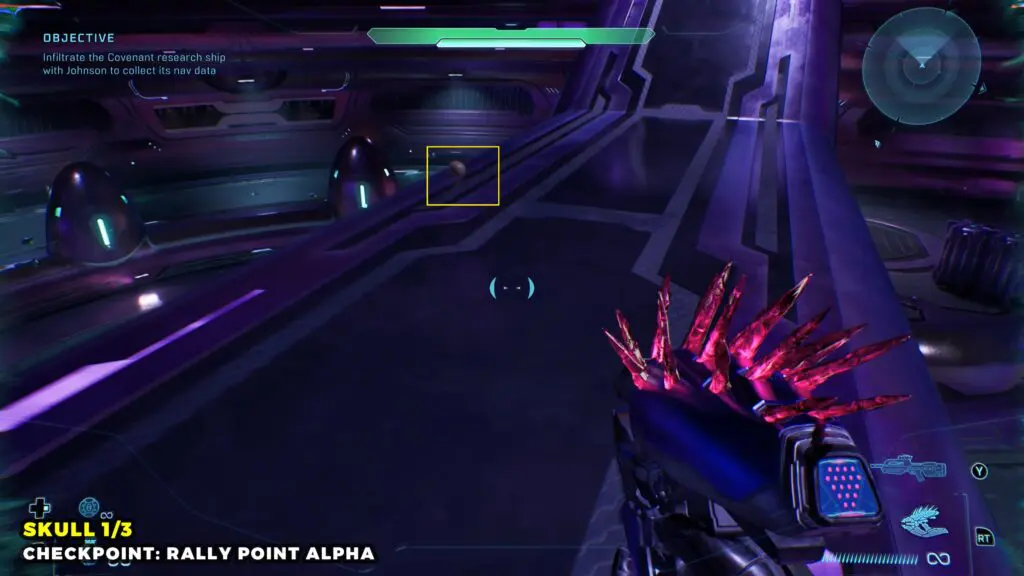
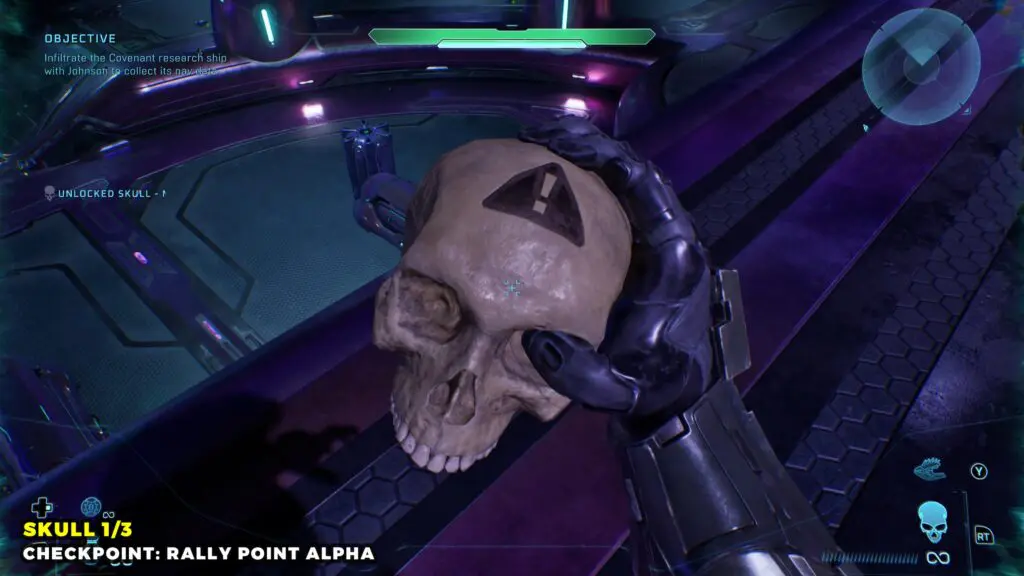
Continue through the mission until you come across two heavily armored white Hunters. After defeating them, ignore the objective marker and head to the right instead. Drop down to the lower level where the Covenant dropship is parked, then enter the doorway directly ahead.
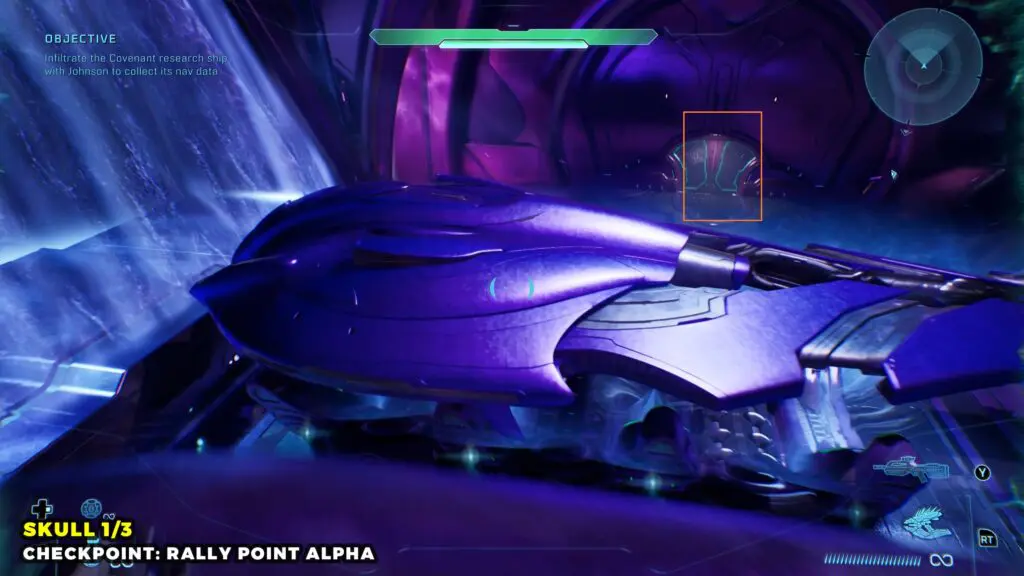
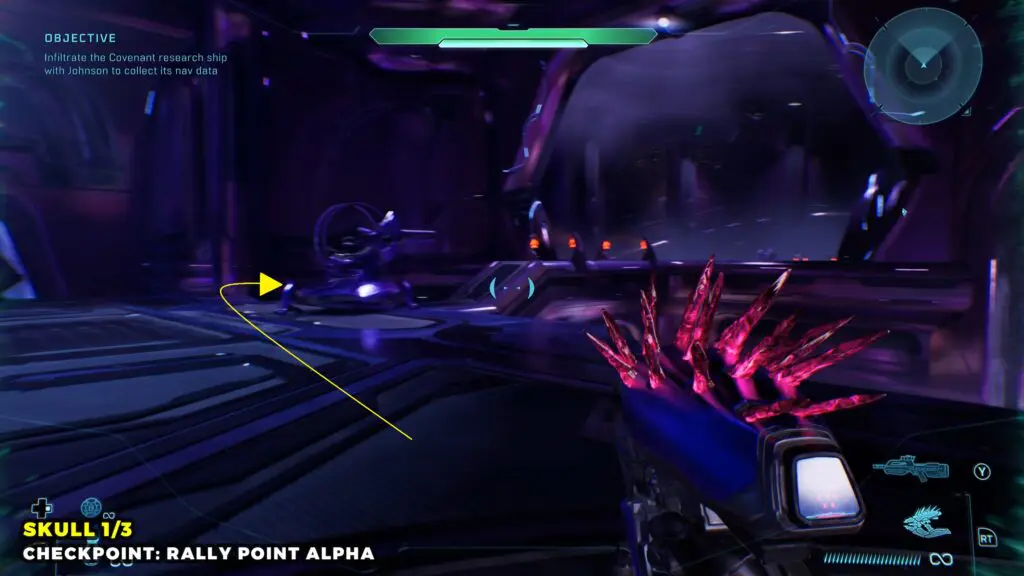
Inside, you will find a turret. Follow the bridge behind the turret connecting to the central platform to find the Skull lying on the floor.
Skull 2
After Sgt. Johnson comments that the area looks like a training room with a purple cylinder running horizontally near the roof. Go to the upper level.
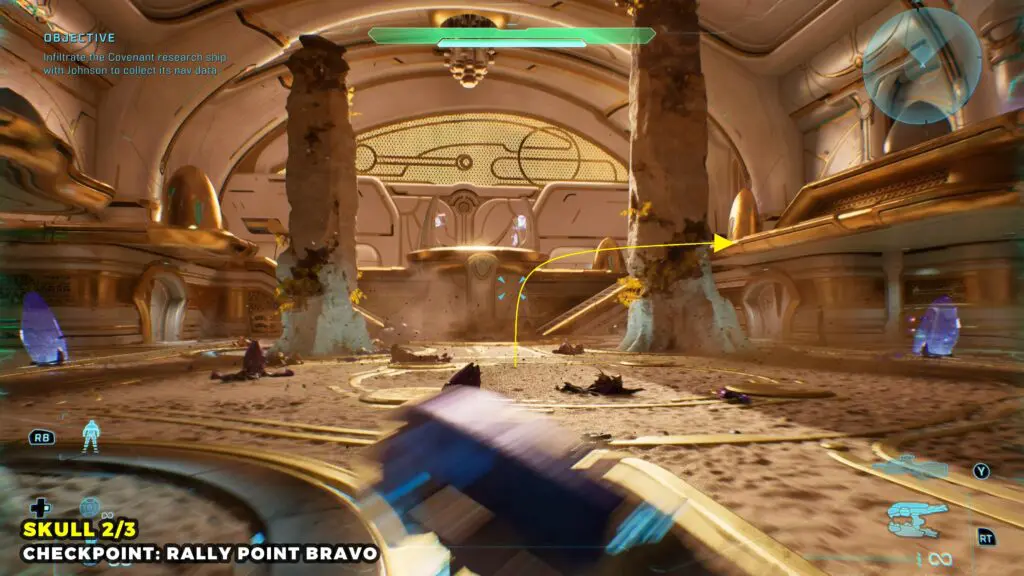
Go to the rear end of the upper level and take the left exit.
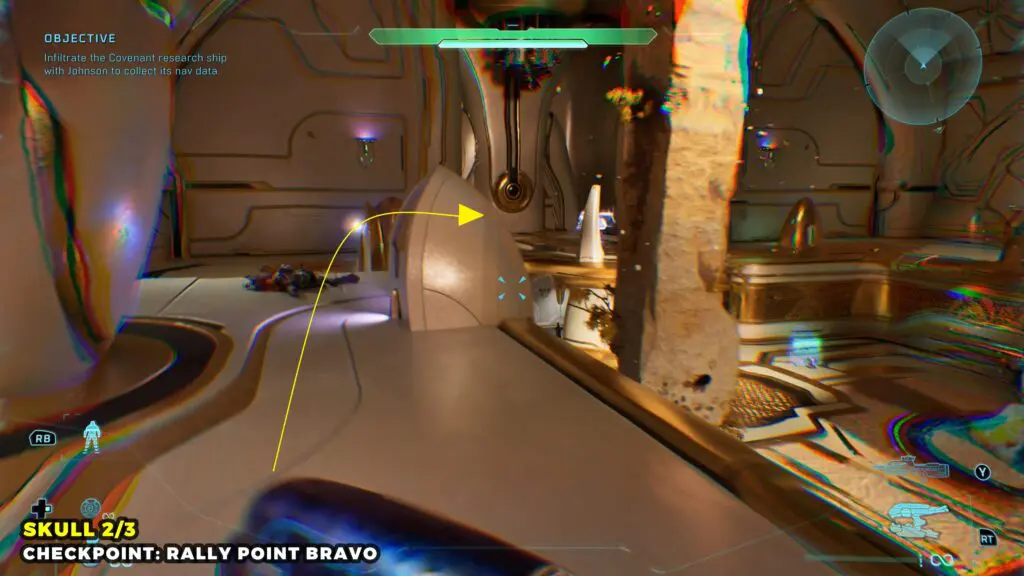
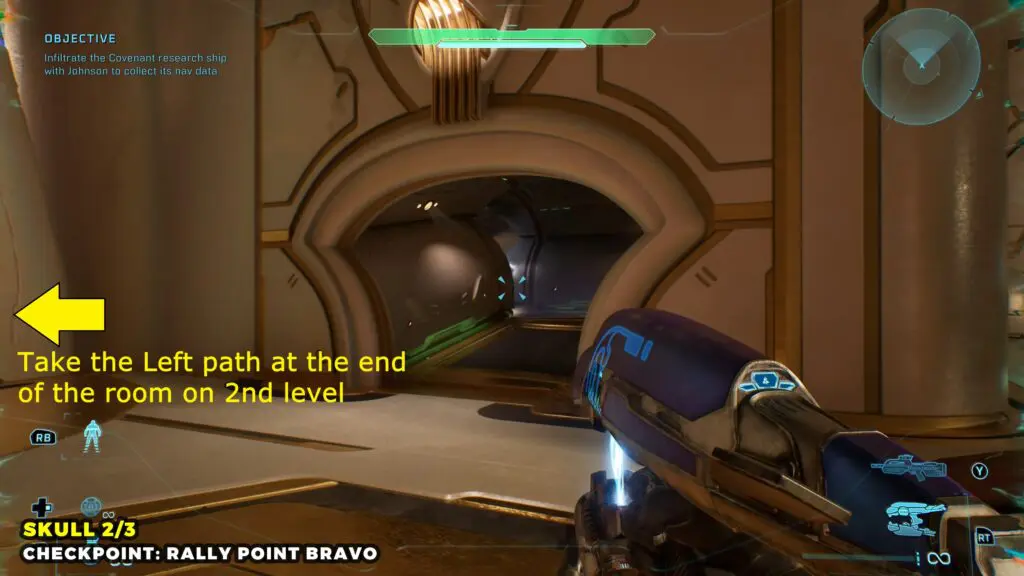
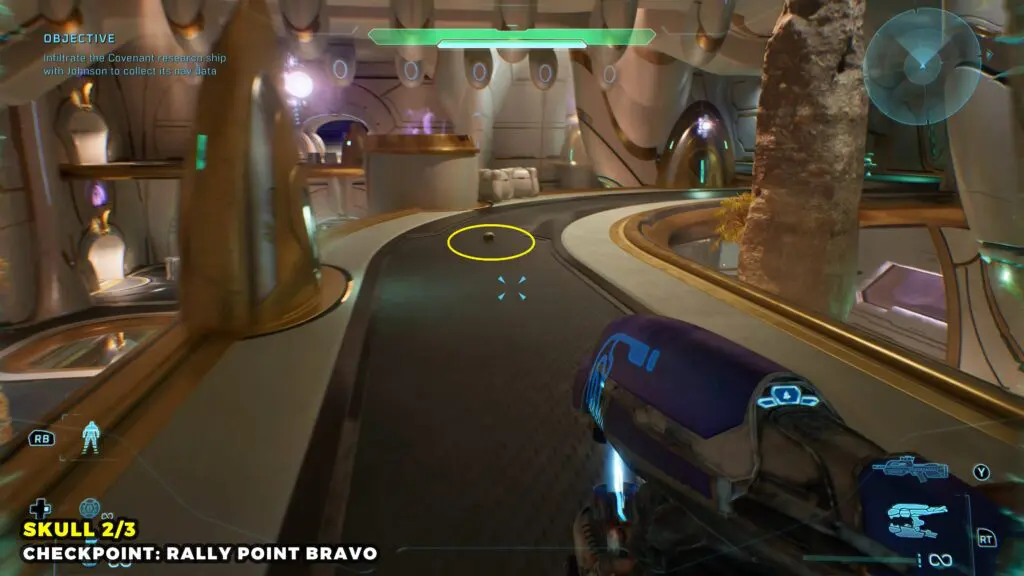
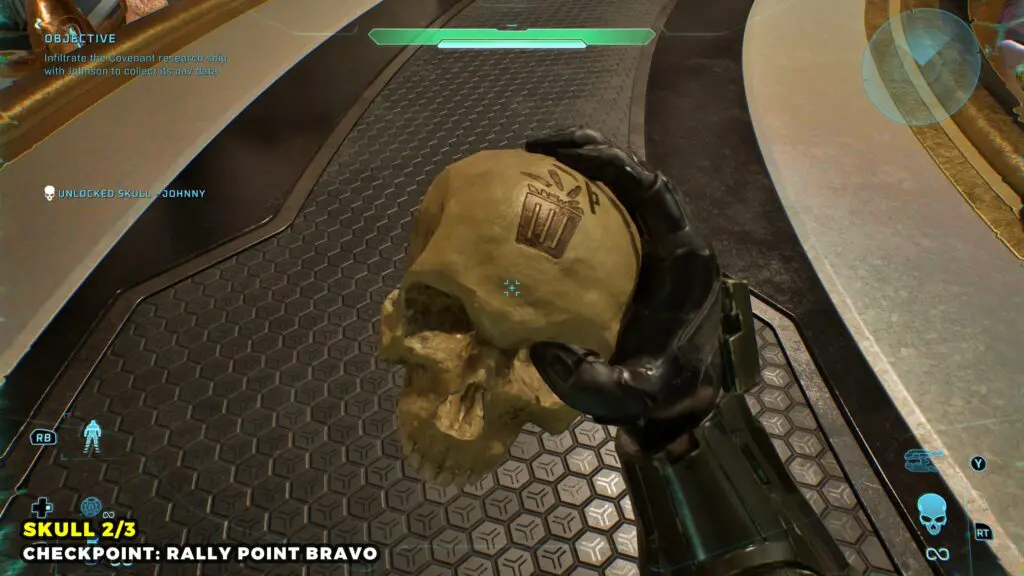
Follow the path to the upper ledge. The Skull is in the middle of the walkway.
Skull 3
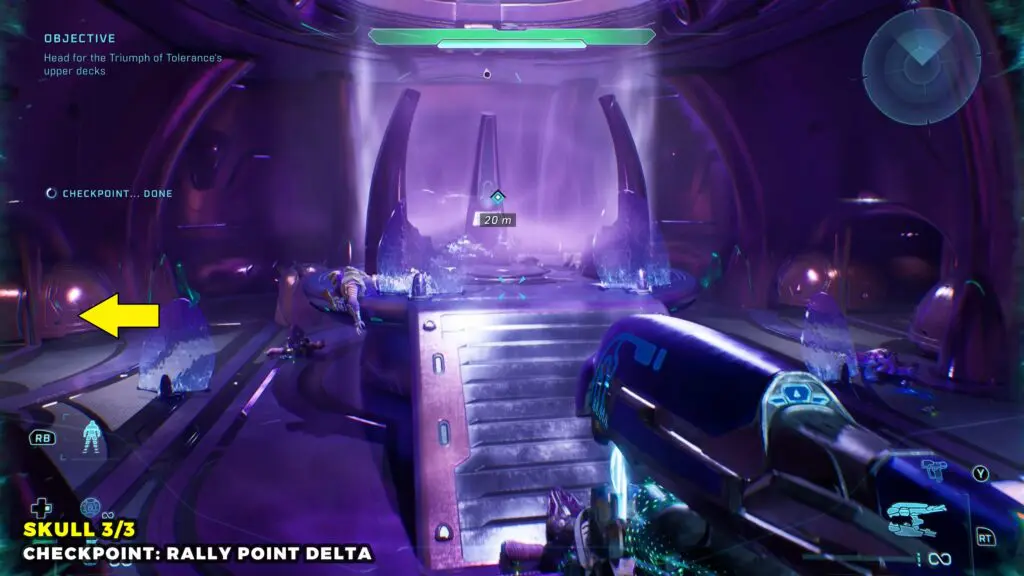
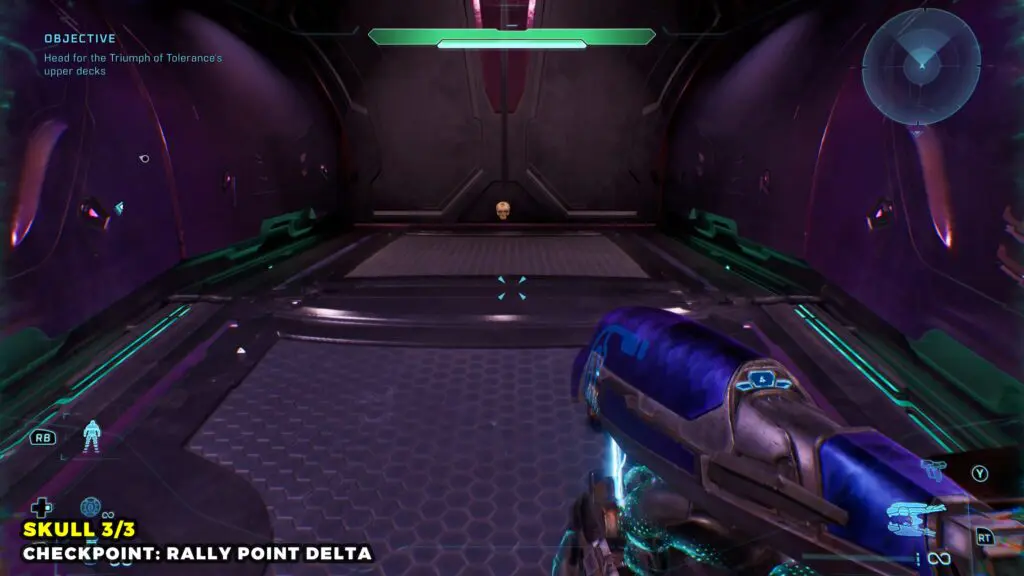
While making your way to the upper decks of the Triumph of Tolerance, you’ll reach a room where Sgt. Johnson activates the gravity lift after you defeat several waves of Covenant. Once the area is clear, go through the back-left door and follow the corridor to the end to find the Skull.
The Most Dangerous Game
Skull 1
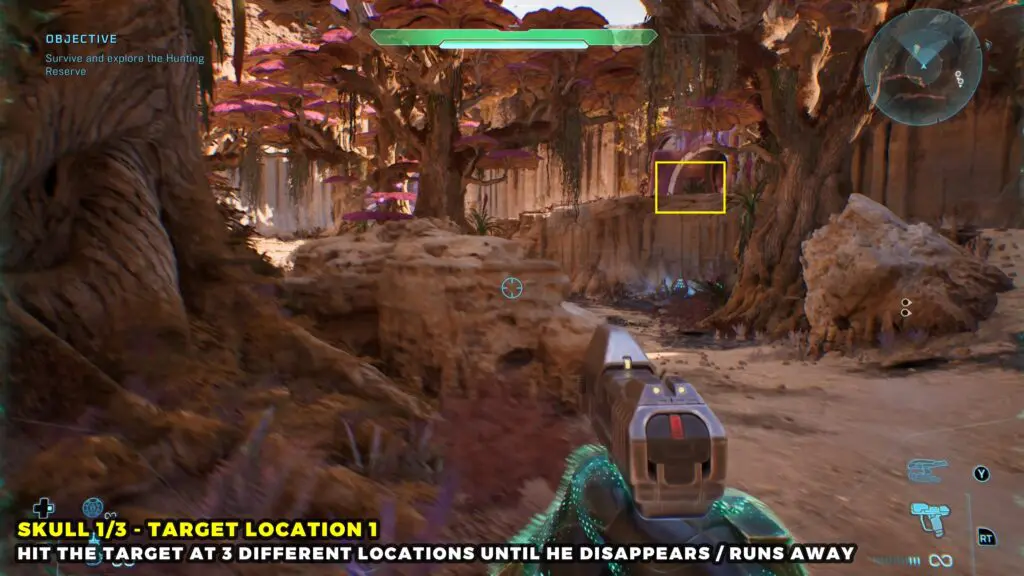
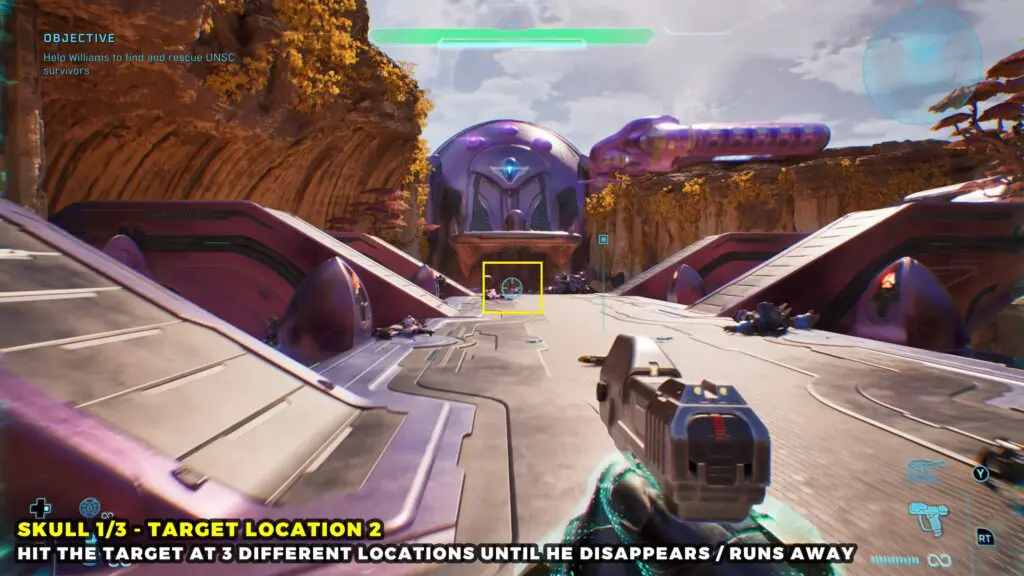
This Skull is unlocked by breaking the shields of high-value targets that appear in multiple parts of the mission. You can’t kill these high-value targets, but breaking their shields each time is required. Keep hitting the target until he runs away or disappears.
Location 1: After the opening cutscene, continue until you reach the purple trees. Look to the right ledge and break the target’s shield.
Location 2: At the bridge.
Location 3: Later in the mission.
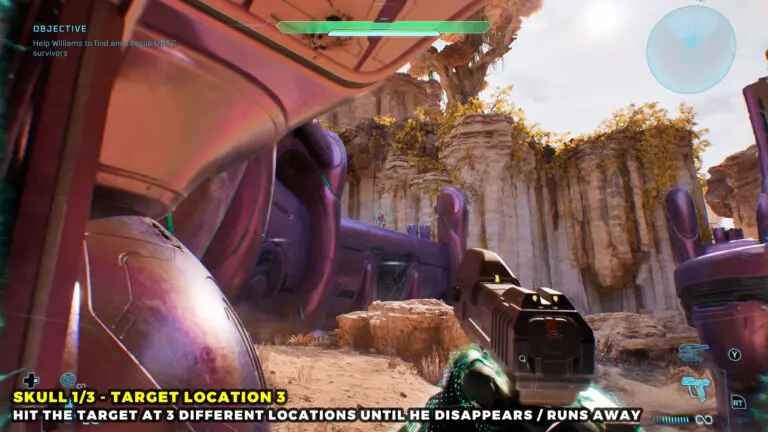
The skull will appear once the target runs away or disappears from teh third location.
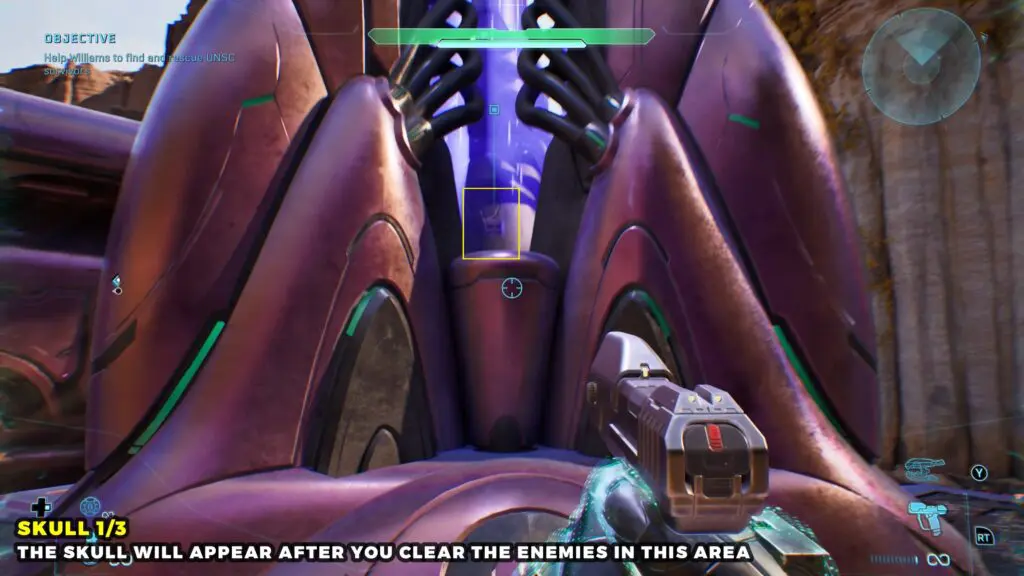
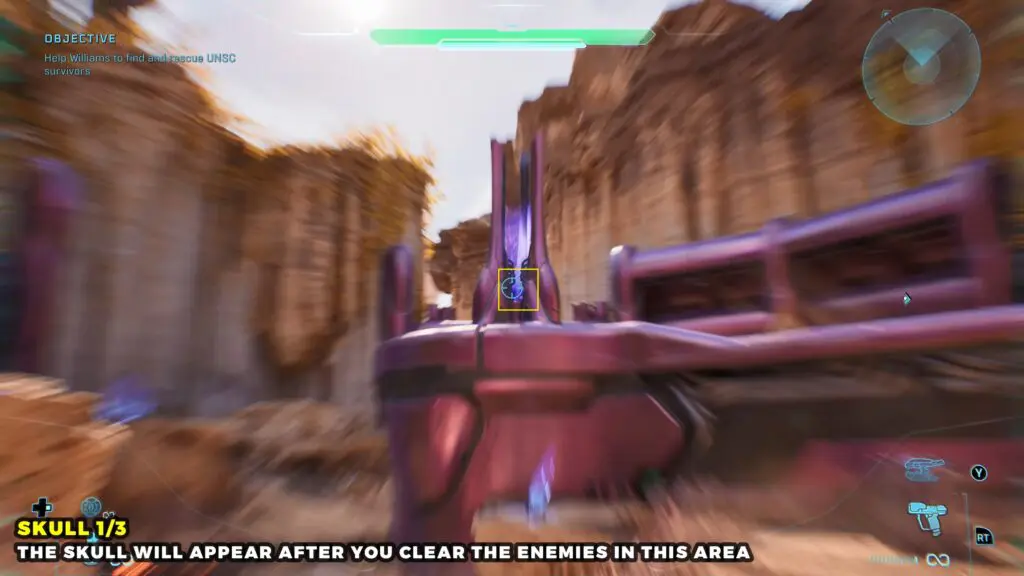
Skull 2
When you reach the bridge where the high-value target appears for the second time. From the bridge, turn around and face the purple building. Shoot the explosive boxes beneath the purple flames on both sides of the doorway to blow the door open. Head inside to collect the Skull.
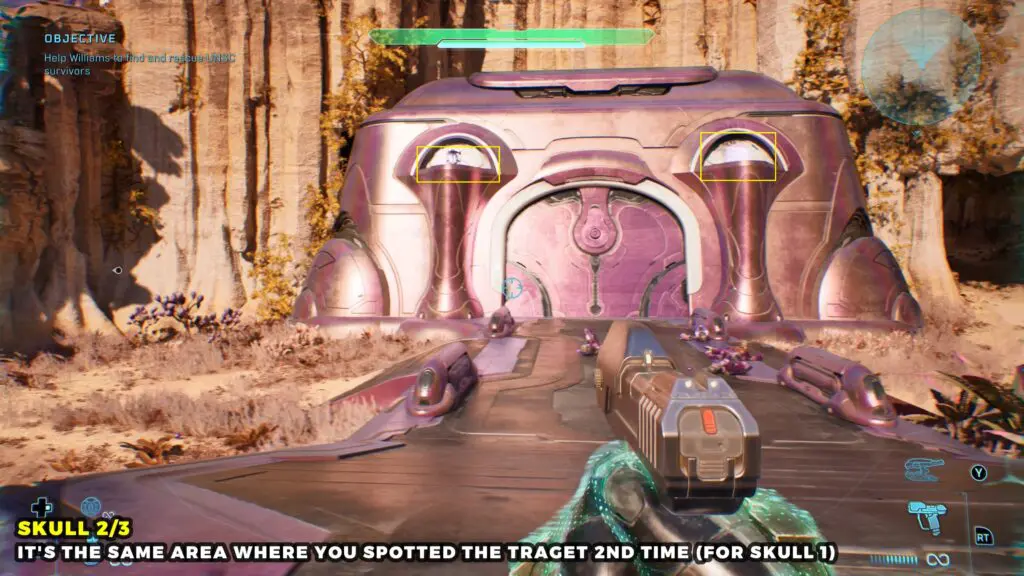
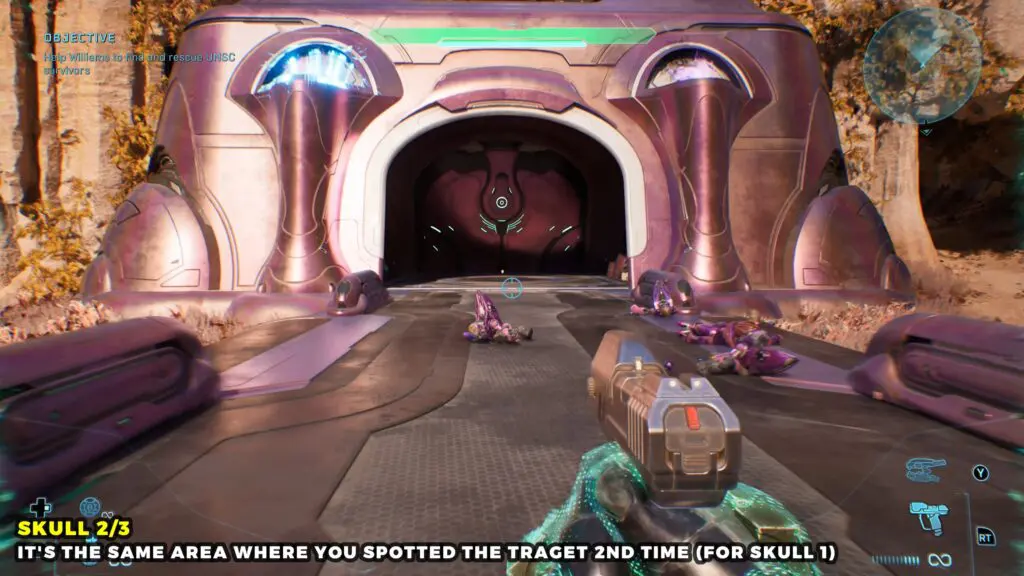
Skull 3
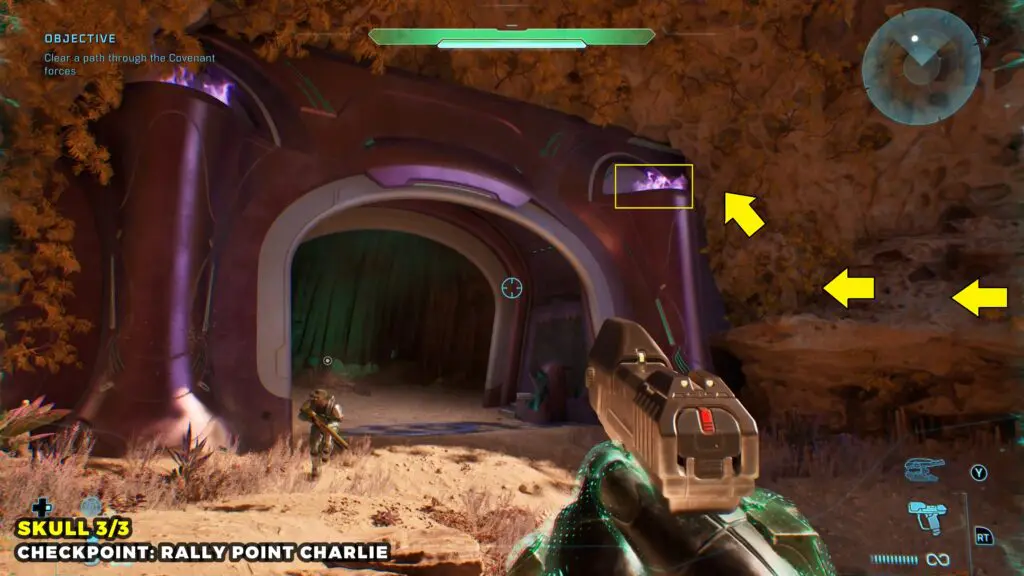
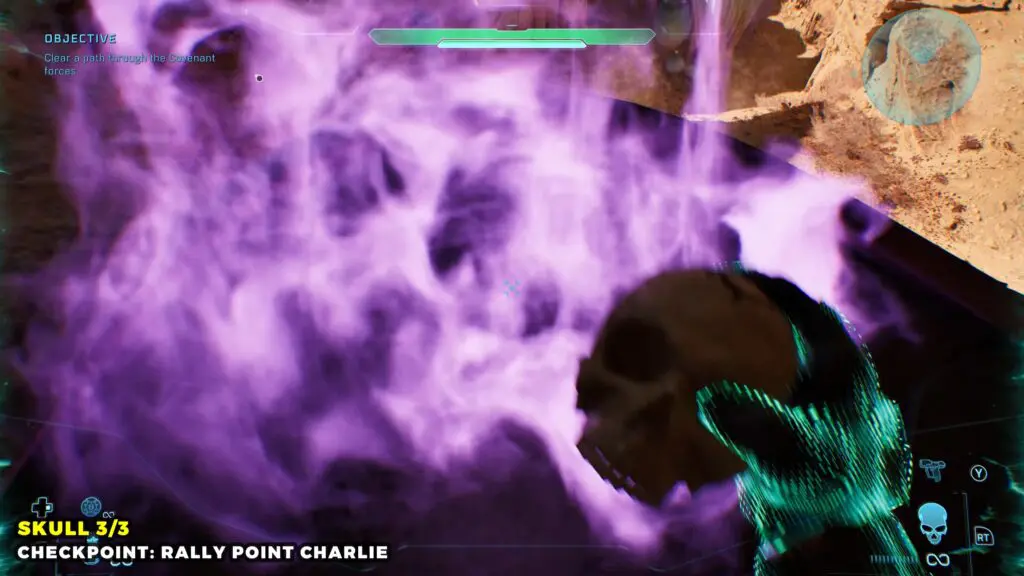
Once you pass through the gate and enter the valley, turn around to spot the purple flames on the ledges above both sides of the gate. Use the right-side cliff wall to carefully climb up to the top of the gate. Once you reach the ledge, head over to the purple flames to collect the Skull.
Heavy Burden
Skull 1
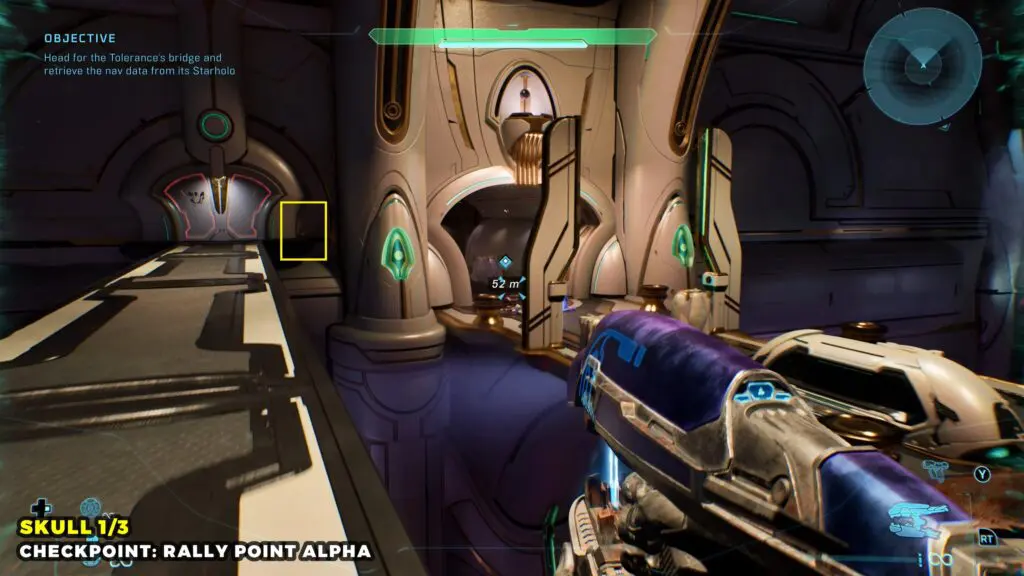
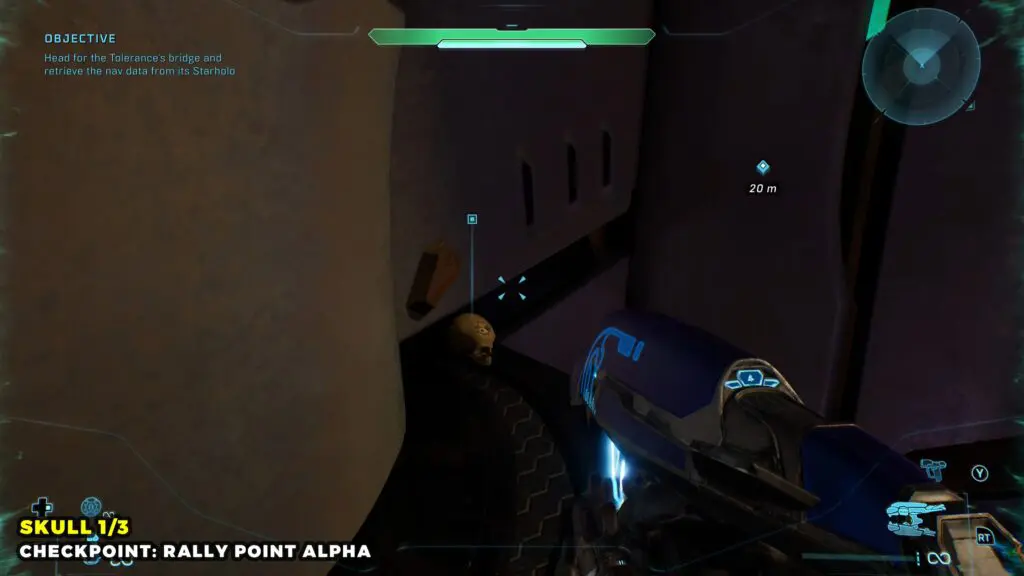
Progress through the mission until you reach a bridge. Instead of crossing it, turn left and go through the door to access the walkway above the bridge.
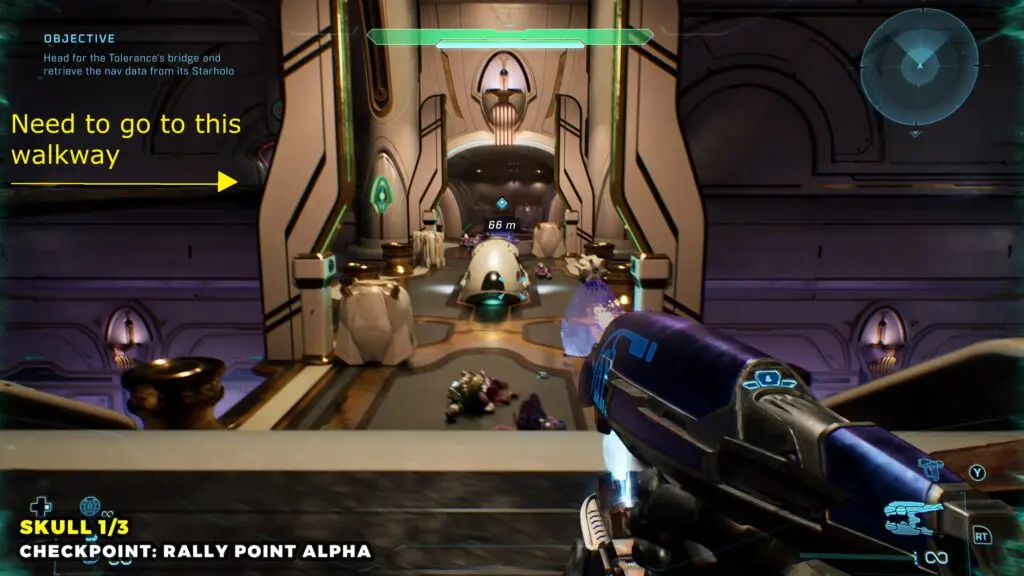
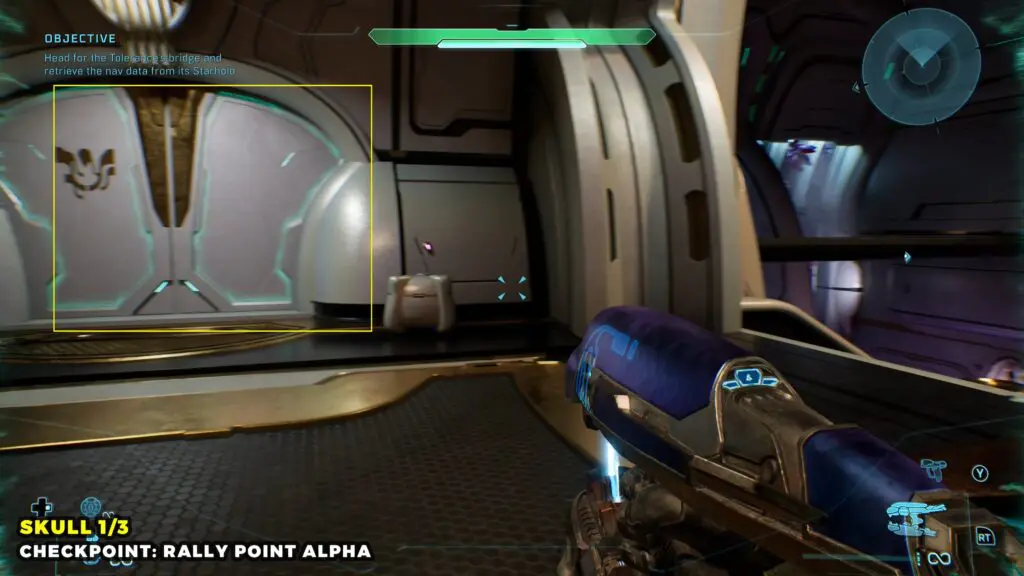
Follow this path to the other side, and you’ll find the Skull on the ledge to the right of the locked door.
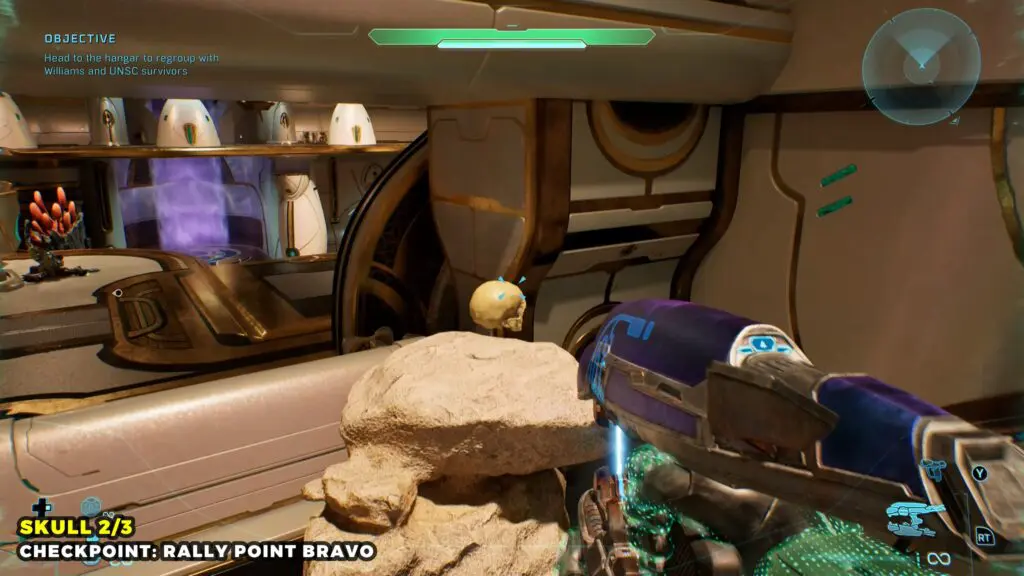
Skull 2
As you make your way to regroup with Williams and the UNSC survivors, you’ll enter a large room from the upper level that’s filled with enemies.
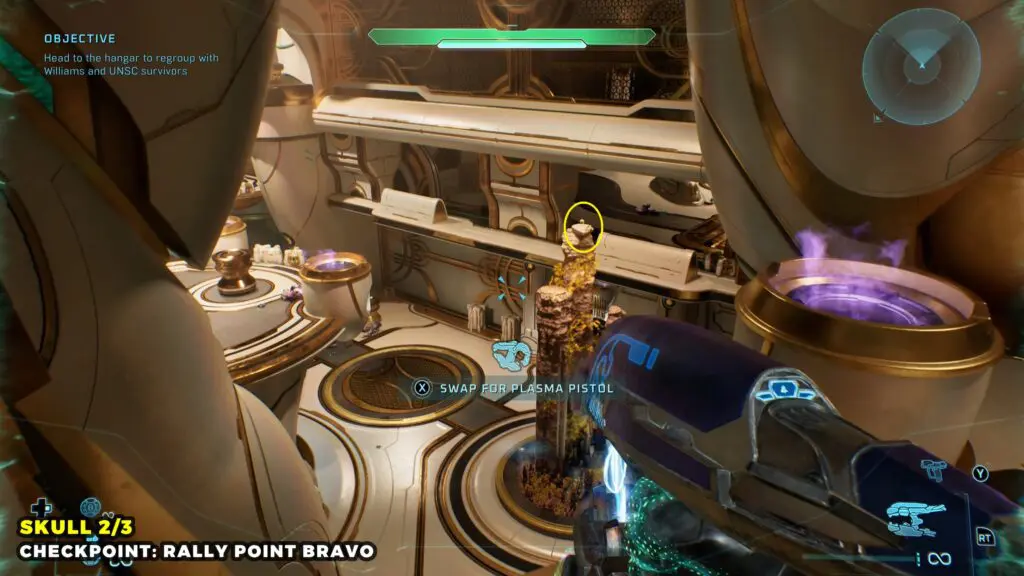
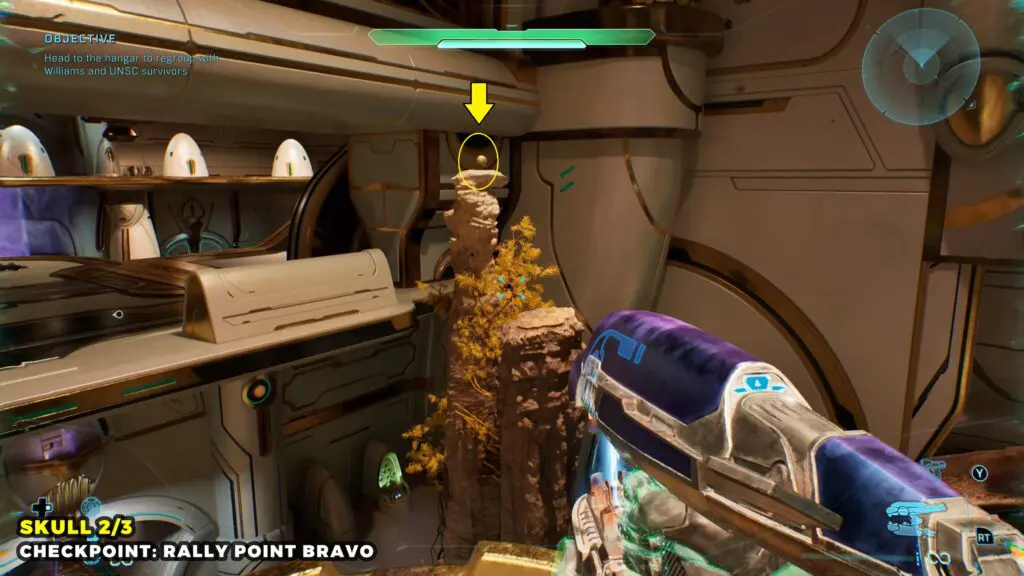
The skull is on top of the tall rock formation.
Skull 3
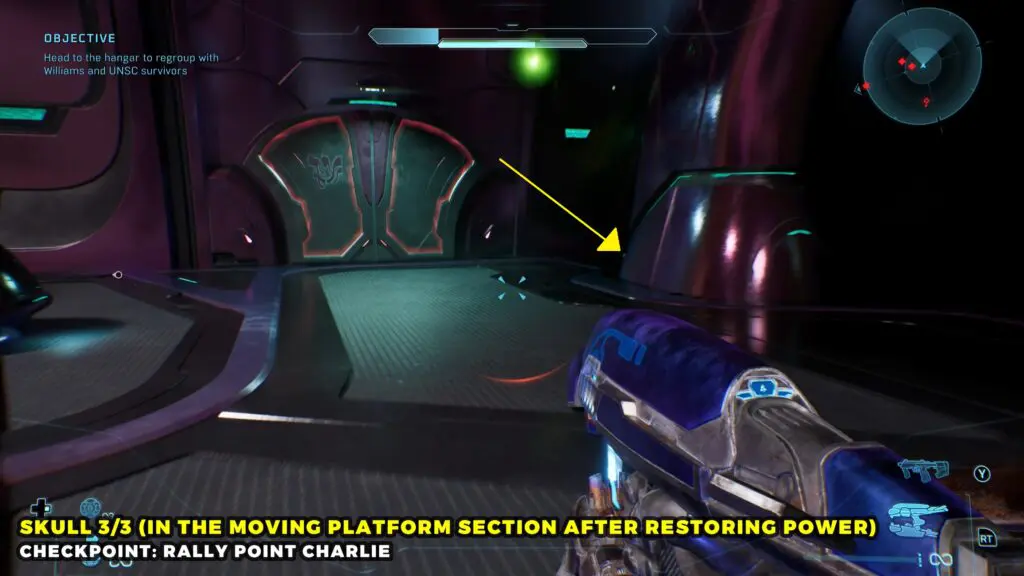
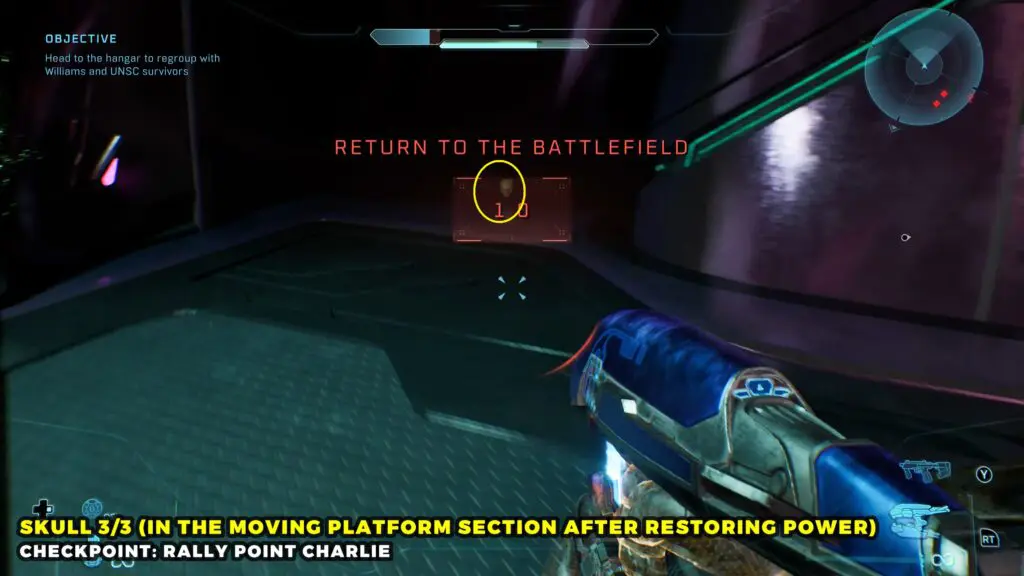
During the moving platform section, restore the power and get back on the platform. As it starts moving again, jump onto the platform on your left, then head to the far-right corner.
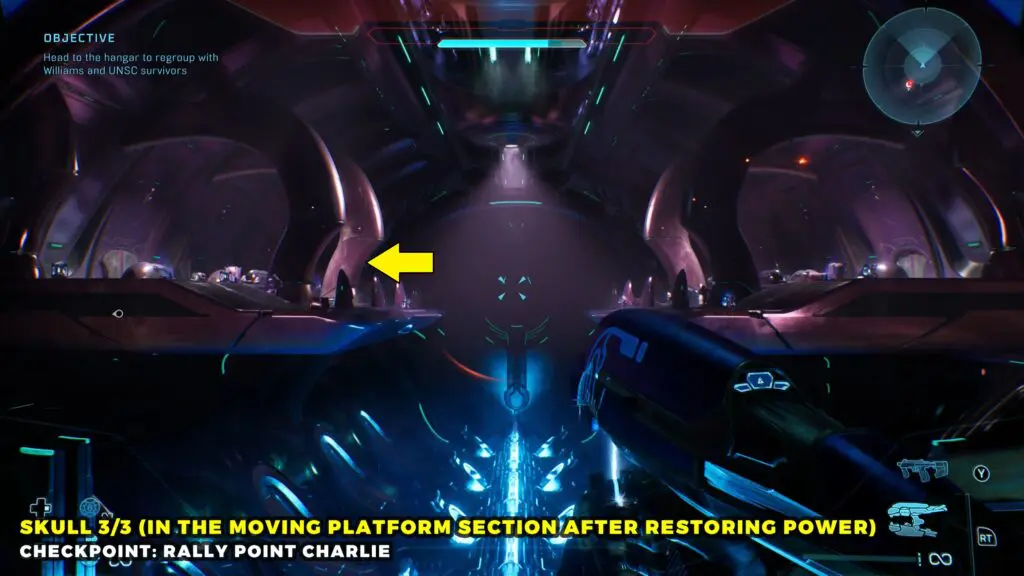
You’ll find the Skull on the ground next to the locked door.