Astro Bot: Hieroglitch Pyramid Collectibles Guide
This guide shows the location of all Collectibles (Bots, Puzzle Pieces & Secret Exit) in the Hieroglitch Pyramid area in the Astro Bot game, released on 6th September 2024.
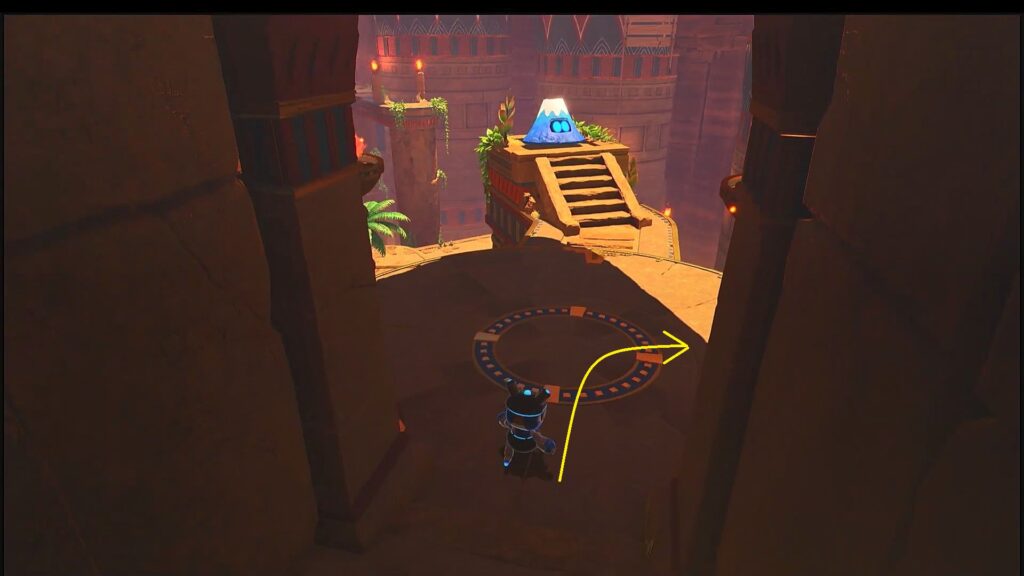
Bot 1/7
At the start of the level, go right to find the bot as shown in the picture below.
Bot 2/7
After the bridge breaks, and you fall down, go to the platform with the blue light as shown in the picture below. Stand on the blue light and spin to reach the room below. There you will find the bot as shown in the second picture below.


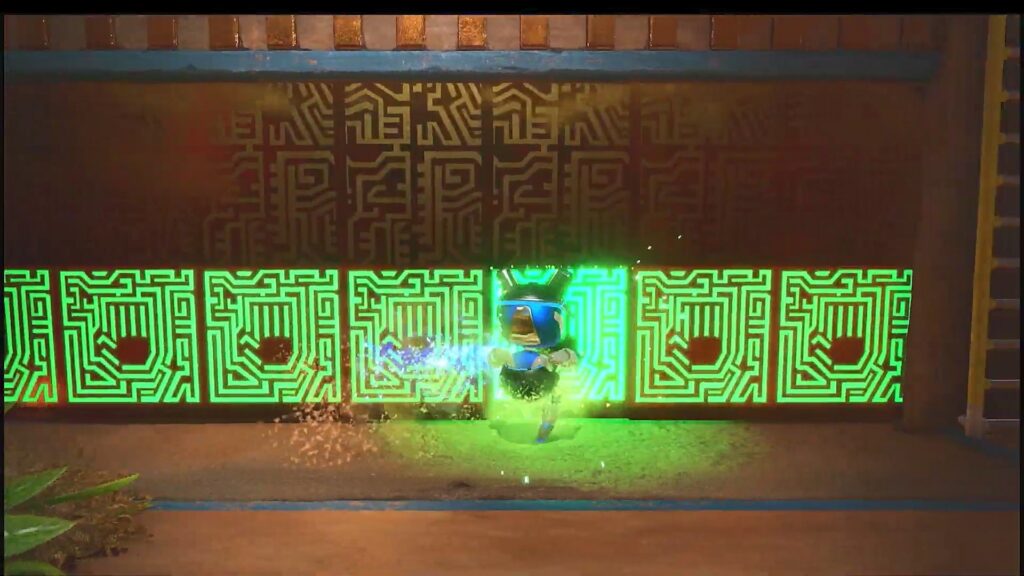
Bot 3/7
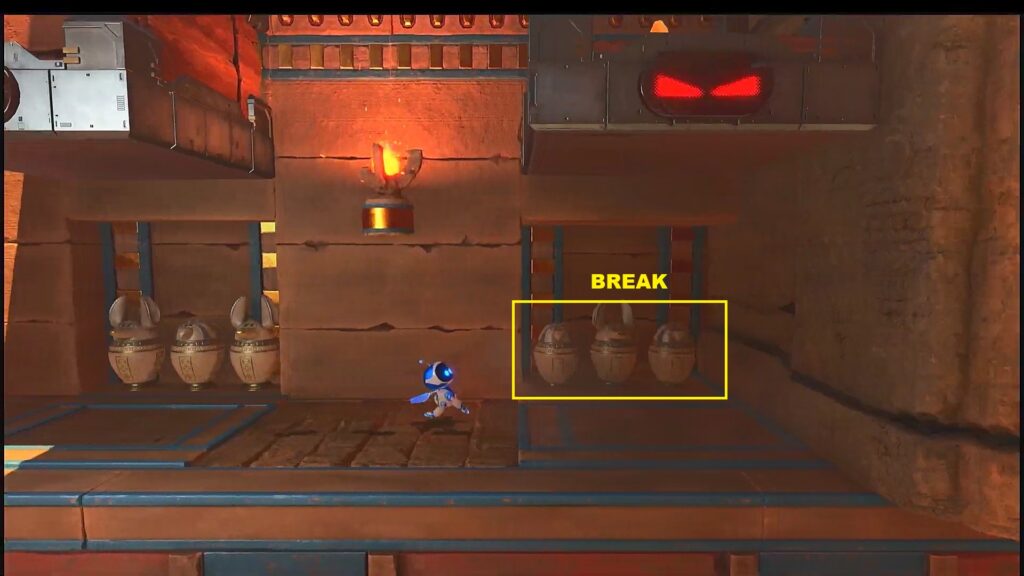
Proceed ahead and soon you will reach some crushing blocks. Go to the last crushing block and destroy the barrels there as shown in the picture below. Underneath one of those barrels, you will find a blue light. Stand on the blue light and spin to reach the area underneath. There you will find the bot as shown in the second picture below. You need to walk slowly there so that the blocks do not become active and crush you.
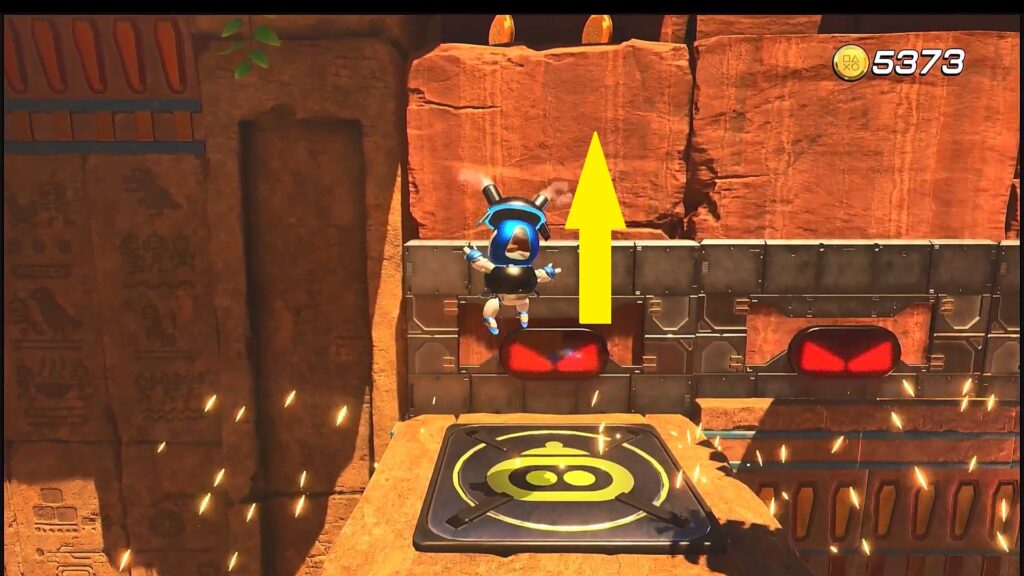
Puzzle Piece 1/3
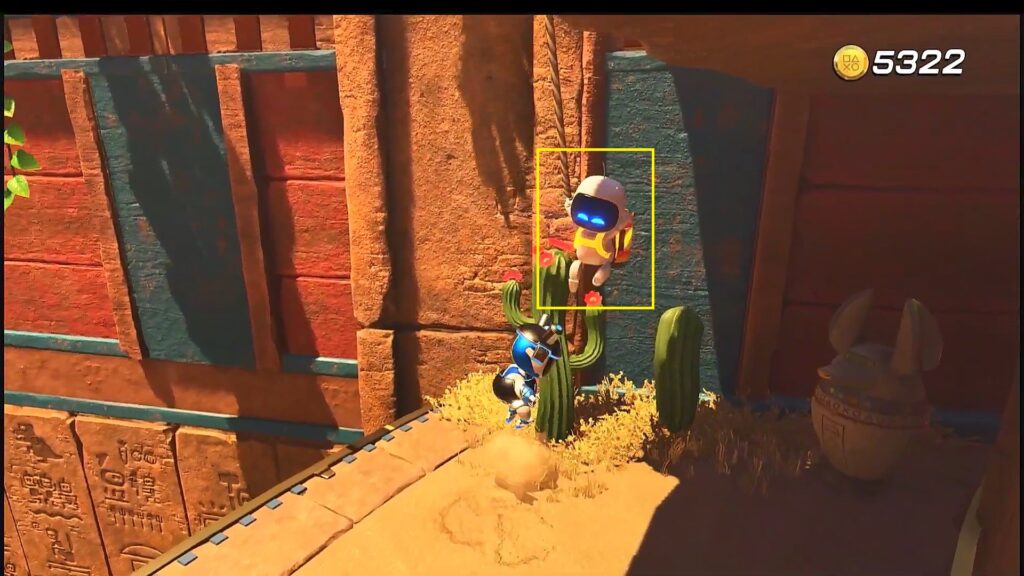
After you get Power-Up of the level, metal ball, proceed straight ahead and the moving column will take you up. Then roll down the slope and you will reach a hole in the wall as shown in the picture below. Before going through the hole, go right to collect the Puzzle Piece as shown below.
Puzzle Piece 2/3
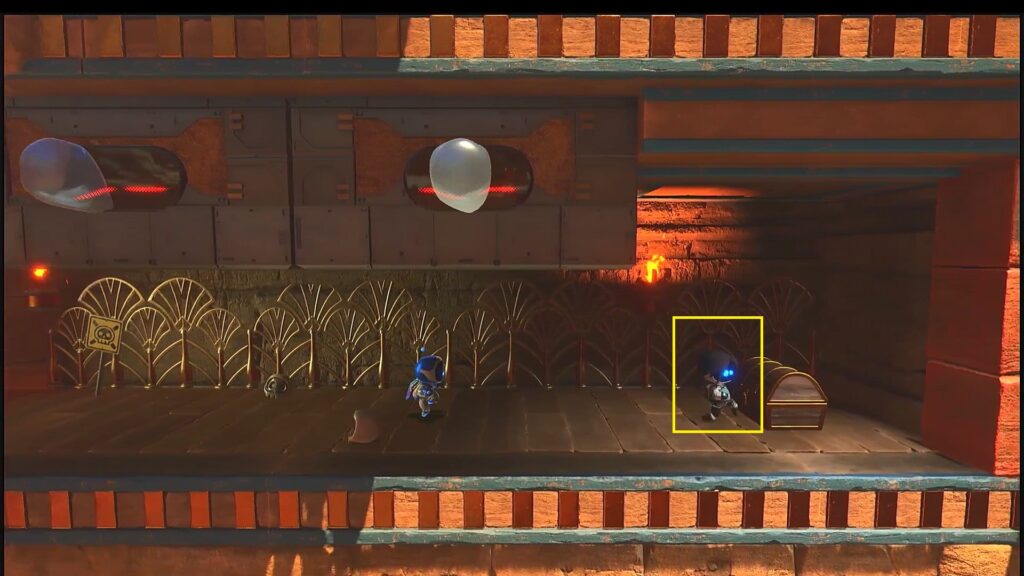
After collecting the previous puzzle piece, go through the hole. Then exit the building. Before going straight to the blue volcano, turn left and go through the hole as shown in the picture below. Open the chest inside to get the puzzle piece.
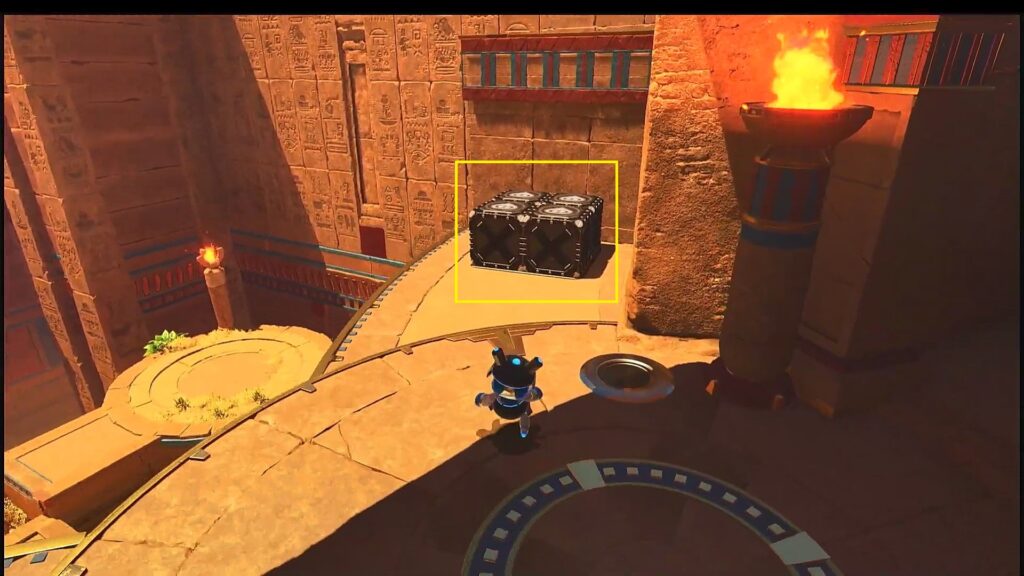
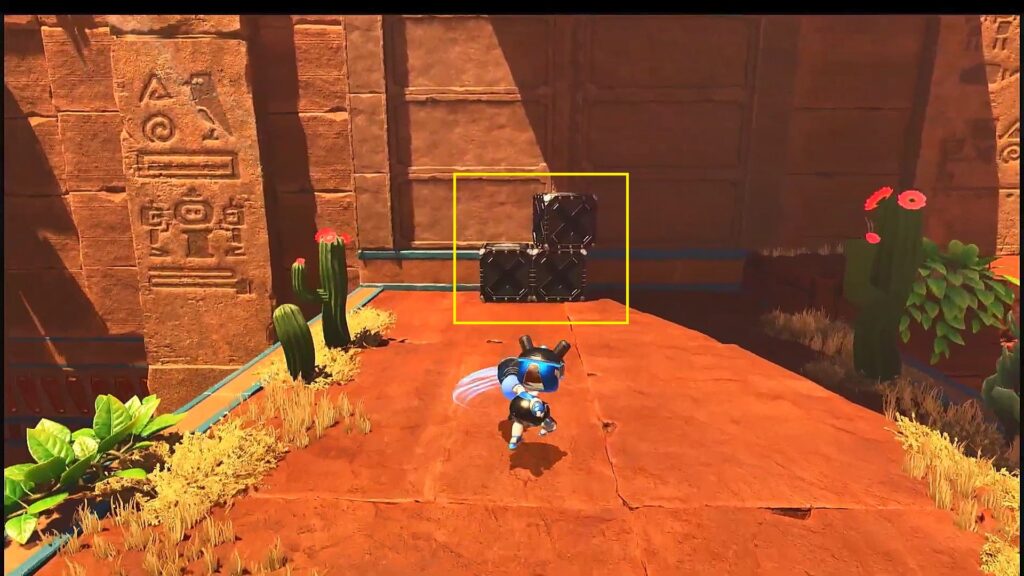
Bot 4/7
After getting the Power-Up of the level, metal ball, proceed ahead and exit the building. Before going straight to the blue volcano, go right and you will find a few boxes there as shown in the second picture below. Jump and smash to break the boxes, revealing a jumping pad. Use the jumping pad to climb up the platform with the bot as shown in the third picture below.
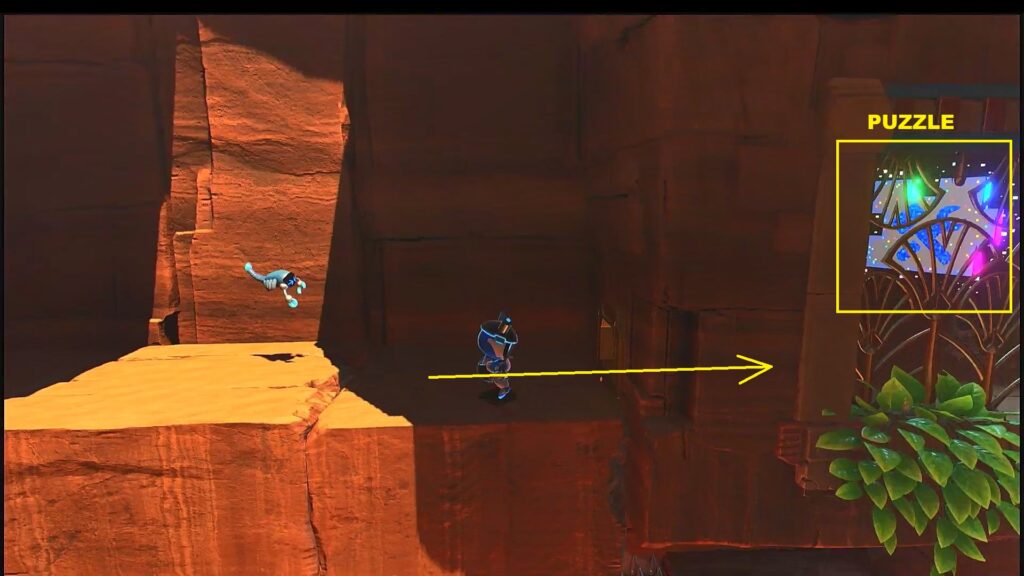
Bot 5/7
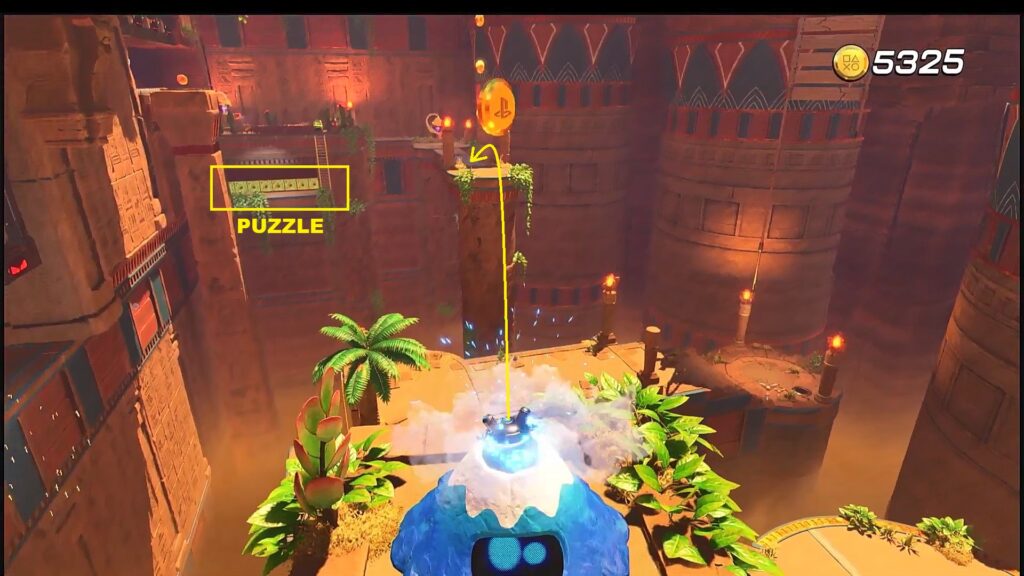
Use the first blue volcano to jump across the gap. Defeat the enemies there and then climb down the ladder to reach the “Find The Spot” puzzle as shown in the pictures below. Solve the puzzle to rescue the bot behind it.
Puzzle Piece 3/3
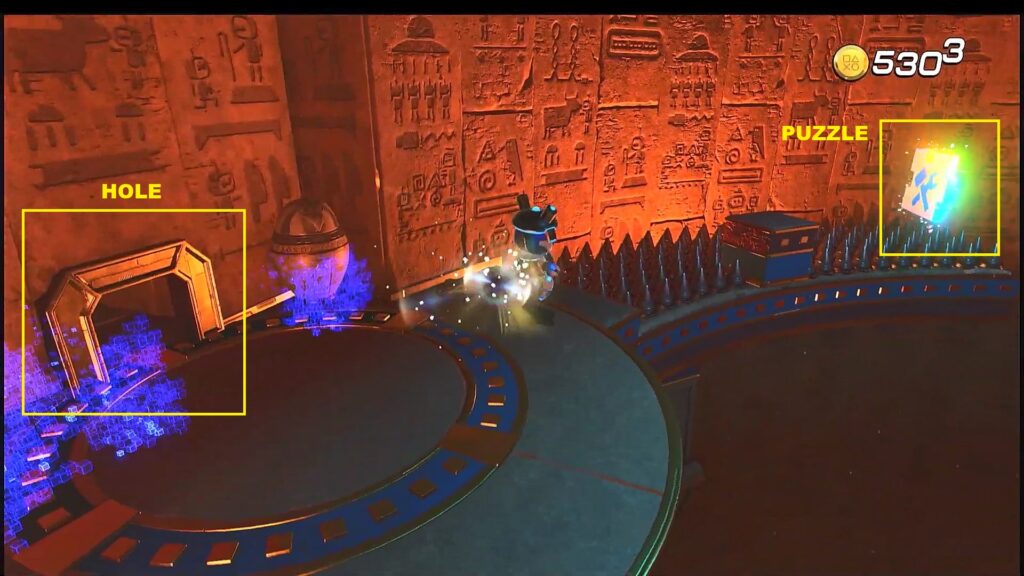
After using the first blue volcano, defeat the enemies and use the jumping pad to reach the checkpoint above. Proceed ahead and use the next jumping pad to reach the top of the crushing blocks as shown in the picture below. Then go right, and when the crushing blocks go down, enter the hole on the right wall to reach the puzzle piece as shown in the second picture below.
Bot 6/7
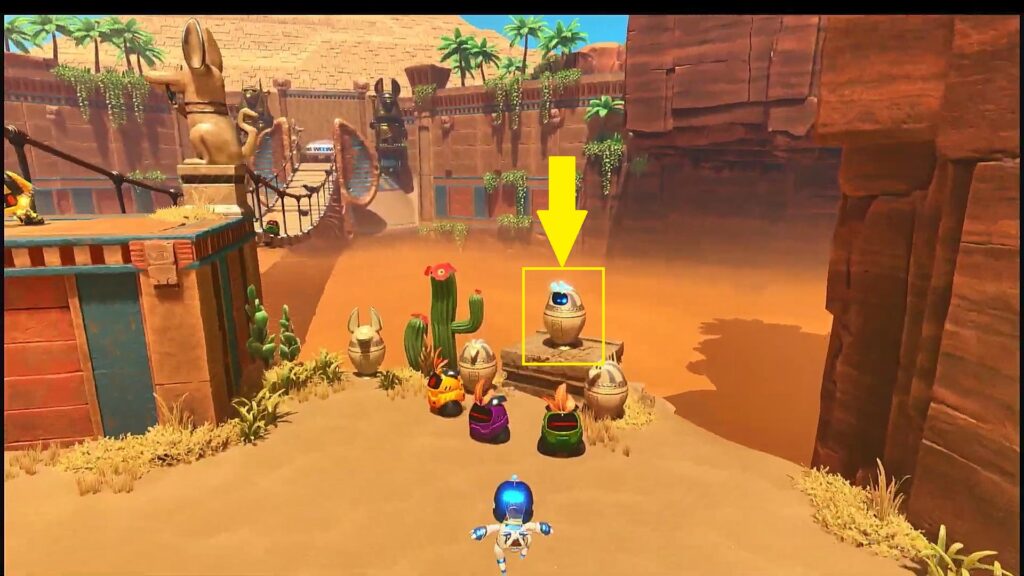
After using the second blue volcano, you will reach a golf hole. There you will find a rotating blue volcano. Rotate the volcano such that it points towards the caged bot as shown in the picture below. Now use the blue volcano and it will send you crashing into the cage. This will break the cage, rescuing the bot.

Bot 7/7
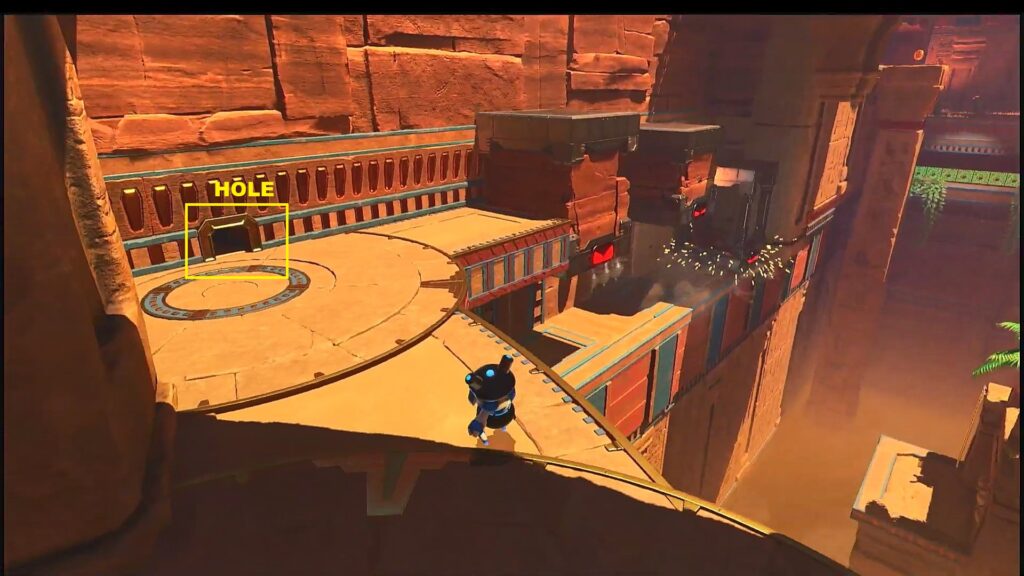
After rescuing the previous bot, rotate the blue volcano and use it to hit the button on the tall wall. This will turn the wall blue. Climb up the wall and destroy the boxes on the top as shown in the picture below. This will reveal some wires. Pulling the wires will reveal a jumping pad behind. Use it to reach the blue volcano up ahead. then use it to reach the secret area above.
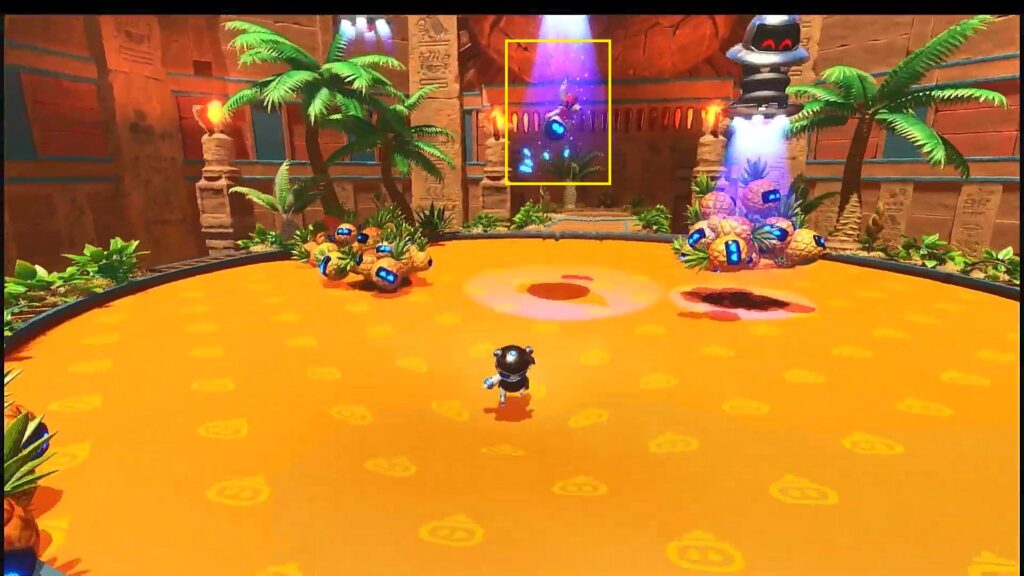
Enemies in the secret area will be flying around carrying the bot as shown in the picture below. Jump and use your foot laser to rescue the bot.
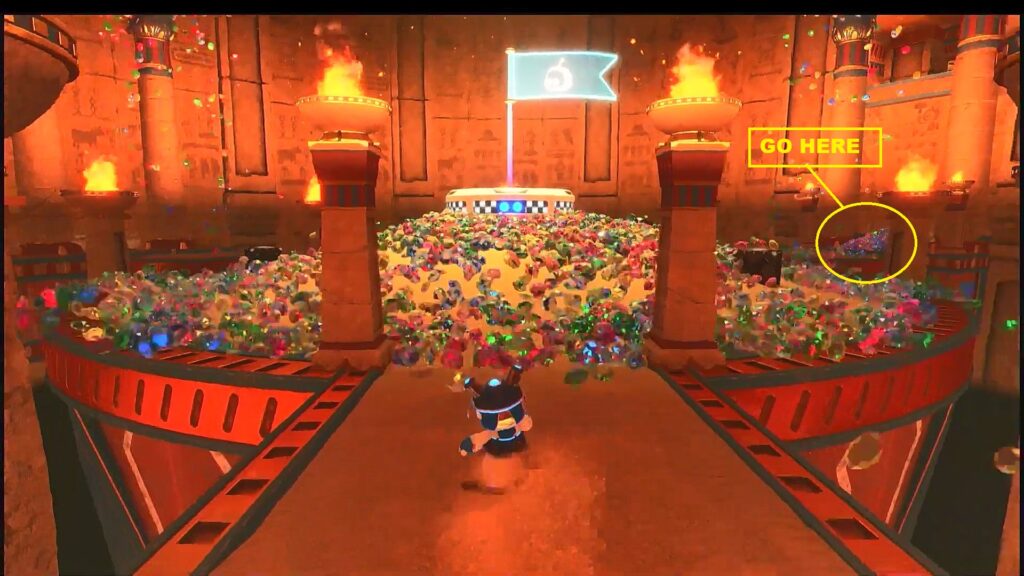
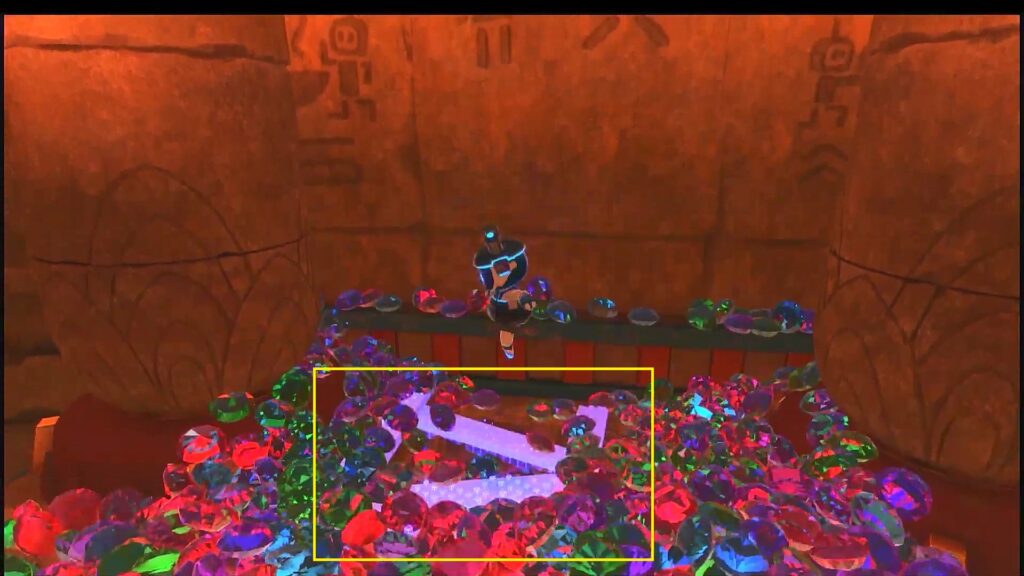
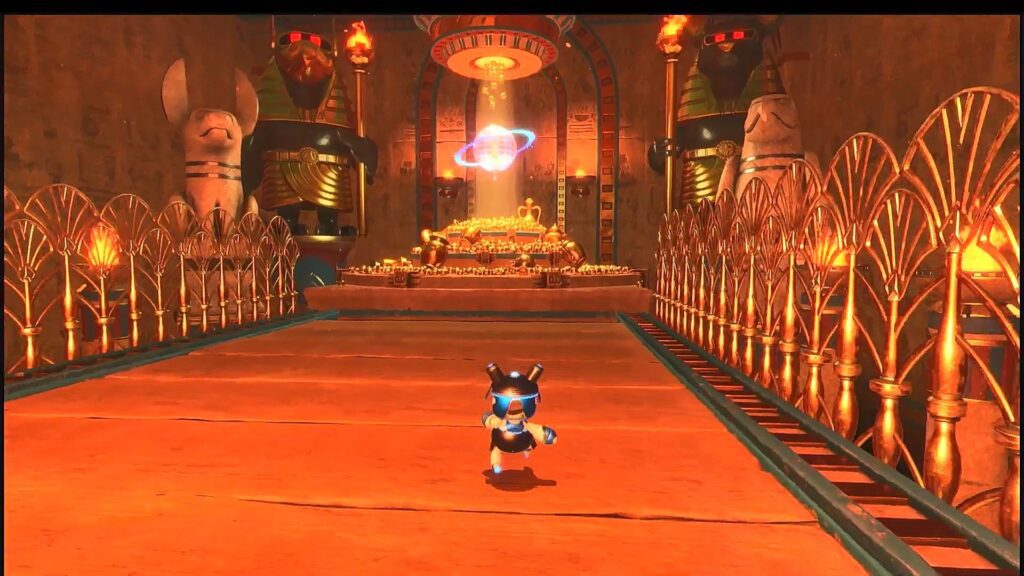
Secret Level Exit: Lost Galaxy
Proceed until you reach the exit flag. Instead of using the exit flag, go to the platform on the right side as shown in the picture below. Remove the balls there and you will see some wooden planks on the ground as shown in the second picture below. Jump and smash the ground and you will be thrown to the platform up ahead. There you will see a “Find The Spot” puzzle. Solve the puzzle to get entry to the hall with the globe as shown in the third picture below. You will need to solve a couple of more “Find The Spot” puzzles to reach the globe. Pull down the wire hanging out from the globe to unlock the secret level exit.