If you’re diving into the world of Elden Ring: Nightreign and looking to dive deep into the post-game content, you may have encountered the mysterious Remembrance Quests. This is a step-by-step guide to help you unlock and complete Remembrance Quests efficiently in Elden Ring: Nightreign.
Step 1: Defeat a Night Lord
To initiate a Remembrance Quest for a specific character, you’ll first need to defeat at least one Night Lord while playing as that character. For instance, if you’re aiming to unlock Iron Eye’s Remembrance, you must overcome a Night Lord using Iron Eye in combat.
Step 2: Access the Journal at Round Table Hold
Open your menu at the Round Table Hold and navigate to the Journal section. If you’re eligible, you’ll see the option to “Begin Remembrance.”
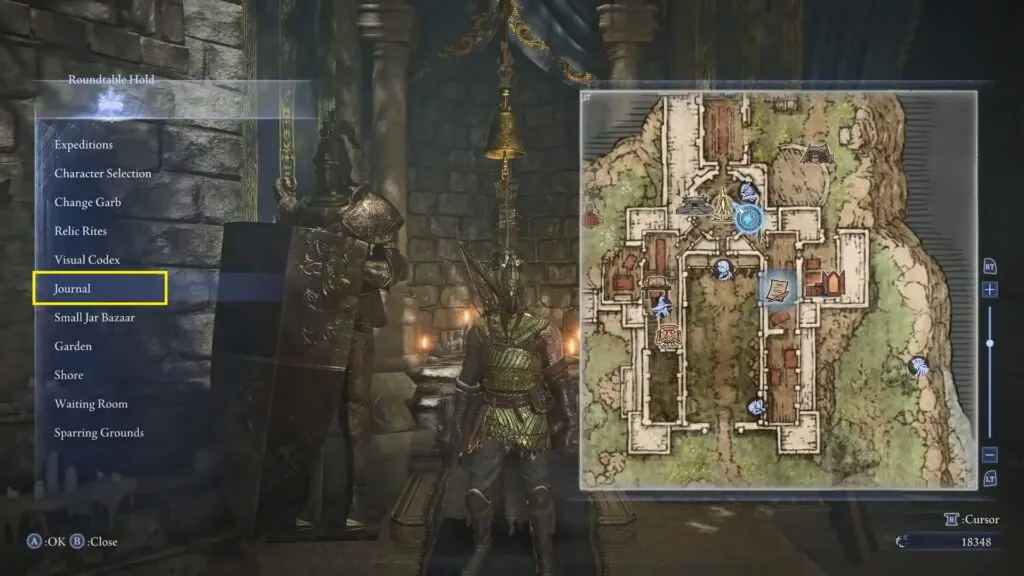
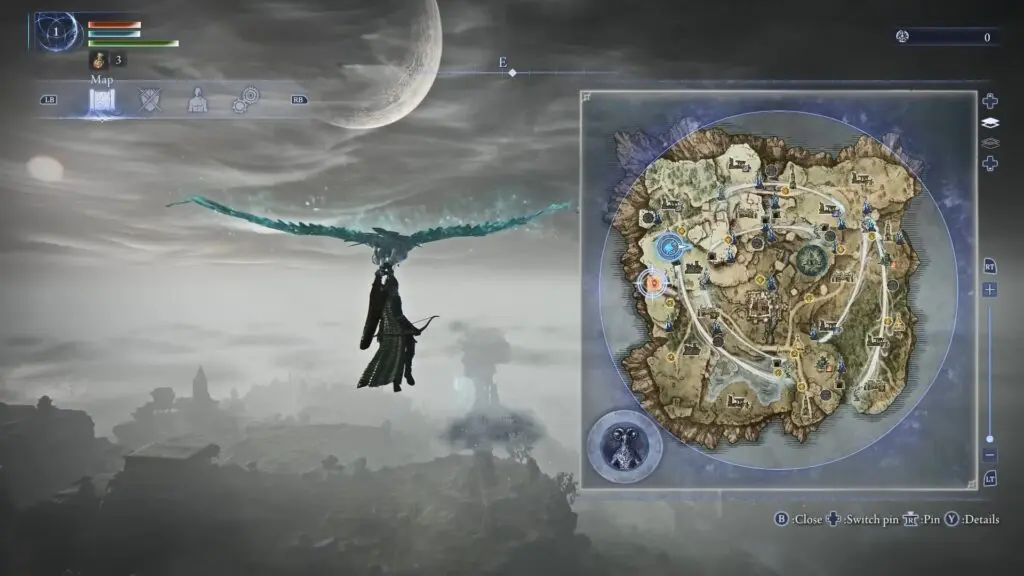
Select it to be transported into the Realm of Remembrance, a spectral, alternate version of the world.

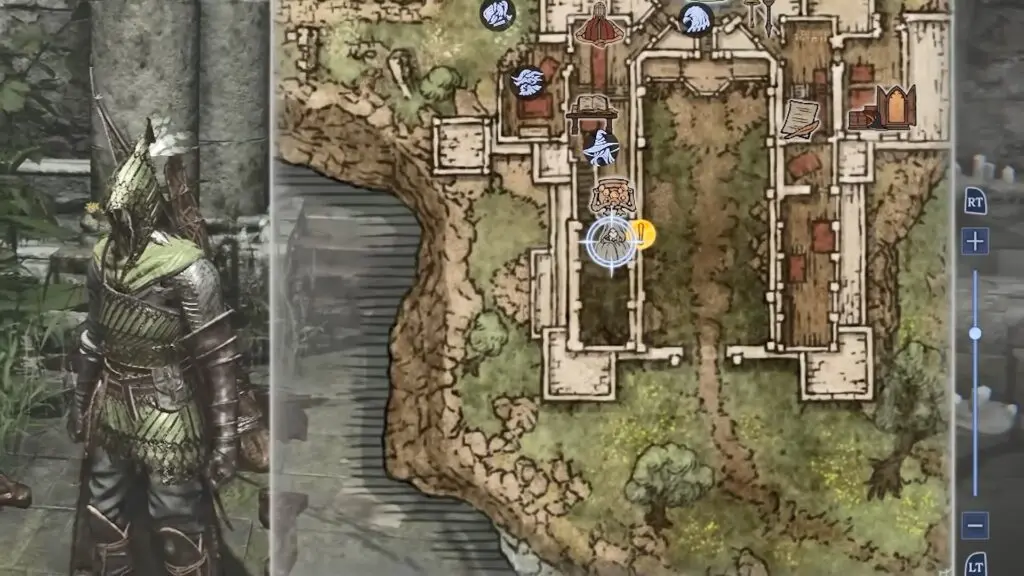
Step 3: Locate and Speak to the Priestess
Open your map. You’ll notice an NPC marked with an exclamation point (!)—this is the Priestess. Head to her location and speak to her. She’ll introduce two key conversation topics:
- The Fellowship
- The Traitor
Discuss both topics to unlock the next phase.

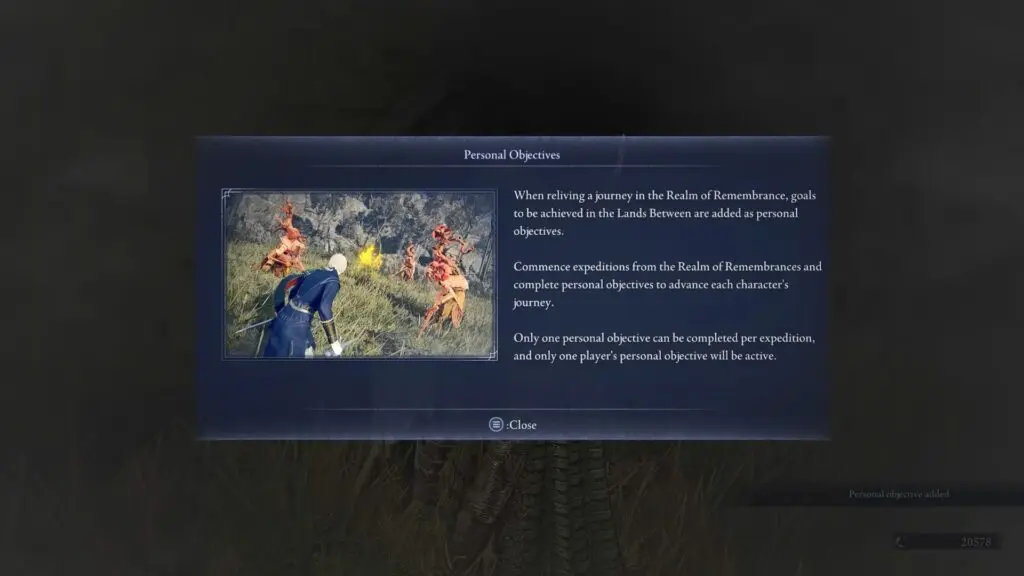
Step 4: Accept the Personal Objective
After speaking with the Priestess, she will offer you a Personal Objective: eliminate a band of the Condemned. Accept the task.
Here’s how it works:
- Only one Personal Objective can be completed per expedition.
- In multiplayer, only one player’s Personal Objective will be active at a time.
Step 5: Complete the Objective in Your Next Hunt
In your next match or expedition, you’ll spot a red flag marker on the map—this signifies your active Personal Objective. This usually involves a battle against a clone of your current character, a symbolic duel to defeat
Defeat your clone to complete the objective and earn the Traitor’s Letter.
Step 6: Return to the Priestess
Return to the Priestess at the Round Table Hold with the Traitor’s Letter.
Speak to her and show her the Traitor’s Letter. After a brief dialogue, a portal will appear, allowing you to conclude the Remembrance phase and return to the normal game world.
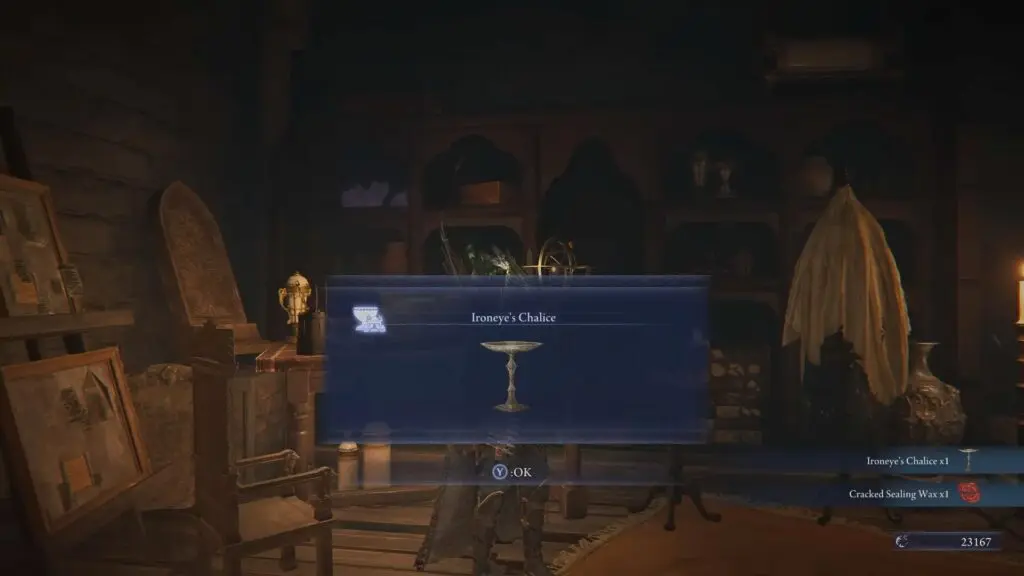
Step 7: Claim Your Reward – The Chalice
Upon completion, you’ll receive a unique Chalice for your character—in this example, Iron Eye’s Chalice. These Chalices expand your relic customization:
- Red Slots: Only accept red relics
- Green Slots: Only accept green relics
- White Slots: Wildcards – accept any color
- This system adds significant depth to your build strategy and is well worth the effort.