Assassin’s Creed Valhalla 1.4 update released on 14th December 2021. The update brings a crossover story with Assassin’s Creed Odyssey. The update introduces a new map containing several Wealth Chests, Mysteries, and Artifacts. This guide shows the location of all the collectibles in the Isle of Skye and how to get them.
1) Arnish Deadlock Wealth (Tungsten Ingot)
This wealth chest is inside a hut at Arnish Deadlock as shown in the pictures below.
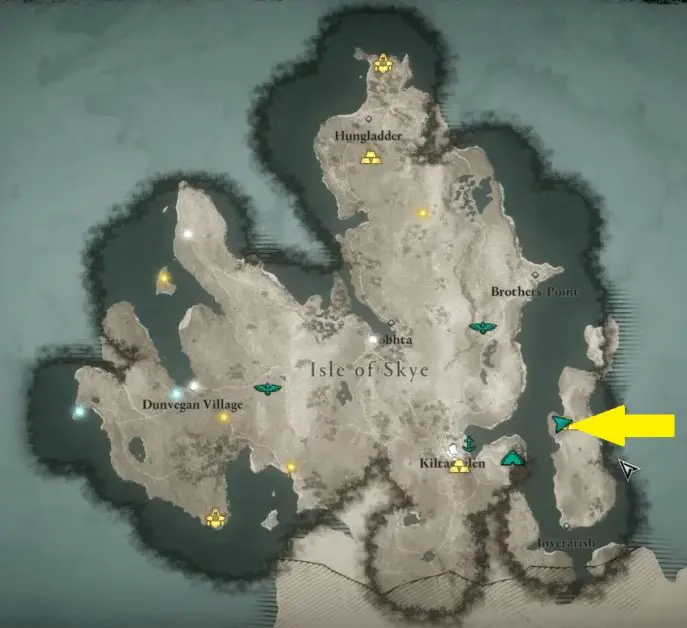
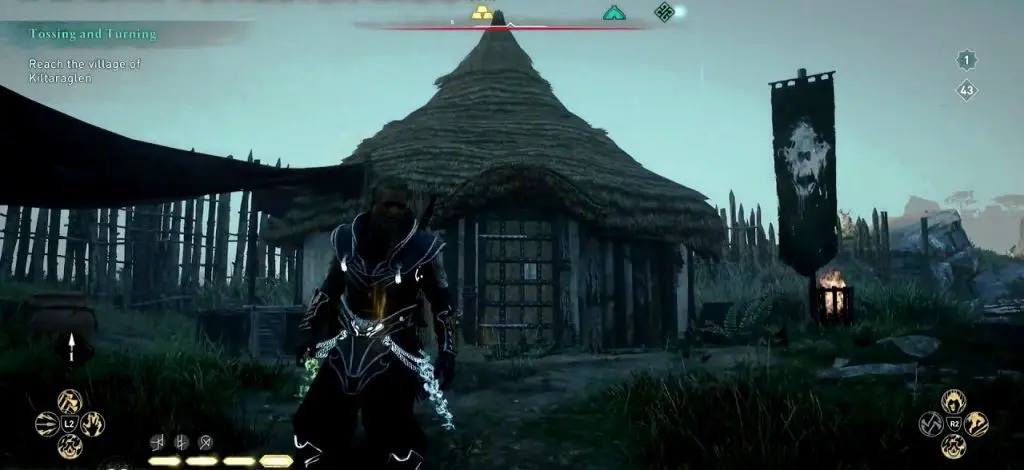
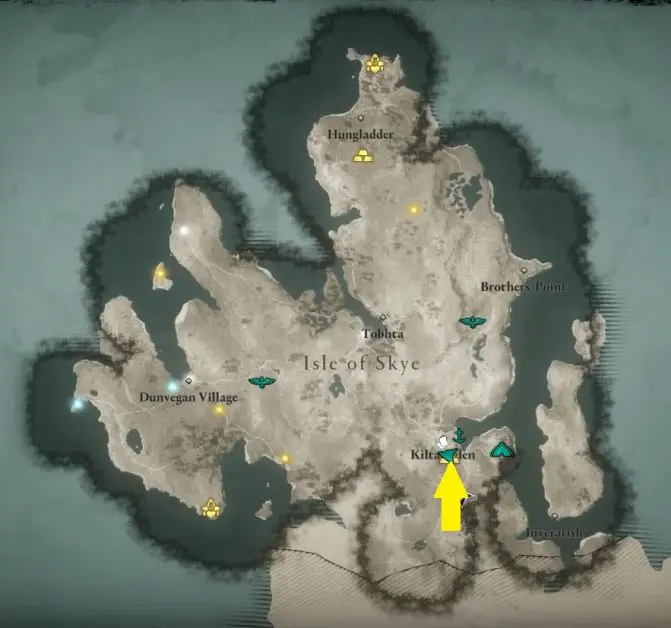
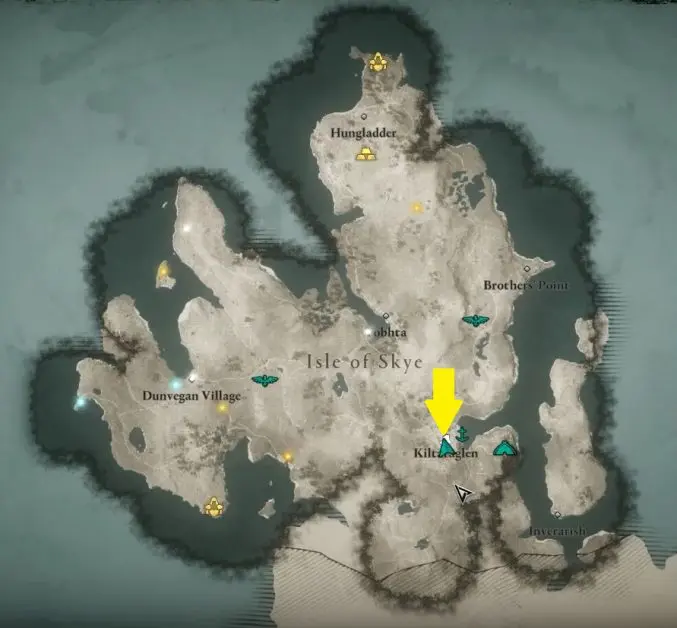
2) Kiltaraglen Wealth (Tungsten Ingot)
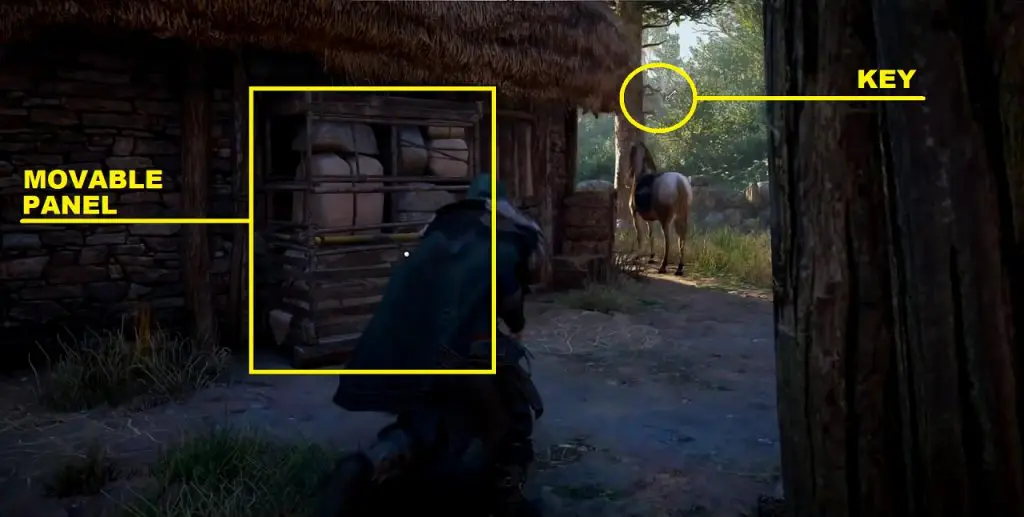
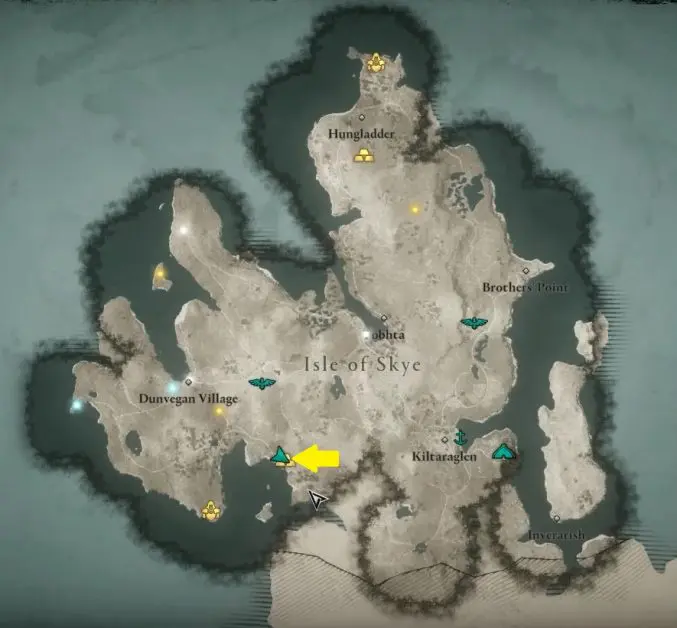
This one is south of Kiltaraglen at the location marked in the pictures below.

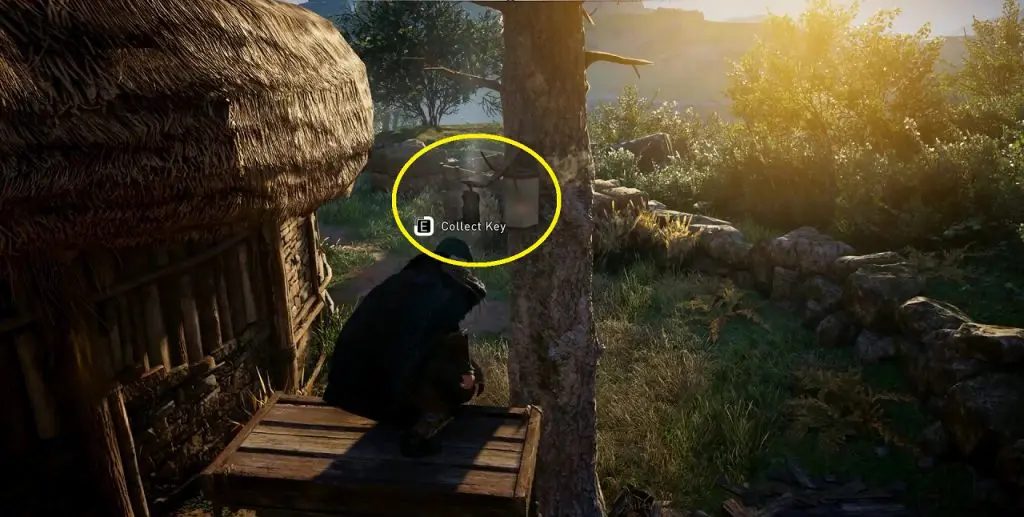
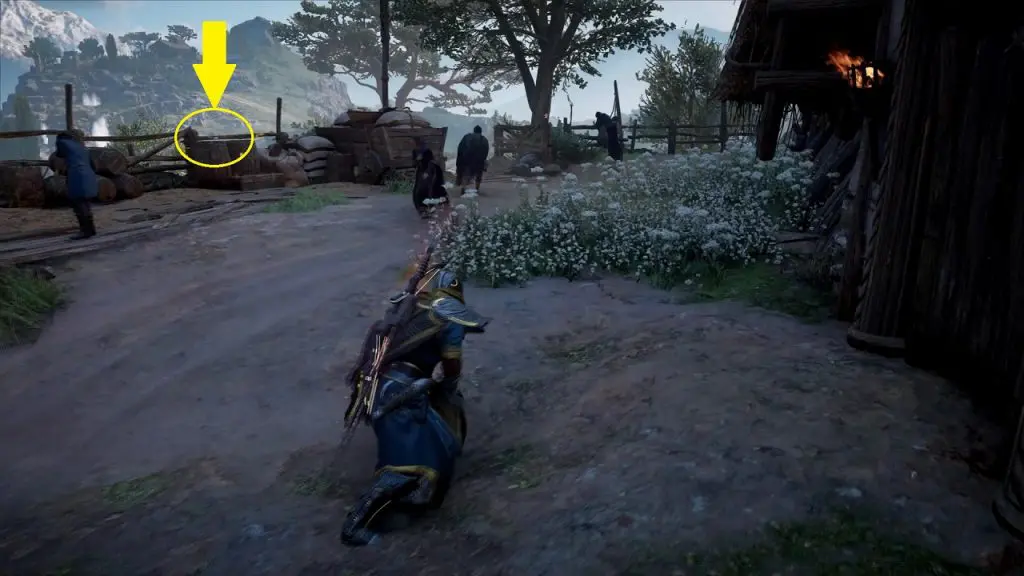
At the marked location, you will find the chest key hanging from a tree. Near the tree, there is a movable panel blocking the entrance to the house containing the chest. Move the panel below the hanging key and then climb the movable panel to get the key as shown in the pictures below.
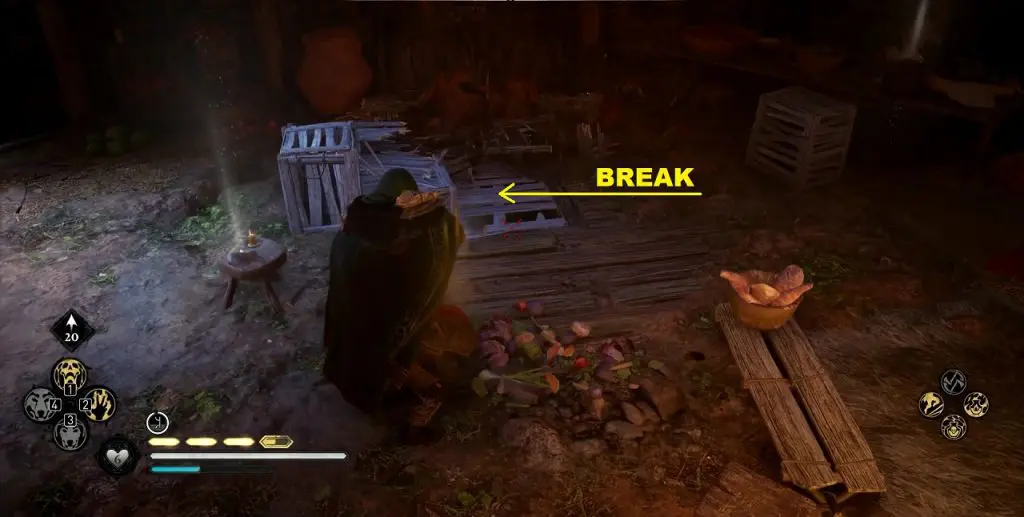
Once you have the key, enter the house from where you just moved the panel. Inside the house, break the wooden crates to reveal a breakable floor. Break the floor and then jump inside to reach the chest. Use the key to unlock the chest and get Tungsten Ingot.
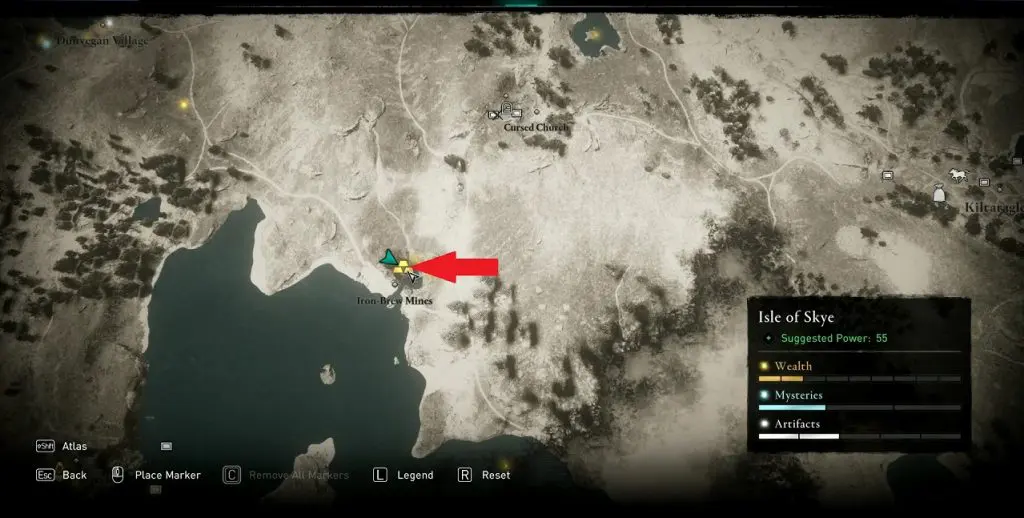
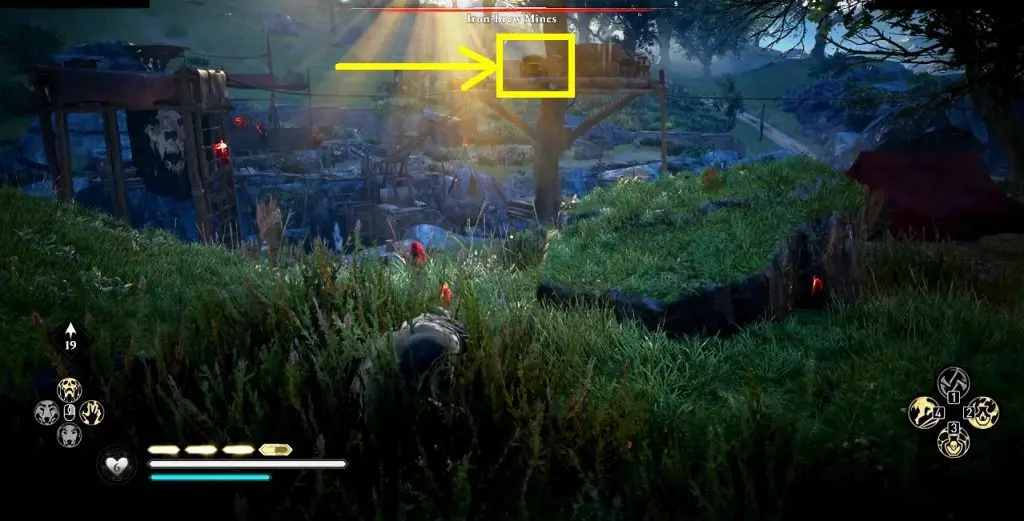
3) Iron Brew Mines Wealth (Tungsten Ingot)
This chest is on a tree in Iron Brew Mines as shown in the pictures below.
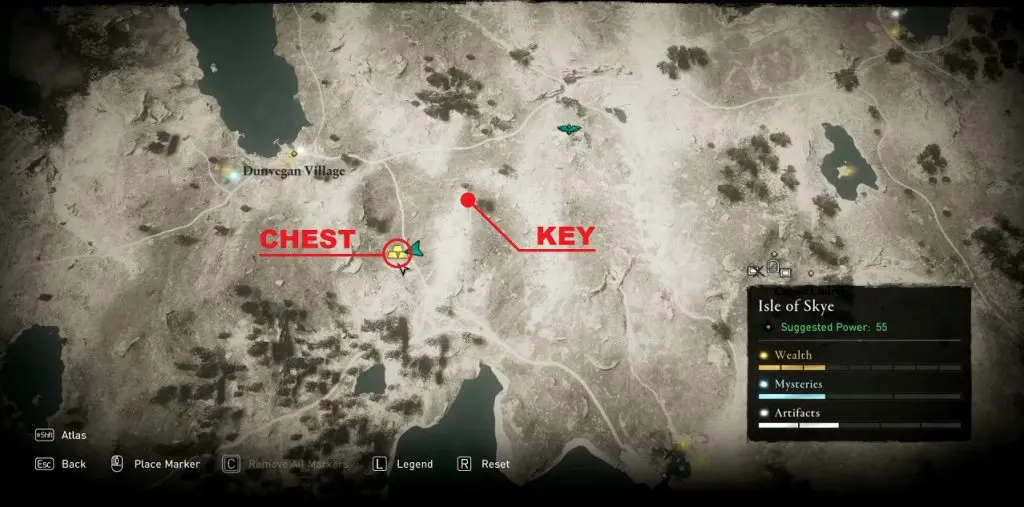
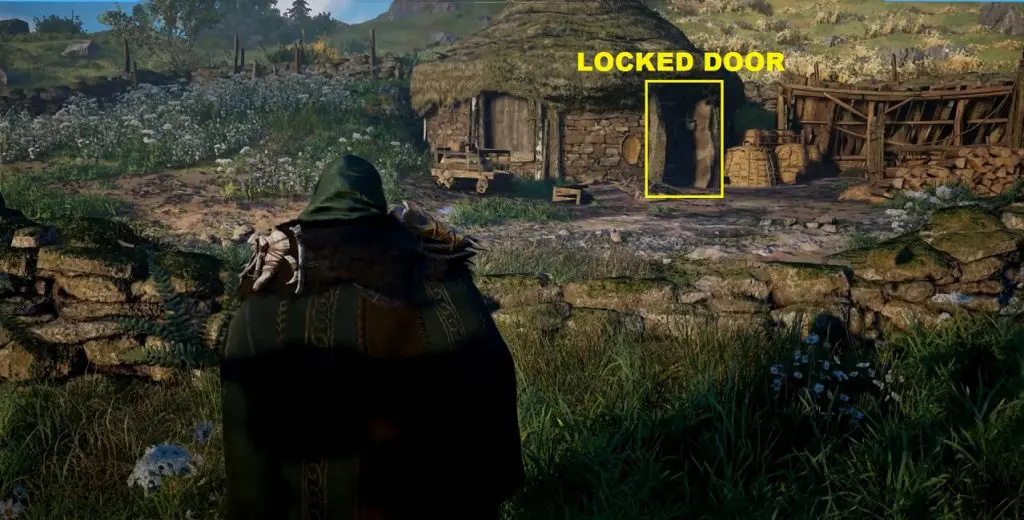
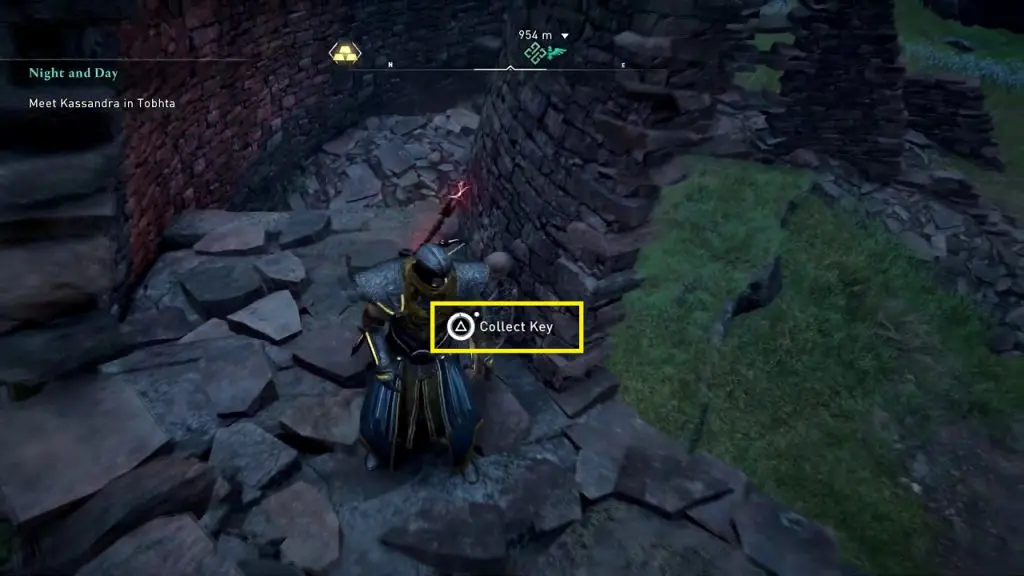
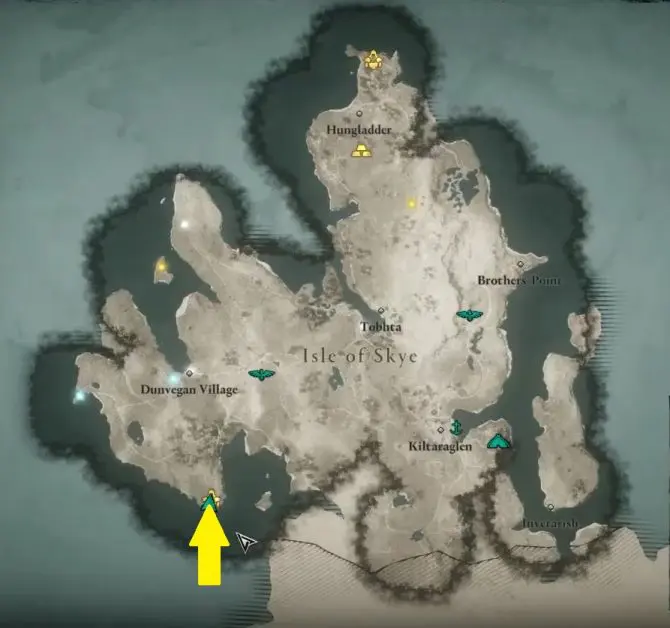
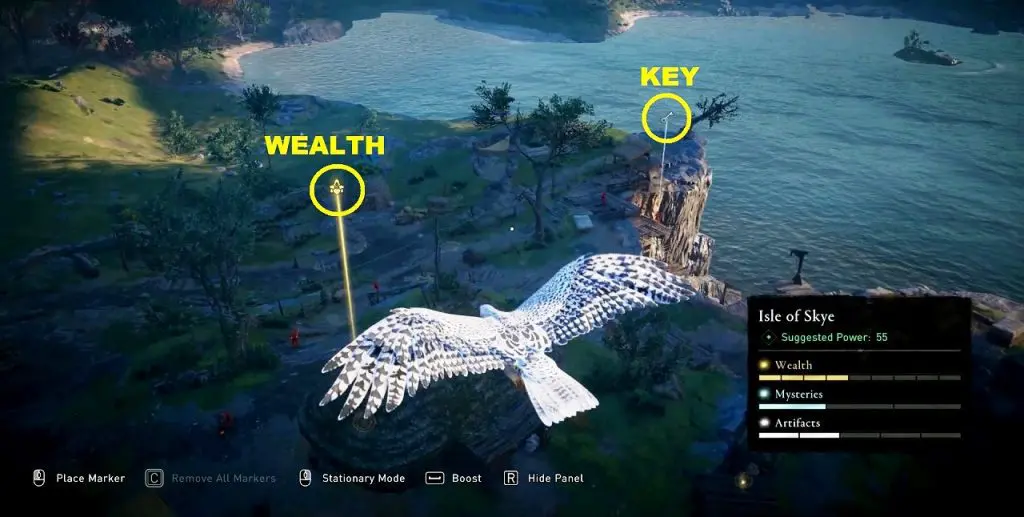
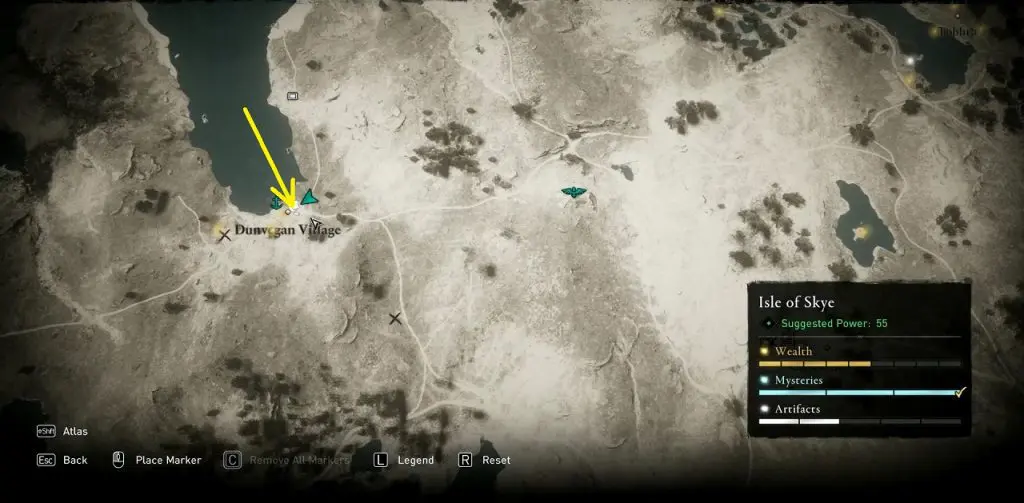
4) Dunvegan Village Wealth (Tungsten Ingot)
This chest is inside a house with a locked door, southeast of Dunvegal Village. The key to the locked door is on a ruined tower northeast of the house as shown in the picture below. Collect the key and use it to go inside the house to get the wealth.
5) Dun Ardtreck Gear Chest (Spear of Leonidas)
The chest is inside a hut in Dun Ardtreck. The chest is locked and you will need a key to open it. You will find the key on one of the enemies in the area as shown in the picture below.
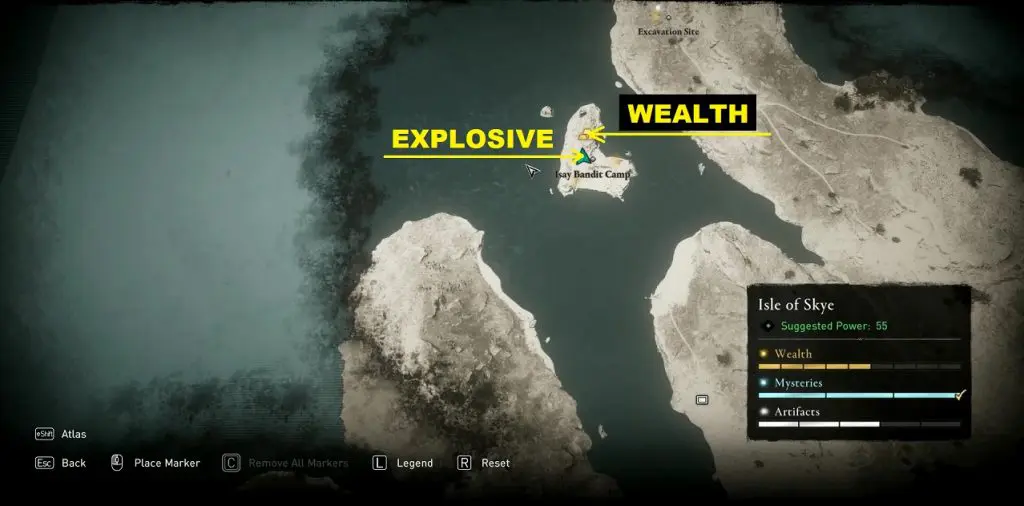
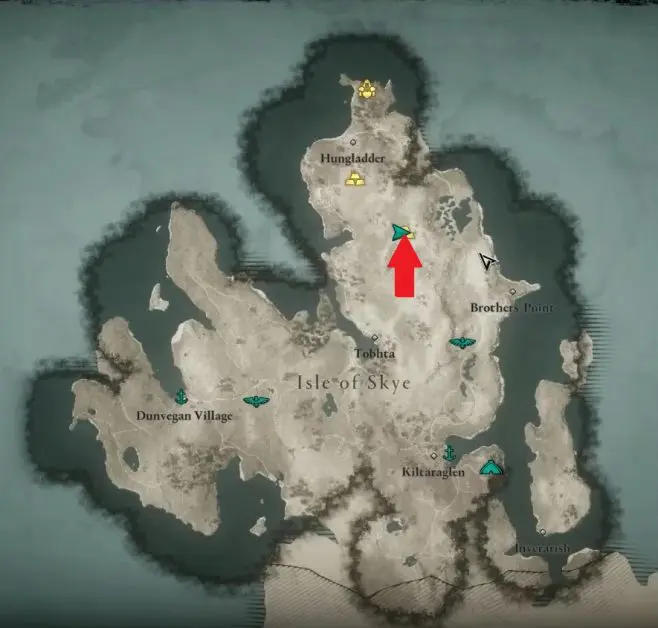
6) Dunvegan Village Wealth (Tungsten Ingot)
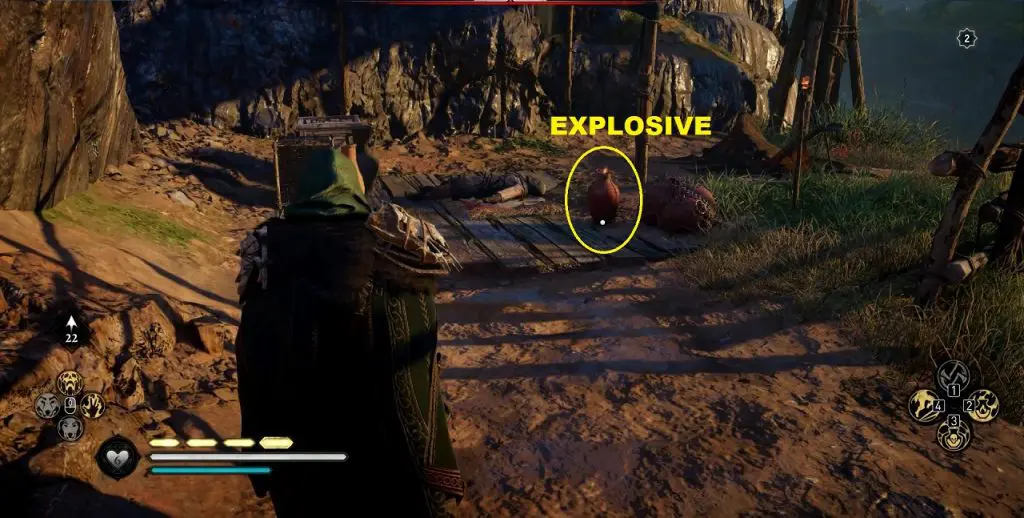
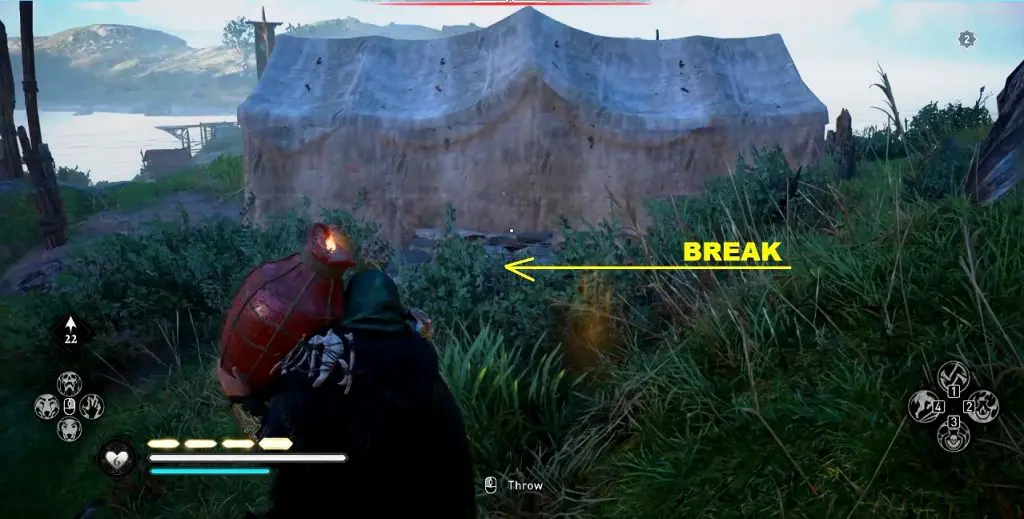
This chest is buried in the ground near a white tent in Isay bandit Camp. South of the tent, you will find an explosive barrel at the location shown in the picture below. Pick up the explosive barrel and carry it to the wealth location. Use the explosive barrel to destroy the ground above the chest. Then jump down the hole to get the wealth.
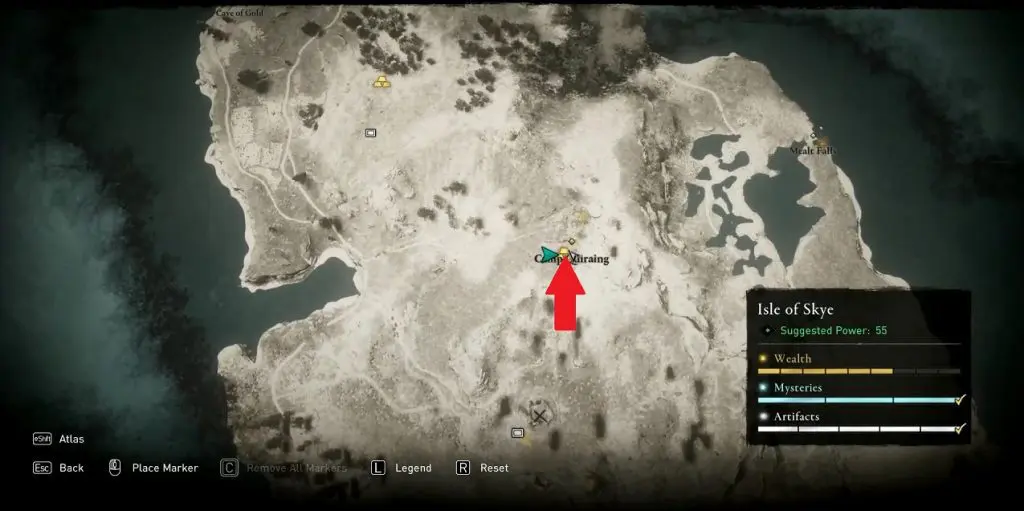
7) Camp Quiraing Wealth (Tungsten Ingot)
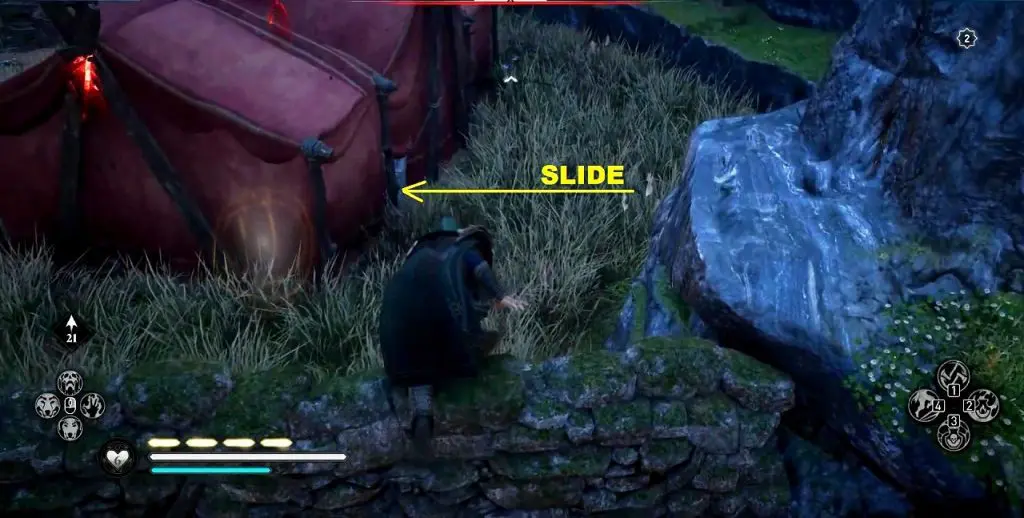
The chest is inside a red tent in Camp Quiraing. Slide through a hole on the tent wall to get inside and get the wealth.
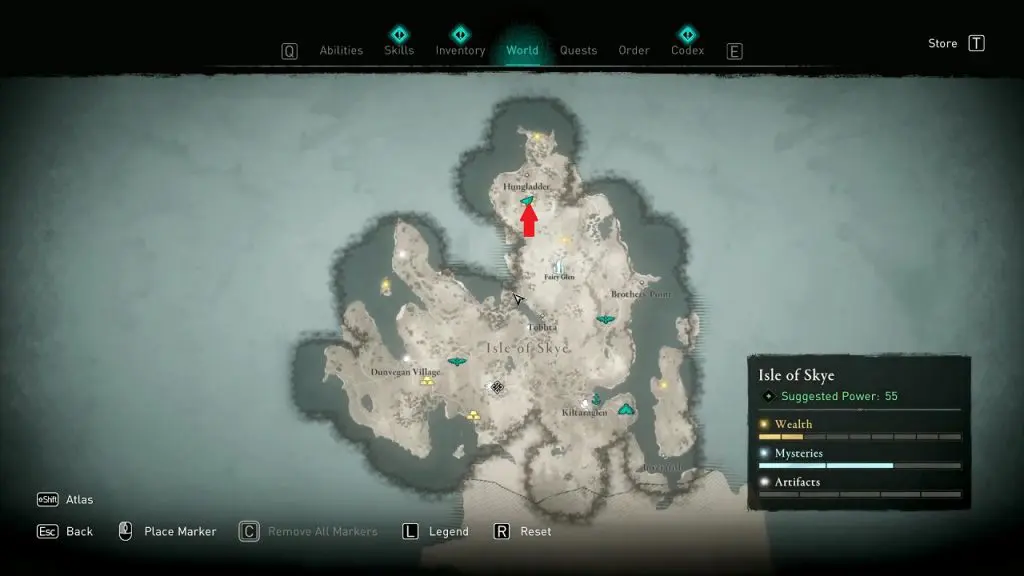
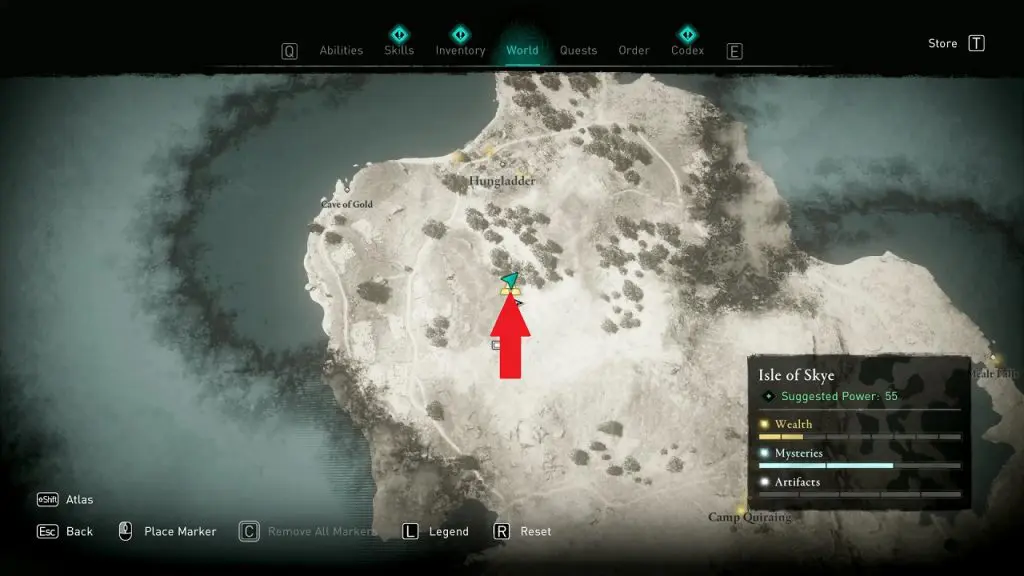
8) Hungladder Underground Wealth (Tungsten Ingot)
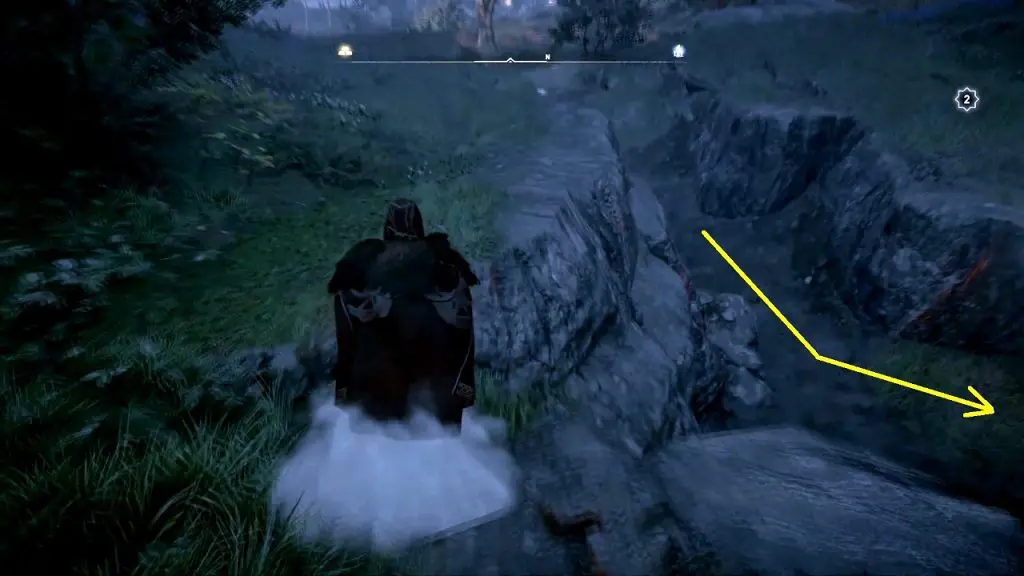
The chest is under the ground south of Hungladder at the location marked in the pictures below.
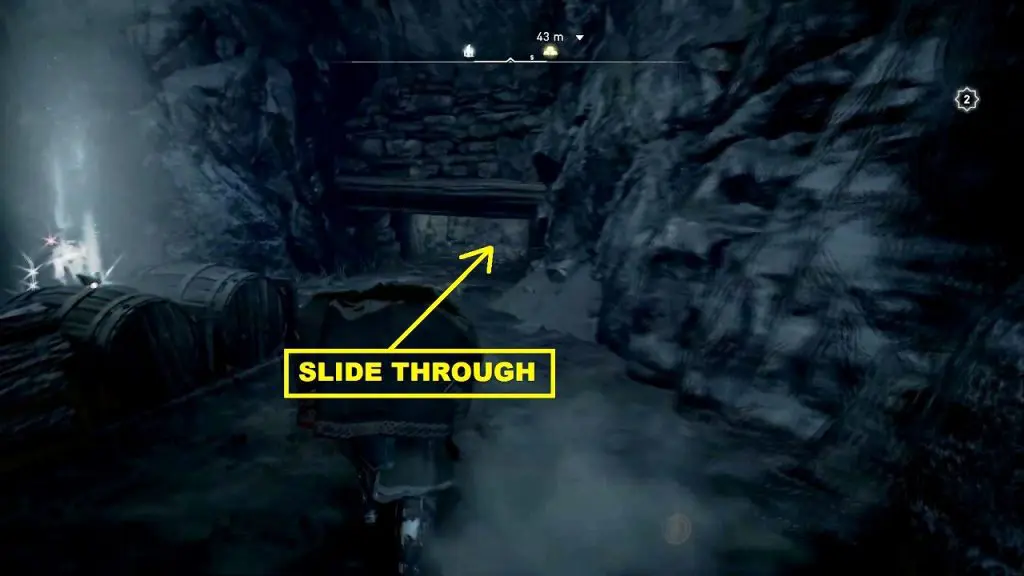
Slide through the small hole on the wall as shown in the picture below to reach the underground area.
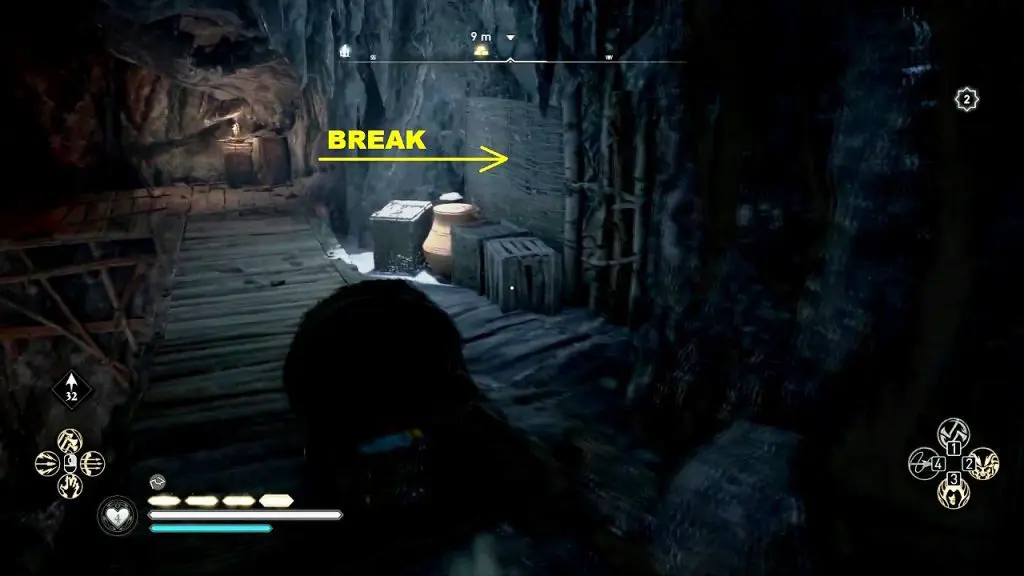
As you move ahead in the underground area, you will see a wooden blockage on the right side as shown below. Destroy the blockage and get the explosive barrel behind it.
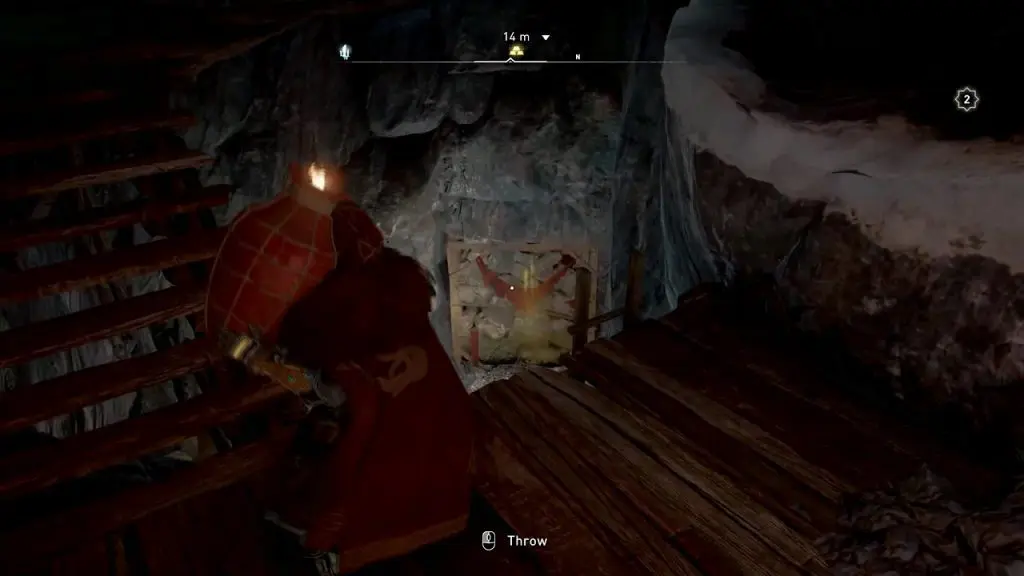
Pick up the explosive barrel and carry it down the ramp. Then use it to destroy the wall as shown in the picture below. Then get the wealth behind it.
9) Duntulm Camp Gear Chest (Hero’s Sword)
The chest is on a ruined tower in the Duntulm camp. to open the chest you will need two keys. The location of the keys is marked in the picture below.
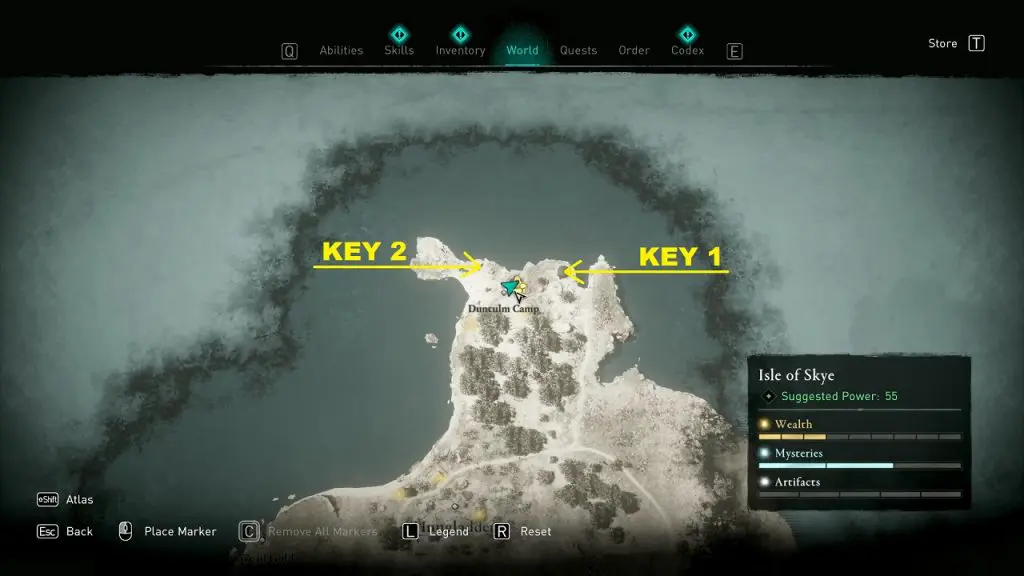
One key is with a Goliath, who is inside a hut on the east side of Duntulm Camp as shown in the picture below. Defeat the Goliath to get the key.

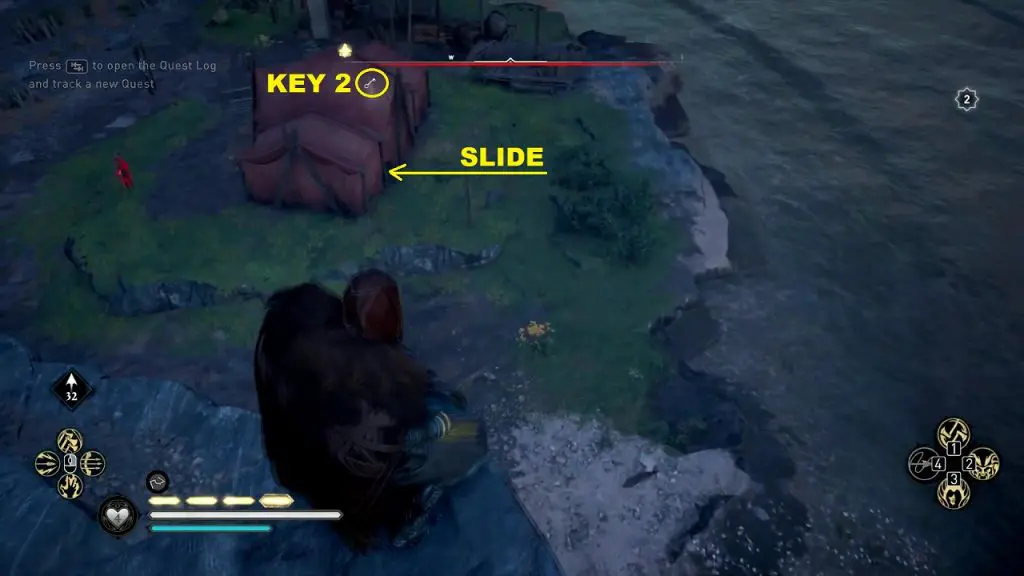
Another key is inside a red tent on the west side of Duntulm Camp as shown in the picture below. Slide through the hole on the tent wall to go inside and get the key.
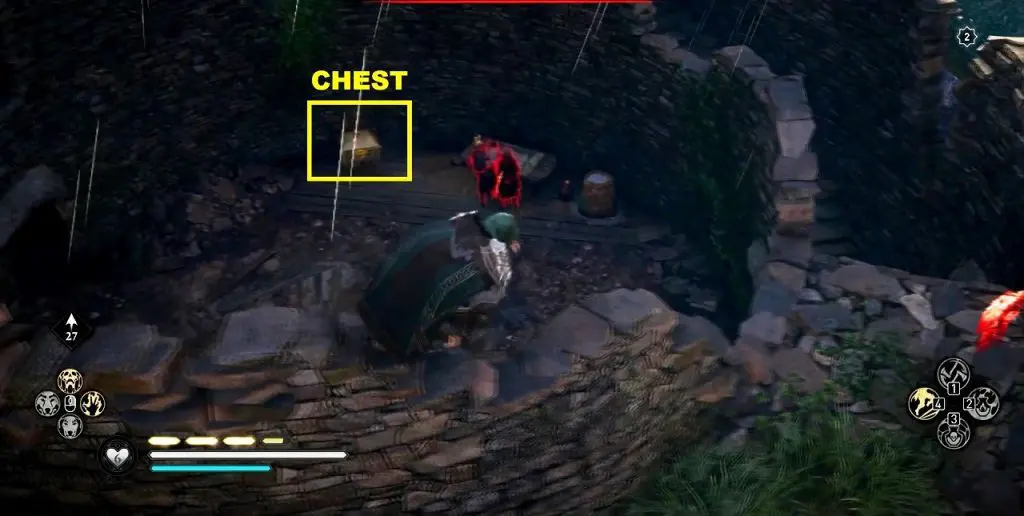
Once you have the two keys. Go to the ruined tower and use the keys to open the chest and get the Hero’s Sword.
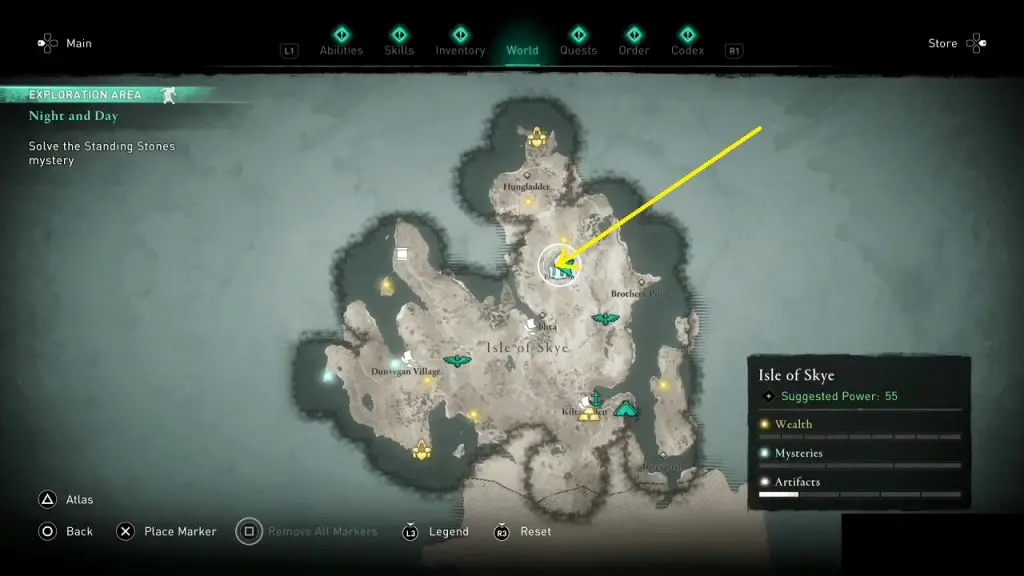
10) Standing Stone Msytery in Fairy Glen
During the ‘Day and Night’ day and night quest, you will have to solve a Standing Stone puzzle at Fairy Glen, which is at the northern part of Isle of Skye as shown in the picture below.
East of the rock, you will find a note on a stone that will tell you the shape you need to achieve to solve the puzzle.
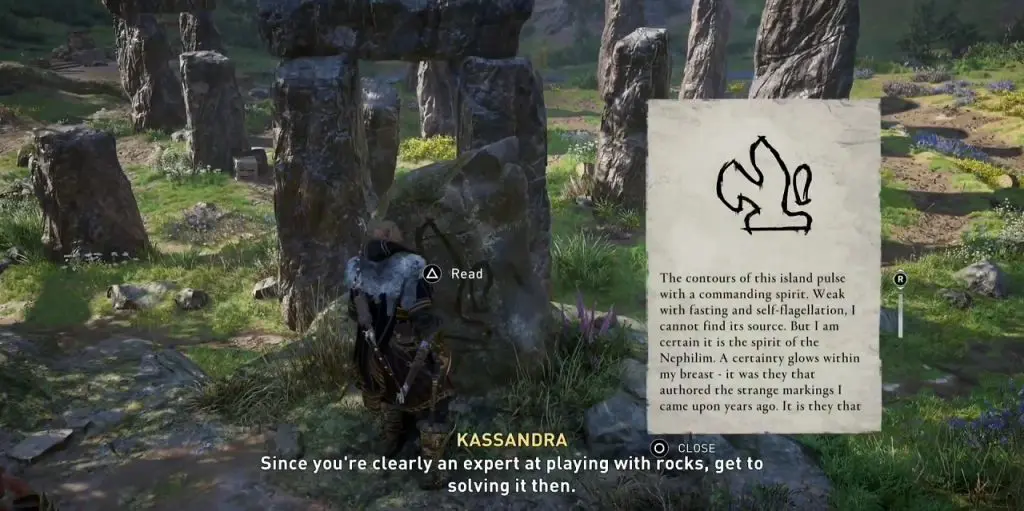
In this area, you will find three notes that will give hints to solve the puzzle. The hints will tell you that you will need to climb up higher on a makeshift shelf to solve this puzzle. You don’t need to read these notes to be able to solve the puzzle.
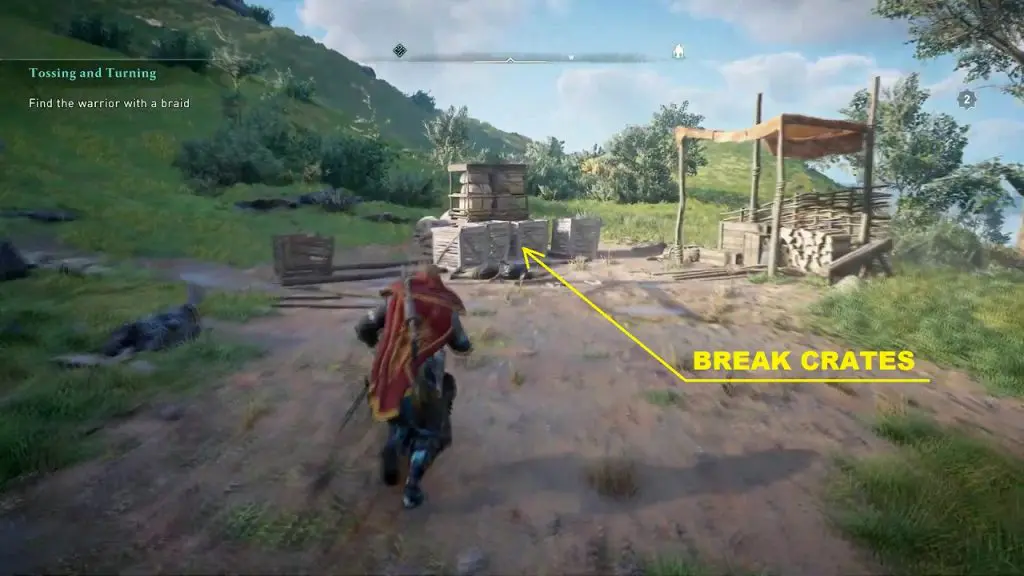
Go to the west of the stones, and destroy the crates near the movable panel as shown in the picture below.
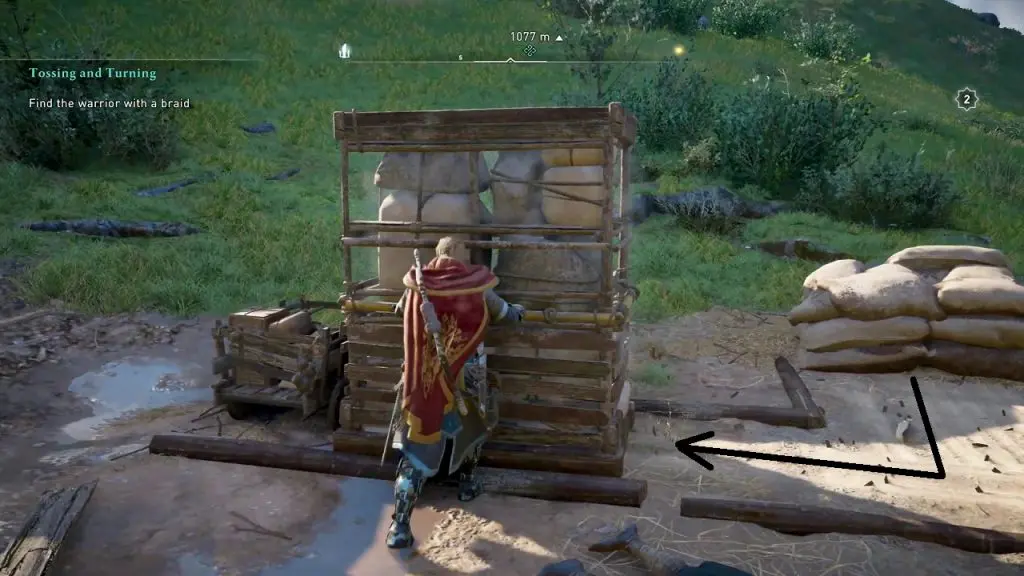
Once the crates are destroyed, the panel will be free to move. Move the panel to the end of the movable area as shown in the picture below.
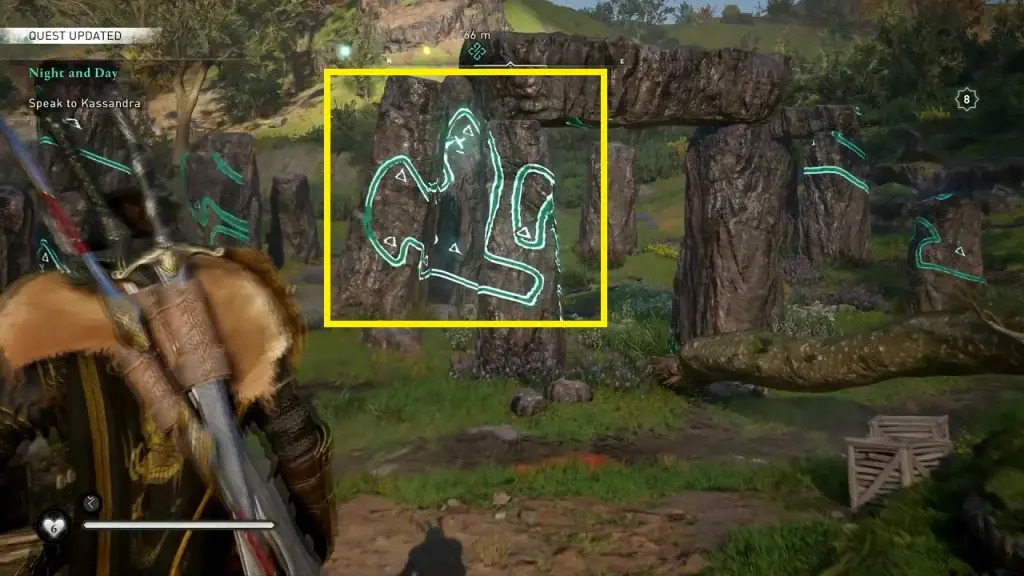
Now, climb up on the movable panel and see the standing stones till your vision forms the shape as shown in the picture below. This will solve the puzzle.
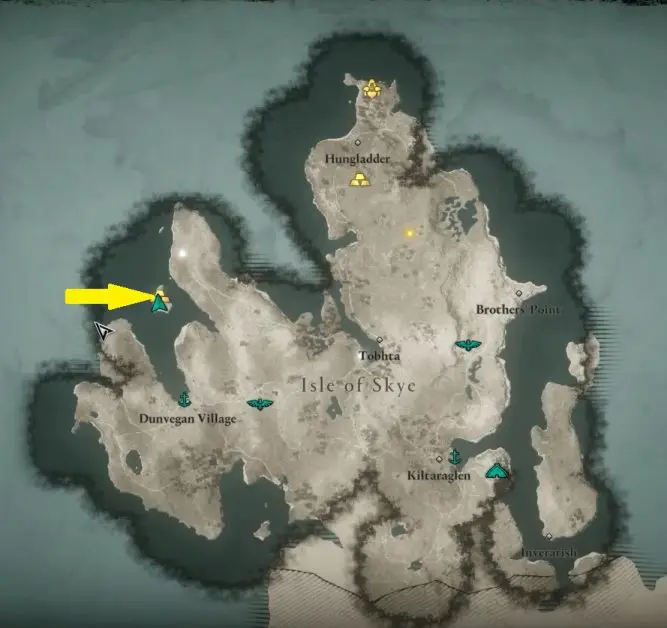
11) Dunvegan Village Mystery (Drink of the Picts)
You will find this mystery is the west of Dunvegan Village as shown in the picture below.
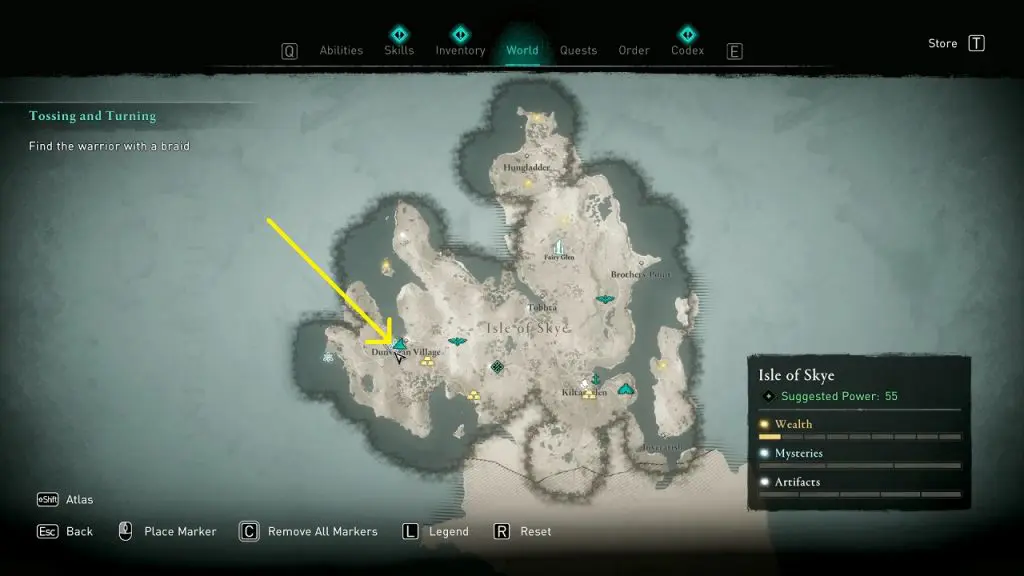
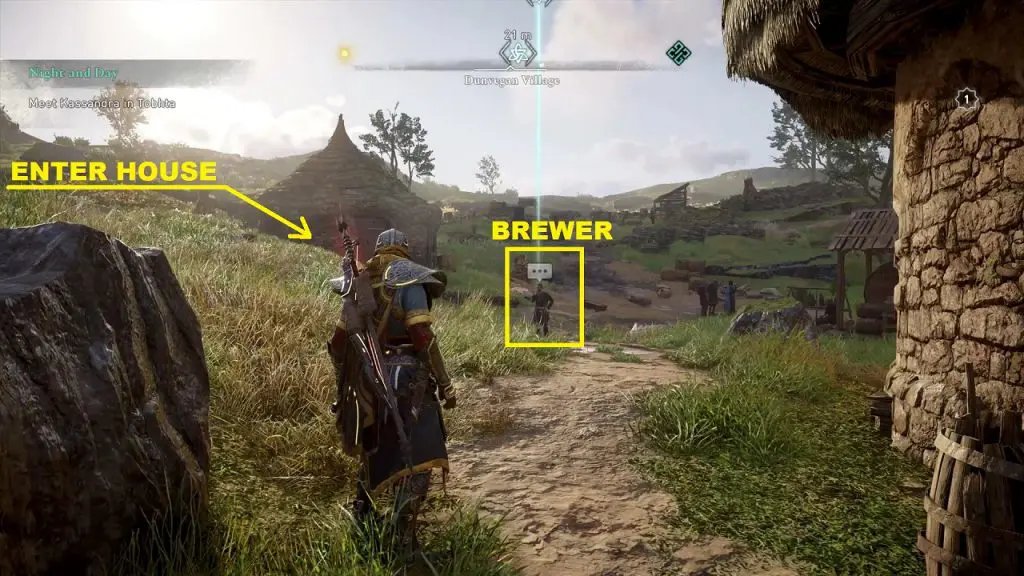
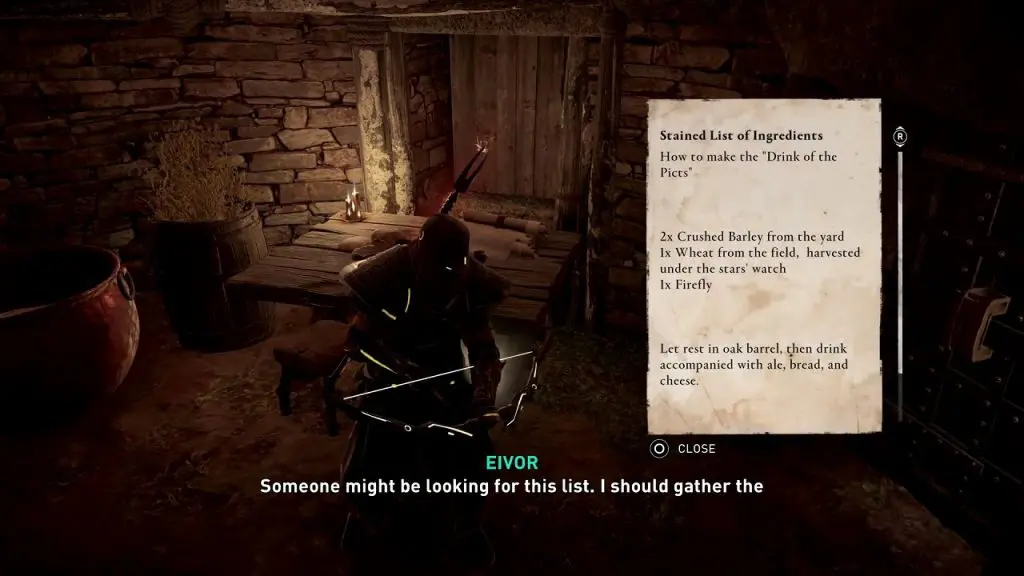
At the marked location, you will find a Brewer talking with himself. There is a hut next to the brewer. Break the window of the hut and enter inside. Read the note kept on the. The note mentions the ingredients required to make ‘Drink of the Picts’. Now go and talk to the Brewer, and he will request you to collect the ingredients for him.
Note: The ingredients can be collected only during the night.
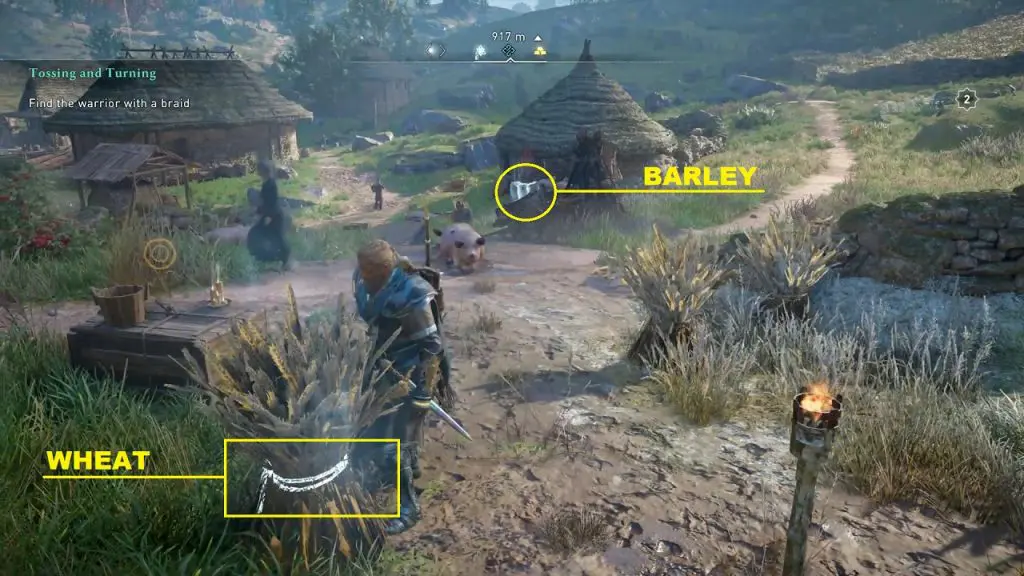
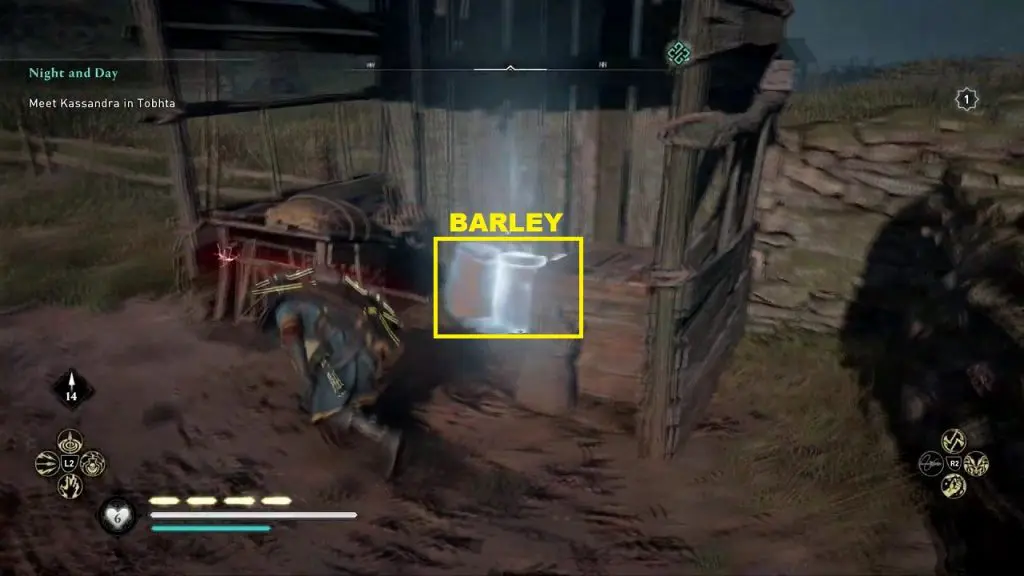
You will find 1 Barley on top of a barrel outside the hut where you found the note as shown in the picture below. Then go west and you will find the wheat on the farm at the location shown in the picture below.
After collecting the wheat, go further west, then jump the wall and you will find another barley on top of a barrel under a small structure as shown in the picture below.
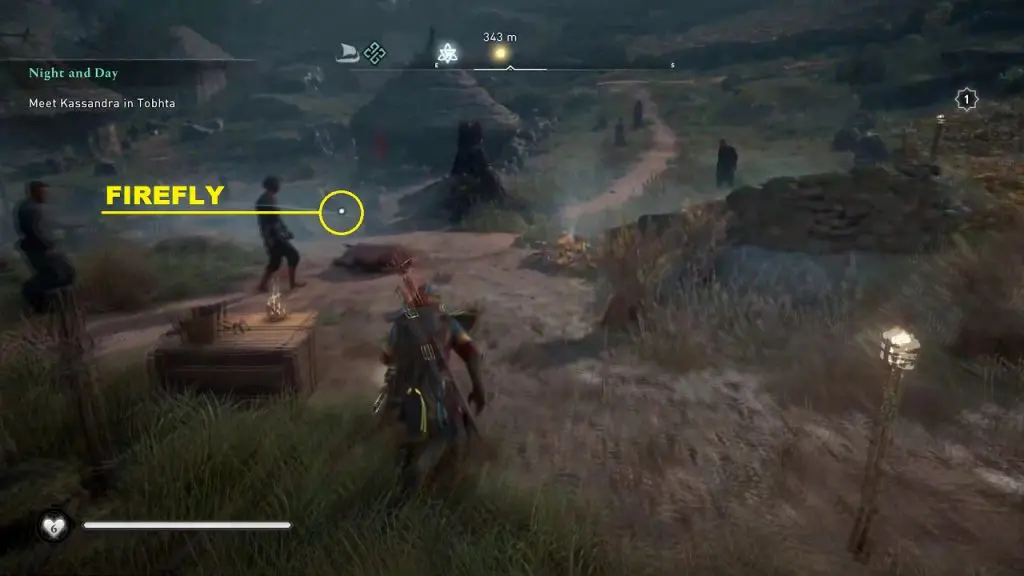
Firefly location is not fixed but it is easy to find as it will appear as a flying white dot as shown in the picture below. Usually, the firefly would appear near you so it won’t be very difficult to find. Once you have all the ingredients, go and talk to the Brewer to complete the mystery ‘The Drink of the Picts’.
12) Neist Point Mystery
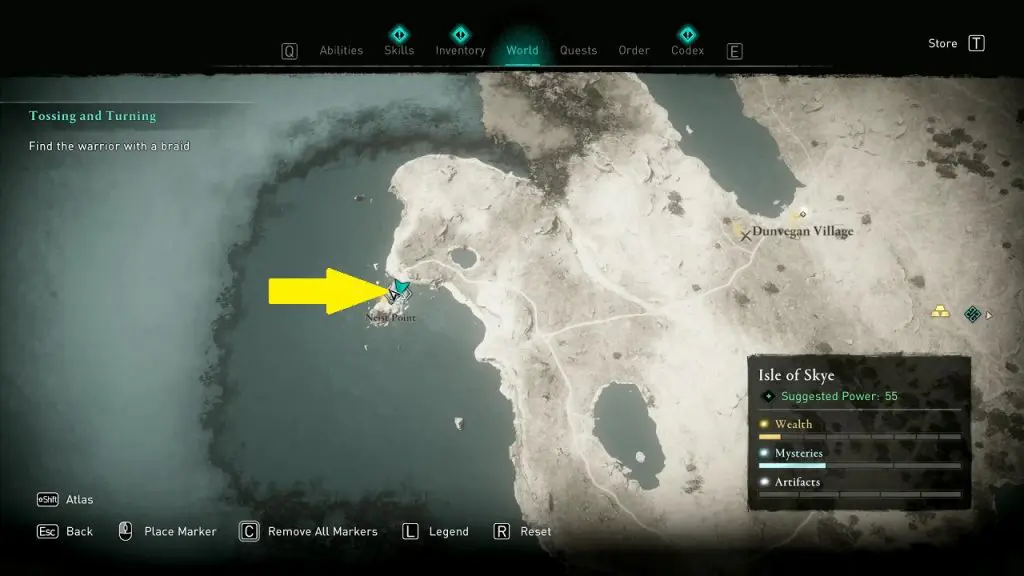
This mystery is at the highlighted location at the western end of Isle of Skye as shown in the picture below.
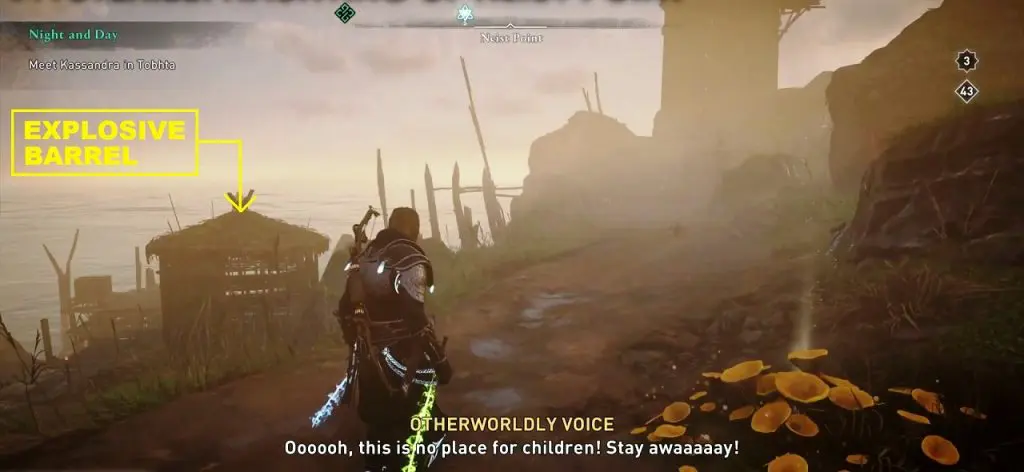
Destroy the door of the hut near the shore at the location shown in the picture below. Then go inside and collect the explosive barrel.
Use the explosive barrel to destroy the wall of the tower in the Neist Point. Then go inside the tower and climb the ladder.
After getting off the ladder, destroy the wooden plants on the roof above. Then climb up the hole to reach the top of the tower. Talk to the old man on the top of the tower to complete the mystery “Haunting of Neist Point”.
13) Kiltaraglen Artifact (Flying Paper)
This artifact is at the highlighted location in Kiltaraglen. Chase the flying paper and catch it to get a tattoo design.
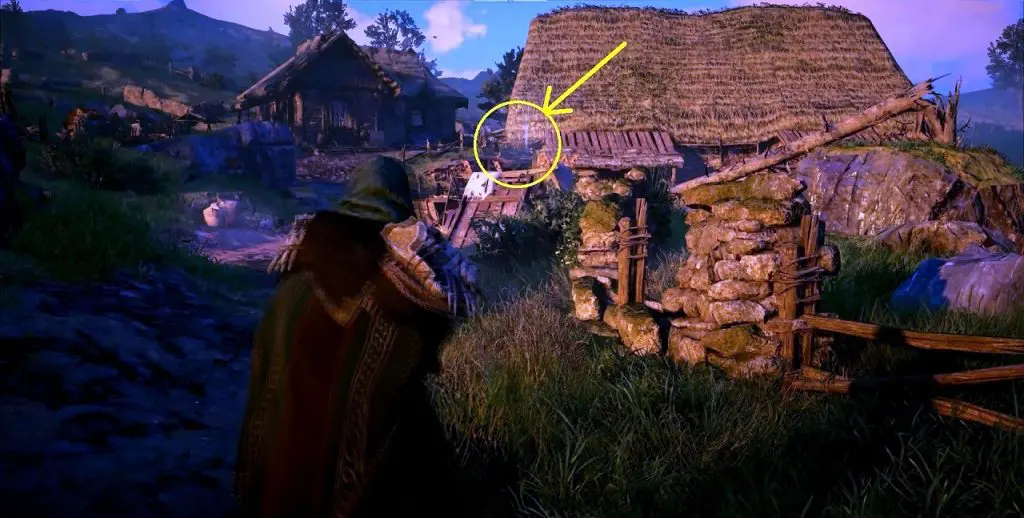
14) Dunvegan Village Artifact (Flying Paper)
This artifact is at the highlighted location in Dunvegan Village. Chase the flying paper and catch it to get a tattoo design.
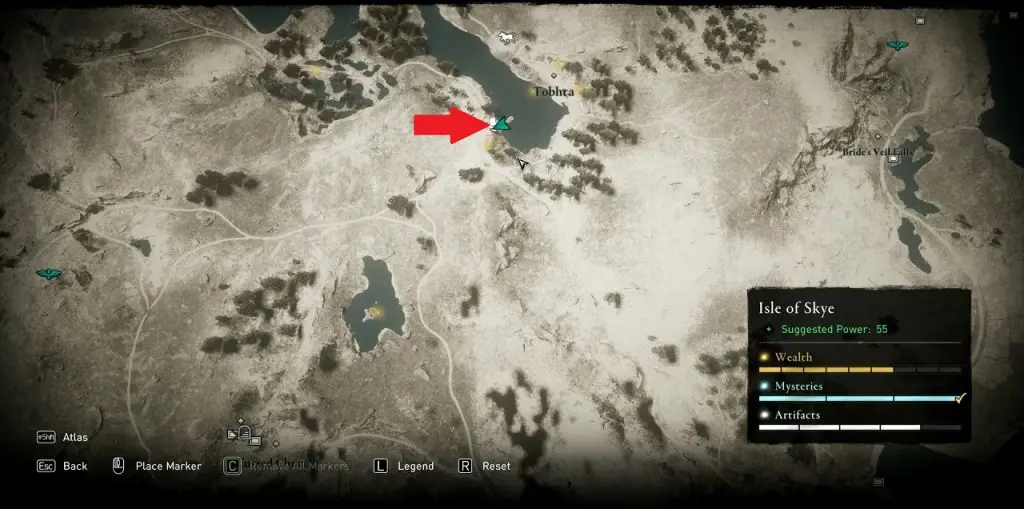
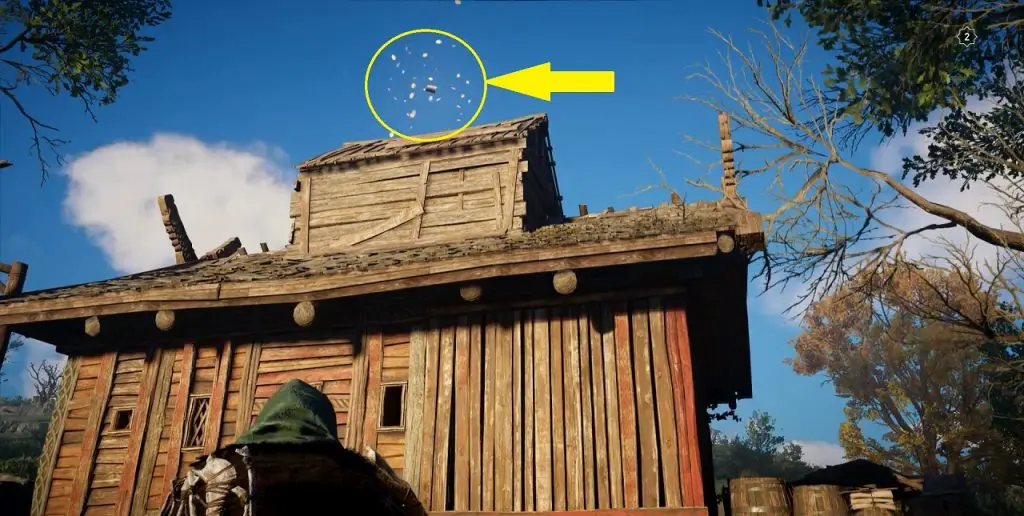
15) Tobhta Artifact (Flying Paper)
This artifact is on the roof of a house west of Tobhta at the location shown in the picture below. Chase the flying paper and catch it to get a tattoo design.

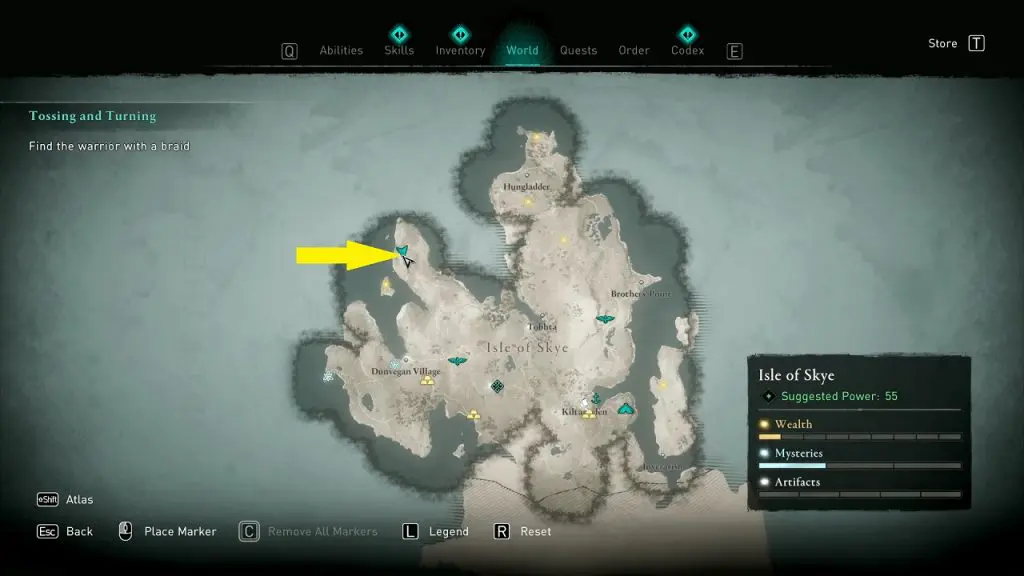
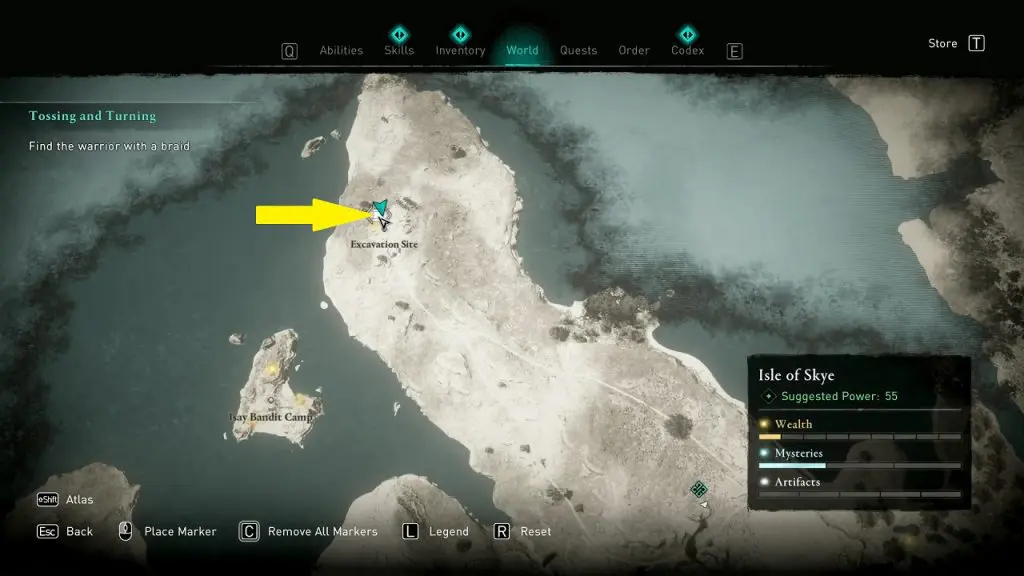
16) Skye Hoard Map & Treasure
You will find the Skye Hoard Map in the Excavation site, which is on the northwest portion of the Isle of Skye at the location shown in the picture below.
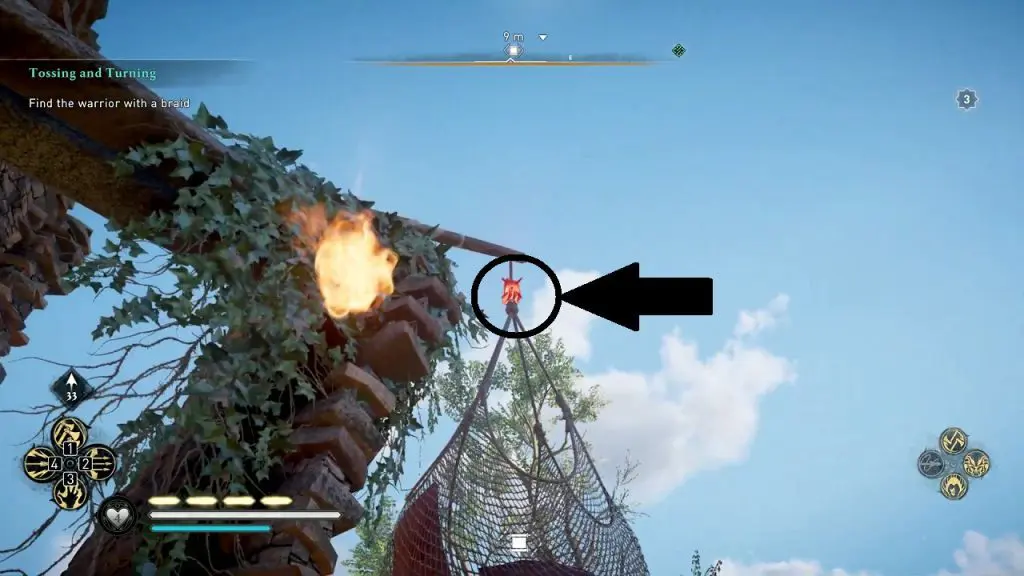
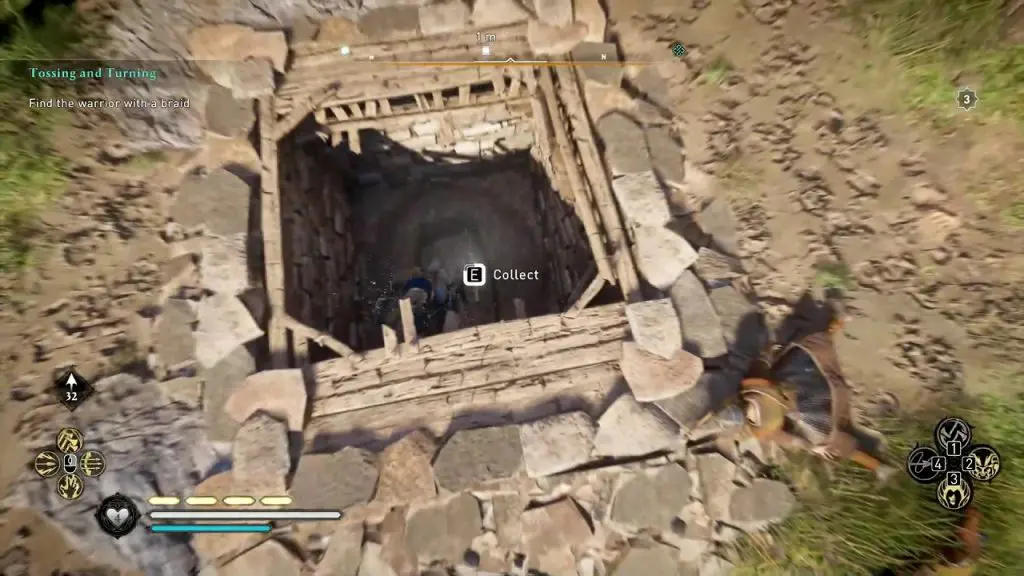
The map is under the breakable floor at the highlighted location. You will find some load hanging above the breakable floor. Stoot the support of the load, for it to fall and destroy the breakable floor. Then jump inside and collect the map as shown in the pictures below.
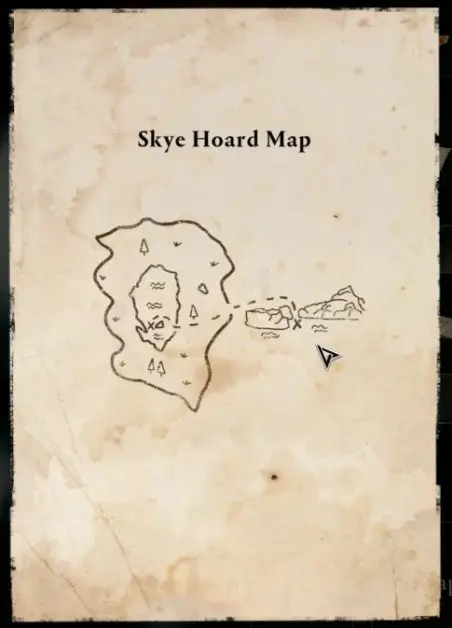
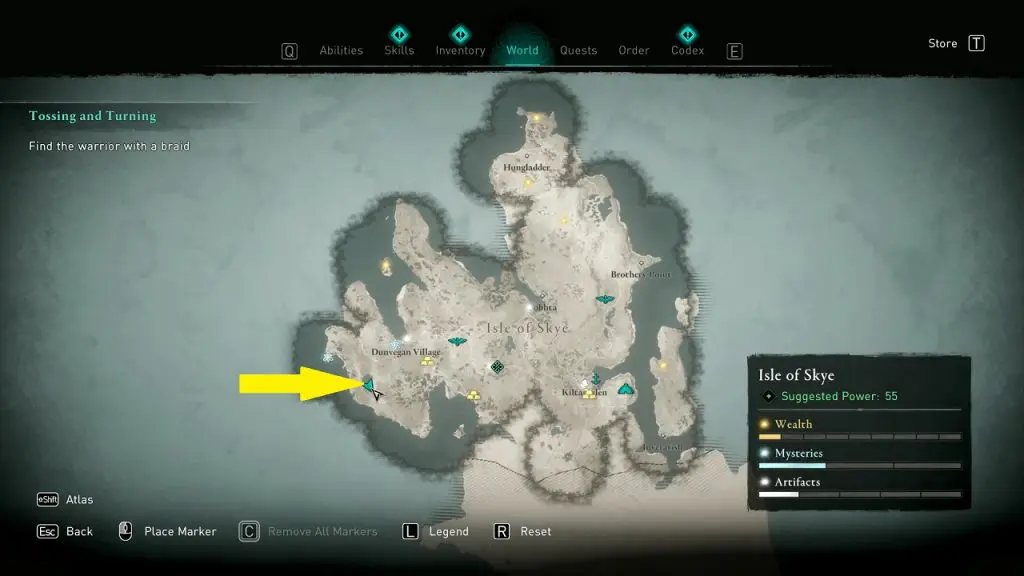
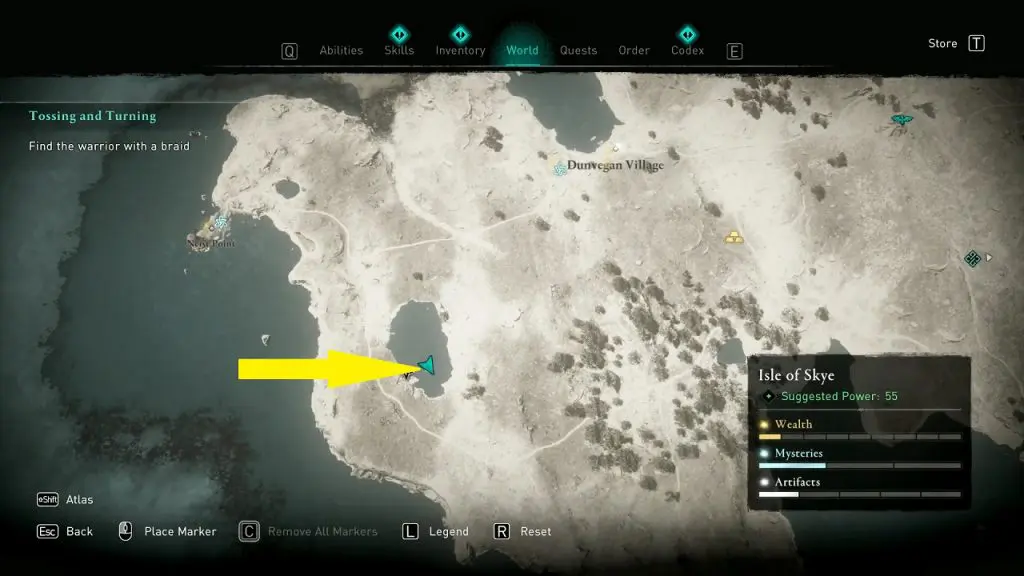
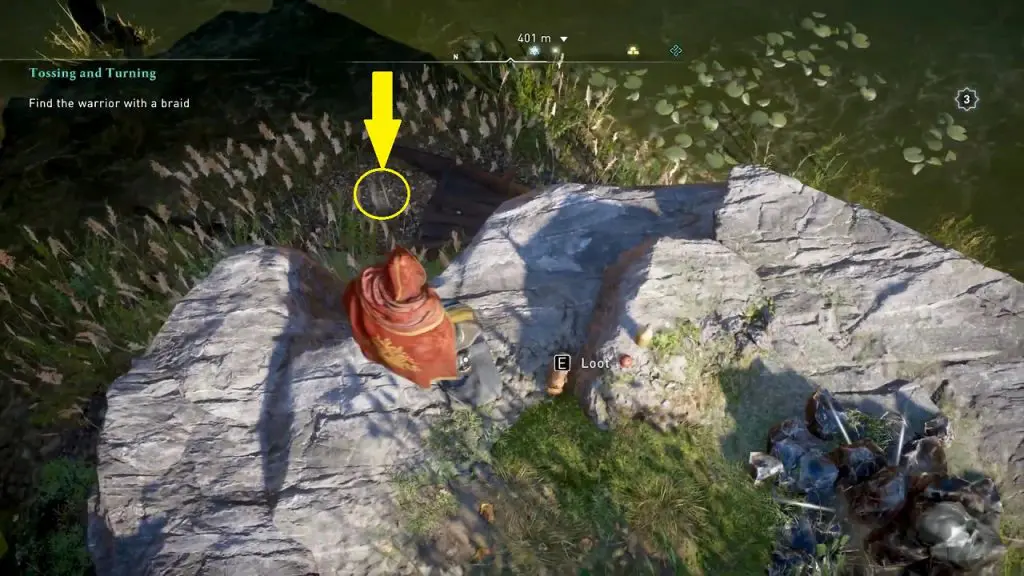
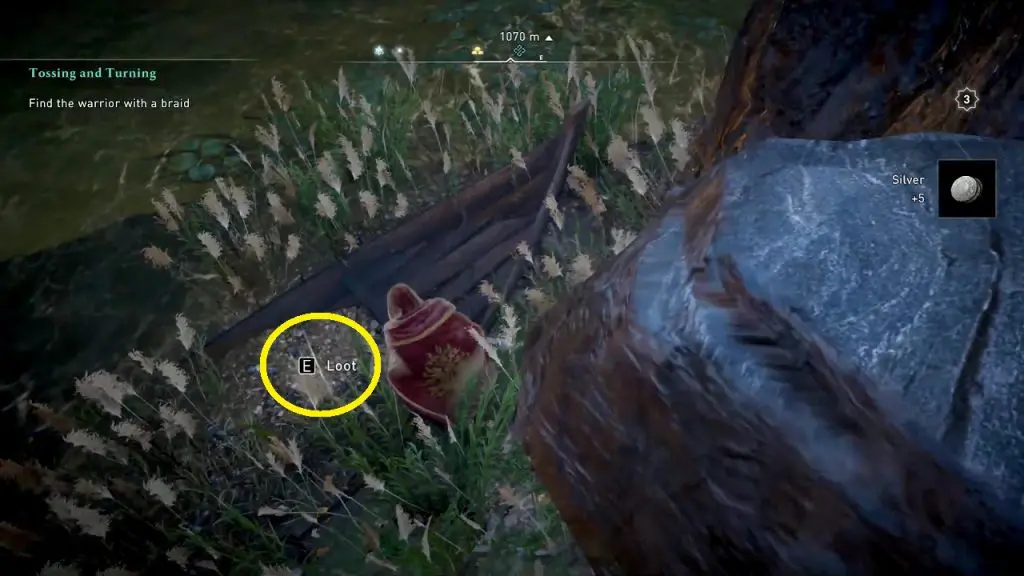
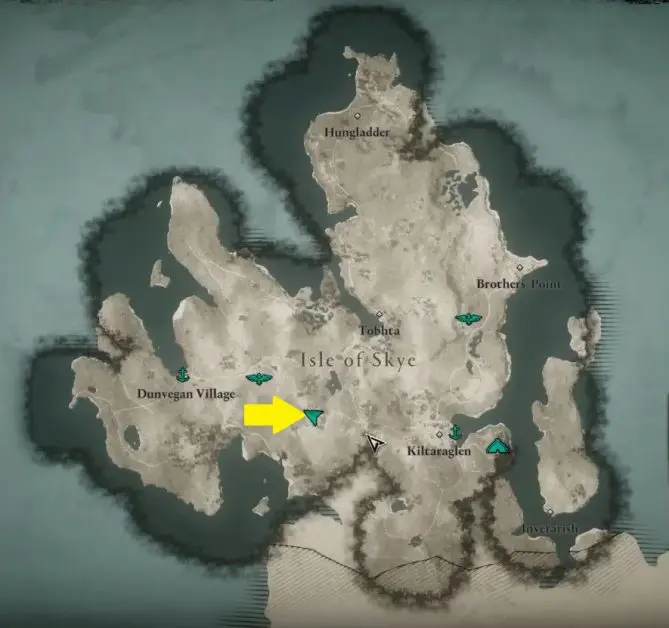
The treasure is on a small landmass inside a lake at the western part of the Isle of Skye as shown in the picture below. On the northern part of this landmass, you will find a destroyed boat with the treasure on it as shown in the third and fourth pictures below. On collecting the treasure, you will get Eagle Bearer Tattoo and The Medusa Sail.
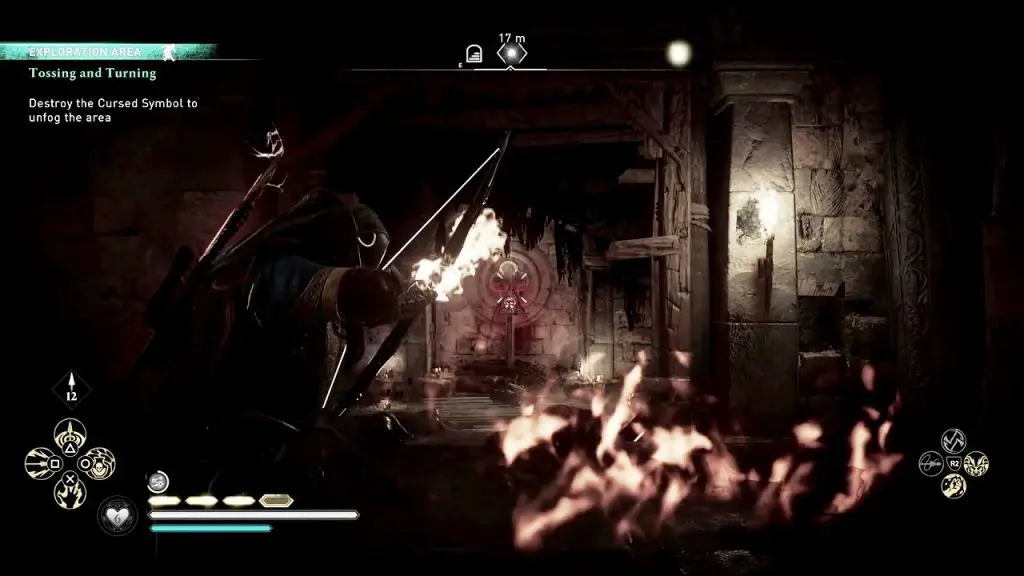
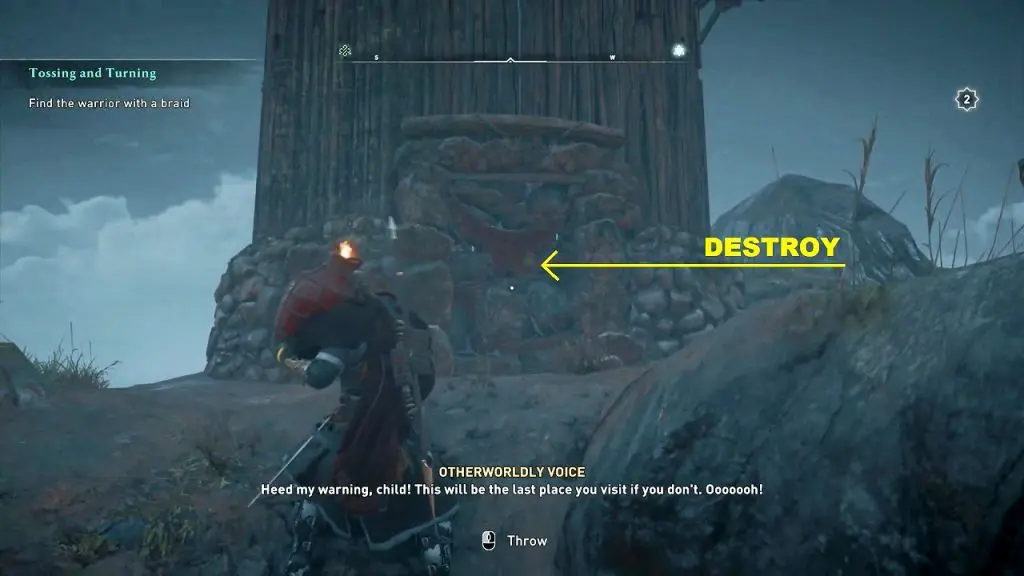
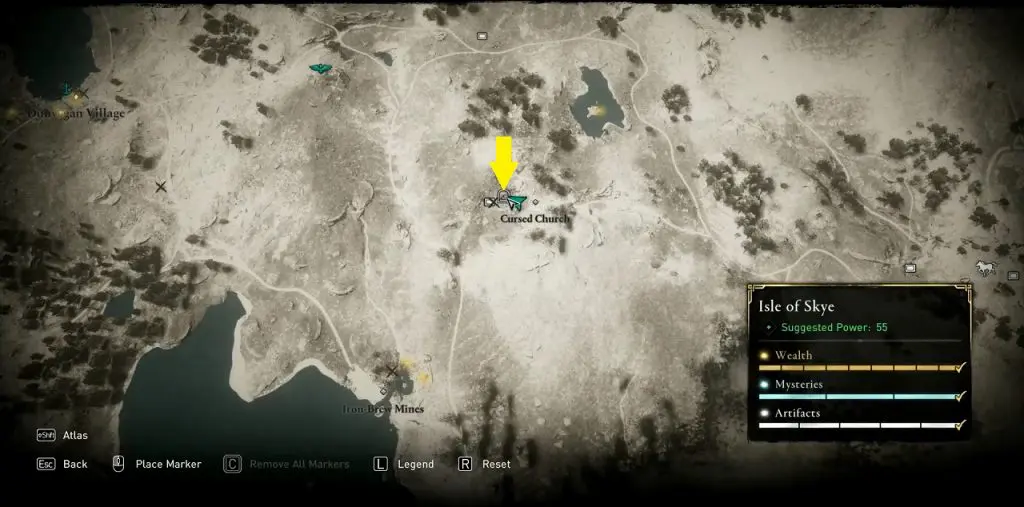
17) Cursed Church (Cursed Symbol)
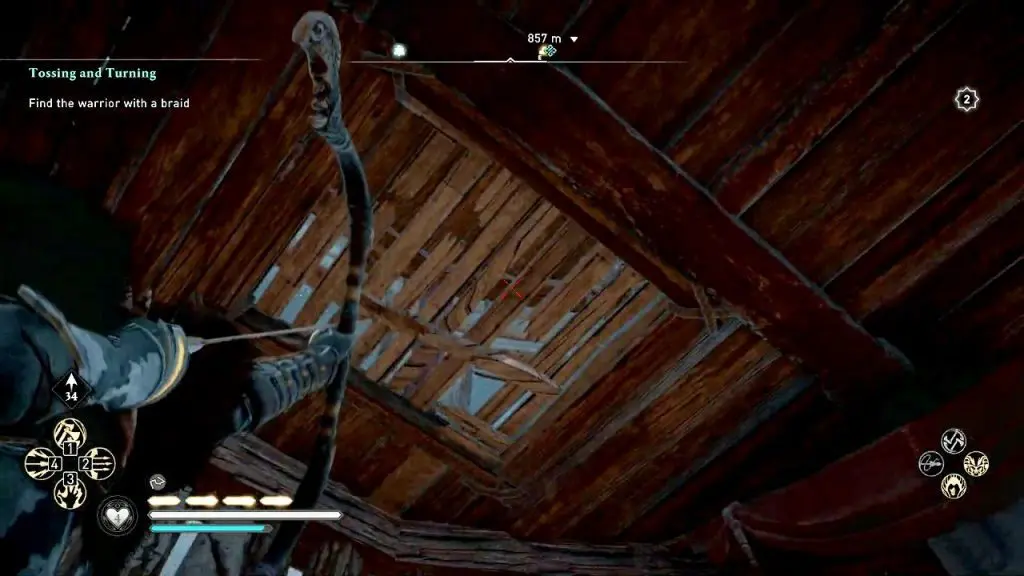
This artifact is story-related and you will get in the Cursed Church during the ‘Tossing and Turning’ quest. Force open the church door and go inside. Then destroy the floor and go to the underground area.
Proceed in the underground area until you reach a movable panel. Move the panel and go inside to get an explosive barrel as shown below.
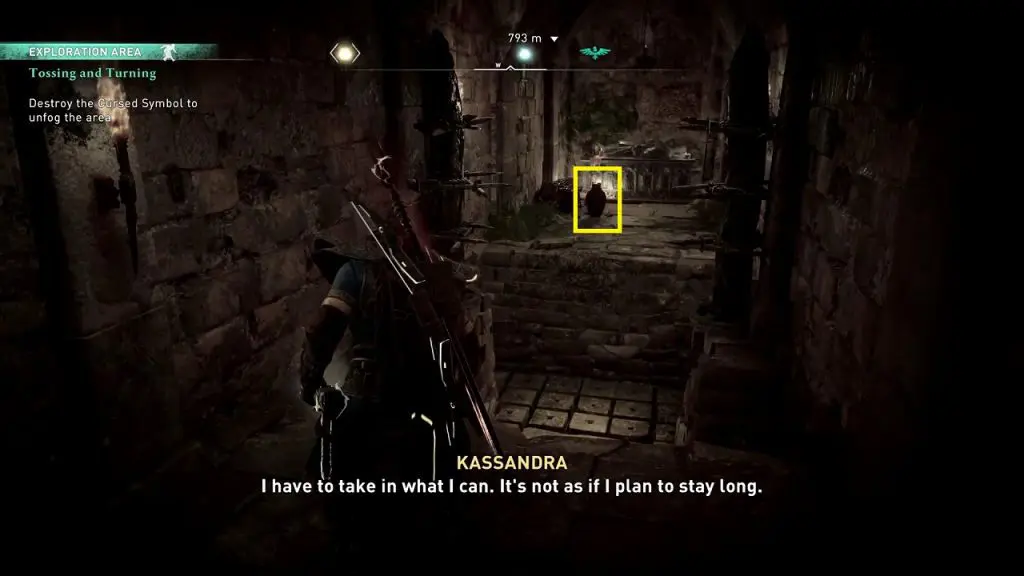
Pick up the explosive barrel. Then go out of the room and destroy the breakable wall nearby. Inside, you will find the cursed symbol. Destroy it to complete the objective.