This step-by-step guide will show where to find all the Collectibles in Lakeview Hotel in the game Silent Hill 2 Remake. Lakeview Hotel is the 13th area in Silent Hill 2 Remake.
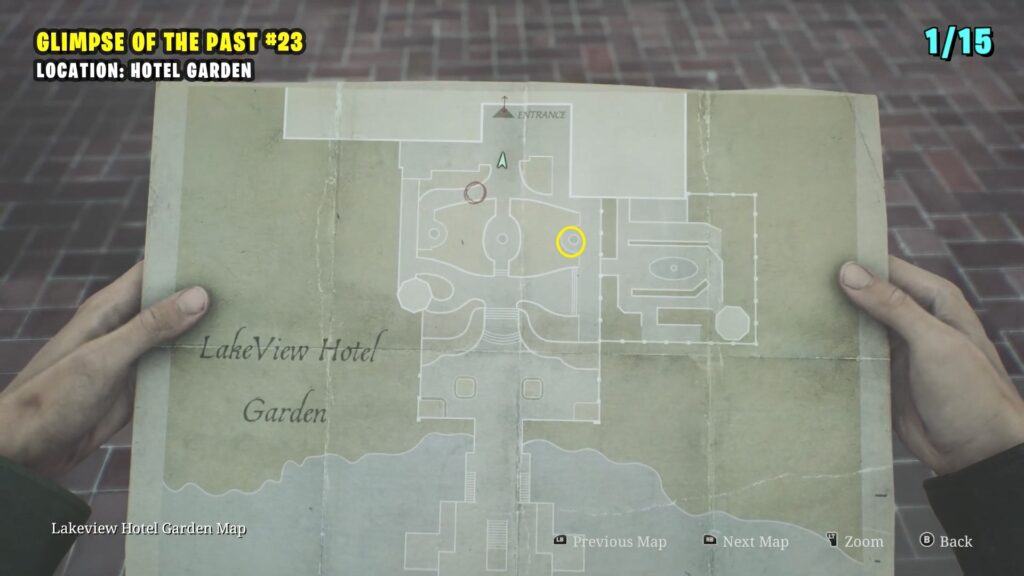
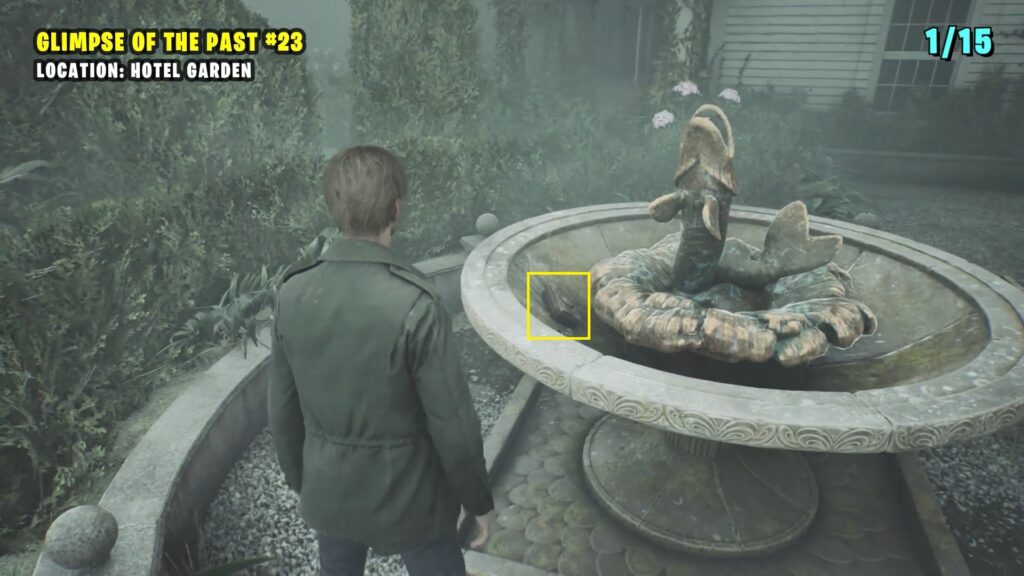
1) Glimpse of the Past #23
Enter the Lakeview Hotel Garden and check the small fountain on the eastern side to discover a Glimpse of the Past.
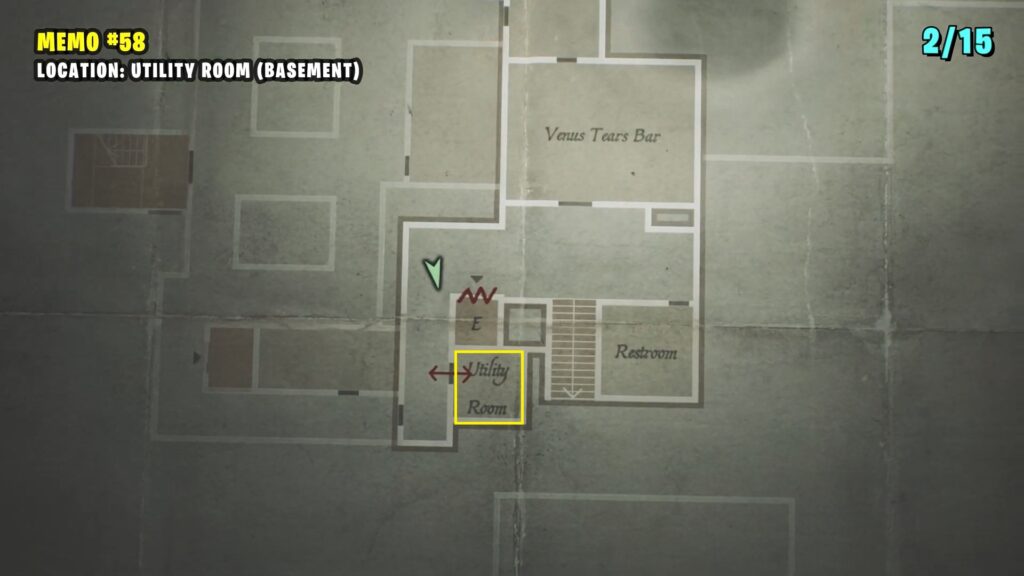
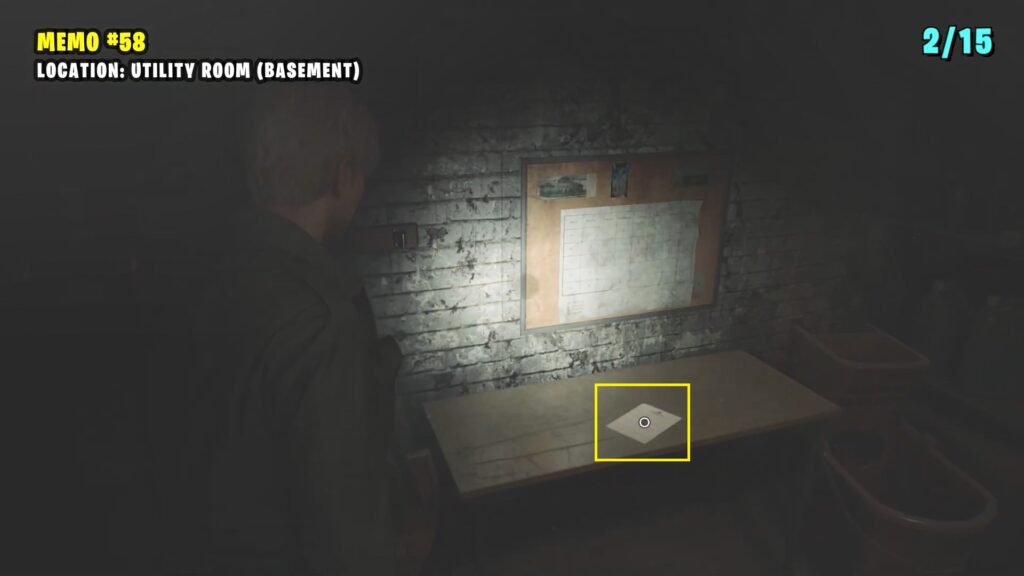
2) Memo #58: Cleaning Staff Memo #1
Enter the hotel and head downstairs to the basement. In the Utility Room, you’ll find a memo on the table.
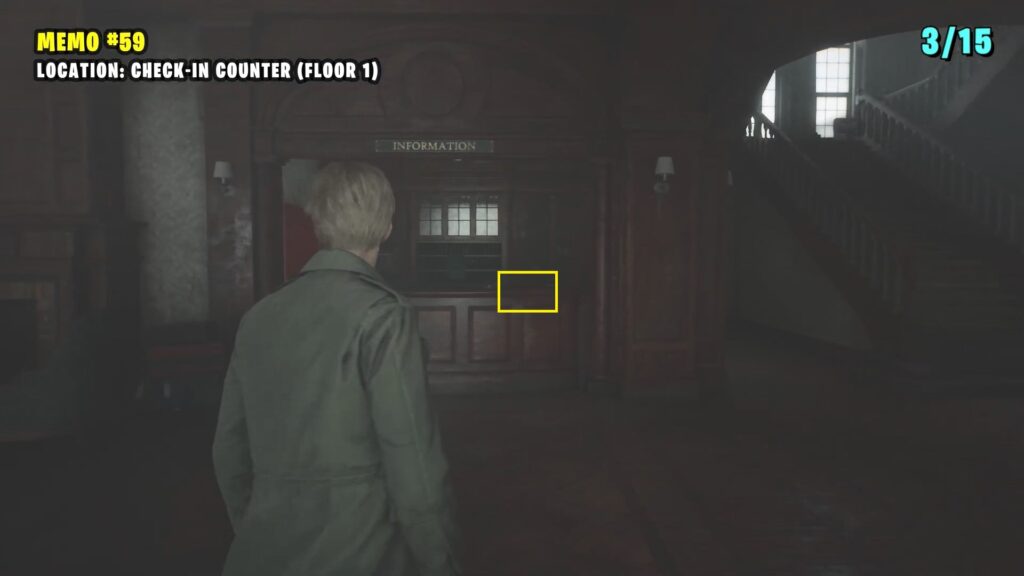
3) Memo #59: Laura’s Letter
You will automatically receive it after the cutscene in the Lake Shore Restaurant.
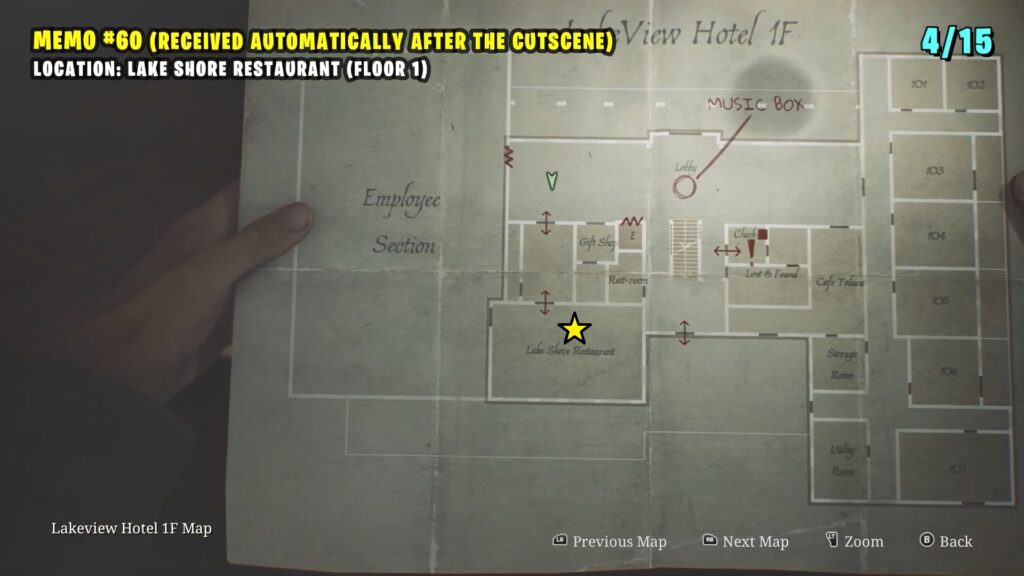
4) Memo #60: Receptionist Memo
Return to the 1st floor and inspect the counter in the Check-in Room.
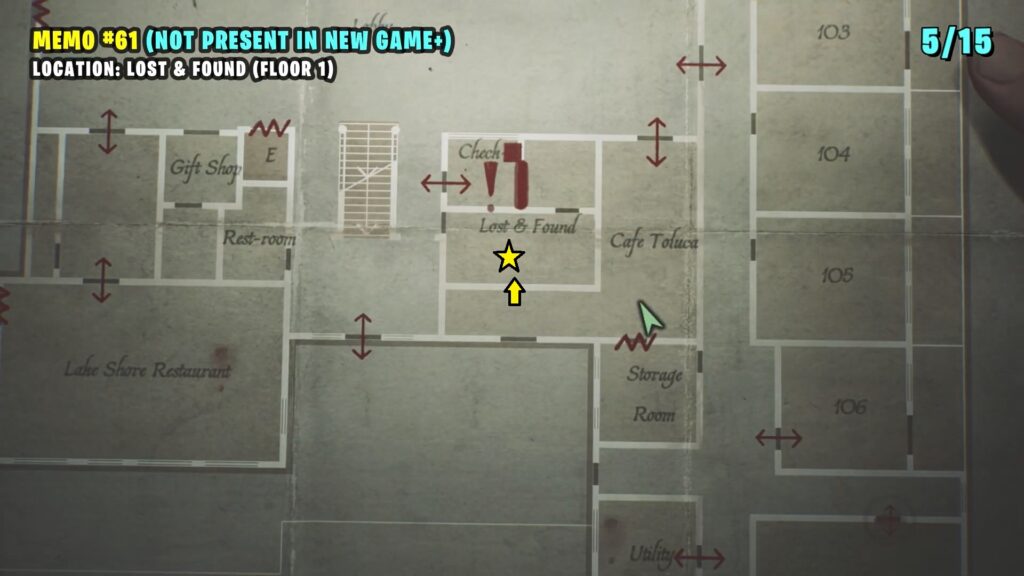
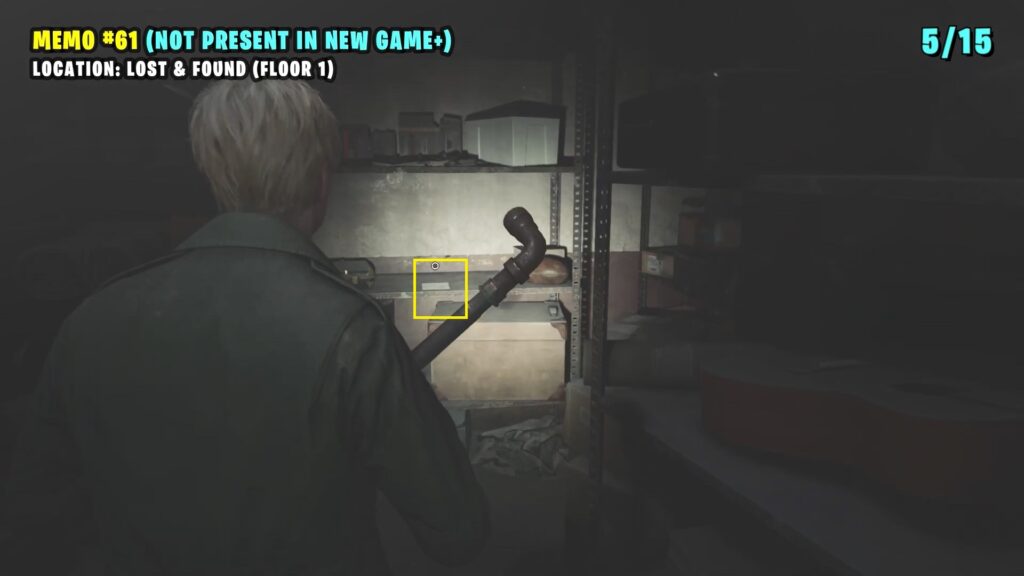
5) Memo #61: Lost & Found Note – New Game Only!
Note: This memo is only available in a New Game. You can find it on a shelf inside the Lost & Found Room.
To access the Lost & Found, you need to break through the wall in Cafe Toluca.
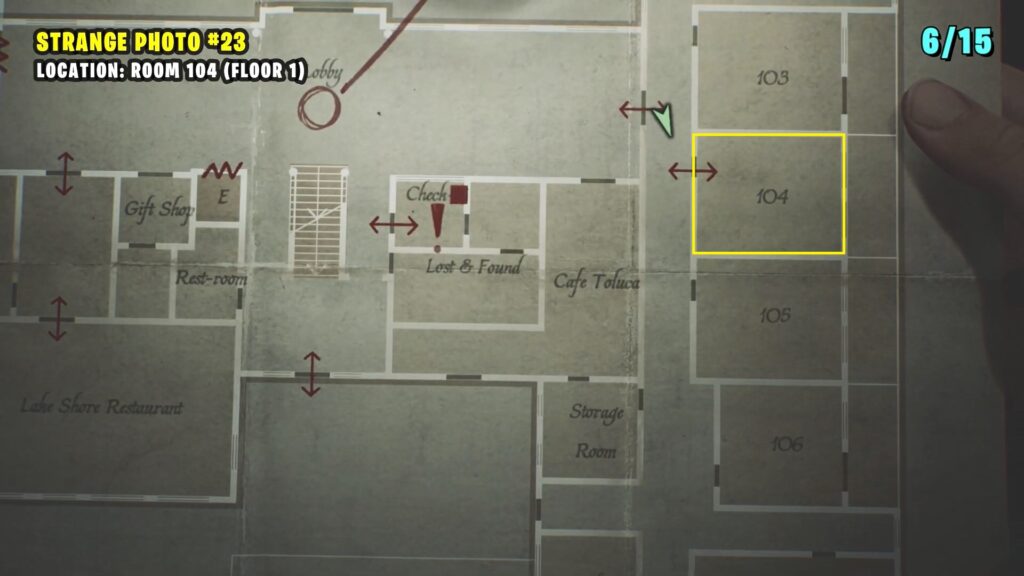
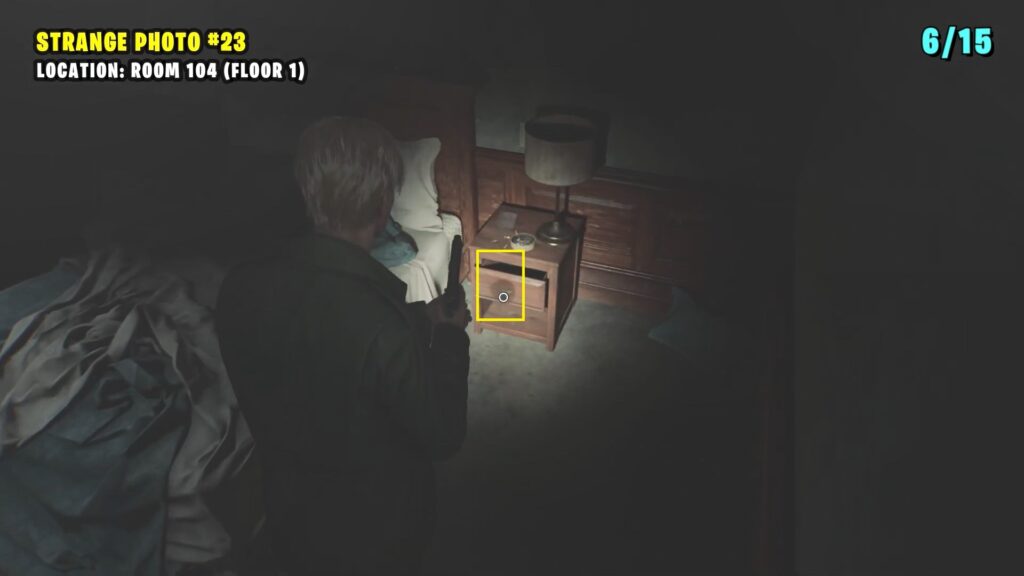
6) Strange Photo #23: “aftermath…”
Head to Room 104 and check the drawer of the bedside table.
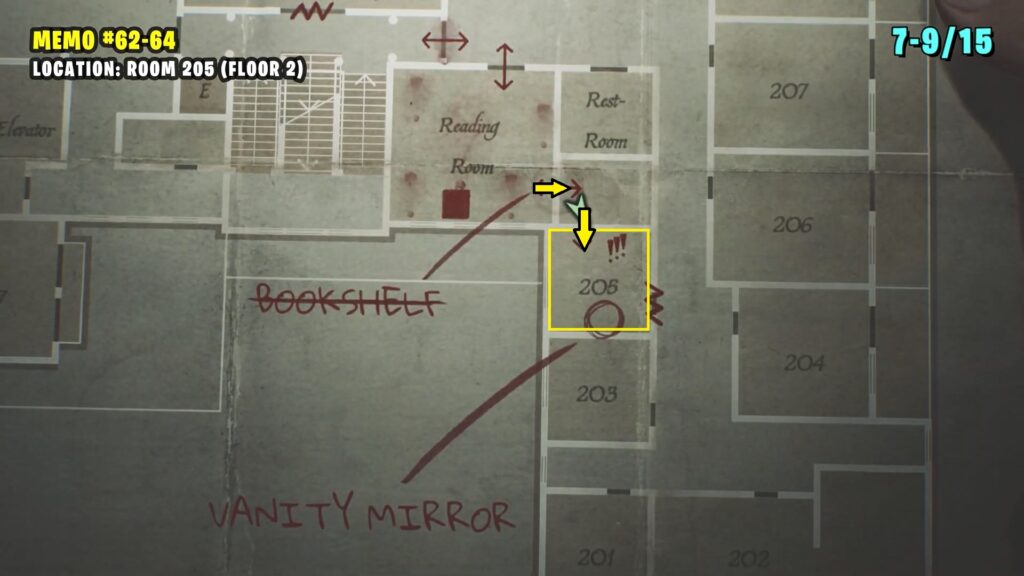
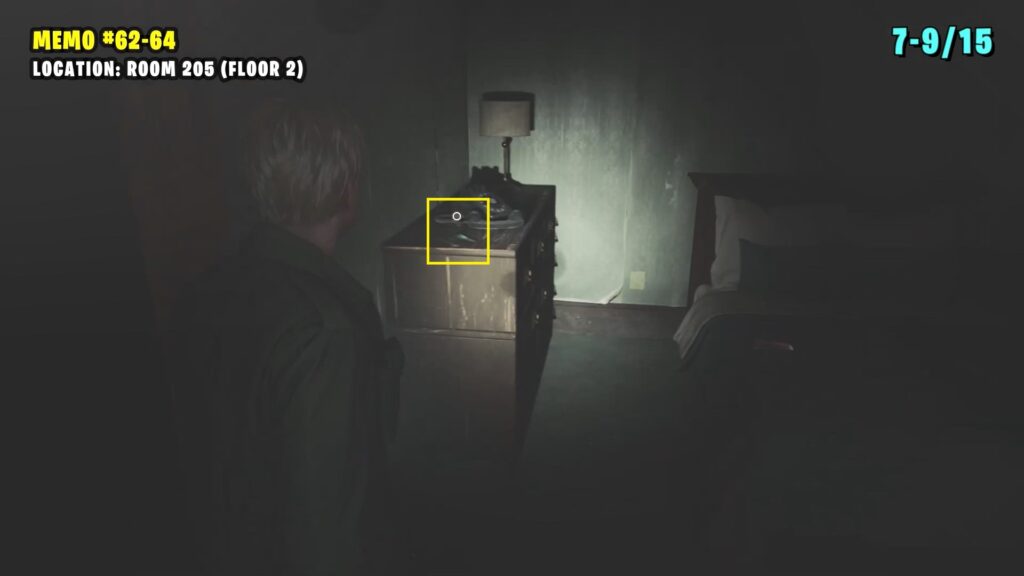
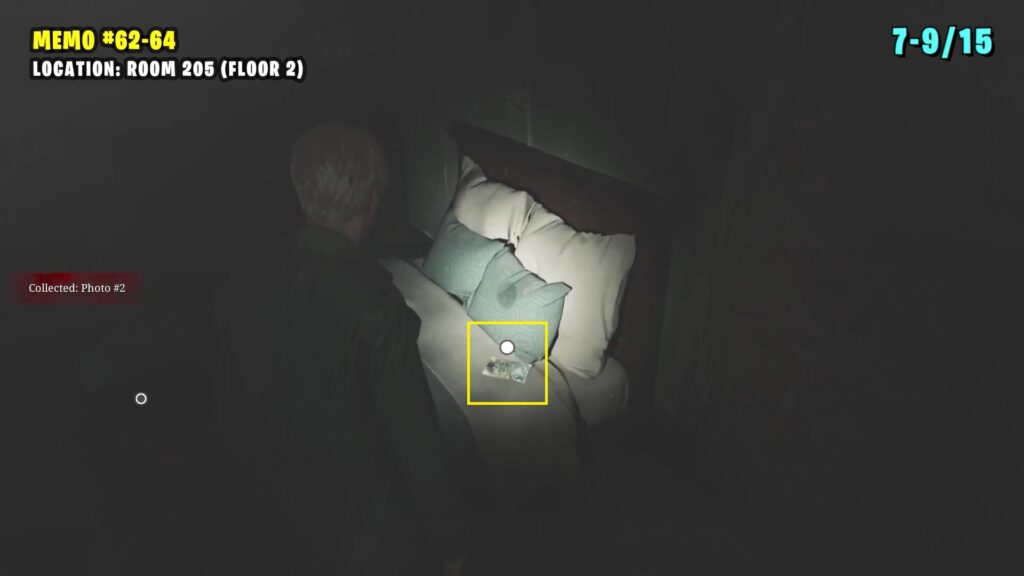
7-9) Memos #62 + #63 + #64: Door Photo + Stain Photo + Gate Photo
Make your way to the Reading Room on the second floor and solve the bookshelf puzzle to reveal a secret door leading to Room 205. Inside, you’ll find three photos near the bed.

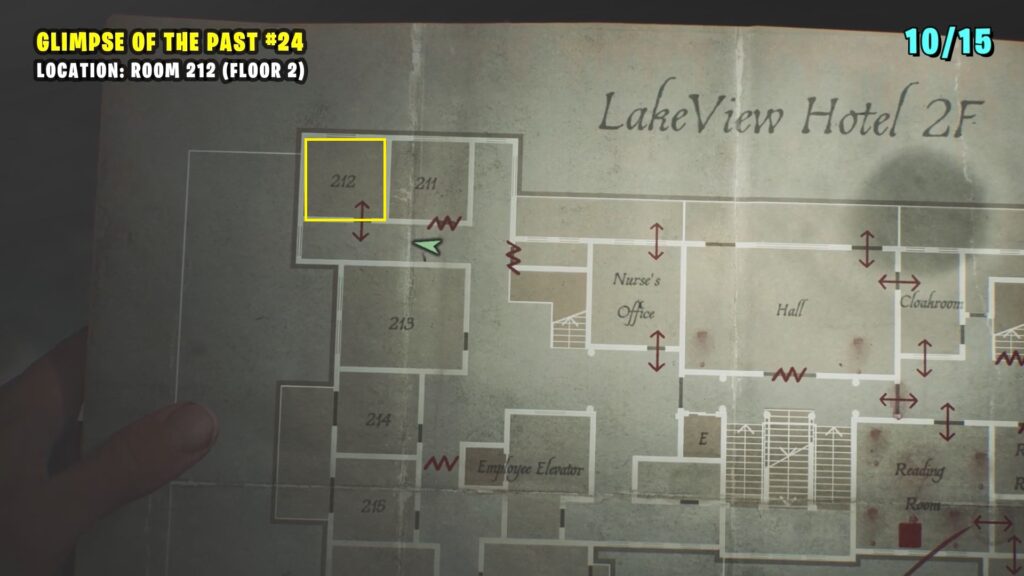
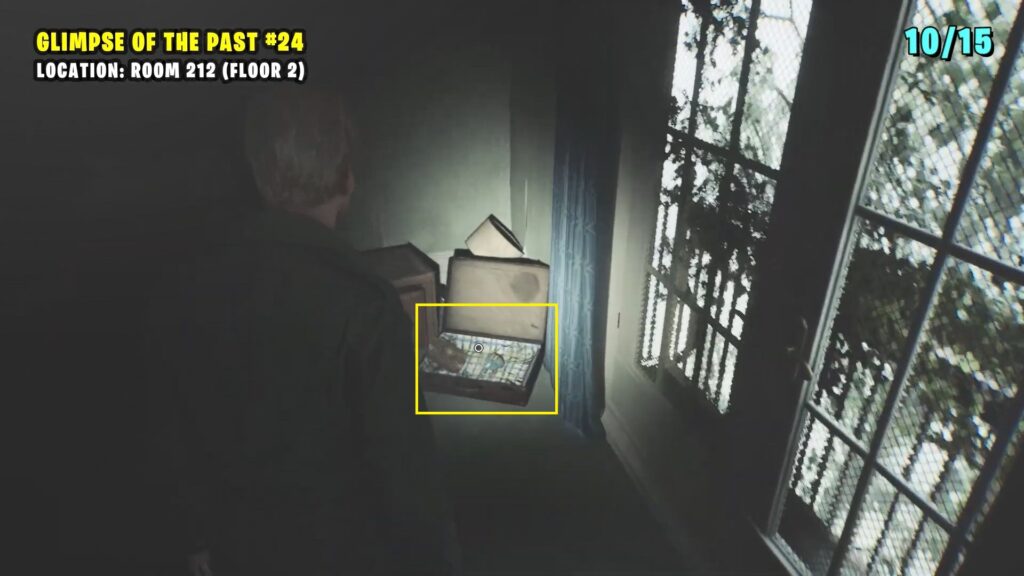
10) Glimpse of the Past #24
Interact with the suitcase on the floor in Room 212.
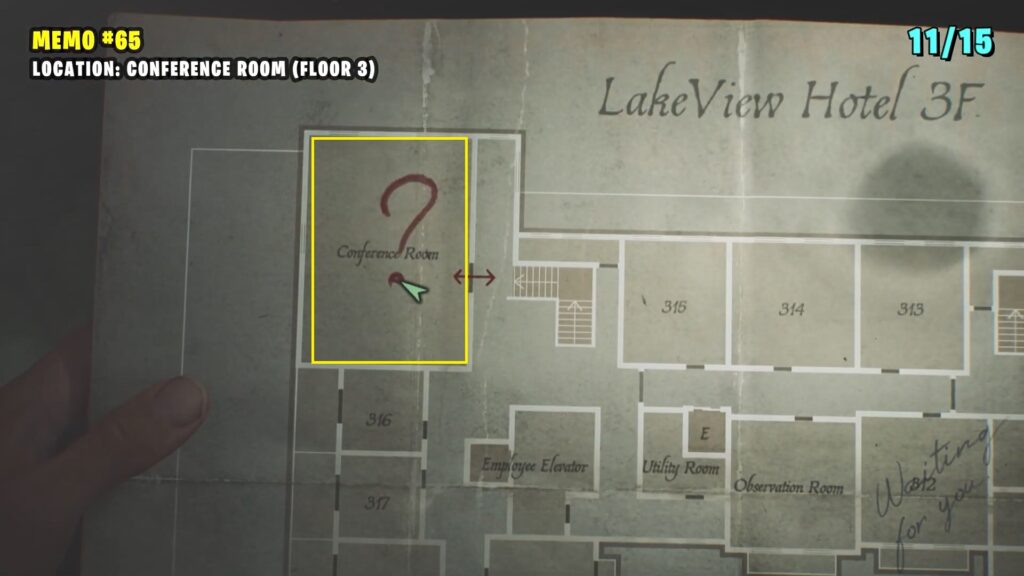
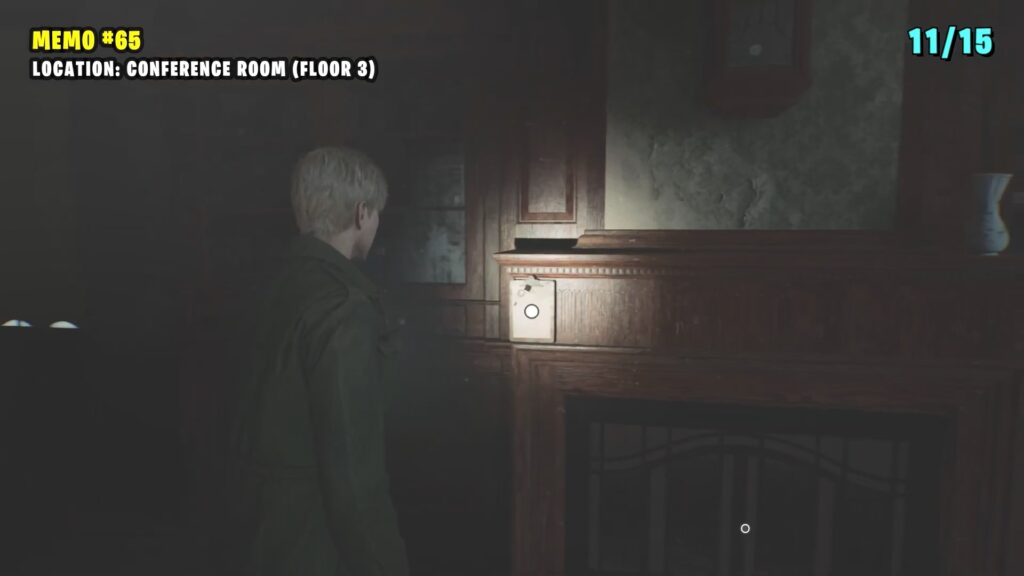
11) Memo #65: Cleaning Staff Note #2
Go to the Conference Room on the third floor to locate the memo near the fireplace.
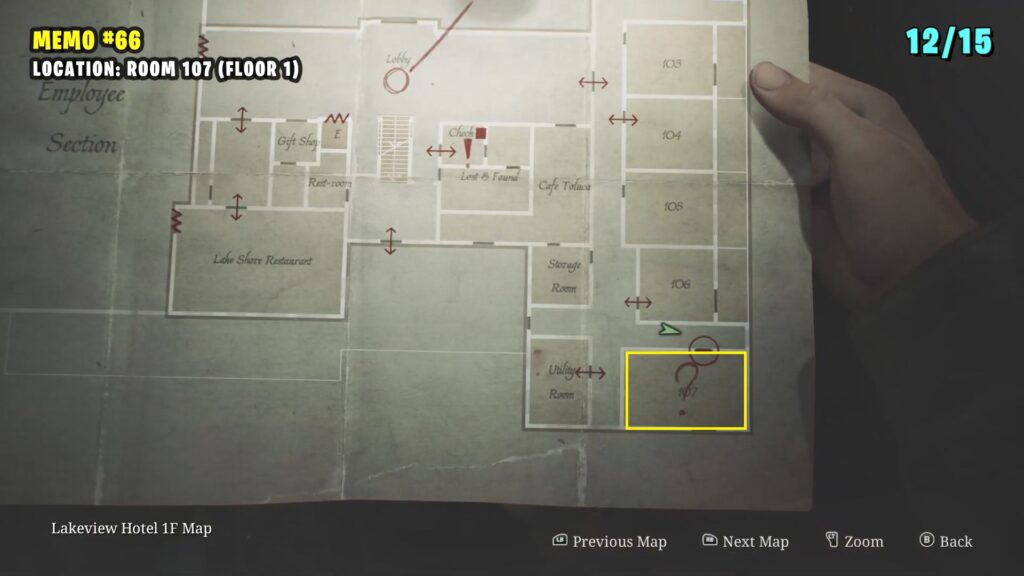
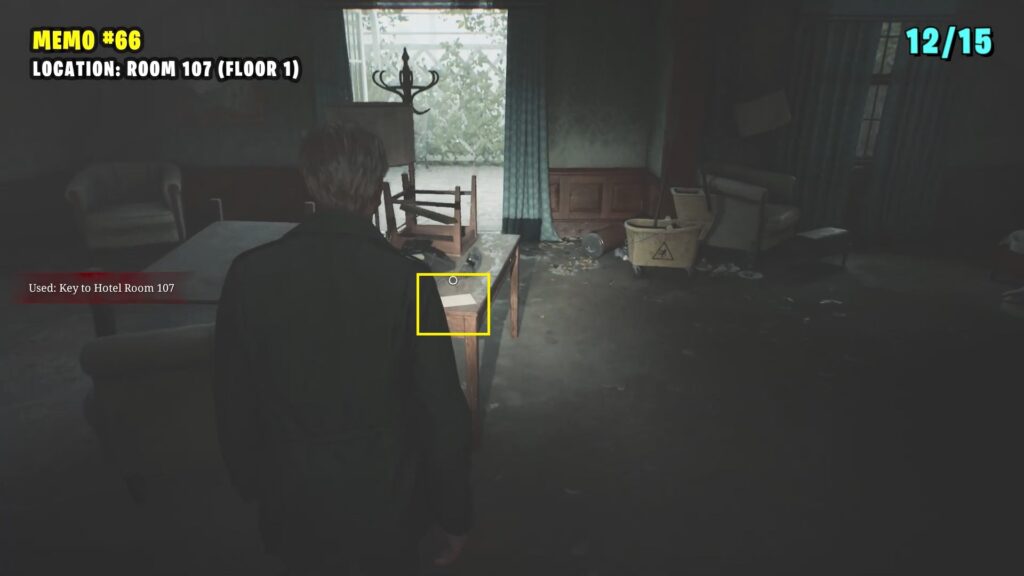
12) Memo #66: Cleaning Staff Note #3
Head to Room 107 to find it directly in front of you on a table.
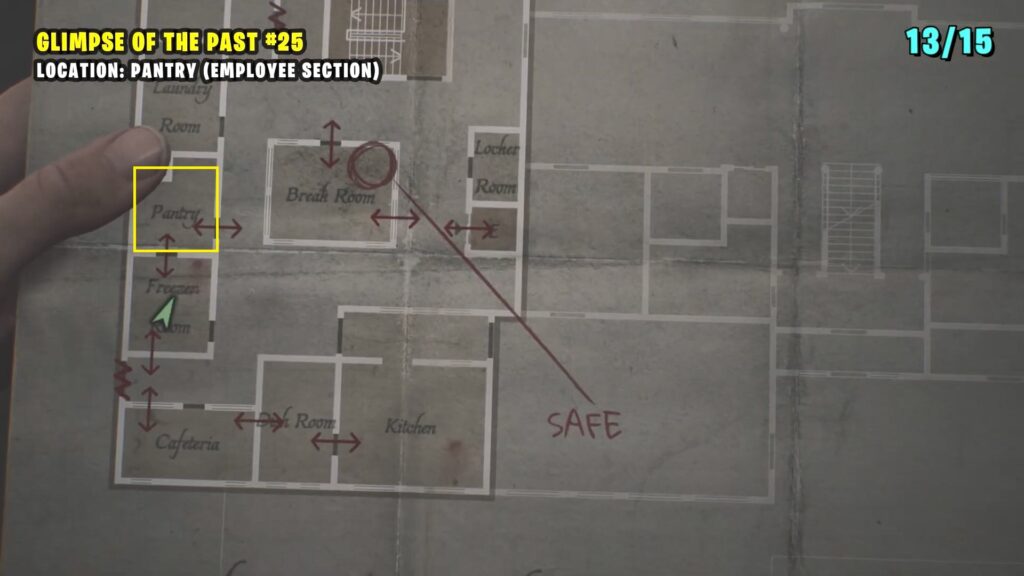
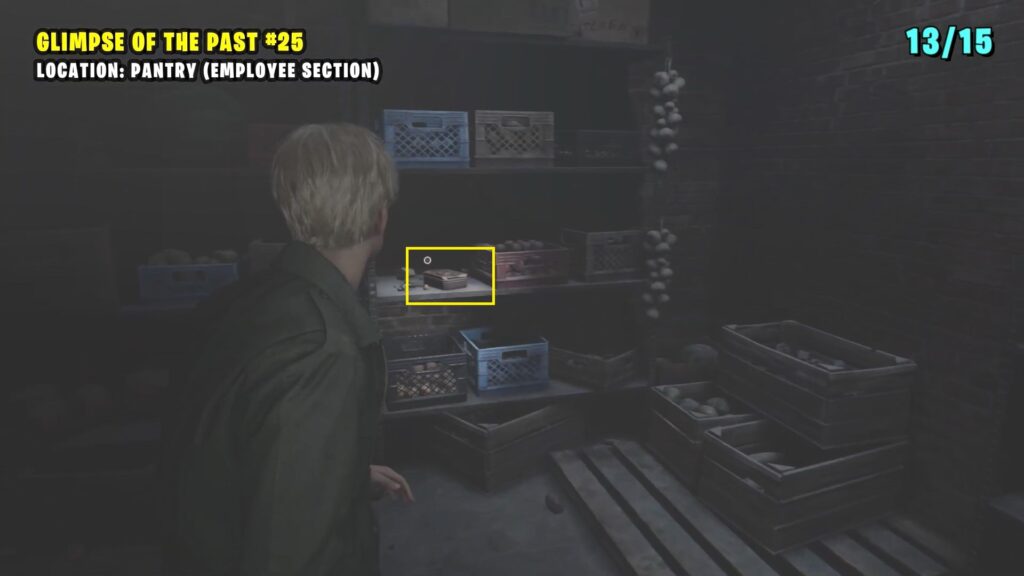
13) Glimpse of the Past #25
Go to the Pantry Room and look in the shelf to find the Glimpse of the Past
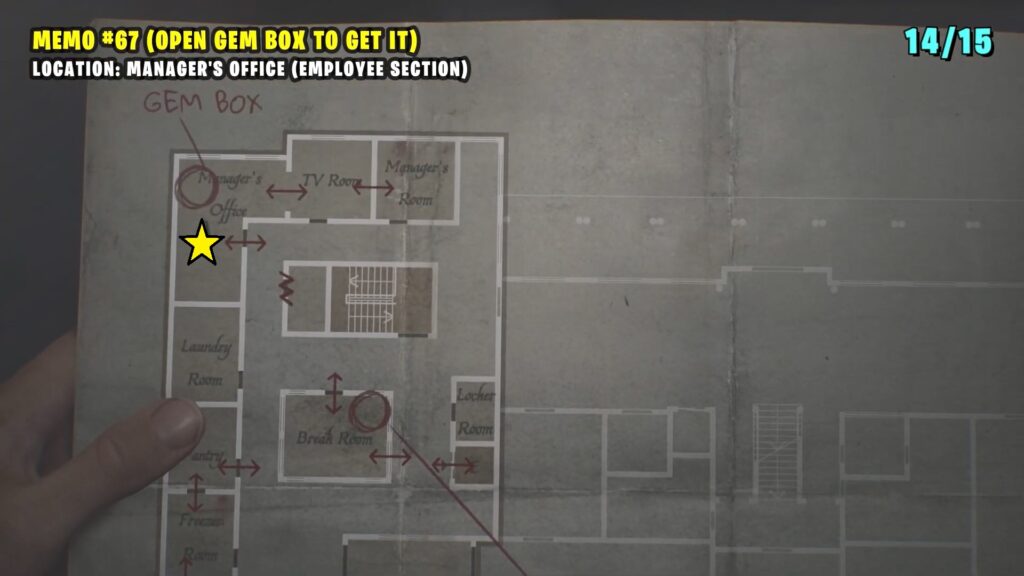
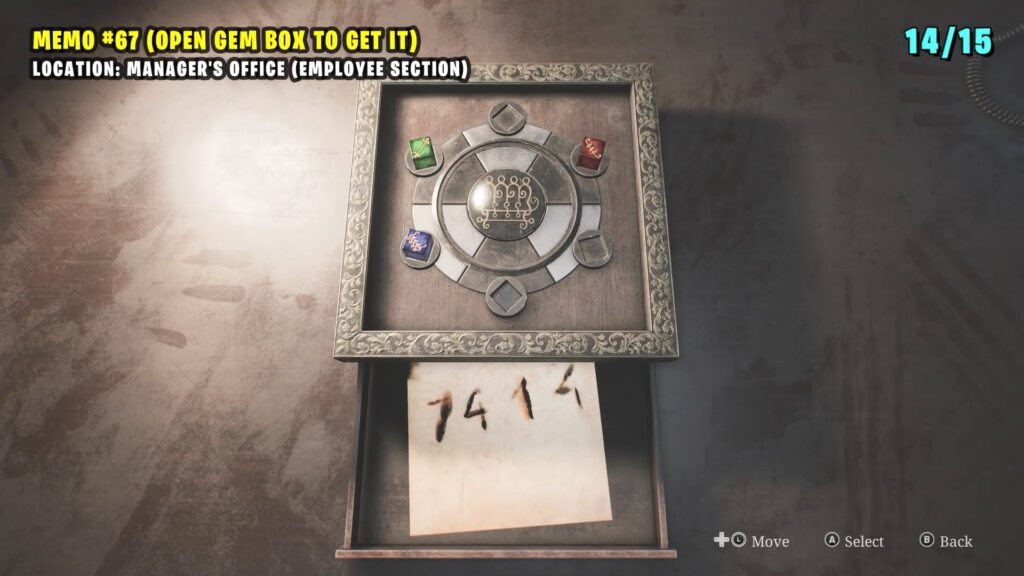
14) Memo #67: Keypad Numbers Memo
Solve gemstone puzzle in the Manager’s Office to get Memo #67: Keypad Numbers Memo
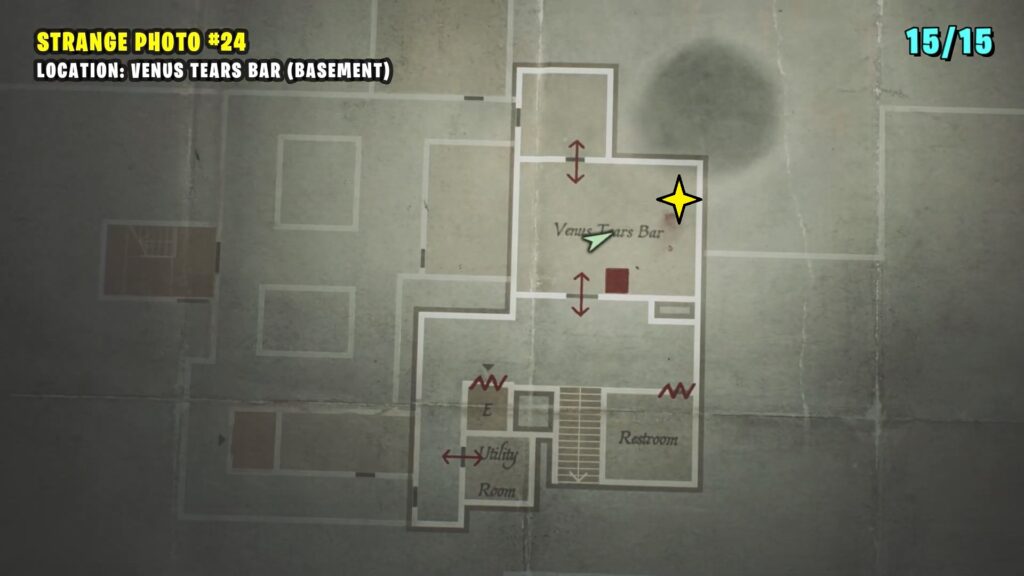
15) Strange Photo #24: “Better leave…”
Enter Venus Tears Kitchen and turn right to find this photo behind the bar.