In this guide, we’ll show you the complete walkthrough of the Lakeview Hotel and How to Reach Room 312 of the game Silent Hill 2 Remake, released on September 8th Oct 2024.
Lakeview Hotel
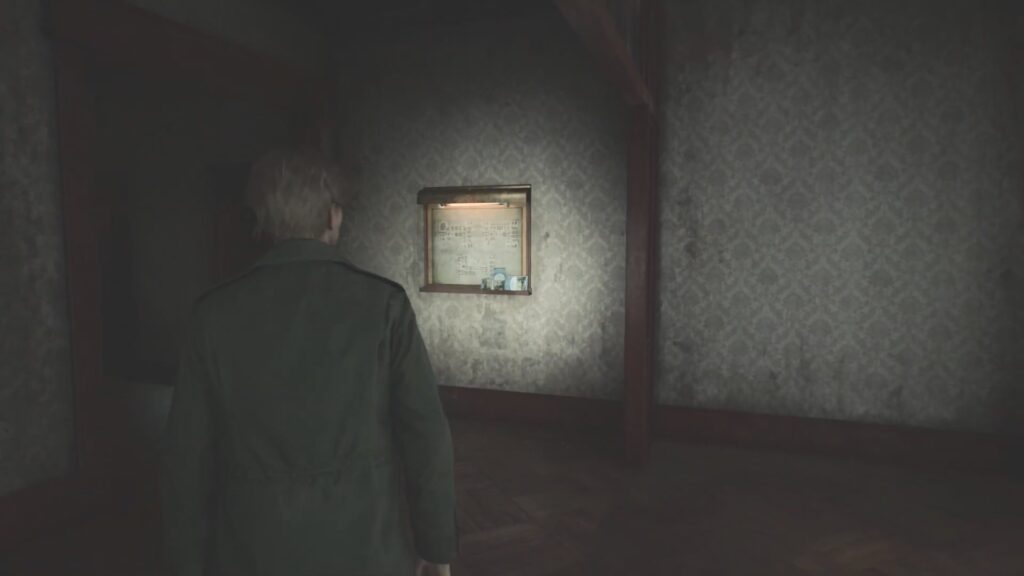
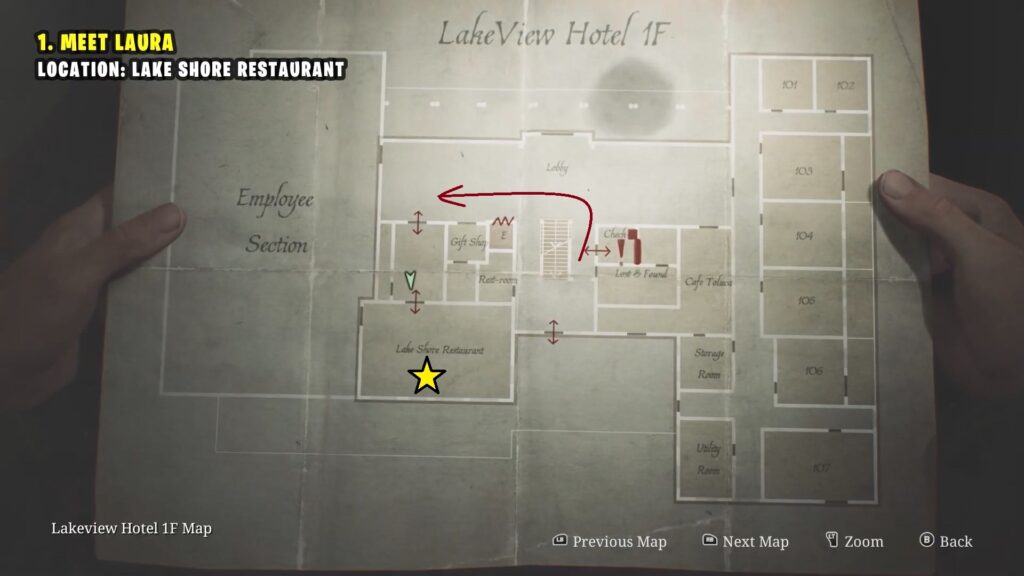
After you reach the Lakeview Hotel, go through the front doors and pick up the Lakeview Hotel Map from the bulletin board on your right.
Meet Laura
Next, head to the Lake Shore Restaurant through the lobby to meet Laura, and she will give you the letter – Laura’s Letter.
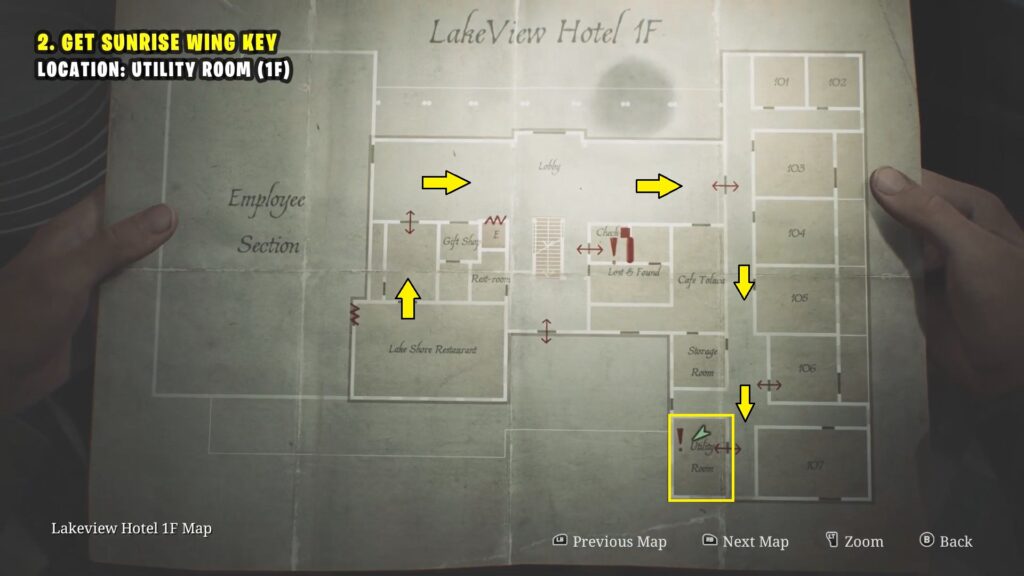
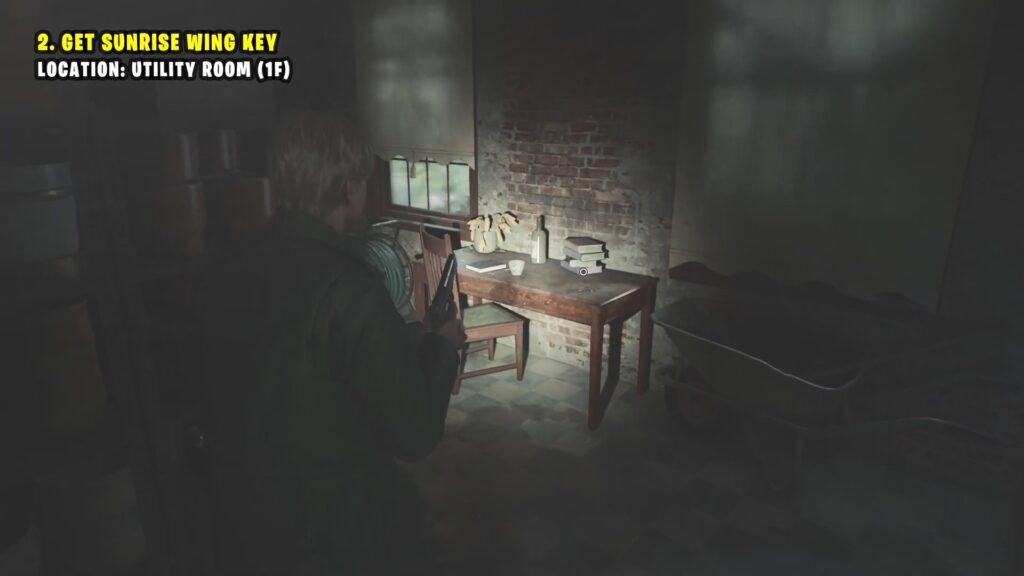
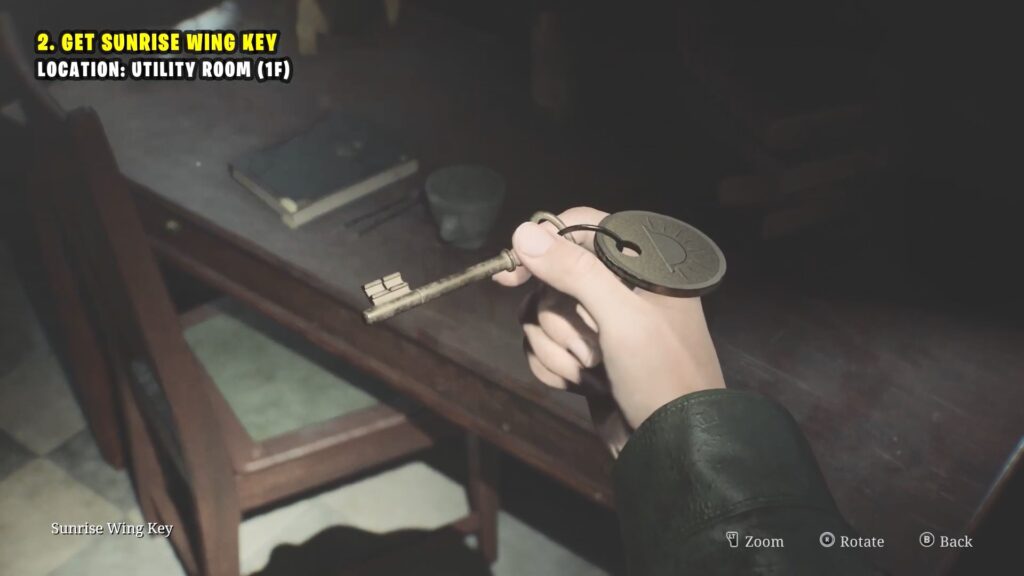
Get Sunrise Wing Key
Start following Laura until she disappears in the hallway near the Utility Room. Go inside the Utility Room to find the Sunrise Wing Key on the table.
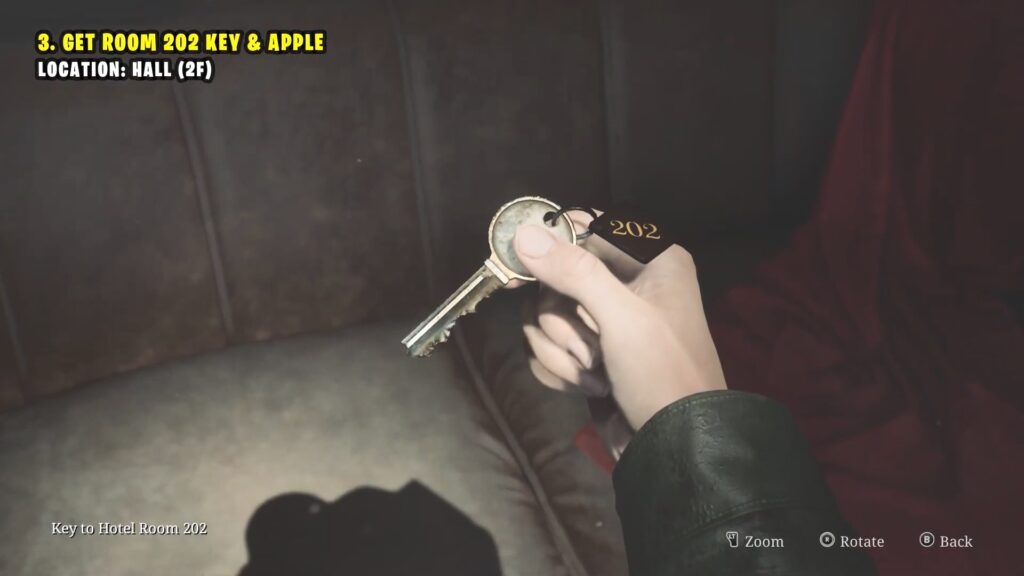
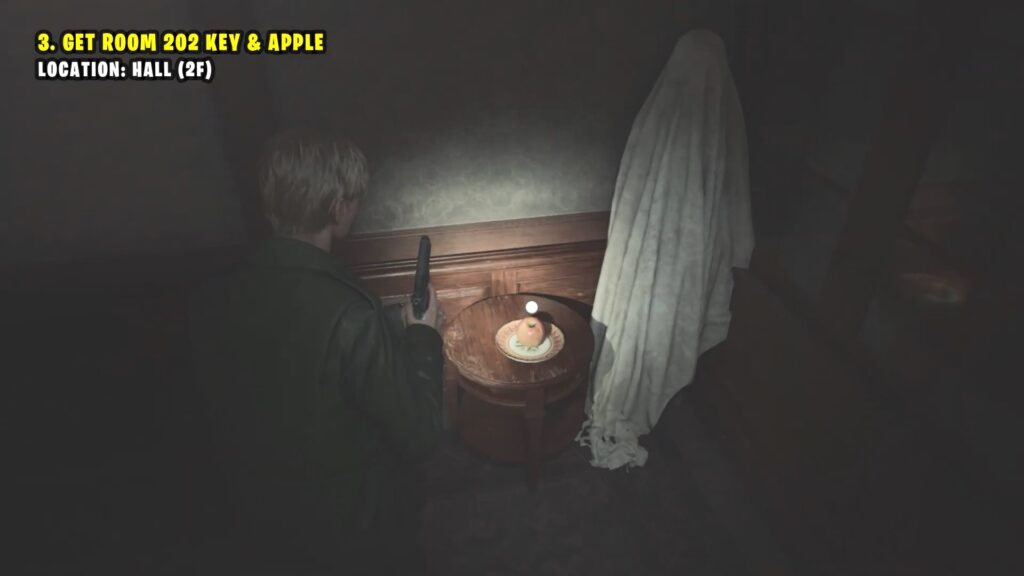
Room 202 Key & Apple Location
Go upstairs using the stairs in the Lobby area and use the Sunrise Wing Key to enter the eastern wing of the Hotel. Jump through the window to get into the cloakroom, and then go to the Hall as shown on the map.
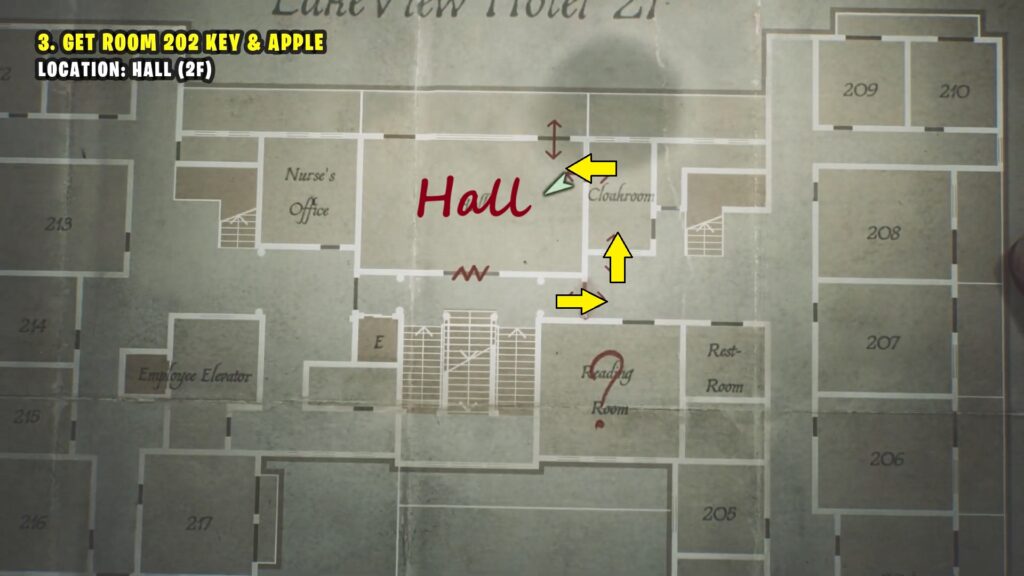
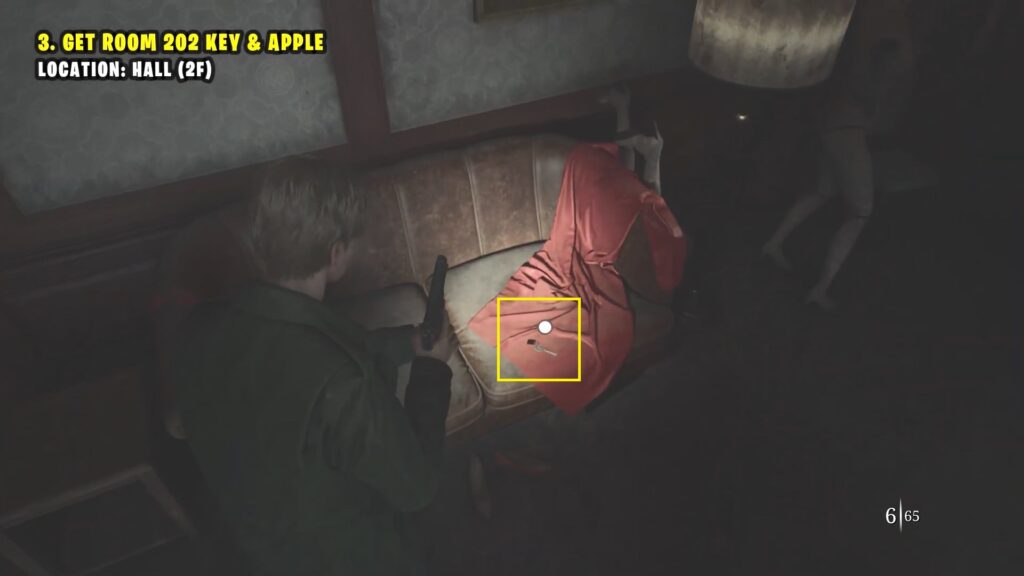
Pick up the key for Hotel Room 202 from the sofa.
Also, pick up the apple from the southwest corner of the hall.
Mirror Puzzle (Snow White Figurine)
Now, go to Room 202 and use the key to get inside.
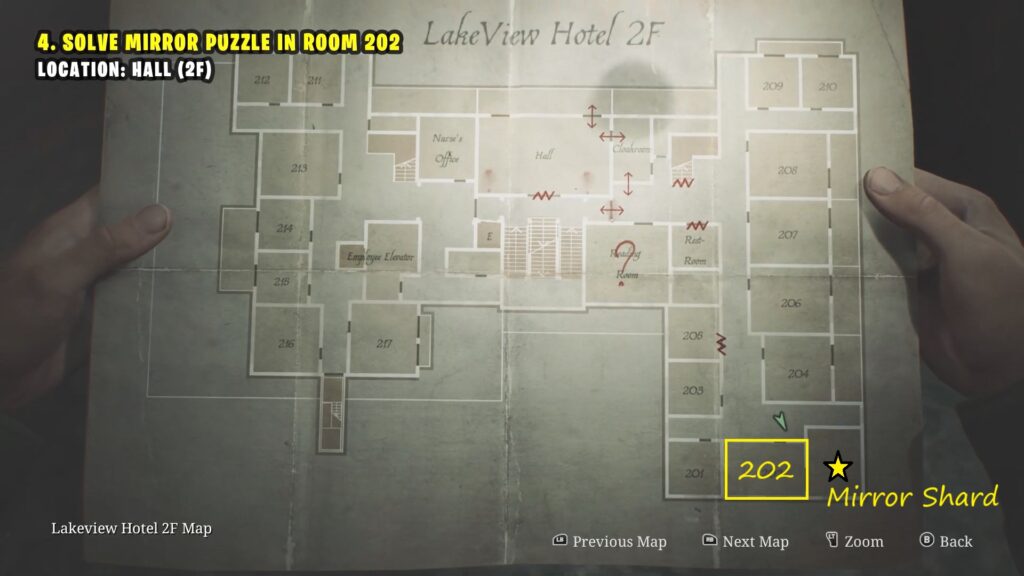
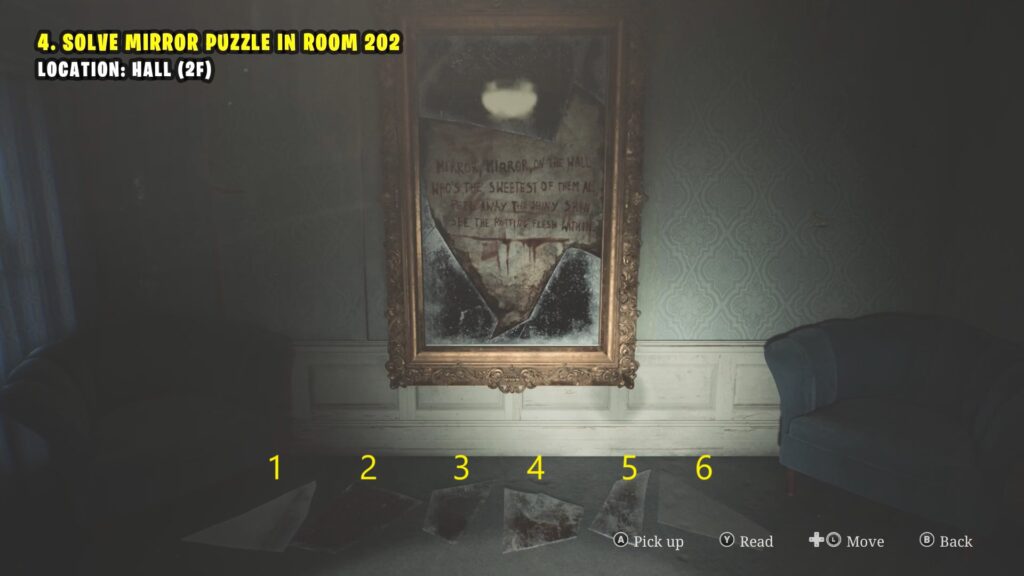
Go into the bedroom across from the broken mirror to find a mirror shard.
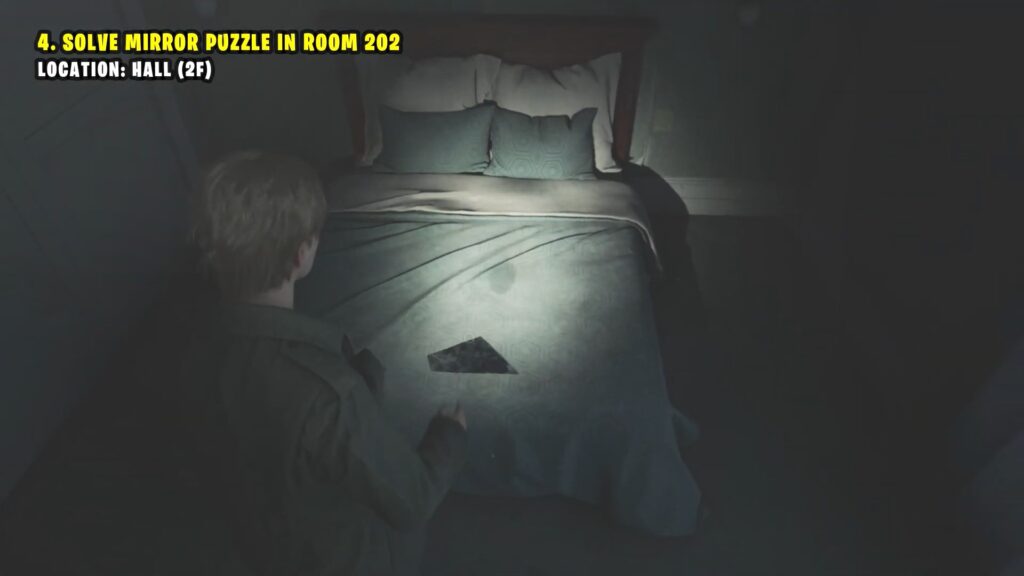
Use the mirror shard and the other piece on the floor to fix the mirror, just like in the picture below. You need to rotate a certain piece to get the right shape to repair the mirror. One of the possible solutions.
1 >> Rotate twice in anti-clock direction
2 >> Rotate twice in anti-clock direction
3 >> Rotate thrice in anti-clock direction
4 >> Rotate once in anti-clock direction
5 >> Rotate thrice in anti-clock direction
6 >> Rotate thrice in anti-clock direction
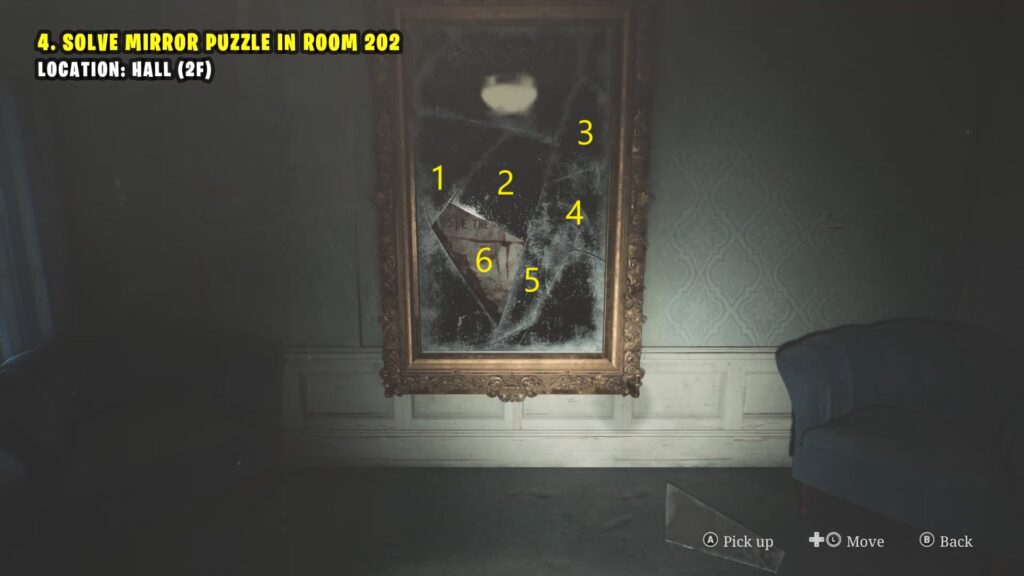
Finally, put the Ripe apple on the table to finish the puzzle.

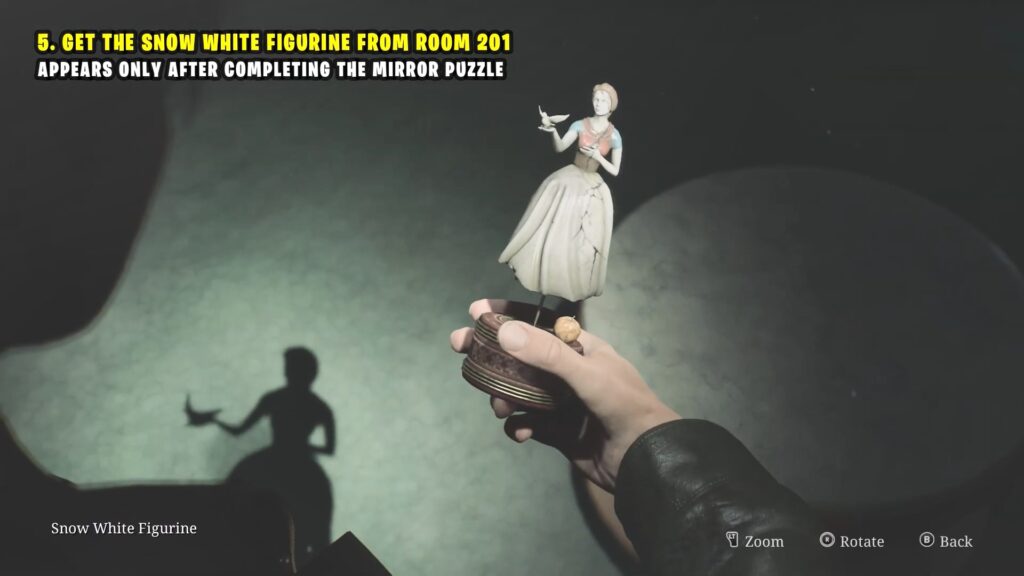
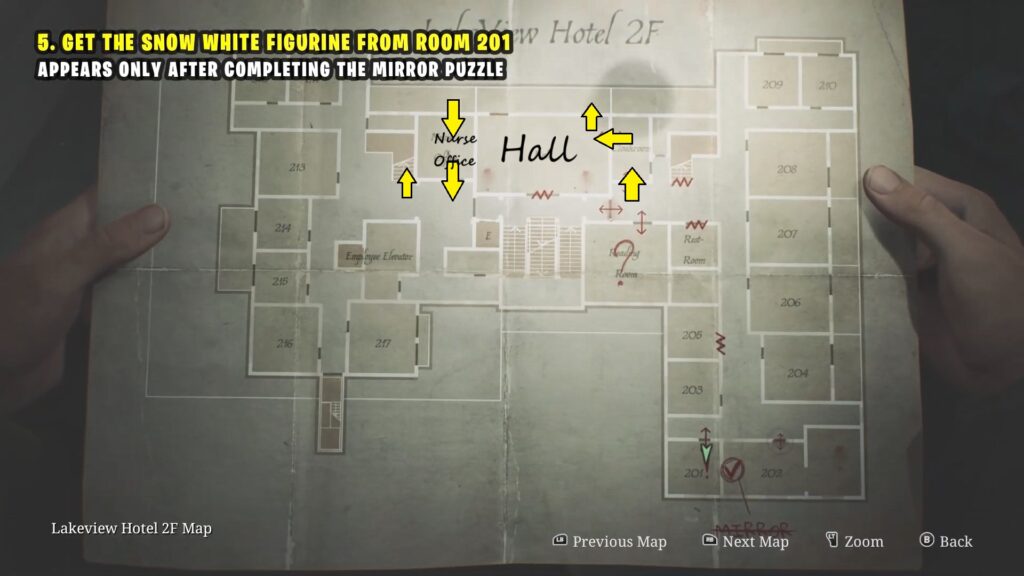
Next, enter Room 201 and pick up the White Figurine from the table.
Room 107 Key Location
Go back to the Hall on the 2nd floor, and use the balcony to enter the Nurse’s office.
Conference Room Fireplace Key Location
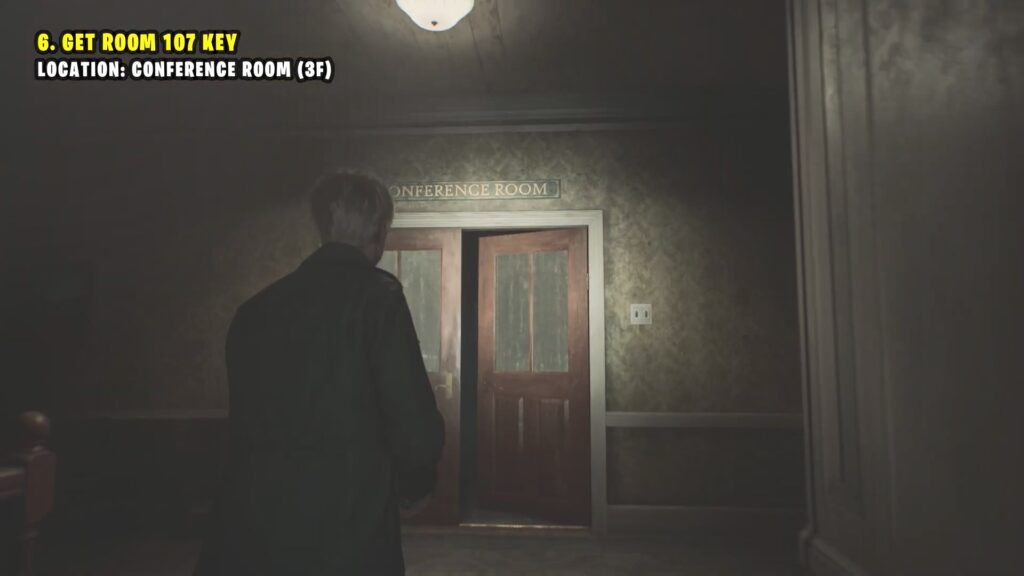
After leaving the Nurse’s office, head upstairs in the west wing to reach the 3rd floor and enter the Conference Room. The Conference Room is just in front of the stairs.
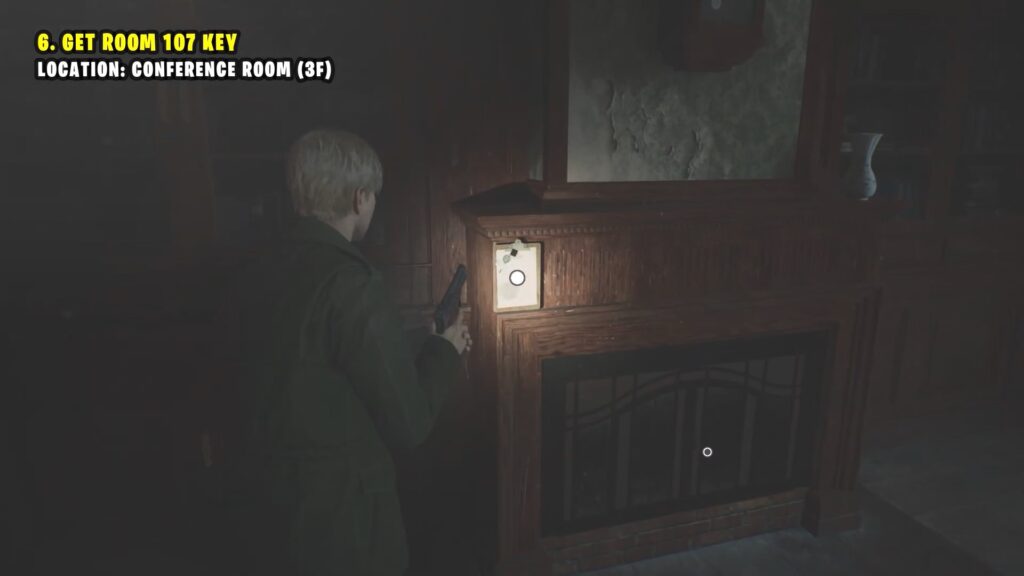
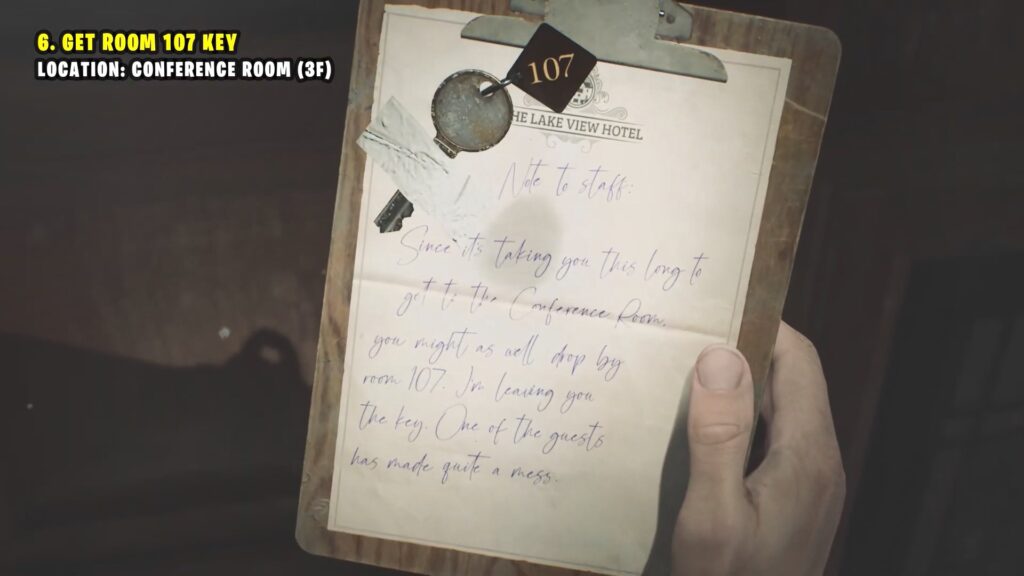
Inside, interact with the memo by the fireplace to get the Key to Room 107.
Cinderella Figurine
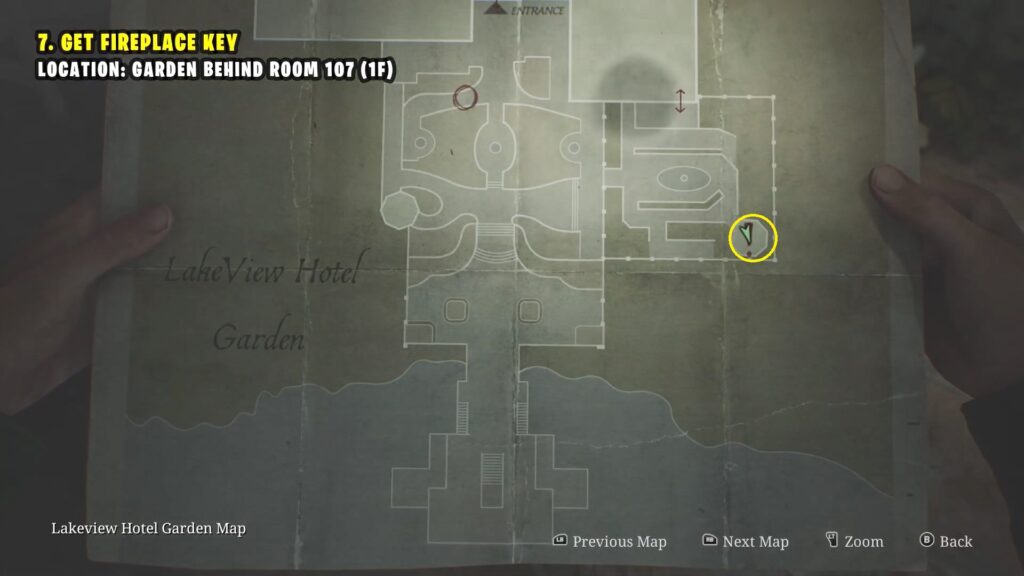
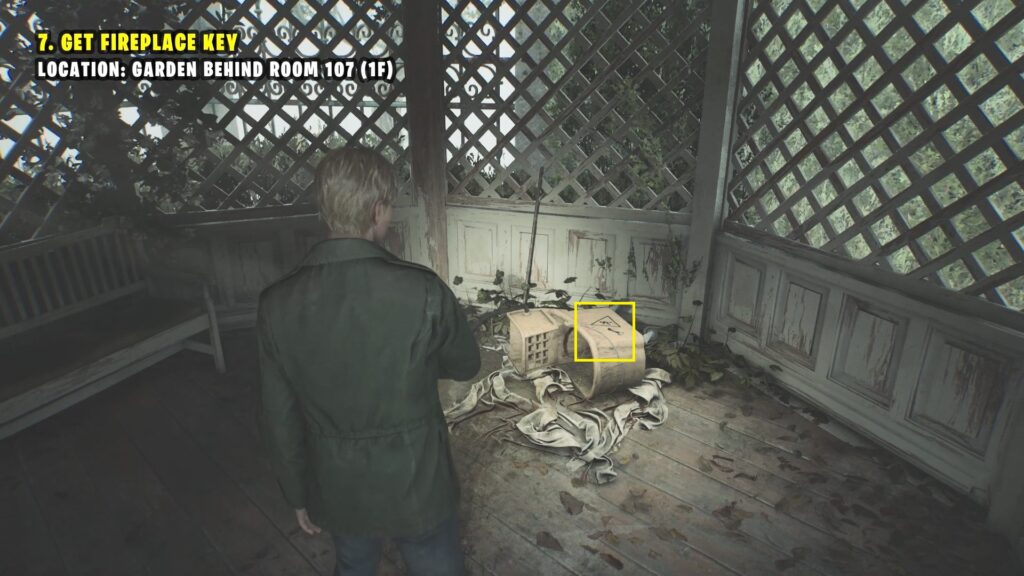
Use the main stairs to get to the 1F level and go to Room 107 in the eastern wing near the utility room.

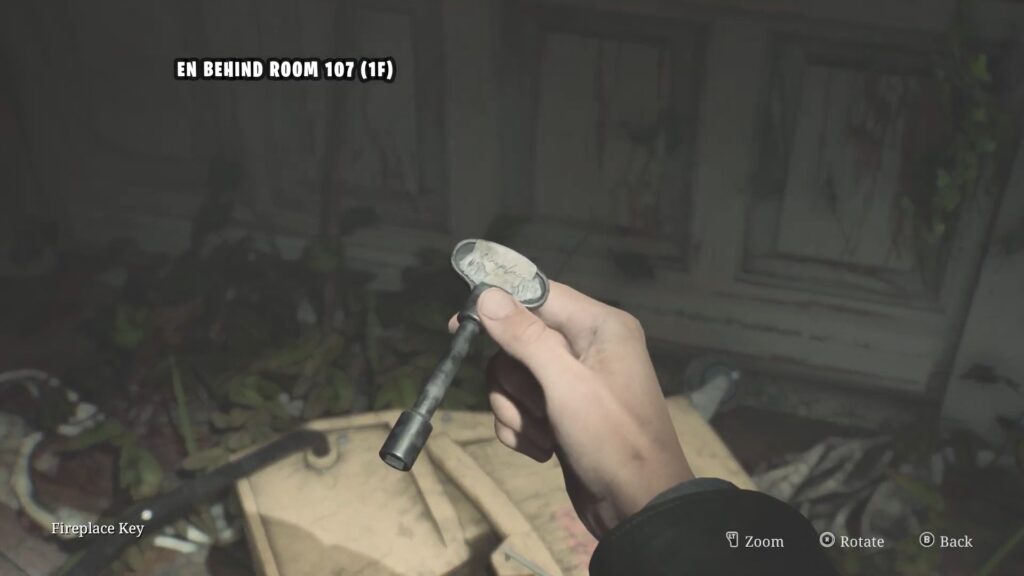
Go to the garden through Room 107 and check the gazebo on the eastern side to find the Fireplace Key.
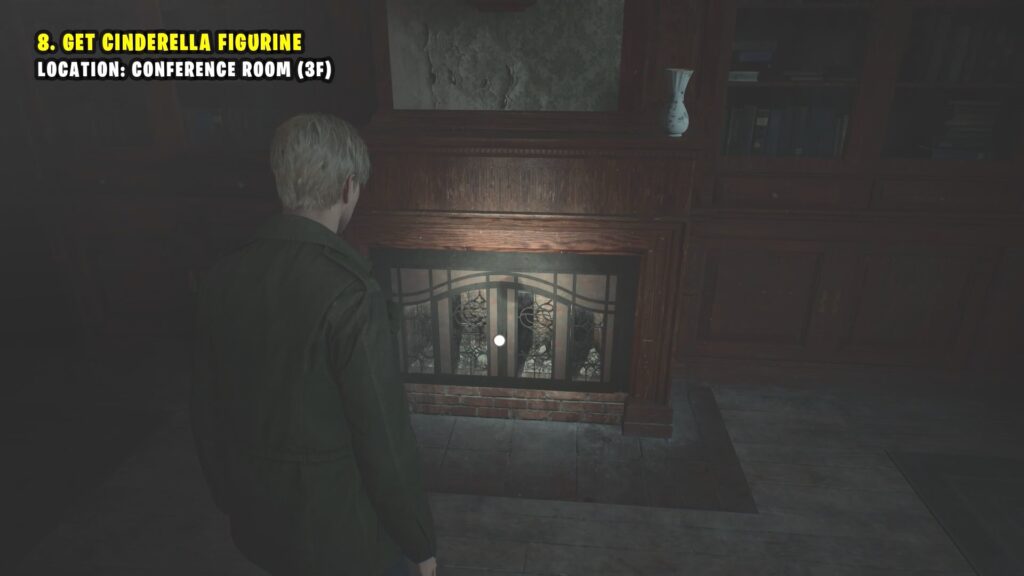
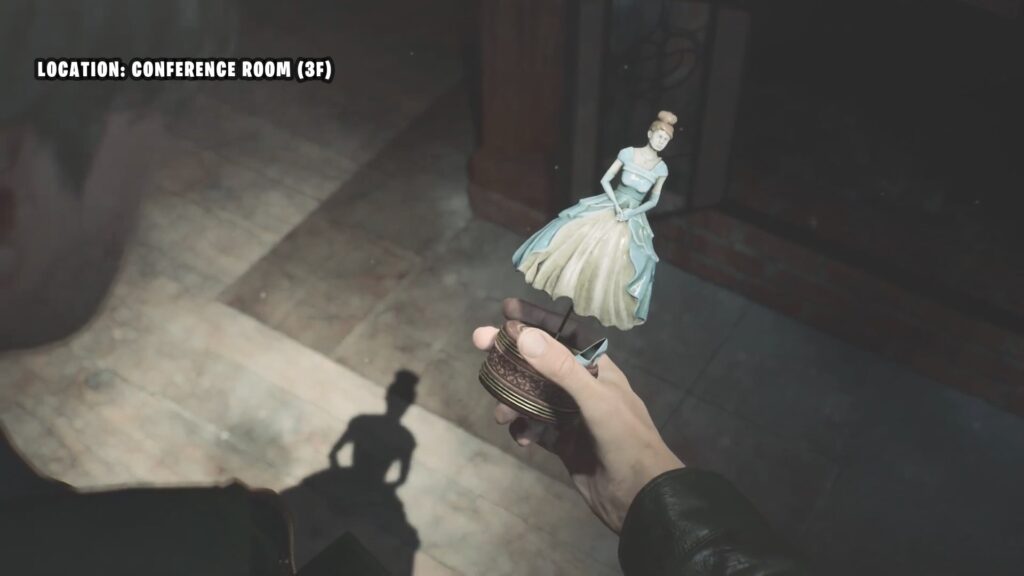
Go back to the Conference Room in 3F level and use the Fireplace Key to unlock the cabinet below the fireplace. Inside, you will find a Cinderella figurine.
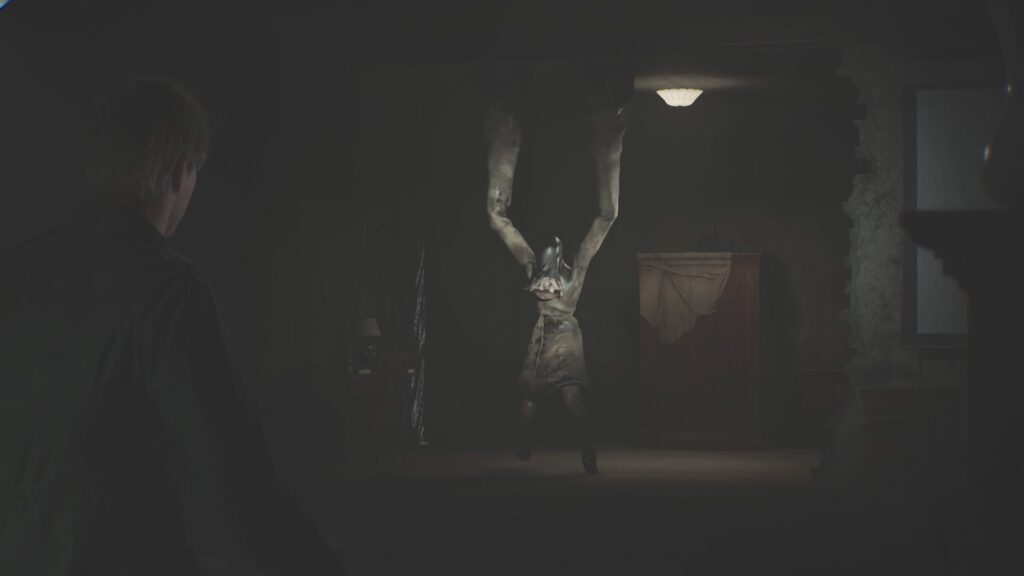
This will be followed by a Bossfight with Boss: Mandarin
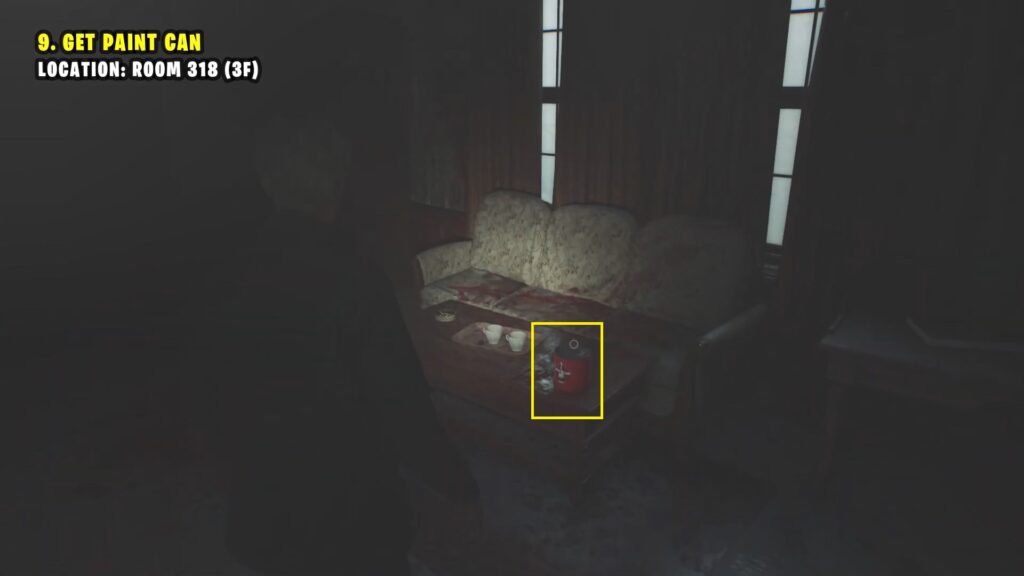
Paint Can Location
Next, go to Room 316, where the Boss: Mandarin came from earlier. Push the wardrobe and break the wall behind the wardrobe to enter Room 317.
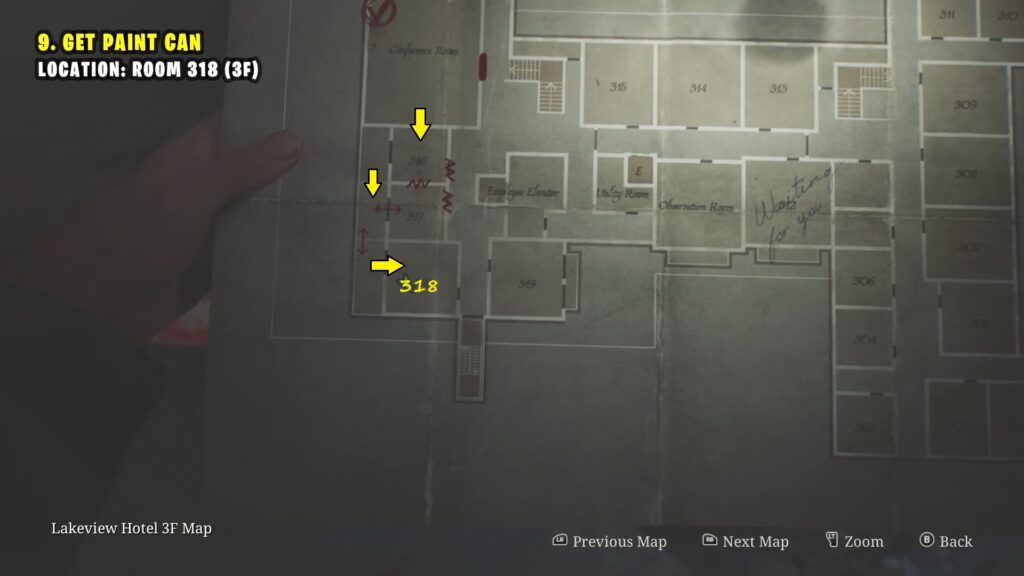
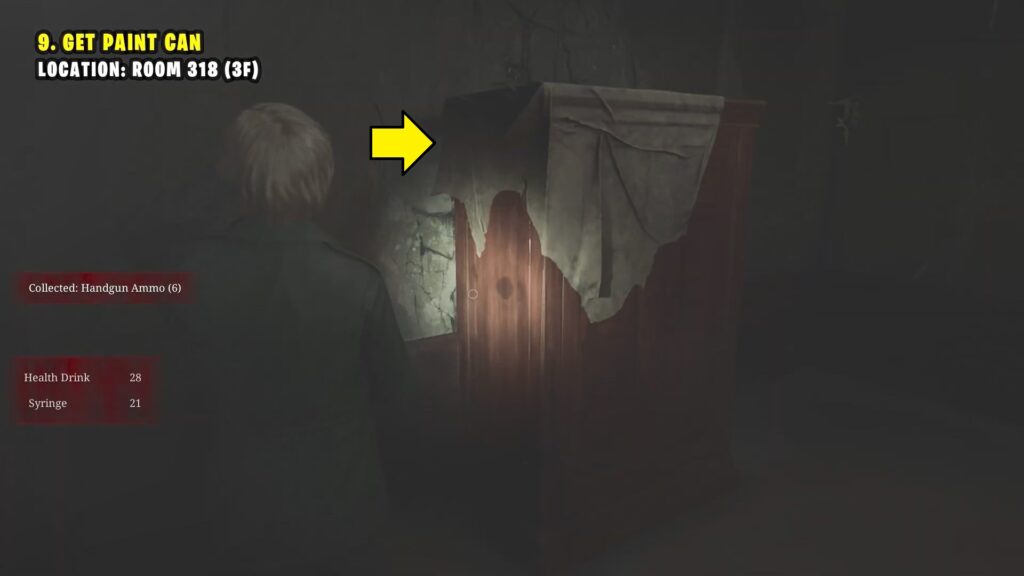
Then, use the balcony to enter Room 318 and collect the paint can from the table.
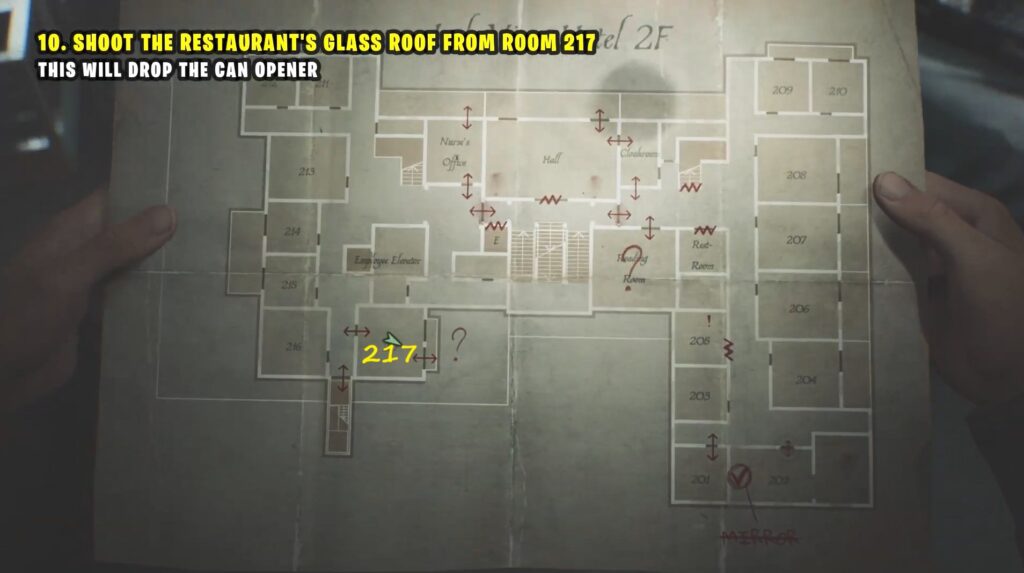
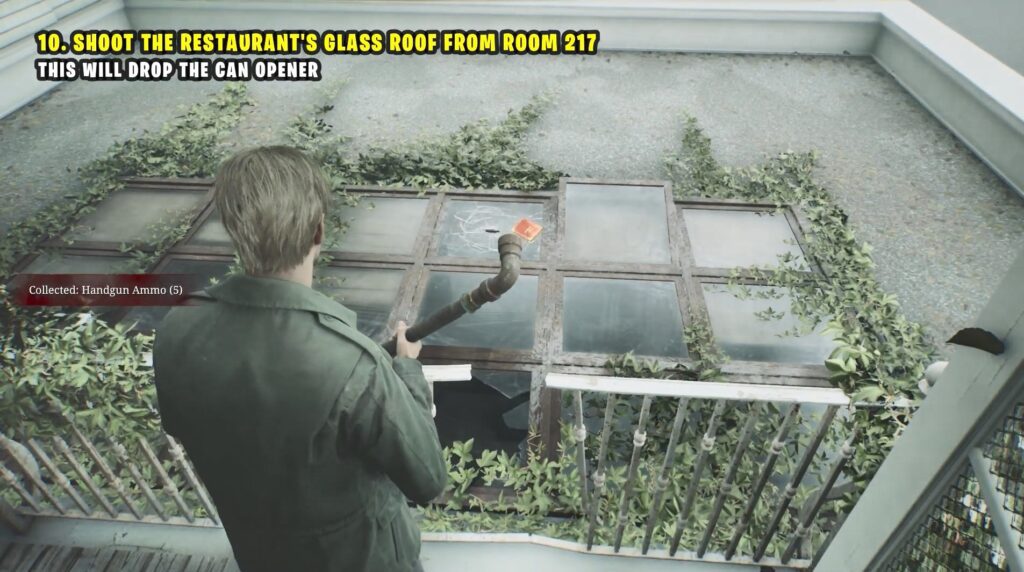
Shoot Can Opener (Room 217)
Leave Room 318 and go down the stairs to enter Room 217. Go to the balcony and shoot the glass floor to drop the can opener.
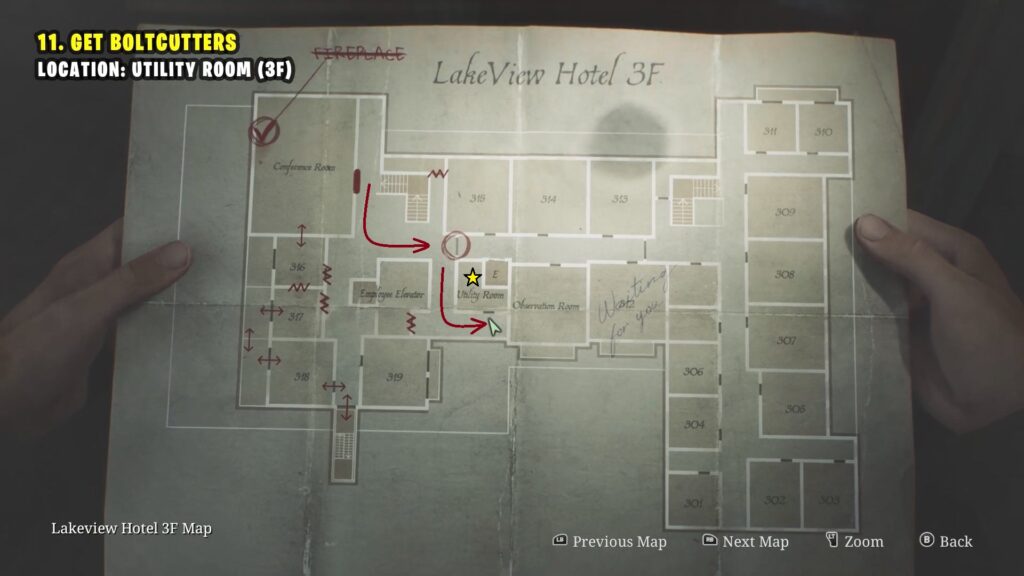
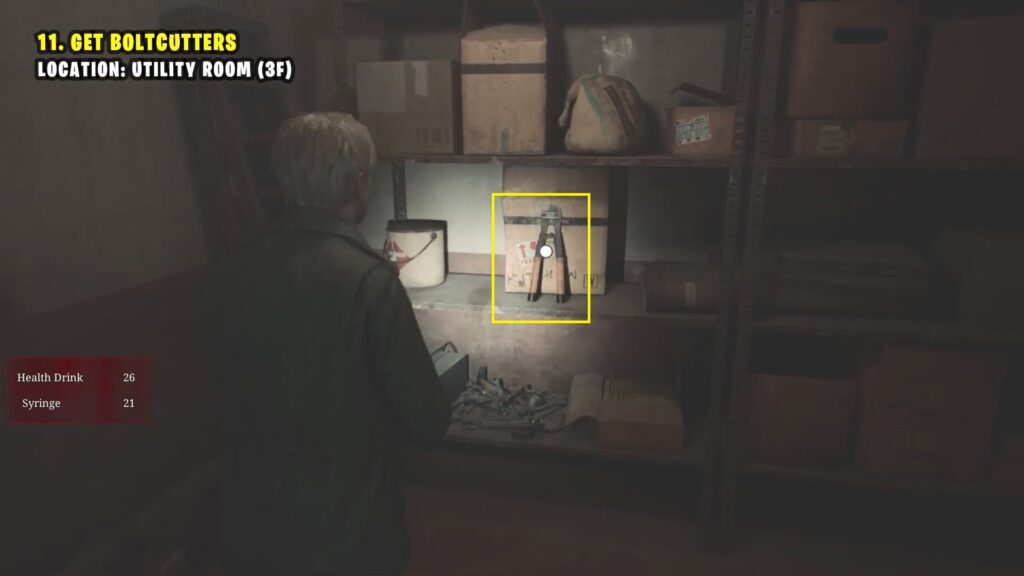
Boltcutters Location
The next location the player needs to go to is the 3rd floor. Enter Room 215, break the wall to reach the stairs, and then head up to the 3rd floor.
After that, enter the Utility Room on the 3rd floor to get the bolt cutters.
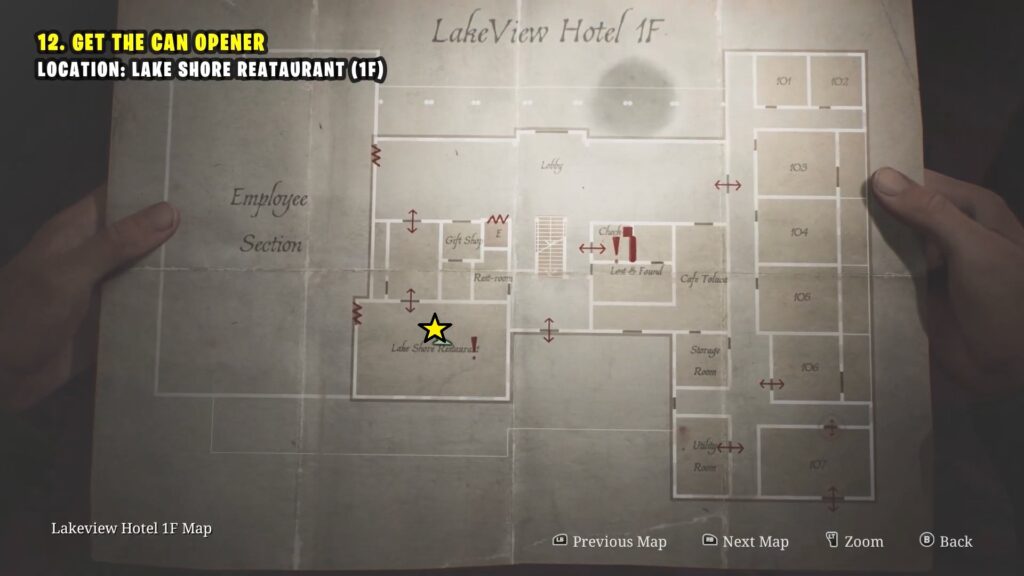
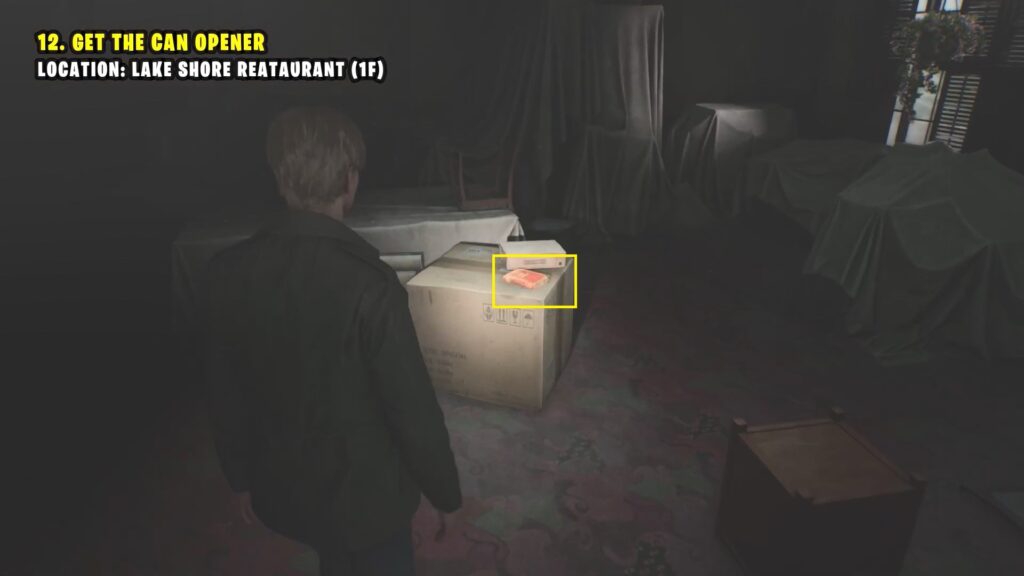
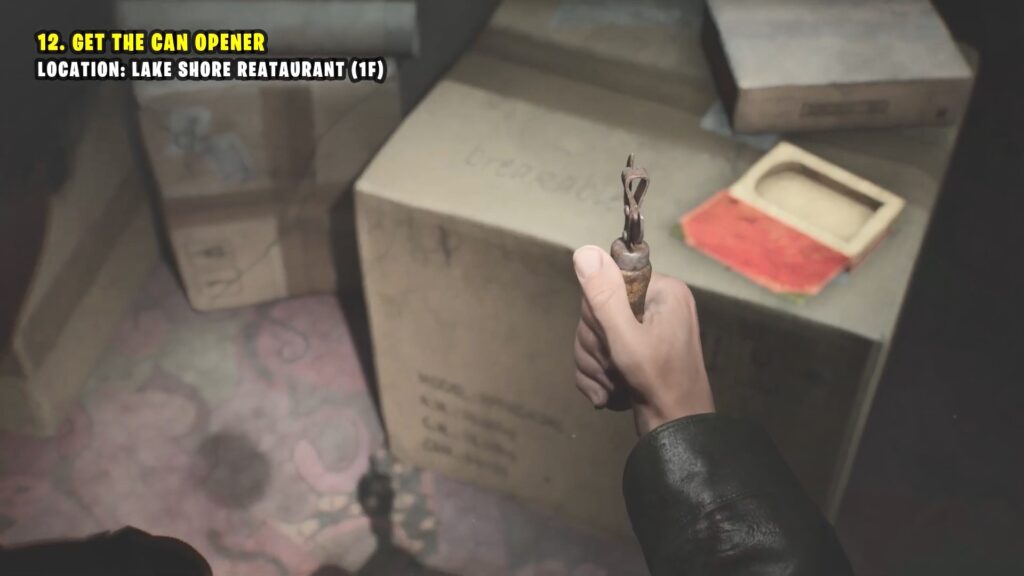
Get Can Opener (Restaurant)
Go to the Lake Shore Restaurant on the 1F level. Check the book on the cardboard box to find a can opener.
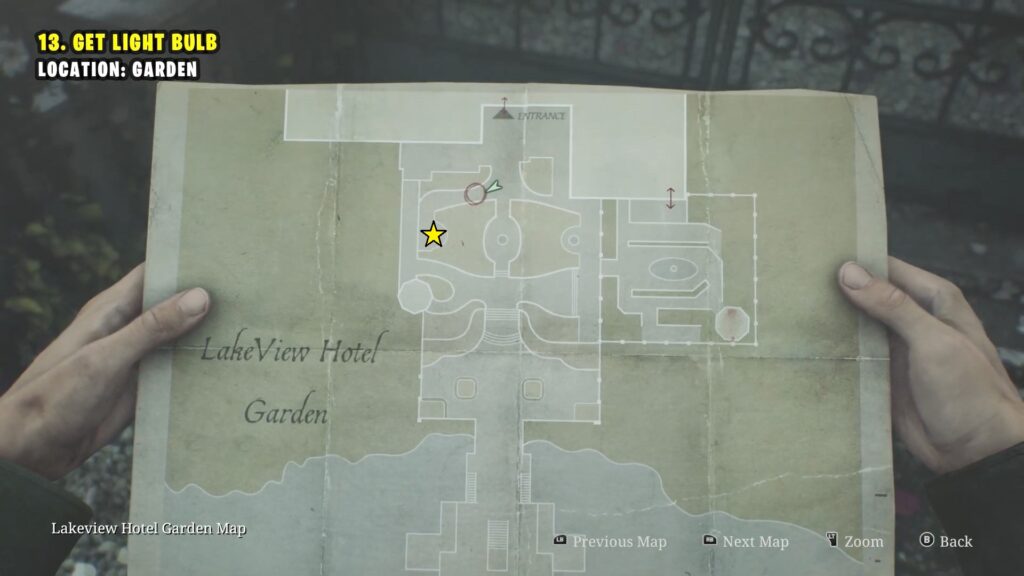
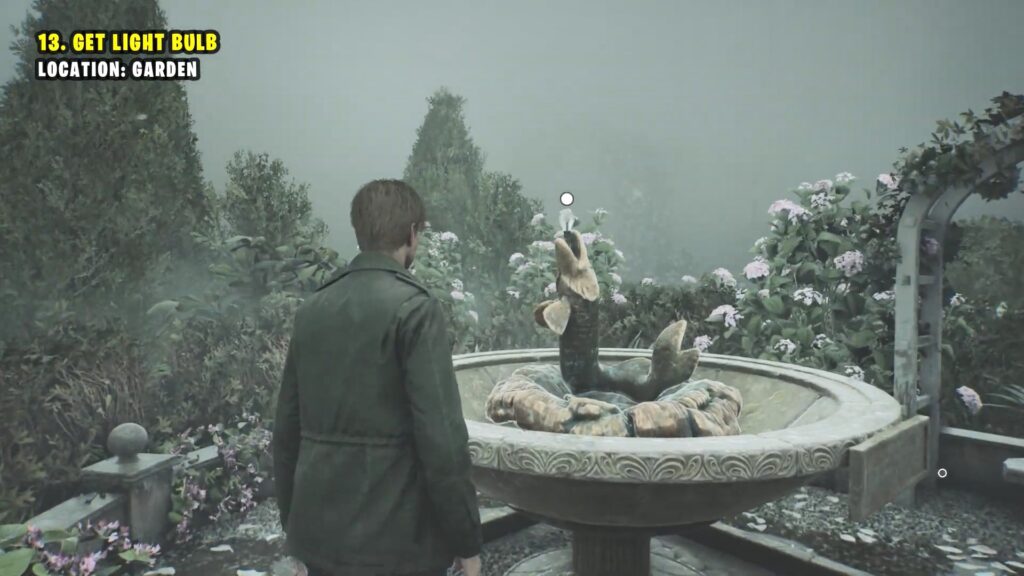
Light Bulb Location
Go to the garden on the 1F and use the bolt cutters to open the chained gate. Inside, check the fish statue to find a light bulb.
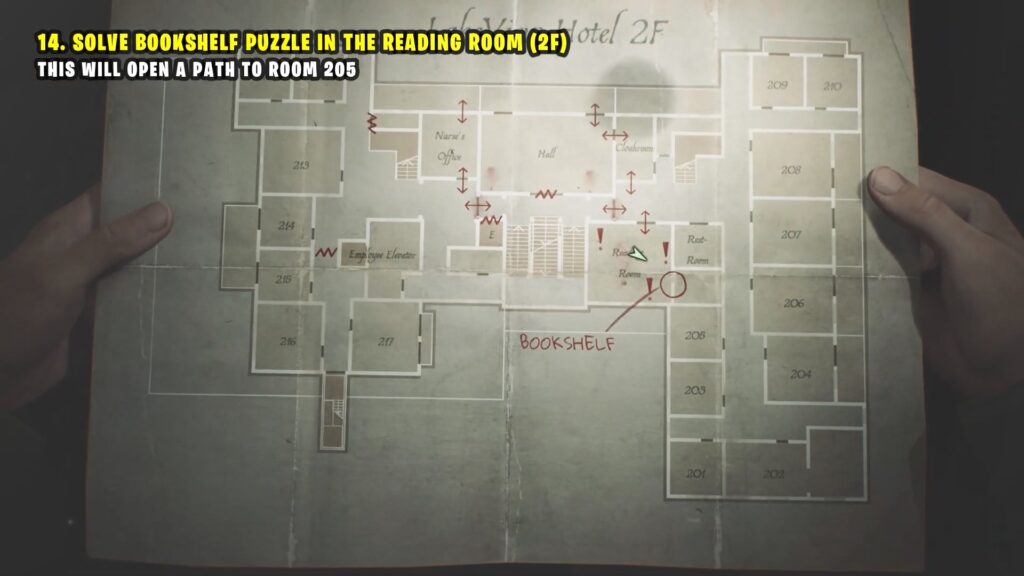
Bookshelf Puzzle (Reading Room)
Next, head to the Reading Room on the 2nd floor.
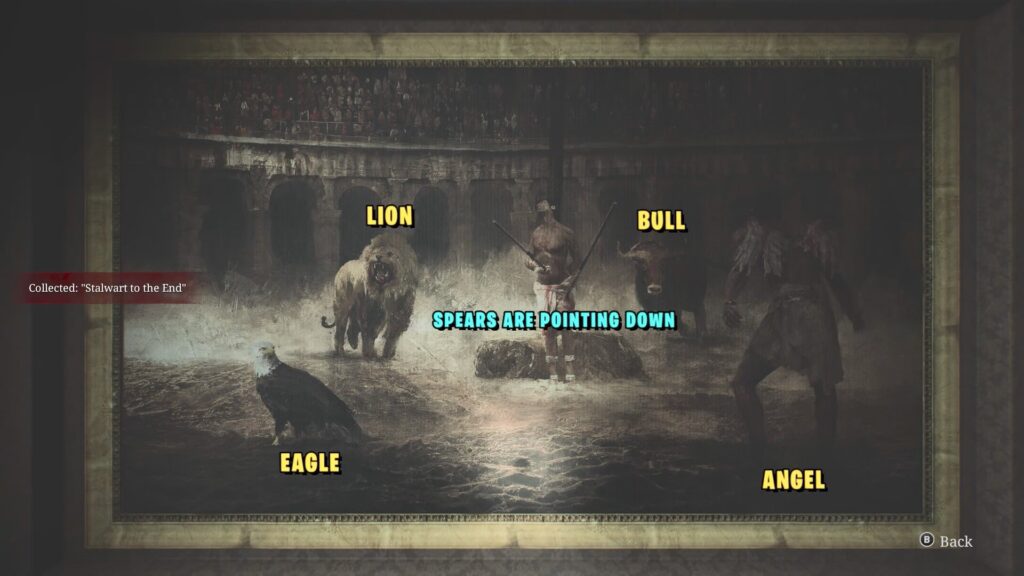
To solve the Bookshelf Puzzle, first pick up 4 books in this room. One book is on the bookshelf, two are on different study tables, and one is on a table near the sofa. These books have 4 different kinds of symbols on their side.
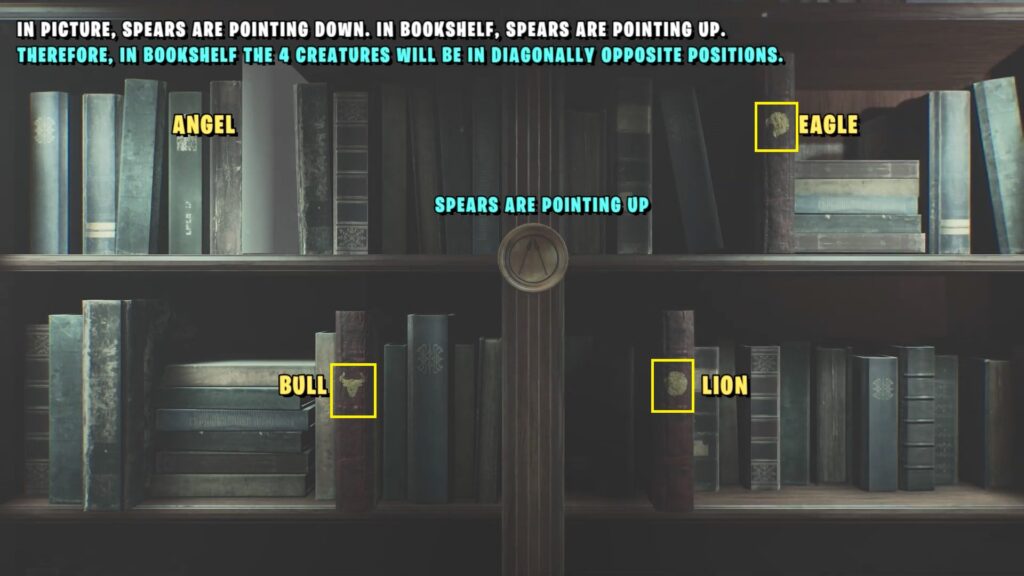
Solution: In painting spears are pointing down and on the bookshelf. So books should be placed in reverse order than that of painting.
Place all 4 books into the empty spots on the bookshelf to solve the puzzle.
Vanity Mirror Puzzle & Briefcase Code (Room 205)
Solving the bookshelf puzzle will open a secret door leading to Room 205.
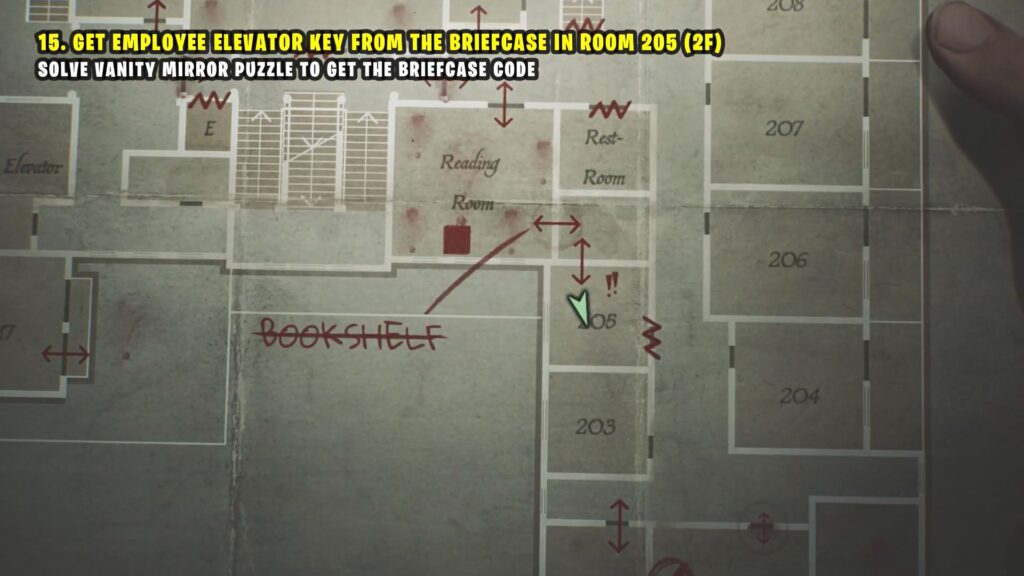
Remove the broken bulb on the Vanity Mirror.
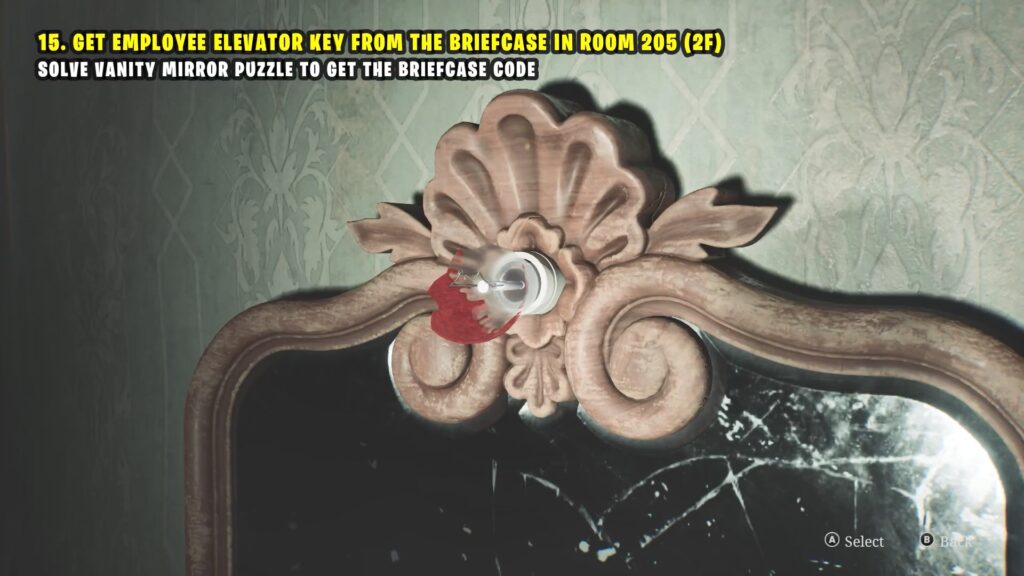
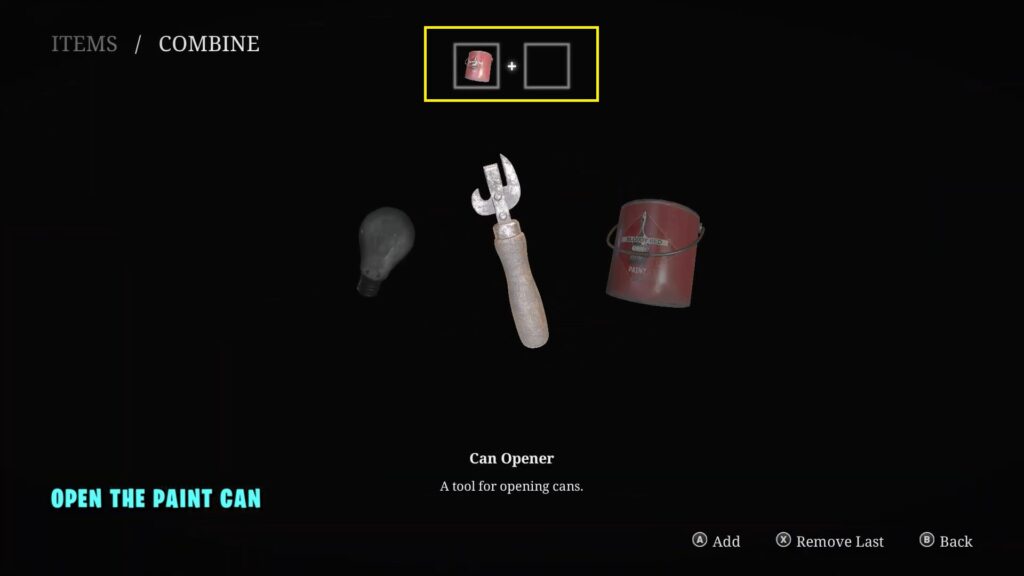
Combine the Paint Can and the Can Opener in your inventory to open the paint can. Then, combine that paint can with the light bulb to create a red light bulb.
Put the red light bulb on the vanity mirror to show the code for the briefcase lock. Standard: DEED DONE

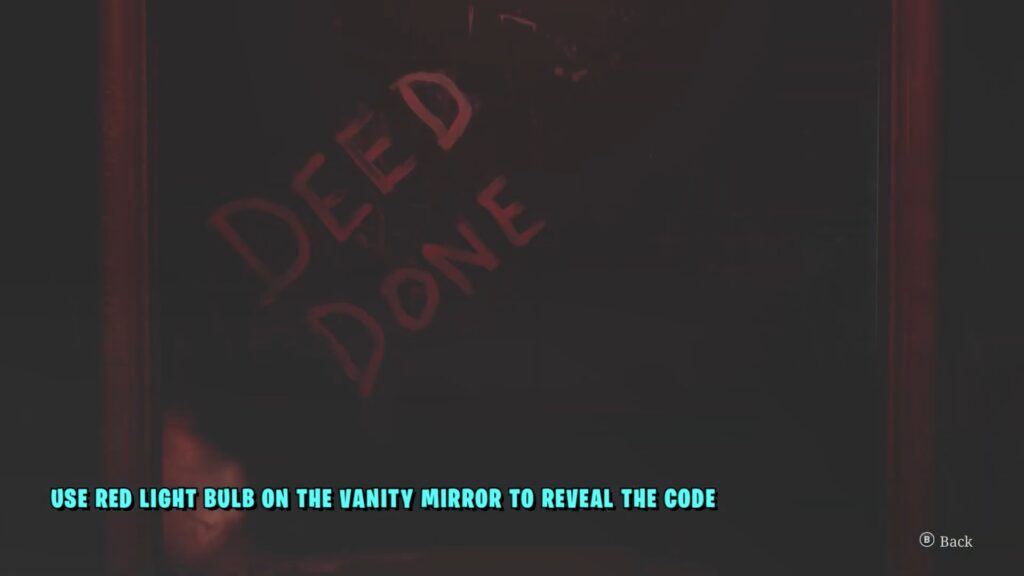
Use the Standard Code: DEED DONE to unlock the briefcase in the room.
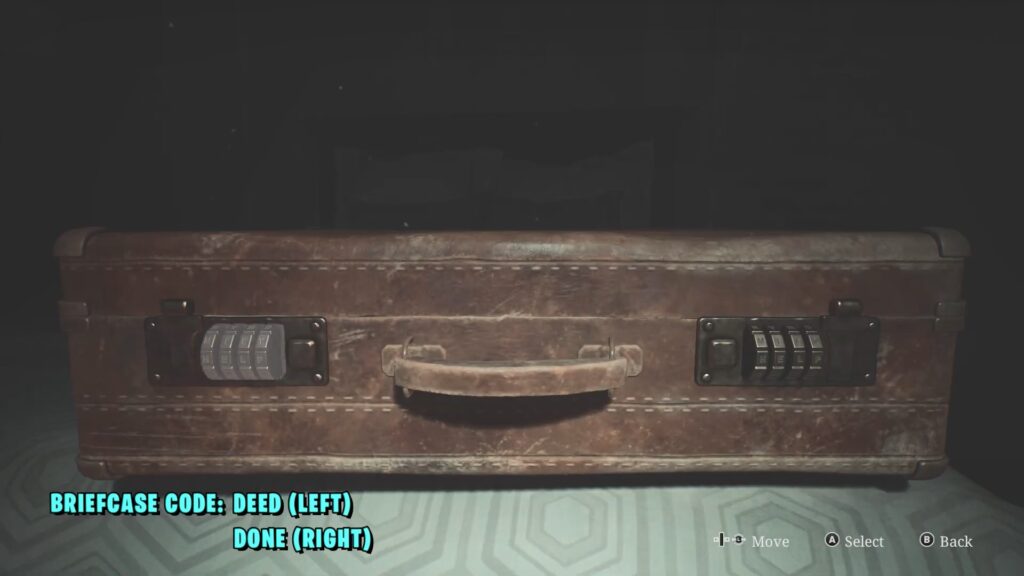
Inside the briefcase, you’ll find the Employee Elevator Key.
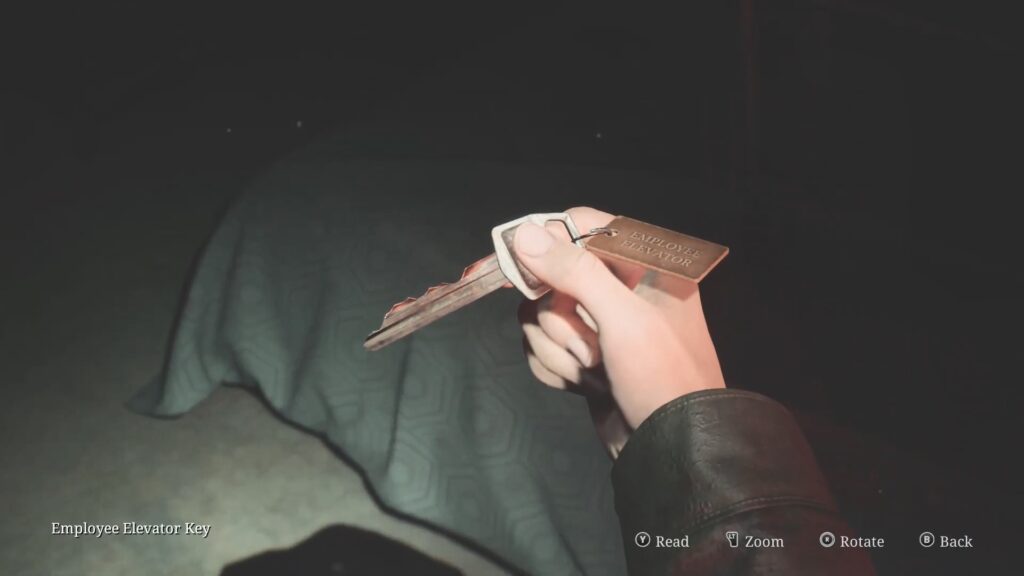
Employee Elevator
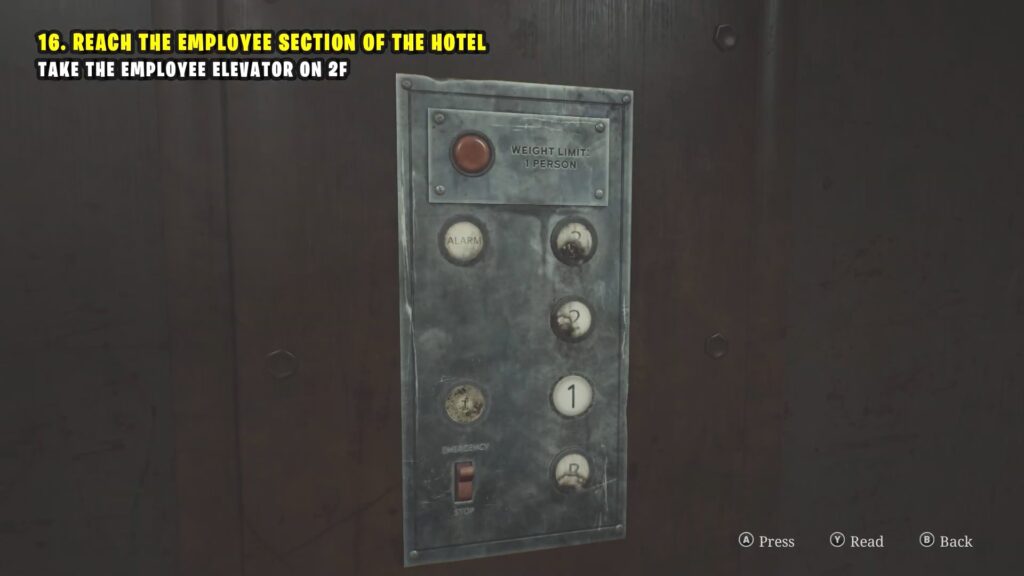
Go to the Employee Elevator room in 2F. Refer image below.
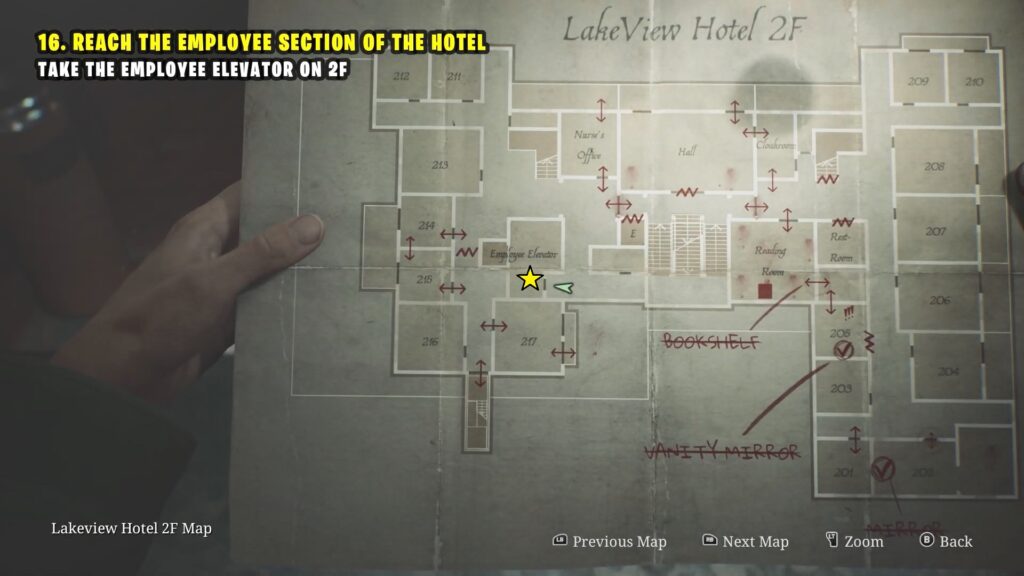
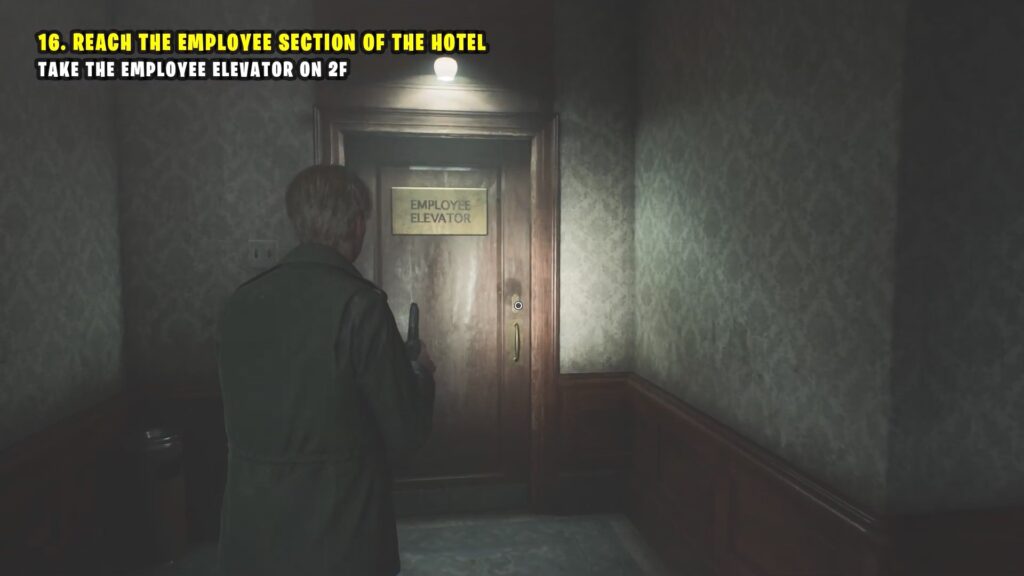
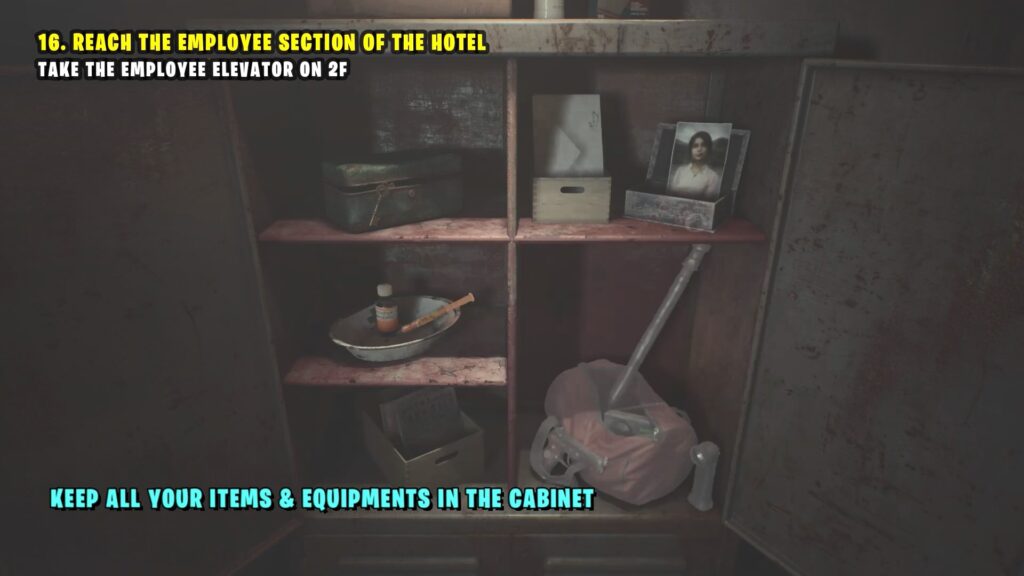
Place all your items in the cabinet inside the Employee Elevator since it has a weight limit.
Then, take the elevator to the Employee Section.
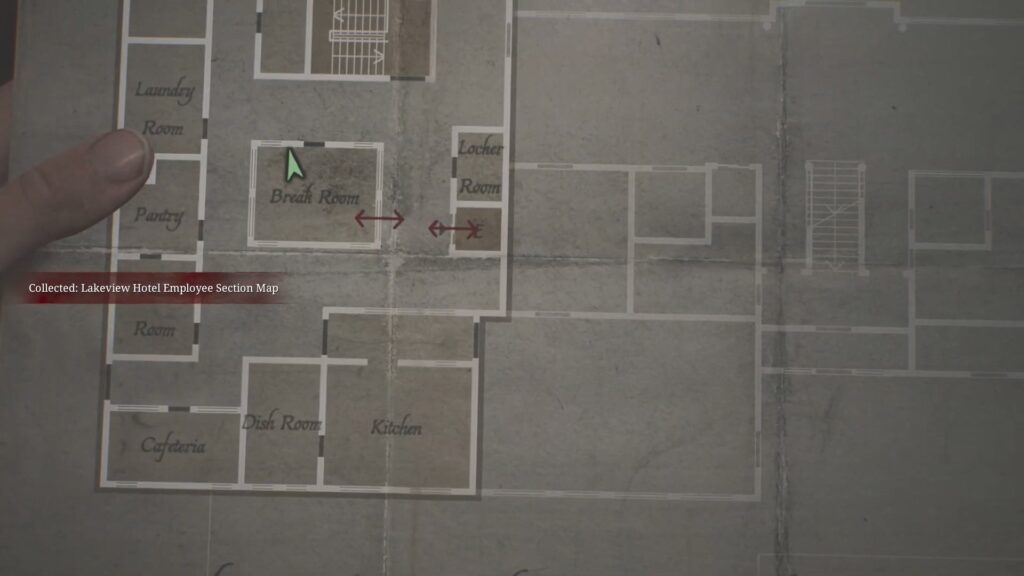
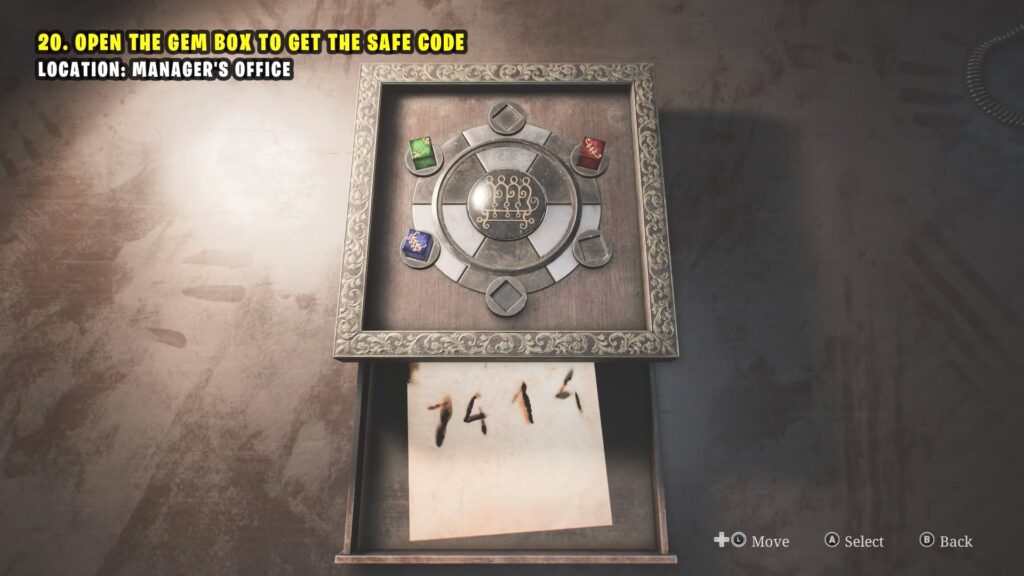
Employee Section (Gem Box Puzzle & Safe Code)
In the Employee Section, jump through the window into the Break Room and grab the Employee Section map.
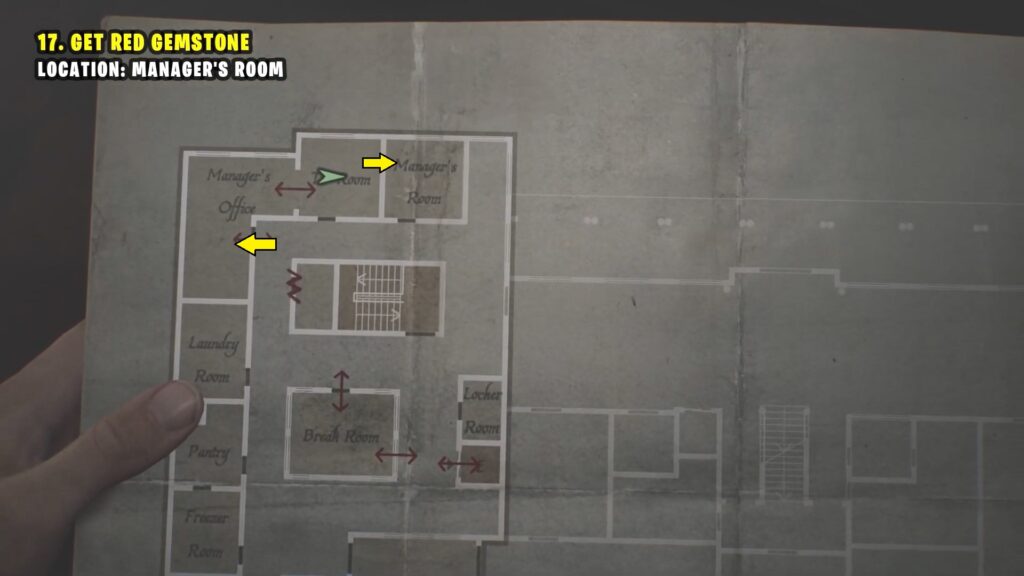
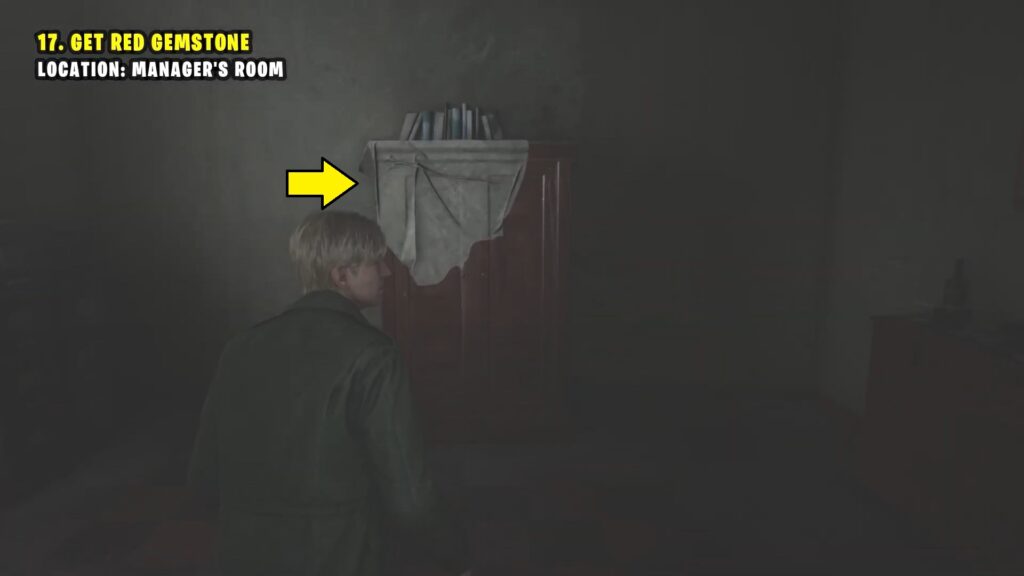
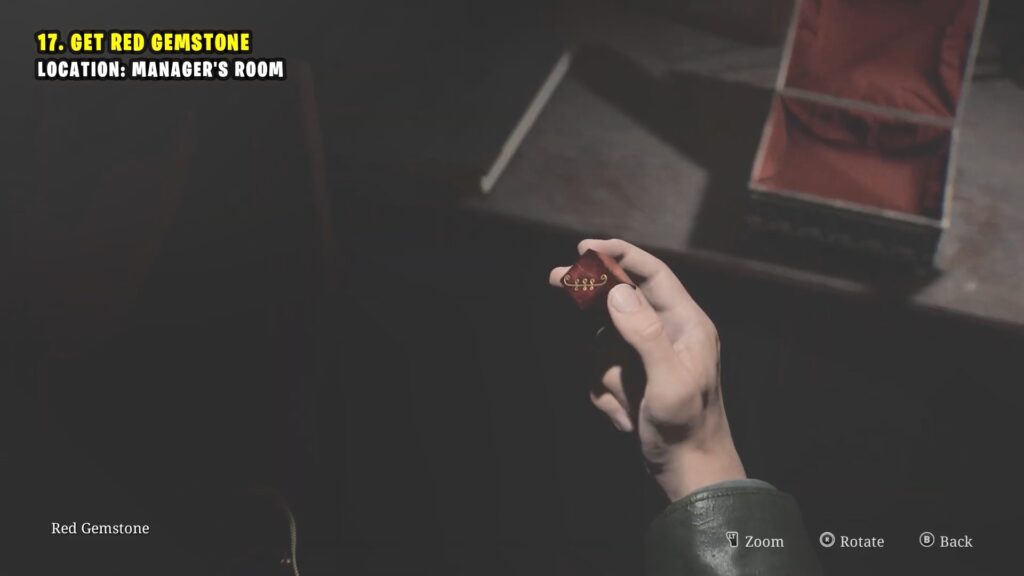
Collect Red Gemstone
Go to the Manager’s Office, then head to the TV Room. Move the wardrobe to access the Manager’s Room and collect the Red Gemstone.
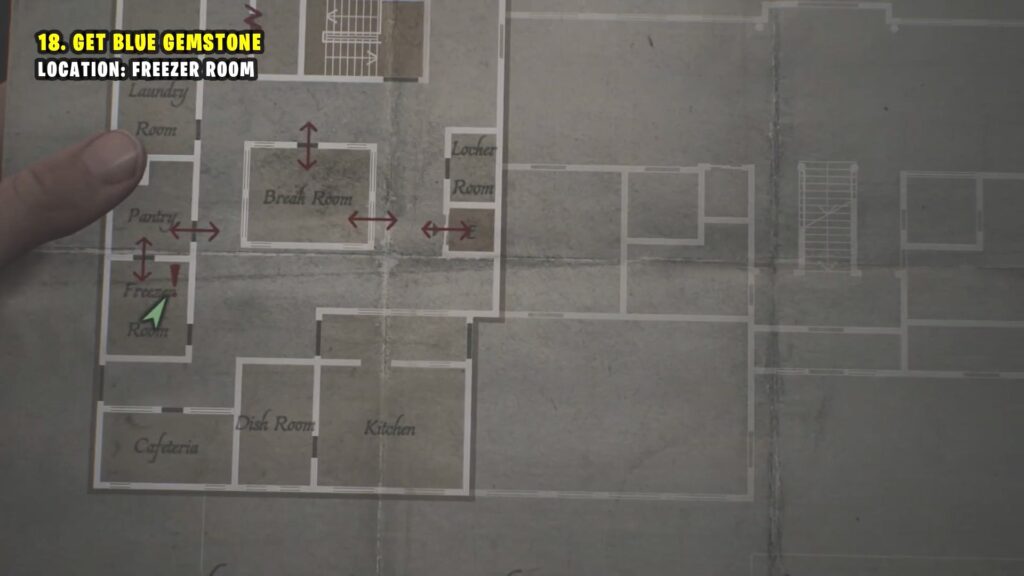
Collect Blue Gemstone
Go to the freezer room via the Pantry and collect the Blue Gemstone from a fridge.

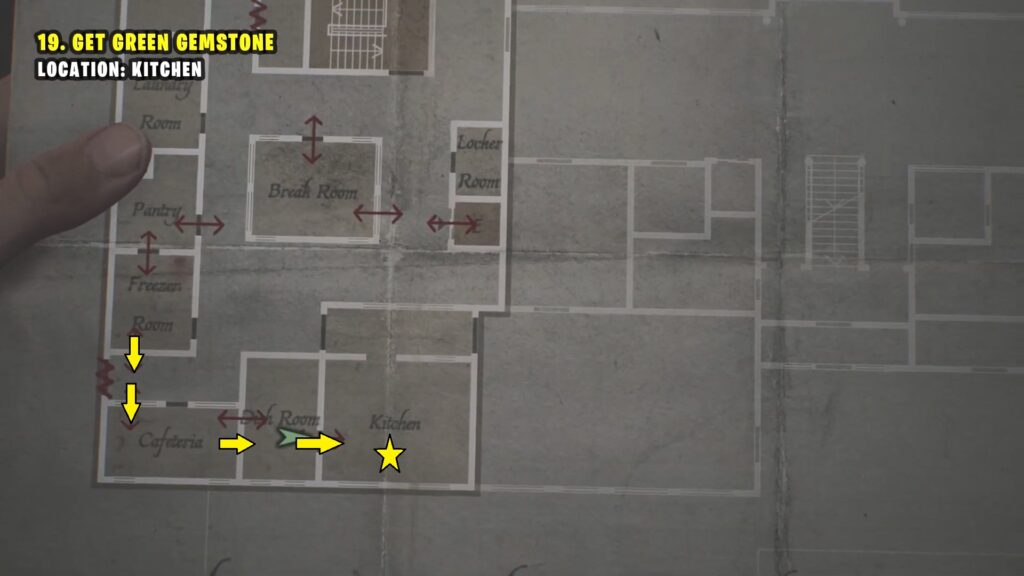
Collect Green Gemstone
Leave the freezer room through the hole in the wall, then head to the kitchen. Pick up the Green Gemstone from the table.

Go to the Manager’s Office and put the three gemstones in the box on the desk. This will unlock a drawer in the box with a burned piece of paper inside.
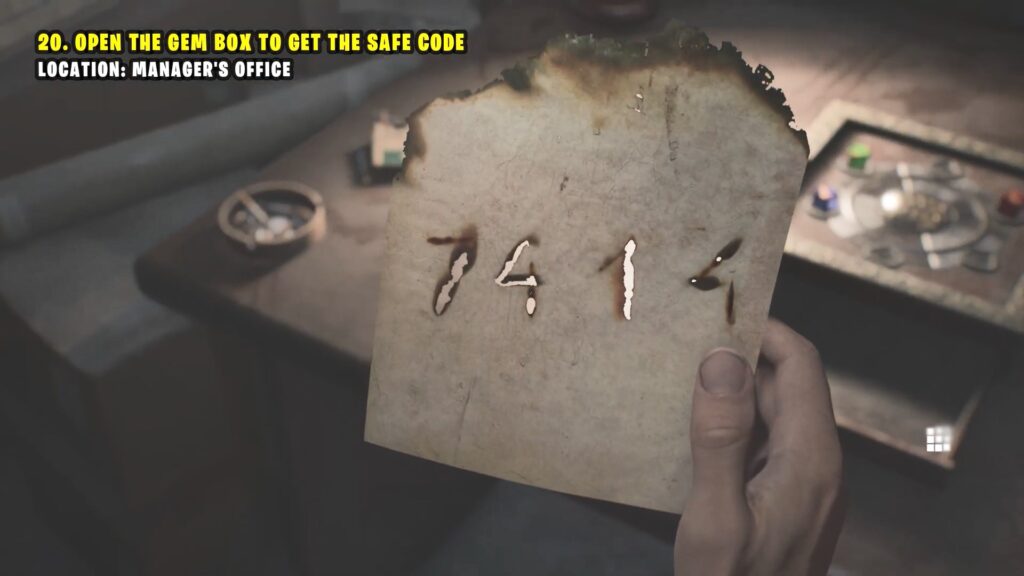
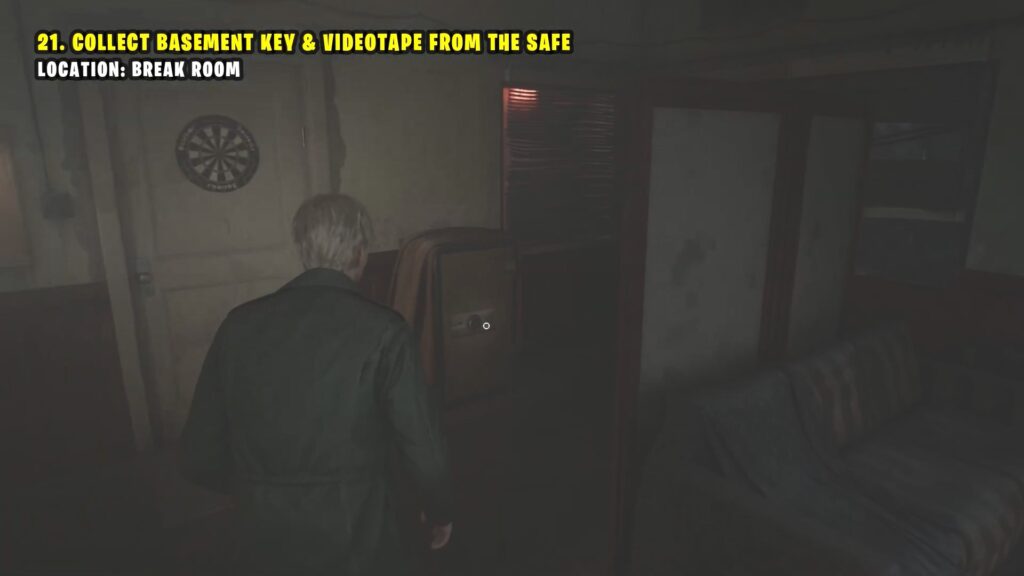
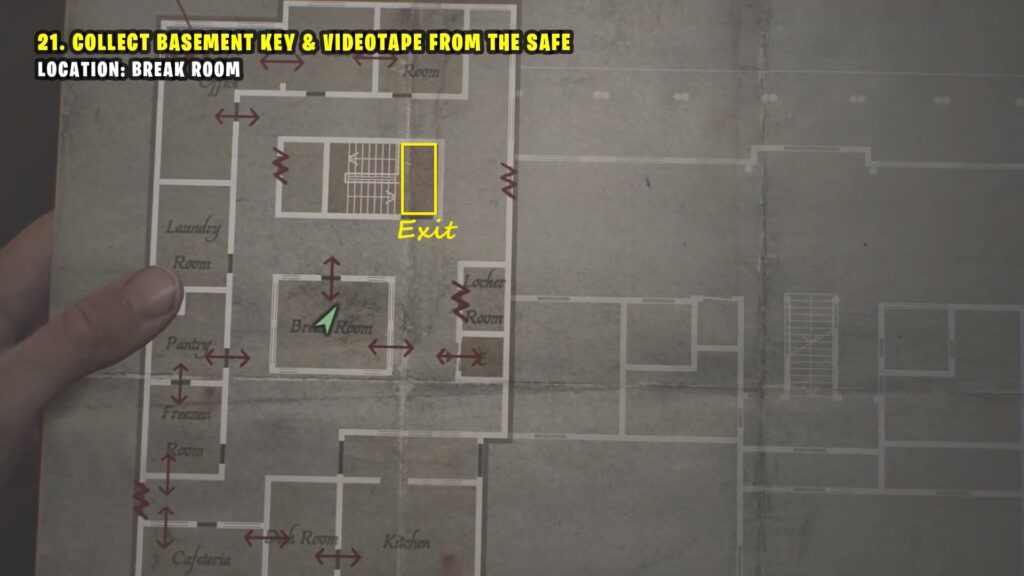
Break Room Safe Code
Go back to the Break Room where you found the map earlier, and open the safe using code 7414. Inside, you’ll find a videotape and the Basement Key.
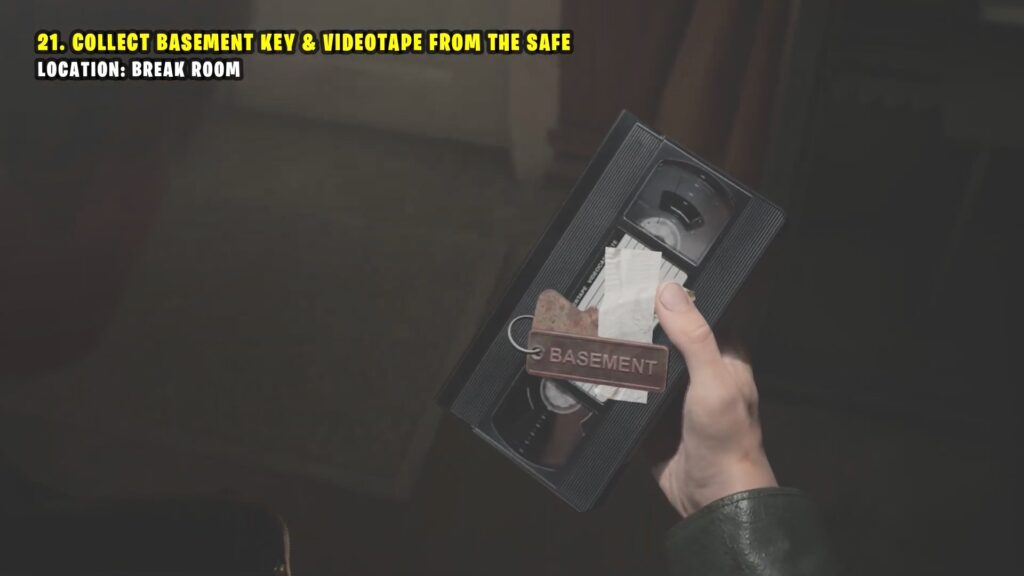
Venus Tears Bar Key & Little Mermaid Figurine (Basement)
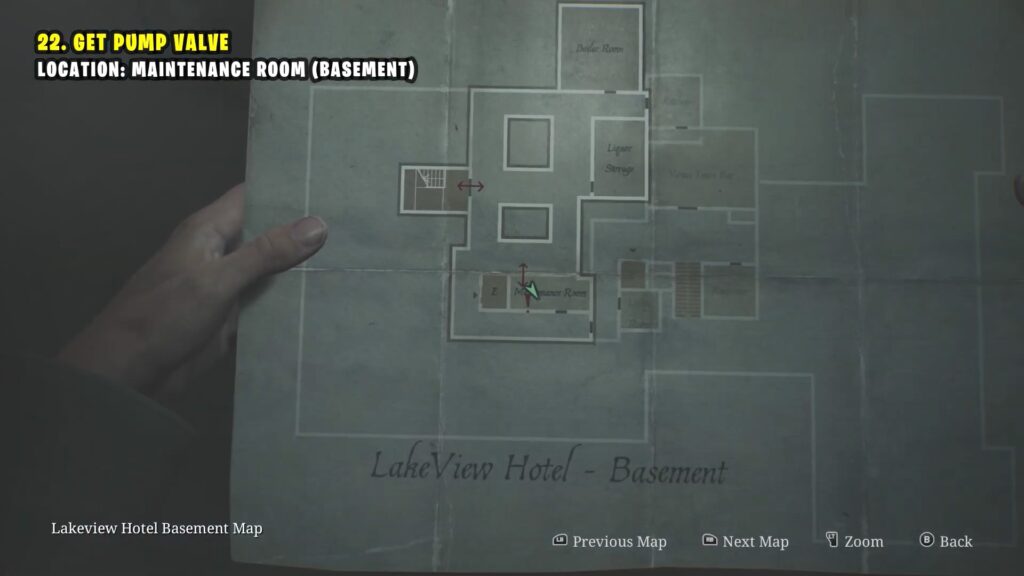
Leave the Break Room and use the Basement Key on the door labeled “Basement/EXIT“
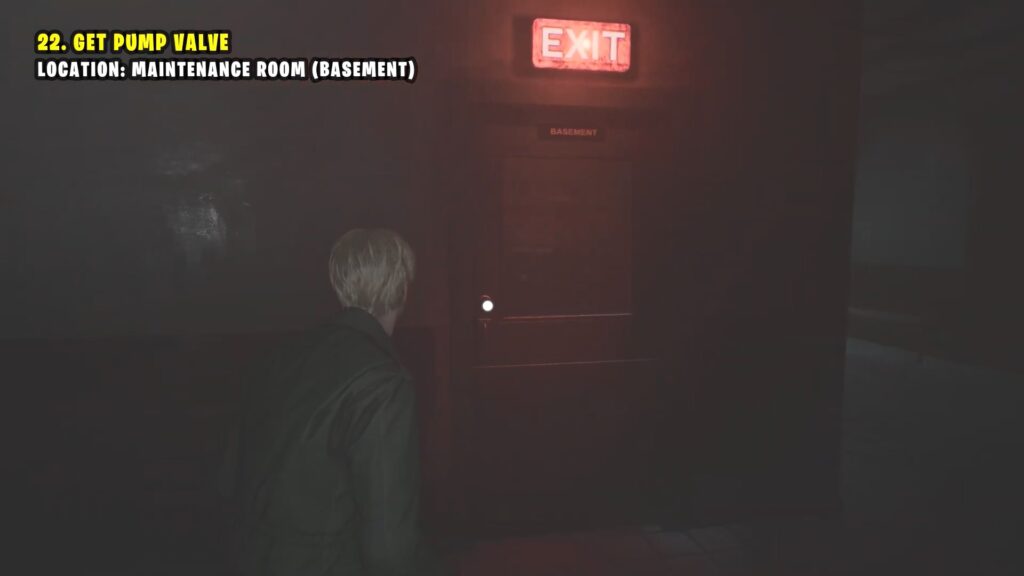
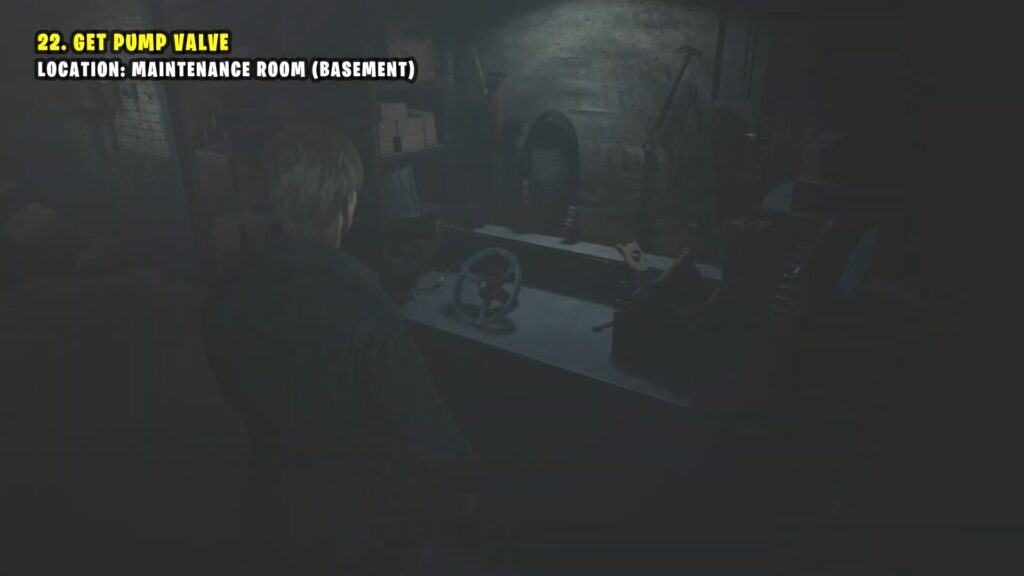
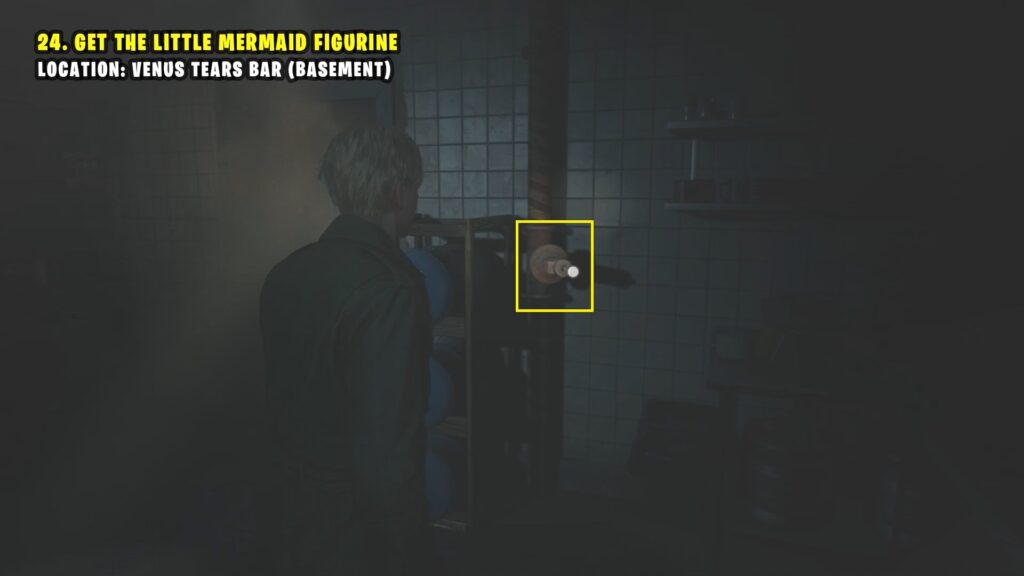
Go downstairs into the basement and enter the Maintenance Room to pick up the pump valve.
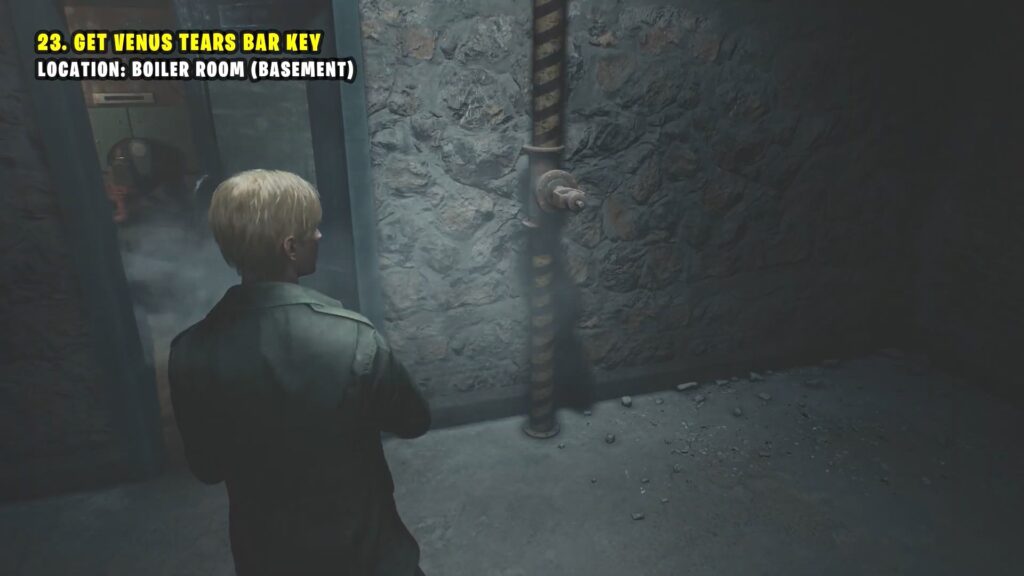
Next, go to the Liquor Storage room and leave through the broken section of the wall to reach the door of the Boiler Room. Attach the pump valve to the pipe and turn it to stop the steam coming out of the Boiler Room.
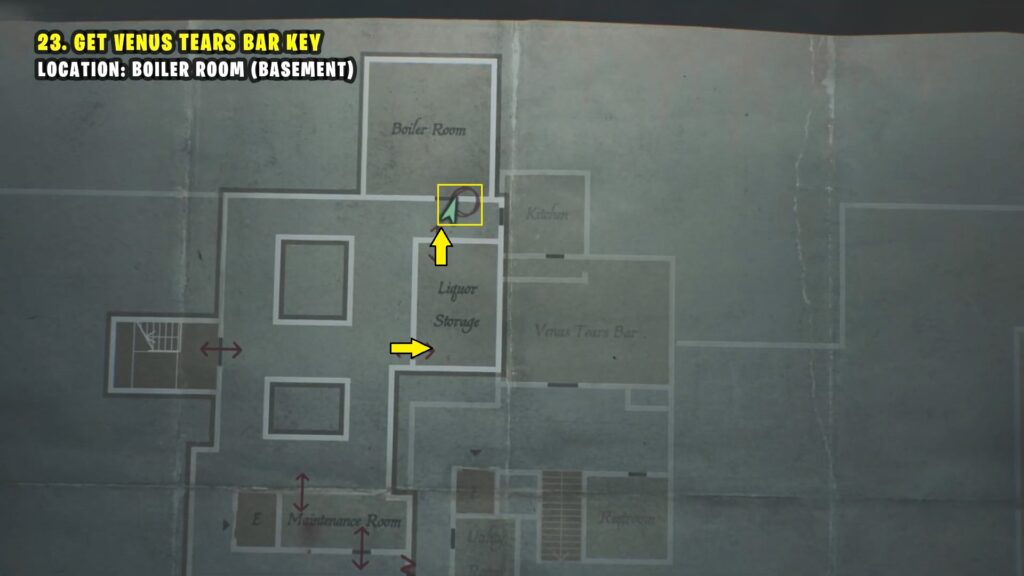
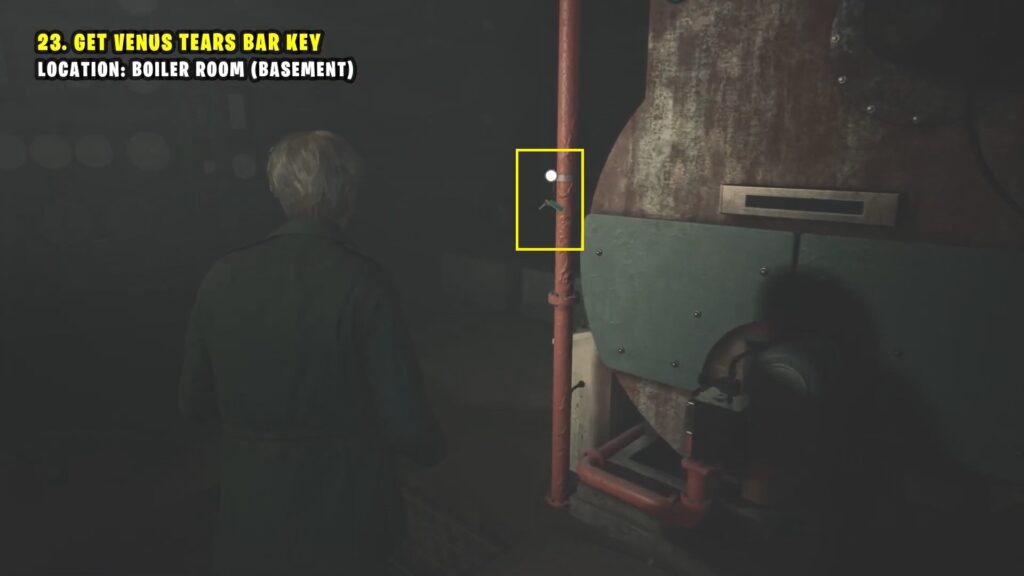
Next, go inside and pick up the Venus Tears Bar Key hanging on a pipe.
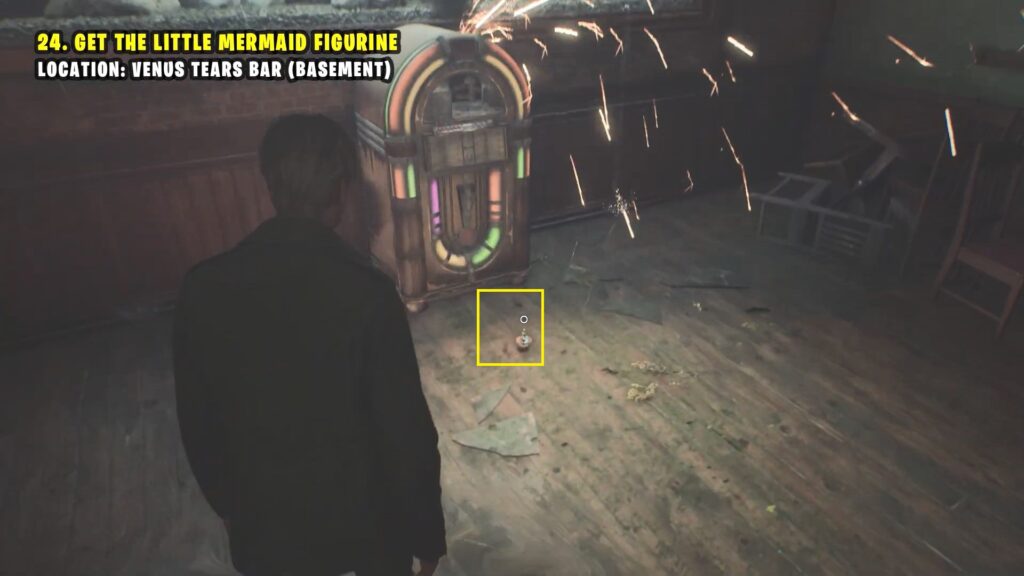
Leave the Boiler Room and grab the pump valve again.
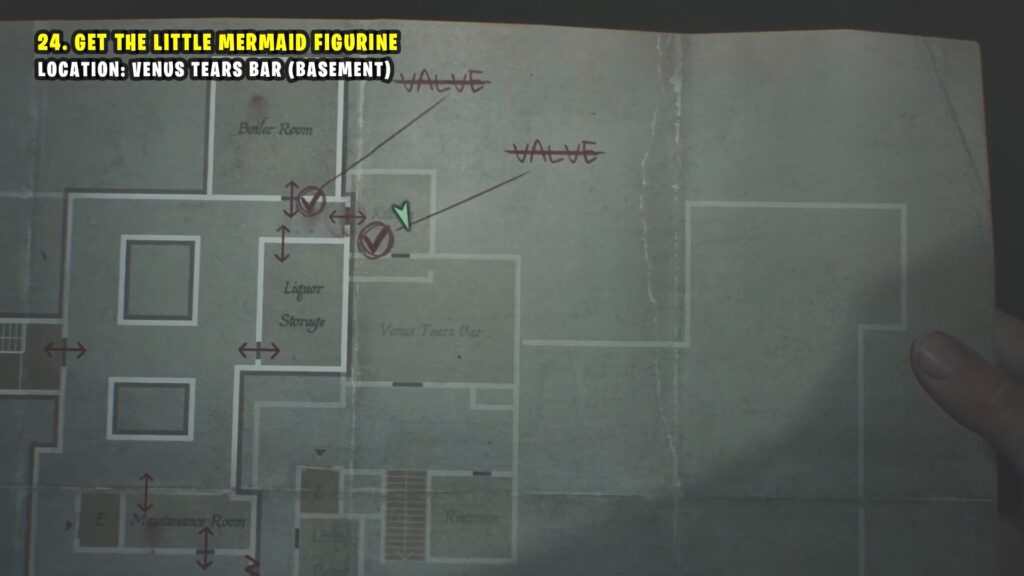
Then, enter the Kitchen on the right (outside the Boiler Room) and use the pump valve to stop the steam so you can enter the Venus Tears Bar.
Pick up the Little Mermaid figurine from the flooded floor of the Venus Tears Bar.
Leave the Venus Tears Bar and go upstairs to return to the lobby. Then, go back to the Employee Elevator room on the 2F to get your equipment, including the other two figurines.

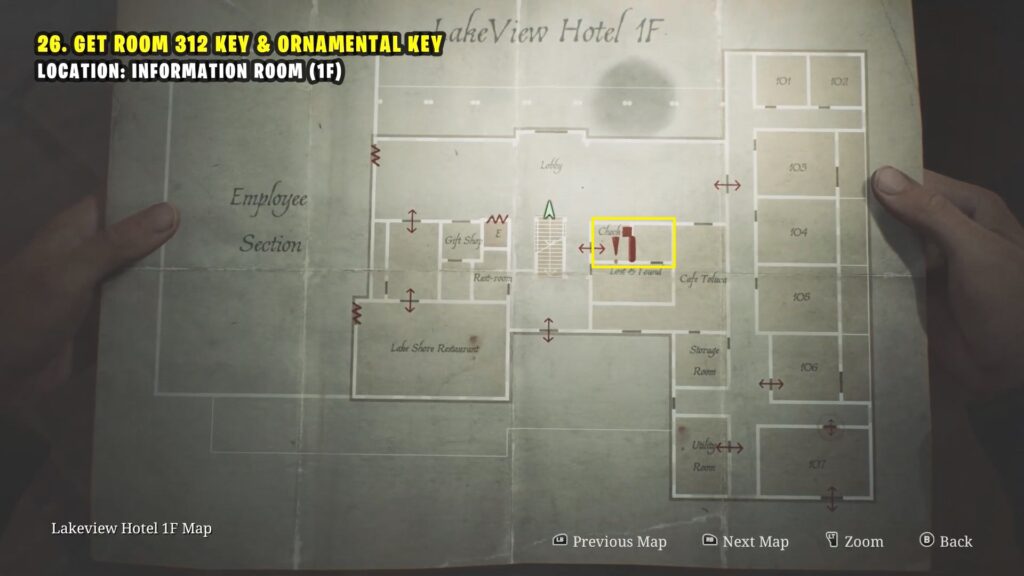
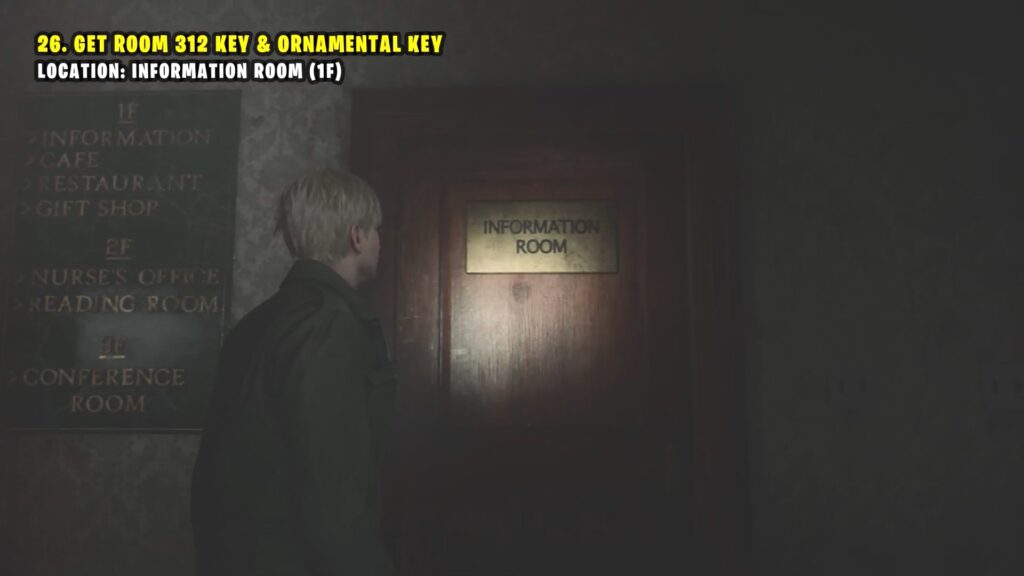
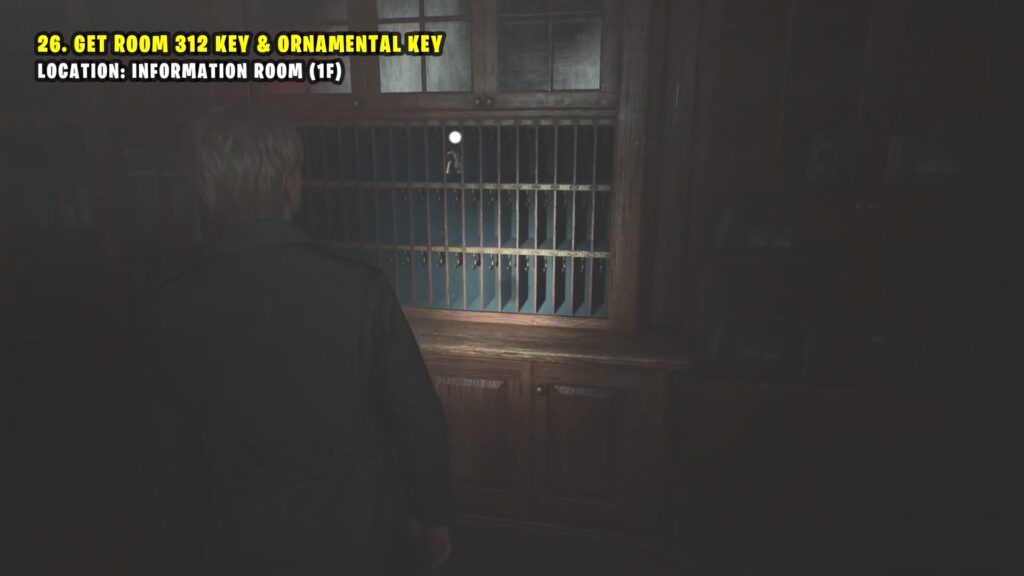
Go to the Information Room near the main stairs in 1F and collect the Ornamental key and Room 312 Key
Music Box Puzzle
Go back to the lobby and use the Ornamental Key on the music box.
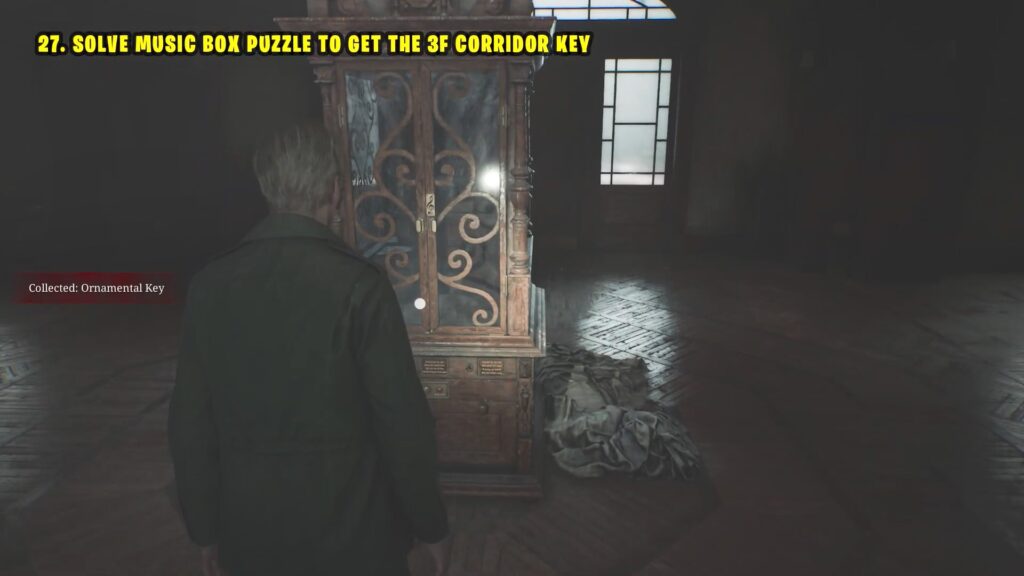
Place the three figurines inside the main compartment of the music box.
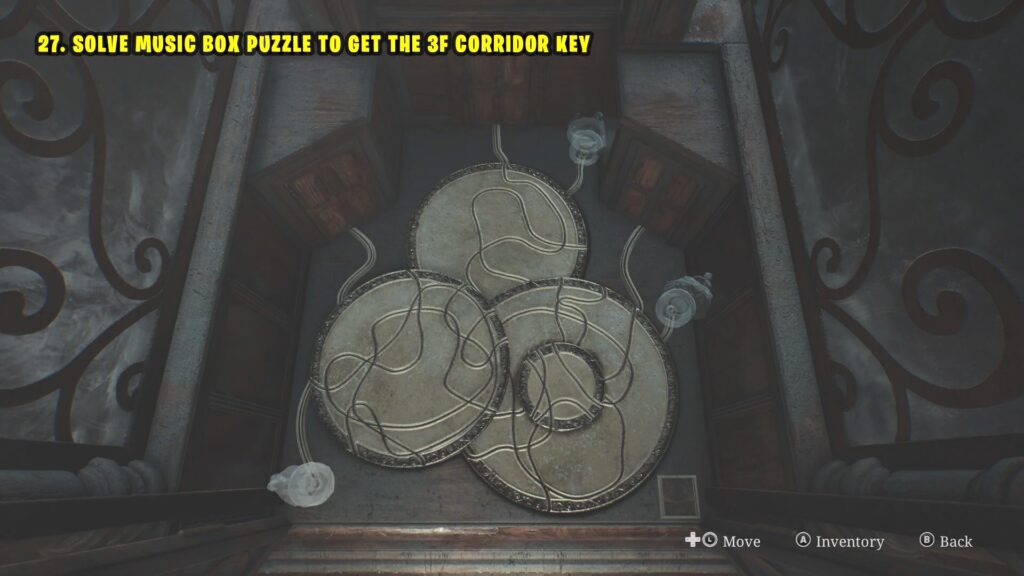
Then, rotate the four discs in the display to create a continuous track that connects each figurine’s starting position to the door at the back of the cabinet. Try to match the edges of the discs to get the correct path.
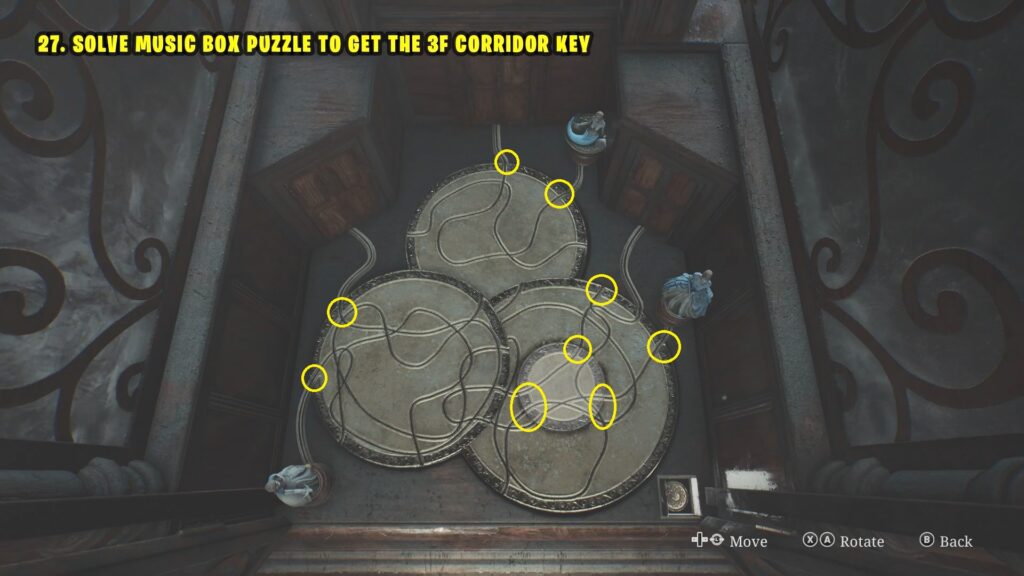
After this, the game will show three short poems next to the music box with a winding key. To solve the puzzle, the solution is 7, 5, 1.
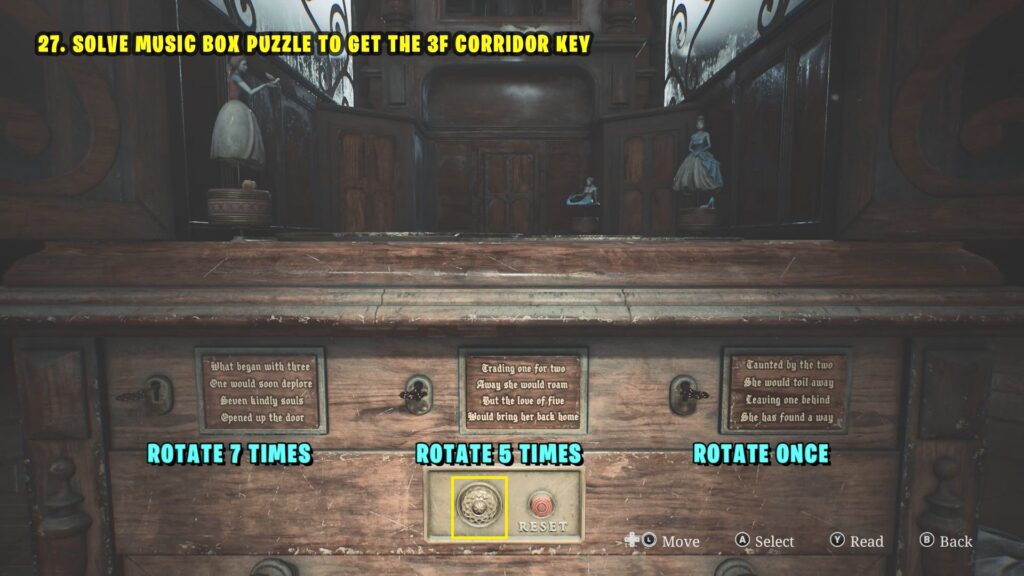
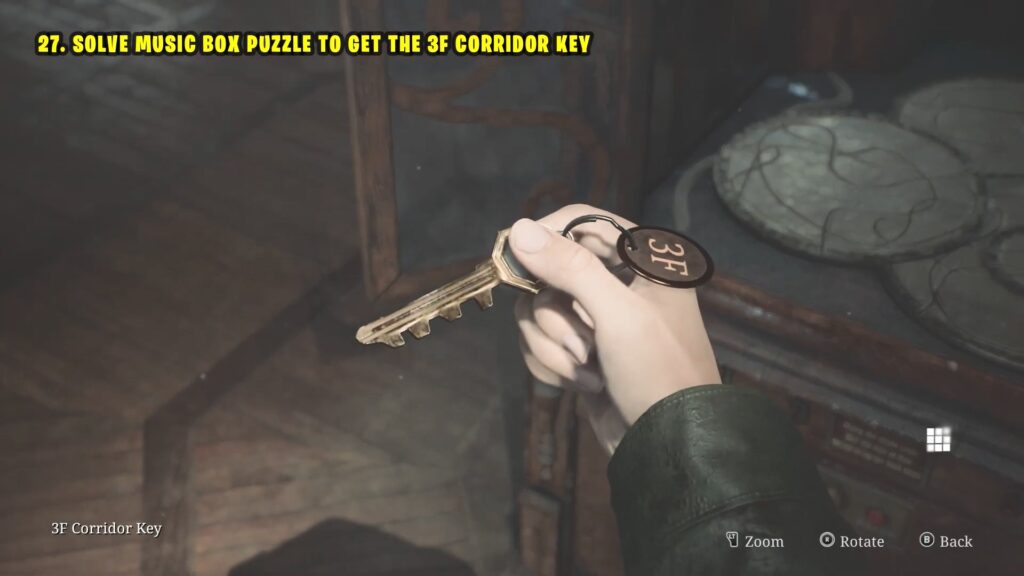
Finally press the the button below the poem to receive the 3F Corridor Key.
Finally, go to the 3rd floor and use the 3F Corridor Key to open the iron gate in the corridor.
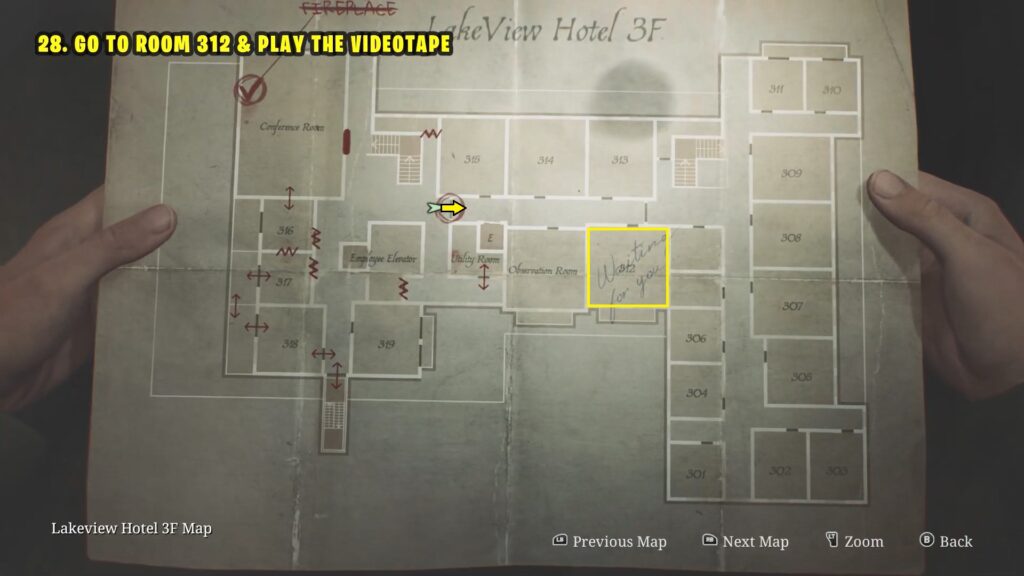
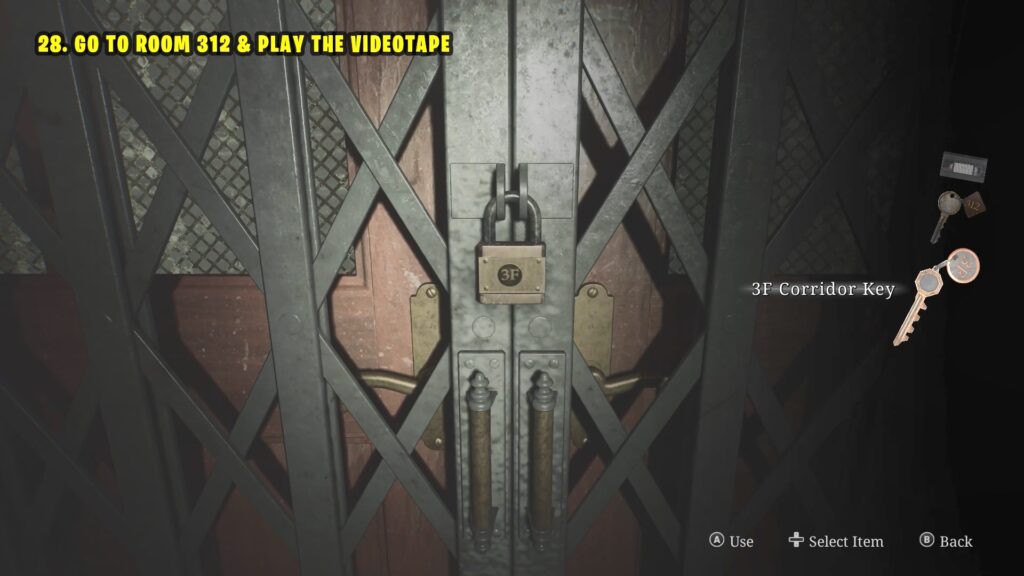
Then, use the Room 312 Key to enter Room 312. Use the videotape on the VCR to finish the chapter.
