This walkthrough will guide you through everything you need to know on how to complete the world quest “Perils in the Dark” in Genshin Impact 2.6. This world quest will get unlocked after you complete The Heavenly Stone’s Debris.
Perils in the Dark
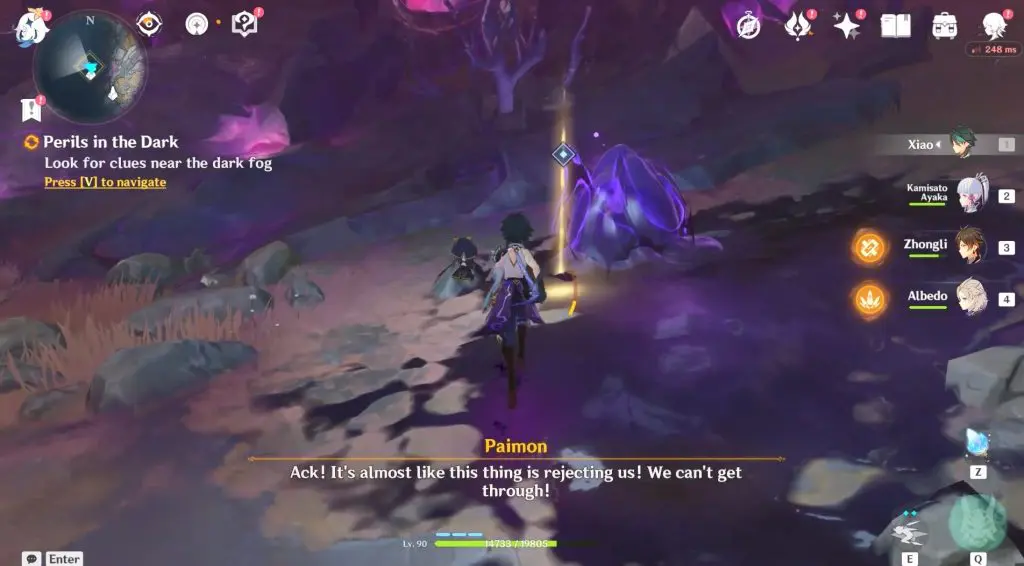
As the quest start, the game will take you further into the deeper zone. In the new section, you have to examine the dark fog for clues until you locate a ‘Fatuus’ Journal’ inside a Dark Mud.

You’ll find a glowing Investigate spot with Oozing Concretions in front of it. Use the Lumenstone Adjuvant (minimum level 2) to clear the dark blobs and reveal Fatuus’ Journal. After you’ve finished reading it, you’ll be instructed to ring the two bells on either side of the ruins.
Ring the two bells on either side of the ruins (0/2)
From here, you’ll need to ring two bells in the northern (Southwest of Underground Waterway) and The second bell (South of Stony Halls). You just need to follow the pathways and tunnels until you get to these two locations.

#1 North Bell – Southwest of Underground Waterway
As you get closer to the tower, you’ll notice a tower in the distance. A Seelie can be found near the ground floor. Climb the tower to uncover a sealed monument in the midst of Dark Mud. First, eliminate the Abyss Mages present there.
Now, use your Lumenstone Adjuvant to activate the mechanism. To perform this, you must have at least three charged bars of energy. If you have enough energy, interact with Seelie on the ground floor to recharge it.
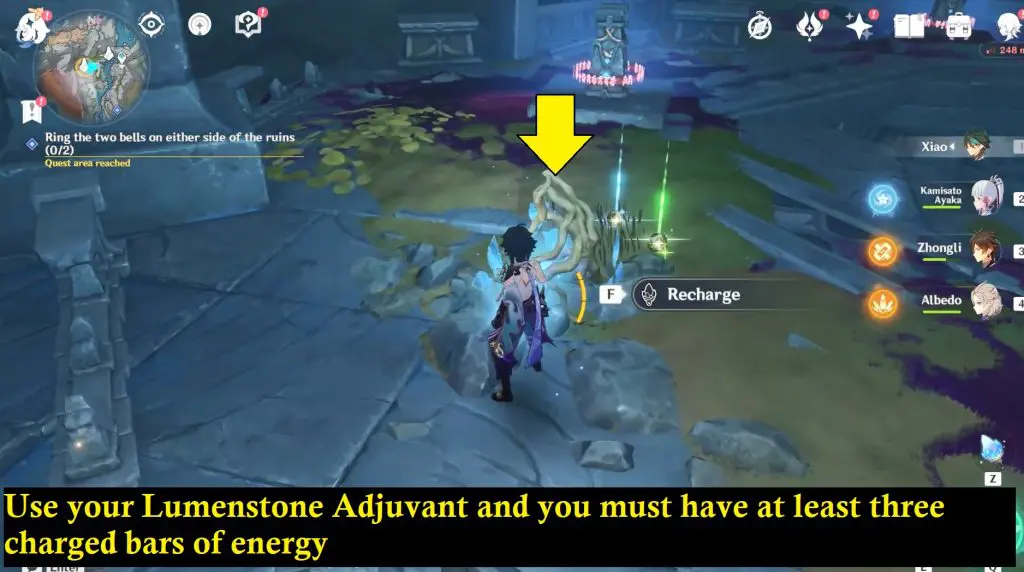
With enough energy, activate the mechanism on the top floor and this will make the purple rocks to appear. Now, unlock the totems by using your Blooming Light (“Z” key) and destroy the corrupted growths. Or else use the activate mechanism to release a tiny AoE projectiles. To clear the Dark Mud you need to aim the projectile toward the purple rocks surrounding the monument.


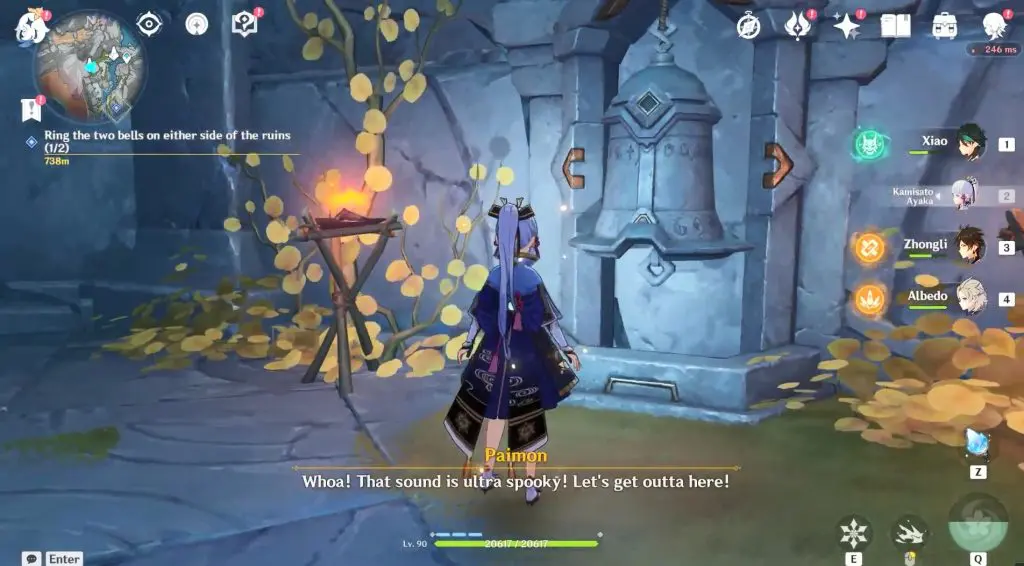
Defeat all enemies (Banished Knights) and clear all corruption surrounding the totems till the bell appears. Finally, press the bell to finish this section.
#2 South Bell – South of Stony Halls
Proceed to the area shown on the map, which is located south of Stony Halls. Eliminate the Ruin Grader from the area around the tower. Inside the tower, you’ll discover a totem that can be recharged permanently, four lanterns that must be recharged at the same time, and two luminous Seelies.
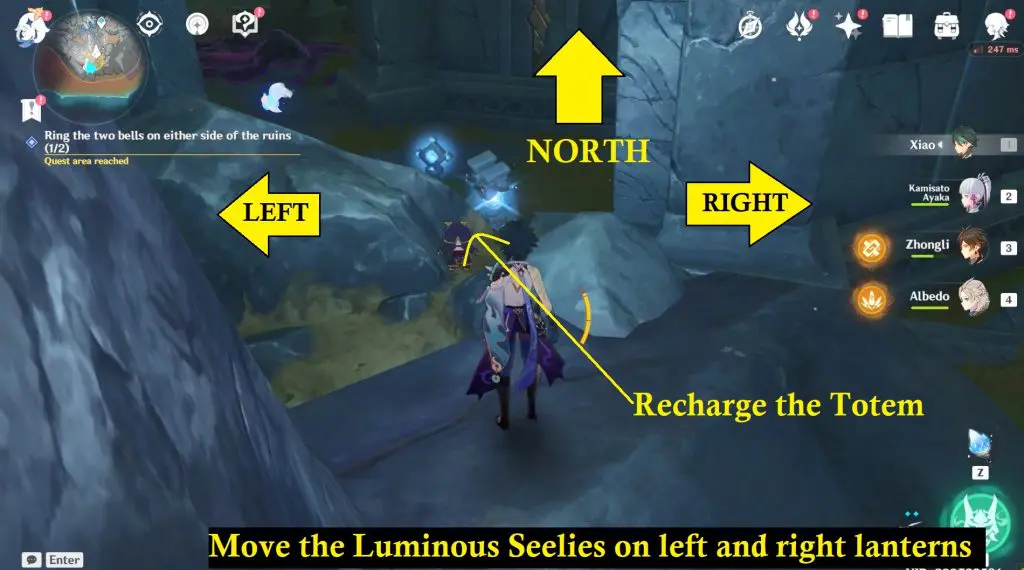
Recharge the totem to keep the southern cross illuminated indefinitely. To do this, you must have at least three charged energy bars. Interact with Seelie to recharge your energy if you don’t have enough.
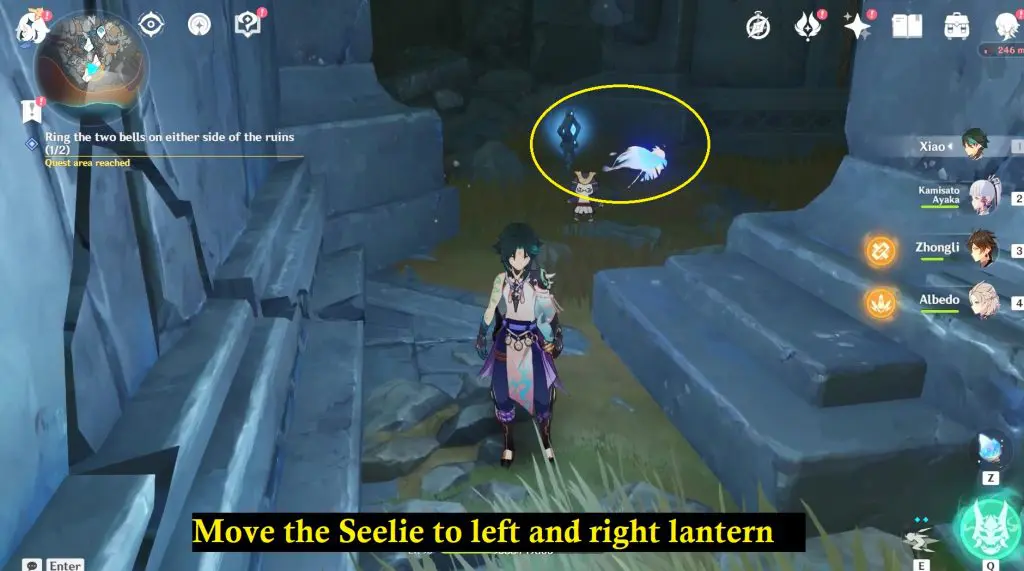
Interact with the two Luminous Seelies to spread them out so that they can be placed on the west and east lanterns.

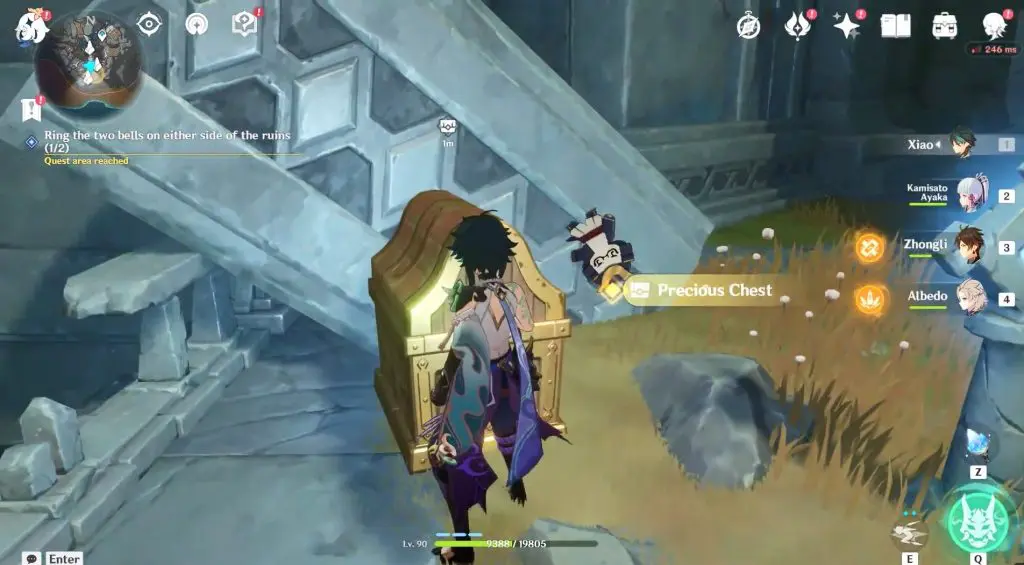
Finally, stand near the last remaining lantern on the north side to activate the lights that will summon Precious Chest. When you open the Precious Chest, an air stream will appear.
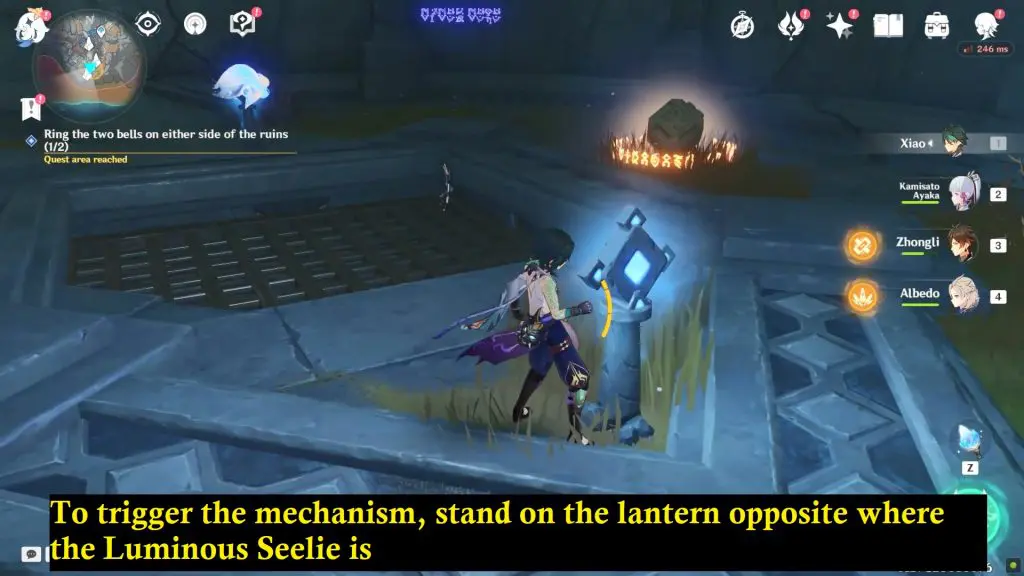
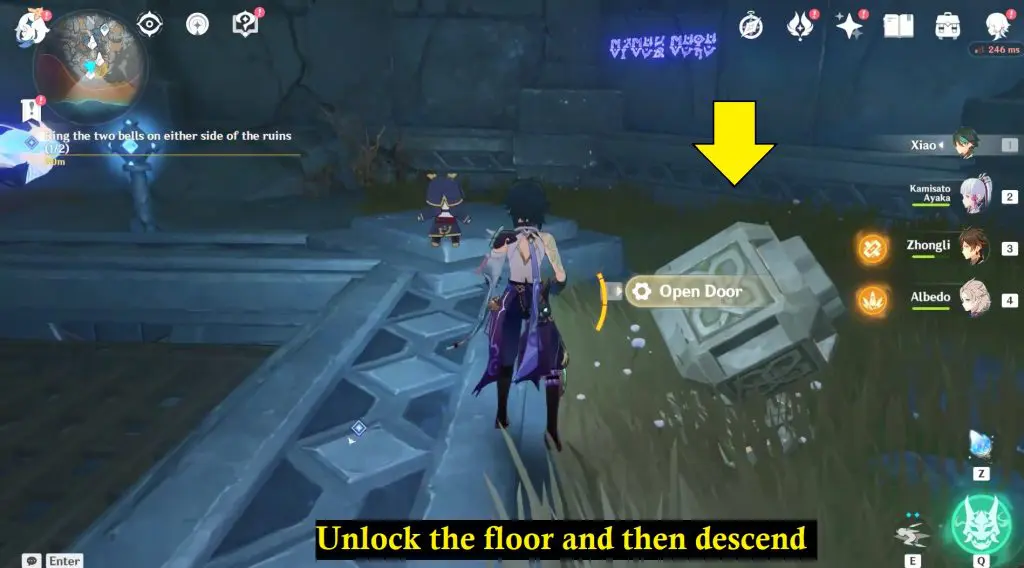
Use the current to float upward to the higher floor. On the upper floor you will find another Luminous Seelie. To trigger the mechanism, stand on the lantern opposite where the Luminous Seelie is. Interact with the pedestal to unlock the floor and then descend.
You will find a Ruin Grader sitting on Dark Mud. First, use your Lumenstone Adjuvant to clear the Oozing Concretion, then beat the Ruin Grader to uncover the bell. Finally, press the bell to ring it.


Approach the Dark Fog
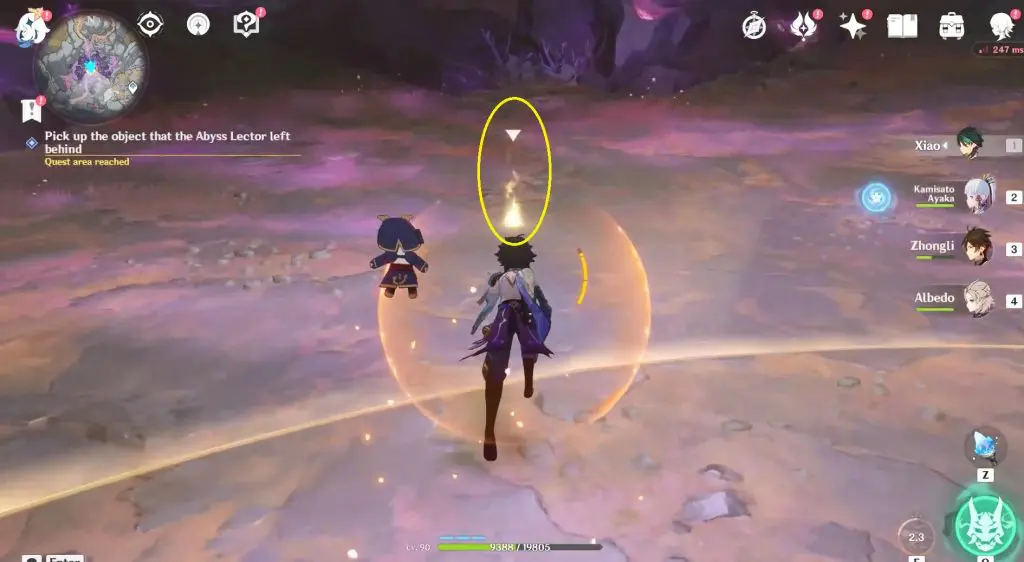
After ringing both bells, head back to the Nameless Ruins where you have to battle with Pyro and Electro Abyss Lectors.

After defeating both, interact with the glowing investigate spot on the ground to collect a Curious Cube. At this point, the quest will end.