Rescue Zee from the Lucrehulk
This guide shows how to complete the “Rescue Zee from the Lucrehulk” objective in Star Wars Jedi: Survivor game, which released on 28th April 2023. The objective starts as soon as you land on Koboh in search for compass. The video walkthrough is also posted below.
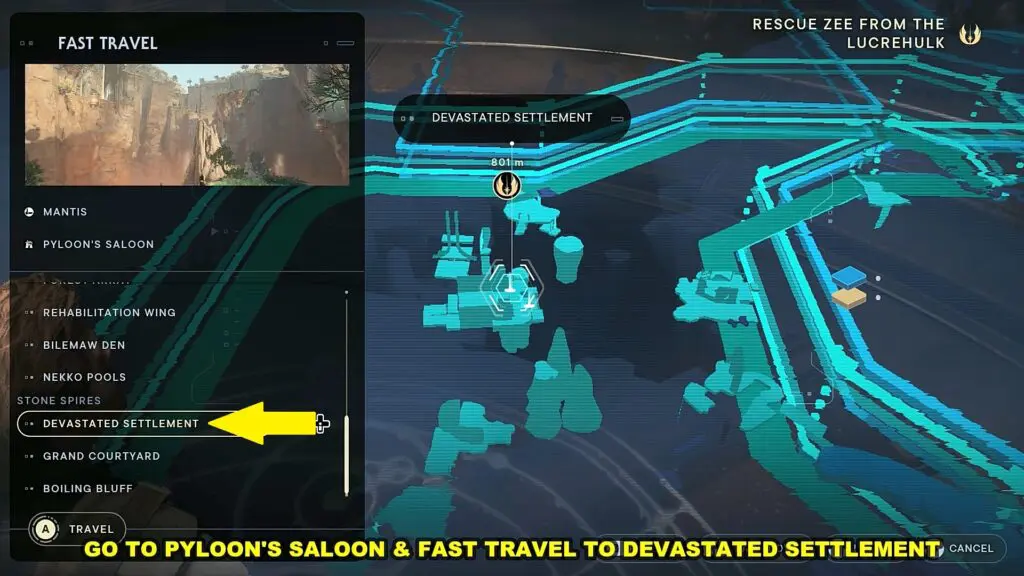
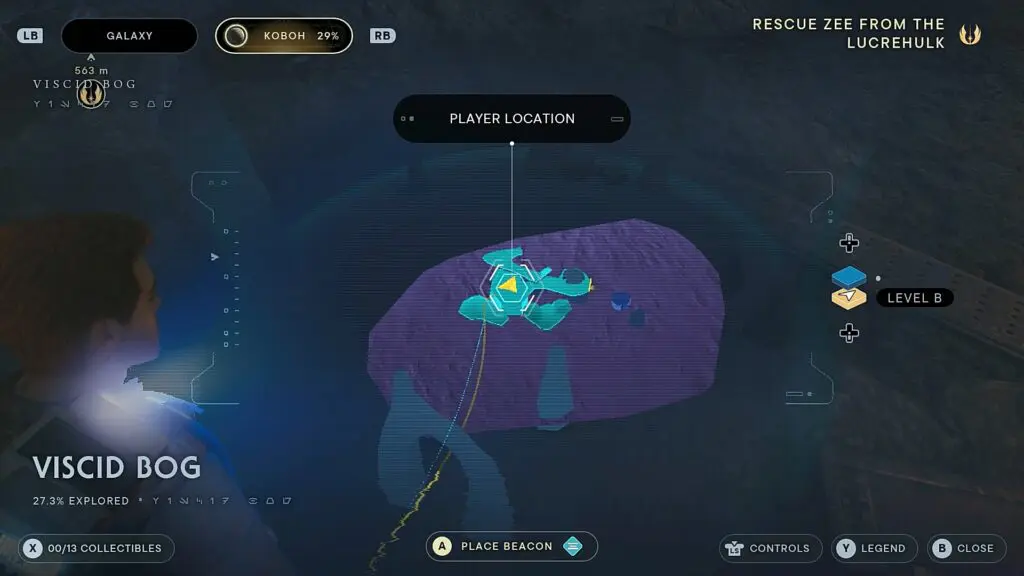
As the objective starts, go to Pyloon’s Saloon and fast-travel to Devastated Settlement.
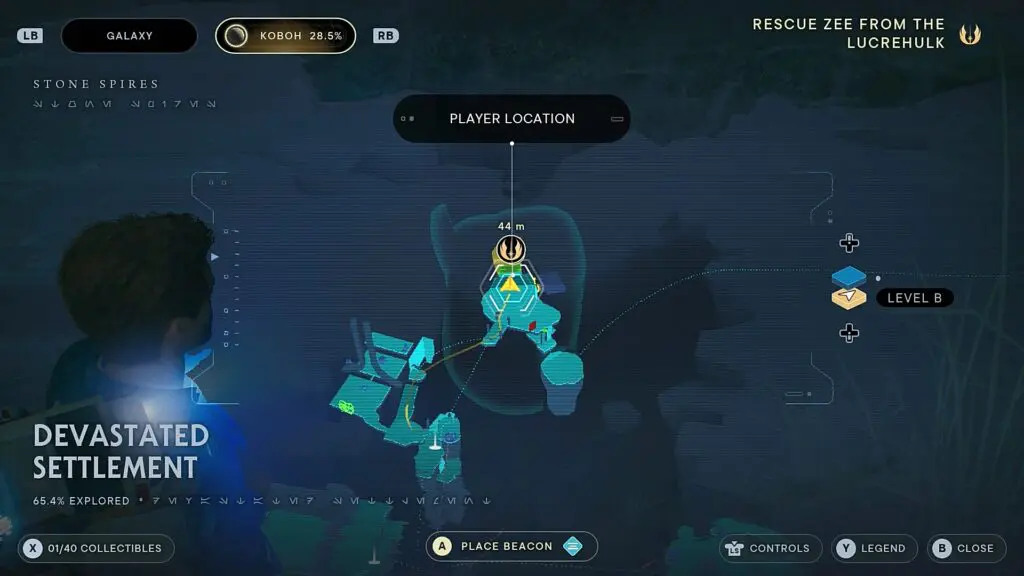
Devastated Settlement
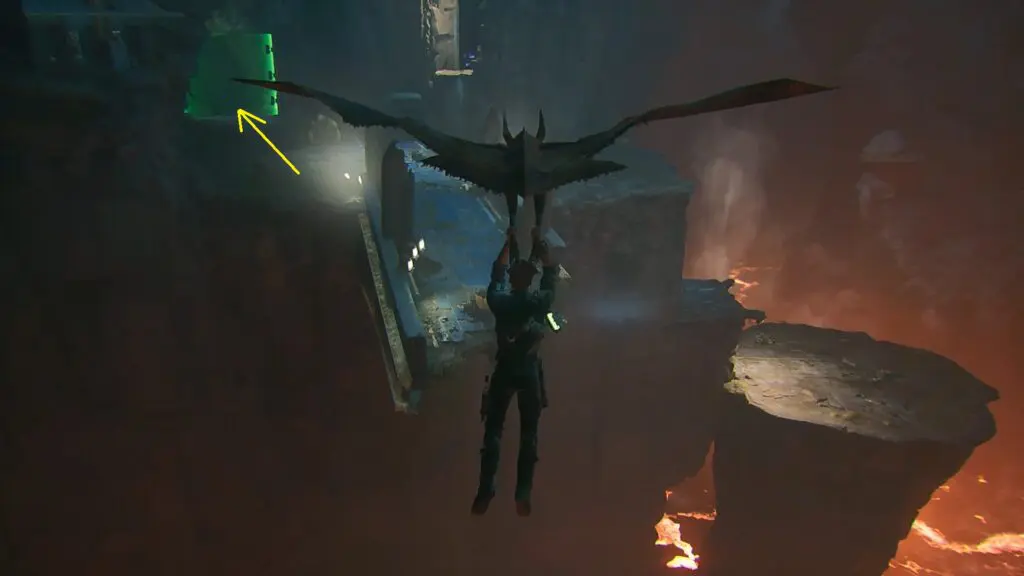
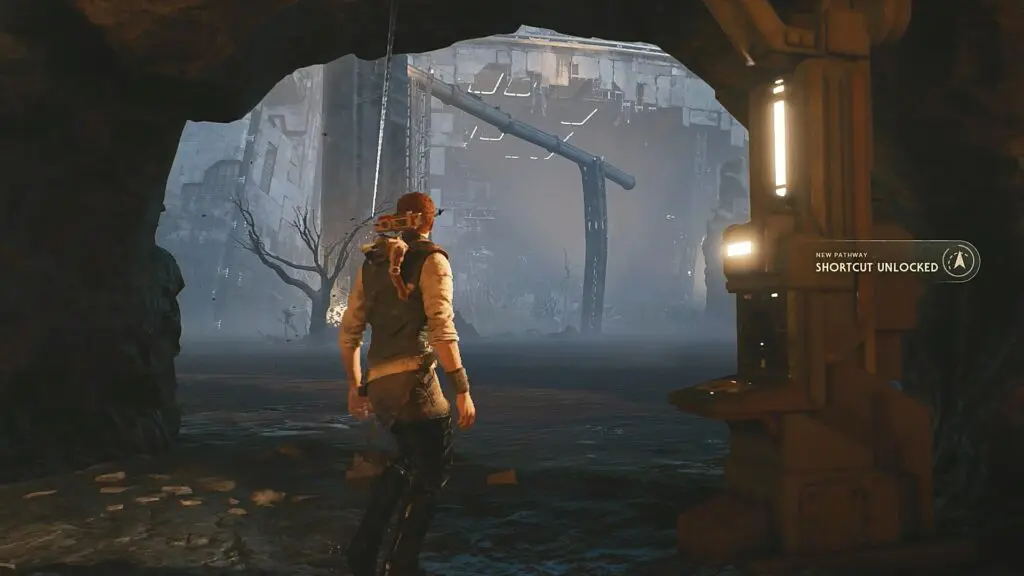
From the Devastated Settlement meditation point, grapple on the mountain wall next to it. Then go left while holding the ledge and climb up to the top surface. Proceed ahead and glide on Relter to reach the location shown in the pictures below. Dash through the green barrier to enter the cave.
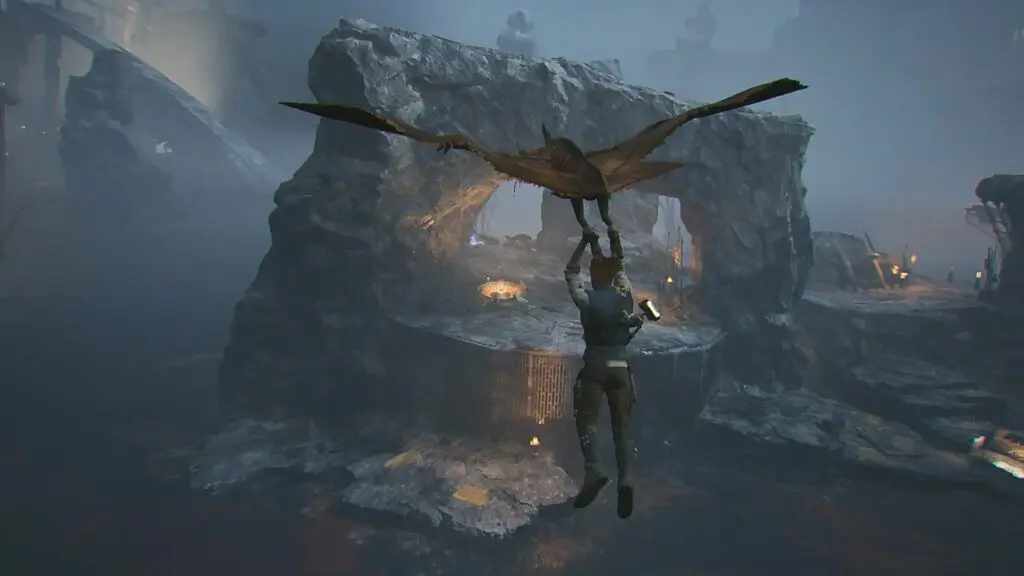
Proceed ahead and squeeze through the walls on the right side to come out of the cave. Then go left and run on the wall to reach the other side. You will find a Relter there. Use it to glide to the location shown in the pictures below.|
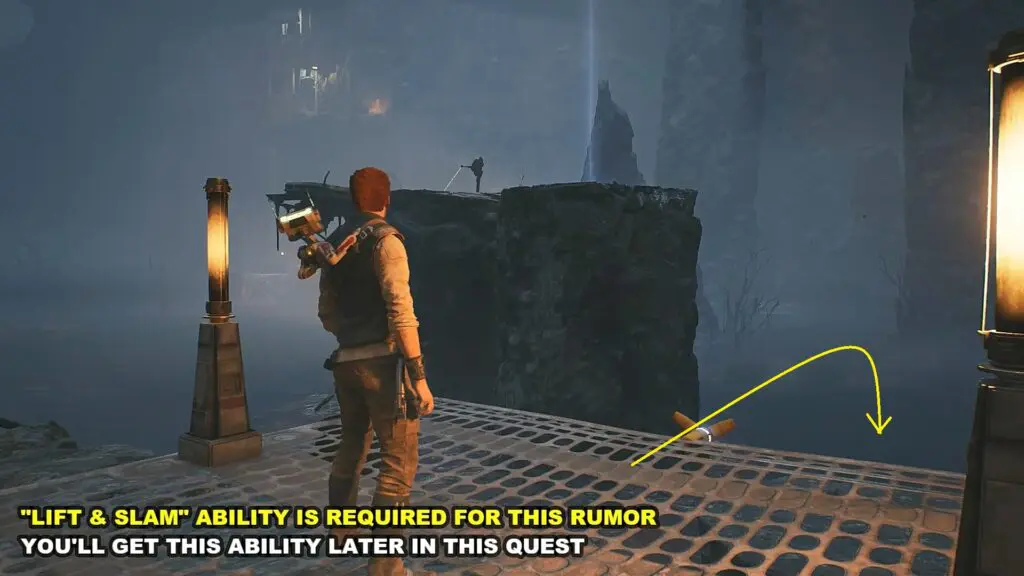
Note: Talking to Zygg there starts the “Help Zygg in Swamp” side quest. You will need Lift & Slam ability for this quest. These abilities will be unlocked later in this quest.
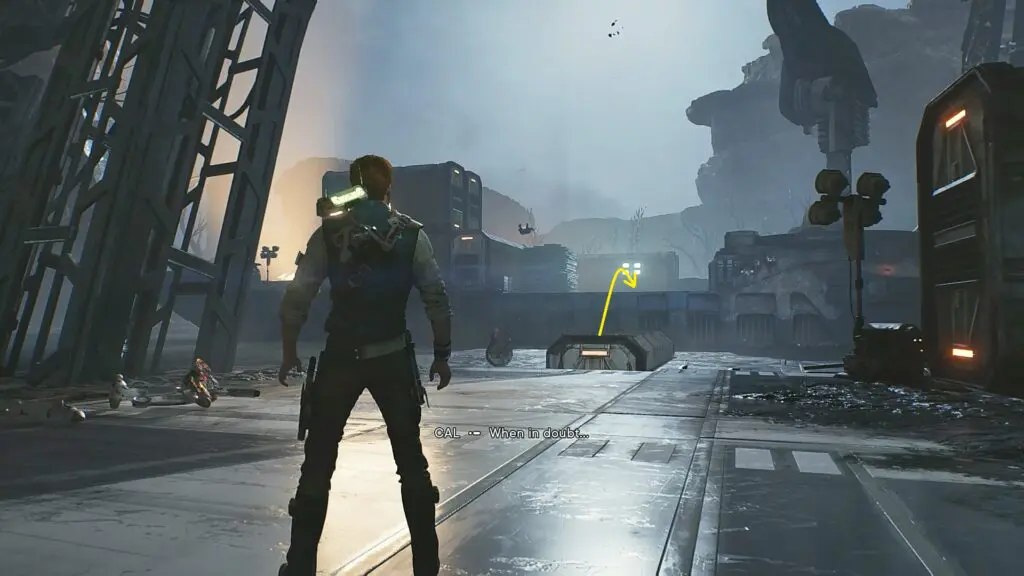
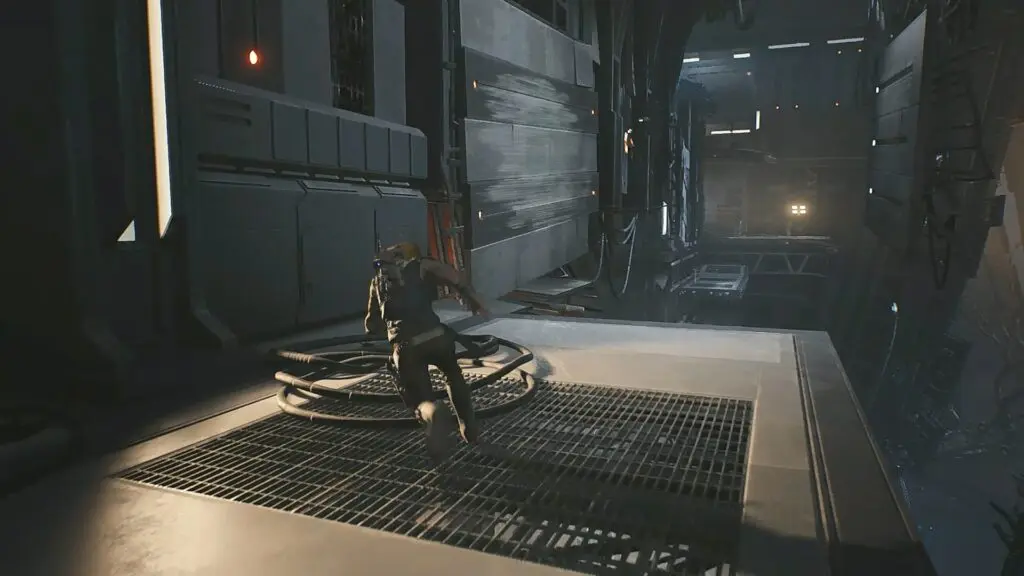
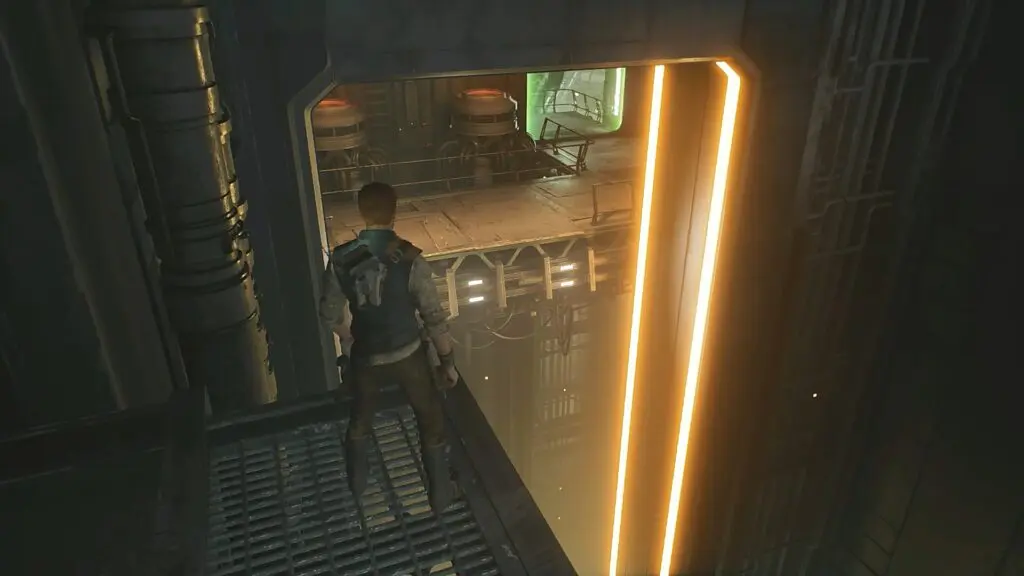
Jump on the stone platform in the water at the location shown in the picture below. Then turn around and enter the tunnel. Go till the end, where you will be able to unlock a zipline as shown in the second picture below.
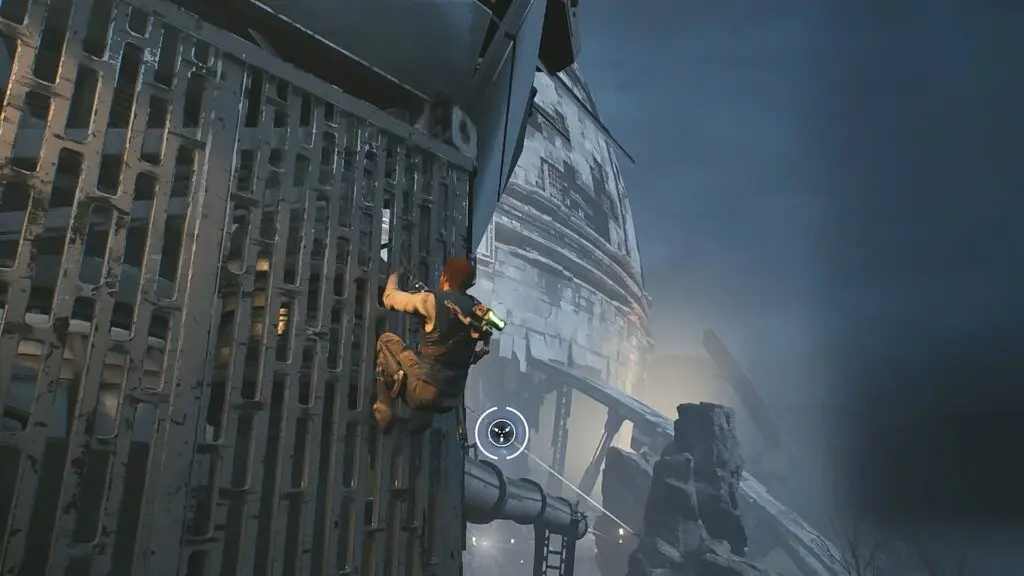
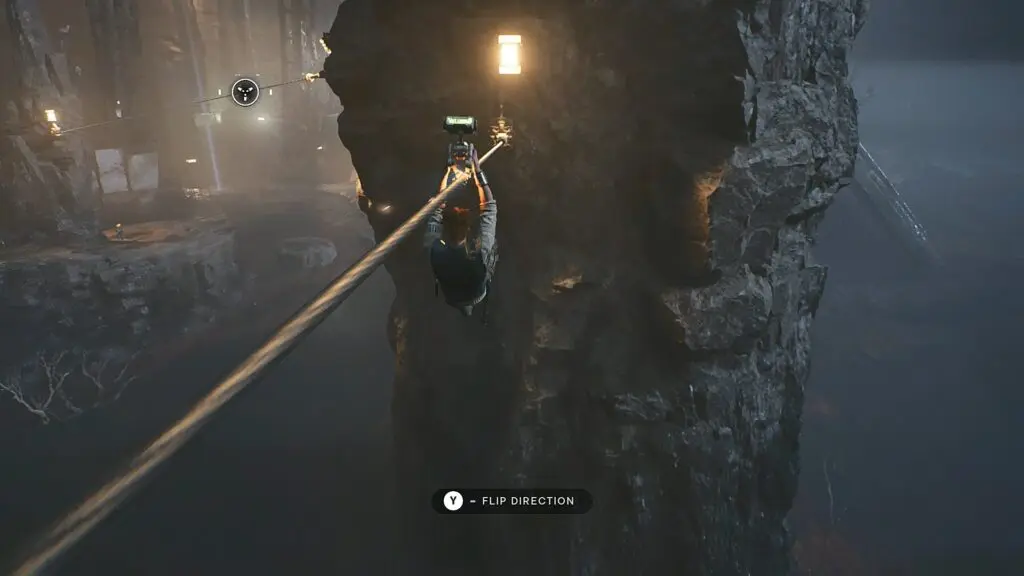
Take the zipline and grab the wall grating at the end. Climb to the top right edge of the wall grating. From there, jump and grab the zipline as shown in the picture below. When the zipline is towards the end, jump to the next zipline and then to the third as shown in the second picture below.
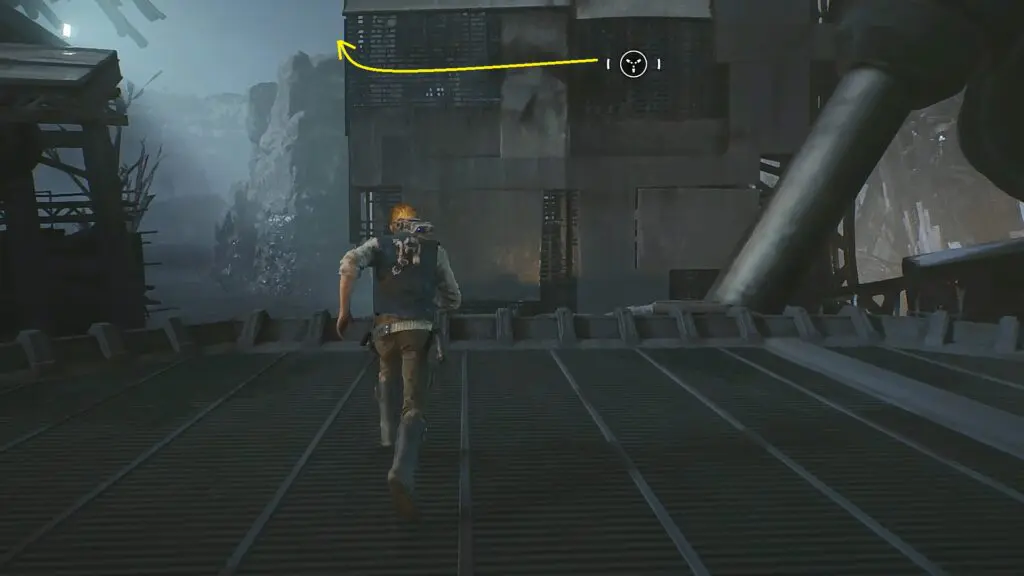
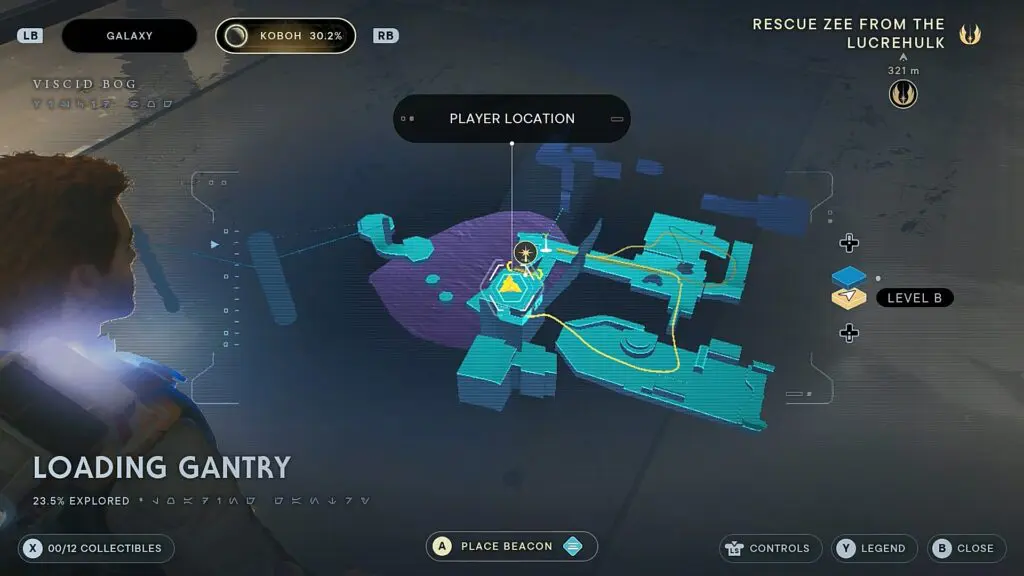
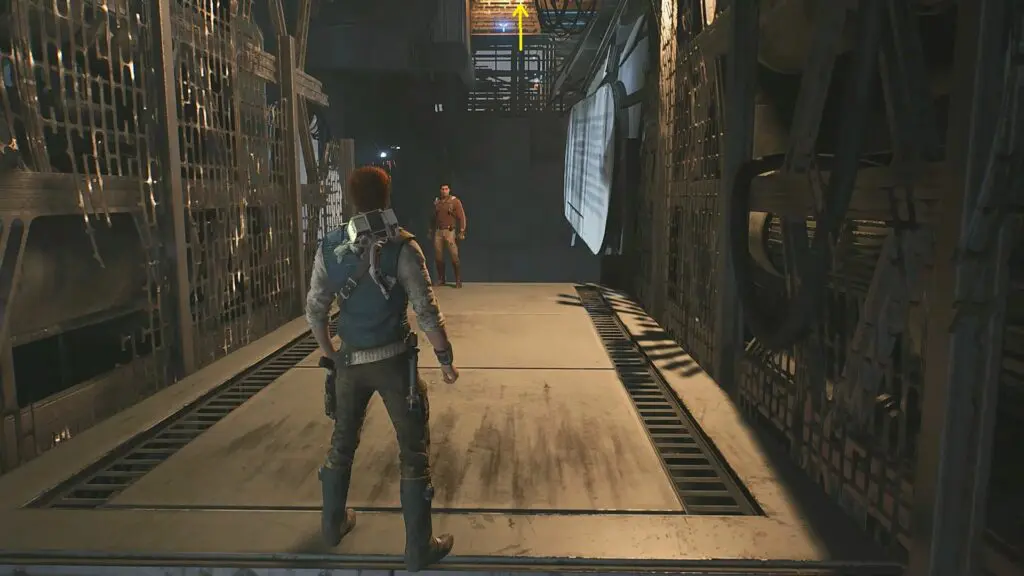
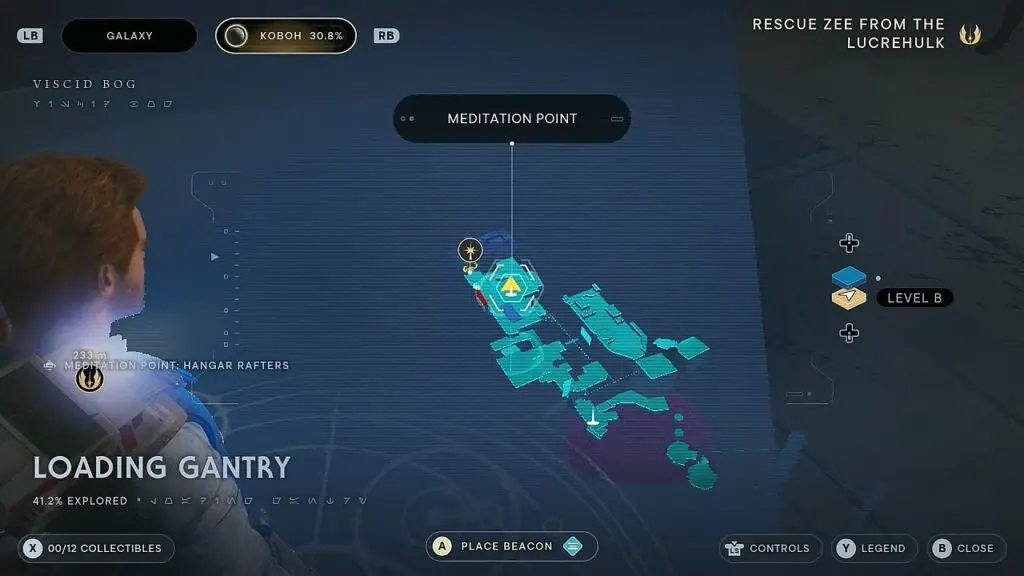
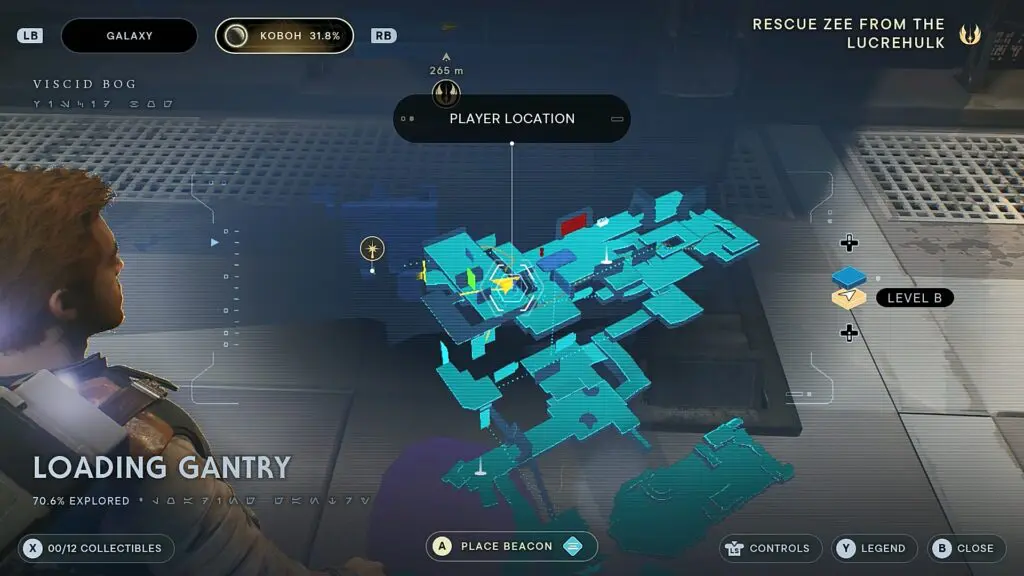
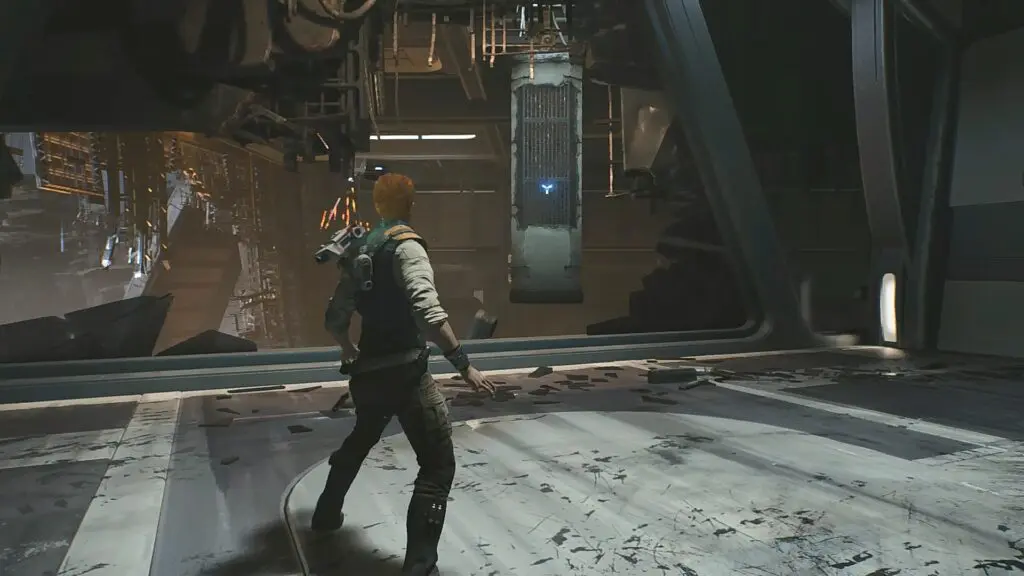
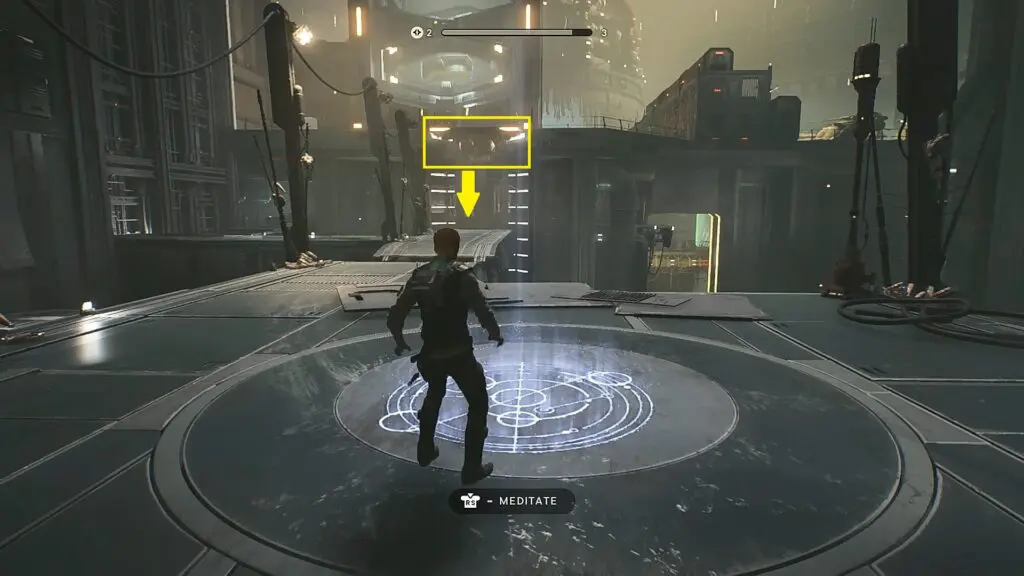
After landing from the ziplines, defeat the enemies there. Then proceed ahead to reach the Loading Gantry meditation point as shown in the picture below.
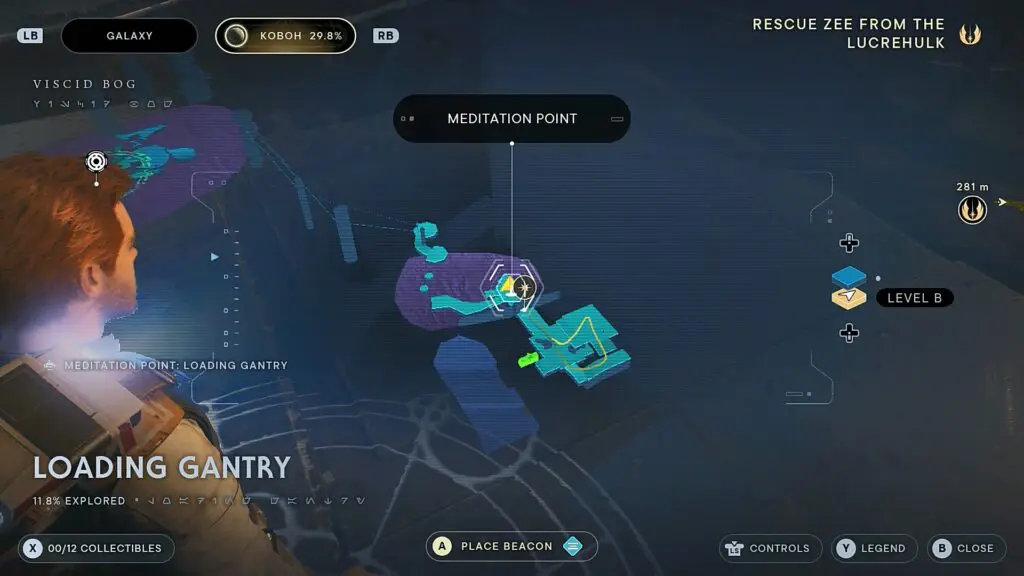
Loading Gantry
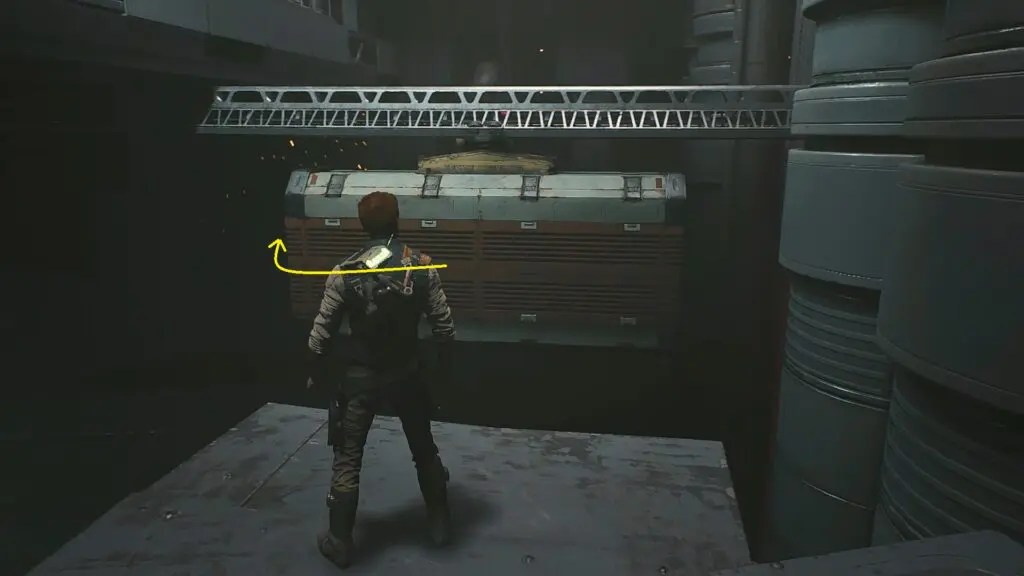
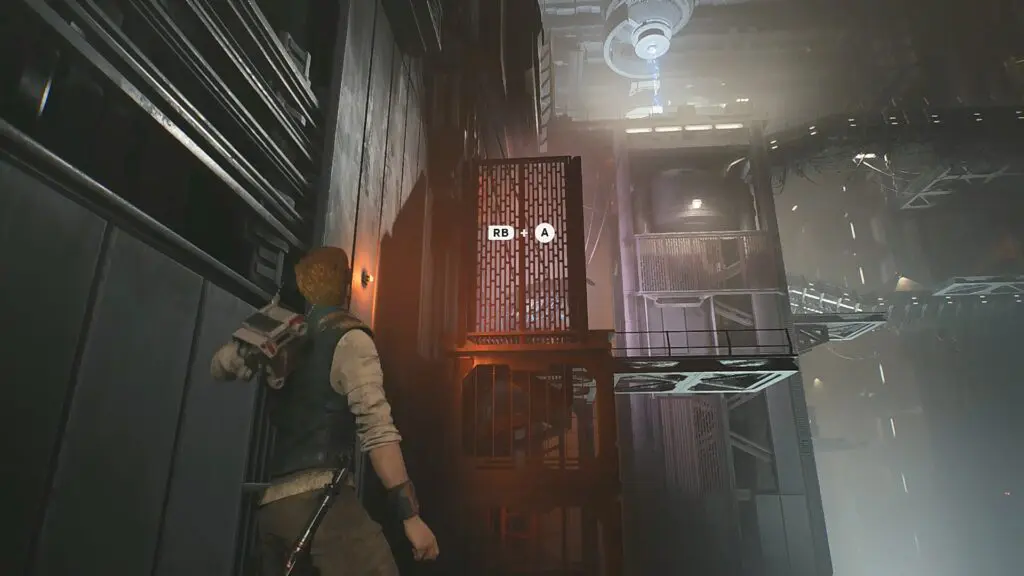
Squeeze through the door next to the meditation point. Defeat the enemies there then break the coupling to drop down the crate hanging in the air. Now use this crate to go to the other side as shown in the picture below.
Then go right and grapple on the wall grating as shown in the picture below. Go left on the grating and then climb to the roof (Location shown in the second picture below).
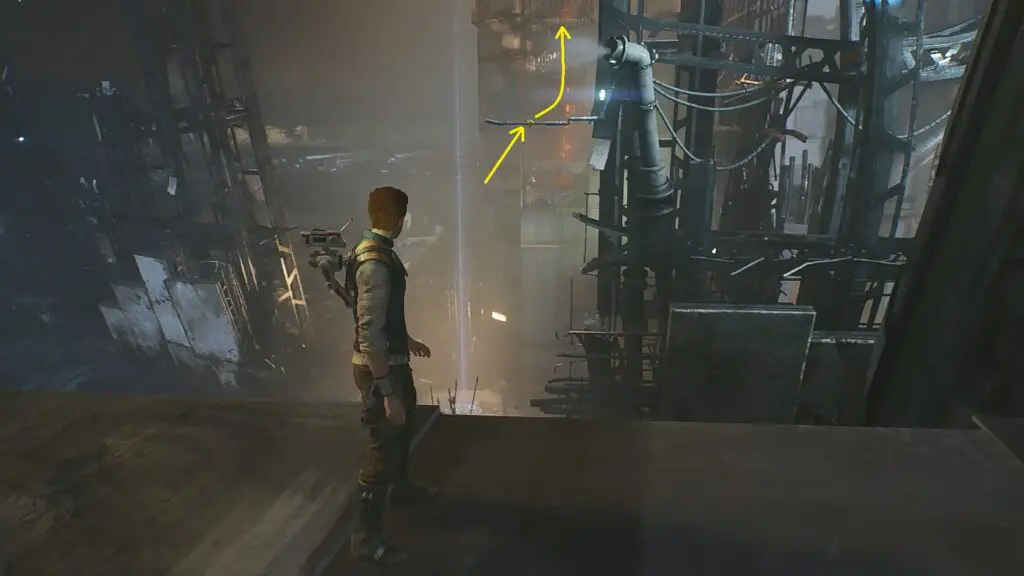
From there, use the pipe to reach the wall grating on the other side as shown in the picture below. Climb up the wall grating and then go left. Clim further up on the grating to reach the upper level. Then proceed ahead and run on the walls to reach the platform on the other side as shown in the second picture below.
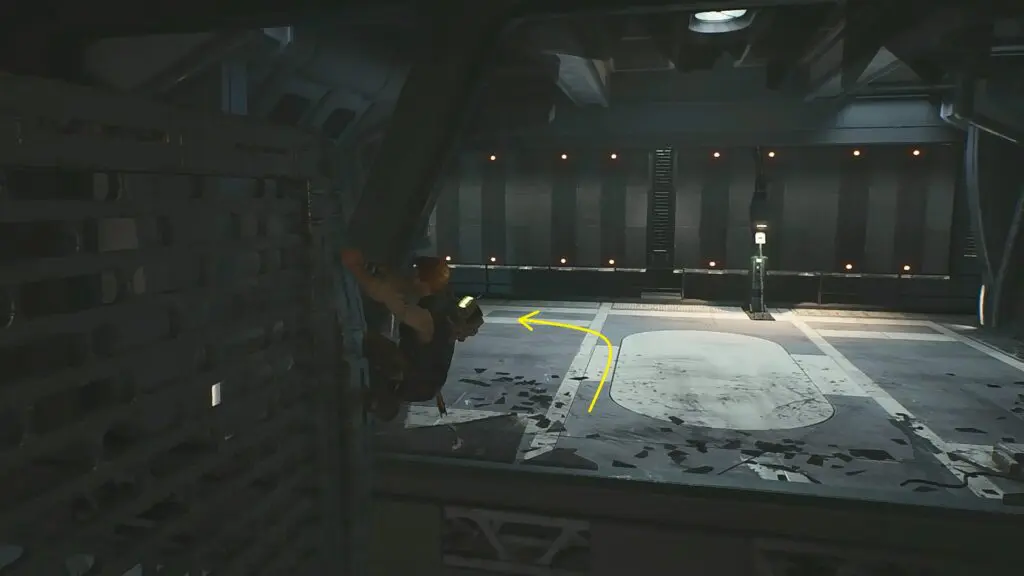
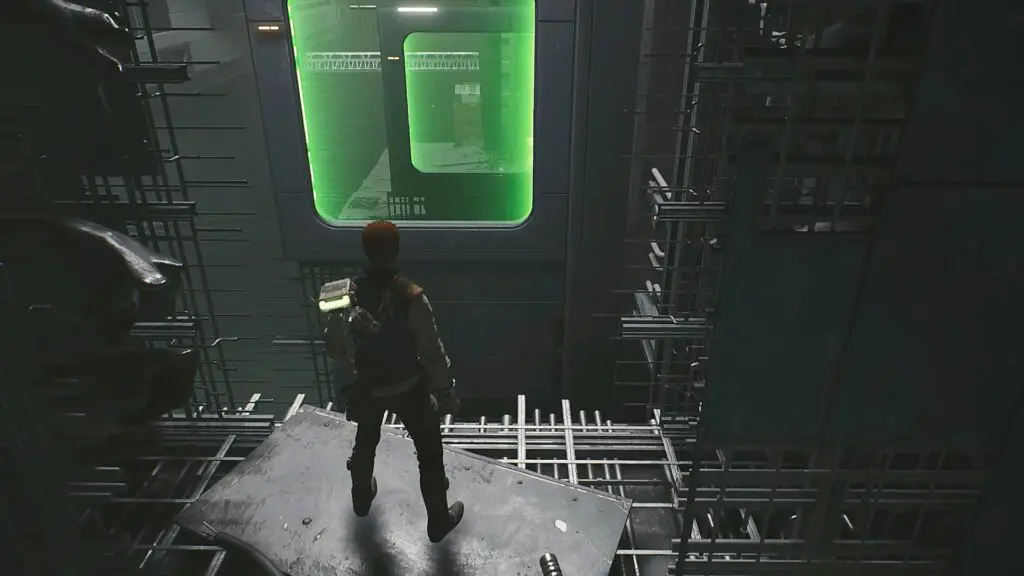
Climb up the stairs on the left side and proceed ahead. Then run on the wall to grab the wall grating on the opposite side as shown in the picture below. Then grab the roof grating and move to its edge. Then jump to the surface to reach the Hangar Rafters meditation point as shown in the second picture below.
Hangar Rafters
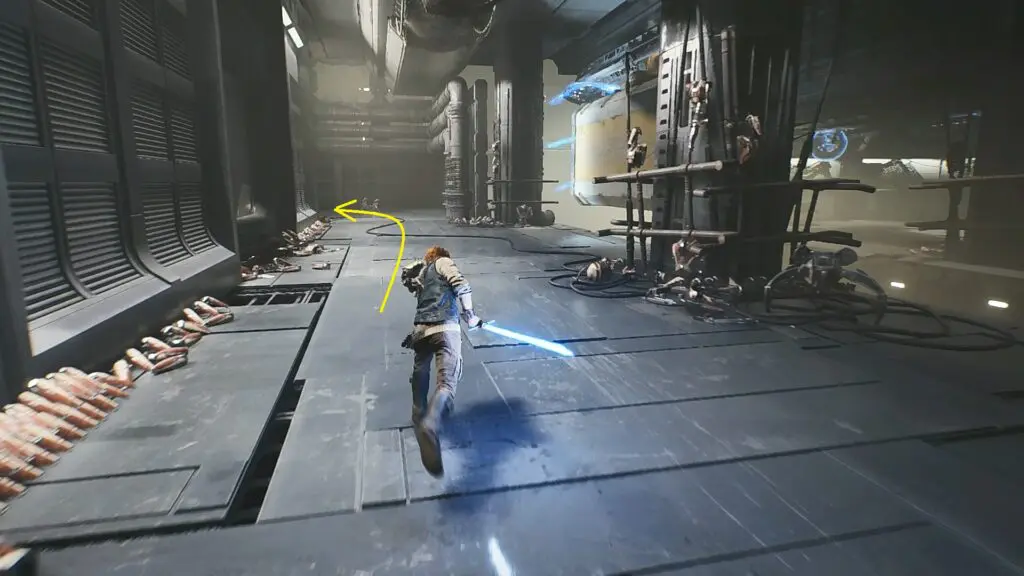
from the meditation point, go through the circular doors to reach the location shown in the picture below. Push the beam up ahead to make the wall grating come down. Then use it to climb up. RUn on the walls and dash to enter the green barrier ahead.
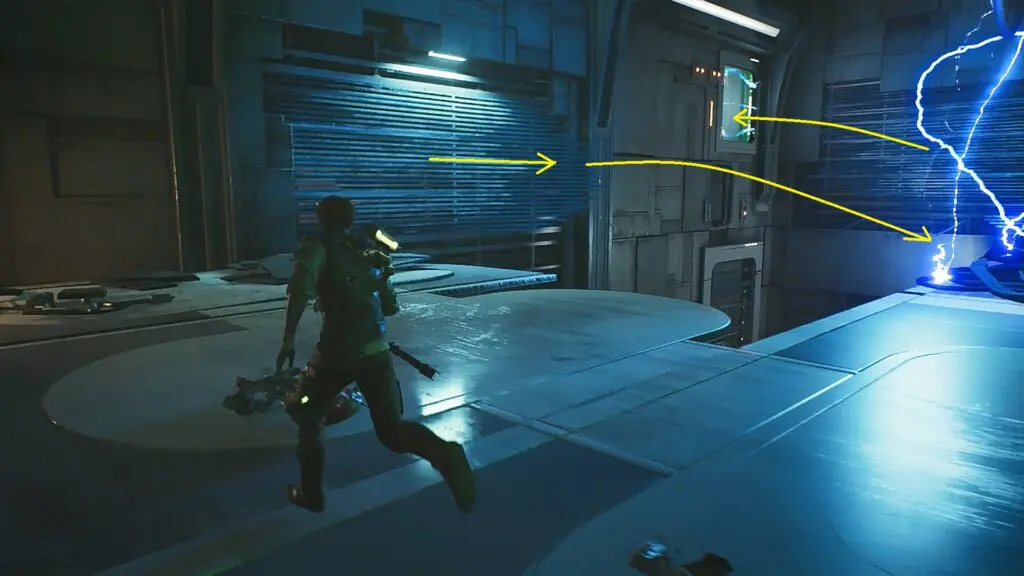
Defeat the enemies there then run on the walls to cross another green barrier as shown in the picture below. You have to time it correctly so that you pass the barrier when it is not electrified.
Proceed ahead and cross another green barrier. Then quickly start running on the wall and grab the wall grating ahead. Climb up the wall grating and then grab the roof grating. Move to its edge and then jump and grab the wall grating ahead. Now go right and jump on the surface as shown in the picture below.
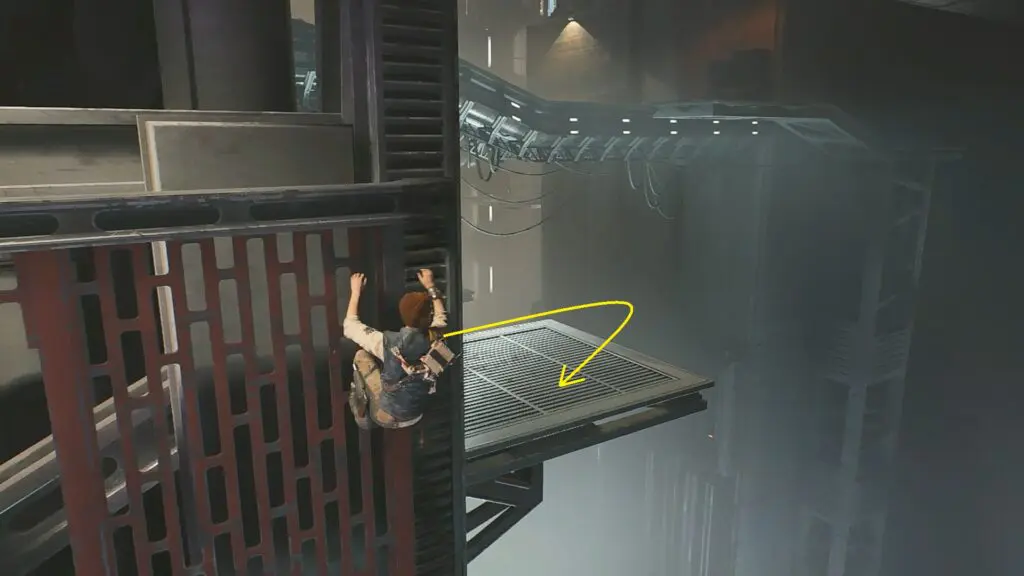
Proceed ahead and remove the blockage to clear the wall as shown in the picture below. Then jump and grab the wall grating ahead. Go to the right edge of the grating and jump to the right grating on the right side. Then make your way to the yellow hanging platform as shown in the second picture below.
From the yellow hanging platform, jump and grab the wall grating ahead. Then go down and make your way to the surface below. Defeat the enemies there. Then go down the ramp and jump across to go through the door as shown in the picture below. Here you can push the wall grating ahead to create a shortcut to Hangar Rafters meditation point. But for this objective, you need to go through the door on the left side as shown in the second picture below. Jump and grab the wall grating ahead. Then dash through the green barrier.
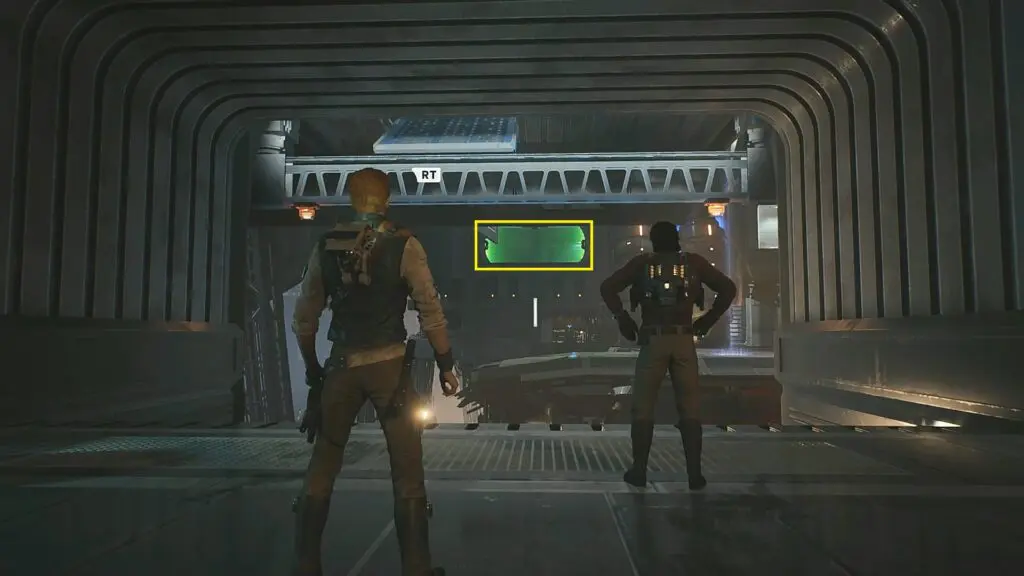
Defeat the enemies there. Then unlock the door to reunite with Bode. Now keep following Bode and he will take you to the location shown in the picture below.
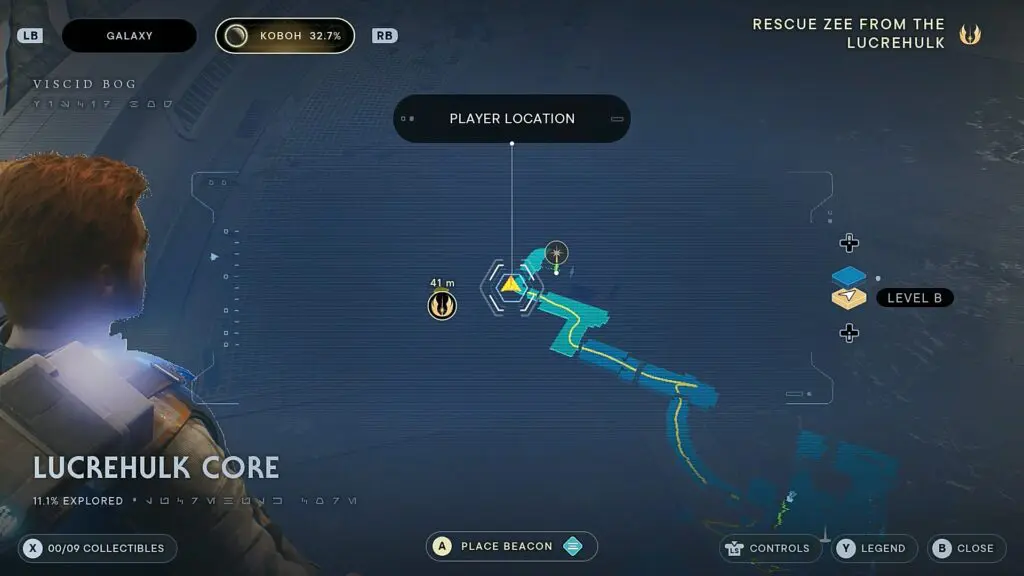
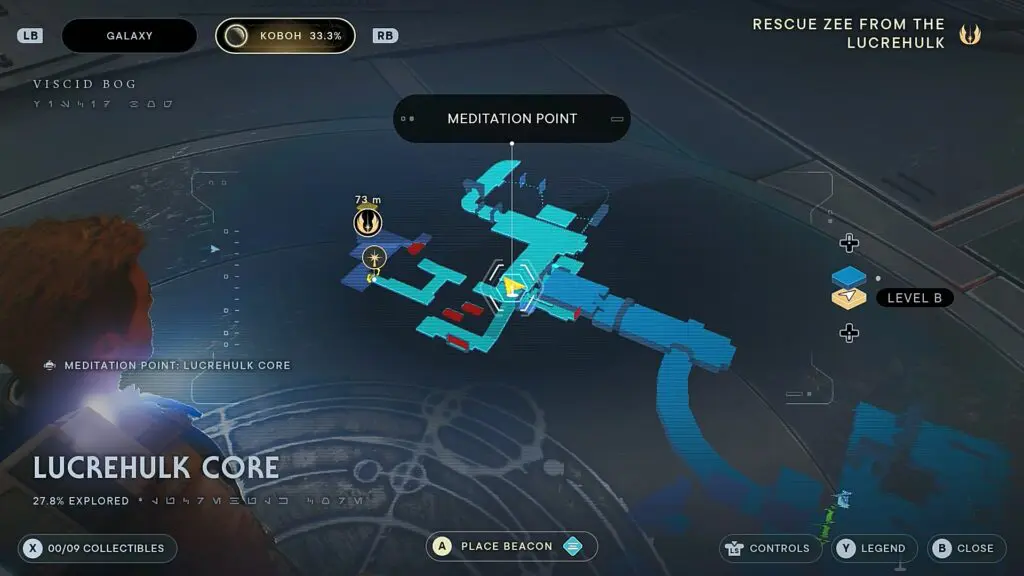
Lucrehulk Core
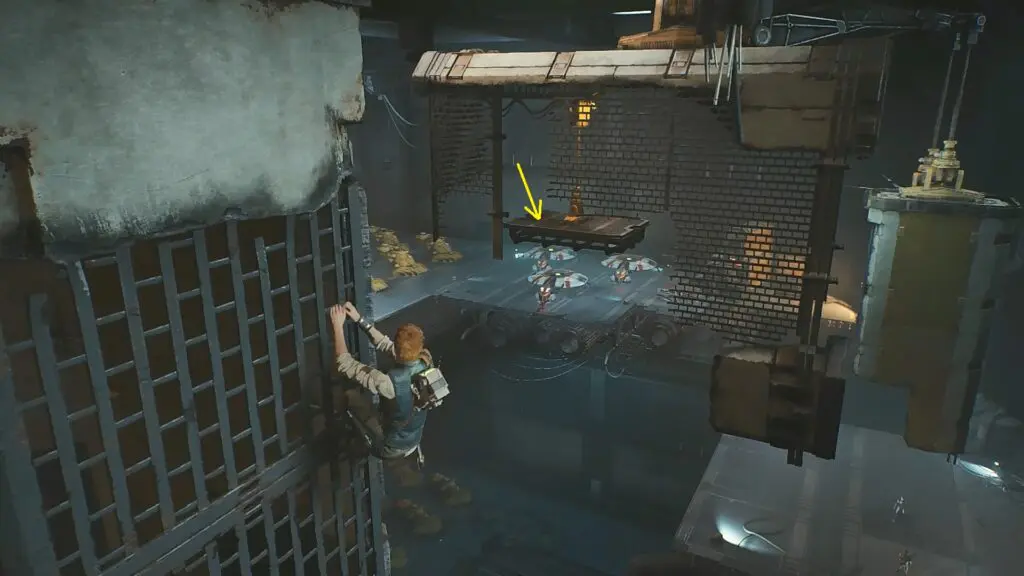
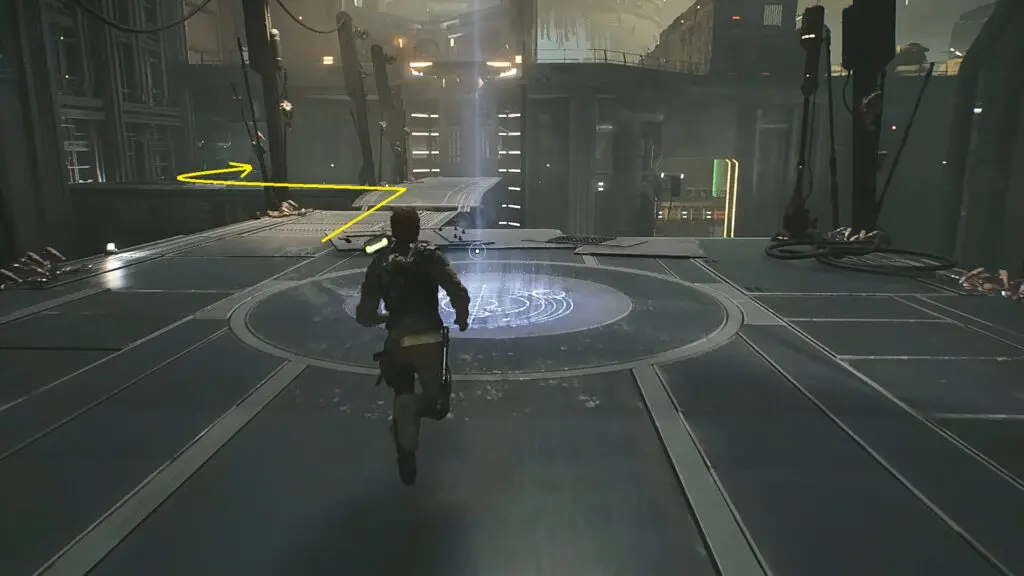
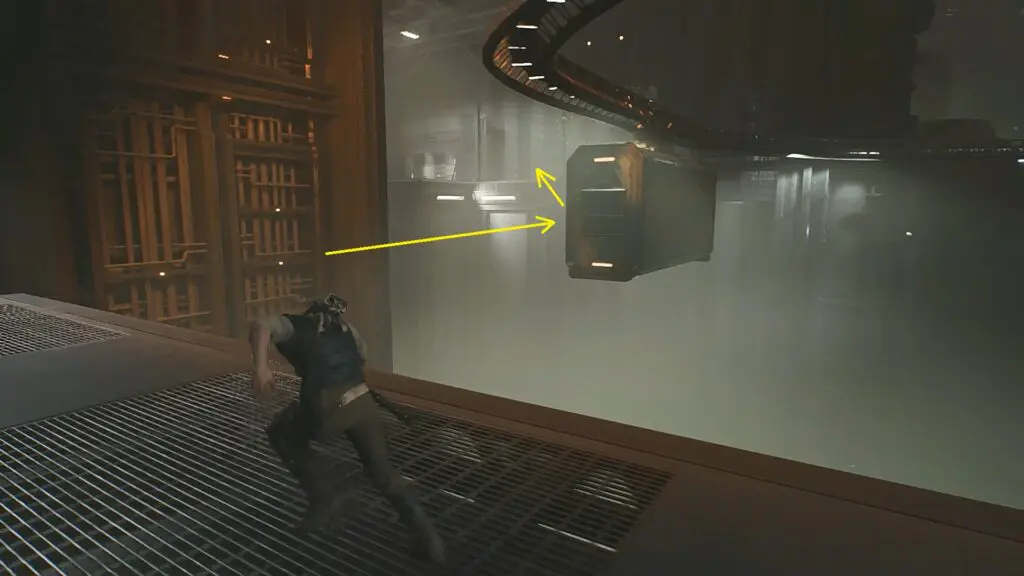
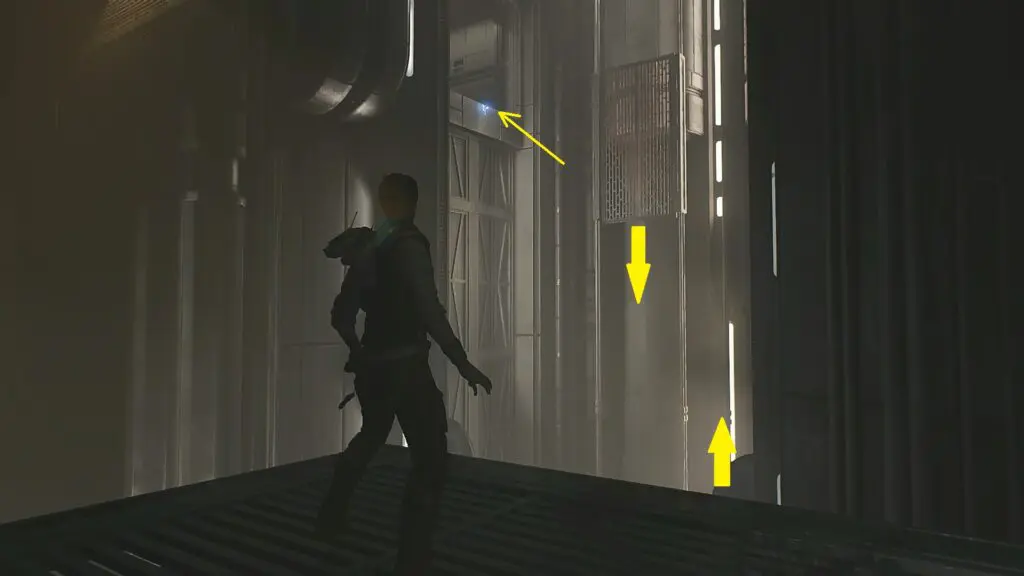
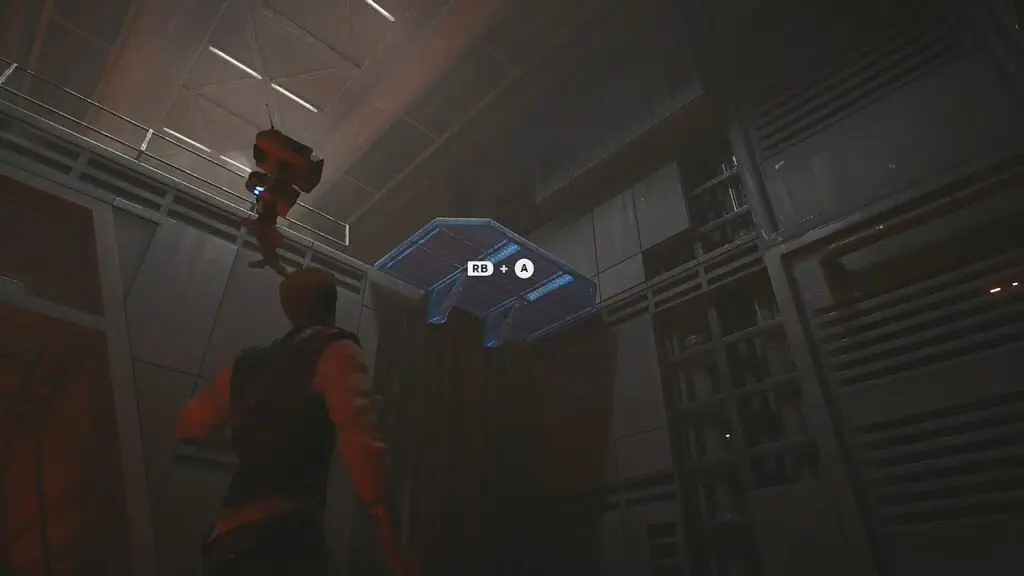
After Bode leaves again, open the door and dash through the green barriers on the right side as shown in the picture below to reach the surface ahead. There you will see some moving crates. jump and gram a moving crate and slide to its back side as shown in the second picture below.
When the crate is about to go through an electric barrier, jump down. Defeat the enemies there. Then climb up the stairs and open the door. Step on the lift on the right side to go down to the Lucrehulk Core meditation point. From there, proceed in the path shown in the second picture below. There will be turrets on the path. Hide behind objects to avoid bullets. Then proceed when you find the right time. After the first turret, you will reach the location shown in the third picture below. Jump down to the surface below and go through the green barrier.
Defeat the enemies there and proceed in a linear path as shown in the pictures below. Avoid the turrets in the path and eventually, you will reach the location shown in the third picture below. You will fight Bedlam Raider there and reunite with Bode.

After the fight is over, unlock the door there. Then jump to the platform ahead. There you will find moving crates. When the crates turn, run on its wall and jump to reach the other side as shown in the picture below.
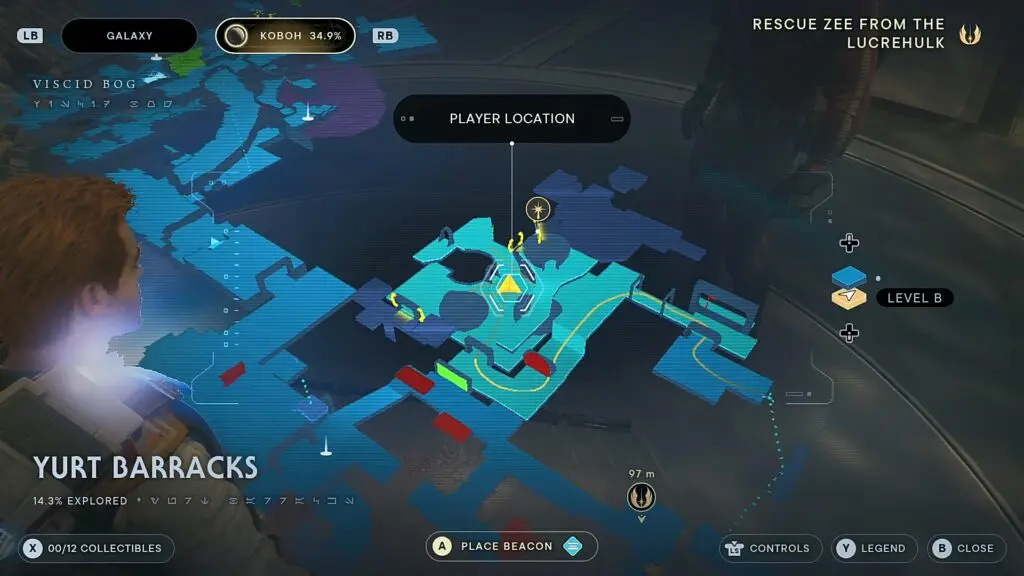
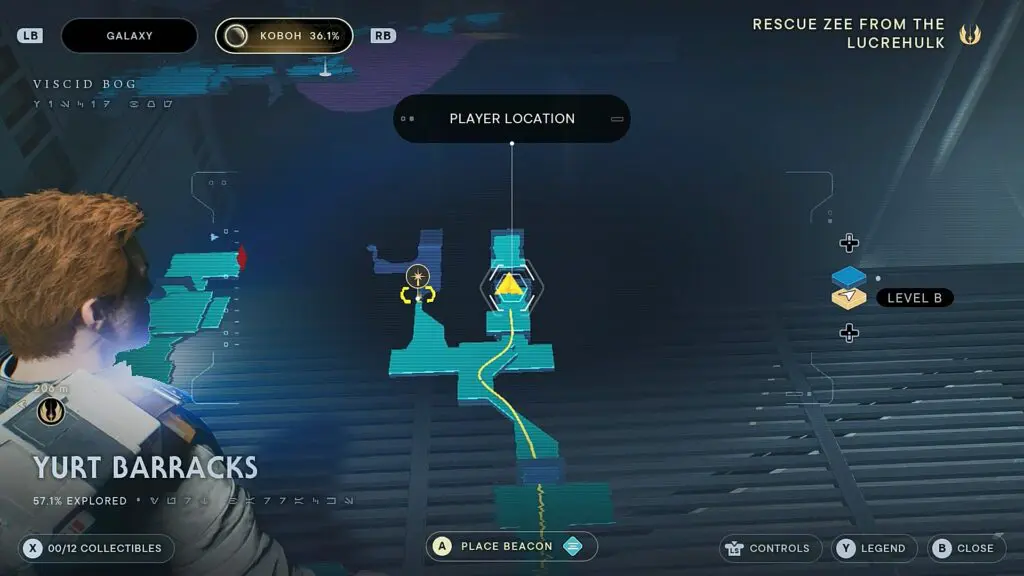
Yurt Barracks
Follow Bode and he will lead you to Yurt Barracks as shown in the pictures below.
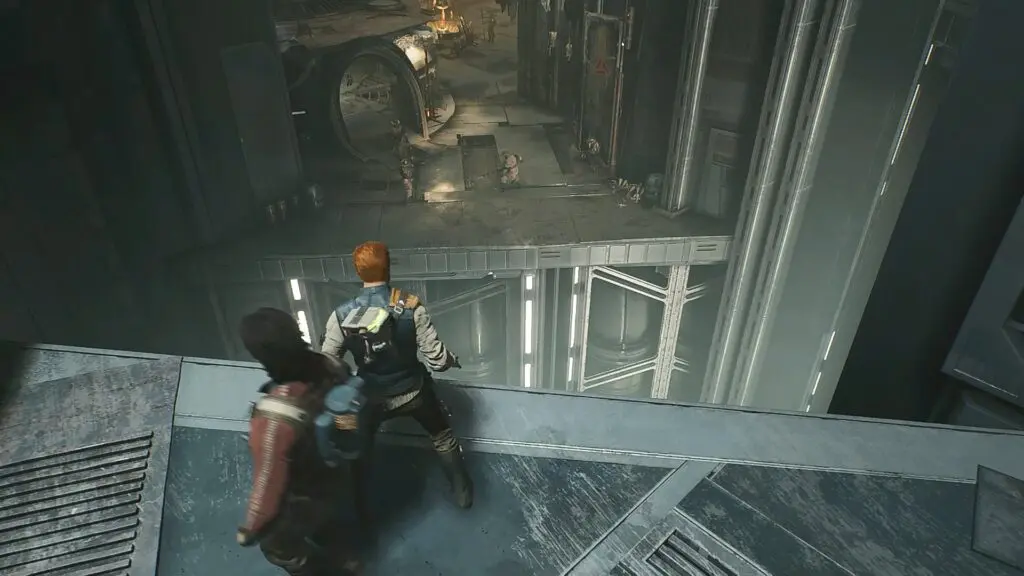
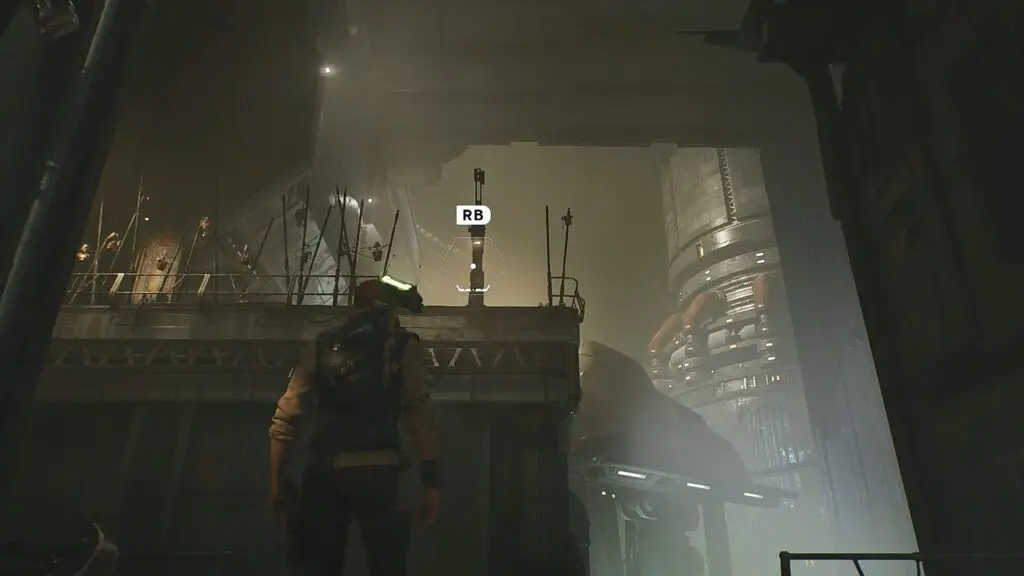
Defeat all the enemies there then ask Bode to drop down the rope as shown in the picture below. Climb up using the rope and defeat the enemies there. Then open the door there and follow Bode. He will leave you at the location shown in the second picture below.
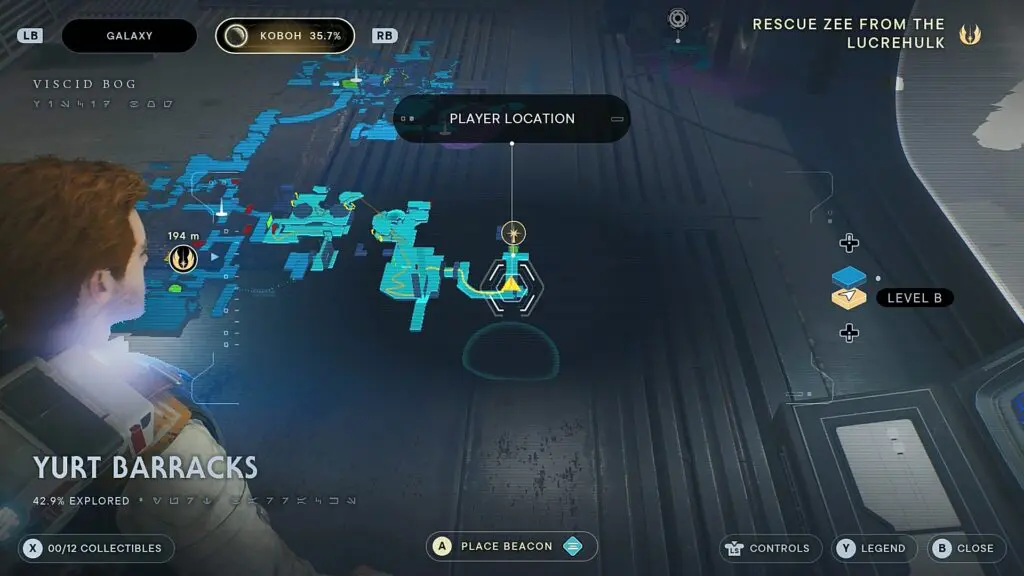
After Bode leaves you, cross the bridge and squeeze through the wall to reach a dark area. Jump down and squeeze through another wall to come out from the dark area at the location shown in the picture below.
Jump down to the lower level. Then turn around and jump down to the further lower level as shown in the picture below. Proceed ahead and turn right. Then squeeze through the wall on the right side as shown in the second picture below.

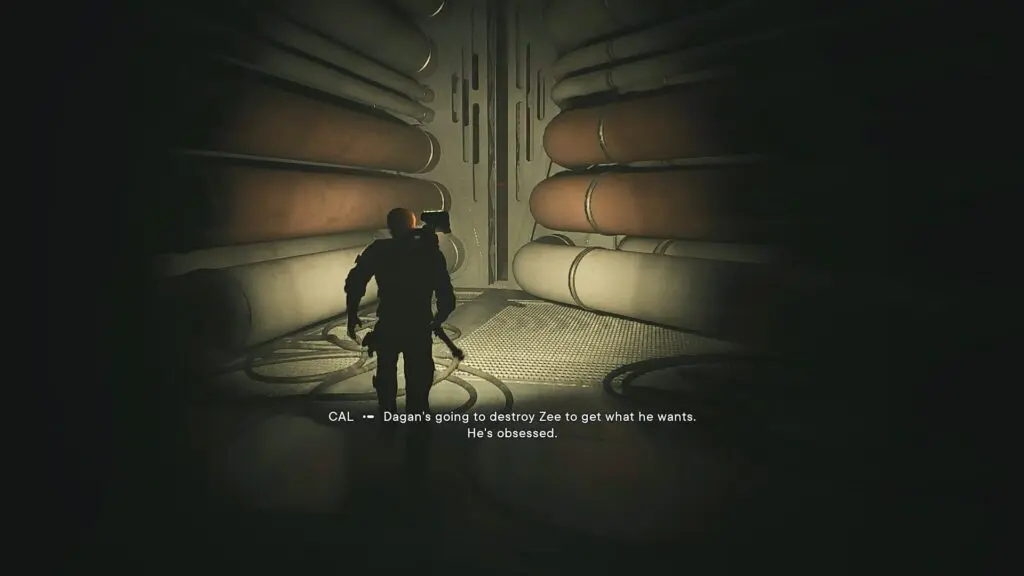
Now squeeze through the pipe on the left side. At this point, you will be attacked by Rayvis. After the fight, you will drop down to Generator Underbelly. Here you will learn Lift and Slam abilities. Use the ability to destroy turrets. Then proceed ahead to reach the Generator Underbelly meditation point.
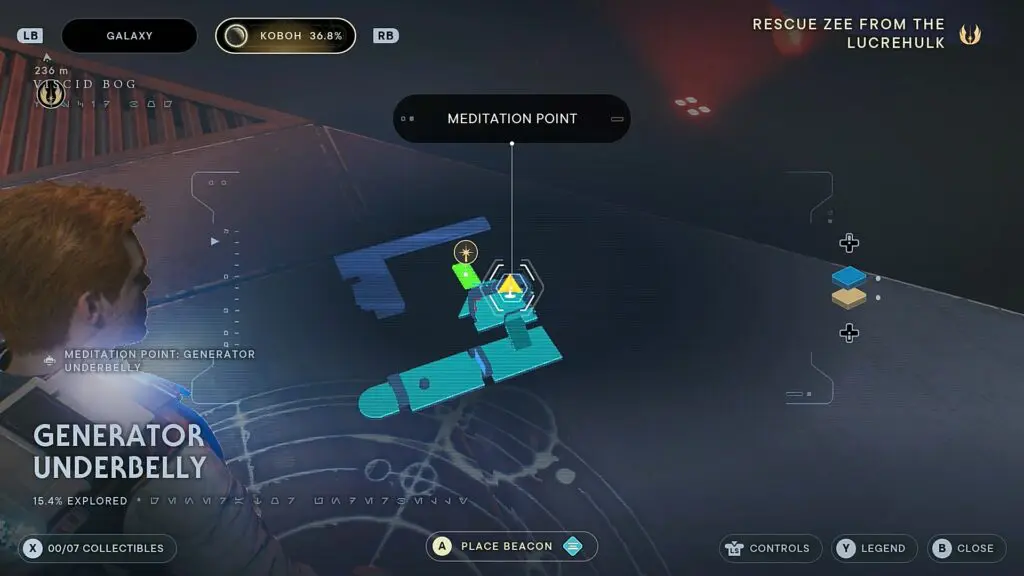
Generator Underbelly
In front of the meditation point, you will see a platform below. Use lift ability to move it up. Then jump on the platform to go across. Proceed ahead and use the ability to lift a platform again and use it to climb the wall to reach the upper level.
Here you will see a wall grating as shown in the picture below. Use your Slam ability to move it down. The jump and grab the grating and climb to the top.
Proceed ahead and use the Lift ability to move a wall grating up. Grab it and climb up. Then go to the right edge of the grating. From there, Jump to the platform as shown in the picture below. Use the slam ability on the roof grating ahead to bring it down. Then use it to reach the surface on the other side.
Proceed ahead and you will reach an area with enemies on top of a hanging platform. Use slam to bring down the platform. Then jump down. Use abilities to bring one wall grating down and one up. Then use these gratings to reach the opening on the top as shown in the picture below.
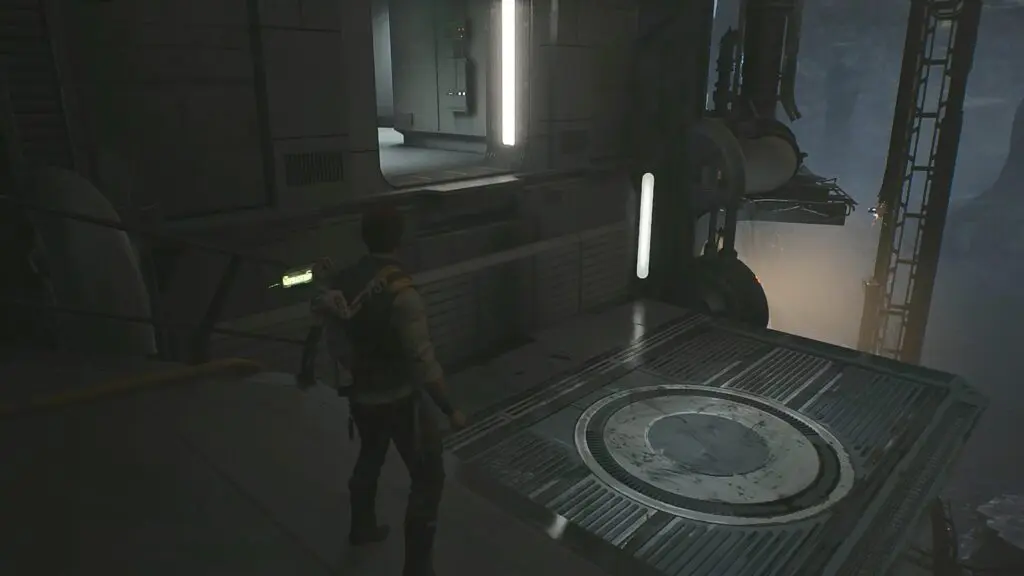
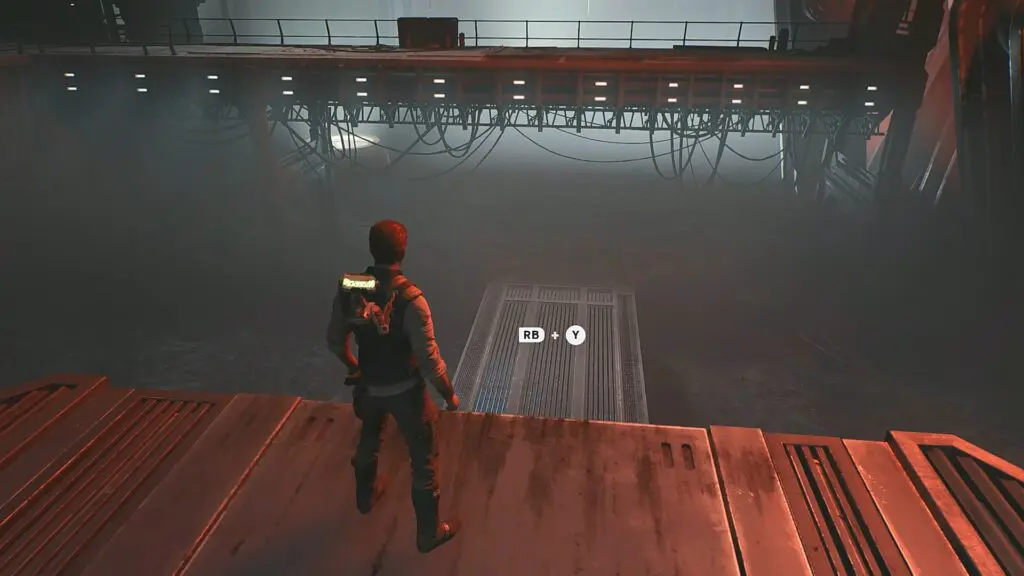
Proceed ahead and bring down the lift in the next room as shown below. Then use it to go up. Proceed ahead and use the elevator to go up. Hop off the elevator and continue on the linear path to reach Lucrehulk Core meditation point.
Lucrehulk Core
From the meditation point, go straight ahead and bring down the lift as shown in the picture below. Then use it to go up. Go right and use the grapple to climb to the roof. Then squeeze through the pipes there. After coming out, lift the wall grating as shown in the second picture below, and use it to go to the other side.
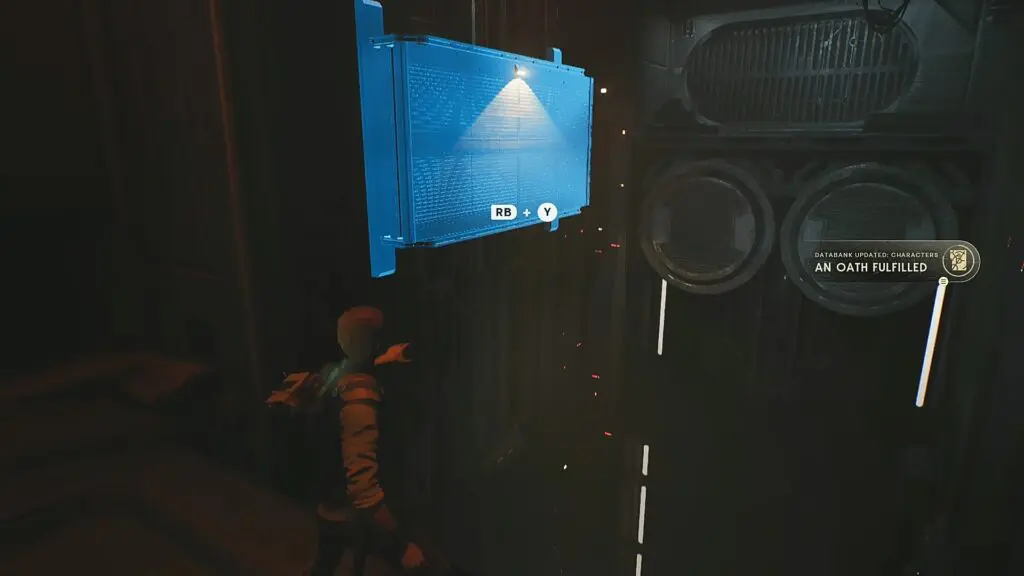
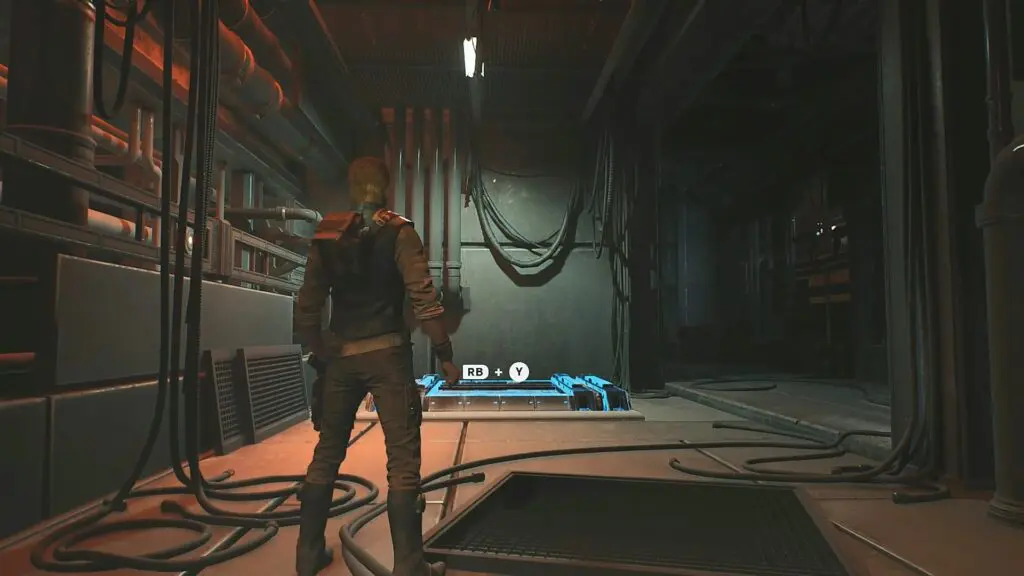
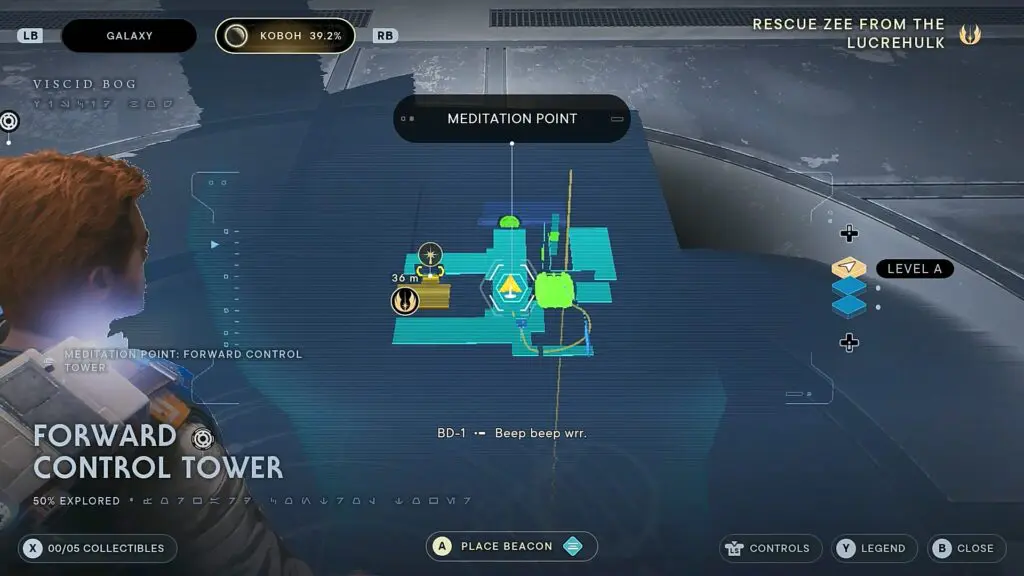
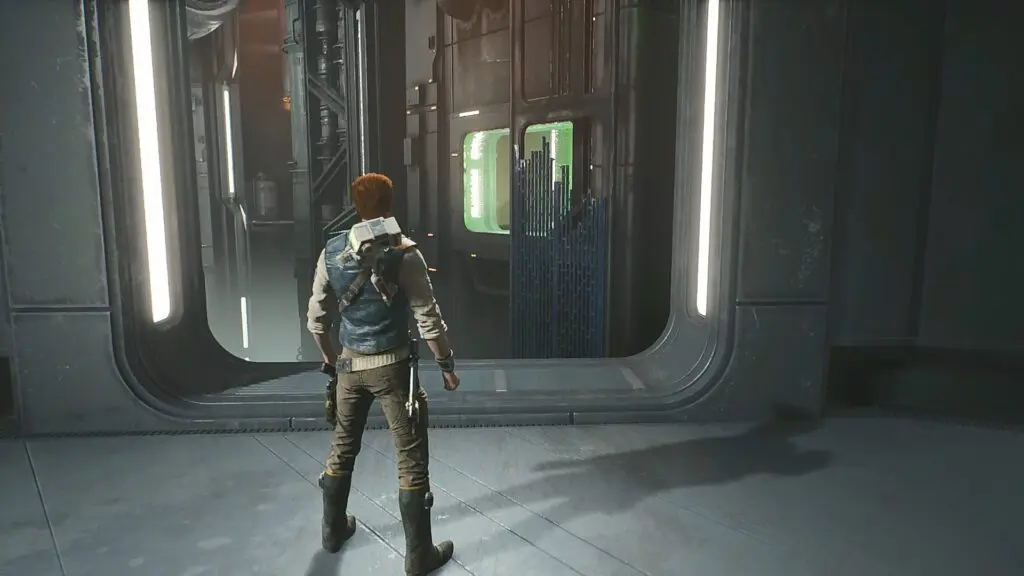
Squeeze through another pipe there and use the lift to open the hatch as shown in the picture below. Then proceed ahead to reach the Forward Control Tower meditation point. From there, go to the room on the left side to find Zee. This will complete the objective.