This step-by-step collectibles guide will show you the locations of all Lorestangir & Face in Chapter 4 of Senua’s Saga Hellblade II (2024).
Also Read: Senua’s Saga Hellblade 2: All Chapter and Collectables Guide
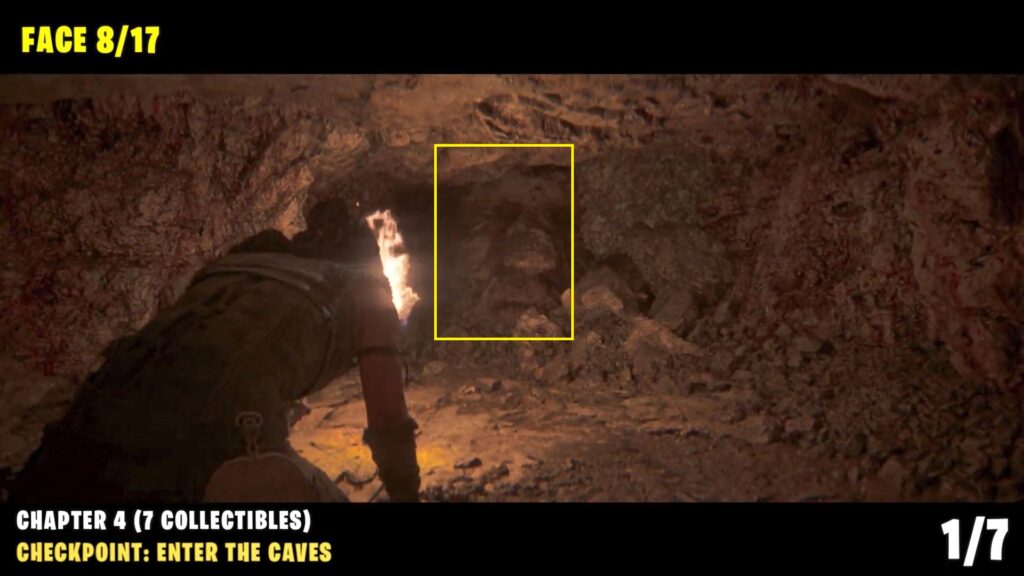
1) Face
Checkpoint: Enter the Caves
The stone face is available at the start of the chapter. Inside the cave, drop down from the ledge and duck through a cave with a low ceiling path. Stoneface is on the left wall.
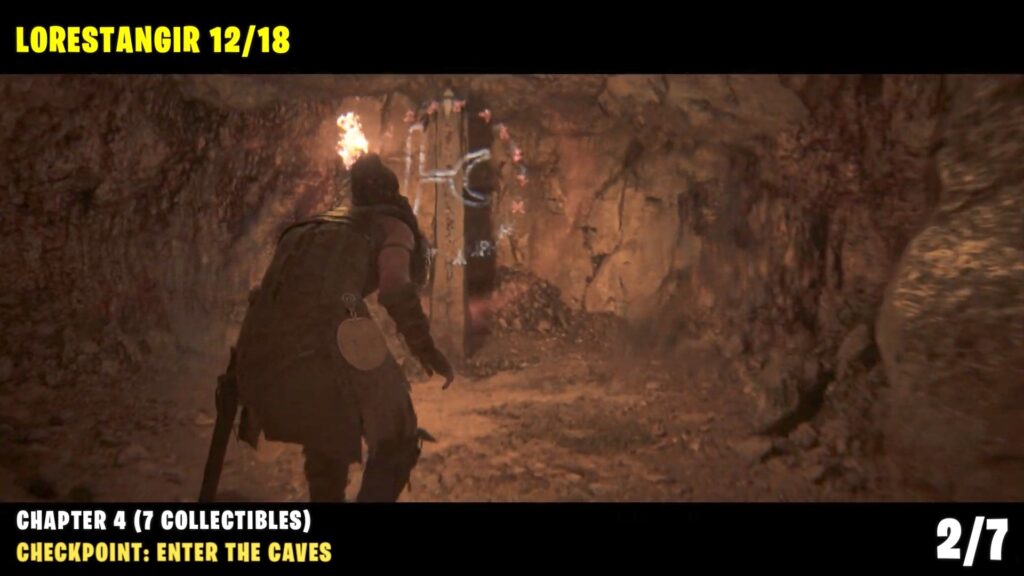
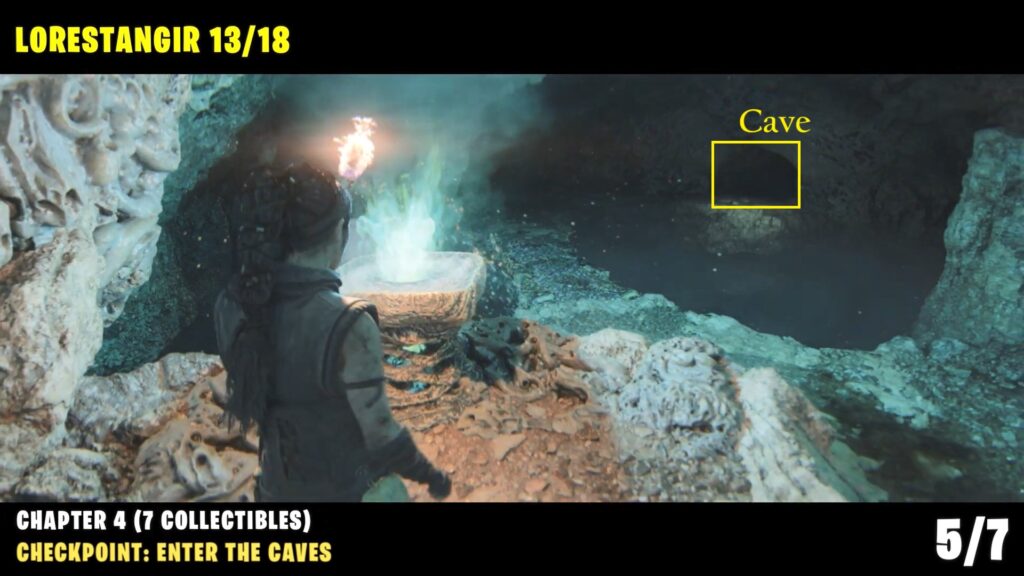
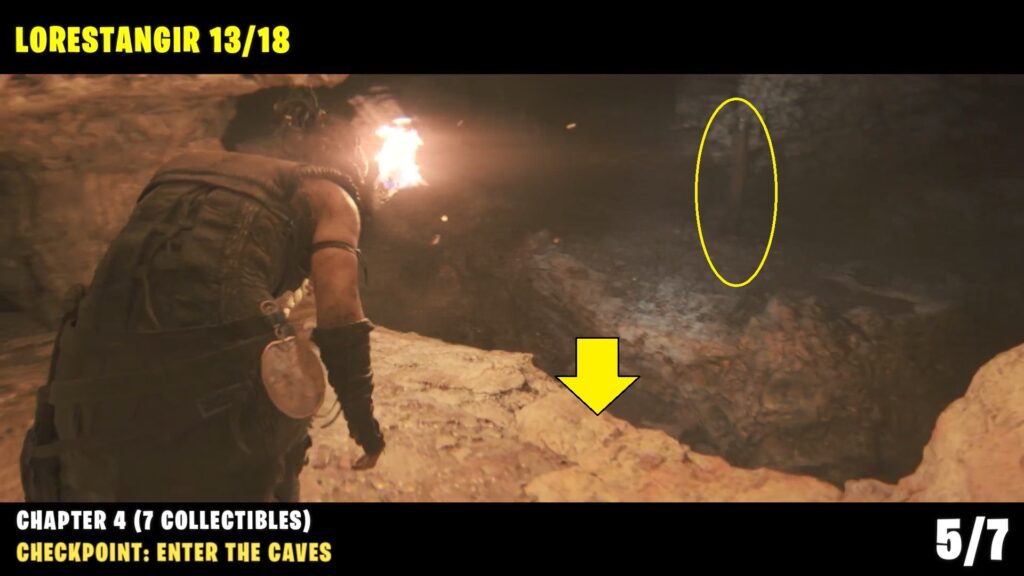
#1 Lorestangir
Continue to follow the main path until you drop down into a larger area with a small puddle of water.
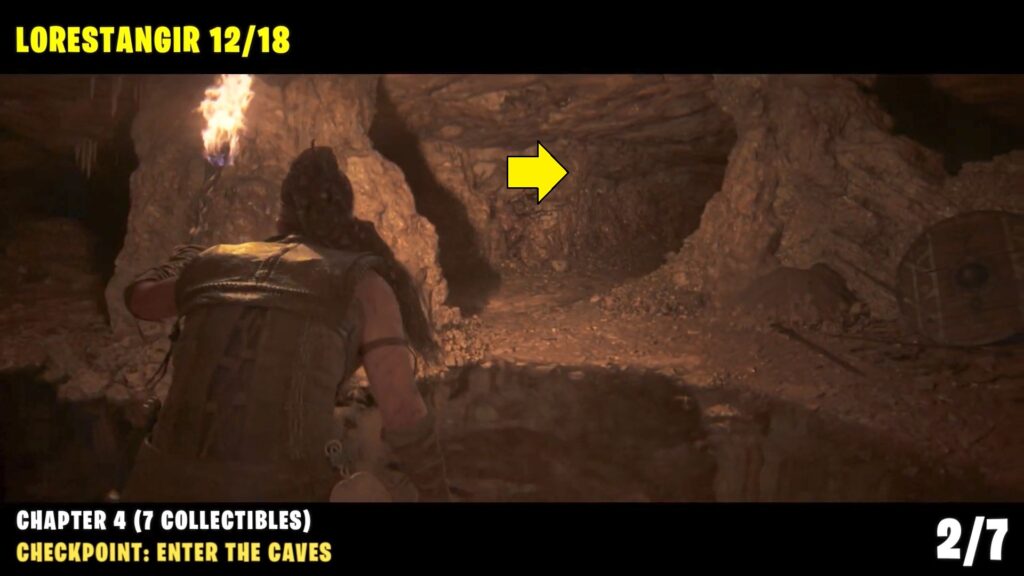
Head to the right side and climb up another ledge to reach the Lorestangir totem.
2) Face
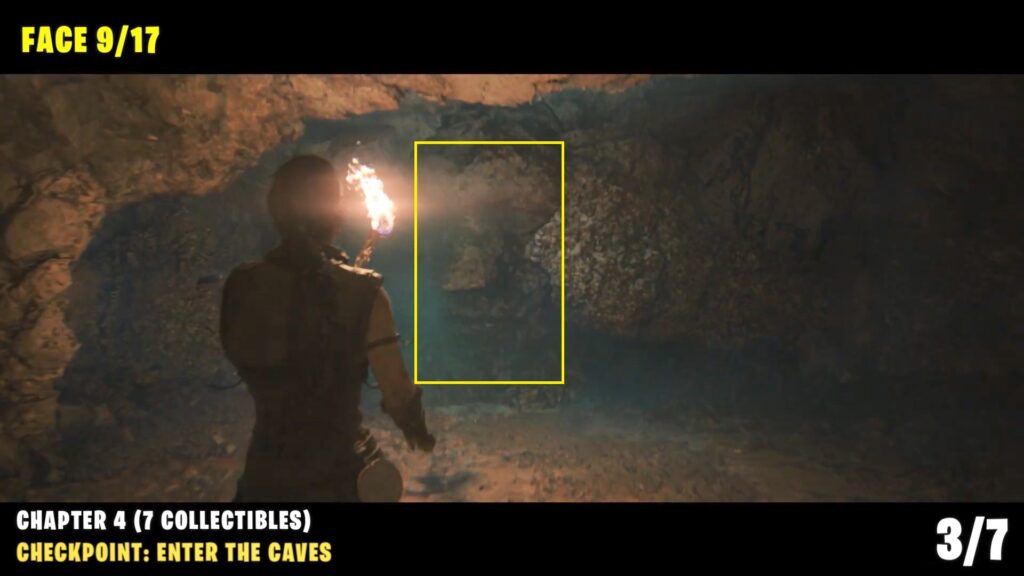
As the chapter progresses you will reach the second blue flame brazier.
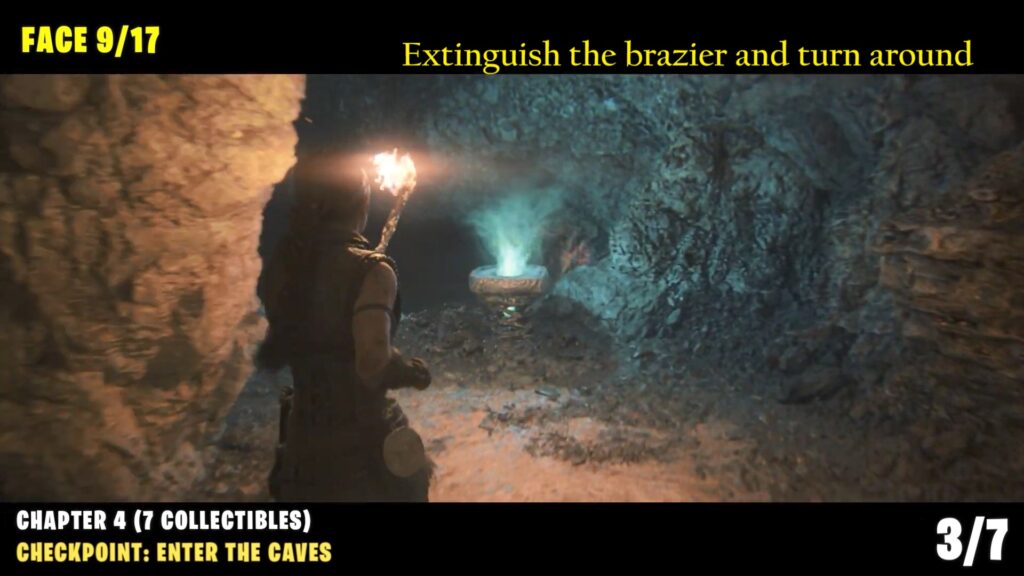
Extinguish the brazier and then turn around to see the stone face on the wall. This stone face is visible after you extinguish the brazier.
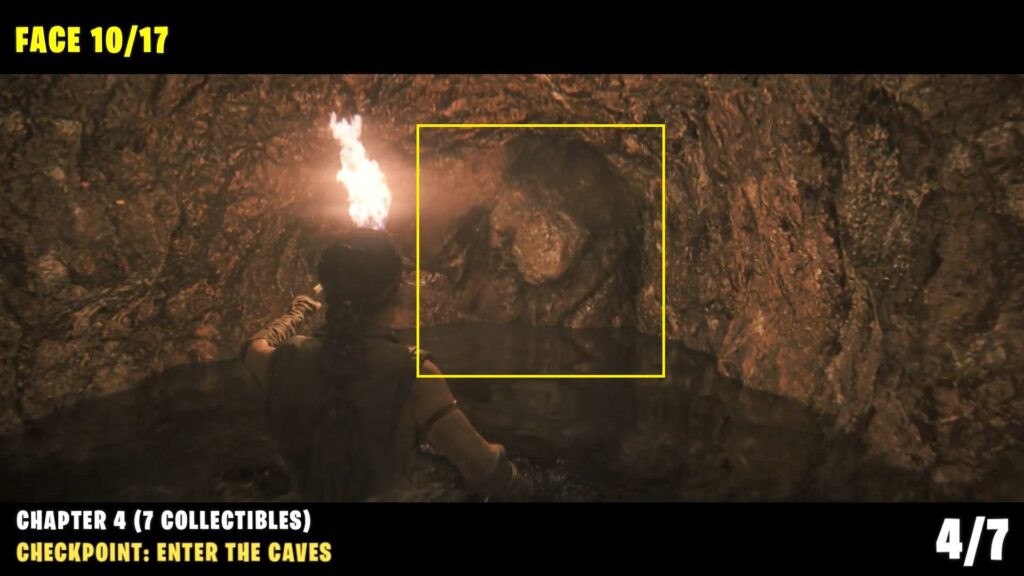
3) Face
Continue to follow the main path until you drop down into a flooded area.
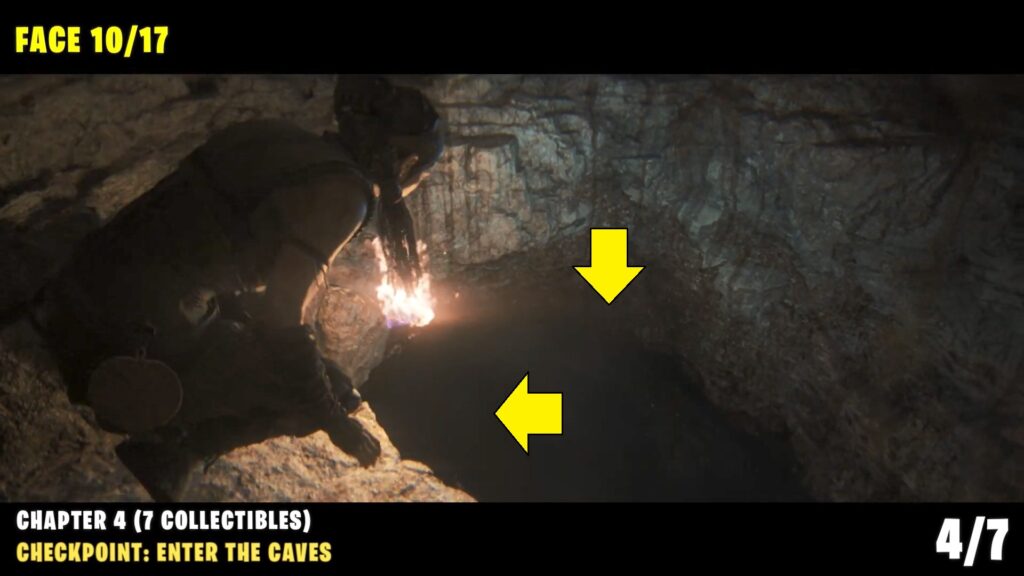
Turn around and proceed until the end of the flooded path to find the Stoneface. (This is the opposite of the story path).
#2 Lorestangir
Follow the main story, until you need to light a brazier after the waterfall. Cross over the bridge and enter the low-ceiling cave.
As you progress further, look to the right side for a place where you can drop down to reach the Lorestang totem.
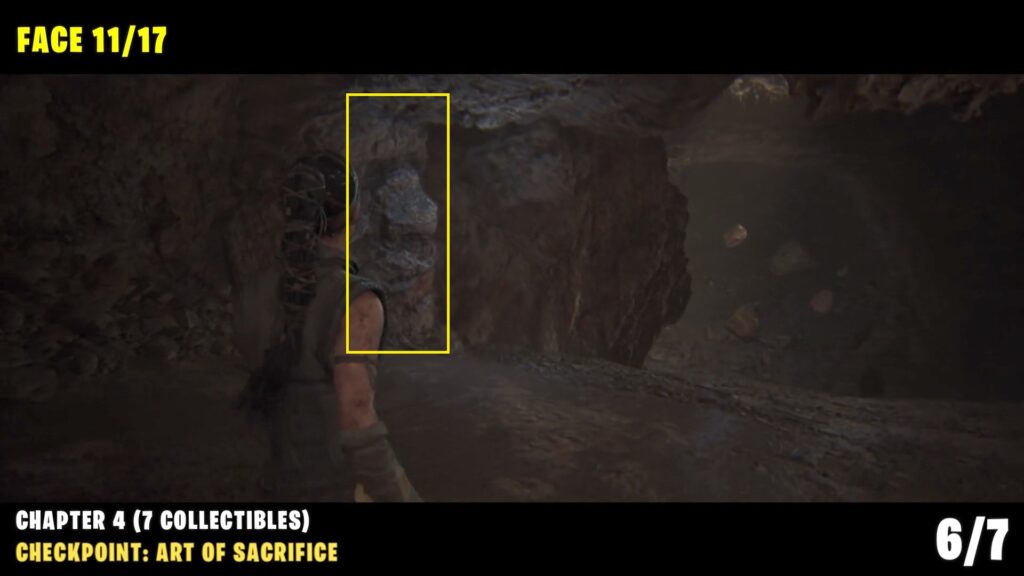
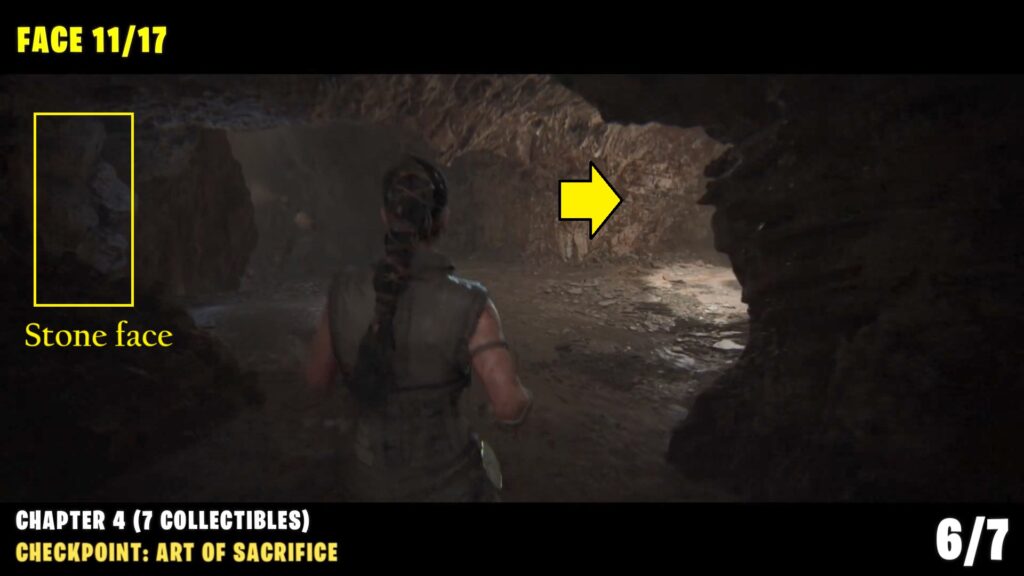
4) Face
Checkpoint: Act of Sacrifice
Available much later in the chapter when you are forced to navigate without your sword
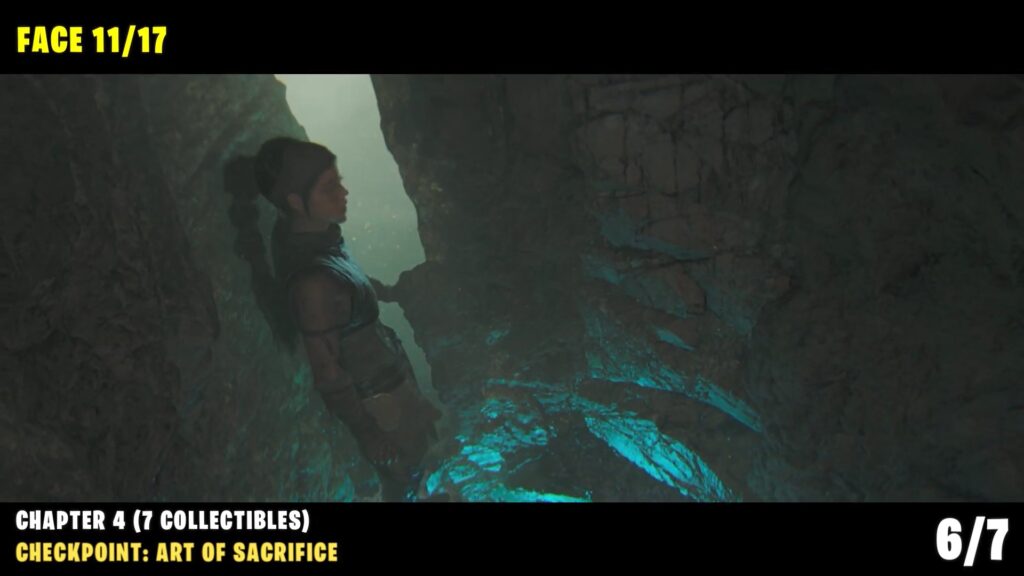
Walk over the think ledge and squeeze through a gap. Follow the linear path till the fork. look to the left to find this face on the rock.
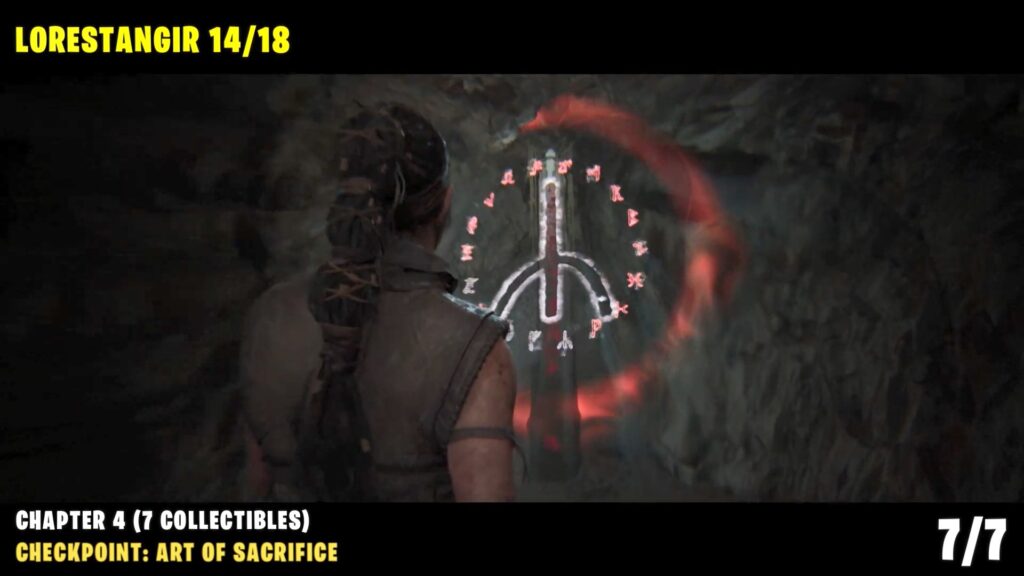
#3 Lorestangir
Checkpoint: Act of Sacrifice
Return to the previous fork along the path and then follow the path to the right until you drop down from the ledge.
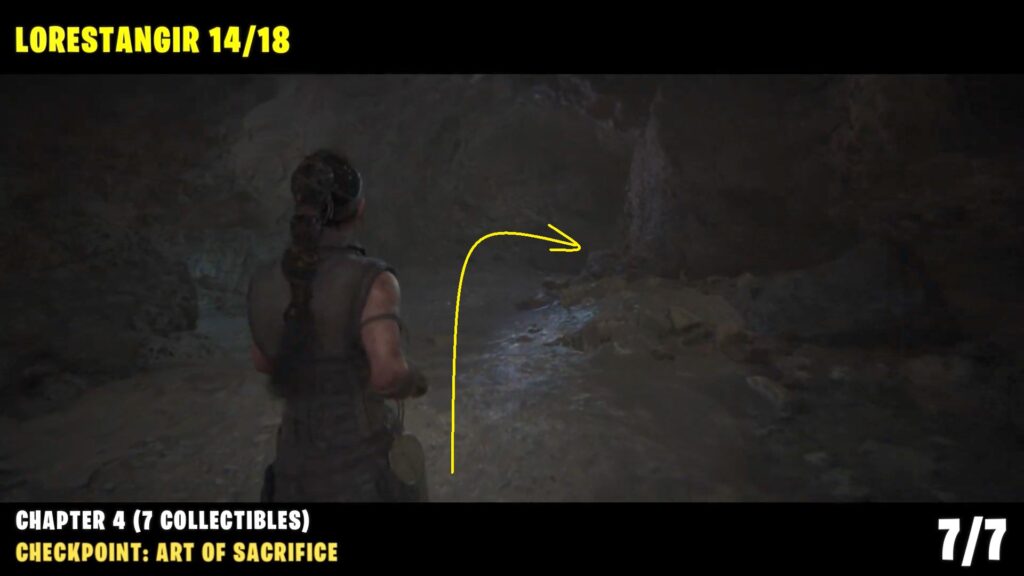
Go straight and take the right path to reach the Lorestangir totem.