Silent Hill 2 Remake: Clock Puzzle (Blue Creek Apartments)
This guide shows how to solve the Clock Puzzle in the Blue Creek Apartments in the Silent Hill 2 game, which was released on 6th October 2024. Click here for a video walkthrough.
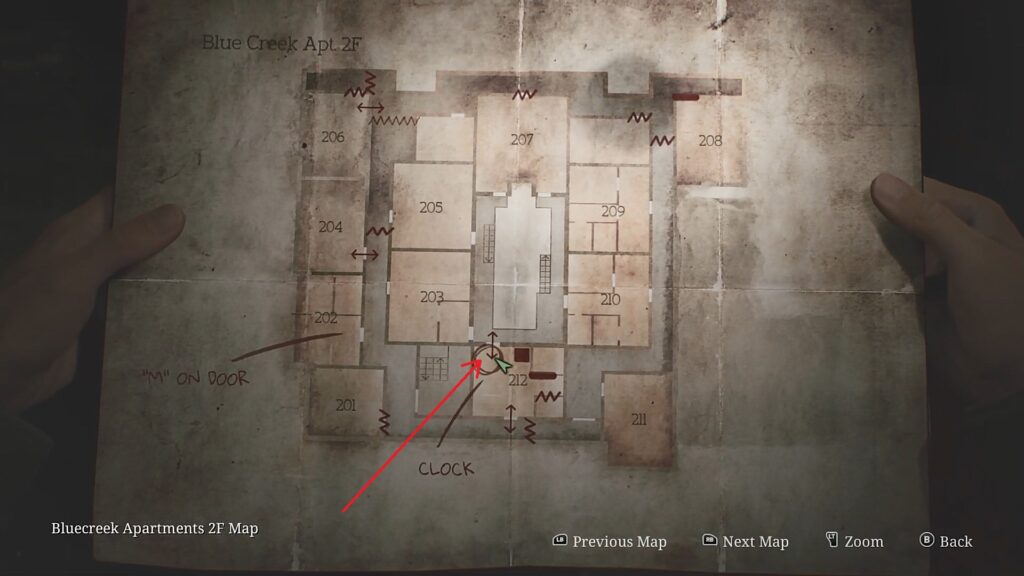
1) Reach the Clock Room
The location of the clock room (Room 212) is shown in the pictures below. To solve the clock puzzle, you need to find the Hours, Minutes, and Seconds hands. Inserting the hands into the clock and placing them in the correct position opens the doors marked ‘H’, ‘M’, and ‘S’ respectively.
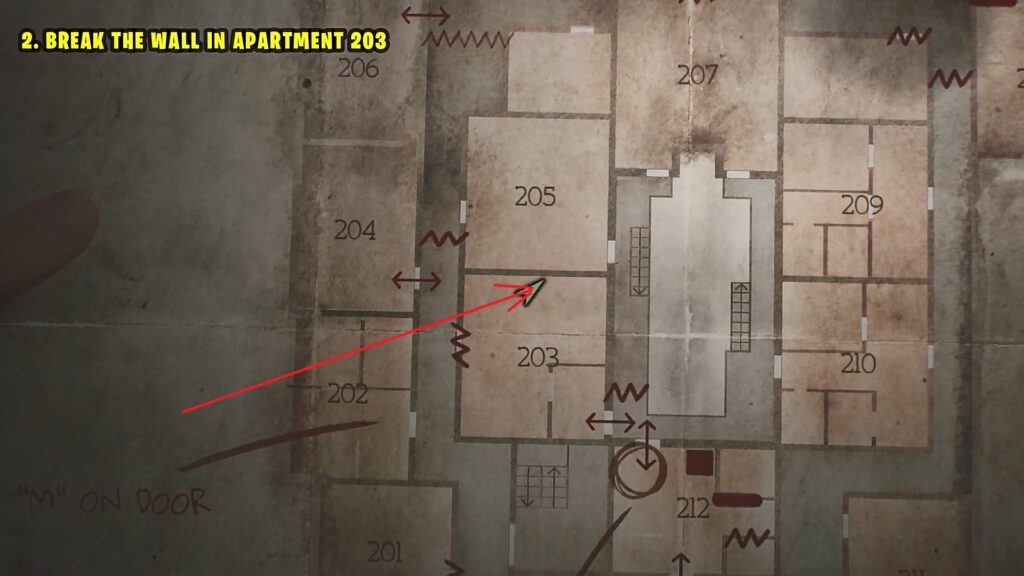
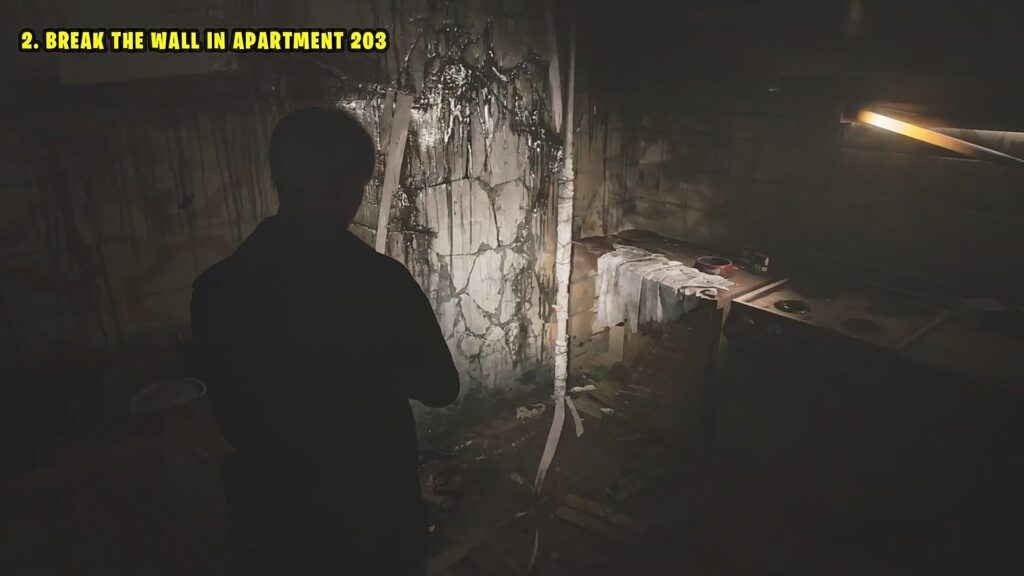
2) Reach the Third Floor
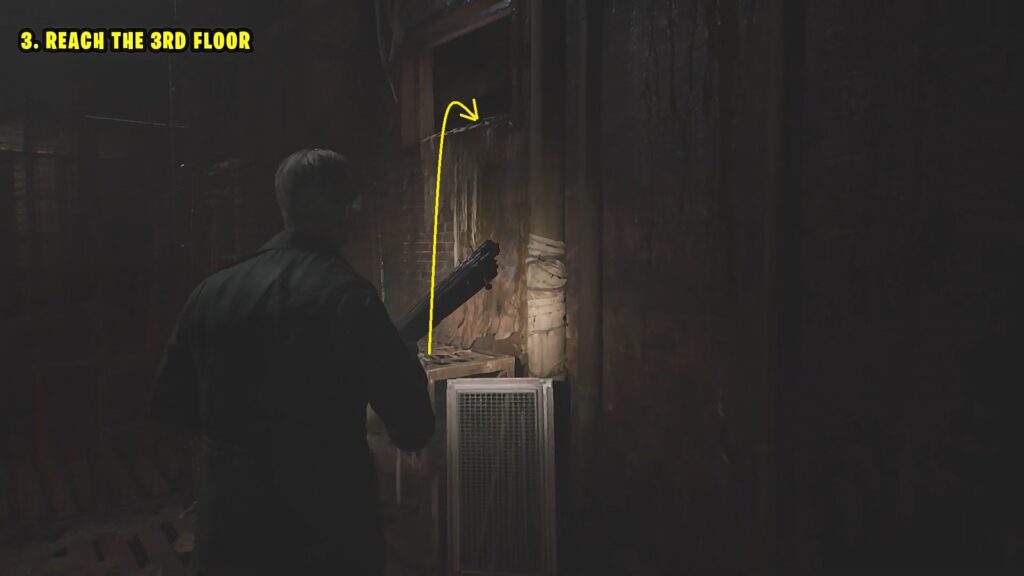
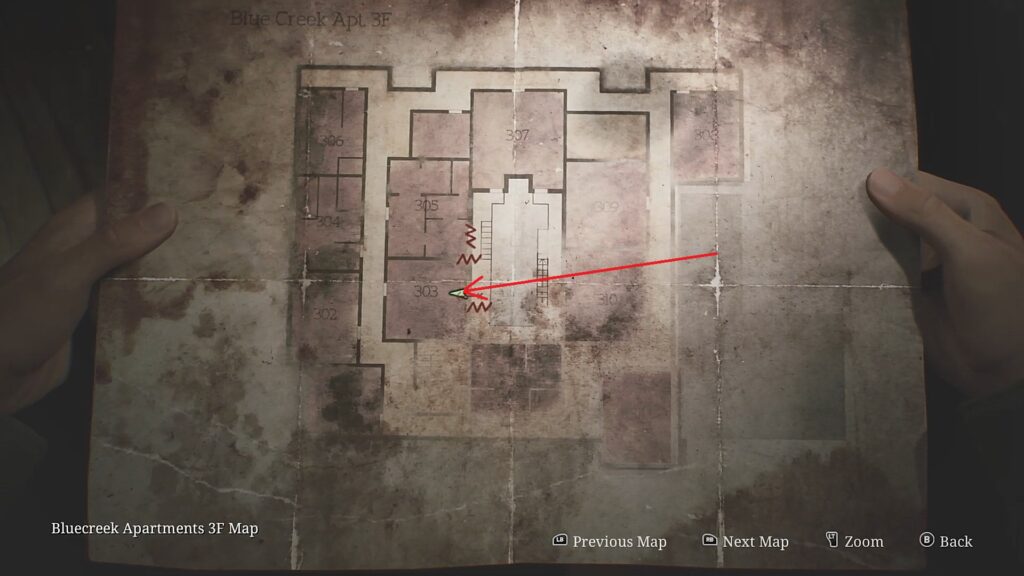
Exit the clock room and go to Room 203. Then break the wall at the location shown in the pictures below.
Go through the broken wall into the next room. Open the door there and then proceed ahead. Jump through the window in the room to go outside. Climb up the emergency stairs to reach the third floor. Then climb up through the hole in the wall to enter the third floor as shown in the pictures below.
3) Reach the Radio Room
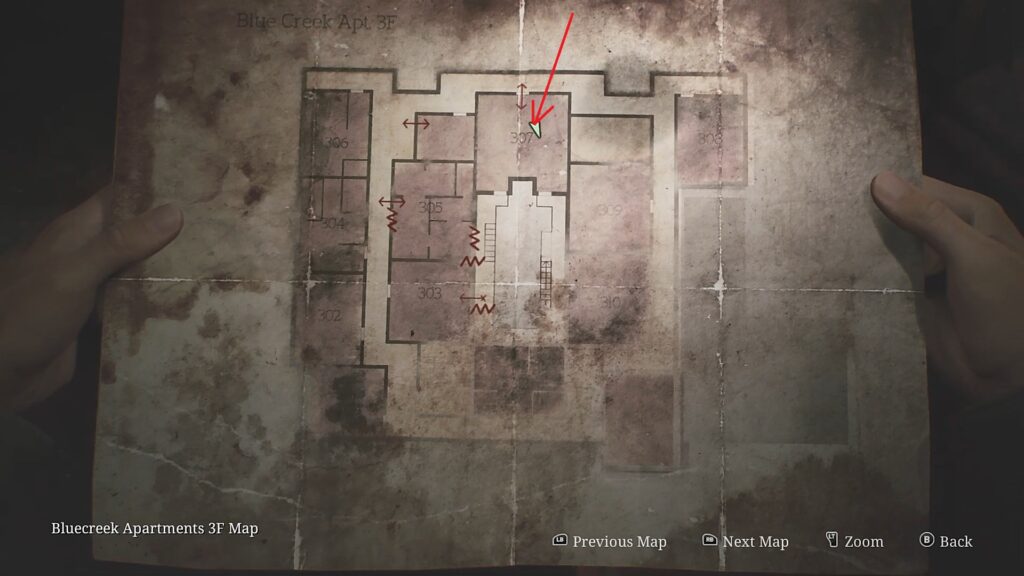
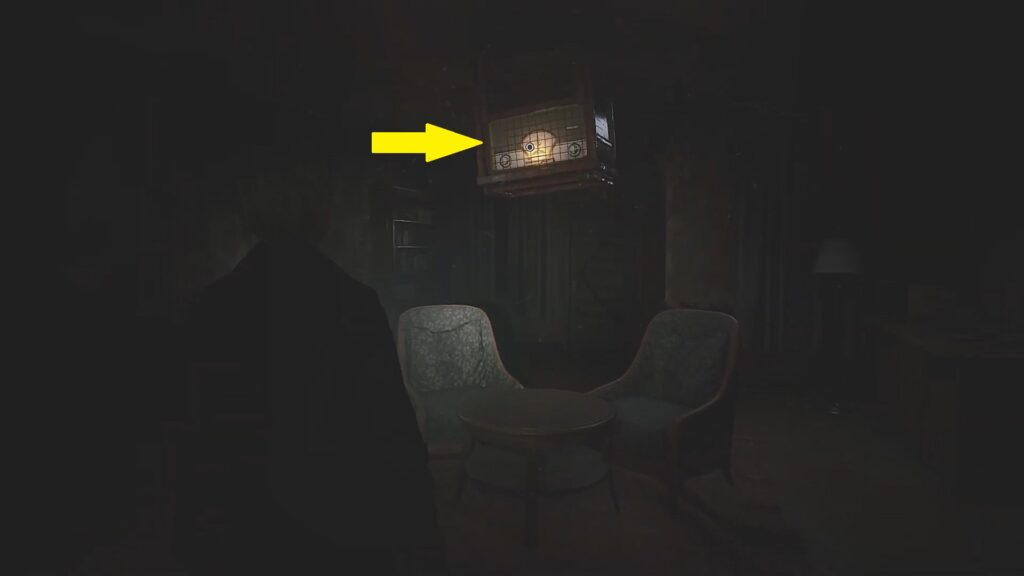
After entering the third floor, proceed ahead and reach Room 307. There you will find a hanging radio containing the Hour hand. You will have to solve the three valves puzzle to get the radio down to get the Hour hand.
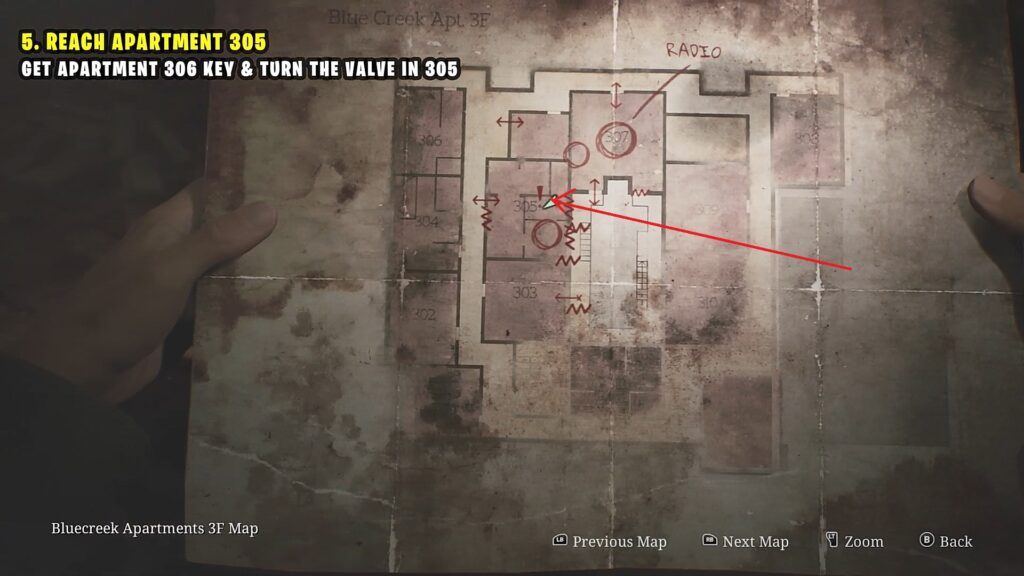
4) Valve #1 in Room 305
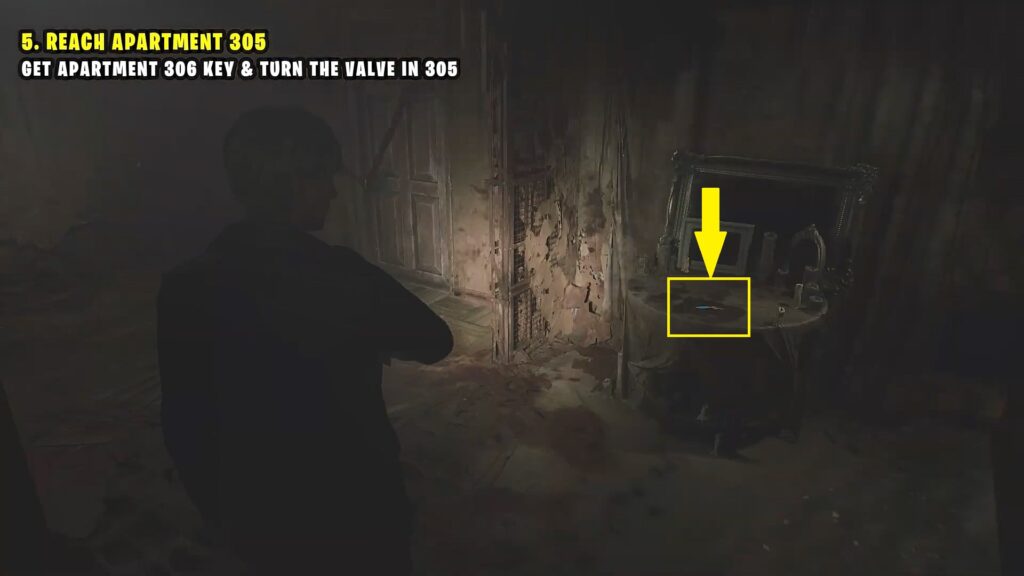
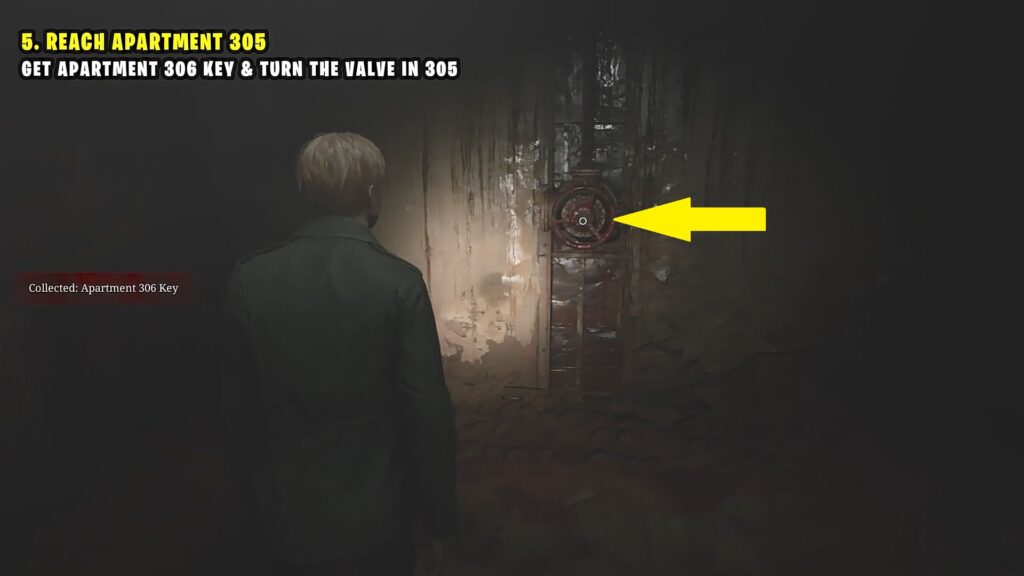
Go out from the radio room to reach the outer area. Then jump through the open window to reach Room 305 as shown in the pictures below. Collect the Room 306 key from the table there as shown in the second picture below. Then turn the valve in room 305 as shown in the third picture below. This will release the first chain and open the door next to the valve.
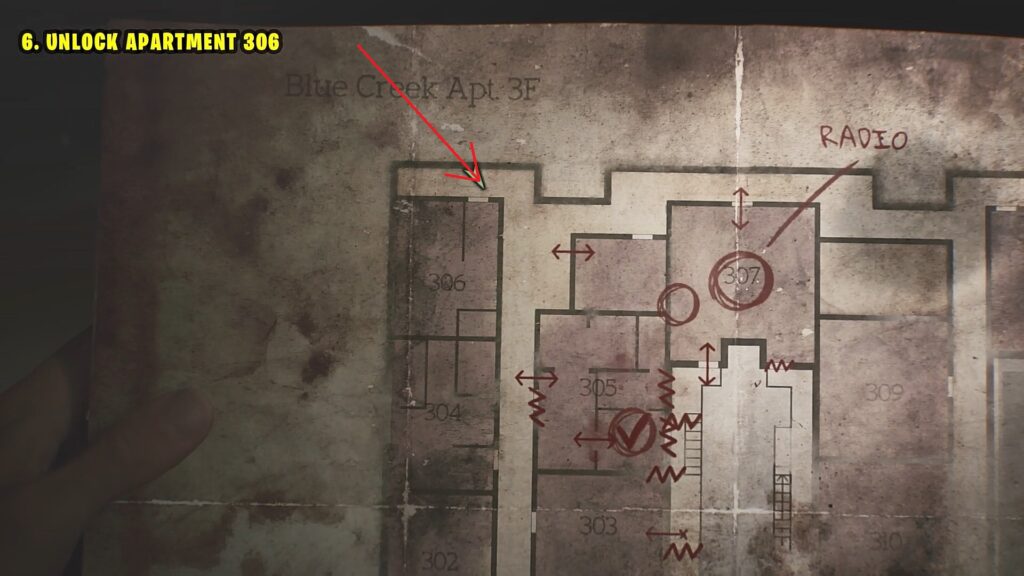
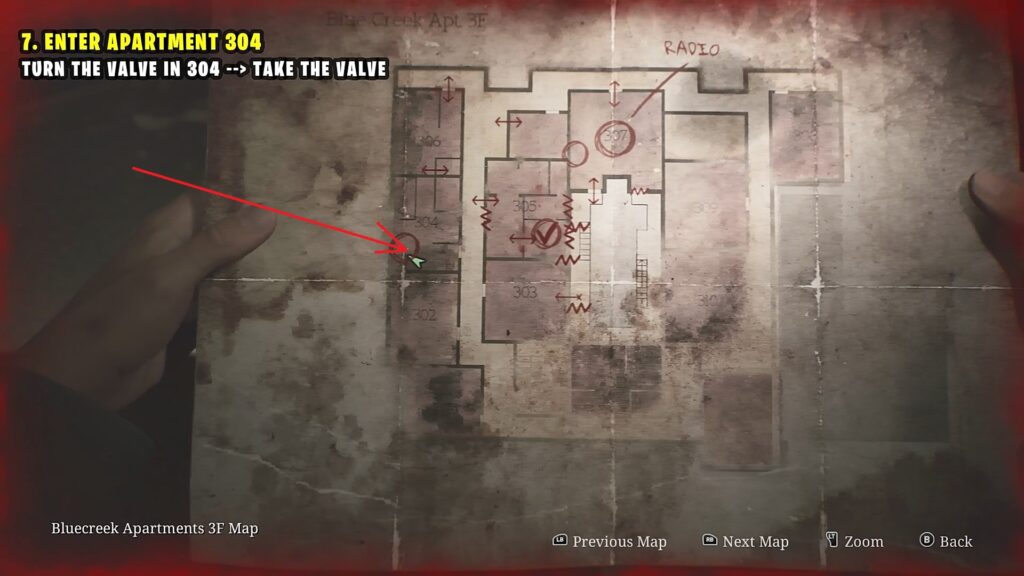
5) Valve #2 in Room 304
After turning Valve #1, defeat the enemies and go through the door next to the valve. Then proceed ahead to reach Room 306 as shown in the picture below. Use the key to open the door.
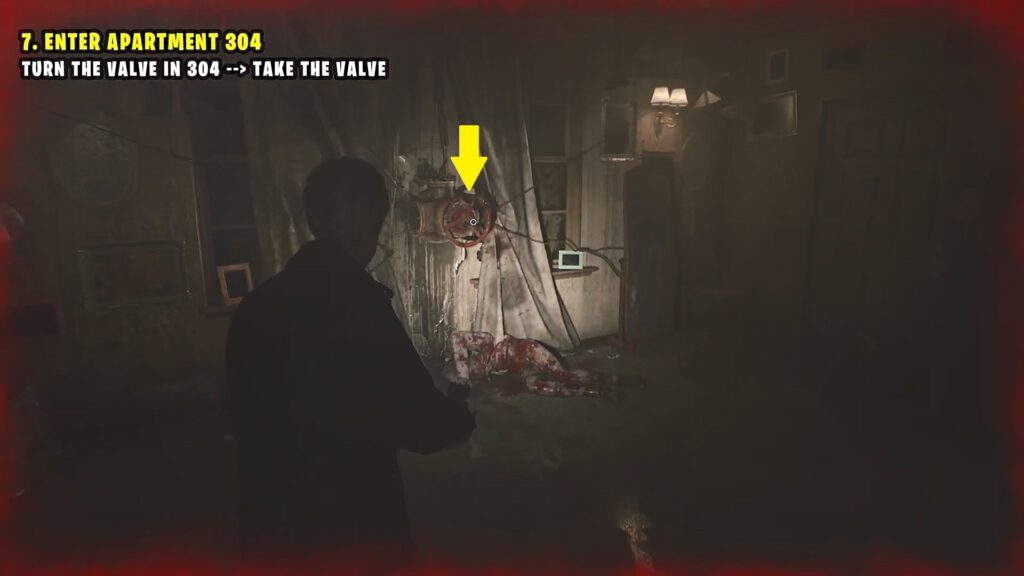
Now go inside and crawl through the hole in the wall to reach Room 304 as shown in the pictures below. Defeat the enemies there and then turn the valve there as shown in the second picture below. Take the valve with you to use it later.
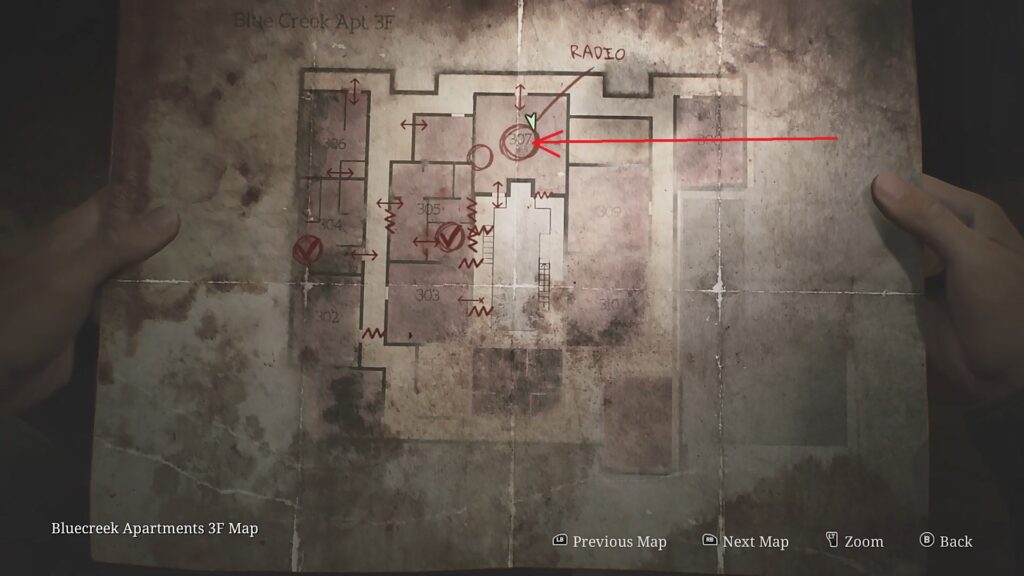
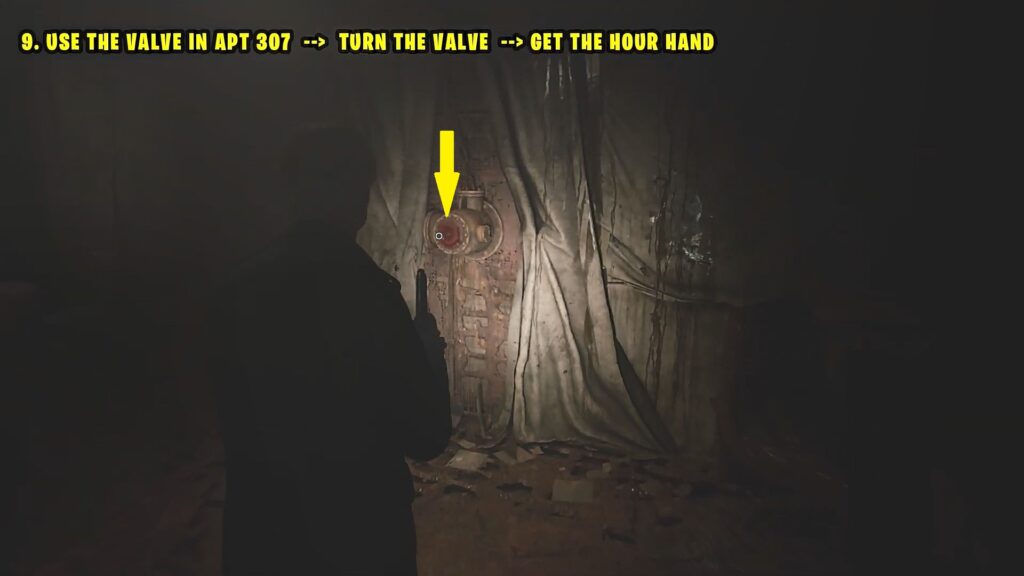
6) Valve #3 in Room 307
Make your way back to Room 307 (Radio Room). Enter the small room next to the main room. Insert the valve into the socket there as shown in the second picture below. Then turn the valve to release the final chain. This will make the radio fall down. Go to the fallen radio and pick up the Hour hand as shown in the third picture below.

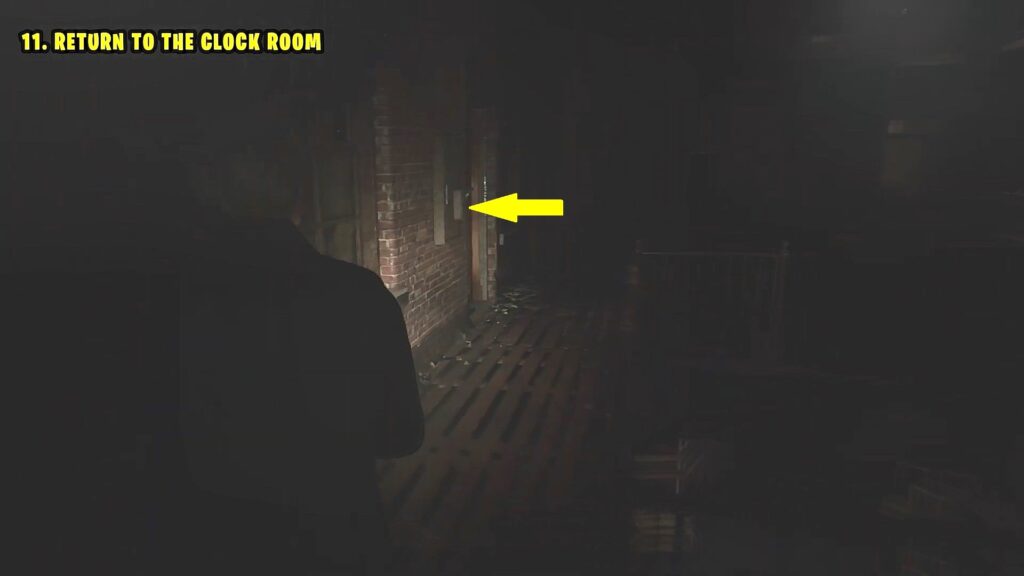
7) Return to the Clock Room
After collecting the Hour hand, go out through the door right behind the radio. Switch the lever there as shown in the picture below. This will lower the stairs ahead to the second level. Go down to the second level and enter the door on the right side to reach the clock room.
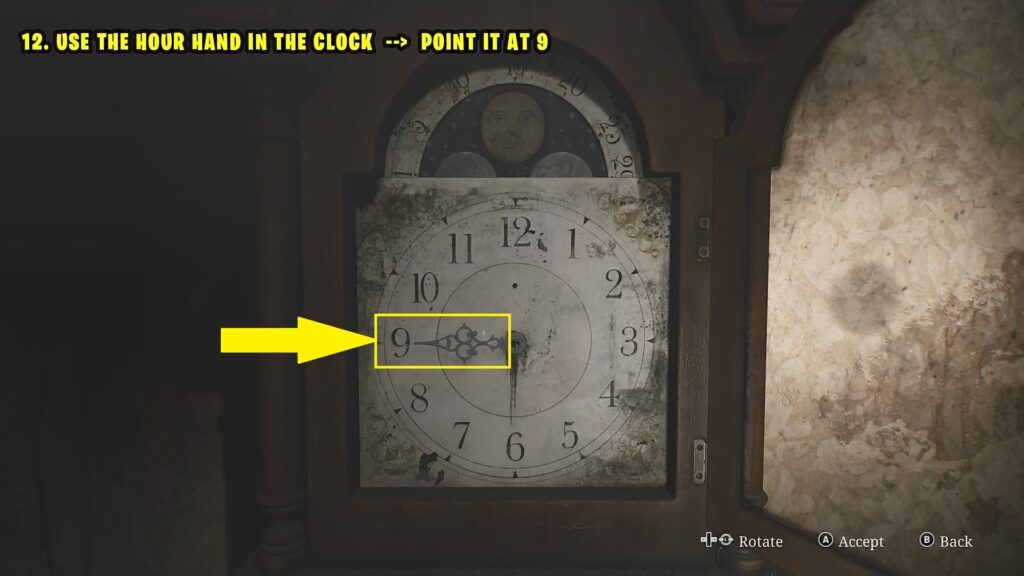
8) Use Hour Hand on the Clock
Interact with the clock and insert the hour hand. Then point the Hour hand to ‘9’ as shown in the picture below. This will open the door marked with ‘H’.
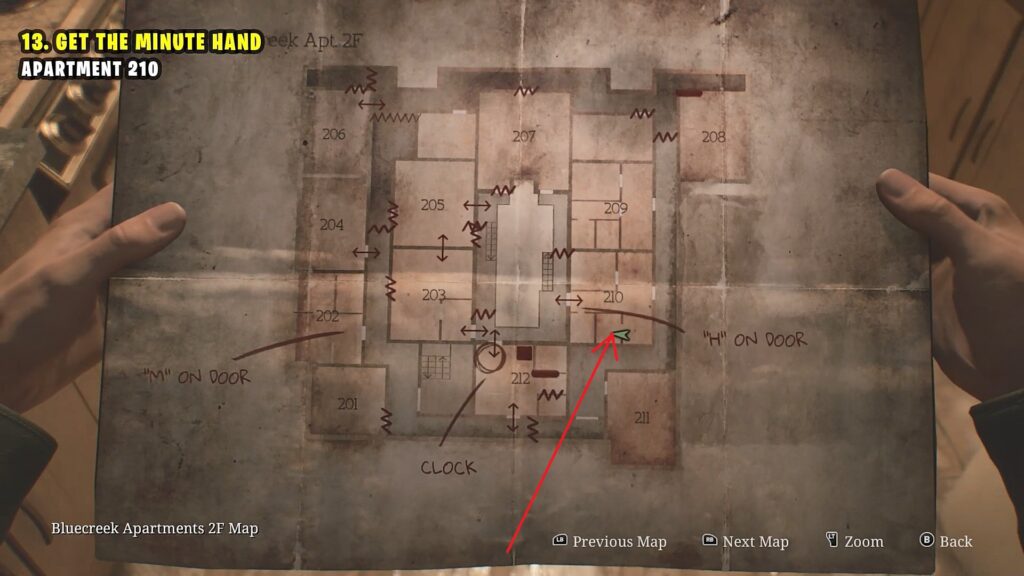
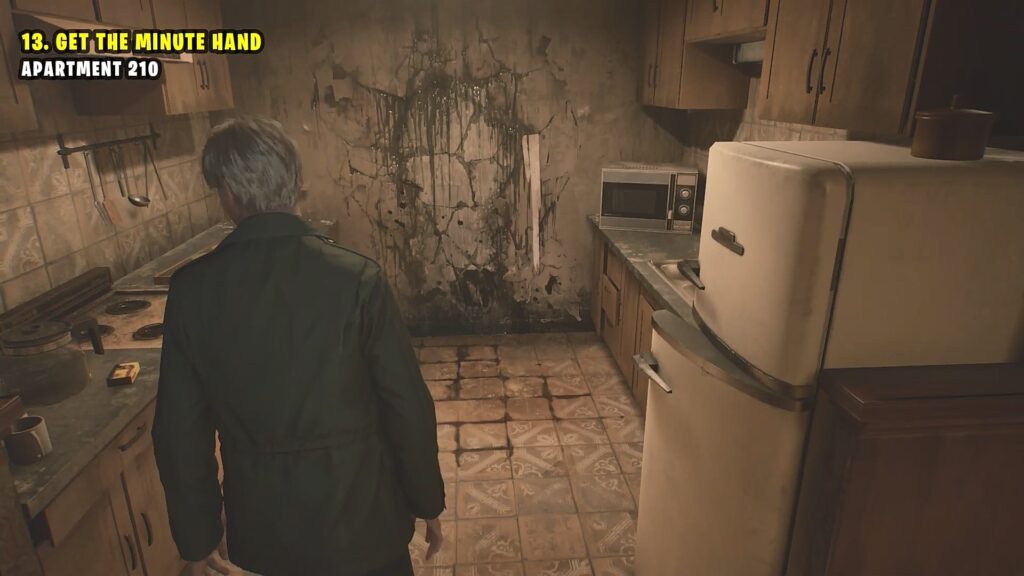
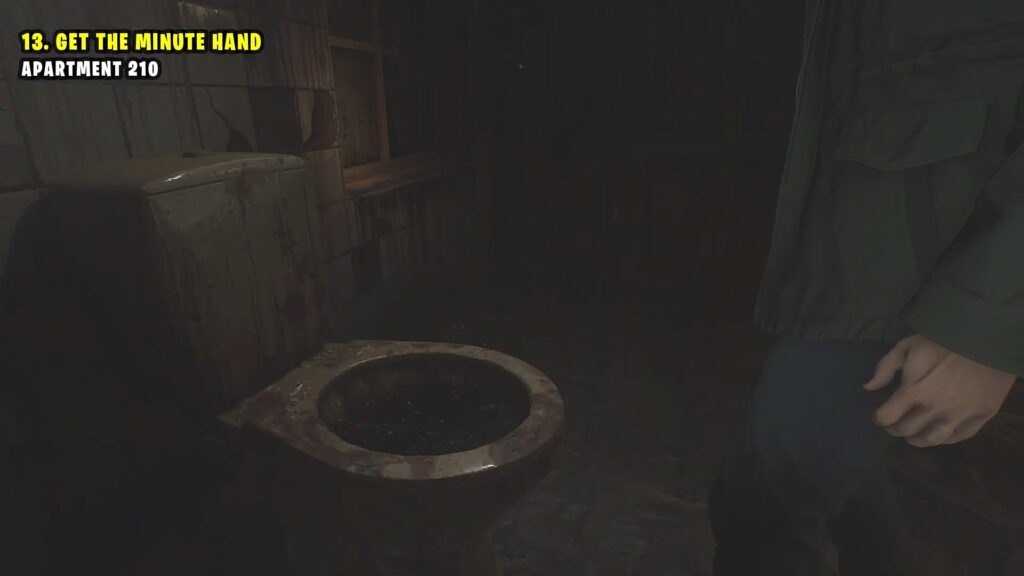
9) Get the Minute Hand from Room 210
Exit the clock room and go right to reach the door marked ‘H’. Go through the door to enter Room 210. Go straight ahead and then turn right to reach the kitchen. Break the wall there as shown in the pictures below. Then go through the hole and interact with the toilet there as shown in the third picture below to get the Minute hand. Now, reaching back to the clock will take you some time. Keep following this guide to see how to get back there.
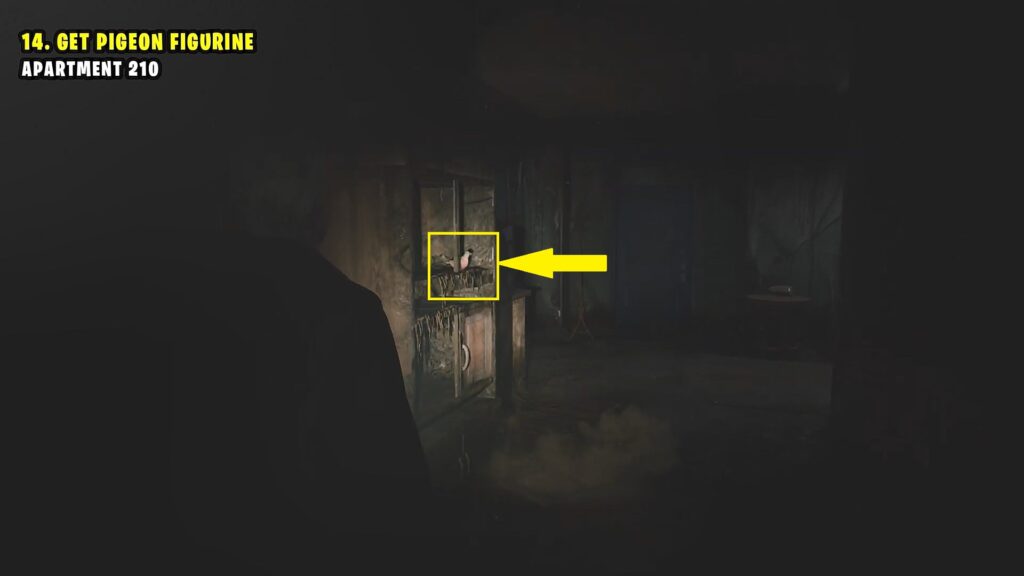
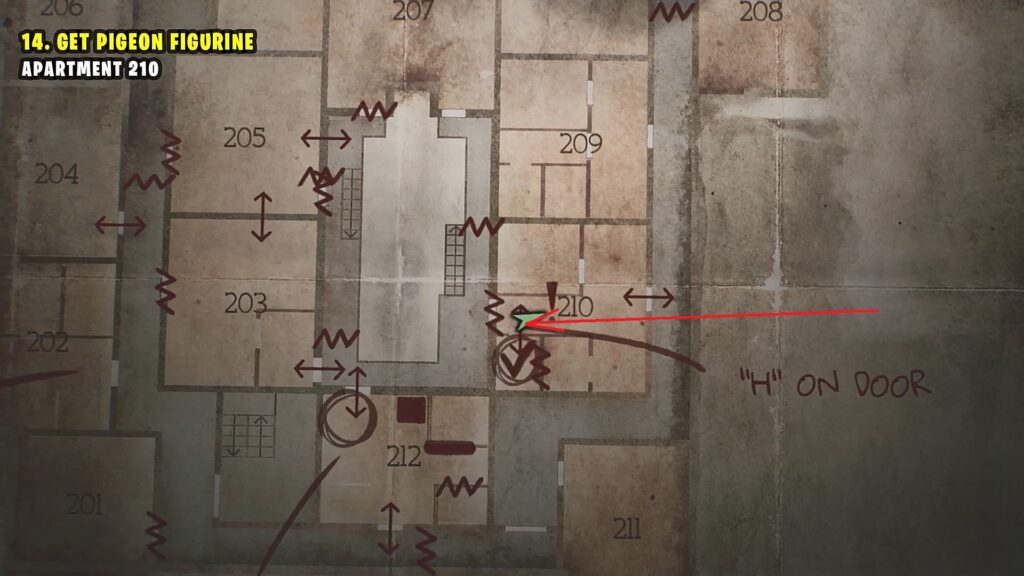
10) Get Pigeon Figurine From Room 210
After getting the Minute Hand, exit the toilet and then collect the Pigeon Figurine from the shelf as shown in the pictures below.
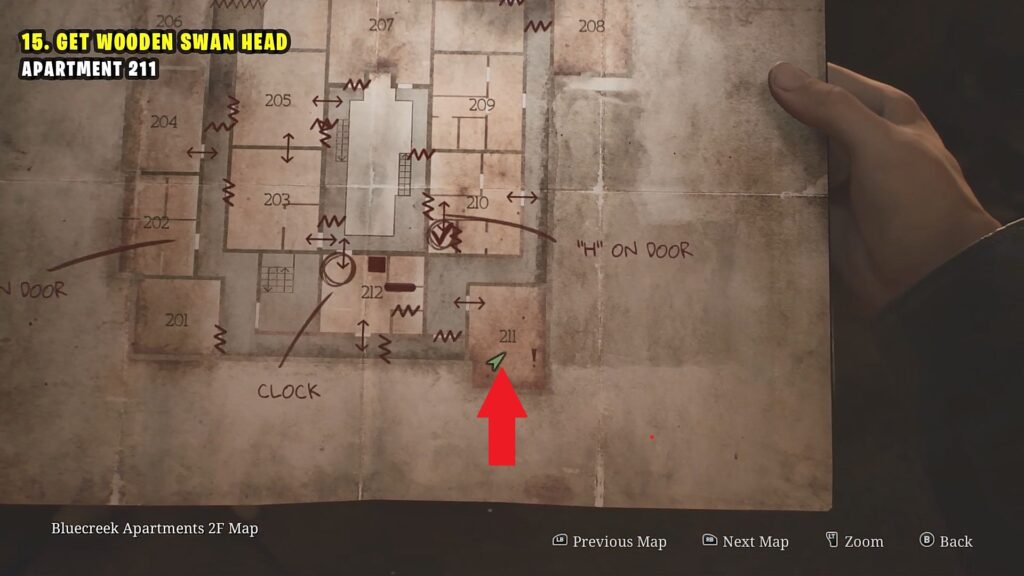
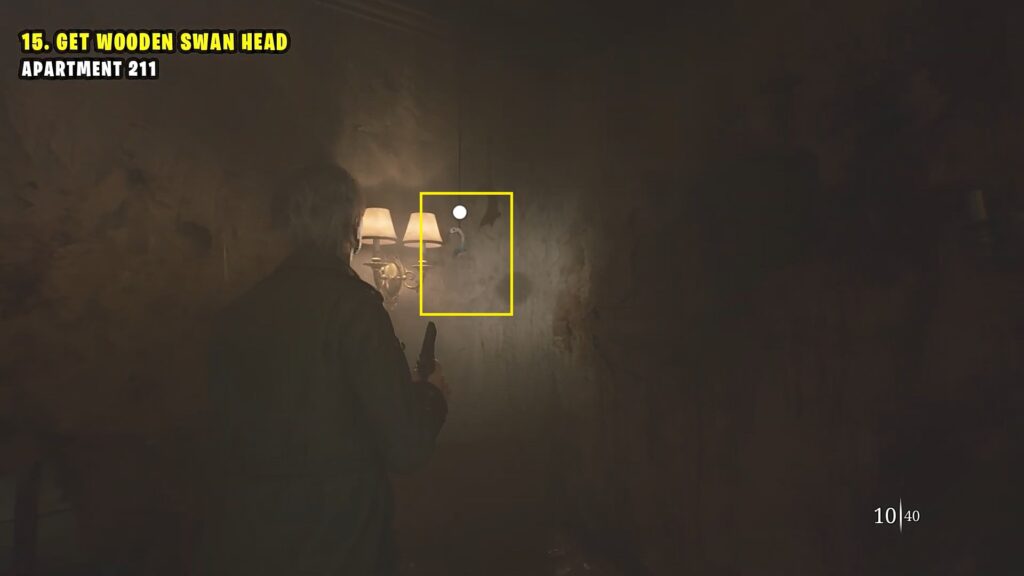
11) Get Wooden Swan Head From Room 211
Make your way to the Room 211 and get the Wooden Swan Head from the location shown in the pictures below.
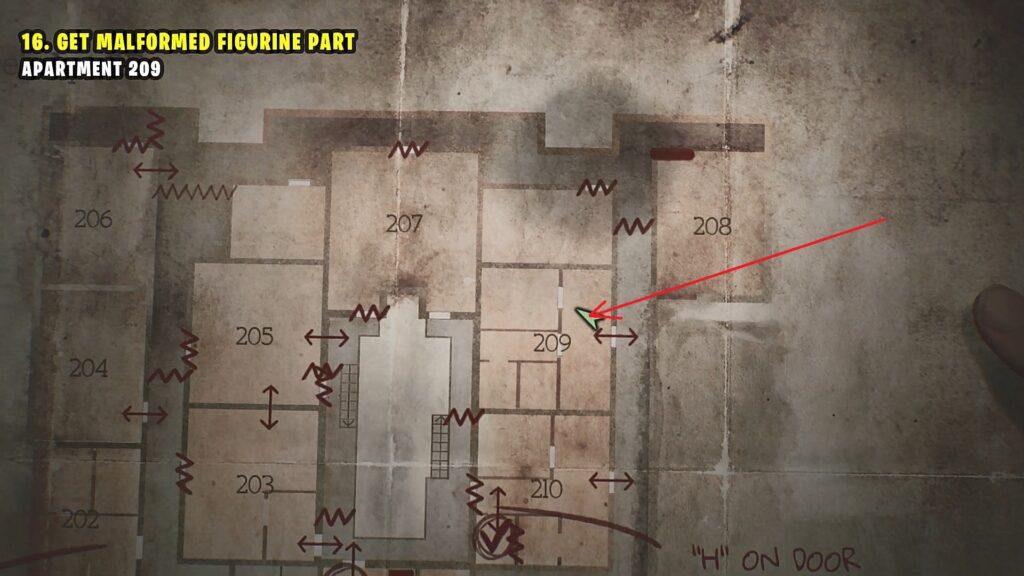
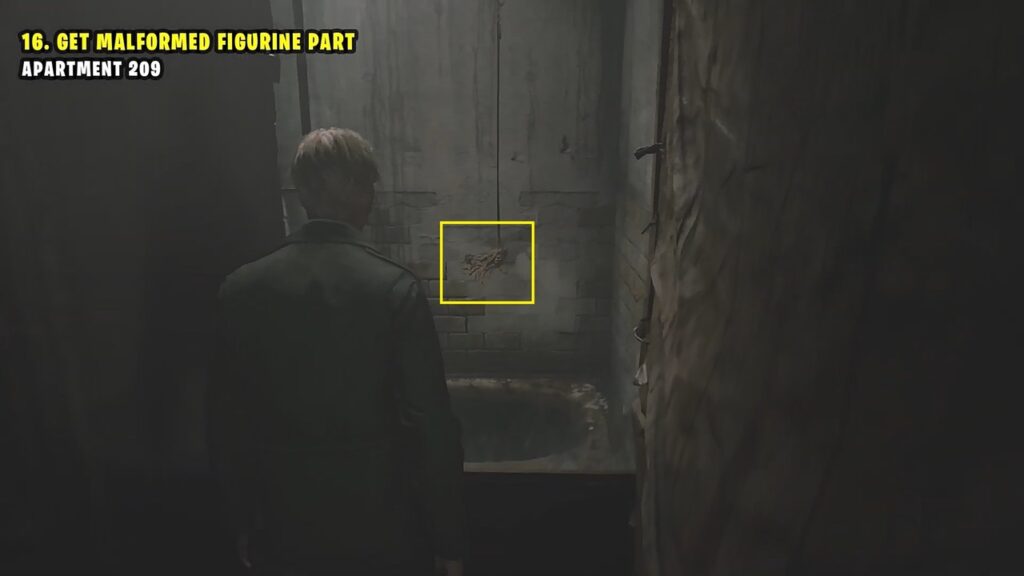
12) Get Malformed Figurine From Room 209
Make your way to Room 209. Then break the glass and collect the Malformed Figurine behind as shown in the pictures below.
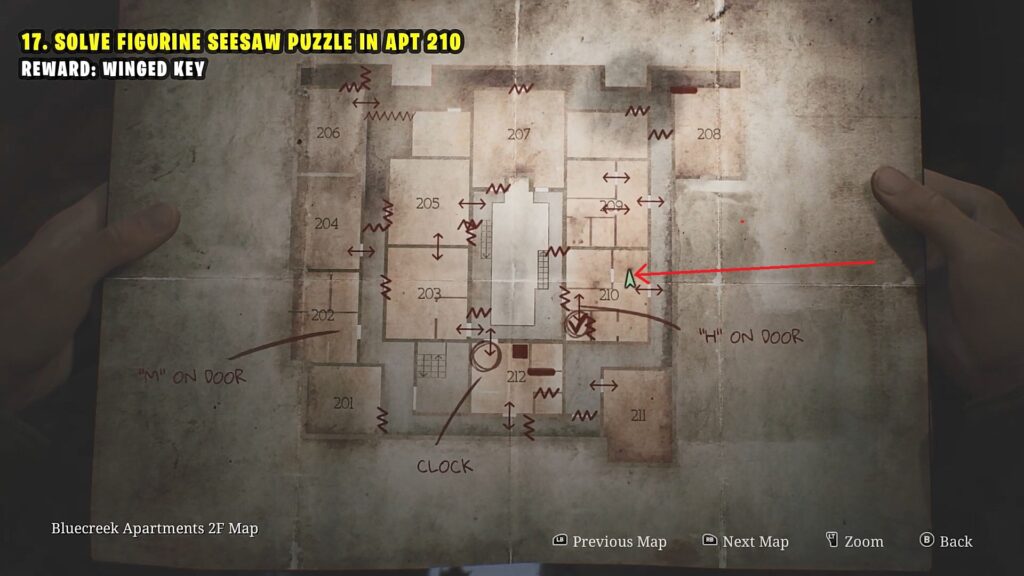
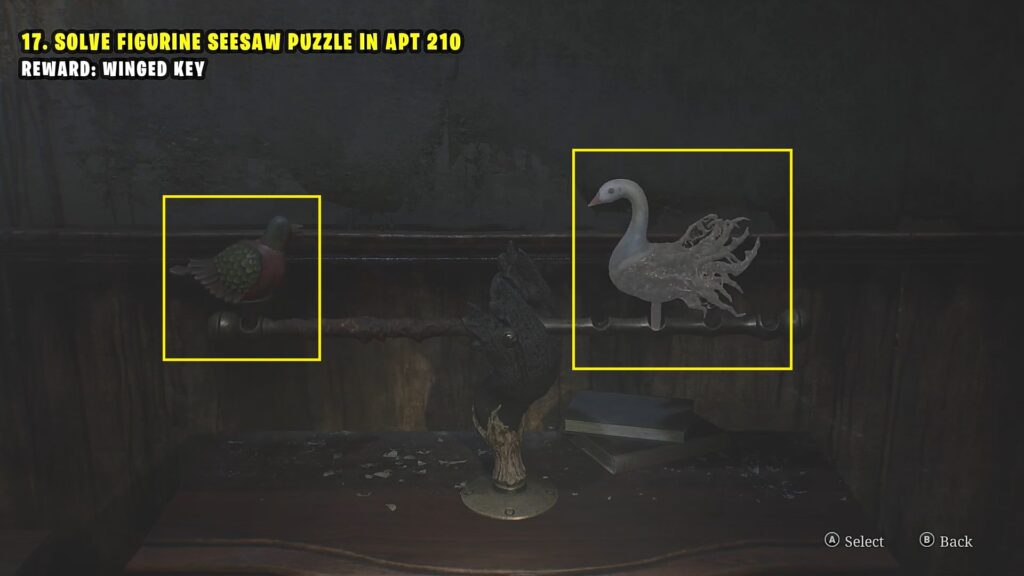
13) Solve the Figurine Seesaw Puzzle
Once you have the three figurines, go back to the Seesaw Puzzle in room 210 at the location shown in the picture below. Now open your inventory and combine the Malformed Figurine and the Wooden Swan Head to get the Swan Figurine. Place the Pigeon Figurine and the Swan Figurine in the Seesaw at the position shown in the second picture below. This will make the Seesaw come into an equilibrium, and you will get Winged Key. The location, where you need to place the figurines might differ based on the difficulty of the game.
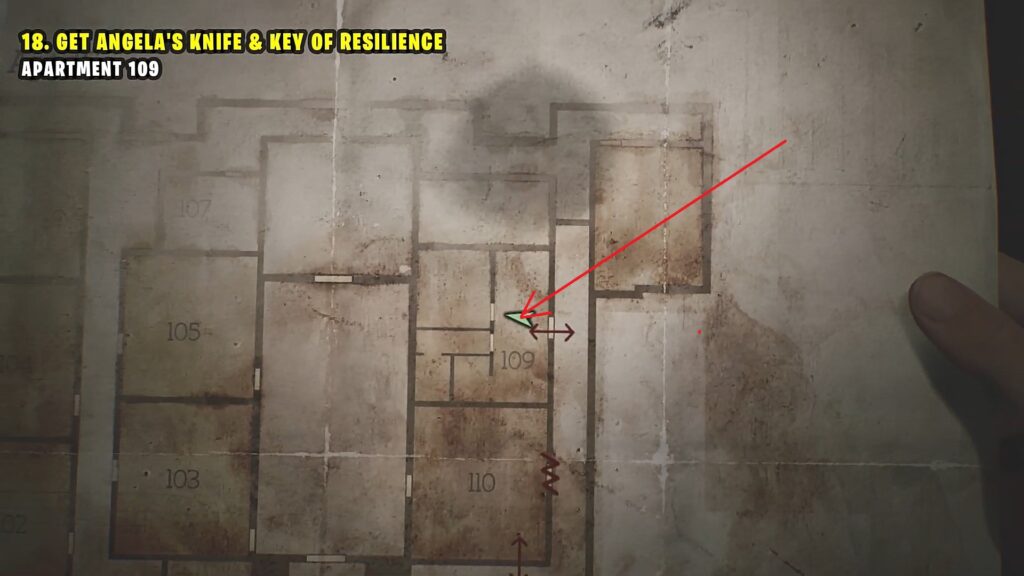
14) Get Angela’s Knife and Key of Resilience from the First Floor
Use the Winged Key to open the door next to the Seesaw in room 210. Then jump down through the hole on the floor to reach the first floor at the location shown in the picture below.
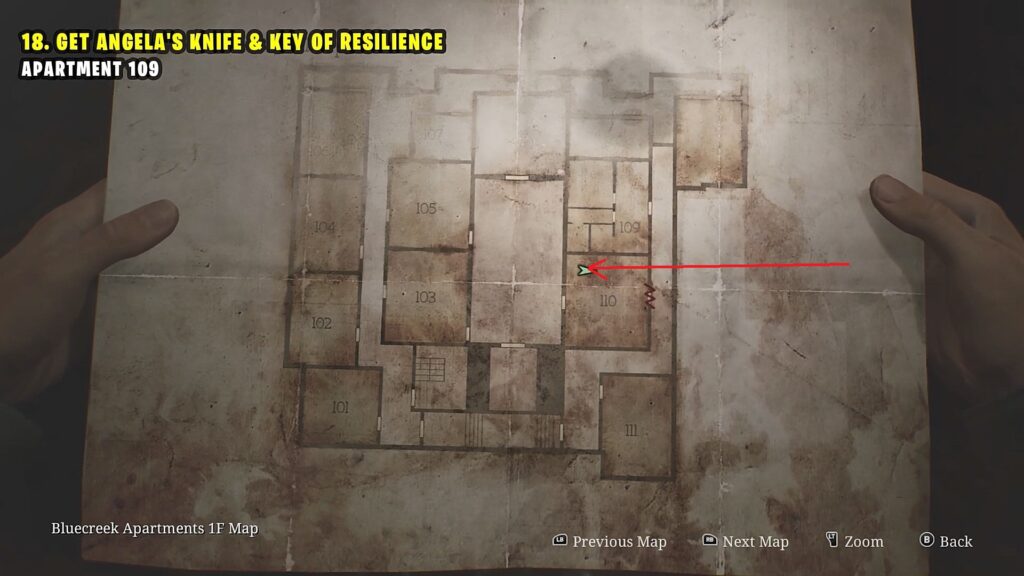
Make your way to Room 109 as shown in the picture below. Go inside and open the door straight ahead for a cutscene. You will get Angela’s Knife during the cutscene. Then collect the Key of Resilience from the table there.
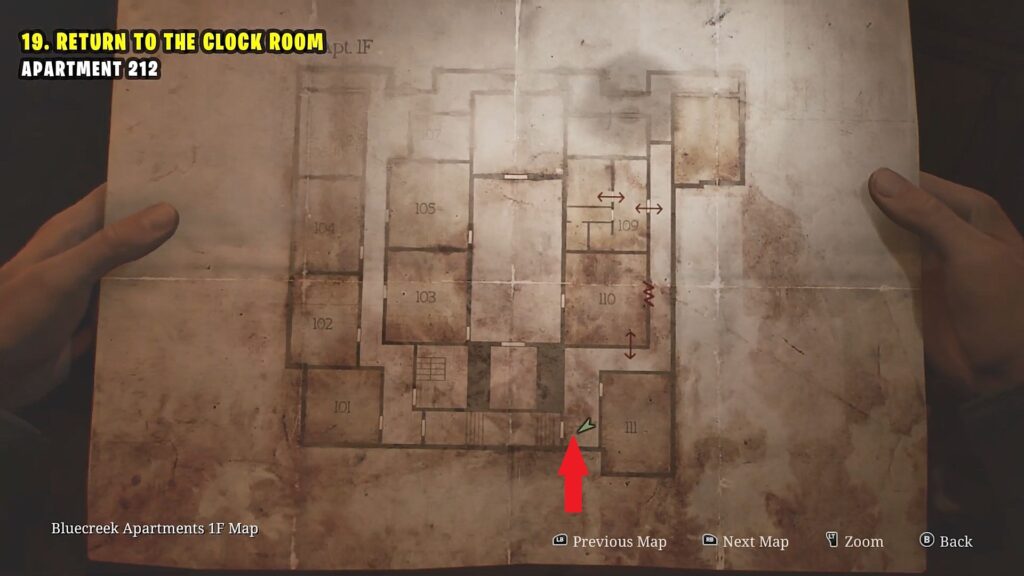
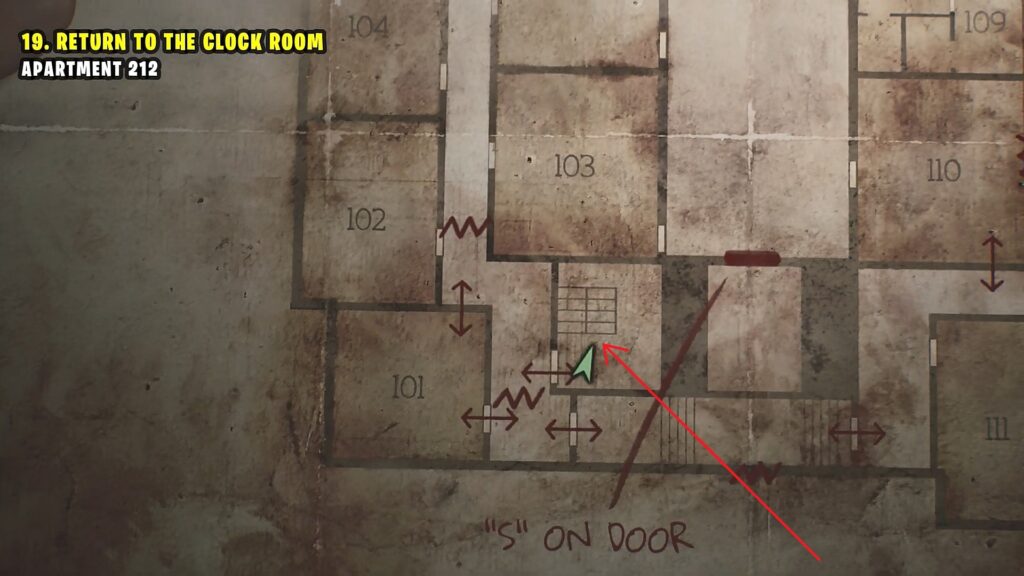
15) Return to the Clock Room (Room 212)
After collecting the Key of Resilience, exit the room and make your way to the location shown in the picture below. Use the key to open the door there. Then proceed ahead to reach the location marked in the second picture below. Climb up the staircase there to reach the second floor. Then make your way to room 212 (Clock Room).
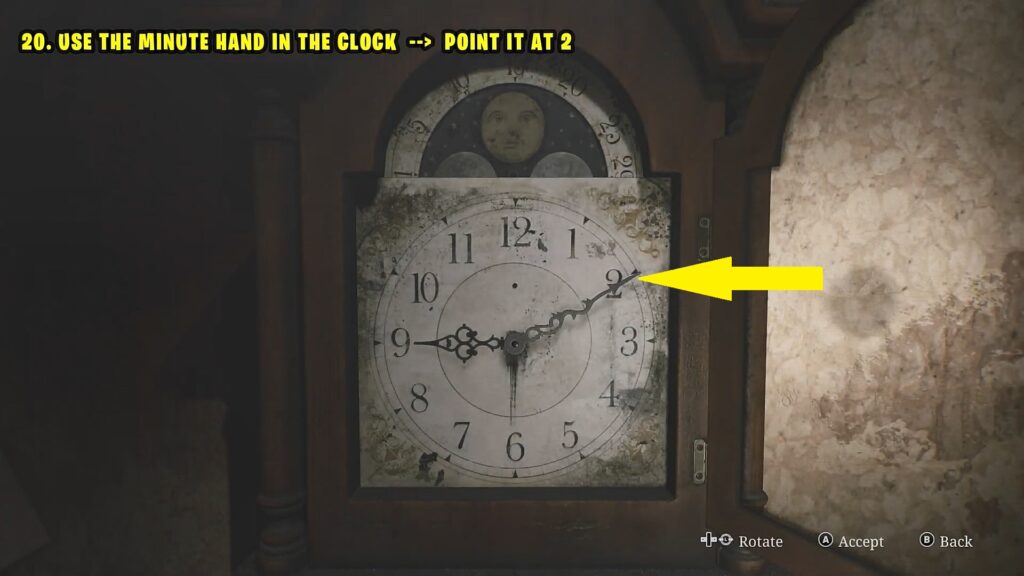
16) Use the Minute Hand on the Clock
Interact with the clock and insert the Minute hand. Then point the Minute hand to ‘2’ as shown in the picture below. This will open the door marked with ‘M’.
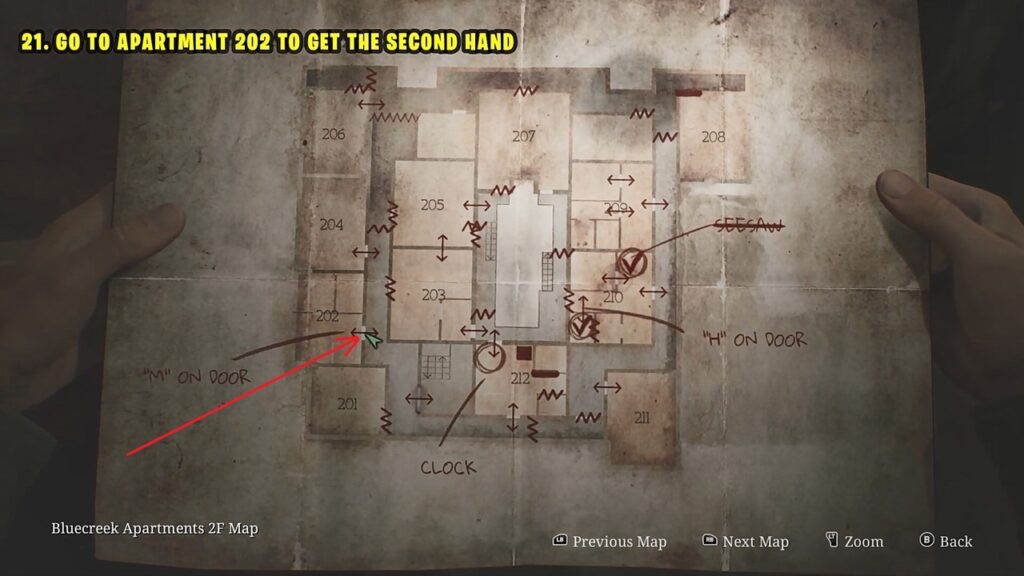
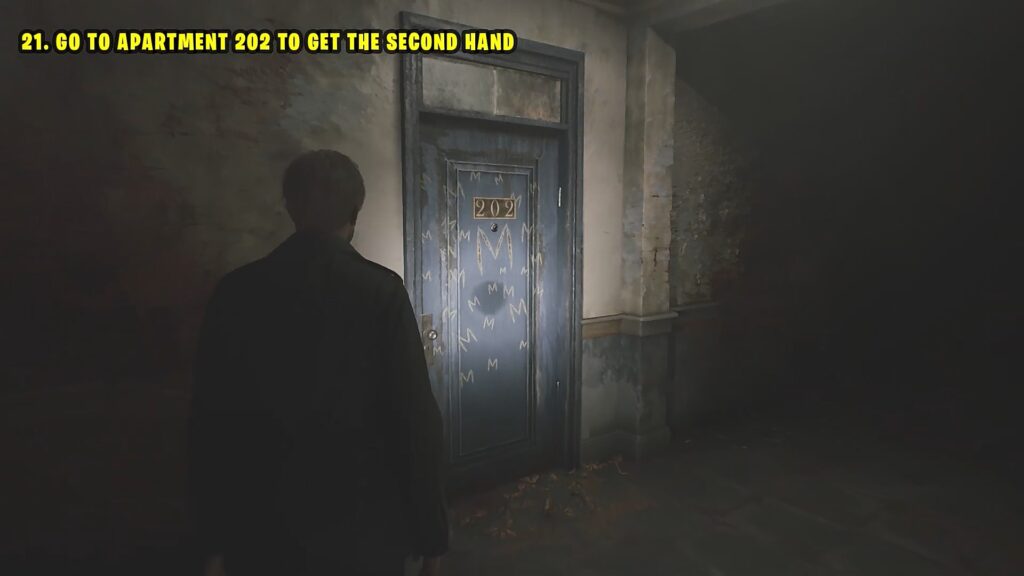
17) Get the Second hand from Room 202 (Insect Puzzle)
Make your way to the location shown in the picture below and enter Room 202.
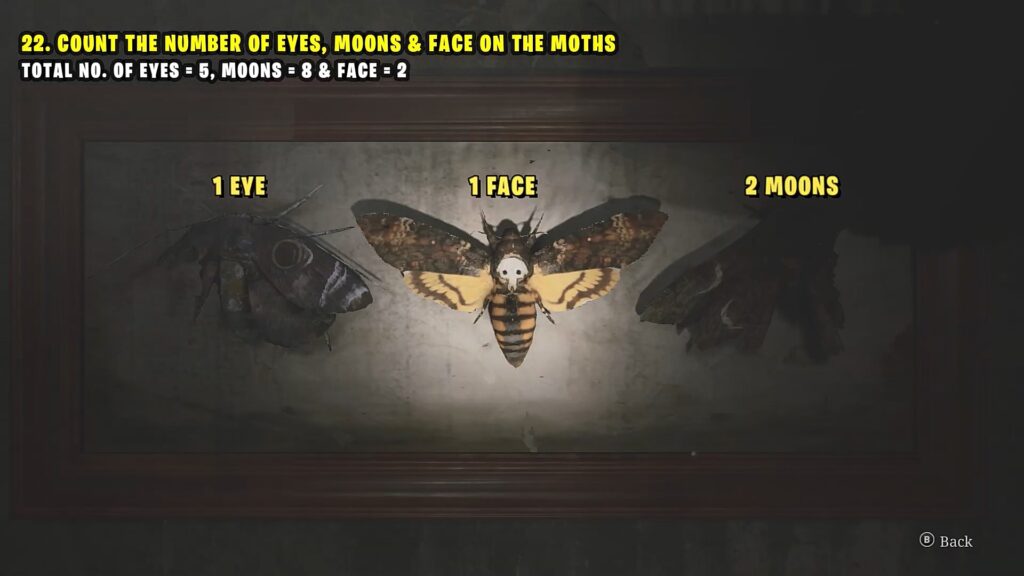
Inside the room, you will find several giant moths with Eyes, Faces, and Moons drawn on them as shown in the picture below. To solve the puzzle, you will need to count all the Eyes, Faces, and Moons. One Moth will be on the sofa. There will be two Moths on two different tables. There will be three Moths in the display. Break the wall next to the display and enter the room ahead. Move the cabinet inside the room and you will find two more Moths in display there. Now add all the Eyes, Moons, & Faces (Eyes=5, Moons=8, Face=2 for Standard Difficulty).
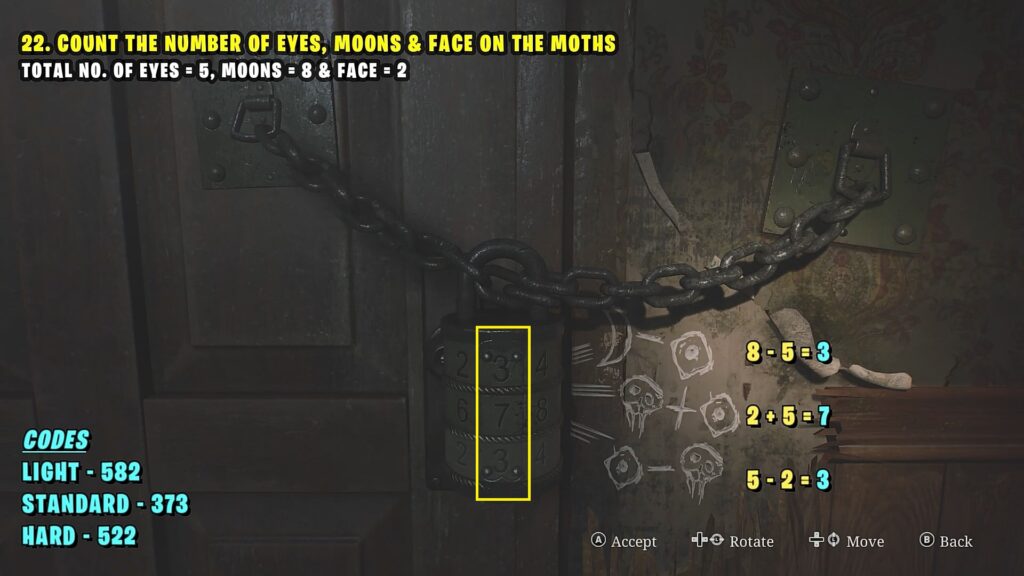
Now interact with the lock in the room. Then solve the equation next to the lock to get the code. The correct code for different difficulties is mentioned below. Insert the correct code and then go inside and interact with the hole in the wall to get the Second Hand for the clock.
Light Difficulty: 582
Standard Difficulty: 373
Hard Difficulty: 522
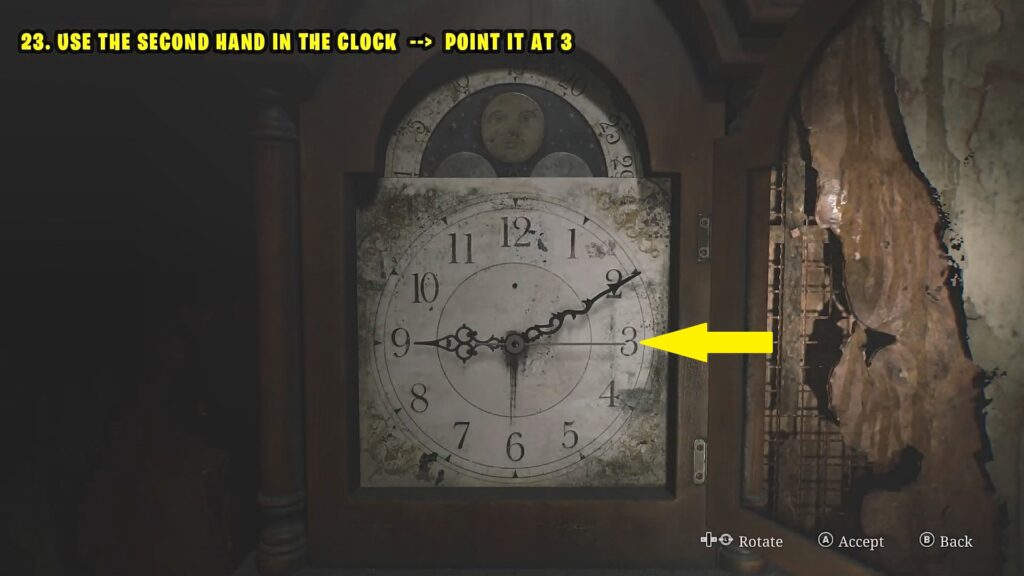
18) Use the Second Hand on the Clock
Interact with the clock and insert the Second hand. Then point the Second hand to ‘3’ as shown in the picture below. This will open the door marked with ‘S’ on the first floor.