This guide shows the location of all Nornir Chests and how to solve the puzzles to open these chests in the Svartalfheim area of God of War Ragnarok. There is a total of 10 Nornir Chests in the area.
1) Aurvangar Wetlands Nornir Chest 1
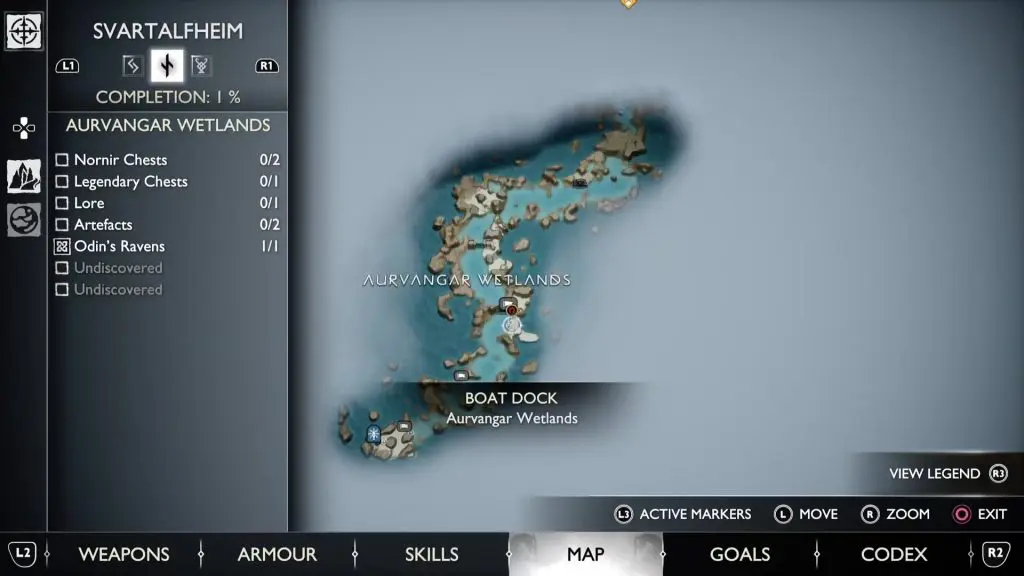
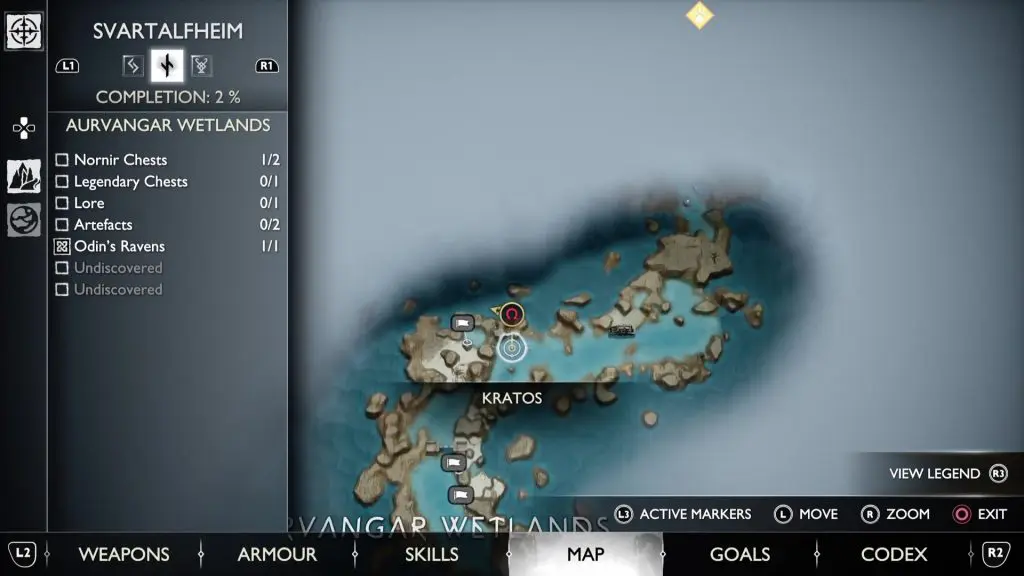
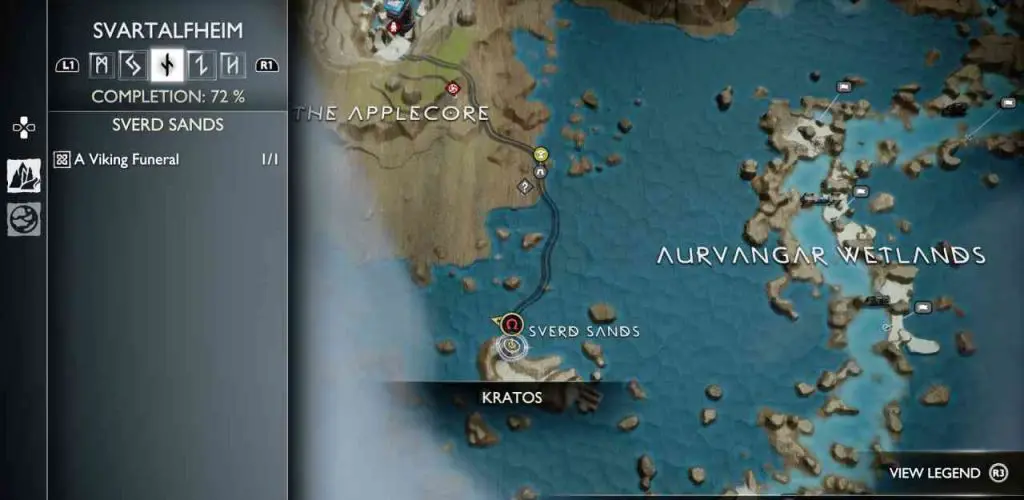
The Nornir Chest is near the water wheel at the location shown in the picture below
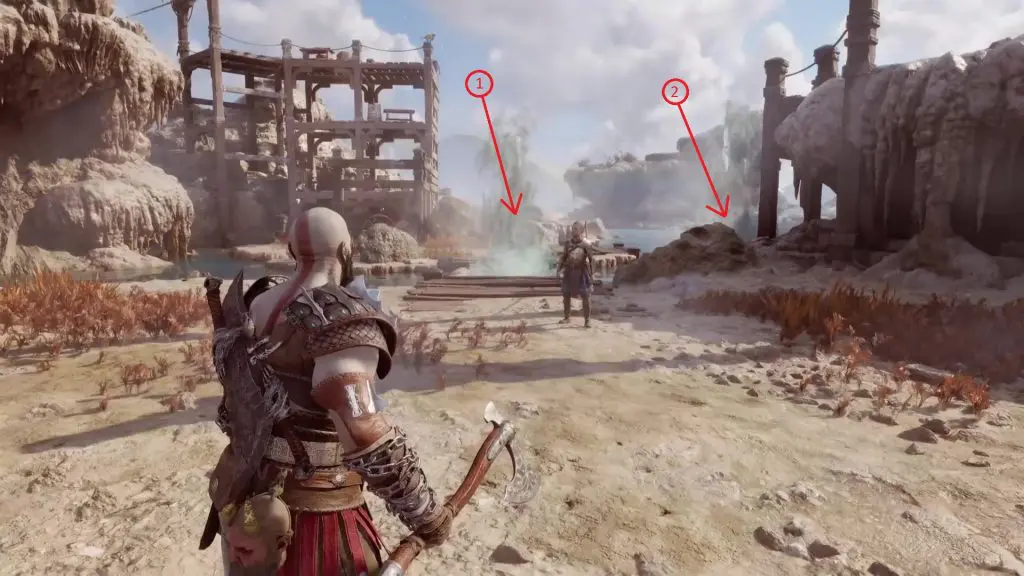
On the right side of the waterwheel, you will see two geysers as marked in the picture below. Hit the Geyser 1 with your axe to freeze it and then jump on the platform behind it. Now turn right and hit geyser 2 to freeze it. Then use the grapple to climb up the wall behind the geyser.
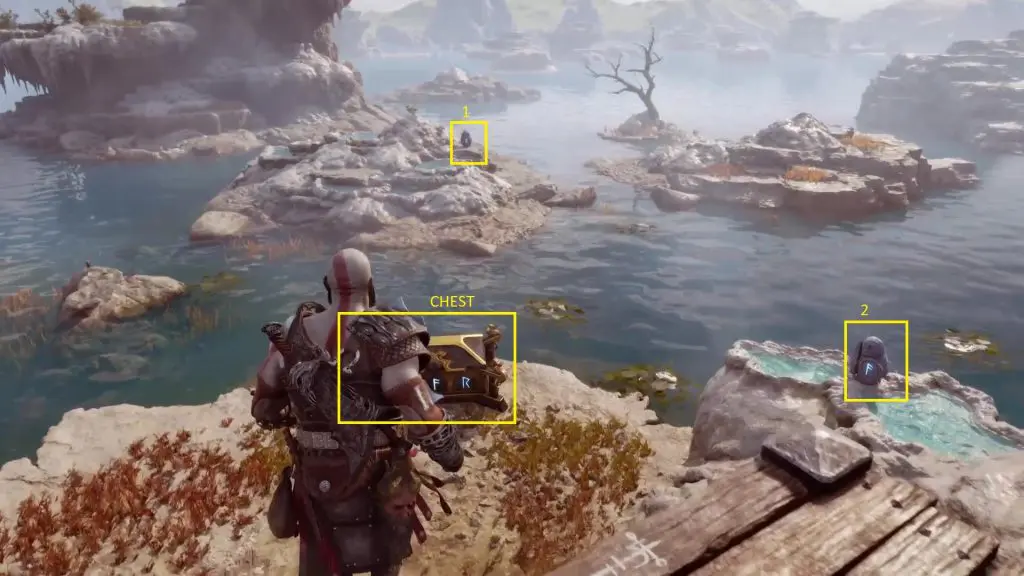
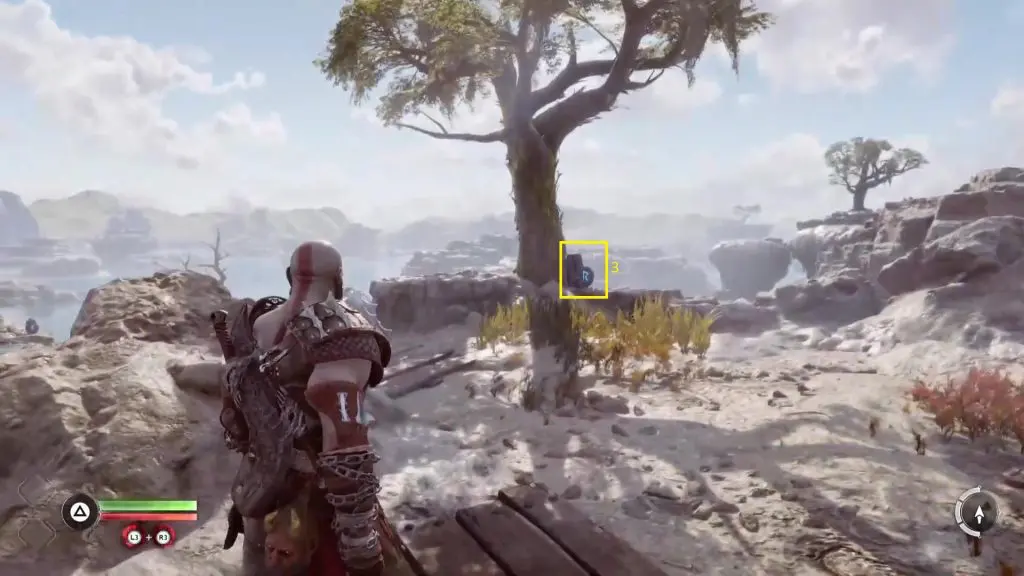
From this platform, you can see the Nornir Chest down below as shown in the below picture. But before jumping down to reach the chest, you need to destroy three seals to unlock the chest. Seal #1 is behind the chest and Seal #2 is on the right side of the chest. Seal #3 is near the tree on the same platform you are on. The locations of all the seals are marked in the pictures below. Throw your axe to destroy the three seals. Then jump down the platform to reach the chest. Open it to get an Idunn Apple.
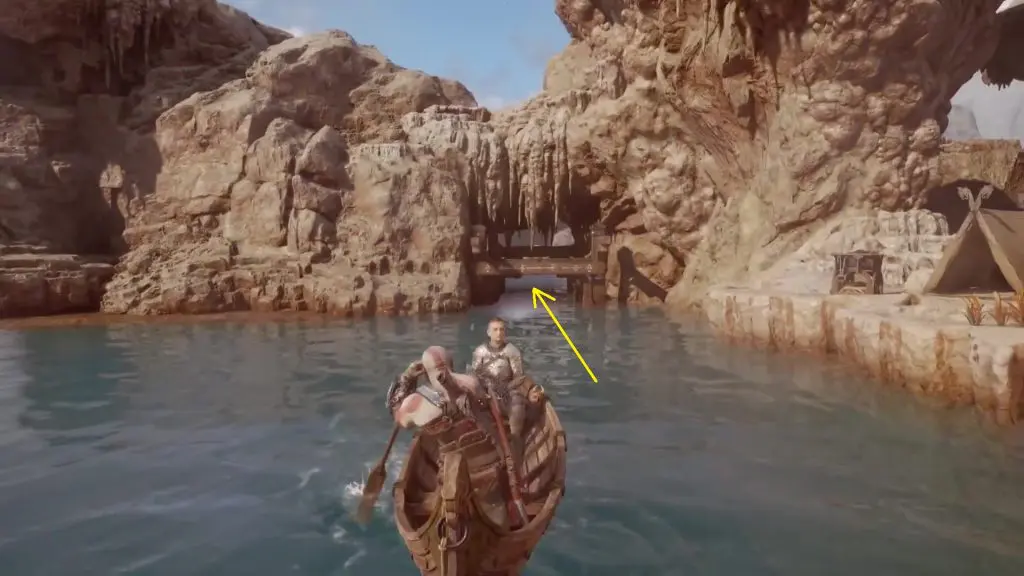
2) Aurvangar Wetlands Nornir Chest 2
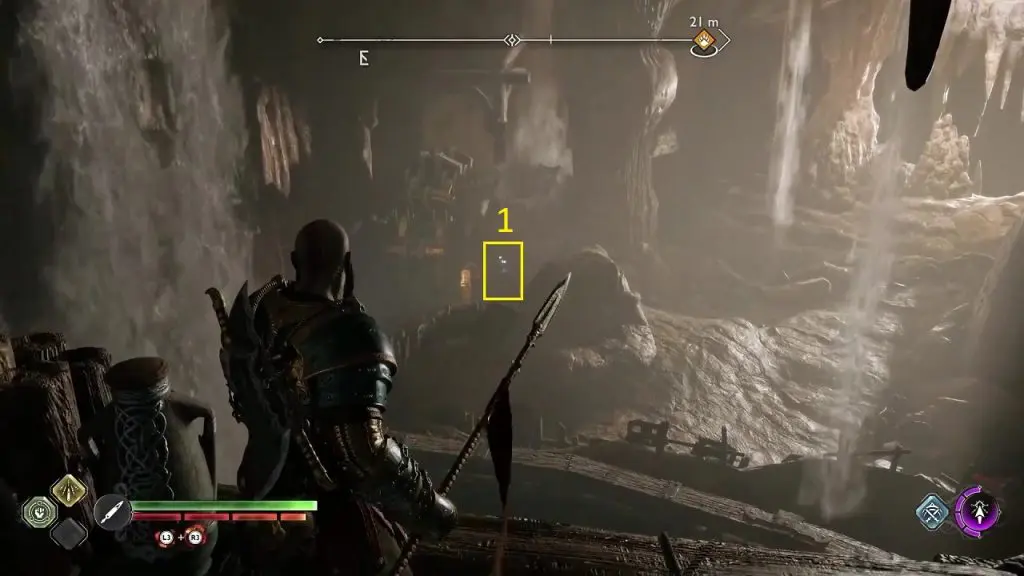
The Nornir Chest is at the location shown in the picture below. Go under the opening on the rock wall as shown in the second picture below to reach a hidden area.
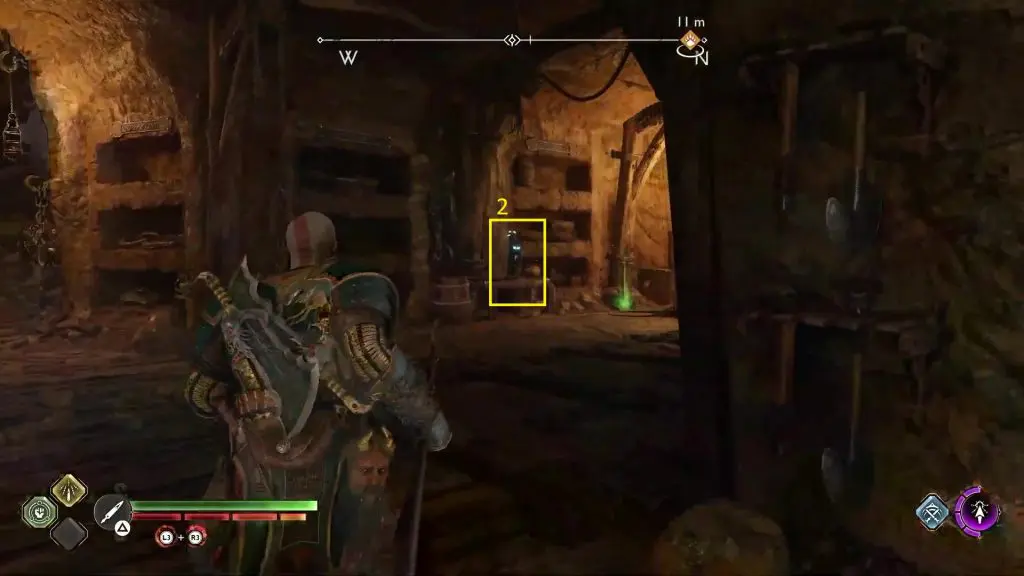
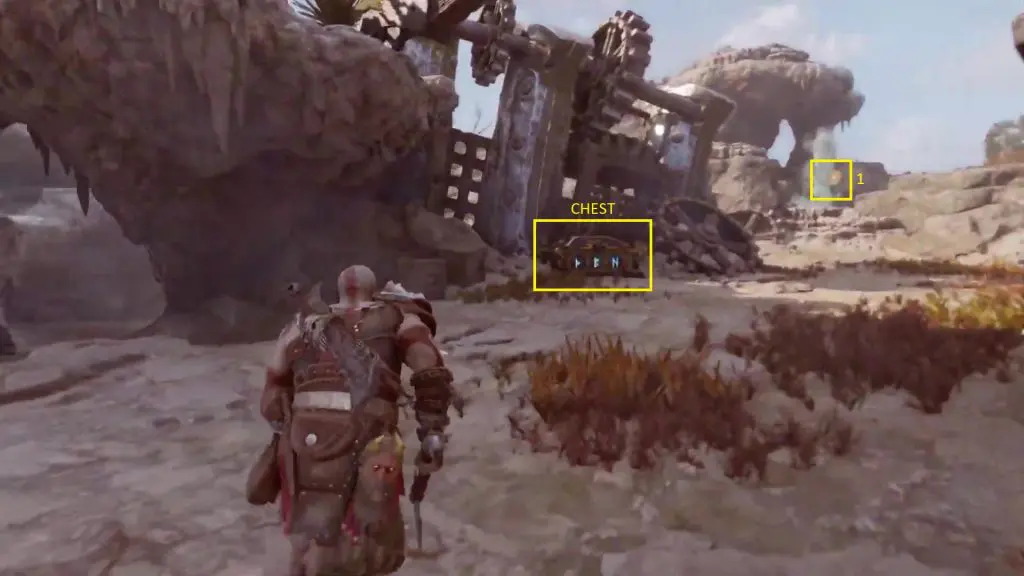
After entering the secret area, go left to find the Nornir Chest. On the chest, you will see three glowing symbols as shown in the picture below. You need to find and hit three posts in the area to make the same symbols as on the chest appear on the post. This will make the symbol on the chest stop glowing and this will unlock the chest. The first post is on the right side of the chest as shown in the picture below. Hit it two times to make the symbol “P” appear on the post. The symbol won’t be visible due to the geyser. Just hit until the symbol “P” on the chest stops glowing.
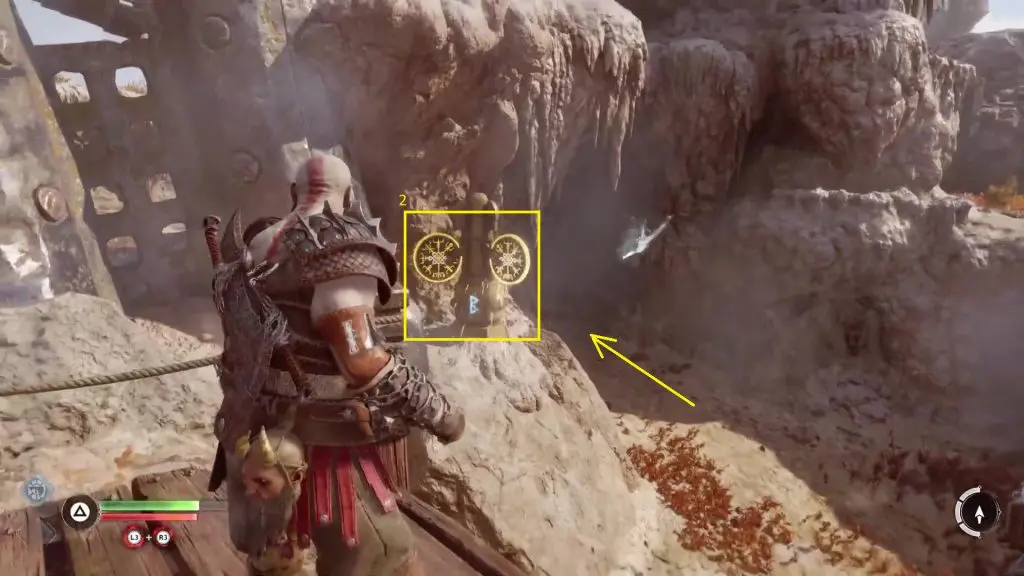
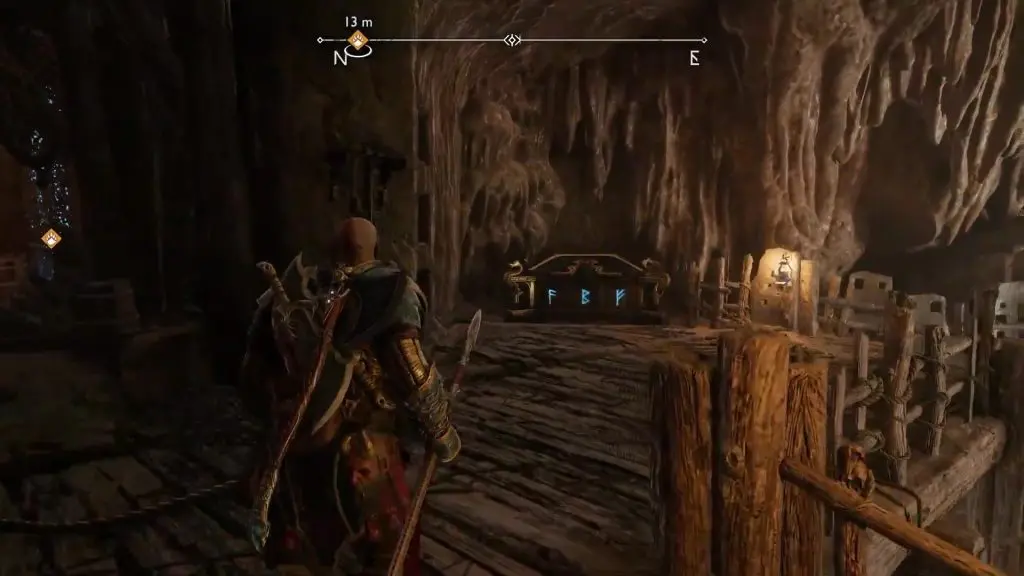
For the second post, take the path on the right side of the chest and turn left. Hit the post until the symbol “B” appears on it as shown in the picture below.
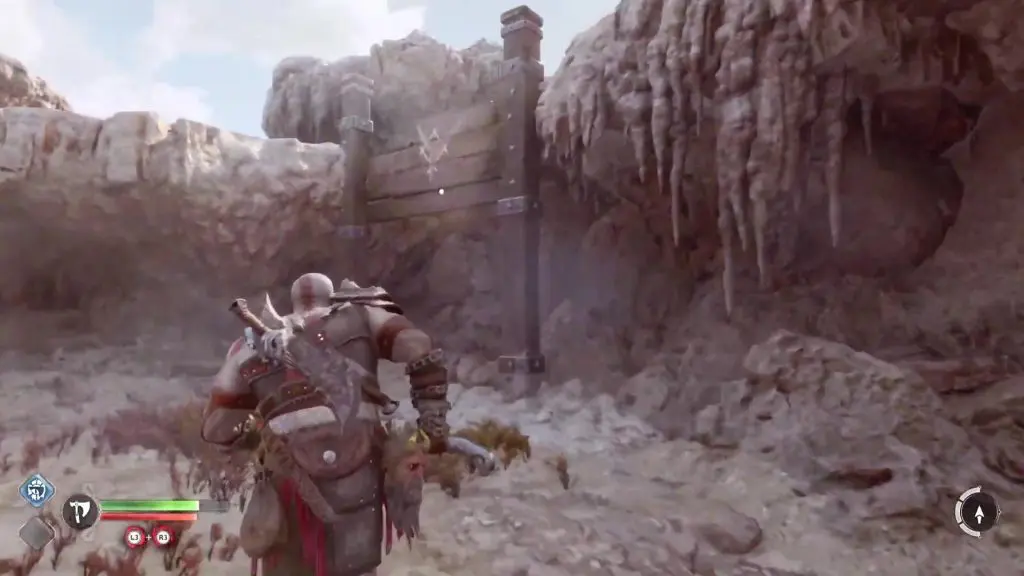
For the third post, grapple up the platform on the left side of the chest and then turn right as shown in the pictures below. Hit the post until the symbol “N” appears on the post. This will unlock the chest. Now go back and open the chest to get a Horn of Blood Mead.

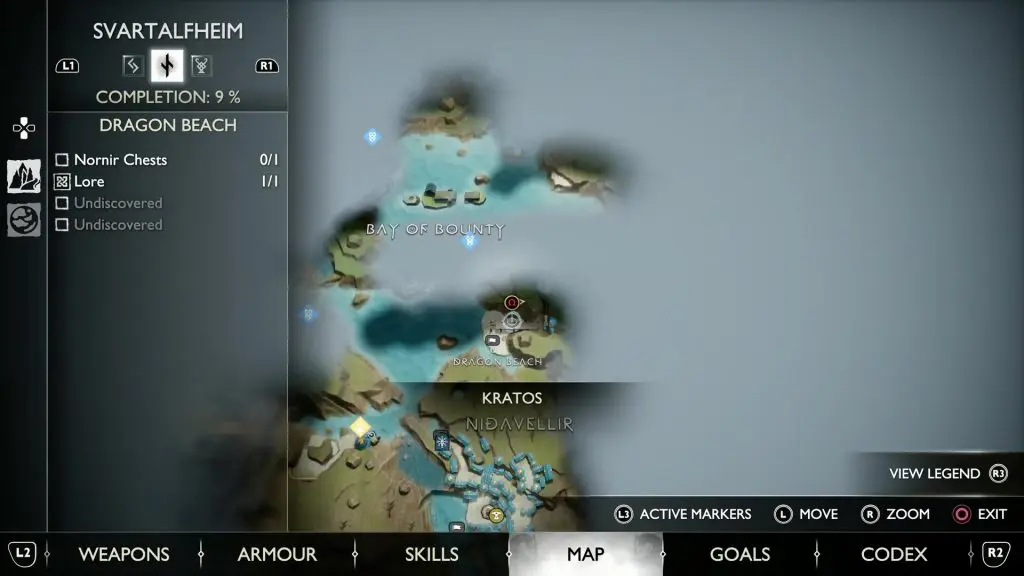
3) Dragon Beach Nornir Chest
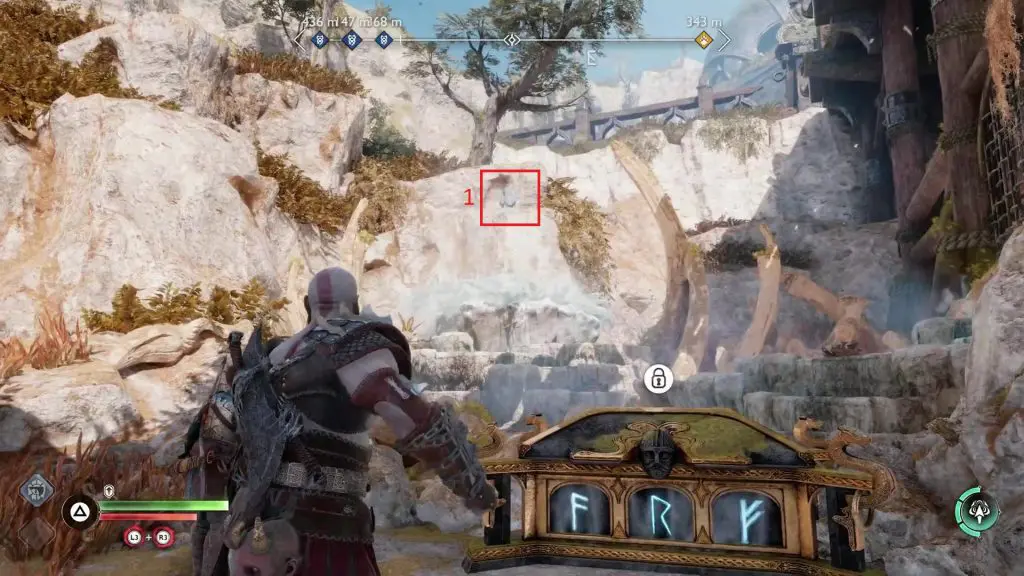
The Nornir chest is on the north side of the beach at the location shown in the picture below. To unlock the Nornir chest, you need to destroy three seals.
The first seal is behind the Nornir chest as shown in the picture below. Throw your axe at the base of the geyser behind the chest to freeze the geyser, to be able to see the seal.
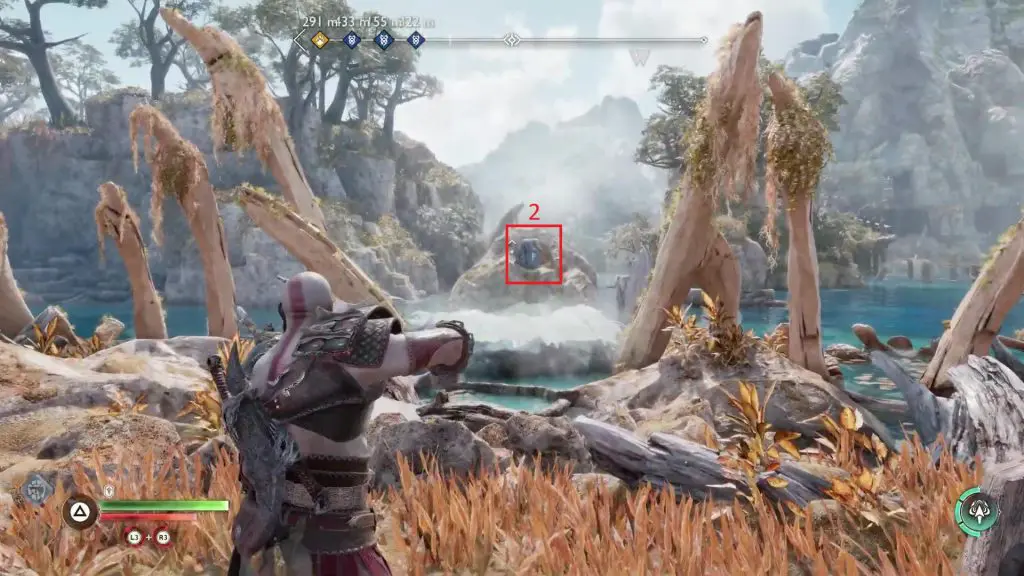
From the Nornir chest’s location, turn around and go west. Shortly, you will find another geyser. Freeze the geyser and you will see the seal behind it as shown in the picture below.
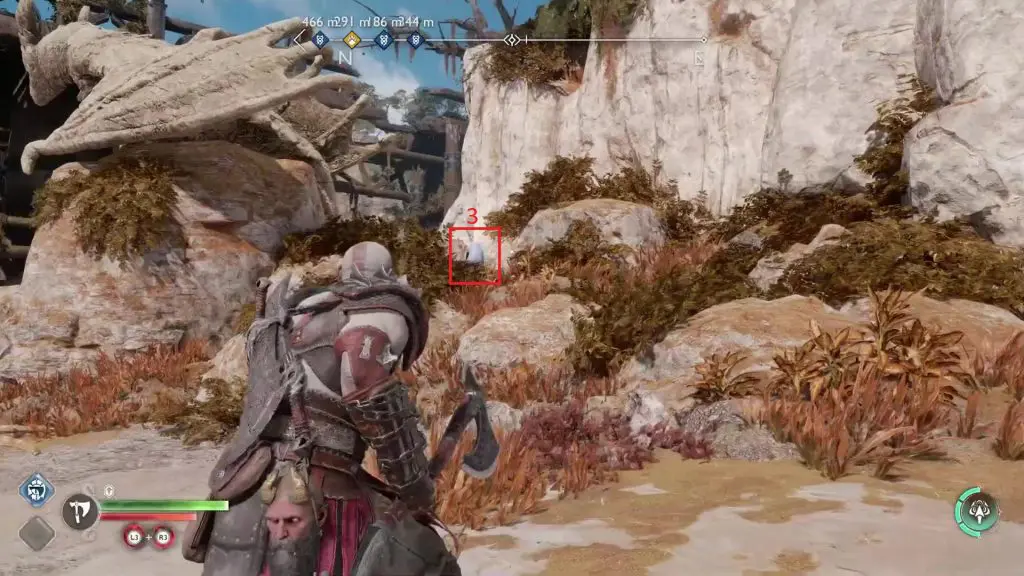
From the previous seal location, turn around and you will see a dragon statue. The third and final seal is behind the dragon statue as shown in the picture below. Once you have destroyed the three seals, the Nornir chest will be unlocked and you will get a Horn of Blood Bead by opening it.
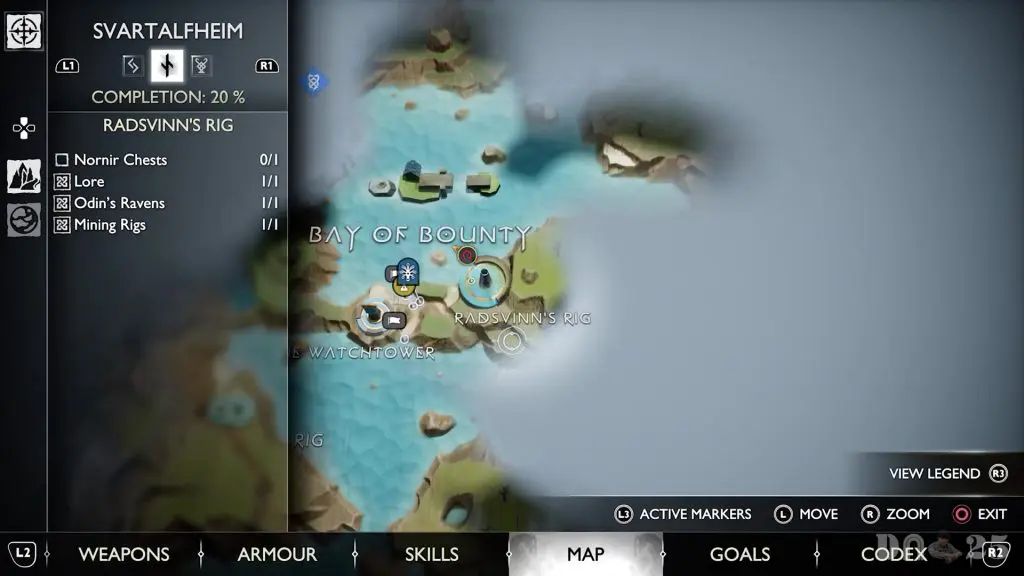
4) Radsvinn’s Rig Nornir Chest Puzzle Solution
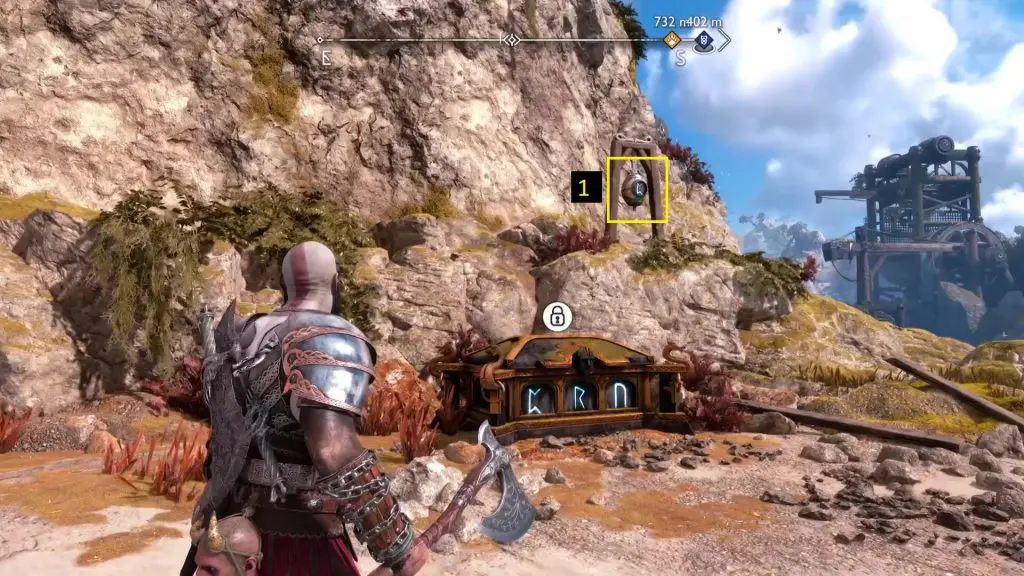
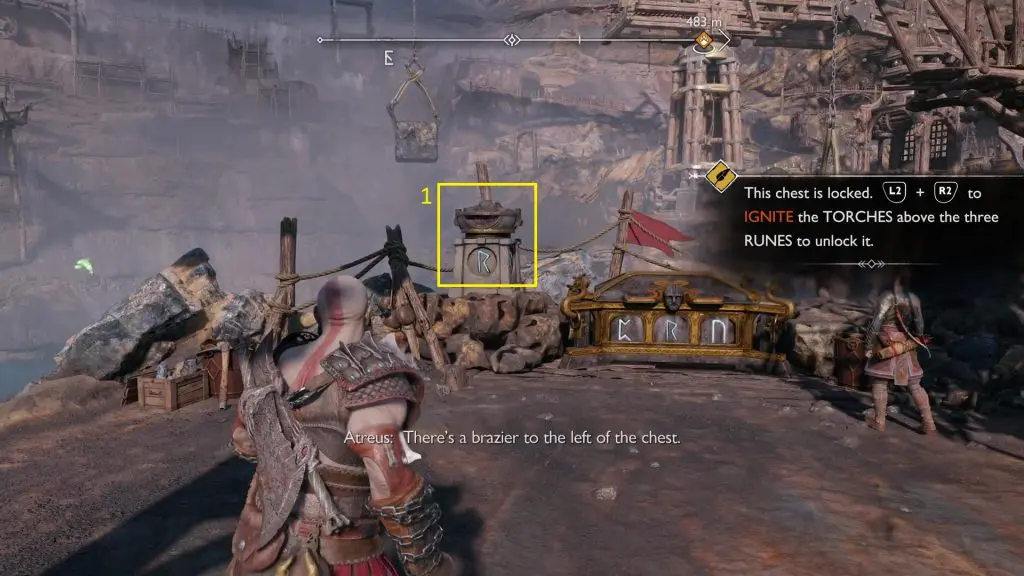
The location of the Nornir chest is shown in the picture below. To unlock the Nornir chest, you need to ignite the torch above three seals.
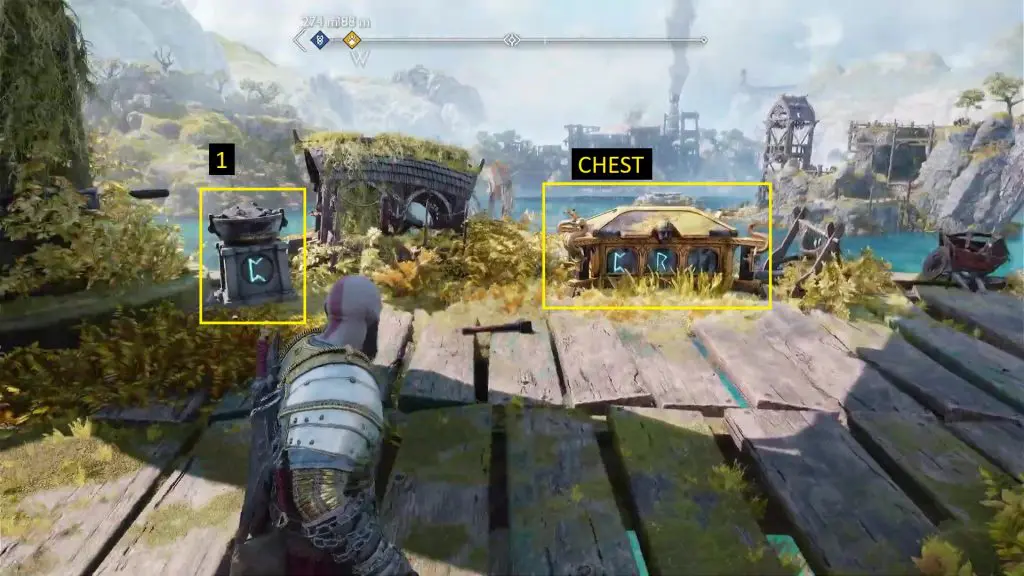
The first torch is on the left side of the chest as shown in the picture below. Press L2+R2 to ignite the torch.
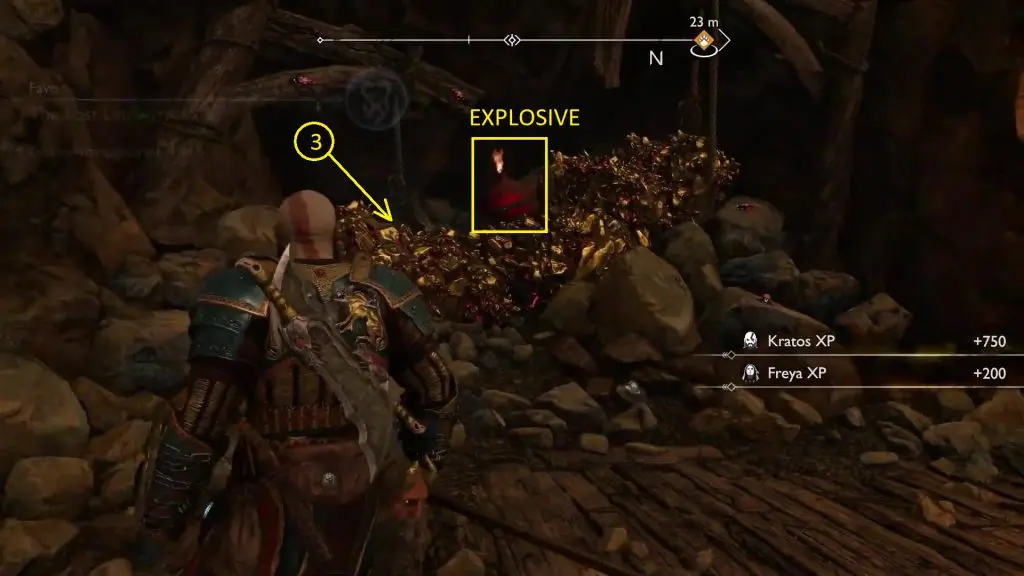
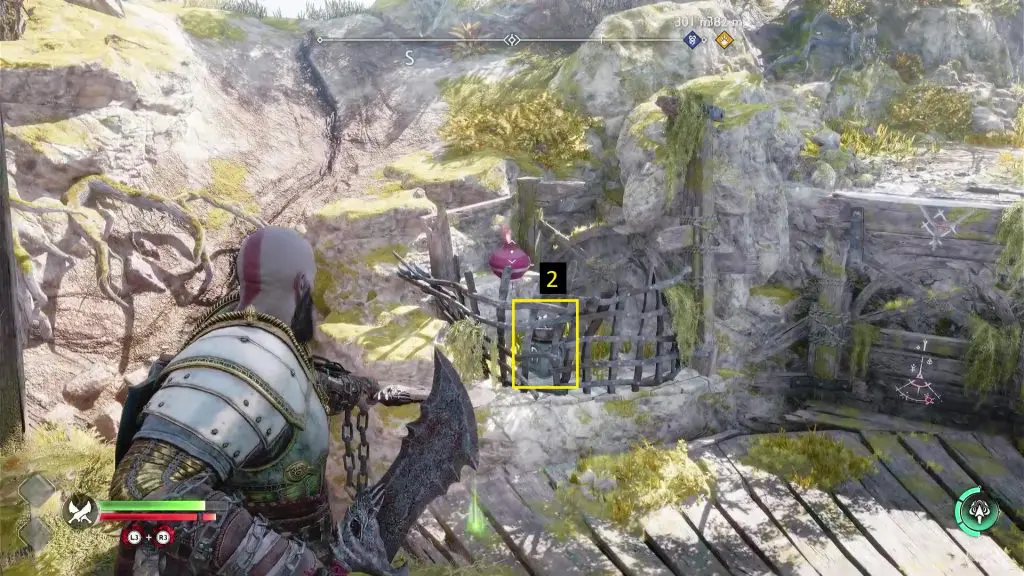
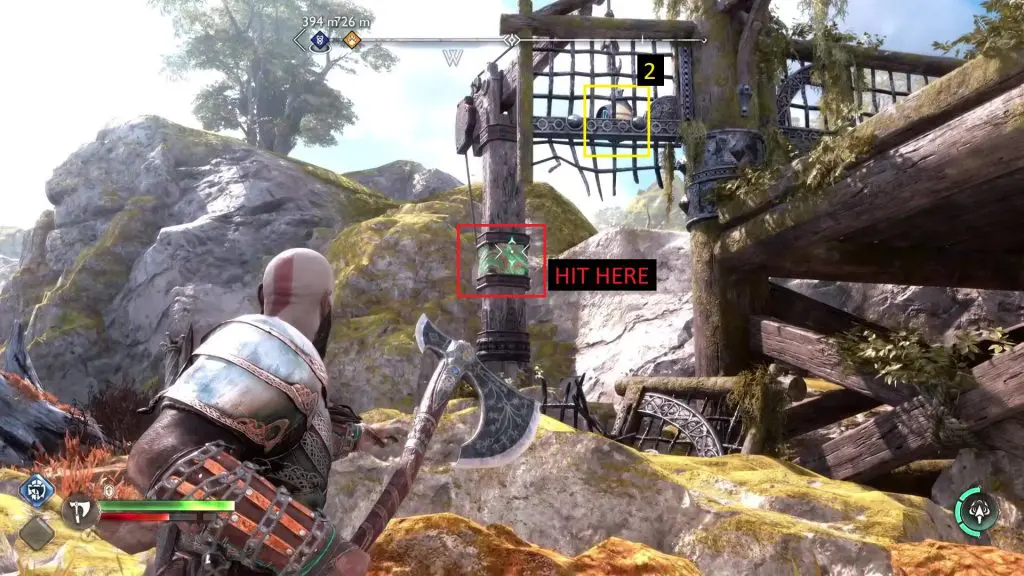
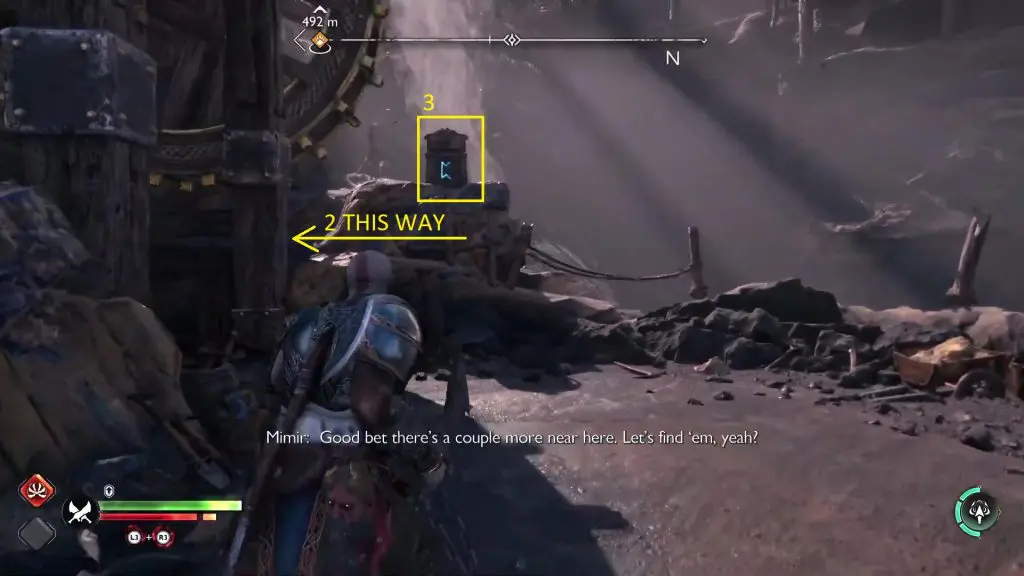
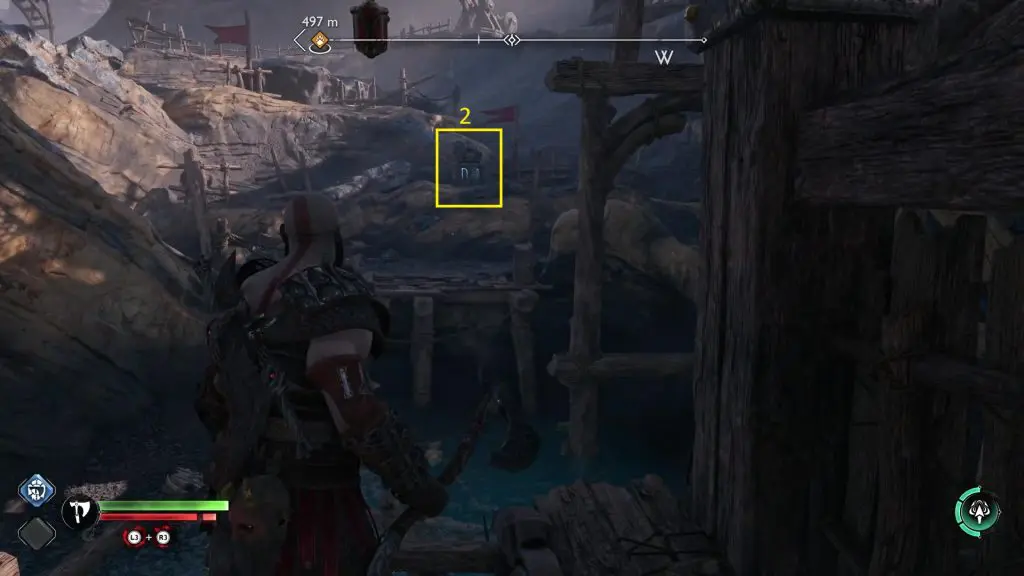
After igniting the first torch, turn around and you will find the second seal in front of the mining rig. But the torch is behind some iron bars, where your blade cannot reach from the ground. To ignite the torch, climb up the platform behind the mining rig. From there, throw your axe at the explosive barrel above the torch as shown in the picture below. This will ignite the torch.
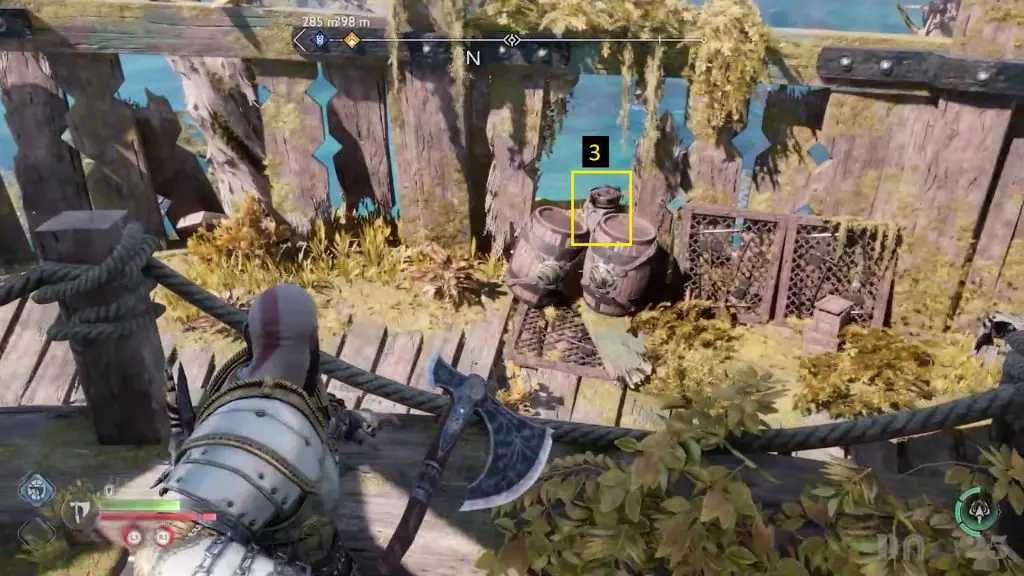
Now, go to the backside of the platform and you will see the third barrel behind some wooden barrels. Break the barrels and then ignite the third torch to unlock the chest. Open the chest to get an Idull Apple.
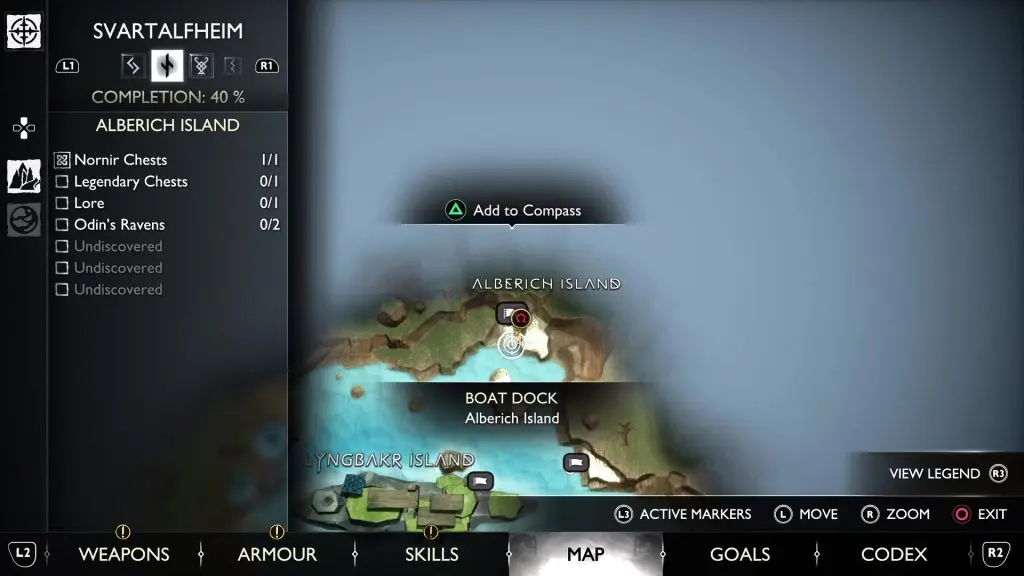
5) Alberich Island Nornir Chest
The Nornir chest is on the north side of Alberich island at the location shown in the picture below. To unlock the Nornir chest, you have to hit three seals in quick succession.
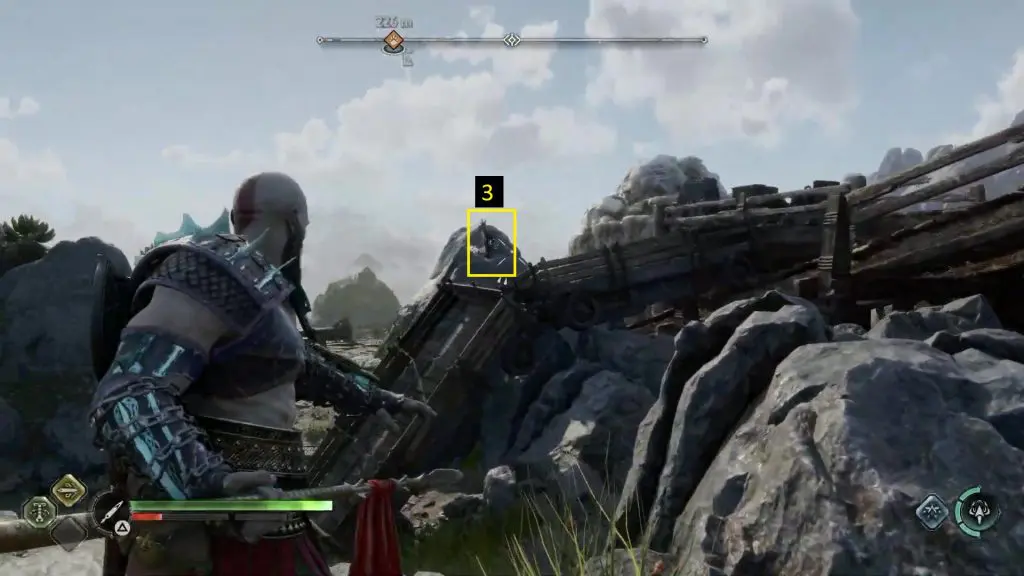
Seal #1 is behind the chest as shown in the picture below. In front of the chest, you will see a crane carrying Seal #2. Hit the green portion of the crane as shown in the second picture below. This will break the crane and the seal will hang down. On the right side of the crane, you will see Seal #3 behind steel bars as shown in the third picture below. Hitting the white portion of the board near the steel bars lifts the seal momentarily. The easiest way to unlock the chest is to hit Seal #3 first, as it is the most difficult one. Hit the board 2-3 times so that Seal #3 rises to the top. Now, hit Seal #3 quickly and then hit the other two seals in quick succession to unlock the chest. Open the chest to get Horn of Blood Mead.

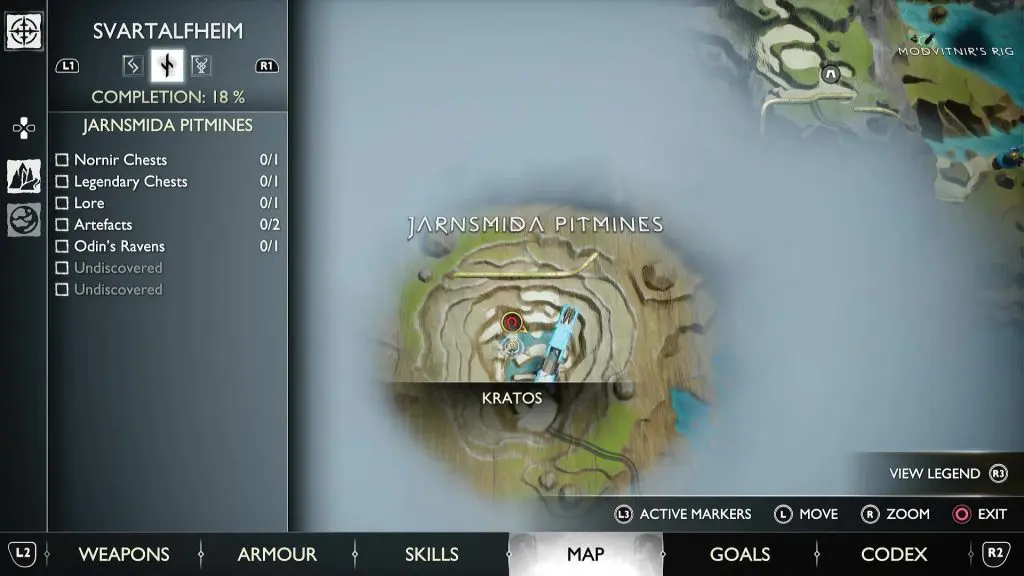
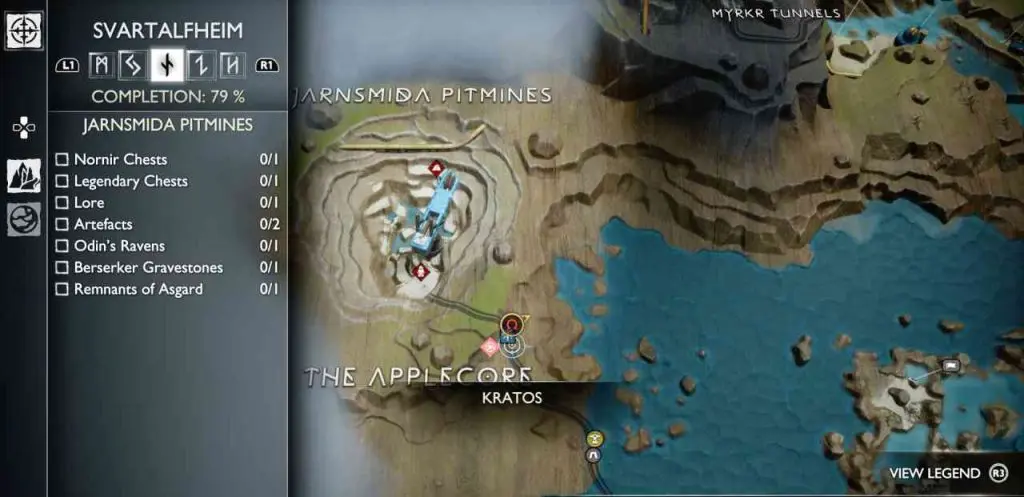
6) Jarnsmida Pitmines Nornir Chest
The location of the Nornir chest is shown in the picture below. To unlock the Nornir chest, you need to ignite three torches.
Torch #1 is next to the Nornir Chest as shown in the picture below. Press L2+R2 to ignite the torch.
After igniting the first torch, turn left and jump down. Here you will see another torch (Torch #3) as shown in the picture below. Don’t ignite it for now. Turn left from the waterwheel instead to see Torch #2 as shown in the second picture below. Use the grapplehook to swing near the torch and then ignite it.
Now swing back to reach Torch #3. Here, you will see water falling down from the waterwheel. Throw your axe at the edge of the wooden trough as shown in the picture below to freeze the water. Now ignite Torch #3 to unlock the Nornir Chest. Make sure to not summon back the axe, otherwise the water will start falling down and extinguish the torch. Now go back to the chest and open it to get an Idunn Apple.

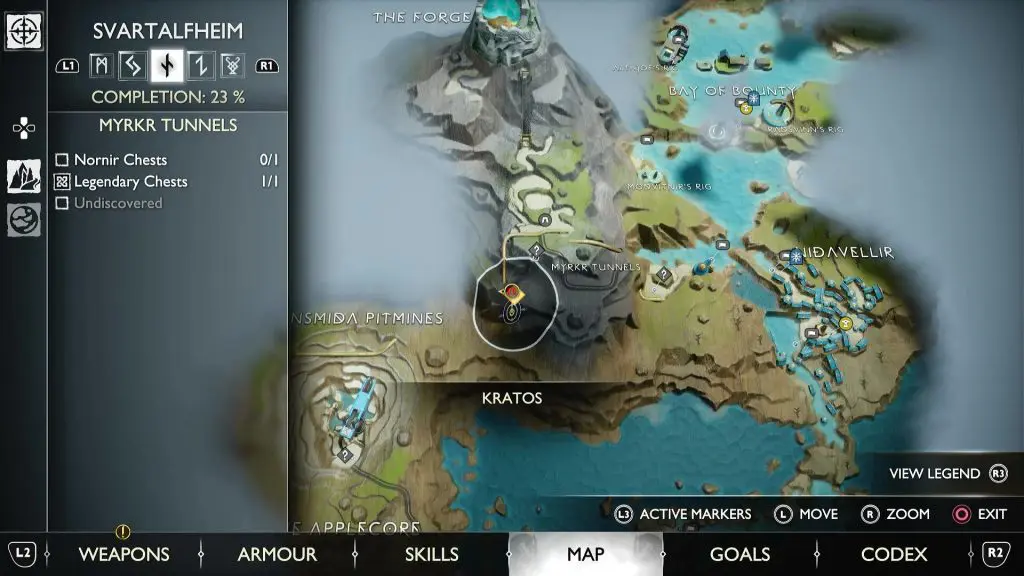
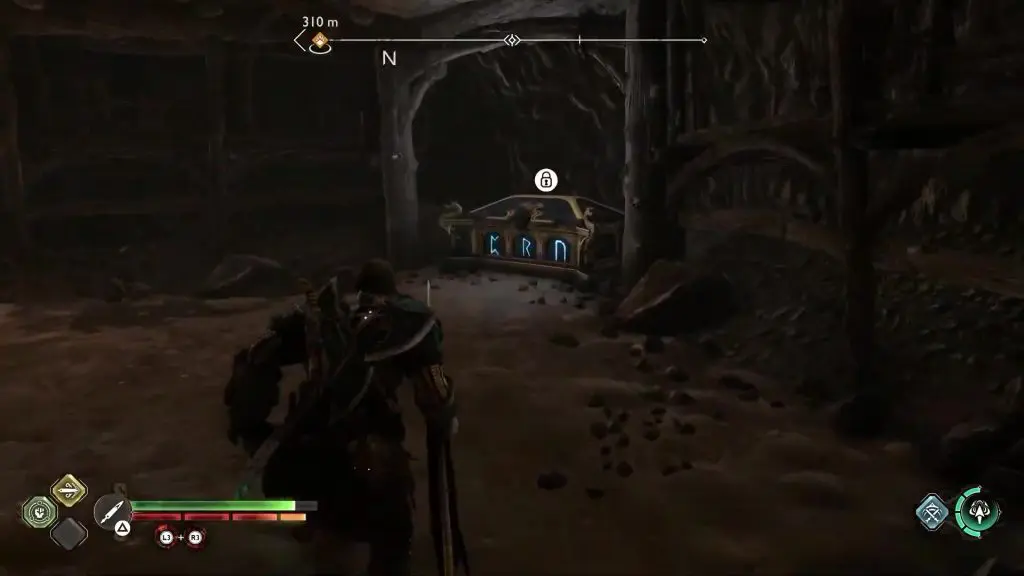
7) Myrkr Tunnels Nornir Chest
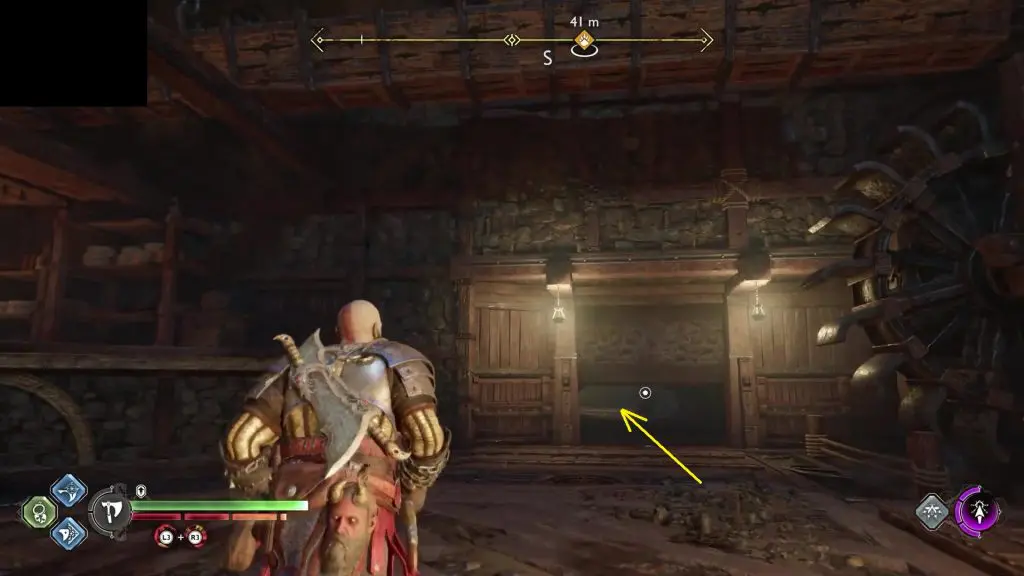
The location of the Nornir chest is shown in the picture below. You will reach there by crouching through the hole in the wall (See the second picture below) in the room where you have to solve the water puzzle during the Forging Destiny main story mission. To unlock the Nornir chest, you need to ignite the torch above three seals.
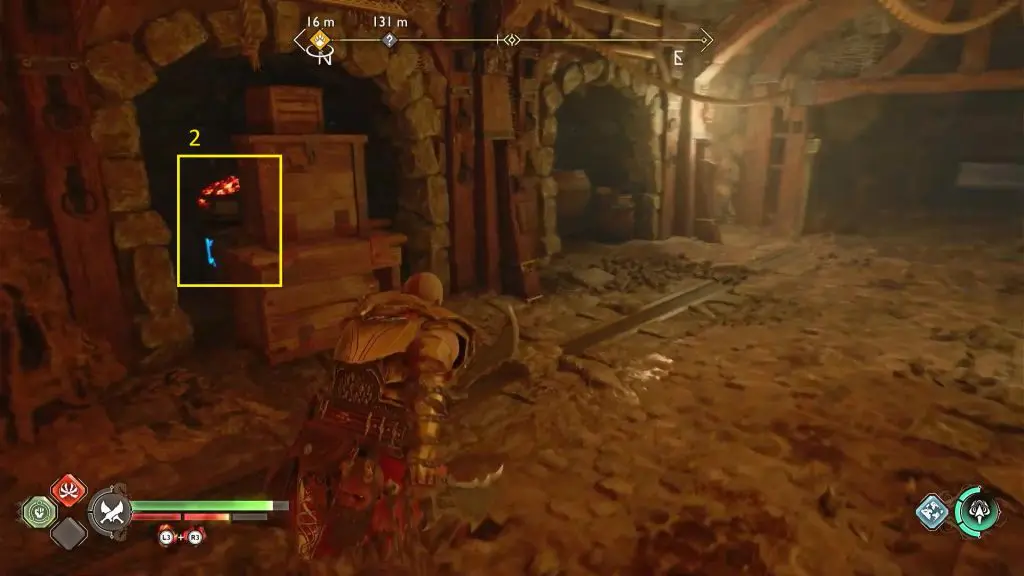
The first torch is in front of the Nornir chest as shown in the picture below. Pres L2+R2 to ignite the torch. The second torch is behind some crates in the same hallway as the previous one as shown in the second picture below. Break the crates and then ignite the torch.

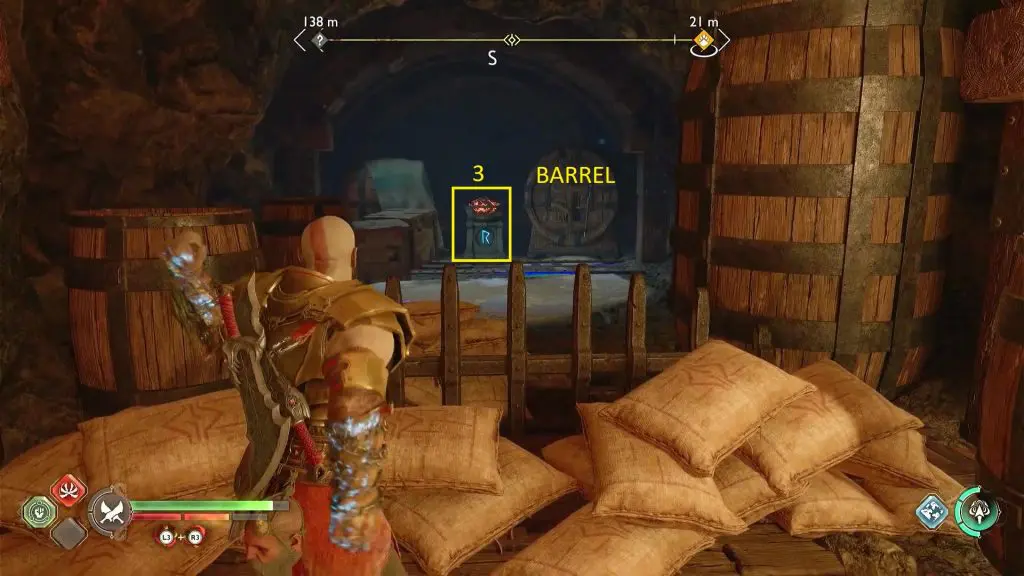
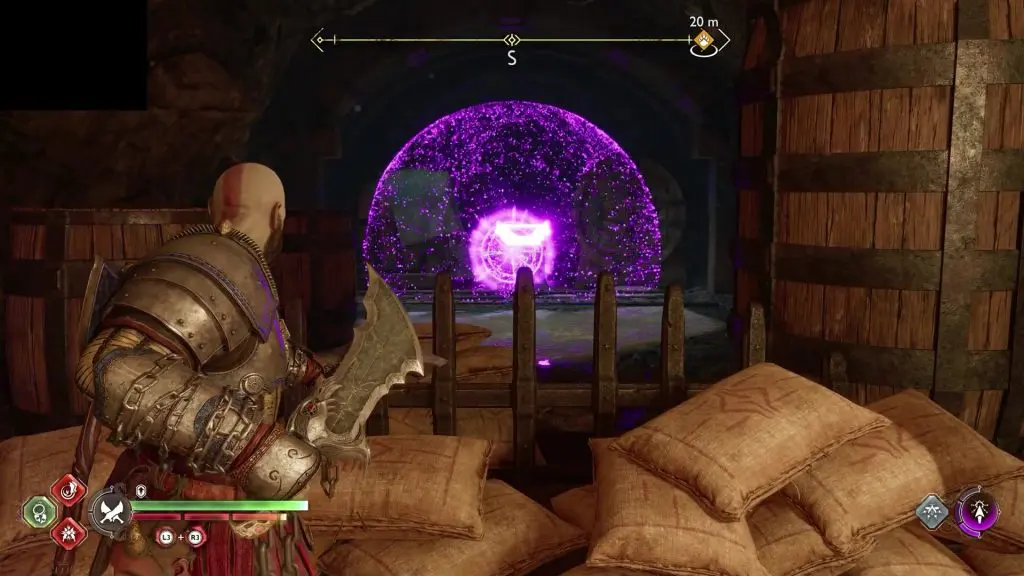
The third and final torch is on the left side of the chest. This torch cannot be ignited with your blade. Hit the barrel next to the torch and it will spill some oil on the ground as shown in the picture below. Now shoot a few purple arrows in the area and hit them with your blade. this will ignite the oil and the torch. This will unlock the chest. Open it to get an Idunn Apple.
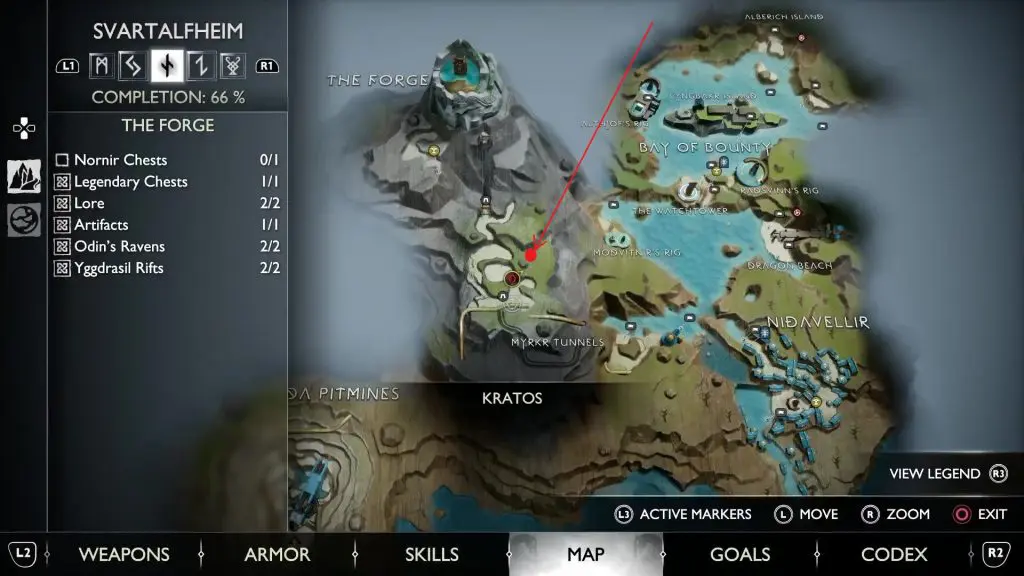
8) The Forge Nornir Chest
The location of the Nornir chest is shown in the pictures below. To unlock the chest, you will need to destroy 3 totems simultaneously. You can do this by using Spear, which you will get during the main story mission.
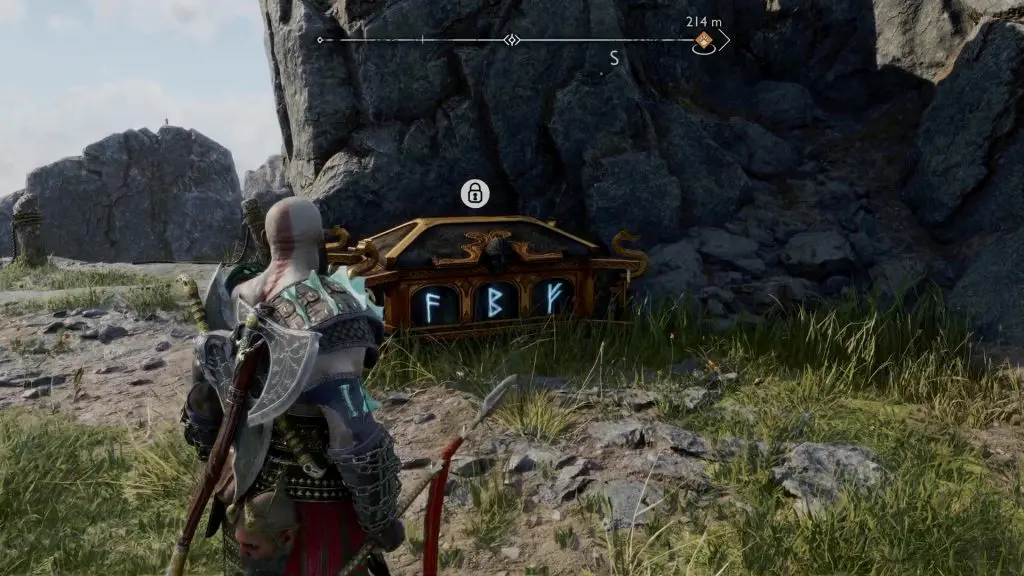
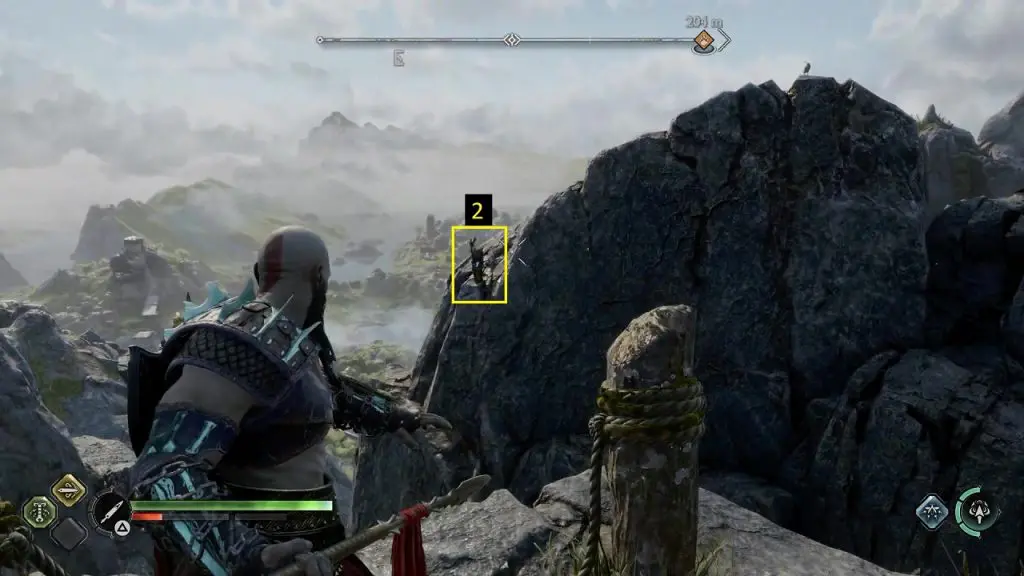
Totem #1 is on the mountain wall in front of the chest. Totem #2 is far away on the left side of the chest. For Totem #3, take the path going right from the chest. Here you will find the totem near the wooden bridge. The location of the totems is shown in the pictures below. Hit the totems with a spear by pressing L2+R1. But make sure to not detonate them. After you have hit all three totems with spears, press the “Triangle” button to destroy them at once. This will unlock the chest. Open it to get Horn of Blood Mead.

9) The Applecore Nornir Chest 1
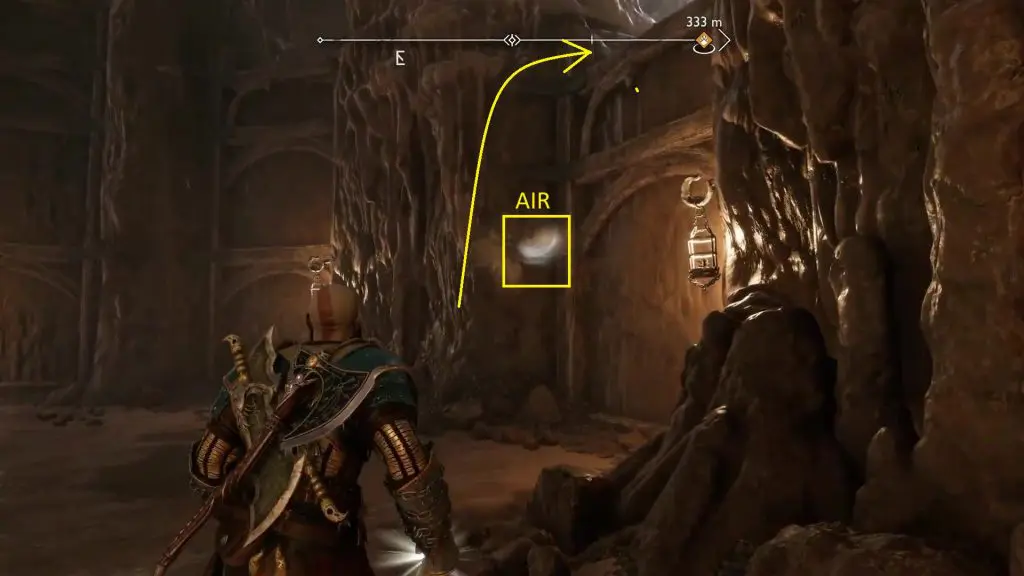
The location of the Nornir chest is shown in the pictures below. During the main story, you will reach this area after using a long zipline. After that, you will see some air coming out from the wall on the right side as shown in the second picture below. Throw your spear into the hole and then use it to jump to the upper level and reach the Nornim Chest. To unlock the chest, you will need to destroy 3 totems simultaneously. You can do this by using Spear.
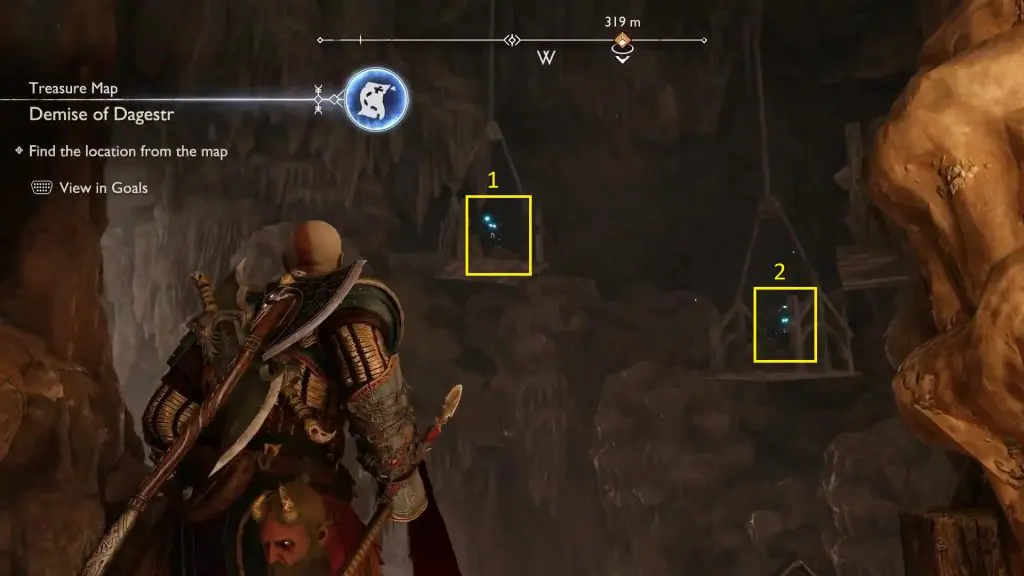
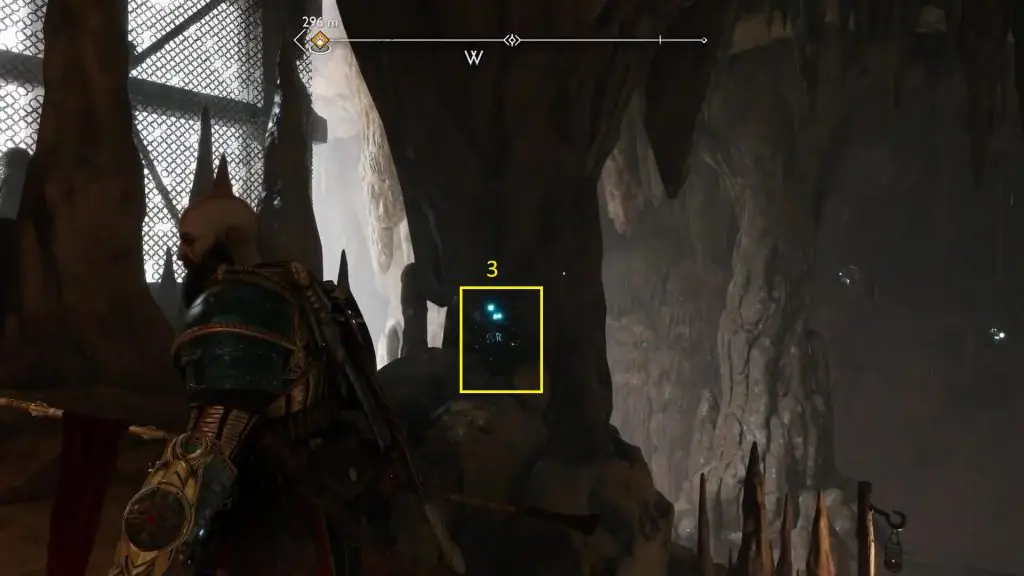
You will find two totems hanging up in the air in front of the chest. Go right from the chests and climb up the walls to reach the third totem. location of the totems is shown in the pictures below. Hit the totems with a spear by pressing L2+R1. But make sure to not detonate them. After you have hit all three totems with spears, press the “Triangle” button to destroy them at once. This will unlock the chest. Open it to get an Idunn Apple.
10) The Applecore Nornir Chest 2
The location of the Nornir chest is shown in the pictures below. To unlock the chest, you will need to destroy 3 totems simultaneously. You can do this by using Spear.
Go to the right edge of the platform the chest is on. The totem won’t be visible as it is behind a waterfall far away. Freeze the waterfall to reveal the totem as shown in the picture below. Hit the totem with the spear. Totem #2 is on the left side of the chest. Continue further left from Totem #2, and you will see an explosive barrel behind some blockage on the right side. Hit the explosive barrel to remove the blockage, revealing the totem. Hit the totems with a spear by pressing L2+R1. But make sure to not detonate them. After you have hit all three totems with spears, press the “Triangle” button to destroy them at once. This will unlock the chest. Open it to get a Horm of Blood Mead.