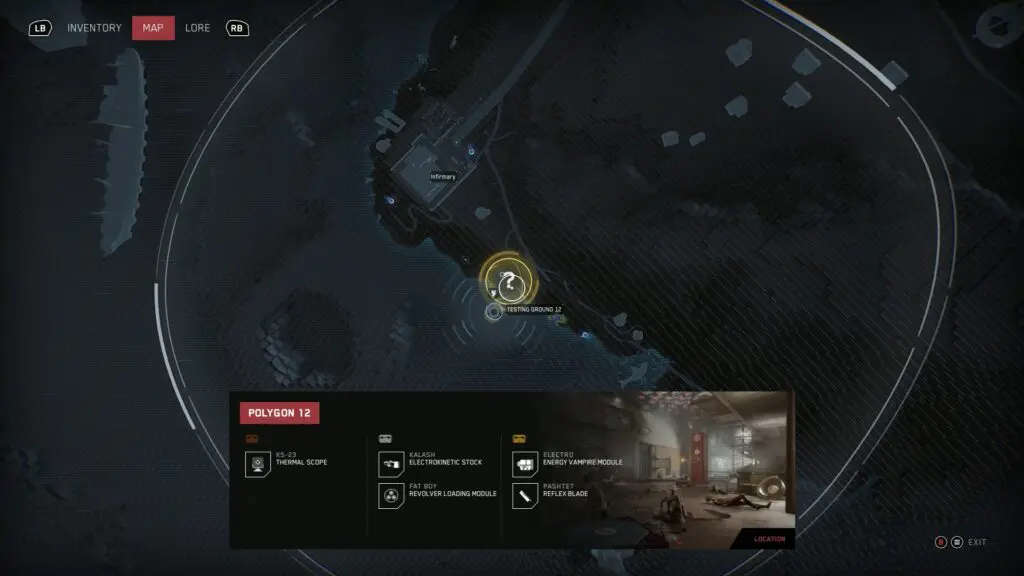
Atomic Heart: Testing Ground 12/ Polygon 12
This guide shows the complete walkthrough of Testing Ground 12/ Polygon 12 in the Atomic Heart game. Check the link posted below for a video walkthrough.
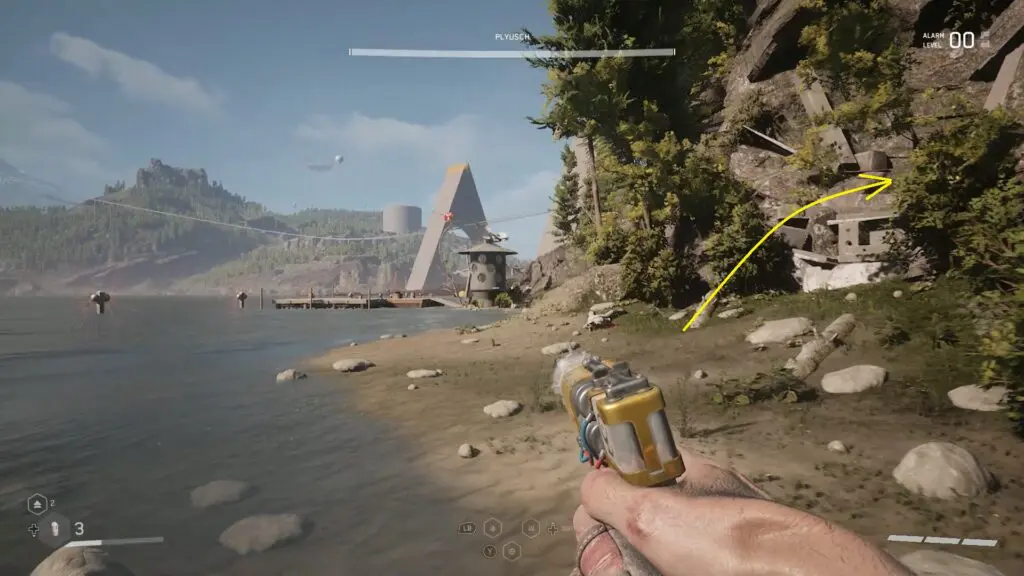
How to enter Testing Ground 12
Go to the beach shown in the pictures below and enter the cave. Then take the elevator down to reach the Testing Ground.
Bronze Chest
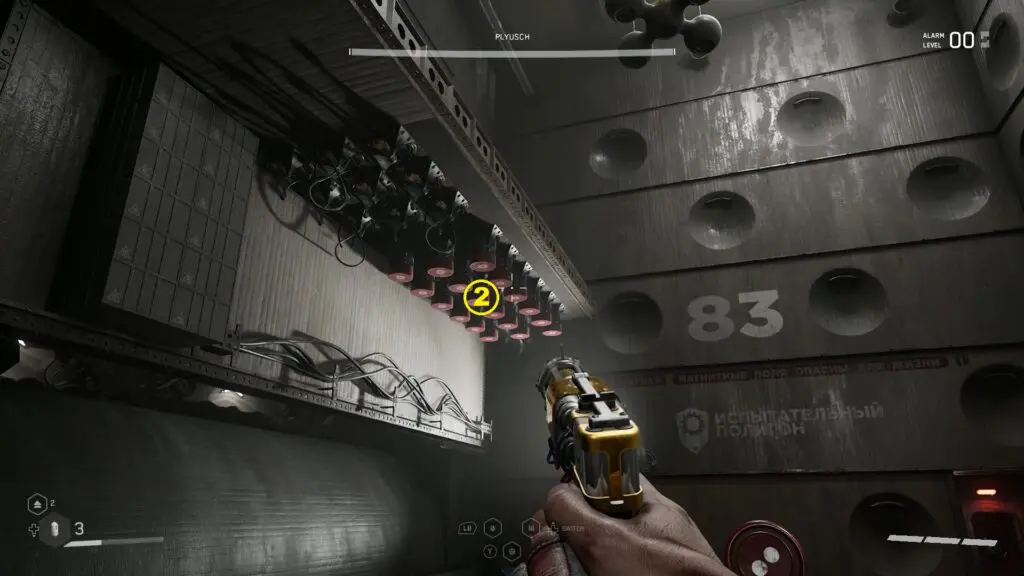
Proceed ahead and you will reach a puzzle room. Rotate the red wheel there and a set of magnetic coils will appear as shown in the picture below. Use shock on the magnetic coils and a platform will move up. Then move the red wheel again and another set of magnetic coils will appear as shown in the second picture below. Use shock on the magnetic coils and another platform will move up. Use the platform to cross to the other side. Then open the puzzle door and proceed ahead to reach the bronze chest. Open it to get the KS-23 – Thermal Scope blueprint.
Silver Chest
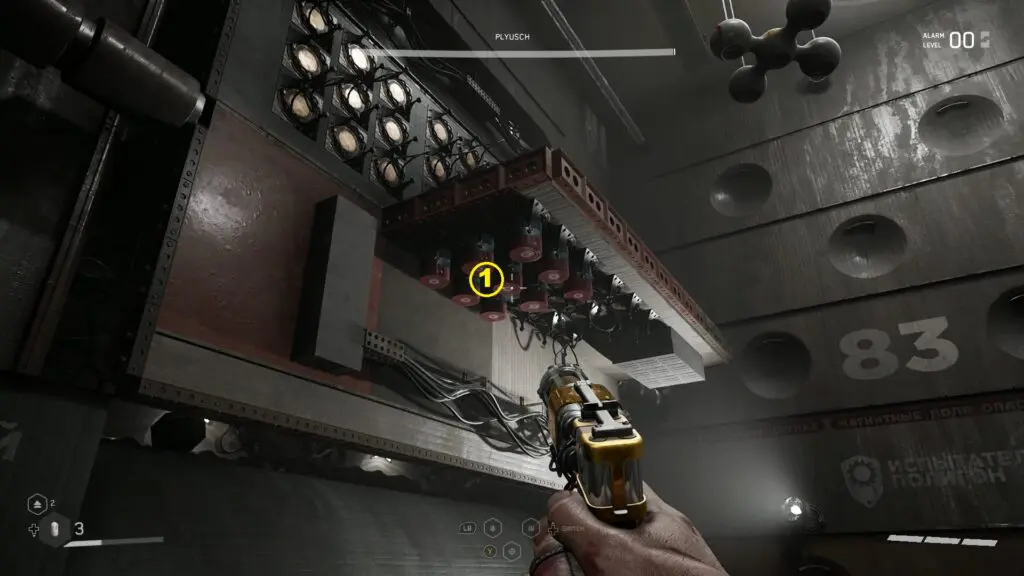
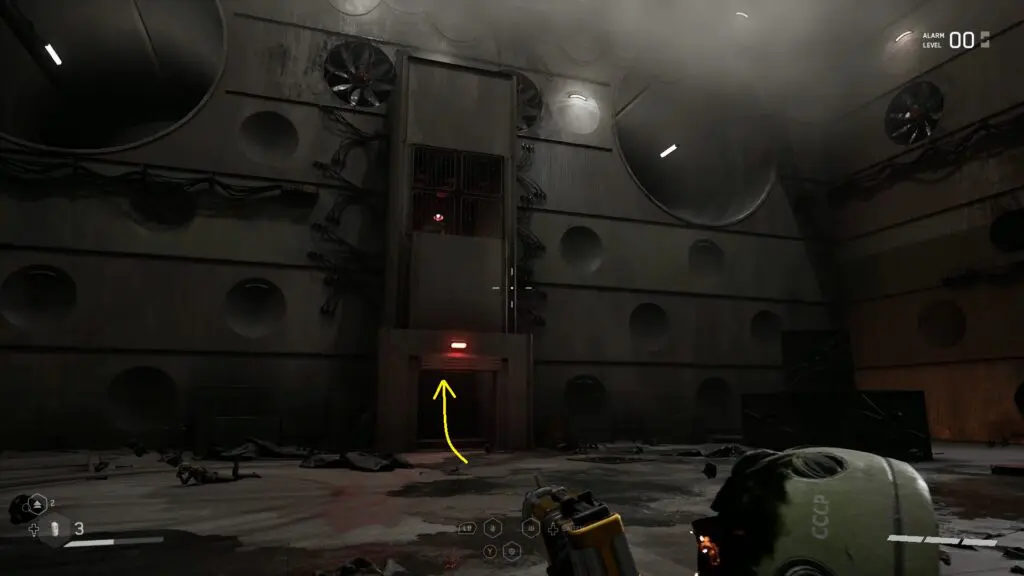
Proceed ahead and defeat NA-T256 Natasha boss. Then step into the shaft as shown in the picture below. Use shock on the roof to go up. Open the puzzle door and proceed ahead to reach the silver chest. Open it to get Kalash – Electrokinetic Stock blueprint.
Gold Chest
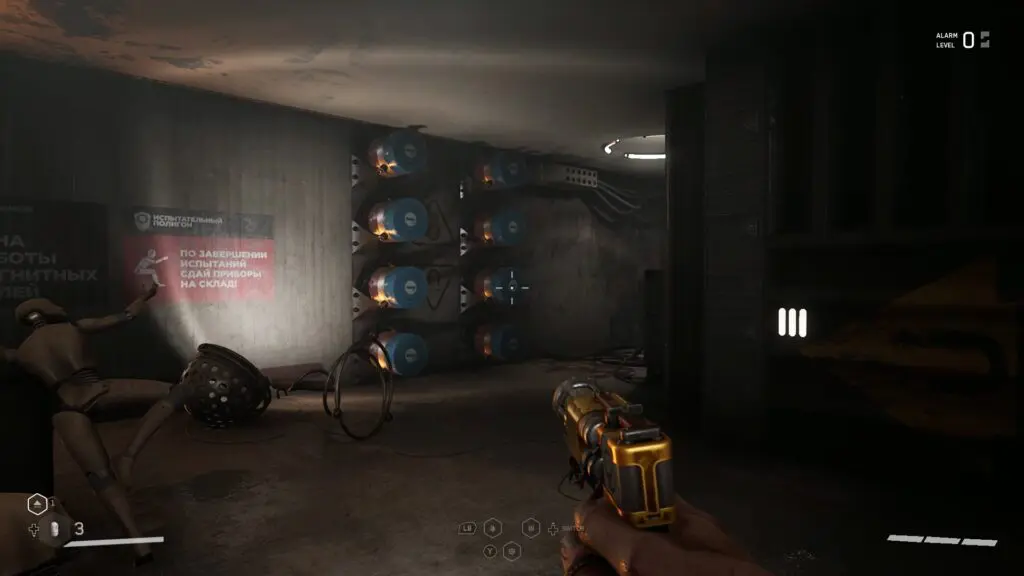
Proceed ahead and you will reach a magnetic gate as shown in the picture below. Use shock to open the gate.
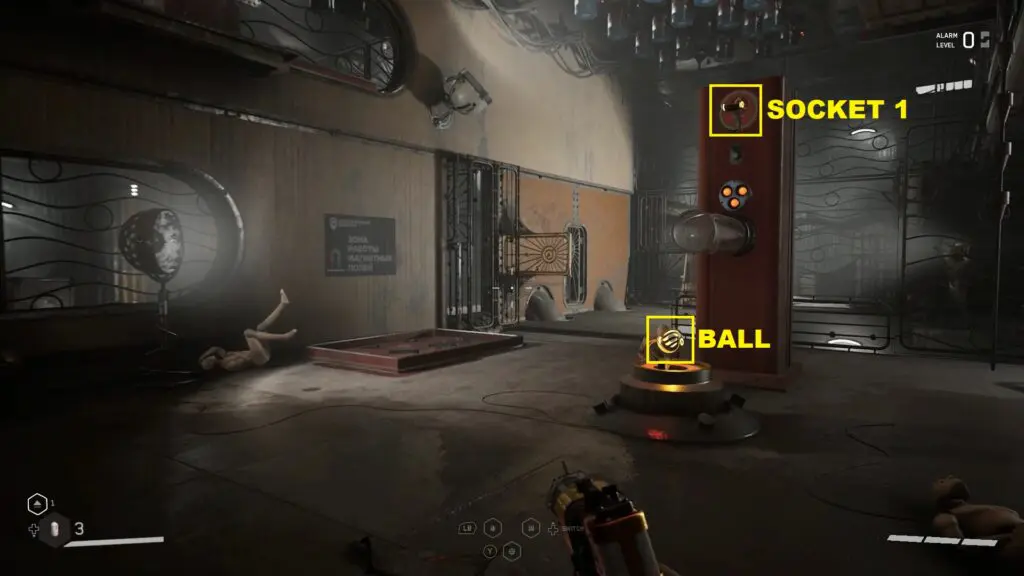
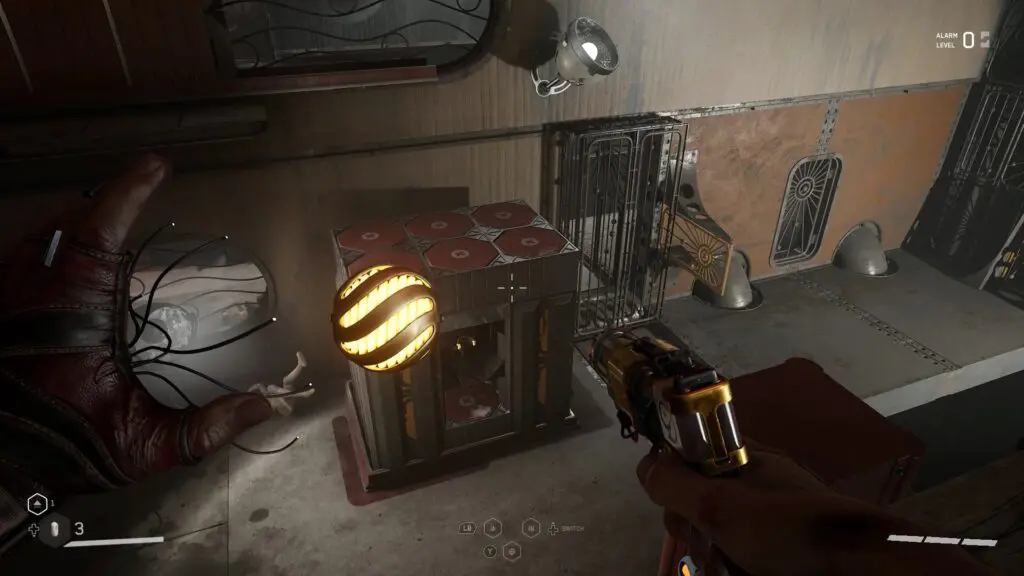
Pick up the ball in the next room and insert it into the socket above it (Socket 1) as shown in the picture below. This will activate the magnetic coils on the roof. Use shock on the roof to make a pedestal with a socket (Socket 2) come out. Now take out the ball from socket 1 and insert it into socket 2. This will make the diorama next to it start rotating. Pull out the ball from socket 2 when the diorama with an opening as shown in the second picture below comes.
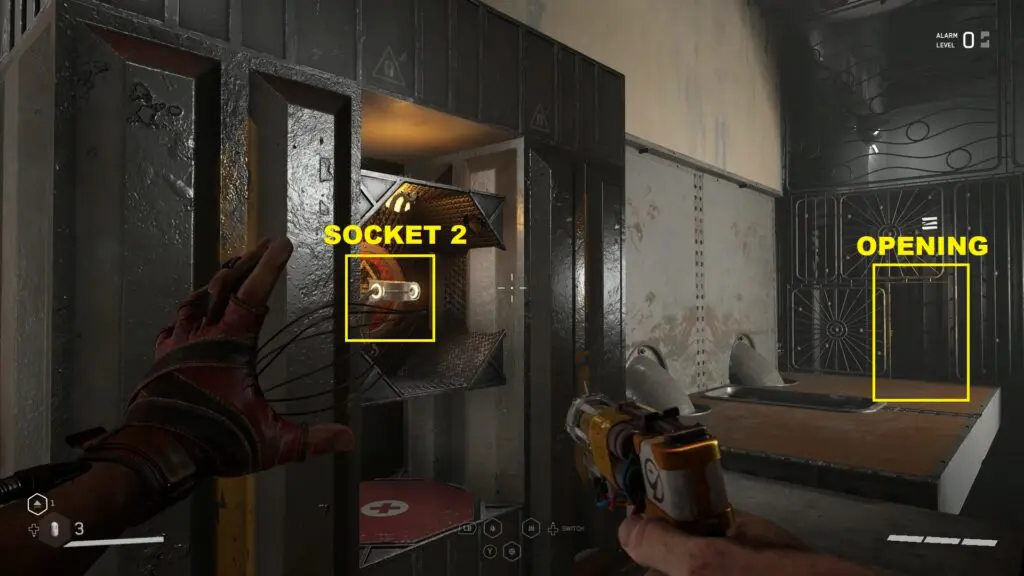
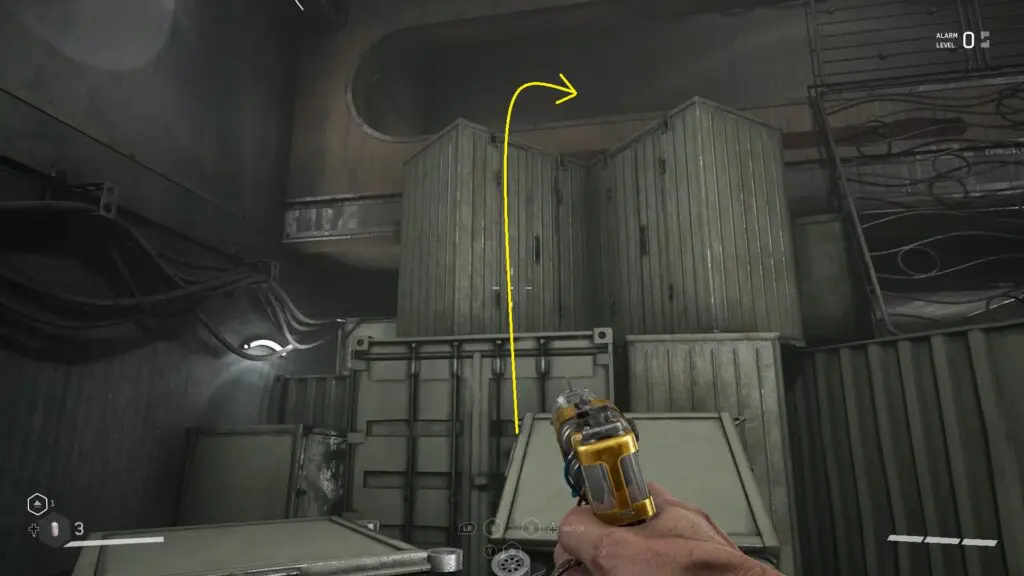
Insert the ball into socket 1. Now use shock on the roof. This will make the magnetic wall in front of the opening go down, clearing your path. Go through the opening and climb up the boxes on the right side to reach the upper level as shown in the picture below. Then open the magnetic gate there as shown in the second picture below.
Use shock on the roof again to make socket 2 come out. Now pull out the ball from socket 1 and insert it into socket 2. This will again make the diorama next to it start rotating. Pull out the ball from socket 2 when the diorama changes to as shown in the picture below. Insert the ball into socket 1.
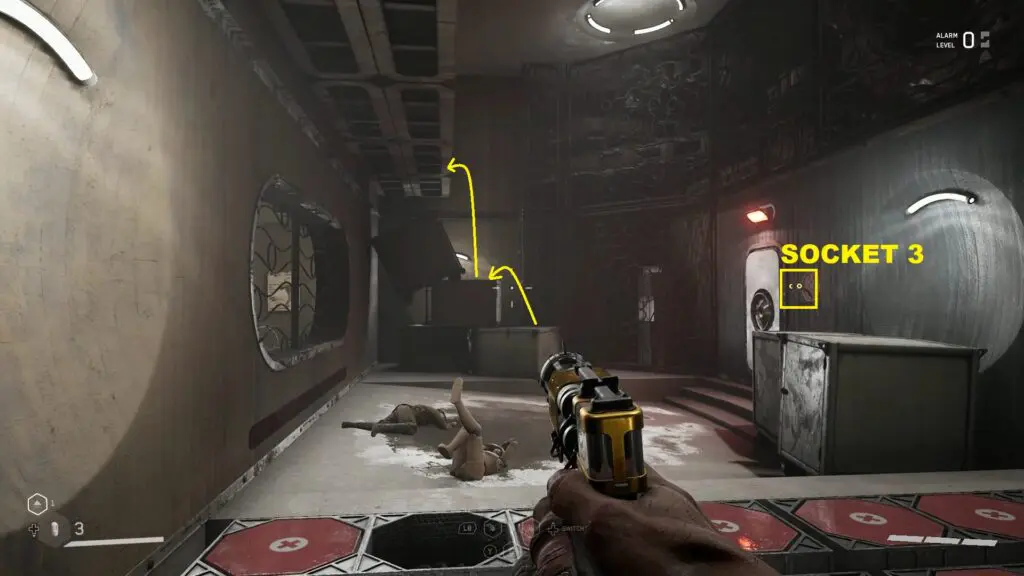
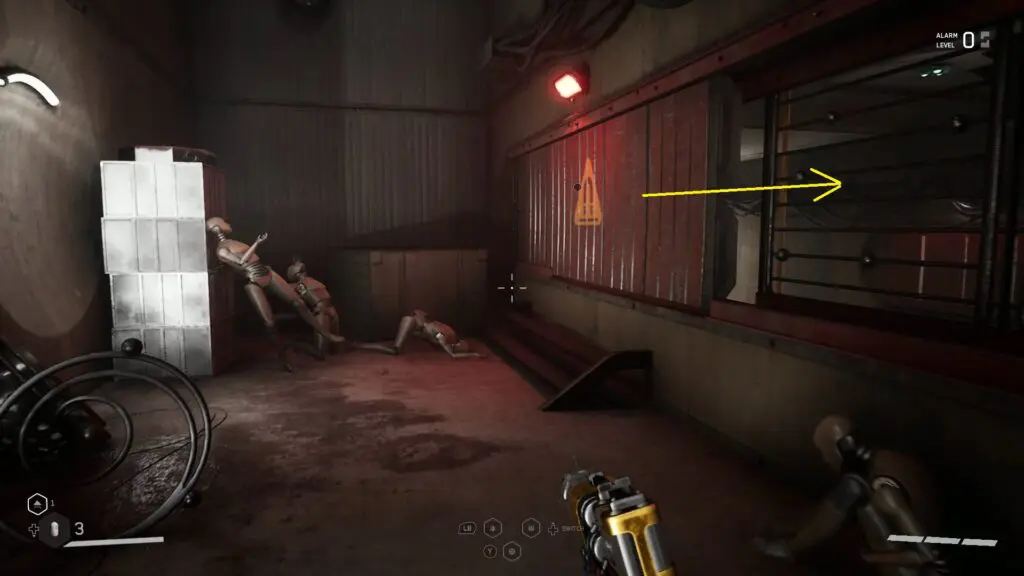
Now climb down the boxes and go straight ahead to the next room. Use shock on the roof to make the magnetic wall move down. Then go through the opening. Again use shock on the roof to make another magnetic wall come down. Then climb up the boxes ahead to reach the upper level as shown in the picture below. Open the magnetic gate there and pull out the ball from socket 1. Insert the ball into socket 3 to open the door. Then go straight ahead to reach the gold chest. Open it to get Electro – Energy-Vampire Block and Pashtet – Blade blueprints.