Atomic Heart: Testing Ground 2/ Polygon 2
This guide shows the complete walkthrough of Testing Ground 2/ Polygon 2 in the Atomic Heart game. Check the link posted below for a video walkthrough.
How to enter Testing Ground 2
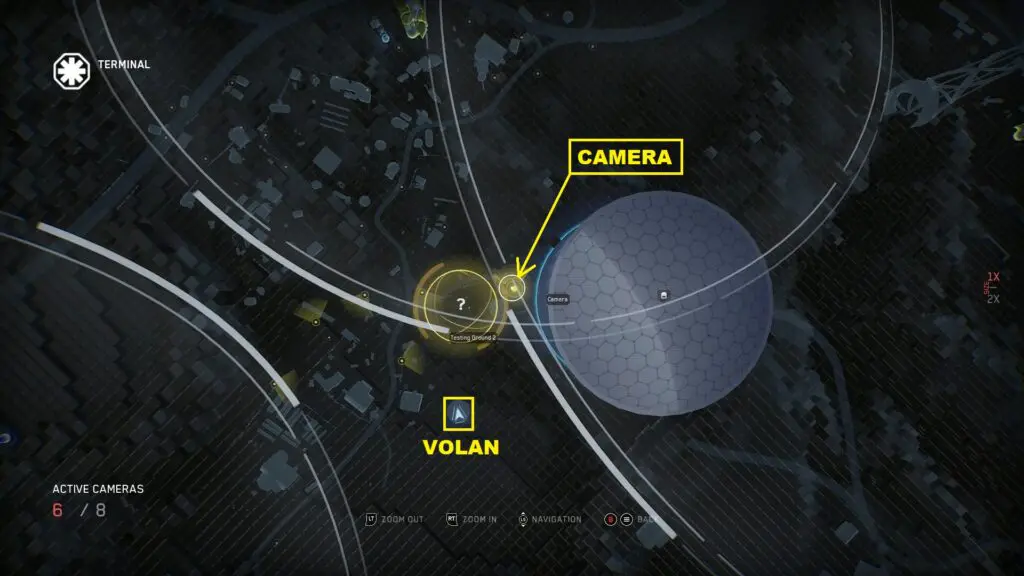
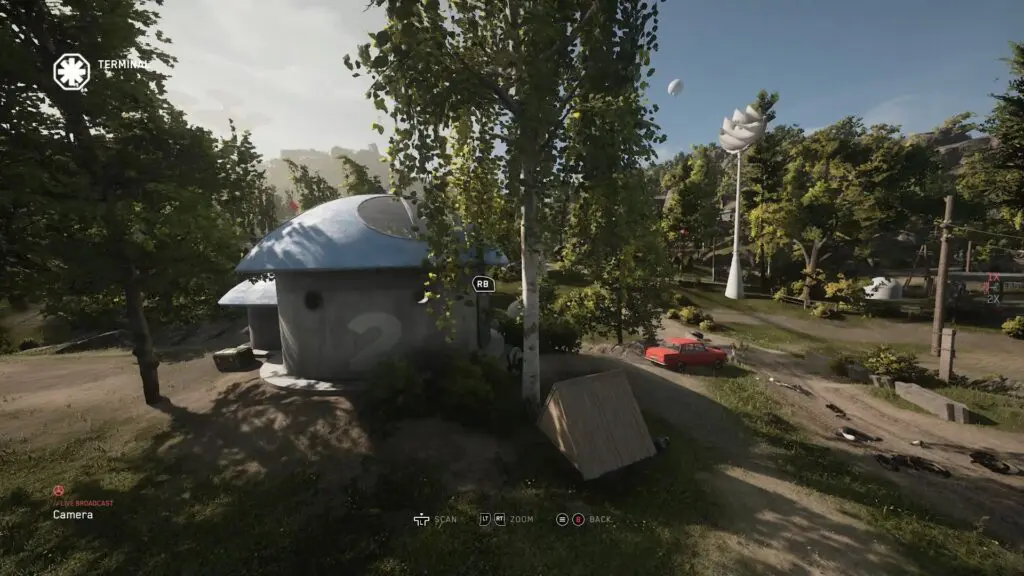
Go to the location shown in the picture below and climb up the small tower there to find a Volan. Interact with the Volan and use the camera shown in the picture below to open the entrance gate shown in the second picture below. Now, go inside and take the elevator down to reach the Testing Ground.
Bronze Chest
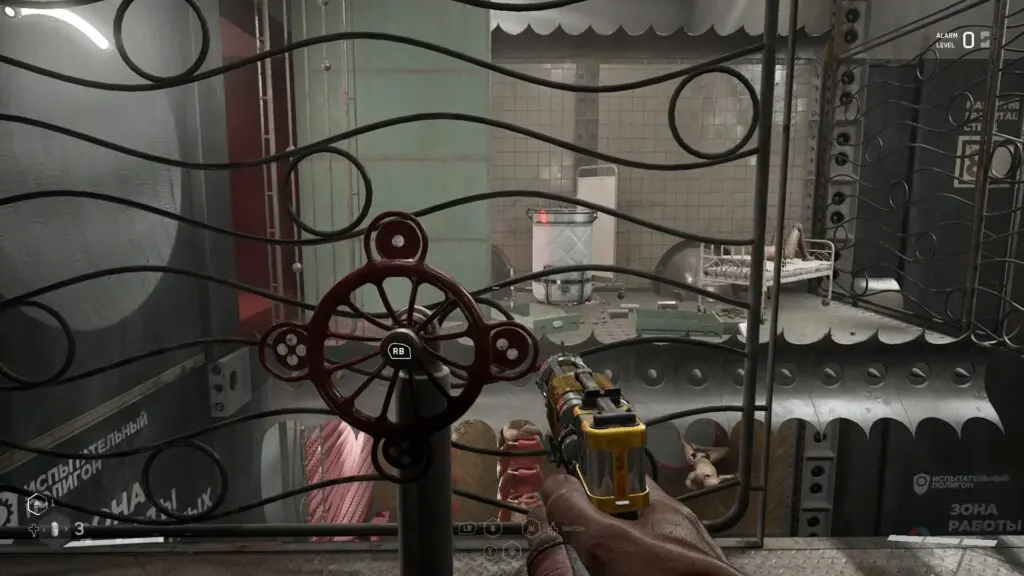
Proceed ahead and you will reach a puzzle room. As you enter the room, you will see a red wheel on the right side. Rotate the wheel such that the green shelf on the opposite side of the room has the green arrow pointing up as shown in the picture below.
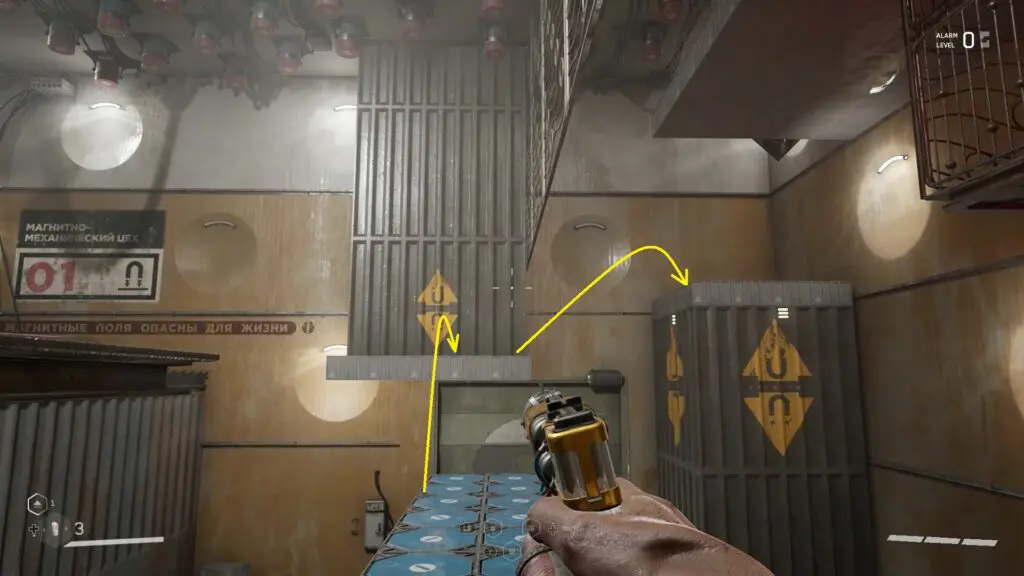
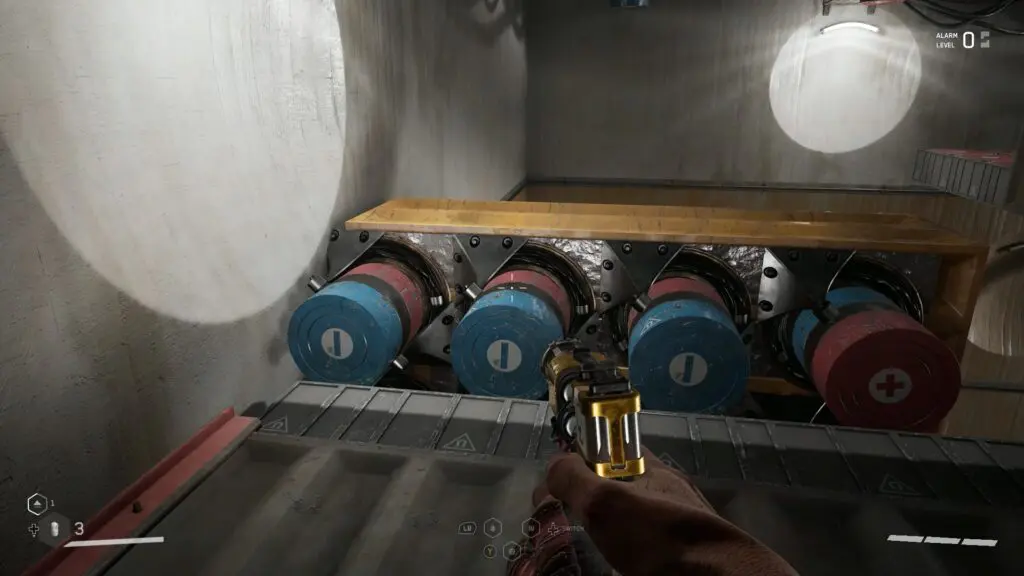
Then use shock on the magnetic coils on the right side. This will open the magnetic gate. Behind the gate, you will see rotating dioramas. Jump on the diorama and go to the opposite side of the room when the arrangement of the diorama is as shown in the picture below.
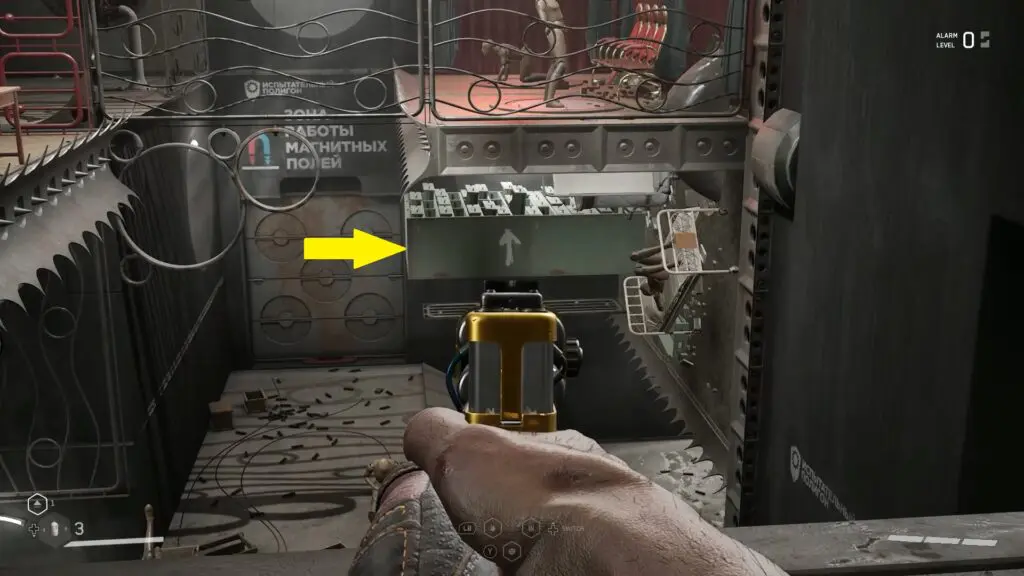
On the other side, you will find another red wheel. Rotate the red wheel to change the diorama in front of it as shown in the picture below. Now jump on the diorama and proceed ahead through the opening to reach the bronze chest. Open it to get PM – Electromagnetic Polarizer.
Silver Chest
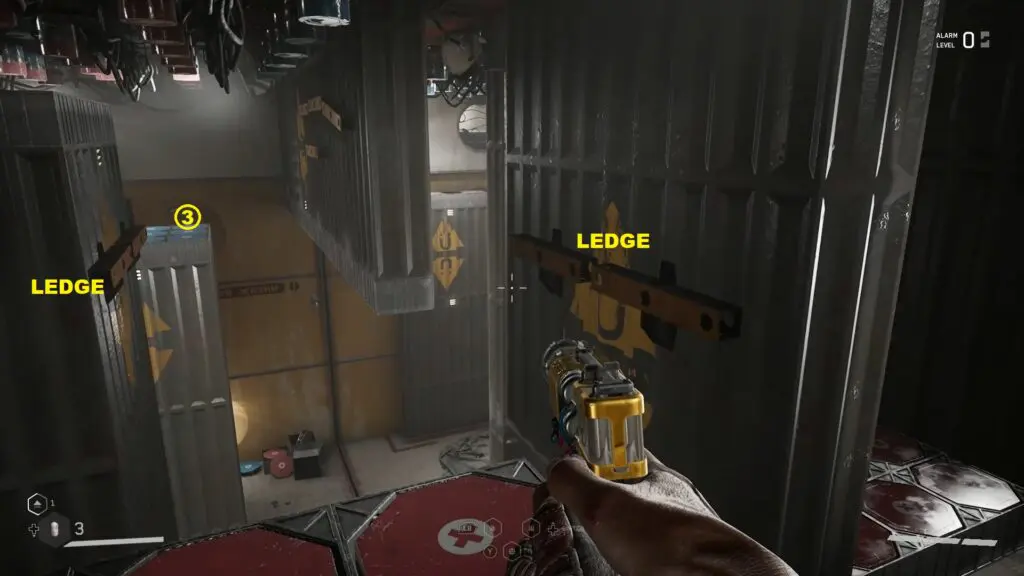
Proceed ahead and you will reach another puzzle room. In this room, you will see some ledges on the wall as shown below. Use shock on the roof and then immediately jump on the ledges. This will take you up. Then jump on the ledge on the right side as shown in the picture below.
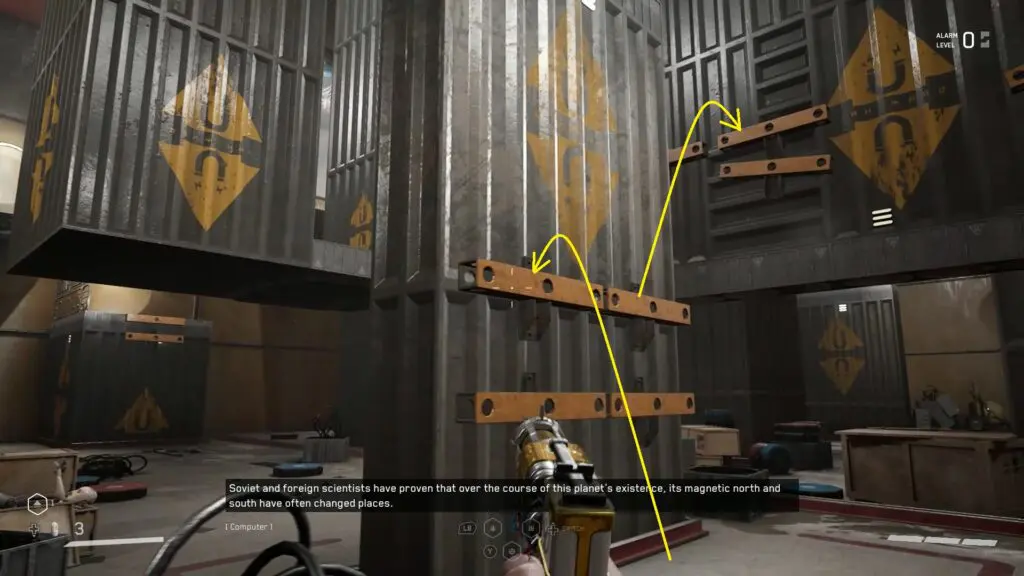
Move on the ledge and jump to Platform #1 as shown below. Then use shock on the roof. This will bring Platforms #1 & #2 down. Now jump to Platform #2. Again use shock on the roof to move Platform #2 up. Then jump to the other magnetic platform ahead.
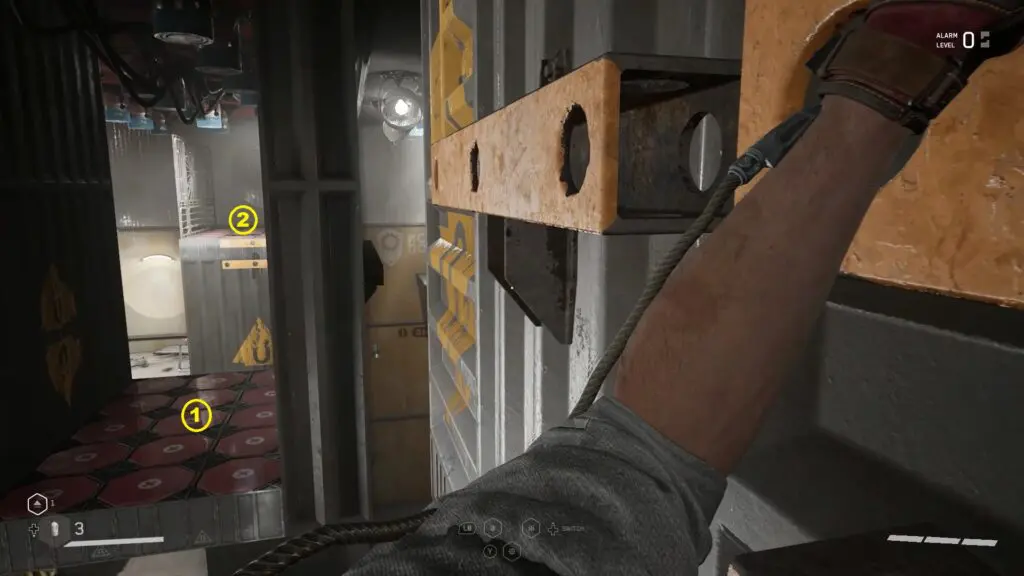
From there, jump on the ledges to reach Platform #3 as shown in the picture below.
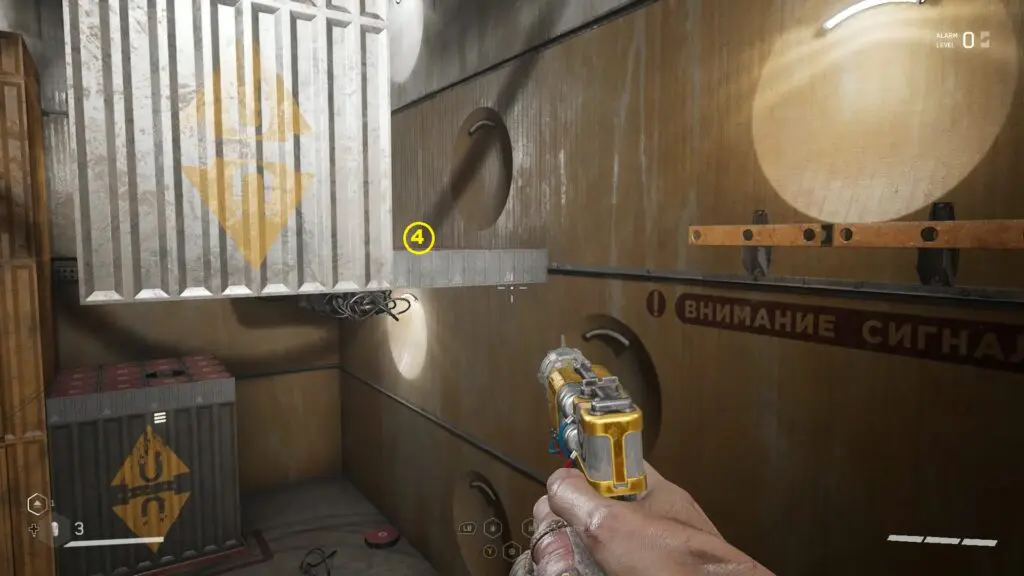
Use shock on the roof to bring the platforms down and use the ledge to jump to platform #4 as shown in the picture below. Then step on the platform ahead of it. Again use shock to move the platforms up. Climb up the platforms in front to reach the magnetic platform above. Now use shock on the magnetic wall as shown in the second picture below. This will move the platform and take you to a vent. Crawl through the vent to reach the silver chest. Open it to get the KS-23 – Supersonic Vibrator blueprint.
Gold Chest
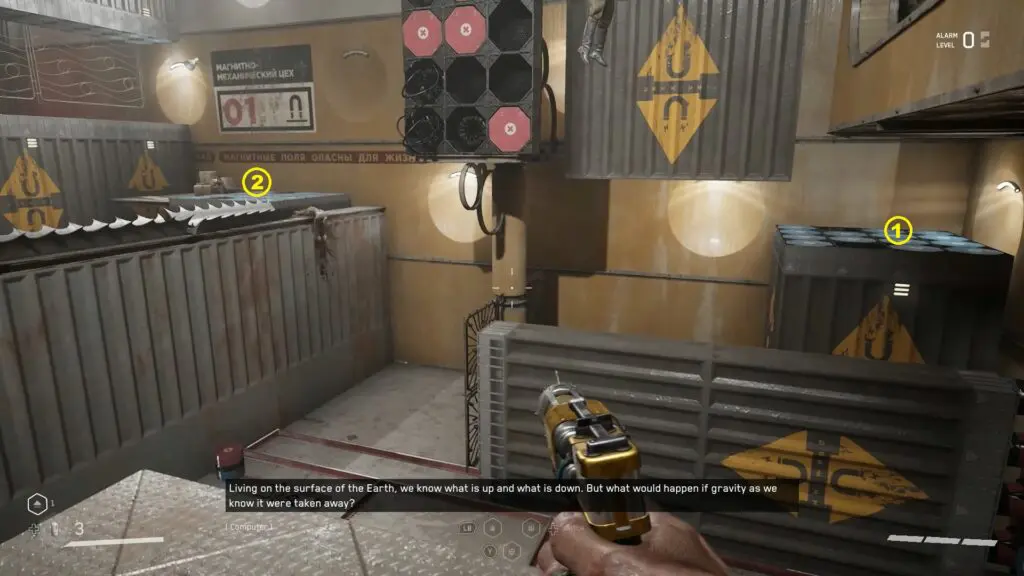
As you proceed ahead, you will reach a magnetic wall. Use shock to move it. Then go through it to reach the next puzzle room. Use shock on the magnetic wall there to open the gate. Now use shock on the roof to move the platforms down. Climb up platform #1 and use the shock on the roof to move it up. Now jump on the platforms to reach platform #2 as shown in the picture below.
Use shock on the roof to move down the magnetic wall. Jump on the magnetic wall. Then jump on the platforms to reach the platform in the corner as shown in the picture below. Use shock on the roof to bring the platform down. Jump on the platform in front. Use shock again on the roof to move the platform back up. Then drop down through the cage in front and proceed ahead to reach the gold chest. Open it to get Kalash – Thermal Scope and Snowball – Blade blueprints. Now take the elevator to the top to exit the testing ground.