This step-by-step guide will show the reader where to find all the Collectibles in West South Vale in the game Silent Hill 2 Remake.
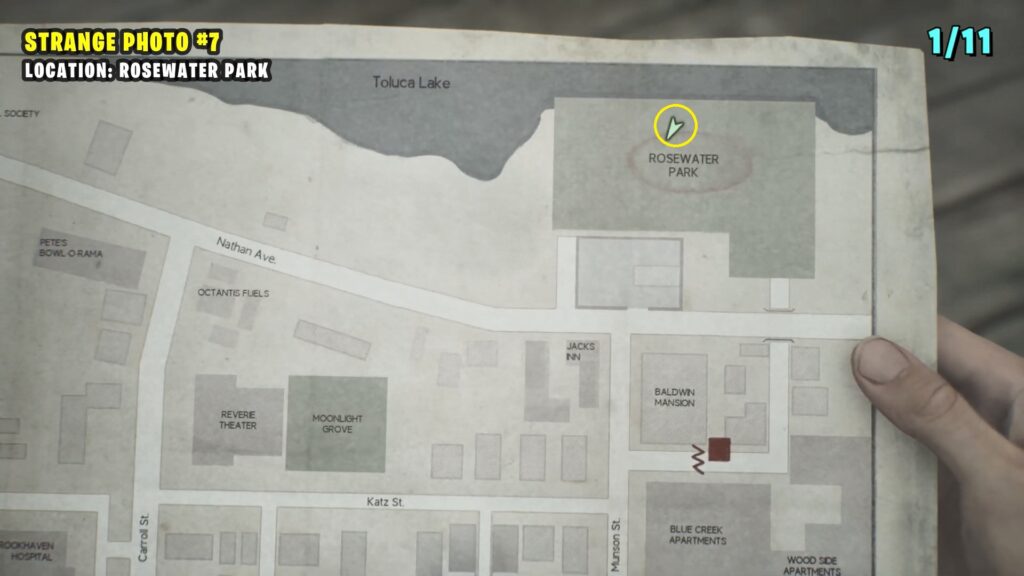
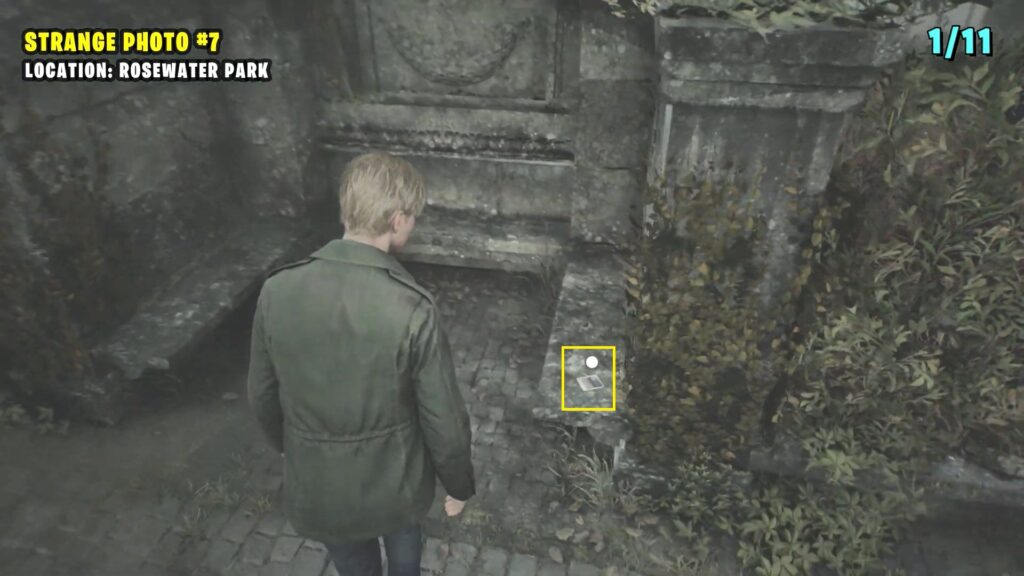
1) Strange Photo #7: “So far from home”
This strange photo is on the stone bench on the right side inside Rosewater Park.
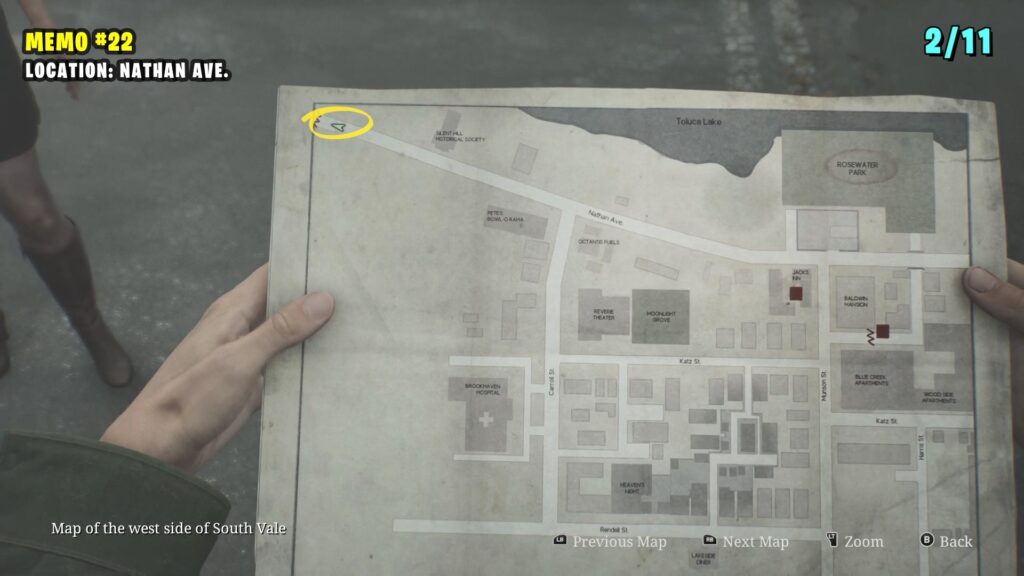
2) Memo #22: Bloody Note
Walk to the far end of Nathan Avenue to find the memo near a corpse.

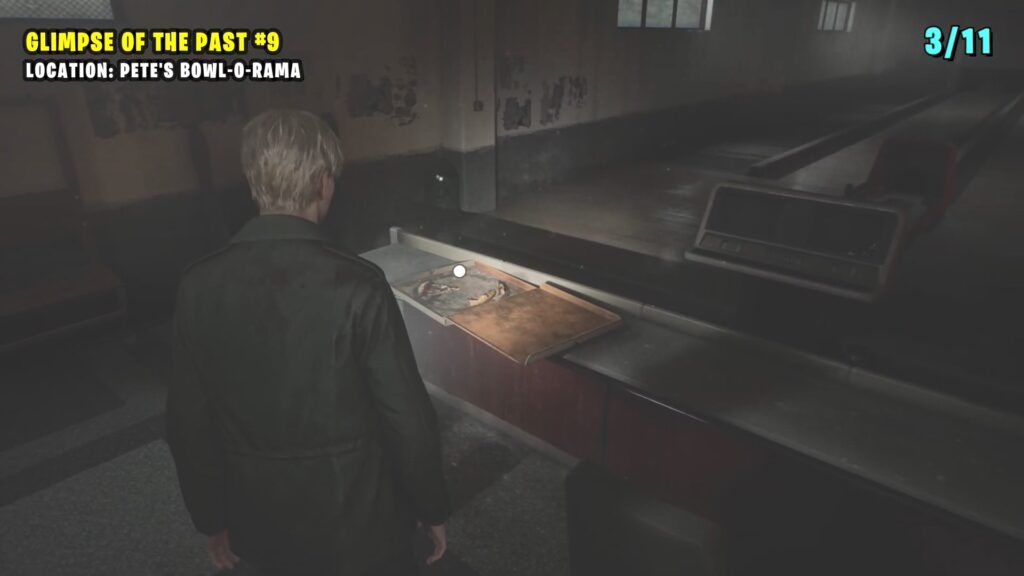
3) Glimpse of the Past #9
Go inside Pete’s Bowl-O-Rama to find this strange photo in a pizza box.

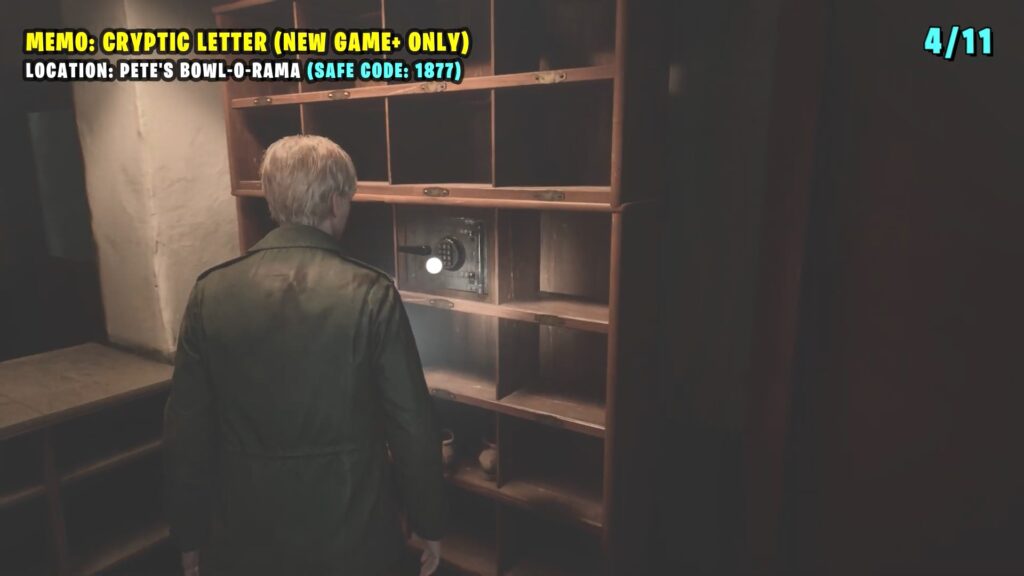
4) Memo: Cryptic Letter
It is inside a locked safe at the counter in Bowl-O-Rama. Open the safe with code 1887. Note: You can only find this memo during a New Game+.
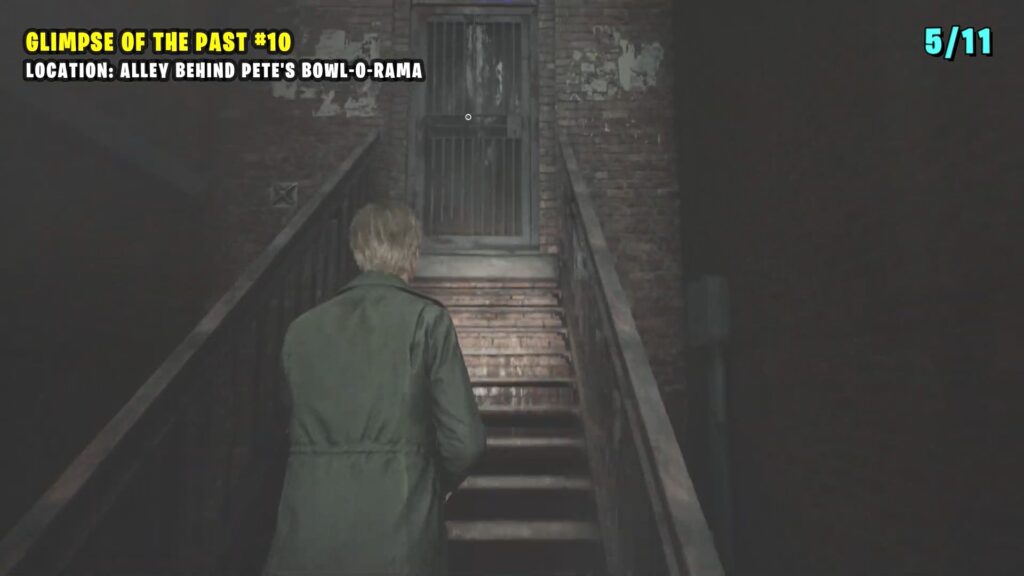
5) Glimpse of the Past #10
Head south on Carrol Street until you reach a dead end. Look to your right and you’ll see stairs leading up to a barred gate to find Glimpse of the Past.

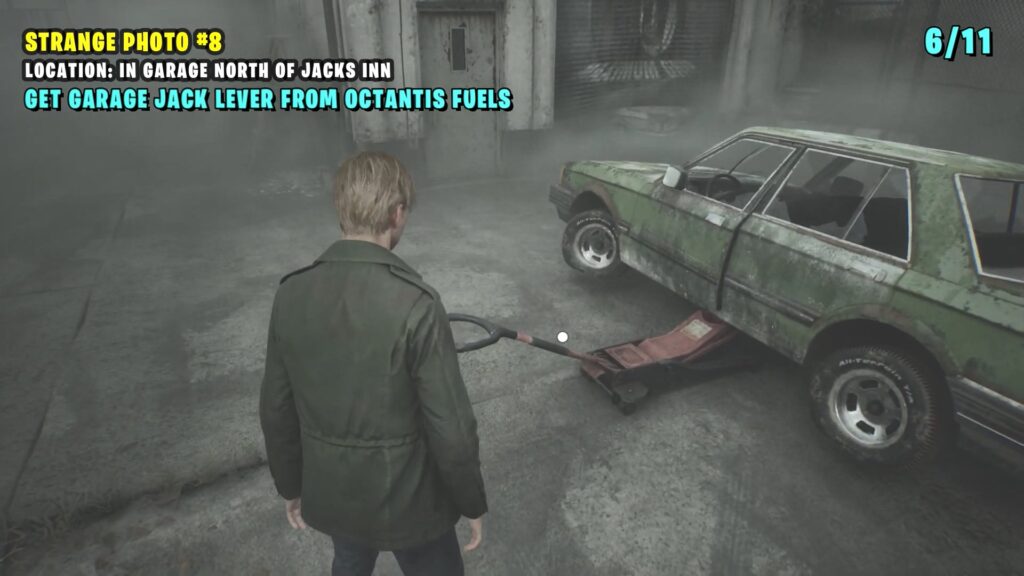
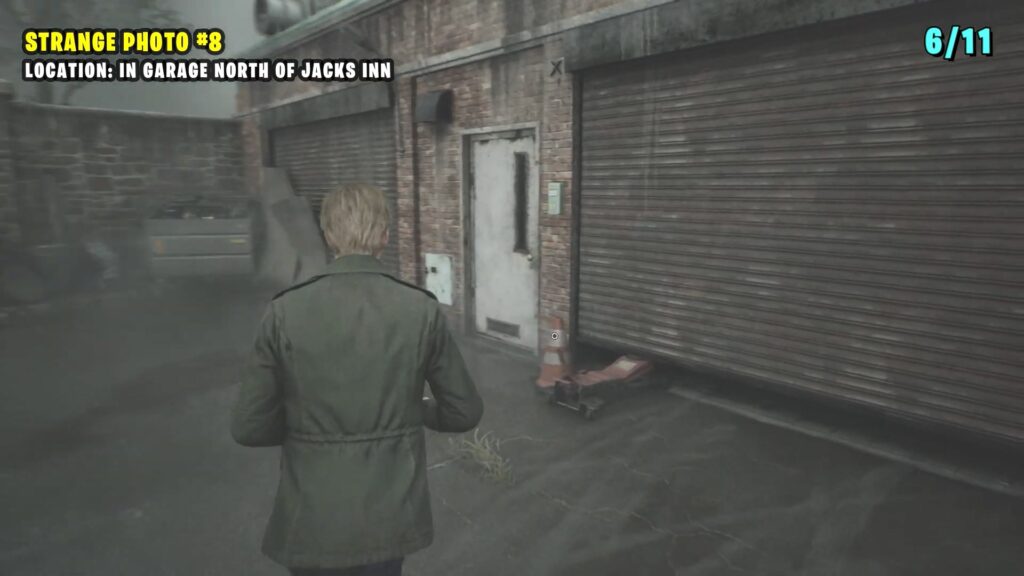
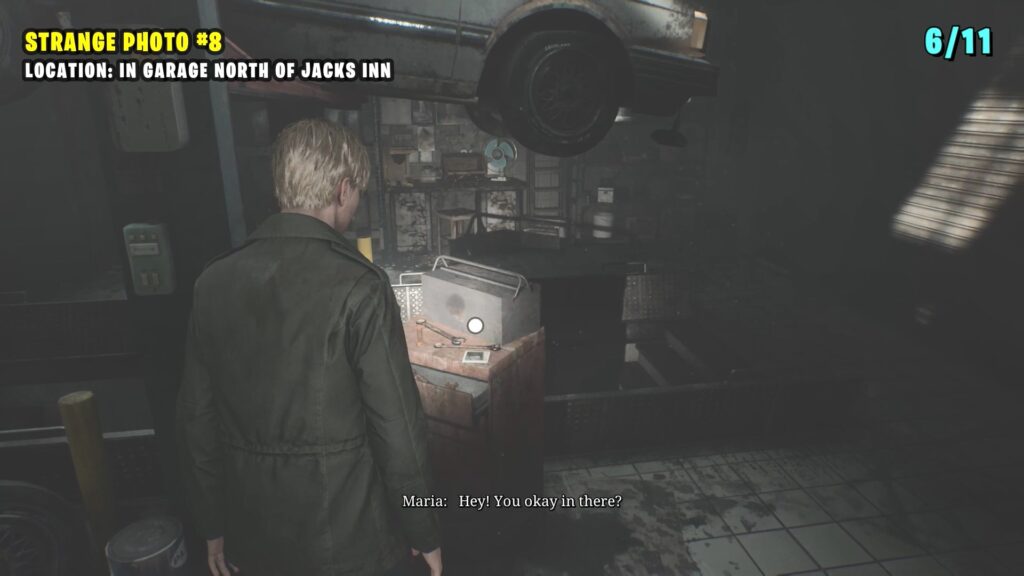
6) Strange Photo #8: “made it!”
Go to Octantis Fuels and grab the Garage Jack Lever from one of the cars.
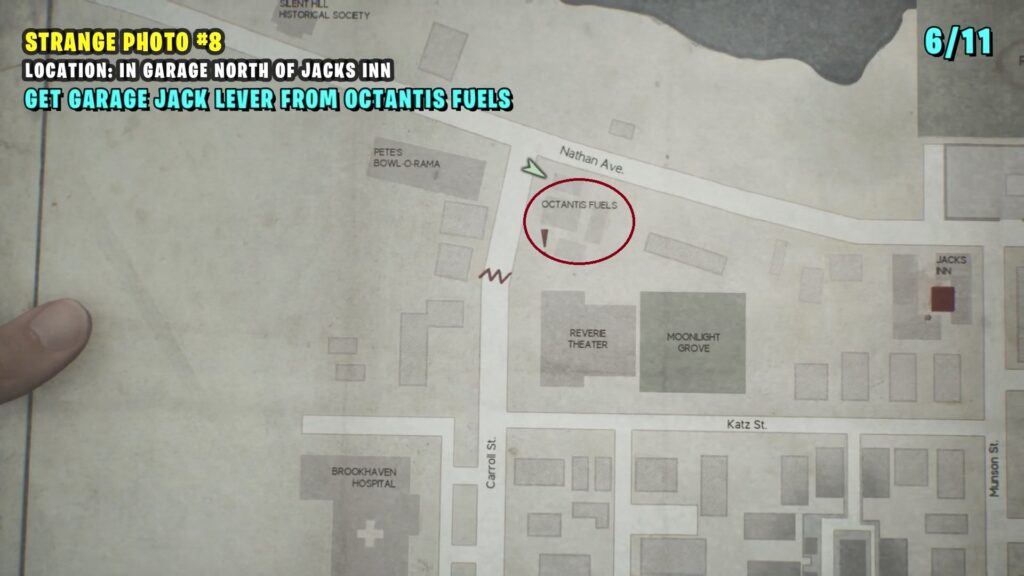
Next, enter the Octantis Fuels building from the back by using the Garage Jack Lever to lift the shutter. Inside, you’ll find a strange photo.
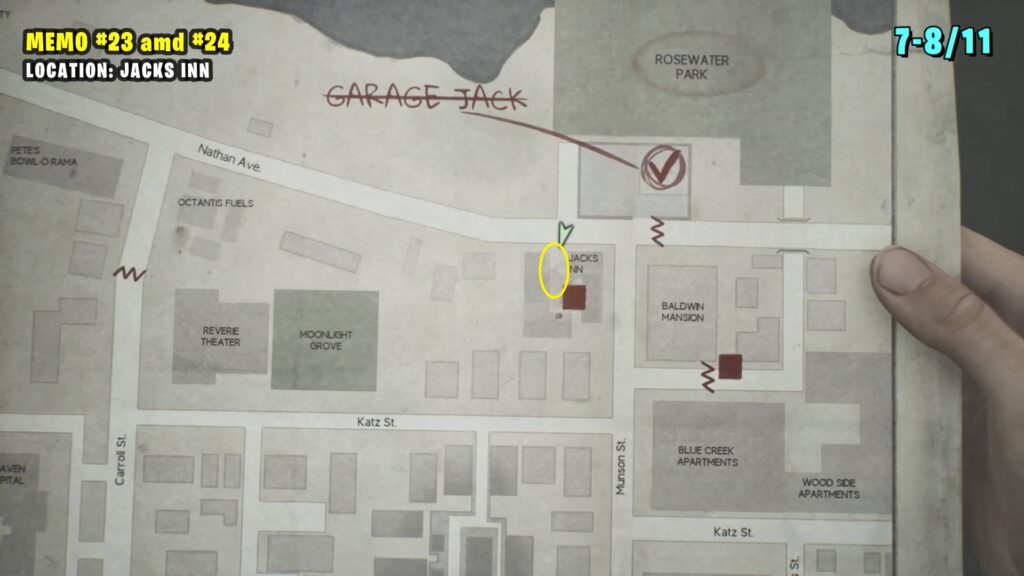
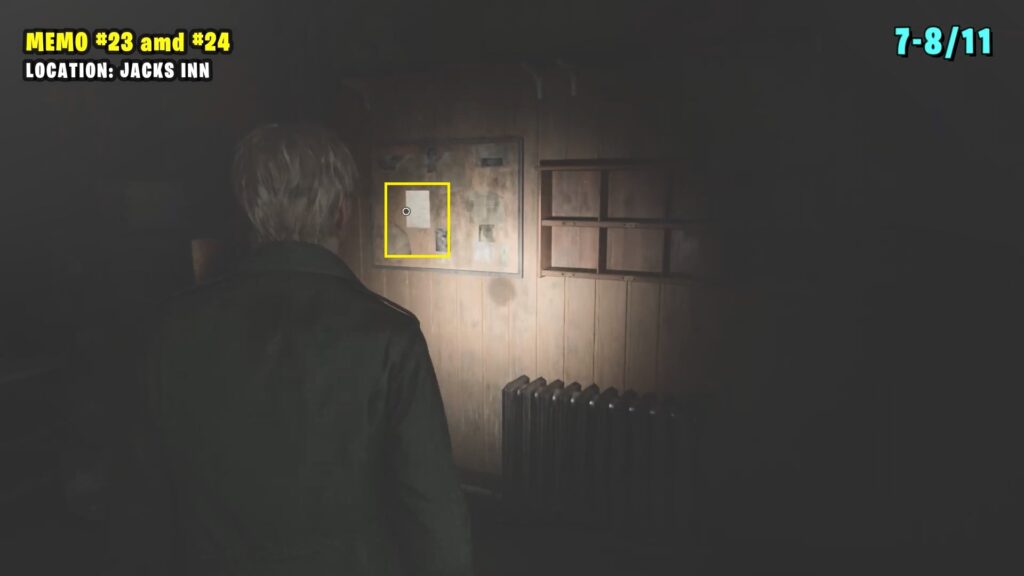
7) Memo #23 (South Vale): Reception Desk Note
On the bulletin board inside the reception area of Jack’s Inn.
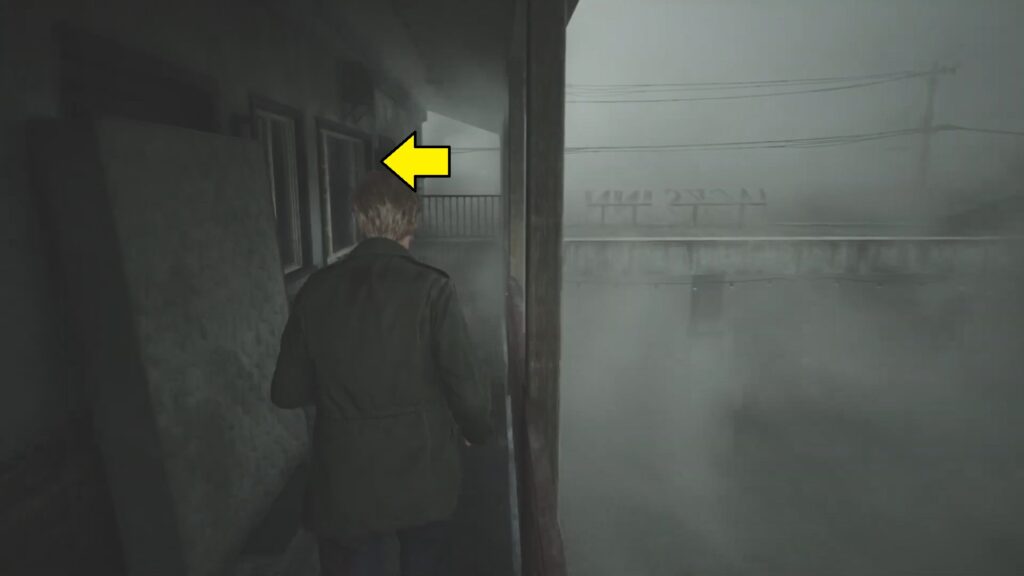
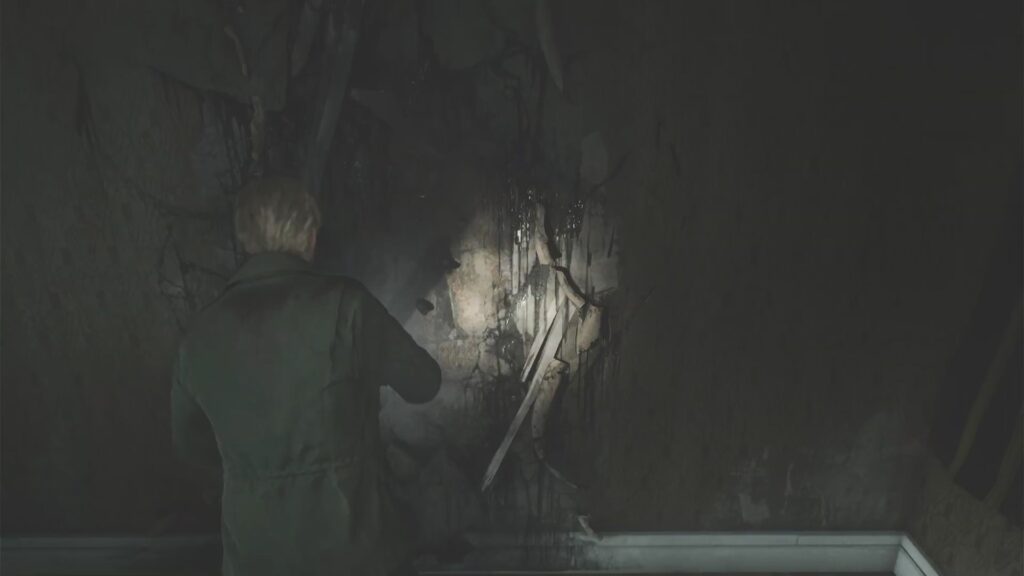
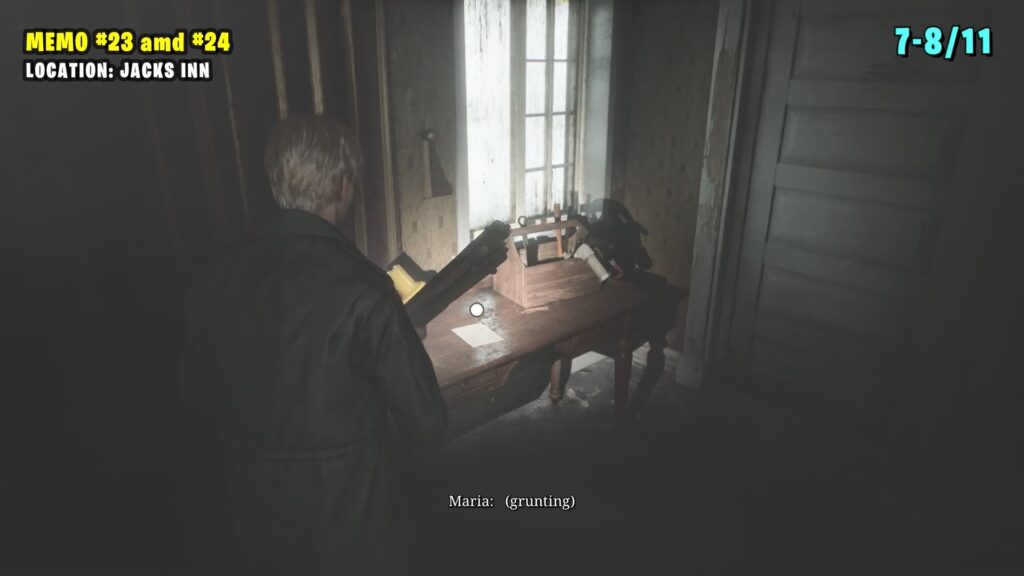
8) Memo: Toolbox Memo
Head upstairs at Jack’s Inn and enter Room 108 by breaking the window.
Once inside, break through the damaged wall to reach Room 107. You’ll find a memo on the table.
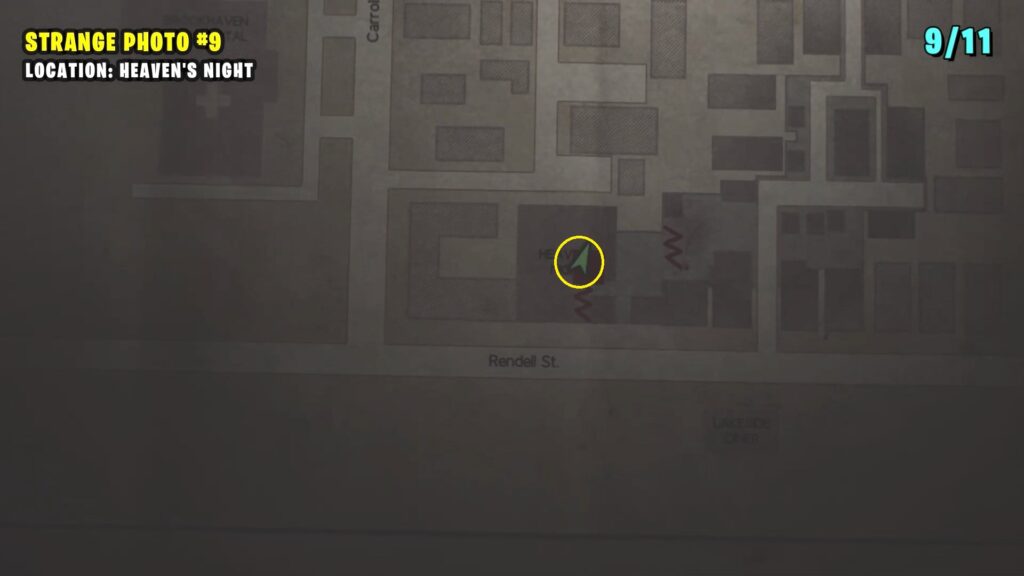
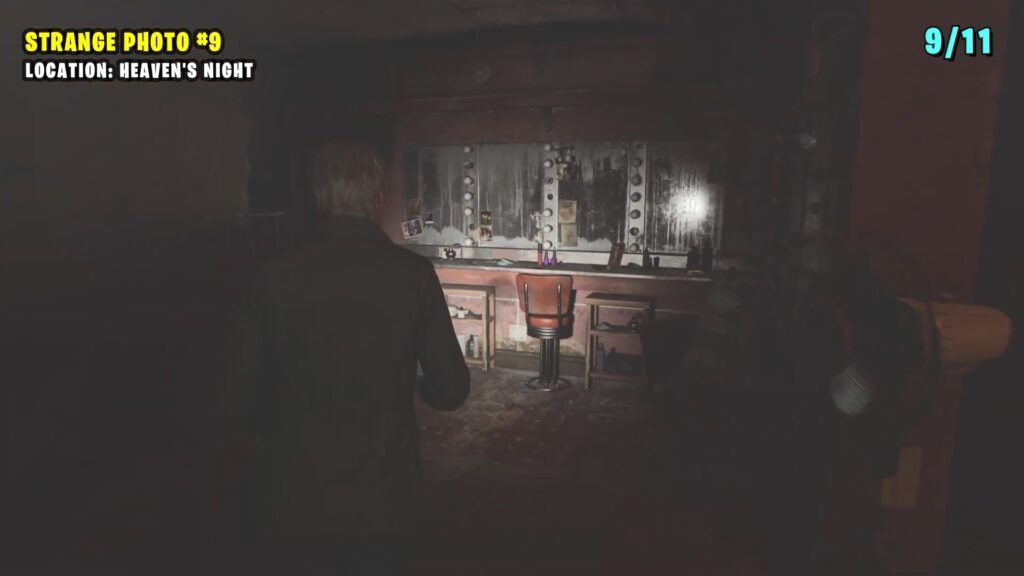
9) Strange Photo #9: “Ready to kill it!”
This photo is on one of the mirrors in the dressing room of the Inside Heaven’s Night.
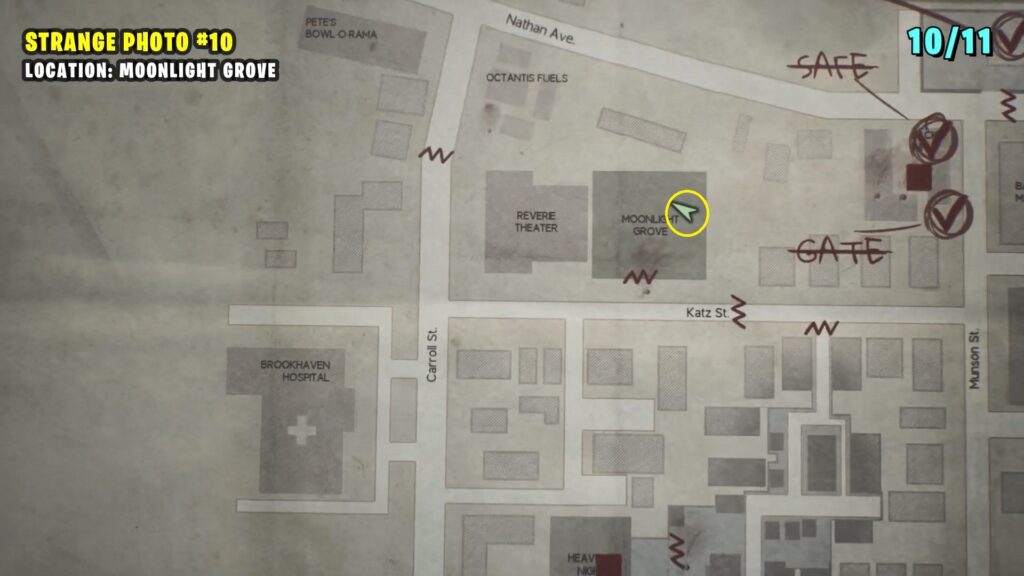
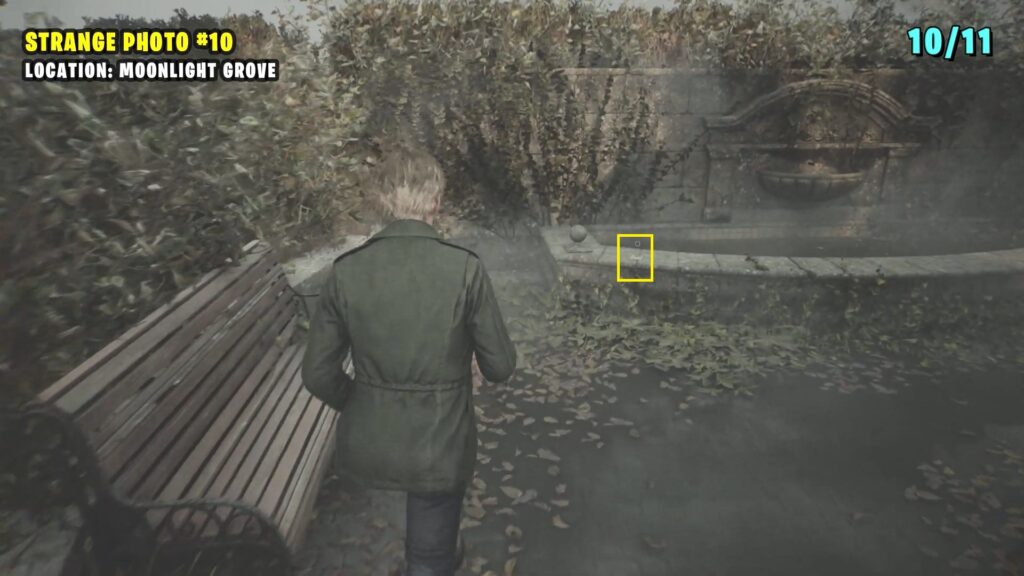
10) Strange Photo #10: “Church entrance”
It is next to a fountain inside Moonlight Grove.
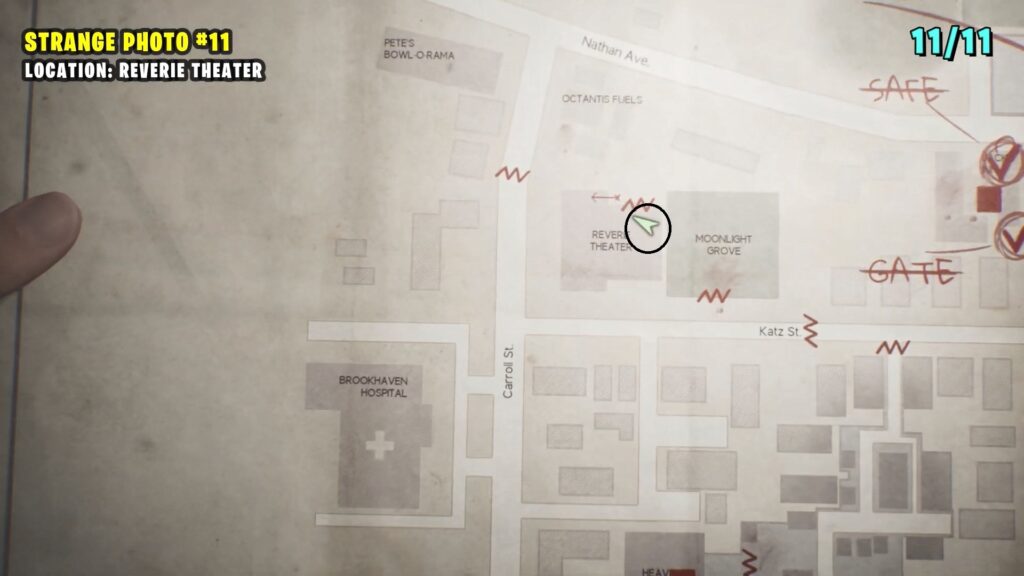
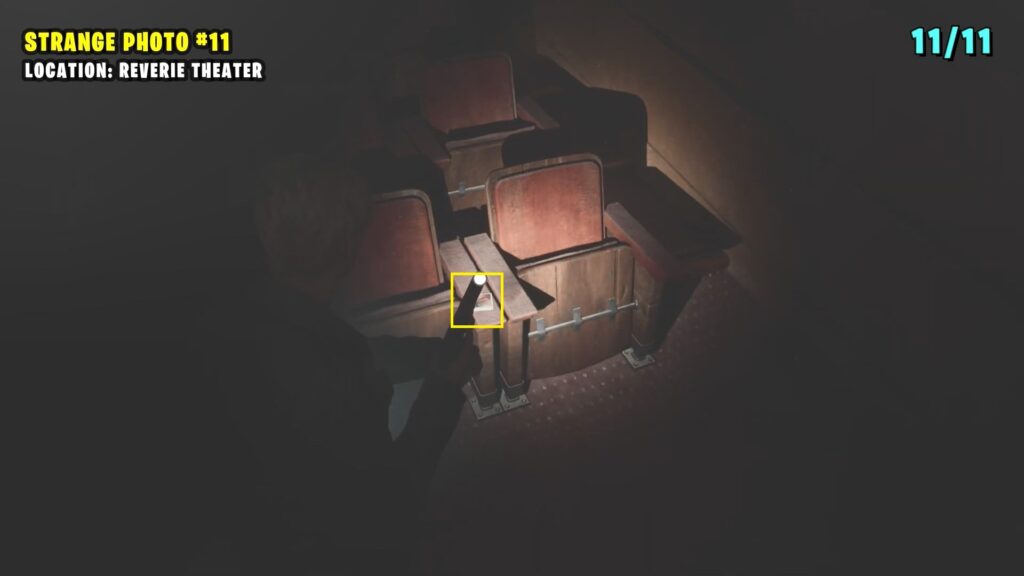
11) Strange Photo #11: “Best Flavor!”
It’s located on a seat in a row behind Eddie inside the Reverie Theater.