Great Sky Island: All 4 Shrines Puzzles
This guide shows the walkthrough for all 4 Great Sky Island Shrines in the Legend of Zelda: Tears of the Kingdom, released on 12th May 2023. Click here for the location of all four shrines on the Great Sky Island.
The First Shrine (Ukouh Shrine Location & Solution)
The quest starts when you are at the Temple of Time entrance. First, you have to make your way to the Ukouh Shrine, which is located near the Temple of Time as shown in the picture below. To reach there, players need to head southwest from the Temple of Time. Upon entering the shrine, players will gain access to the Ultrahand ability which enables grabbing, rotating, moving, and sticking them together.

Here is a guide on how to use the Ultrahand ability:
- Activate the Ultrahand ability by using the L button, and then drag the item to move it.
- Press the A button to attach one object to another.
- To rotate an object, use the R button, and then adjust its orientation by using the arrow keys.
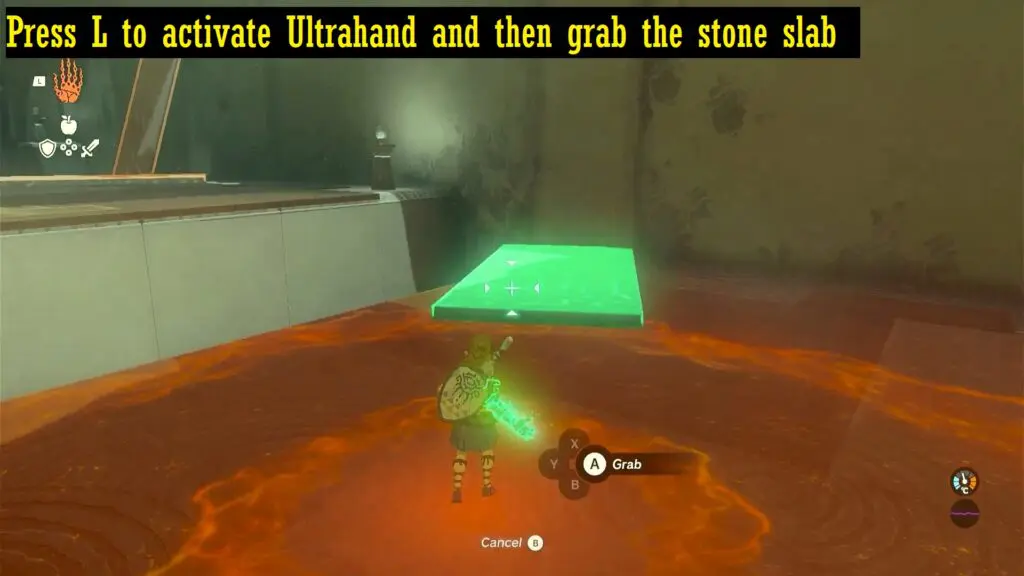
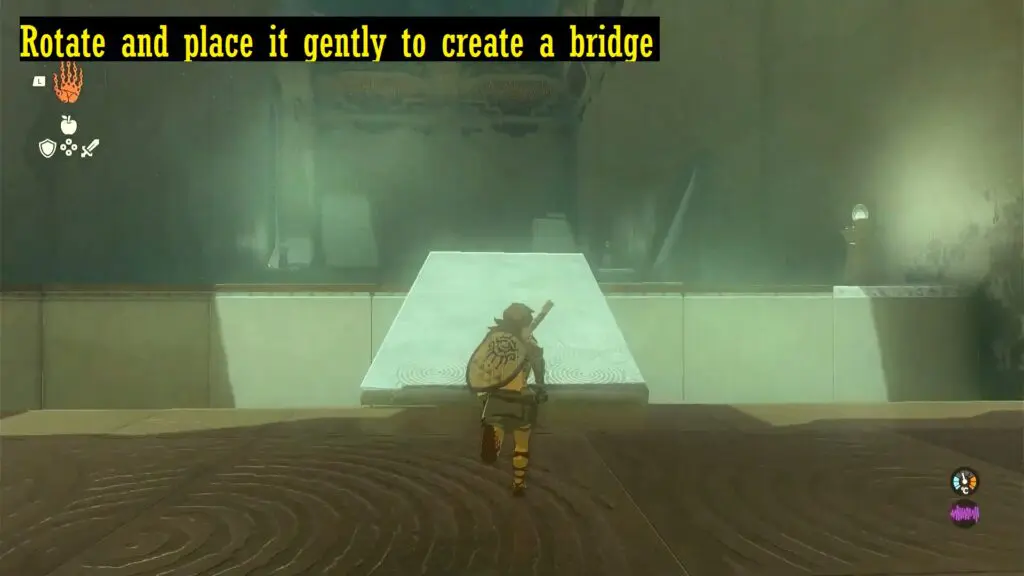
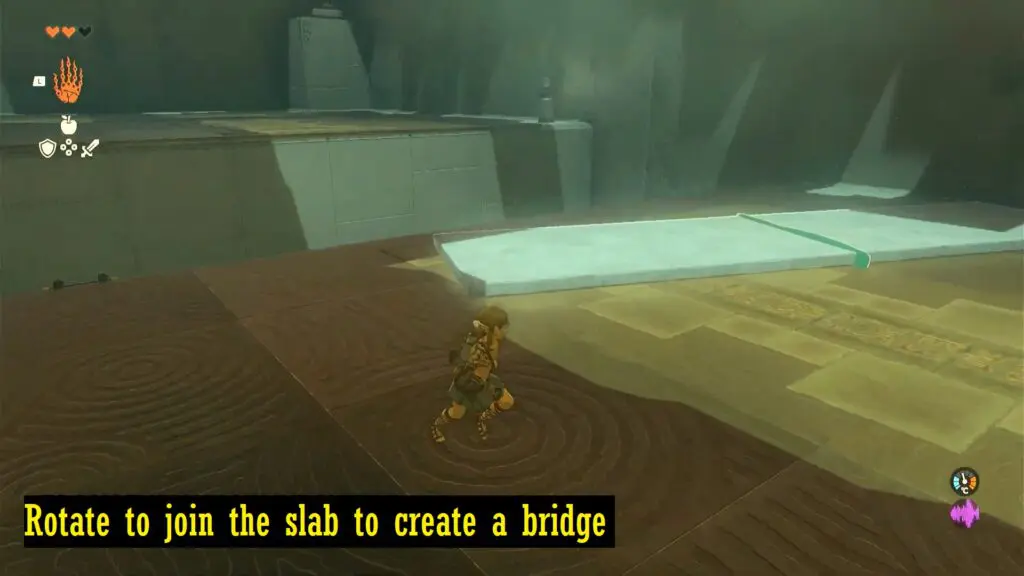
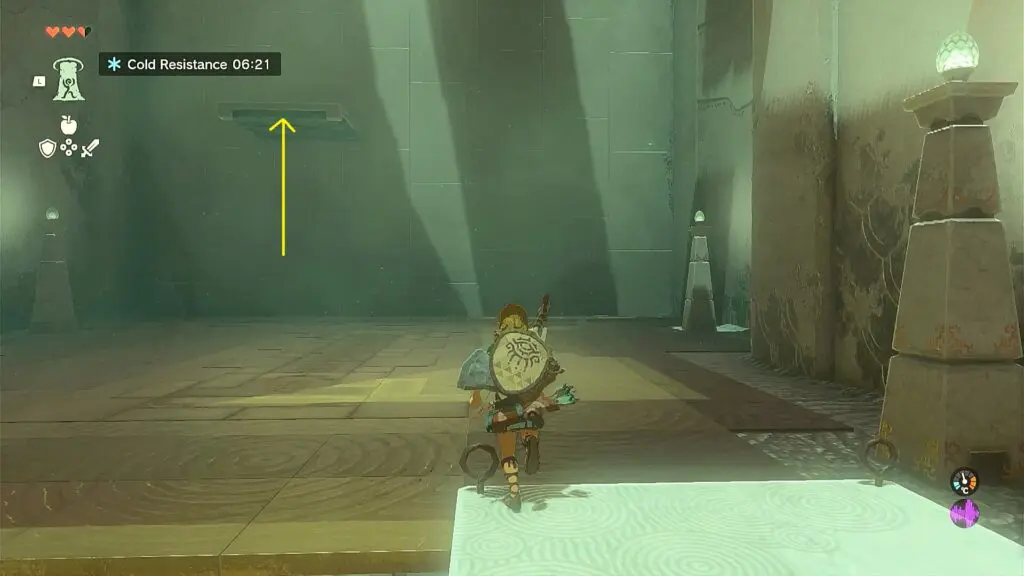
Head inside to find a stone slab lying on the ground. Here you need to create a bridge to go to the other side of the room. In order to build a bridge to the opposite side of the room, press L to activate Ultrahand and then grab the stone slab. Hold R to rotate the bridge, and then place it down.
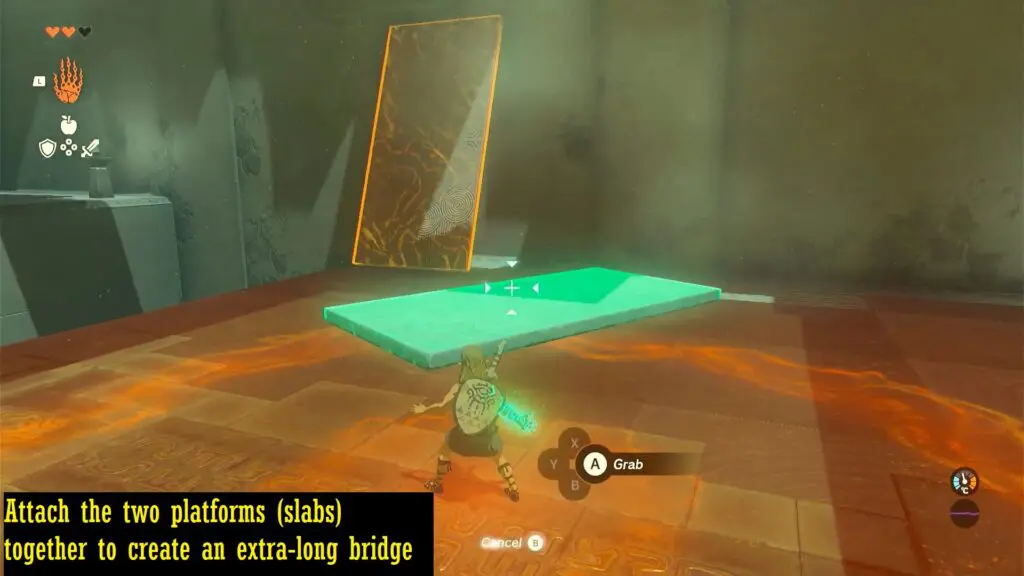
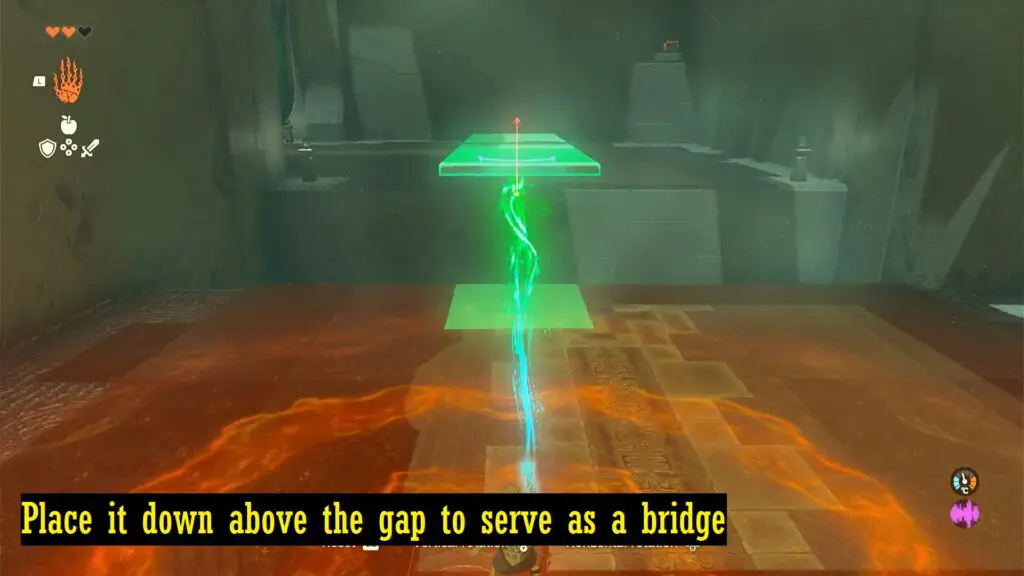
For the next section, you have to attach the two platforms (slabs) together using Ultrahand to create an extra-long bridge. Place it down above the gap to serve as a bridge.
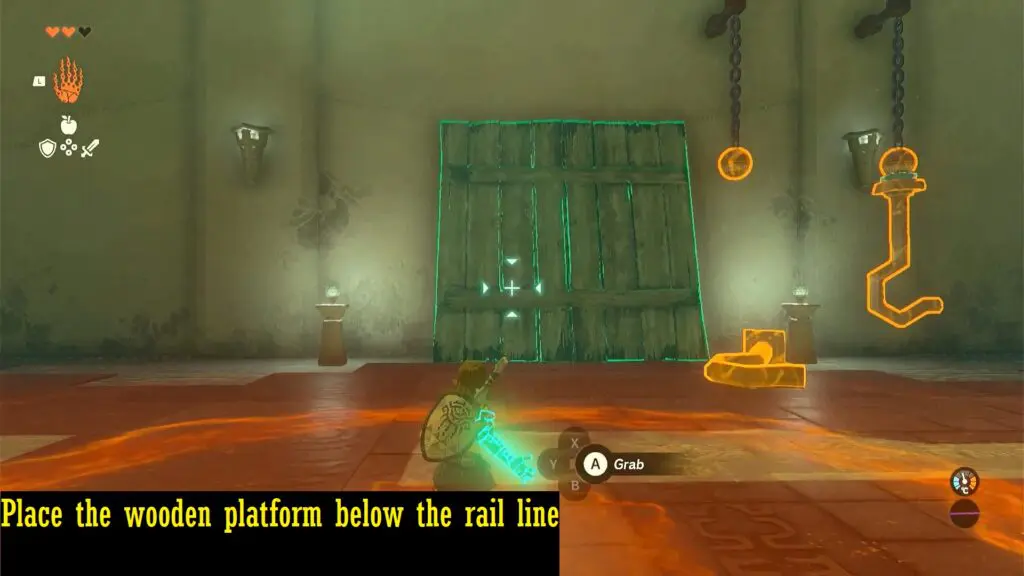
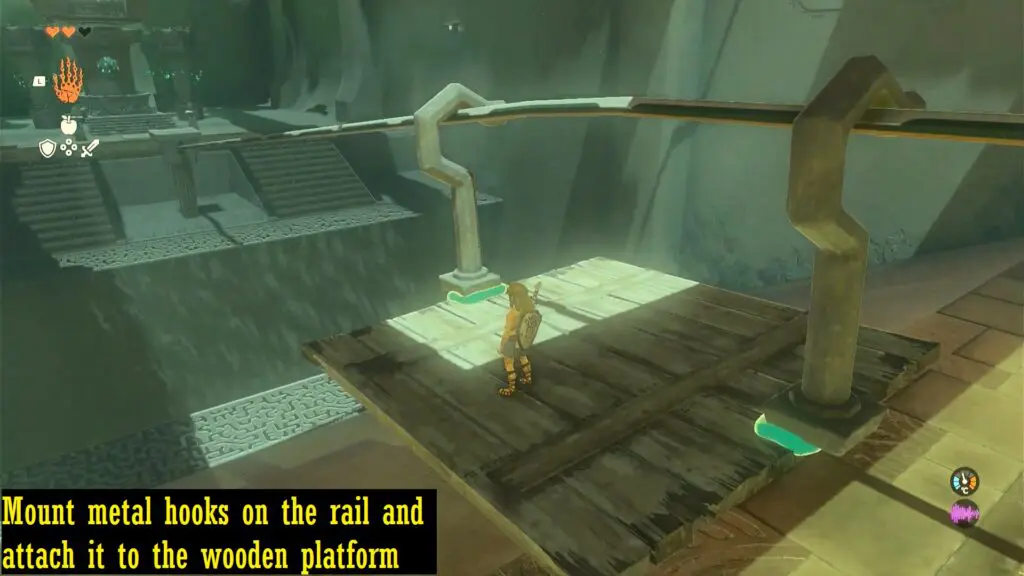
In the next area, players will come across a rail line that leads to the end of the shrine. Place the wooden platform below the rail line. Take one of the metal hooks, mount it on the rail and attach it to the wooden platform.
Similarly, attach a second metal hook also. Stand on the platform to reach the other side.
The Second Shrine (In-Isa Shrine Solution)
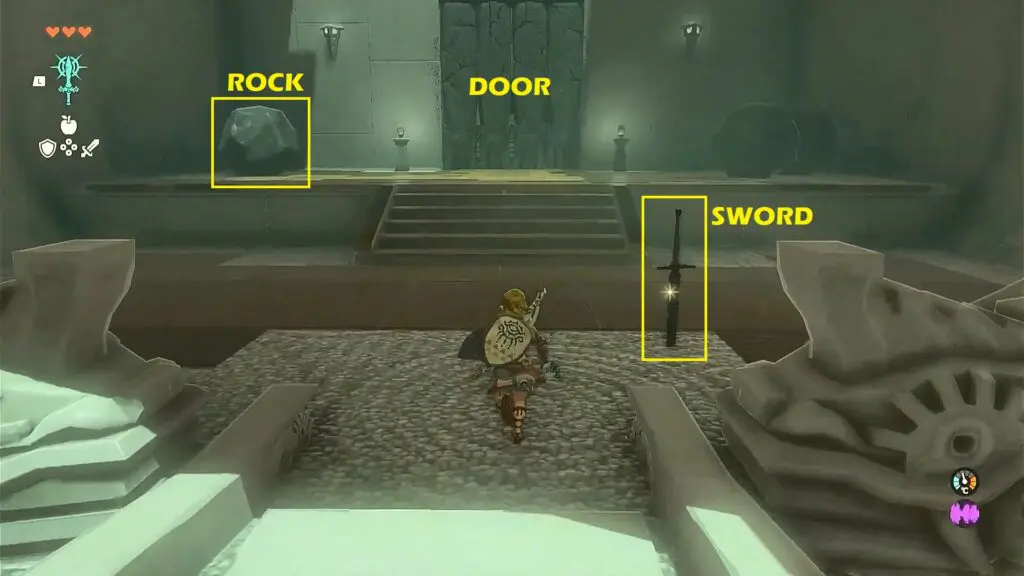
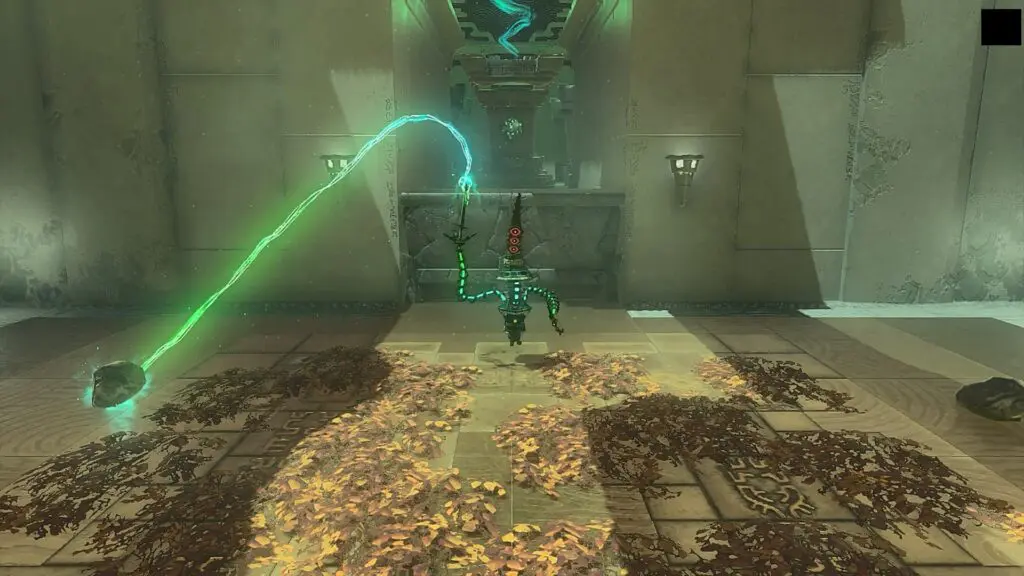
Click here for the location of the shrine. As you enter the shrine, you get the ability to combine (Fuse). Proceed ahead and pick up the sword in the next room as shown in the picture below. Fuse the sword with the rock in the room to make a hammer. Now use the hammer to break the stone door.
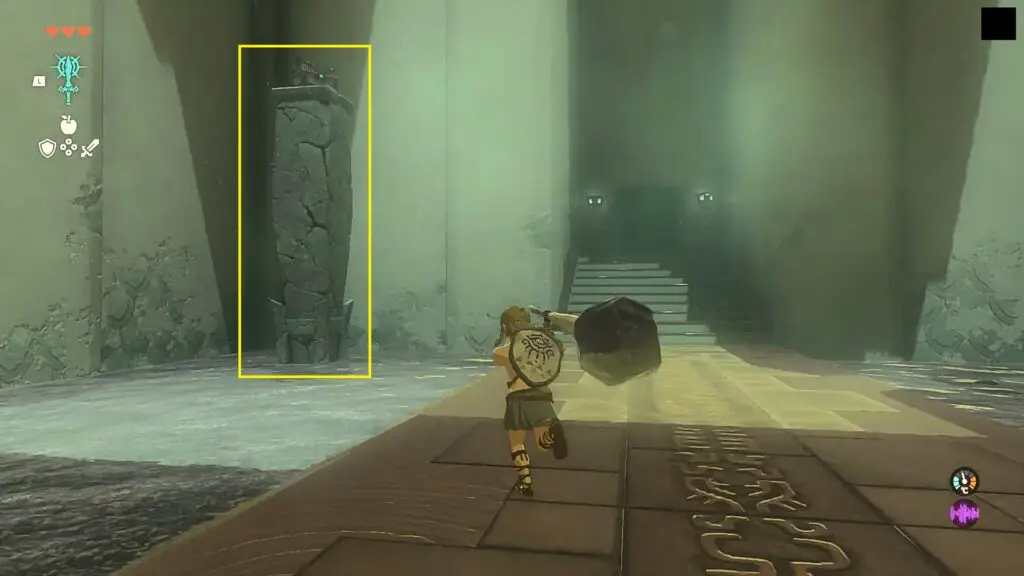
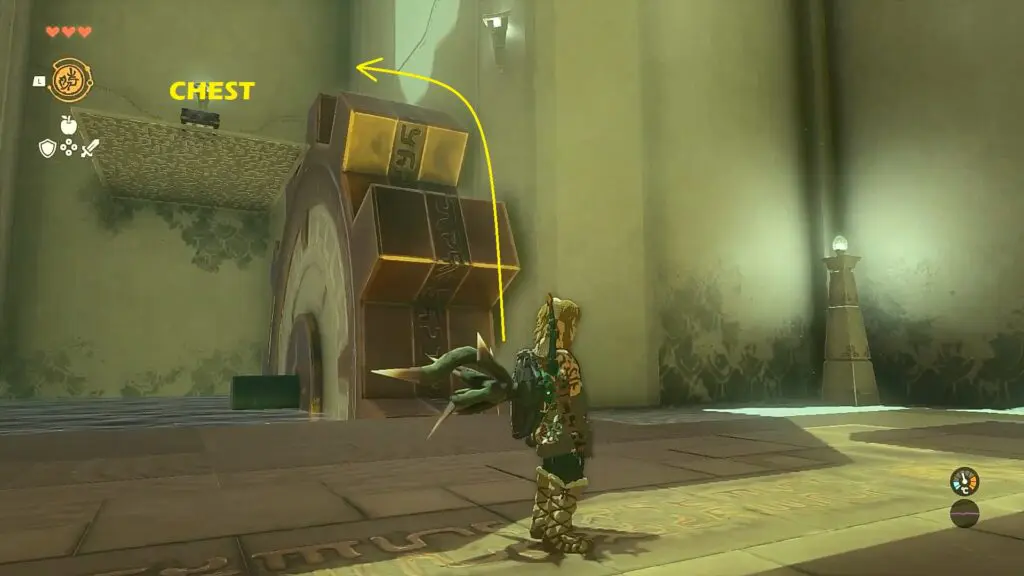
Proceed ahead into the next room and break the rock on the left side as shown in the picture below. Now open the chest to get Arrow x 5.
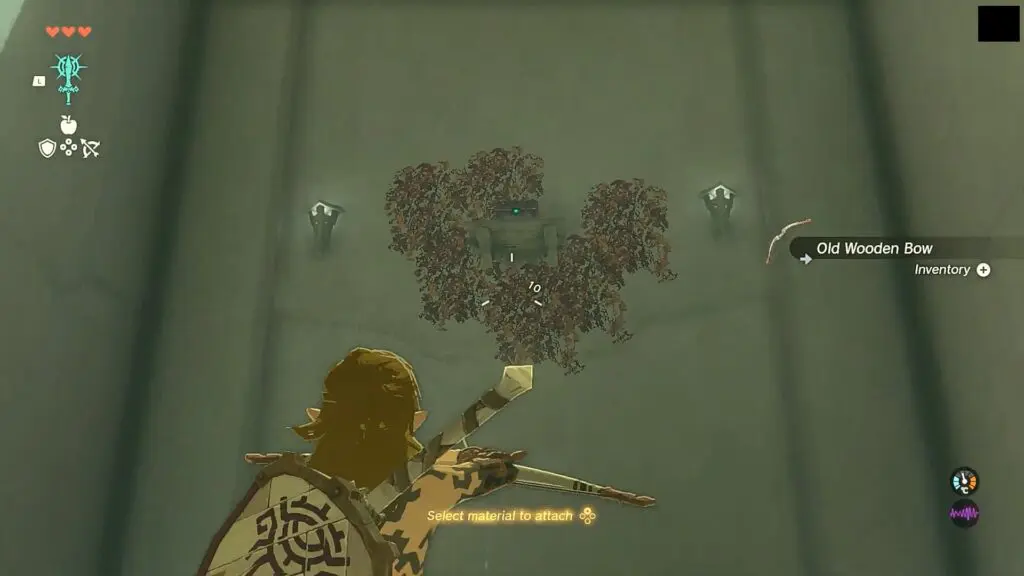
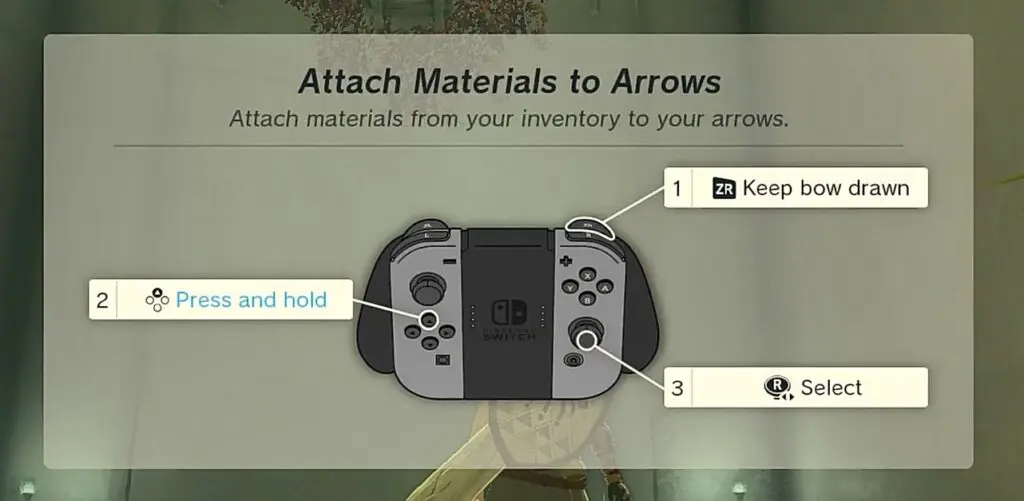
Now go right and collect Firefruit and Bow in the next room. Then keep the bow drawn and attach a Firefruit to the arrow. Use it to burn the vines on the wall on the other side of the room as shown in the pictures below. This will make the chest fall down. Open it to get the Small Key.
Go back to the previous room and climb up the stairs. Then use the key to open the green door there. Proceed ahead and defeat the enemy there as shown in the picture below. Use your rock hammer to break the rock wall ahead. Now proceed ahead to complete the shrine.
The Third Shrine (Gutanbac Shrine Solution)
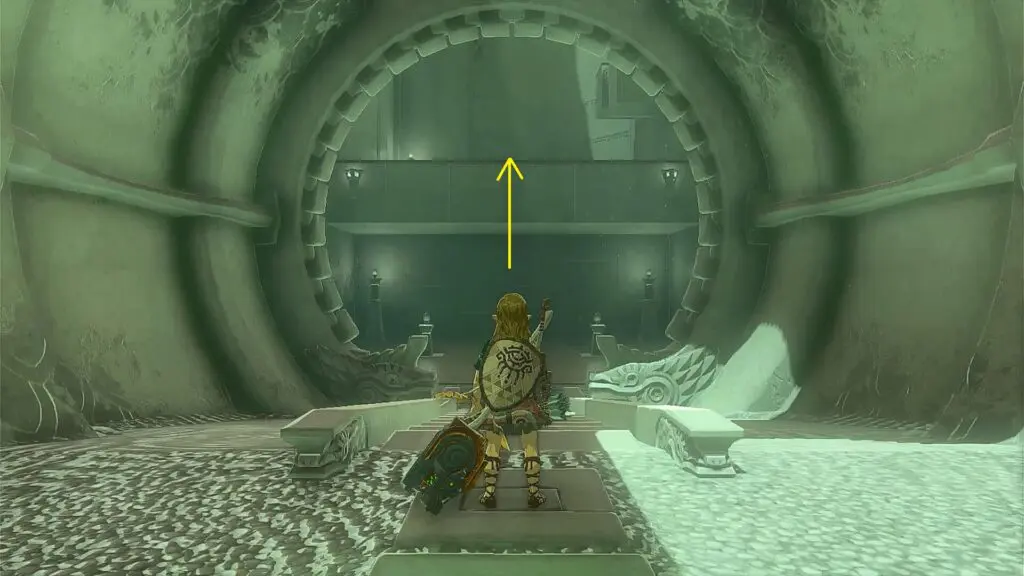
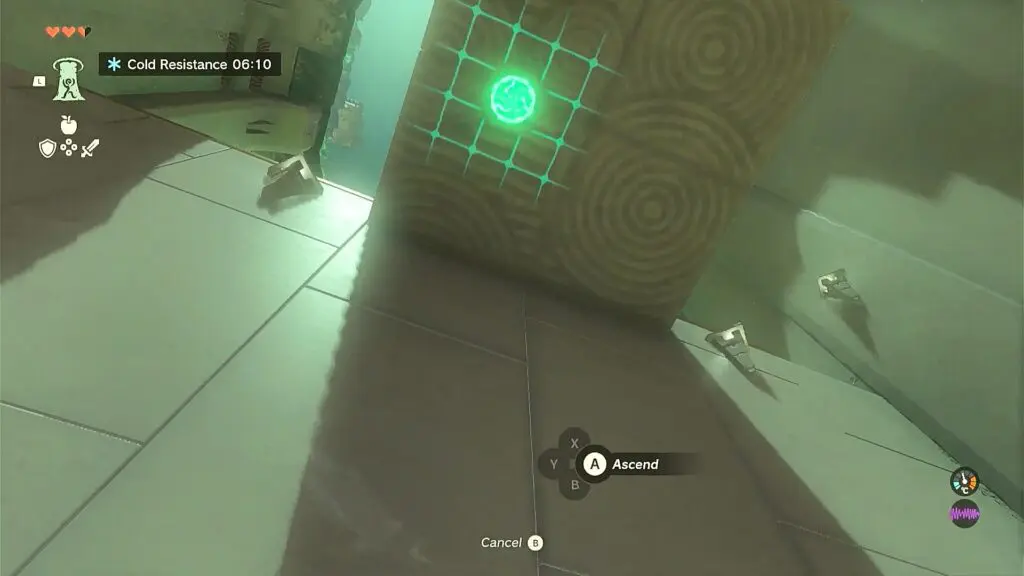
Click here for the location of the shrine. As you enter the shrine, you will get the Ascend ability. Go straight ahead and Ascend through the platform as shown in the picture below.
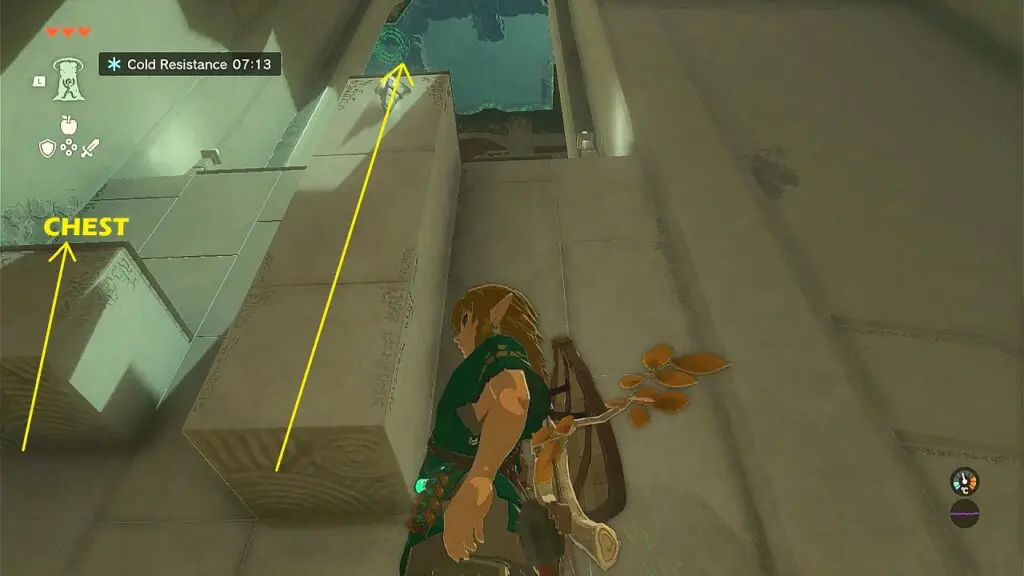
As you reach up, you will see two pillars through which you can ascend as shown in the picture below. Ascend through the thin pillar to reach a chest. Open it to get a Stone Axe. Then jump down and ascend through the thick pillar to reach up.
Defeat the enemy there. Then break the wooden blockage on the right side wall as shown in the picture below. Now ascend up to reach a chest. Open it to get a Bow.

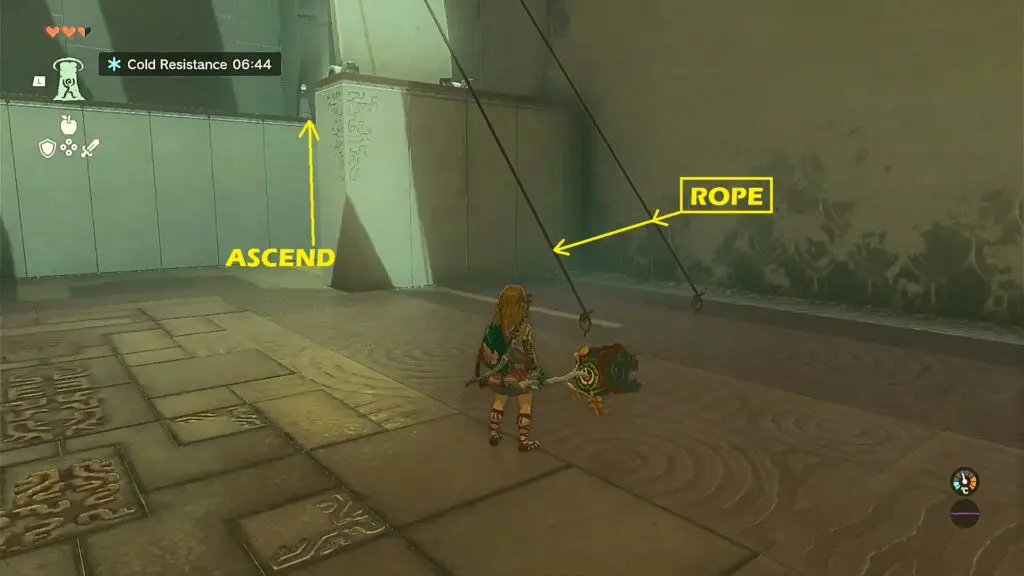
Jump down and cut the two ropes holding up a platform as shown in the picture below. This will make the platform fall down. Now ascend up through the platform.
There you will see a moving platform as shown in the picture below. Ascend through the platform. When the moving platform moves under the platform above as shown in the second picture below ascend through it to complete the shrine.
The Fourth Shrine (Nachoyah Shrine Solution)
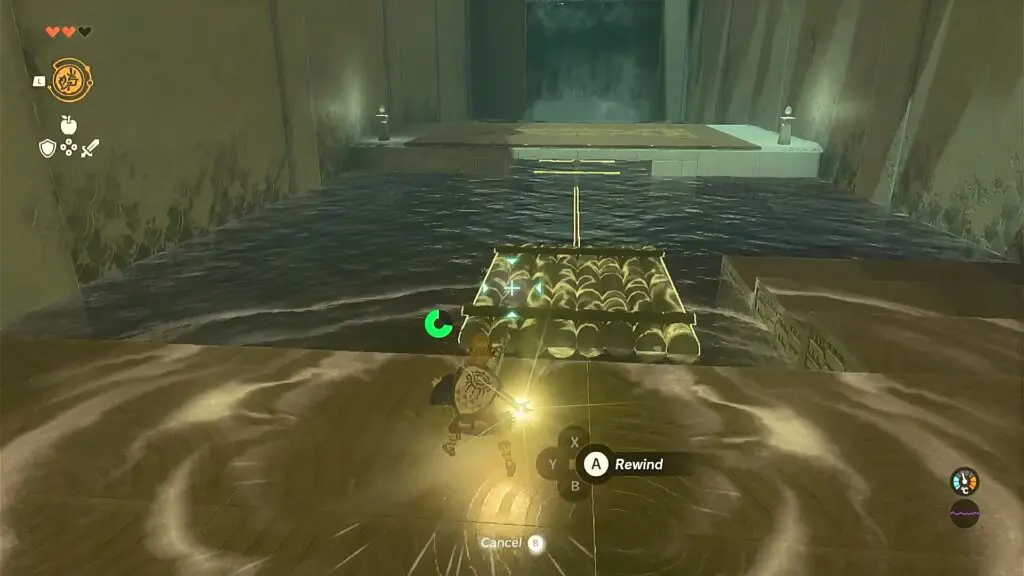
Click here for the location of the shrine. As soon as you enter the shrine, proceed ahead and use the rewind ability on the raft as shown in the picture below. Then jump on the raft to reach the other side.
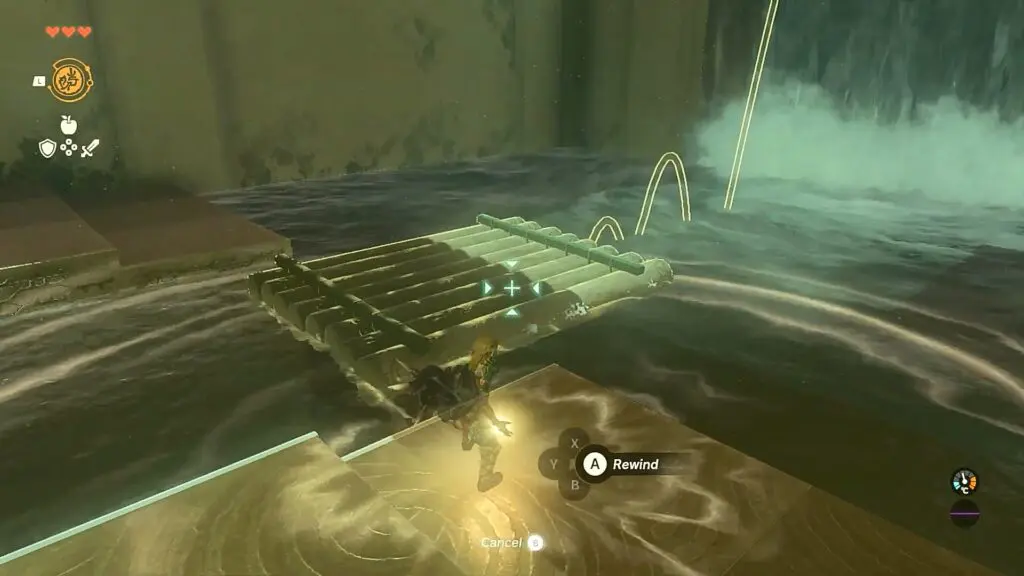
Use the rewind ability on the raft falling down from the waterfall and quickly jump on it to climb up the waterfall as shown in the picture below.
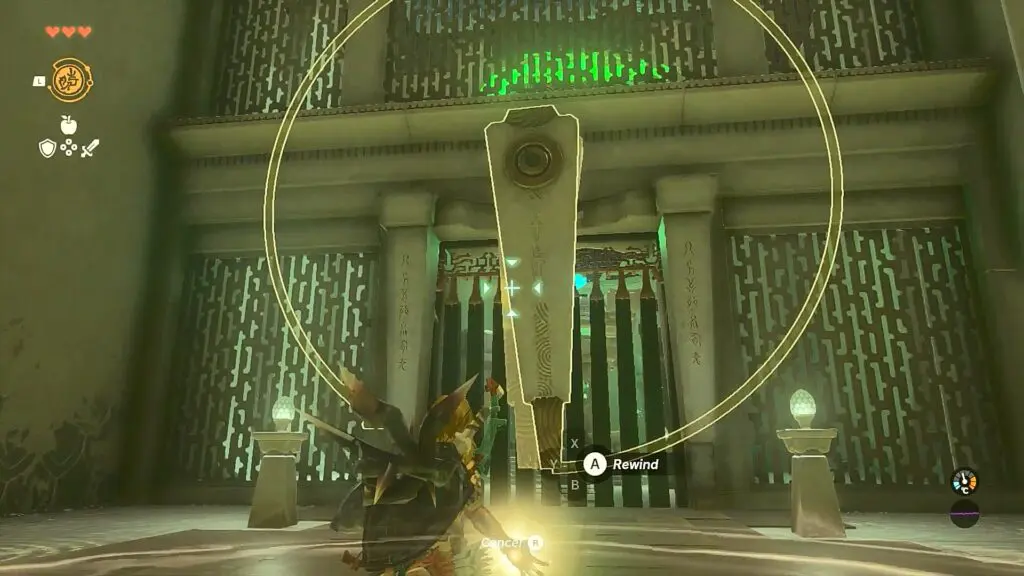
At the top, use the rewind ability on the wheel as shown in the picture below, and use it to reach the platform above. Open the chest there to get Arrow x10.
Now jump down to the main platform and go near the rotating dials. Wait until both the dials overlap as shown in the picture below. As soon as the dials overlap, use the rewind ability on one of the dials and it will rotate in the opposite direction, taking the other dial along with it. This will open the door behind the dials. Go across and interact with the symbol there to complete the shrine.