This walkthrough will guide you to everything you need to know about finding a facility to assign to either the Survivors or the Peacekeepers. Each facility provides some sort of in-world enhancement. Dying Light 2 Stay Human has seven facility locations, which can be Water Towers or Electrical Stations.
Also Read: Dying Light 2 – Guide and Walkthrough
You need to take over Water Towers & Electrical Stations in the game. Water towers generally have a climbing challenge. For this, you need to climb up to the top of the water tower where you will activate it.
Electricity Stations usually require some climbing, but they are usually puzzles about how to navigate the space. You must reconnect powerlines with short chord lengths. The first 3 facilities are automatic from the story and cannot be missed. The remaining 4 facilities are in open-world.
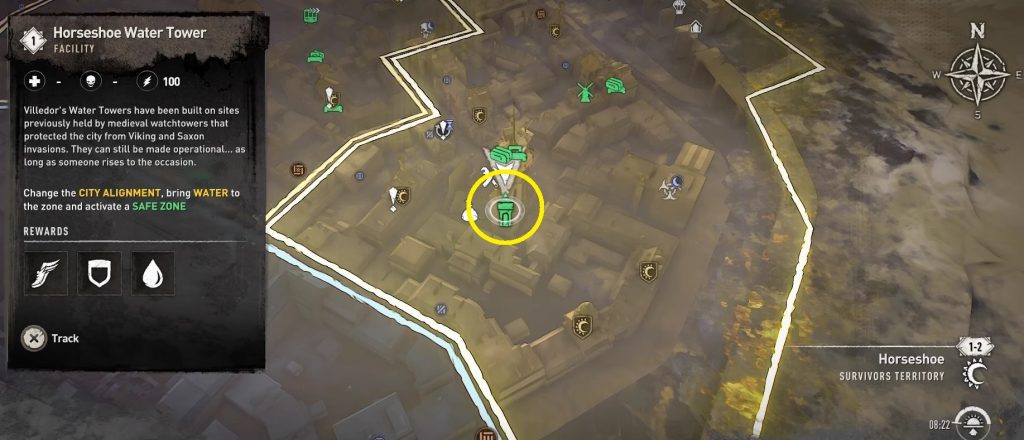
Facility #1: Horseshoe Water Tower
Automatically available from 8th Main Story Quest “Water Tower”.
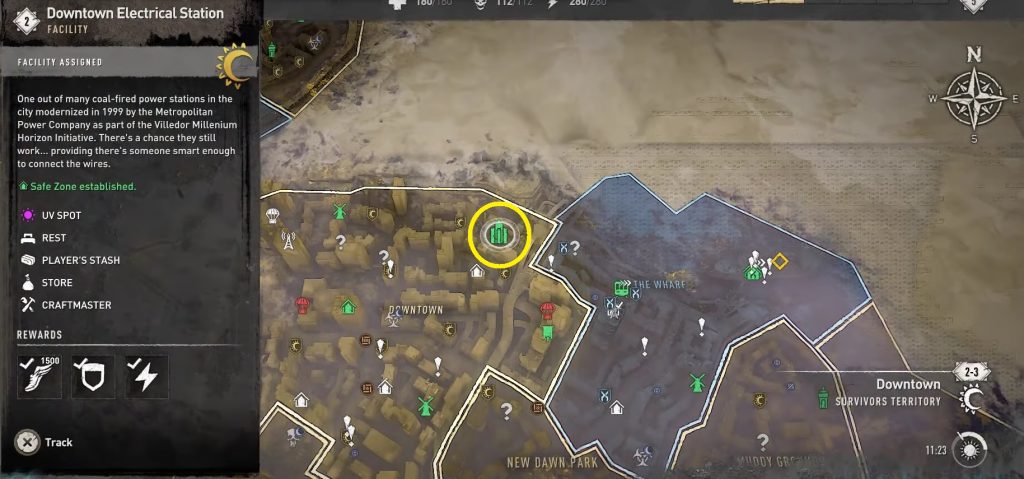
Facility #2: Downtown Electrical Station
This is automatically available from 11th Main Story Quest “A Place to Call Home”.
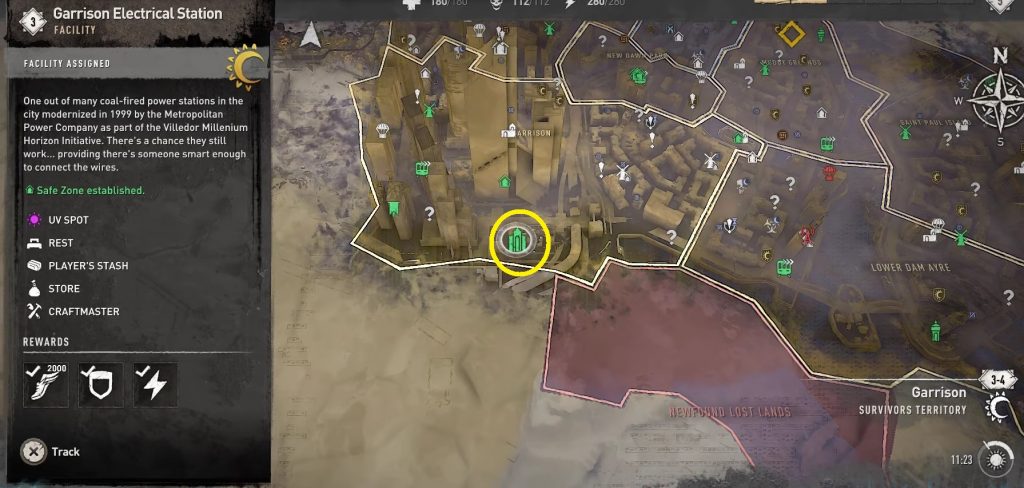
Facility #3: Garrison Electrical Station
This is automatically available from the 16th Main Story Quest “Broadcast”.
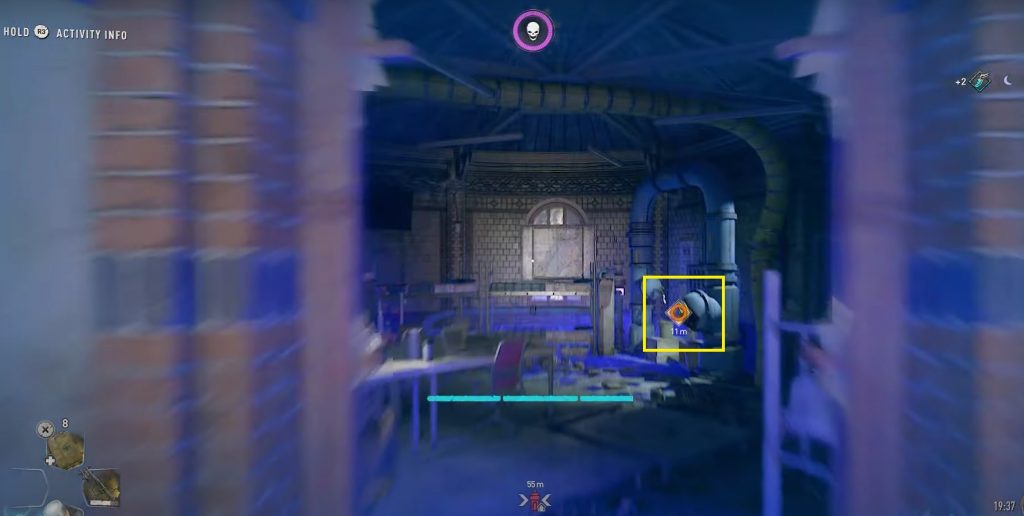
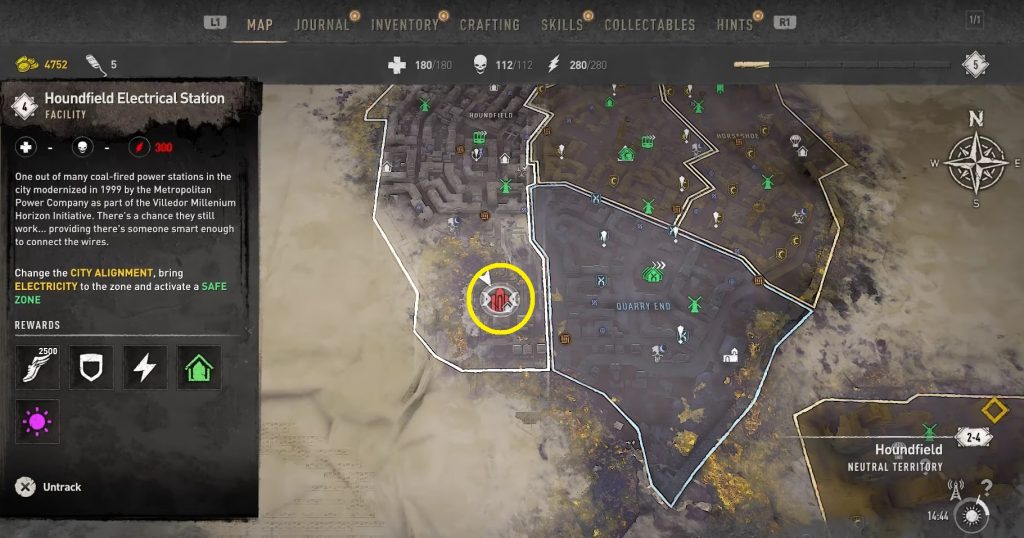
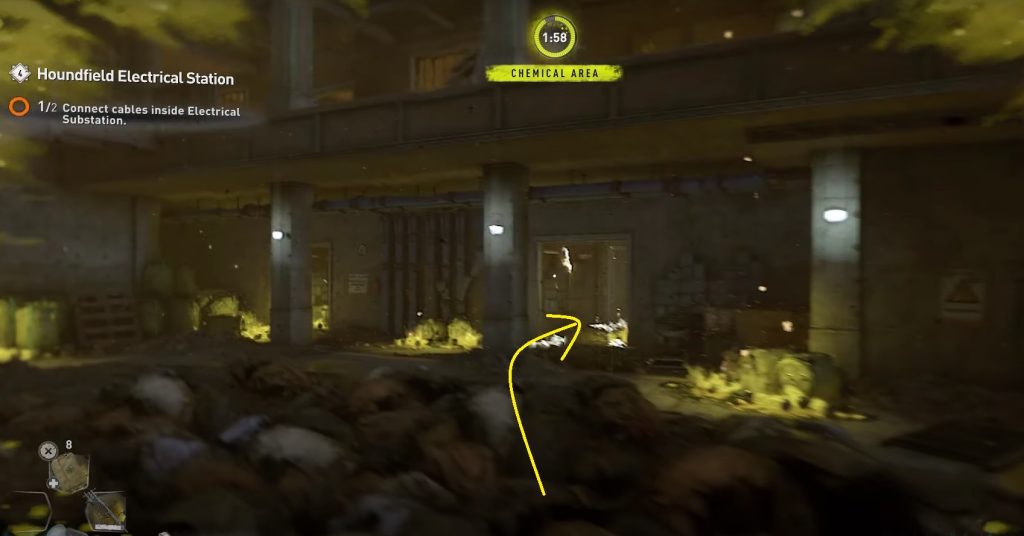
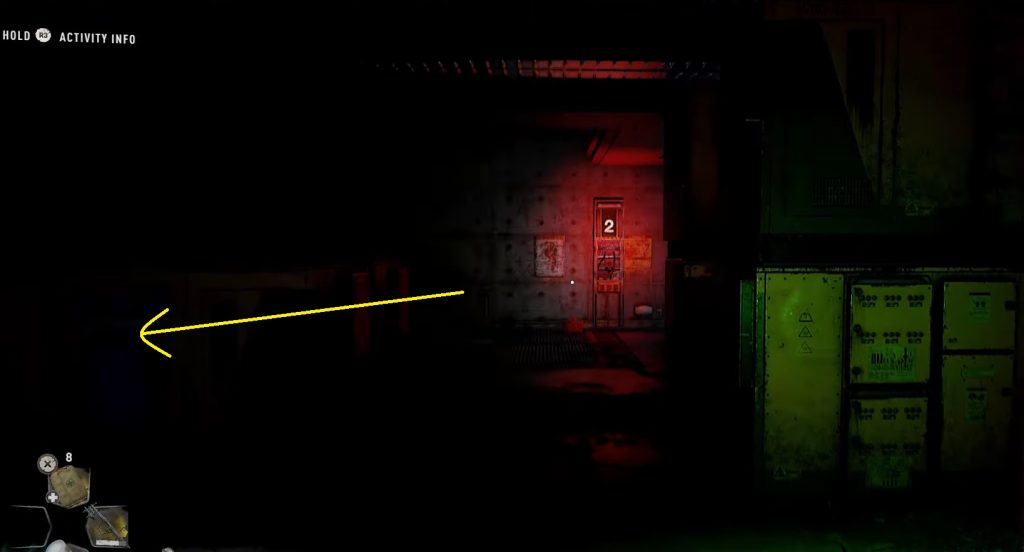
Facility #4: Houndfield Electrical Station
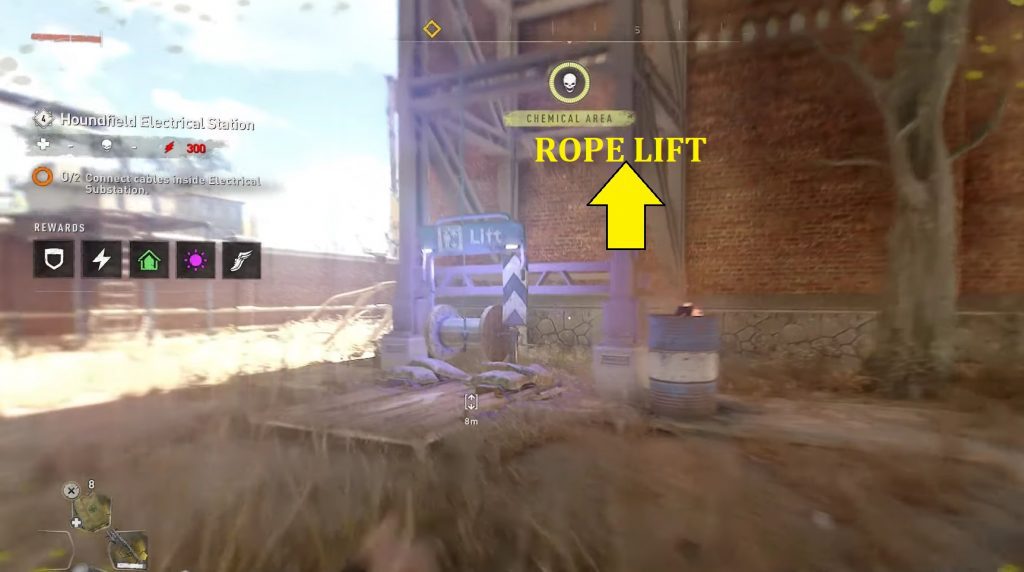
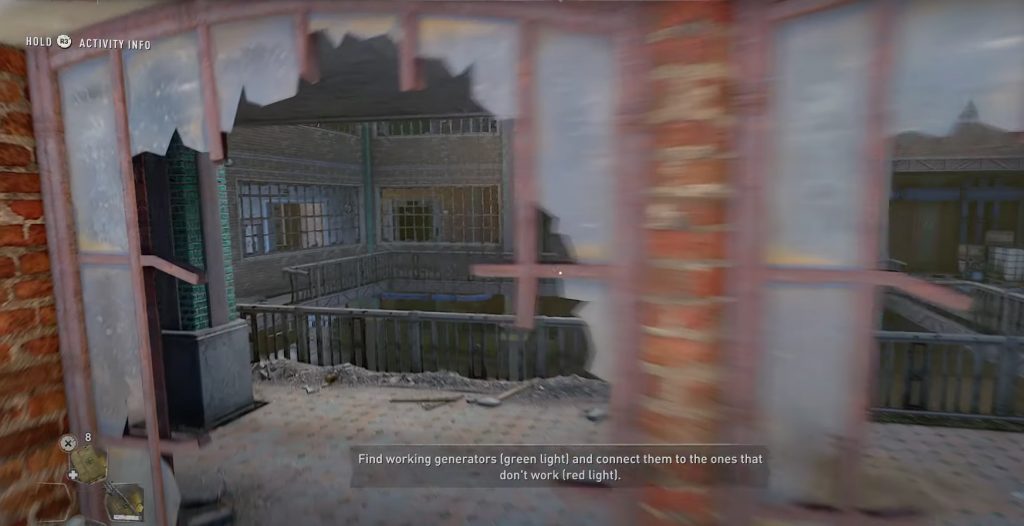
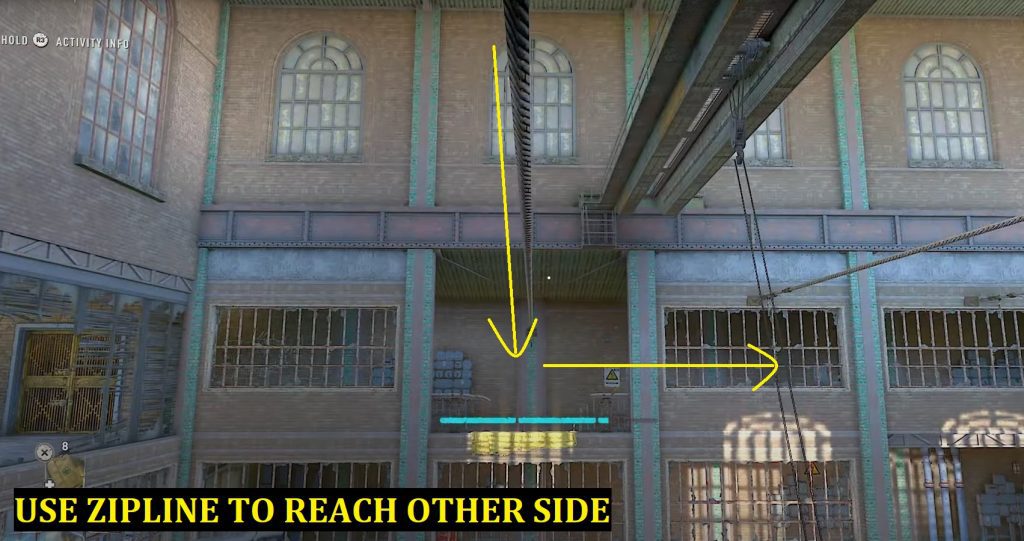
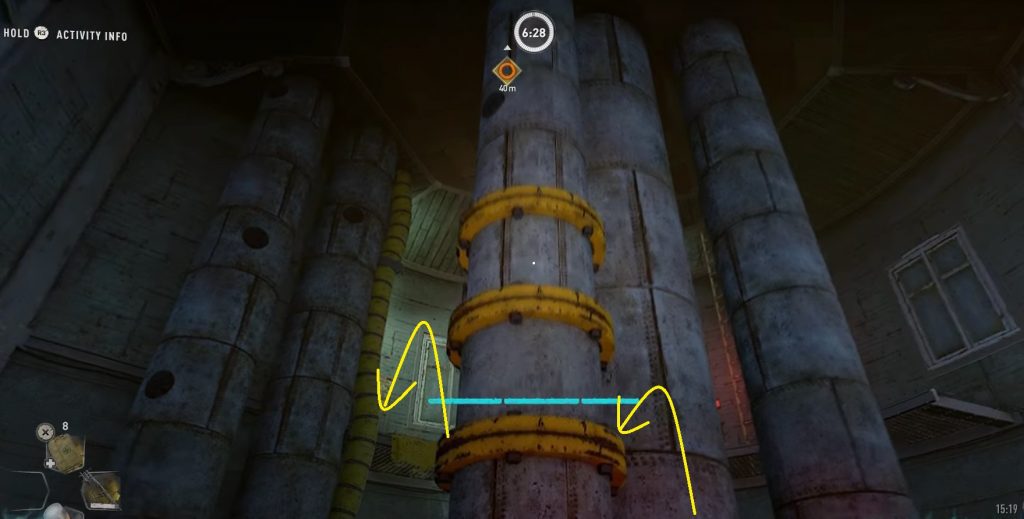
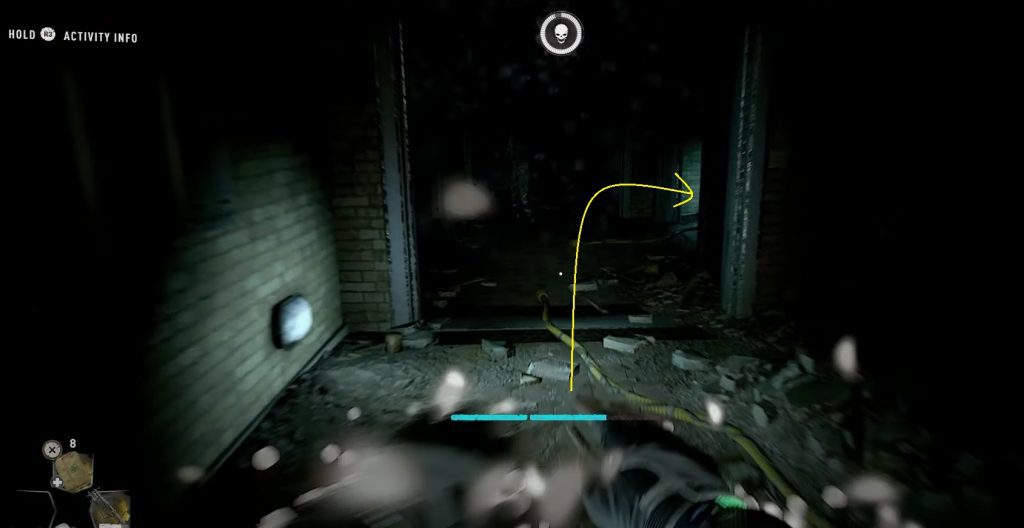
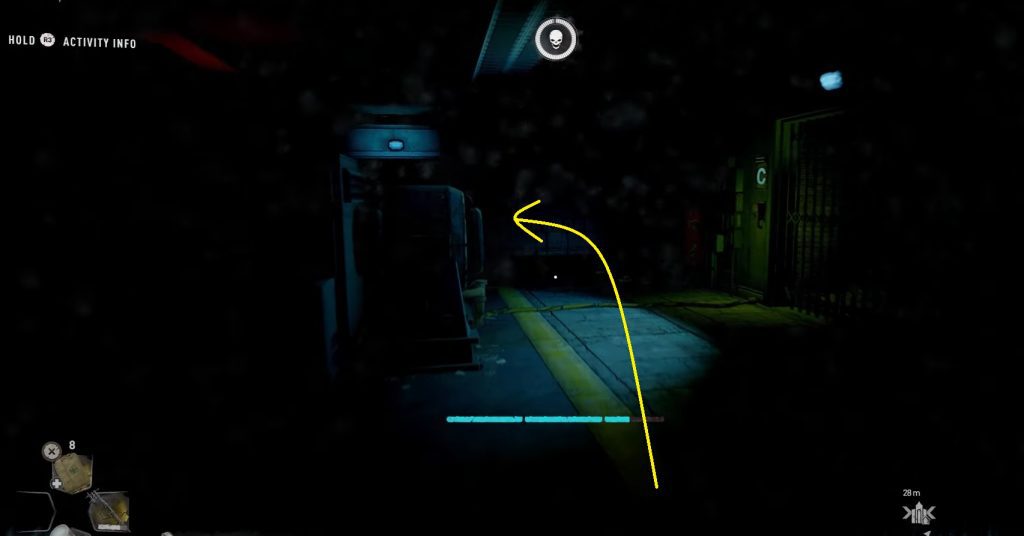
To enter the electrical station, you need to use the broken windows halfway up the building. Use the rope lift in the northeast part of the building to climb up the roof. and they jump to the roof below. Finally, enter the facility through the broken windows. I have attached screenshots for reference below. Inside the facility, you need to connect two power cables.
Cable no. 2
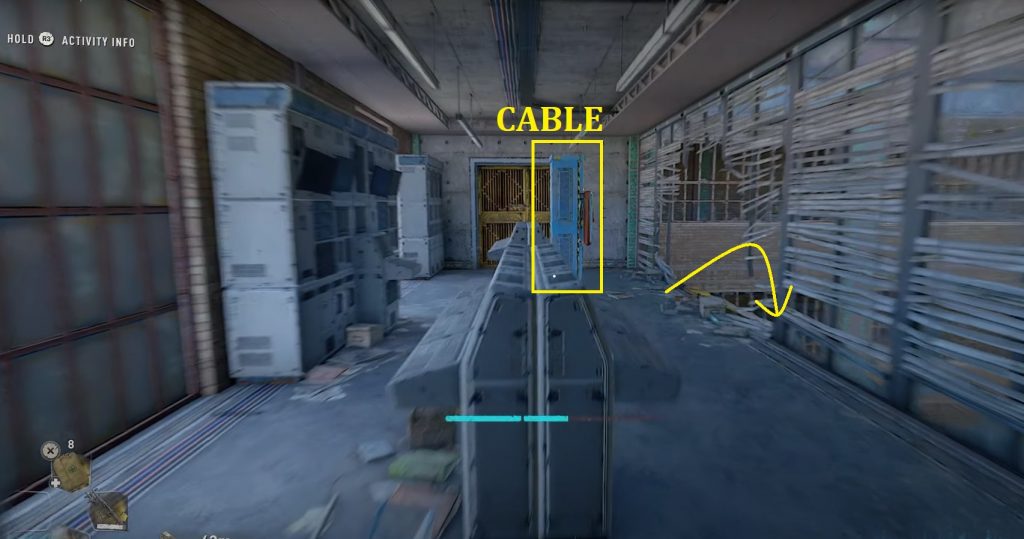
First, jump on the yellow hanging crate (same floor you used to enter) and from there you can jump to the yellow ledges on the wall.
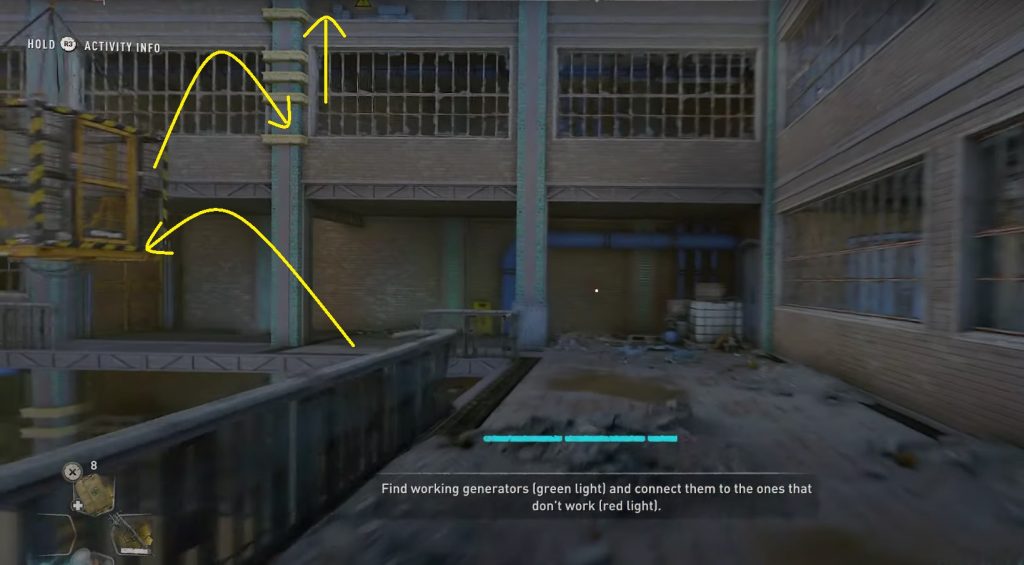
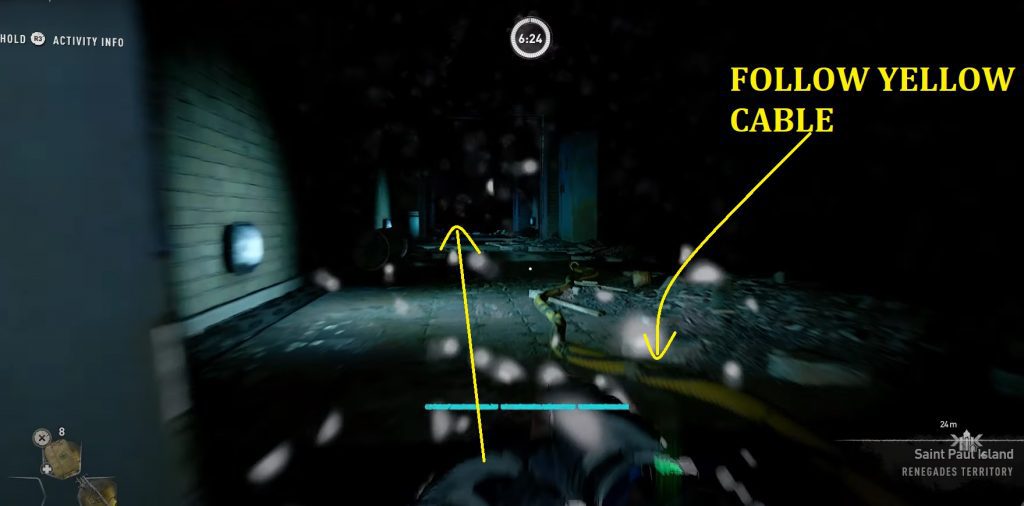
Climb up the pillar/wall and then use the cable to zip to the opposite side of the room. Navigate through the floor to reach power cable no. 2
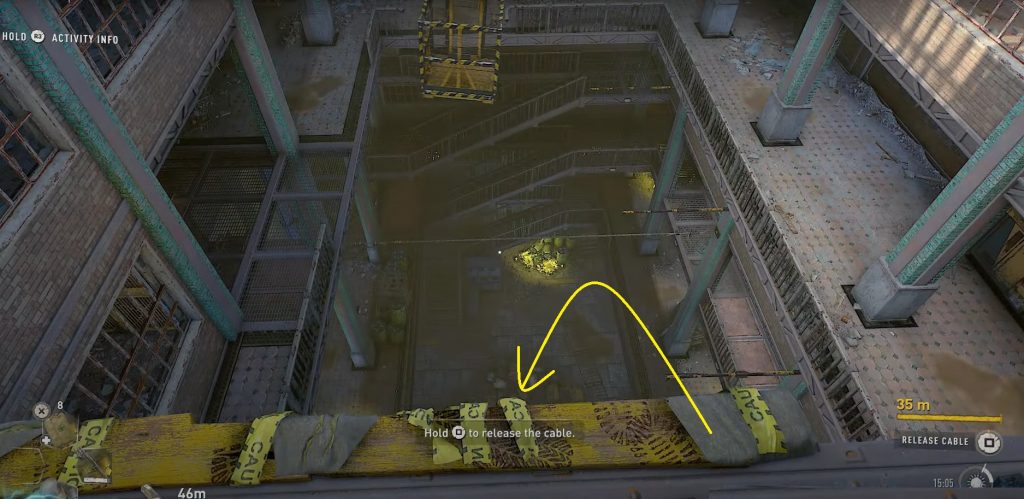
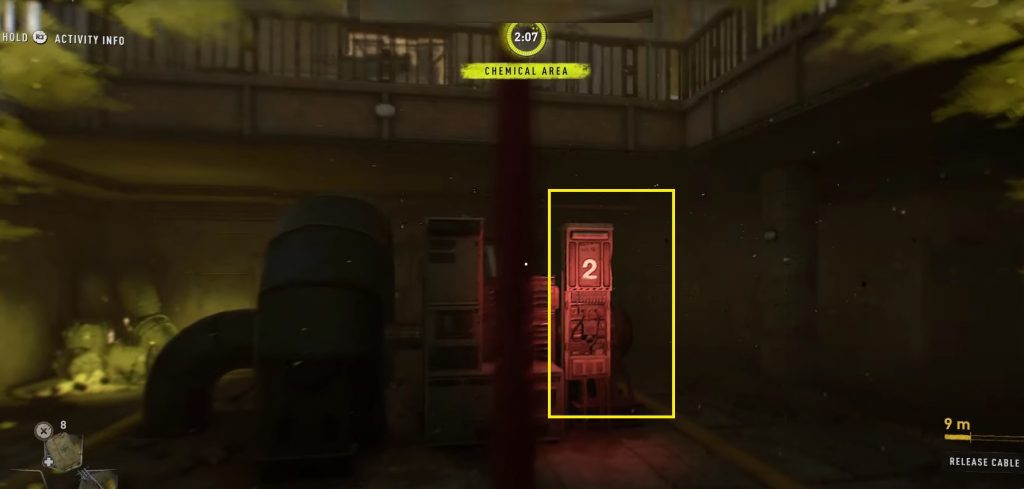
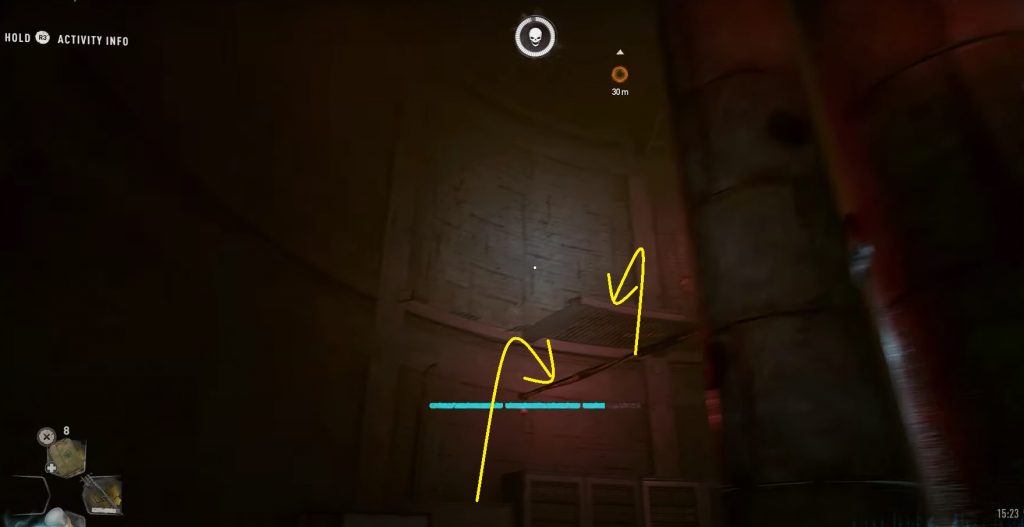
Hold the cable and jump down to the trashbags below in the basement. In the basement you find the box to connect cable no. 2.
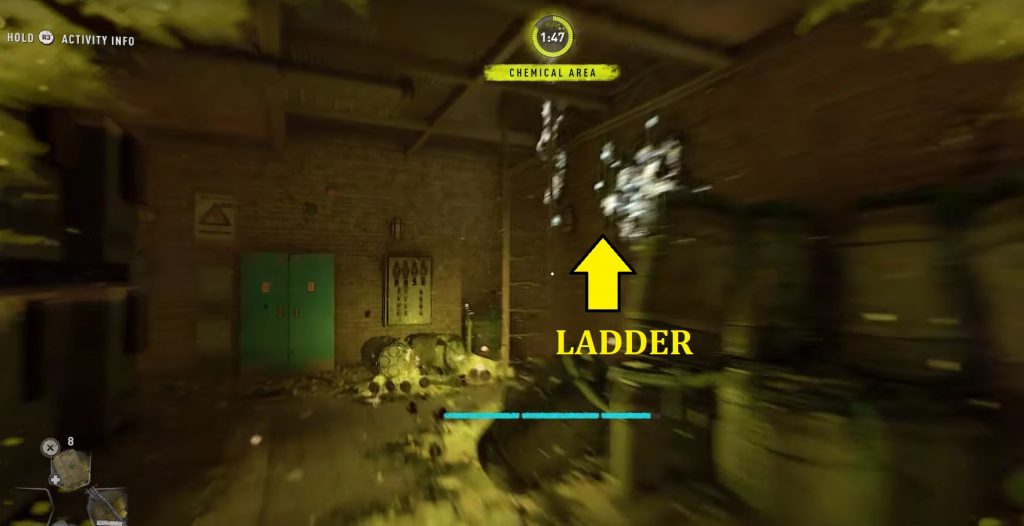
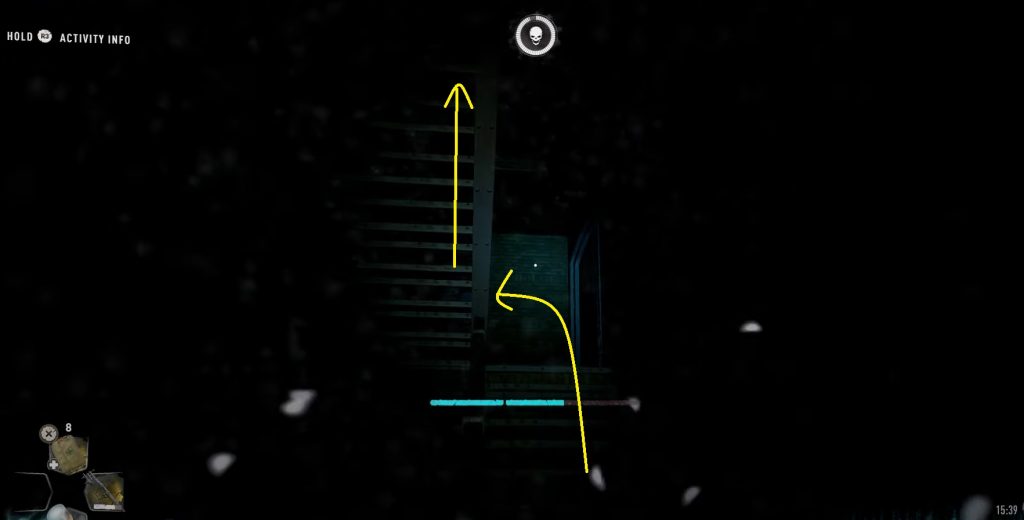
Cable no. 1
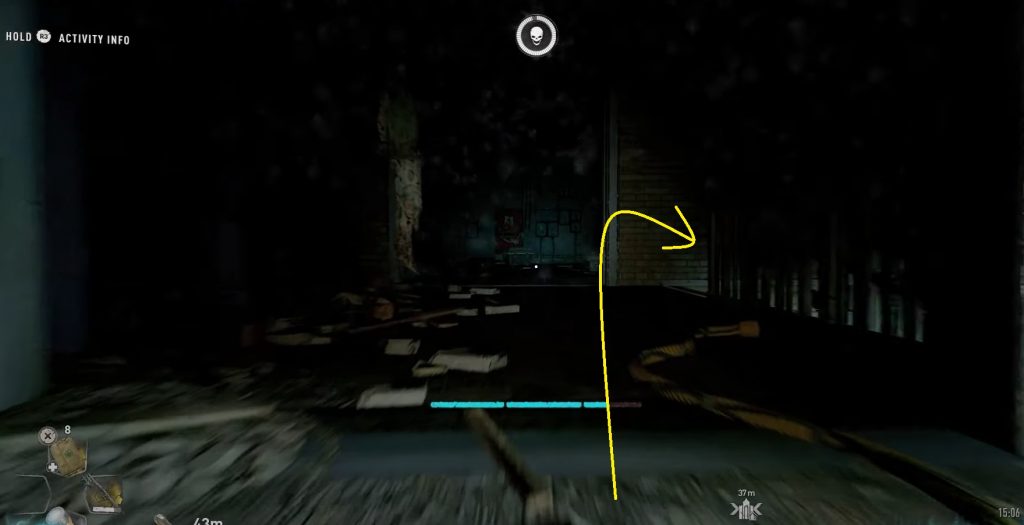
From the basement, look for a side room on the left from cable no. 2.
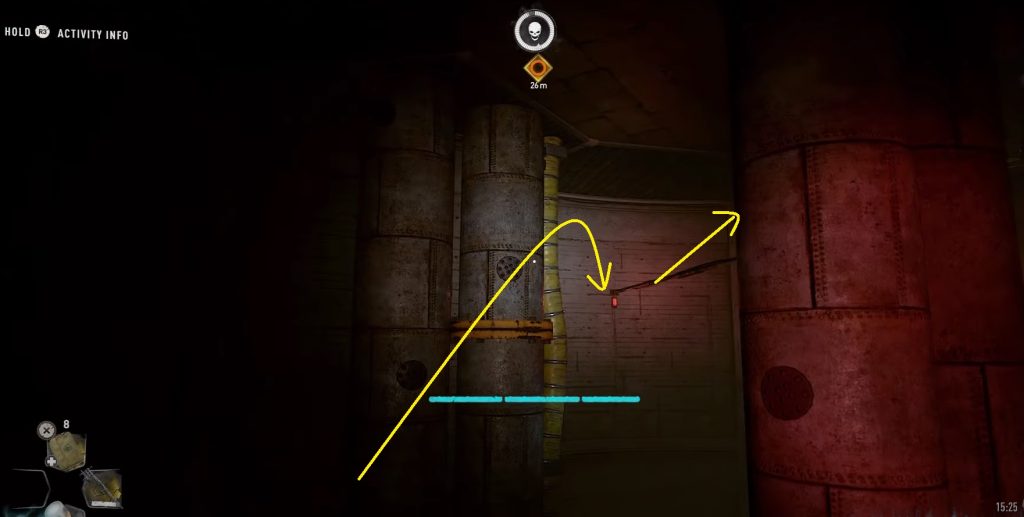
Use the ladder inside the burning side room to climb up. In the upstairs room climb another ladder. This will take you to the room with power cable no. 1

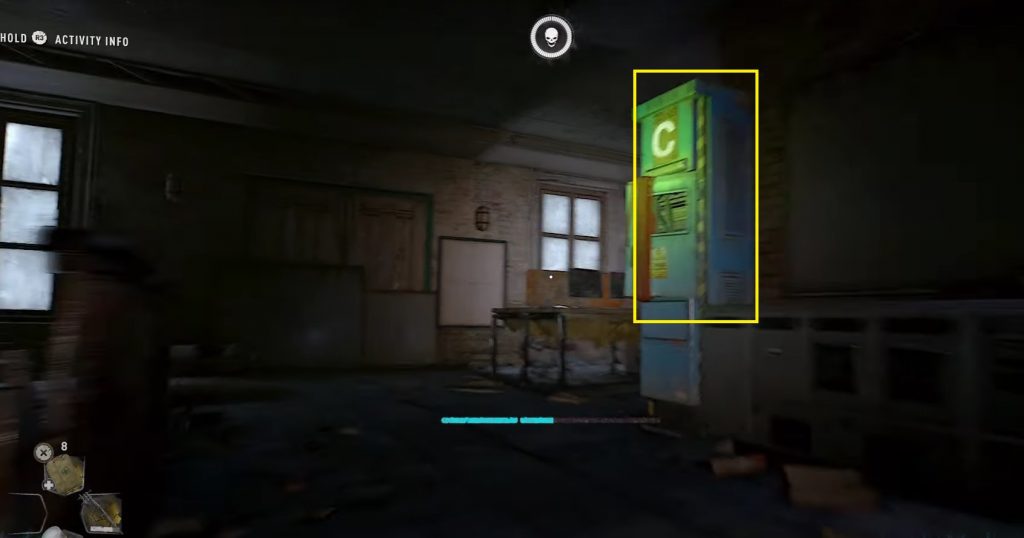
Now, open the grilled iron door to come out of the room.
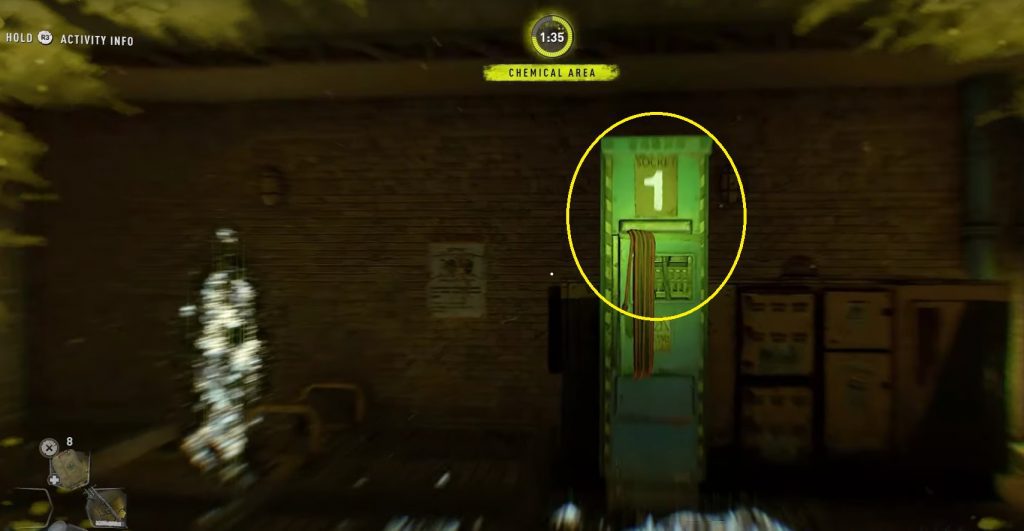
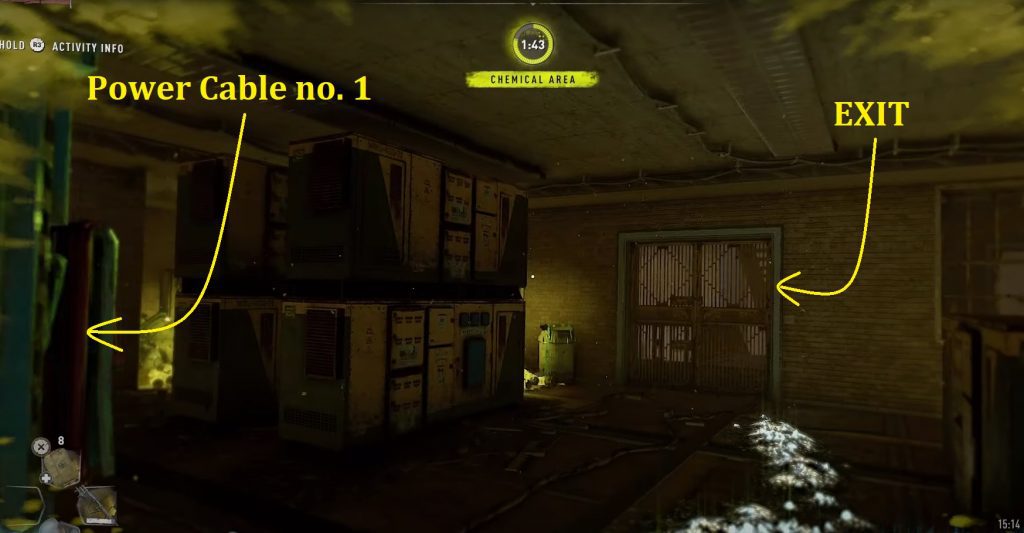
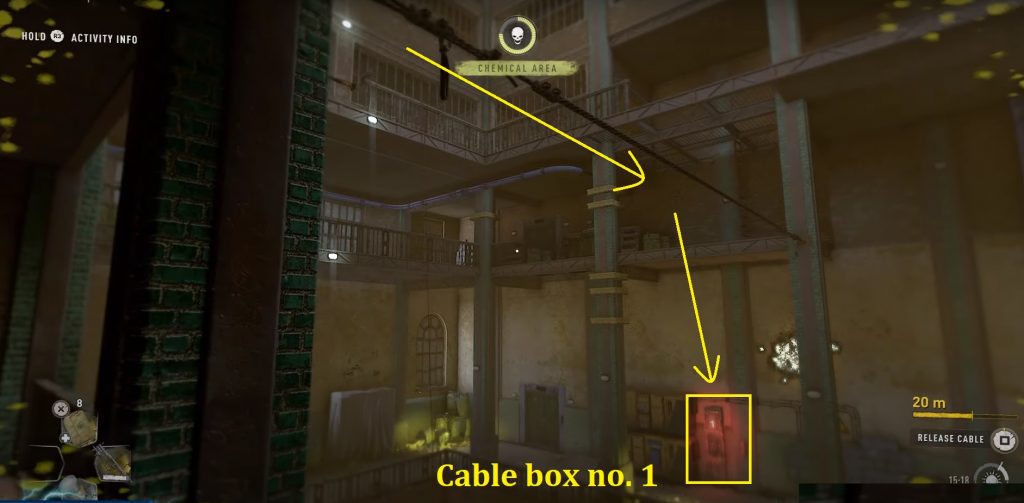
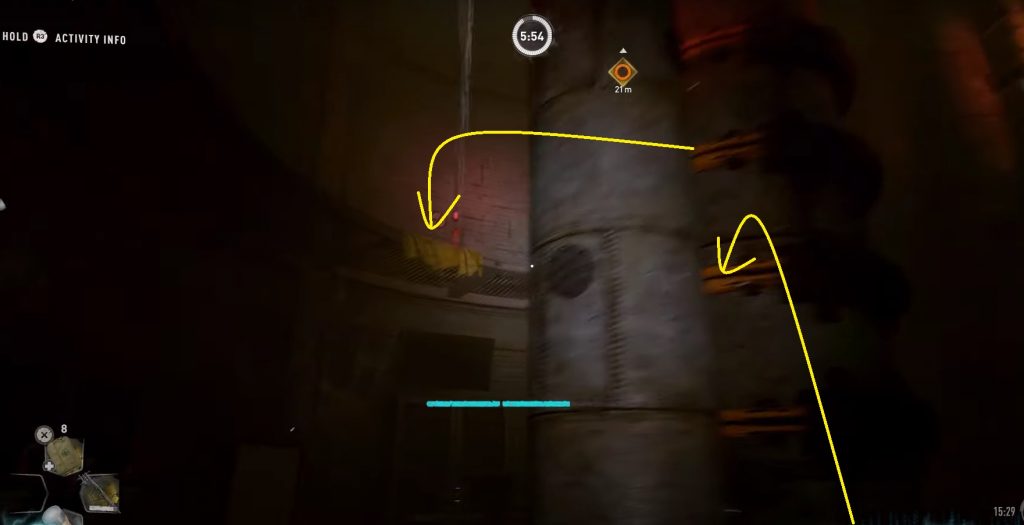
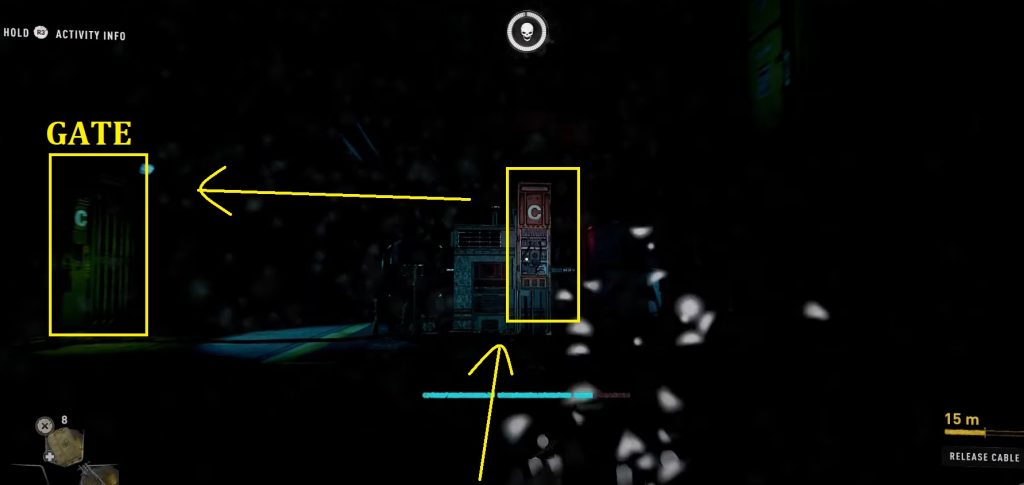
Finally, use the cable to zip and then jump down to cable box no. 1. Use the below images for reference. Connect the cable and wait for the elevator to arrive in the basement.
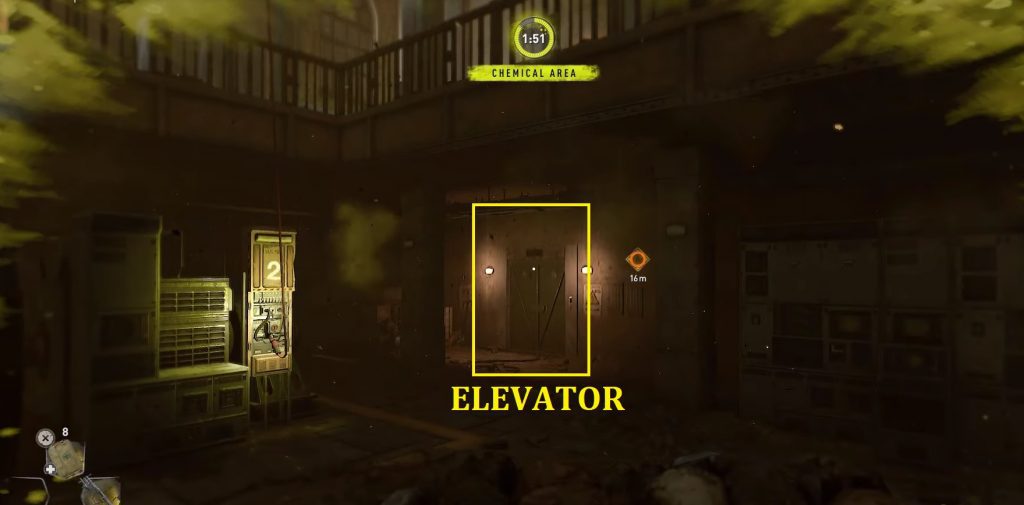
Use the elevator in the basement to reach the control room and activate the terminal to restore power.
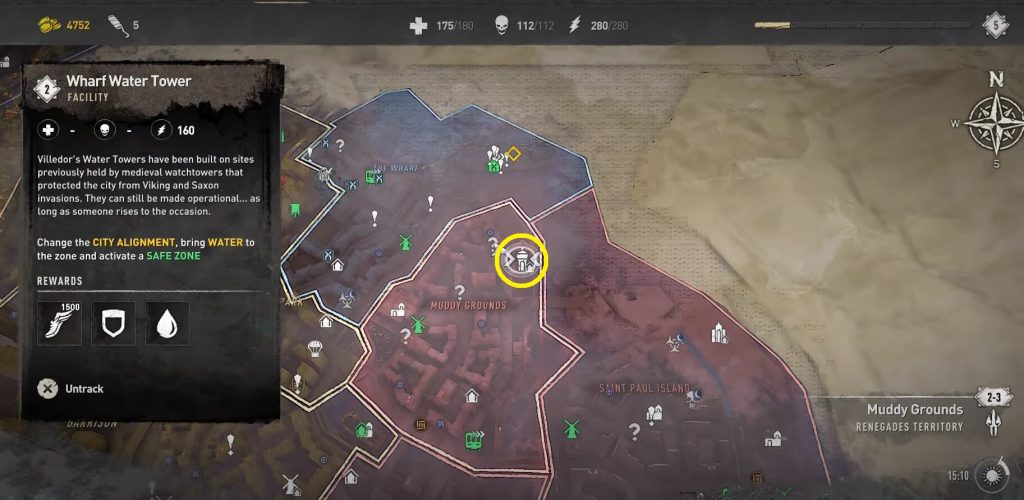
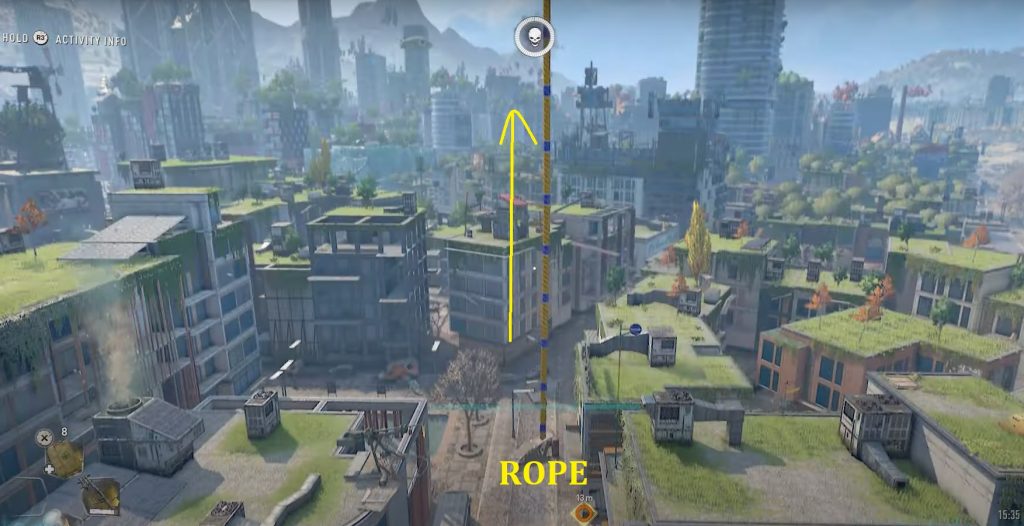
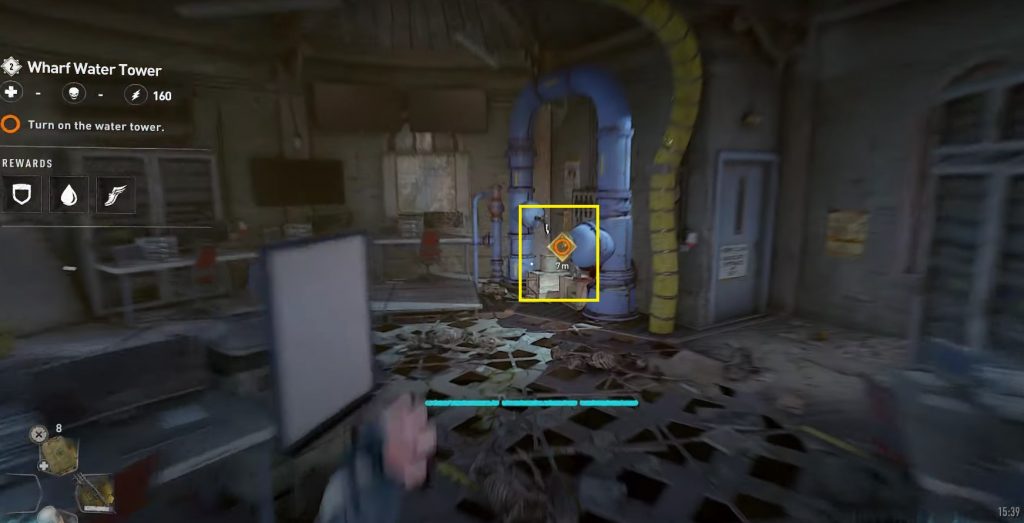
Facility #5: Wharf Water Tower
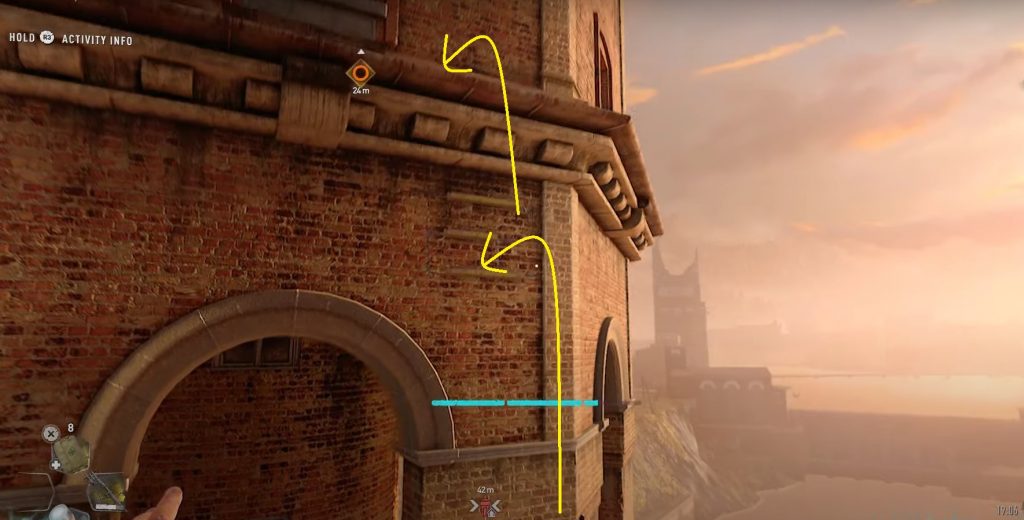
You have to enter the tower area by climbing the wall from the west side of the facility. In case you are unable to climb then fly from the nearby building. Use the below map for reference.

Once inside the tower area, enter the tower through the door on the southern edge as shown below.
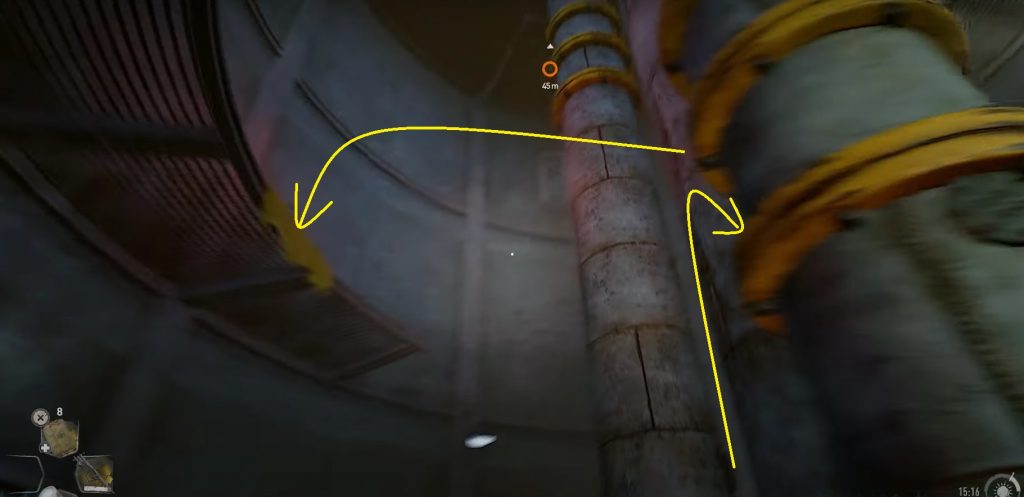
Inside use the yellow rings on the pipes to climb up and then turn around to jump on the platform. You will find a yellow cover to indicate where to jump. Jump on another set of yellow rings, circle around the ring, and then jump on the platform above.
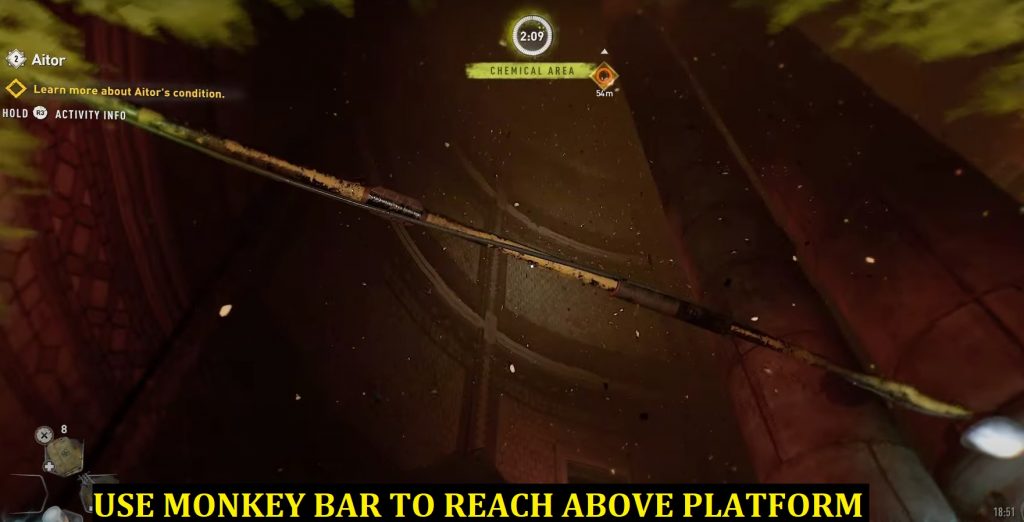
Climb up the ladder and then use the monkey bar to swing to the next platform. Jump on the yellow ring on a pipe, then to another monkey bar and the 2nd set of the ladder.
Upstairs, climb up the yellow rings on the pipe in the middle of the room, and then turn around to jump on the platform with the yellow sheet.
Use the two ropes to swing to the platform above.
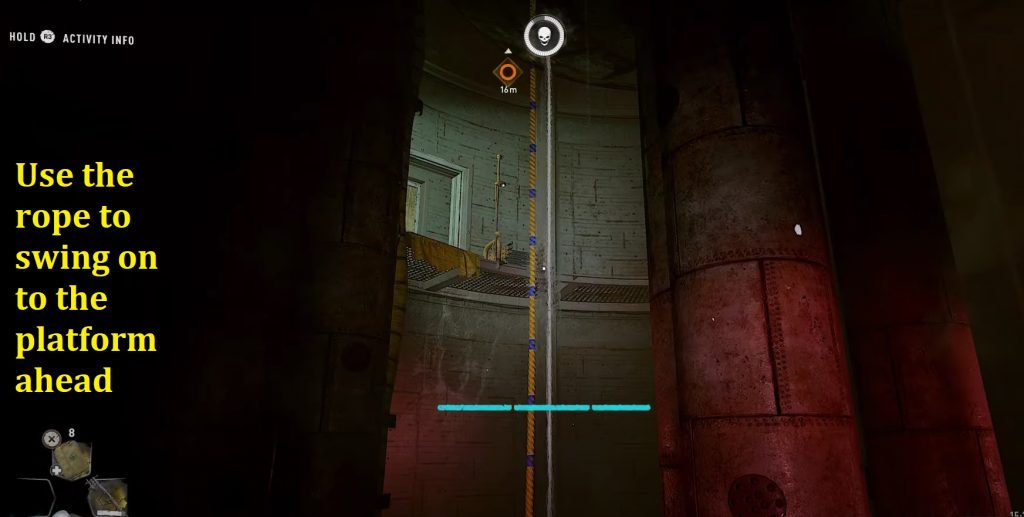

At this point, you will see a rope hanging outside of the window. Jump to catch the rope, then turn around and swings back.
Jump off to reach the top floor of the tower with yellow sheet marks. On the top floor, you just need to activate the valve that turns on the water tower.

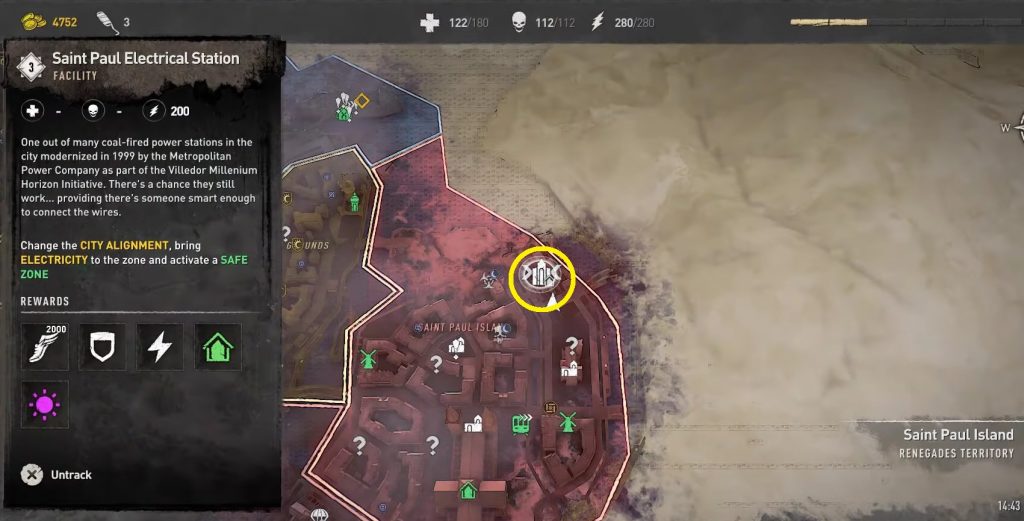
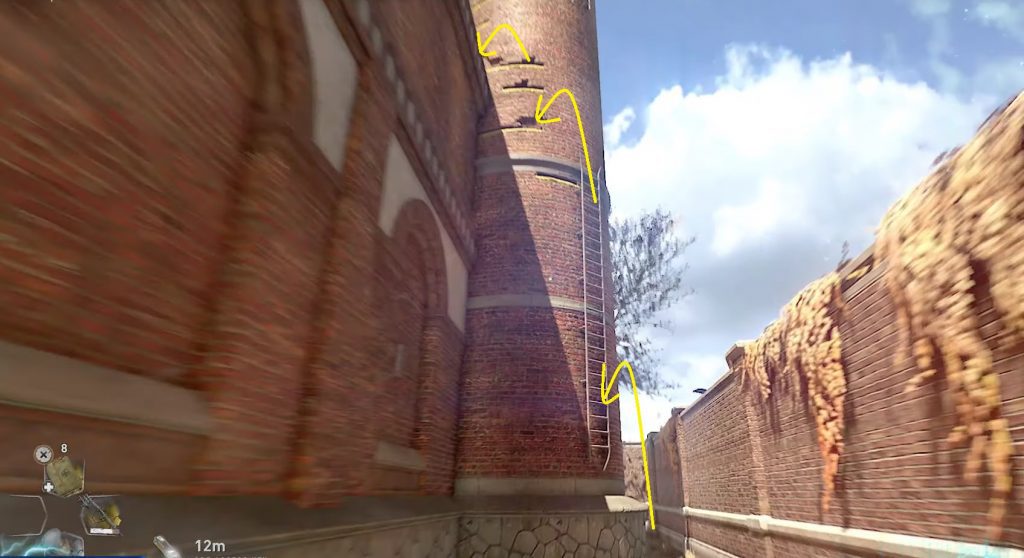
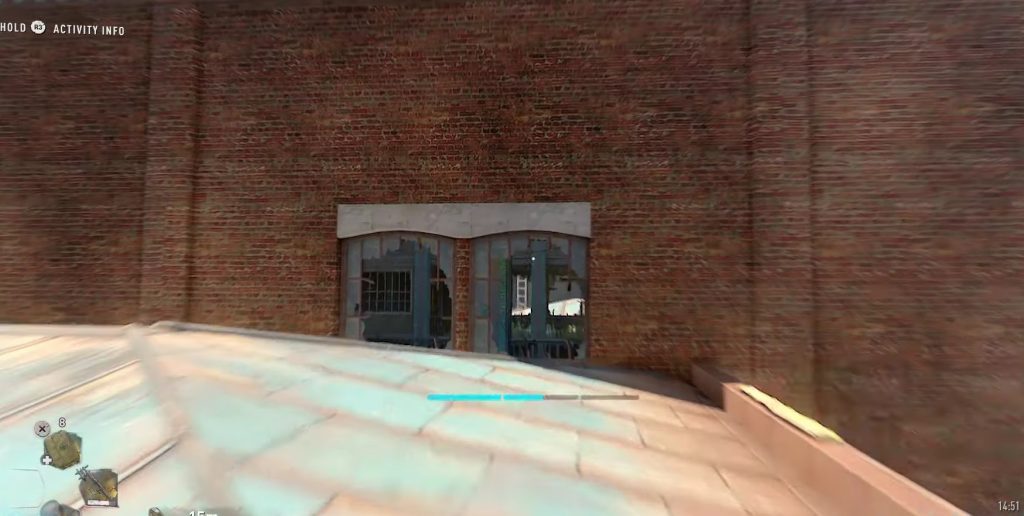
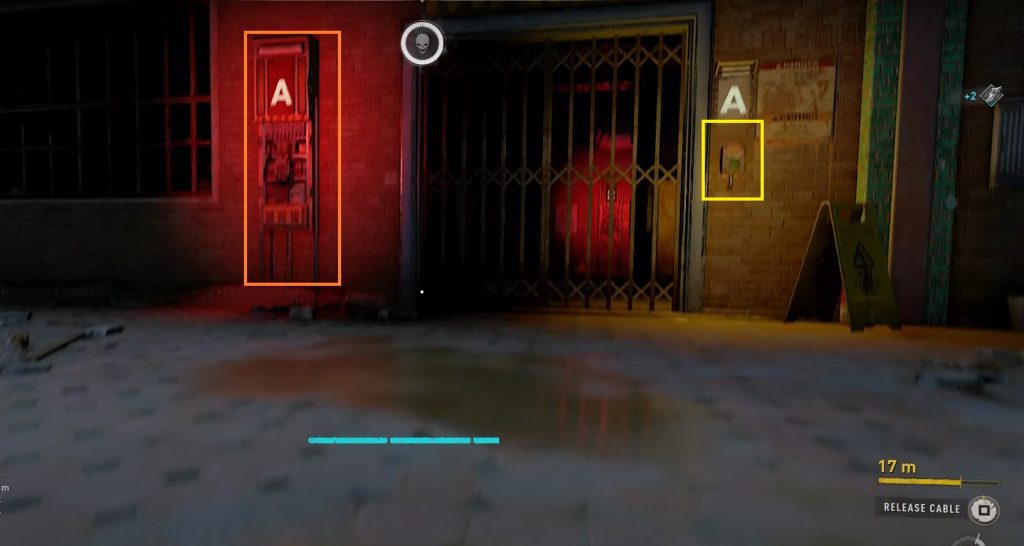
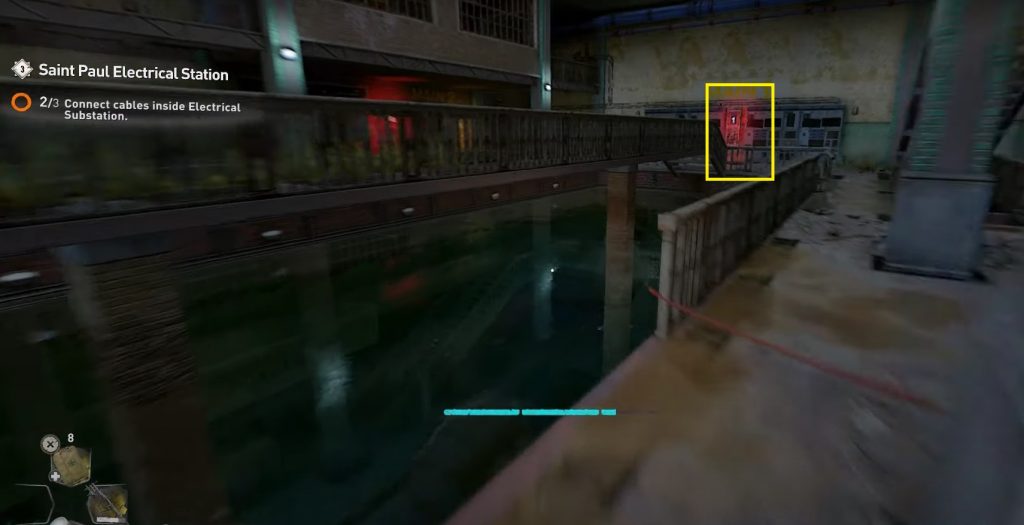
Facility #6: Saint Paul Electrical Station
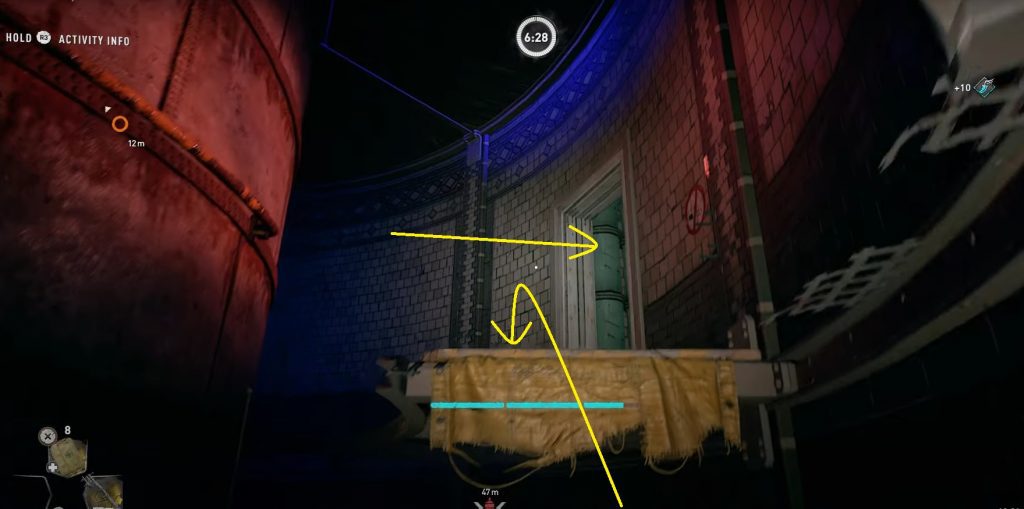
Use the chimney on the east wall to reach the roof and enter the facility through the broken windows.
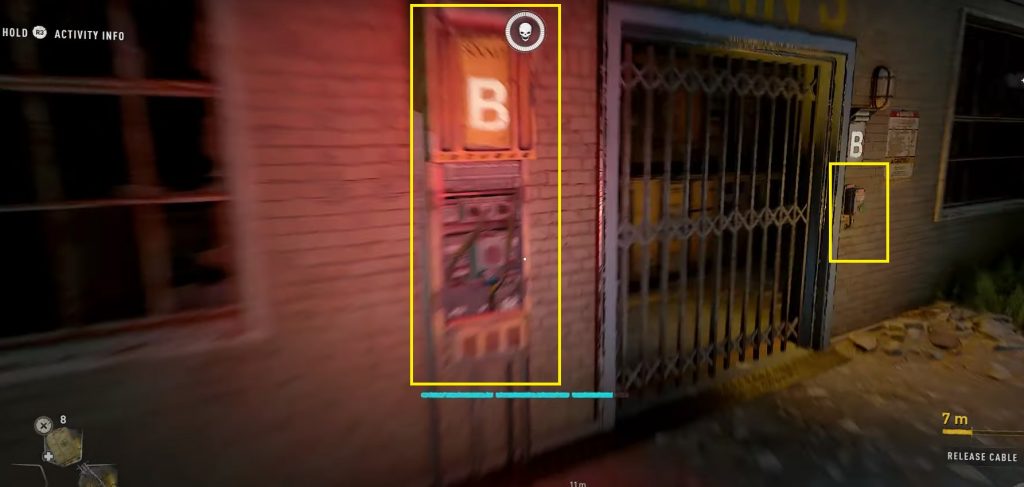
Inside the facility, jump down into the water. Underwater you will find a cable box (1/A/B).
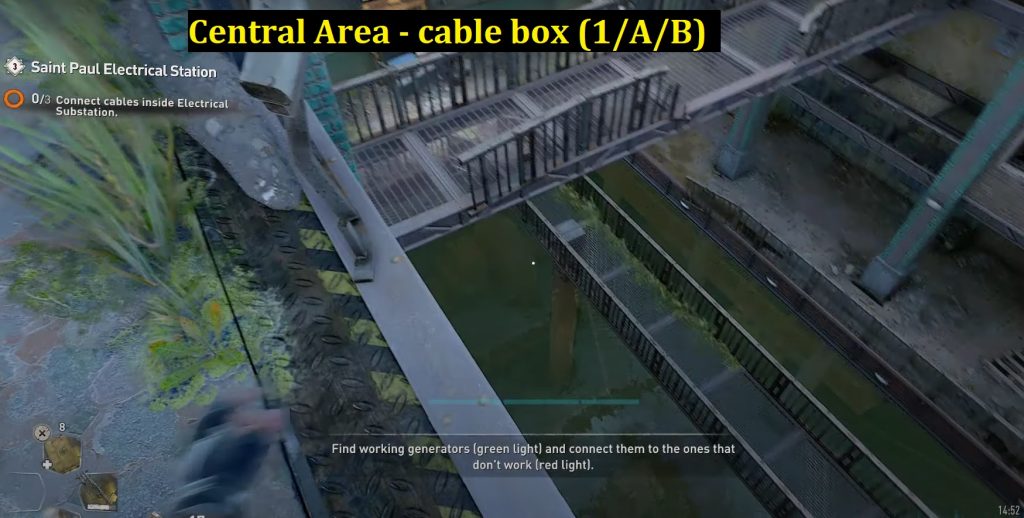
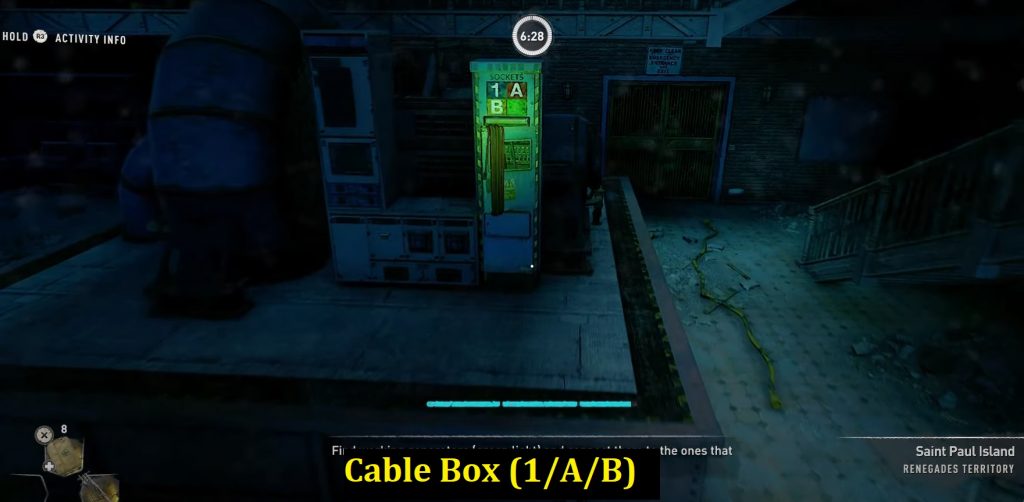
From the underwater cable box swim up and exit the water on the left. Connect the cable to the red “A” box and hit the button on the door nearby to open it.
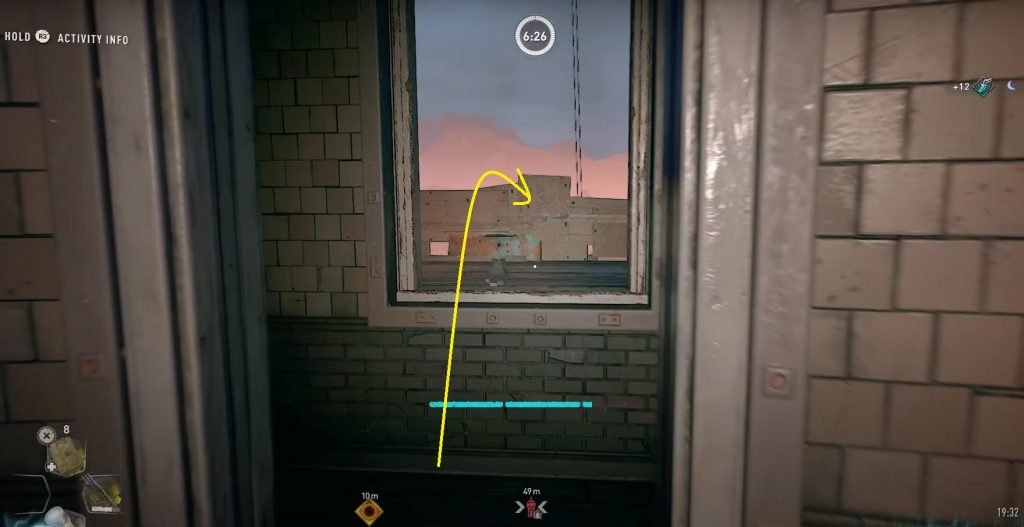
Enter the room and go down the stairs to another underwater area. Swim straight ahead for some time. You can also use the yellow cable on the ground to move forward.
After swimming straight for some time turn right. Swim downstairs and turn right to reach a room with a locked gate and power box-2.
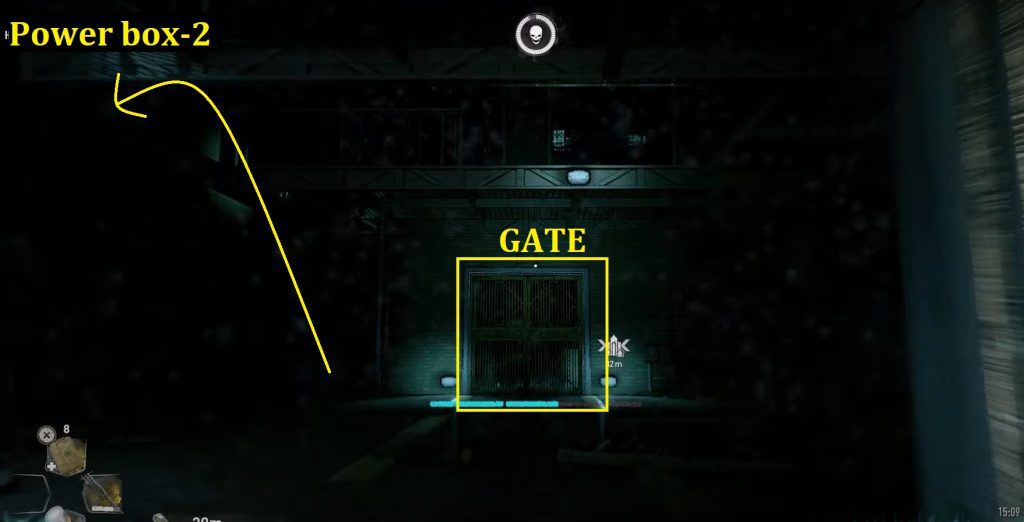

Take the cable from power box-2 (a level up) and exit from the locked gate. You will reach the central flooded room with cable box-1/A/B. Connect the cable to the red “2” box in the “A” room.

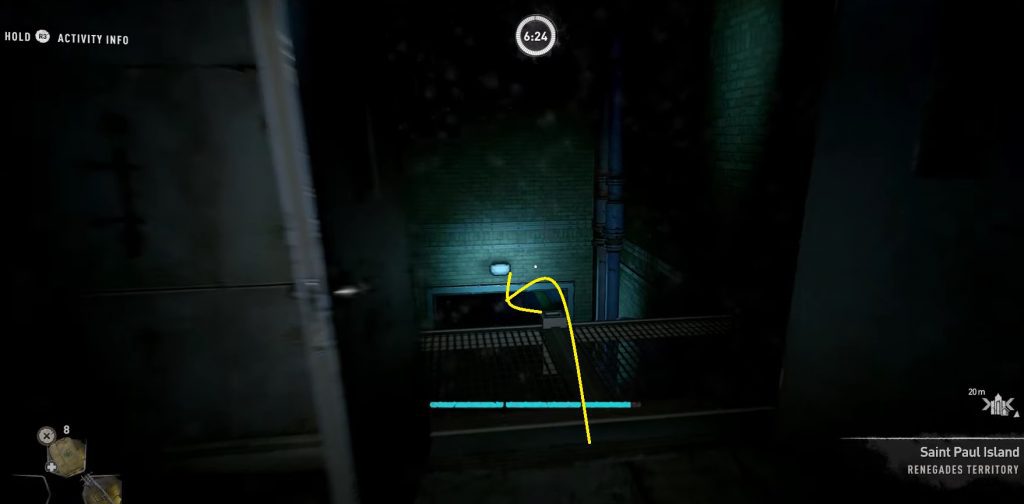
Now head back to the cable box-1/A/B underwater in the central area. Take the cable and exit the water on the right. Connect the cable to the red “B” box. Hit the door button to open it.
Enter the room and go down the stairs to another underwater area.

Swim straight ahead, swim 1 level down (a linear path), and swim up the stairs on the other side to reach the “C” box.
Take the cable from the “C” box and swim back the way you came and connect it to the red “C” box underwater.
After connecting the cable to the “C” box, open the gate on the left and then swim into the next room on the left after the stairs. You will find cable no. “3” here.
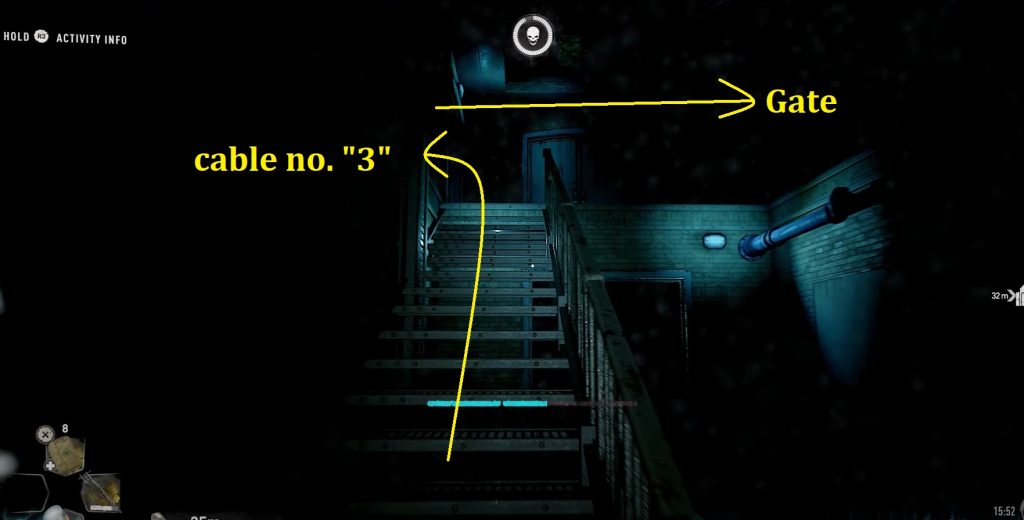
Collect the cable and open the locked gate opposite the no. “3” box (This gate is right of the stairs from where you reached here) This will take you back into the central room.
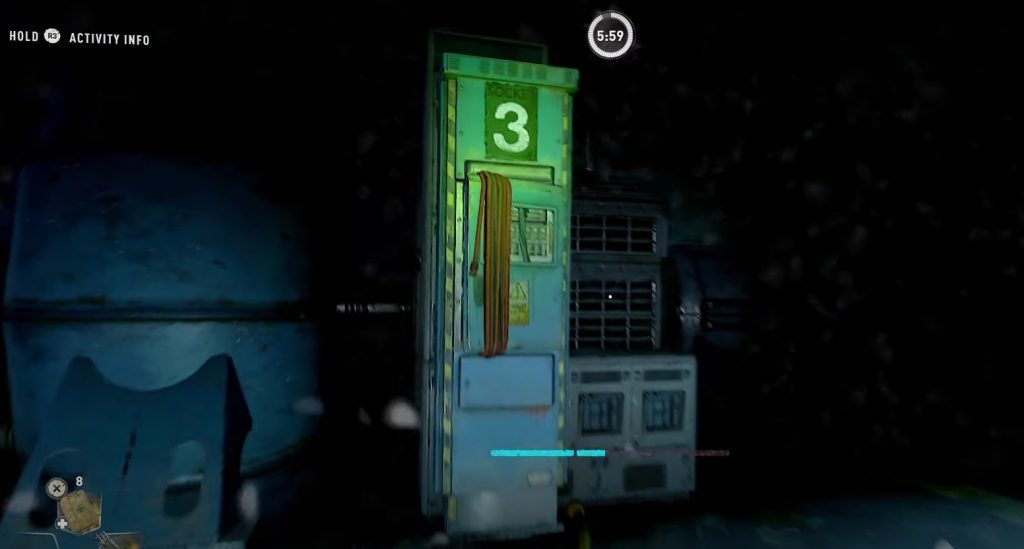
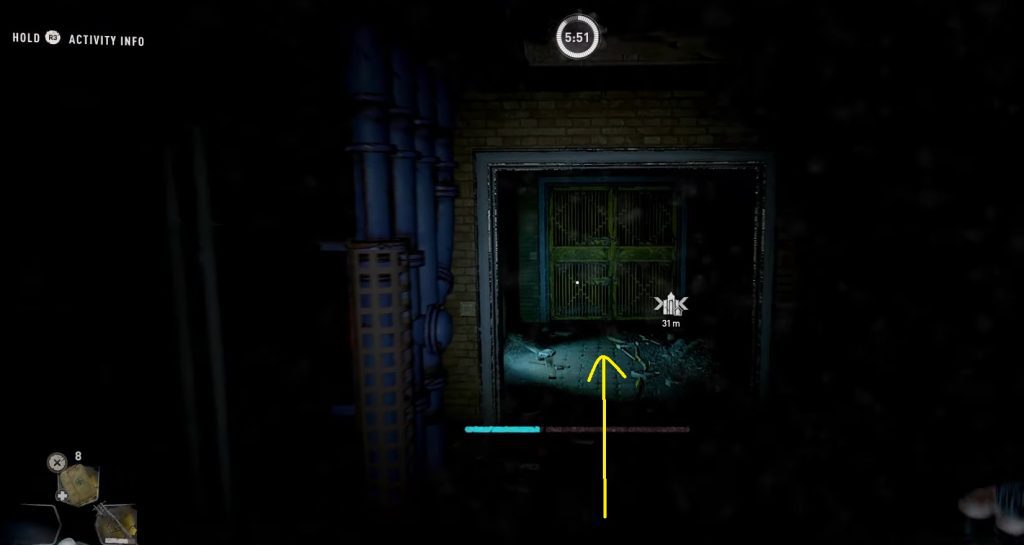
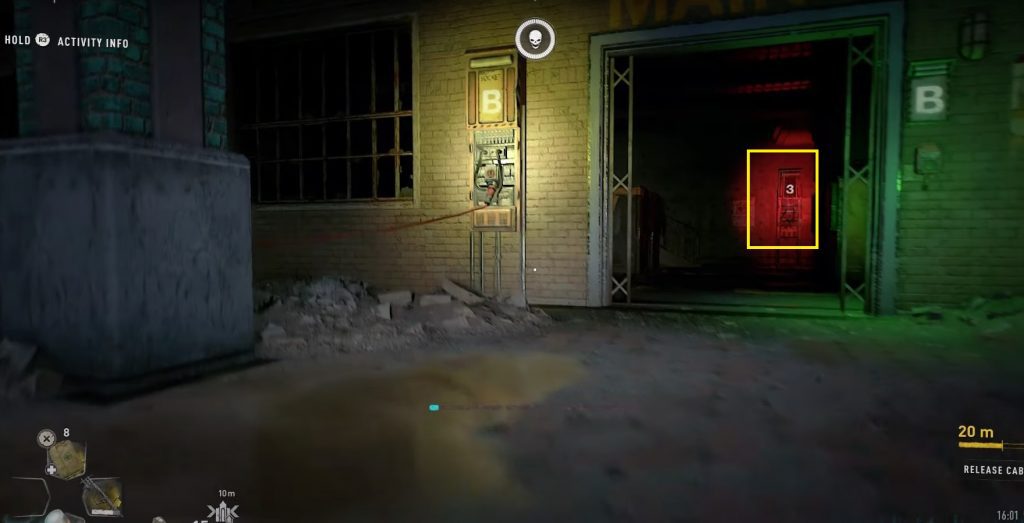
Now, exit the water on the right, and enter the “B” room which contains the red “3” box. Connect the cable to the red “3” box
Now dive back to the cable box-1/A/B underwater in the central area. Take the cable and exit the water. Connect this cable to box no. 1 which is straight above the cable box-1/A/B box outside the water.
An elevator should arrive in this room after all 3 cables are connected. Use the elevator to reach the control room and activate the terminal to restore power.

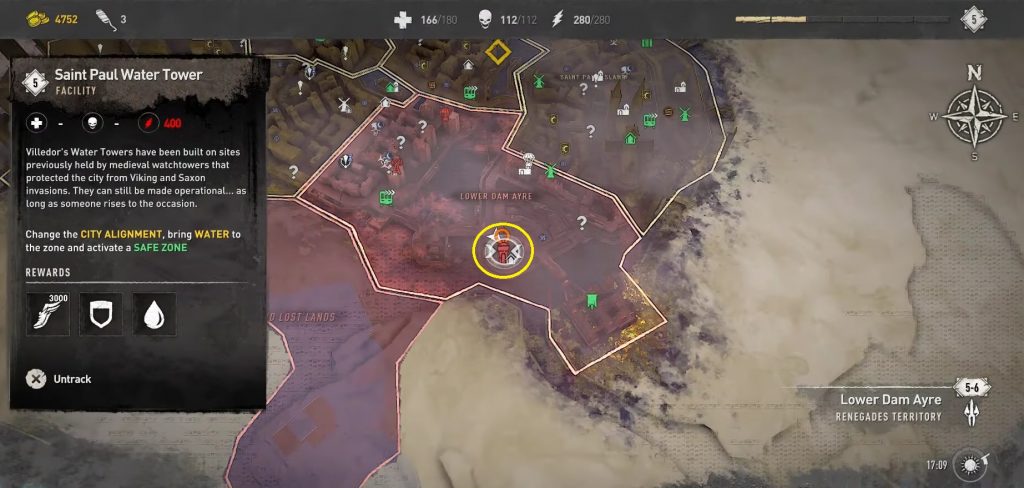
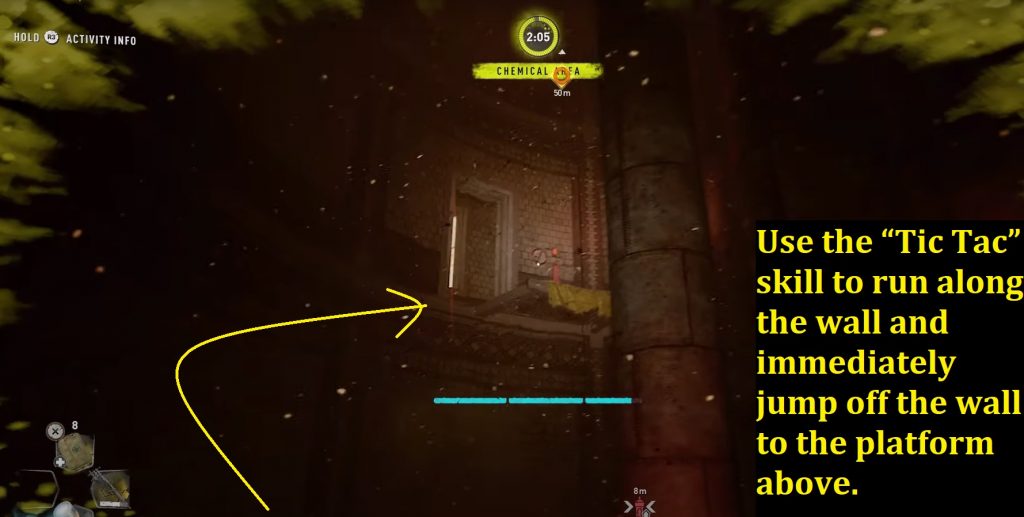
Facility #7: Saint Paul Water Tower
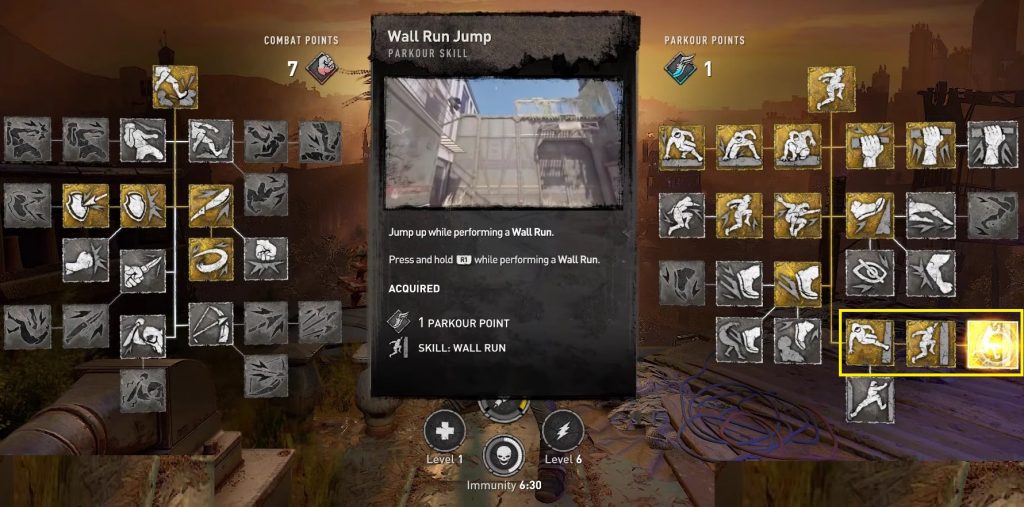
You need three Parkour Skills to reach the tower top – “Tic Tac” “Wall Run” & “Wall Run Jump”.
From the first floor, use the monkey bar to swing to the platform above.
Now, use the “Tic Tac” skill to run along the wall and immediately jump off the wall to the platform above.
From there head out the window and climb up the yellow ledges > monkey bar > metal bar to reach the middle of the tower.
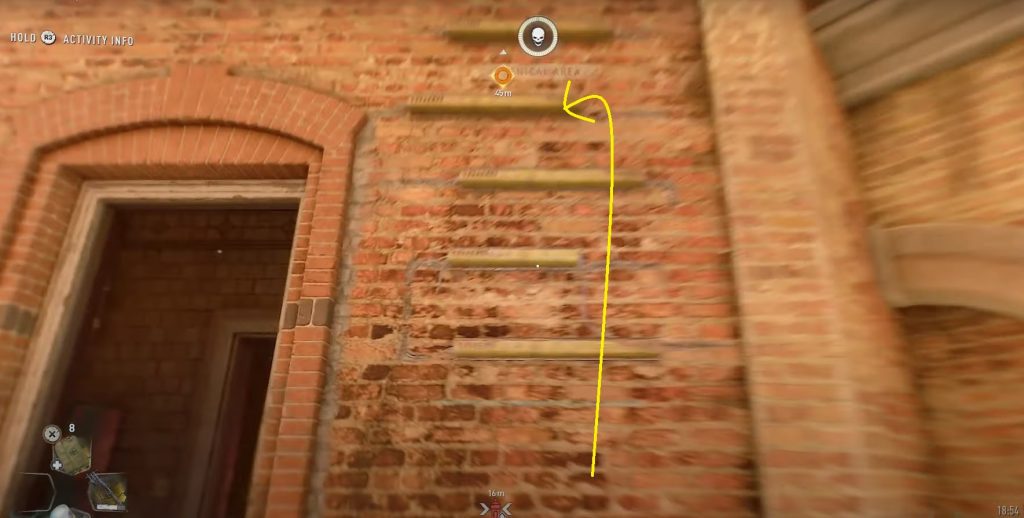
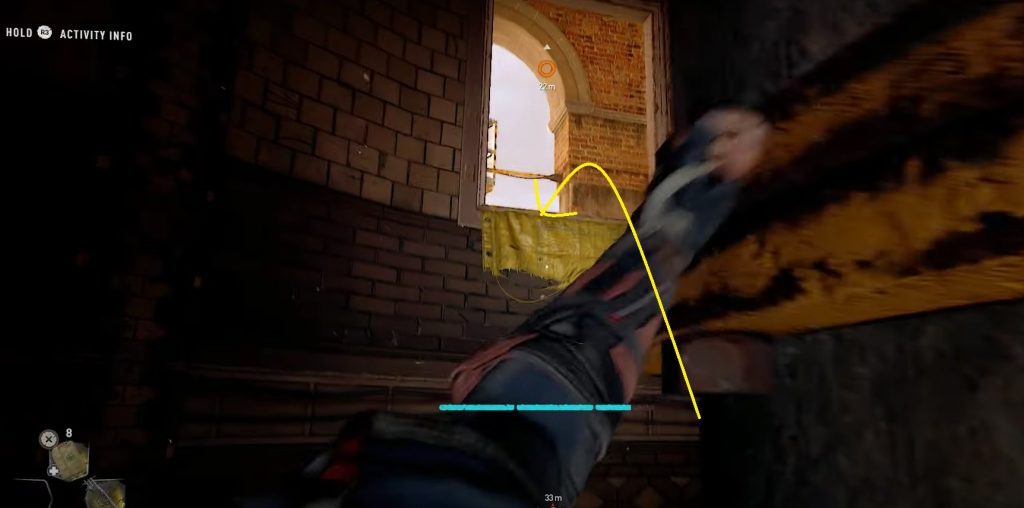
Here use the skill “Wall Run” & “Wall Run Jump” to reach the open window above as shown in the image below.
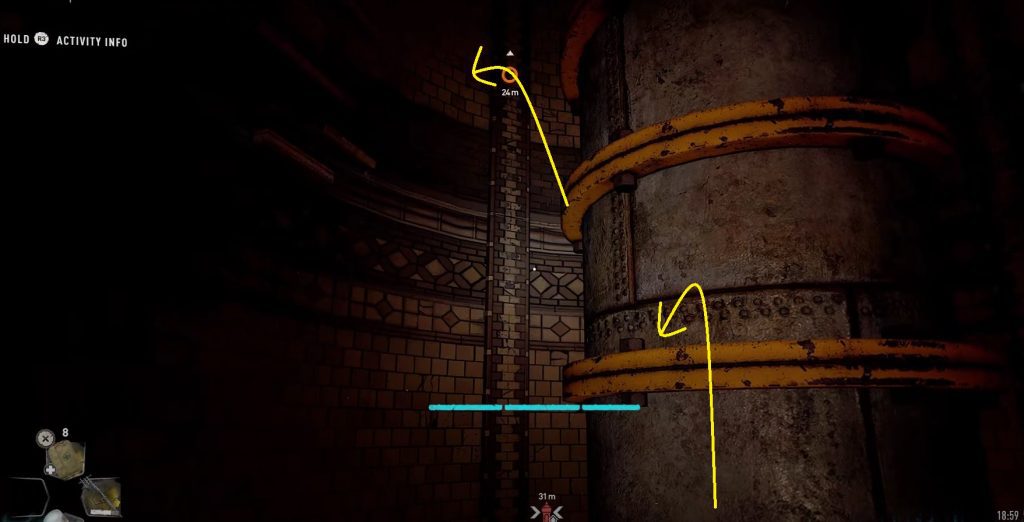
Now climb up the yellow rings in the center of the tower, turn around, and then jump to the open window with the yellow sheet.
Use the monkey bar to reach the yellow crate, hanging in the air. Swing the crate, turn around and then jump on the yellow ledges and climb up.

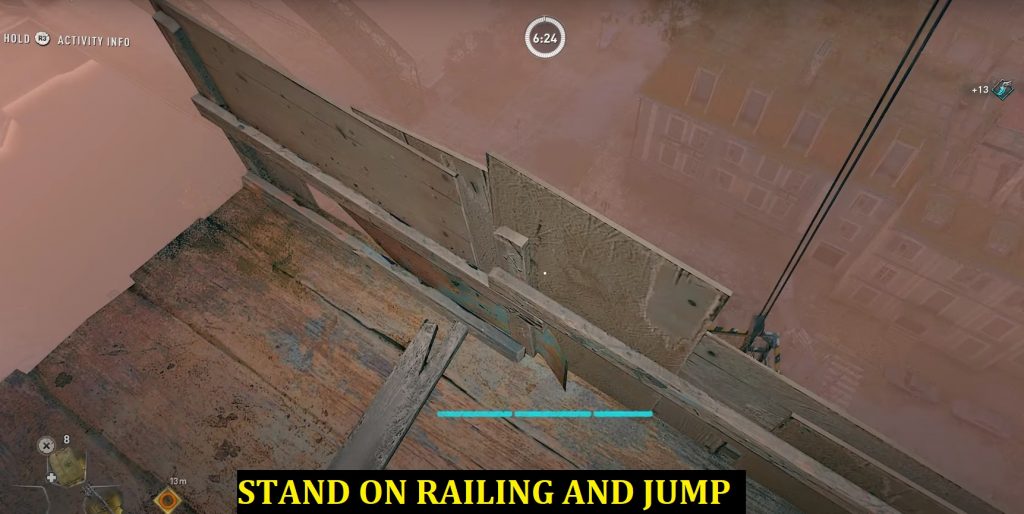
Now you are back inside the tower, climb the yellow ledges on the left, jump on the platform to the left. Head outside the window to the wooden balcony.
Stand onto the wooden railing on this balcony and then jump up to catch the roof above.
Climb up to reach the control room. Interact with the valve to restore the tower.