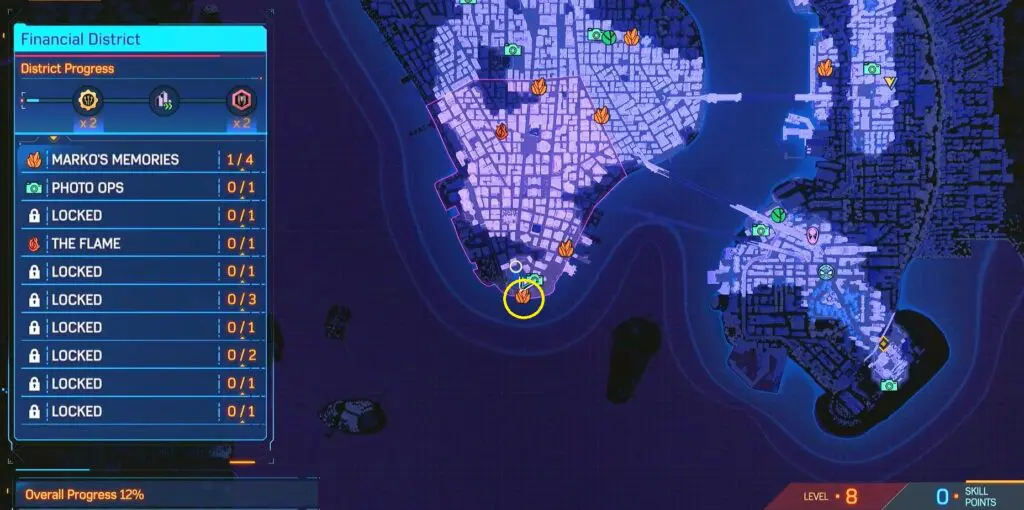
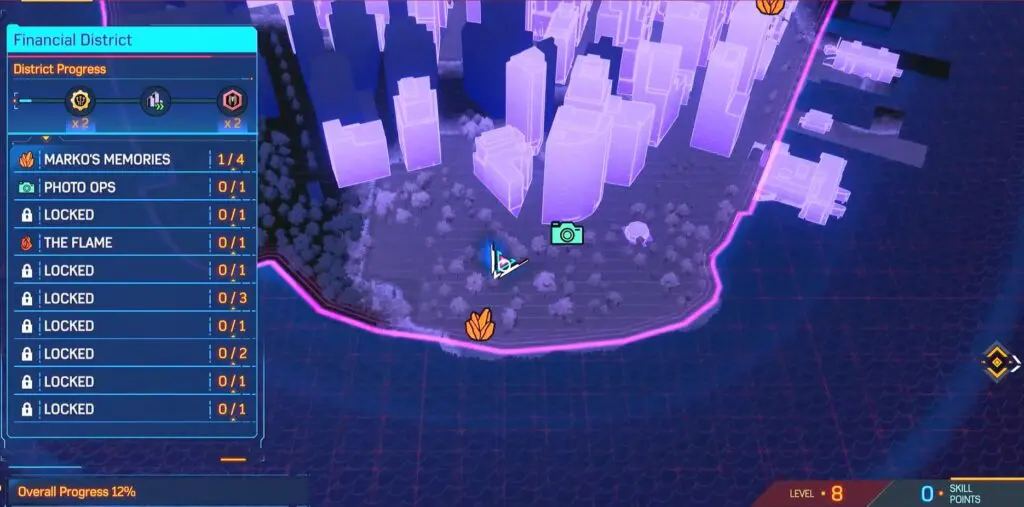
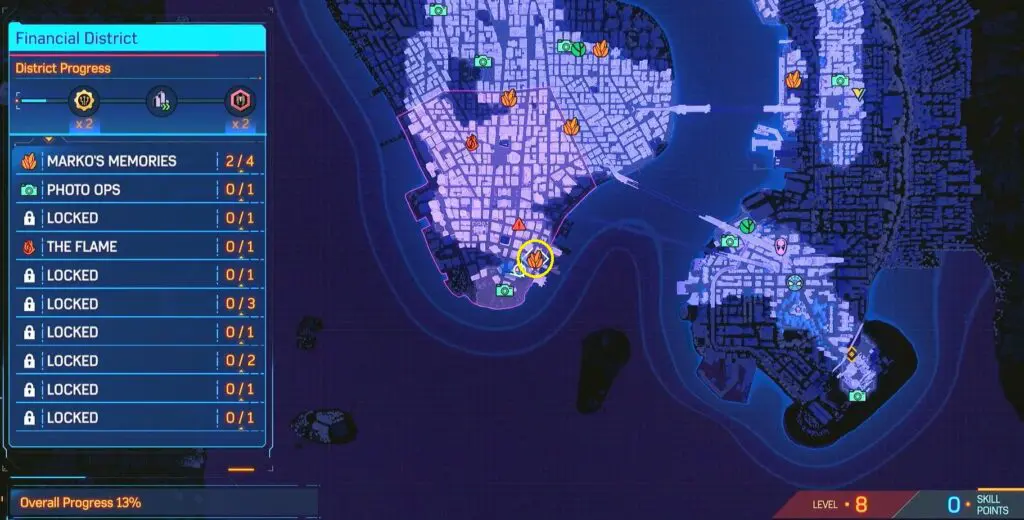
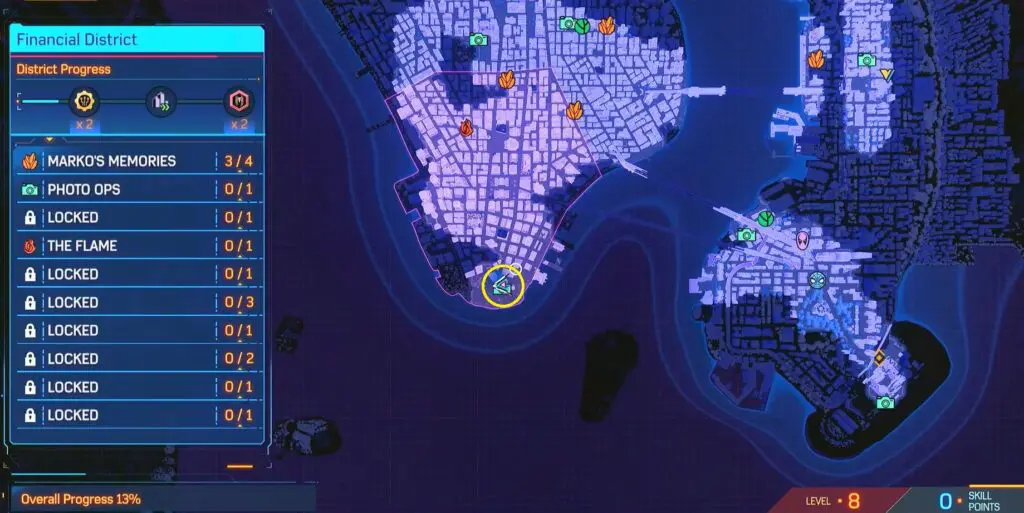
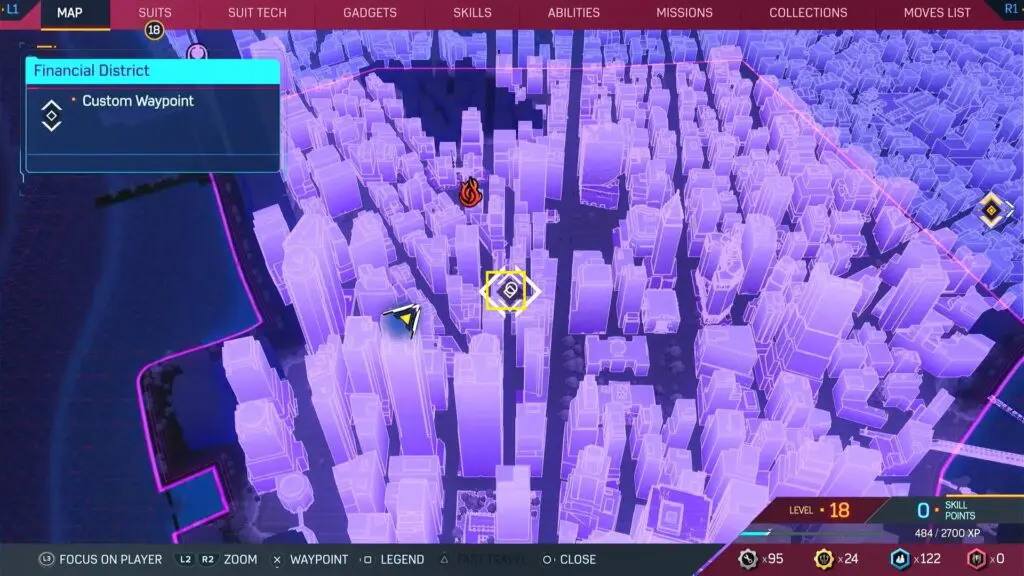
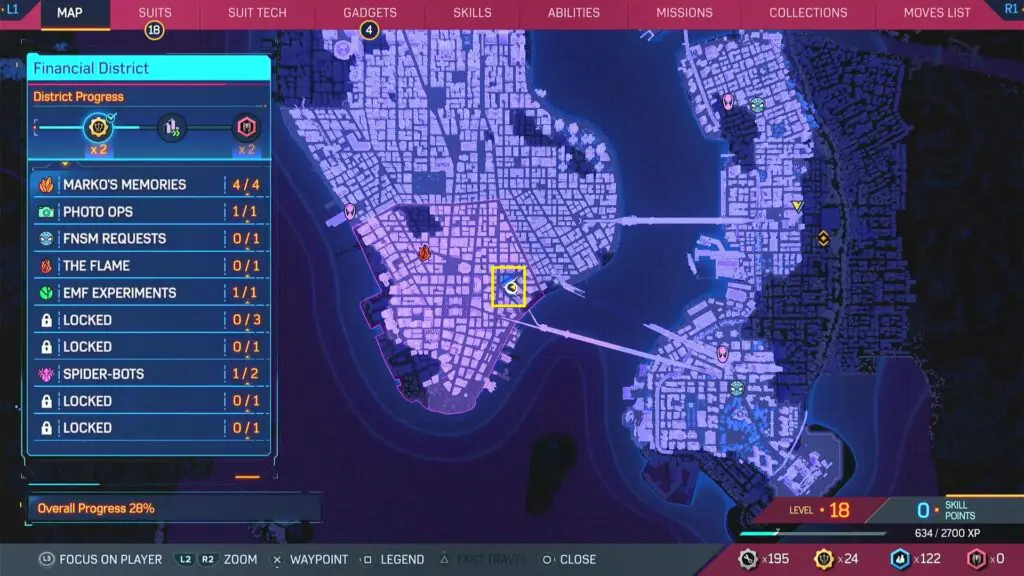
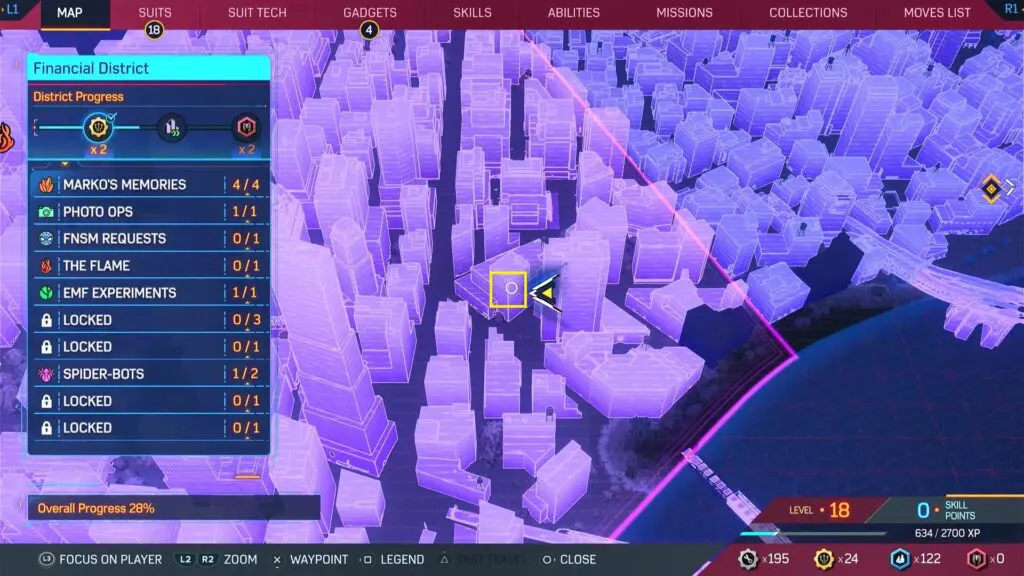
This guide shows the location of all collectibles in the Financial District district in the Spiderman 2 game, which released on 20 October 2023. The list of Financial District Collectibles is shown below.
- 4 Marko’s Memories
- 1 Photo Ops
- 2 Spider-Bots
- 1 Unidentified Targets
- 1 Symbiote Nests
- 1 FNSM Request
- 1 EMF Experiment
- 1 The Flame Missions
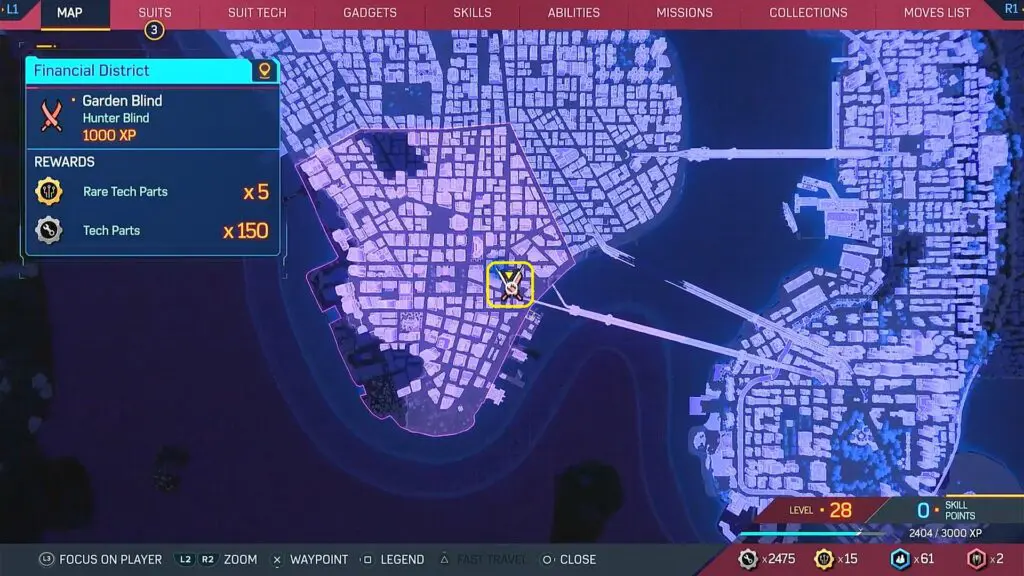
- 3 Hunter Blinds
- 1 Hunter Base
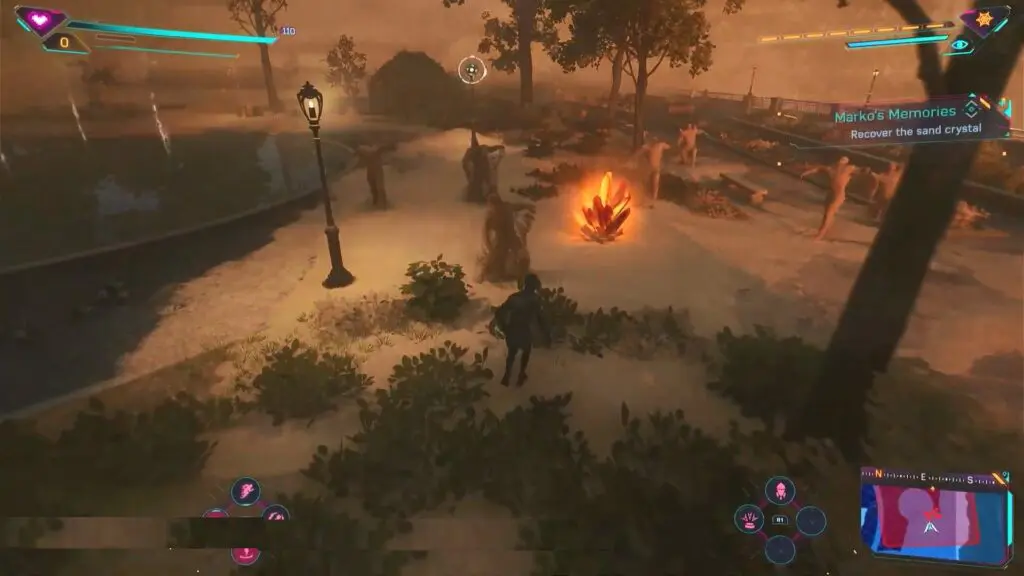
1) Marko’s Memory: She’s Gone
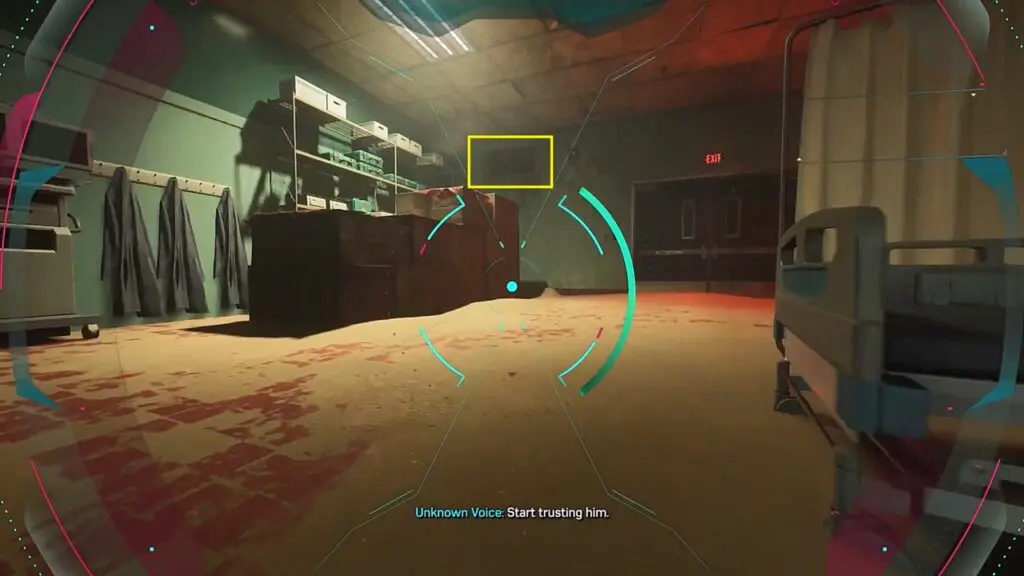
The first crystal is earned automatically from Main Quest 02: One Thing At a Time. All other Marko’s Memories are unlocked. Miles will receive a request named “Trapped in a High-Rise” during the second main mission. After rescuing the victims from the flames, descend a rubble slope to locate the crystal.
2) Marko’s Memory: Prying Eyes
It is located at the park at the southern point of the Manhattan Island coastline.
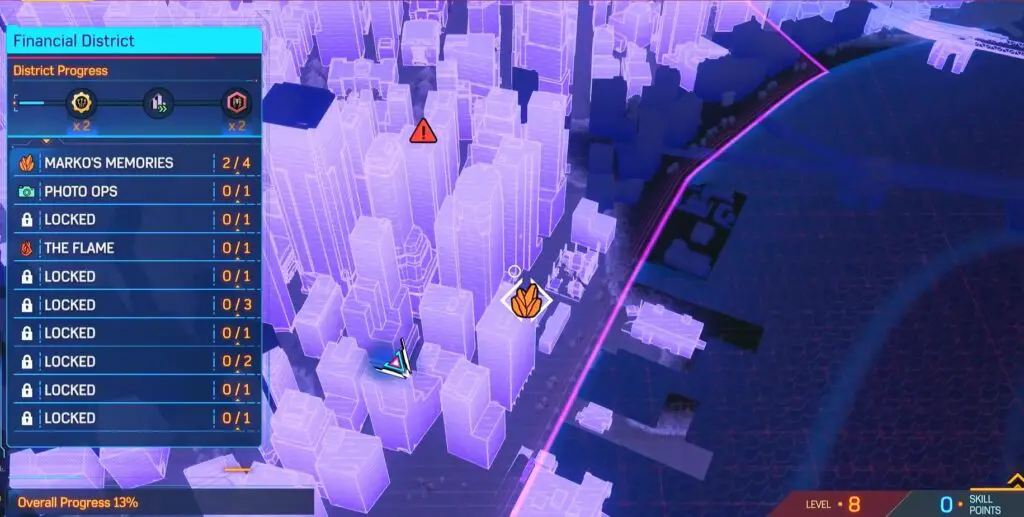
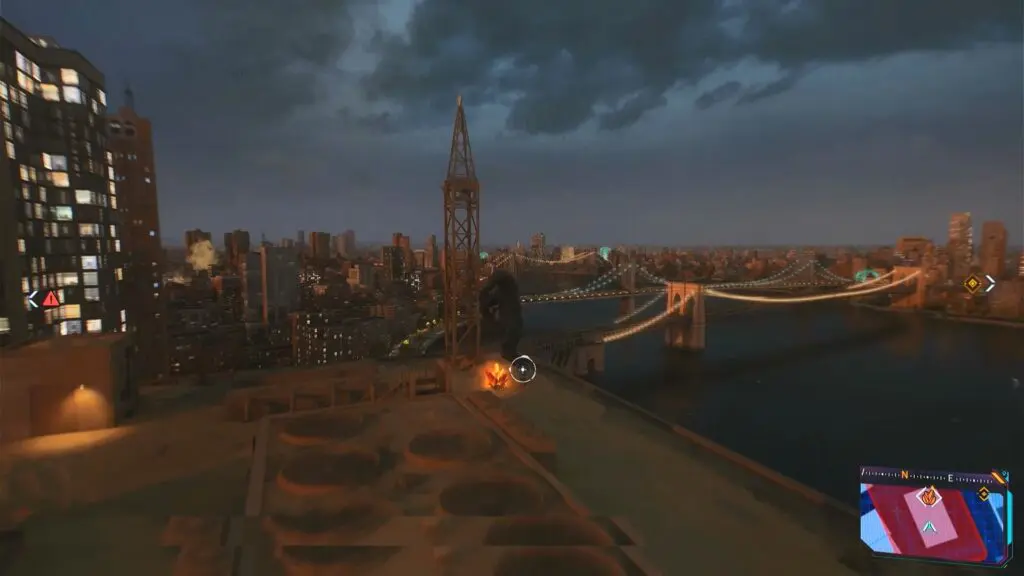
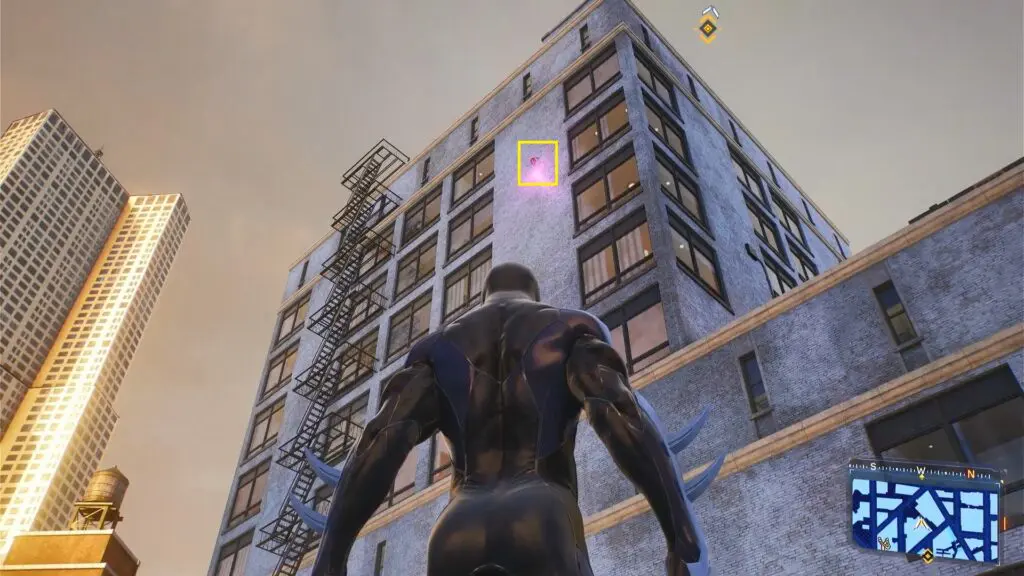
3) Marko’s Memory: Being Followed
The third Memory in the Financial District is on the roof of a white building on the Financial District’s south-eastern shore, adjacent to an aerial tower.
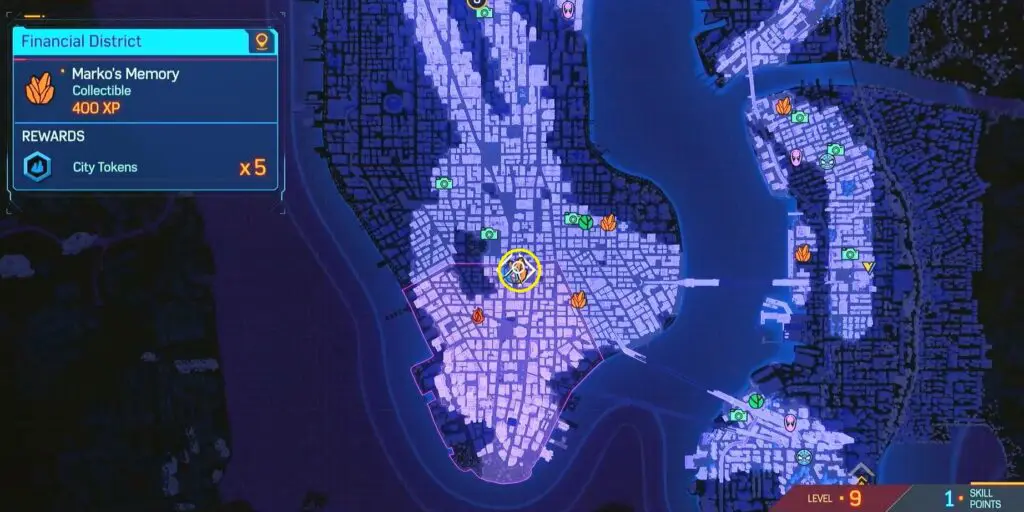
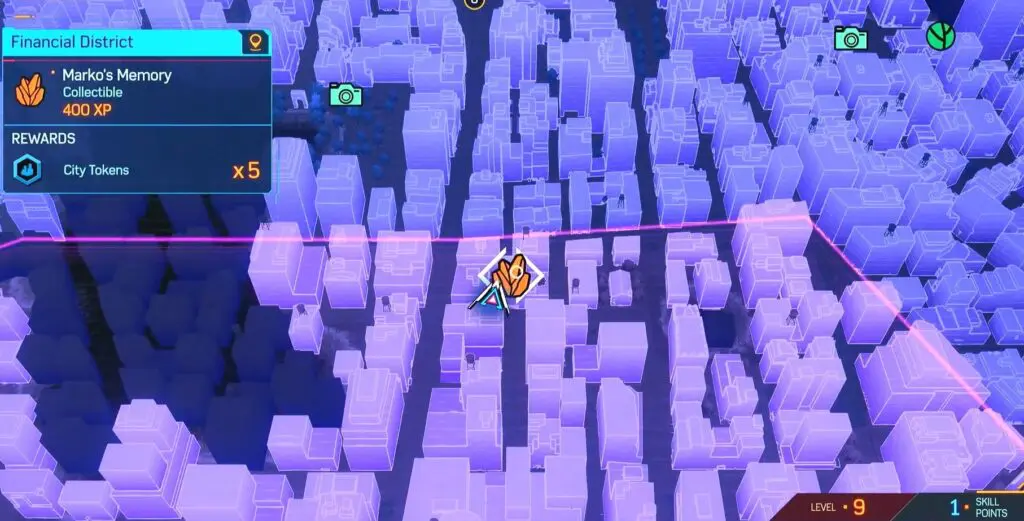
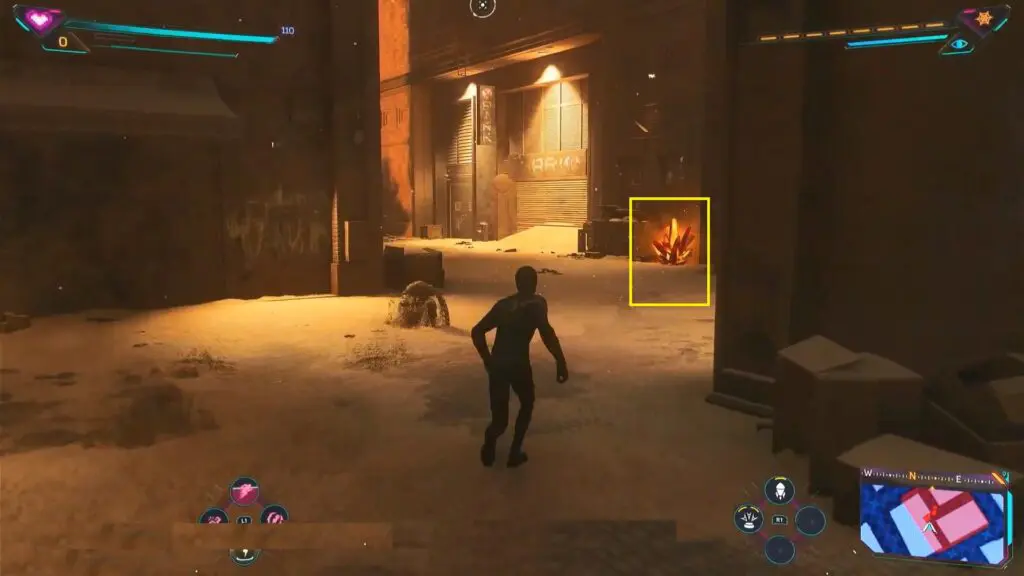
4) Marko’s Memory: No One Believes Me
The final Marko Memory in the Financial District is situated near its northern border, tucked away in an alley surrounded by three buildings
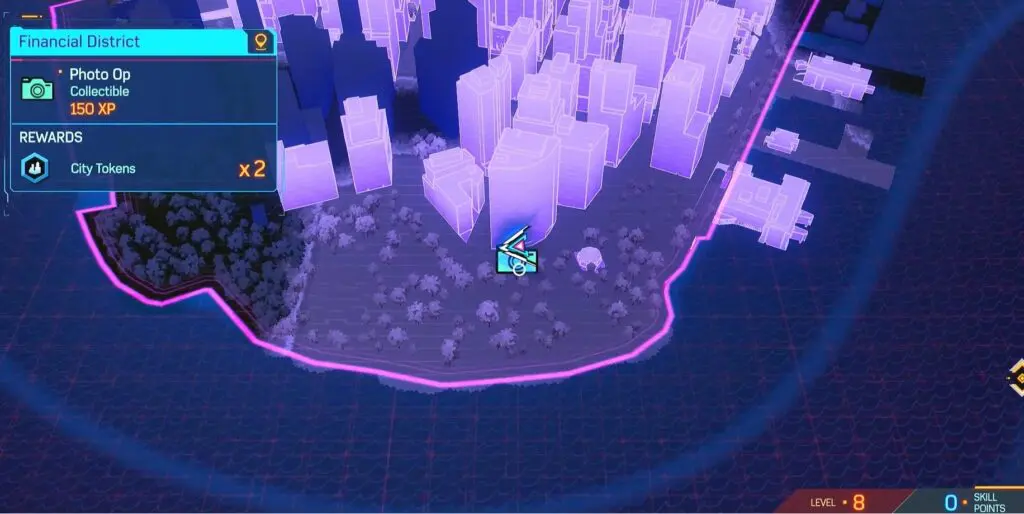
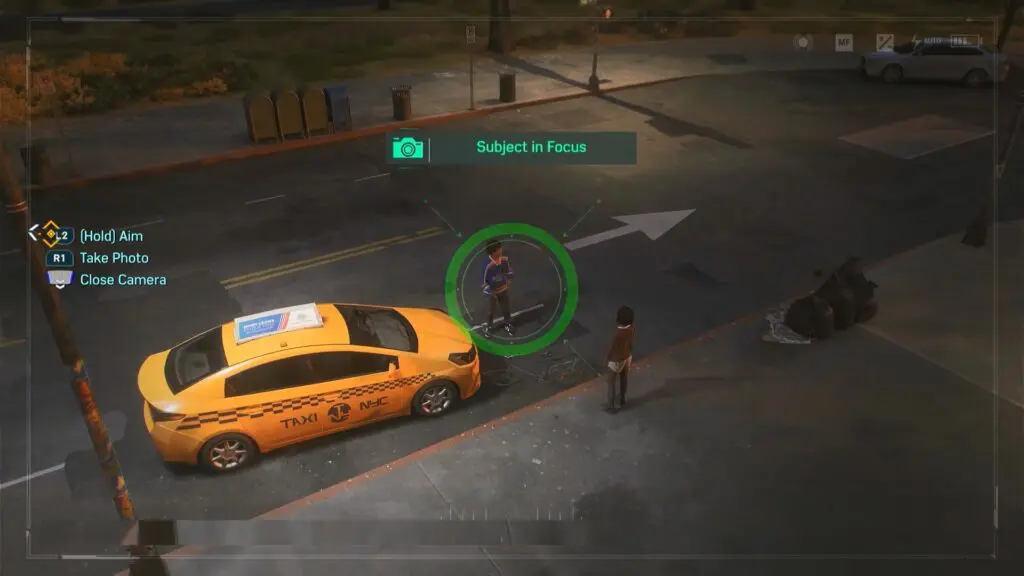
5) Photo Op: It Was An Accident
Get a picture of the two people having an argument in front of the taxi.
6) Spider Bot 1/2
This Spider-Bot is in the air. The easiest way to get to it is by leaping from the tall building located on the south and gliding over.
7) Spider Bot 2/2
You can find this Spider-Bot on the building’s south wall, close to the top.
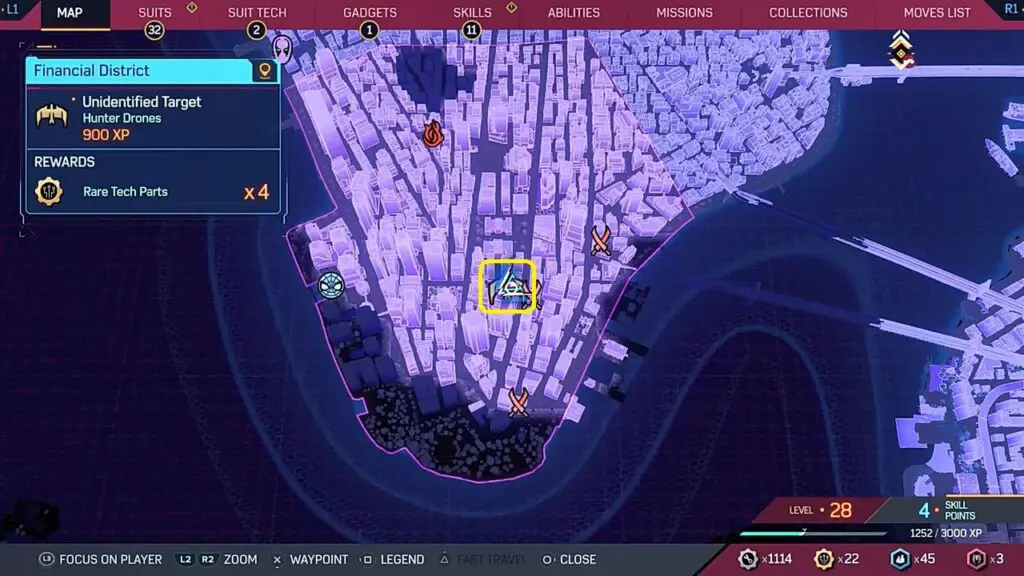
8) Unidentified Target
Go to the marked location and use Webwings to follow the drone until the download is 100% complete.
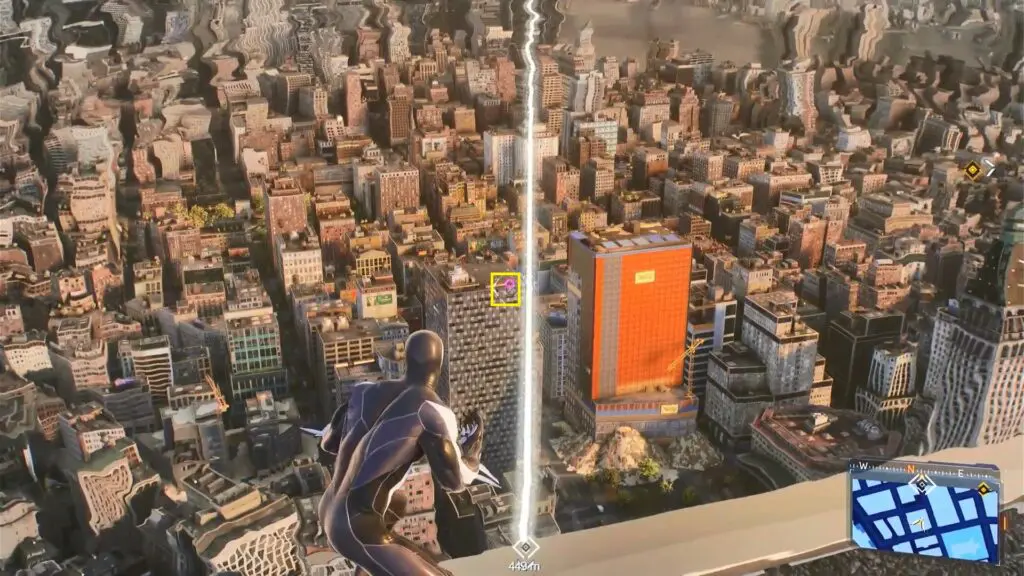
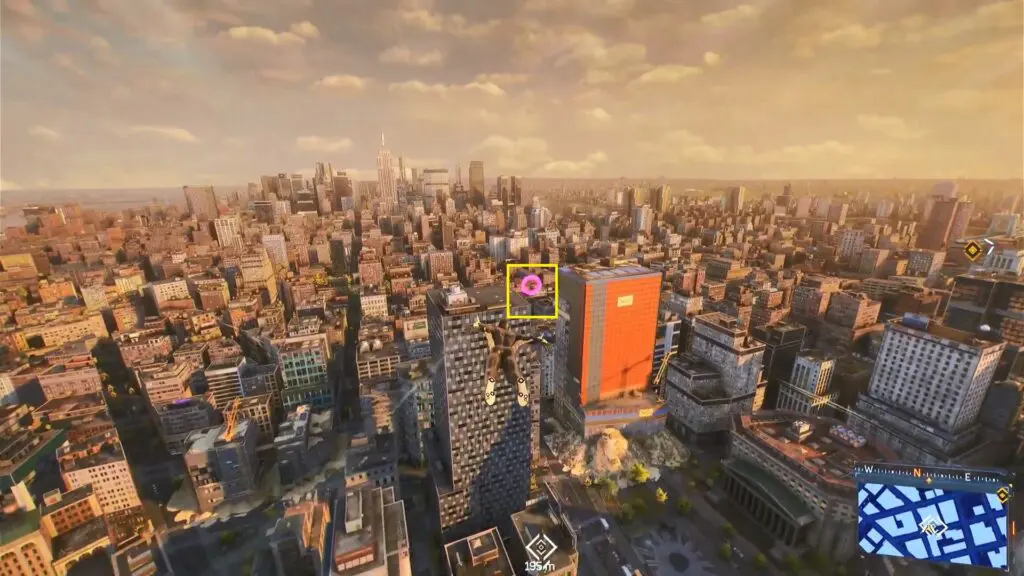
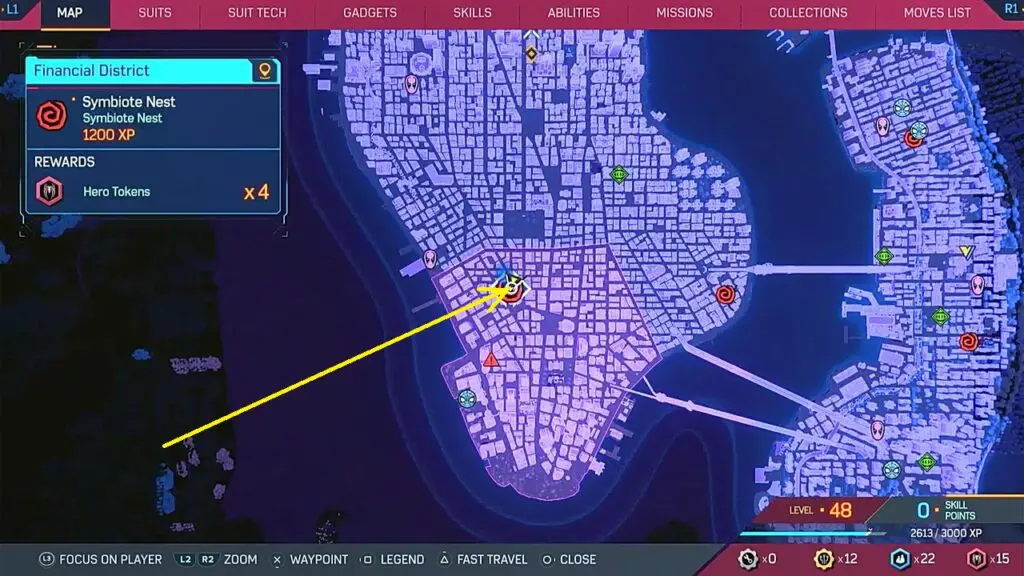
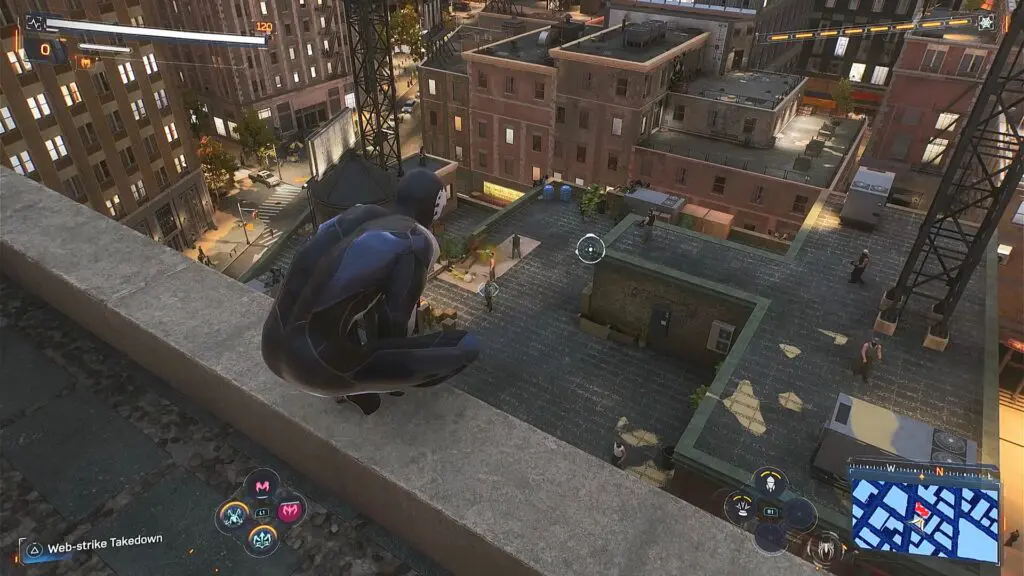
9) Symbiote Nest
It is unlocked after Main Quest 28: Set Things Right. The location is shown in the picture below. You need to approach the nest and plant Sonic Burst on it. At this point, you will be attacked by waves of enemies and a timer will start. Defend the Sonic Burst from the enemies and when the timer ends it will blow up, destroying the Symbiote Nest.
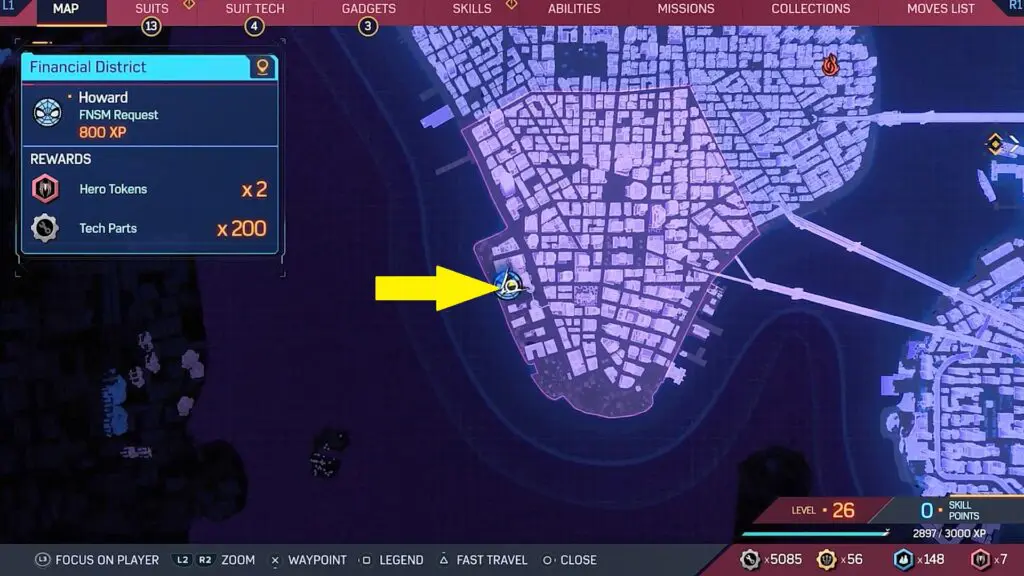
10) FNSM Request (Howard)
Go to the location shown in the picture below and talk to Howard. You will find him sitting on the stairs by the water. During the conversation, he will ask you to look at the Statue of Liberty on the left side. Must must look there for the conversation to continue. After the conversation is over, fly towards the objective marker. Once you reach there, the marker will shift to another location. Keep flying from marker to marker until you have taken the birds to their destination. This completes the request.
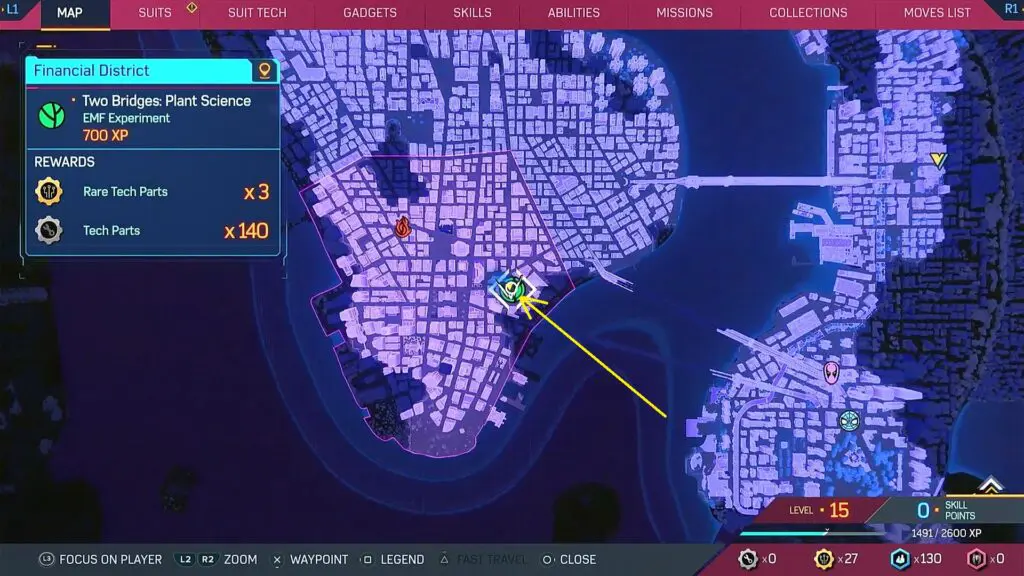
11) EMF Experiment (Two Bridges: Plant Science)
This experiment will be available after you have completed the Portside Plant Science EMF Experiment. Go to the location shown in the pictures below and interact with the terminal there to start the experiment. Now follow the objective marker to reach the greenhouse and investigate it. You will find the plant to be stolen.
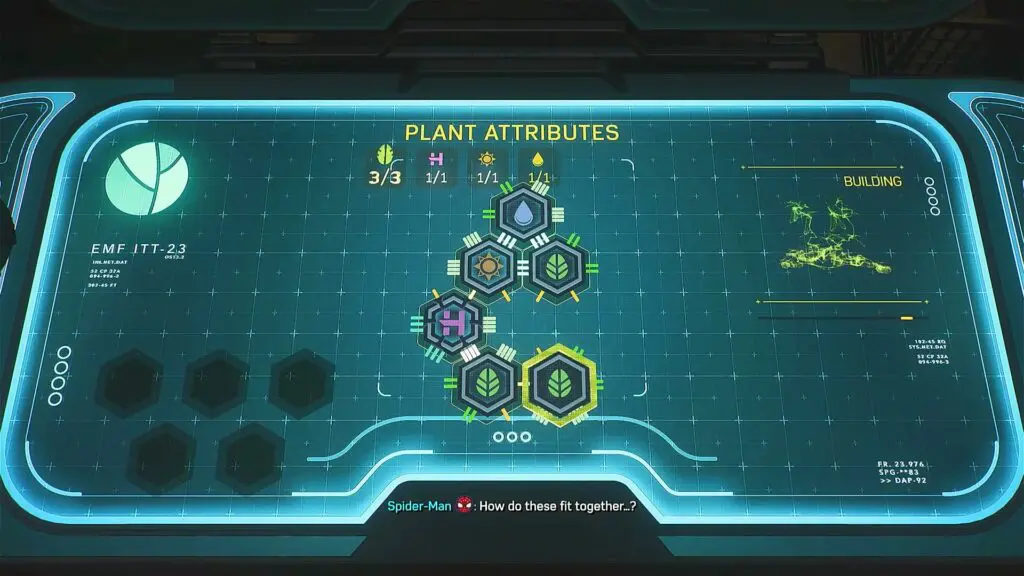
Look up in the air, and you will see triangular-shaped pollen trails as shown in the picture below. Follow the trail and it will lead you to a roof full of criminals as shown in the second picture below. Defeat the criminals and pick up the stolen plant. Take the stolen plant back to the terminal and start the Plant Attributes puzzle.

To solve the puzzle, you need to place the Hex genes in the correct empty slot. Each side of a Hex Gene will have either 1,2,3, or 4 lines. Only the hex genes with the matching sides can be placed next to each other. For example, the side with two lines can only be attached to another Hex Gene’s side with two lines. The puzzle is randomly generated. The solution to the puzzle that I got is shown in the second picture below. Solving the puzzle completes the experiment.
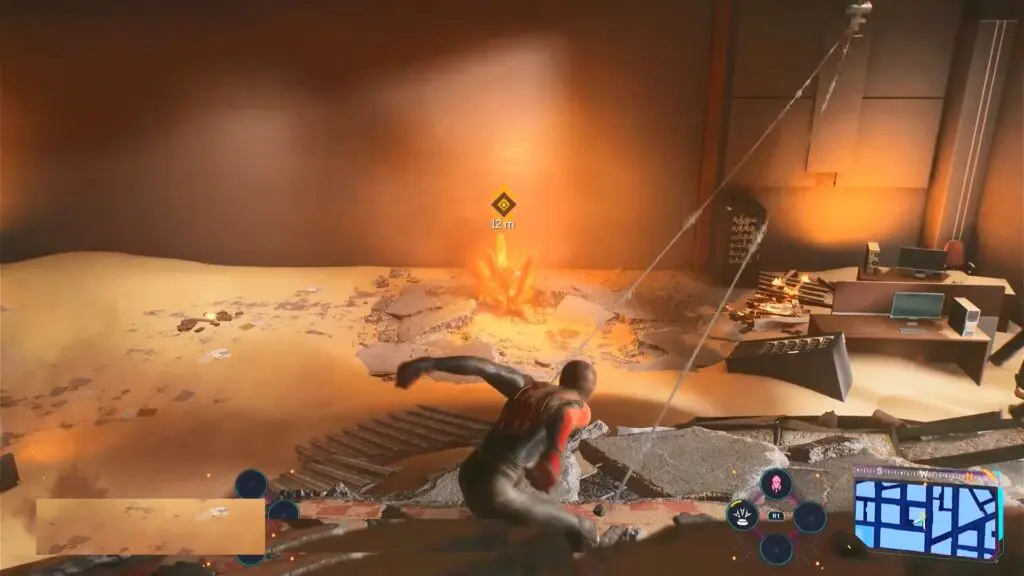
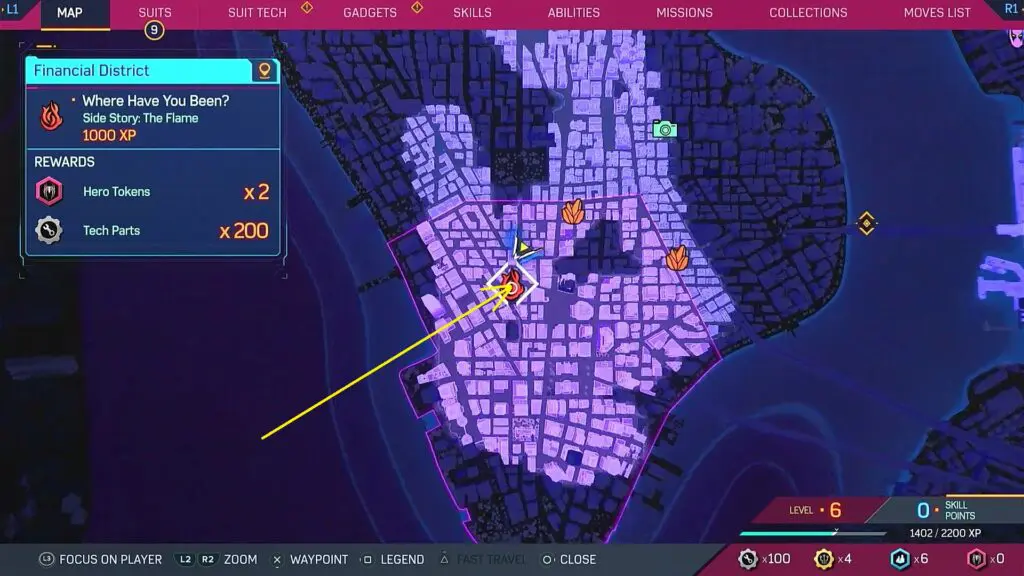
12) The Flame Mission (Where Have You Been)
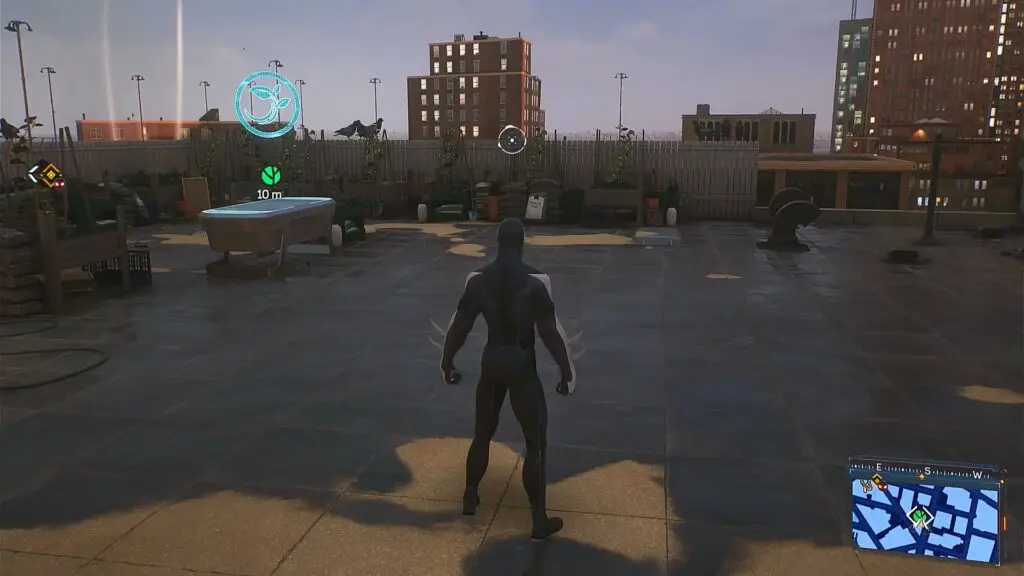
It unlocks after you have completed the Main Quest 6: Amends. Go to the location shown in the picture below and talk to the fireman there to start the mission. As the mission starts, you will be controlling a Spider Bot and your objective will be to mark trapped people for the firefighters.
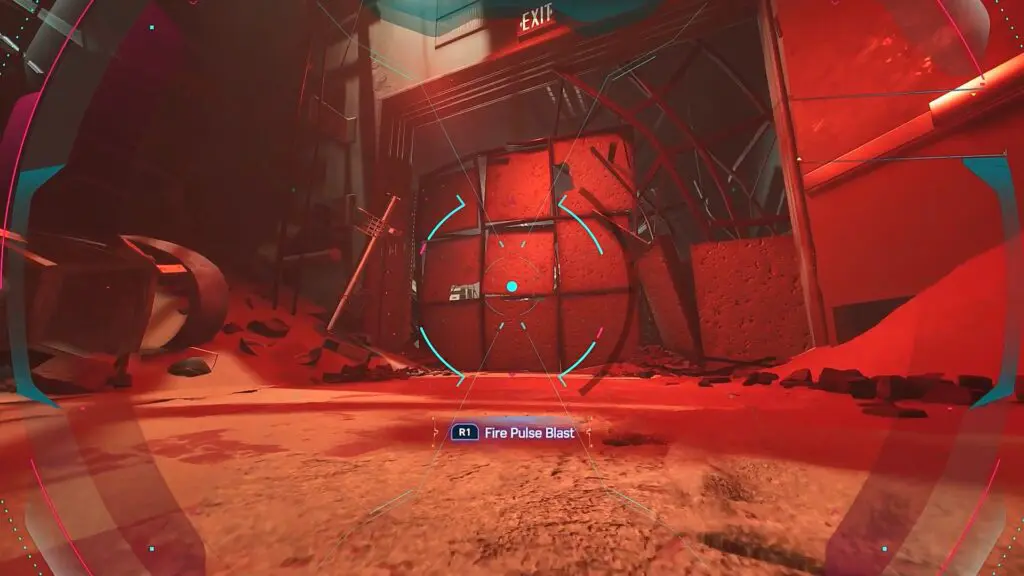
Crawl through the vent and open it to find the first trapped civilian. Go near him and press the Triangle button to mark him. Then go through the hole on the wall in the left corner of the room. Climb up the slope on the right side and you will reach a room with a blocked path as shown in the picture below. Fire pulse blasts on the panel blocking the path and proceed ahead. Turn left and destroy the panels ahead to find the second trapped person behind a shelf as shown in the second picture below. Press L1+R1 to move the panel. Then go near the civilian and mark him.
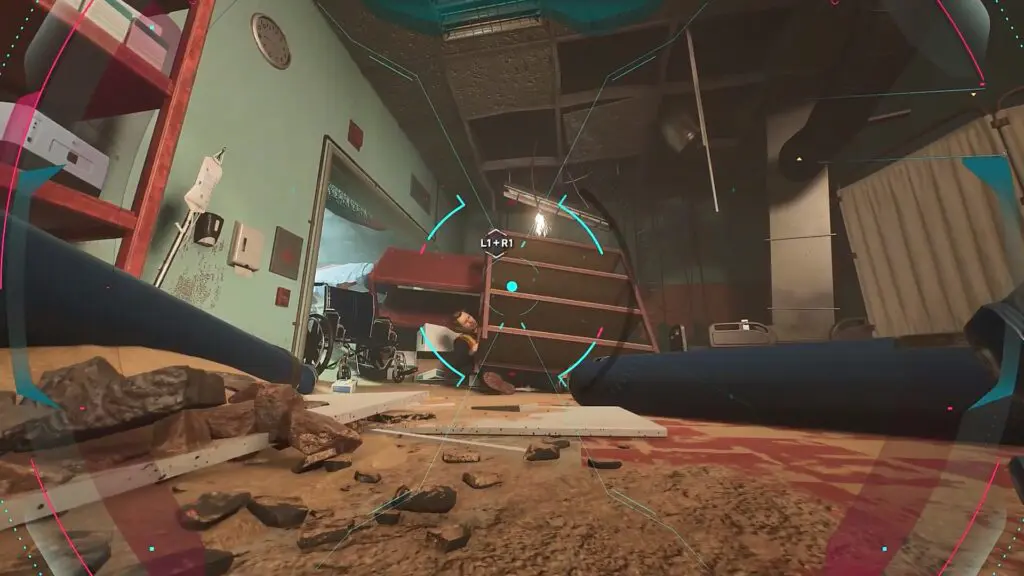
Go underneath the wheelchair next to the second person. Destroy the panel ahead. Then turn right and proceed ahead. Destroy the panel blocking the exit door. Then open the exit door and move ahead to find the third person underneath a panel as shown in the picture below. Destroy the panel. Then go near the civilian and mark him.

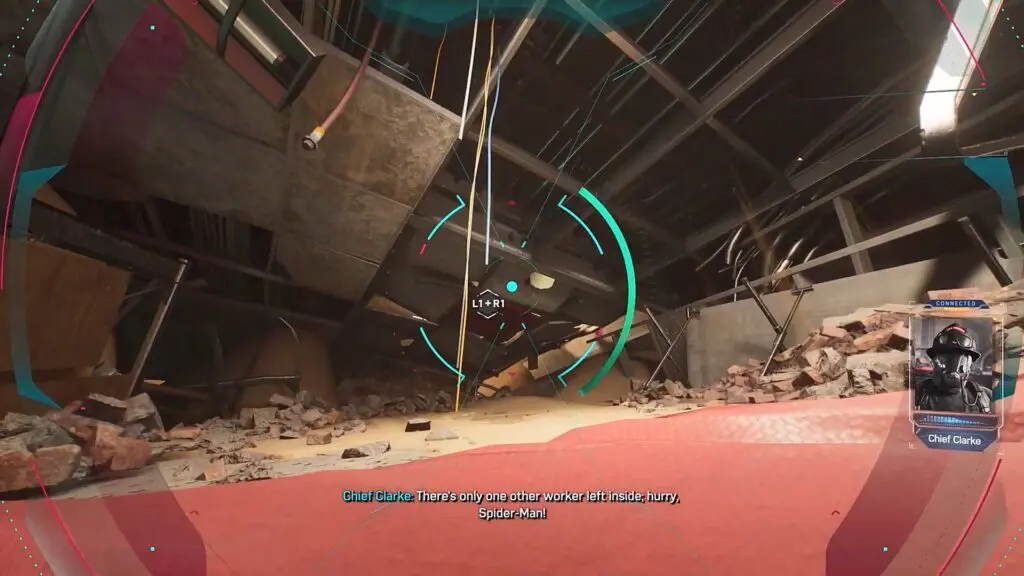
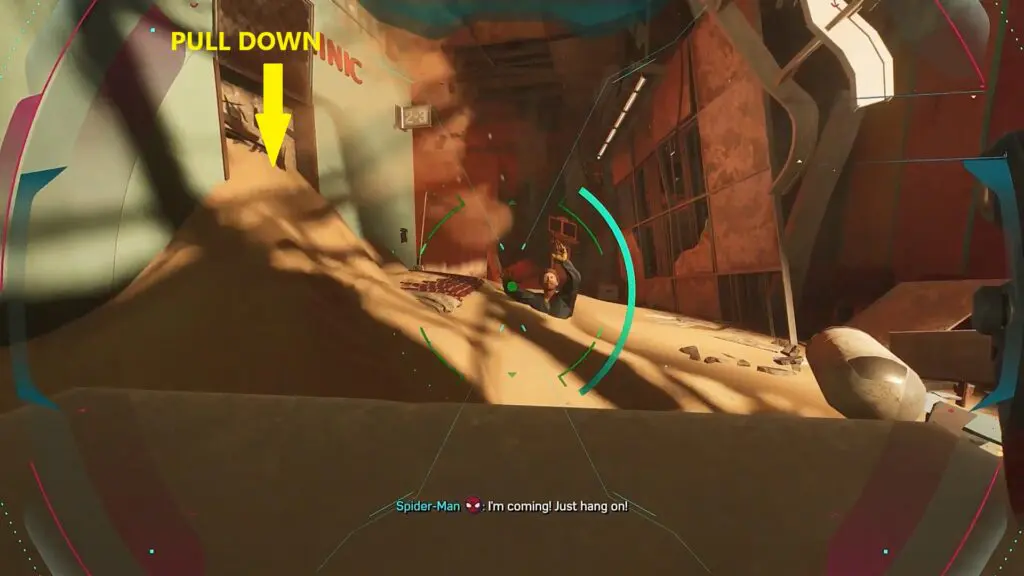
After marking the third person, turn right and jump up the blocks on the right side. You will reach an area where you can pull down the roof panel as shown in the picture below. then destroy the roof and jump to the upper level. There you will find the final person half buried in the soil as shown in the second picture below. Pull down the panel on the left side to stop the flow of sand. Then pull out the civilian and mark him for the firefighters.
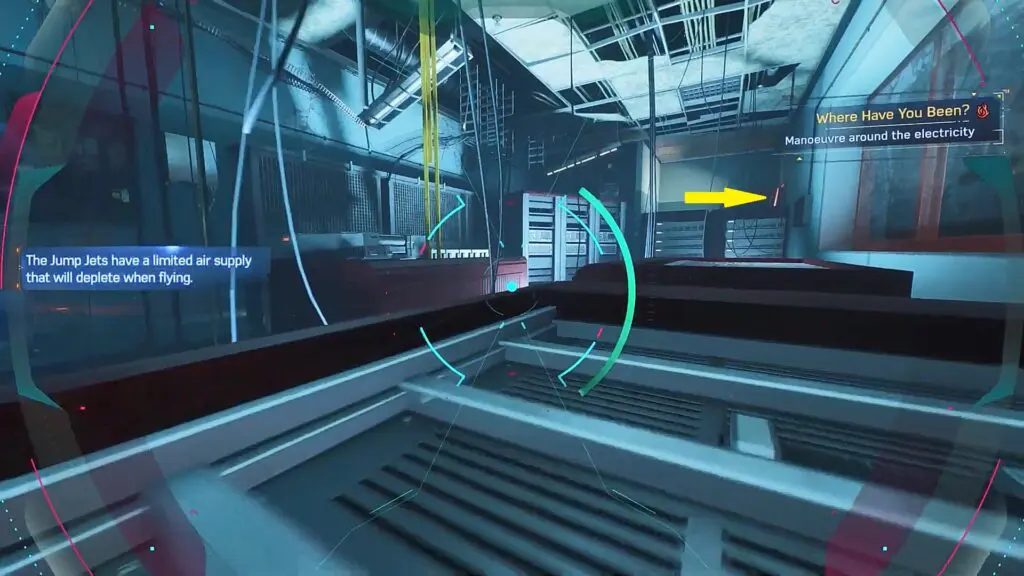
Proceed ahead and soon you will reach an area with an electrified floor as shown in the picture below. Jump on the blocks to reach the opening on the other side as shown below. Proceed to the opposite side of this room and you will reach a vent as shown in the second picture below. Enter the vent and proceed ahead. Drop down at the end. When you come out from the vent, you will have to defeat the enemies. This will complete the mission.
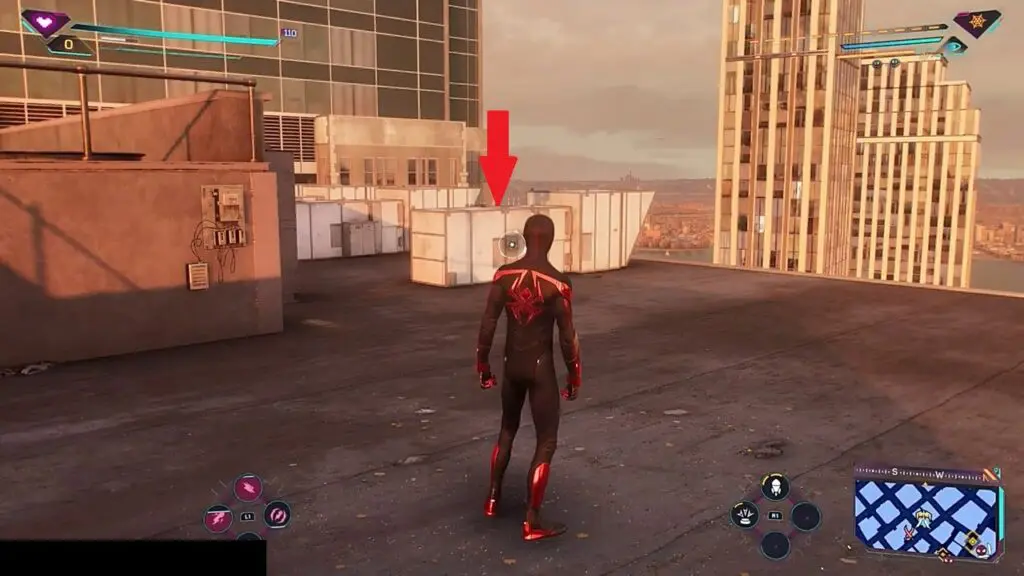
13-15) Hunter Blinds 1,2,3
The location of the three hunter blinds is shown in the pictures below. Defeat the enemies on the roof of the marked buildings and then interact with the drones there to complete the blinds.
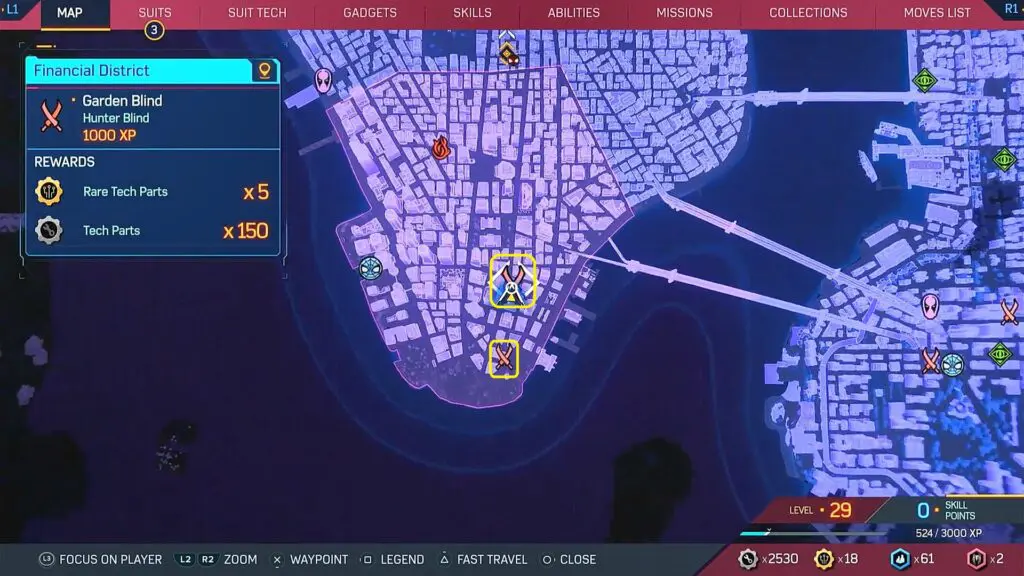
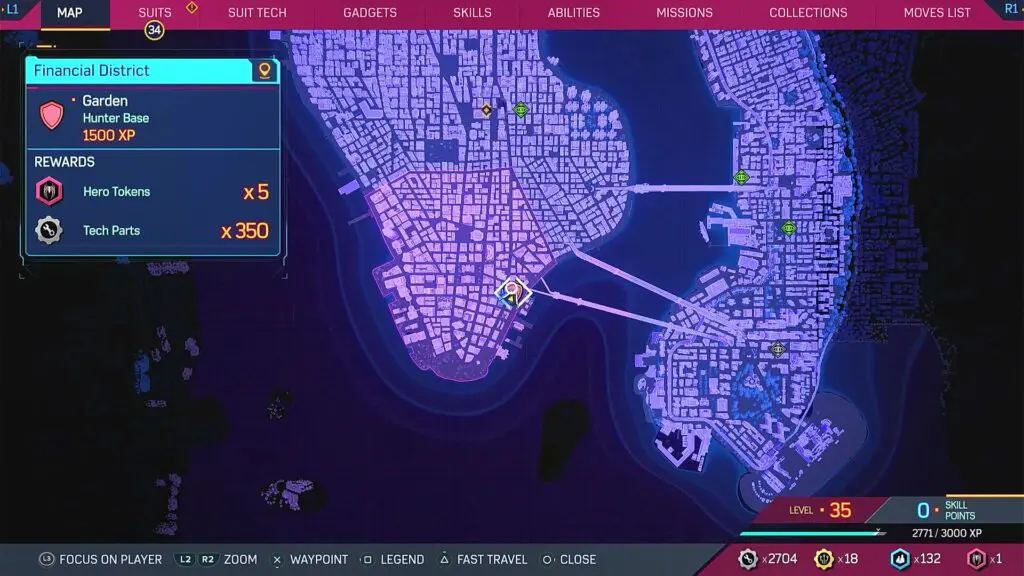
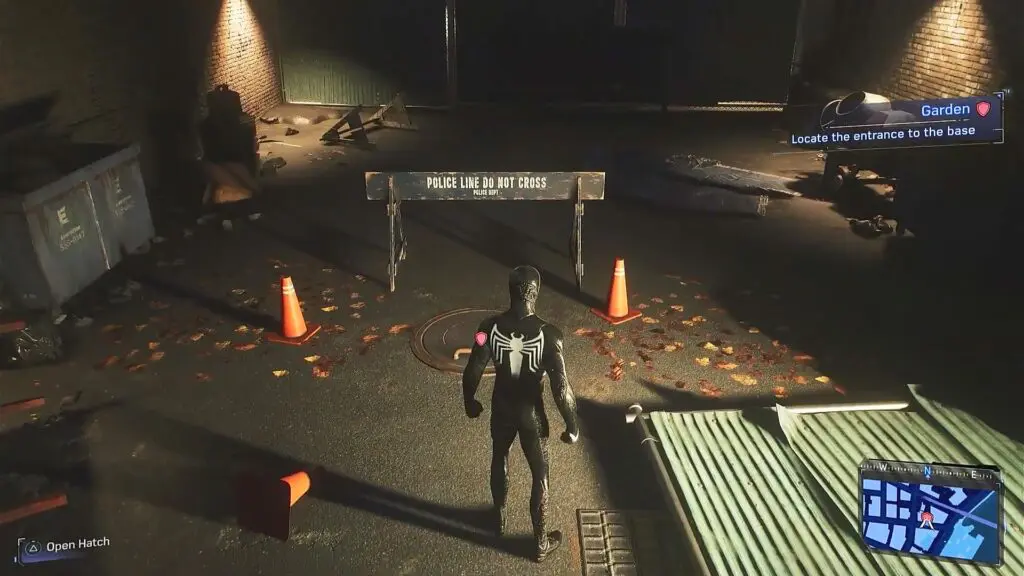
16) Hunter Base
Hunter base will be marked on the map once you have completed the three Hunter Blinds in the area. Enter the manhole at the location shown in the pictures below and proceed ahead to reach the base. Defeat all the hunters there and then download hunter data to complete the base.