This guide shows where to find all Phantasmal Conch in the Golden Apple Archipelago of Genshin Impact 2.8. Click on the day to move to the respective day’s Phantasmal Conch.
Also Read:
All Day 1 Phantasmal Conch Locations
DAY 1
There are 6 Imaging Conches and 8 Echoing Conches available in the area.
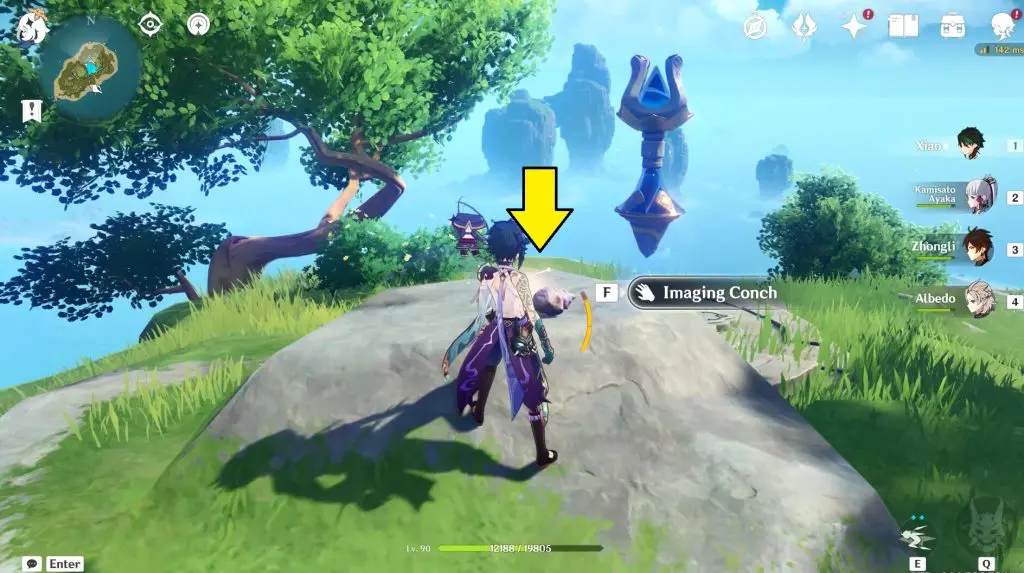
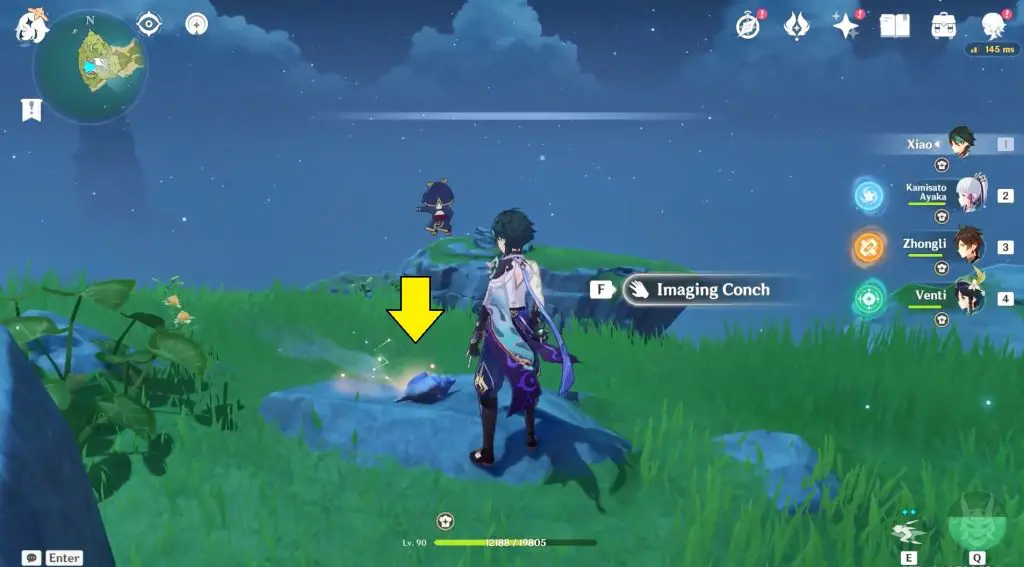
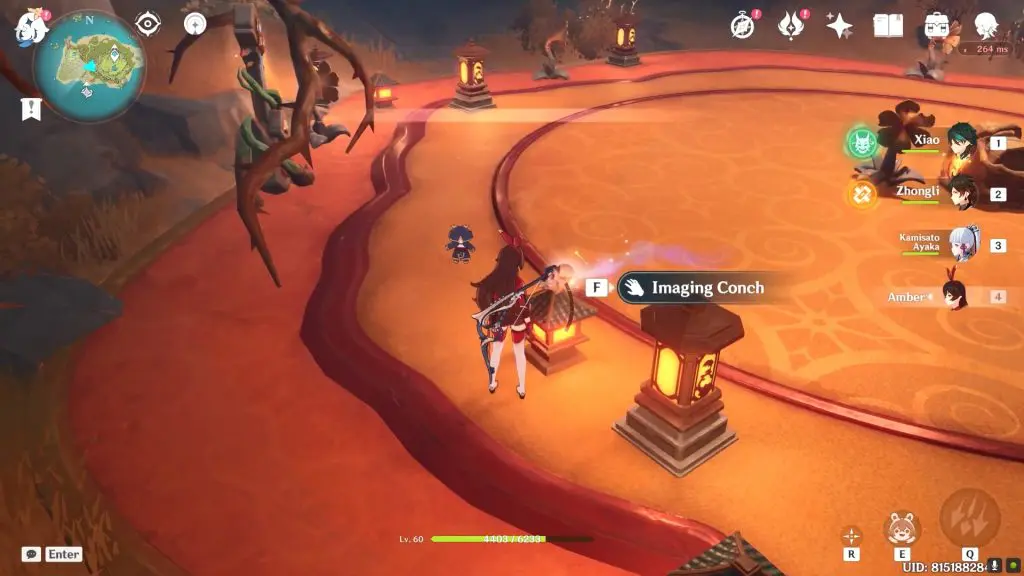
#1 Imaging Conch 1 (Pudding Isle)
The first imaging conch is sitting on top of a boulder near the teleport waypoint of Pudding Isle.
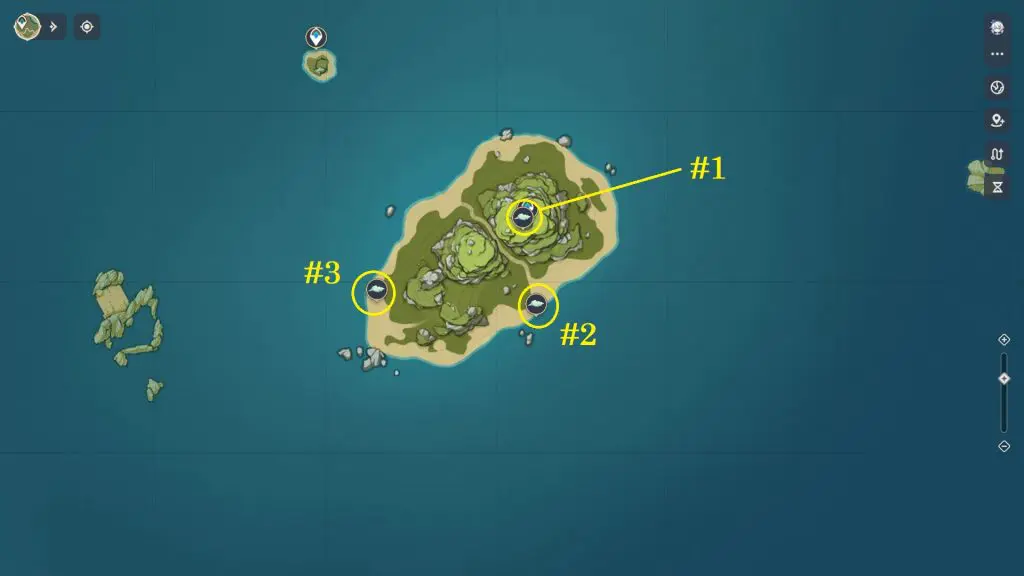
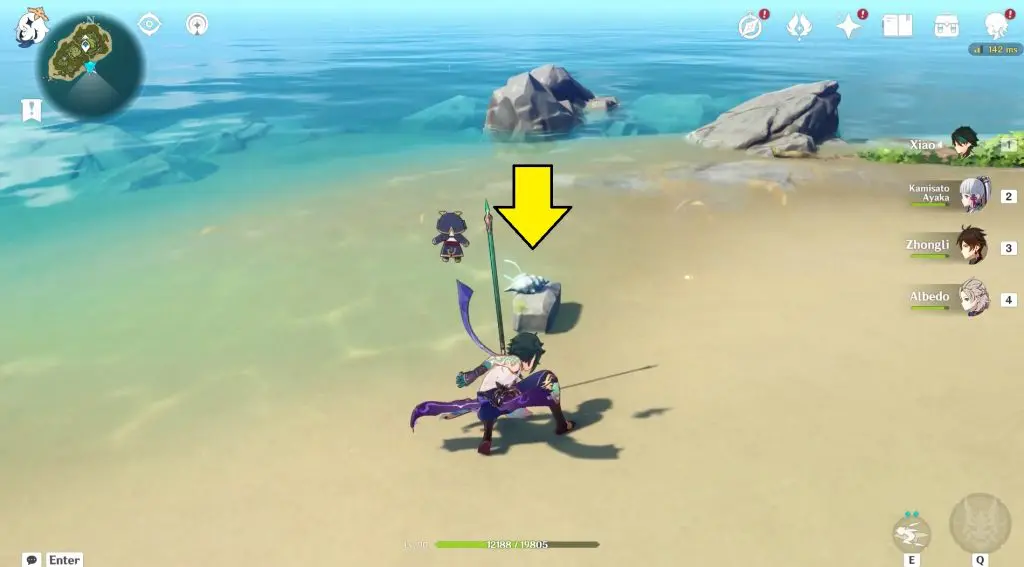
#2 Echoing Conch 1 (Pudding Isle)
Southern Beach of Pudding Isle
#3 Echoing Conch 2 (Pudding Isle)
Northern Beach of Pudding Isle
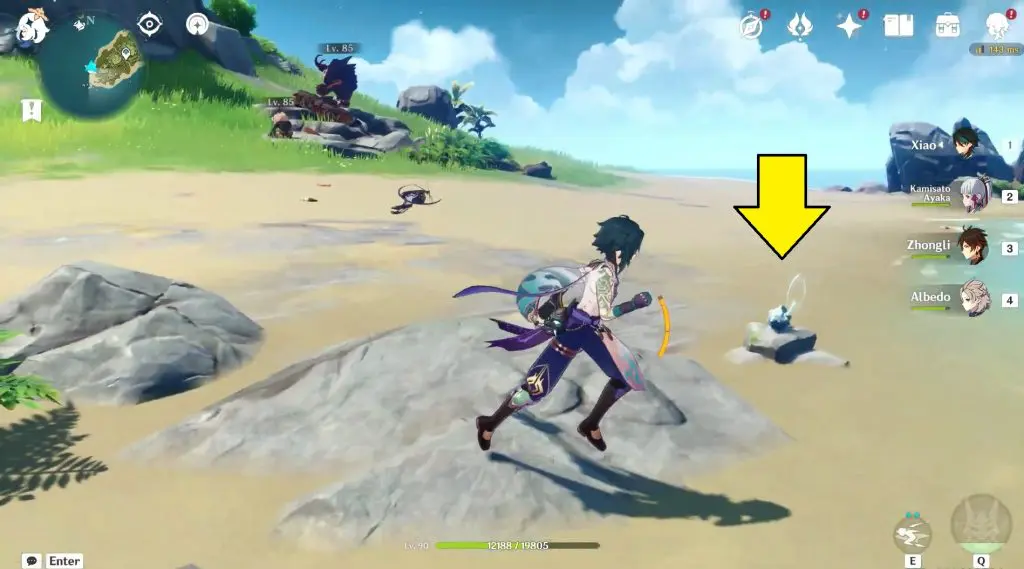
#4 Imaging Conch 2 (Twinning Isle)
On top of a rock close to the cliff in Twinning Isle. This is a small island east of the main bigger island of Twinning Isle as shown on the map.
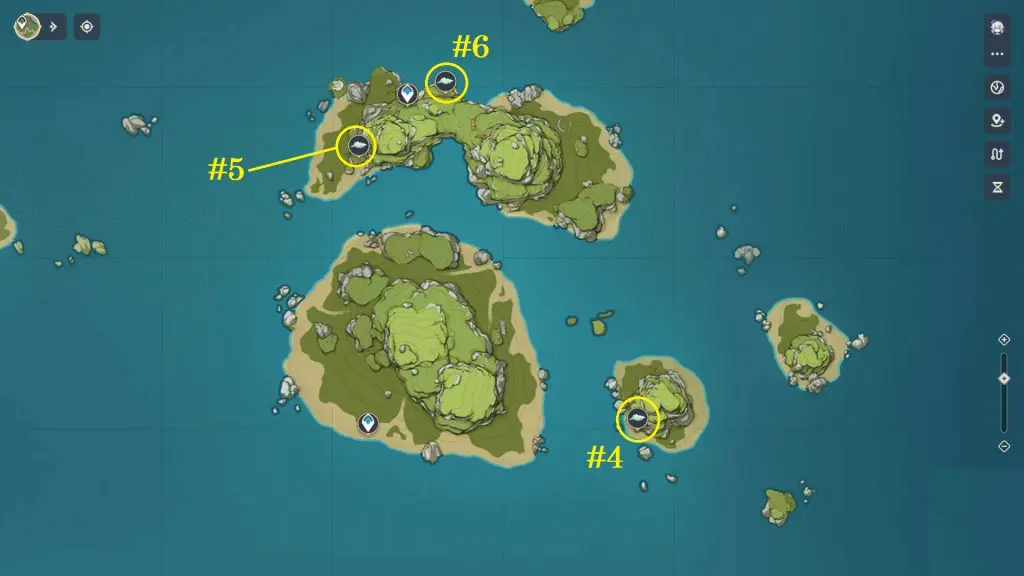
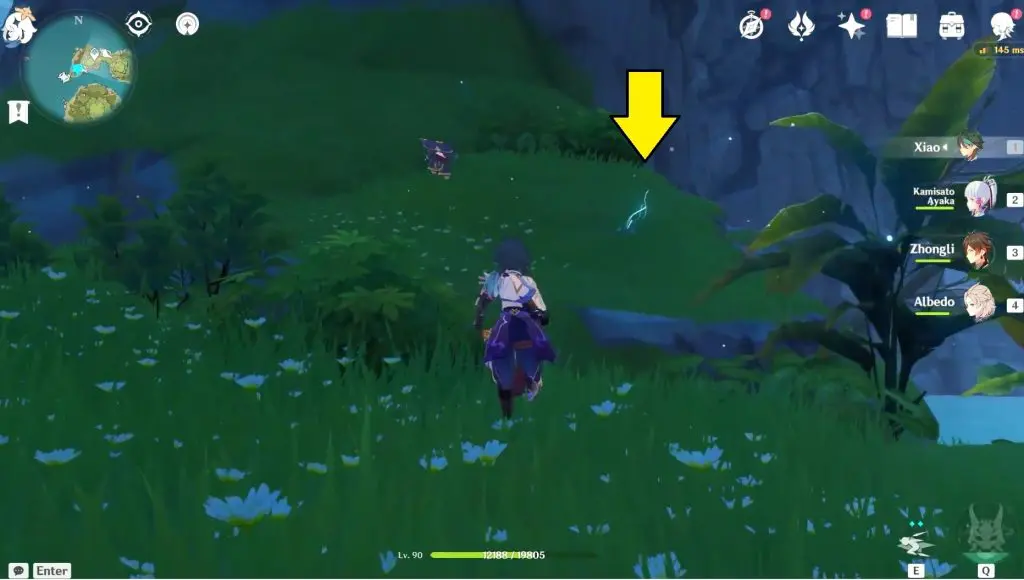
#5 Echoing Conch 3 (Twinning Isle)
On the northern island of Twinning Isle. You will find the Echoing conch on the western slope of the island, close to the Waverider Waypoint.
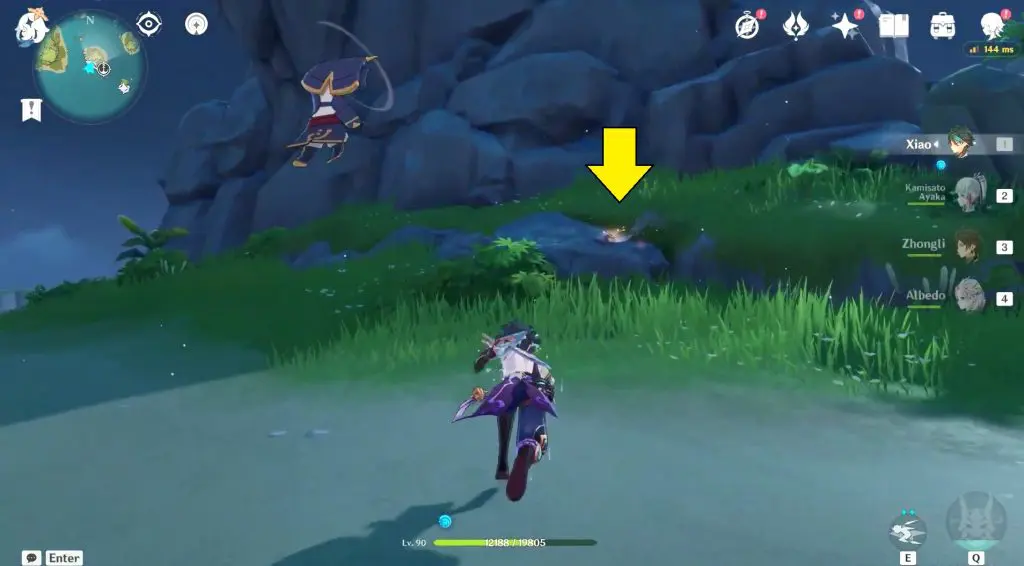
#6 Echoing Conch 4 (Twinning Isle)
On top of the cliff and east of Teleport Waypoint.
#7 Imaging Conch 3 (Broken Isle)
North of the main island, on the smaller island, on top of a rock next to a cliff. It is below the wooden staircase.
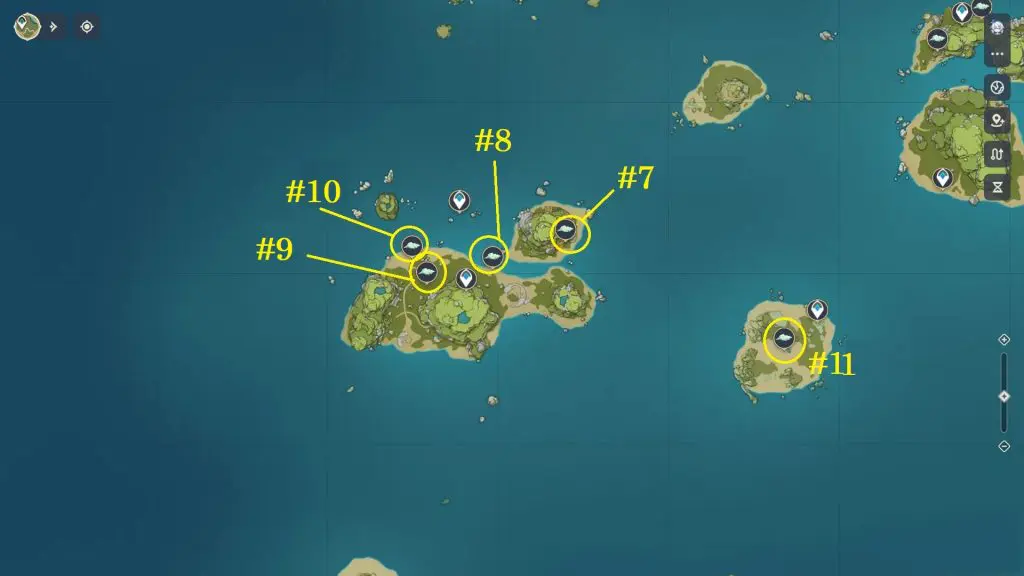

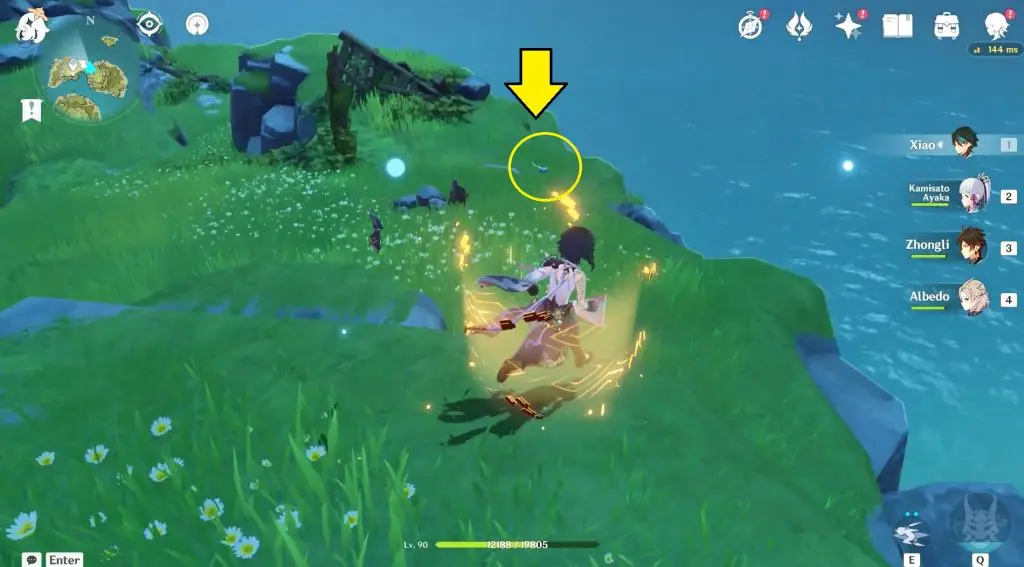
#8 Echoing Conch 5 (Broken Isle)
To the northeast of the teleport waypoint, on top of a rock close to the shore.
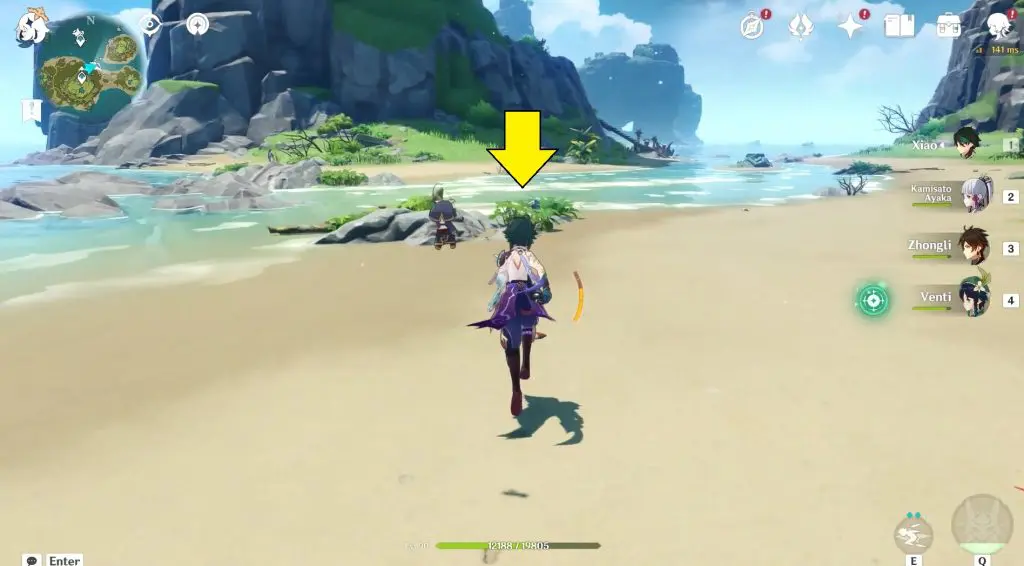
#9 Echoing Conch 6 (Broken Isle)
To the northwest of the teleport waypoint of the main island, on top of a rock close to the cliff.
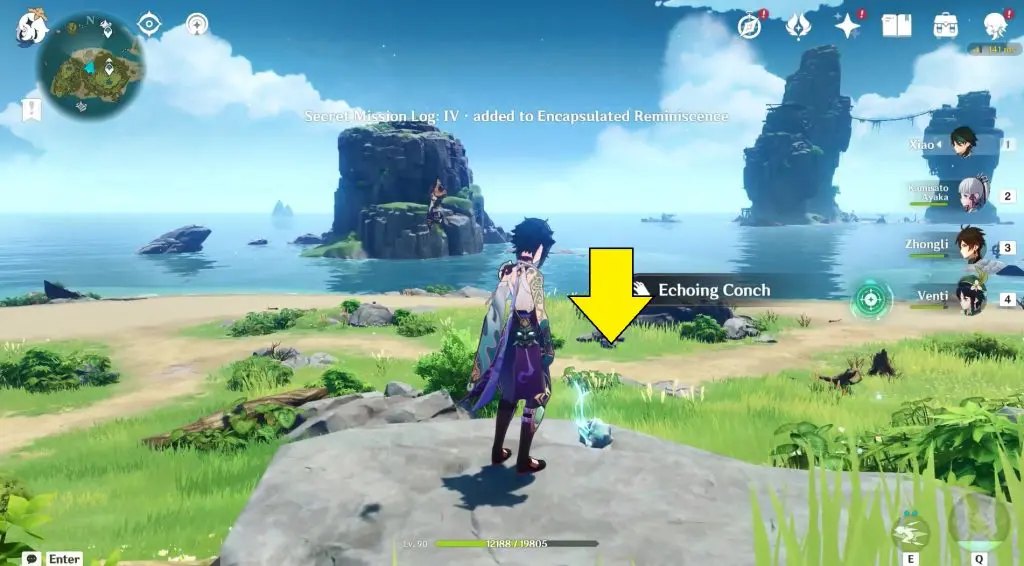
#10 Echoing Conch 7 (Broken Isle)
To the northwest of the teleport waypoint of the main island, on top of a rock close to the shore.
#11 Imaging Conchs 4 (Broken Isle)
Located on an island located on the eastern side of the Broken isle as marked on the map. Imaging Conch is sitting on top of a wooden box.
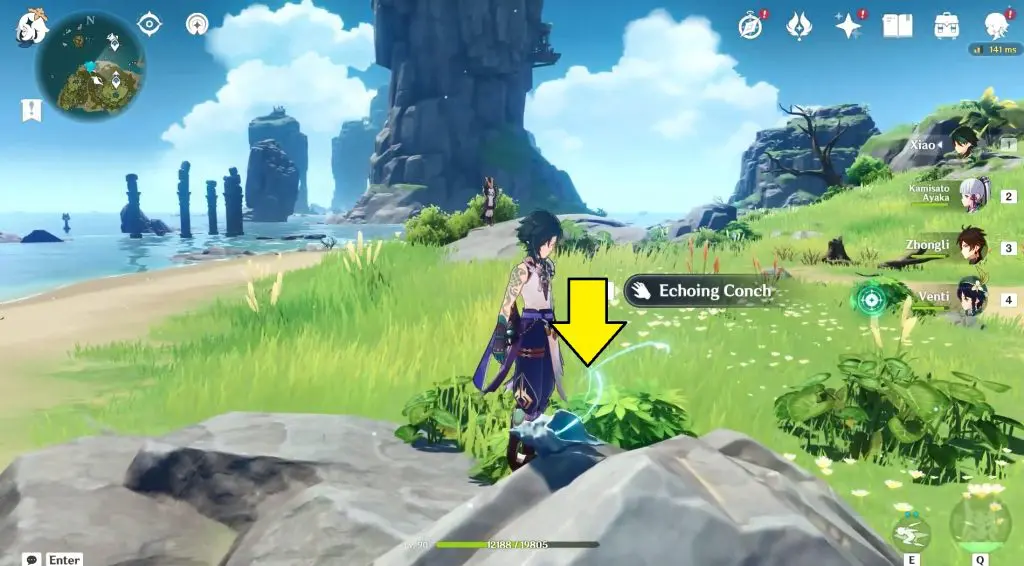
#12 Echoing Conch 8 (Minacious Isle)
Below the big arch-shaped mountain.
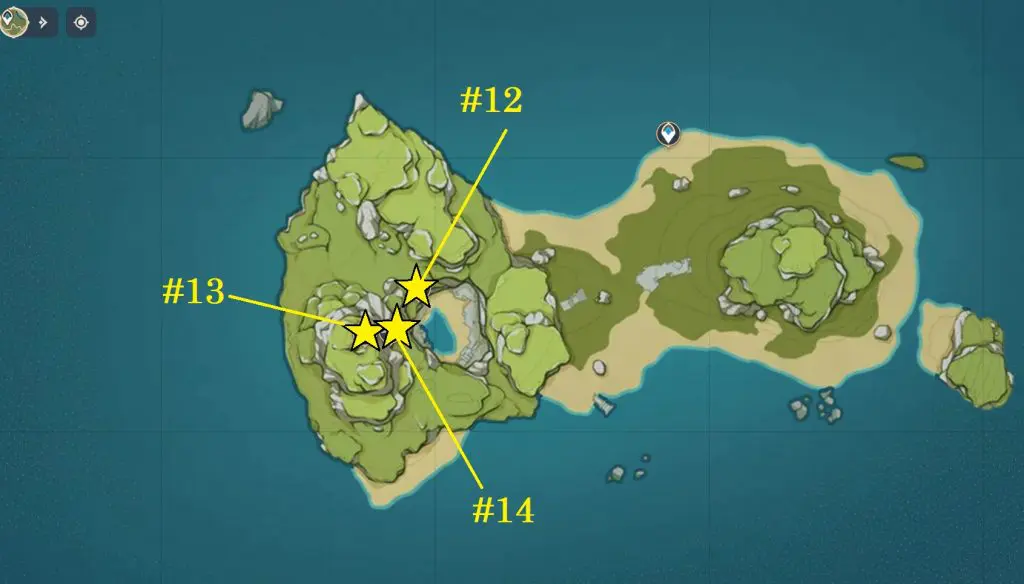
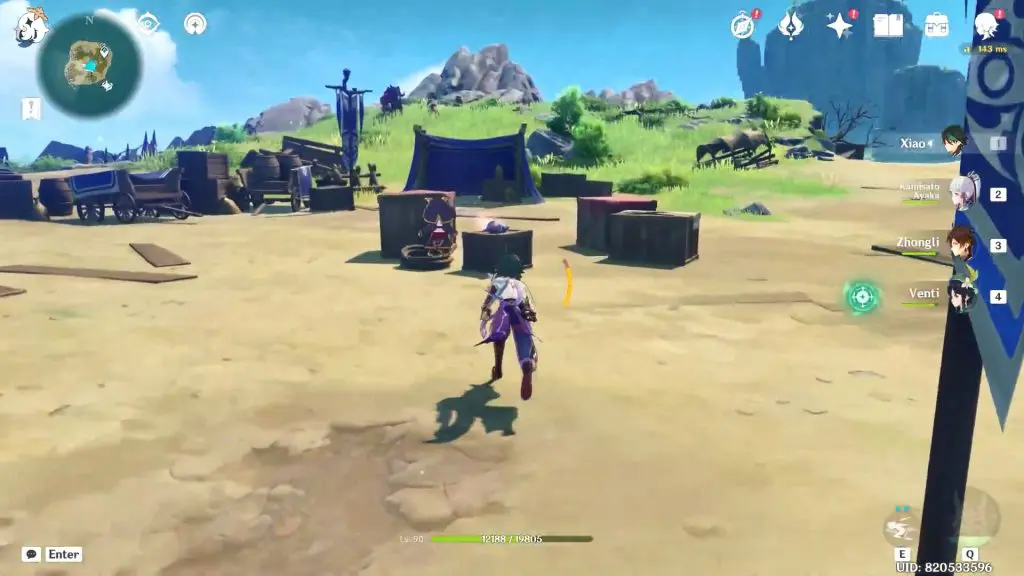
#13 Imaging Conchs 5 (Minacious Isle)
On top of the Mountain on the western side.
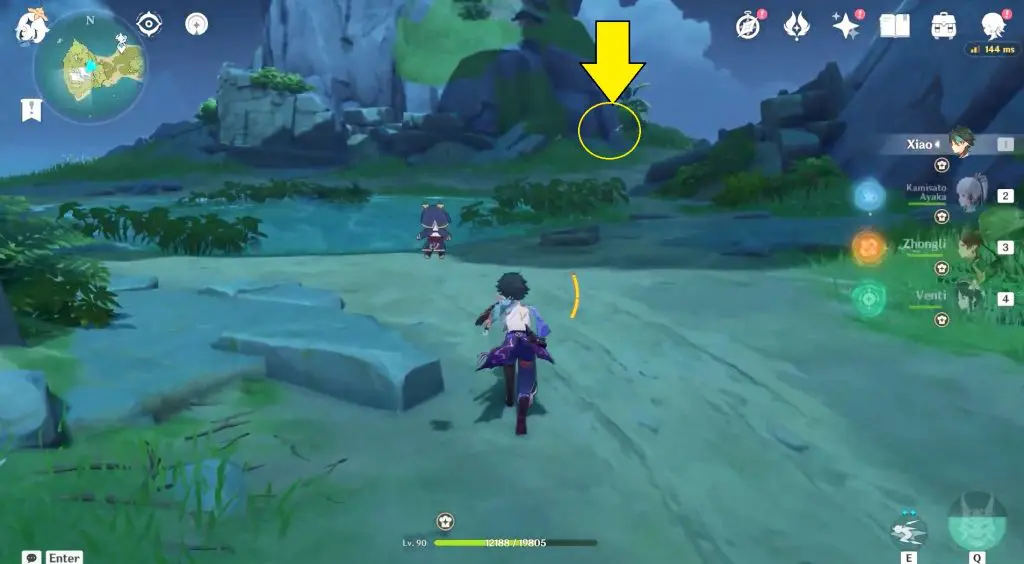
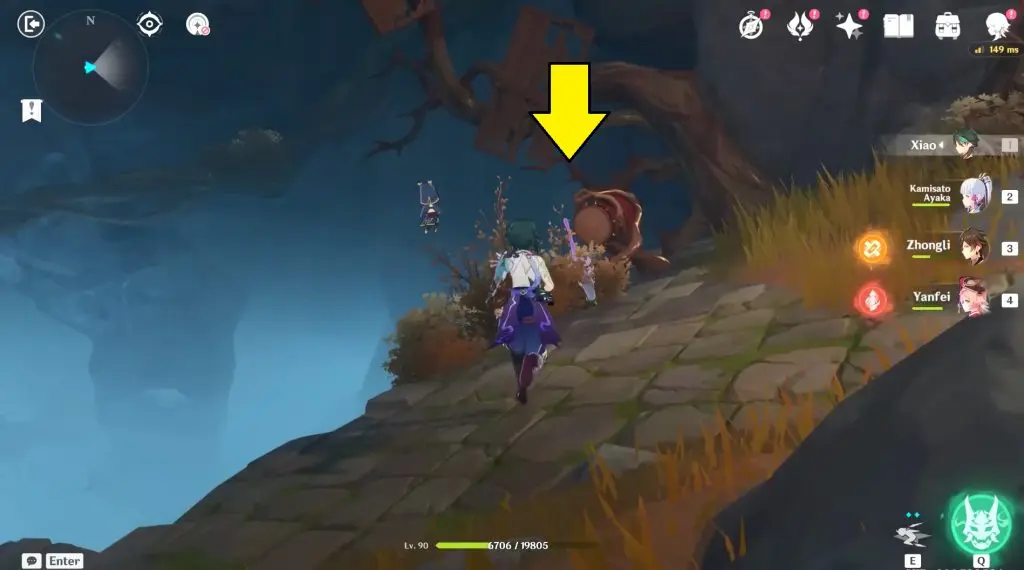
#14 Imaging Conch 6 (Minacious Isle)
Glid down from the previous location to find this item on the cliff wall where a fallen tree trunk is acting like a bridge.
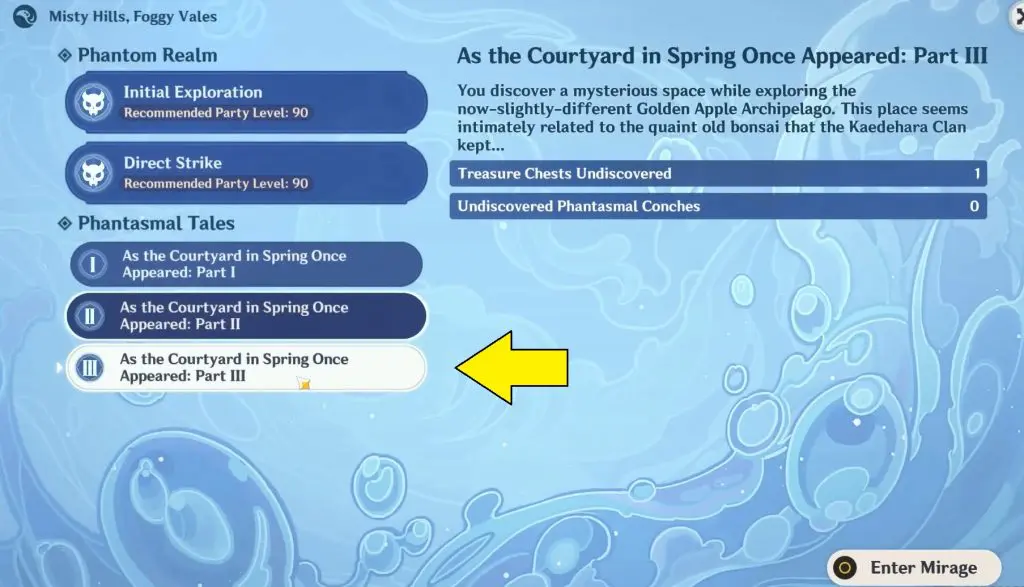
#15 Echoing Conch – DAY 2
Day 2 Phantasmal Conch is available while doing “As the Courtyard in Spring Once Appeared – Part 3“
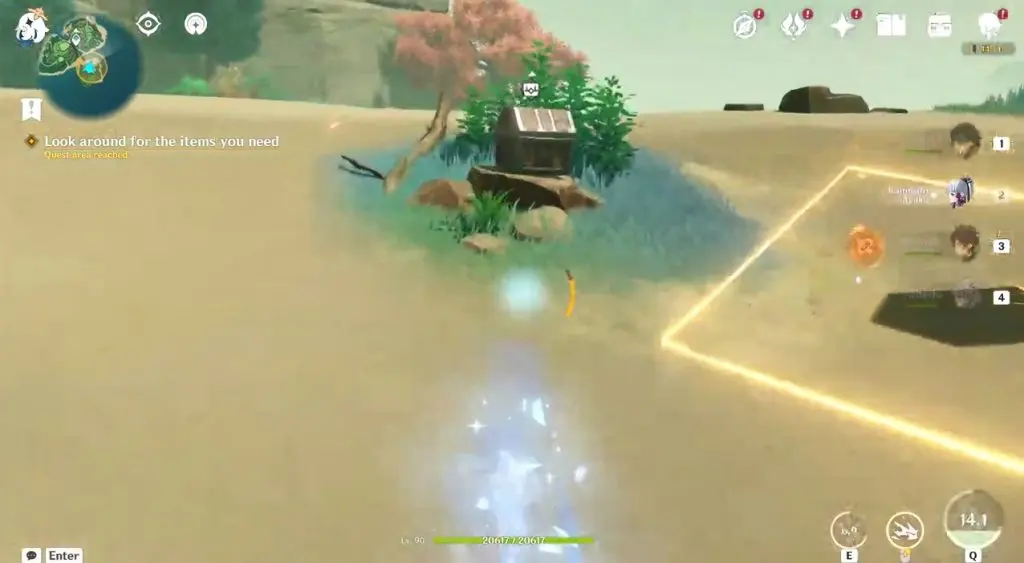
Look around for the items you need
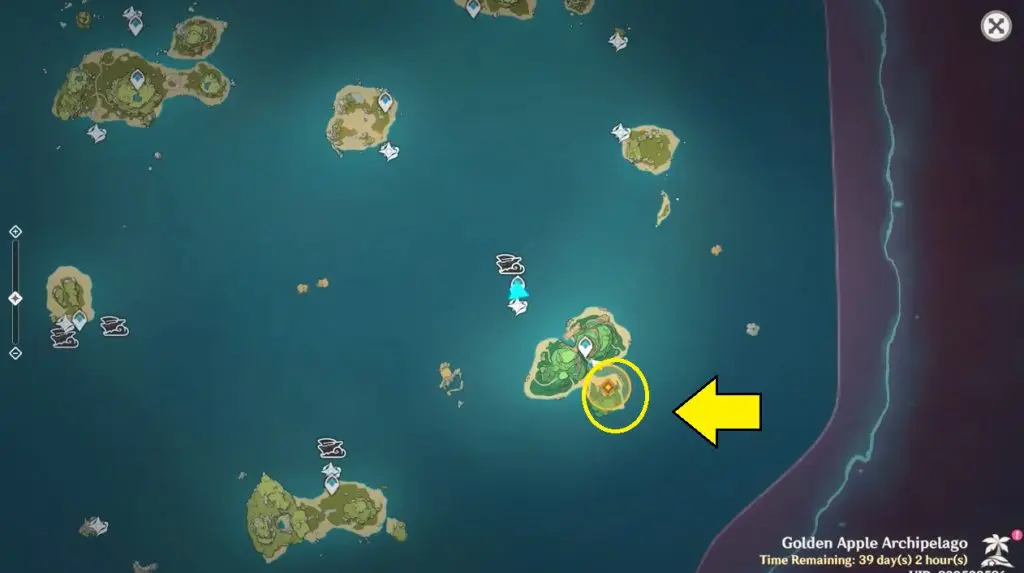
In this part 3 of the game, you need to place some items to adjust the bonsai. Use the Waverider to sail to the marked location. Defeat the enemies to collect both items that need to be placed on the bonsai.
Place the rock into the bonsai and Enter Misty Hills, Foggy Vales
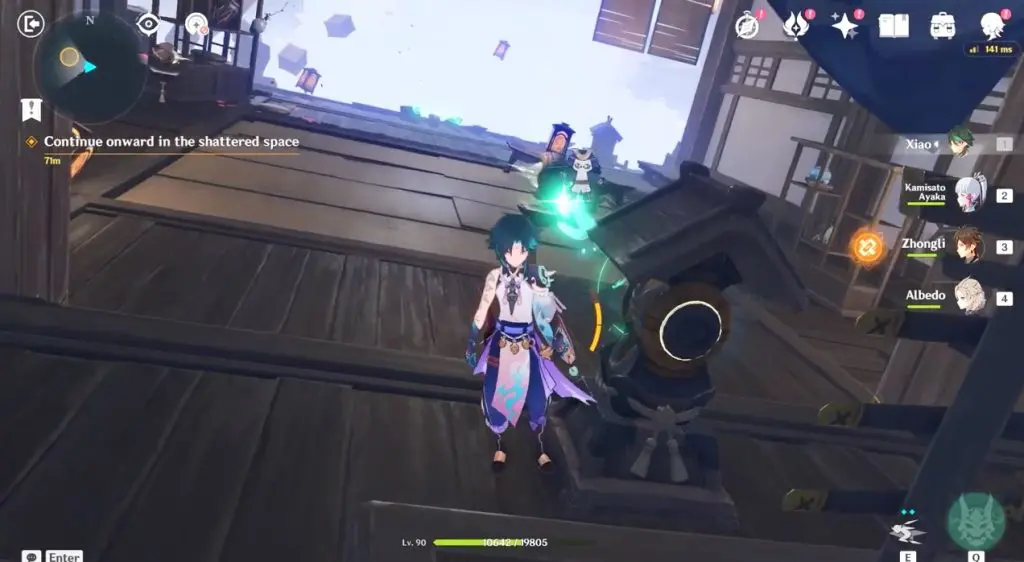
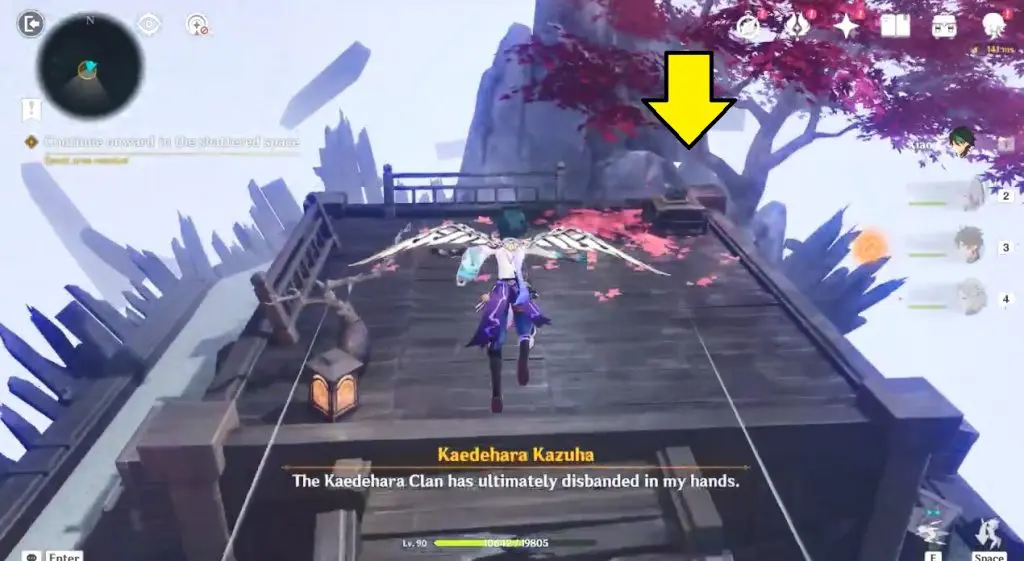
Continue onward in the shattered space
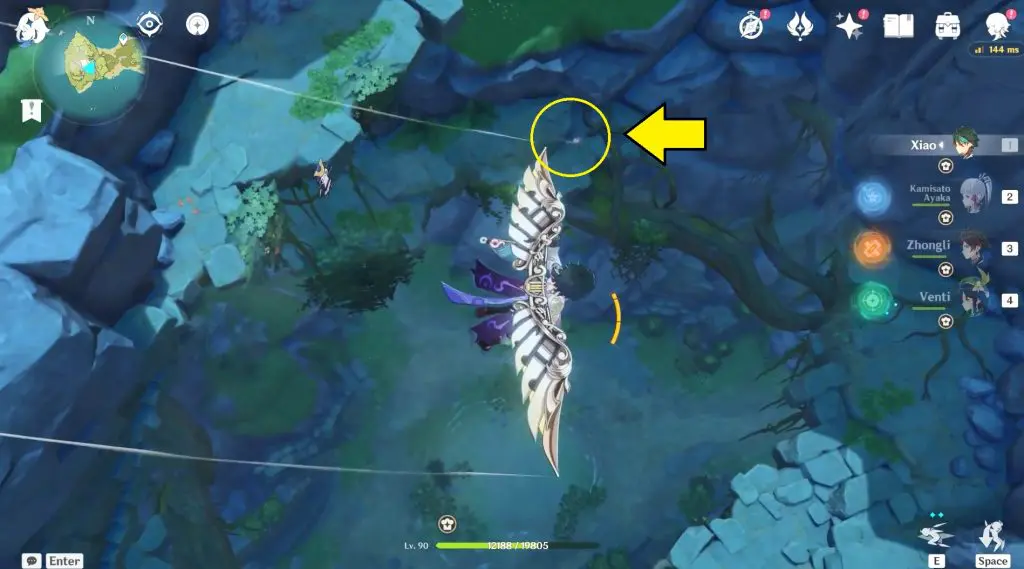
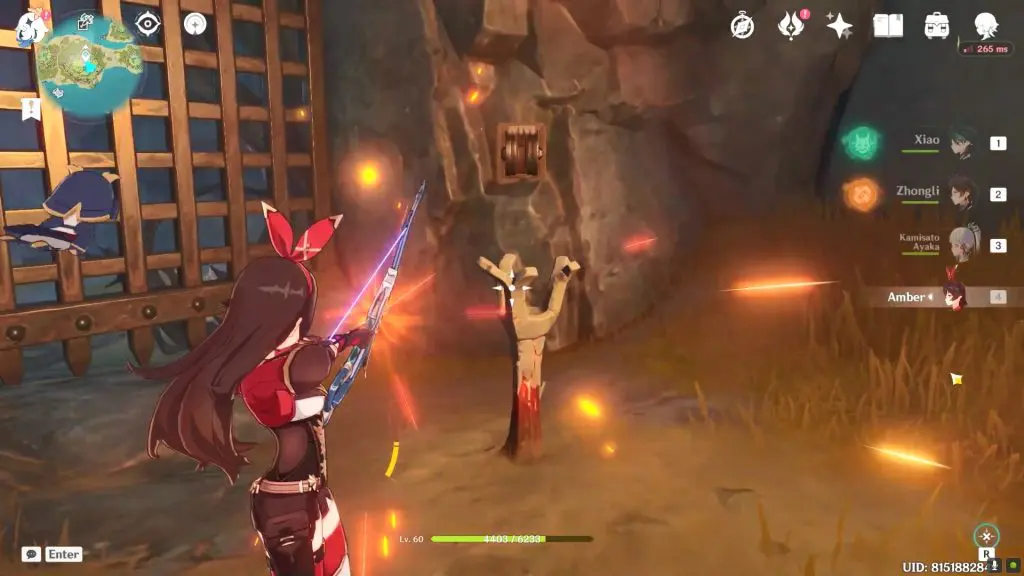
Shoot arrow using Prismatic Rampart without making any adjustment. This will break the seal around Melodic Omamori. Collect the Melodic Omamori and place it on the shrine to activate the Wind Current.
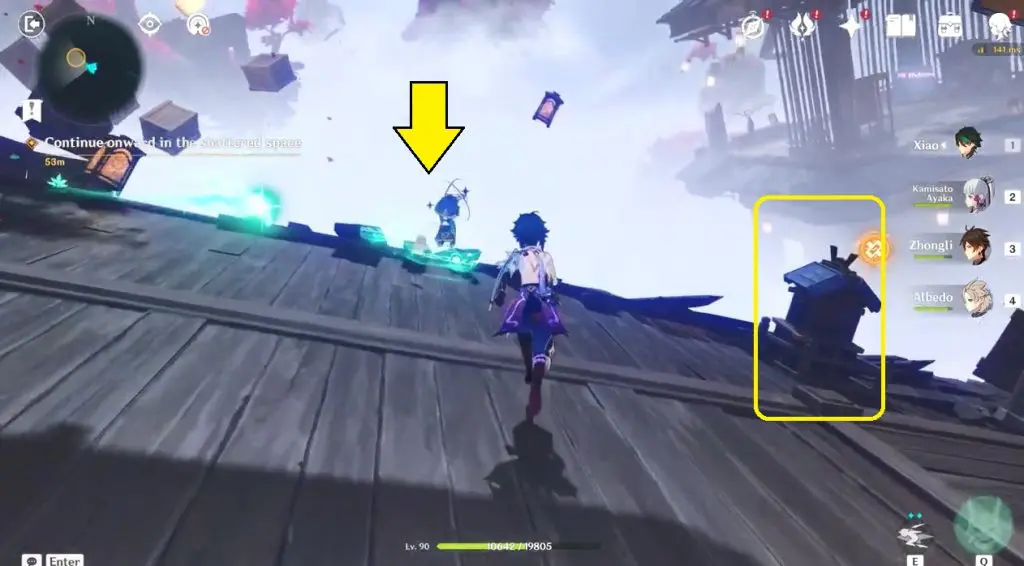
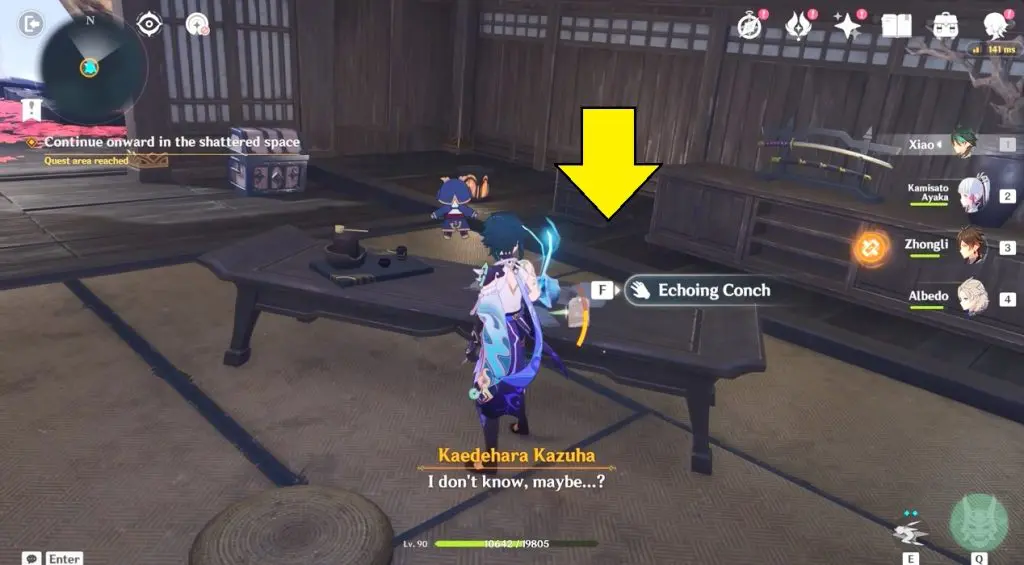
Use the Wind Current to glide to the next house. Pick the Melodic Omamori floating on top of the table and place it on a shrine to activate another Wind Current.
Use the Wind Current to glide to the next platform. Interact with the switch to activate another Wind Current.
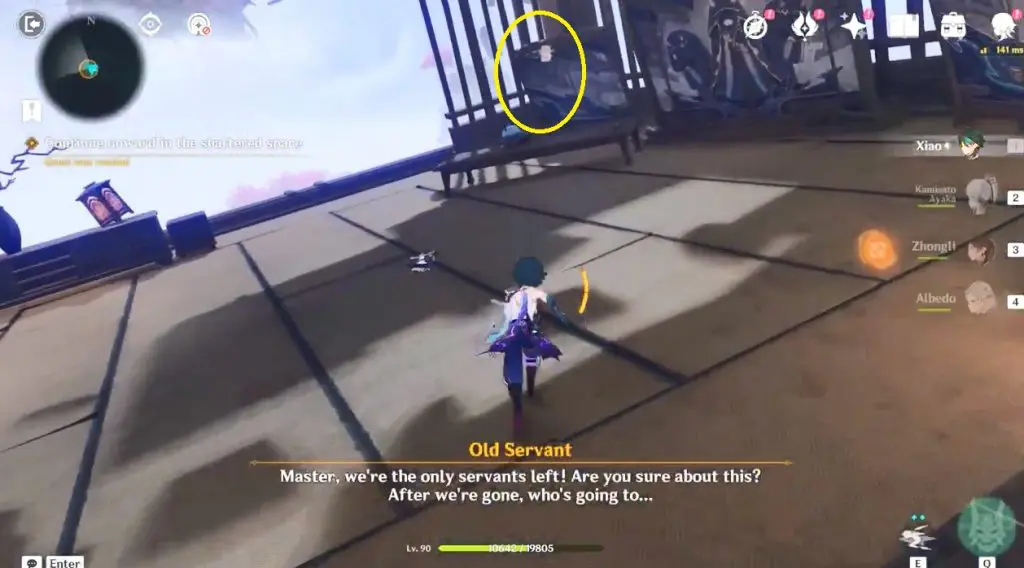
Glide to the next house and go downstairs. Collect the Melodic Omamori from the table. Also, loot the nearby chest.
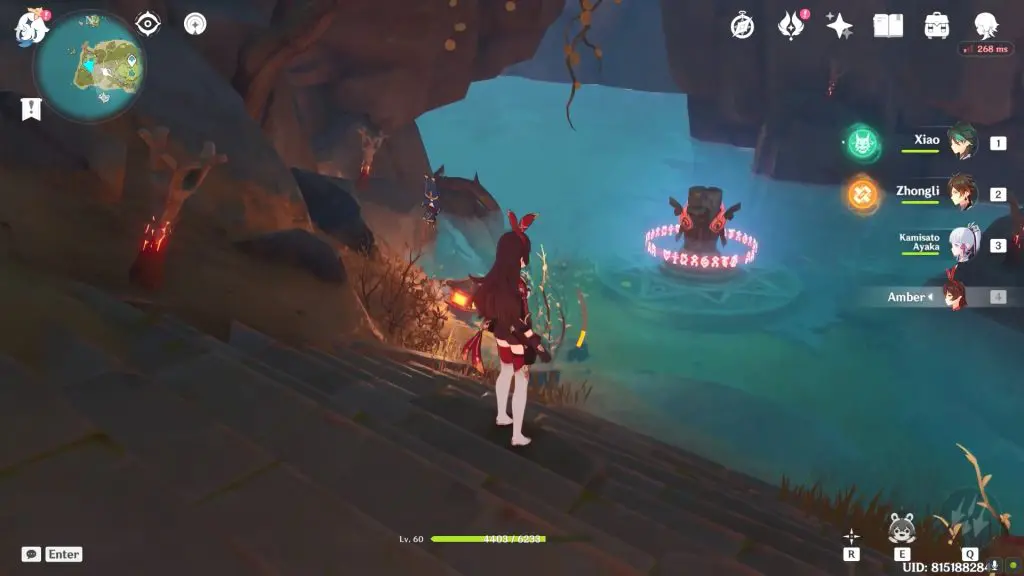
#16 Echoing Conch – DAY 3
Once you finish Xinyan’s Domain, go back inside to the Frozen Soul, an ice flower. I have taken this location as a reference point to start the search for day 3 Phantasmal Conches.

Exit the area where you find Frozen Soul and turn left. Enter the door at the end of the passage, and it will take you to a new Domain area.
This domain includes a series of bloom puzzles, but they’re pretty straightforward. At first, the location just hit the Melodic Harp to create a small wind current that will take you to other islands.
At the second location also, just hit Melodic Harp to create wind rings and use it to move to the third location.
Third location: Walk on melodic pedals to activate the Melodic Harp. Then Hit the Melodic Harp for the first time to clear the roots and again hit the Melodic Harp for the second time to create wind rings.
Defeat all the enemies at the third location and then interact with the Heron (Bird). Follow Heron to enter a door.
Continue to follow the heron, and hit the drum to create a new path. After a few more Melodic Harp locations, you will come to the last part.
Defeat all the enemies then adjust the orientation of the bloom upward and hit the Melodic Harp to create air rings.
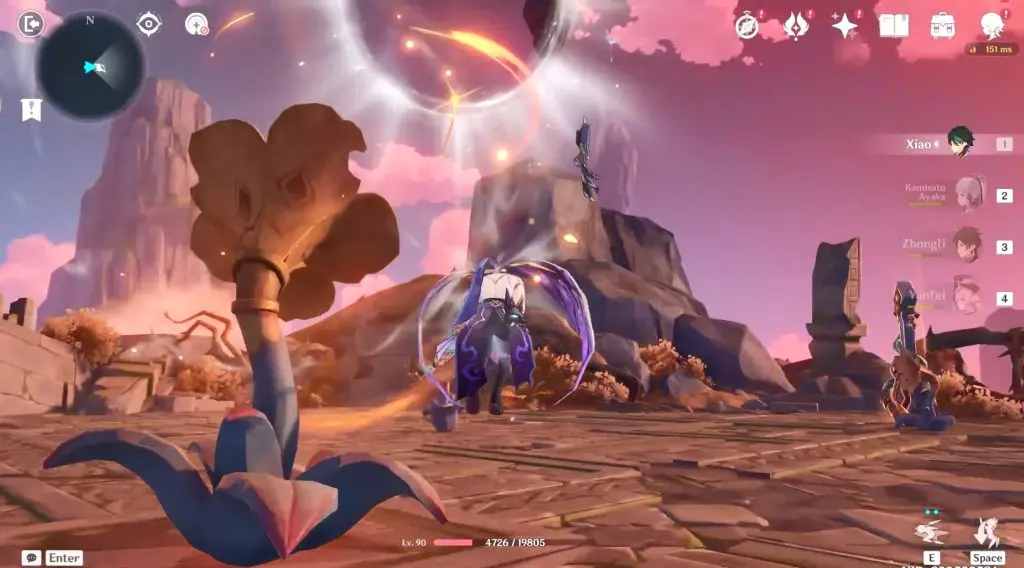
Ride the wind rings up to the top of the nearby rock, where you’ll find the conch.

#17 Imaging Conch – Day 3
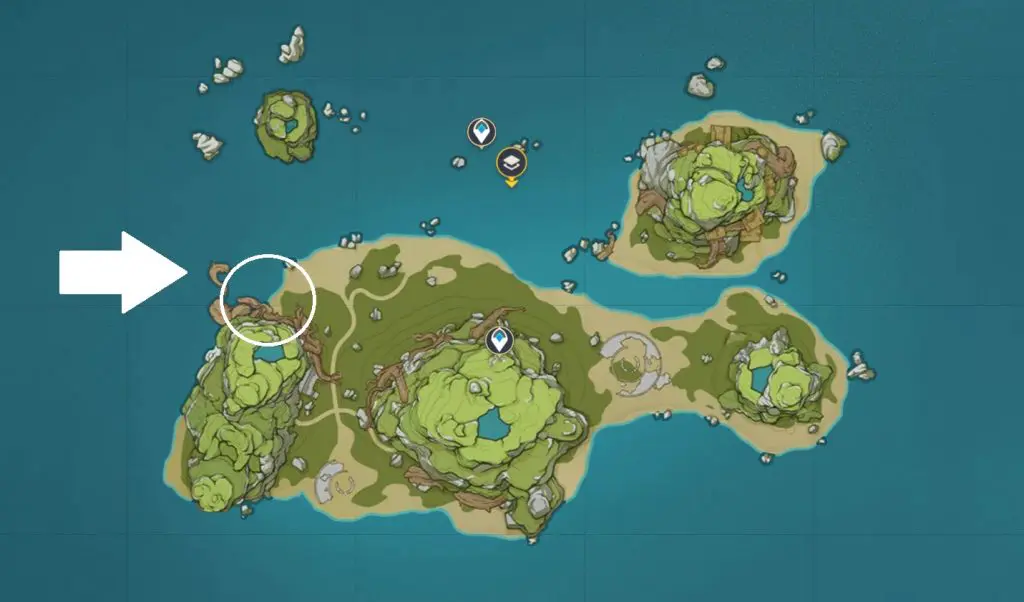
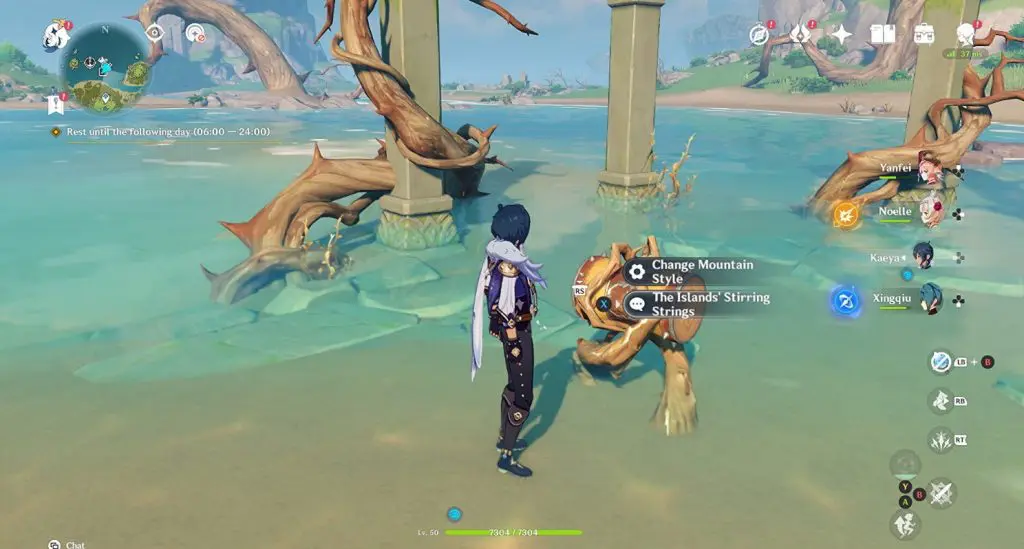
Go to the drum north of Broken isle from where you enter ‘The Islands’ Stirring Strings’ domain, and pick ‘Change mountain style‘. This will lower the size of the mountain on your right. Enter the mountain from the northern side as marked on the map.
Choose a Pyro character to light up the torches surrounding the Pyro elemental pillar, and then you can light up all other three torches along the path.
Go through the door at the top to light the final torch. Pull the lever and head back to the water area.
Activate the Pyro pillar if not done earlier to drain the water and pick up the conch. You need to activate both the Pyro pillar to drain the water completely.
#18 Echoing Conch – DAY 4
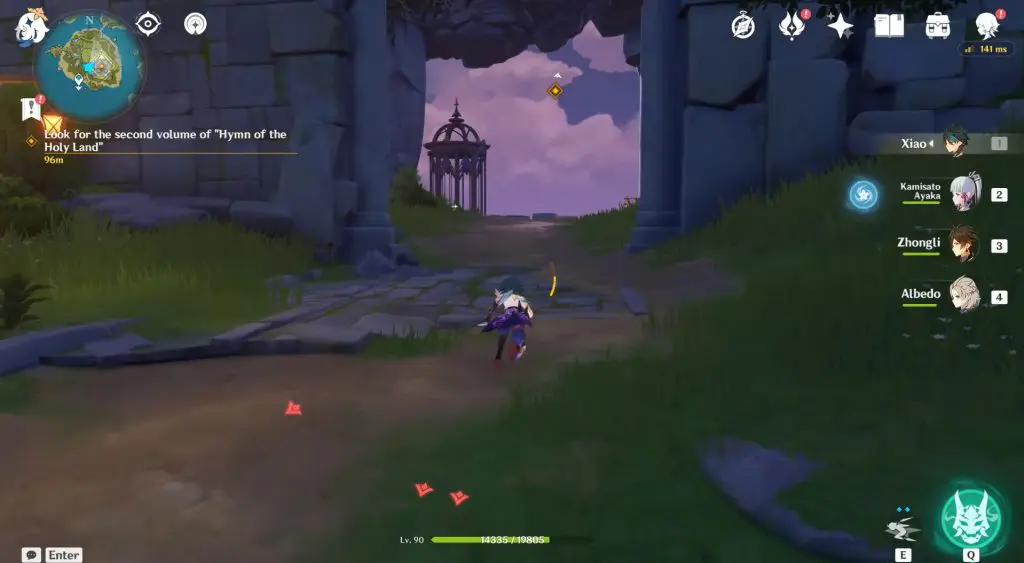
This is available in Part 2 of the Immernachtreich Apokalypse quest.
Look for the second volume of “Hymn of the Holy Land”
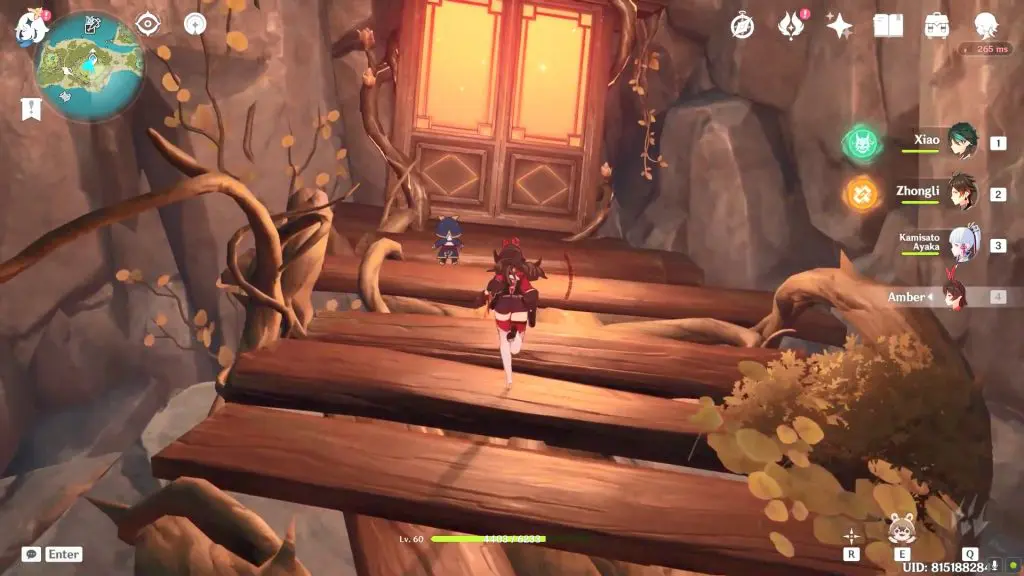
When the quest begins, enter the arch and take the elevator that is there to get to the upper level. Head left and then enter the castle. Go upstairs to find the book.
Open the second volume of “Hymn of the Holy Land”
After the cutscene, interact with the book to get transferred to a new domain.
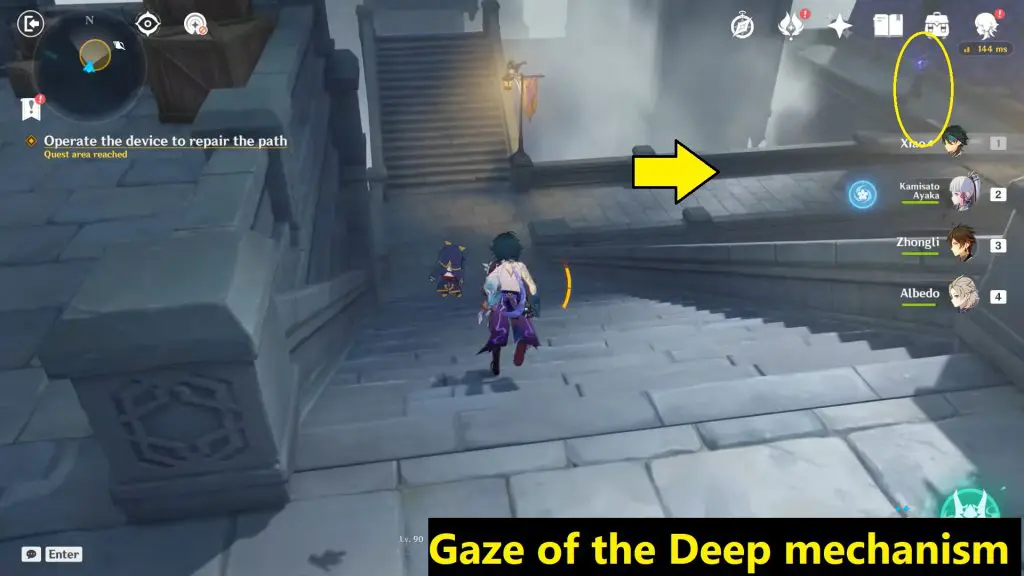
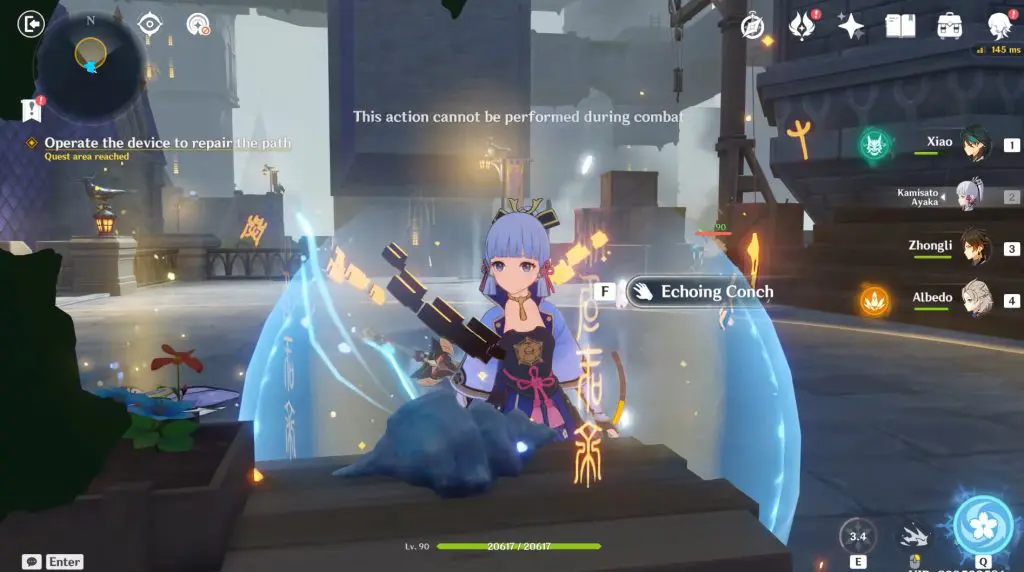
Operate the device to repair the path
In the new domain, go north using the stairs going down and then go to the first Gaze of the Deep mechanism on the right.
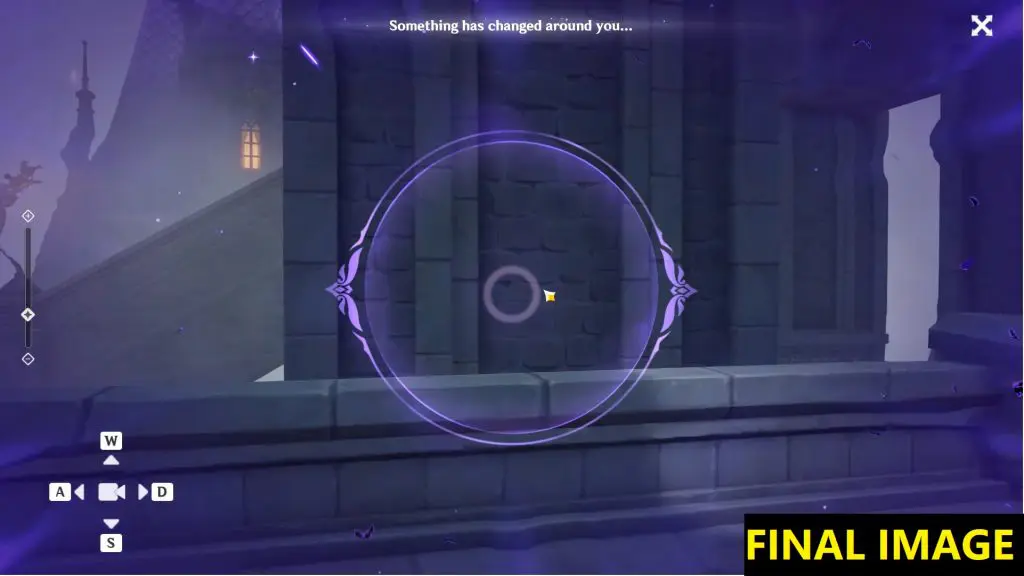
Move the screen to the right at default zoom to adjust the image to have the pillar be in the middle.
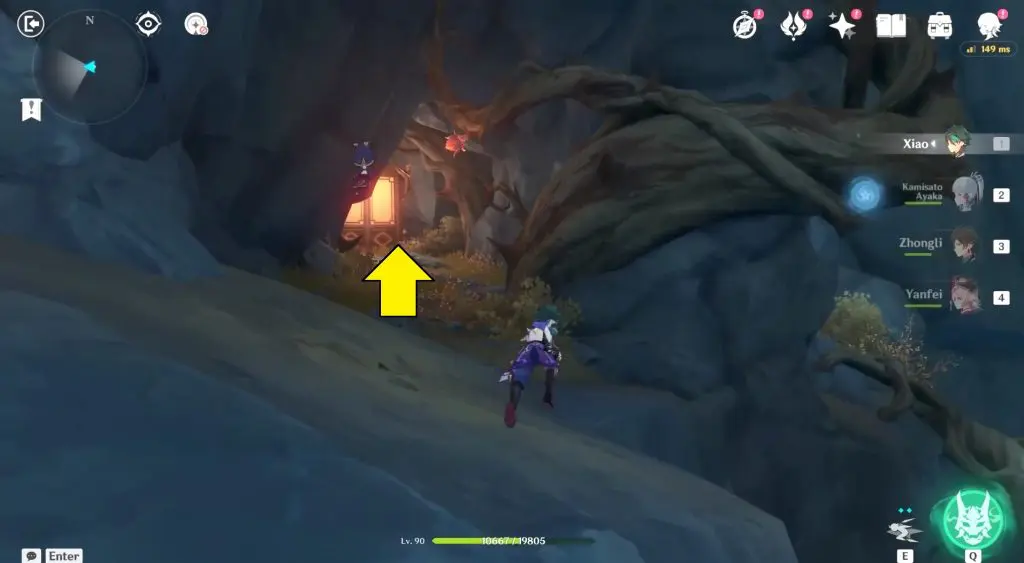
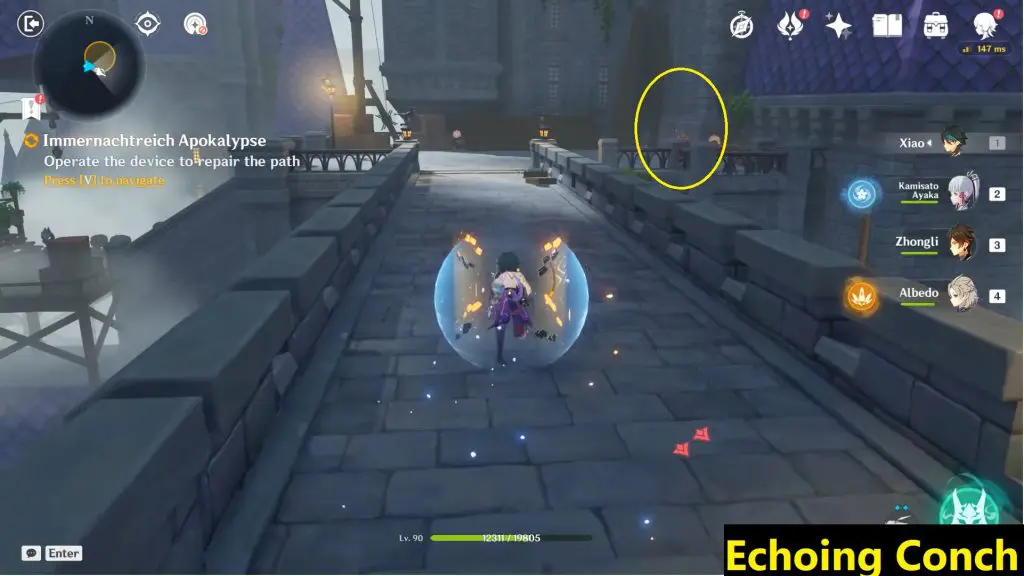
Follow the path
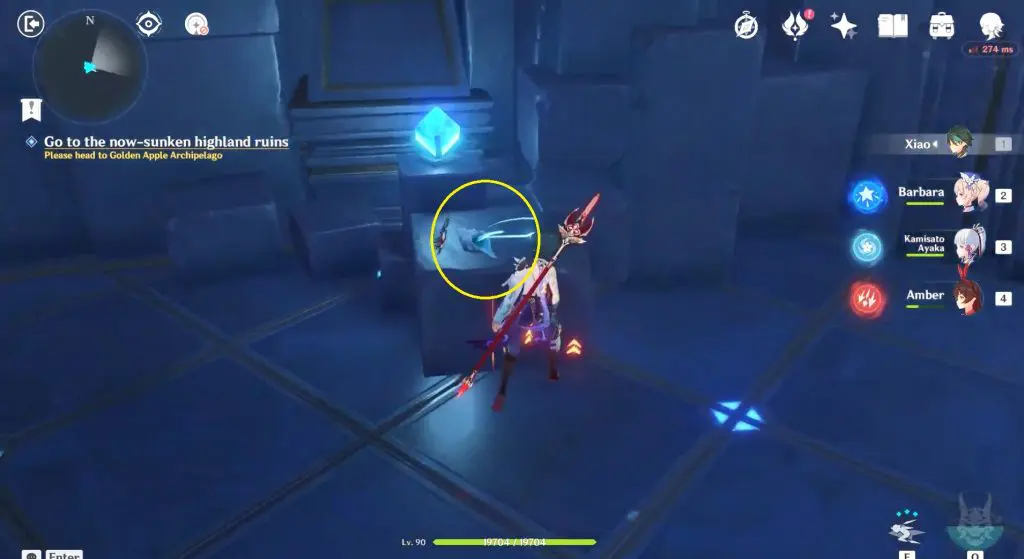
Head north, and climb the two sets of stairs. You will find an Echoing Conch on the table on the path to the next Gaze of the Deep.
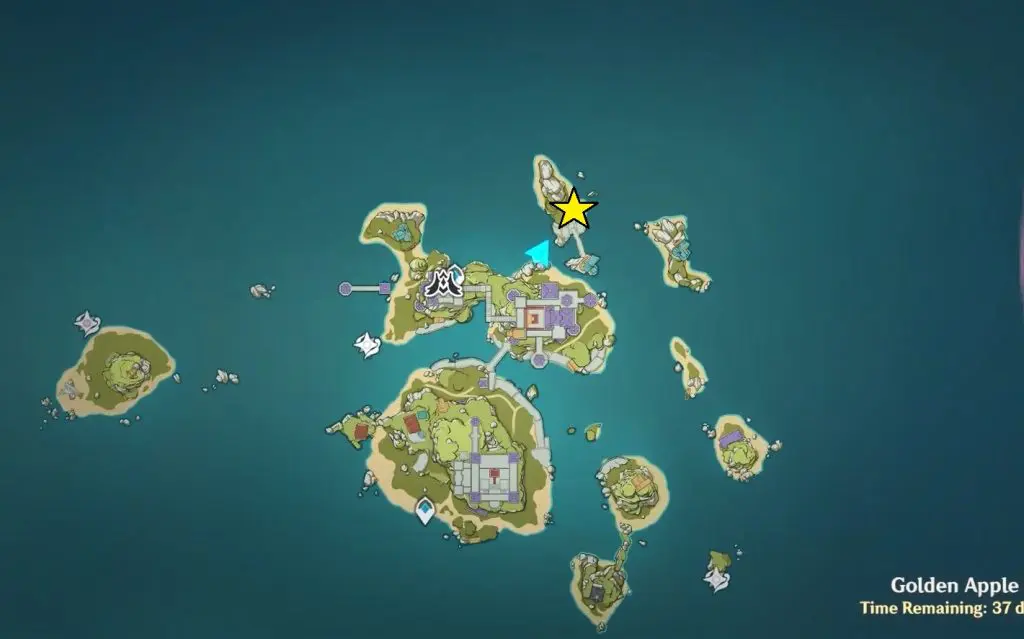
#19 Imaging Conch – DAY 4
Twinning Isle Phantasmal Conch location Day 4
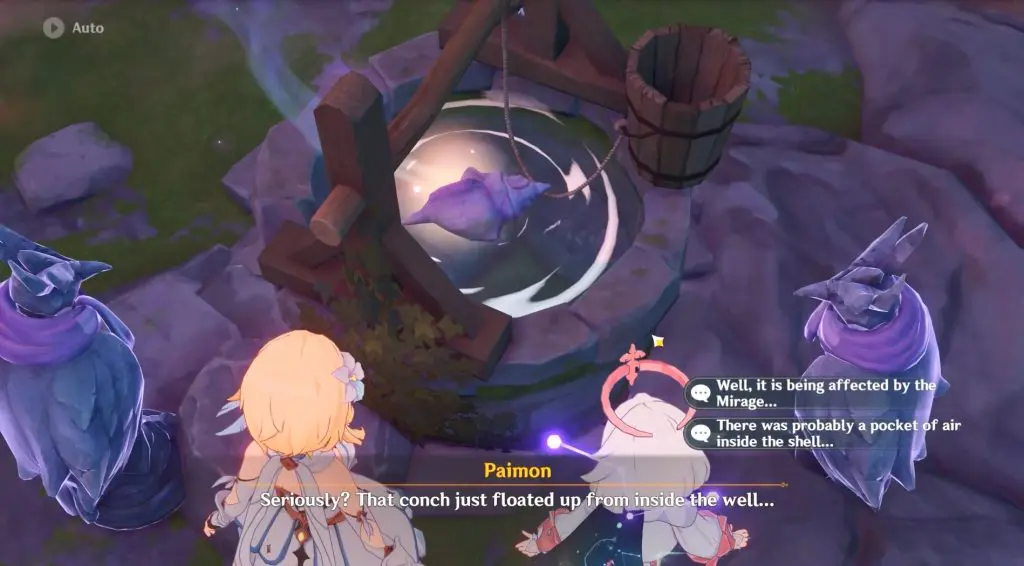
Complete Fischl’s domain during the ‘Immernachtreich Apokalypse’ event quest, you can visit the northern island of Twinning Isle to solve the stone raven puzzle to find the next Phantasmal Conch.
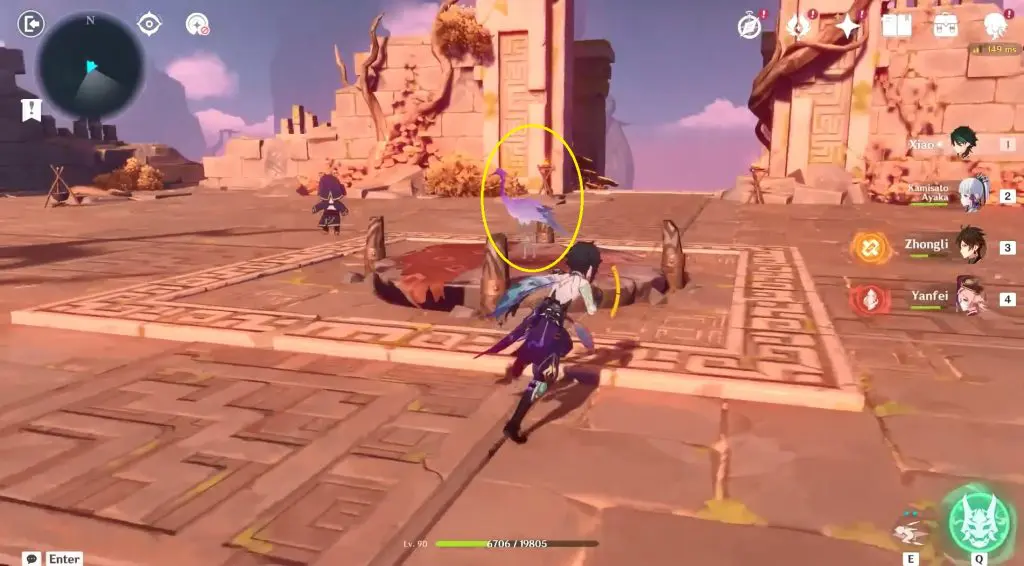
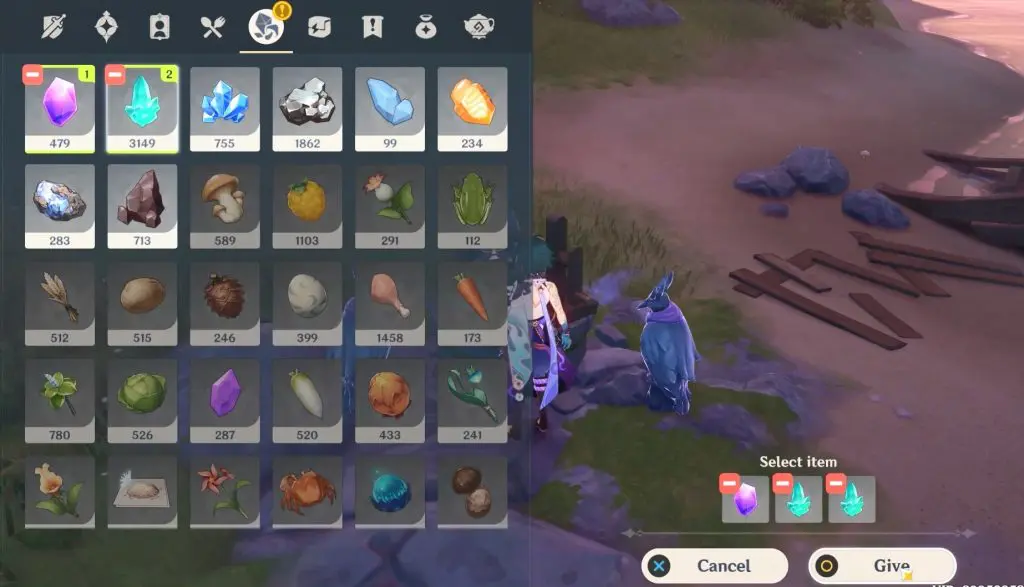
Talk to the three stone ravens surrounding the well to get the ‘Throw Stone’ prompt to appear and click it. Choose three eligible stones that aren’t blacked out to throw into the well.
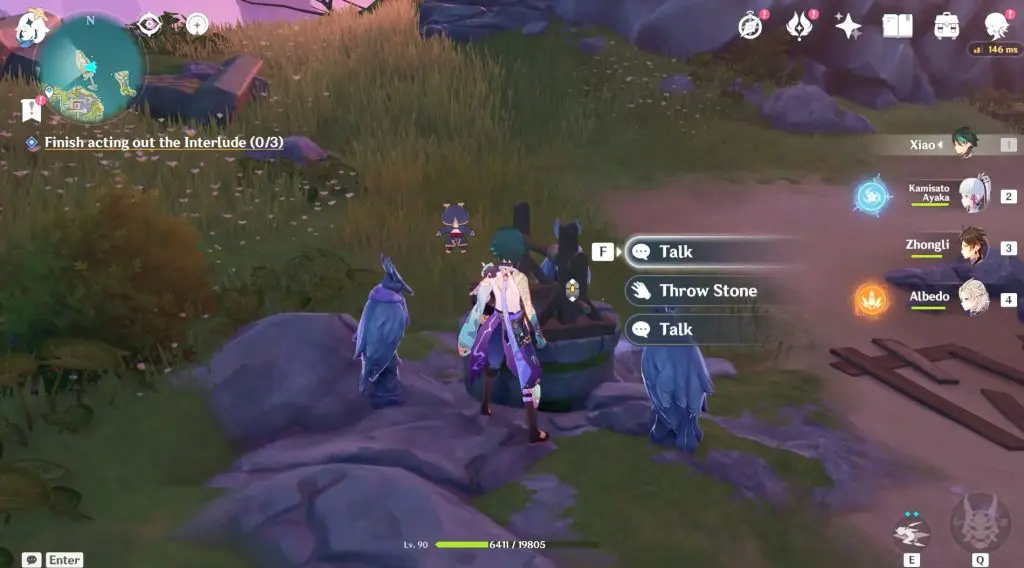
The Conch will then float to the top of the well and you can now click it to add it to your collection!
#20 Echoing Conch Day 5
The Phantasmal Conch inside Mona’s domain is located behind the first door you entered during the story.
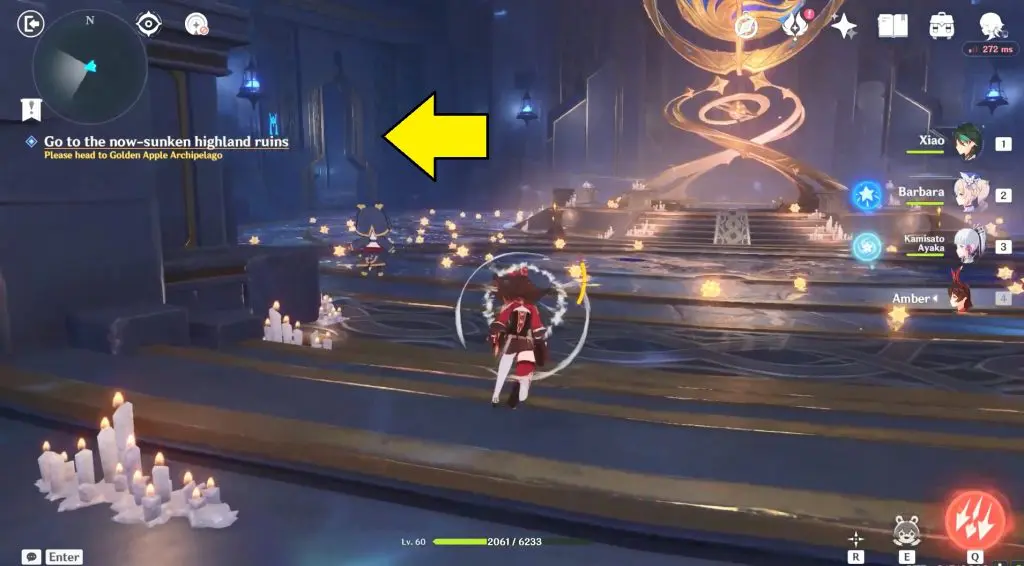
In case visiting the first time: Enter the first door and solve the Astral puzzle to summon the chest in order to open the door up the stairs to the back of the room to gain access to the next area.
Go up the stairs and enter the room on the rear to reach a new area if you have already solved the Astral puzzle and obtained the chest.
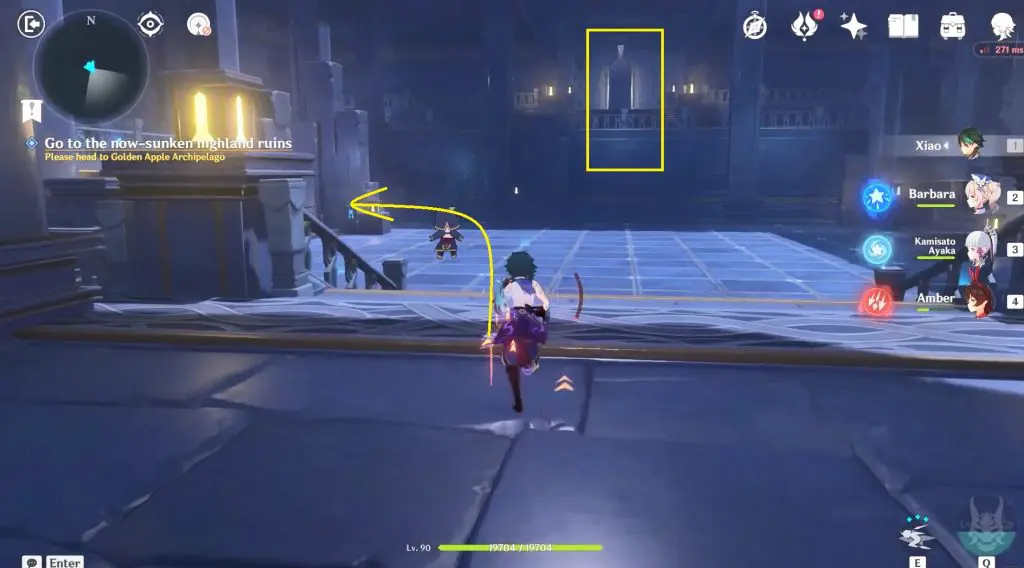
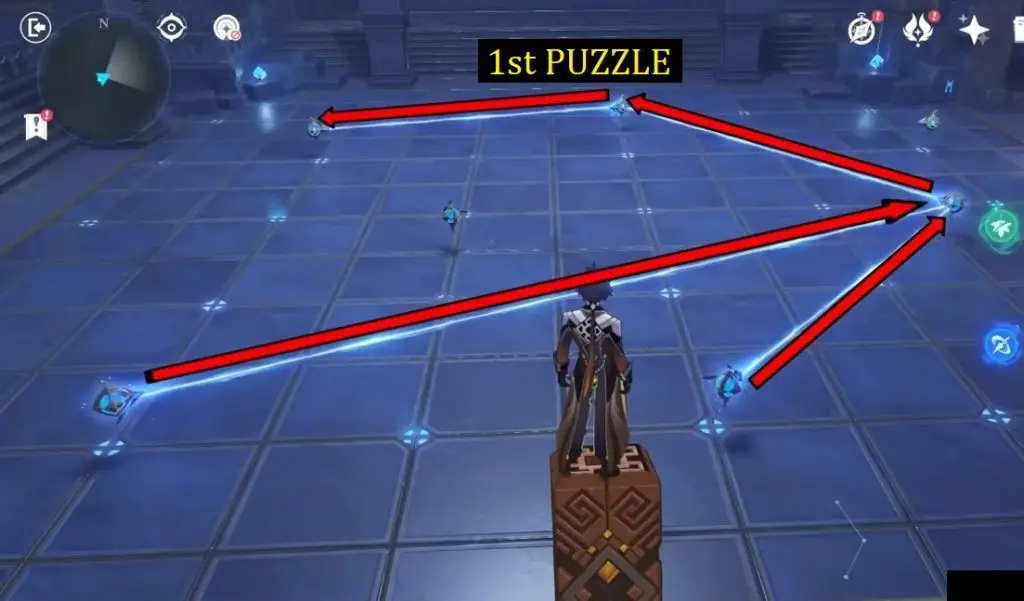
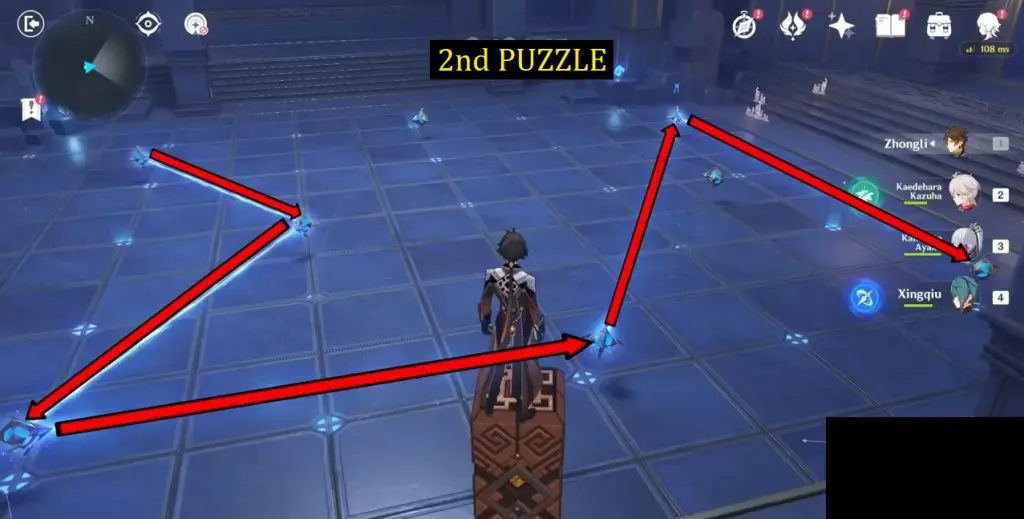
Proceed ahead until you reach an area with translucent bridges. Cross the translucent bridges to reach the next area. In the new area, you will have to solve another Astral puzzle. Input the three correct patterns that appear on the wall in order for the wall constellation to change to an arrow pattern.
Puzzle 1
Puzzle 2
Puzzle 3
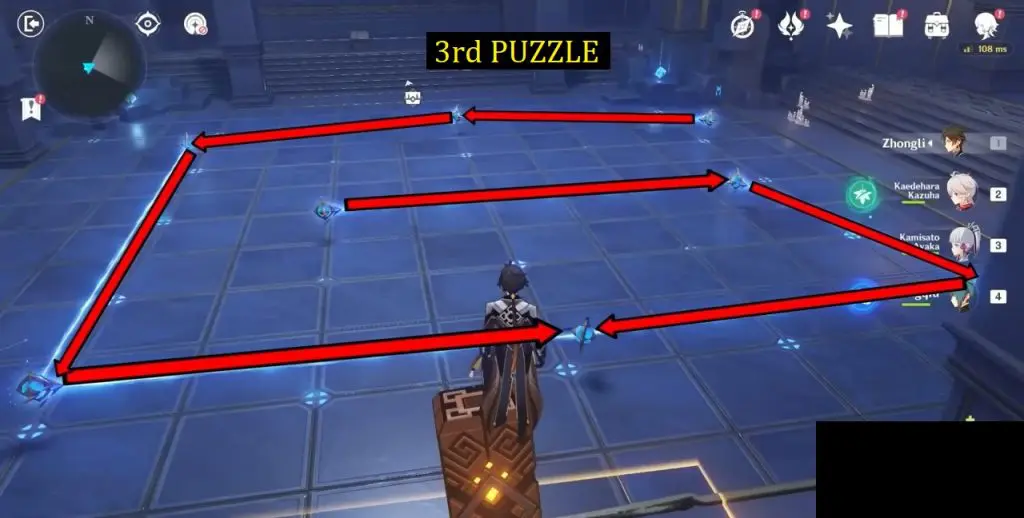
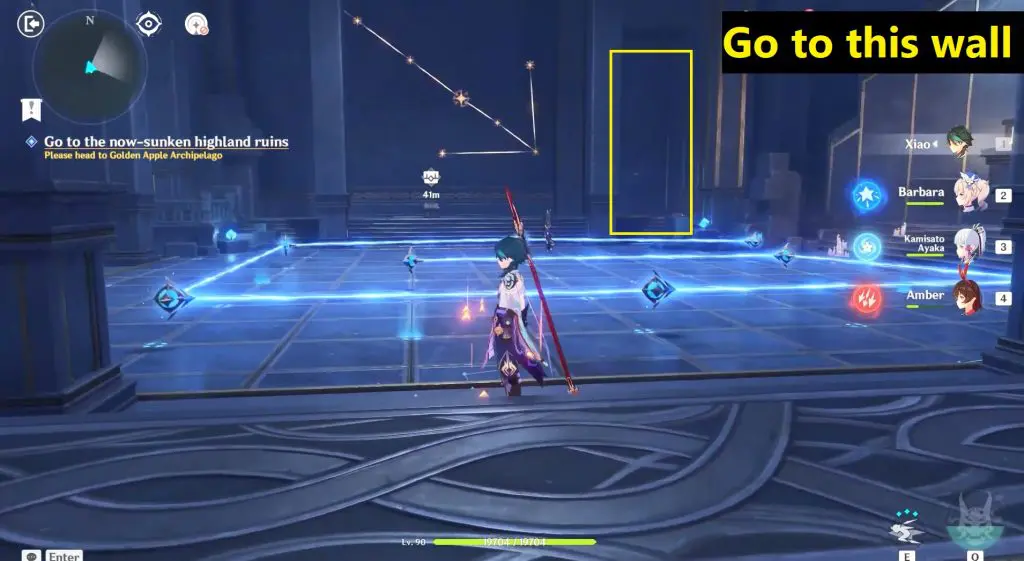
On solving the three puzzles, stars will form an arrow. Go to the wall the arrow is pointing at and touch it to reveal the next area.
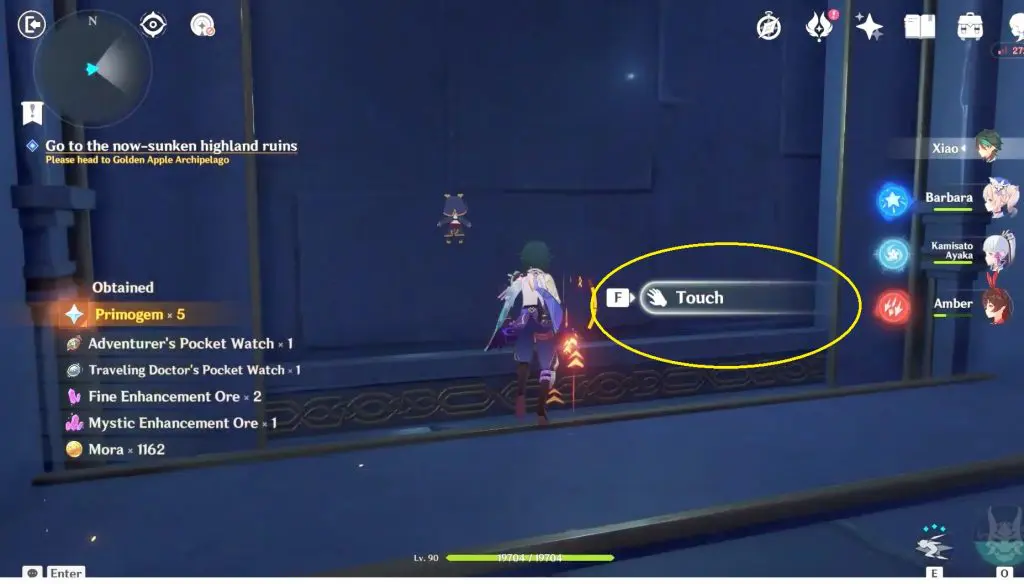
Enter inside, then take the astral path up to a room with four circular switches on the floor. On the left side of these switches is where you’ll find the Phantasmal conch.