Spiderman 2: All Prowler Stashes Locations & Puzzles
This guide shows the location of all 10 Prowler Stashes and how to get them in the Spiderman 2 game, which released on 20 October 2023.
Prowler Stash 1: Upper West Side (Main Mission 6 – Amends)
This one is unmissable. You get this one automatically during the Follow Uncle Aaron’s Instructions objective in Main Mission 6: Amends.
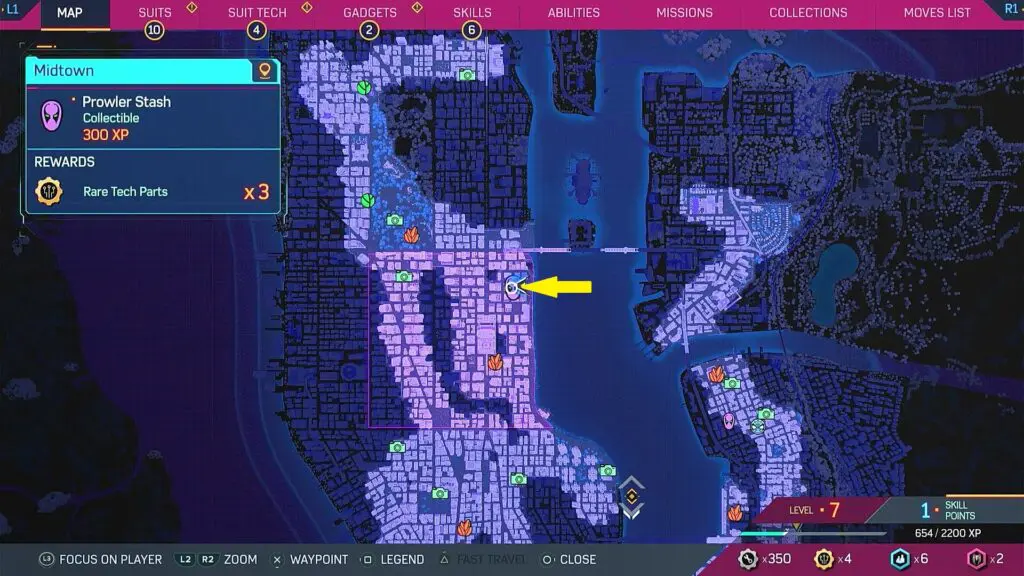
Prowler Stash 2: Midtown
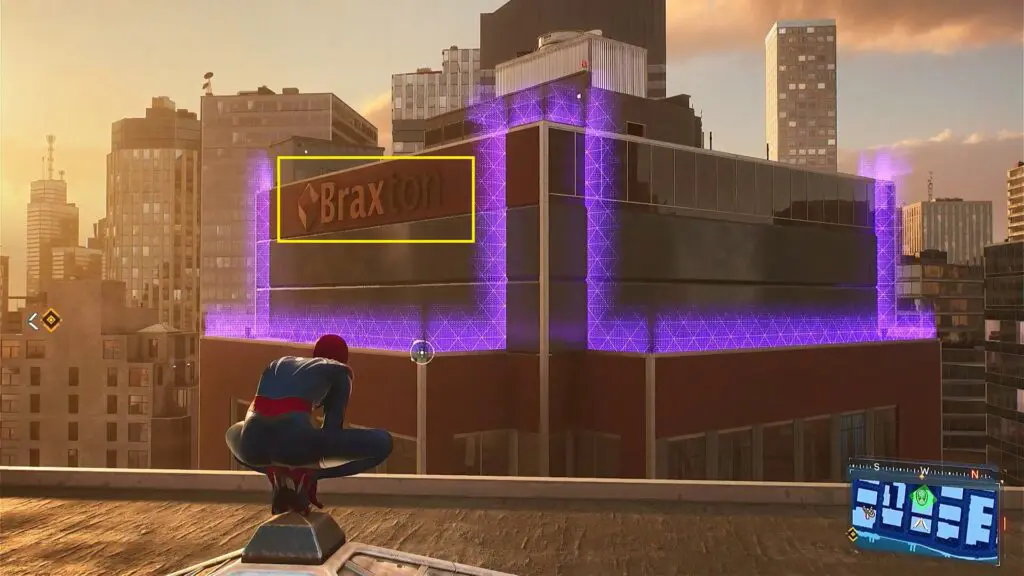
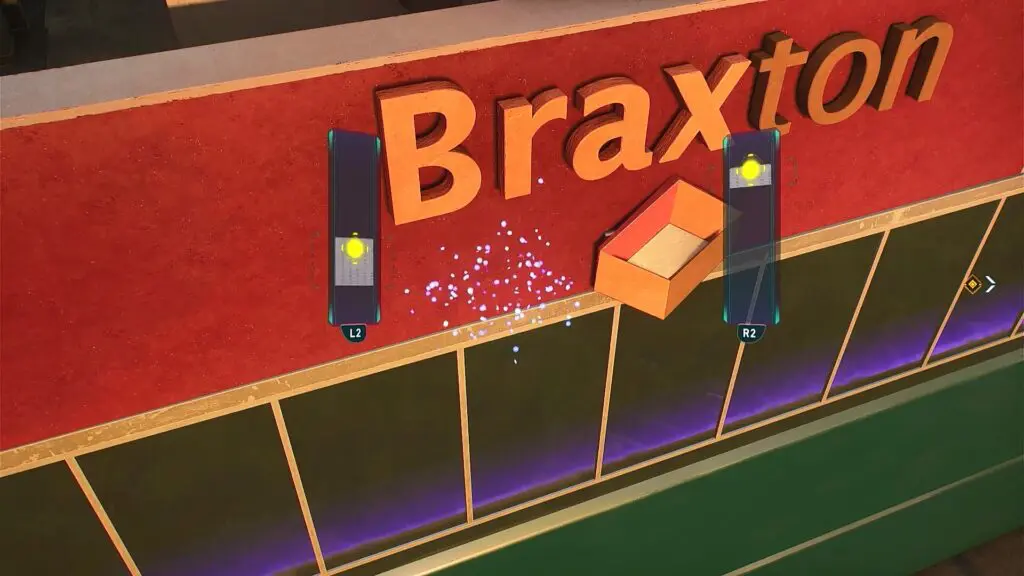
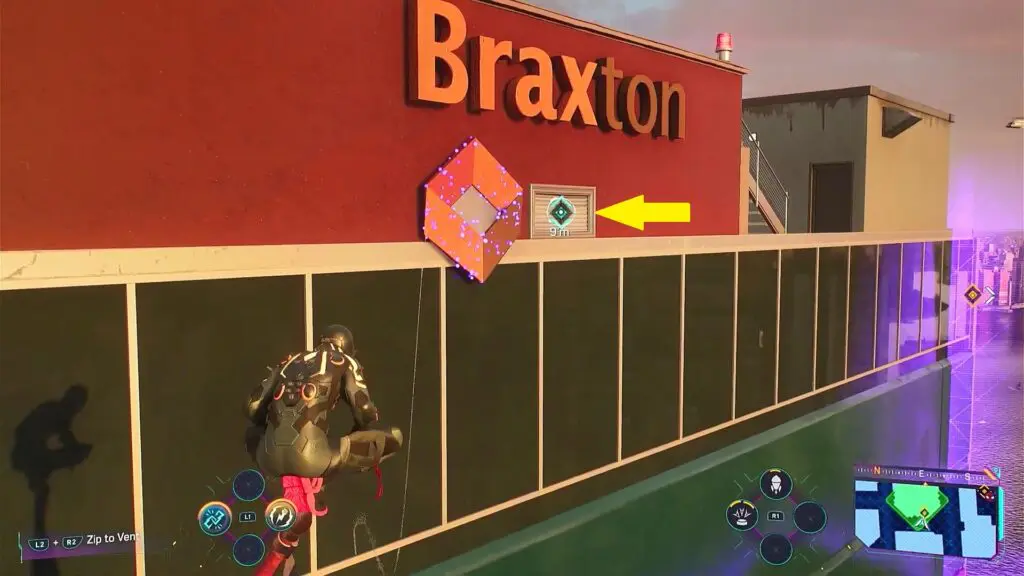
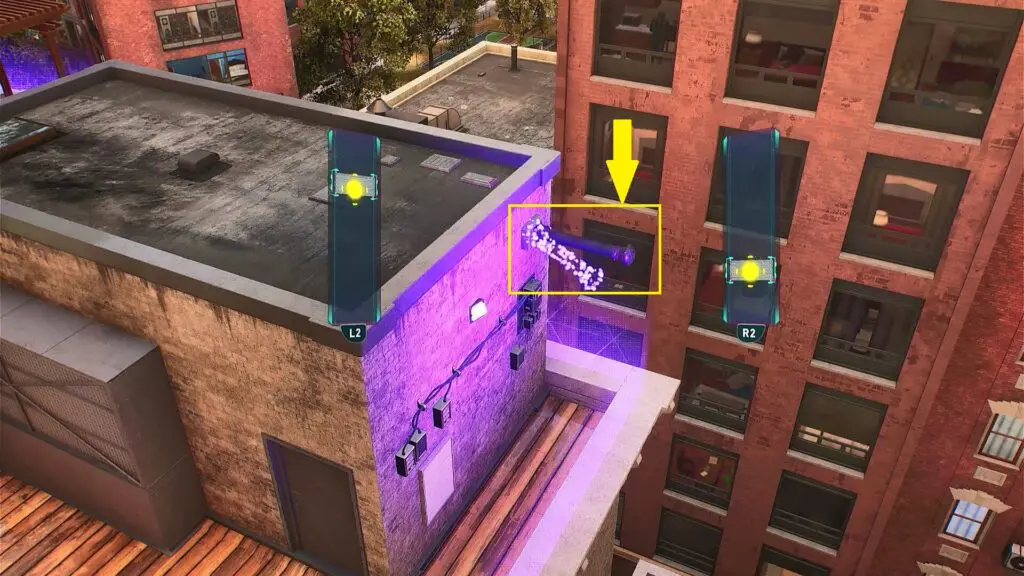
Go to the top of the Braxton Building and analyze their name for Prowler Code as shown in the pictures below. Then stabilise the code by holding the yellow circles inside the grey boxes as shown in the third picture below.
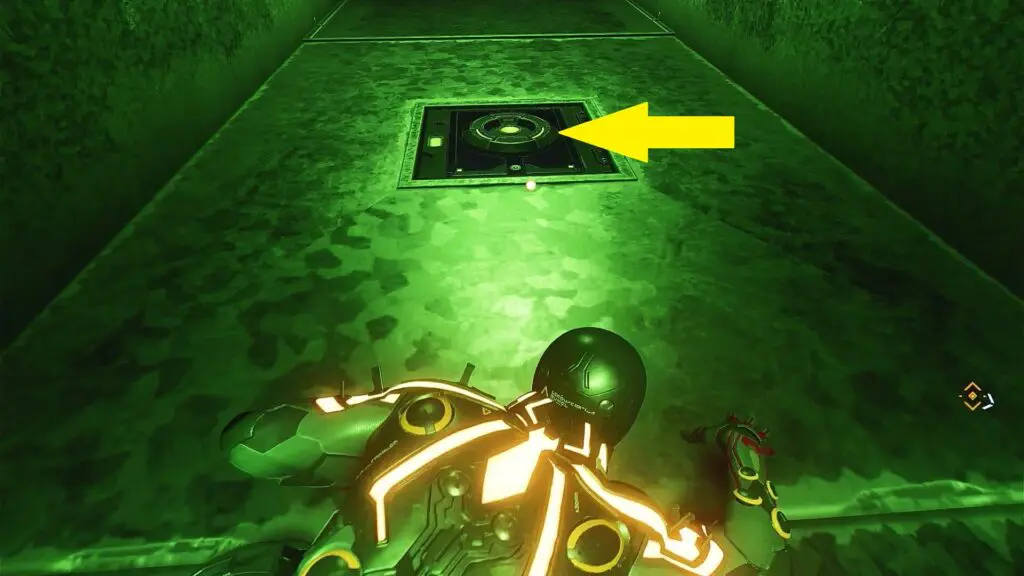
Now move the logo underneath the name, revealing a vent as shown in the picture below. Go inside the vent. Crawl through the vent safely avoiding the lasers inside. When you approach a fan, use spiderweb to hold it and go across. Finally, you will reach the Prowler Stash at the end of the vent as shown in the second picture below.
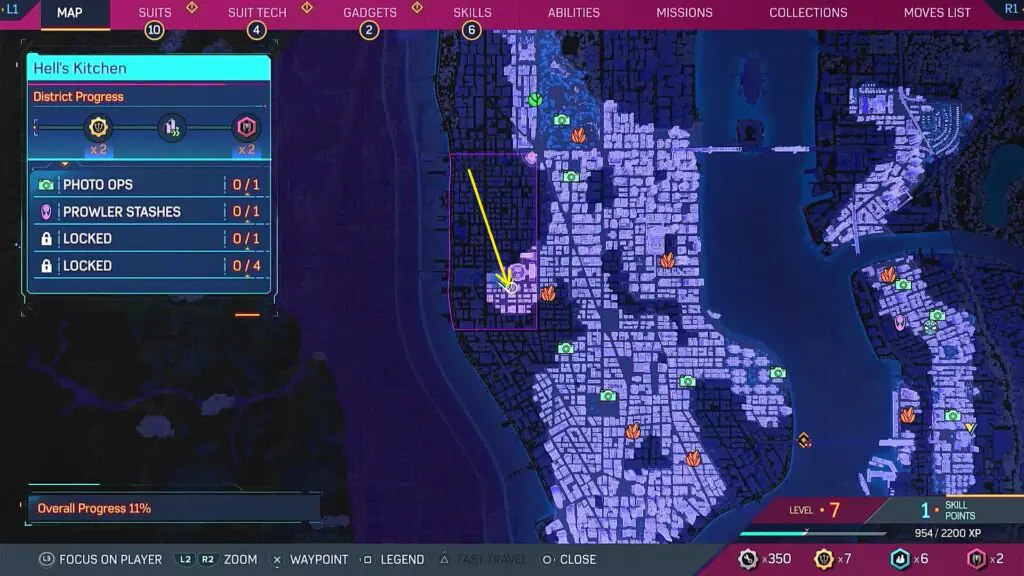
Prowler Stash 3: Hell’s Kitchen
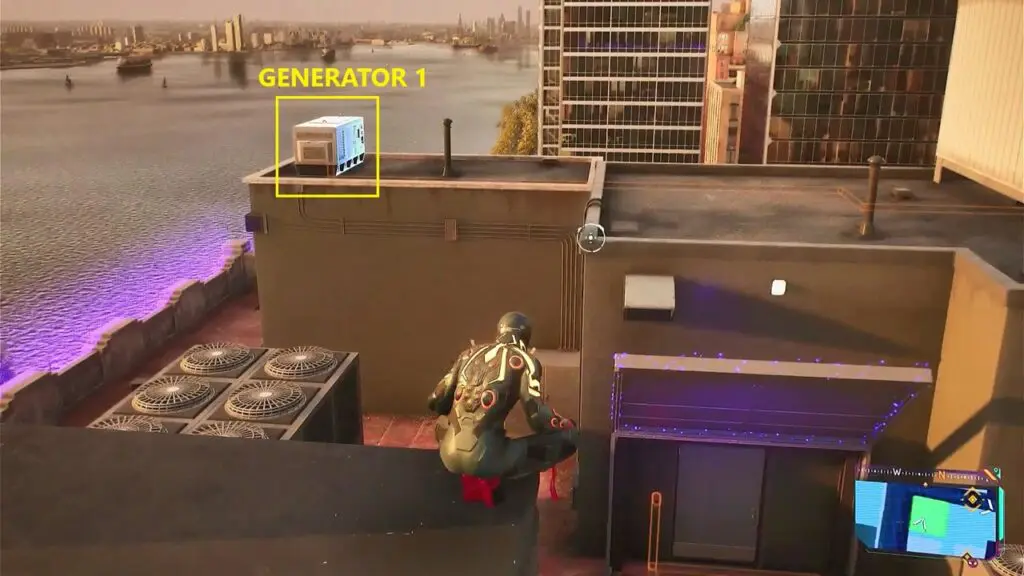
Go to the top of the Building at the location shown in the picture below. Scan the rod on the roof as shown in the second picture below. Then stabilise the code by holding the yellow circles inside the grey boxes. Once it’s done, pull the rod by pressing L1+R1. This will open the hatch on the wall underneath the rod, revealing a power generator.

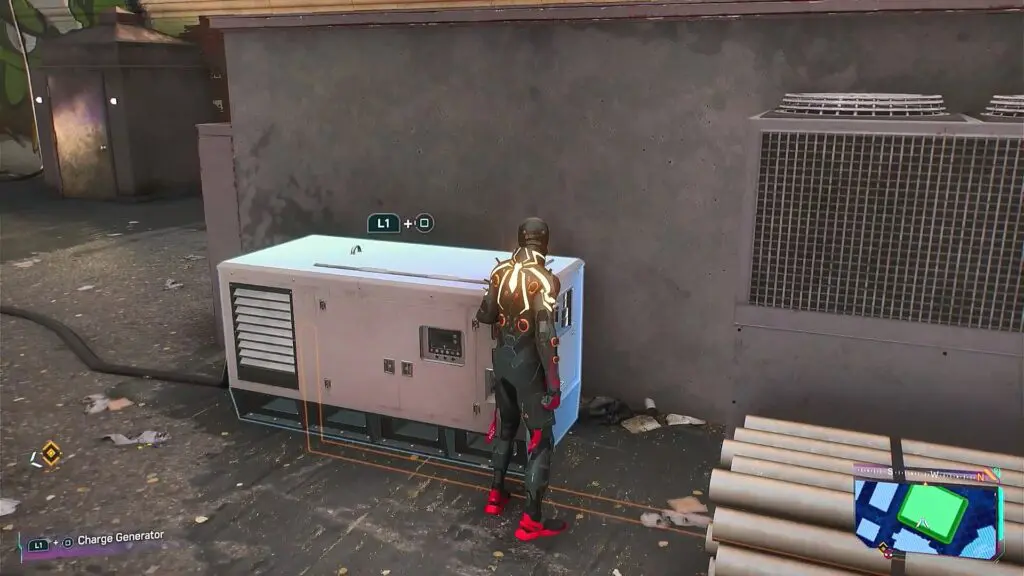
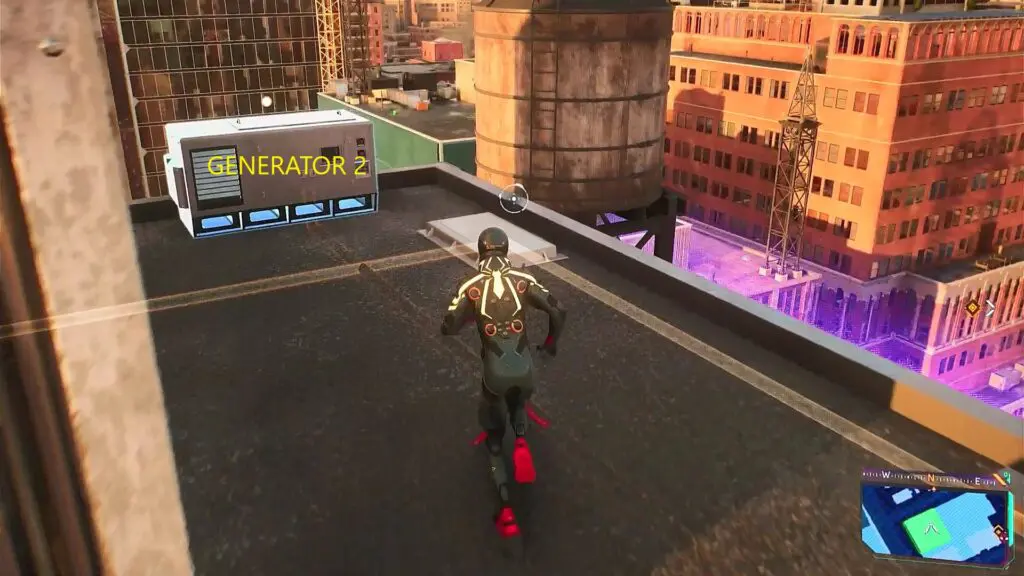
Go to the generator and charge it by pressing L1+Square. This will get the power flowing, revealing the cable underneath the floor with an orange outline. Follow this wire to reach the second generator as shown in the picture below. Charge this generator as well by pressing L1+Square.
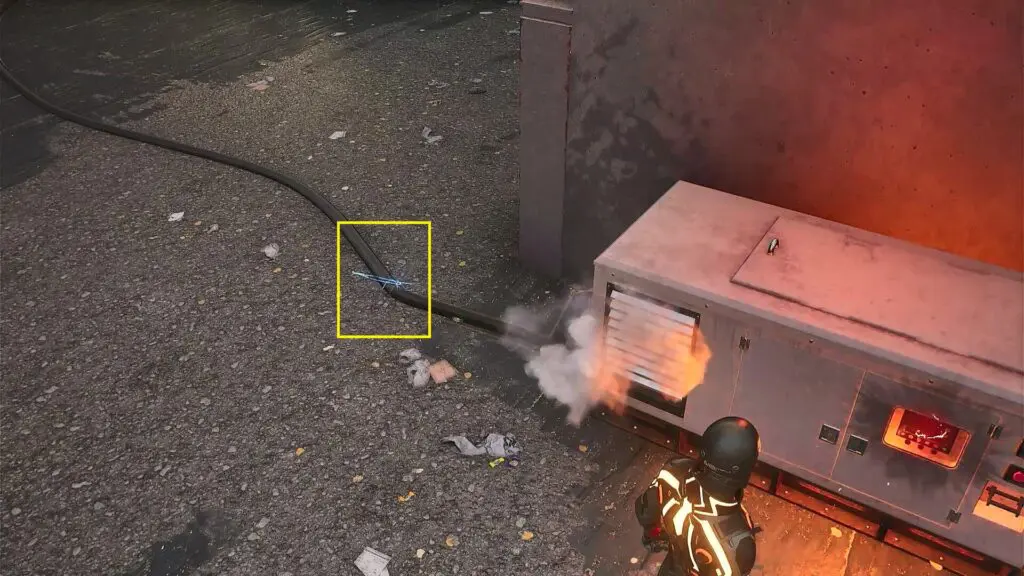
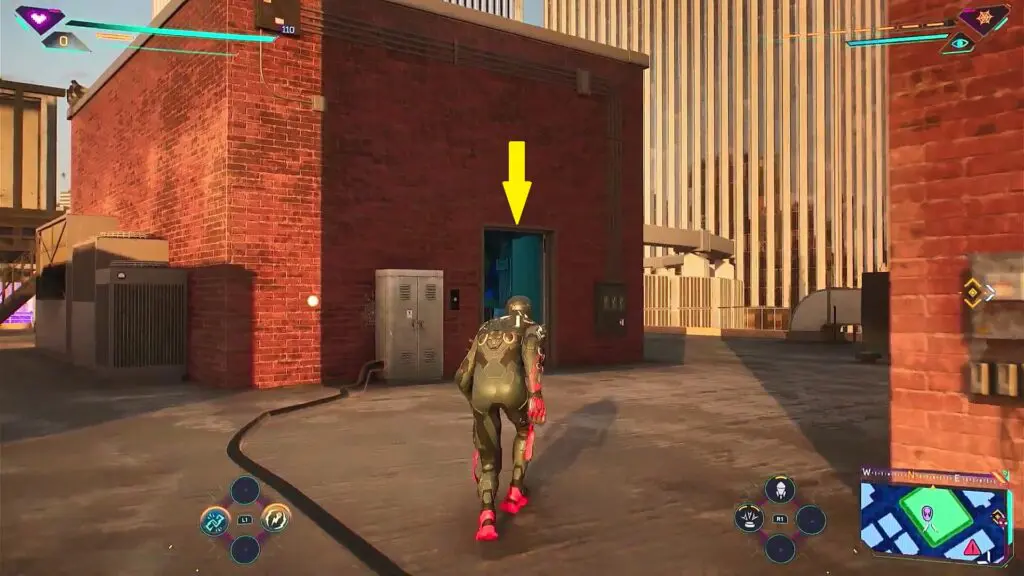
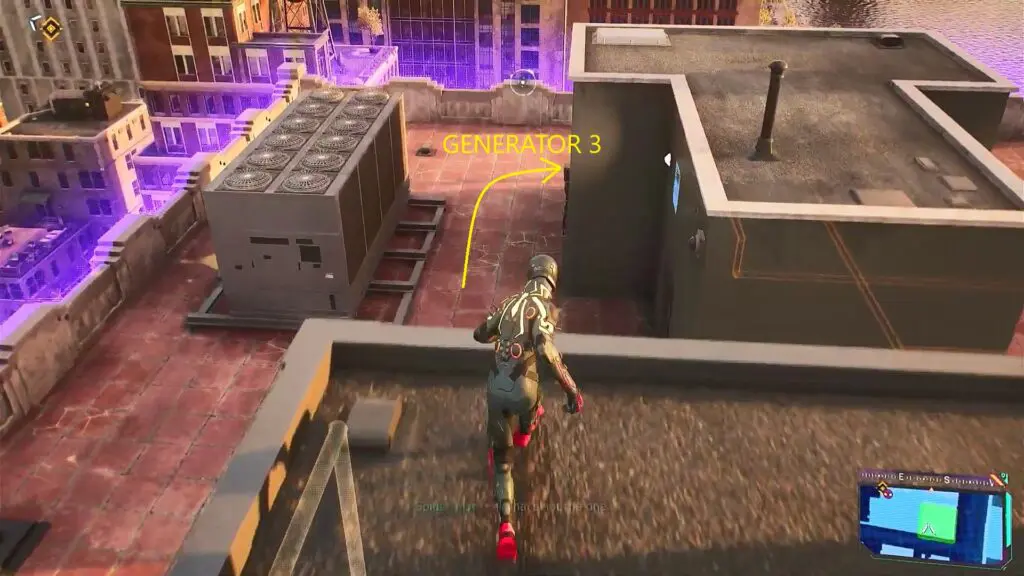
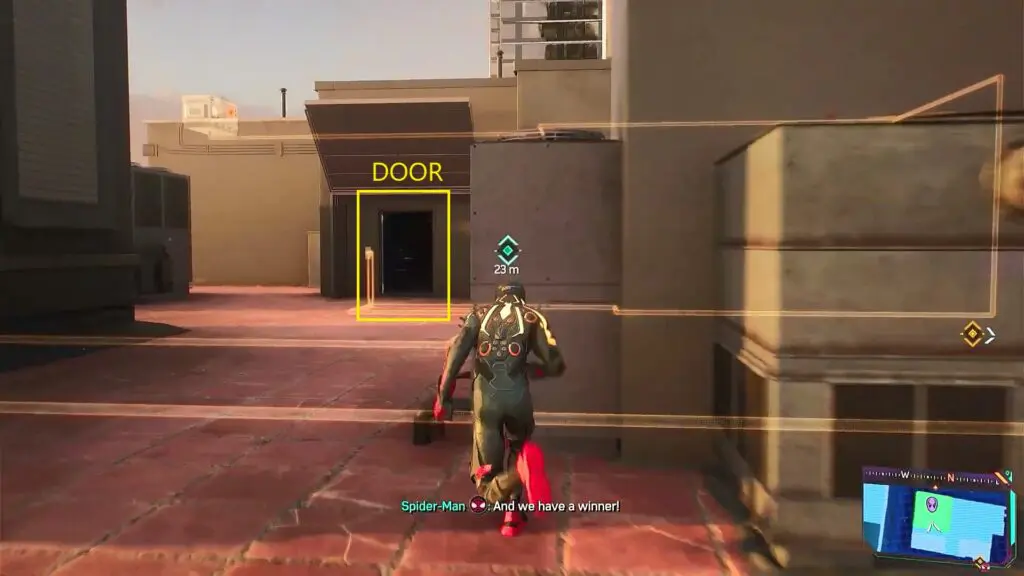
This will get the power flowing through the black cable. Follow the black cable and you will find a few locations with some trouble conducting electricity as shown in the picture below. Shoot webs at such locations to continue the flow of electricity. Keep following the black cable, repairing the short in the cable and it will eventually lead to a door as shown in the second picture below. If you haven’t repaired all the shorts in the black cable, then the door won’t be open. Go inside to get the Prowler Stash.
Prowler Stash 4: Greenwich
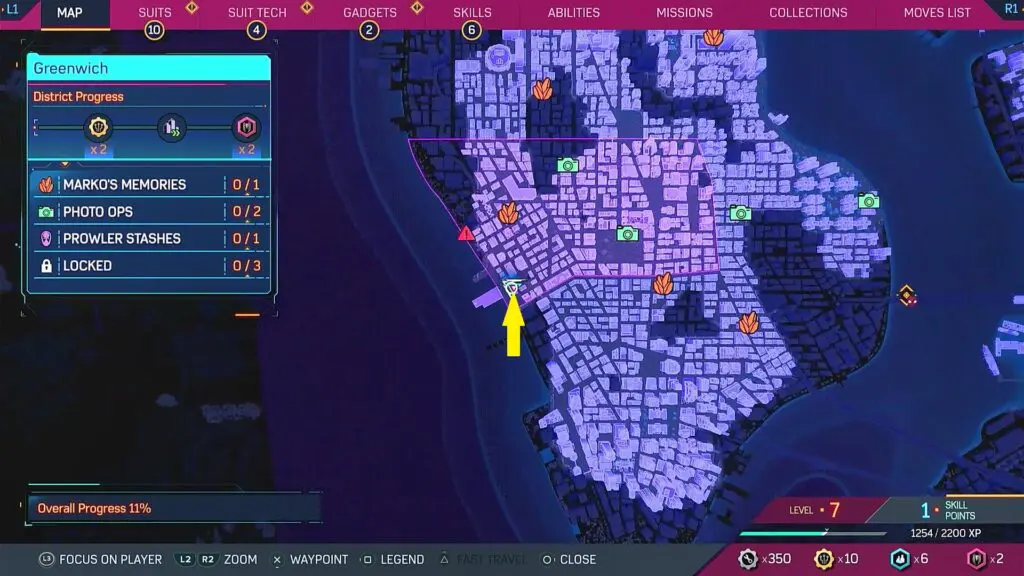
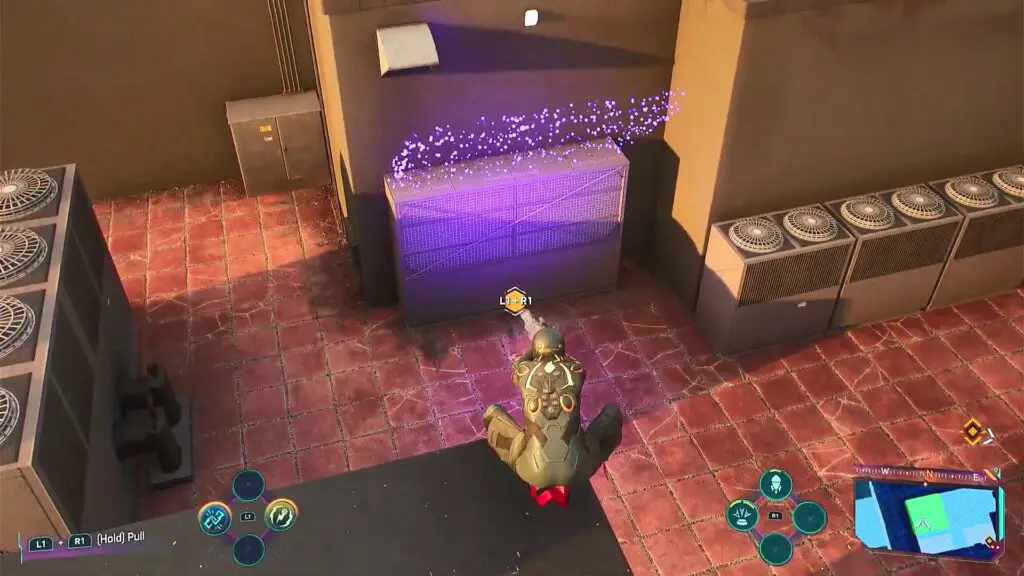
Go to the top of the Building at the location shown in the picture below. Scan the panel as shown in the second picture below. Then stabilise the code by holding the yellow circles inside the grey boxes. Once it’s done, pull the panel to reveal a locked door. You need to charge three generators to open the door.
One generator is on the roof behind the locked door as shown in the picture below. Charge the generator, then turn around and reach the next generator next to the water tank on the same roof as shown in the second picture below. Change the generator, then turn around and jump down to the lower level of the roof to reach the third generator as shown in the third picture below. Once the three generators are charged, the door will be unlocked as shown in the fourth picture below. Go inside to get the Prowler Stash.
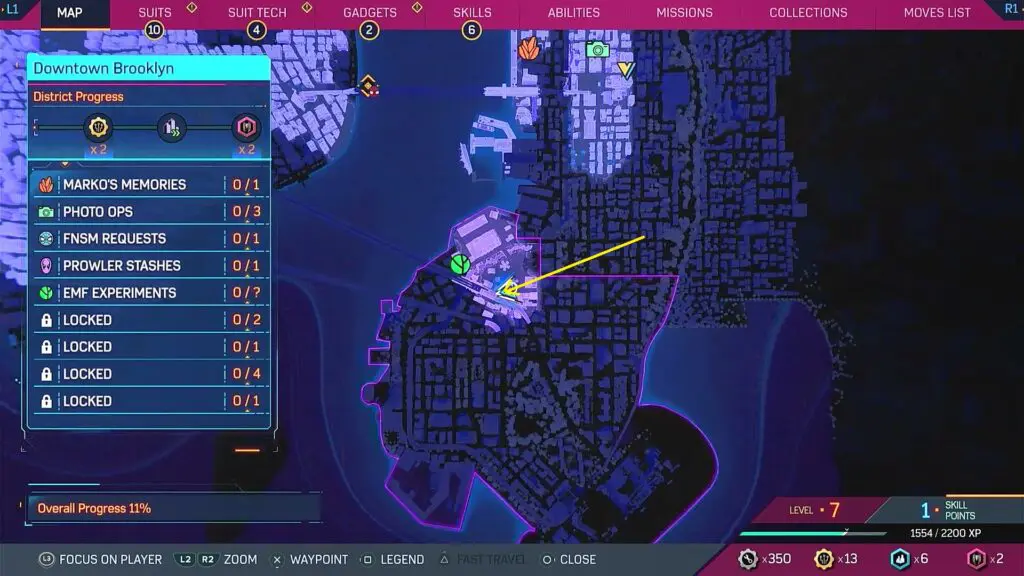
Prowler Stash 5: Downtown Brooklyn
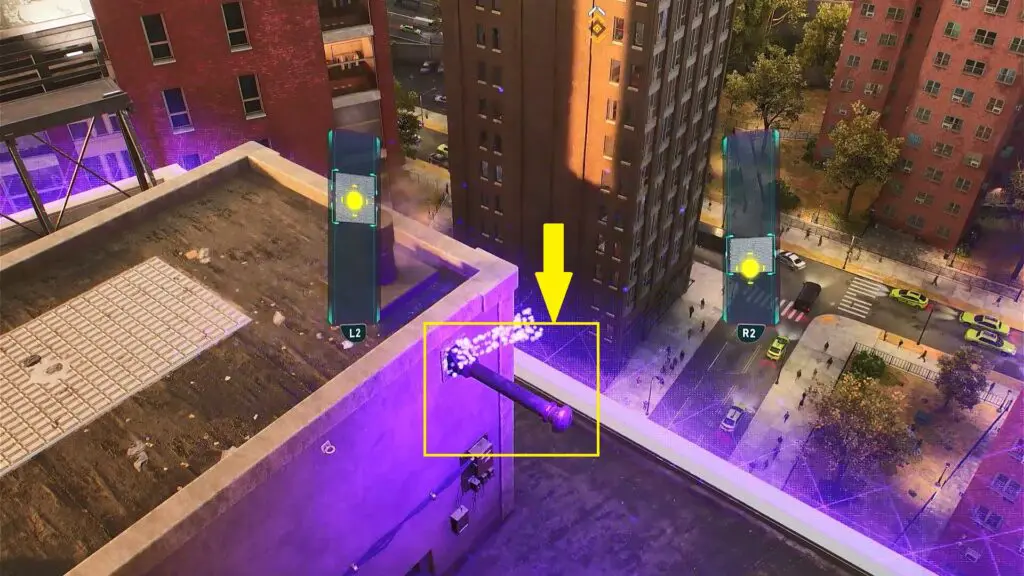
Go to the top of the Building at the location shown in the picture below. Scan the rod on the roof as shown in the second picture below. Then stabilise the code by holding the yellow circles inside the grey boxes. Once it’s done, go to the top roof and pull up the rod by pressing L1+R1. This will open the hatch on the wall behind the rod, revealing another panel.
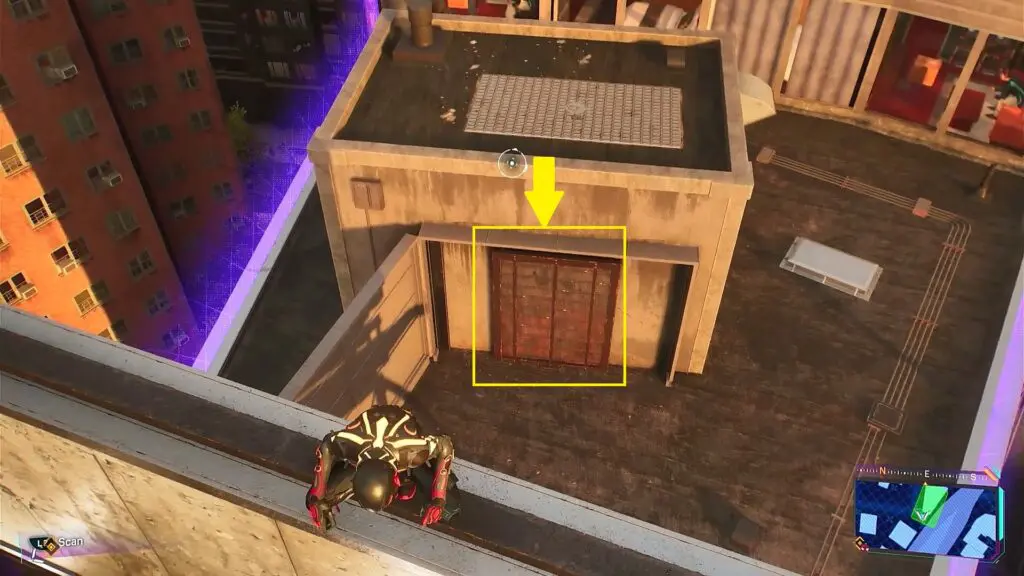
Scan the panel as shown in the picture below. Then stabilise the code by holding the yellow circles inside the grey boxes. Once it’s done, pull the panel to reveal the Prowler Stash.
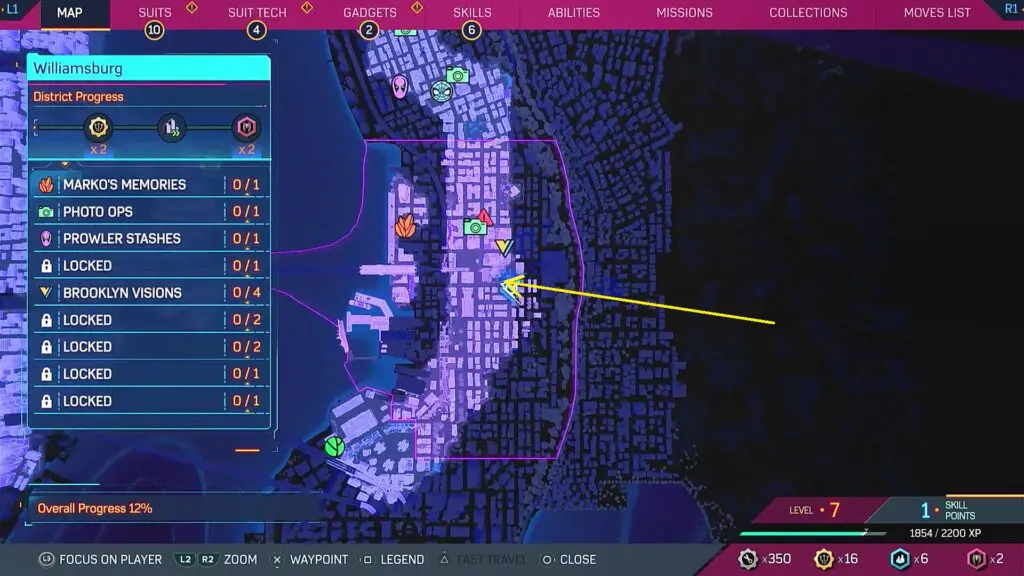
Prowler Stash 6: Williamsburg
Go to the top of the Building at the location shown in the picture below. Scan the panel as shown in the second picture below. Then stabilise the code by holding the yellow circles inside the grey boxes. Once it’s done, pull the panel to reveal a round lever.
Press L1+R1 to rotate the round lever. This will open another panel on the left side. Quickly shoot the web on the round lever to hold it in its place, otherwise, it will rotate back and the panel will close again. The other panel opened up by rotating the lever, contains another round lever behind it as shown in the second picture below. Rotate this lever by pressing L1+R1 and shoot webs at it to hold it in its place. This will open the small panel between these two levers, revealing the Prowler Stash.
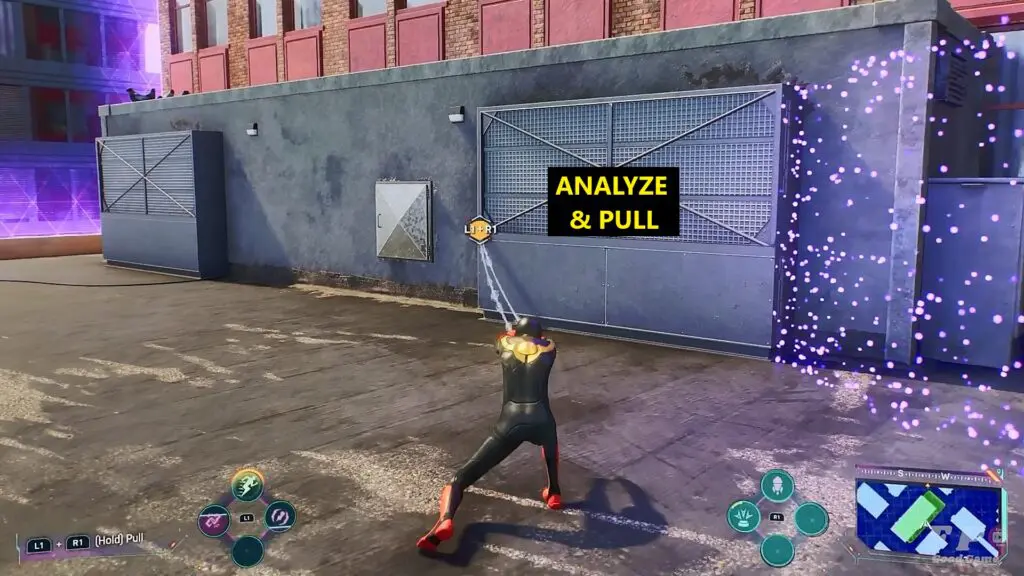
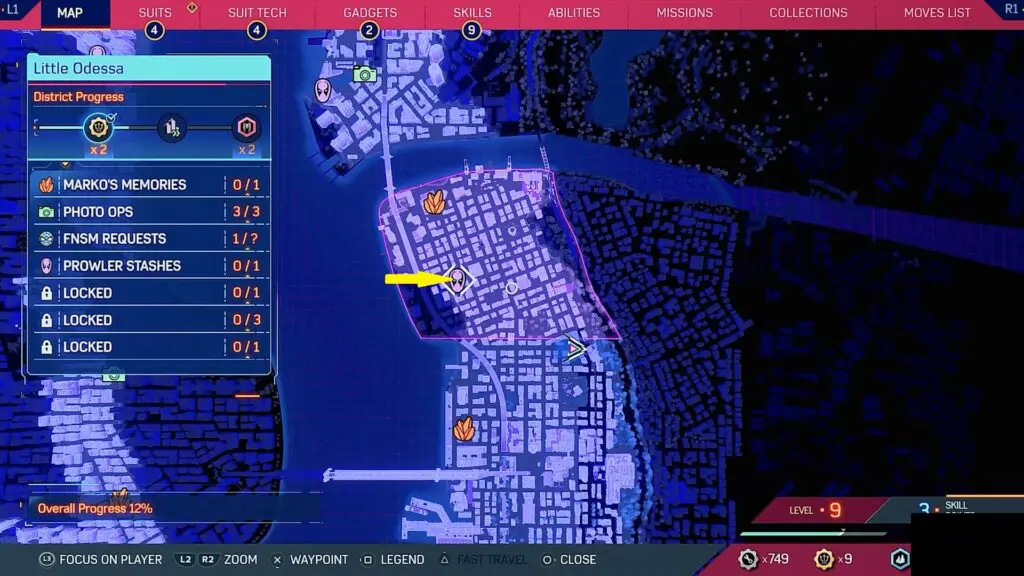
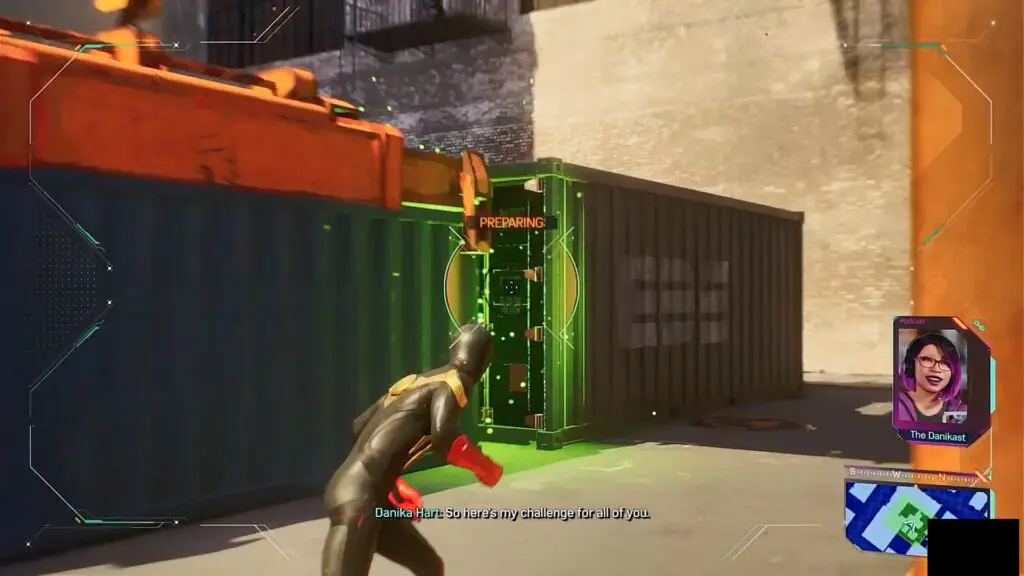
Prowler Stash 7: Little Odessa
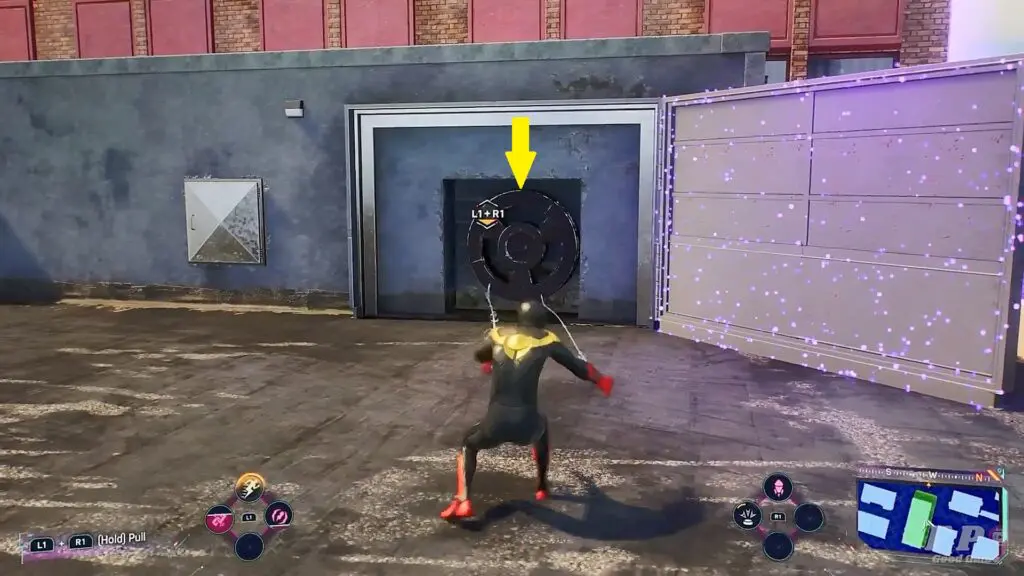
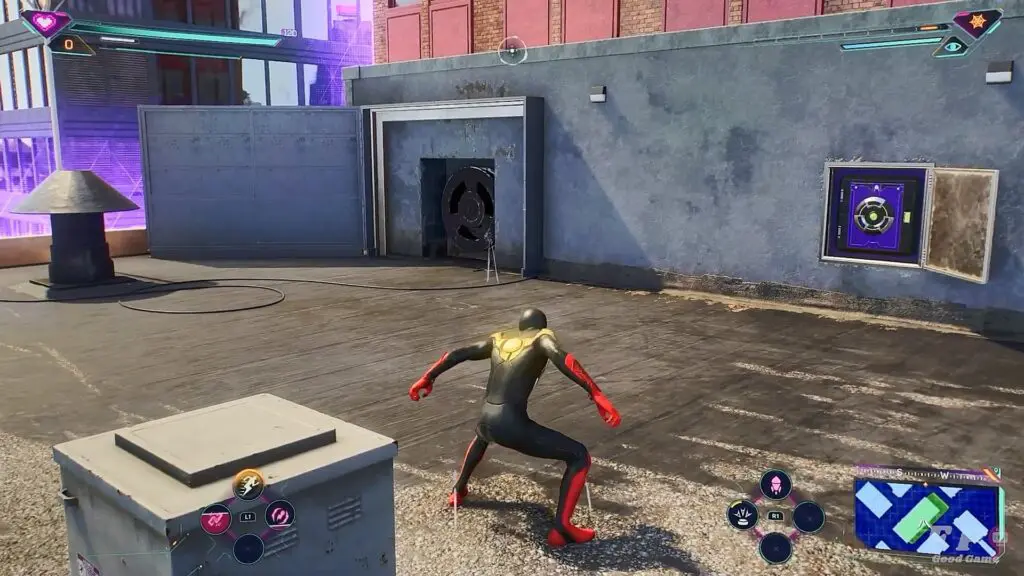
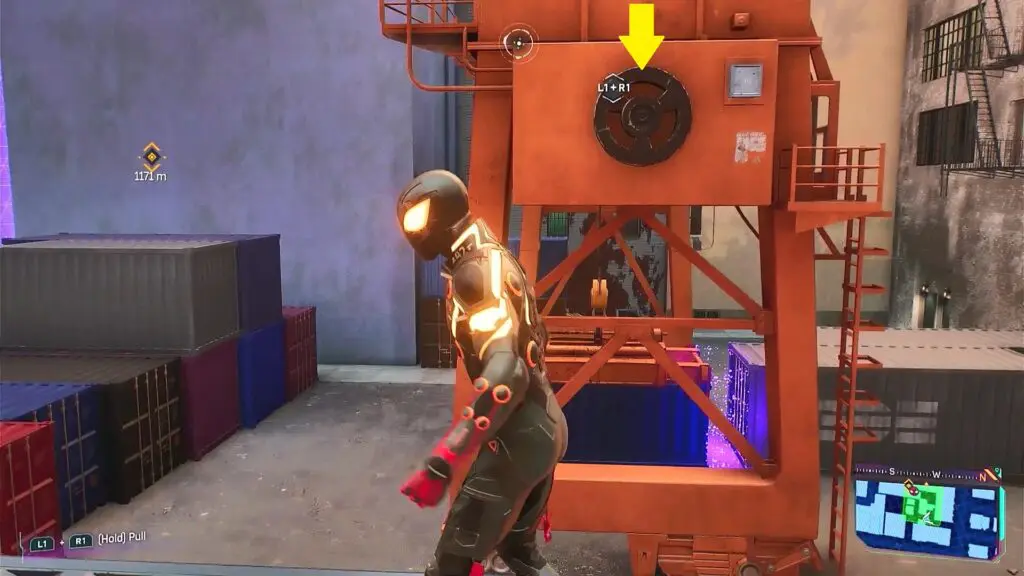
Go to the location shown in the picture below and scan the container door as shown in the second picture below. Then climb up the containers on the side and rotate the round lever by pressing L1+R1 as shown in the third picture below. This will lift up the container in front of the container that you scanned before. Now go back and open the container door that you scanned. Go inside to find the Prowler Stash.
Prowler Stash 8: Downtown Queens
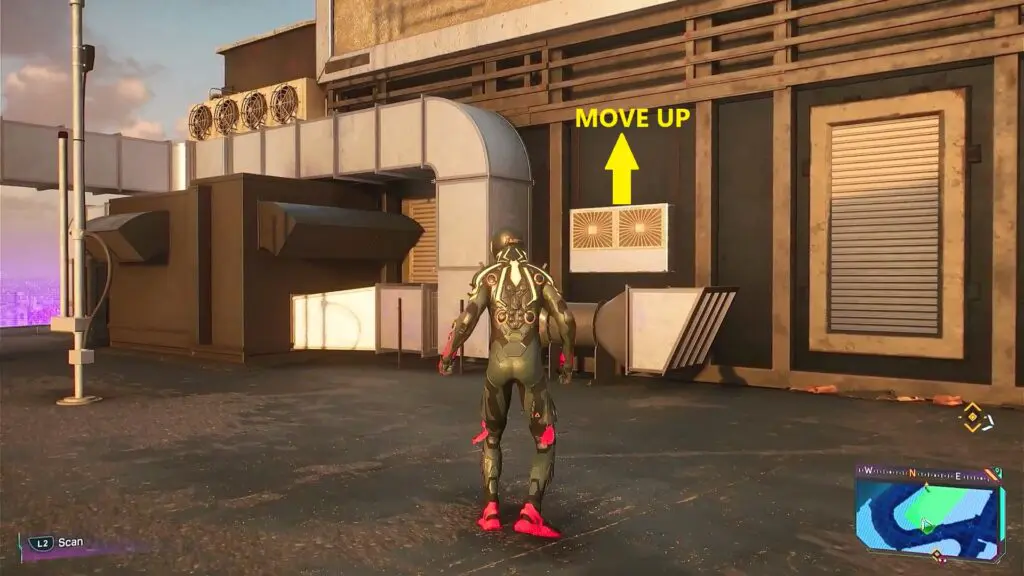
Go to the roof of the Building as shown in the picture below. Scan the panel there as shown in the second picture below and then stabilise the code by holding the yellow circles inside the grey boxes. Now climb up the antenna and press L1+R1 to pull up the panel, revealing a vent.

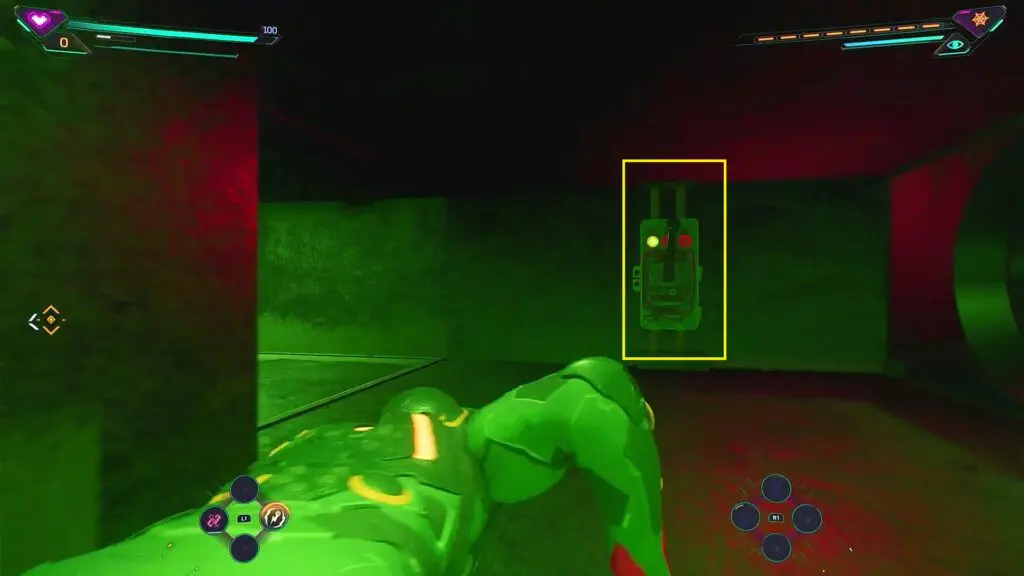
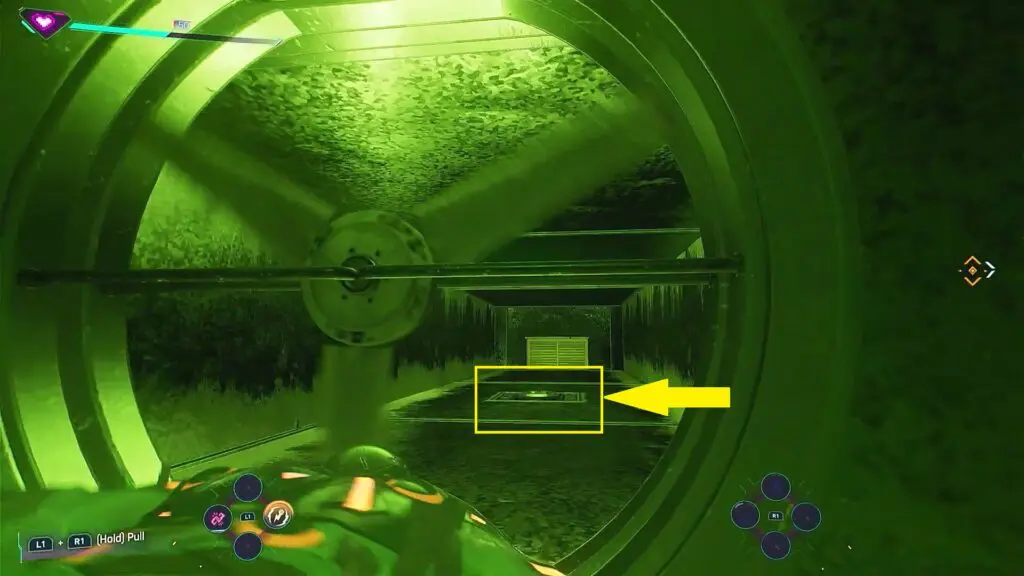
Go inside the vent. The path on the left will be blocked by lasers. Take the path going right. Crawl through the vent safely avoiding the lasers. When you approach a fan, use spiderweb to hold it and go across. Soon you will reach a lever as shown in the picture below. Pull down the lever. This will clear the lasers blocking the path on the left side of the vent entrance.
Go back to the vent entrance and this time take the path on the left side. Crawl through the vent safely avoiding the lasers. Finally, you will reach the Prowler Stash at the end of the vent as shown in the picture below.
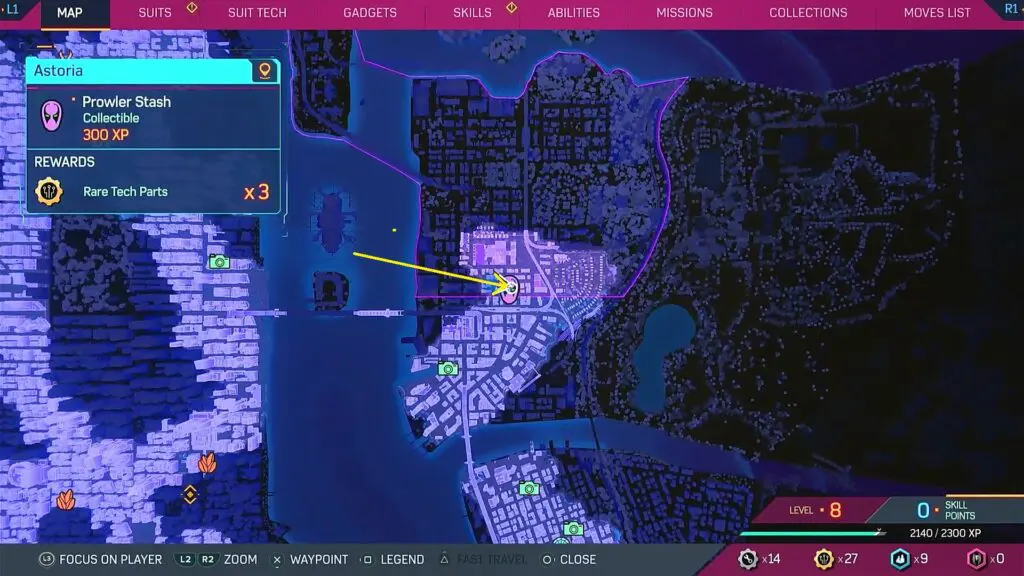
Prowler Stash 9: Astoria
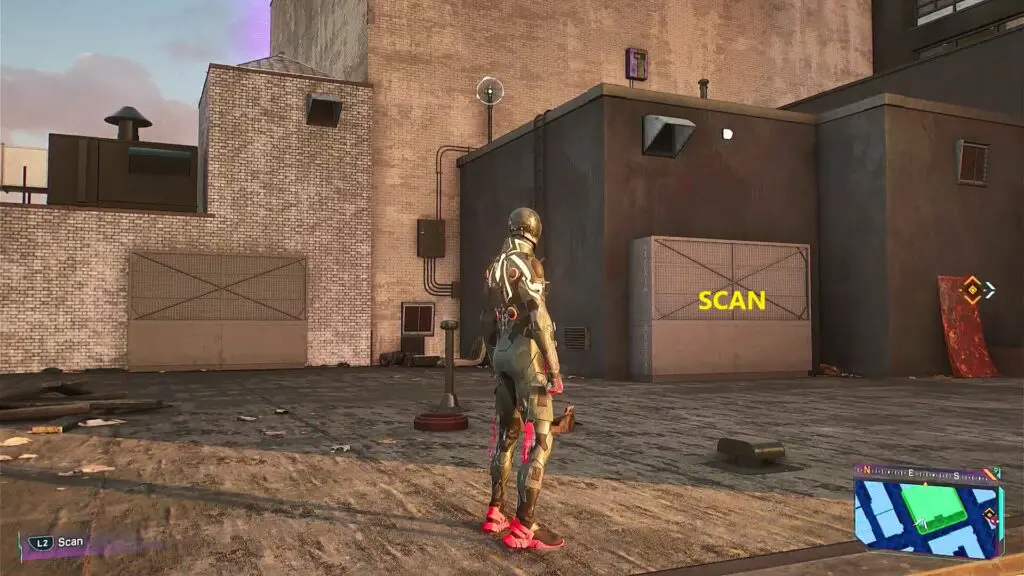
Go to the roof of the Building as shown in the picture below. Scan the panel there as shown in the second picture below and then stabilise the code by holding the yellow circles inside the grey boxes. Now press L1+R1 to open the panel, revealing a locked door.
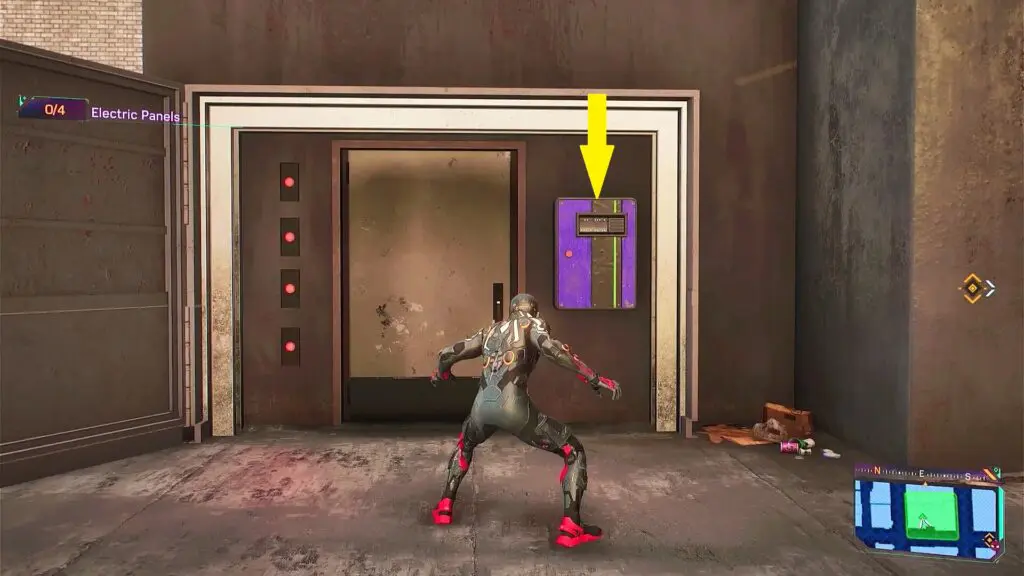
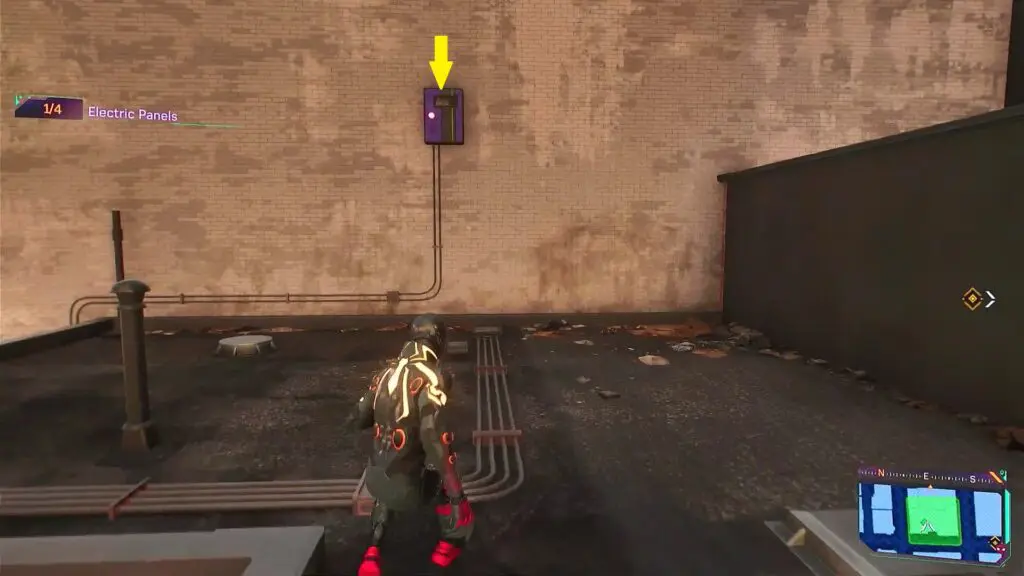
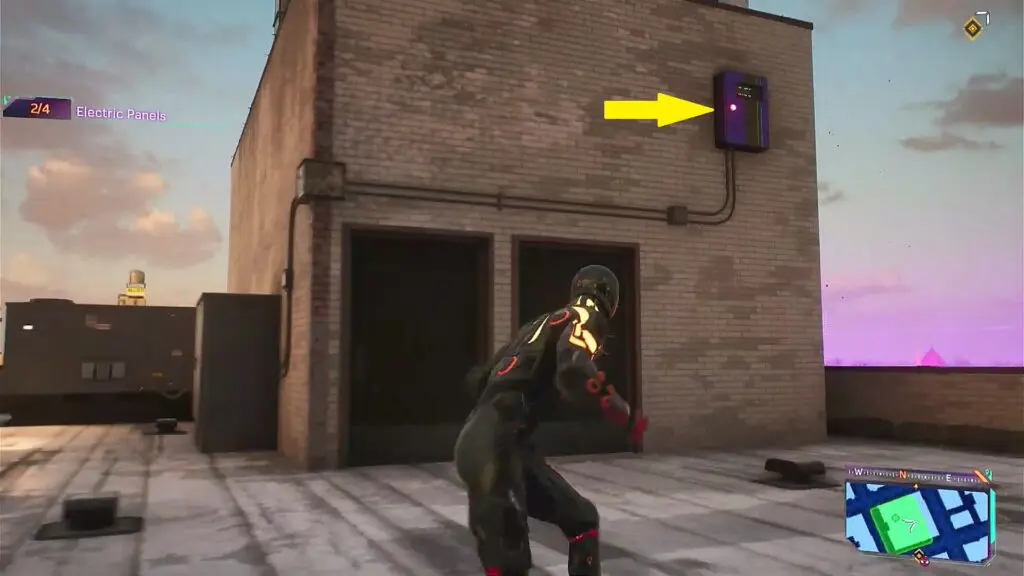
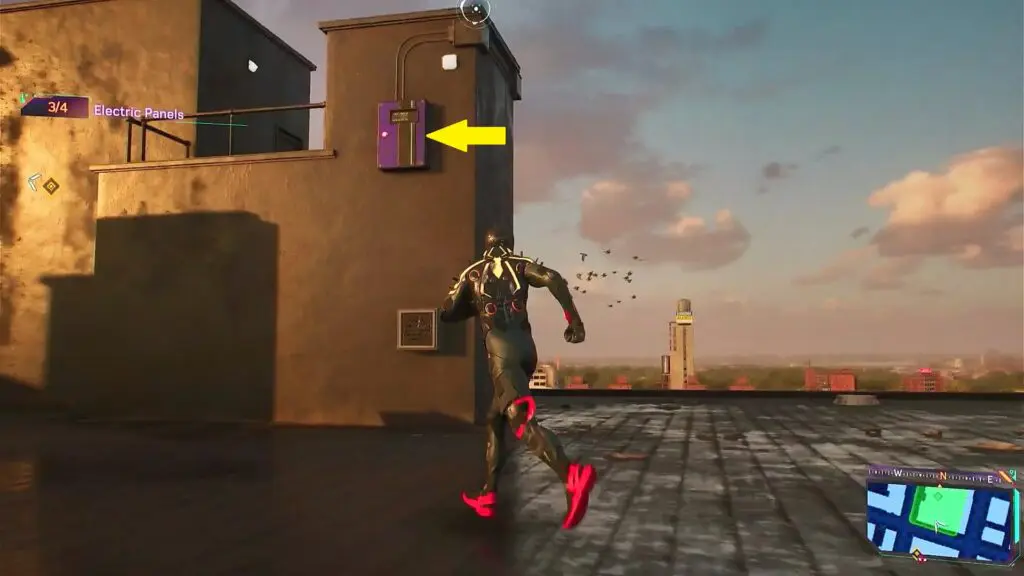
Next to the locked door, you will find an Electric Panel as shown in the picture below. There are a total of 4 Electric panels in the building. You need to overload all four electric panels to unlock the door. Press L1+Square to overload the panel next to the door. Then climb the wall behind the door to find the next panel as shown in the second picture below. Climb up the wall behind this panel to find the next one as shown in the third picture below. Then turn left and climb up the roof to find the final panel as shown in the fourth picture below. Once the four Electric Panels are overloaded, the door will be unlocked. Go inside the door to find the Prowler Stash.
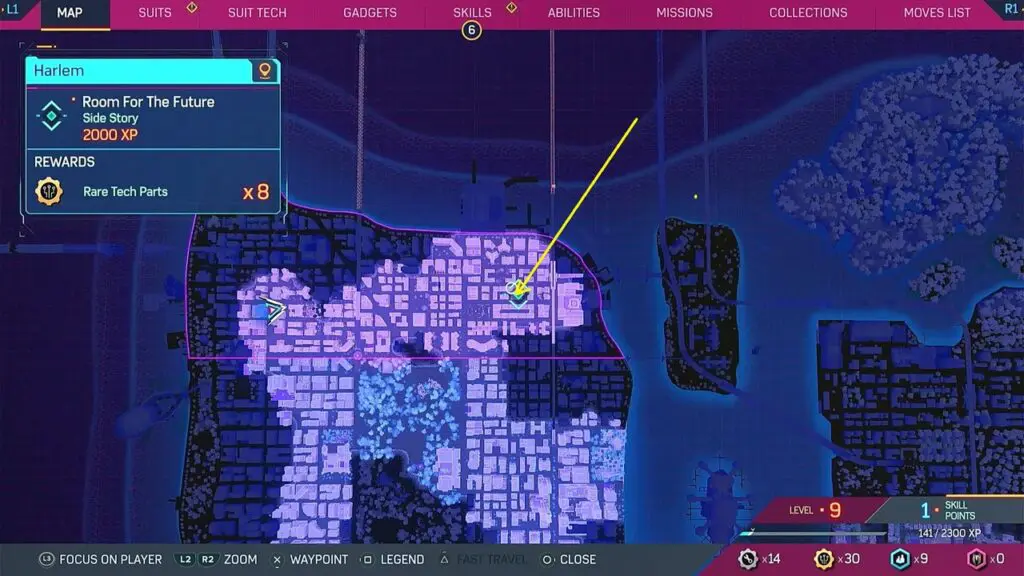
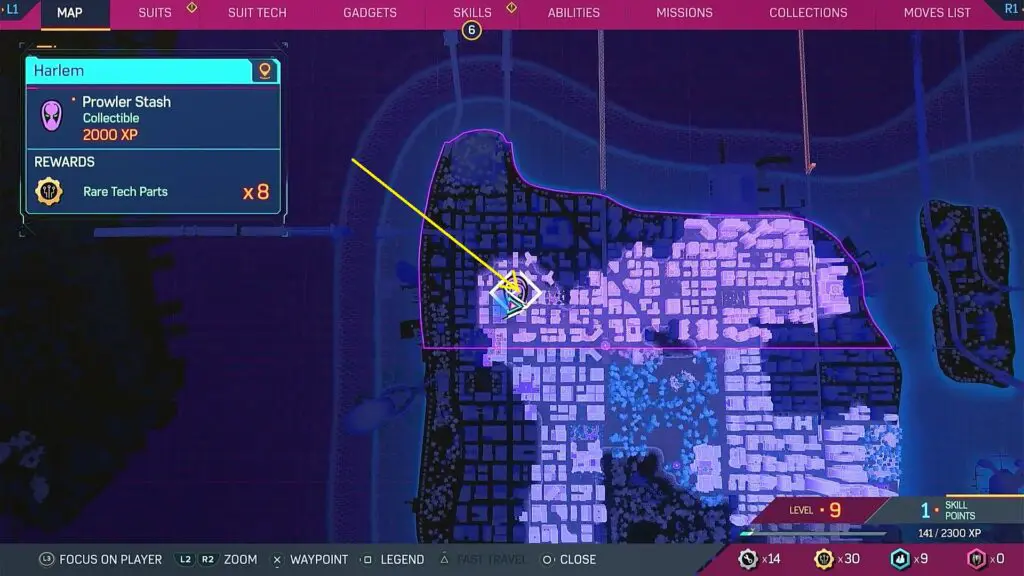
Prowler Stash 10: Harlem
This will be available only after you have collected all the other Prowler Stashes. Go to the top of the Building at the location shown in the picture below. Scan the rod coming out from the wall as shown in the second picture below. Then stabilise the code by holding the yellow circles inside the grey boxes. Once it’s done, pull the rod by pressing L1+R1. This will open the panel on the wall behind the rod, revealing a secret room. Go inside and collect the Floor Plan kept on the table. A waypoint marker will be marked on the map for the Room for the Future mission.
Room for the Future
Go to the marked location and interact will the bag on the roof to enter the apartment. Inside the apartment, look at the picture kept on the kitchen counter. Then interact with the table next to the TV. Then go to the room upstairs to start a cutscene. The Prowler Stash will be complete after the cutscene.