This guide shows the location of all 9 Vista points and how to complete them in Horizon Forbidden West. Vista Points are a type of collectible in the game, for which first you will need to scan a tower to get an incomplete holographic image from the old world. Then you will have to stand at a specific spot and look in a specific direction from where the picture was taken to complete the holographic image, recreating the old world.
Shortcut:
1) The Daunt Vista Point
2) Plainsong Vista Point
3) Scalding Spear Vista Point
4) The Long Coast Vista Point
5) Shrouded Heights Vista Point
6) The Stillsands Vista Point
7) The Memorial Grove Vista Point
8) Dunehollow Vista Point
9) Isle of Spires Vista Point
1) The Daunt Vista Point
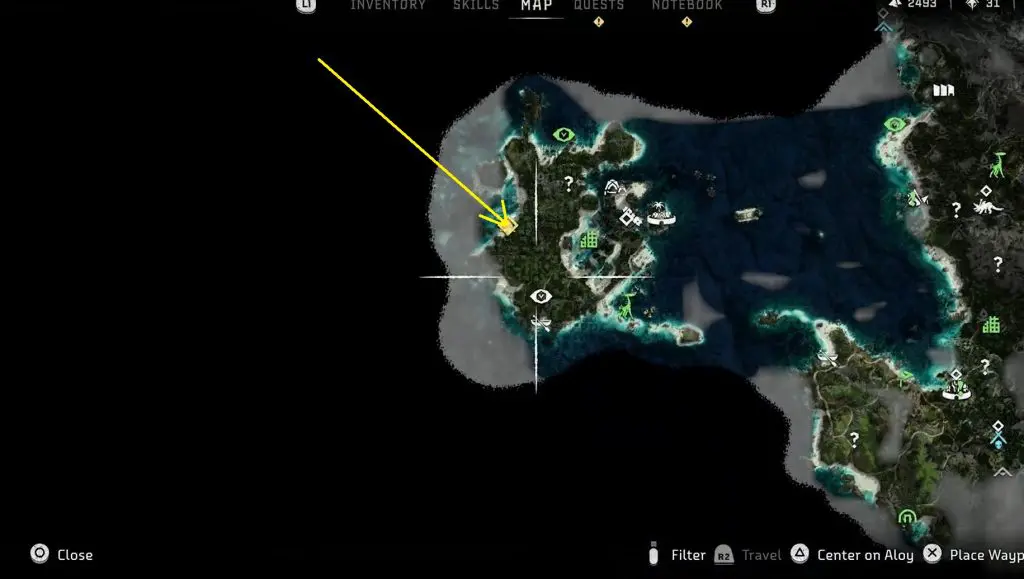
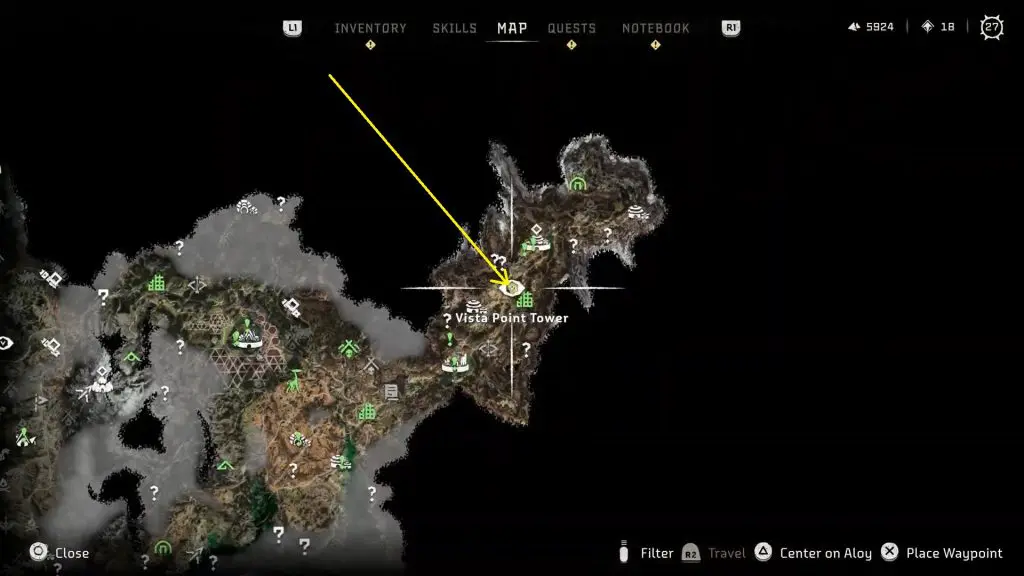
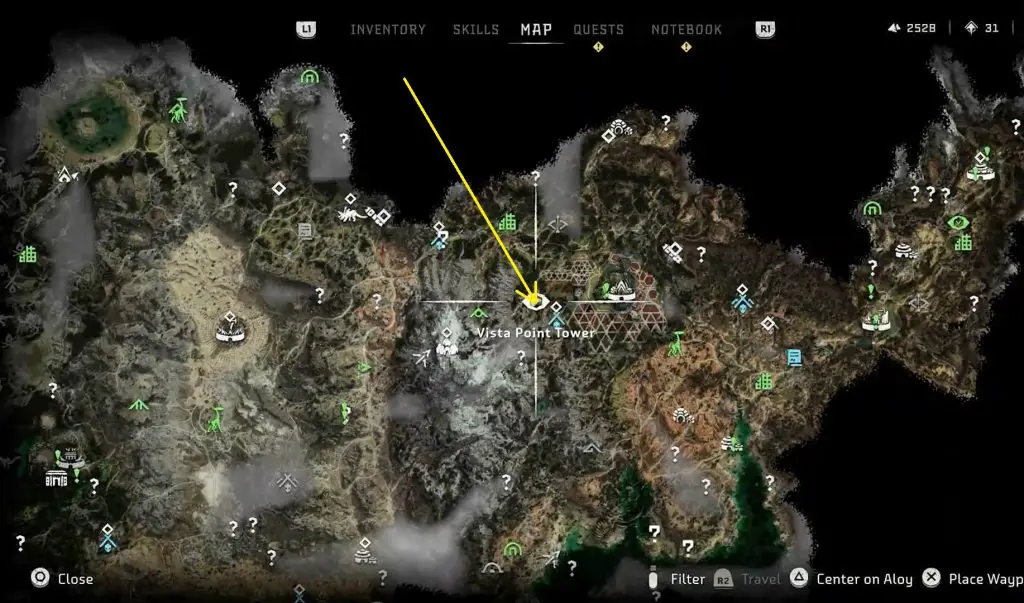
The Daunt Vista Point is at the location marked in the picture below. Go to the highlighted location and scan the tower to get a holographic image. This image from the old world will be of some kind of a building in front of sheer cliffs.
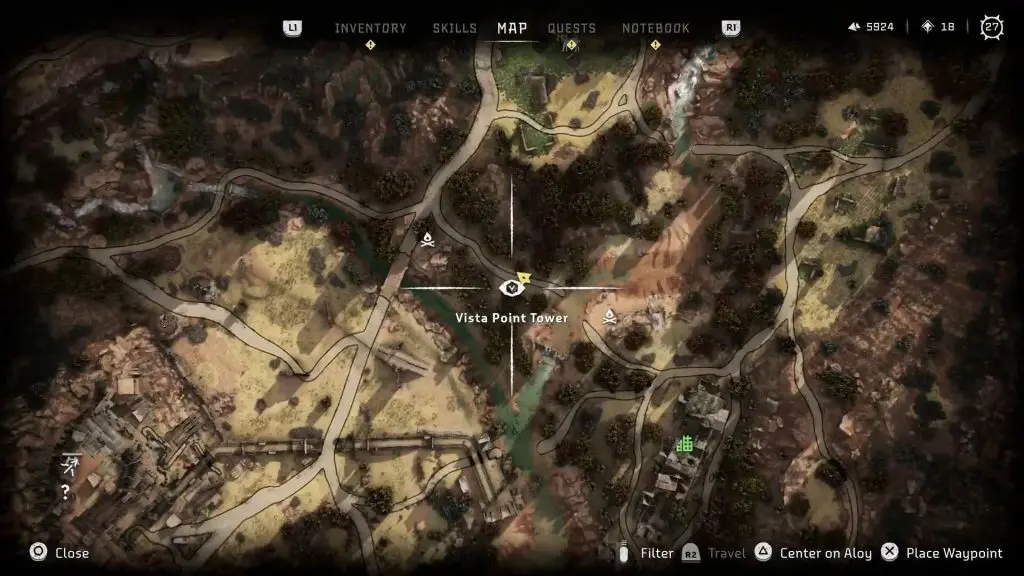
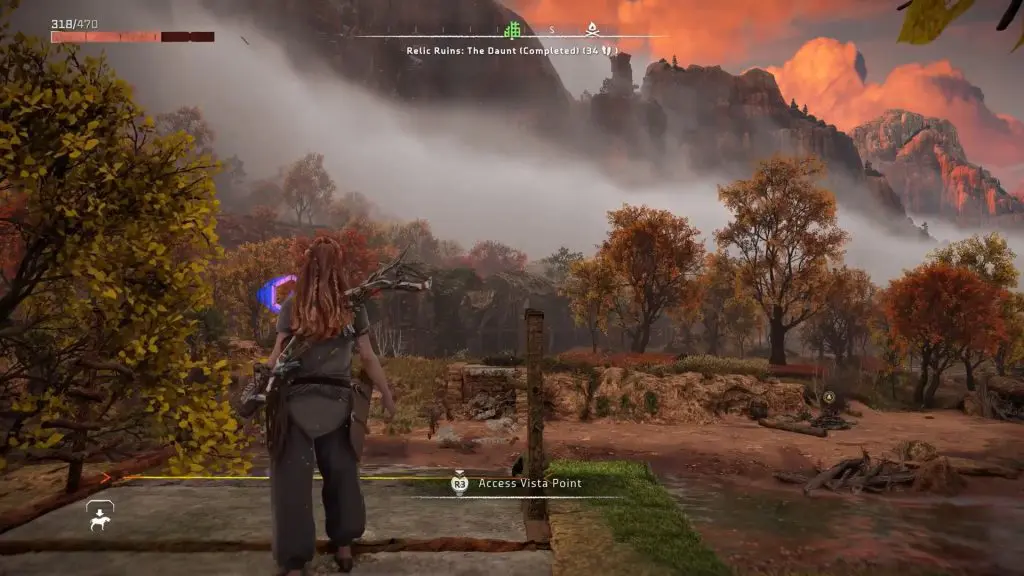
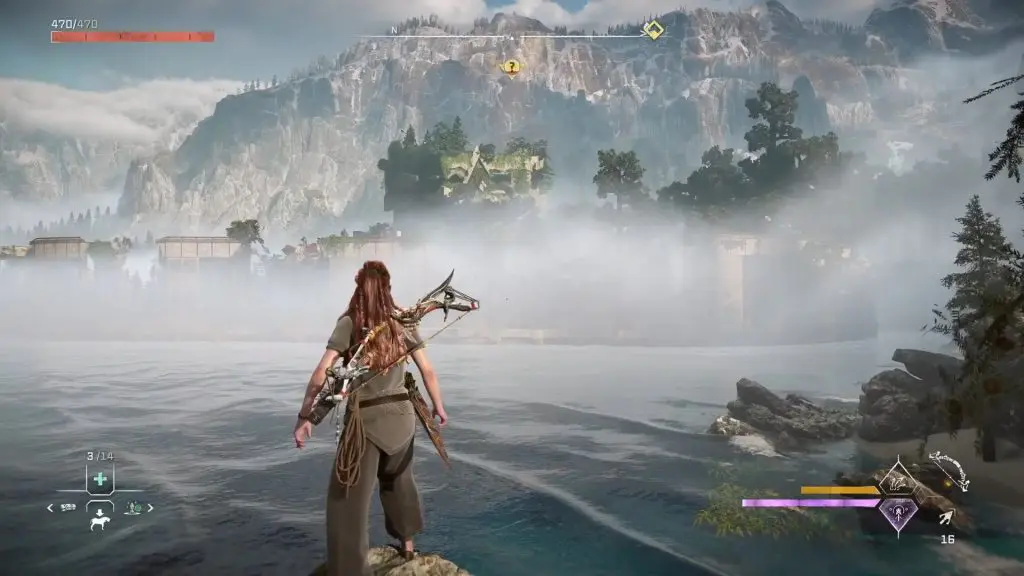
From the vista point tower, go northeast along the river until you reach a broken bridge at the location marked in the picture below.
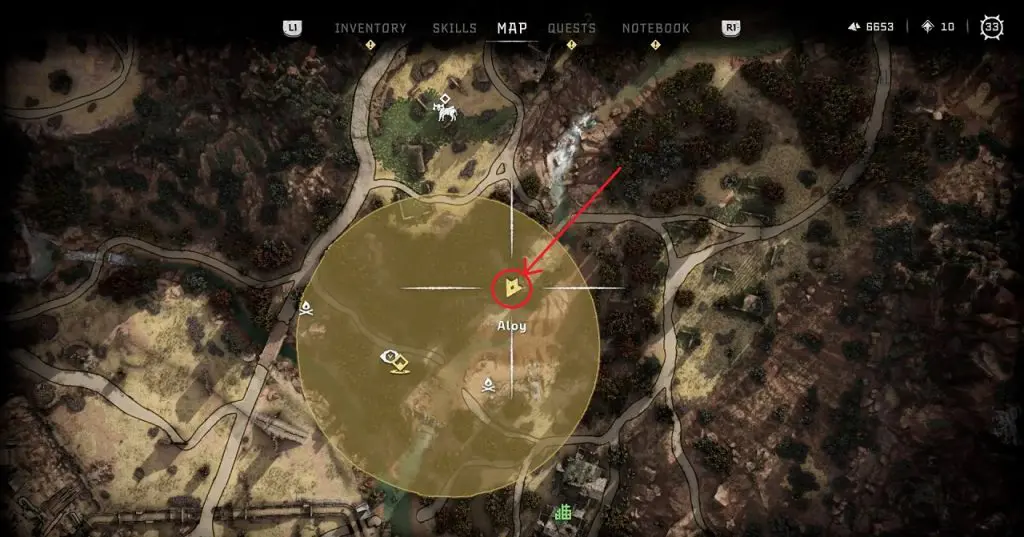
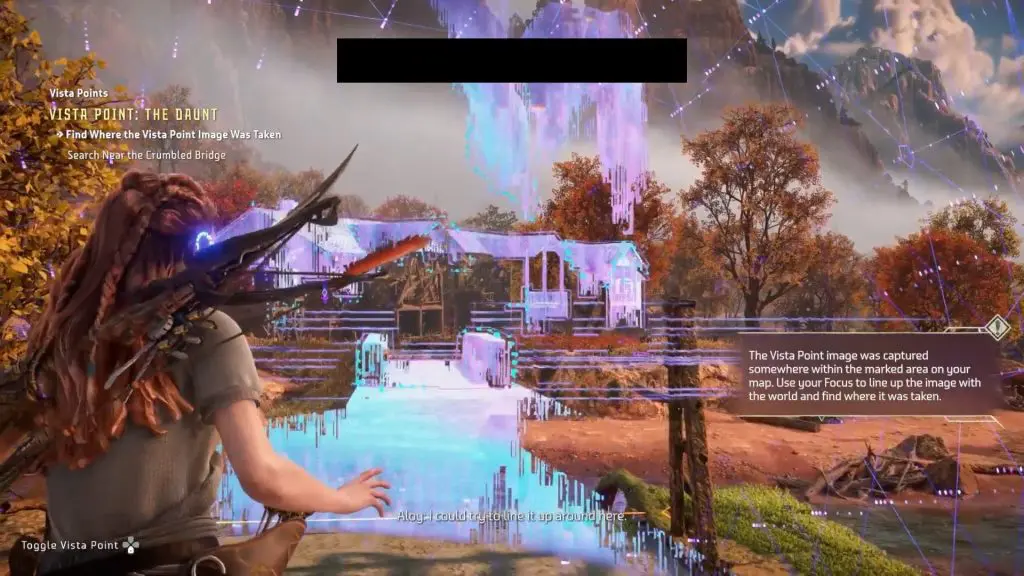
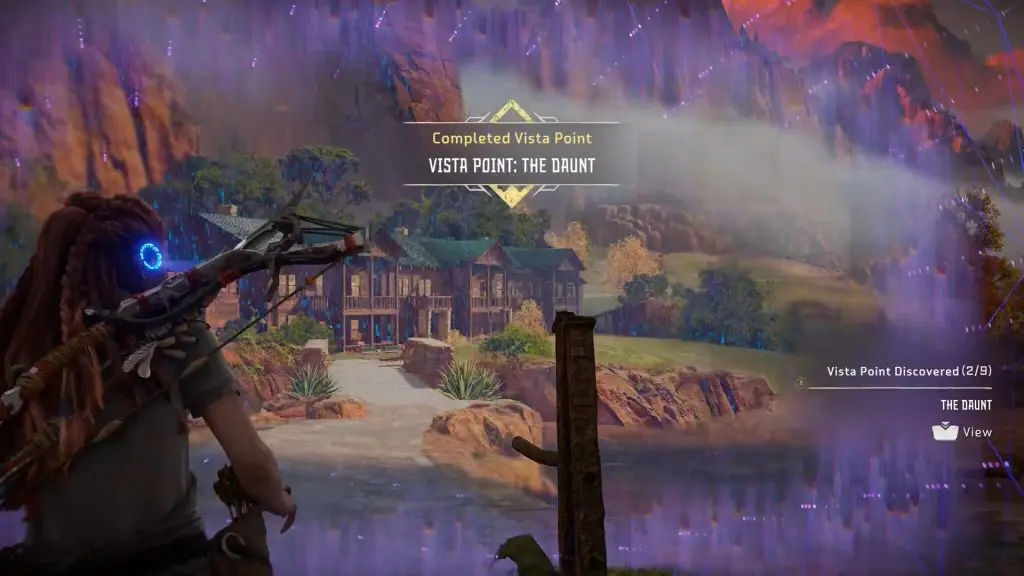
Stand on the edge of the broken bridge spanning a river bed. From there, look over to The Daunt Relic Ruin. Activate focus and superimpose the holographic image on the ruin as shown in the pictures below. An easy way to do this will be by aligning the bridge. When the hologram is properly aligned, the vista point will be complete.
2) Plainsong Vista Point
Plainsong Vista Point is at the location marked in the picture below. Go to the highlighted location and scan the tower to get a holographic image. This image from the old world will be of some kind of metal structures looking like wind turbines and antennas.
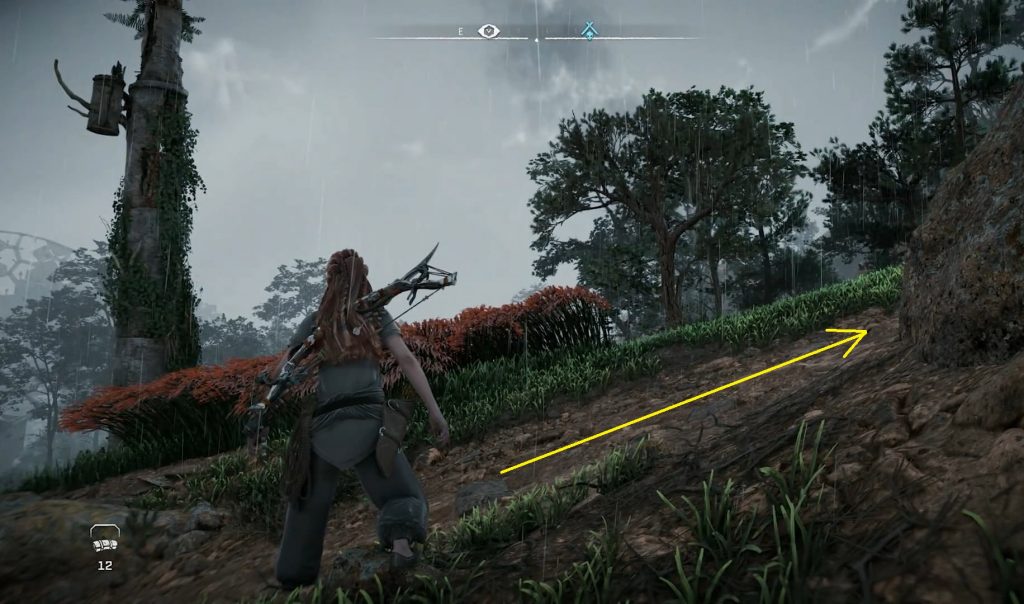
After scanning the tower, take the path going uphill in the southwest direction as shown in the picture below.
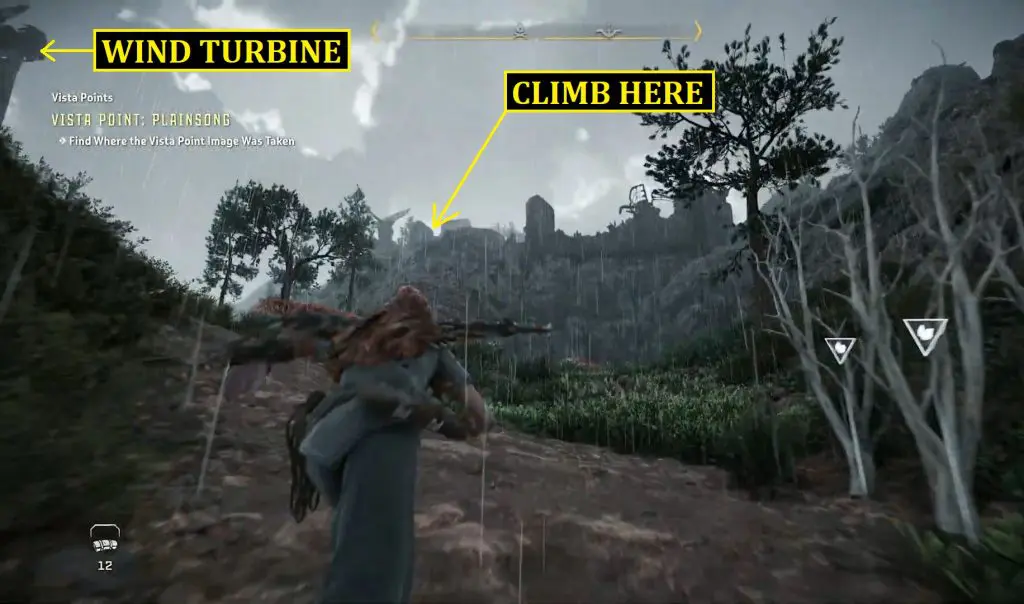
After the first bend in the path, you will reach an area where you can see a wind turbine on the east and a ruined lookout building on the west side of the path as shown in the picture below. Climb up the mountain to reach the ruined building.
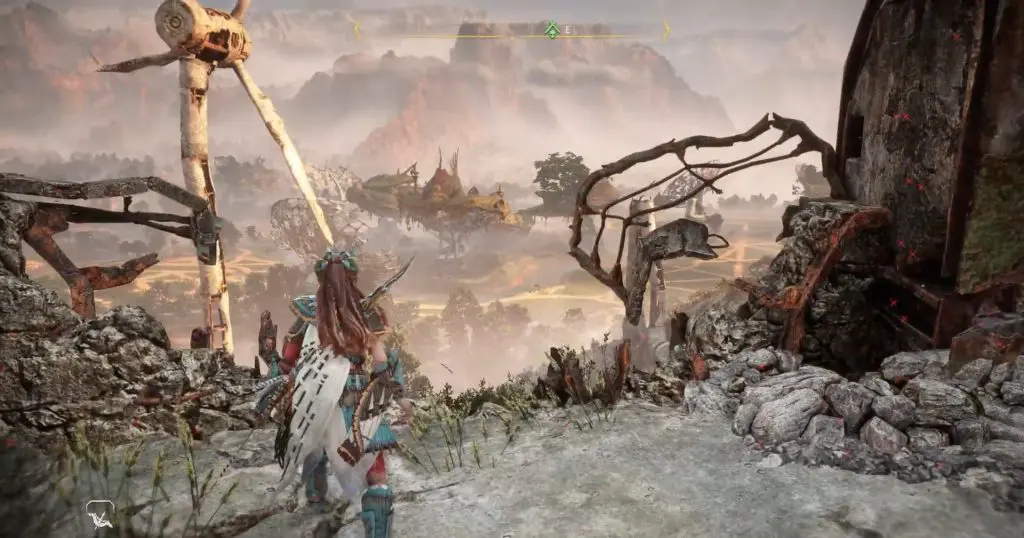
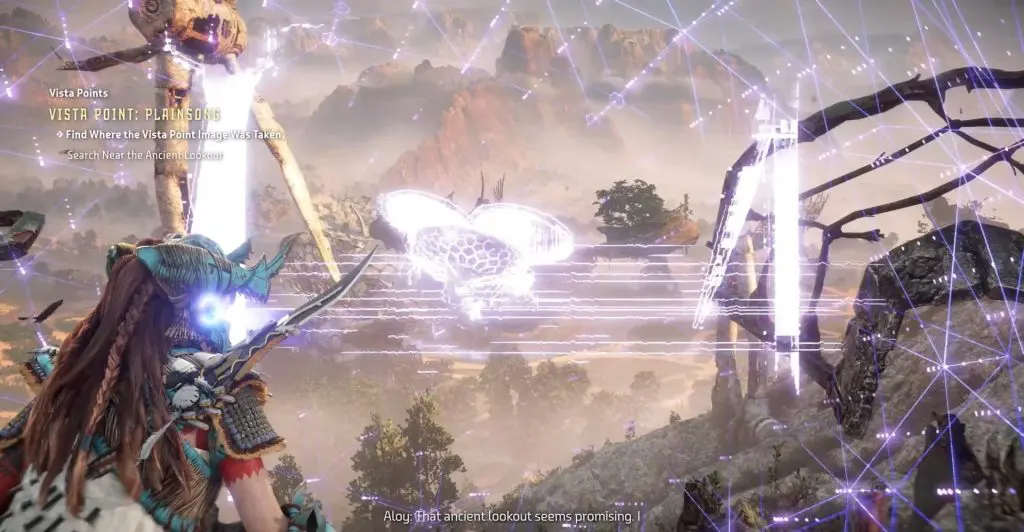
The location of the ruined lookout building is shown in the picture below. Stand on the edge of the mountain and look east. Activate focus and superimpose the holographic image as shown in the pictures below. An easy way to do this will be by superimposing the wind turbine. When the hologram is properly aligned, the vista point will be complete.


3) Scalding Spear Vista Point
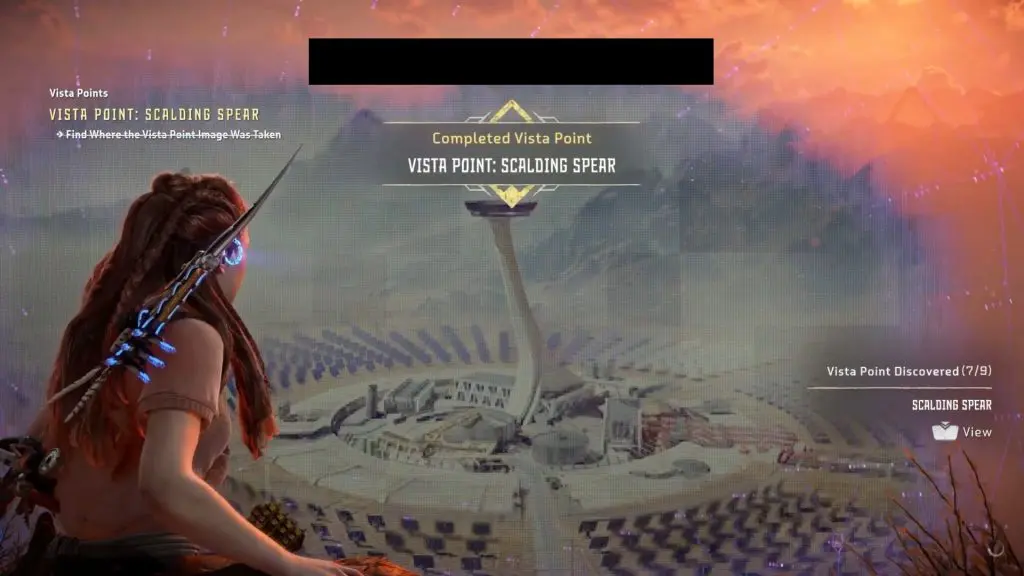
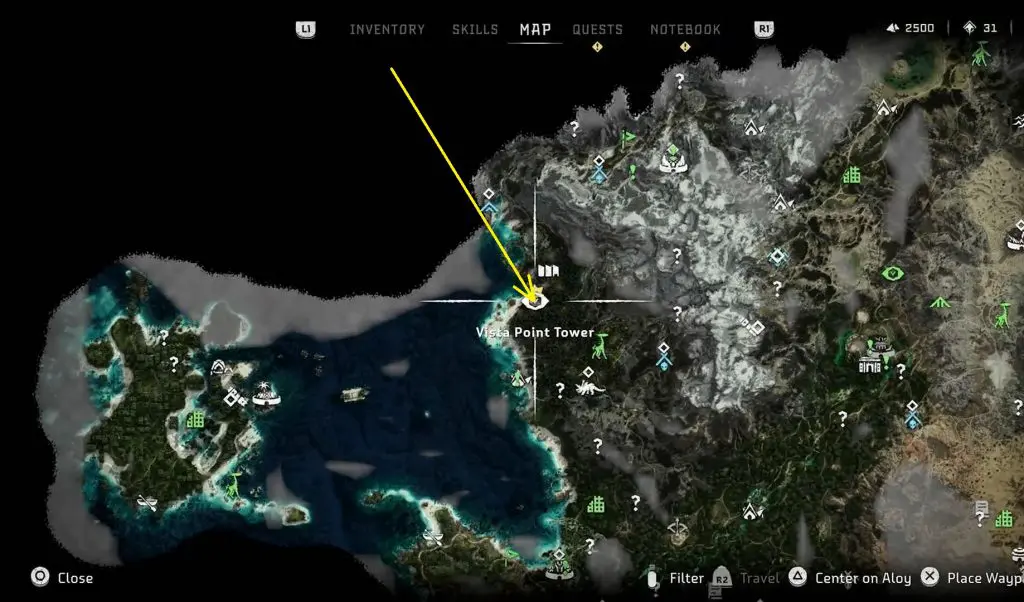
Scalding Spear Vista Point is at the location marked in the picture below. Go to the highlighted location and scan the tower to get a holographic image. This image from the old world is of some kind of tower surrounded by panels in the backdrop of mountains.
From the vista point tower, look towards the west and you will see a platform as shown in the picture below. You need to go on this platform.
Climb up the platform using a wooden log as shown below. Then stand at the edge of the platform. Activate focus and superimpose the holographic image on the ruin as shown in the pictures below. An easy way to do this will be by aligning the tower and mountains. When the hologram is properly aligned, the vista point will be complete.

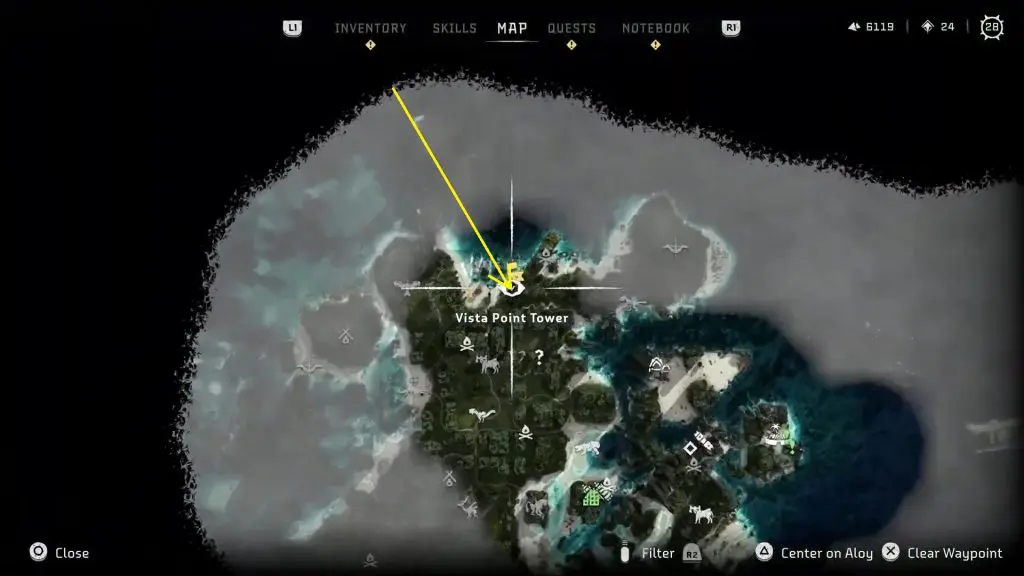
4) The Long Coast Vista Point
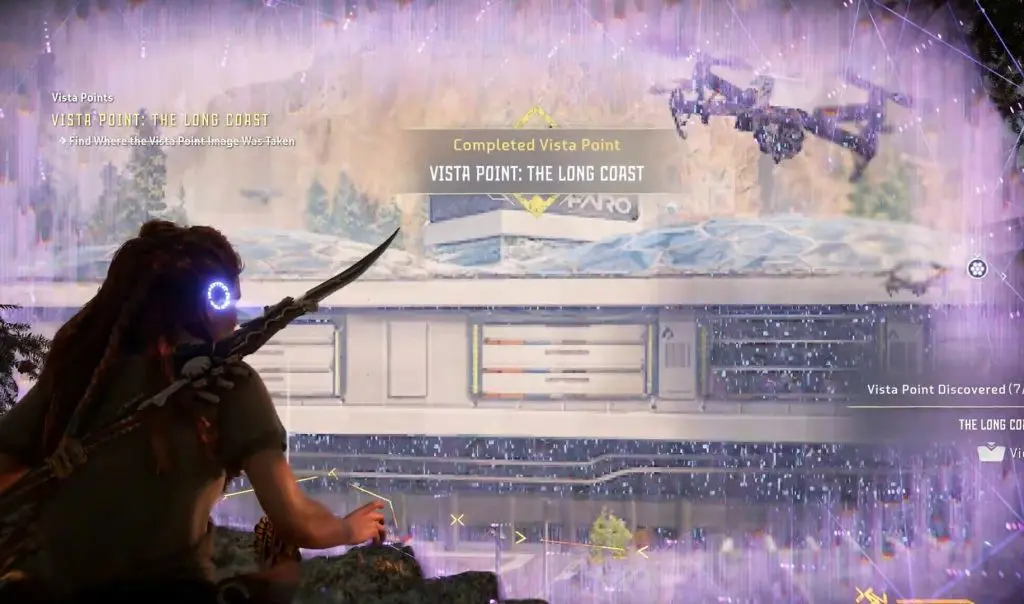
The Long Coast Vista Point is at the location marked in the picture below. Go to the highlighted location and scan the tower to get a holographic image. This image from the old world is of a greenhouse building in front of the cliffs with the Faro logo.
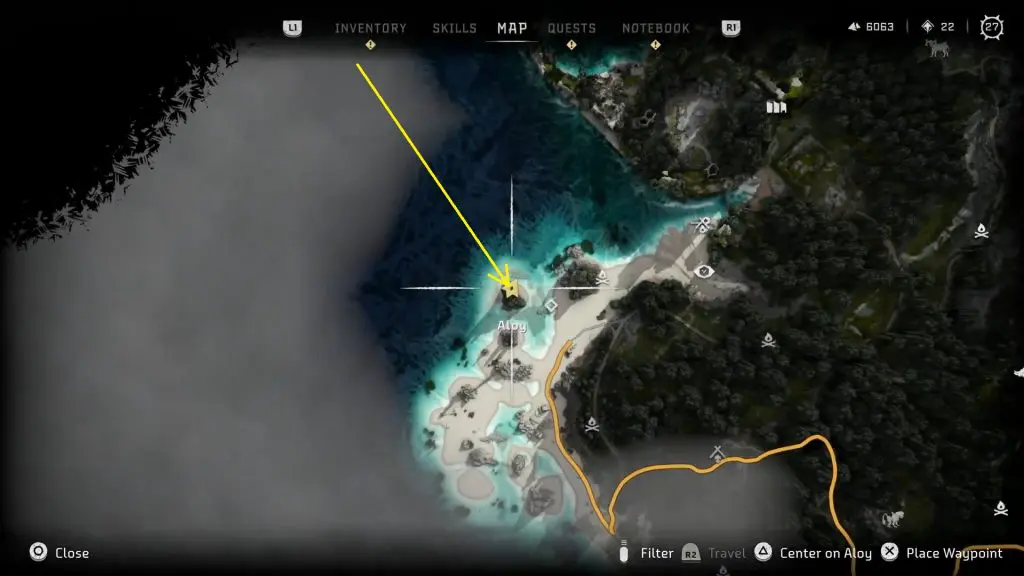
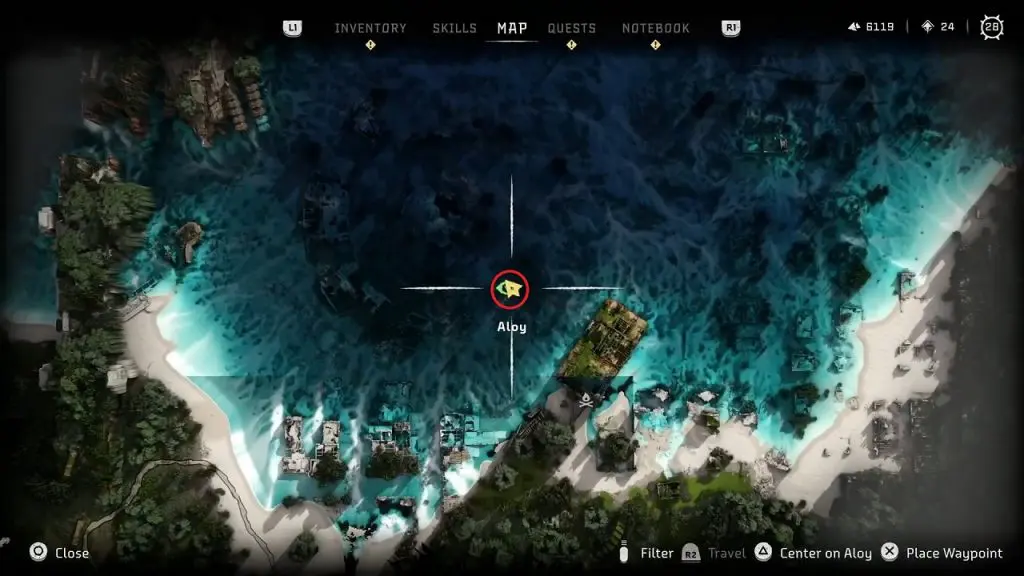
The location you need to go to is a small island on the west side of the vista point tower as shown in the picture below.
Stand on the edge of the island and look north. Activate focus and superimpose the holographic image on the building as shown in the pictures below. An easy way to do this will be by aligning the logo. When the hologram is properly aligned, the vista point will be complete.
5) Shrouded Heights Vista Point
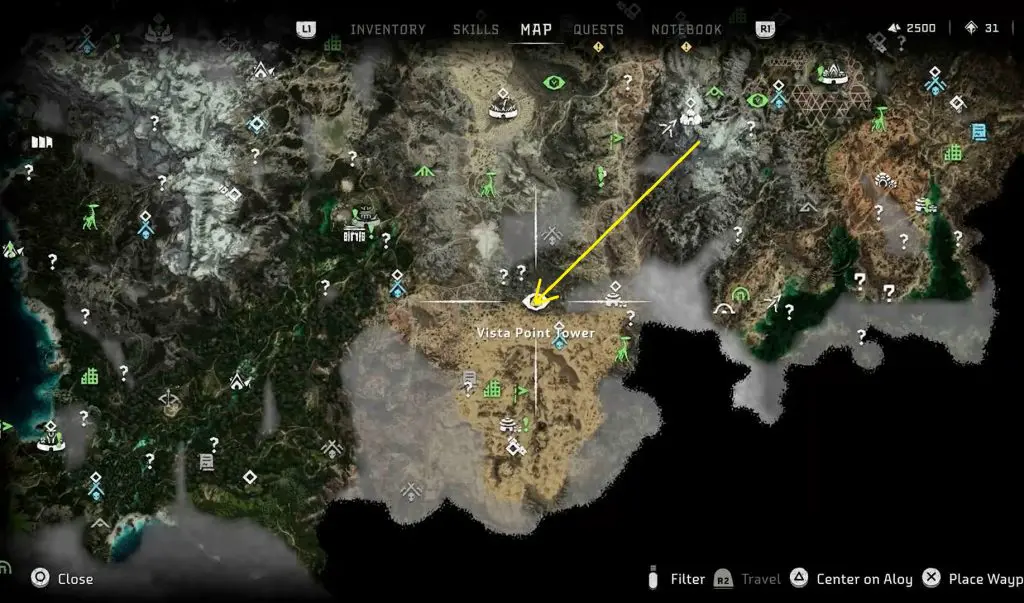
Shrouded Heights Vista Point is on the north coast of San Francisco at the location marked in the picture below. Go to the highlighted location and scan the tower to get a holographic image. This image from the old world is of some kind of underwater structure.
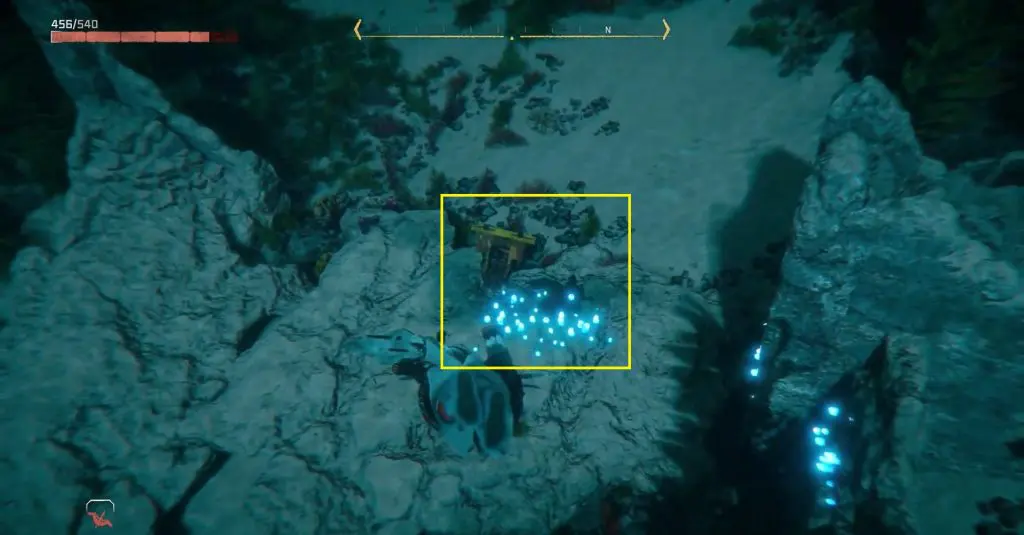
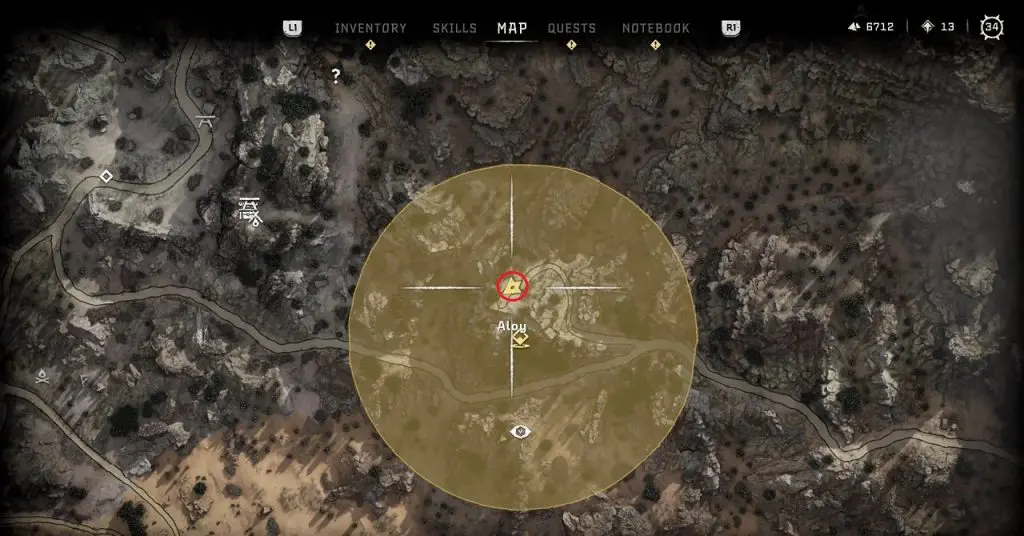
For this vista point, you will need the diving mask, which you will get during “The Sea of Sands” main quest. Dive underwater at the location marked in the picture below.
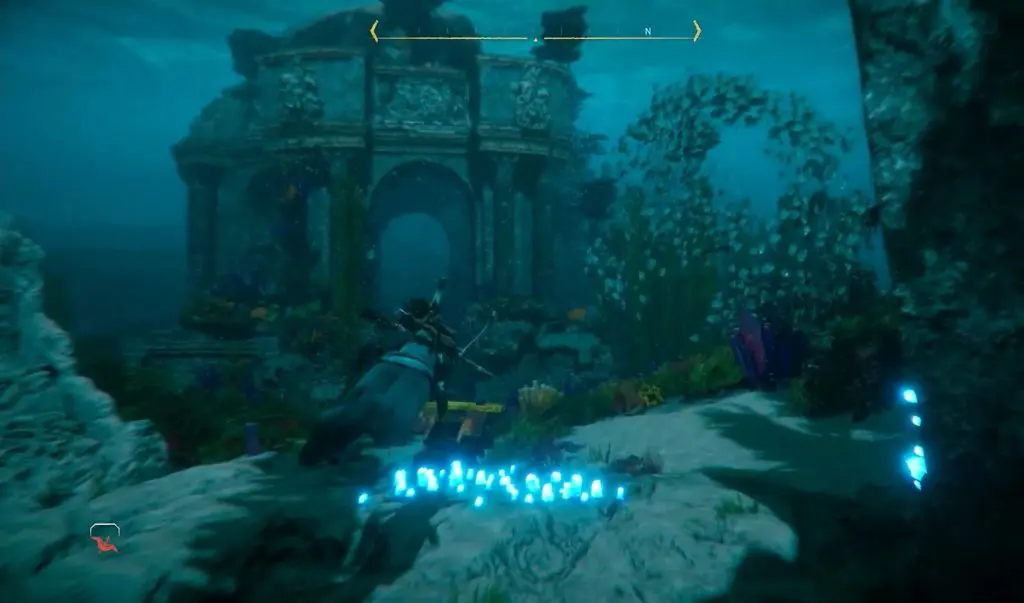
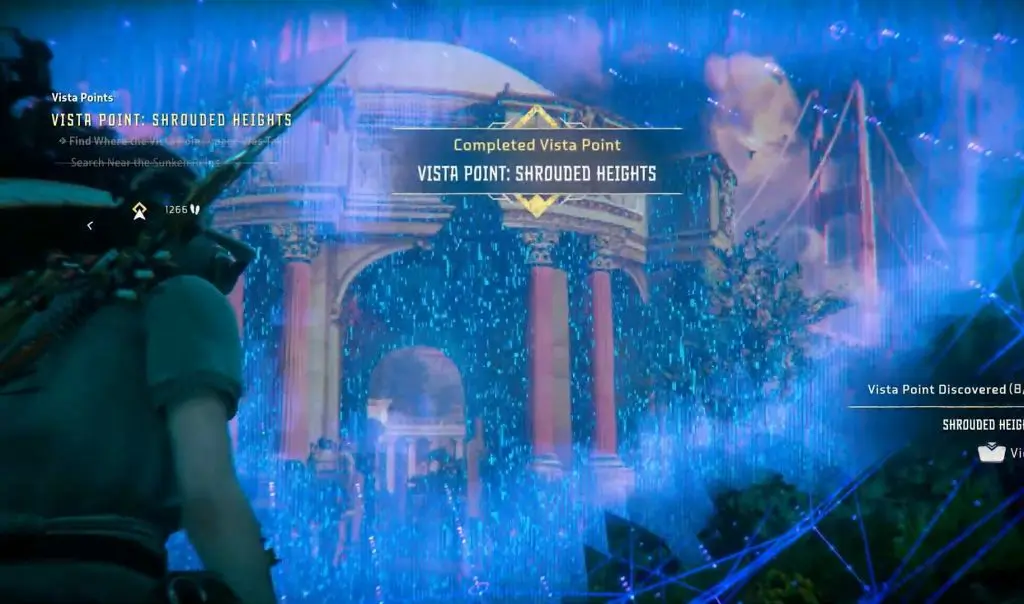
As you dive underwater, you will see a cluster of blue glowing lights as shown below. Near to these lights is a yellow handlebar that helps you boost. Stand next to the yellow handlebar. Activate focus and superimpose the holographic image on the ruin as shown in the pictures below. When the hologram is properly aligned, the vista point will be complete.
6) The Stillsands Vista Point
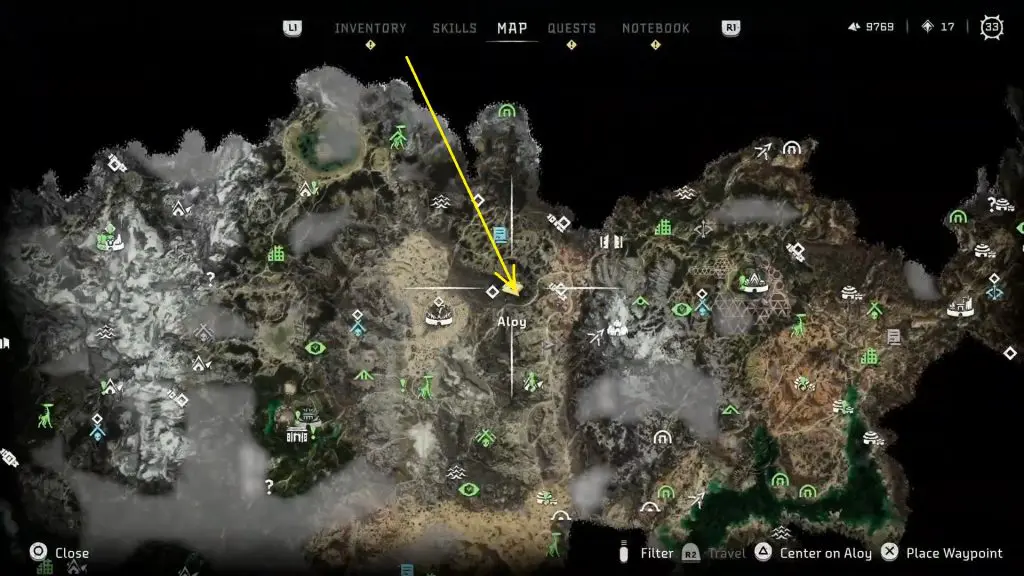
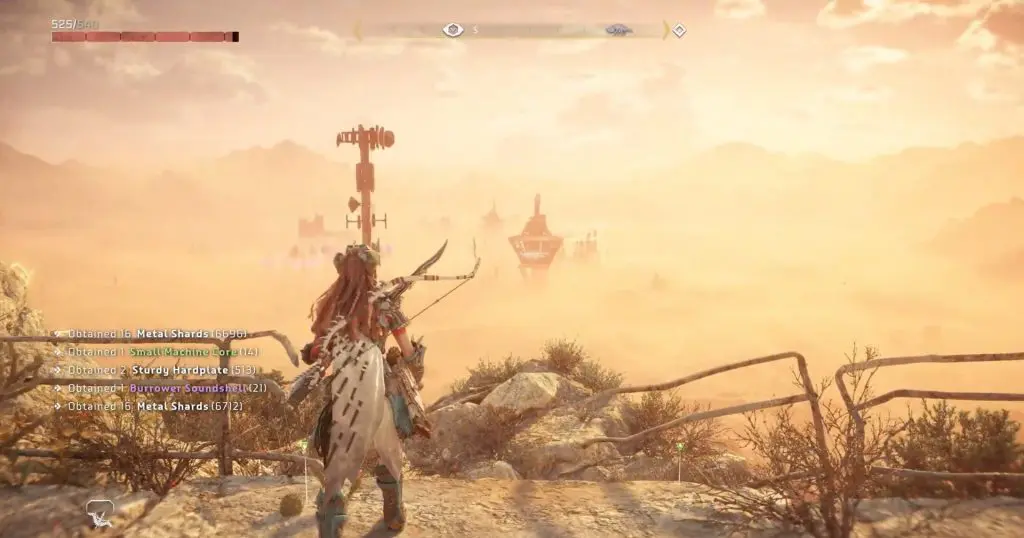
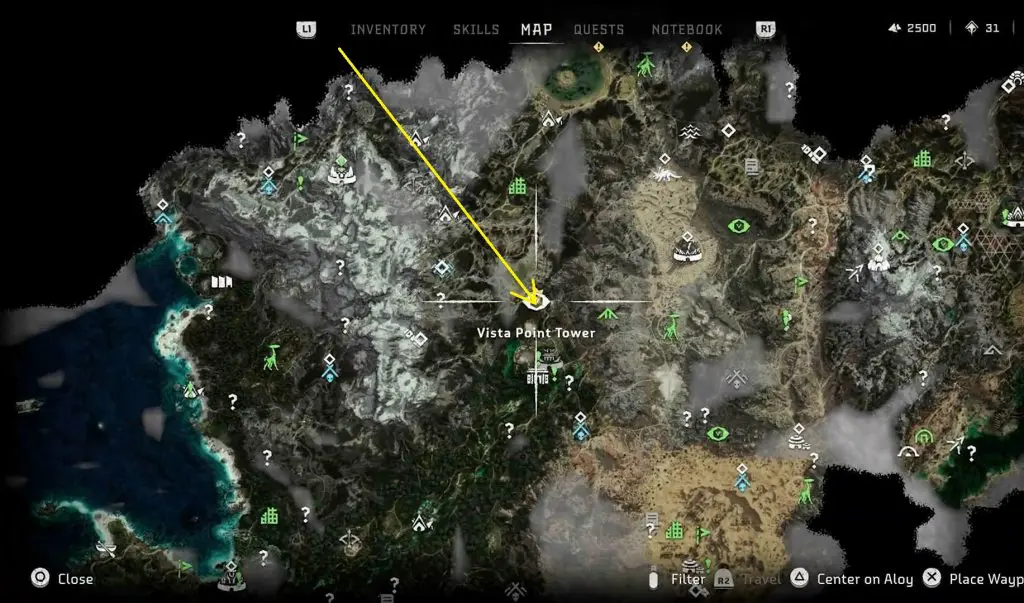
The Stillsands Vista Point is at the northern edge of the deserts at the location marked in the picture below. Go to the highlighted location and scan the tower to get a holographic image. This image from the old world is a part of a city like las Vegas.
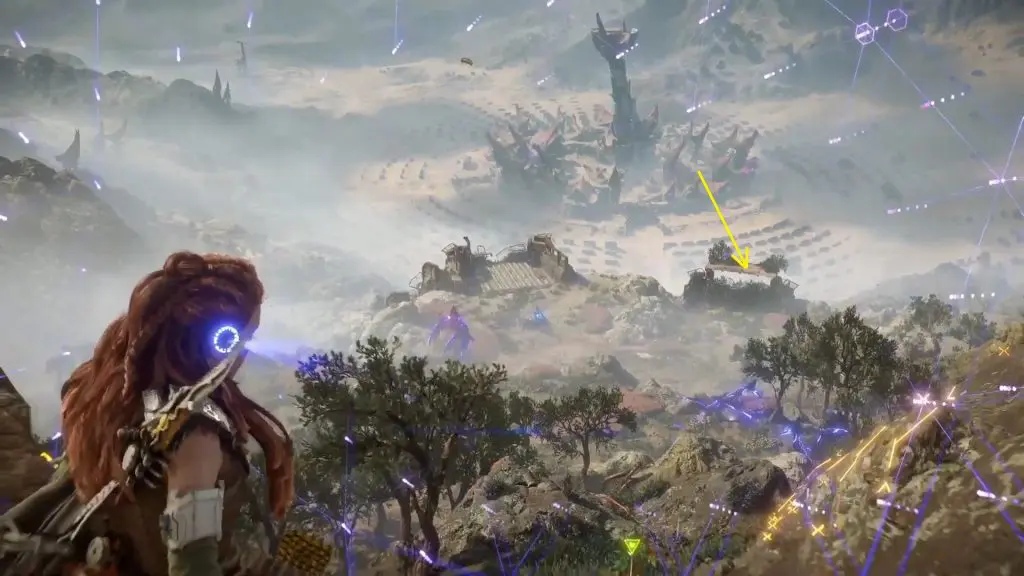
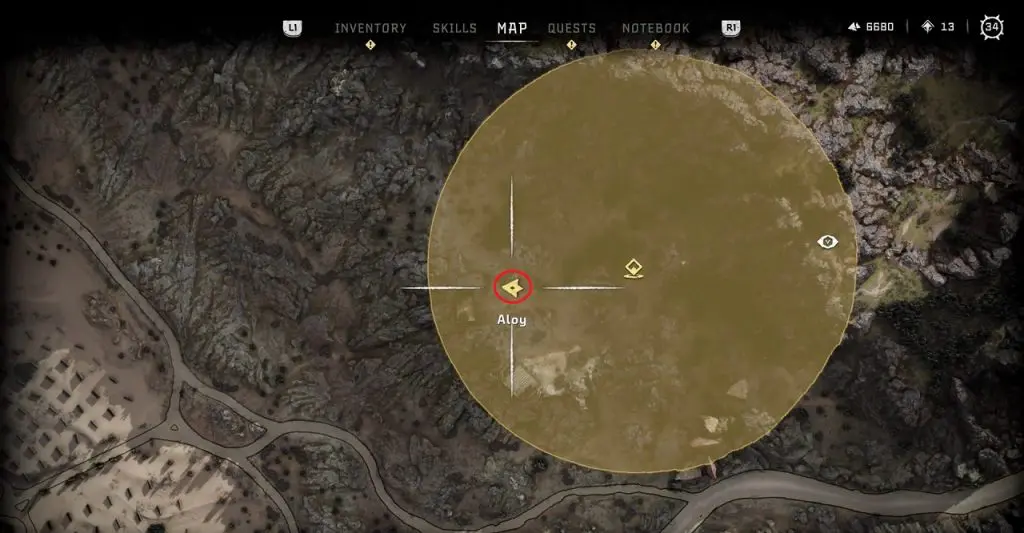
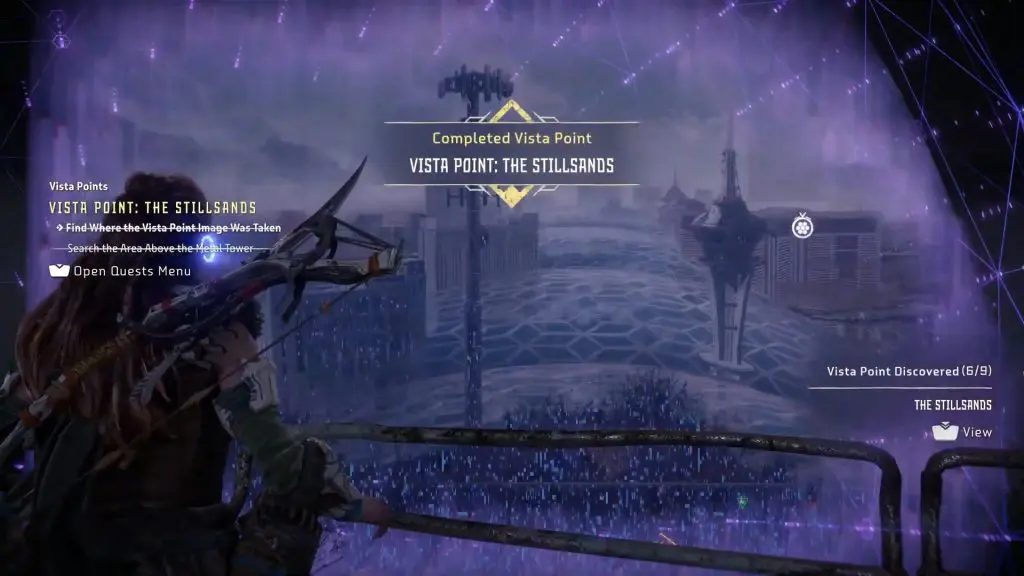
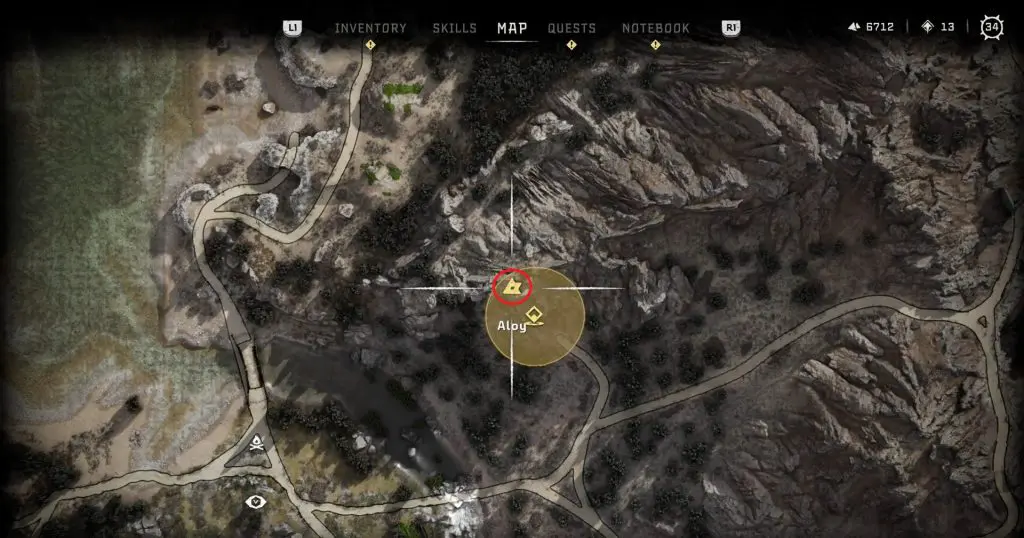
Go to the viewpoint north of the vista point tower at the location marked in the picture below.
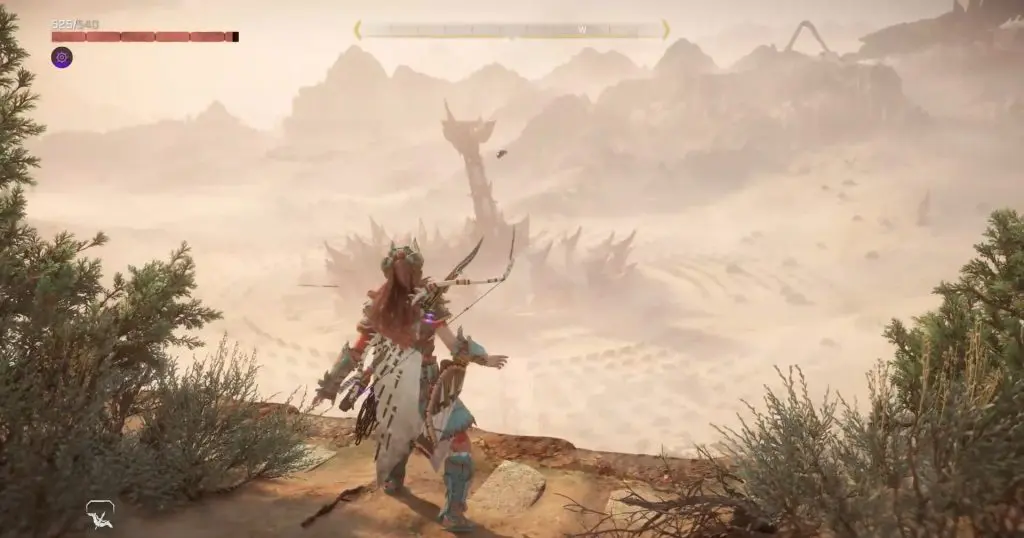
Stand at the edge of the viewpoint. Activate focus and superimpose the holographic image on the ruin as shown in the pictures below. An easy way to do this will be by aligning the tower. When the hologram is properly aligned, the vista point will be complete.
7) The Memorial Grove Vista Point
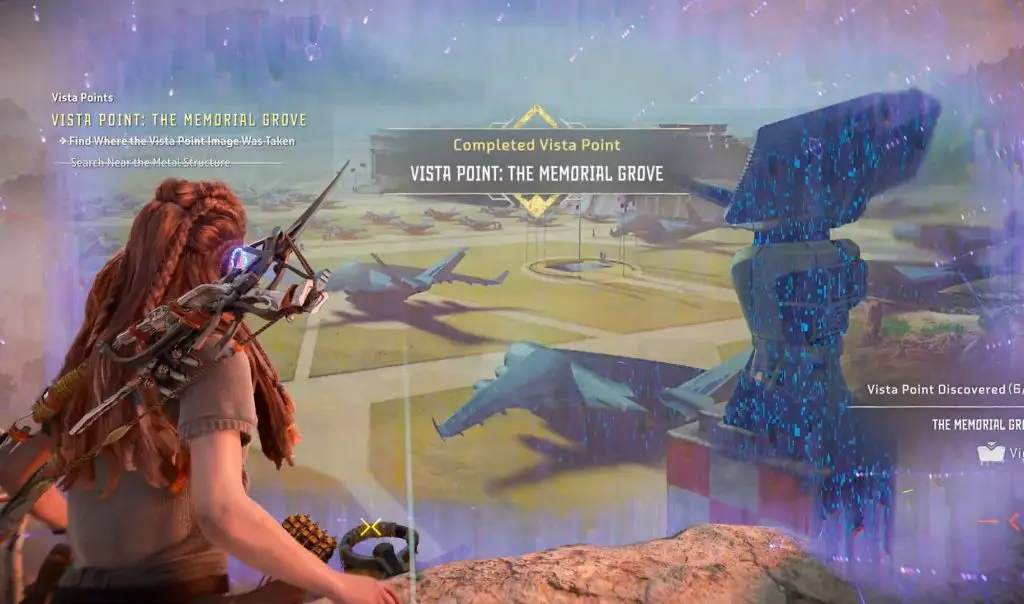
The Memorial Grove Vista Point is at the location marked in the picture below. Go to the highlighted location and scan the tower to get a holographic image. This image from the old world is of a plane and some steel structures nearby.
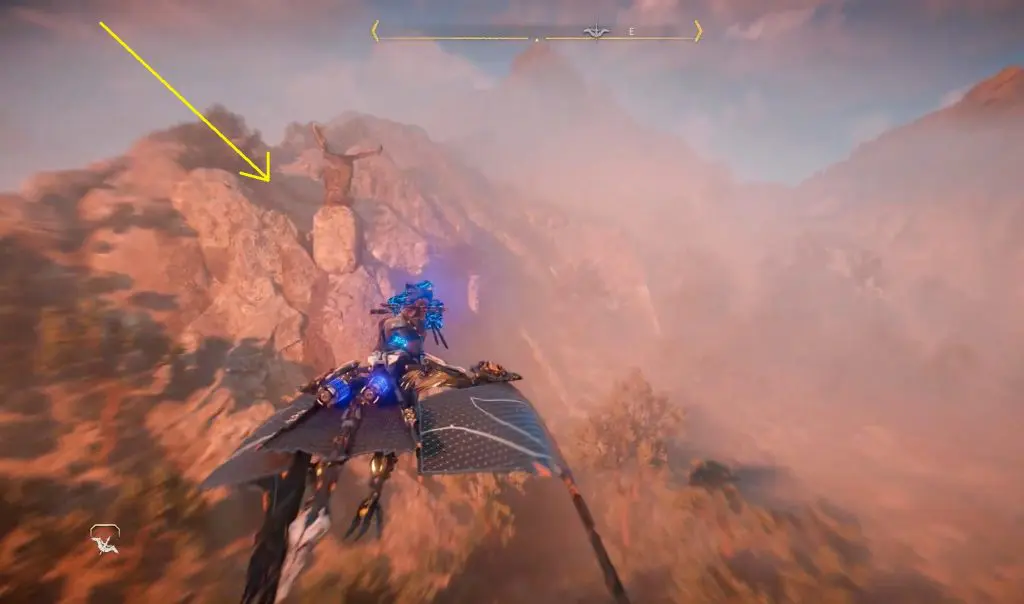
The location you need to go to is a small viewpoint up on the mountains on the northeast side of the vista point tower at the location as marked in the picture below.
As you fly to the marked location, you will see a small viewpoint behind some bushes and a radar as shown in the pictures below. Stand at the edge of the viewpoint. Activate focus and superimpose the holographic image on the ruin as shown in the pictures below. An easy way to do this will be by aligning the radar. When the hologram is properly aligned, the vista point will be complete.

8) Dunehollow Vista Point
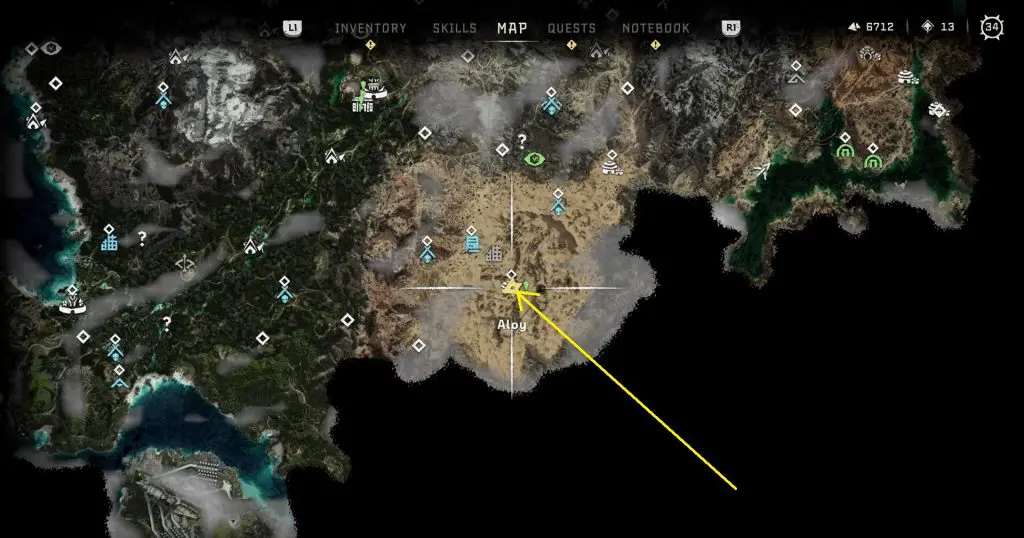
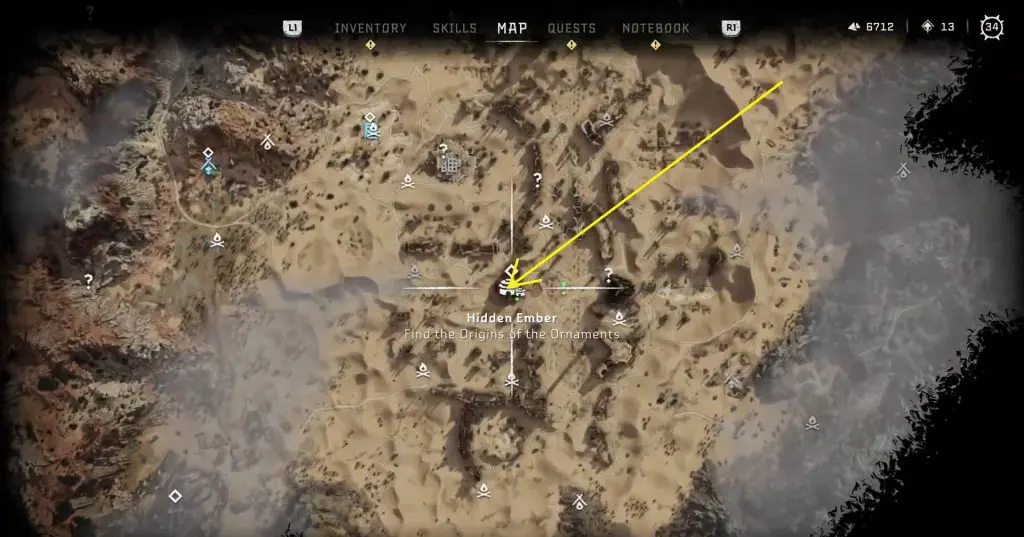
Dunehollow Vista Point tower is inside the Hidden Ember. You won’t be able to see this vista point on the map, as it is on a different map (Dunehollow indoor map). You can access this area only after completing the main quest 11, the sea of sands. Before this quest, the area will be flooded and it won’t be accessible to players.
Enter the Hidden Ember and jump down the elevator shaft as shown in the picture below. Go to the bottom of the elevator shaft. Then climb up the door and proceed ahead. After crossing a circular door, jump down to reach the 3rd floor in Dunehollow.
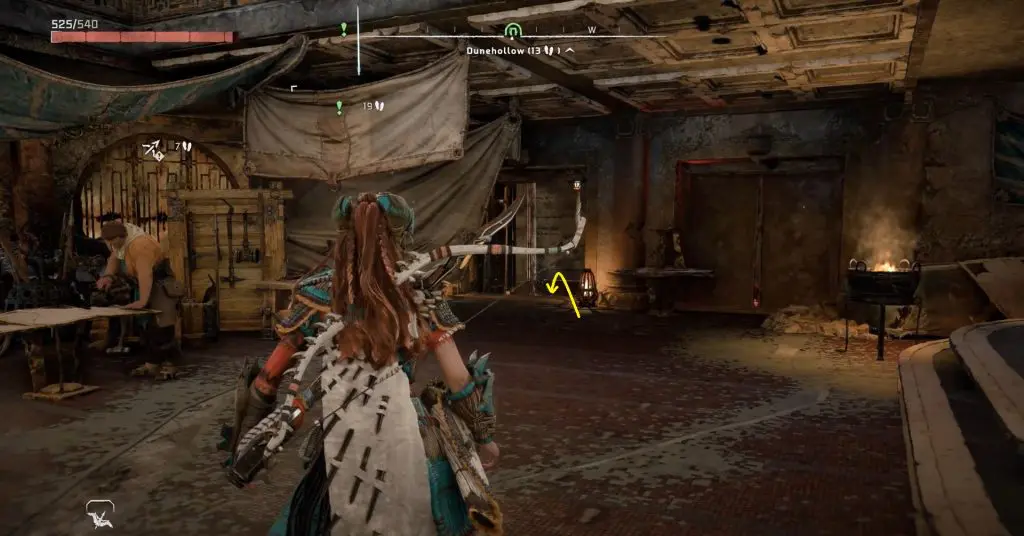
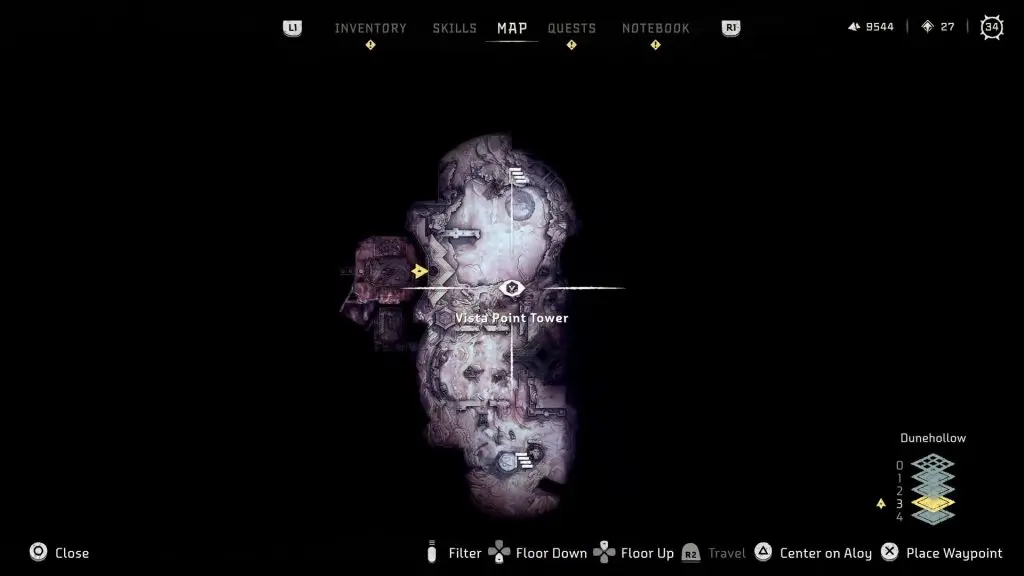
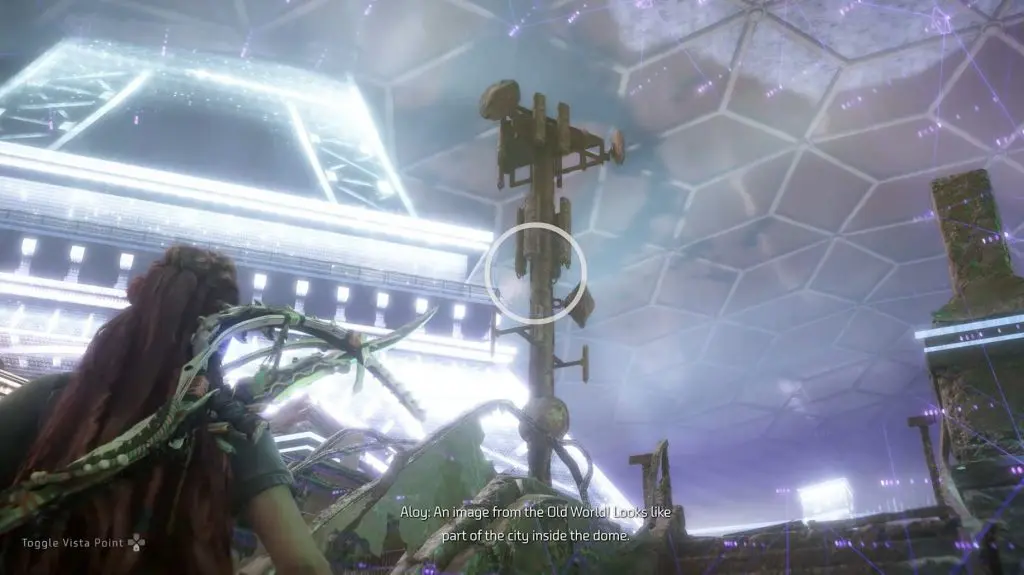
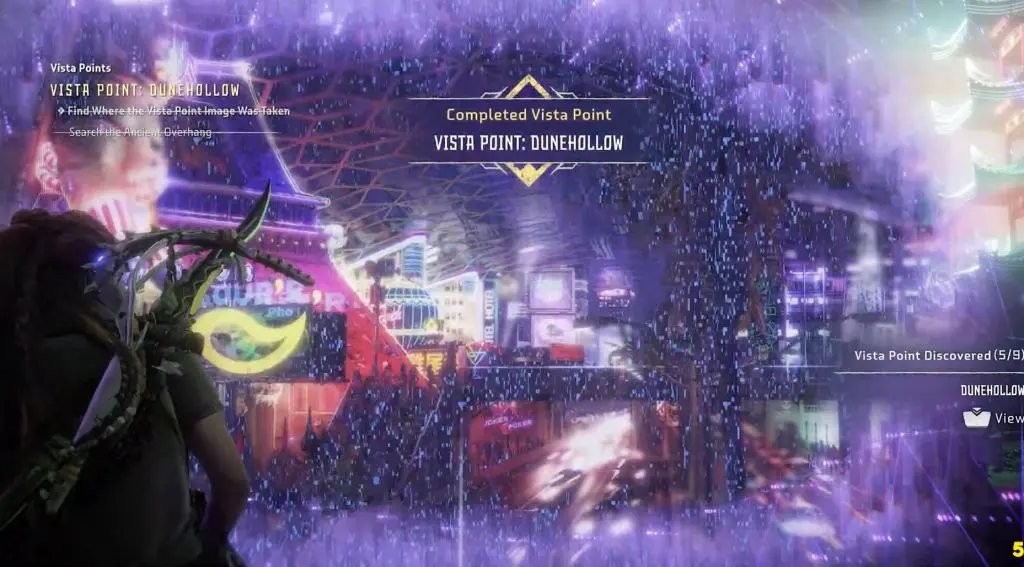
Once you are on Dunehollow 3rd floor, you will find the Vista Tower in front of the Las Vegas Eiffel Tower as shown in the picture below. Go to the highlighted location and scan the tower to get a holographic image. This image from the old world looks like part of a city inside a dome.
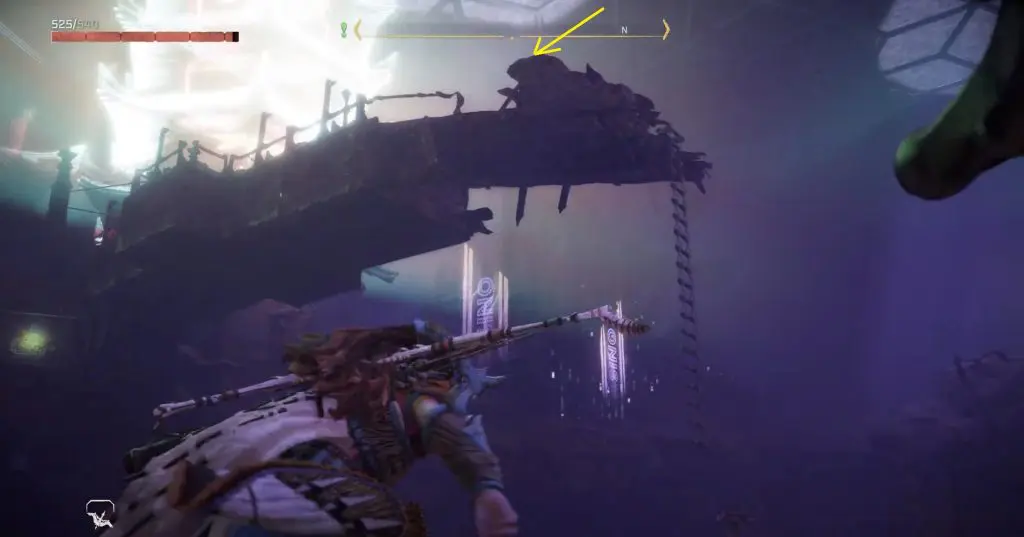
From the Vista Point tower, go north and climb up the broken bridge at the location marked in the picture below.
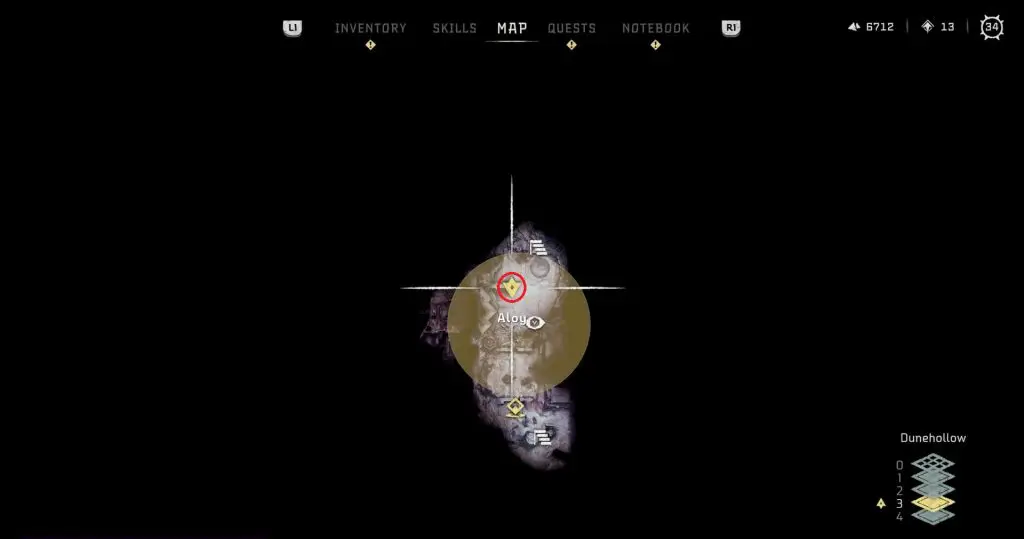
Stand at the edge of the bridge as shown below and look south. Activate focus and superimpose the holographic image on the ruin as shown in the pictures below. An easy way to do this will be by aligning the Eiffel tower. When the hologram is properly aligned, the vista point will be complete.
9) Isle of Spires Vista Point
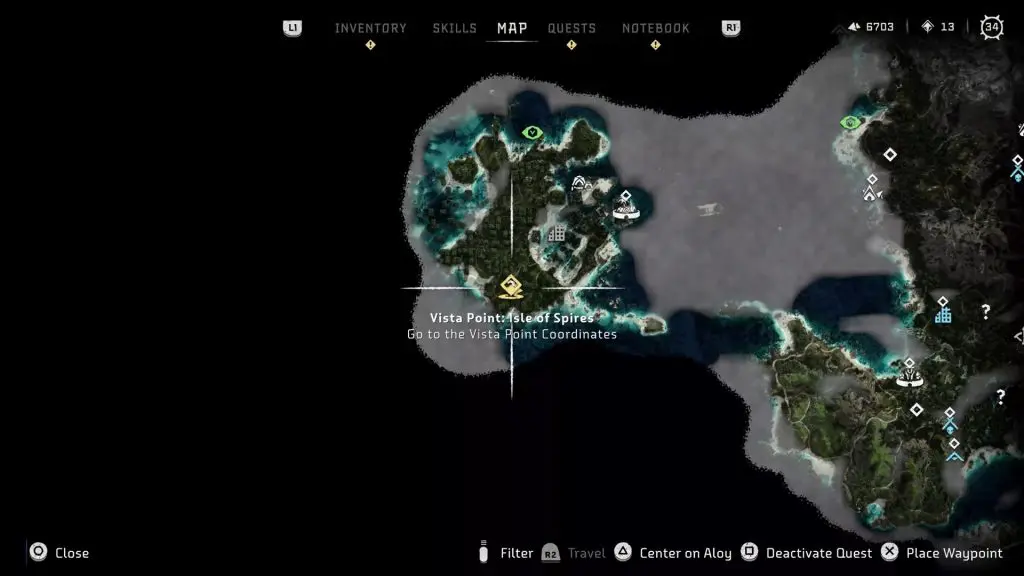
Isle of Spires Vista Point tower is on the southern coast of San Francisco at the location marked in the picture below. This vista point will be available only after you have completed all the 8 other Vista Points. Go to the highlighted location and scan the tower to get a holographic image. This image contains a lot of towers and it seems to be taken from somewhere really high up.
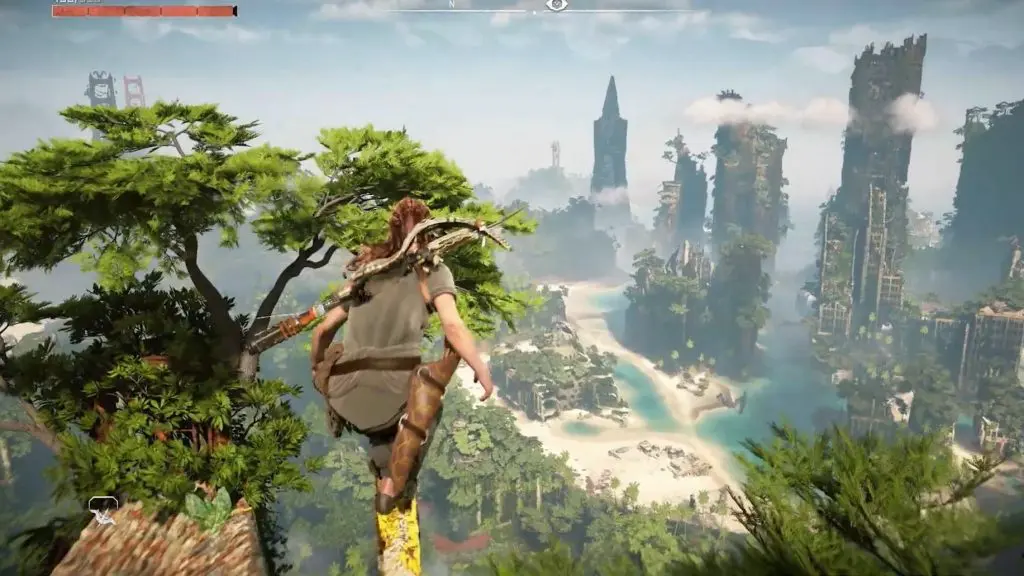
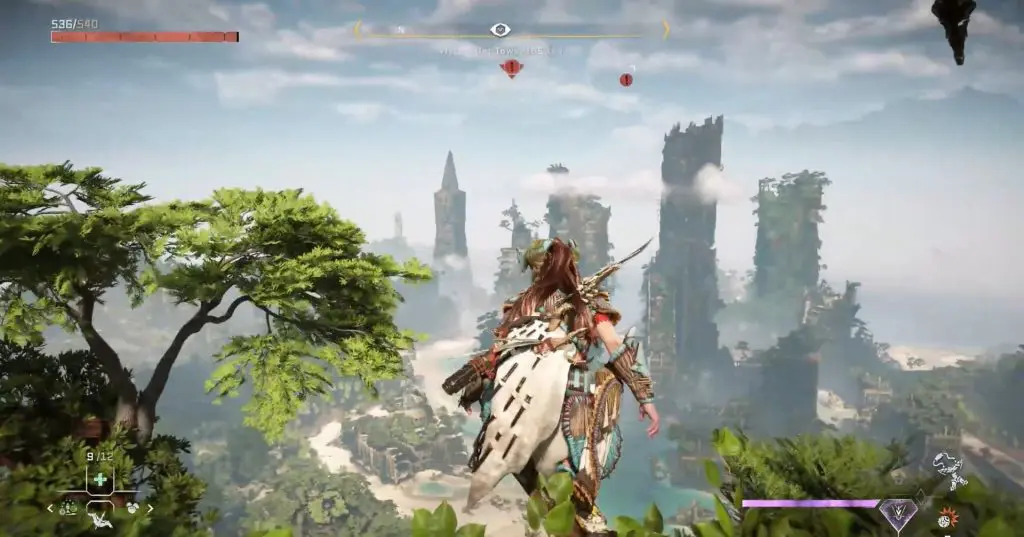
After scanning the Vista Point tower, call your flying mount. You will get a flying mount in Main Quest 16, The Wings of the Ten. Ride the flying mount to the top of the structure near the vista point. Jump to the platform on the top of this structure as shown in the picture below.
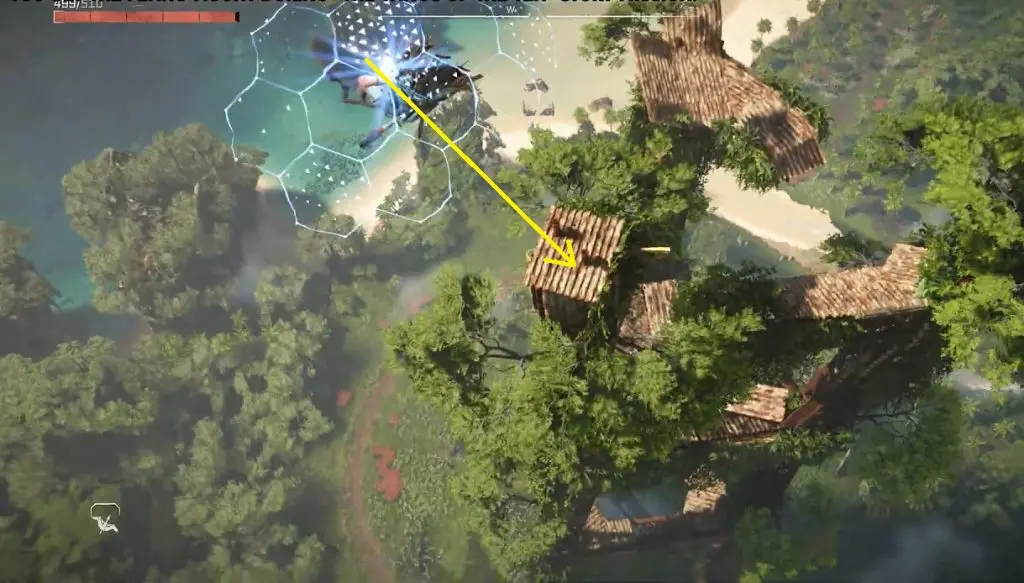
Stand on the perch in this platform. Activate focus and superimpose the holographic image on the ruin as shown in the pictures below. An easy way to do this will be by aligning the building with a conical roof. When the hologram is properly aligned, the vista point will be complete.
After this, go and collect your reward from the location marked in the picture below. You will get some resources and an audio file as a rewad.