Chapter 9: Dead on Arrival
This guide shows how to complete Chapter 9: Dead on Arrival in Dead Space Remake. The guide only shows the main mission objectives and does not include the collectibles. Please note that you will be able to access some areas only from the story progression. So, if you are unable to open some doors then don’t fret as you will be able to access those areas later.
Also Read: Dead Space Remake Walkthrough & Collectibles
Salvage the Singularity Core
After you get the mission, enter the Barracks. When you are there, the objective will get canceled and a new objective will start.
Dispose of the Warhead
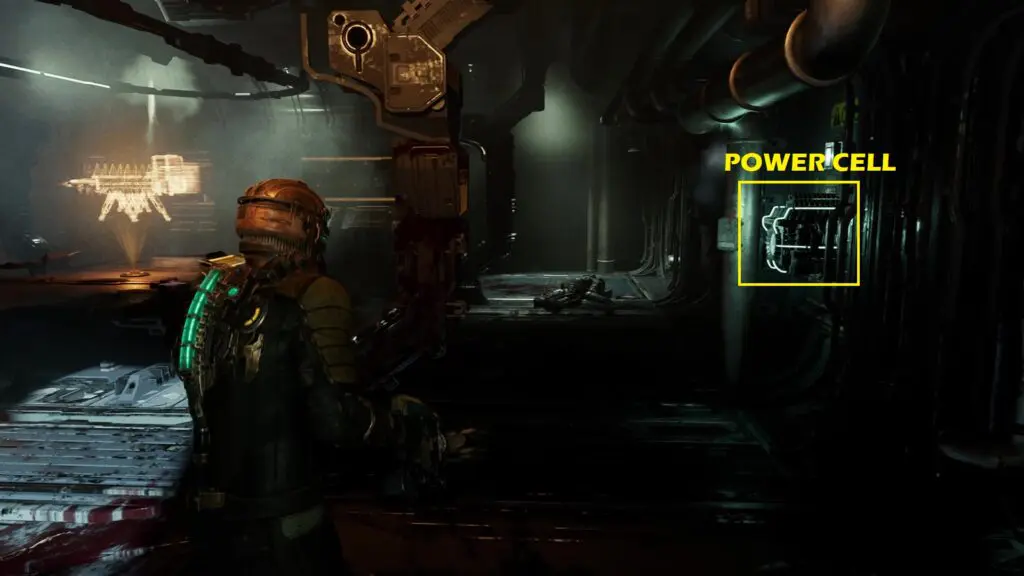
Go towards Briefing Room – Lower Deck. As you enter the elevator next to the Briefing Room and press the controls, the power cell will explode. Now enter the Briefing Room and get the power cell as shown in the picture below. Insert the power cell into the socket in front of the elevator. Then take the elevator down to Torpedo Bay. Enter the Torpedo Bay and you will find the Warhead inside.
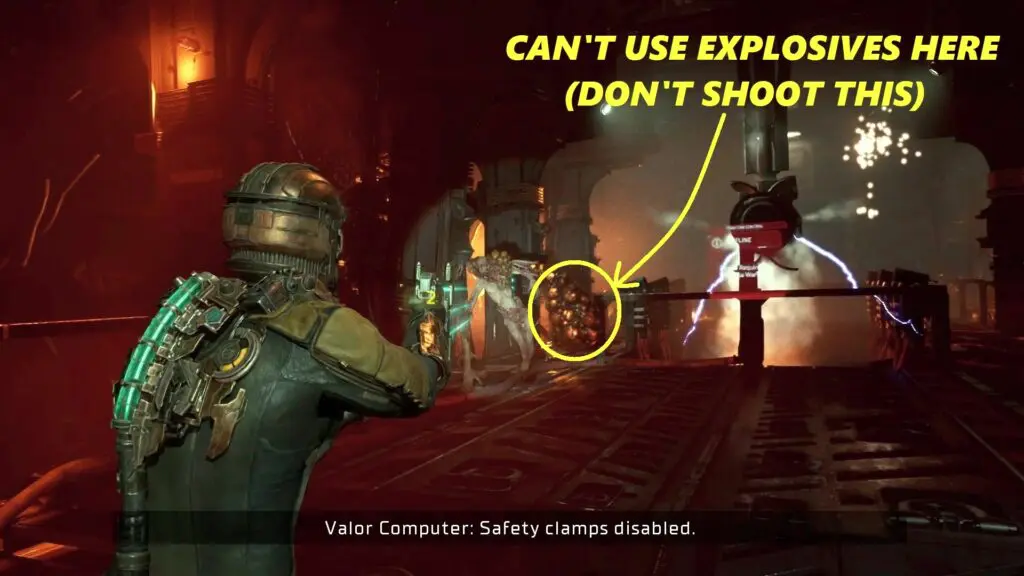
Destroy the six purple tubes around the warhead. Now a monster with a large sack will appear as shown in the picture below. Make sure that you don’t shoot the sack as this will cause an explosion, killing you. Defeat the monster by shooting its limbs, head, and body.
After defeating the monster, get the power cell from the right portion of the room and insert it into the warhead power socket. This will power up the warhead. Now go to the console in front of the warhead and use it to release the warhead.

Salvage the Singularity Core
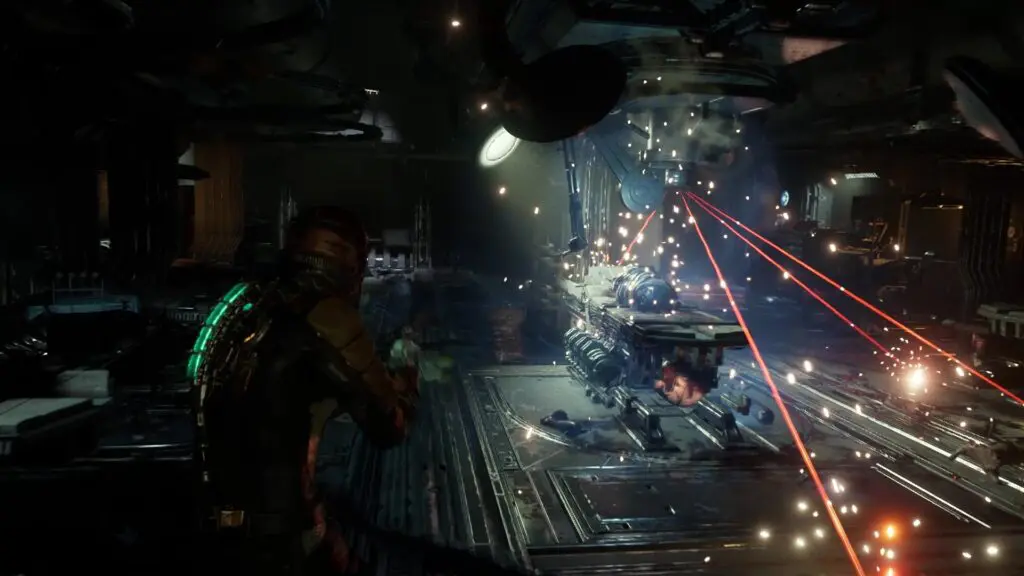
From Torpedo Bay, make your way to the Armory. From there, go to the Infirmary. In the infirmary, you will see a rotating laser. Use Statis on it to slow it down when the path is clear as shown in the picture below. Proceed ahead and go to the Cargo Bay. Defeat the enemies and make your way to the Engine Room.
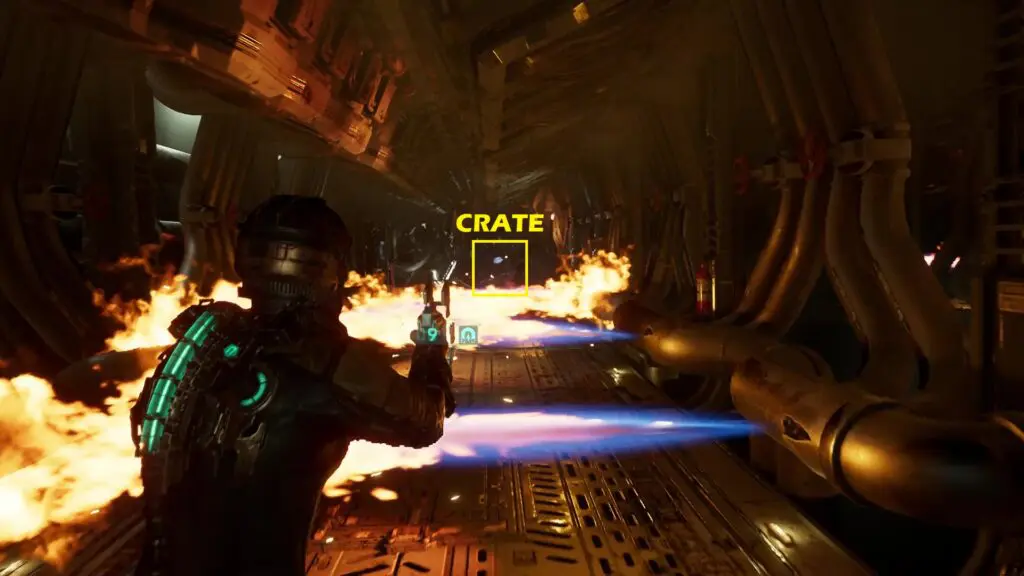
As you enter the Engine Room, you will see an unpowered elevator on the right side. Go to the left side of the room, which is filled with fire hazards. The first few fires will stop for a second. Proceed ahead when the fire stops. When you reach the fire that doesn’t stop, use kinesis to pull the crate ahead of you as shown in the picture below, and use it to block the fire. Now go right.
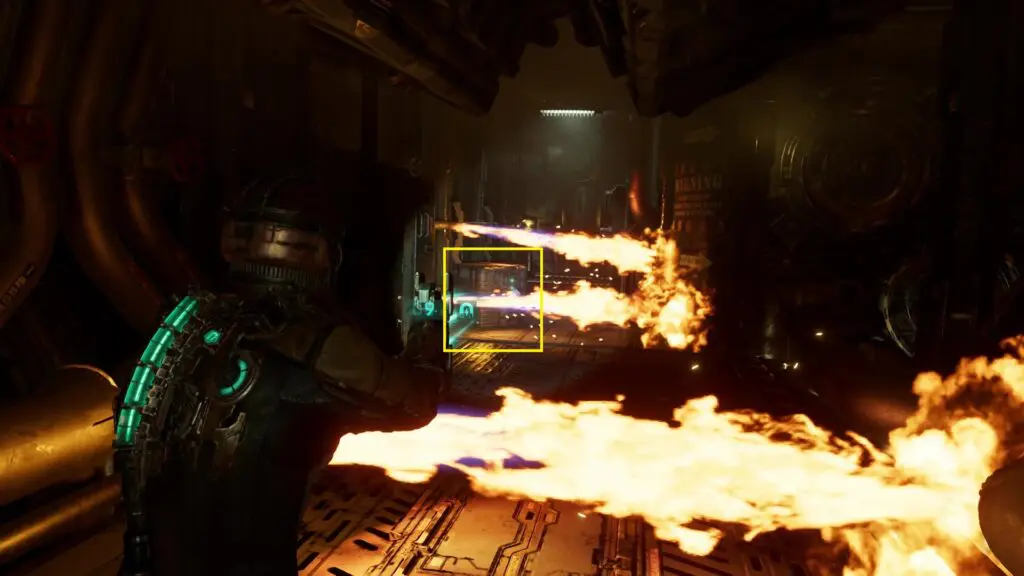
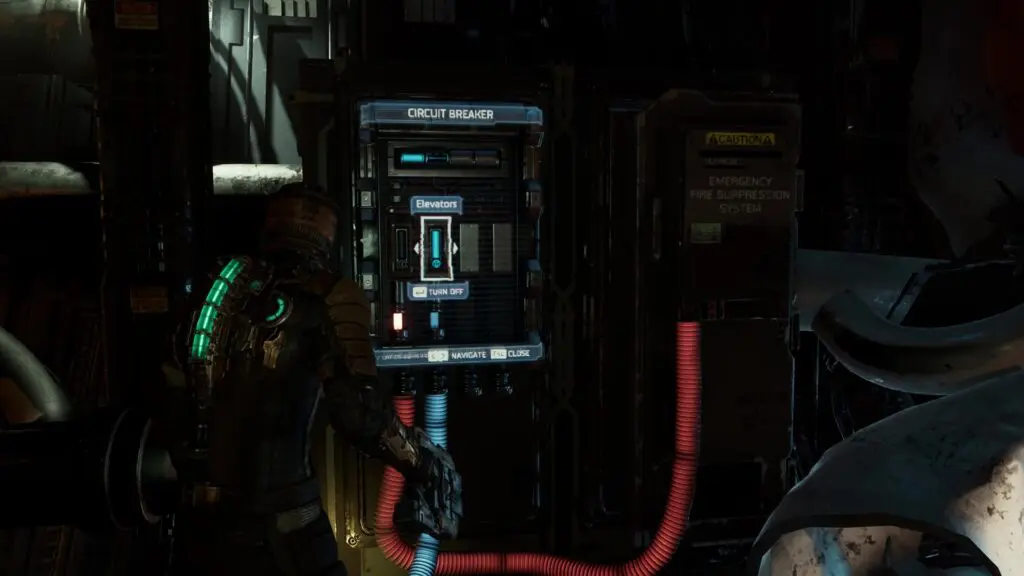
On the right side, you will find more fire coming out from the pipe. Use kinesis to pull the crate ahead of you as shown in the picture below, and use it to block the fire. Proceed ahead by using the crate to block the fire. On the other side, you will find a circuit breaker as shown in the second picture below. Use it to power the elevator. Make your way back to the elevator and take it to the upper level. Now proceed straight ahead to the Singularity Core and pick it up.
Escape the USM Valor
Turn around and enter the door leading to the Upper Deck Elevator. Take the elevator to reach the upper deck. Then proceed ahead and enter the Mess Hall. From there go to the Barracks and then back towards the airlock. Open the Airlock to get out into the space. After a small cutscene, you will find yourself in the Comms Array. Fly down towards the surface and then switch off the thrusters to get down. Now make your way towards the door. The mission will end as you reach the door.