This article will guide you through all the objectives of Chapter 9 of the game Resident Evil 4 Remake which is released on 24 March 2023.
Head for the ballroom
As you begin the chapter, you’ll meet up with Ashley again in a room that overlooks the castle’s courtyard. Make your way outside and descend the stairs leading to the courtyard.
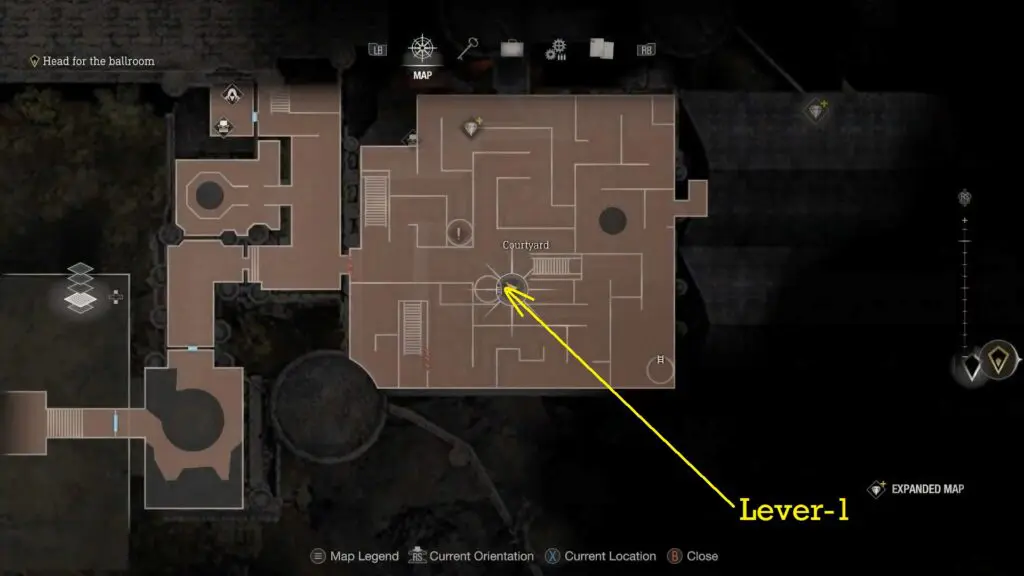
Your primary objective in the castle’s courtyard is to locate and activate the Flag Tower Levers, which will grant you access to the Ballroom. To achieve this, you must navigate through a maze filled with enemies and search for the three levers that lower the flags.
Lever-1
Go down the stairs and then to the left to reach the first tower in the central area. Climb the tower nearby and pull the switch to raise the flag.
Lever-2
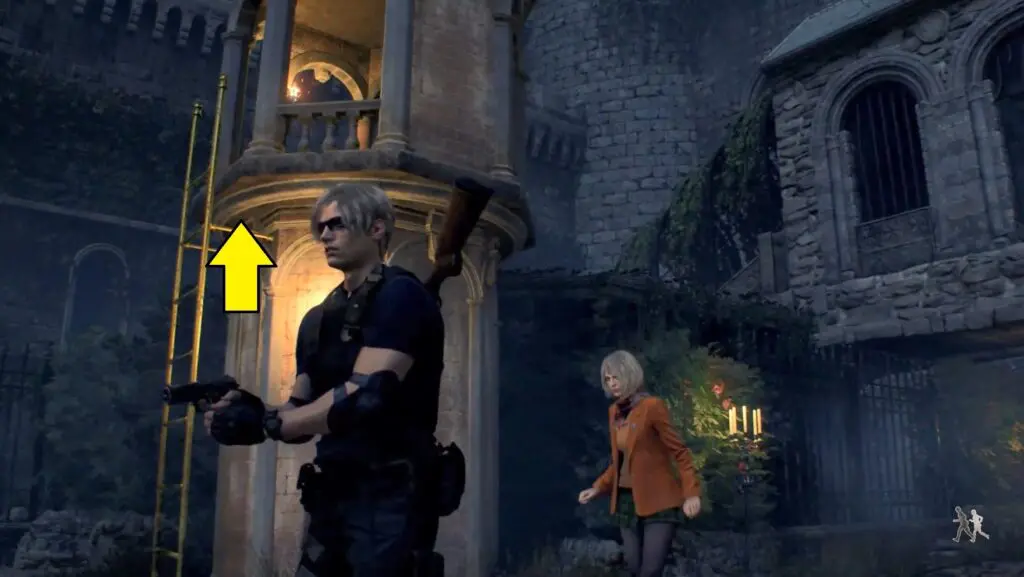
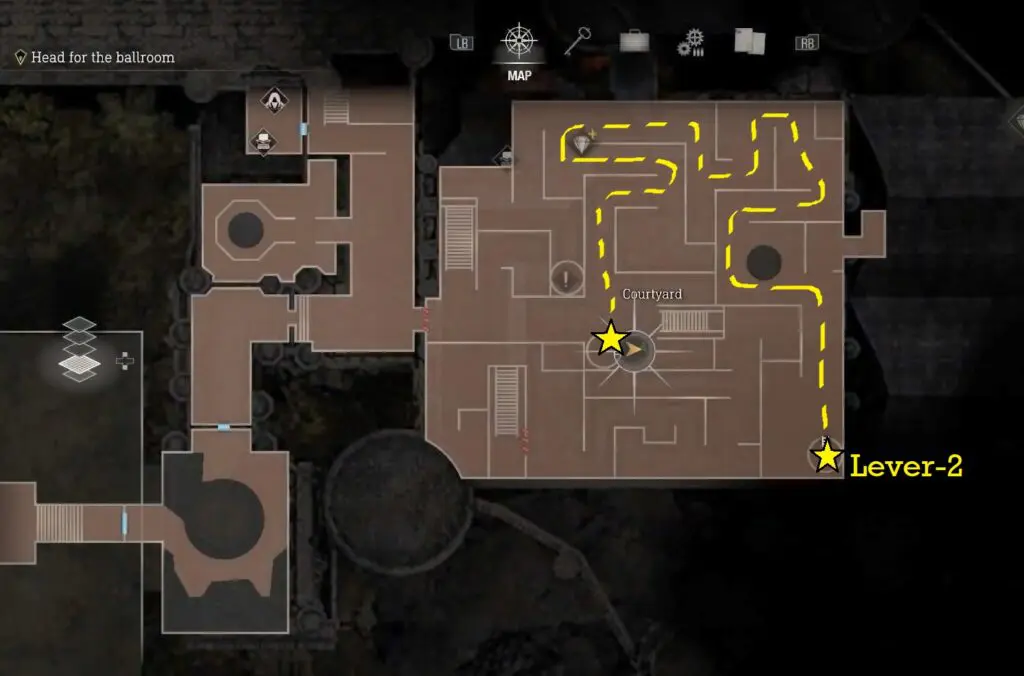
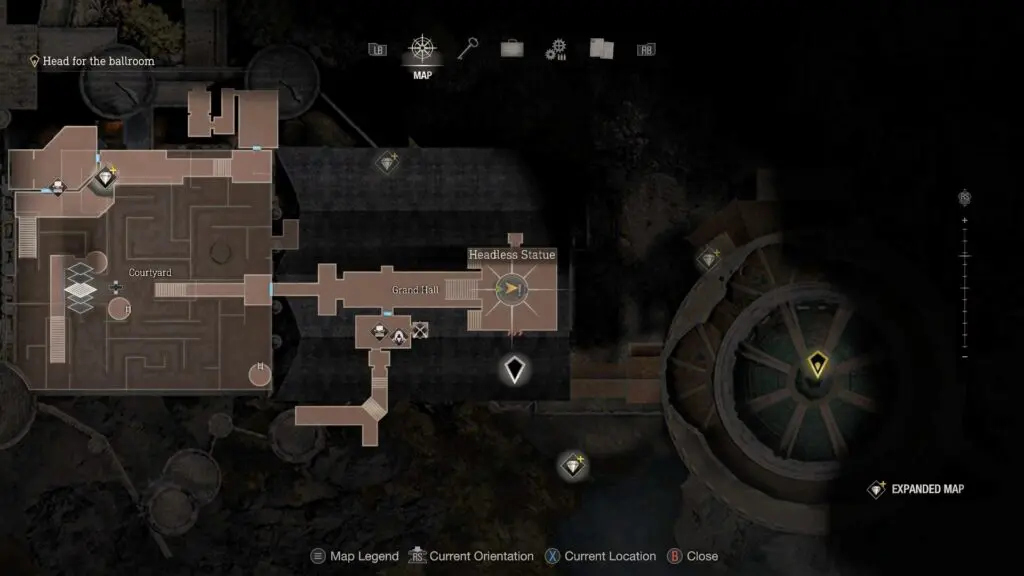
Descend from Tower-1 (Lever-2) and follow the left-hand path. To navigate through the entire maze and reach Tower-2 (Lever-2), check the map below for guidance. It provides a comprehensive overview of the maze area.
Lever-3
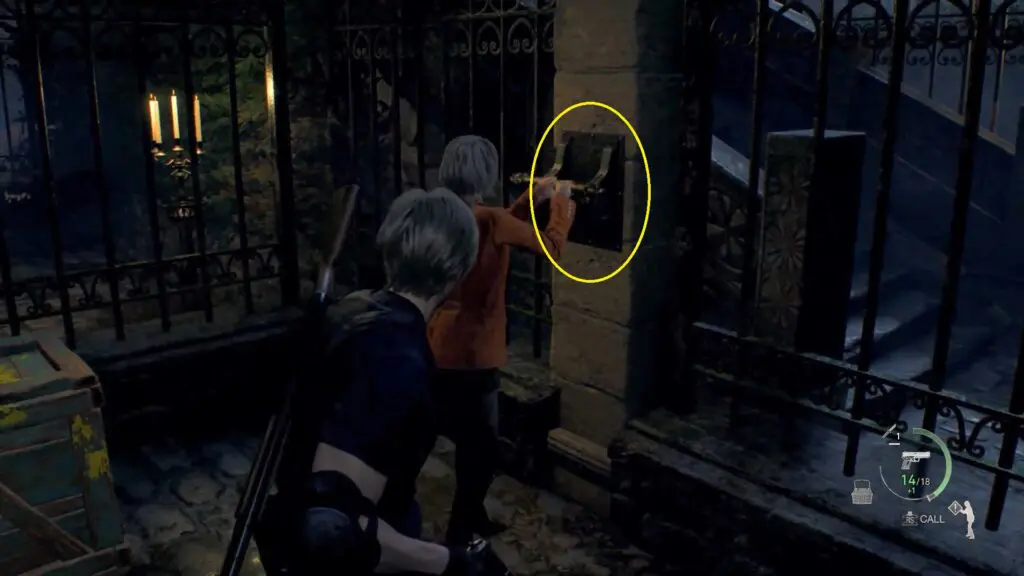
Proceed south from Tower-2 to reach a locked door that can be unlocked. Follow the path indicated on the map to the southwest corner.
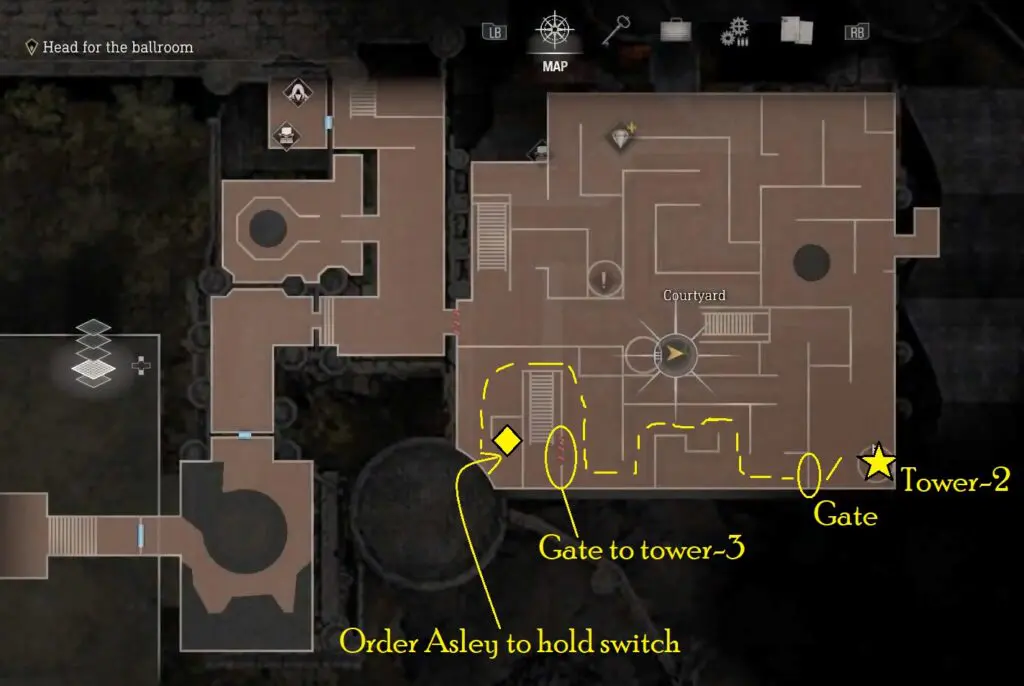
Instruct Ashley to hold the switch that opens the gate on the opposite side, and then make your way around while she keeps it held.
This will enable you to ascend to the upper level and reach the ultimate destination, Tower-3. Once all three levers have been pulled to lower the flags, the entrance to the Grand Hall will be unlocked. Drop down and quickly run back to Ashley, as most of these enemies are rushing over to try and grab her. Finally, depart through the eastern path to enter the Grand Hall.

Keep moving to the east in the Grand Hall until you arrive at the Headless Statue. From there, pass through the left-hand doorway to enter the dining hall.
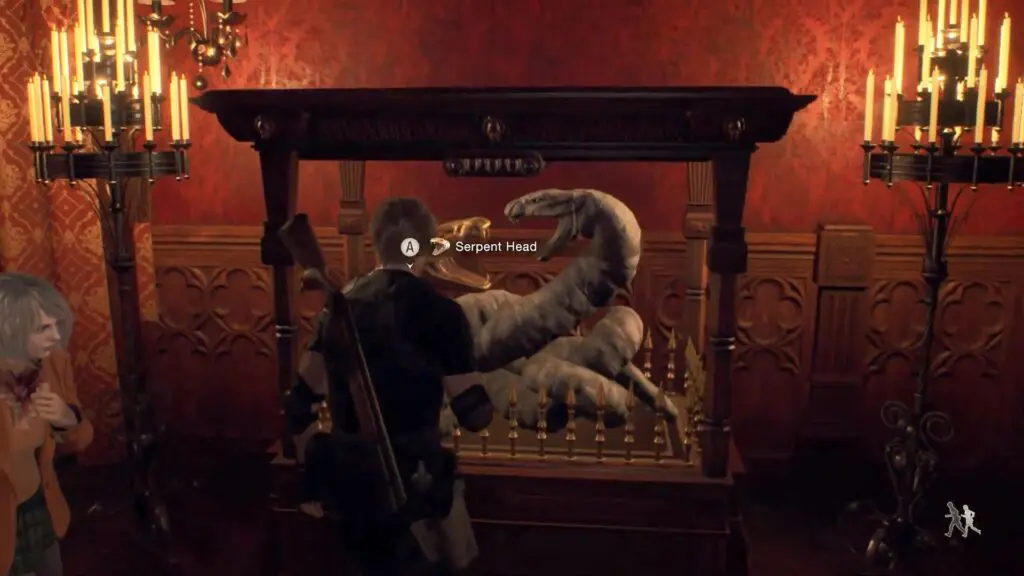
Serpent Head
After arriving in the dining hall, a puzzle must be solved to retrieve the Serpent Head from its cage. To achieve this, both you and Ashley must take a seat at the tables depicted in the portraits of the king and queen and ring the bell.
Observe the two paintings located at the far end of the hall to obtain a hint for this puzzle. The queen is depicted sitting at a table that has two sets of silverware, an empty plate, and an empty glass. The portrait of the king, on the other hand, shows him seated at a table with three sets of silverware, a glass and a wine jug, and a plate of bread.

Instruct Ashley to take a seat at the dining place of the queen, as indicated below. She should occupy the second chair on the right-hand side, while you sit in the last chair on the left.

Then ring the bell and the Serpent Head will be unlocked.
Lion Head
Return to the Grand Hall and go up the stairs to the upper level. Proceed into the room on the right to enter the Armory.
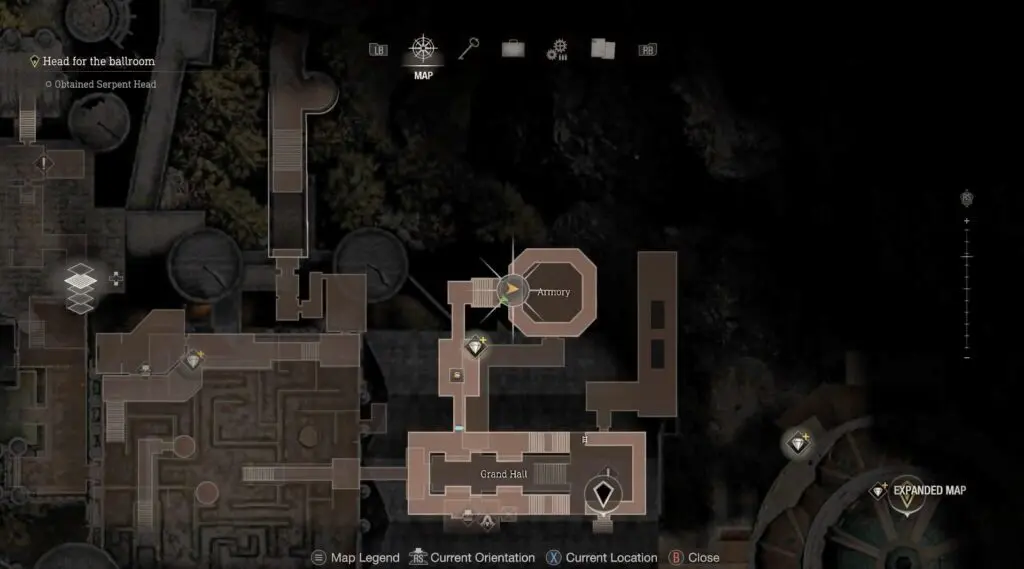
Descend to the lower level and retrieve the Lion Head Key Item from the statue situated in the center of the room. Defeat the armor enemies.
Move beneath the area where Ashley is positioned to catch her, and then interact with the two statues to unlock the exit from the room to return to the Grand Hall.
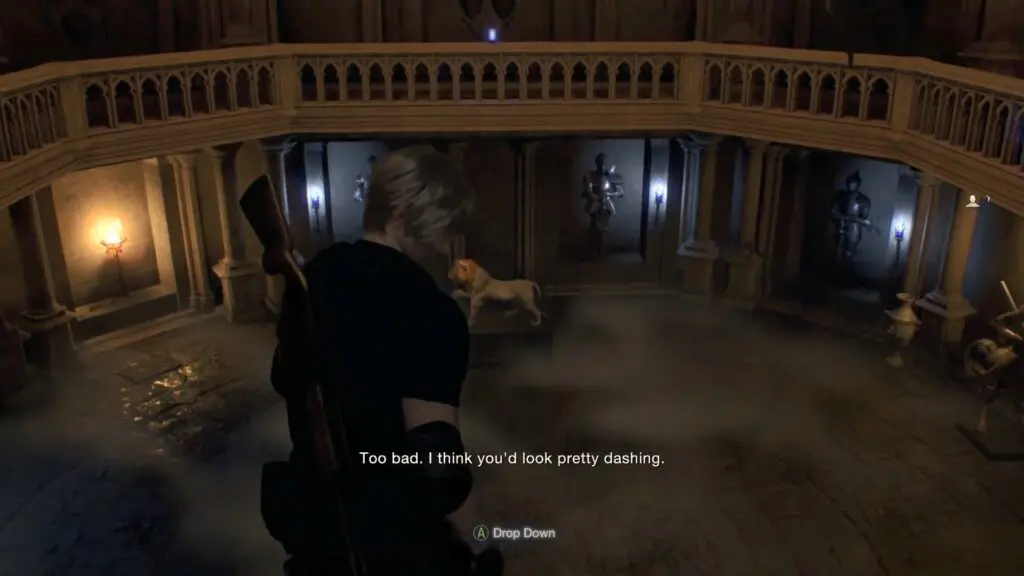
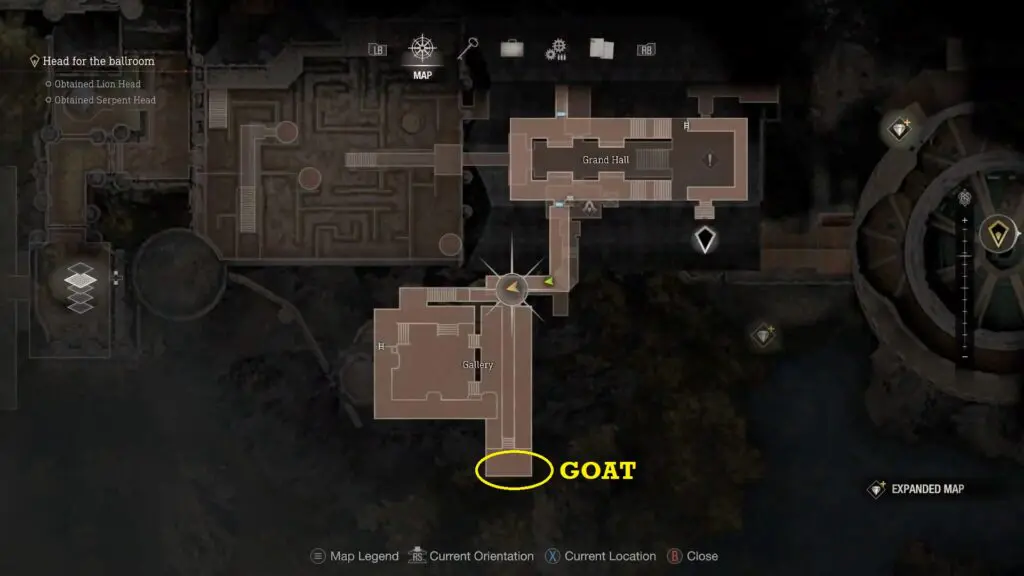
Goat Head
Return to the Grand Hall and go up the stairs to the upper level. Proceed into the room on the left to reach the “Gallery” area.
As you attempt to approach the goat head, an enemy will pull a lever situated on the adjacent balcony to lower the path into the ground. Defeat the summoner and other opponents, and ascend a ladder that leads to the balcony where the lever is located.
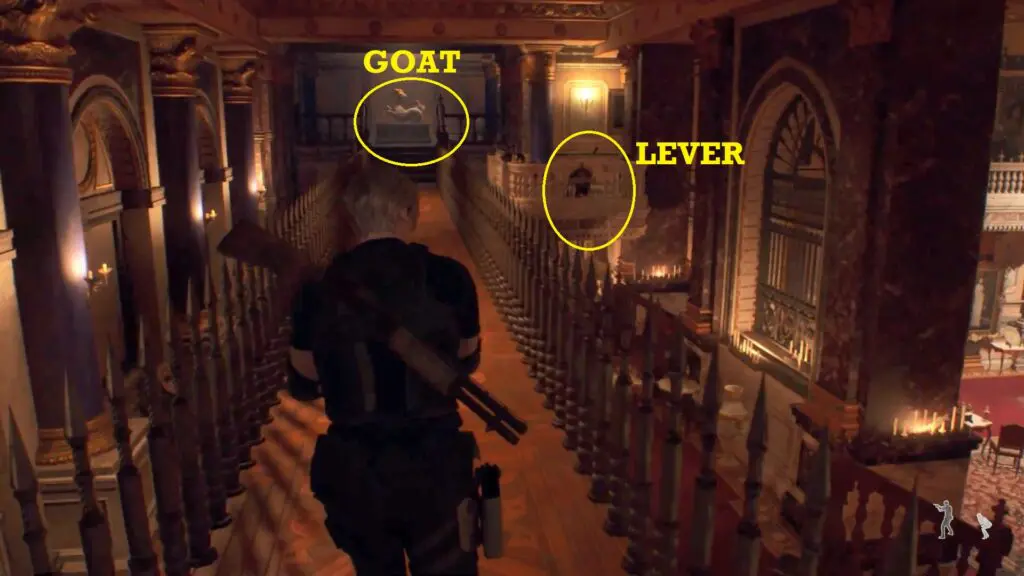
Pull the lever to raise the path back to its original position. Return to the entrance and cross the path to the other side to acquire the last head. Now make your way back to the Grand Hall and place the 3 heads on the statue.
Rescue Leon
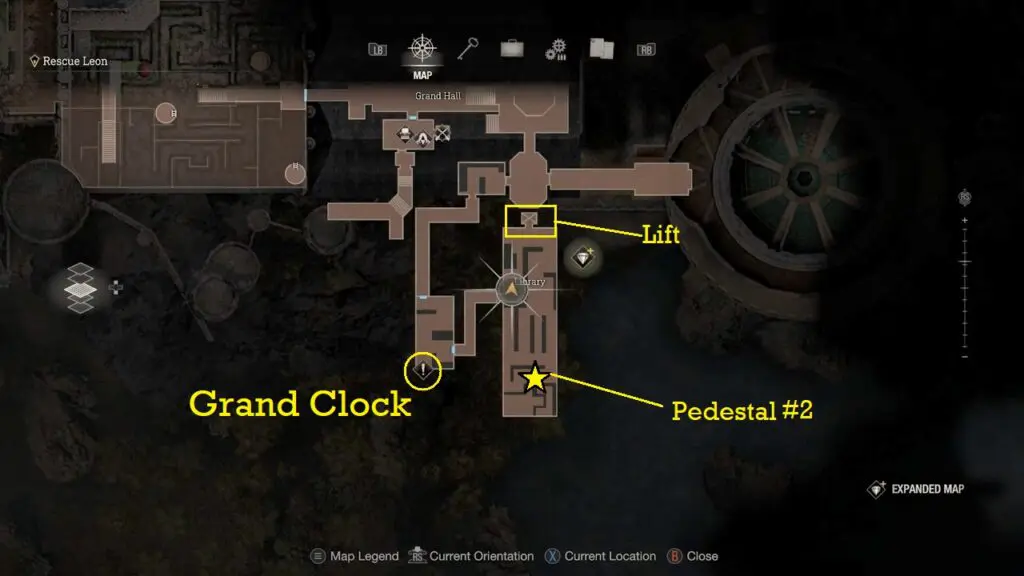
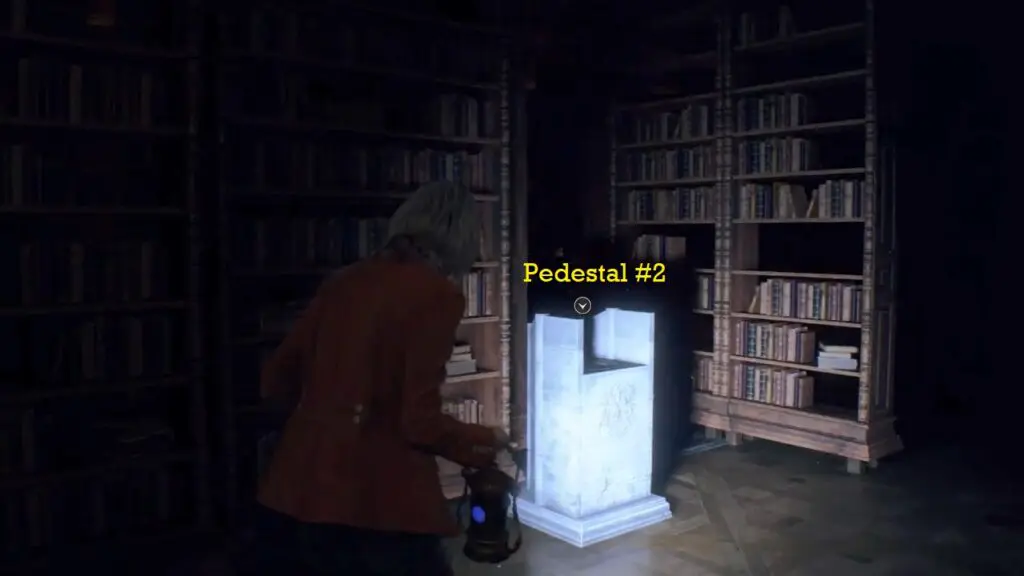
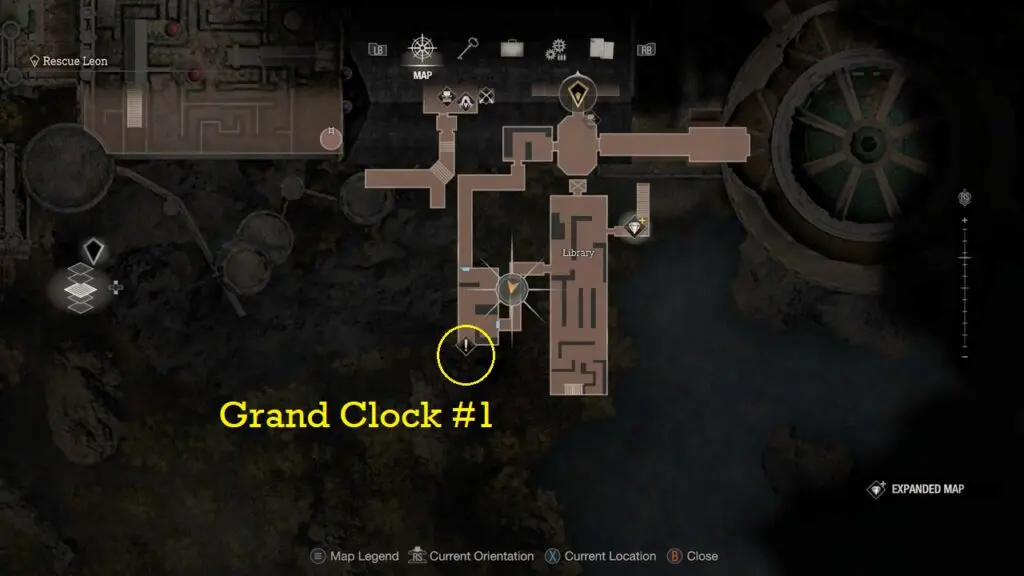
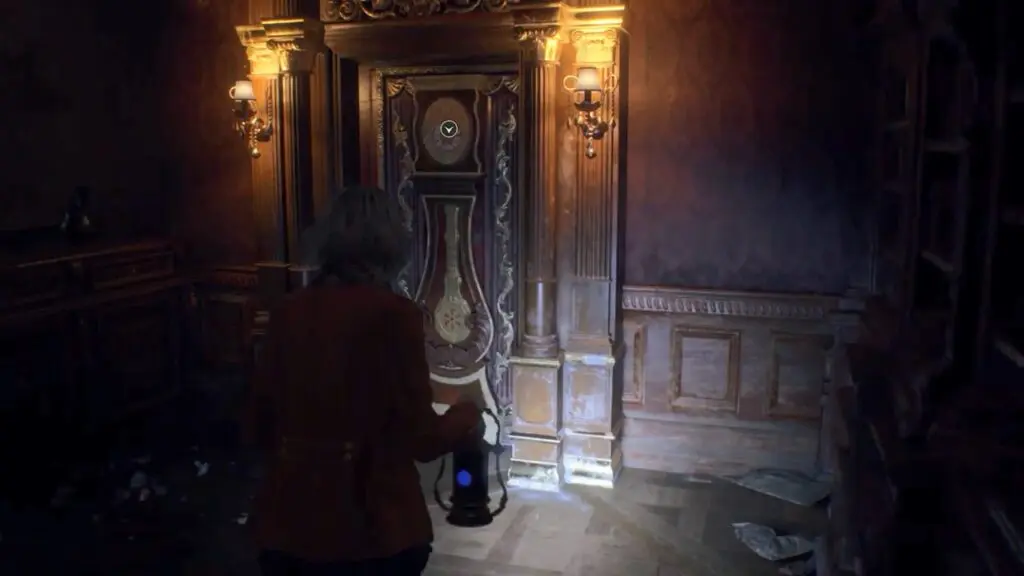
You’ll be required to play as Ashley as you make your way forward to find a way to get Leon out of where he got locked in. To unlock the path in the wall, retrieve the lantern from the pedestal and proceed along the pathway until you arrive at the Library. You will find a Grand Clock on the way that you unlock.

In the library head in the south to find another pedestal #2. Place the lantern on it to shift the bookshelves.
Operating the crank will bring down a flight of stairs.
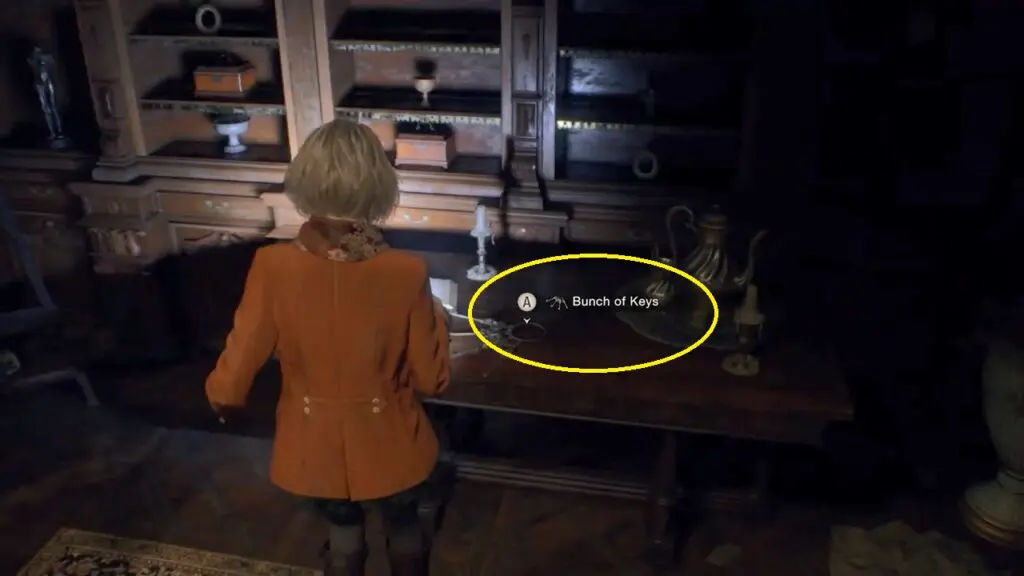
Retrace your steps and retrieve the lantern to shift the bookshelves back to its previous position and climb the stairs. A set of keys can be found on the table.
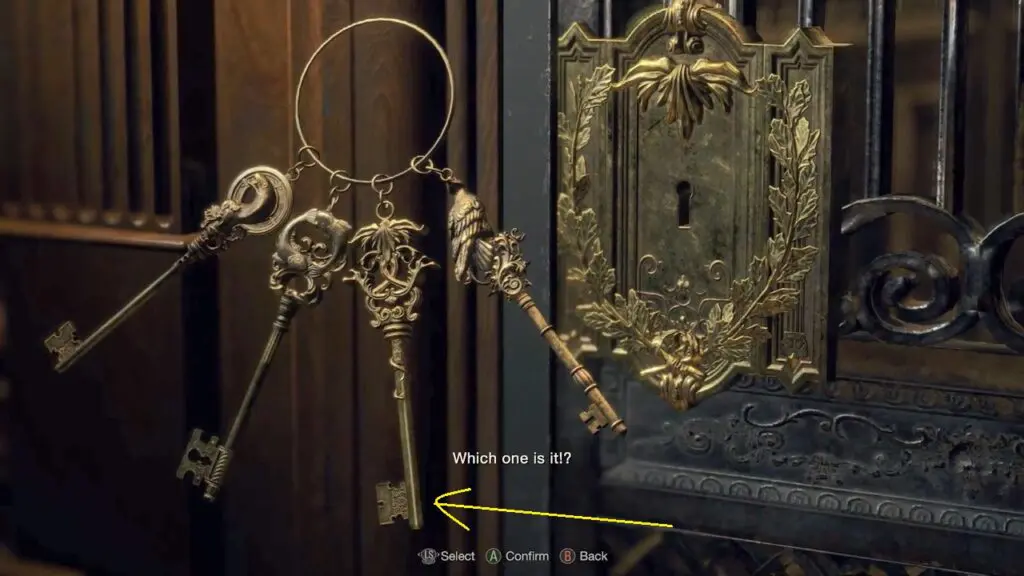
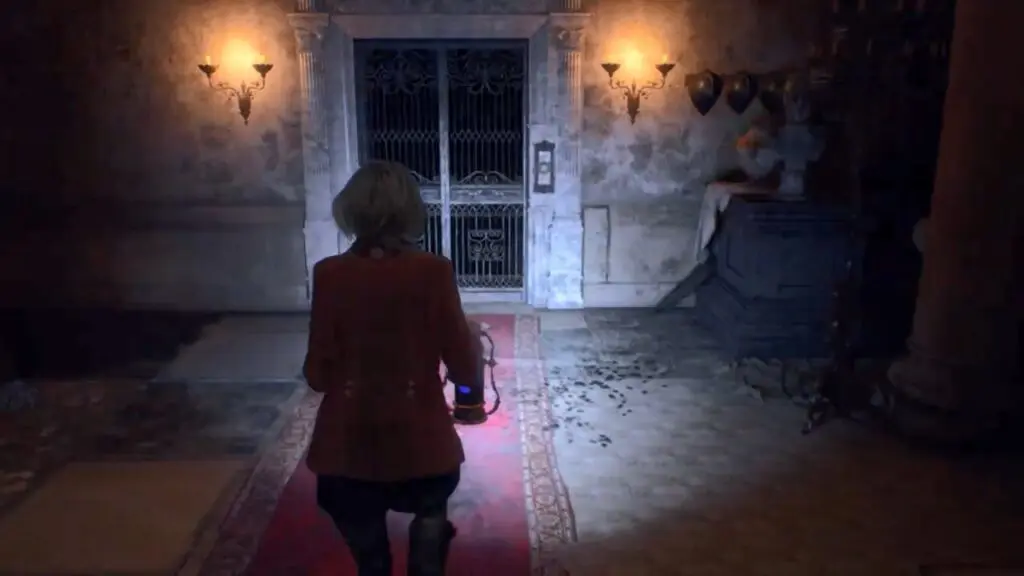
Head back down the stairs and make your way to the elevator located on the northern side of the library. Be mindful of the armor enemies that may be wandering about. Utilize the third key to unlock the door and then activate it.
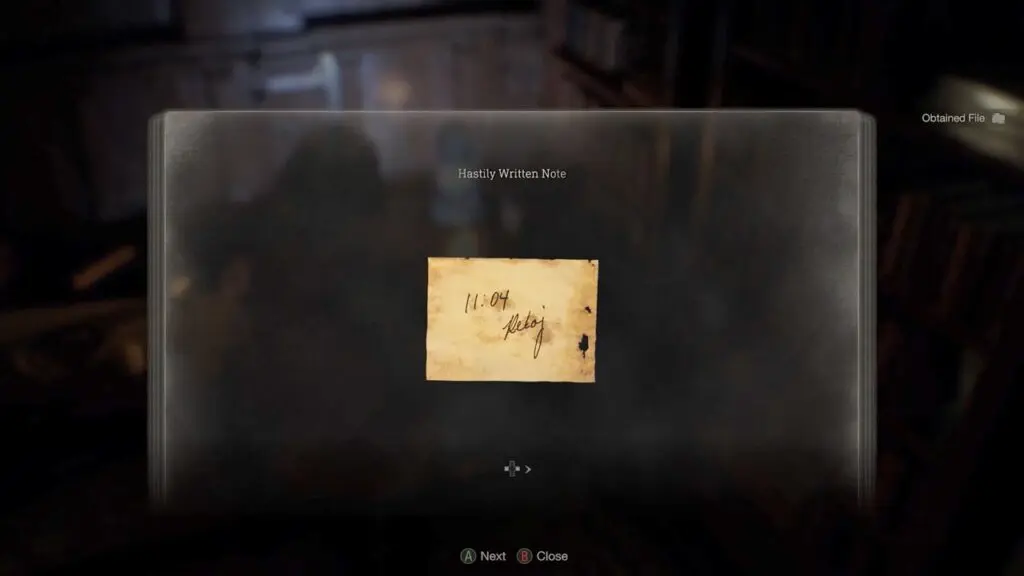
After reaching the upper part of the library and having a brief conversation with Leon, proceed to the back of the room and inspect the note on the table.
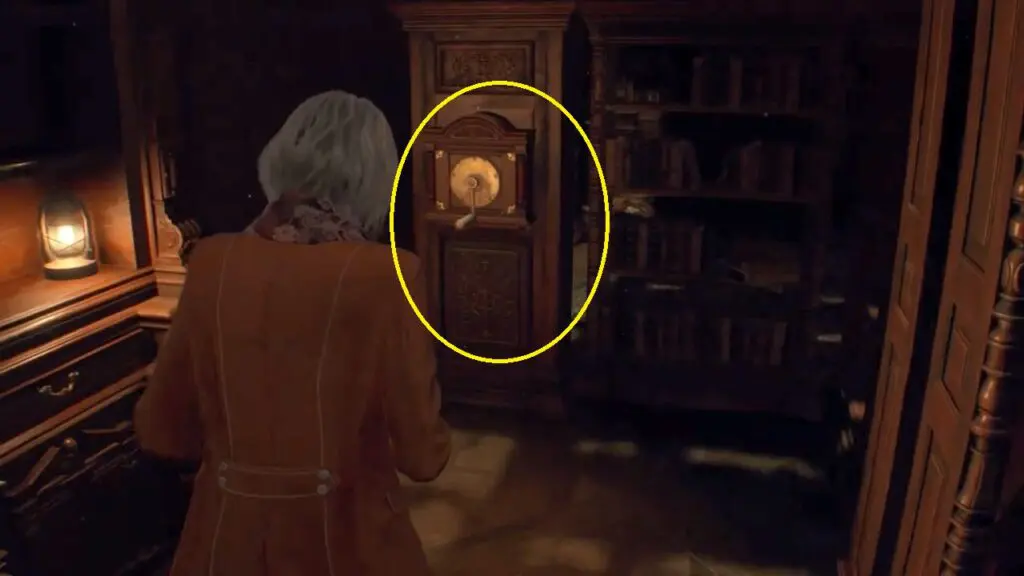
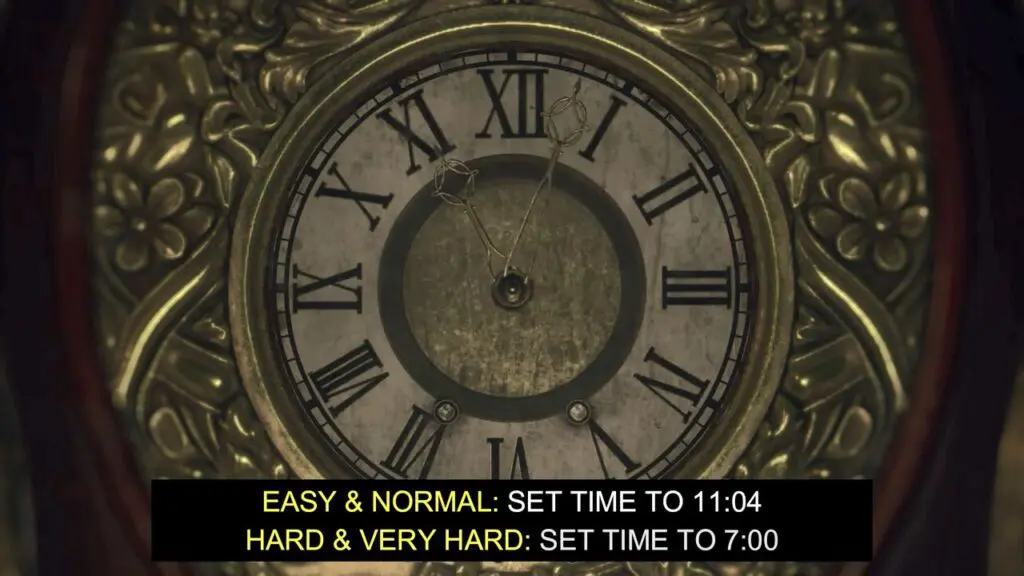
The note on the table will display different times depending on the game difficulty: 11:04 on Assisted/Standard difficulty and 7:00 on Hardcore/Professional difficulty. Once you’ve read the note, return to grand clock #2 and adjust the hands to match the displayed time. This will unlock the door, and all you need to do is change the clock hands to the correct time.
Retrace your steps through the library on the same route you took when you picked up lantern #1 and head towards Grand clock #1.
Adjust the hands to match the displayed time depending on the game difficulty: 11:04 on Assisted/Standard difficulty and 7:00 on Hardcore/Professional difficulty.
By doing this, an underground route will become accessible. Proceed along the route and use the elevator to descend.
As you enter the following chamber, you’ll find yourself in a mausoleum. The area has four symbols that can be activated by pulling their respective chains.
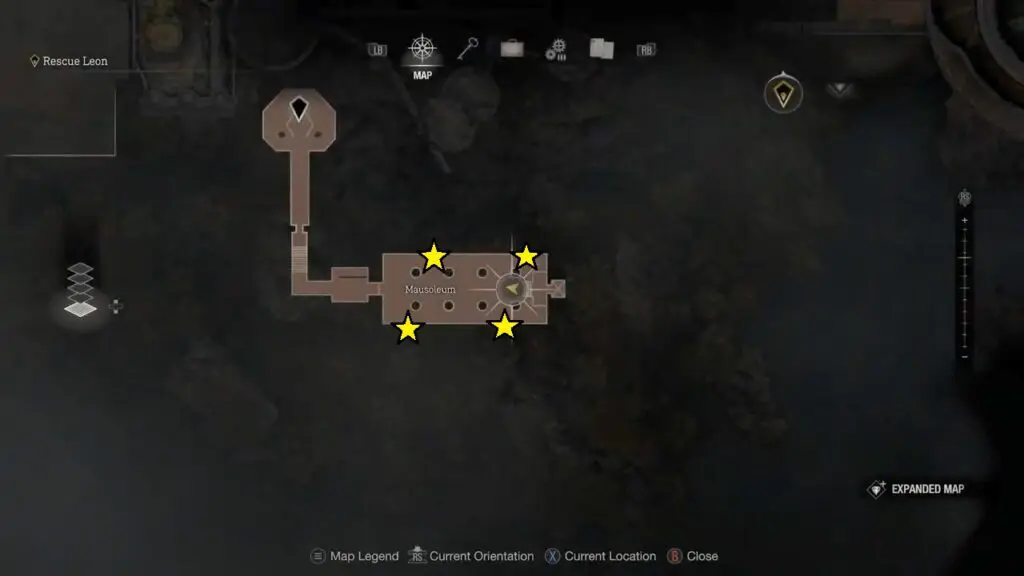
It’s important to note that once activated, the armor in the room will come alive and start coming after you. The symbols are located in each of the four corners of the chamber.

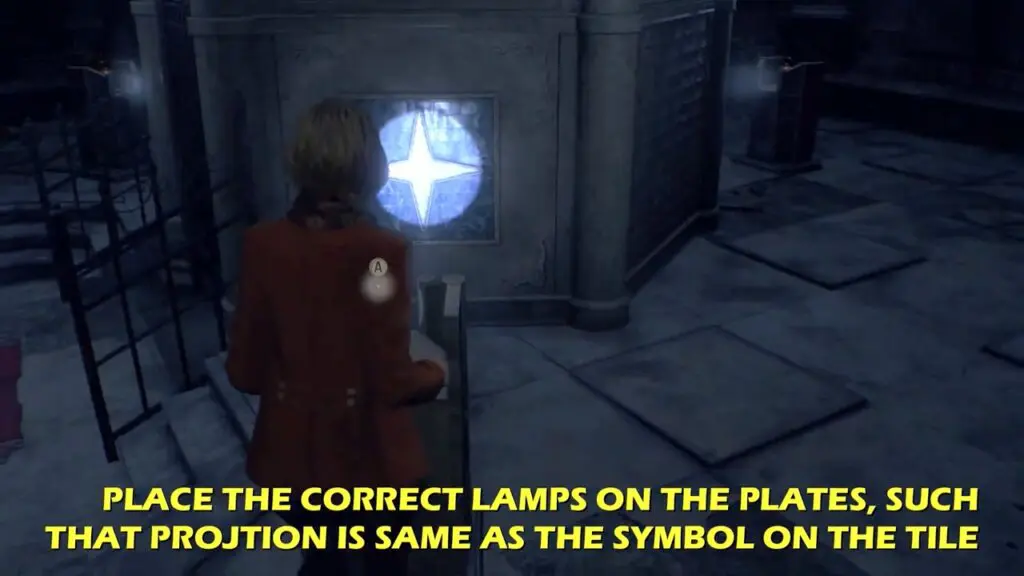
Proceed along the path from the Mausoleum until you encounter a puzzle involving lamps. The objective is to position each lamp onto the correct pedestal, with each one casting a unique shape onto the wall. To solve the puzzle, you can easily exchange the lamp in your possession with those on the pedestals and move them as needed.
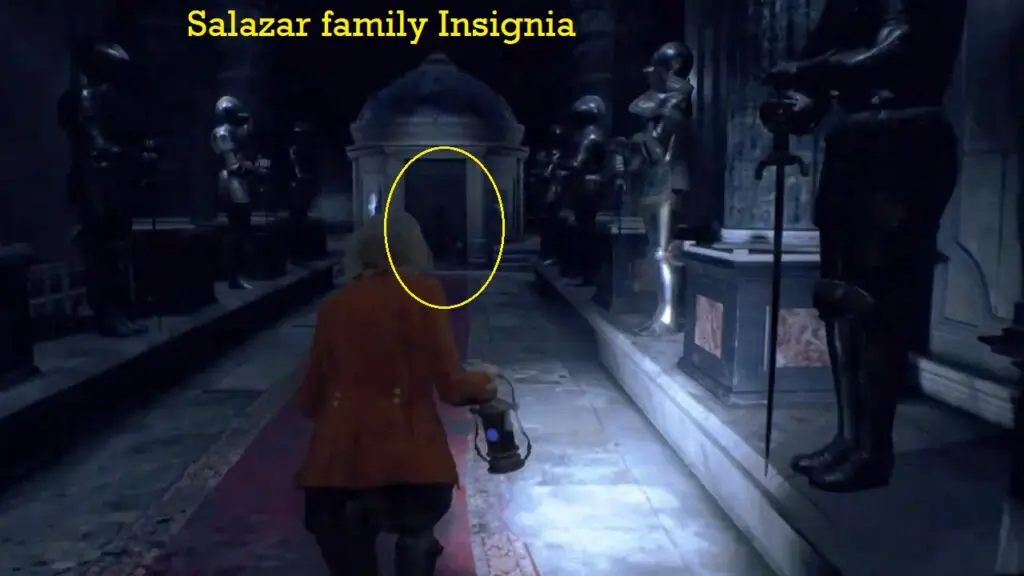
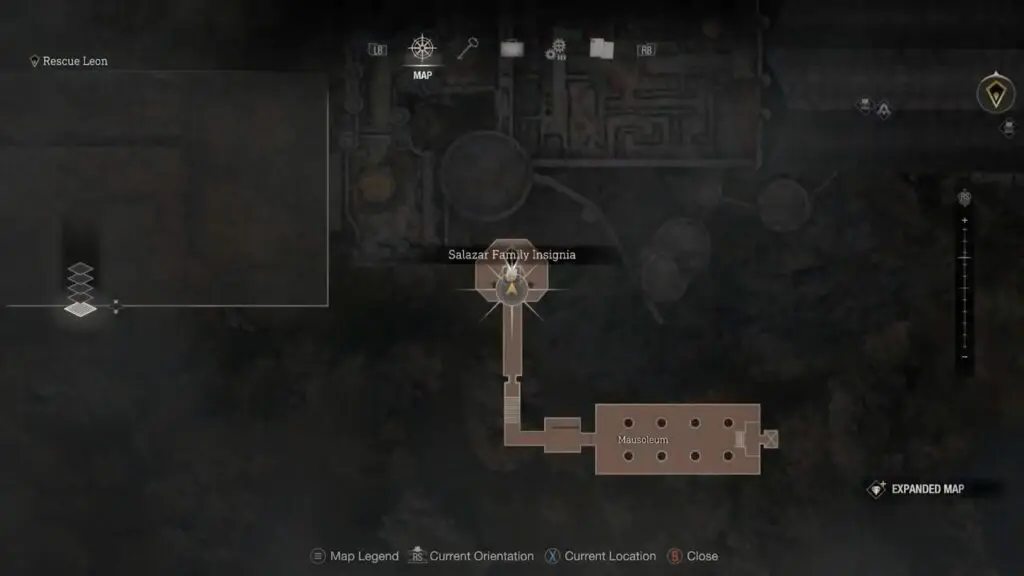
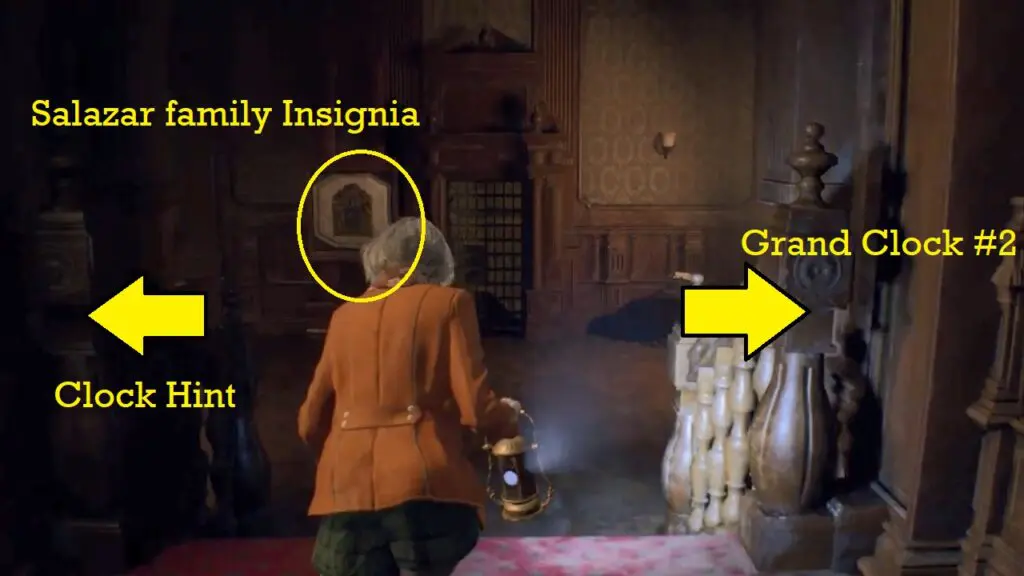
Begin by swapping the lamp you’re currently holding (full moon) with the one at the rear of the room. Then, relocate the crescent moon lamp to the left and the star lamp to the right. This will unlock the central area, allowing you to retrieve the Salazar Family Insignia.
Retrace your steps to where you last encountered Leon, and continue to run towards the Mausoleum. From there, make your way back to the library and ascend to the upper level using the elevator (or the stairs on the eastern side of the library)

Once you reach the designated location, insert the Salazar Family Insignia into the appropriate slot in the wall to bring the chapter to a close.
