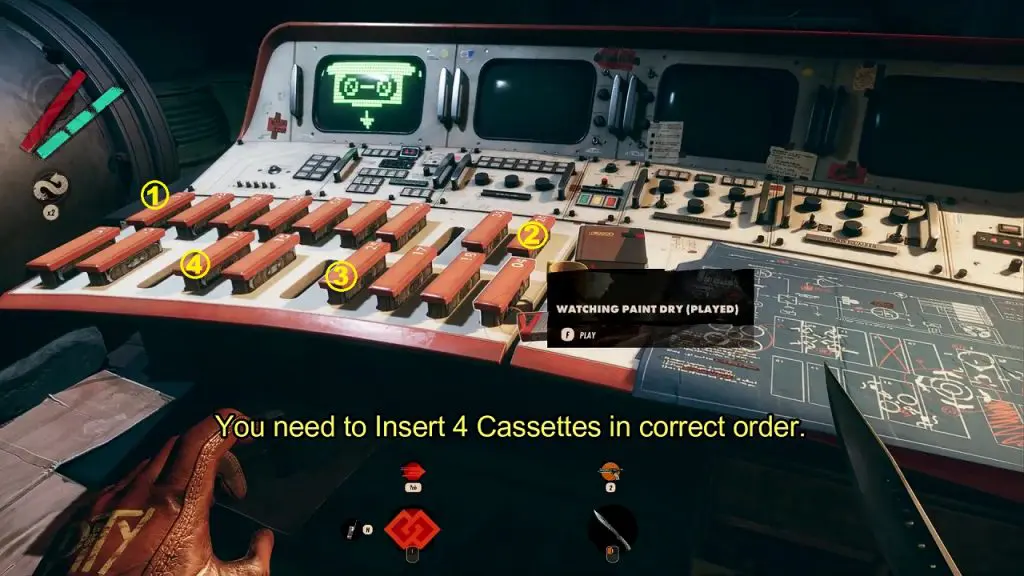
You will find Charlie’s Machine inside a bunker in the Fristad Rock District. The machine consists of four monitors and some Data Cassettes in front of it. Interacting with the cassettes in the correct order opens a door. You will be able to solve the puzzle during the ‘Return to the Machine’ object in the ‘Afternoon Delight’ mission. To solve the puzzle you will need to find 4 Pictograms, which you will get while doing the ‘Afternoon Delight’ mission. This article shows how to solve the Cassette Puzzle inside the bunker in the Fristad Rock District. Click here to see how to reach the bunker in the Fristad Rock.
Note: The solution to the puzzle varies from gameplay to gameplay but the procedure to solve the puzzle remains the same. I will explain how I solved the puzzle in my gameplay. You can use the same process to get the solution of the puzzle in your game.
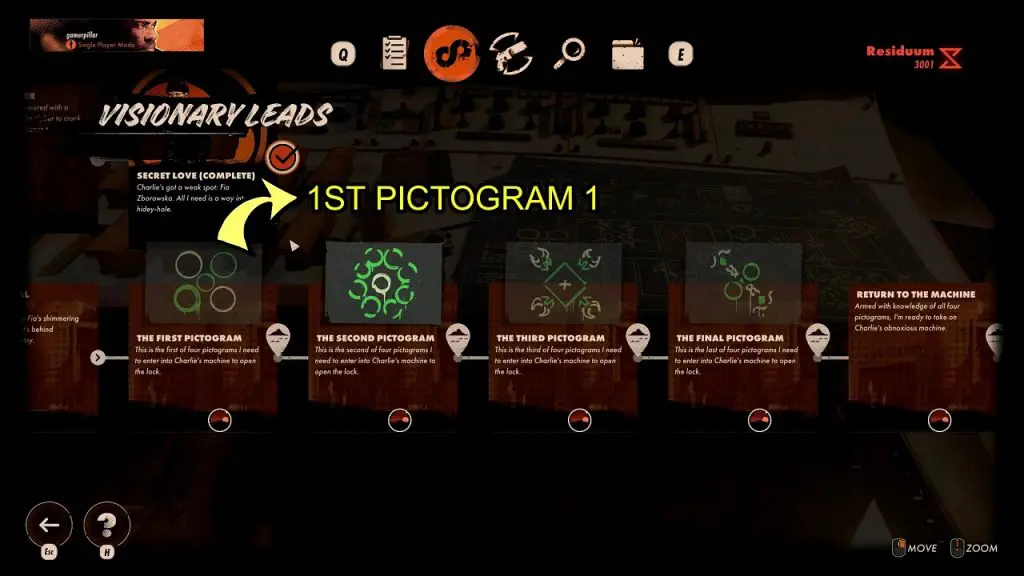
Step 1: The First Pictogram
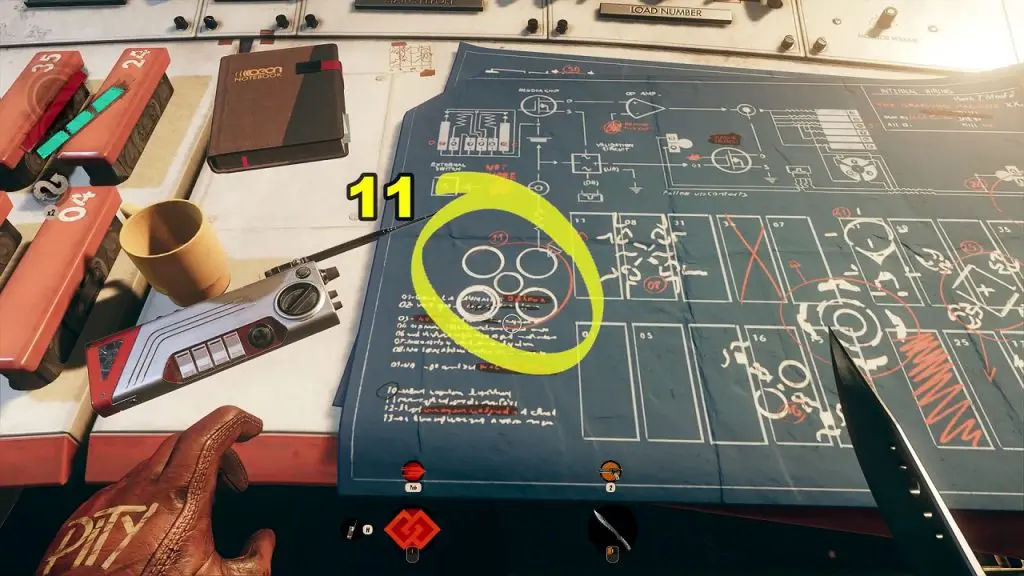
See the picture in the first pictogram that you collected before. Now search for the matching symbol in the blueprint in front of the four monitors. Each symbol is assigned a number, written in red ink near the symbol. In my case, the number corresponding to the first pictogram is ’11’ as shown in the picture below. Since the number in my case is 11, I will insert the Data Cassette 11. You will have to interact with a data cassette based on the pictogram you have in your game.
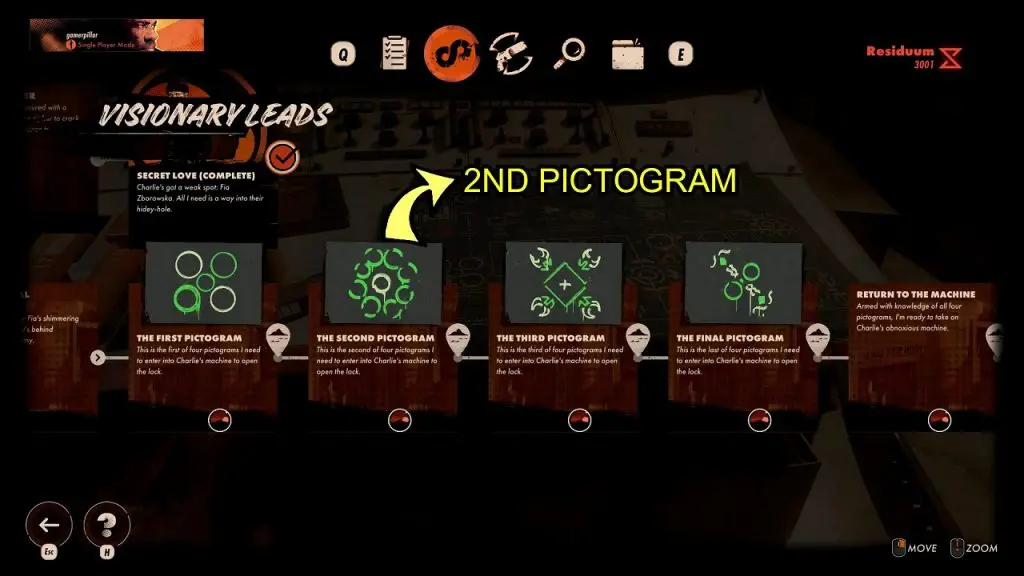
Step 2: The Second Pictogram
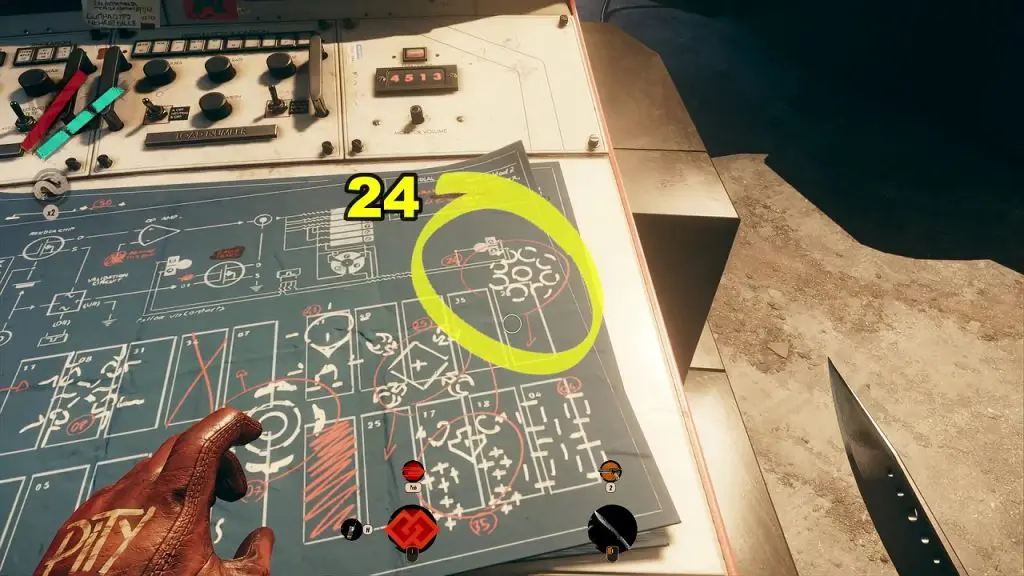
Next, see the picture in the second pictogram. Search for the matching symbol in the blueprint. Each symbol is assigned a number, written in red ink near the symbol. In my case, the number corresponding to the second pictogram is ’24’ as shown in the picture below. Since the number in my case is 24, I will insert the Data Cassette 24. You will have to interact with a data cassette based on the pictogram you have in your game.
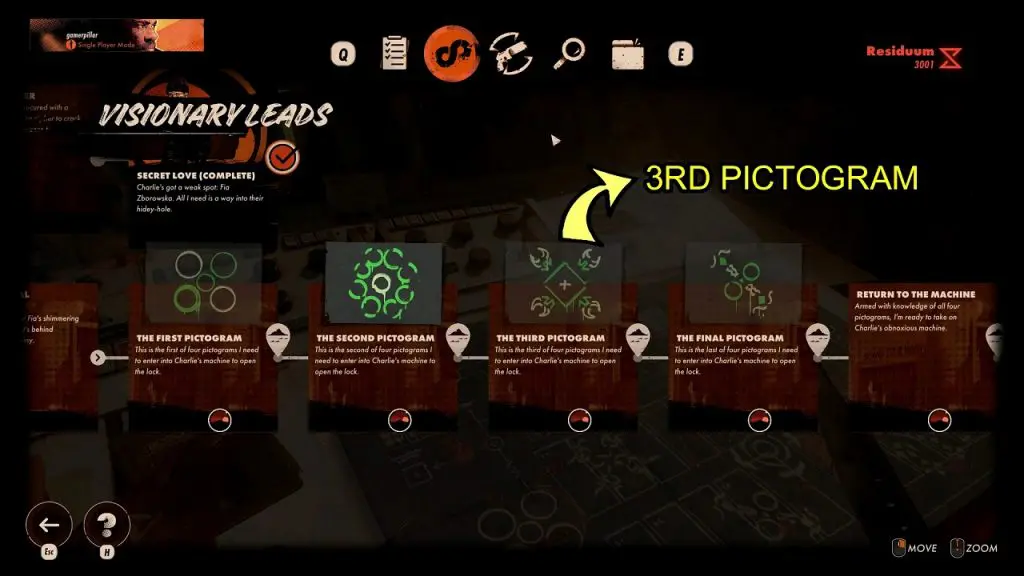
Step 3: The Third Pictogram
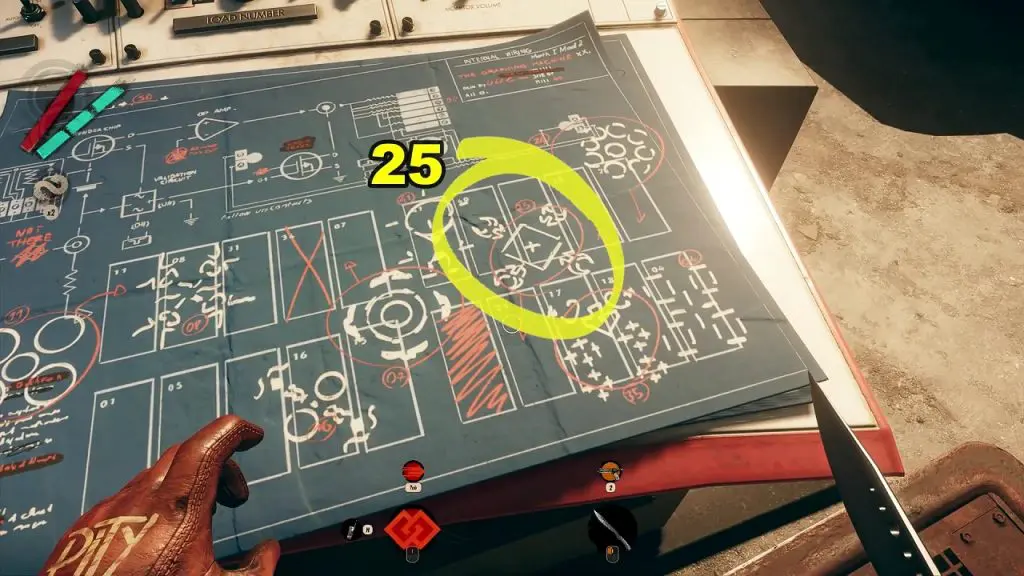
Next, see the picture in the third pictogram. Search for the matching symbol in the blueprint. Each symbol is assigned a number, written in red ink near the symbol. In my case, the number corresponding to the second pictogram is ’25’ as shown in the picture below. Since the number in my case is 25, I will insert the Data Cassette 25. You will have to interact with a data cassette based on the pictogram you have in your game.
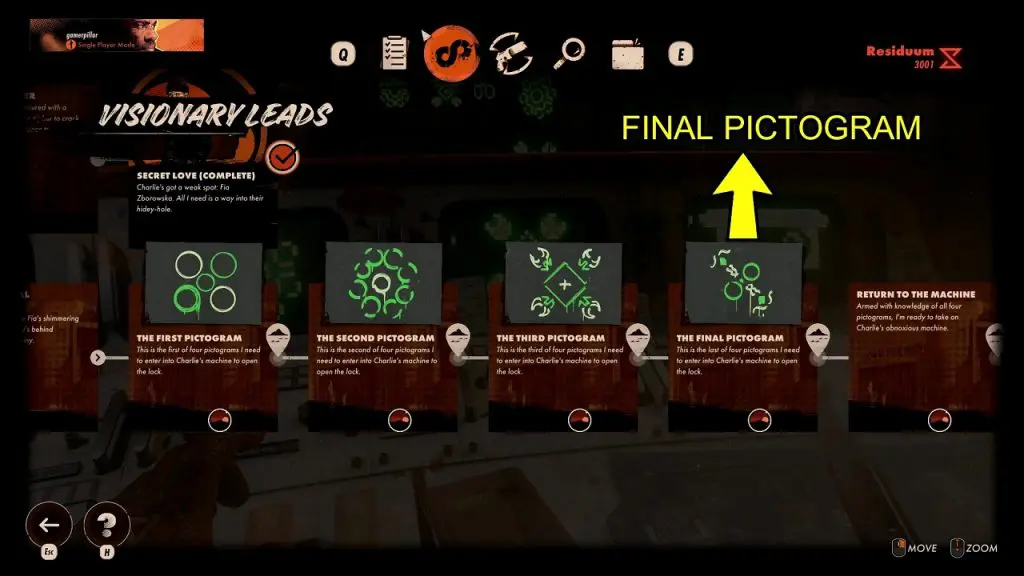
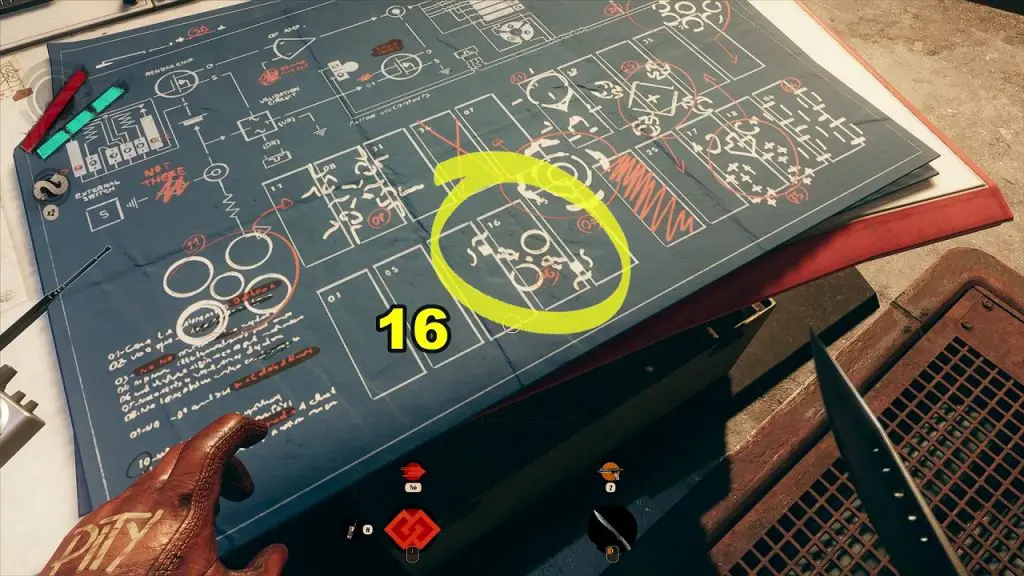
Step 4: The Final Pictogram
Next, see the picture in the final pictogram. Search for the matching symbol in the blueprint. Each symbol is assigned a number, written in red ink near the symbol. In my case, the number corresponding to the final pictogram is ’16’ as shown in the picture below. Since the number in my case is 16, I will insert the Data Cassette 16. You will have to interact with a data cassette based on the pictogram you have in your game.
Step 5: Insert The Data Cassettes
To solve the puzzle, you will have to insert the data cassettes in the correct order. Based on the pictograms I had in my game, my correct order was: Data Cassette 11,24,25,16 (See the picture below). You will have to interact with the data cassettes based on the pictograms you have in your game.