How to Solve Guide The Plank Possibilities to the Meta Terminal Puzzle: Sargasso | Ratchet and Clank Rift Apart
This page is part of Gamerpillar’s Ratchet and Clank: Rift Apart walkthrough & strategy step-by-step guide you on investigating the Dimensional Anomaly and successfully guiding all Clank Possibilities to the Meta-Terminal puzzle.
Guide the Clank Possibilities to the Meta-Terminal is part of Ratchet & Clank: Rift Apart’s main storyline, so you will need to complete it to advance the story. Here you need to guide clank’s ‘Possibilities’ ( which is an endless line of clank copies running around) from one side of the room to the other, clearing obstacles along the way. Your main objective is to guide them and to the Meta-Terminal.
Room #1:
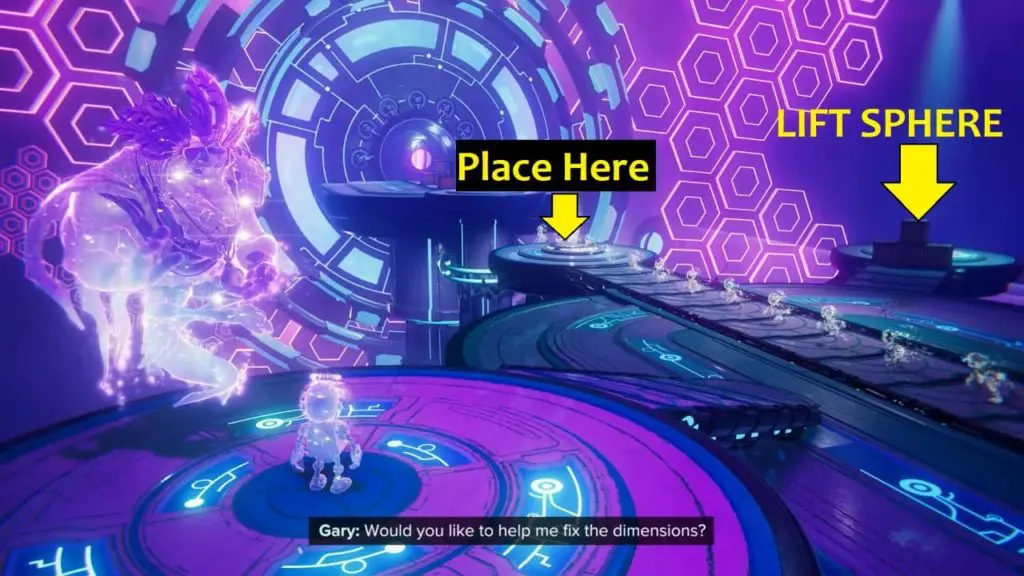
- Gary will guide you to fix the dimensions. Head to the platform on the right, smashing the boxes to make your way to pick the red-color Sphere. This is a Lift sphere that reduces the gravity on the object it touches.
- Pick the sphere and go towards the edge of the middle platform where the Possibilities are falling below. You will see that the round area on the floor is highlighted. Throw your sphere on that round area.
- When Possibilities passes over the Lift Sphere. This List sphere will reduce the gravity of falling Possibilities and help them to jump over to the platform at a higher level on the other side. You (as Clank) also need to pass through it and jump across to the platform to the other side.
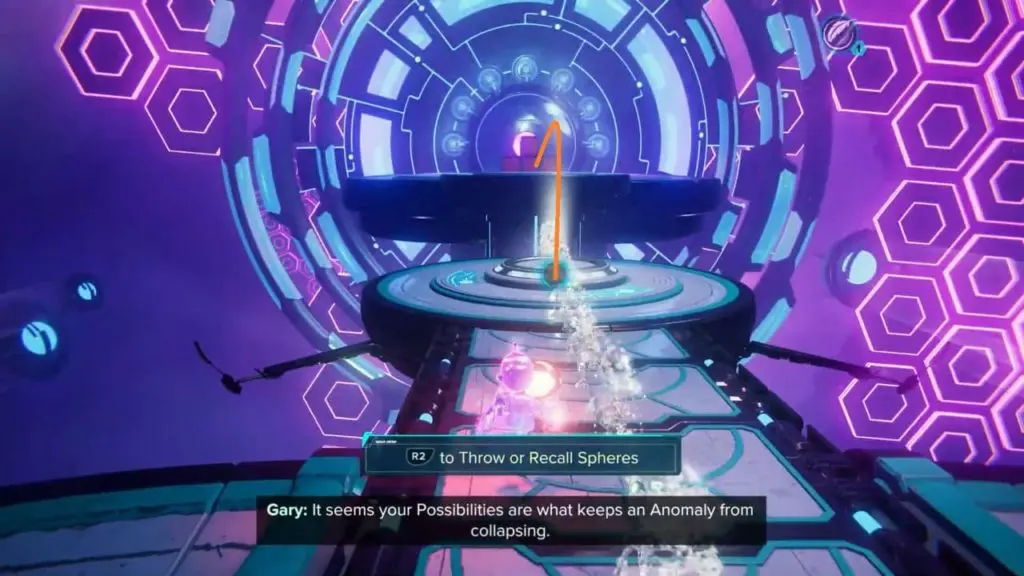
- Smash the two rows of boxes to clear the way for the Possibilities to reached the Meta-Terminal. Once seven of the Possibilities have reached the Meta-Terminal, the door to the next room will open. You can also press “R2” to recall the Lift Sphere back to your hand. Follow the Possibilities and walk into the new room.
Room #2:
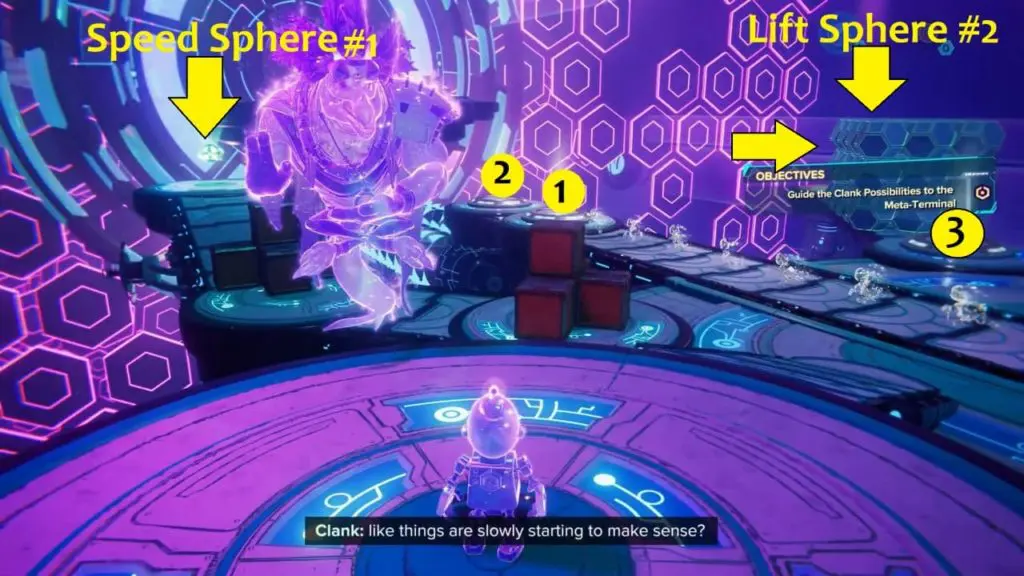
- Inside the new (second) room. There are two spheres to work on with. Head to the platform on the left, smashing the boxes to make your way to pick the green-color sphere. This is a Speed sphere that increases the speed of any object it touches.
- Place the Speed sphere in the first round gap on the middle floor near the barrier of the right platform. Walkthrough the green light, this will give you the boost needed to break the metal boxes. Pick up the red Lift Sphere.
- Go towards the edge of the middle platform where the Possibilities are falling below. There is two highlighted round area in the middle platform.
- Throw the Lift Sphere at the second (edge/last) highlighted area.
- Similarly, throw the Speed Sphere at the first round gap in the middle floor. These two balls will give a speed boost as well as lift ability for the falling possibilities to reach the higher level platform on the other side.
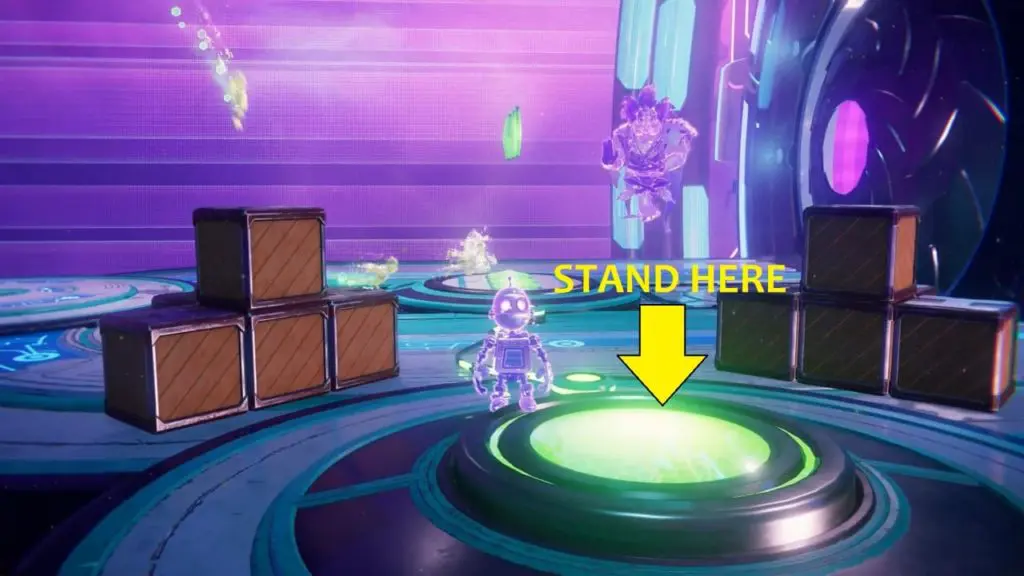
- Walk through both and jump over to the ledge beyond. Now you will observe that instead of proceeding straight, your Possibilities are going left and falling again. Go left to the green button and stand on it. This will make the Possibilities run straight ahead, opening up the way to the final room. Walk into the now-open Meta-Terminal.
Room #3:
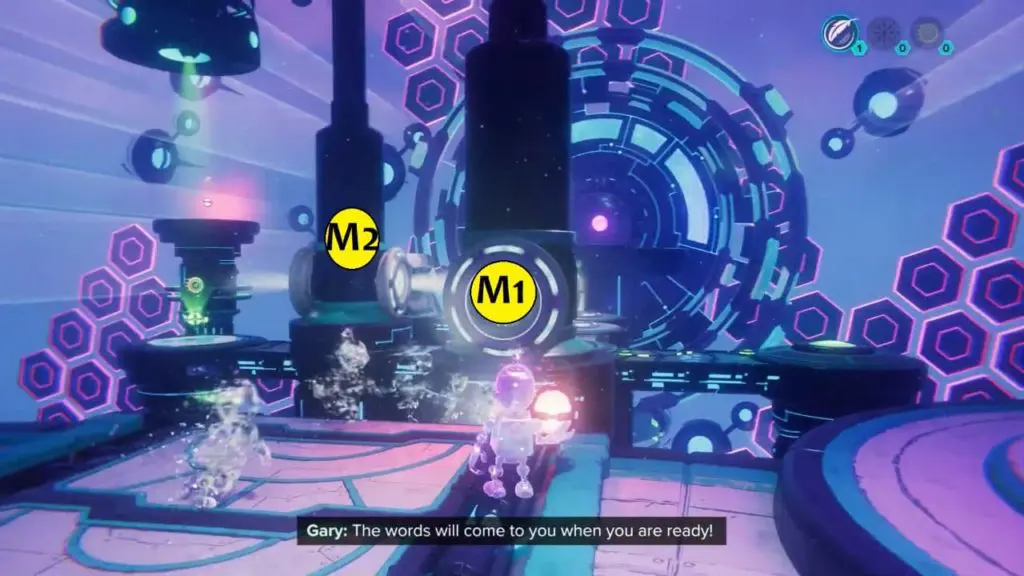
- Inside the third and final room, few large hydraulic press machines are blocking the path.
- Throw the Lift sphere at the large hydraulic press mechanism (M1) directly in front of you. Cross the first hydraulic mechanism and recall your Lift Sphere. Now throw the Lift Sphere at the hydraulic mechanism (M2) to the right to collect the Speed Sphere.
- Go to the middle platform and turn left. Throw a Speed Sphere at the round gap (3) to the left. Walkthrough the green light, this will give you the boost needed to break the metal boxes.
- Recall the red Lift Sphere and place it over the round area (4) that was hidden below the metal boxes.
- Walk through both and jump over to the ledge on the extreme left to collect the second Lift Sphere and gild back.
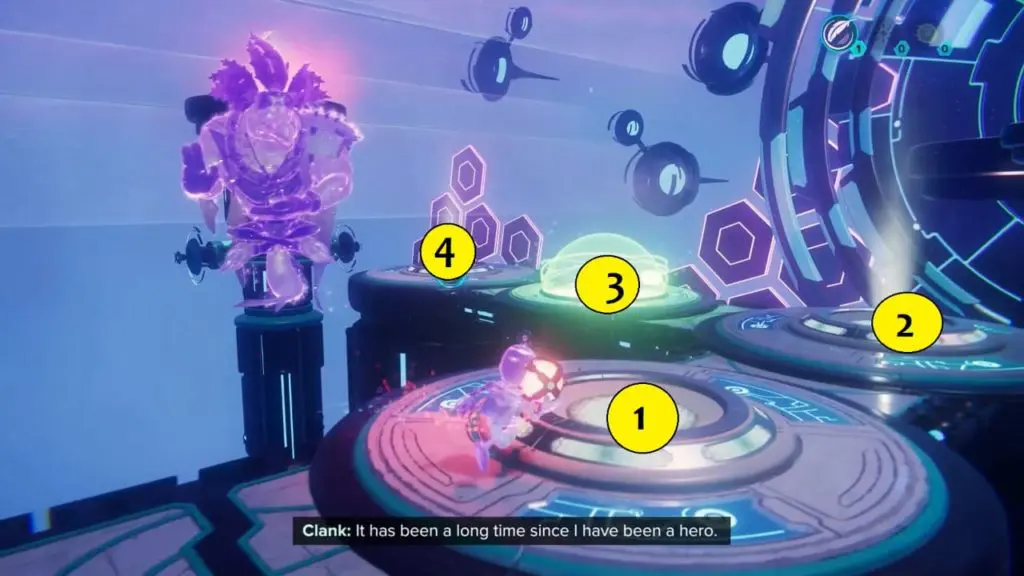
- Now, place Speed Sphere and Lift Sphere in round areas 1 & 2 as marked on the map. Use the second Lift Sphere to lift the hydraulic mechanism.
- Go behind and step on the green button. This will make the path for the Possibilities in the correct way.
- This will complete the Clank Sphere Puzzle. Having completed the Dimensional Clank puzzle, return to your ship to leave Sargasso, as Rivet owes Clank a new signal booster, a part that can be obtained when speaking to Zurkie in Scarstu Debris Field.