Mission: Vergeeb Jamboree
Act I: The Vergeeb Jamboree
Optional Objective: Destroy 20 Goblin Weapon Racks
This walkthrough will show you the location of 20 Goblin Weapon Racks in Act 1 (The Vergeeb Jamboree) of ‘Vergeeb Jamboree’ mission in the new Dungeons and Dragons Dark Alliance game. Check the video link at the bottom of the page to see how to complete this optional objective.
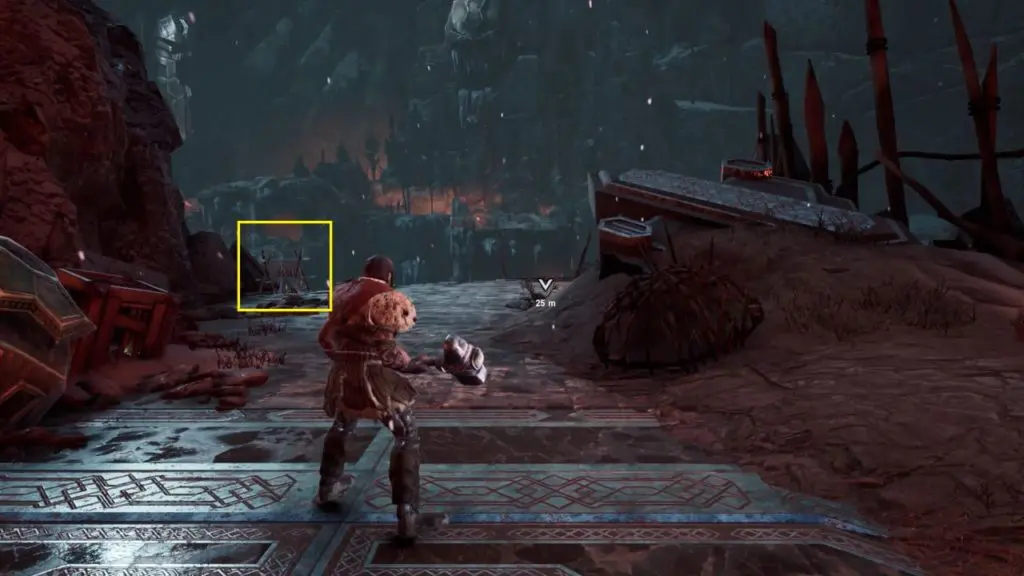
Weapon Rack #1:
The first weapon rack can be found at the beginning of Verbeeg Jamboree. It’s on the left side before entering the portal.
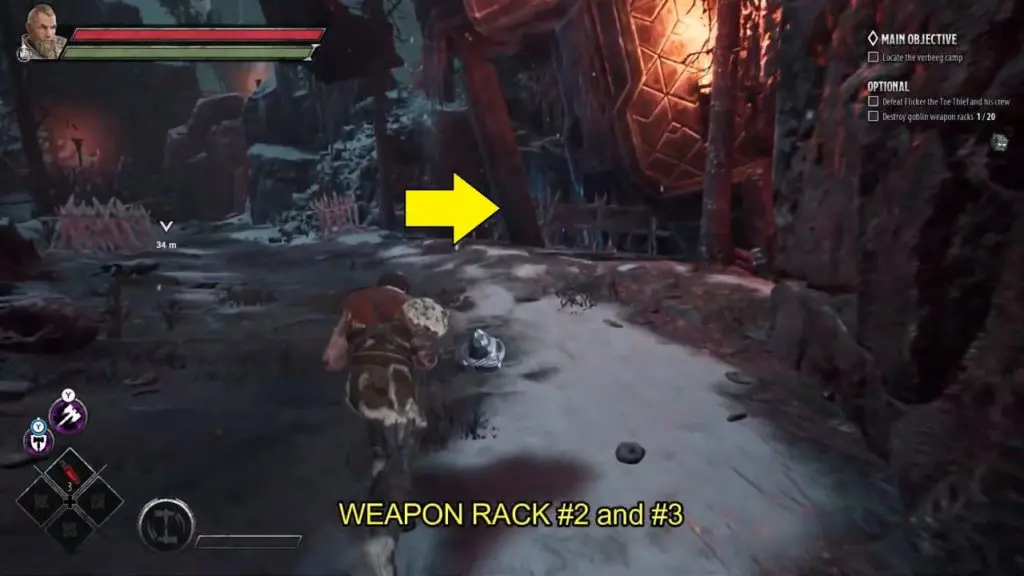
Weapon Racks #2-3
After the first weapon rack, transverse through the two portals one after another to reach the next area. The weapon rack can be found on the right side after ascending the stairs.
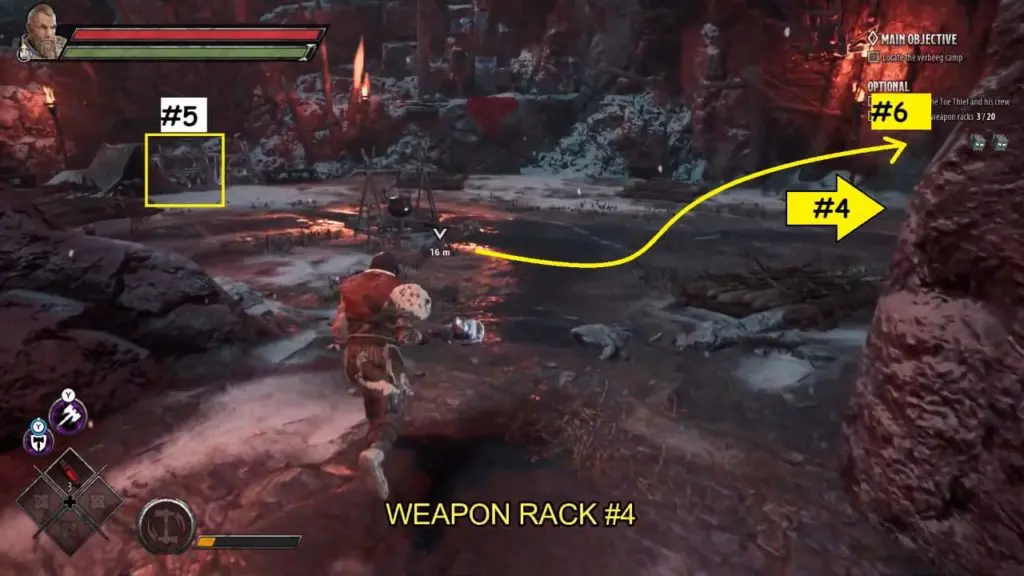
Weapon Racks #4-5:
The fourth & fifth weapon racks are in the first enemy camp where you get the first rest spot. As soon as you reach the enemy camp look to your right for the 4th weapon rack. The 5th weapon rack is at the diagonally opposite corner (near the tents).
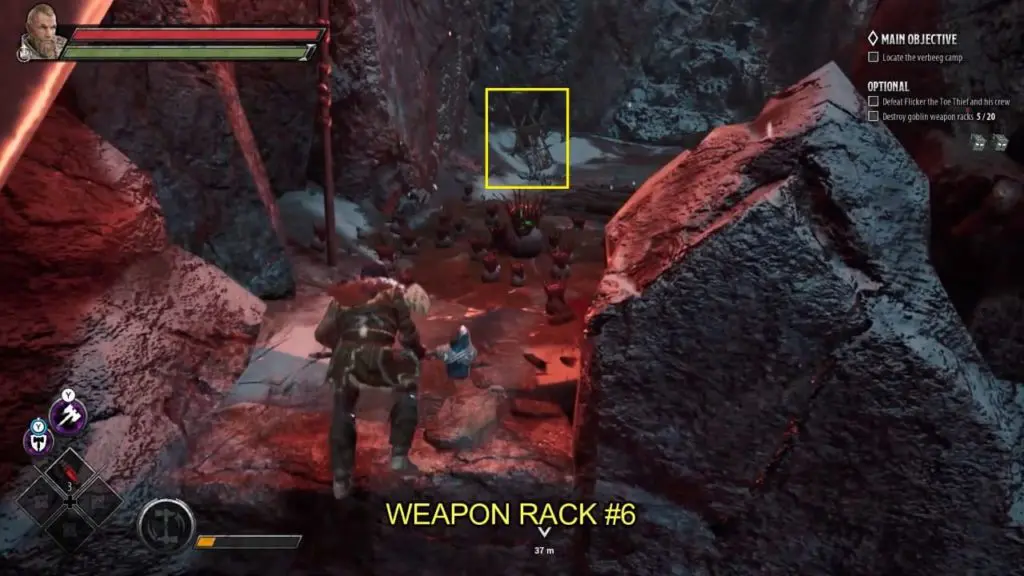
Weapon Rack #6:
From the first enemy don’t follow the main quest marker. Instead, turn around and take the path at the opposite direction. Weapon rack can be found after jumping across the first gap along the path.
Weapon Rack #7:
Return to the first enemy camp and continue towards the main marker. The seventh weapon rack will be on the left as soon as you leave the first enemy camp.
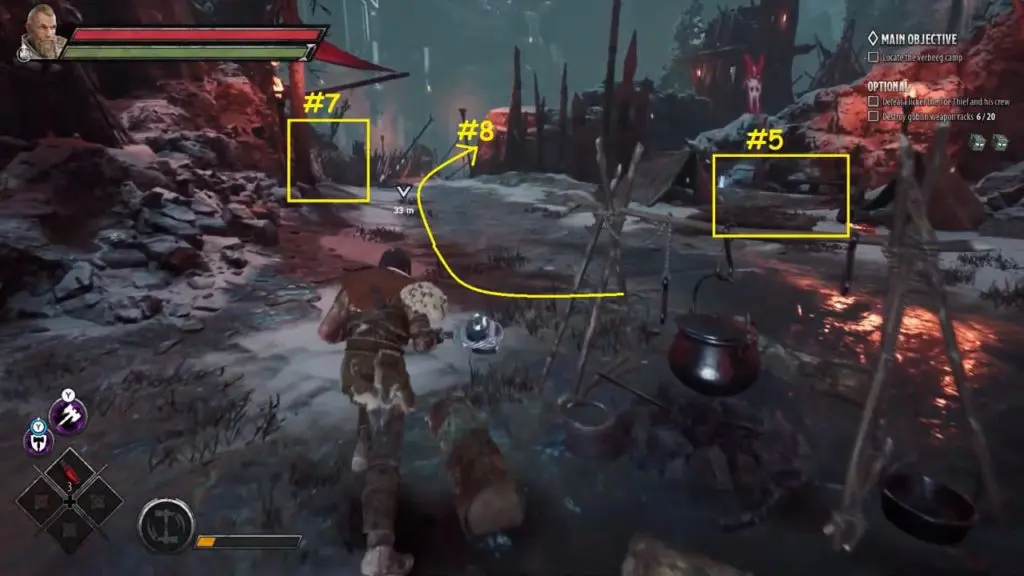
Weapon Rack #8:
After the previous weapon rack you will be in an open area where you’ll encounter enemies. After defeating the enemies look for the eighth weapon rack on the right side.
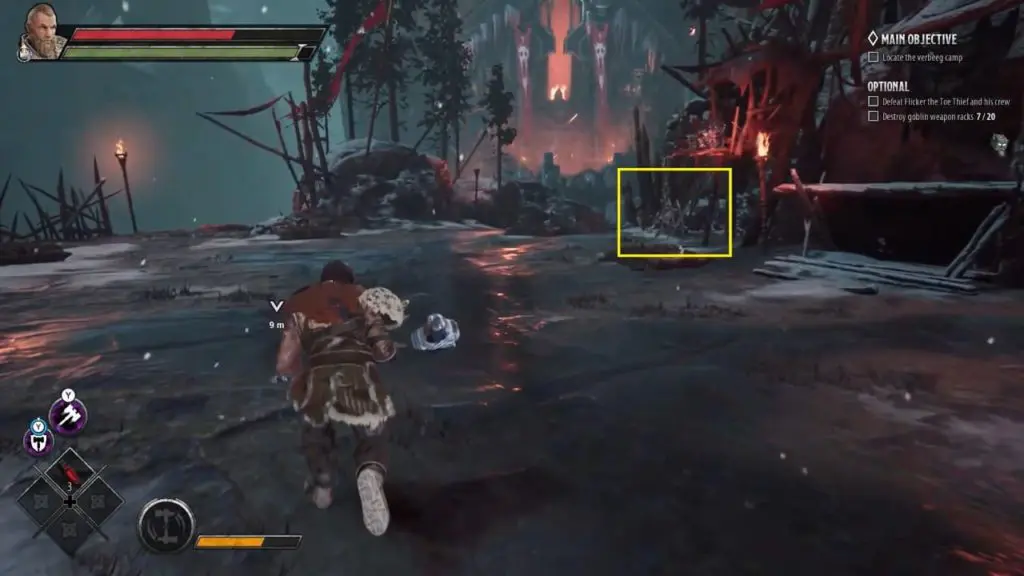
Weapon Rack #9:
As you move ahead from the previous weapon rack (towards the quest marker) you’ll have to jump down at the end of the path. After jumping down ascend the stairs (in the front) and destroy the ninth weapon rack which is on the left side of the platform.
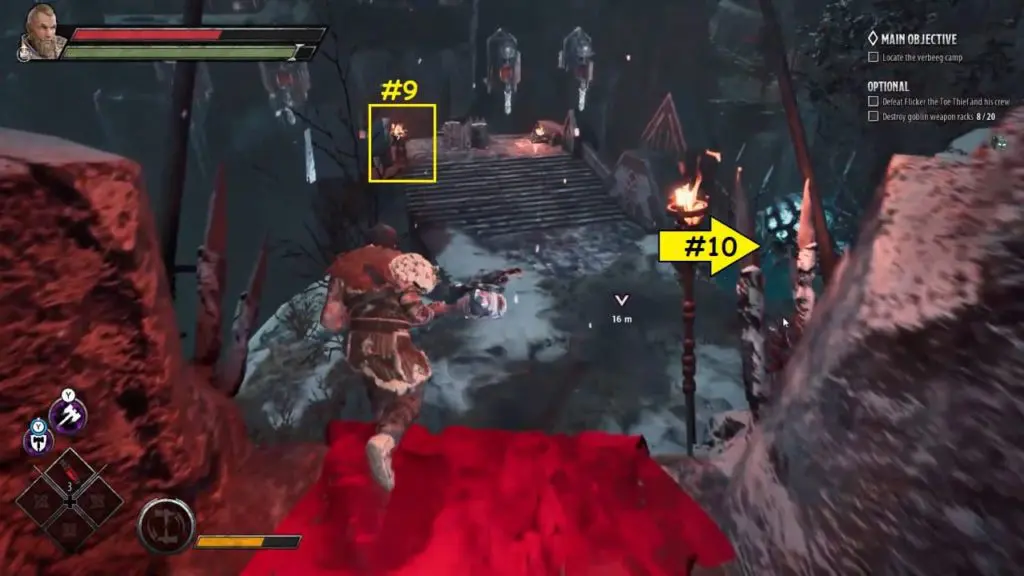
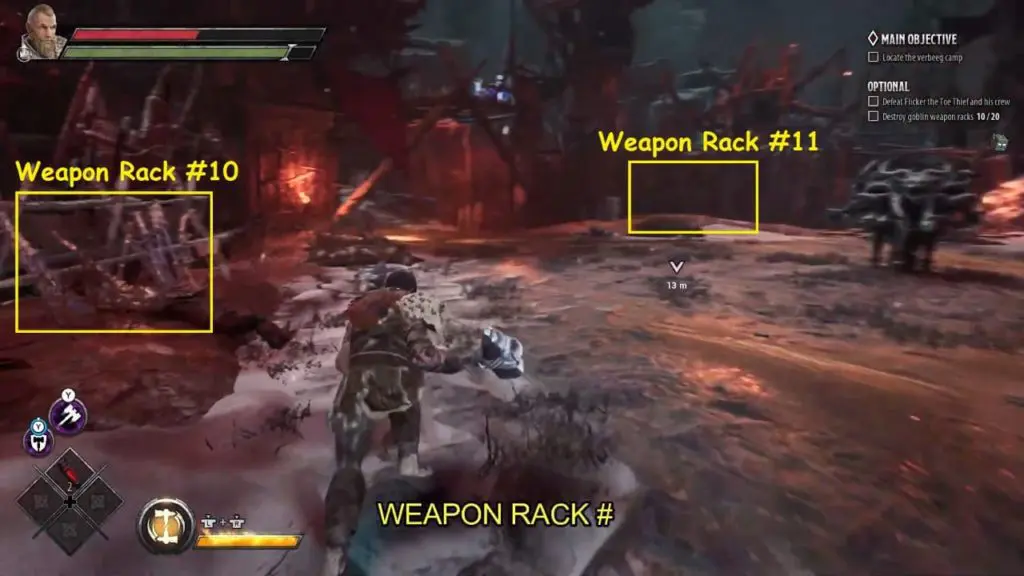
Weapon Racks #10-11:
Continue following the quest marker from the previous weapon rack until you cross the fire emitting statues and reach an enemy camp. You’ll find two weapon racks here. One near the left wall and another one near the right wall.
Weapon Racks #12-13
Continue into the next part of the enemy camp where you’ll get the 3rd rest-spot of this dungeon. This area of the enemy camp has two more weapon racks. The weapon rack #12 is located on the right side and weapon rack #13 on the left.
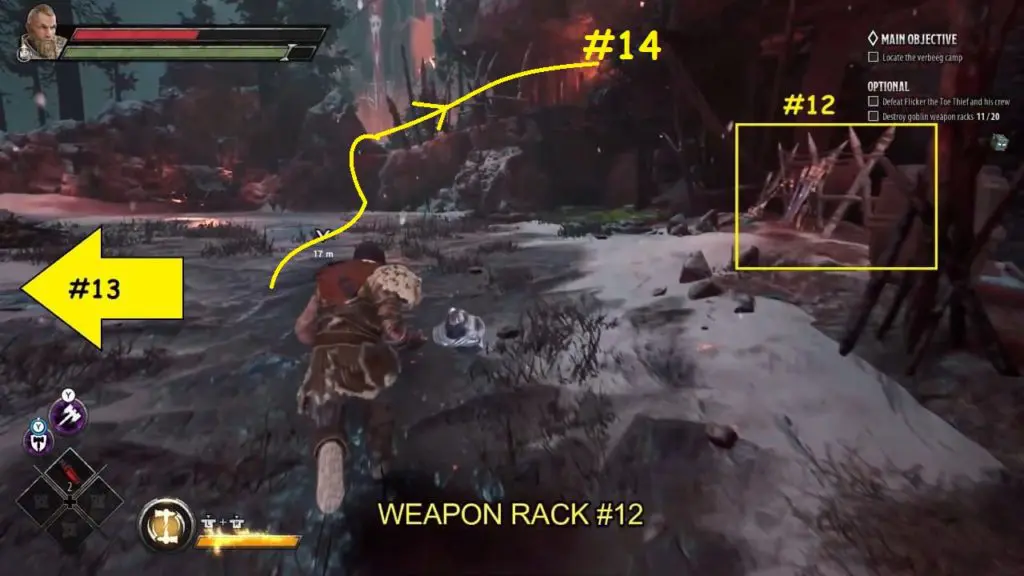
Weapon Rack #14
Leave the enemy camp by climbing up onto the wooden ramp. At the end of the wooden ramp you’ll find a breakable wooden wall on the right. Break the wooden wall and jump across to the next wooden platform for the 14th weapon rack.
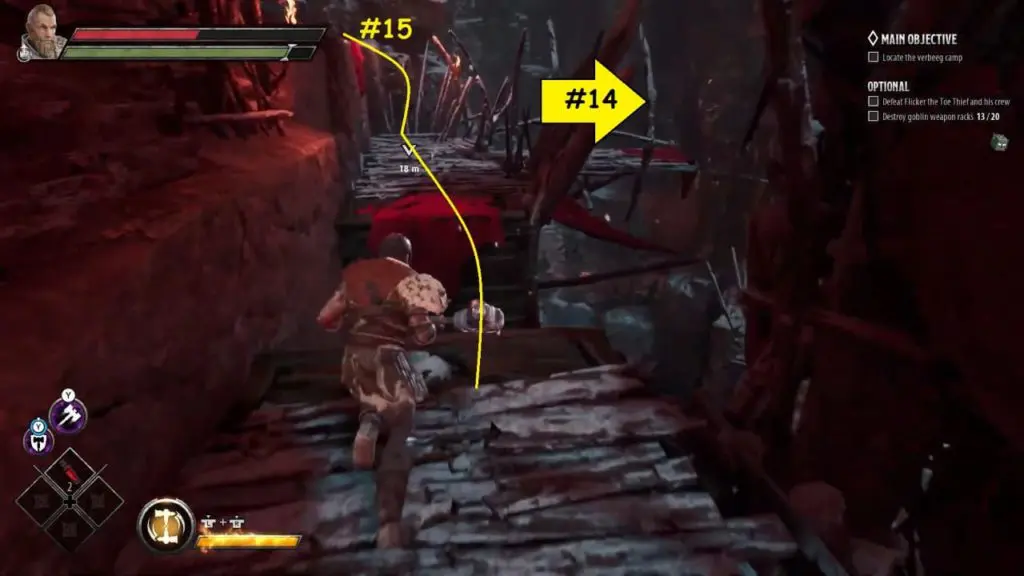
Weapon Racks #15-16
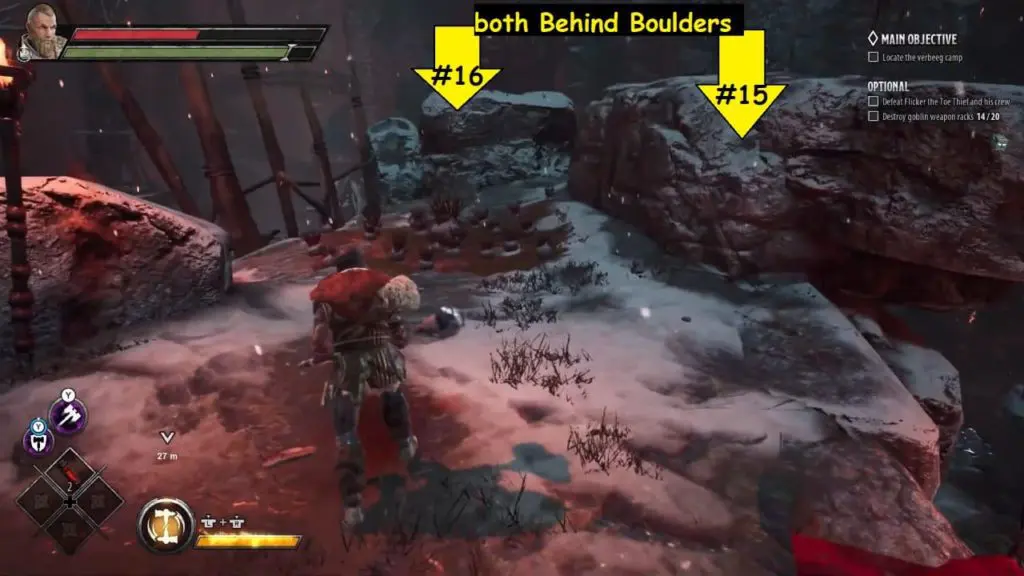
Backtrack a little from the previous weapon rack and leave the wooden ramp by climbing up the ledge. Before heading down (towards the main quest marker), go to the right for two more weapon racks. Weapon rack #15 is hidden behind the large boulder on the right side. From there move little ahead and drop down for weapon rack #16.
Weapon Rack #17
Start following the quest marker from the previous weapon racks and climb down the ladder. Weapon rack #17 is near the base of the ladder.
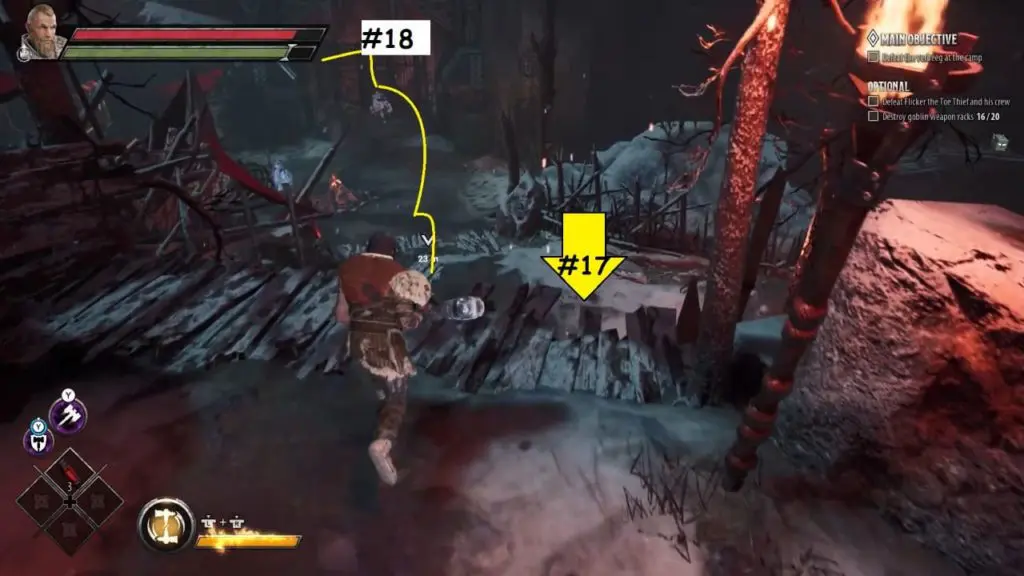
Weapon Rack #18
The remaining three weapon racks are in the final area of the dungeon (during the objective “find the missing Verbeeg”). After you reach the final area by jumping across the broken wooden bridge, go left and break the wooden barricade. Weapon rack #18 is at the end of the wooden path near the chest.
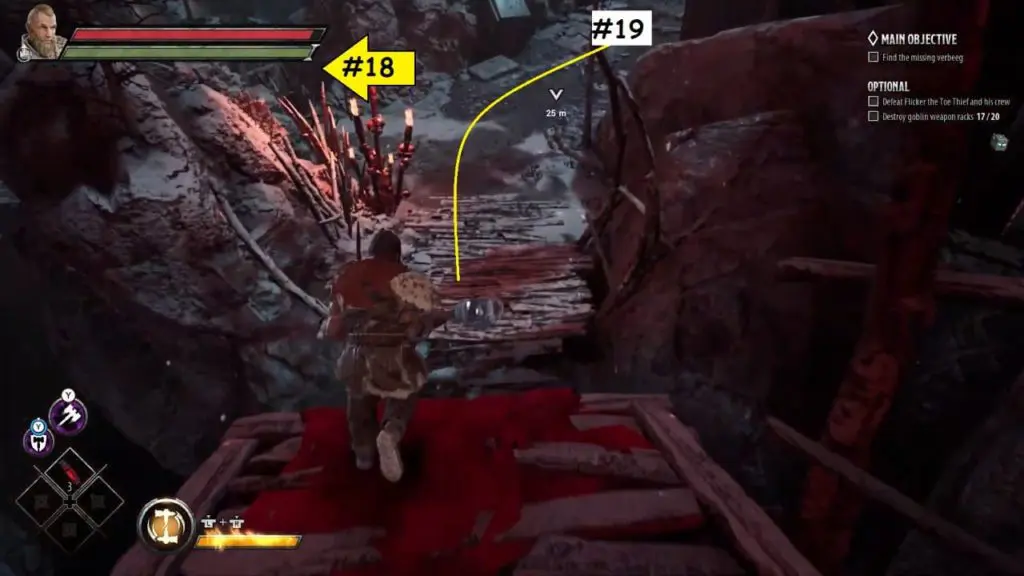
Weapon Racks #19
Follow the quest marker from the previous weapon rack. The weapon rack #19 will be on the right side of the path near the castle wall.
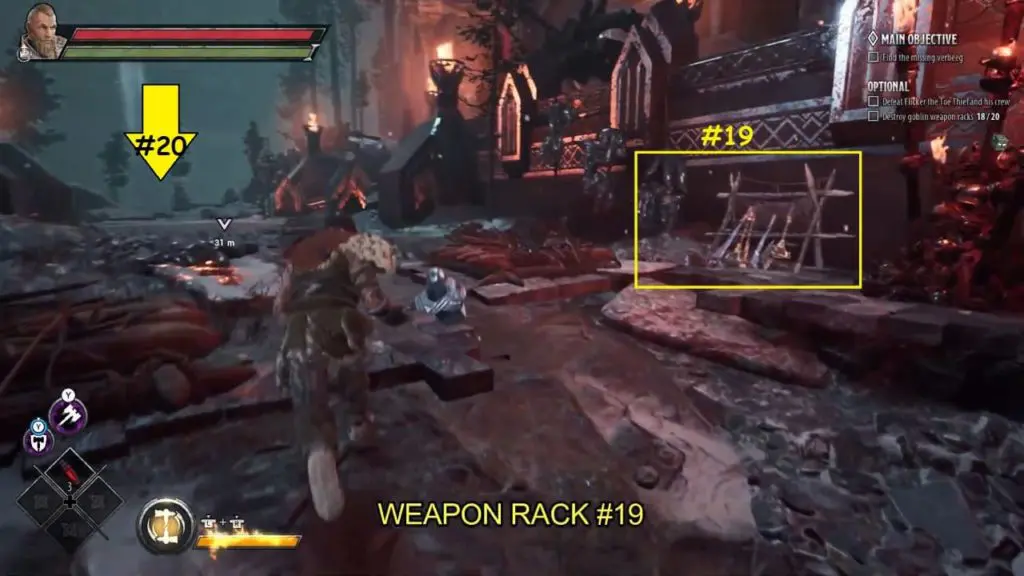
Weapon Rack #20
Before going up the castle stairs, go to the left and at the very end drop-down to the lower ground to reach the last weapon rack.