This step-by-step guide will show how to complete all the objectives of the mission “Eye of the Storm” in Starfield.
Speak with Delgado
To begin the quest, Go to The Key and look for Jazz’s Ship Services. When you speak with Delgado, he will inform you that it is time to return to Bannoc 4 with the stolen equipment.
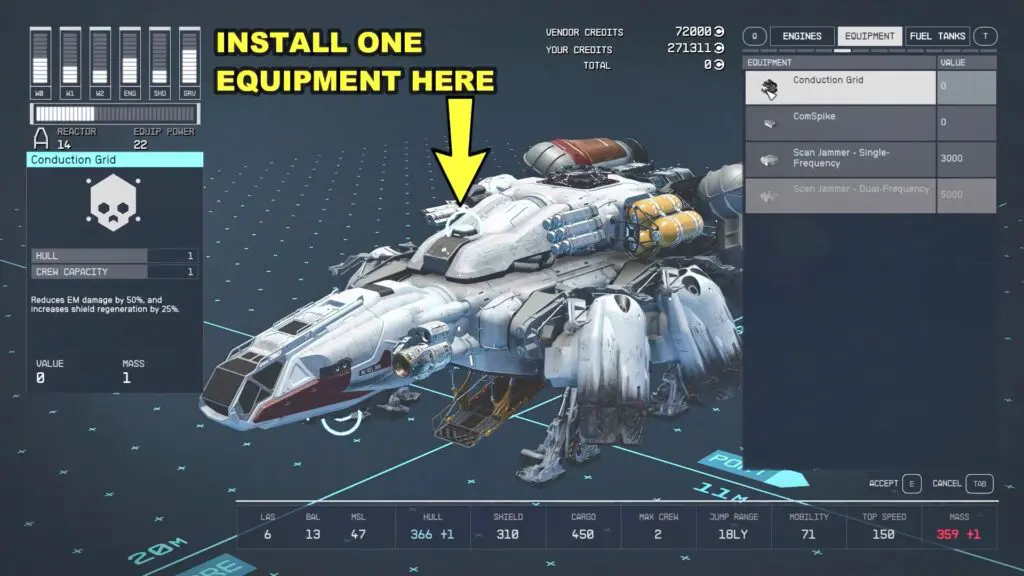
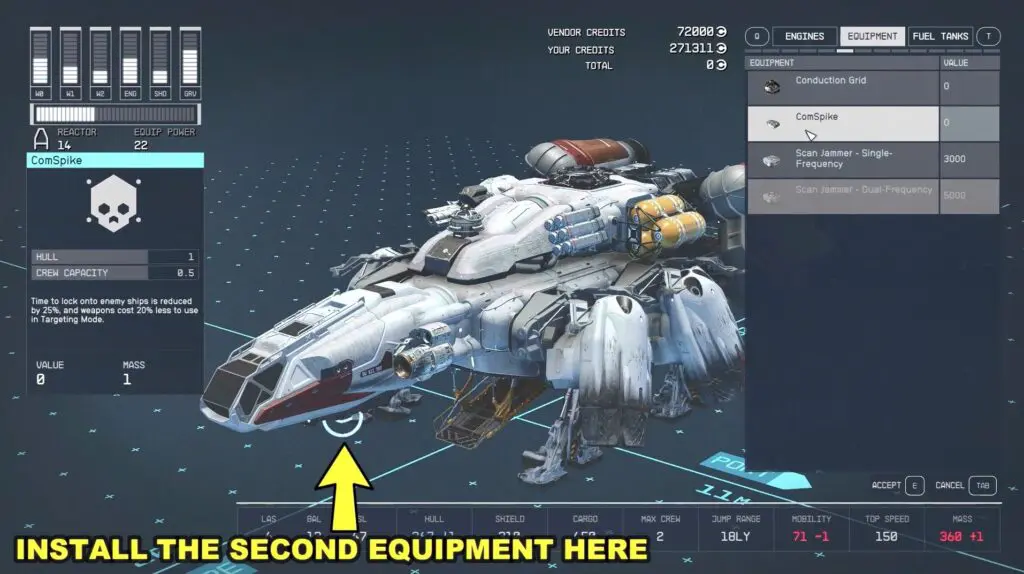
Install the Comspike Module and the Conduction Grind Module
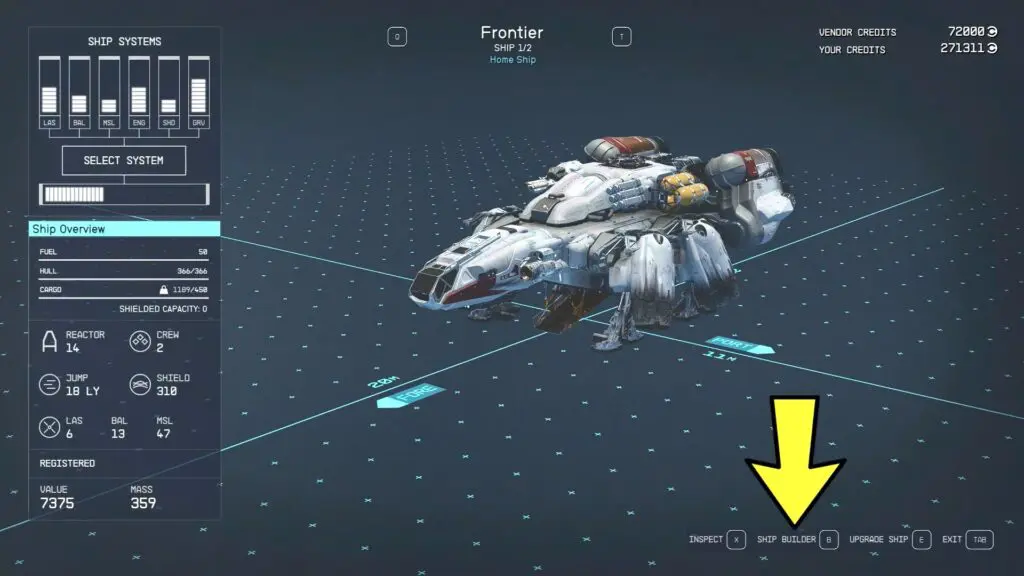
Speak with Jazz (Jasmine Durand) in the Jazz’s Ship Services. Ask her for assistance with your ship, and then tell her you want to inspect and modify it.


Choose “Ship Builder” from the bottom of the screen.
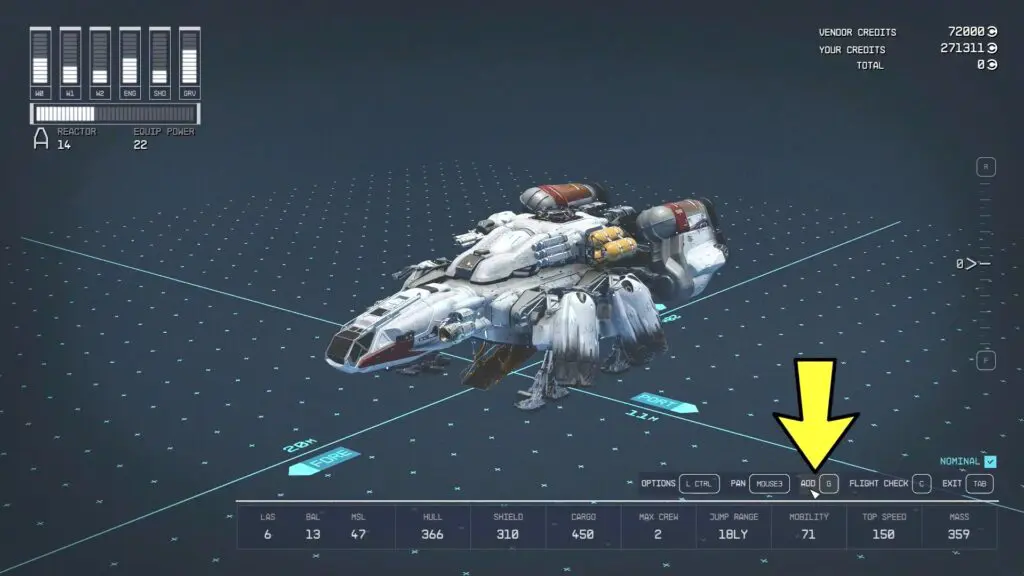
Choose “Add” to apply for modification in the ship.
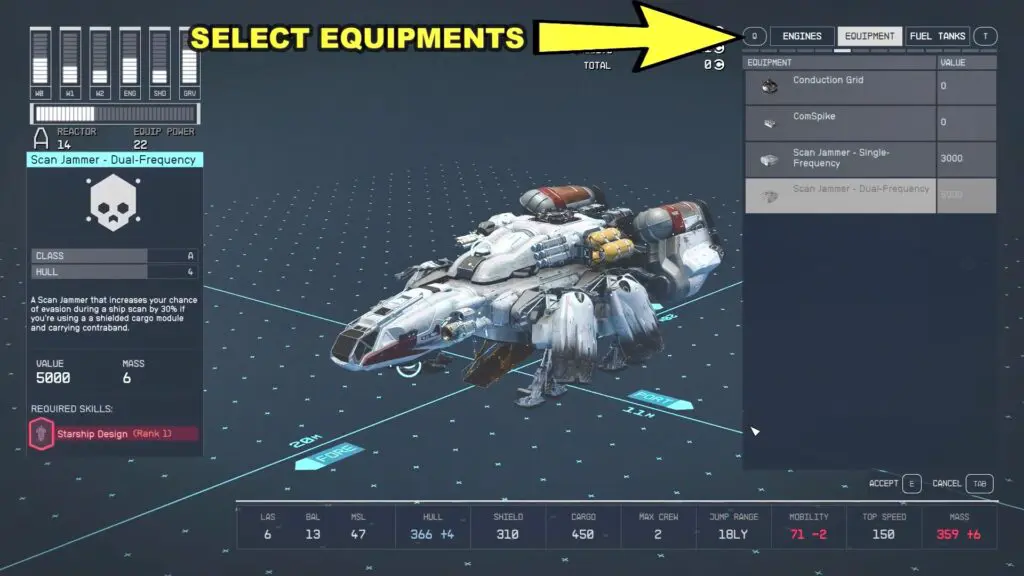
In the next screen, toggle the panel on the right side of the screen to the “Equipment” tab. You will find the Comspike Module & Conduction Grid in the equipment tab and the game will also show the possible location to add these components to the ship.
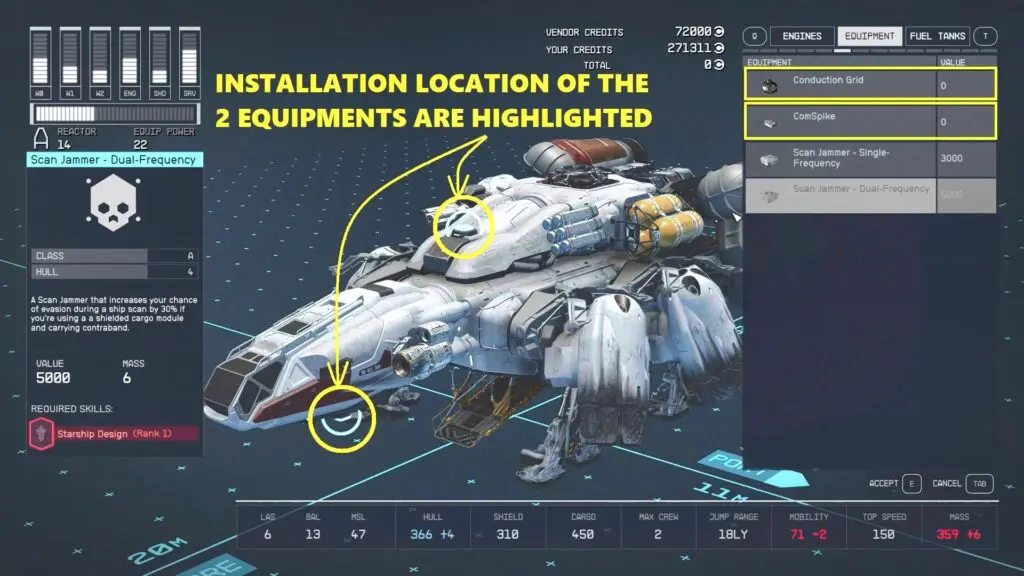
Add a Conduction Grid on top of the ship and a Comspike Module at the bottom of the ship as shown.
Proceed to the UC Vigilance
Proceed to the UC Vigilance and speak with Commander Kibwe Ikande to inform him of the Crimson Fleet’s plans.

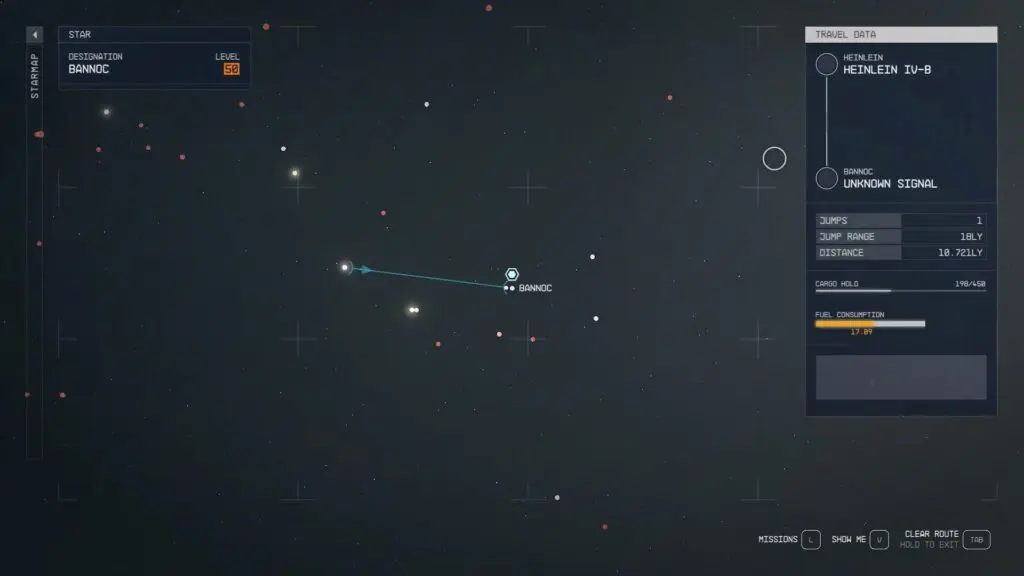
Proceed to Bannoc 4
Board your ship and navigate to Bannoc IV in the Bannoc star system.
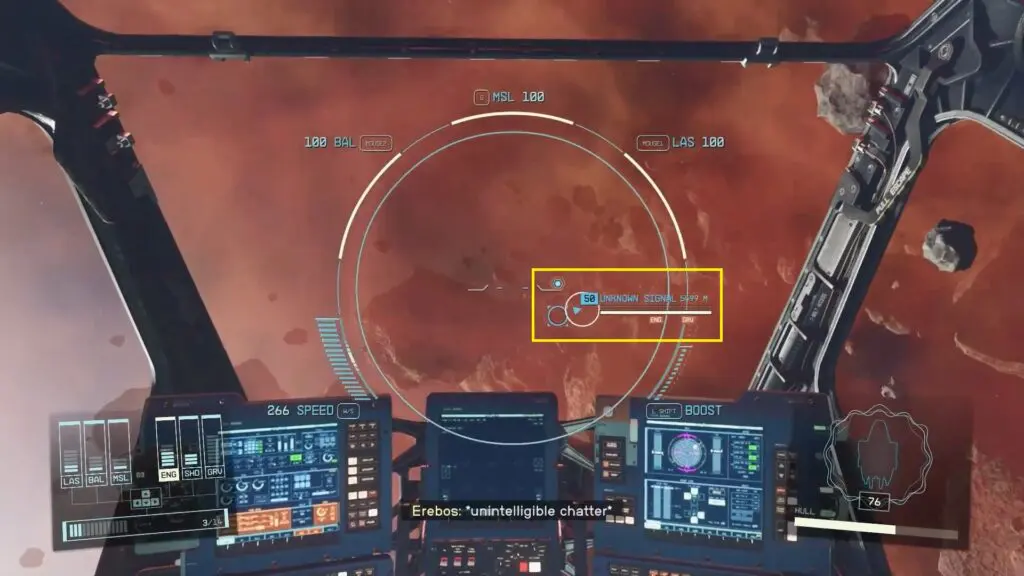
Board the Galbank Transport Legacy
Navigate through the EM Field and track the Unknown Signal until you locate the Legacy, the ship you’ll want to dock with.
Locate the Vault Control Center
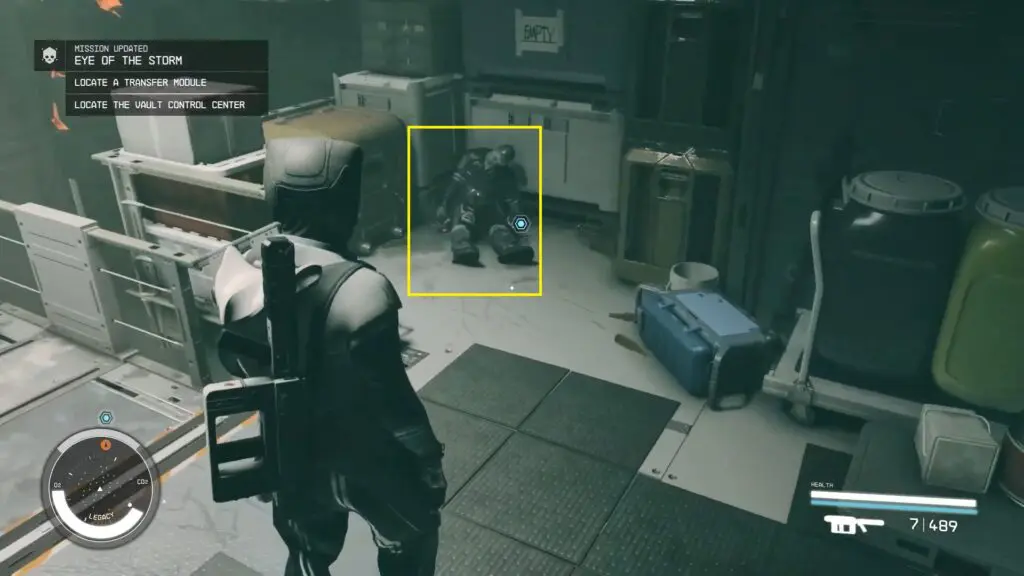
After boarding the Legacy, players will immediately observe that the ship has been abandoned for quite some time and is full of corpses. The next step is to ascend the stairs and progress through the corridors till the end to reach the initial Control Center. To access the Control Center you will need a Transfer Module.
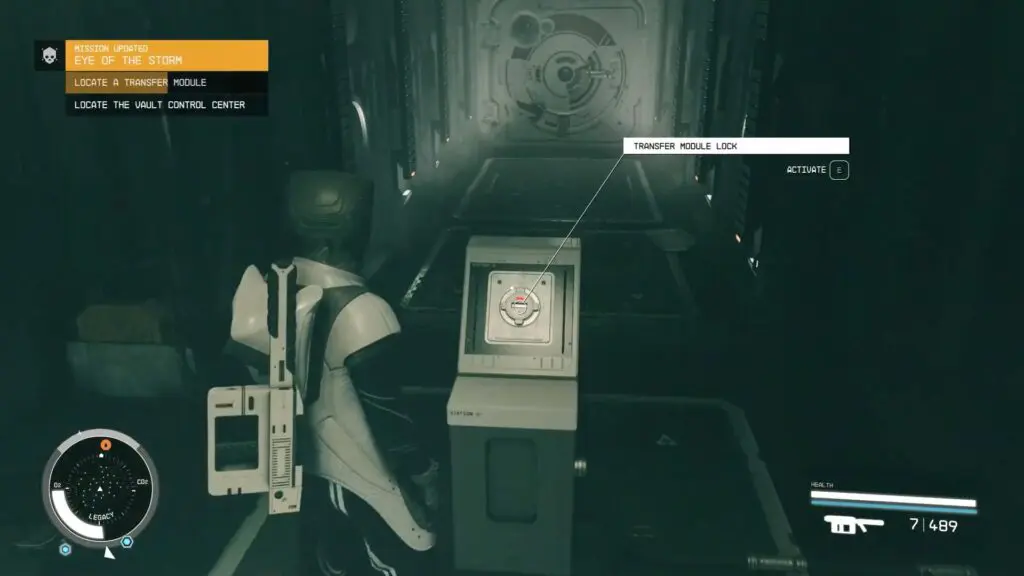
Fortunately, a Transfer Module can be located just outside of the room next to Osterholt’s body.
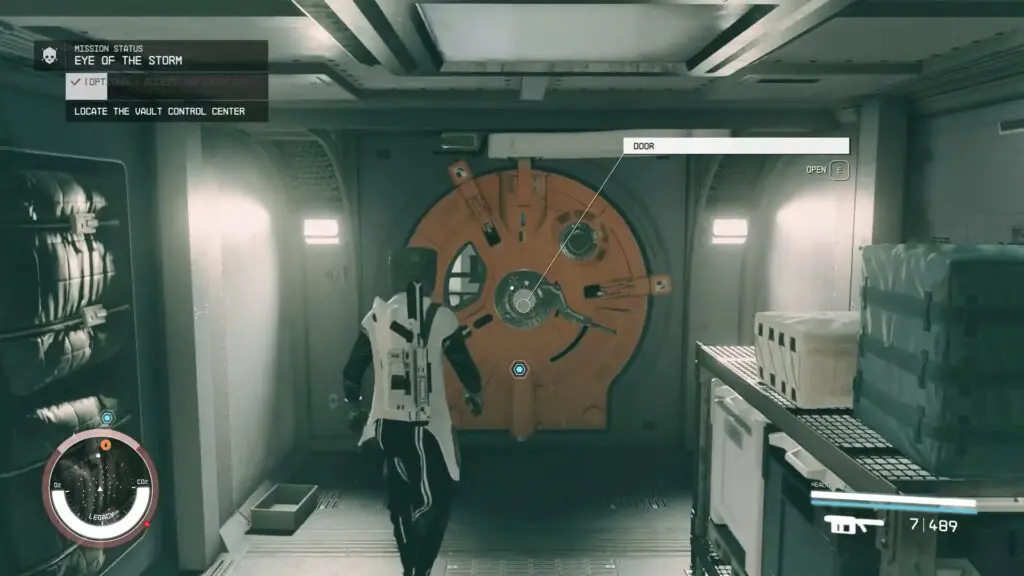
Proceed inside and make their way to the left to locate the large orange sealed door. Open it and patiently wait for the camera to look away before entering.

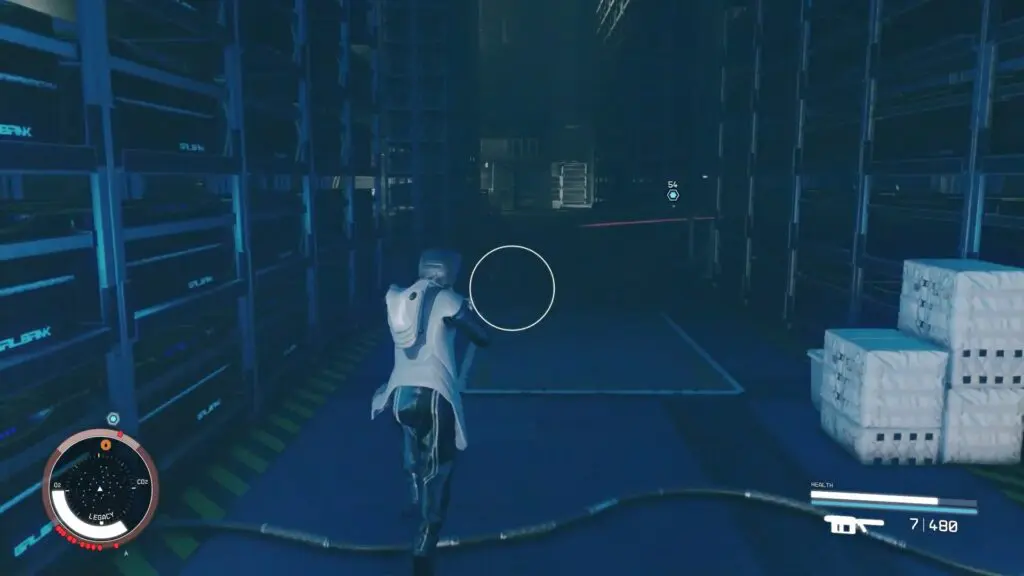
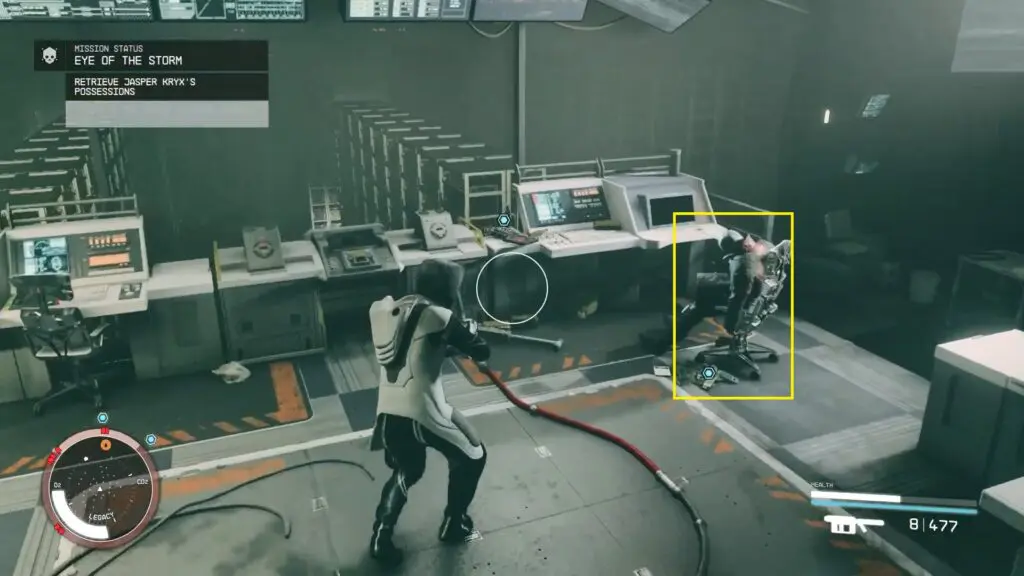
Traverse the Vault, avoiding surveillance cameras and defeating turrets and robots encountered on the journey.
Retrieve Jasper Kryx’s Possession
In the Vault Control Room, you’ll find the final resting place of the Crimson Fleet’s founder. Next to his body, players can discover stacks of Credstiks, the crucial GBLR013: Mortem Obire Evidence, and the essential GalBank Transfer Module. On the desk, players can grab the special legendary rifle known as the Revenant.
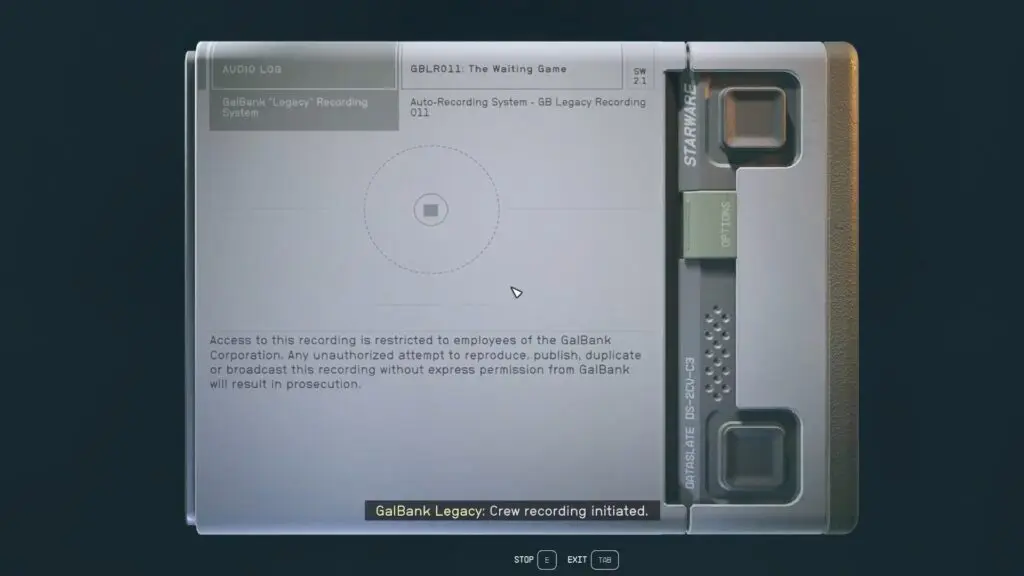
Listen to Kryx’s Recording
Once you’ve collected Kryx’s Belongings, retrieve GBLR011: The Waiting Game, which serves as Kryx’s last recording. Listen to Kryx’s Recording afterward.
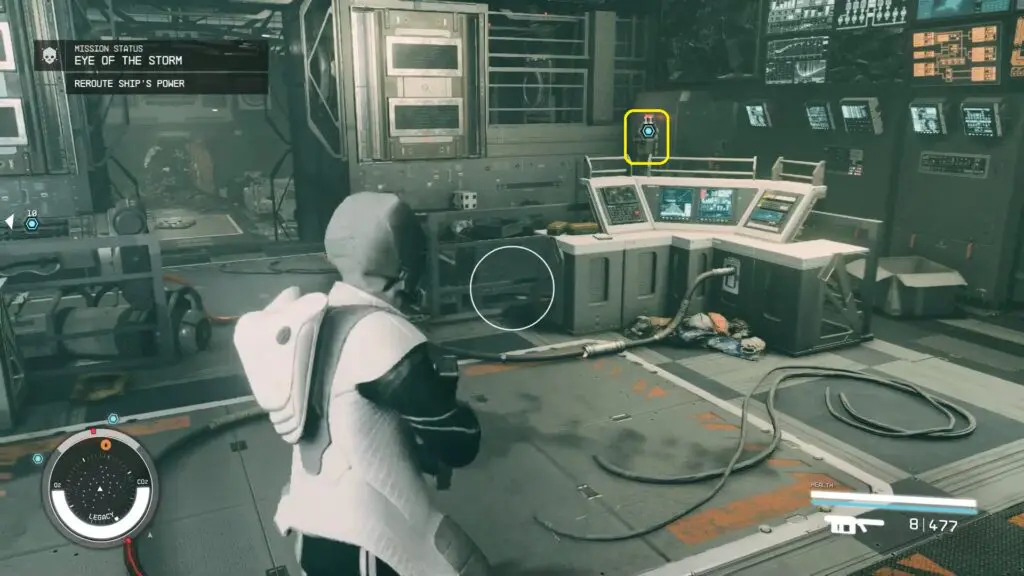
Reroute Ship’s Power And Use The Data Core Port
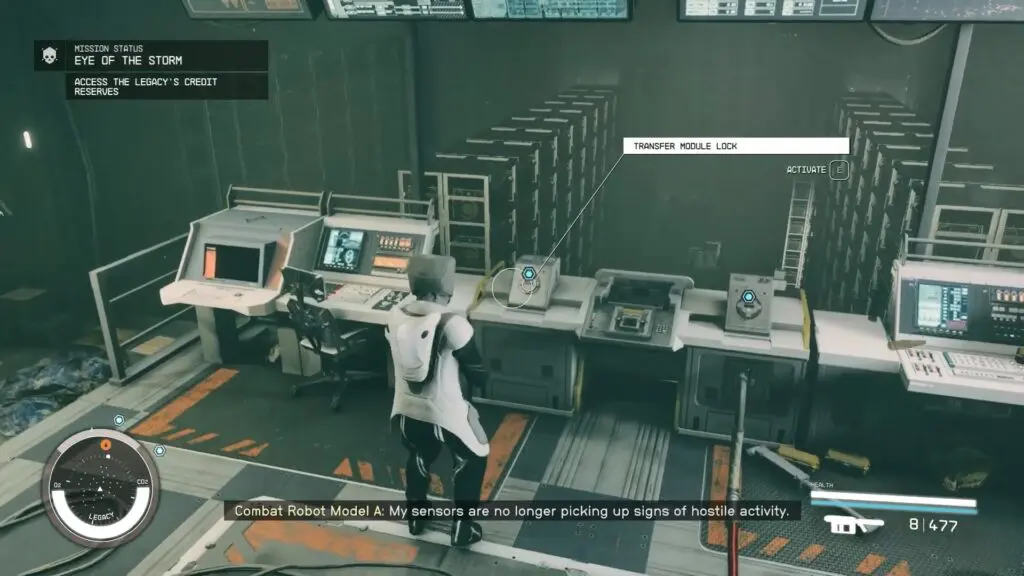
Players are assigned the duty of reconfiguring the ship’s power system. To achieve this, activate both Power Override Control switches, situated directly across from each other within the same room. This action will restore power and activate the dual Transfer Module lock switches positioned at the room’s center.
Once both Transfer Modules are securely placed in their designated slots, players should insert the Data Core into the Data Core Port and commence the Credit Reserves download from the Legacy.
Escape the Legacy
Once you’ve acquired the Data Core, return to your ship. Exposing yourself to the EM Storm will steadily deplete your health.

Bring Kryx’s Legacy to the Key or to the UC Vigilance
Now that players are back on their ship, they must choose between UC SysDef and the Crimson Fleet to hand over Kryx’s Legacy in Starfield.