The workbench is used for crafting, upgrading, repairing items broken tools, and allow the construction of various buildings. Building a workbench in Valheim is very easy. You need to collect 10 x Wood and equip yourself with a hammer.
To craft a hammer you need to collect 3 x Wood and 2 x Stone. Hammer Guide
How to Build a Workbench in Valheim
Once you craft/equip with a hammer, right-click (Mouse-2) to open the build menu. Go to the crafting tab and select workbench. Place the workbench on some flat surface.
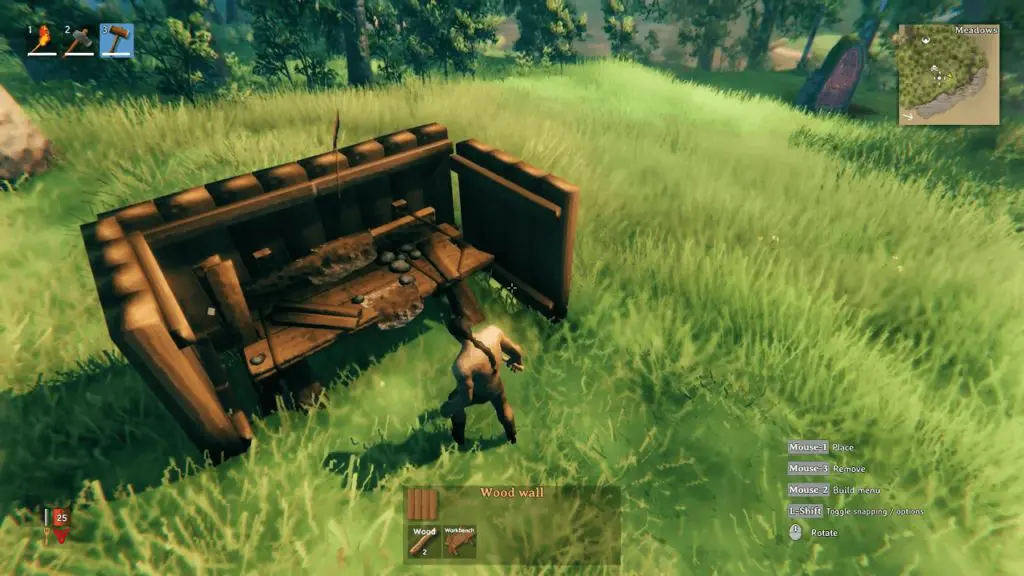
Note: A workbench (or crafting station) is unusable unless it’s surrounded by a wall on three sides and cover with a roof.
How to cover a Workbench in Valheim
To make a workbench workable you need to place a wall on three sides and cover it will roof tiles.
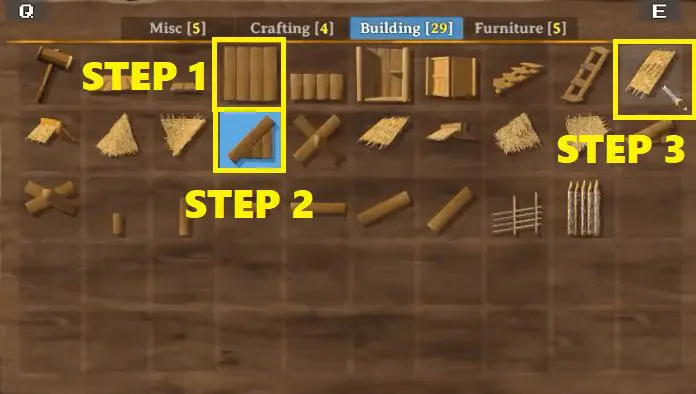
Here is an easy and simple method to cover a workbench:
Place 4 Wood Wall tiles around the back and sides of the workbench as shown in the below figures.
Place two 45° Wood Wall above two sides wall pointing up.
Place Thatched Roof26° (or 45°)
Here is the step-by-step video guide to use and cover a Workbench