This guide shows where to find all collectibles in every location of Burenia in the game – Metroid Dread
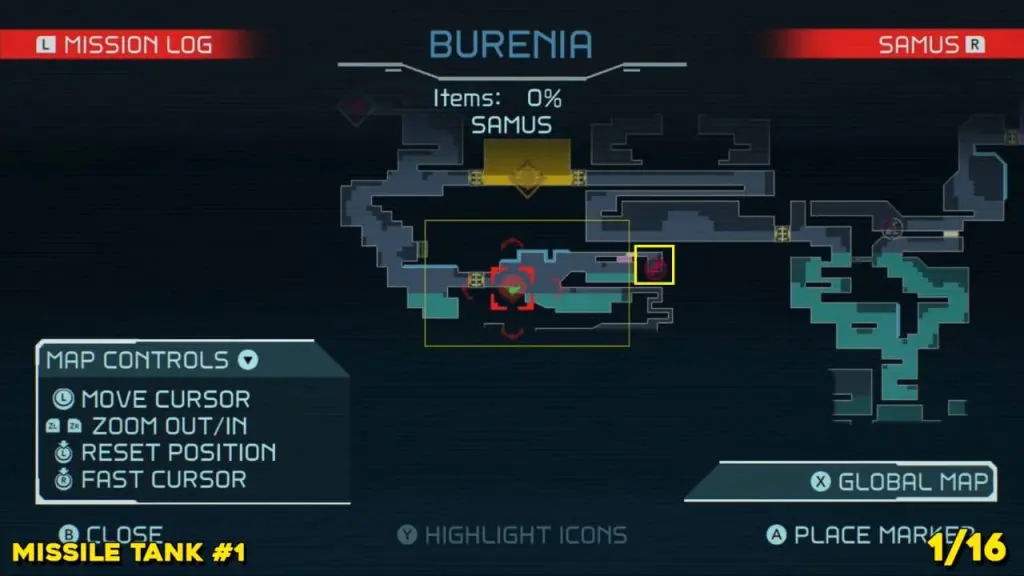
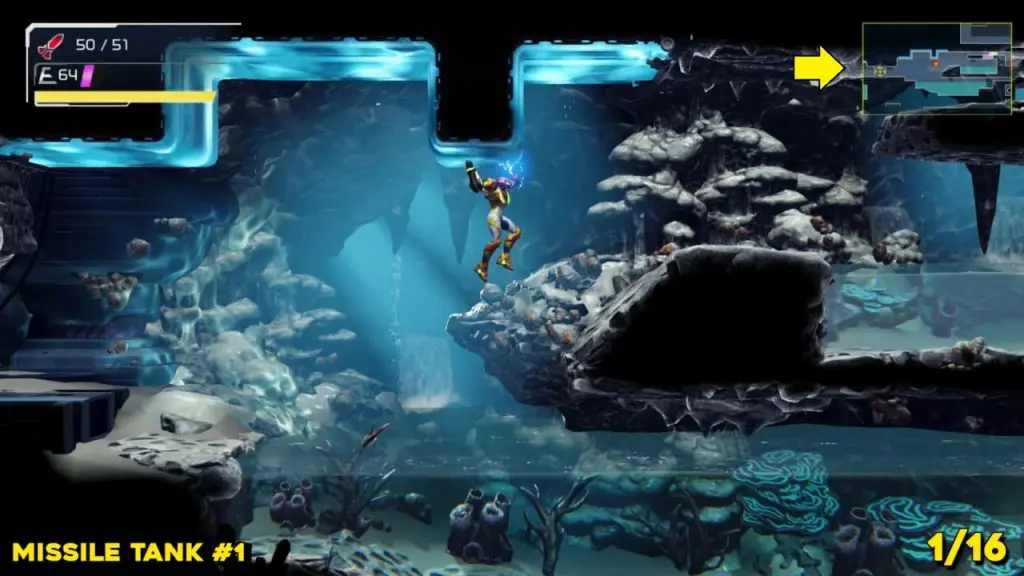
Missile Tank #1
Descend to the lower floor after the first Network Station and then head to the adjacent room to the right. Use the blue magnetic panels on the roof to get attached and cross a pool of water. Use Morph Ball form to reach the marked location.
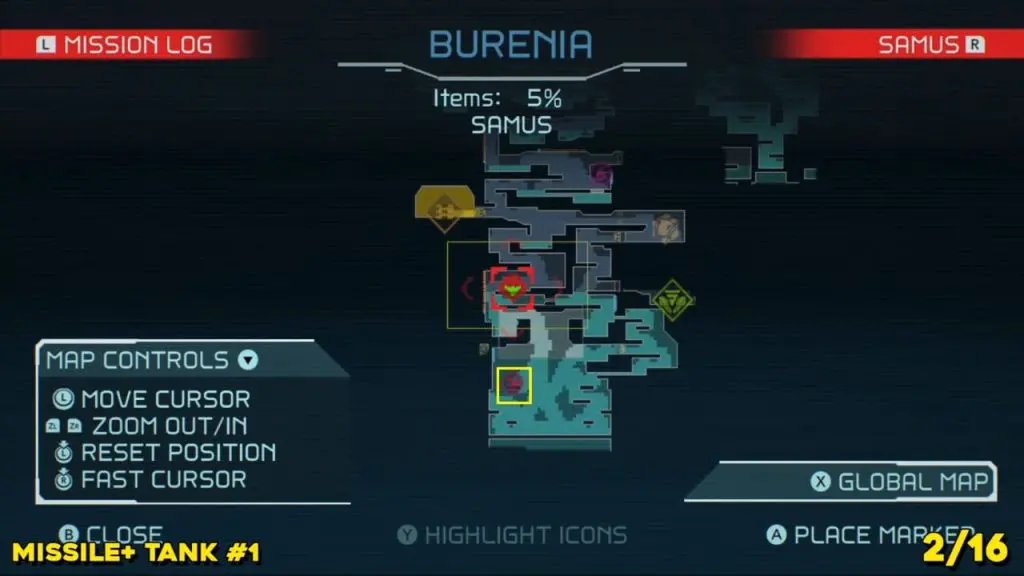
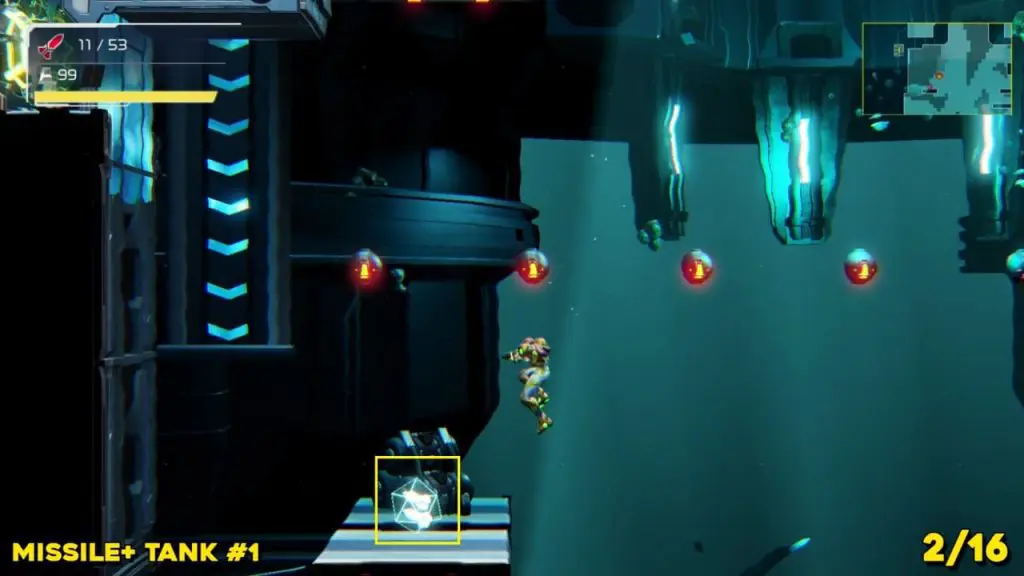
Missile+ Tank #1
Located on the southwestern side of the area. This will be a room full of water. You will find this Missile Tank+ waiting on a ledge in deep water. You can drop down onto it.
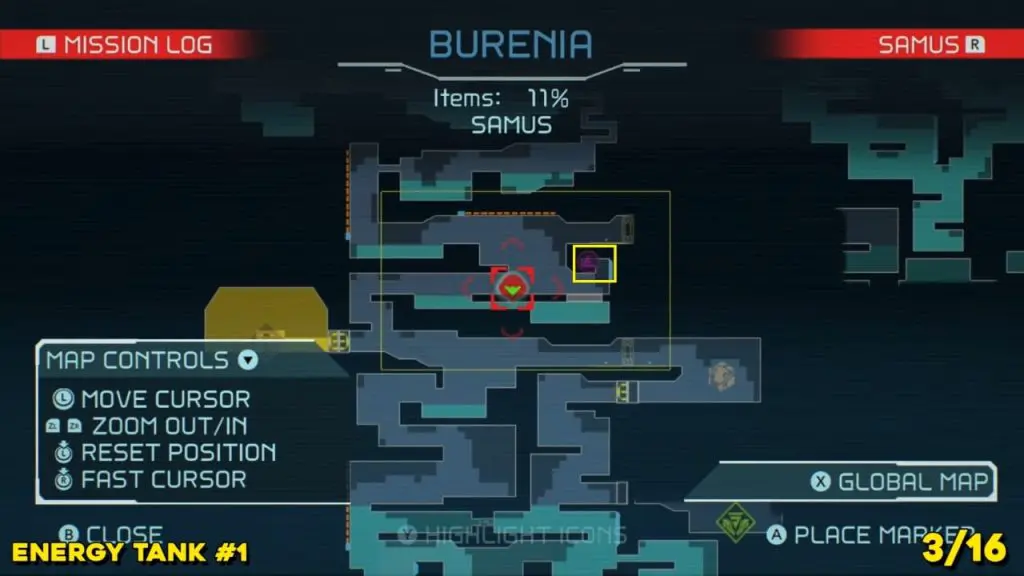
Energy Tank #1
Available at marked location on the map. Simply walk and climb using the blue magnetic panels up to the ledge and collect the award.
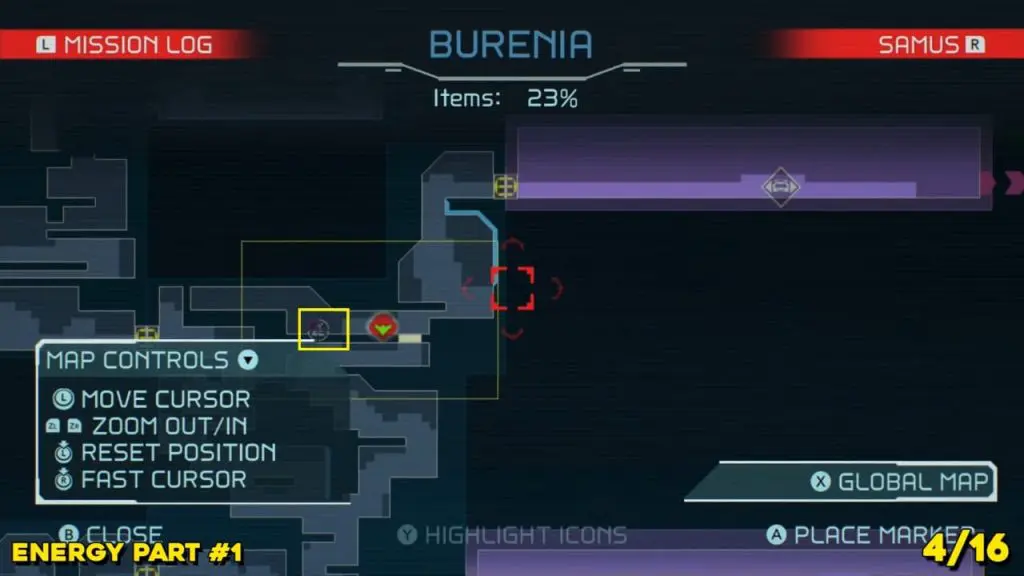
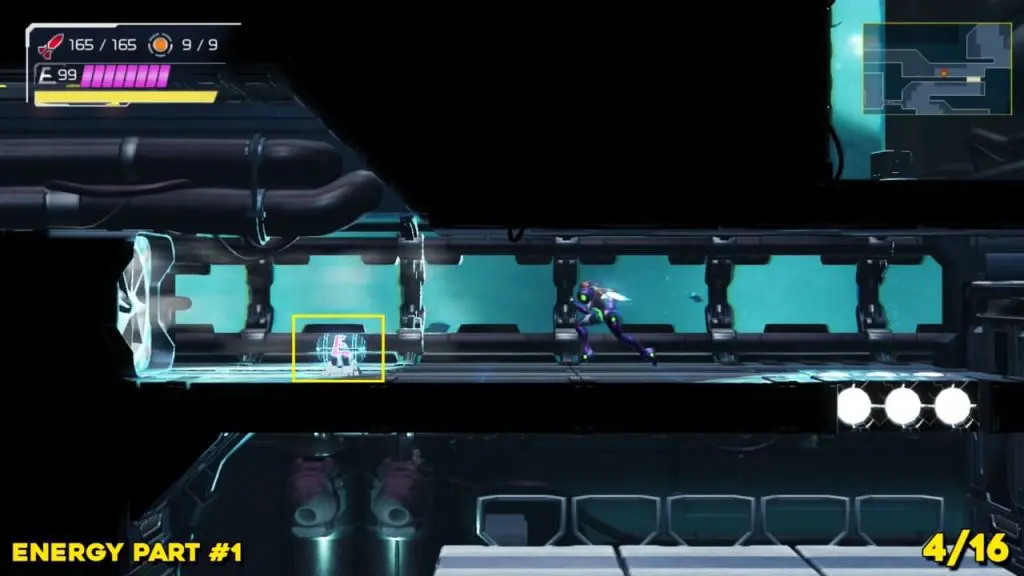
Energy Part #1
You’ll find the Energy Part sat in front of a large fan, so you’ll need to run toward the large fan wind. You’ll find the energy part sat in front of a large fan, so you’ll need to run into the wind charging your Speed Boost in order to outrun the gust
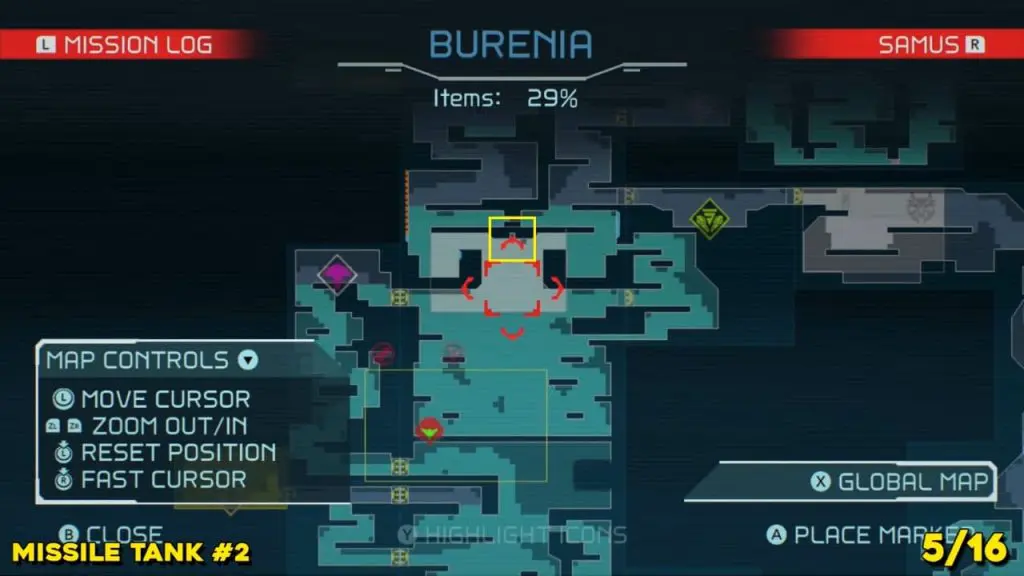
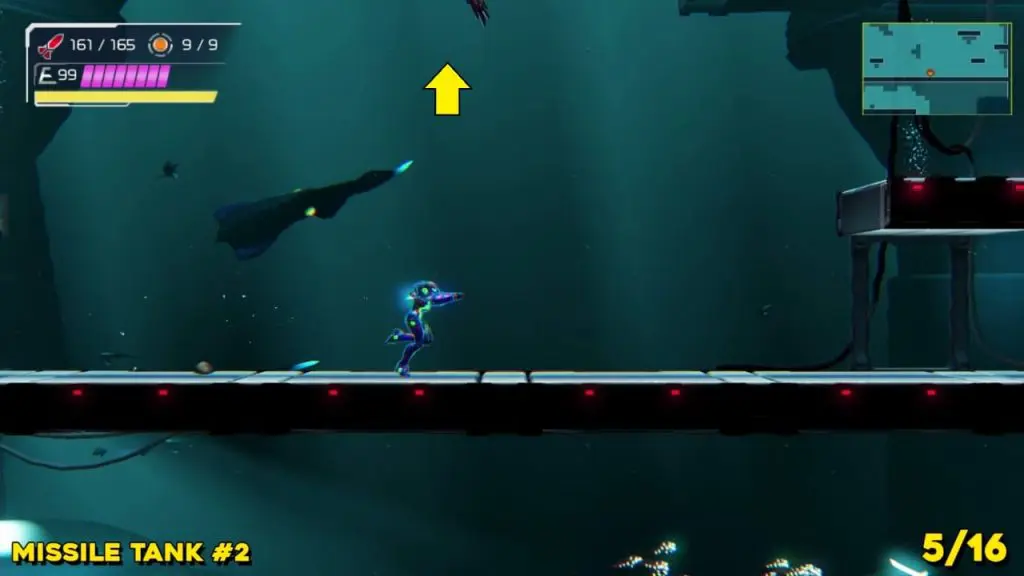
Missile Tank #2
Located on the southwestern side of the area. This is a big location, full of water. Use your Speed Booster on the lower floor and then activate Spineshark in the middle (aim above you). You will break three blocks and pick up the Missile Tank.
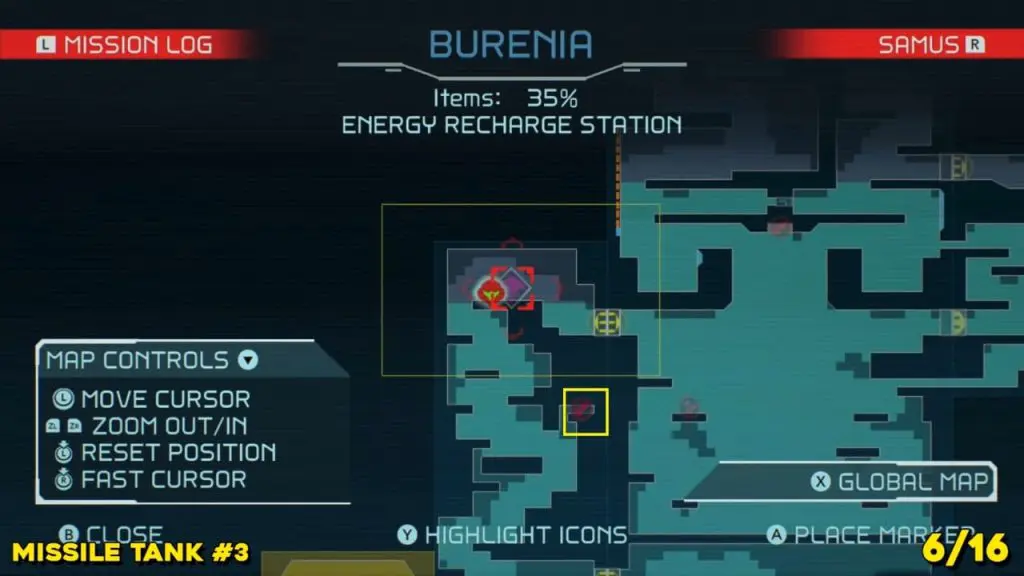
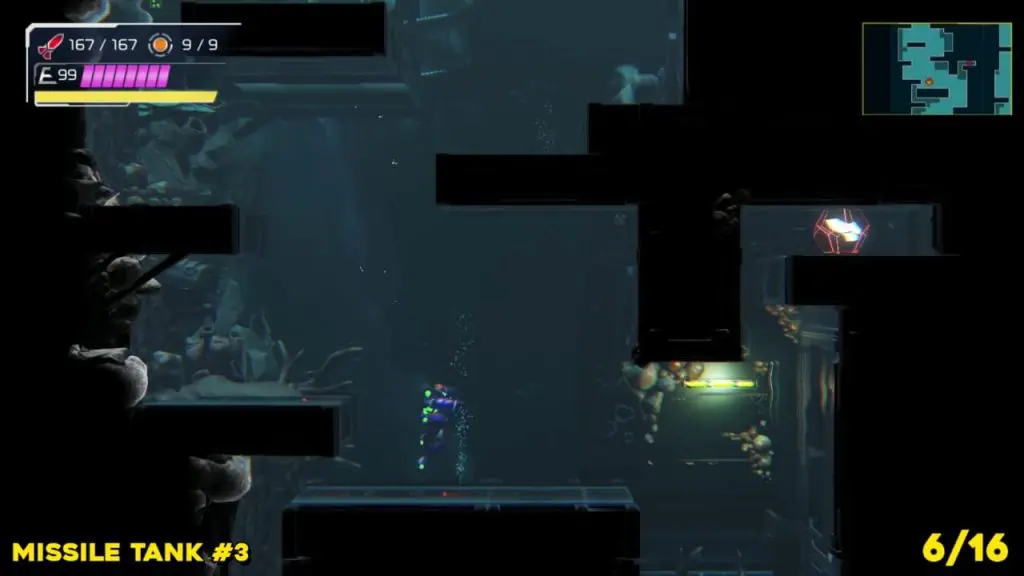
Missile Tank #3
From the previous location, pass through the Plasma Door on the left. Missile Tank is pinpointed on the map below. Use Morph Ball action to reach the location.
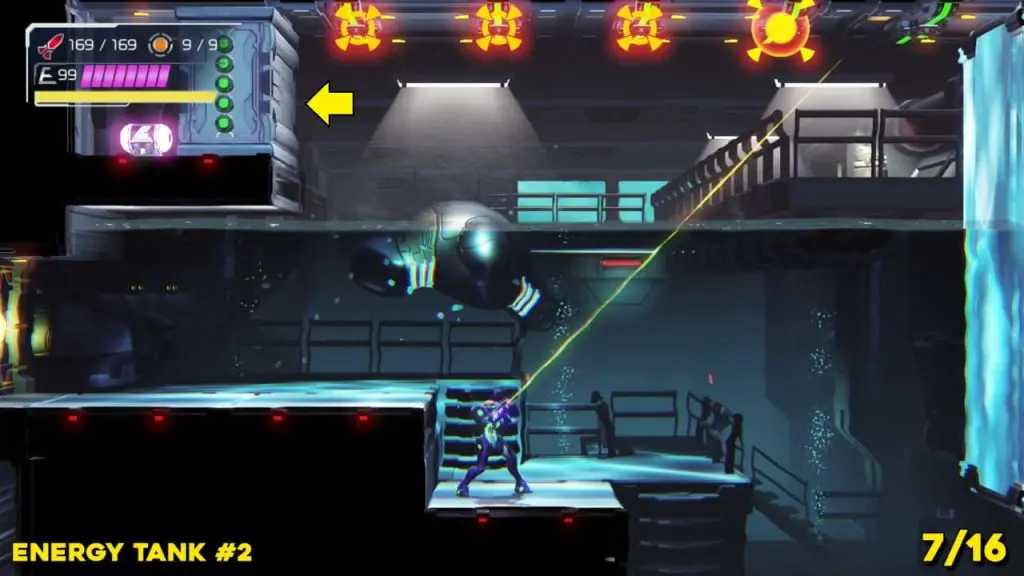
Energy Tank #2
This one is located in the southern area of the Burenia. After reaching the Save Station on the southwestern side, you’ll find your way here. Follow the path to the right until you reach a room with a Storm Missile Box. Charge your missiles and then use Space Jump to reach the green boxes on the roof.

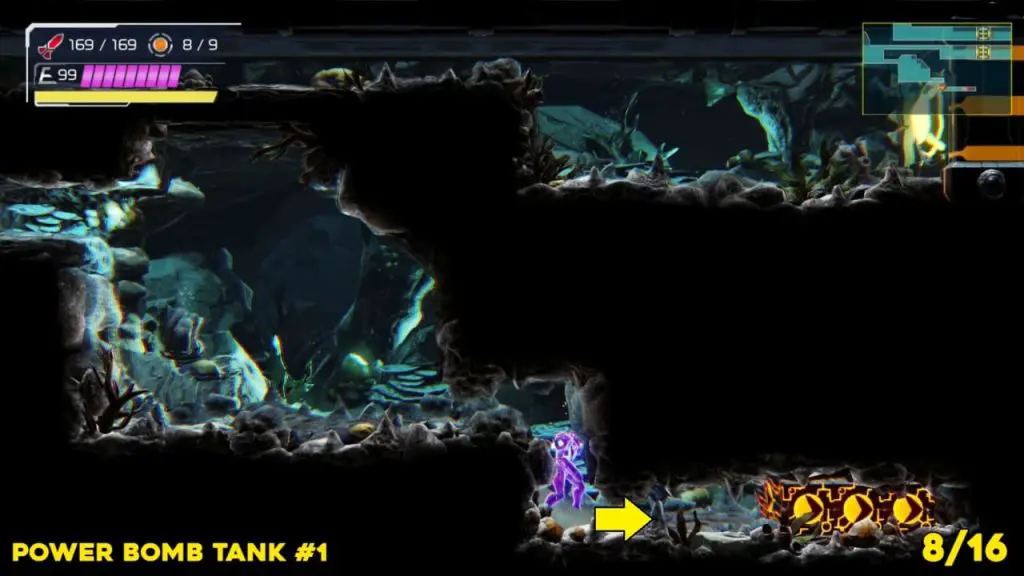
Power Bomb Tank #1
Go to the bottom of the area, where the big whale creature is swimming around. From Save Station on the west side and make your way down. Go all the way to the right, drop a Power Bomb to unlock a new path. You must now return to the previous room and activate the Speed Booster. Activate Shinespark when you reach the new path. In morph ball mode, release it to break the block in the right corner and obtain the item.

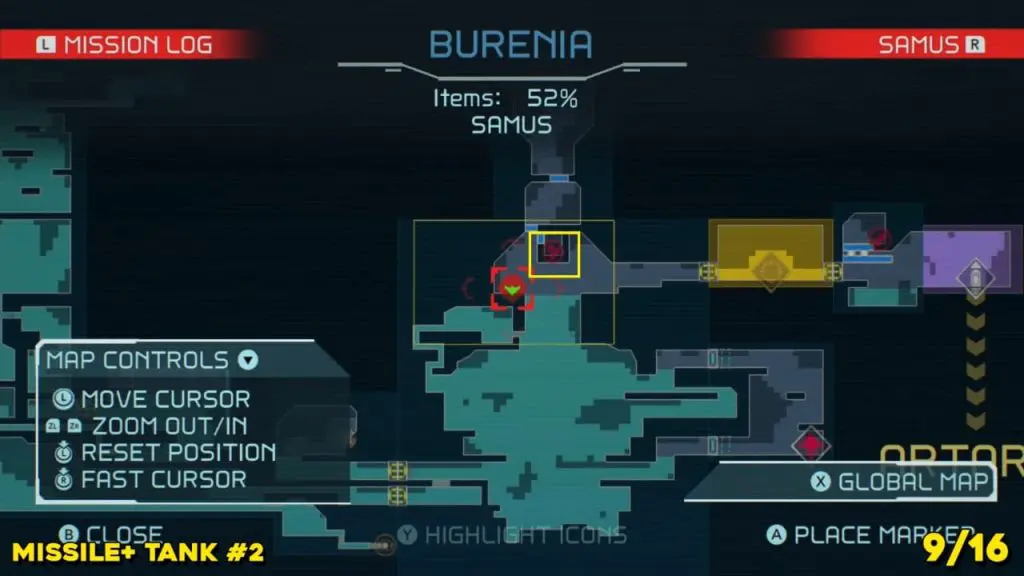
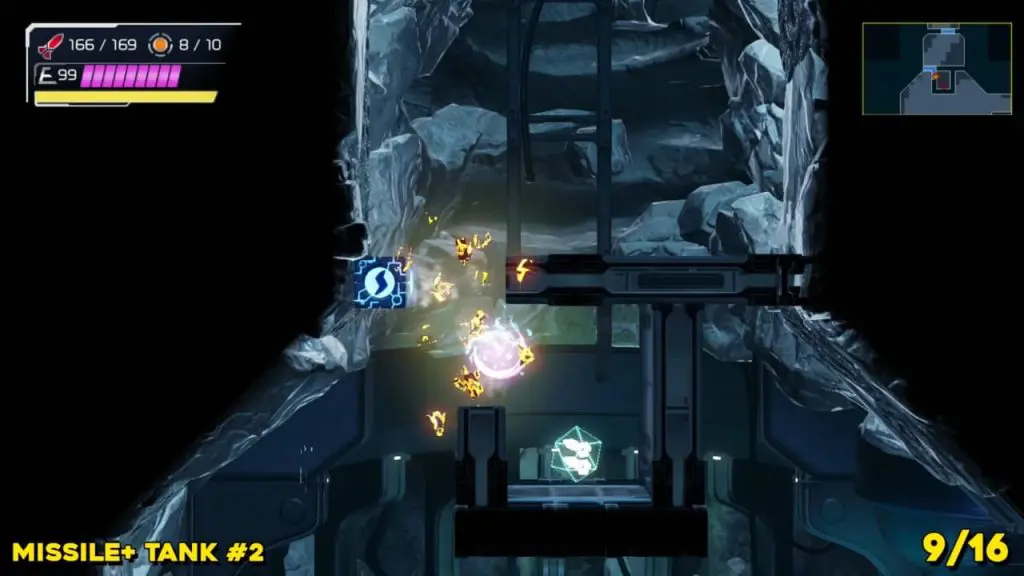
Missile+ Tank #2
This one is located in the eastern area of Burenia, left of the Network Station. There’s a large block cell above the watery pit and is made of Screw Attack Blocks. Simply head to the location and smash the blocks for the win.
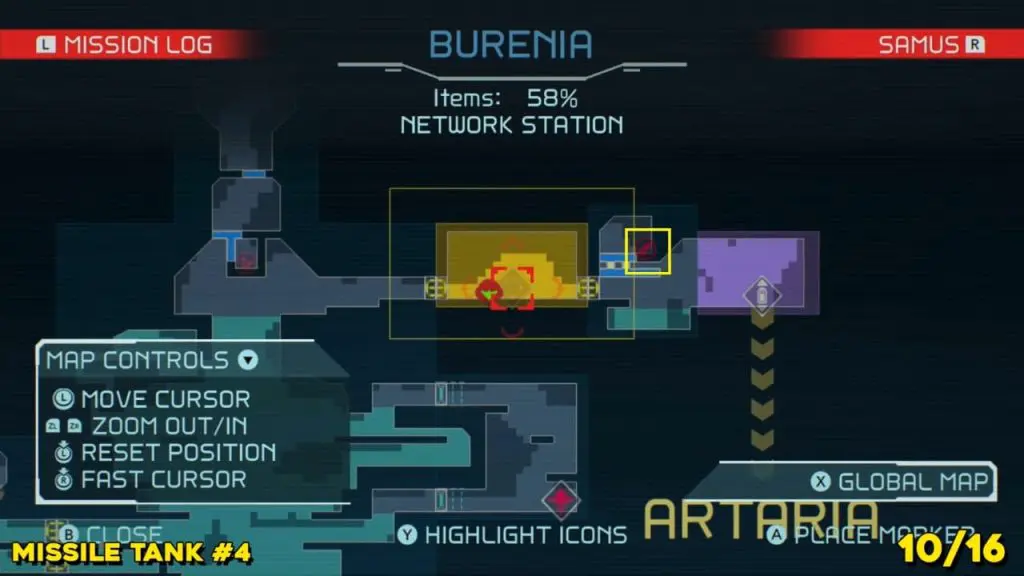
Missile Tank #4
Location is marked on the map. Simply jump to the upper left side of the place and break all the blocks to collect the reward.
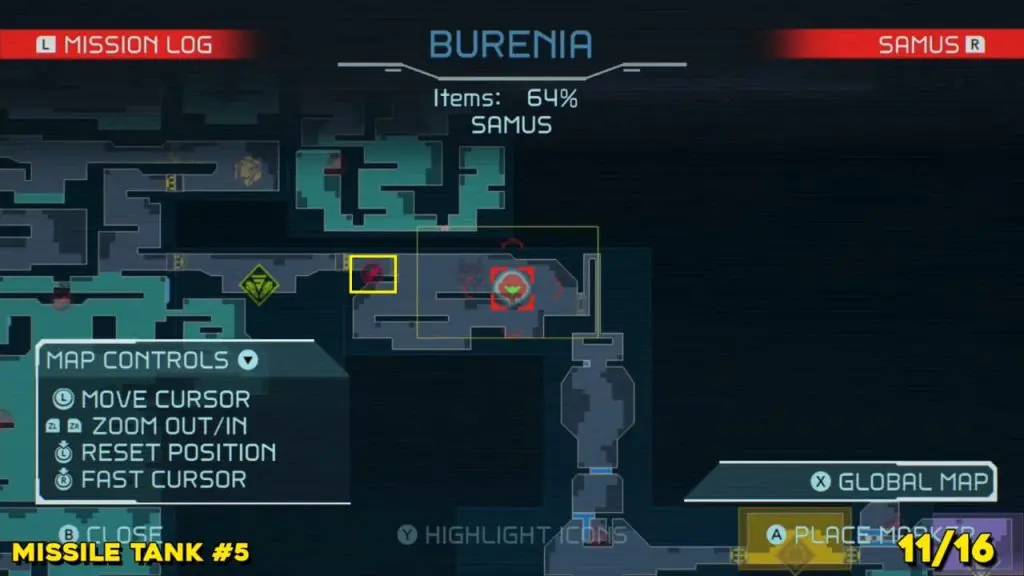
Missile Tank #5
Location is marked on the map. Simply jump to the upper left side of the place and break all the blocks using Screw Attack.
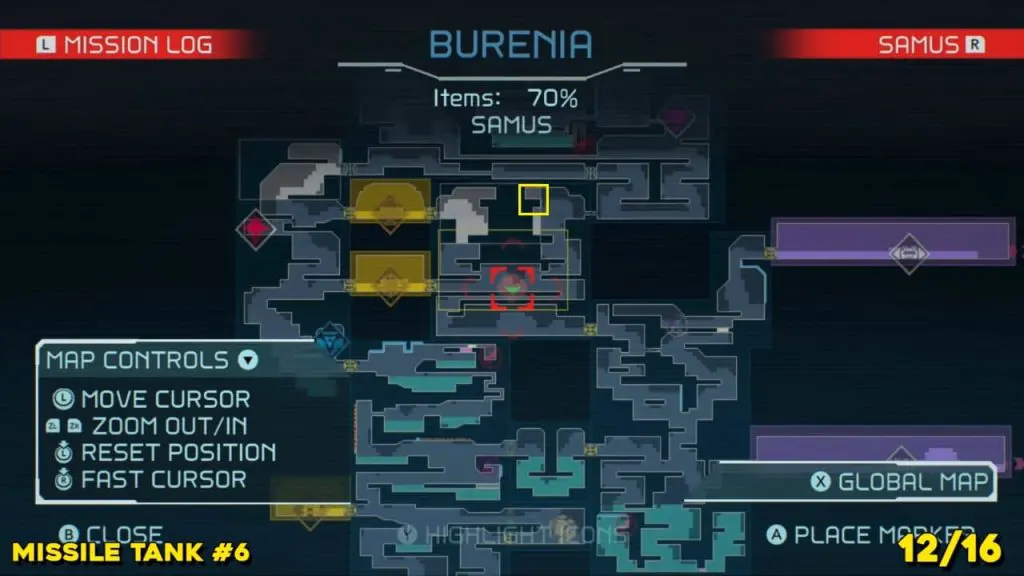
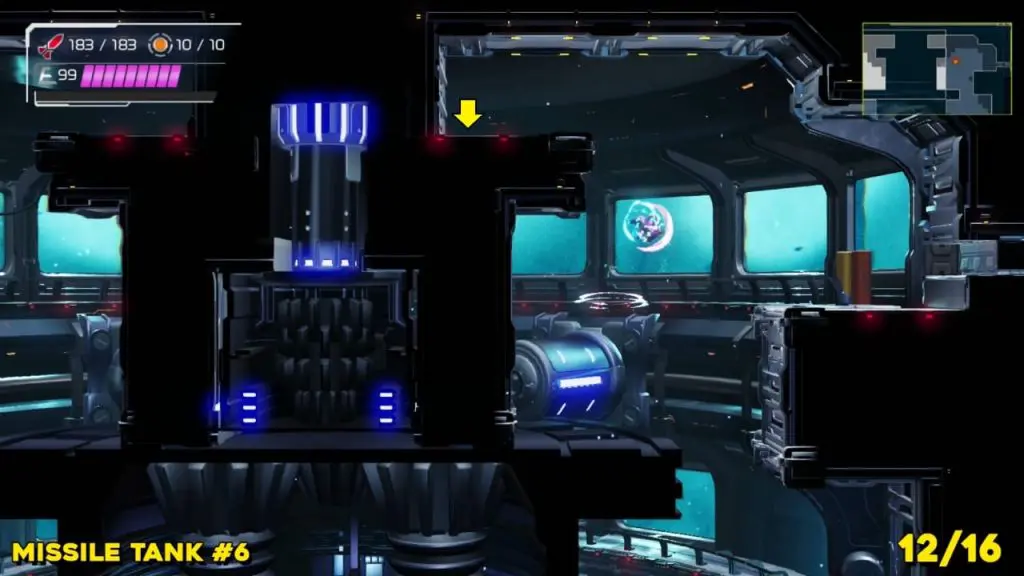
Missile Tank #6
You will reach this room after facing the double boss fight. I have marked the location on the map below. You need to reach the platform on the upper right side of the room. You can scan for a hidden block and break it open to reveal this tank. Shoot missiles to the floor. You will reveal a secret Missile Tank.
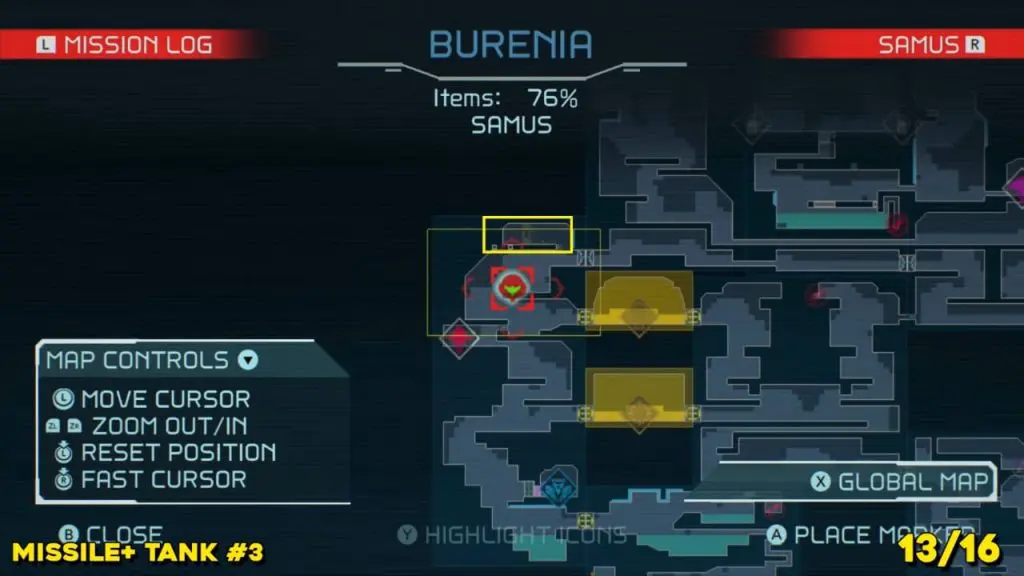
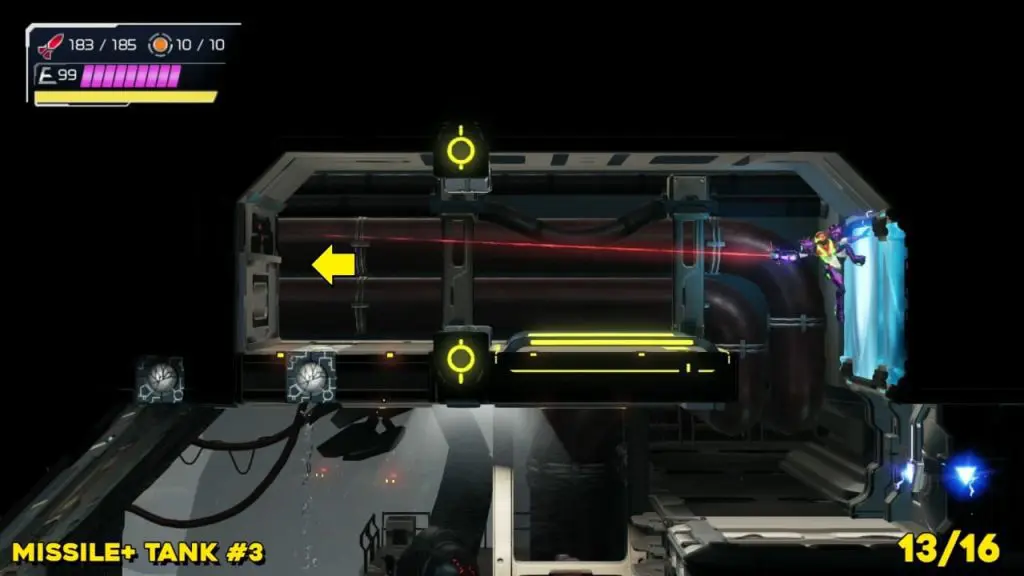
Missile+ Tank #3
From the Map Save Station, take the left door and climb up, fighting the two monsters in the way. Then hang on the blue panel on the right side and then throw a missile to the left. You will destroy a block and reveal the item’s location. Quickly, jump to the left to reach the location.
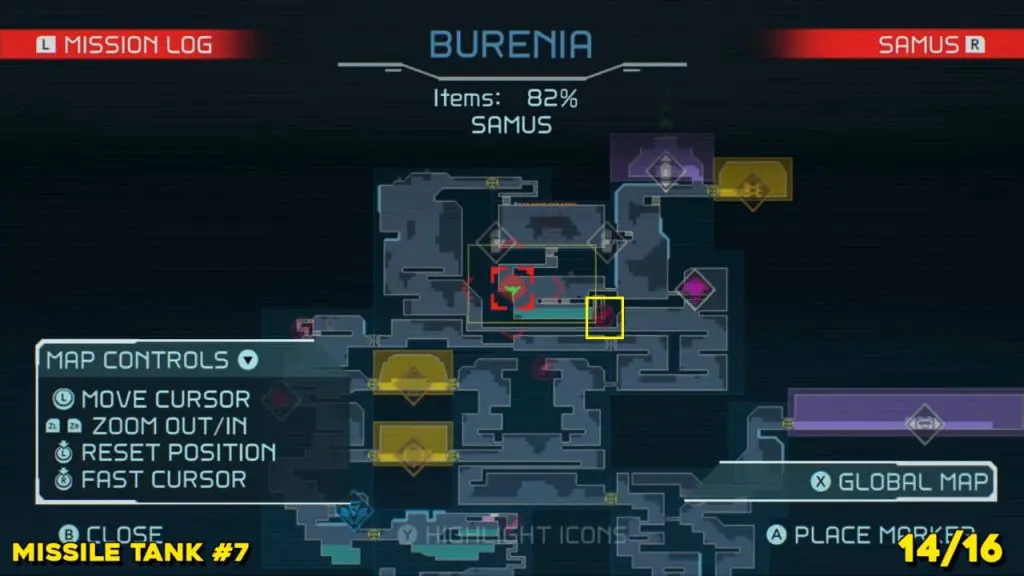
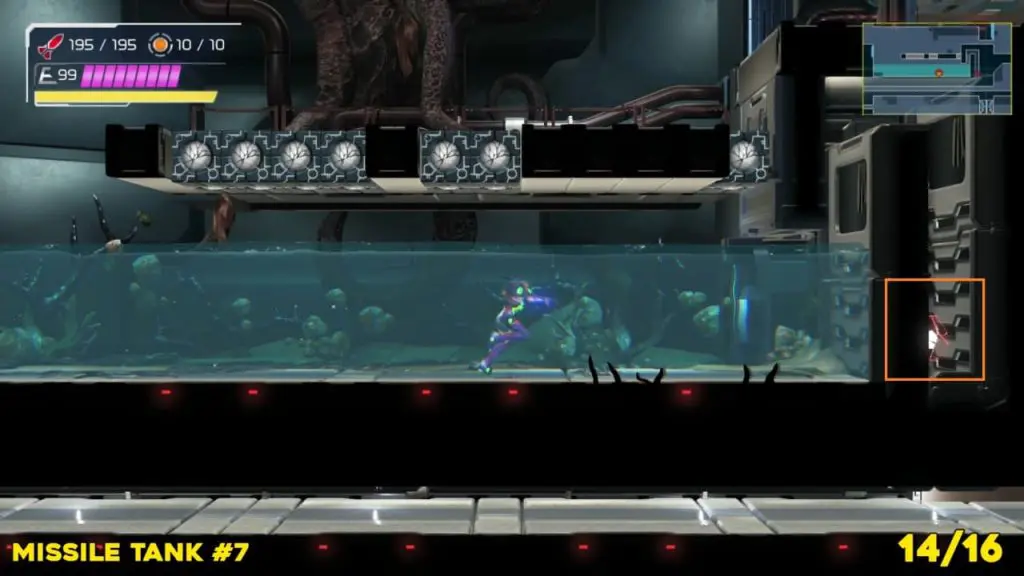
Missile Tank #7
It is located on the map as shown in the image below. Missile Tank is behind a wall after a pool of water.
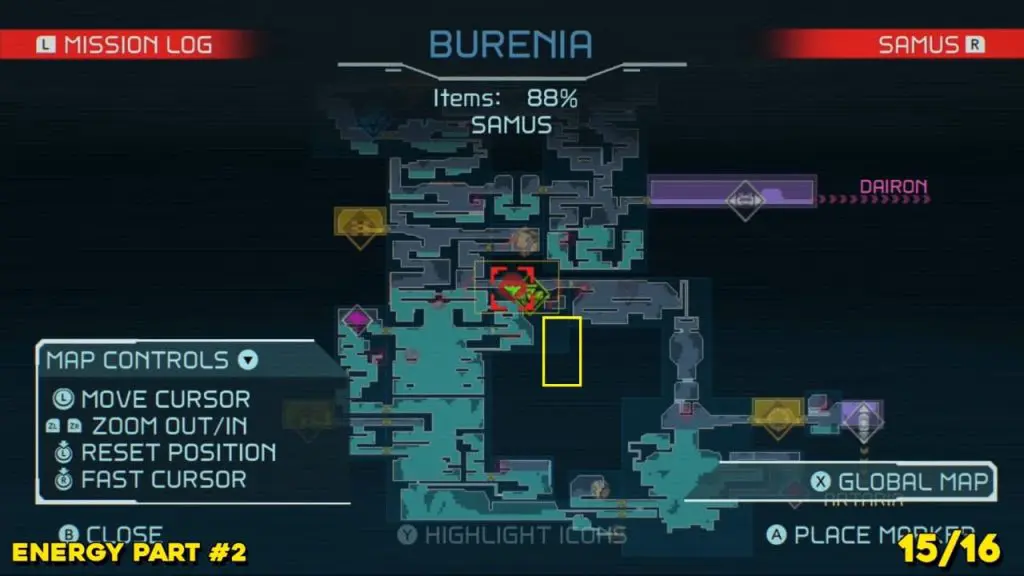
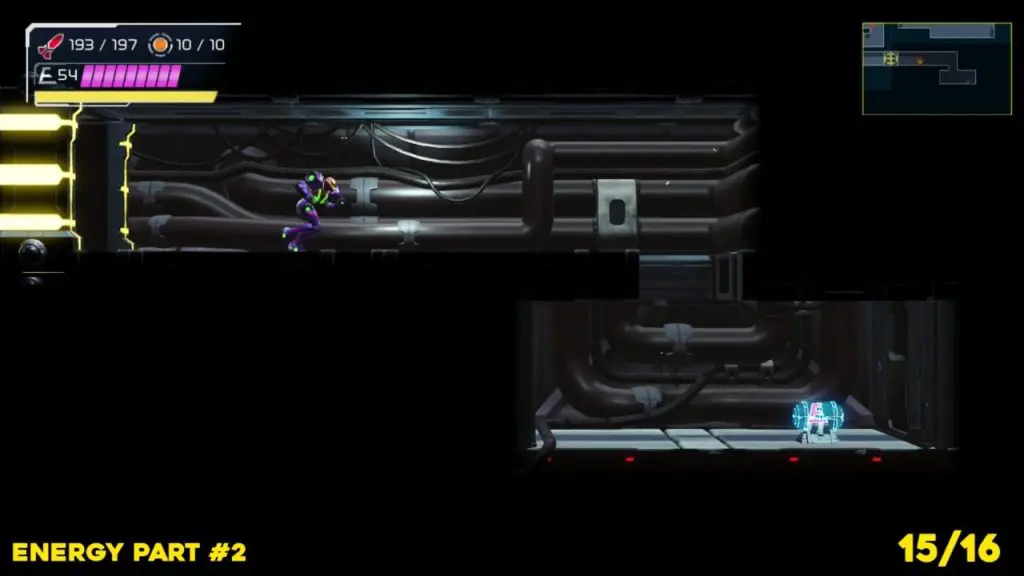
Energy Part #2
This tank is located in the same chamber where you fought Drogyga. On the map, I’ve marked the location. In order to get down to this area, you’ll need to have Ice Missiles on hand.
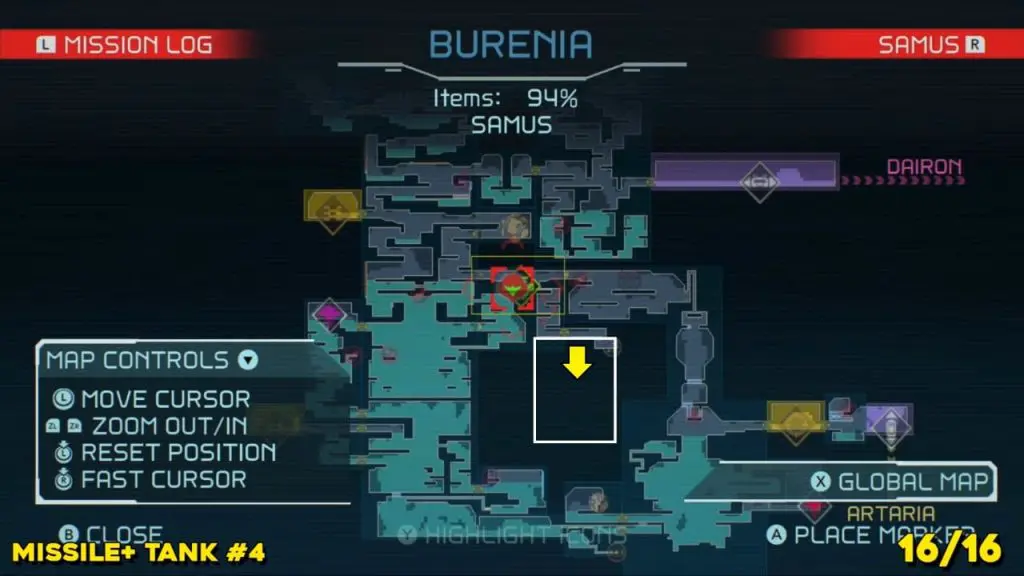
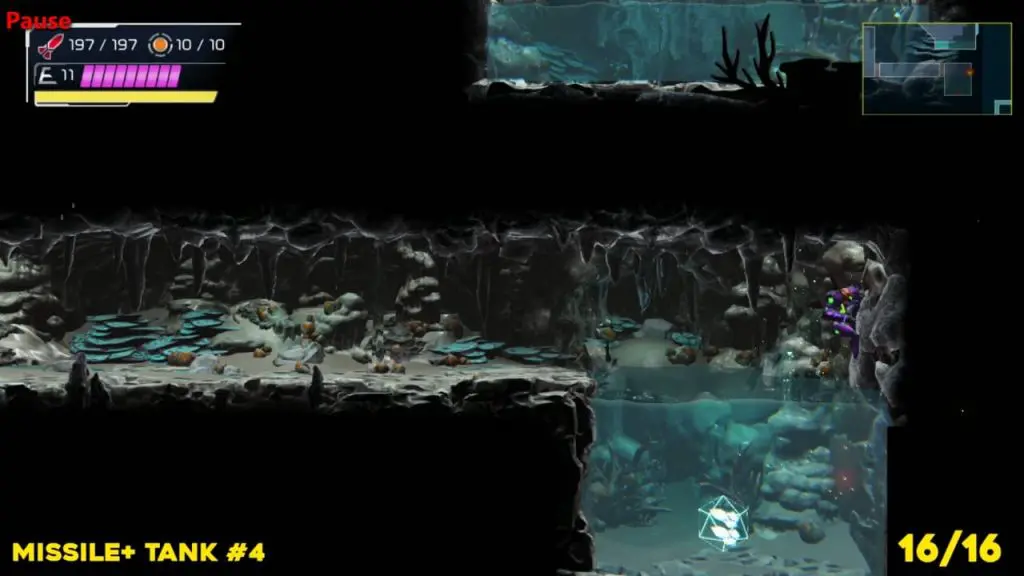
Missile+ Tank #4
This tank is in a chamber right under the one in which you fought Drogyga. On the right side of it is a room with an Energy Recharge Station. You just have to jump into the water and go all the way to the right. The Missile Tank will be on the right side, between two walls.