Atomic Heart: Testing Ground 10/ Polygon 10
This guide shows the complete walkthrough of Testing Ground 10/ Polygon 10 in the Atomic Heart game. Check the link posted below for a video walkthrough.
How to enter Testing Ground 10
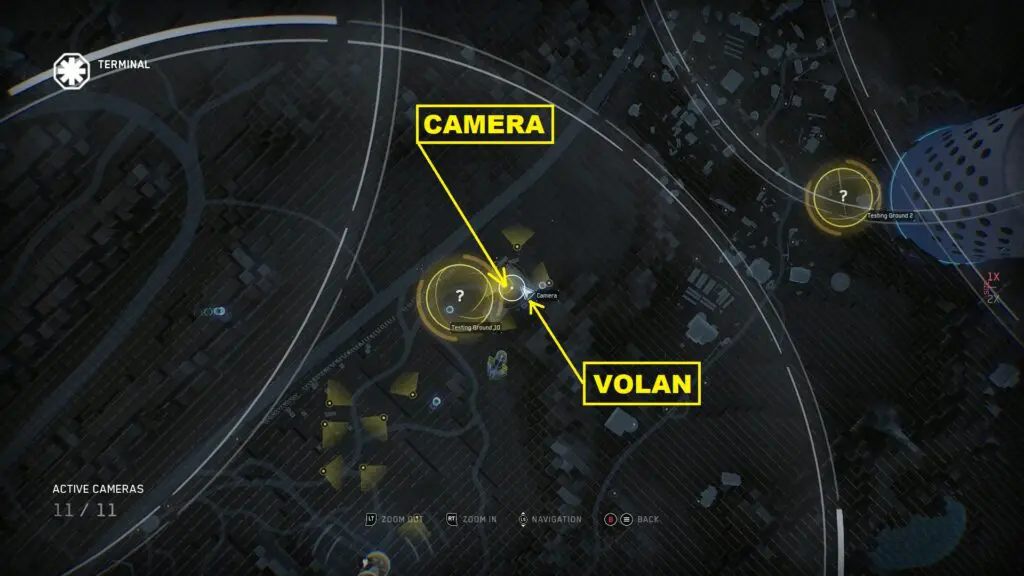
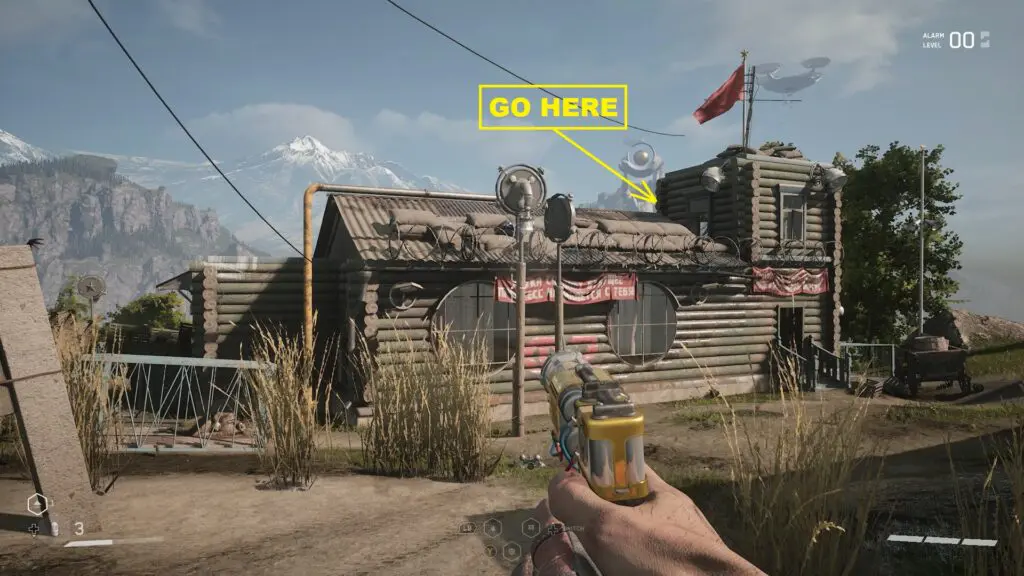
Volan is on the top of the house as shown in the pictures below. Climb up the house using the pipes and then make your way to the Volan. Interact with the Volan and use the camera to bring up the elevator. Take the elevator down to reach the Testing Ground.
Bronze Chest
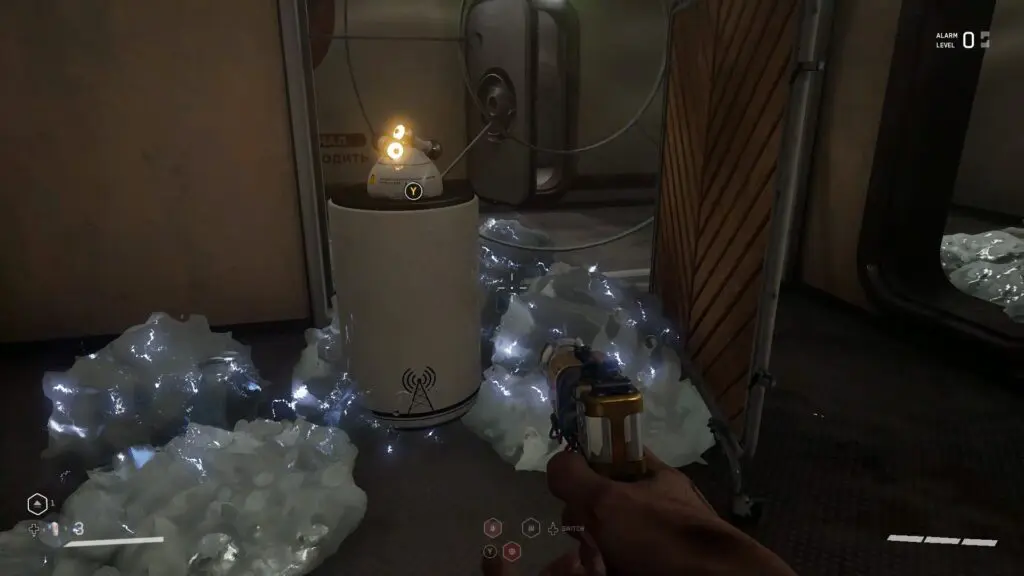
Proceed ahead and you will reach a small pedestal. Using shock on this pedestal opens the door ahead only for a few seconds, which isn’t enough for you to go through. Throw polymer around the pedestal by using your polymer-throwing ability as shown in the picture below. Now use shock on the polymer, which will give a continuous shock to the pedestal. This will keep the gate open.
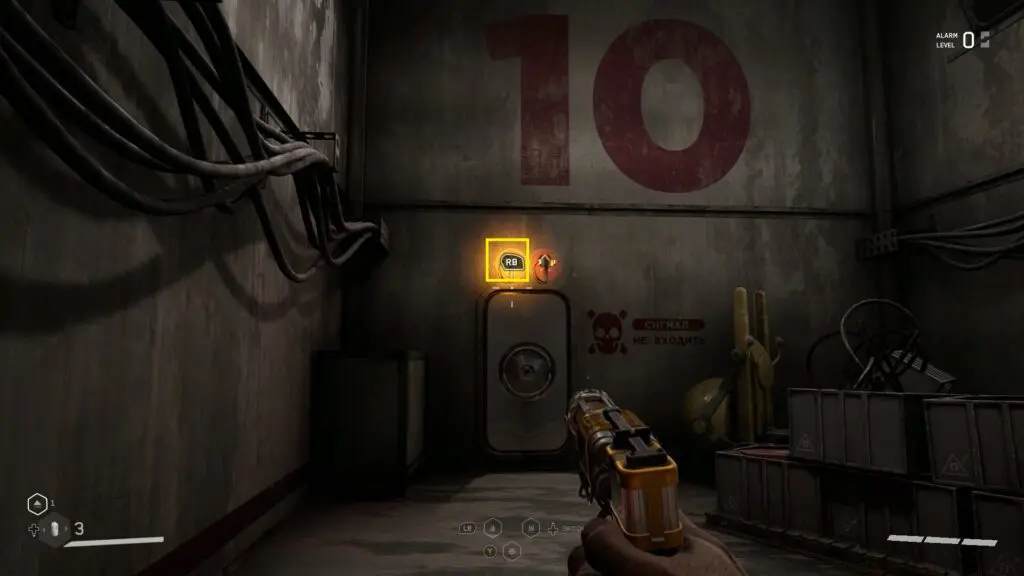
Continue ahead and you will reach a locked door with two sockets above it as shown in the picture below. Take out the ball from the socket and insert it into the socket on the roof. This will activate the magnetic coils on the roof. Now use shock on the roof. This will make another ball come out. Insert both balls into the sockets above the door. Now press the red button to open the door and proceed ahead.
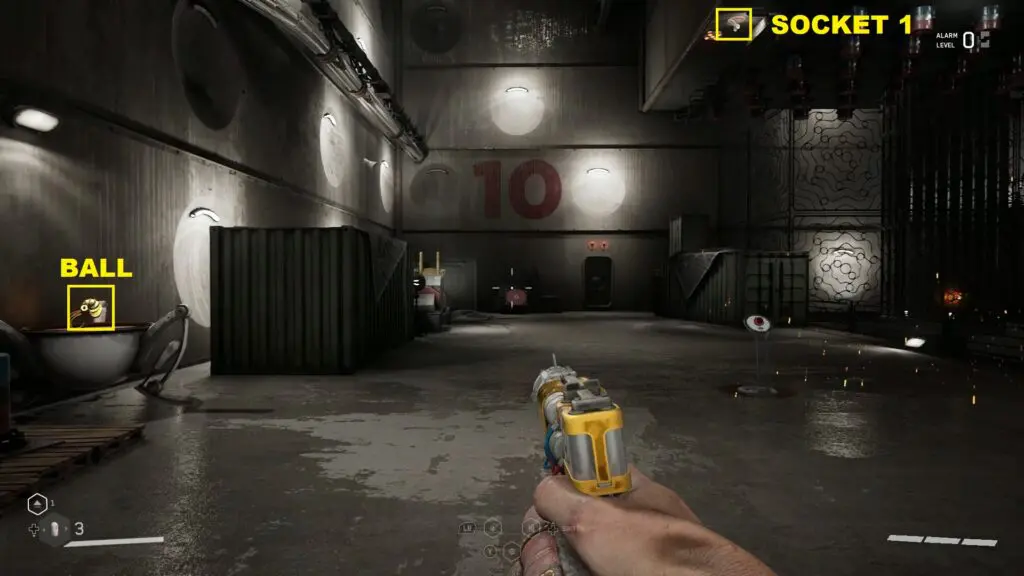
Soon you will reach another puzzle room. Pick up the ball as shown in the picture below and insert it into Socket 1. This will activate the magnetic coils near Socket 1. Use shock on the roof and this will make a platform with another ball come up as shown in the second picture below.
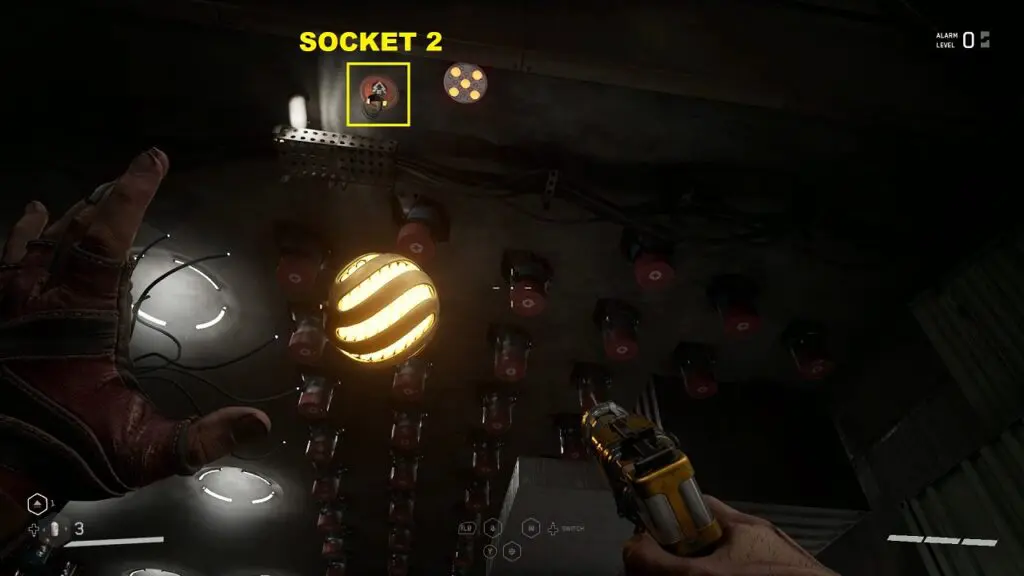
Now take out the ball from Socket 1 and insert it into Socket 2 as shown in the picture below. This will activate the magnetic coils near Socket 2.
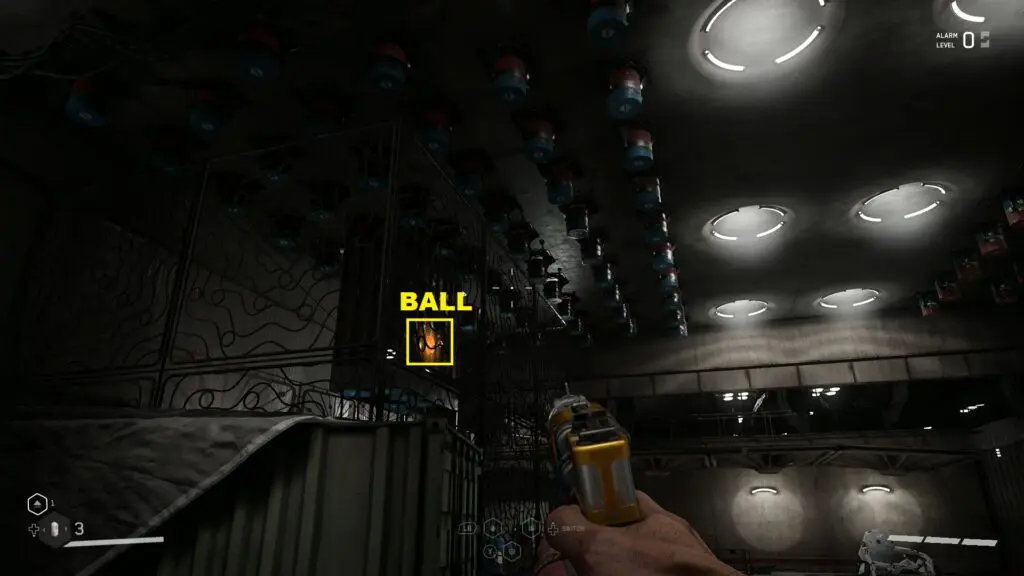
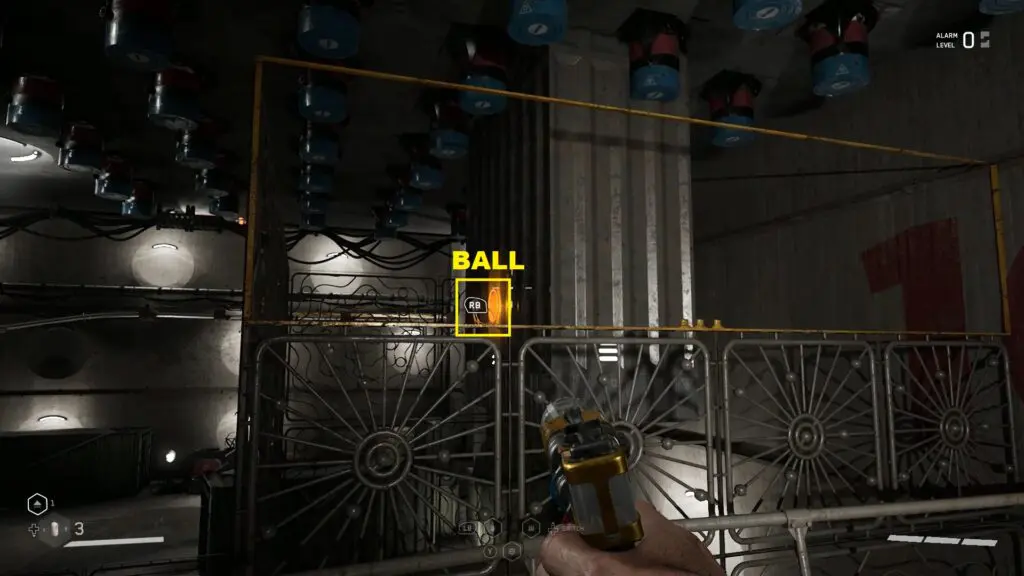
Use shock on the roof, which will make a platform come down. Use the platform to go to the other side. Stand on the magnetic platform there and again use shock on the roof. This will make the platform go up. Now take out the ball from the platform that you raised up before as shown in the picture below and throw it to the other side.
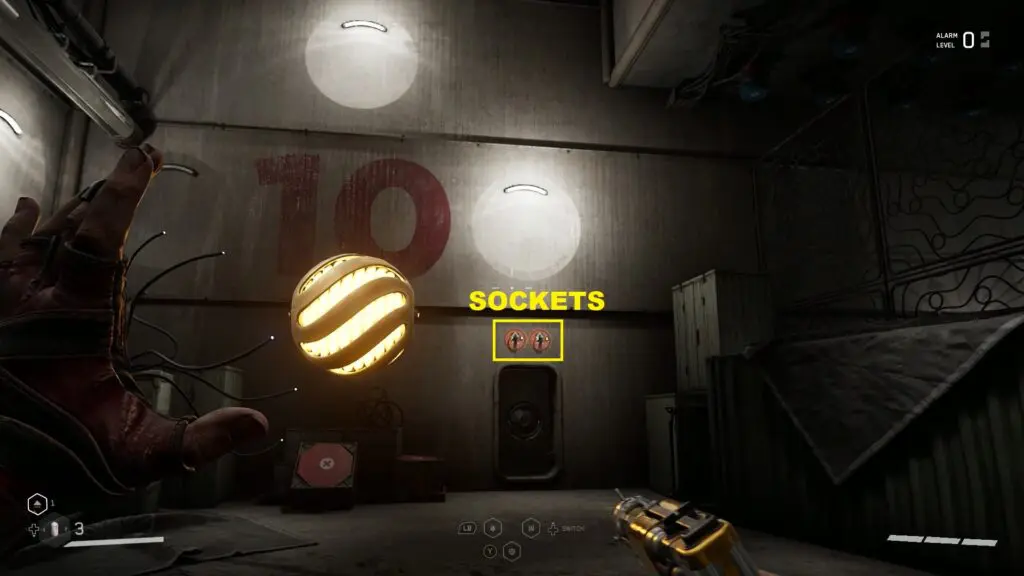
Use shock on the roof again to make the platform come down. Go back to the other side using the platform. Now insert both balls into the sockets above the door as shown in the picture below. Then press the red button to open the door and proceed ahead to reach the bronze chest. Open it to get Kalash – Extended Magazine blueprint.
Silver Chest
Continue ahead and you will reach two small pedestals. Throw polymer around the pedestals by using your polymer-throwing ability as shown in the picture below. Now use shock on the polymer, which will give a continuous shock to the pedestals. This will keep the gate open.
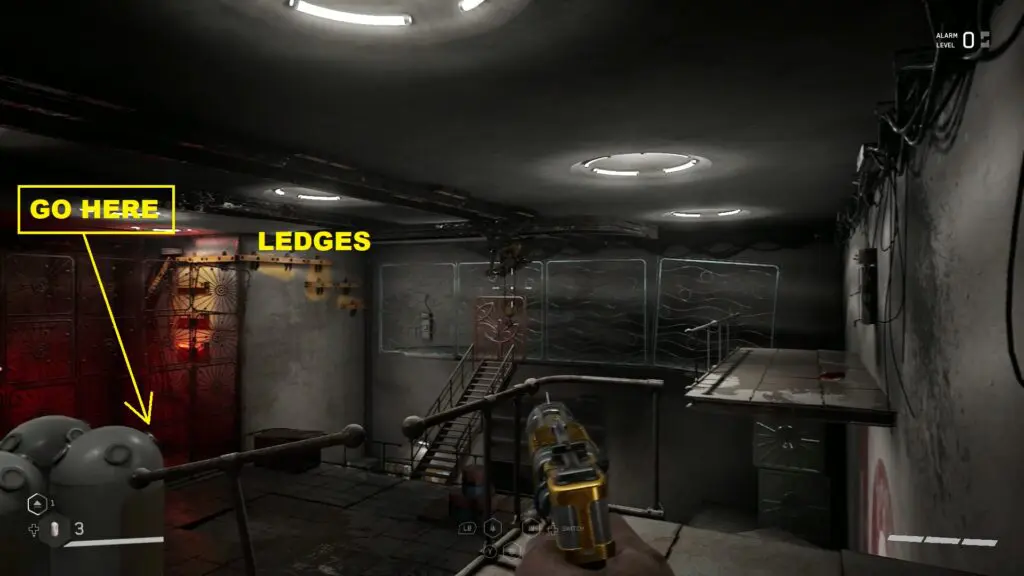
Proceed ahead and use the containers in the next room to climb up the catwalk above. Then use the ledges to reach the opposite corner of the room as shown in the picture below. Jump down the hole on the floor there to reach the silver chest. Open it to get PM – Collimator blueprint.
Gold Chest
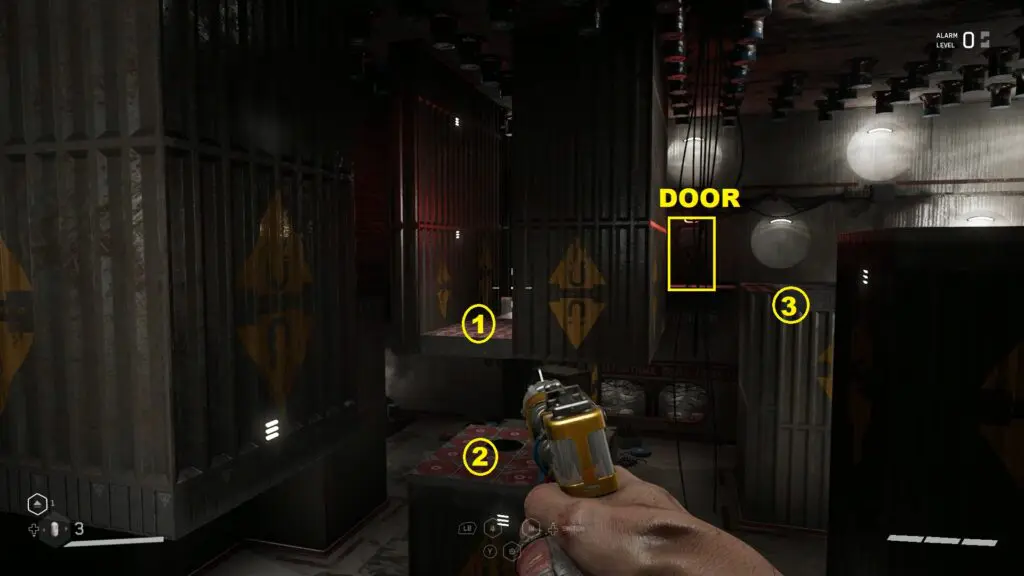
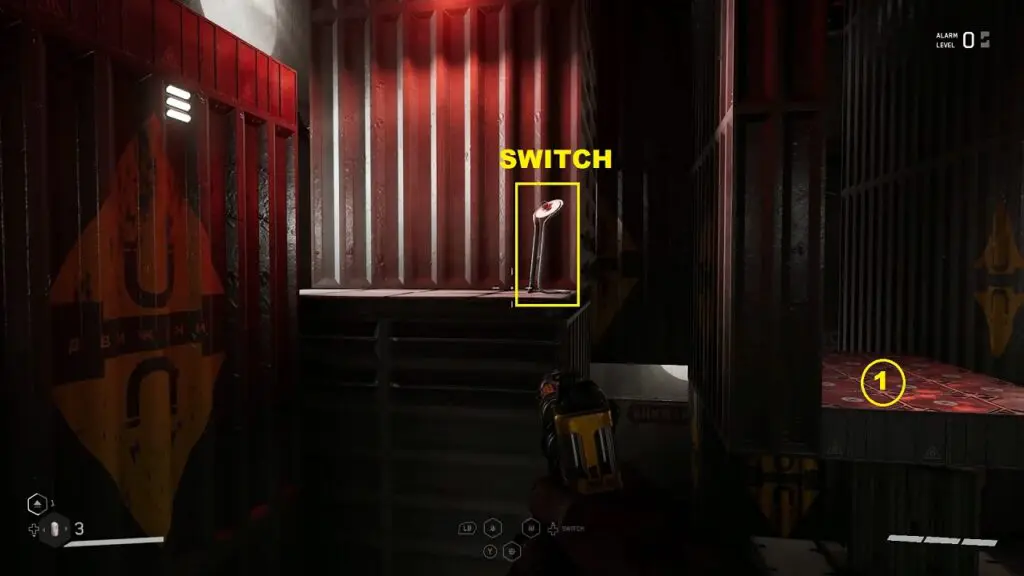
Proceed ahead and you will reach another puzzle room. Jump on the platform to reach Platform #1 as shown in the picture below. Then turn around and jump on another small platform behind it. From there, you will be able to see a red switch as shown in the second picture below. Press the red switch to open the door. After pressing the switch, jump to Platform #2 as shown in the picture below. Then use shock on the roof. This will make Platform #3 come down. Stand on Platform #3 and again use shock on the roof. This will make Platform #3 go up and take you to the door. Proceed ahead to reach the gold chest. Open it to get Fat Boy – Mine Rockets and Dominator – Coil blueprints. Now take the elevator to the top to exit the testing ground.