This guide shows the complete walkthrough for The Ancient Azure Stars Quest in Genshin Impact 2.8 Summertime Odyssey event, which started on 15th July 2022 and will end on 24th August 2022.
Rest until the following day (06:00 – 24:00)
For the first objective, simply set the time to something after 6:00.
Rendezvous with everyone
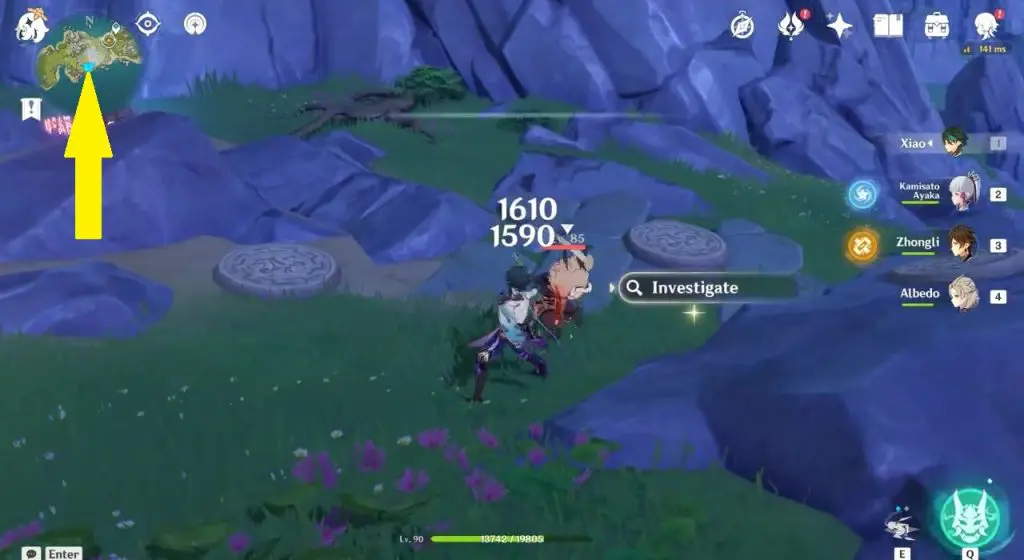
Go to the location marked in the picture below.
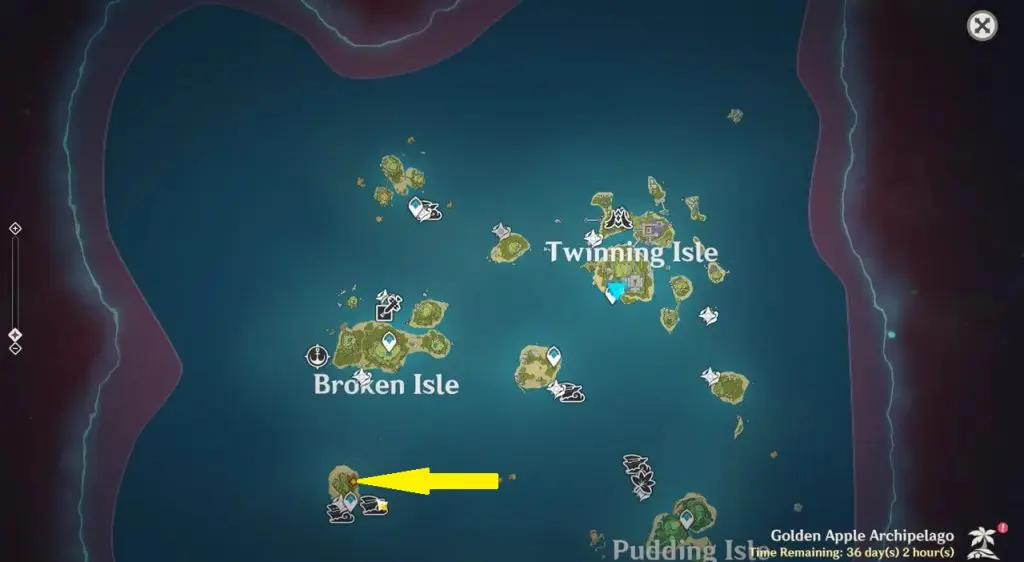
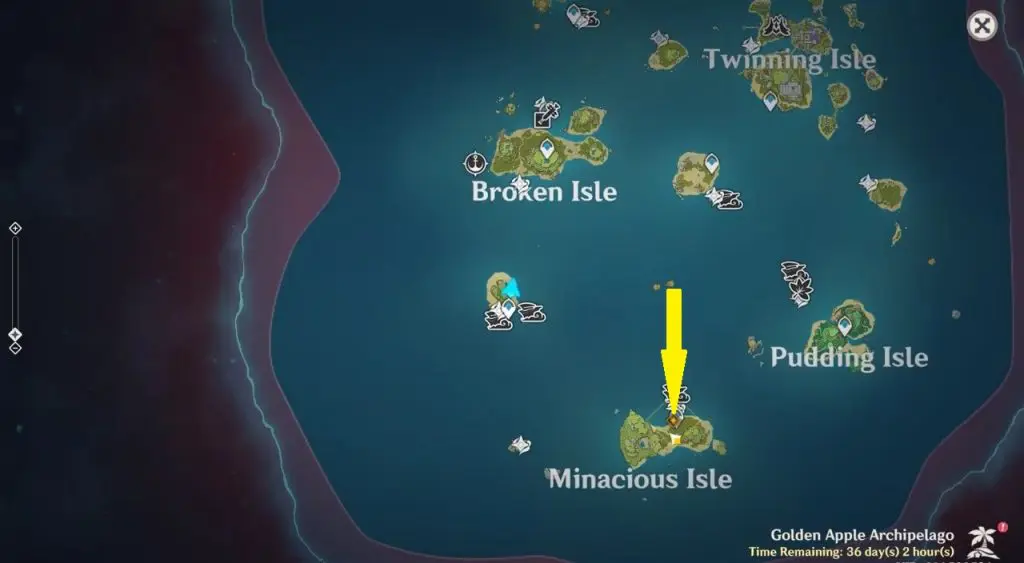
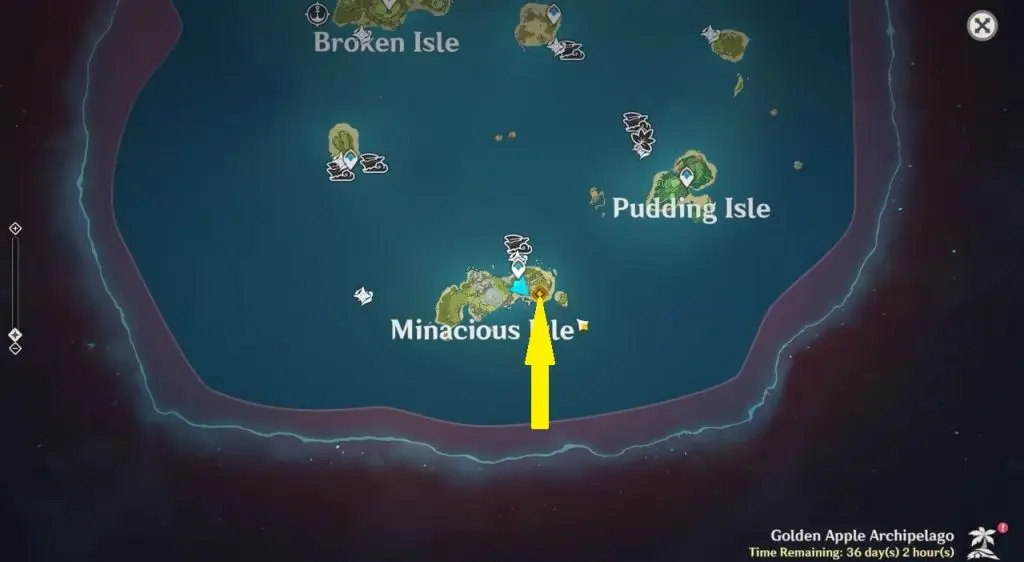
Head to Minacious Isle
Fast travel to Minacious Isle and enter the Temple of the Star Latitudes.
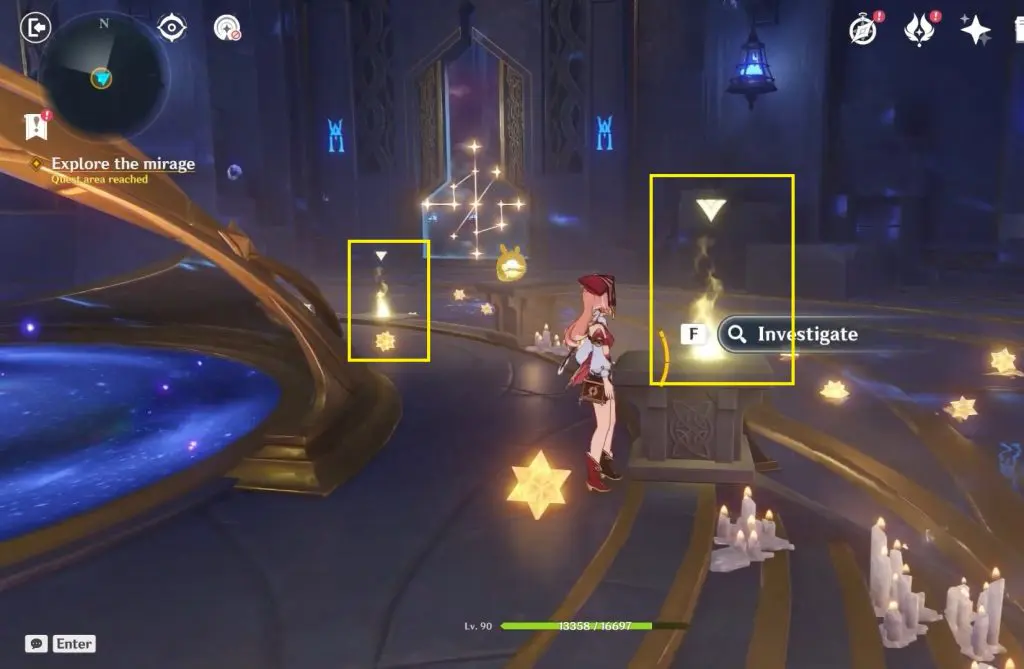
Explore the mirage
As the objective starts, you need to collect two Asterism Shards near the water pool as shown in the picture below. Each Asterism Shard has an astronomical pattern inscribed on it. The projection platform of the Starshadow Lamp has two slots where Asterism Shards can be placed and projected.
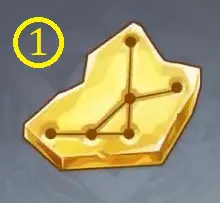
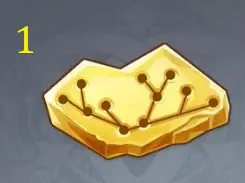
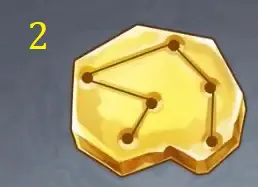
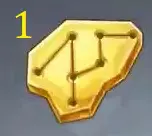
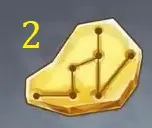
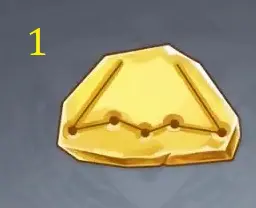
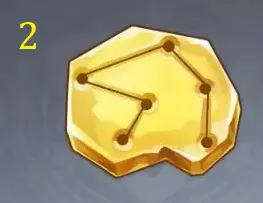
The Asterism Shards that I got are shown in the pictures below. I have marked the Asterism Shards as ‘1’ and ‘2’. If you received different Asterism Shards, then this solution won’t work for you. But you can follow the method explained in the article to solve the puzzle in your game.
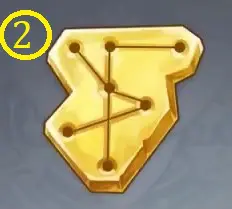
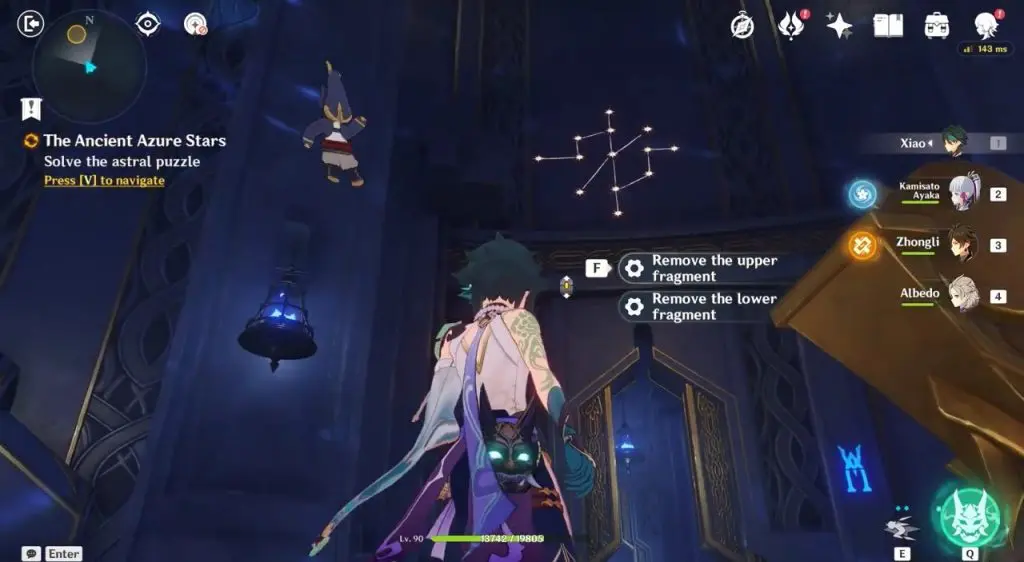
Once you have the two Asterism Shards, go to the door with the astronomical pattern as shown in the picture below. Interact with the projection platform in front of this door. Place Asterism Shard 1 on the upper slot of this projection platform and Asterism Shard 2 on the lower slot.
The Starshadow Lamp will project the astronomical pattern from the Asterism Shards onto the dome above the door as shown in the picture below. If the projected pattern is the same as that on the sealed door, then the door will open. If you received the same Asterism Shards as me, then this solution will work for you. Otherwise, follow the method explained in this article to solve the puzzle in your game.
Solve the astral puzzle
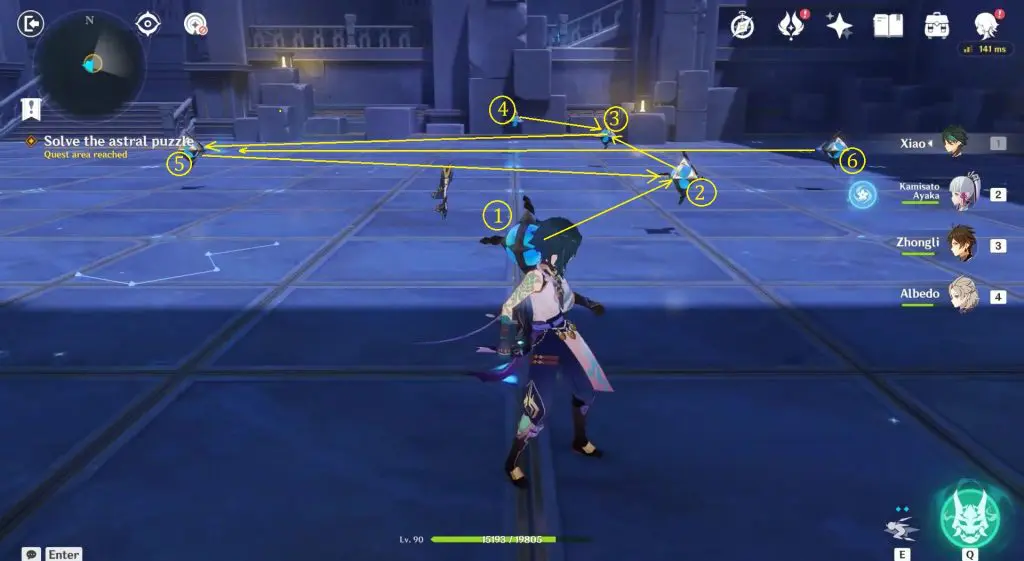
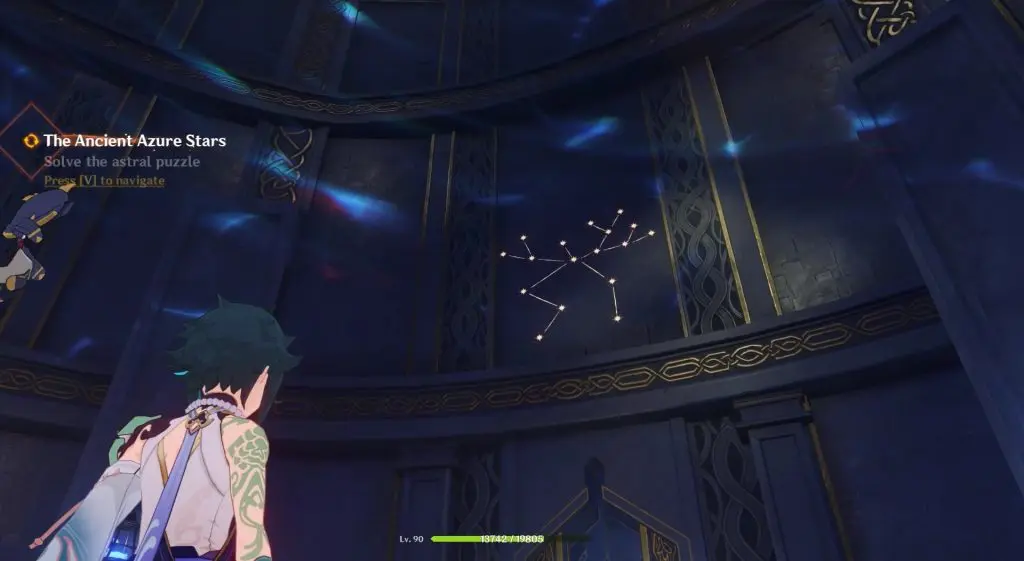
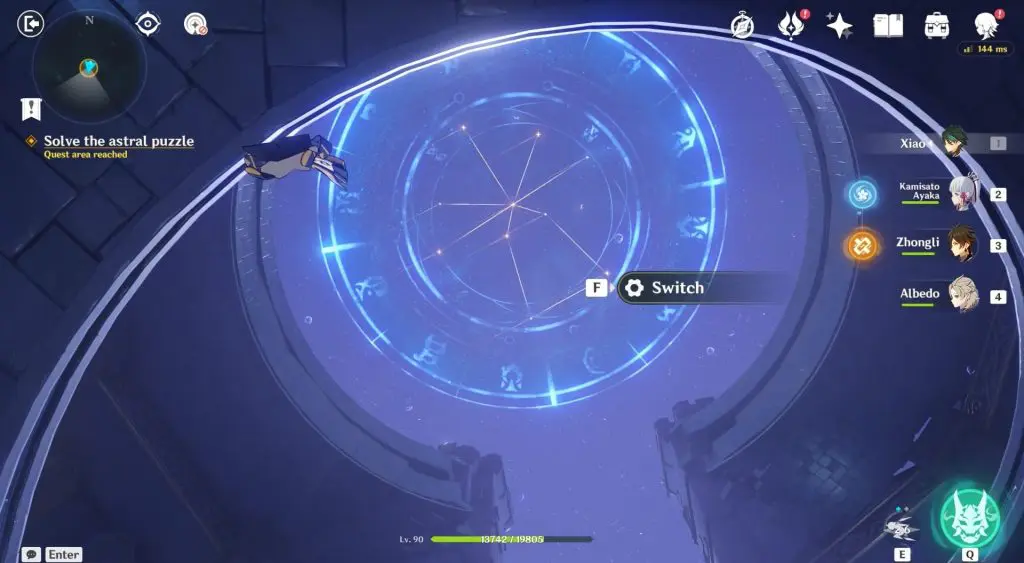
Go through the opened door and proceed ahead. When you reach the puzzle area, you will see several Star Guides. When a Star Guide is attacked, it shoots rays of starlight towards a specific direction and links up with other star guides. When you get close to a Star Guide, you can change the direction in which it is facing to help it link up to different star guides.
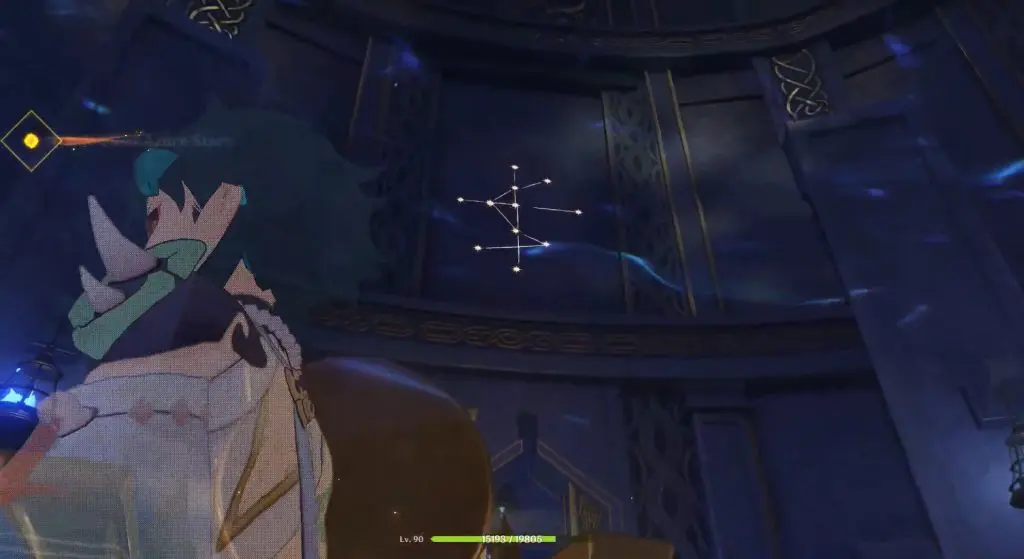
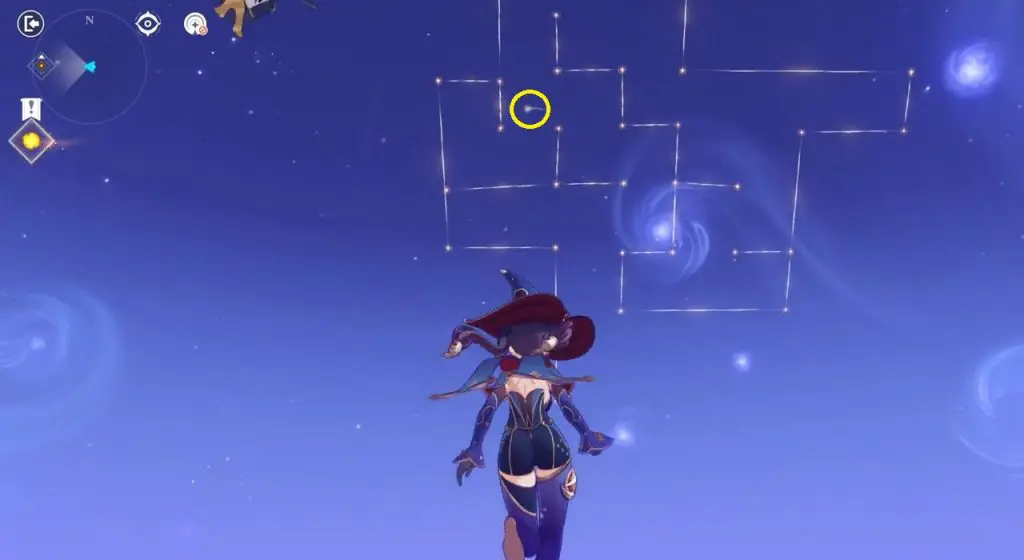
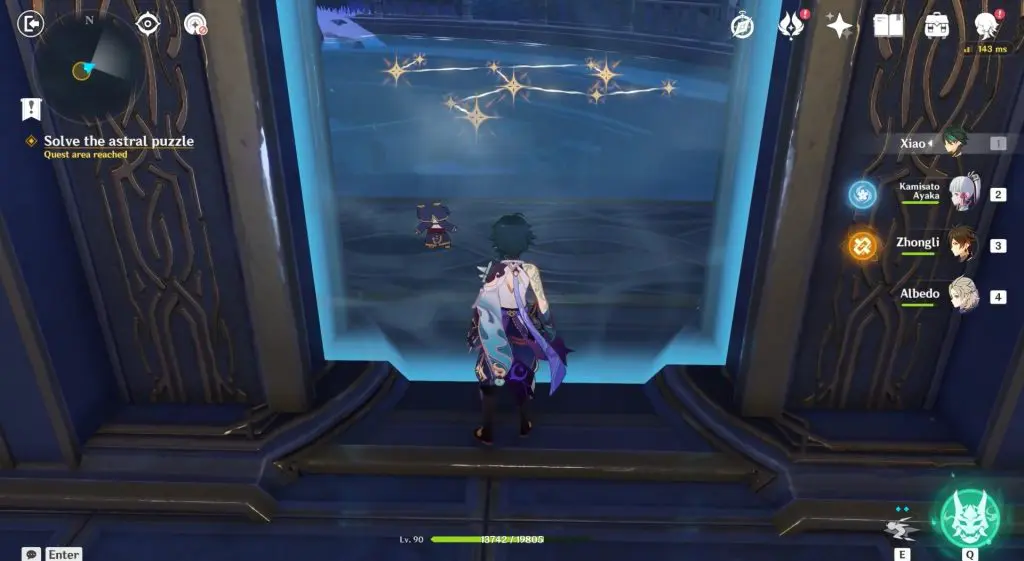
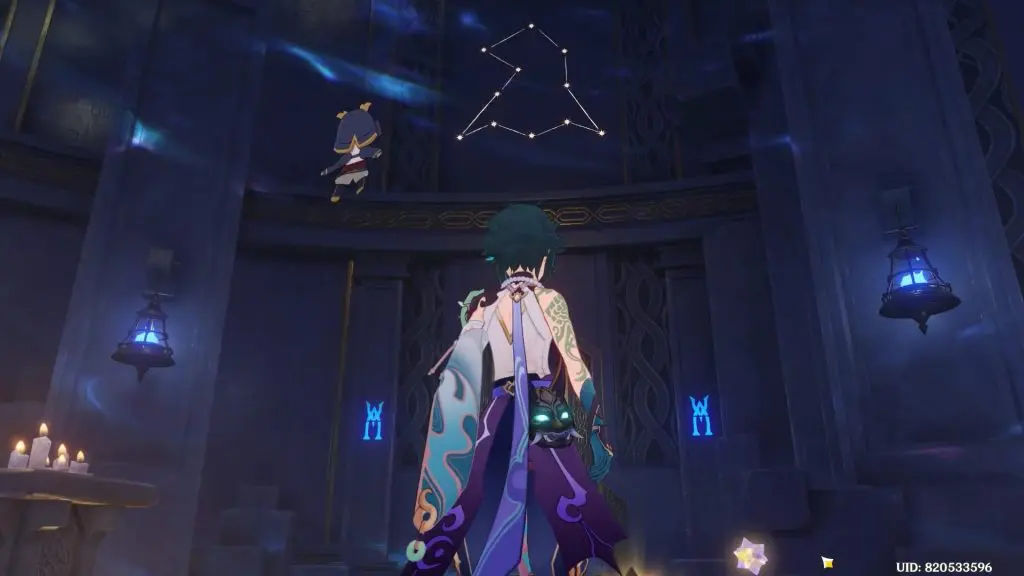
To solve the puzzle, you need to link the Star Guides in a specific pattern. The pattern that you need to form can be seen by looking up in the sky. The picture below shows the pattern for the first Astral Puzzle that you will encounter in the game. I have numbered the stars in the picture below to help you better understand the solution for this specific puzzle.
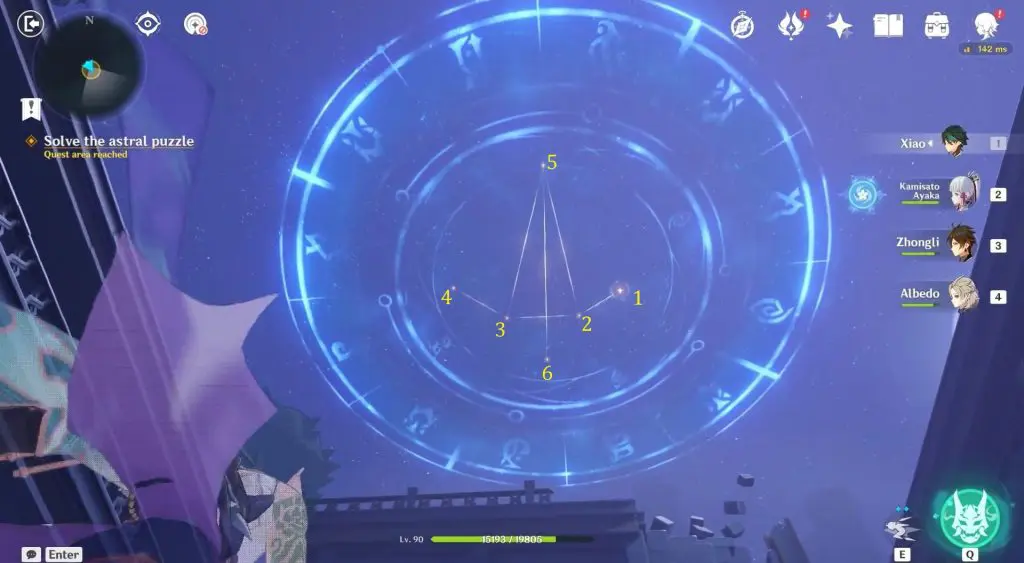
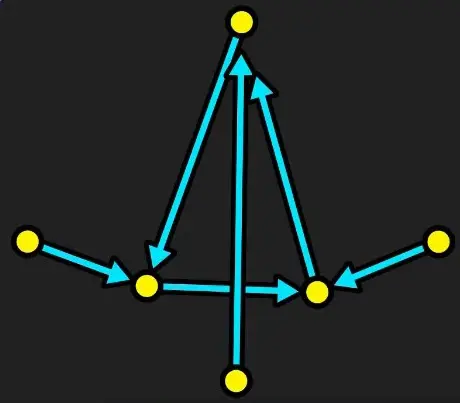
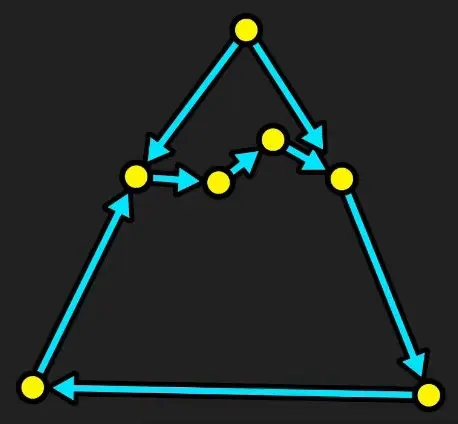
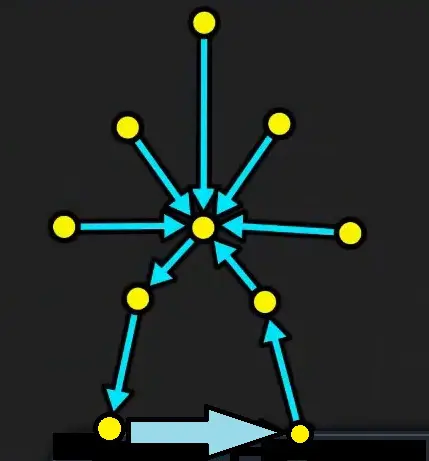
Link the star guides as shown in the picture below to solve the puzzle. I have numbered the Star guides to help you better understand the solution.
Link Star Guide #1 to Star Guide #2
Link Star Guide #2 to Star Guide #3
Link Star Guide #3 to Star Guide #5
Link Star Guide #4 to Star Guide #3
Link Star Guide #5 to Star Guide #2
Link Star Guide #6 to Star Guide #5
Follow the strange star
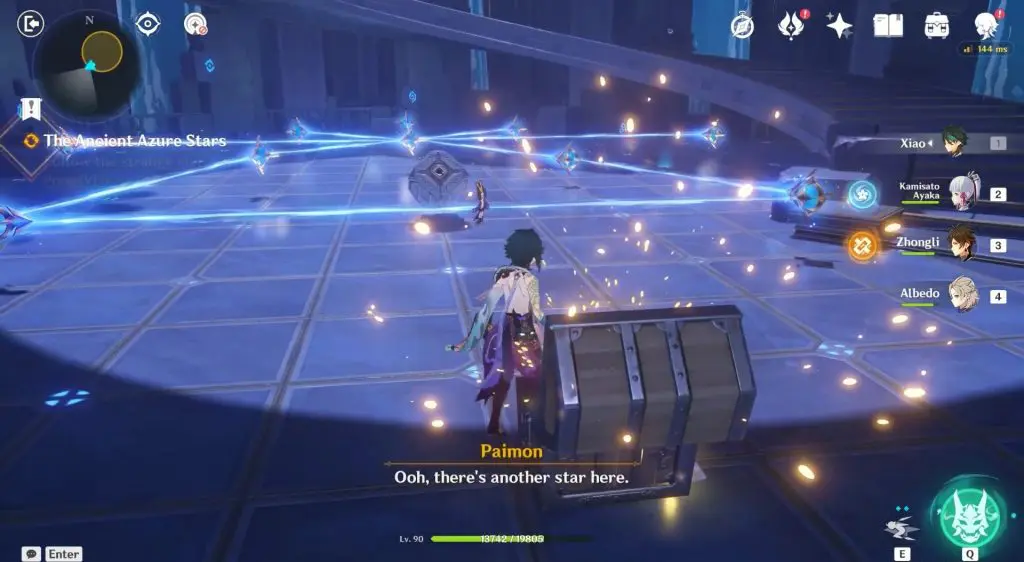
On solving the Astral Puzzle, a chest will spawn. Open the chest and a Star will come out from it. Simply follow the star and it will lead you to a Mirage.
Pass the challenge of the starry sky
In the Mirage, there will be several moving stars. To complete the challenge, you need to lake less than 30 hits in the given time limit. This is a fairly easy challenge to complete. After completing the challenge, enter the Mirage door. This finishes the first part of the quest.
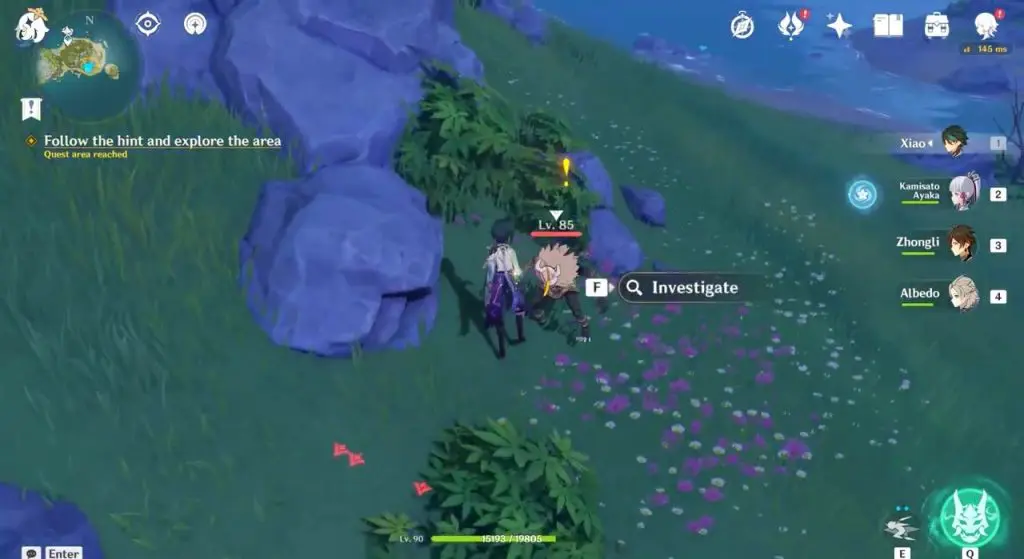
Follow the hint and explore the area
Collect the Asterism SHard from the location shown in the pictures below.
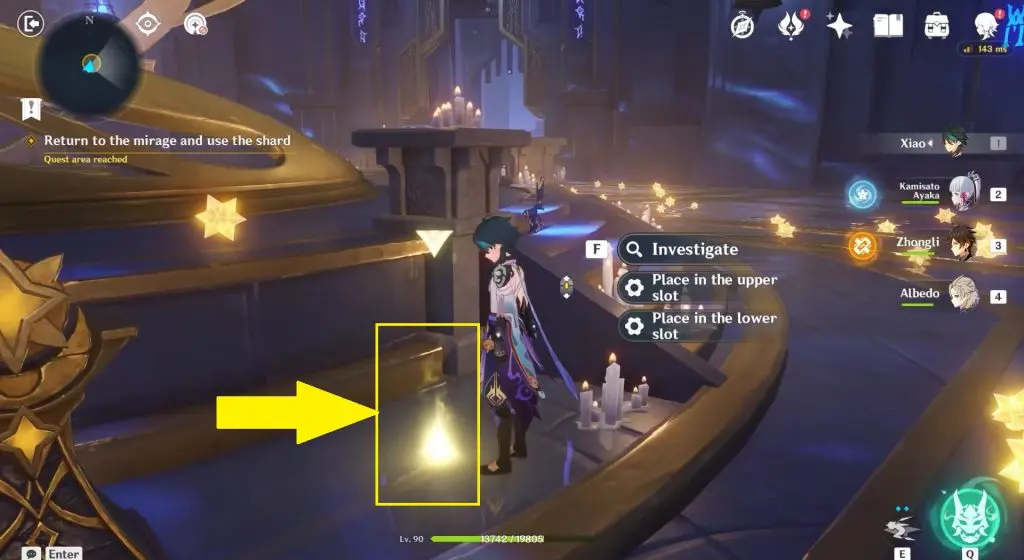
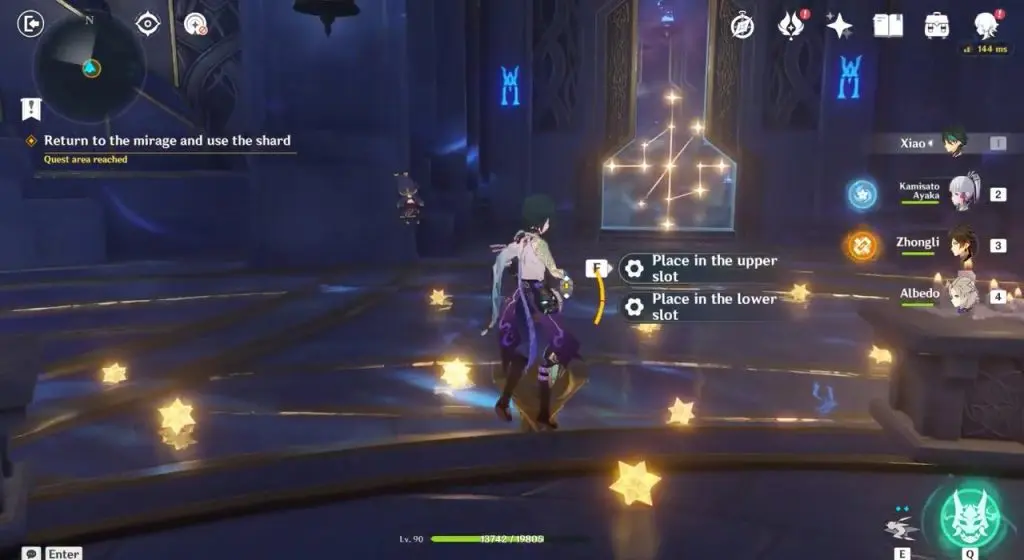
Return to the mirage and use the shard
Enter the Temple of the Star Latitudes. Then head to the pool and pick up the shard sitting near one of the projection platforms as shown in the picture below.
Now, go to the projection platform in front of the door with the astronomical pattern as shown in the picture below.
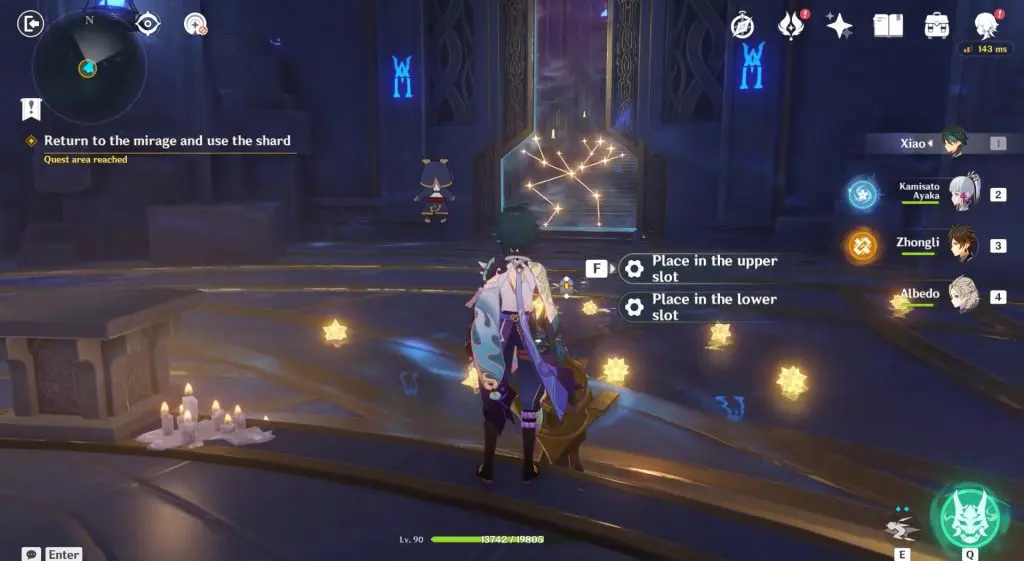
Interact with the projection platform in front of the sealed door shown above. Place Asterism Shard 1 on the upper slot of this projection platform and Asterism Shard 2 on the lower slot.
The Starshadow Lamp will project the astronomical pattern from the Asterism Shards onto the dome above the door as shown in the picture below. If the projected pattern is the same as that on the sealed door, then the door will open.
Solve the astral puzzle
Head through the door until you reach the puzzle area. The solution for the second Astral Puzzle is shown in the pictures below.

Follow the strange star
On solving the Astral Puzzle, a chest will spawn. Open the chest and a Star will come out from it. Simply follow the star and it will lead you to a Mirage.
Find the destination of the mirage maze
Chase the moving star in the mirage until it goes up inside a maze. When it is in the maze, it will mimic your movements. Move it outside the maze as shown in the picture below to complete the objective. Now the star will drop down. Chase the star again and it will take you to the Mirage Door. Exiting the Mirage completes the second part of the quest.
Follow the hint and explore the area
Collect the Asterism shard from the location shown in the picture below.
Return to the mirage and use the shard
Enter the Temple of the Star Latitudes and go to the projection platform in front of the door with the astronomical pattern as shown in the picture below.
Interact with the projection platform in front of the sealed door shown above. Place Asterism Shard 2 on the upper slot of this projection platform and Asterism Shard 1 on the lower slot.
The Starshadow Lamp will project the astronomical pattern from the Asterism Shards onto the dome above the door as shown in the picture below. If the projected pattern is the same as that on the sealed door, then the door will open.
Solve the astral puzzle
Head through the door until you reach the puzzle area. The pattern for this puzzle can be seen through the sealed door as shown in the first picture below. The solution to the Puzzle is shown in the second and third pictures below.

Follow the strange star
On solving the Astral Puzzle, a chest will spawn. Open the chest and a Star will come out from it. Simply follow the star and it will lead you to the fourth door.
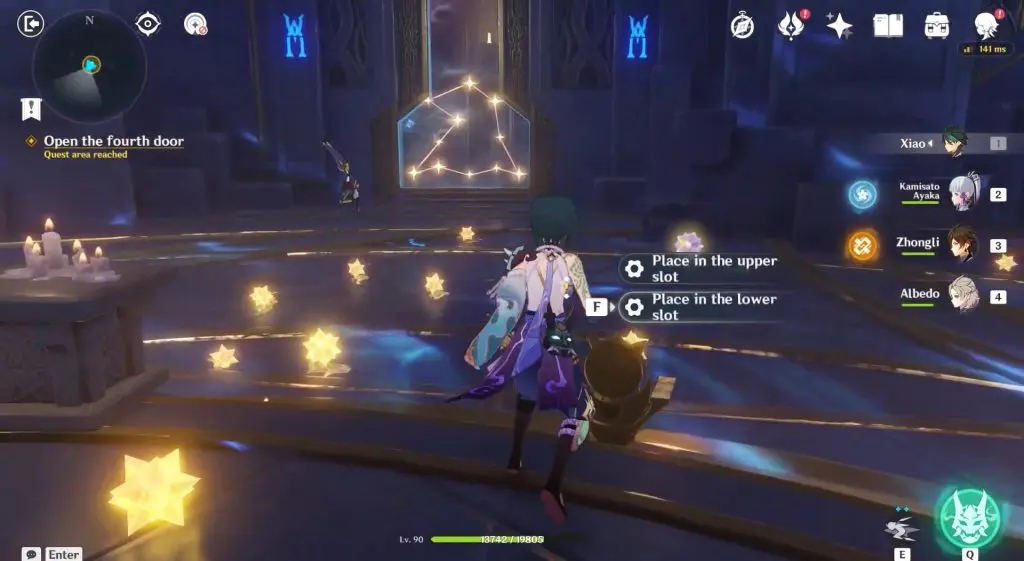
Open the fourth door
As the objective starts, go to the projection platform in front of the door with the astronomical pattern as shown in the picture below. Unfortunately, you won’t be having all the required Asterism Shards with you at this point.
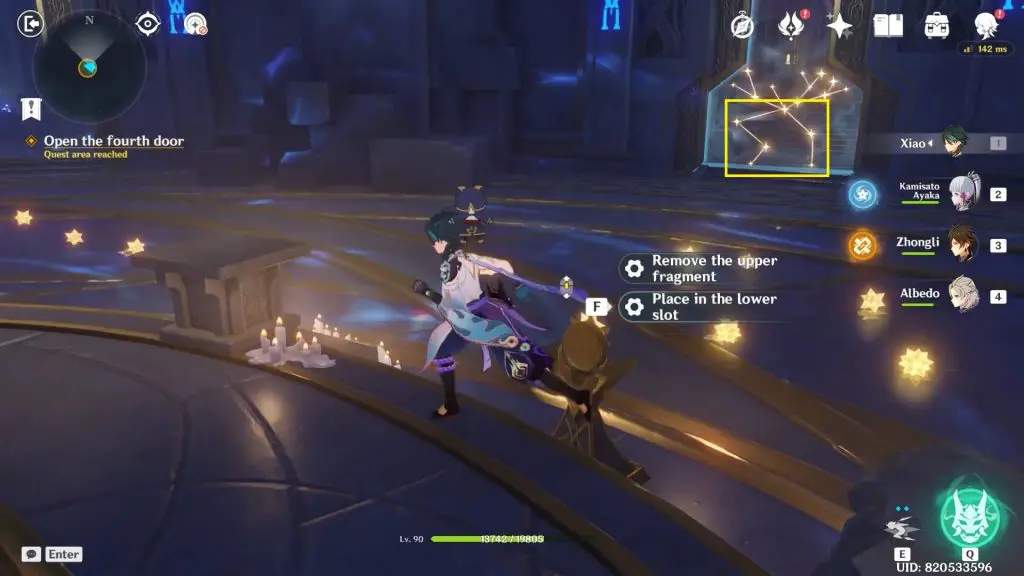
Go back to the second sealed door that you opened before in the quest and remove the Asterism Shard from the lower slot as shown in the picture below. This will give you the missing Asterism Shard. Snapshots of the required Asterism Shards are shown in the pictures below.
Once you have the two Asterism Shards, go to the fourth door. Interact with the projection platform in front of this door. Place Asterism Shard 2 on the upper slot of this projection platform and Asterism Shard 1 on the lower slot.
The Starshadow Lamp will project the astronomical pattern from the Asterism Shards onto the dome above the door as shown in the picture below. If the projected pattern is the same as that on the sealed door, then the door will open. If you received the same Asterism Shards as me, then this solution will work for you. Otherwise, follow the method explained in this article to solve the puzzle in your game.
Solve the astral puzzle
Head through the door until you reach the puzzle area. The solution for the fourth and final Astral Puzzle is shown in the pictures below.
Follow the strange star
On solving the Astral Puzzle, a chest will spawn. Open the chest and a Star will come out from it. Simply follow the star and it will lead you to underwater space.
Follow the star to the destination
Again you have to follow the star, but unfortunately, there isn’t one at the location where you will spawn. Simply follow the blue light on the ground and it will lead you to the star. Then follow the star and it will lead you to the final mirage.
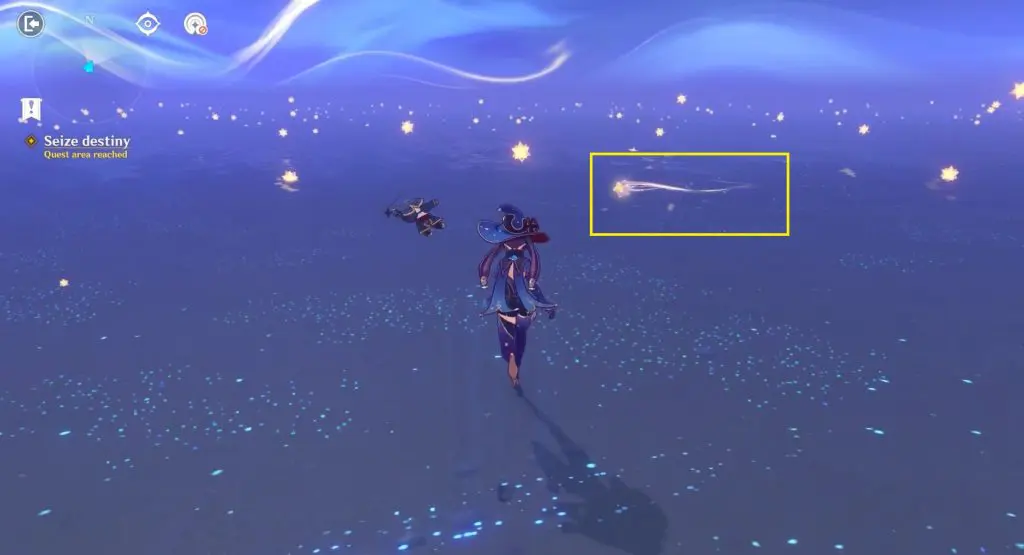
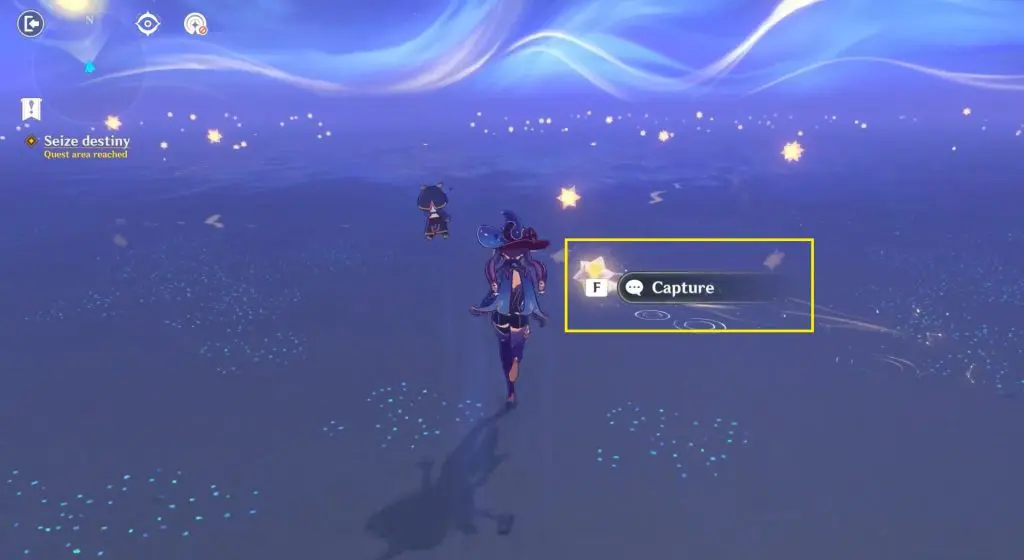
Seize destiny
To complete the objective you will need to find and capture a moving star as shown in the pictures below. Wander around the area and you will find one easily. If you are not able to find a moving star, then use elemental sight to find it. On capturing the moving star, a cutscene will start. This completes The Ancient Azure Stars Story Quest.