There are 7 relay stone puzzles in Tsurumi Island of Genshin Impact 2.2. Solving the relay stone puzzles will grant you access to Exquisite Chests (and sometimes luxurious chests). This walkthrough will show the location and solution of all the 7 relay stone puzzles in Tsurumi Island of Genshin Impact 2.2.
A relay stone puzzle has 3 components:
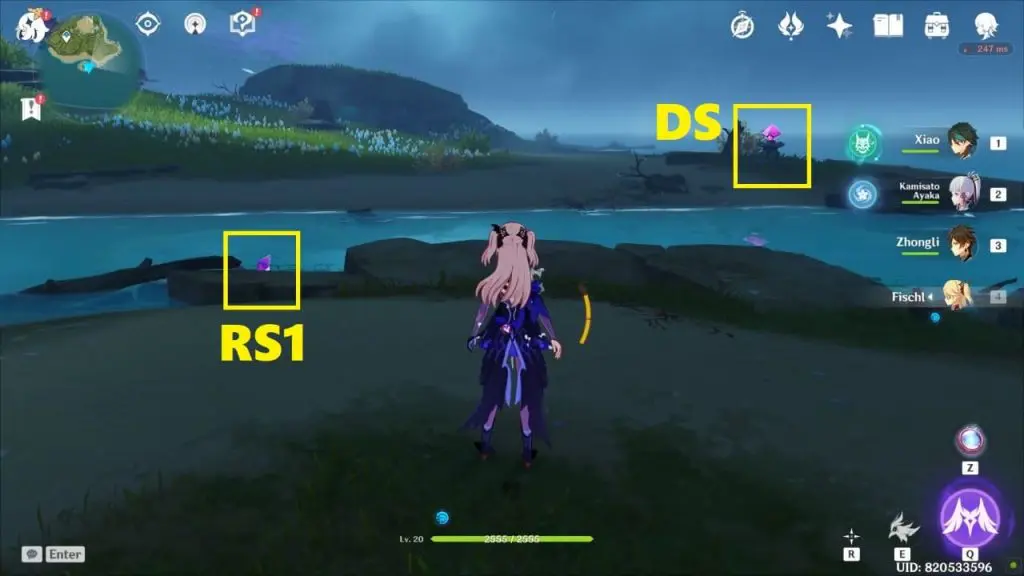
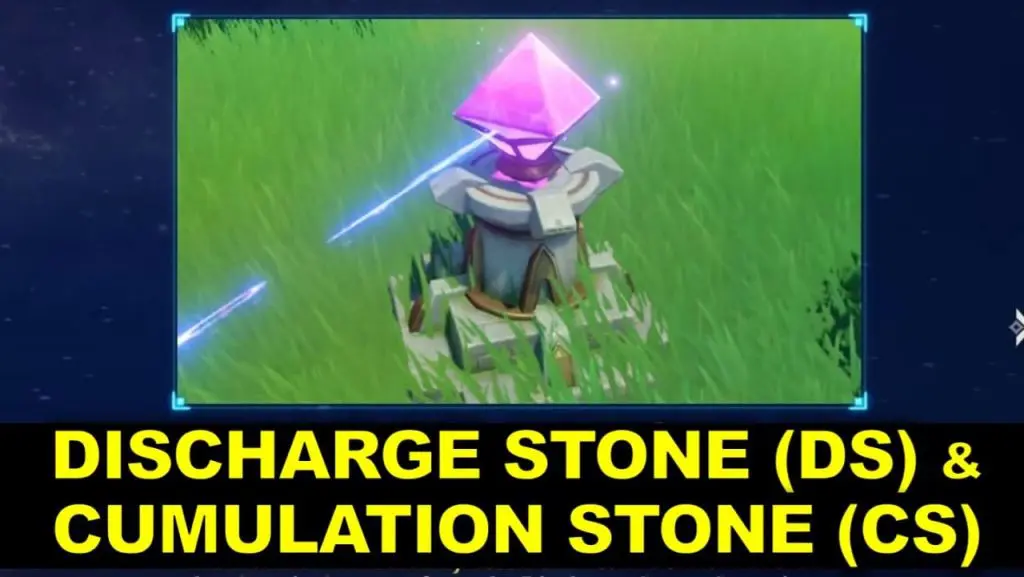
DISCHARGE STONE (DS): Shoots a harmless electric current.
CUMULATION STONE (CS): Absorbs the electrical energy from Discharge Stone.
RELAY STONES (RS): Conducts the current released by Discharge Stone.
To solve the puzzle you must complete the circuit: the current from Discharge Stone must reach the Cumulation Stone. You’ll have to use the relay stones to complete the circuit. There will be multiple relay stones in the area which can be picked up and positioned anywhere. To solve the puzzle, you must position the relay stones in such a way that the current released from Discharge Stone reaches the Cumulation Stone. After the circuit is complete, an exquisite chest will appear and its loot will be yours.

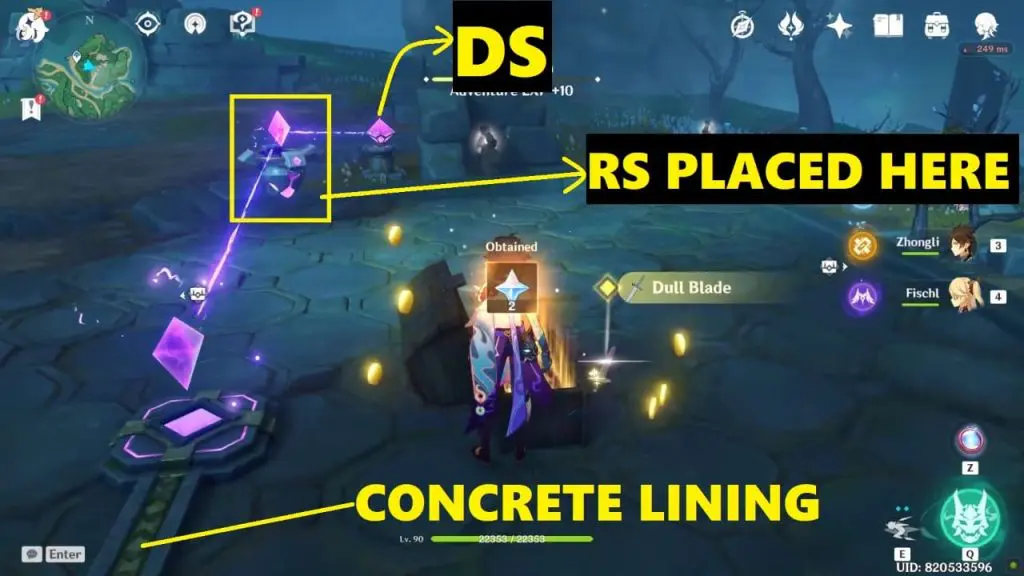
New Component Introduced in Tsurumi Island Relay Puzzles
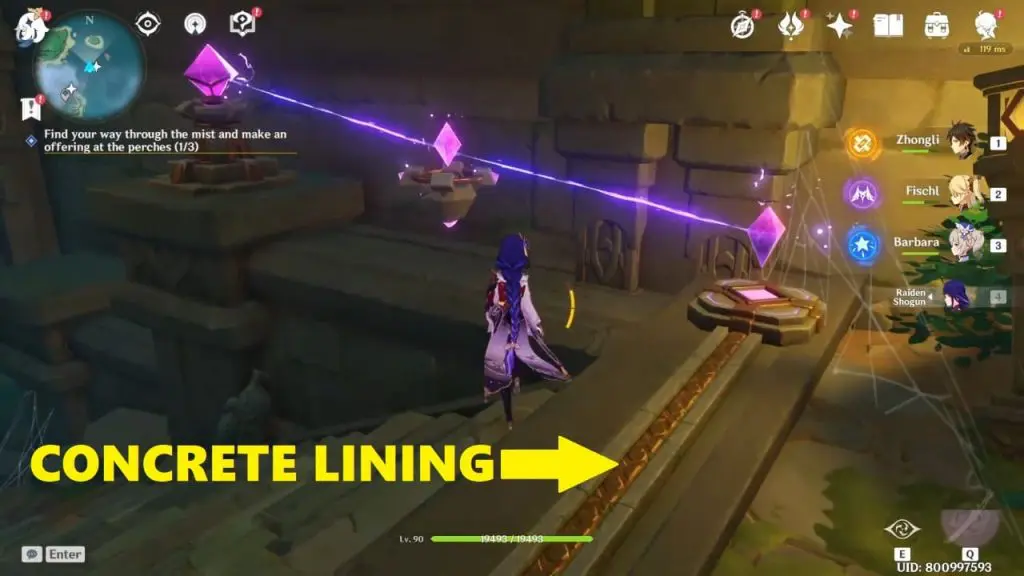
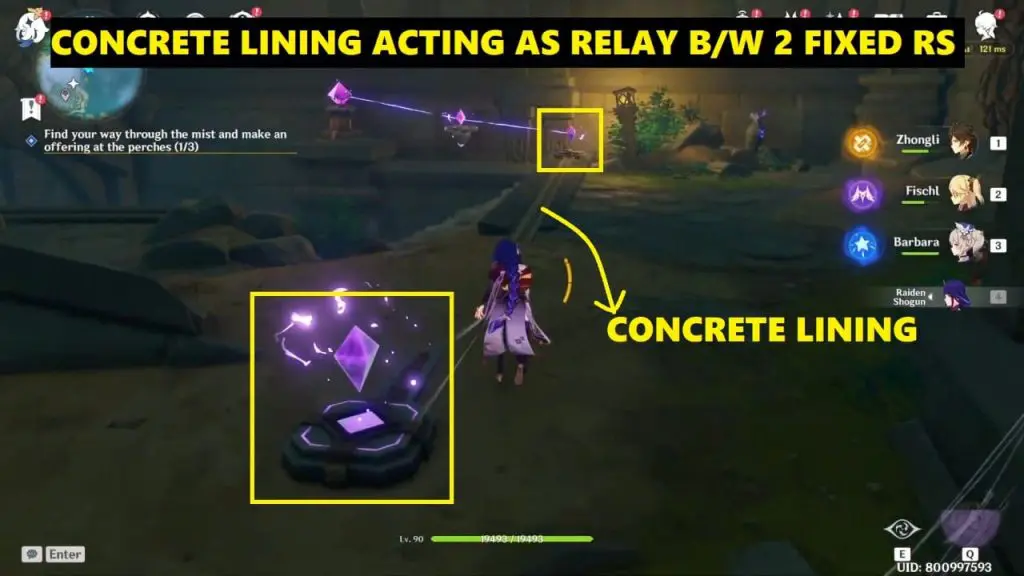
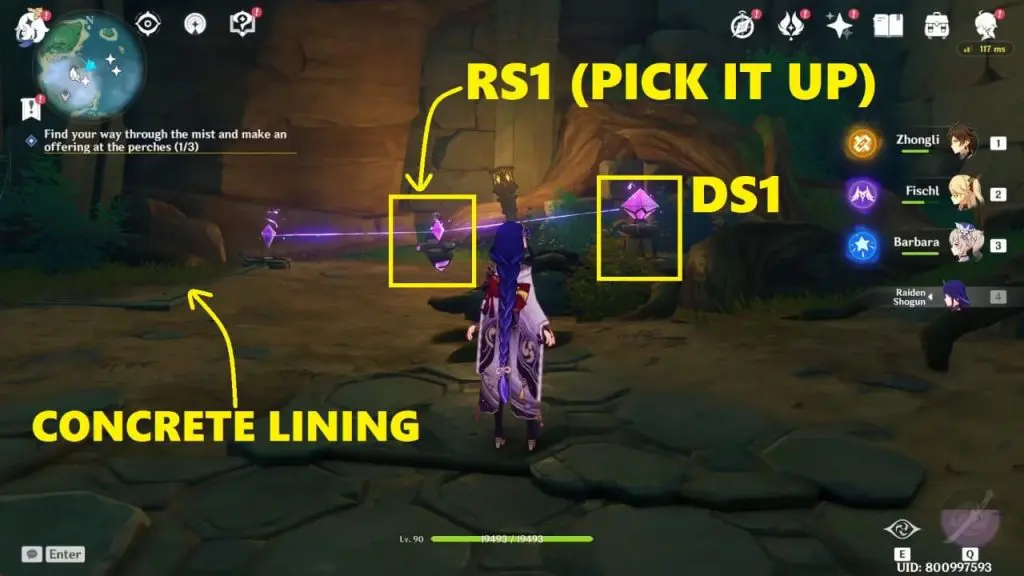
Rectangular concrete linings with gold patterns, acting as conductors (relays), can be seen on the ground (and on walls). There will be non-movable relay stones attached to both ends of these concrete linings. If the relay stone at one end of the concrete lining is getting current supply, then it’ll be conducted to the relay stone at another end automatically.
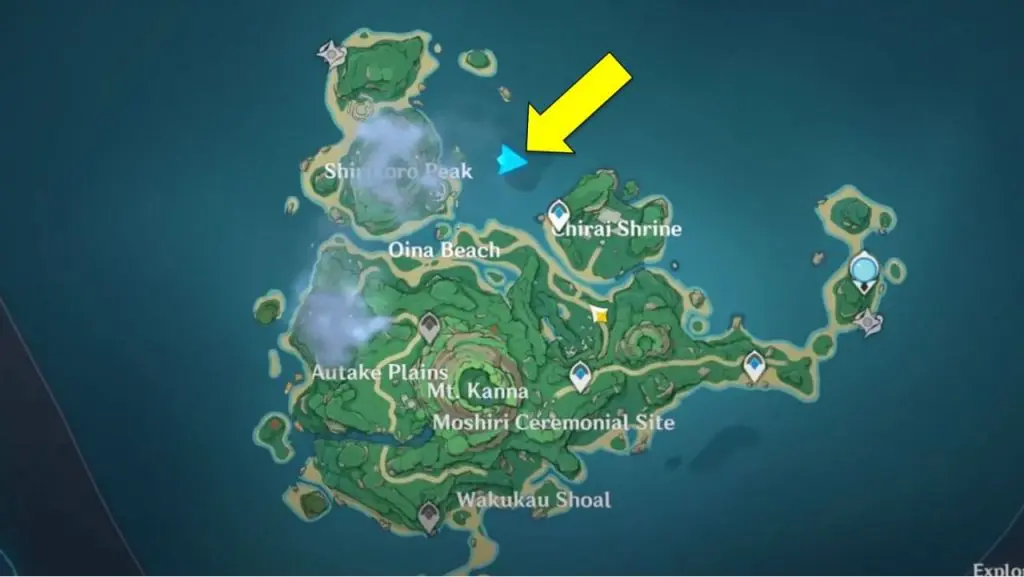
Relay Stone Puzzle #1 (Shirikoro Peak)
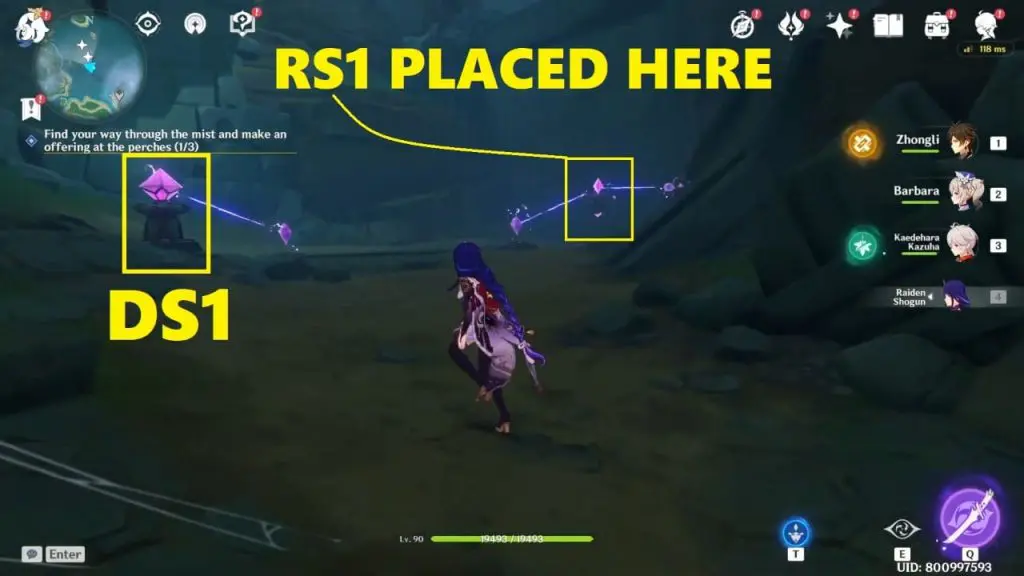
This puzzle contains 3 discharge stones (DS), 1 cumulation stone (CS), 2 relay stones (RS), and 3 concrete linings on the ground. There is 1 concrete lining between DS1 and CS, and 2 concrete linings between DS2 and CS. The 2 relay stones can be found near the 2 discharge stones. To solve the puzzle, you’ve to connect the CS to both the DS.
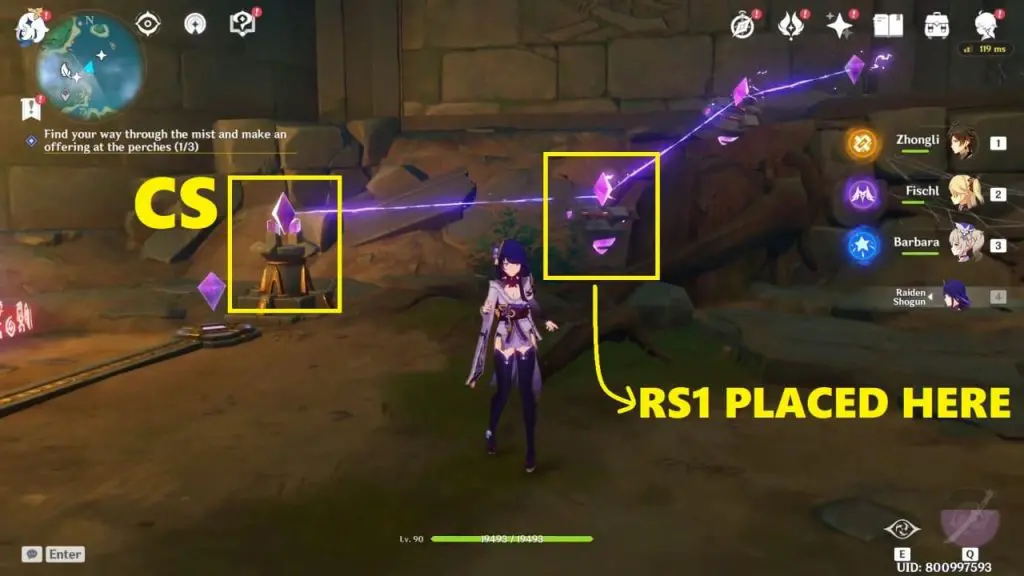
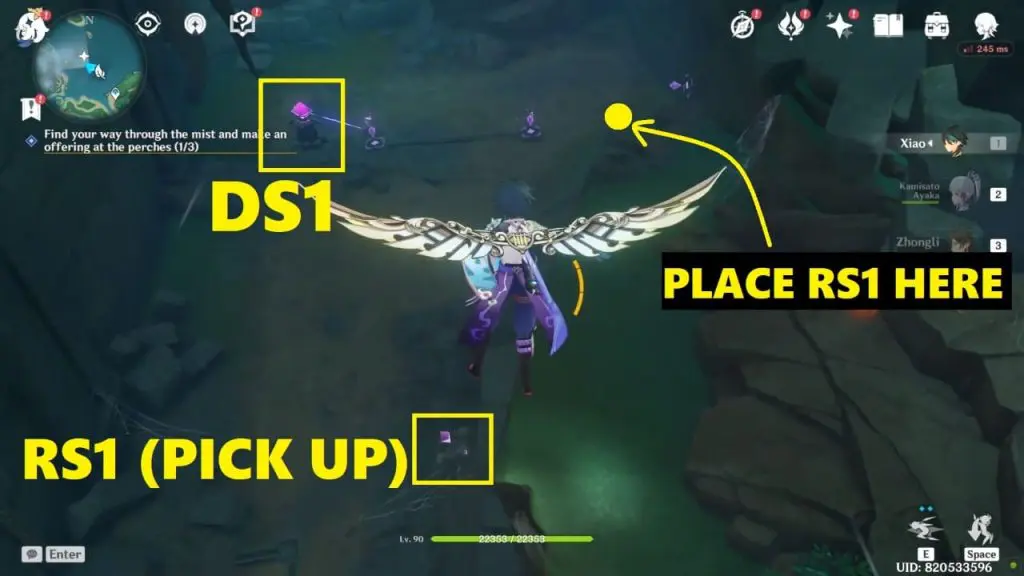
STEP 1 (Connect DS1 to CS): Pick the relay stone lying near DS1 and place it near CS. The rest of the work will be done by the concrete lining between DS1 and CS.
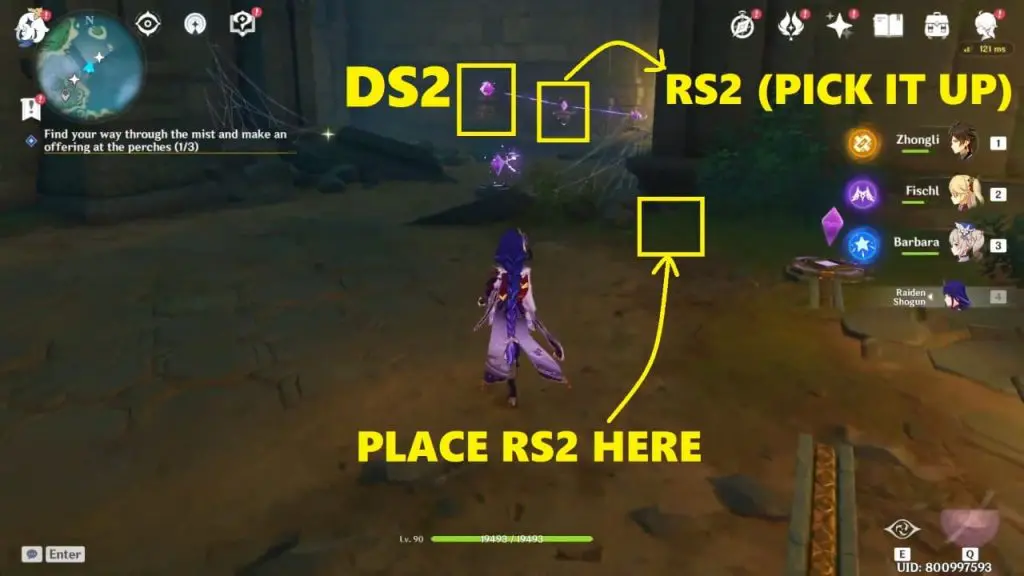
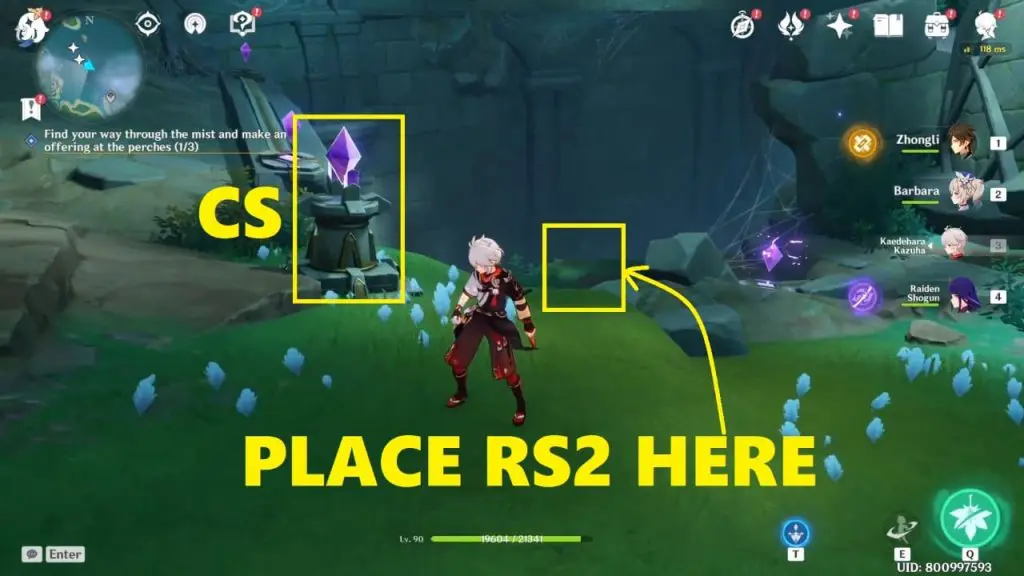
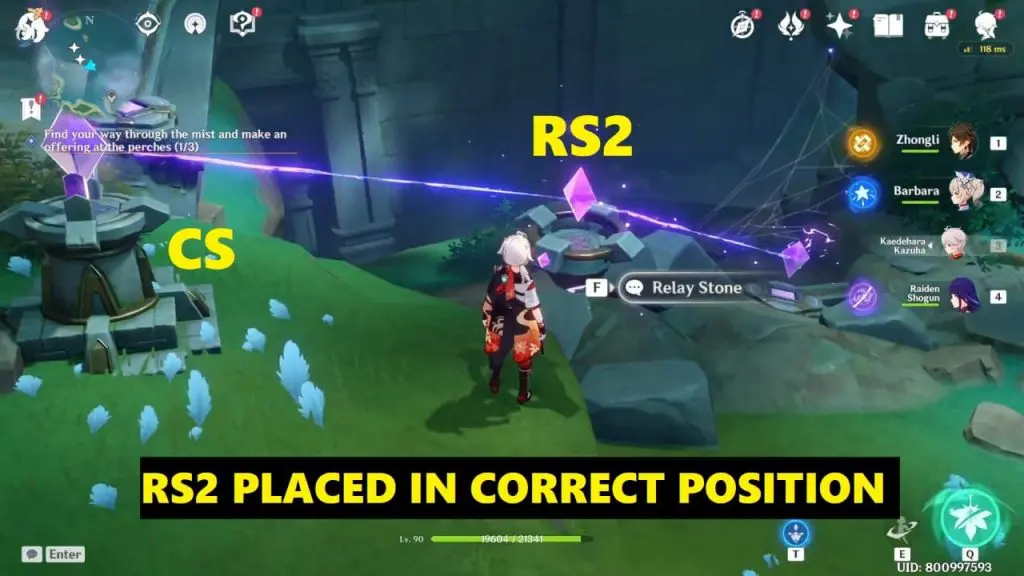
STEP 2 (Connect DS2 to CS): There are 2 concrete linings between DS2 and CS. Pick the relay stone lying near DS2 and place it between the two concrete linings. An exquisite chest will spawn near the CS.


Relay Stone Puzzle #2 (Shirikoro Peak)
This relay stone puzzle has 1 cumulation stone (CS), 2 discharge stones (DS), 3 relay stones (RS), and 4 concrete lines. To solve the puzzle, you’ve to connect the CS to both the DS. The cumulation stone is in front of the closed circular door. The 2 discharge stones and 2 relay stones are submerged underwater. First, you need to drain the water and then try solving the relay puzzle.
STEP 1: Drain the Water
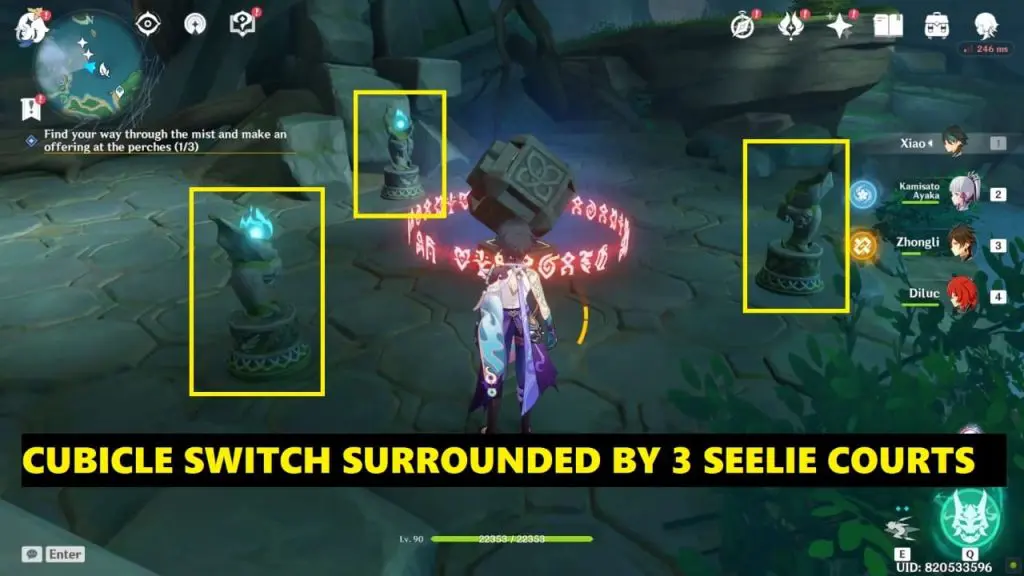
There is a locked cubicle switch surrounded by three seelie-courts. To drain the water, you need to unlock this switch and interact with it. To unlock the cubicle switch, a seelie must be placed on each of these seelie courts. There are 3 seelies in this area. Get near them and chase them until they get to their seelie court.
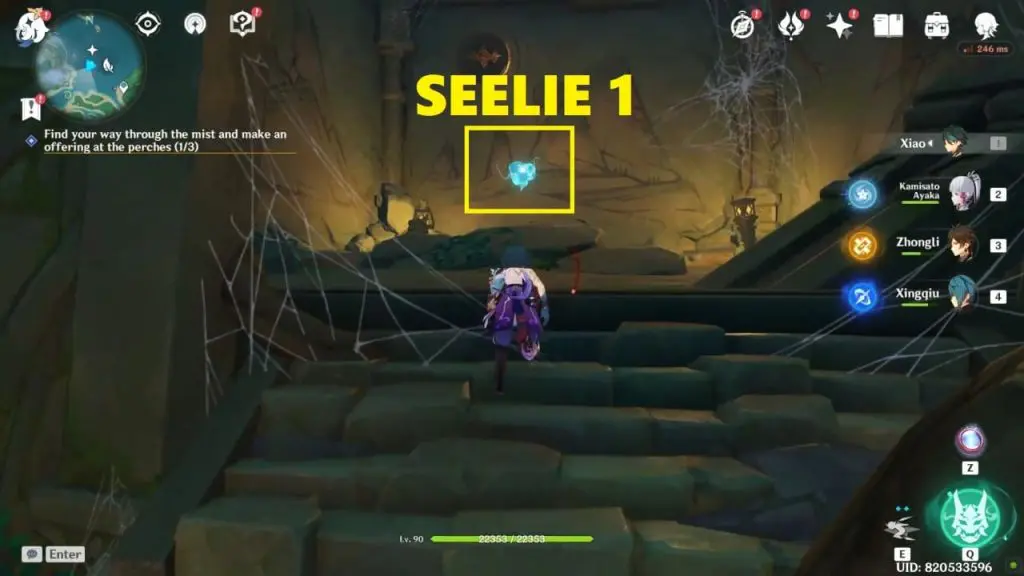
Seelie 1 Location: It’s upstairs (south of the cubicle switch).
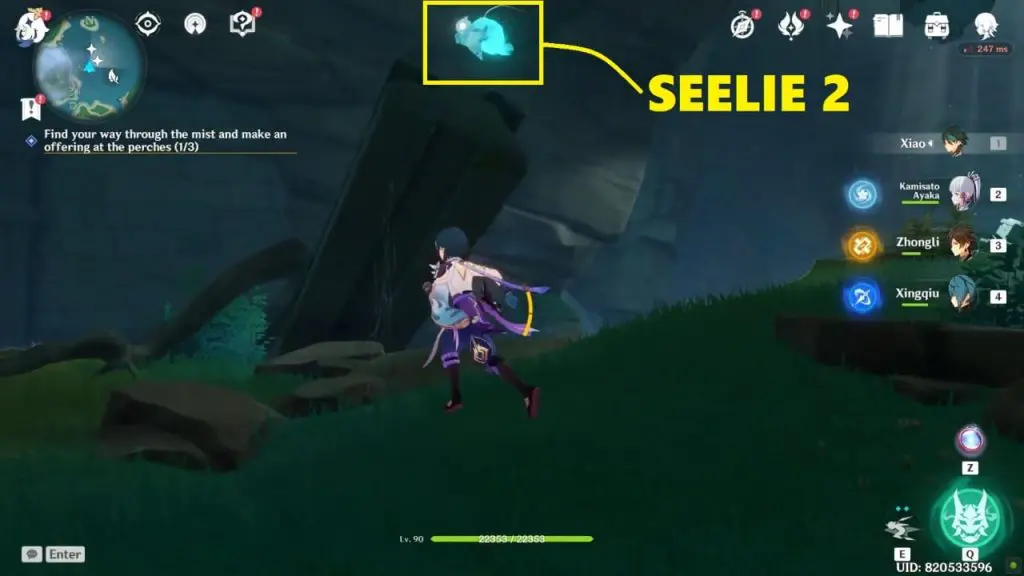
Seelie 2 Location: It’s above a broken pillar (west of the cubicle switch).
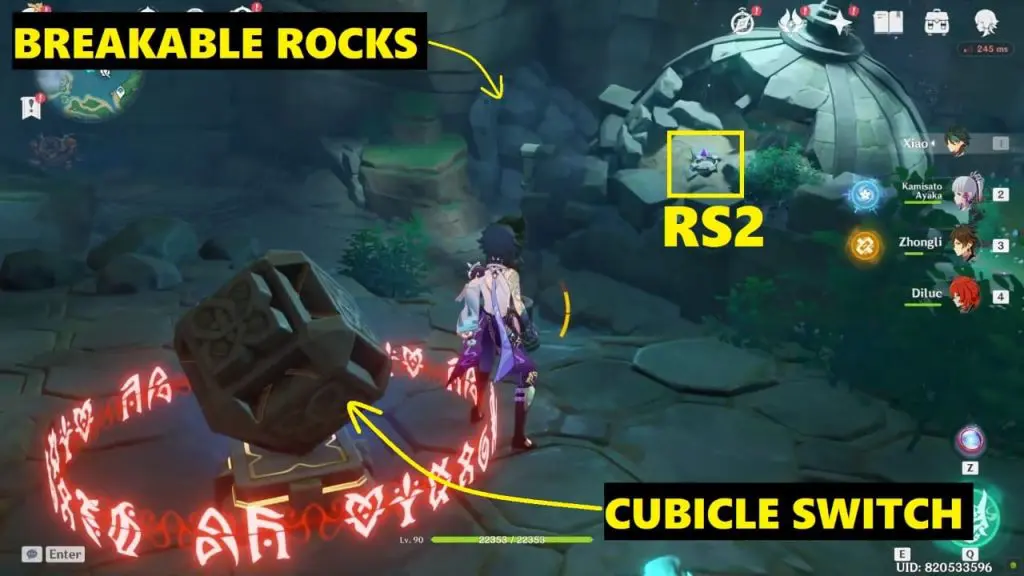
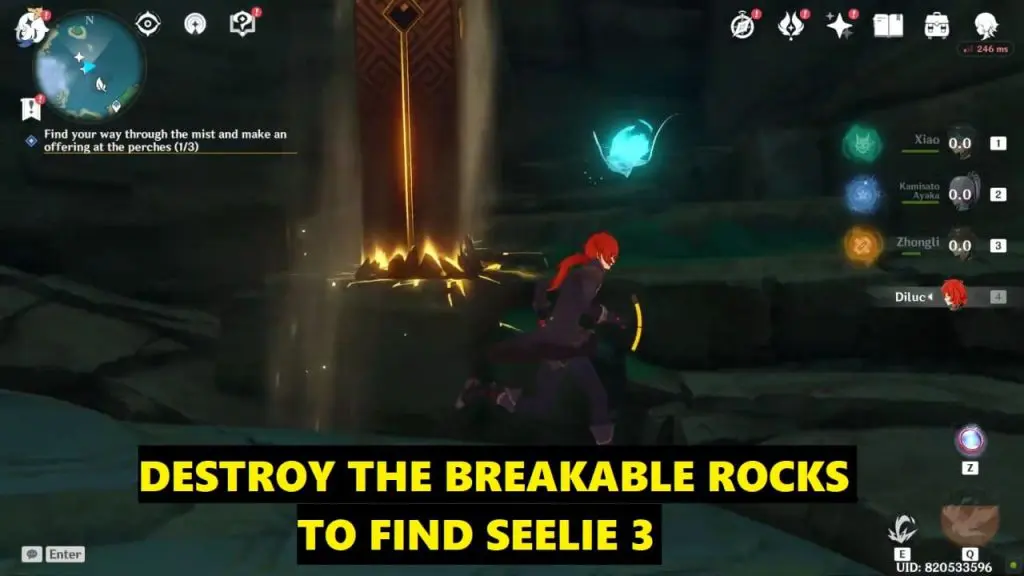
Seelie 3 Location: It’s under the rubble of rocks (north of the cubicle switch). Destroy the rocks to find the seelie.
Once you chase all the 3 seelies and make them reach their seelie courts, the cubicle switch will unlock. Interact with the cubicle switch to drain the water. Now, you can get to the relay stones and finish solving the relay puzzle.
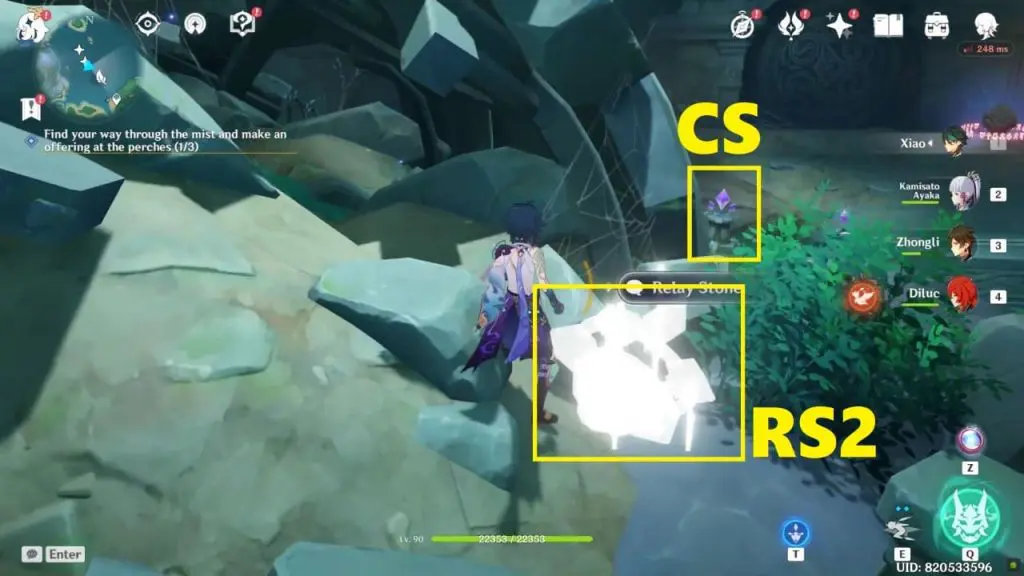
STEP 2: Pick up the 3 Relay Stones
One relay stone is above the ruined dome (a little bit west of the cumulation stone). The other two relay stones are submerged underwater. They can be easily spotted once you drain the water. The 3 images below show the location of the 3 relay stones that you need to pick up.
STEP 3: Connect DS1 to CS
You need 2 Relay Stones for connecting DS1 to CS. There are 2 concrete lines between the DS1 and CS. One concrete line is on the ground and the second one is on the wall. Place the first relay stone between the 2 concrete lines. Place the second relay stone near the CS (between CS and concrete line).
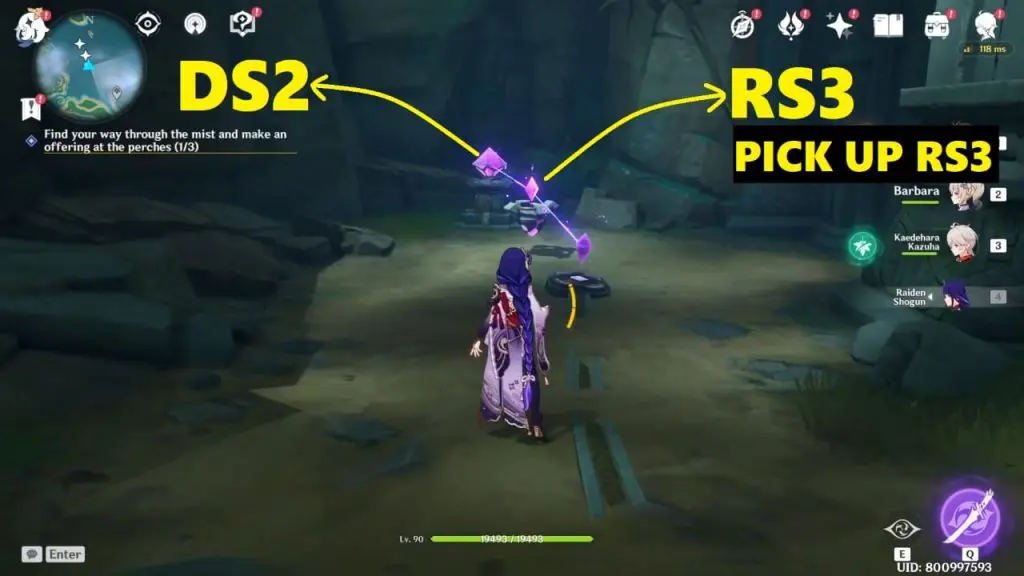
STEP 4: Connect DS2 to CS
You only need 1 Relay Stone for connecting DS2 to CS. There are 2 concrete lines between the DS1 and CS. One concrete line is on the wall and another on the ground (near the CS). You need to place the relay stone mid-air between the 2 concrete lines. This will complete the puzzle and a luxurious chest will spawn near the cumulation stone.
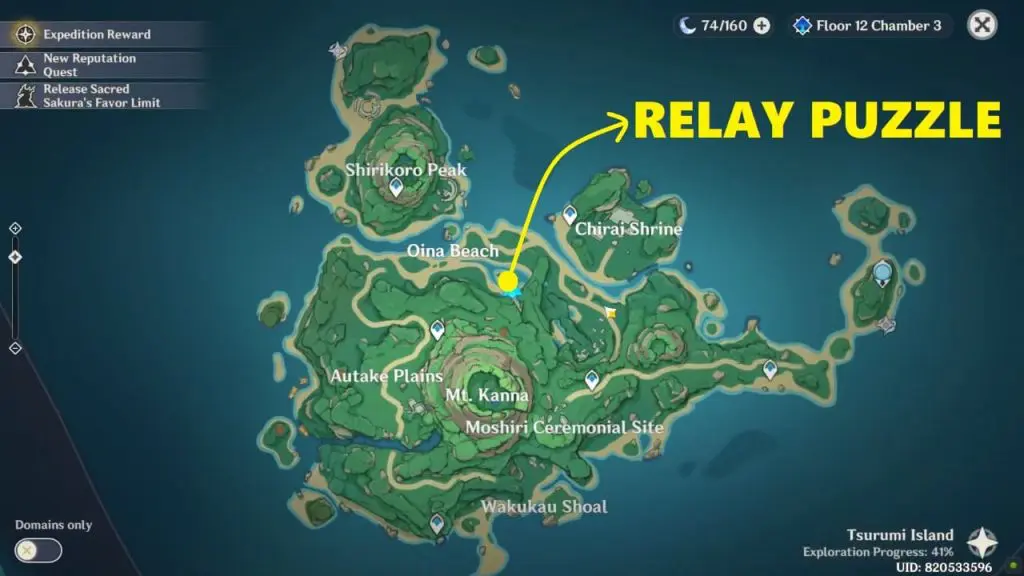
Relay Stone Puzzle #3 (Oina Beach)
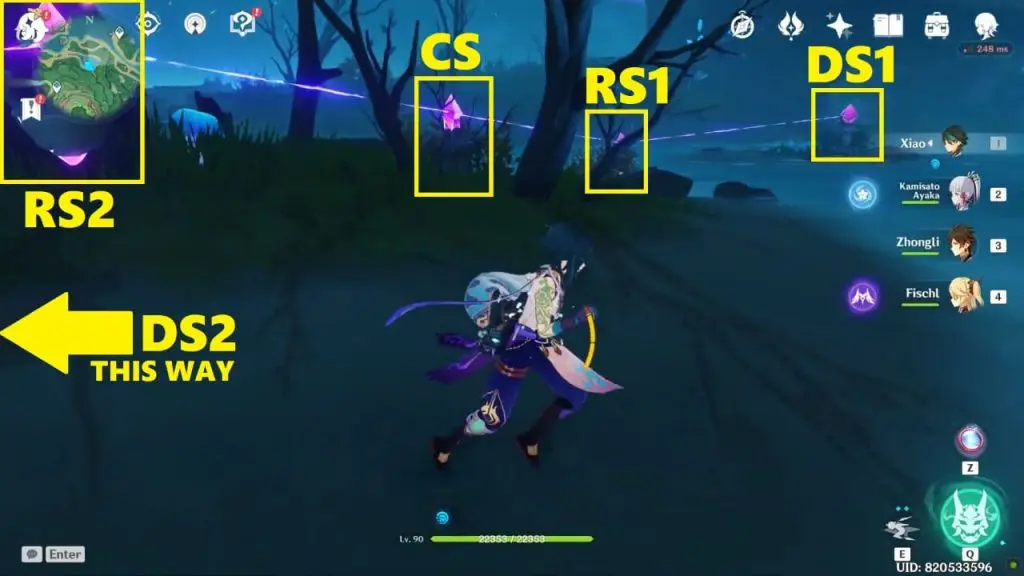
Check the images below for the location and solution of the relay stone puzzle. There are 2 Discharge Stones (DS), 1 Cumulation Stone (CS), and 2 Relay Stones (RS) in this puzzle. Go to the puzzle location as shown in the map below. The cumulation stone is under the big tree and the two discharge stones are also nearby. To solve the puzzle, you’ve to connect the CS to both the DS. First, pick the 2 relay stones (they’re pretty hard to miss).
STEP 1: Place 1 relay stone between DS1 and CS.
STEP 2: Place the 2nd relay stone between DS2 and CS. A common chest will appear near the cumulation stone.
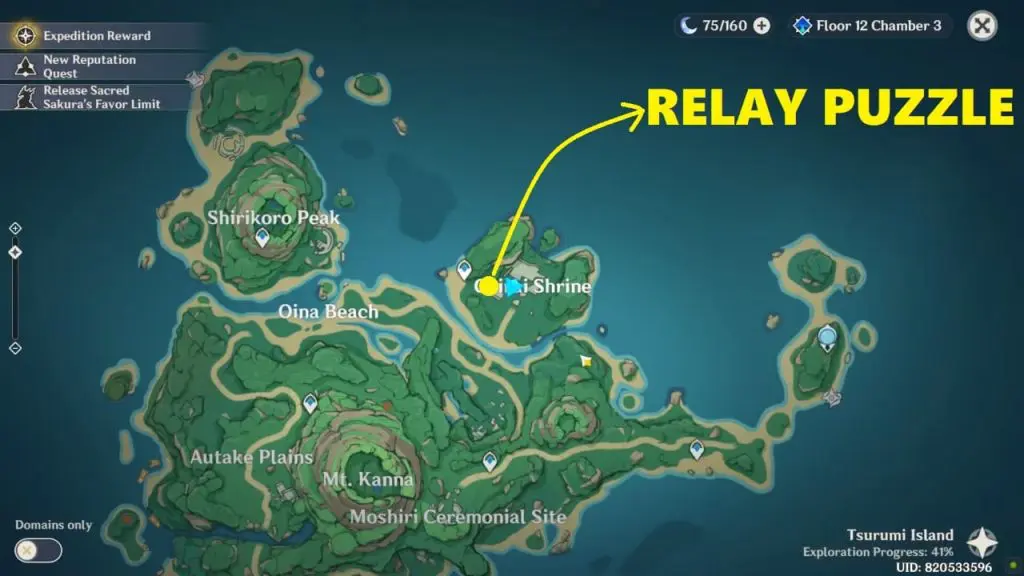
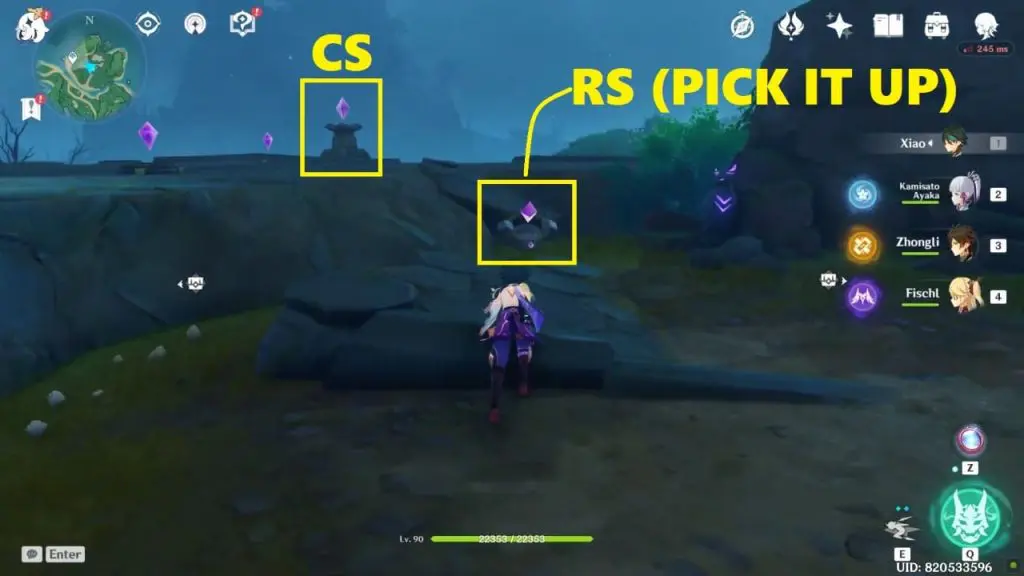
Relay Stone Puzzle #4 (Chirai Shrine)
Check the images below for the location and solution of the relay stone puzzle. This puzzle has 1 cumulation stone (CS), 1 discharge stone (DS), 1 relay stone (RS), and 1 concrete line. To solve the puzzle, just place the relay stone between the DS and the concrete lining. A common chest will then appear.
Relay Stone Puzzle #5 (Mt. Kanna)
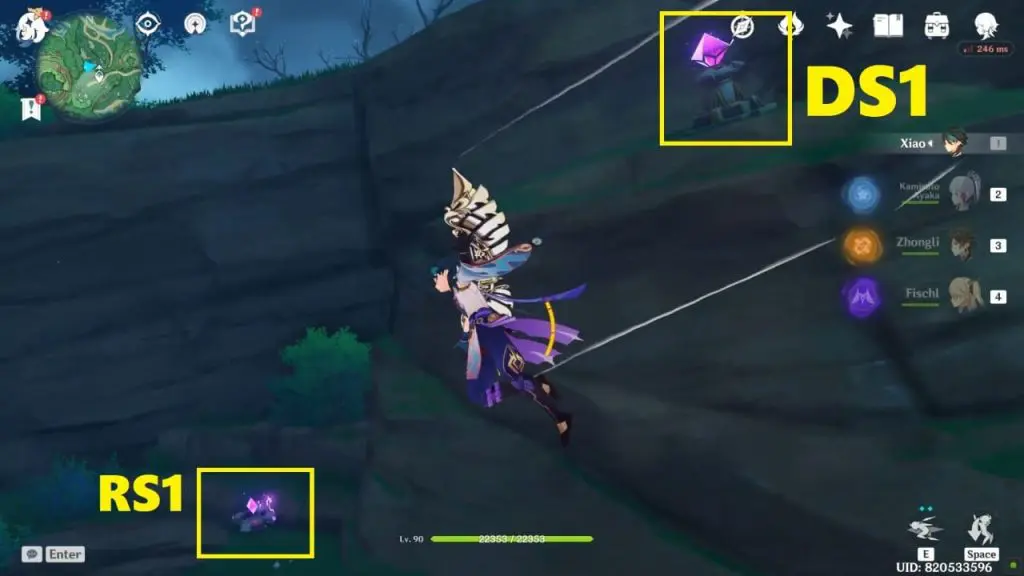
This puzzle has 1 cumulation stone (CS), 2 discharge stones (DS), and 3 relay stones (RS). Check the images below for the locations of the stones. Spotting the stones is pretty easy. The cumulation stone is in the center and the 2 discharge stones are on either side. One discharge stone (DS1) is above the mountain.
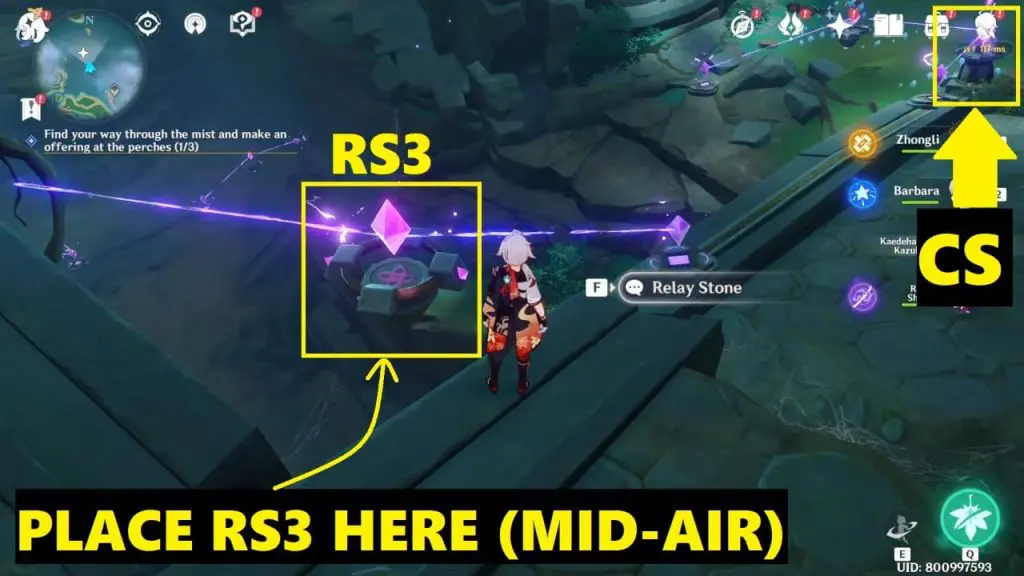
STEP 1: Place 2 relay stones mid-air between DS1 and CS.
STEP 2: Place the last relay stone between DS2 and CS. A common chest will spawn near the CS.
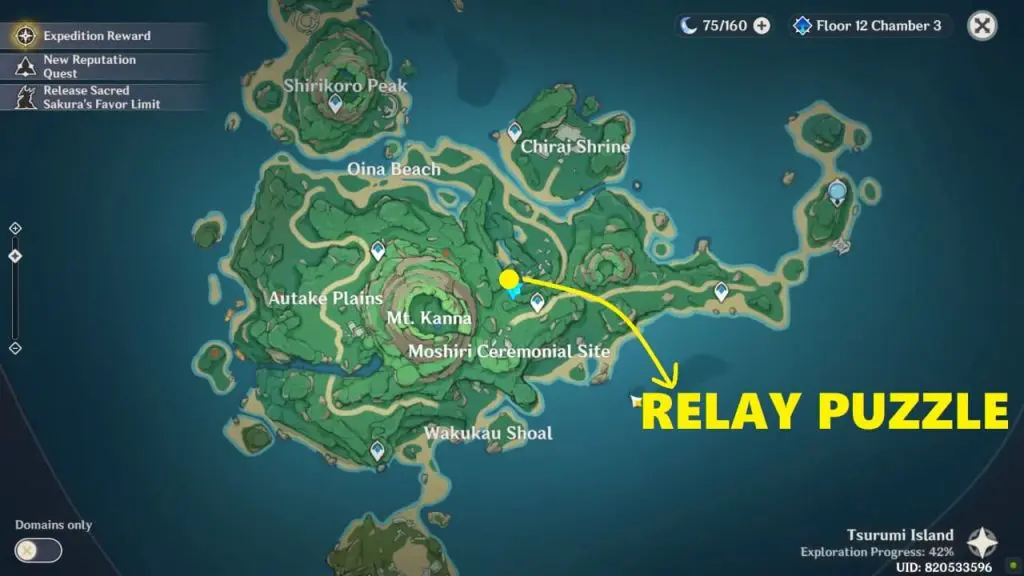
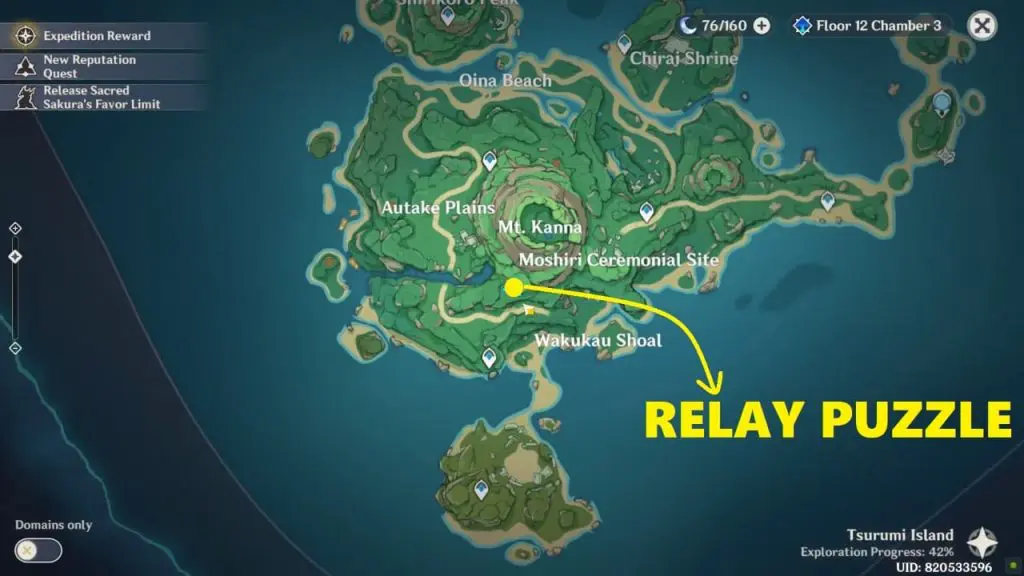
Relay Stone Puzzle #6 (Moshiri Ceremonial Site)
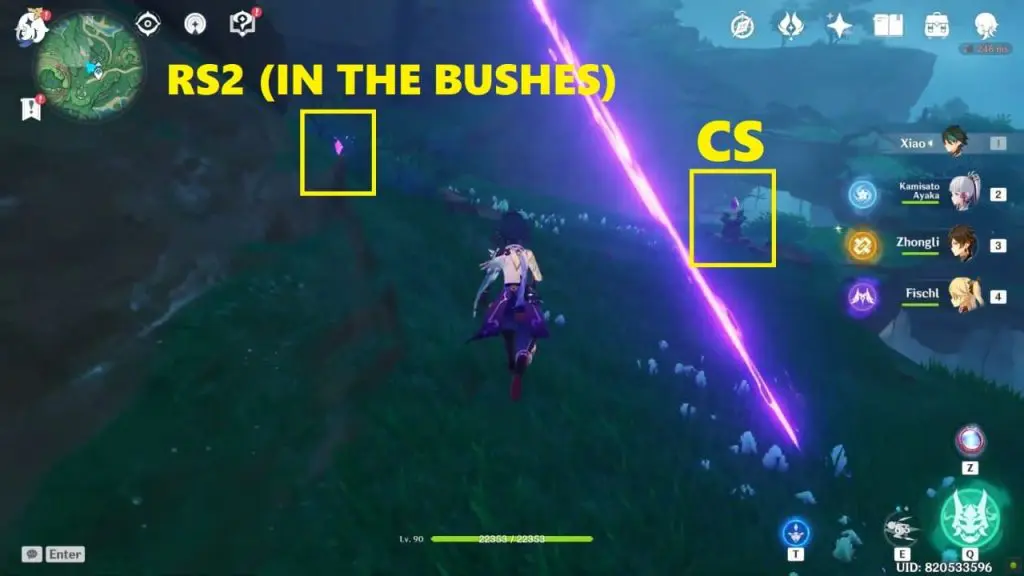
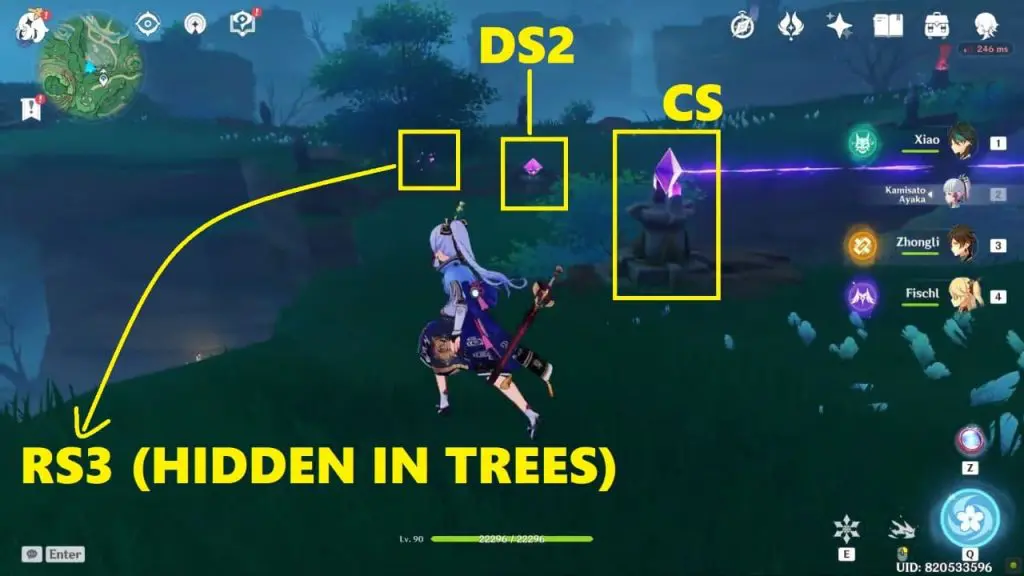
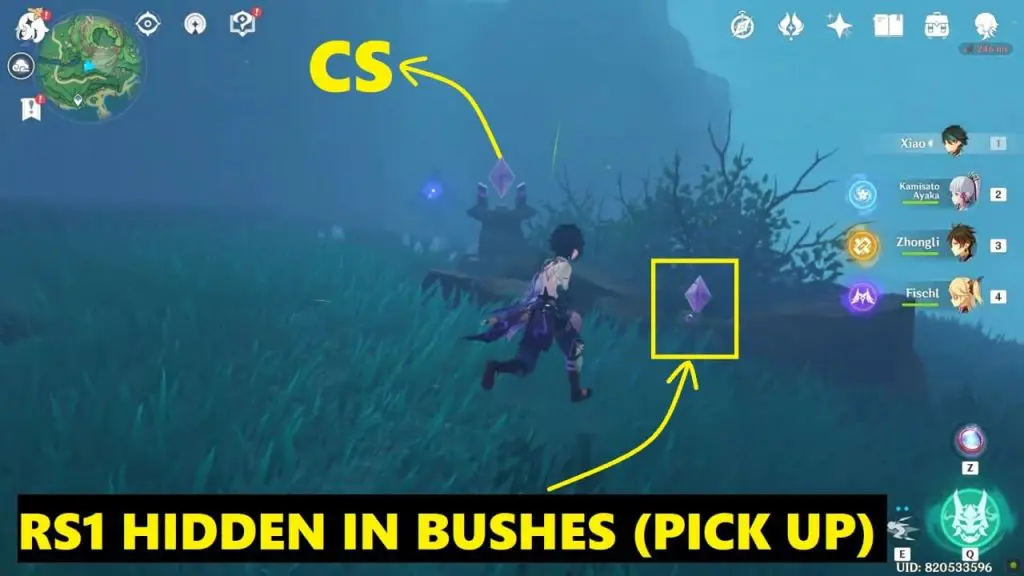
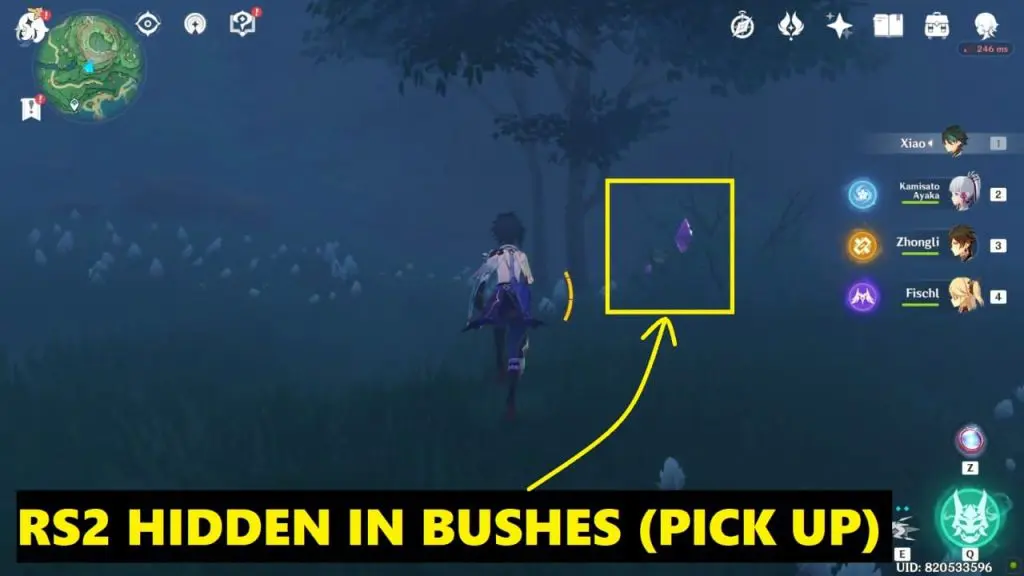
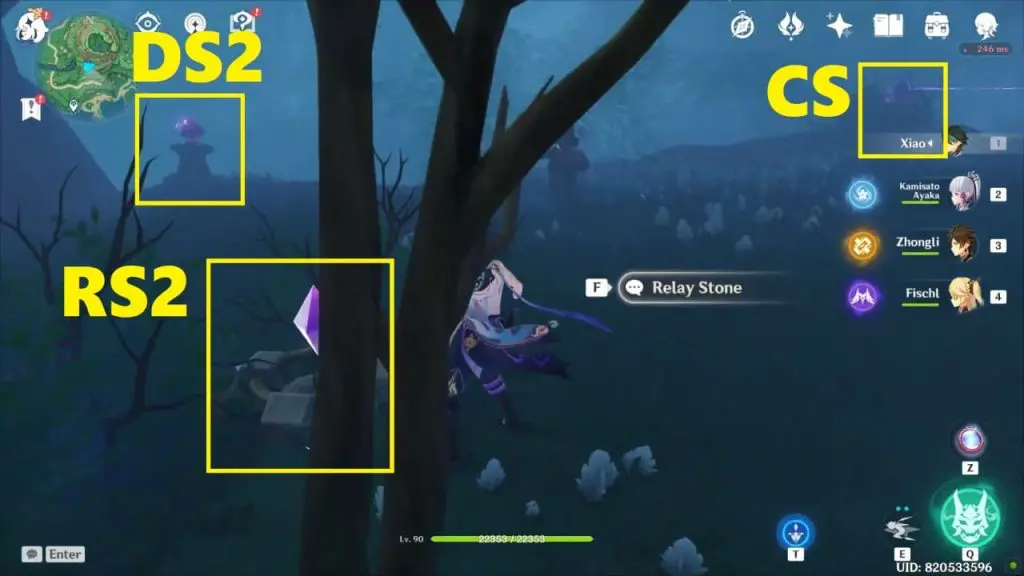
This puzzle has 1 cumulation stone (CS), 2 discharge stones (DS), and 2 relay stones (RS). Check the images below for the locations of the stones. Spotting the stones might be a little bit hard because this area is quite foggy. Other than that the puzzle is very simple. The cumulation stone is in the center and the 2 discharge stones are on either side. The 2 relay stones are in the bushes near the cumulation stone.
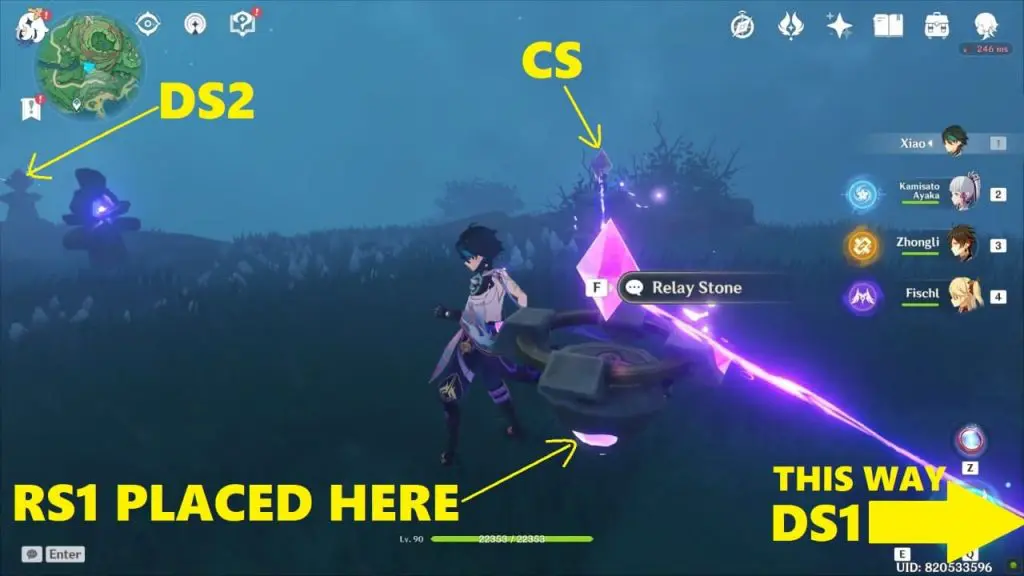
STEP 1: Place a relay stone between DS1 and CS.
STEP 2: Place the second relay stone between DS2 and CS. A common chest will spawn near the CS.
Relay Stone Puzzle #7 (Wakukau Shoal)
This puzzle has 1 cumulation stone (CS), 1 discharge stone (DS), and 2 relay stones (RS). Check the images below for the locations of the stones. Spotting the stones is pretty easy. To solve the puzzle you just have to pick up both the relay stones and place them between the DS and the CS. A common chest will then spawn naer the CS.