There are several Air Seelies and Electro-Seelies to be found in the Watatsumi Island of the Inazuma region. Watatsumi island was introduced in Genshin Impact 2.1 update on 1st September 2021. On finding a Seelie you need to guide it to its court and you get an award. This article shows the locations of all the Seelies in Watatsumi Island and how to solve the Seelie Puzzles.
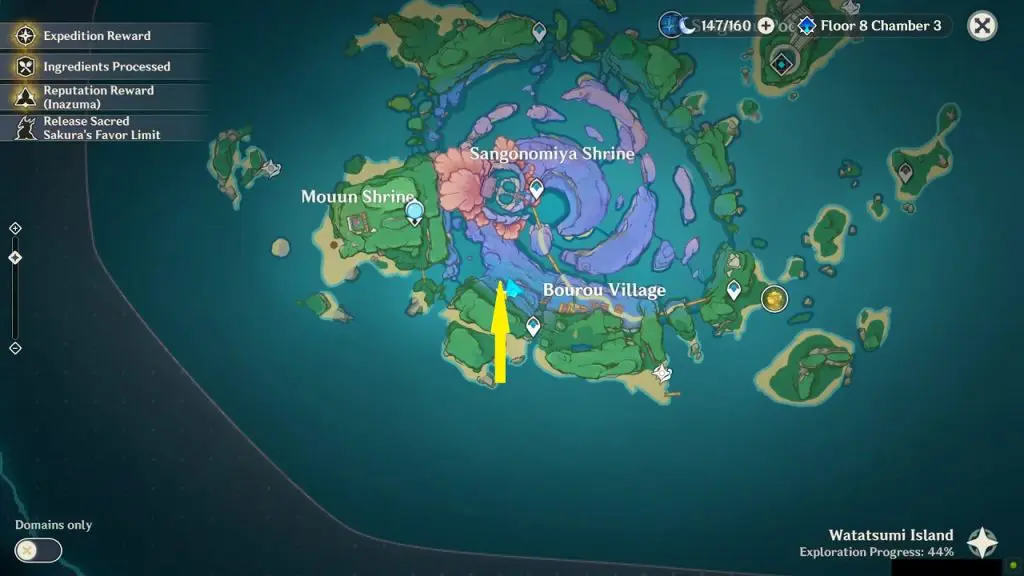
1) Electro Seelie: West of Bourou Village
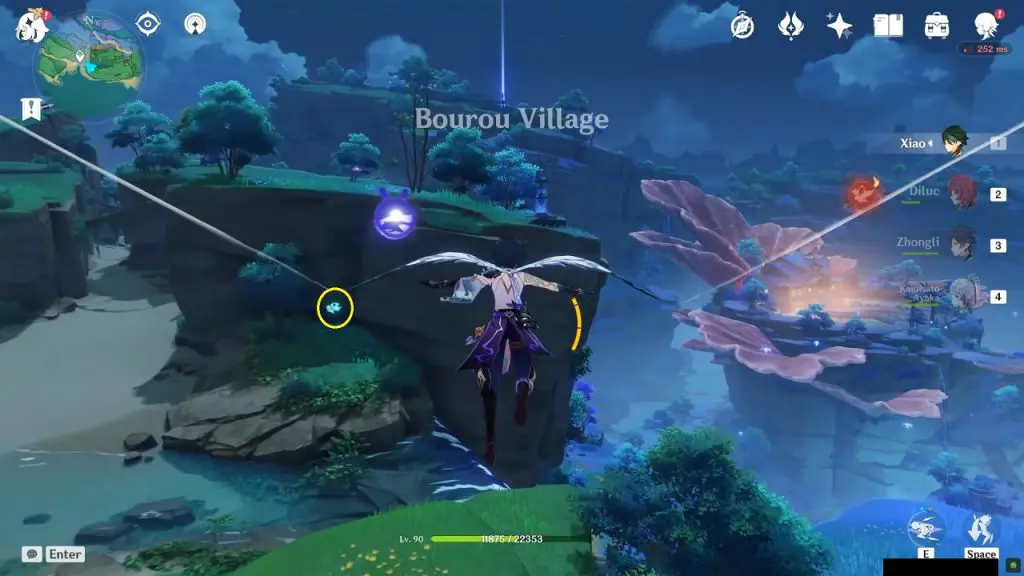
This Electro Seelie is on top of the mountain, west of Bourou Village as shown in the picture below. Simply chase the Seelie to its destination and get a common chest.
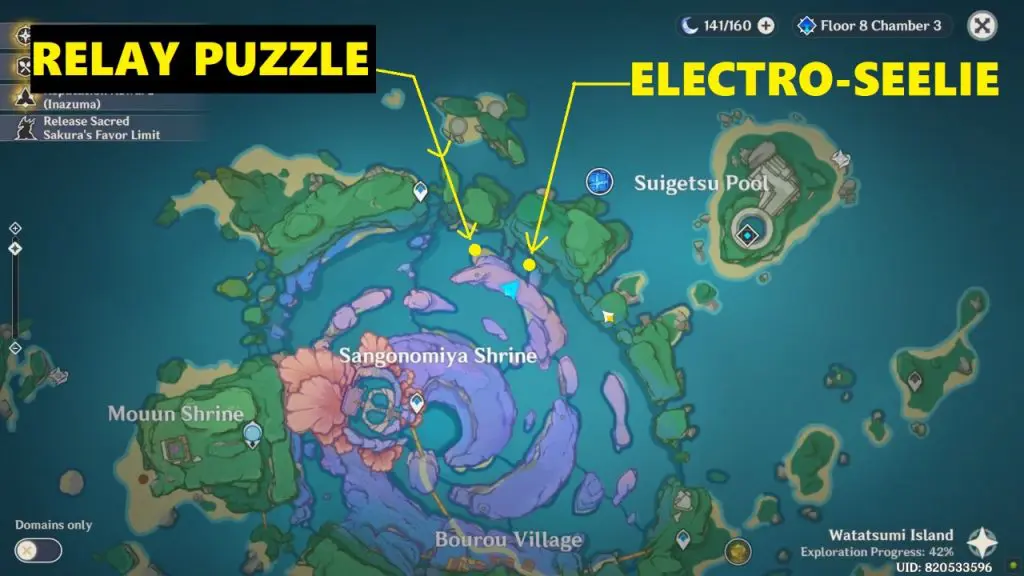
2) Electro Seelie: Northeast of Sangonomiya Shrine
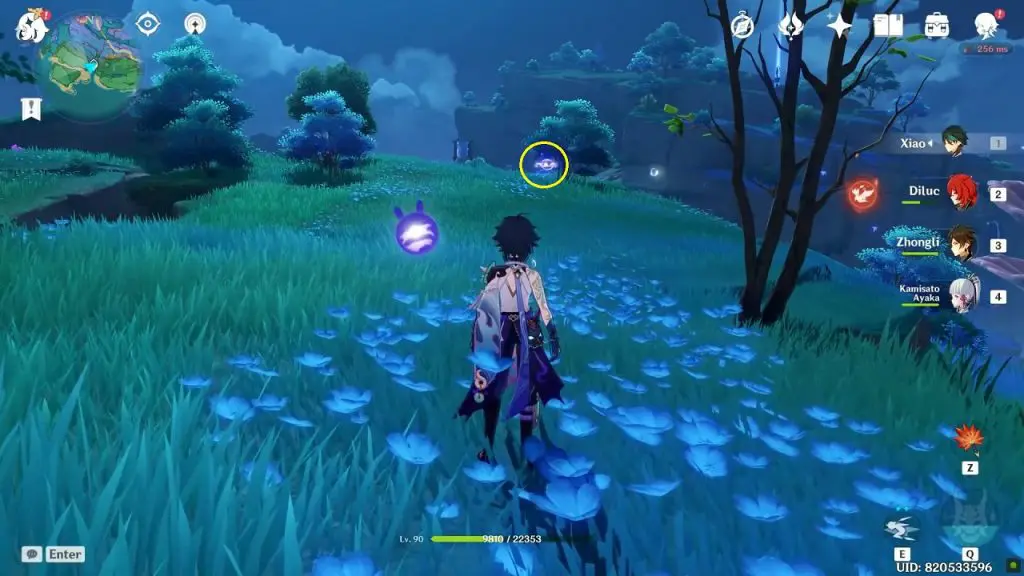
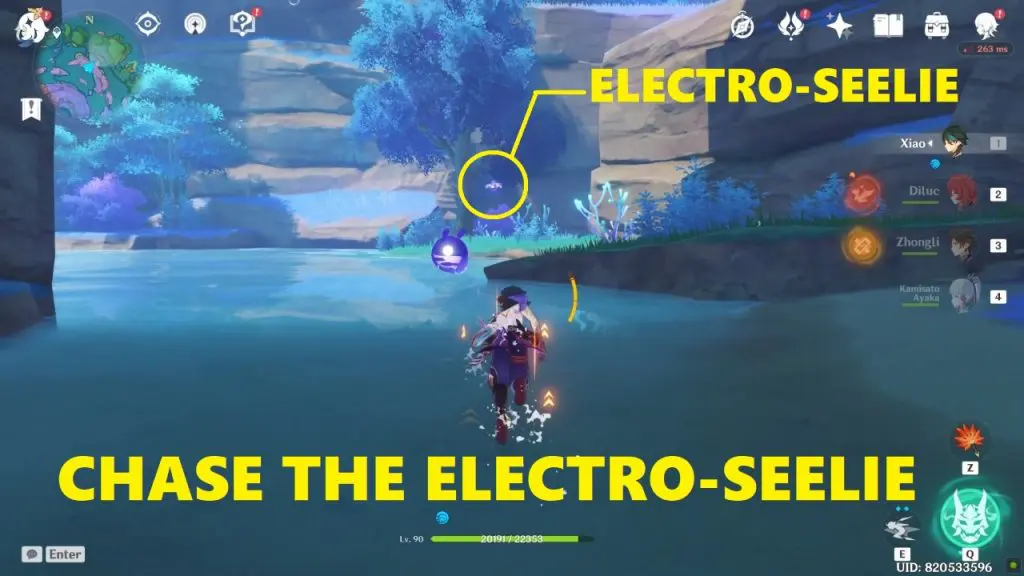
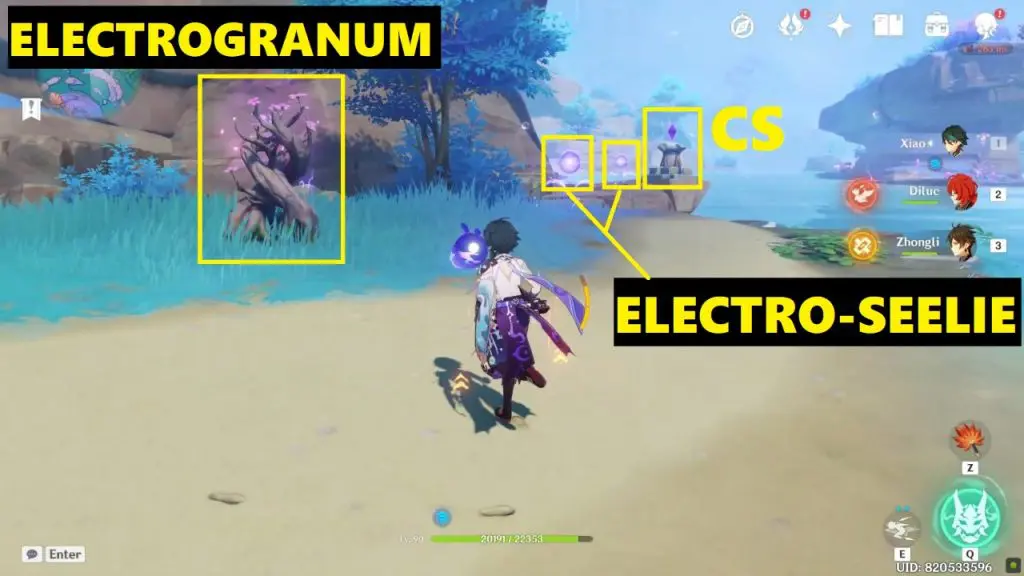
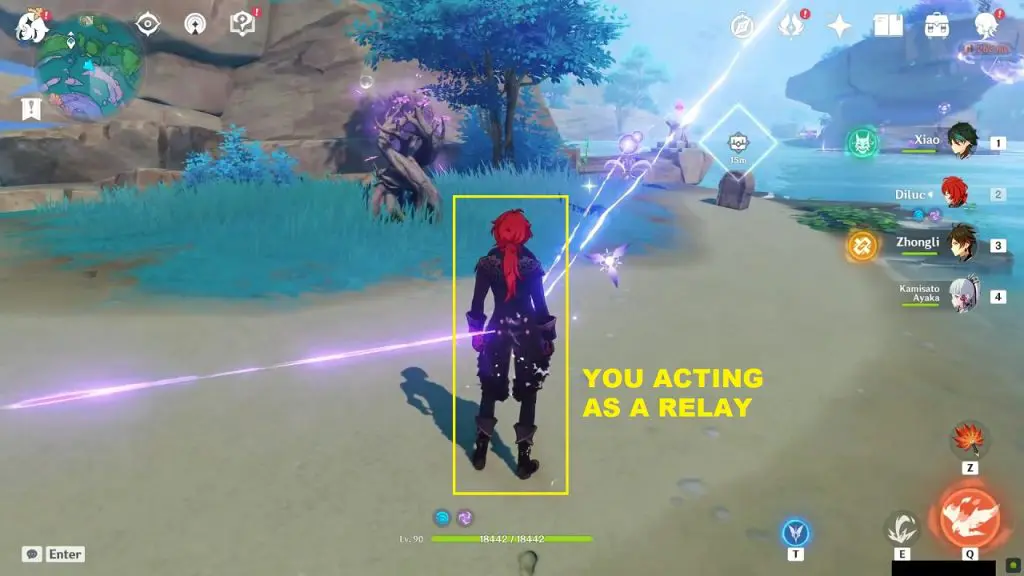
This Electro Seelie is required to solve a relay stone puzzle. You’ll find an Electro-Eeelie underneath a tree at the location shown below. Chase the Electro-Seelie and it will automatically get to the relay puzzle area which is on a small beach in front of the waterfall. Follow the Electro-Seelie to the relay puzzle area. There will be a Discharge Stone (DS) and a Cumulation Stone (CS). You need to connect the DS to the CS (Note: There aren’t any relay stones here). Luckily, there are 2 Electro-Seelie here (one of which you chased here & one will be already here sitting on its court). Both the Electro-Seelie are in the correct position. All you need to do is summon an electrogranum and position yourself between the DS and Electro-Seelie to complete the circuit. Charged with electro, you’ll be acting as a relay here. A common chest will spawn as you finish the puzzle.
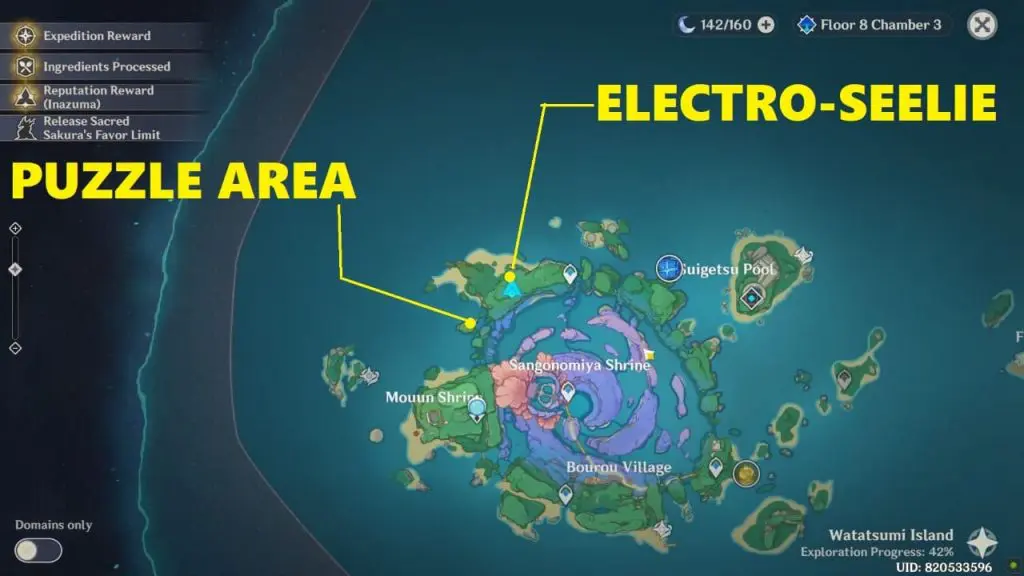
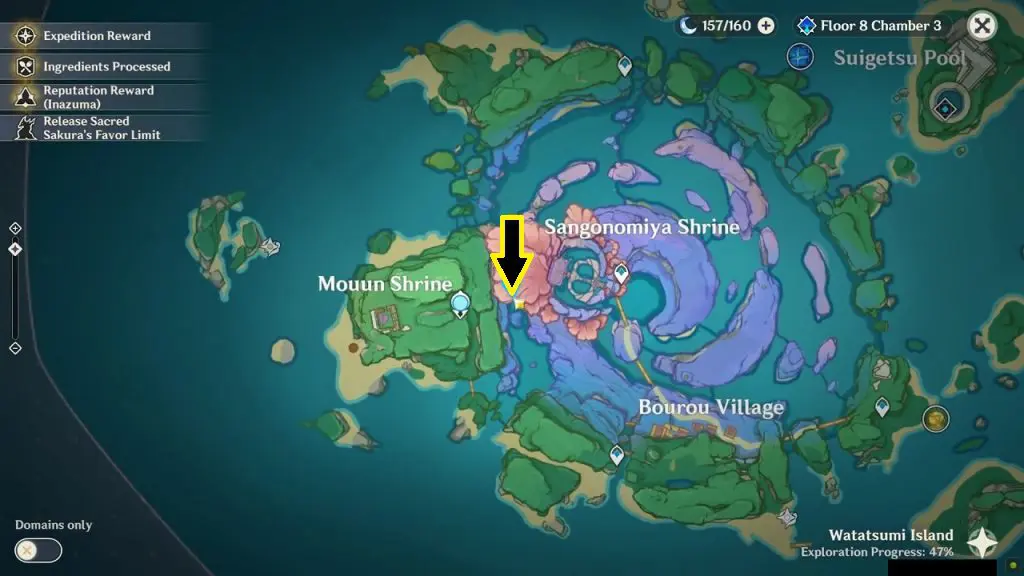
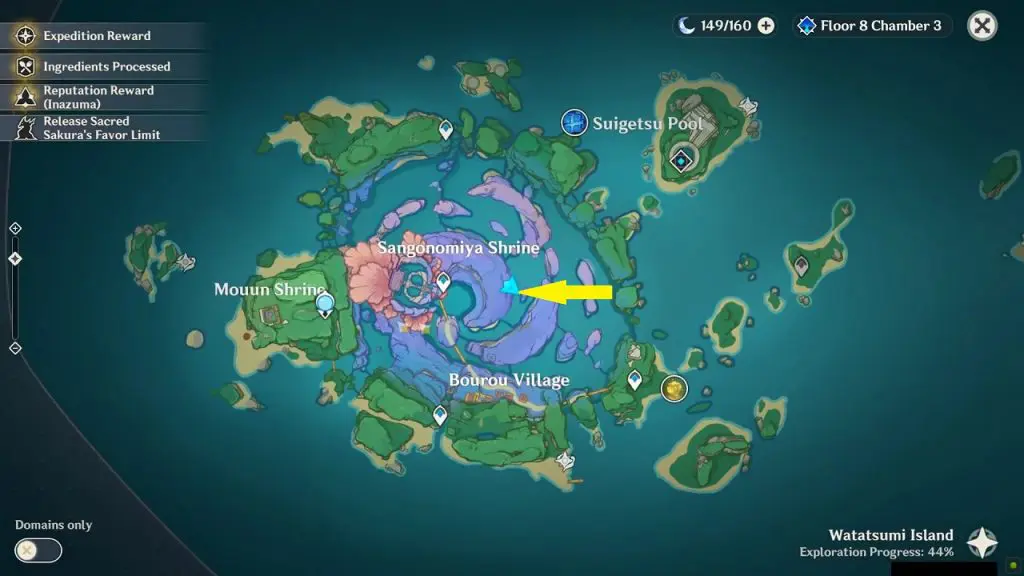
3) Electro Seelie: Northwest of Sangonomiya Shrine
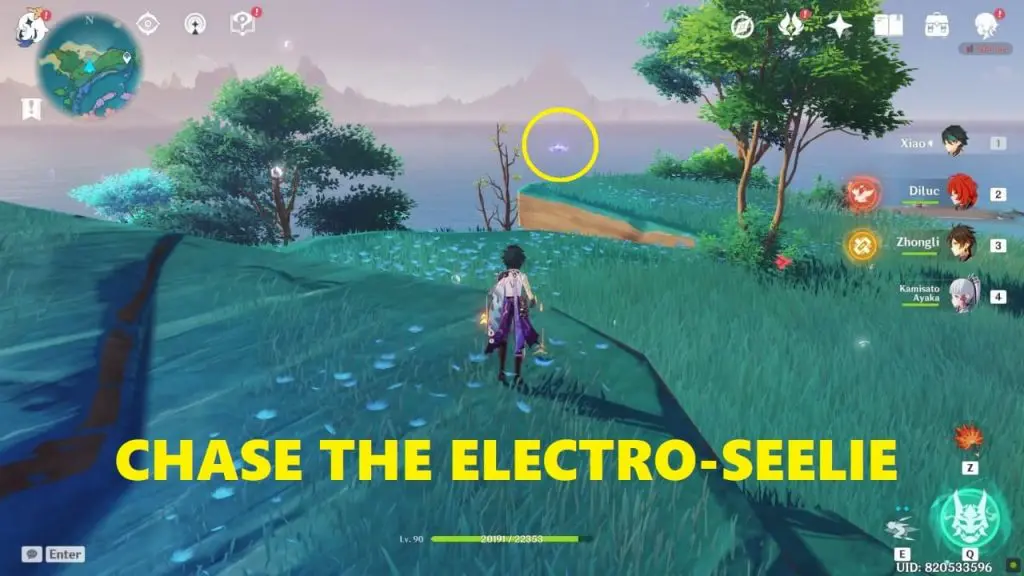
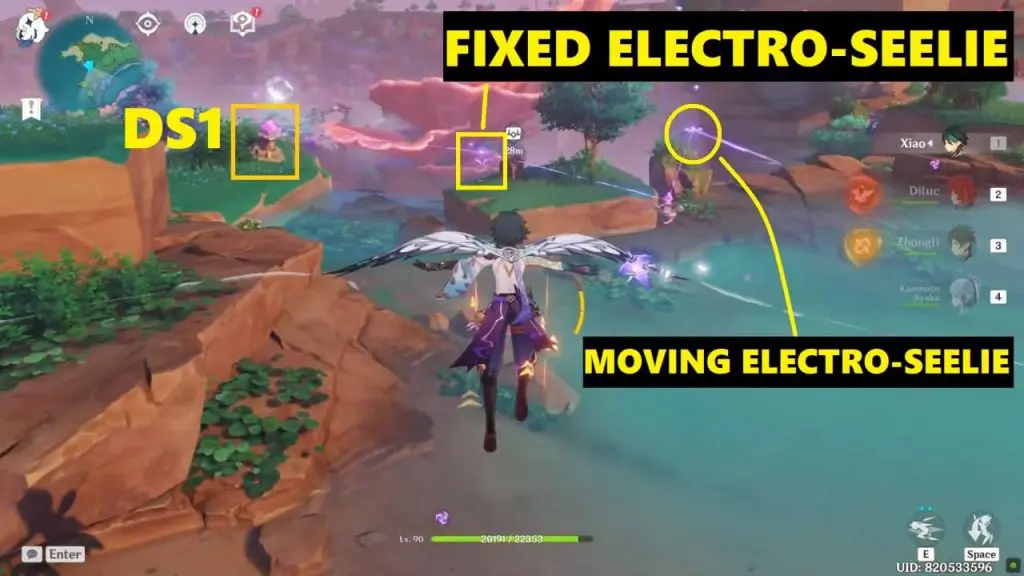
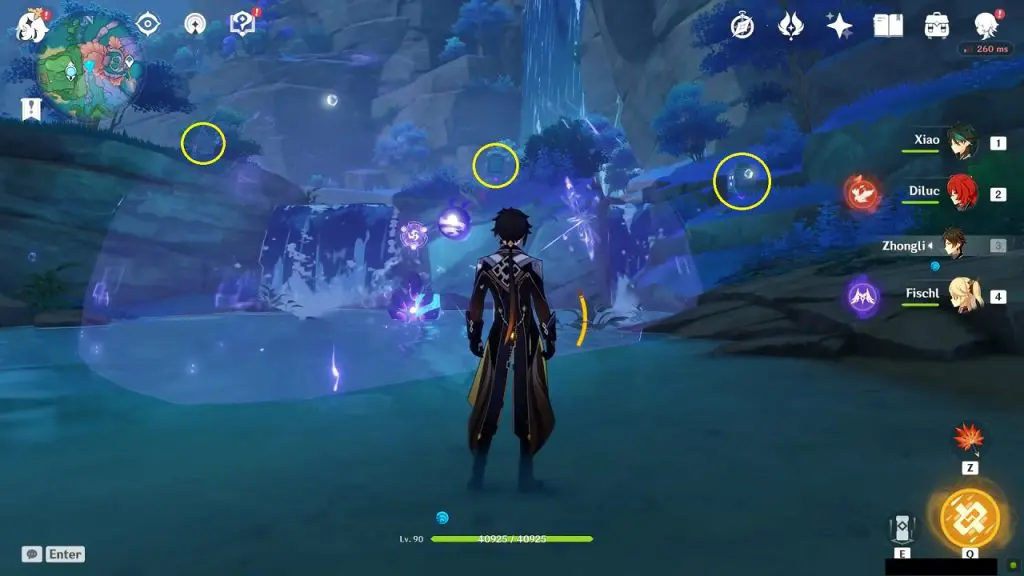
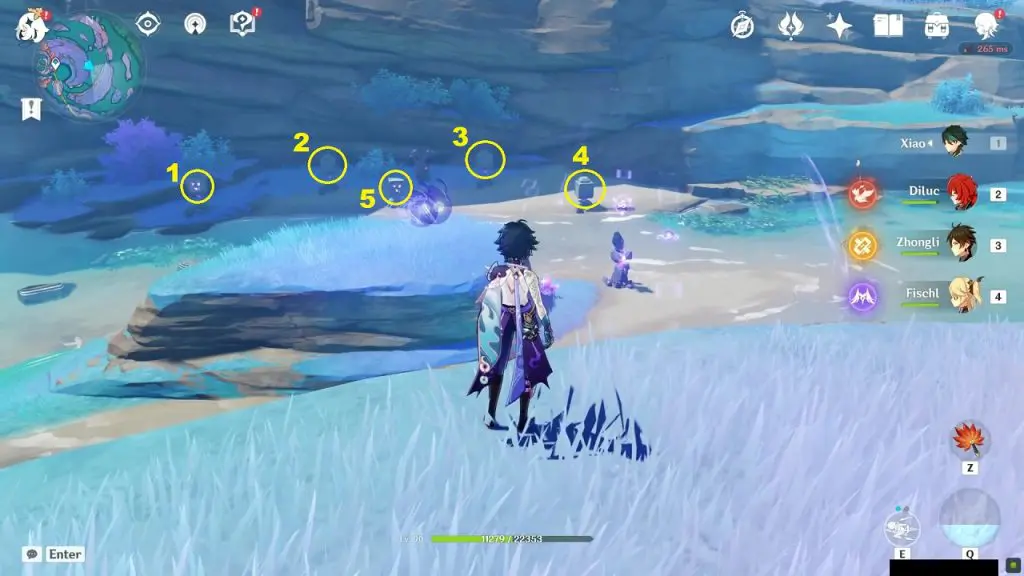
This Electro Seelie is required to solve a relay stone puzzle. You’ll find the Electro-Seelie at the edge of the cliff northwest of Sangonomiya Shrine as shown below. Chase this Electro-Seelie until it reaches the relay puzzle area. The images below will show you the spots the Electro-Seelie will move to while you’re chasing it.
The below images shows the path as you chase the Electro-Seelie
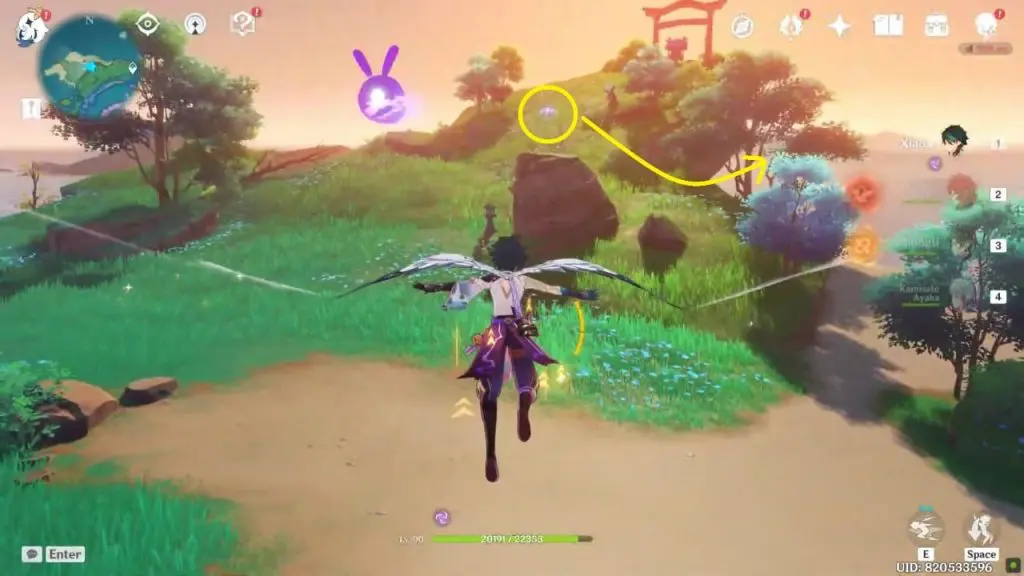
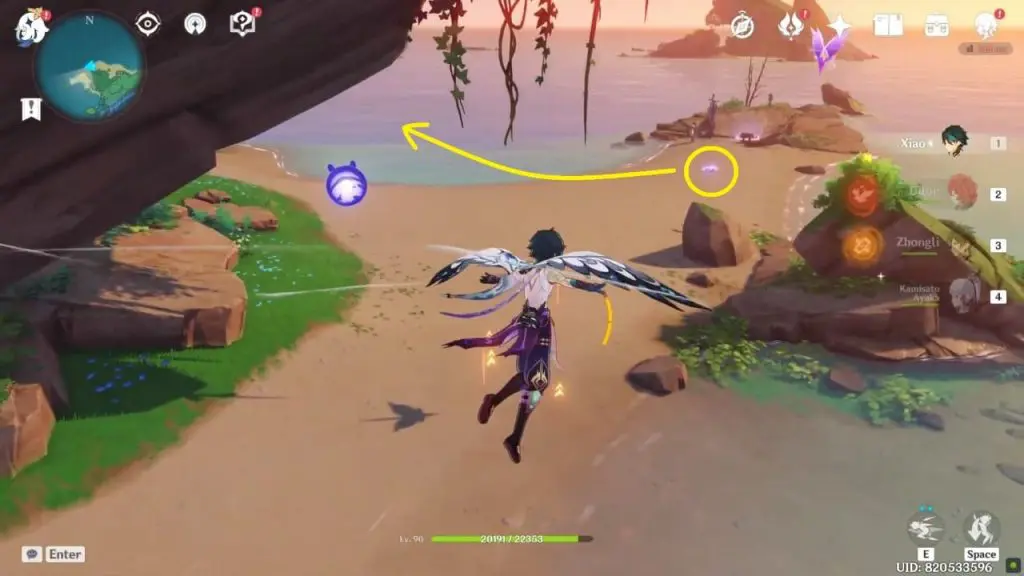
Once it reaches the relay puzzle area it will permanently position itself near a discharge stone after which a common chest will appear. Here you will also find a moving Electro-Seelie. The relay stone puzzle isn’t finished here. Click here to see the complete Relay Stone Puzzle.
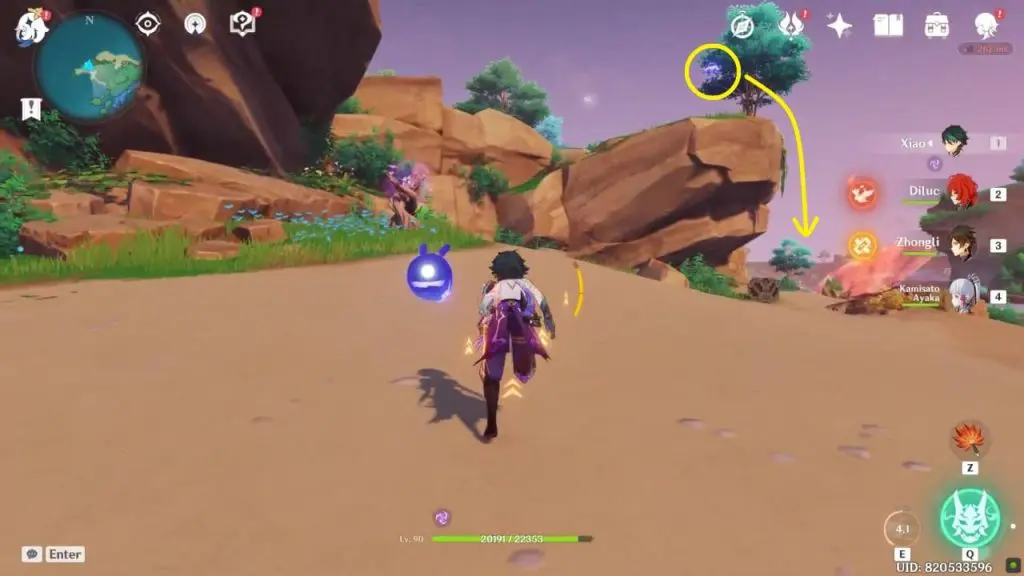
4) Electro Seelie: Secret Luxurious chest
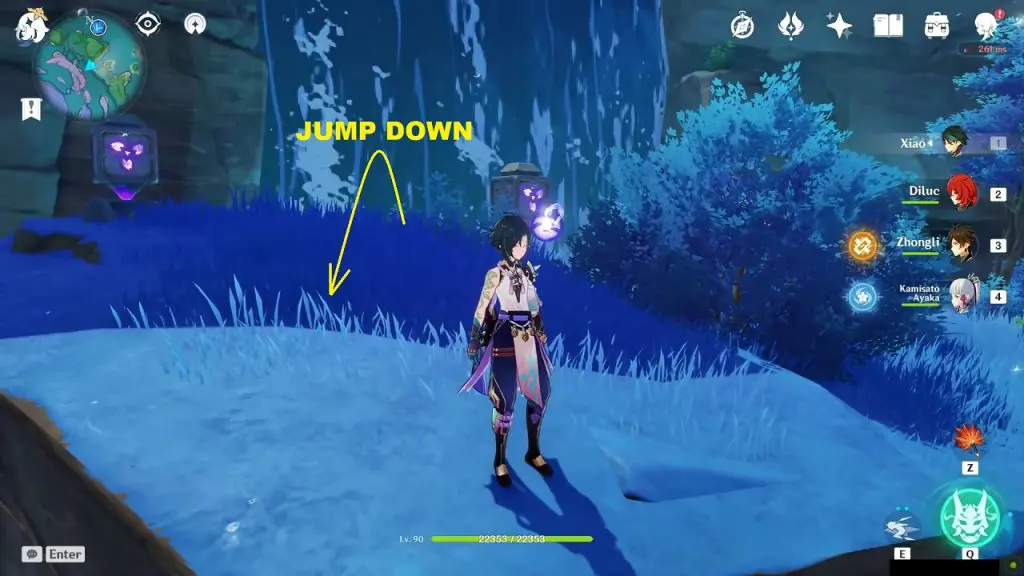
This electro Seelie will lead you to a hidden Luxurious Chest and two Exquisite chests. The path is long and you will have to solve a few puzzles in between, but the reward is definitely worth it. You will find the Electro Seelie on the west side of Bourou Village of Watatsumi Island at the location as shown in the picture below. At the edge of the mountain, you will find the Electro Seelie. Go near it and it will go down. Jump down the cliff and find the Electro Seelie under a tree. Keep following the Electro Seelie and after some time it will go inside a Thunder barrier and you will have to solve a Rotating Stone Cube Puzzle here.
First Thunder barrier (Three Rotating Cubes Puzzle)
The Electro Seelie will lead you to a Thunder barrier. Near the barrier, you will find three rotating cubes. To go inside the thunder barrier you will need to solve the rotating cube puzzle. This puzzle is very simple. There are three cubes (See the second picture below). Hit each cube until it faces north. You can do it by hitting the middle cube two times and the other two, three times. On solving the puzzle, the Electrogranum plant near the middle cube will be activated. Summon Electrogranum and use it to go inside the Thunder Barrier and switch it off. Start following the Electro Seelie again.
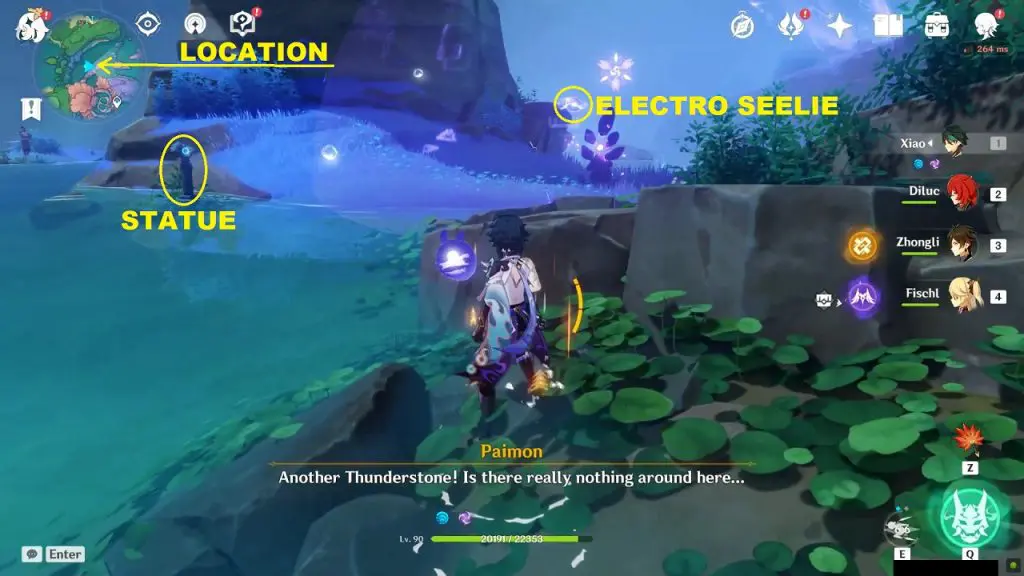
Second Thunder Barrier
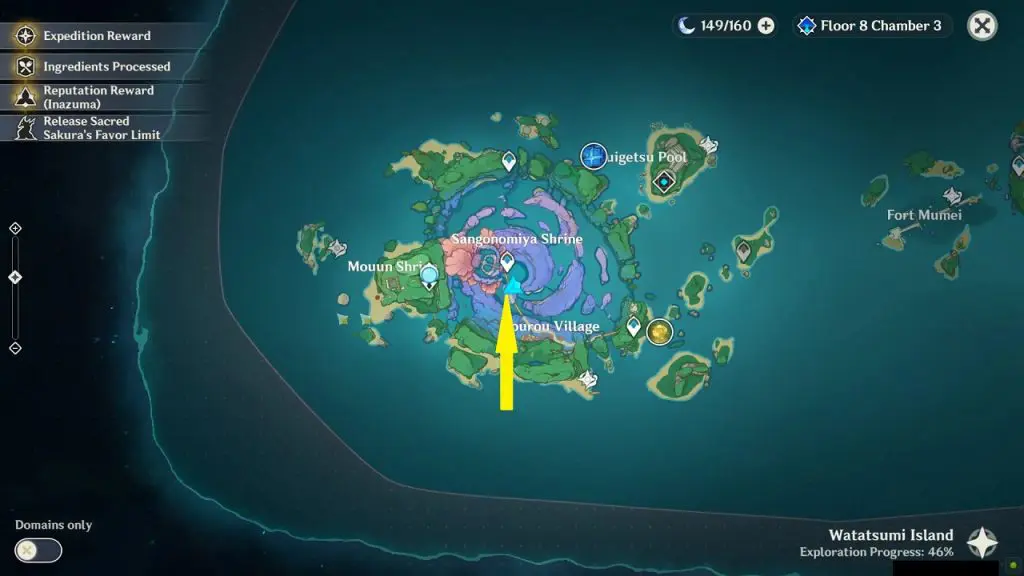
Follow the Electro Seelie and it will go inside a Thunder Barrier at the north portion of Sangonimiya Shrine. Near the barrier, you will find a statue. Pay respect to the statue and an enemy will appear. Defeat it and the barrier will disappear. Now start following the Electro Seelie again.
Third Thunder Barrier
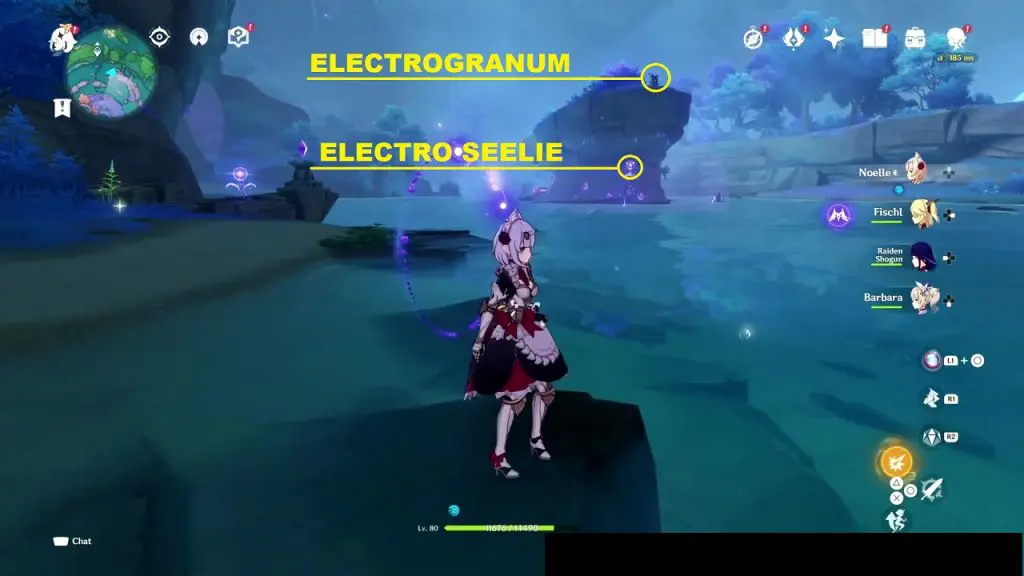
Follow the Electro Seelie and it will go inside a Thunder Barrier at the northeast portion of Sangonimiya Shrine. Climb the mountain behind the barrier. At top of the mountain, you will find an Electrogranum Plant. Summon Electrogranum and use it to go inside the barrier and switch it off. Now start following the Electro Seelie again.
Fourth Thunder barrier (Five Cubes Puzzle)
Follow the Electro Seelie and it will go inside a Thunder Barrier at the east portion of Sangonimiya Shrine as shown in the picture below. Near the barrier, you will find five rotating cubes. To go inside the thunder barrier you will need to solve the rotating cube puzzle.
In this puzzle, there are five cubes. Hitting cube 1 rotates cubes 1 & 2. Hitting cube 4 rotates cubes 3 & 4. Hitting cube 3 rotates cubes 2, 3 & 4. Hitting cube 2 rotates cubes 1, 2 & 3. To solve the puzzle you need to make all the cubes face towards the front side. Solving the puzzle gives you an exquisite chest.
Reset the puzzle and then follow the following steps to solve the puzzle:
1) Hit cube 1 three times
2) Hit cube 2 one time
3) Hit cube 3 three times
4) Hit cube 4 two times
On solving the puzzle, the Electrogranum plant near the cubes will be activated. Summon Electrogranum and use it to go inside the Thunder Barrier and switch it off. Start following the Electro Seelie again.
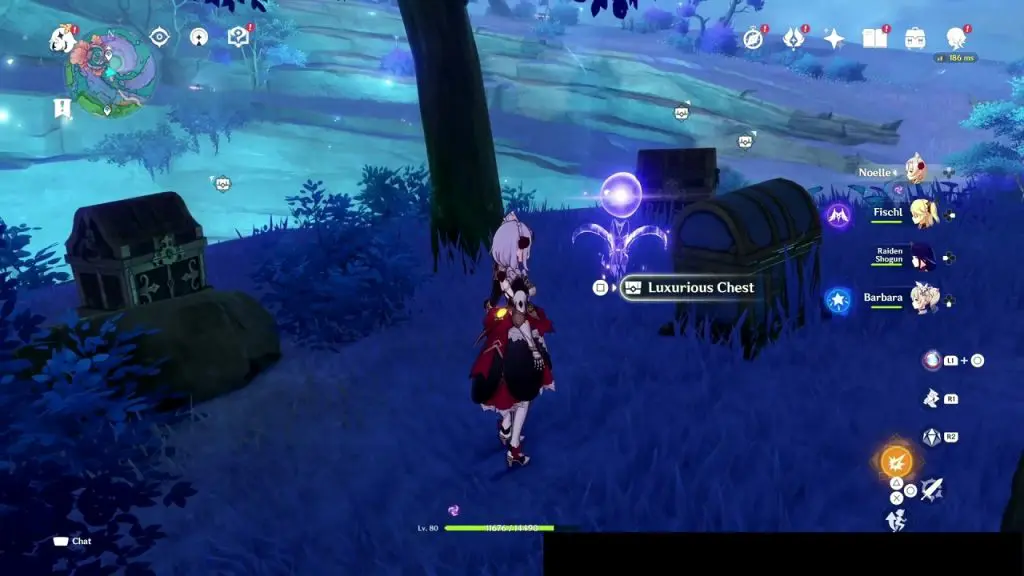
Hidden Luxurious Chest
Start following the Electro Seelie from the previous thunder location. Keep your eye on the Electro Seelie as it will start moving very fast from this point. Keep following it and shortly it will reach its destination as shown in the picture below. This will reveal a luxurious chest and two precious chests.
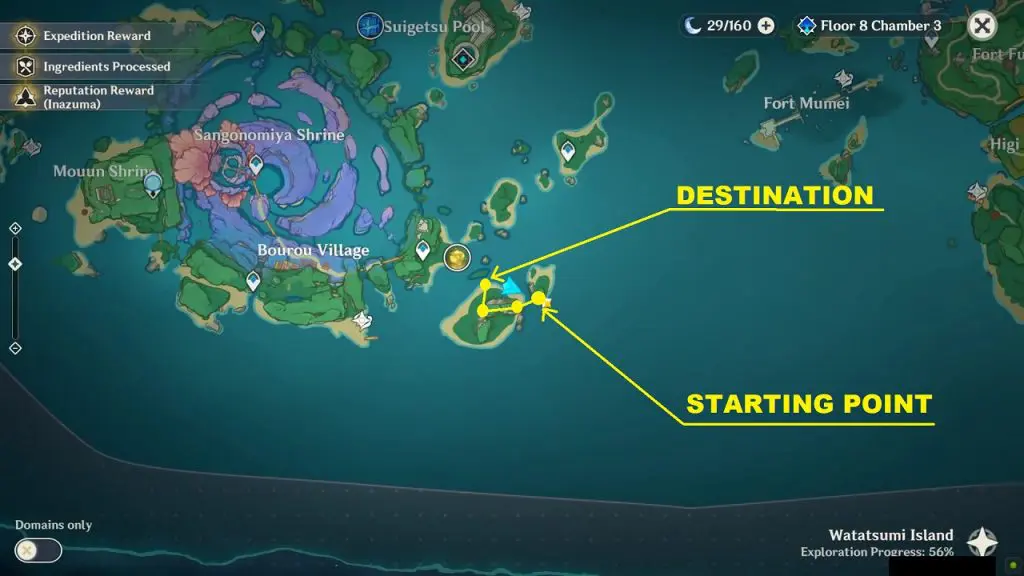
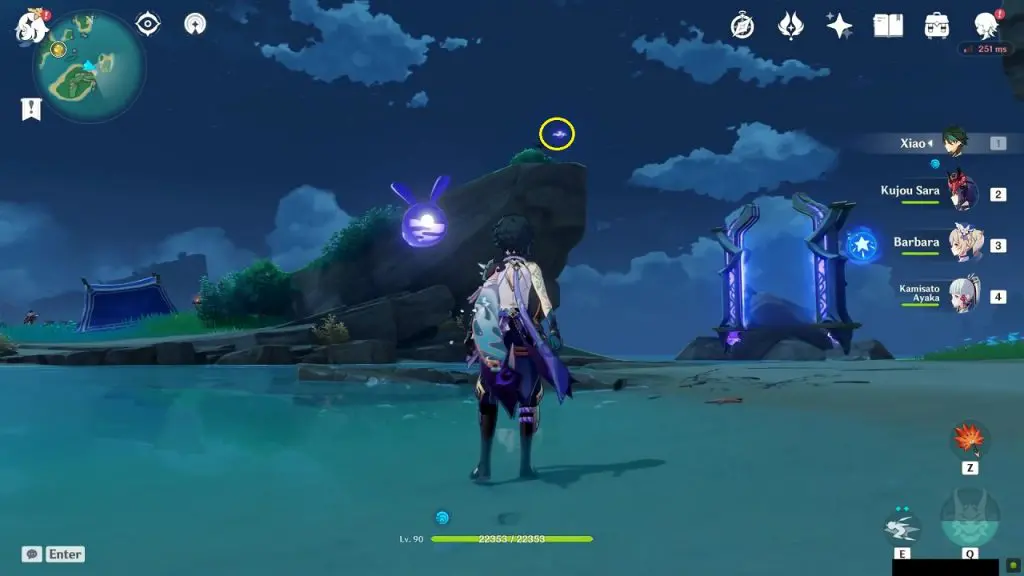
5) Electro Seelie: Watatsumi’s Southeasten island
This Electro Seelie is on top of the cliff on a small island in the southeastern part of Watatsumi as shown in the picture below. Simply chase the Seelie to its destination and get a common chest. The picture below shows the path of the Seelie.
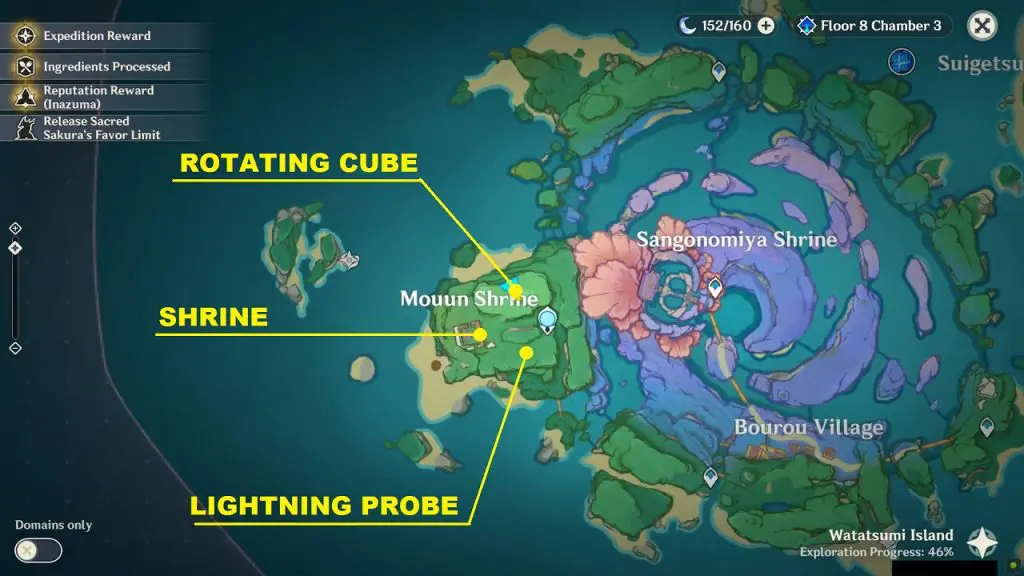
6,7) Electro Seelies: Mouun Shrine
There are two electro Seelies in Mouun Shrine. Mouun Shrine is at the western edge of Watatsumi island. To get these Electro-Seelies you will need to solve two puzzles on the Island. On the north side of Mouun Shrine, you will find a Rotating Cube Puzzle and on the south side, you will find a Lightning Strike Probe Puzzle. Solving both the puzzles will give you two Electro-Seelies. Chase these Seelies to their court and a Luxurious chest will spawn. Click here to see how to solve the puzzles & get the Luxurious Chest.
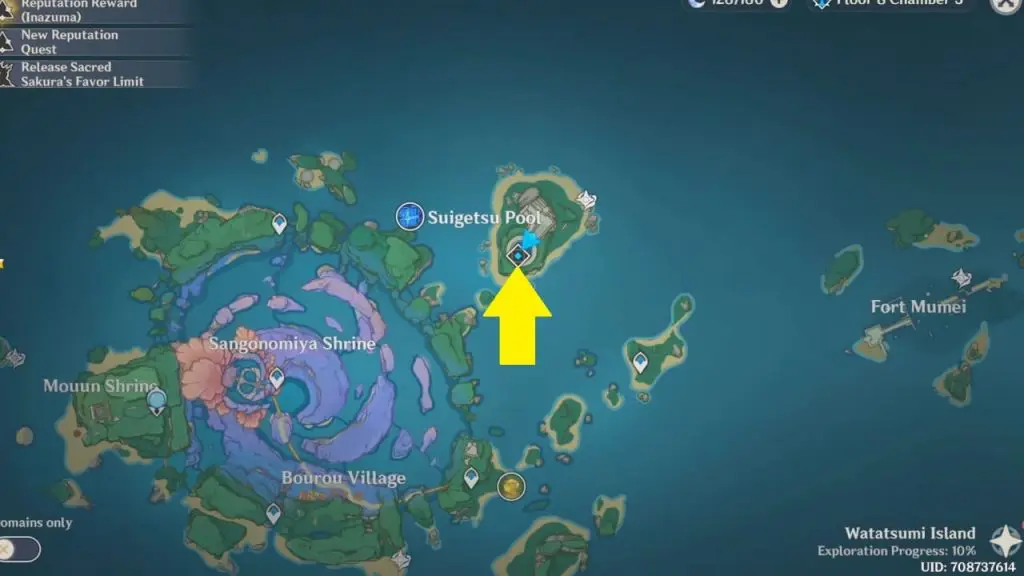
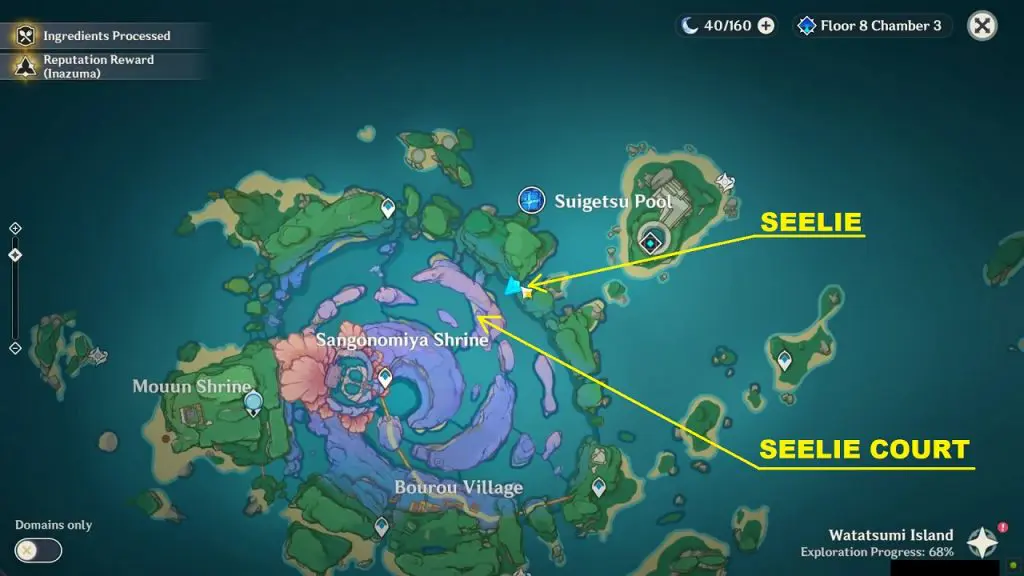
8,9) Electro Seelies: Suigetsu Pool
There are two Electro-Seelies in Suigetsu Pool. they are required to solve the relay stone puzzle in the Suigetsu Pool. Click here to see the complete walkthrough of the Relay StTone Puzzle and Seelie Locations.
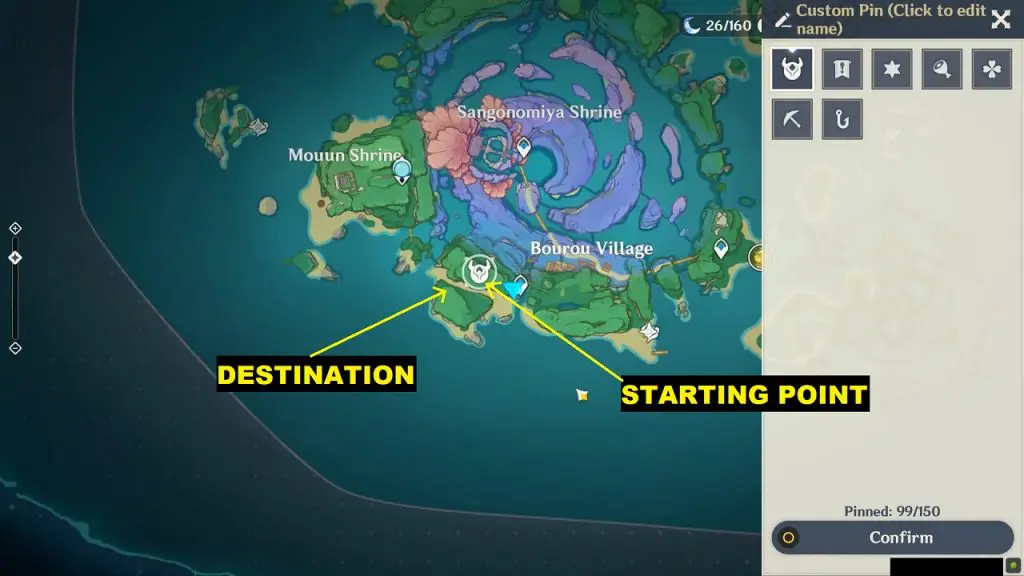
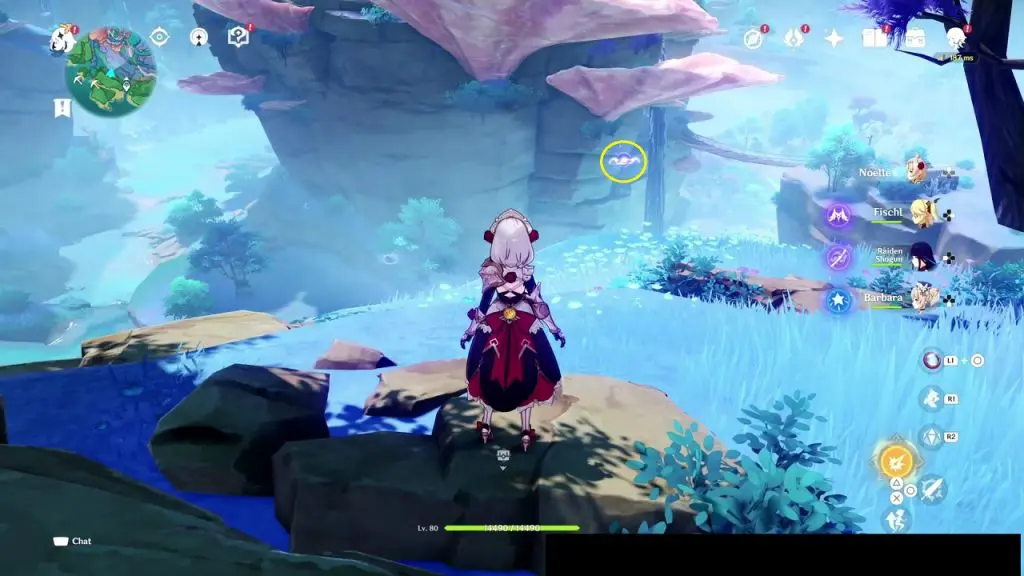
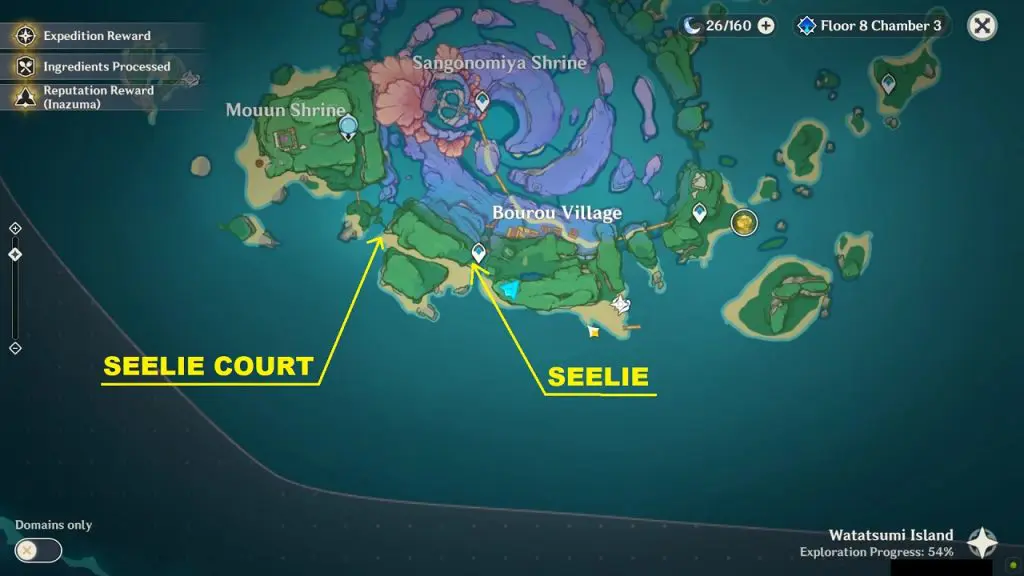
10) Air Seelie Court: West of Bourou Village
You will find the Seelie south of the Bourou Village fast travel point. Chase the Seelie to the Seelie Court, which is on the beach at the west side of Bourou Village as shown in the picture below.

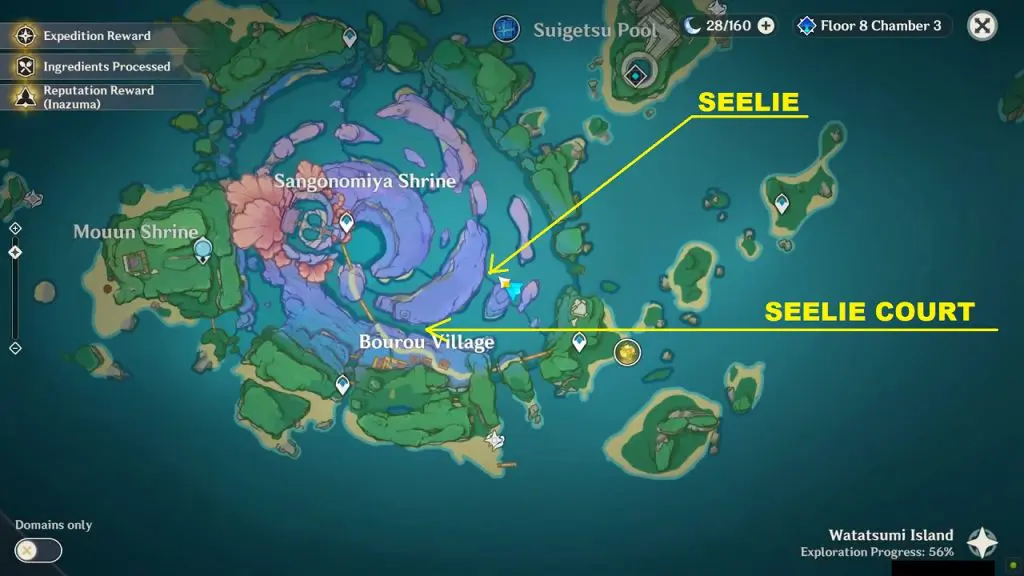
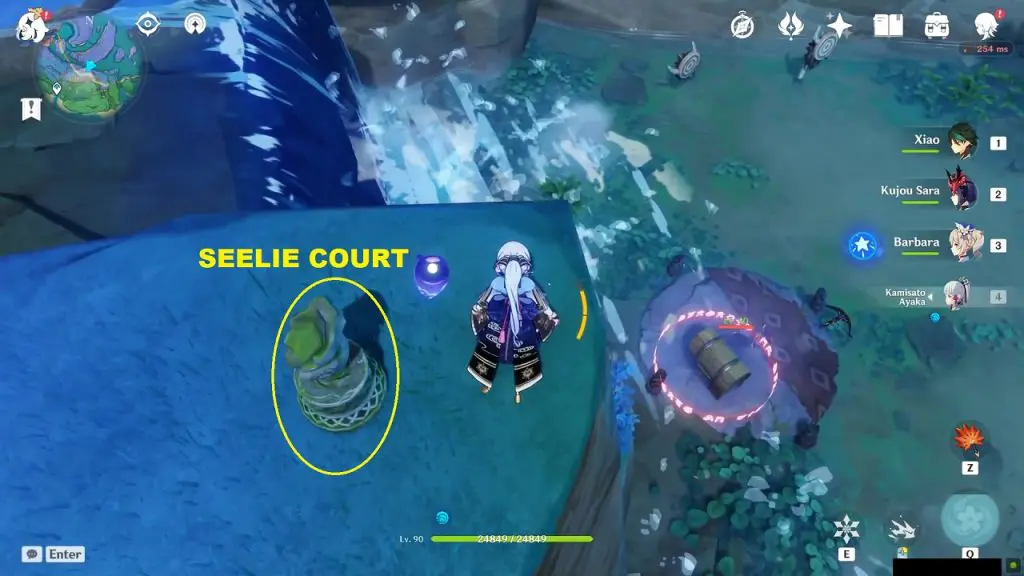
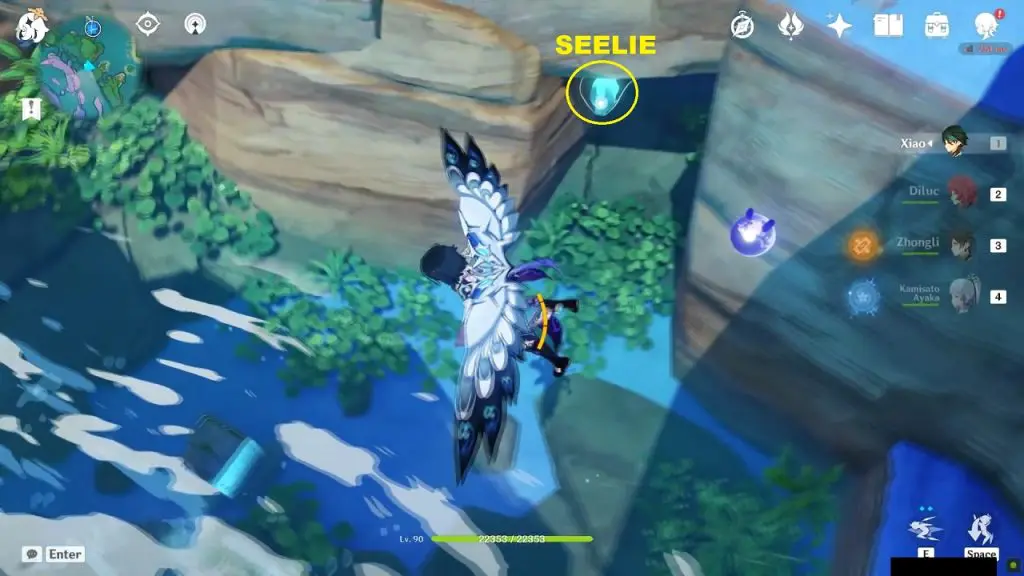
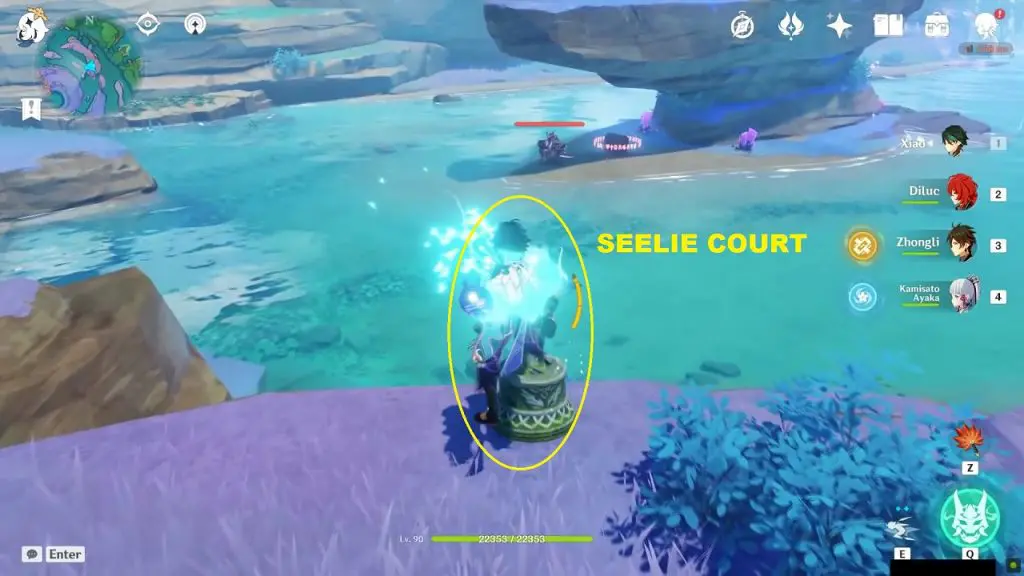
11) Air Seelie Court: Northeast of Sangonomiya Shrine
The Seelie is in front of the waterfall on the northeastern side of Sangonomiya Shrine. Here you will find 4 rotating cubes. Jump down the water behind the cubes. The Seelie is hidden under the cube inside a small hole as shown in the picture below. Chase the Seelie to its court and a common chest will spawn.
12) Air Seelie Court: East of Sangonomiya Shrine
This Seelie is on the eastern side of Sangonomiya Shrine as shown in the picture below. Simply chase the Seelie to its court and a common chest will spawn.