This article will guide you through all objectives of the Yunobo of Goron City quest. Yunobo of Goron City is a Main Quest in The Legend of Zelda: Tears of the Kingdom.
Starting Location: Yunobo of Goron City
This quest begins automatically during Main Quest: Regional Phenomena. Talk to the Bludo (village elder) in Goron City he will send you to visit Yunobo.

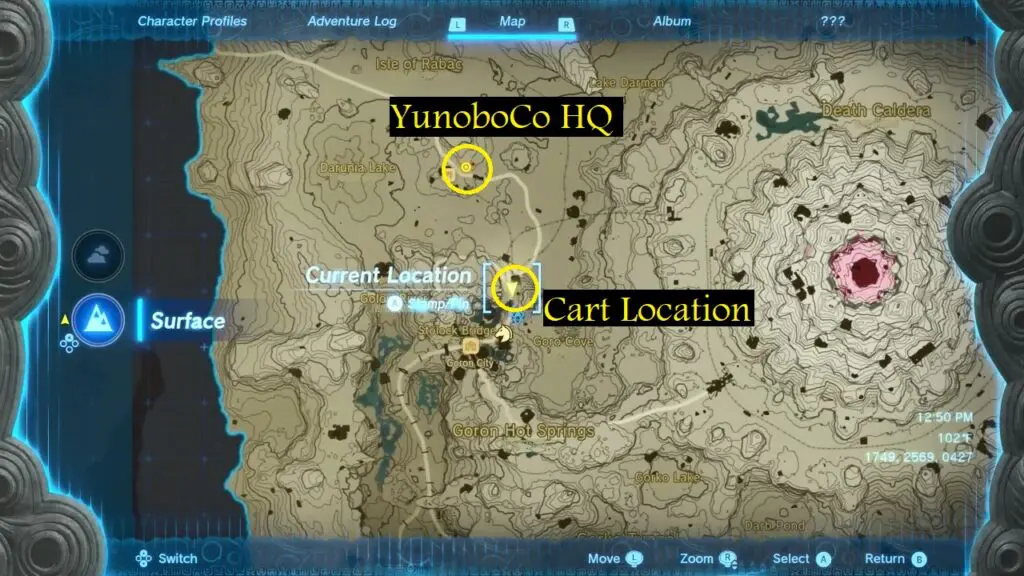
Reach YunoboCo HQ
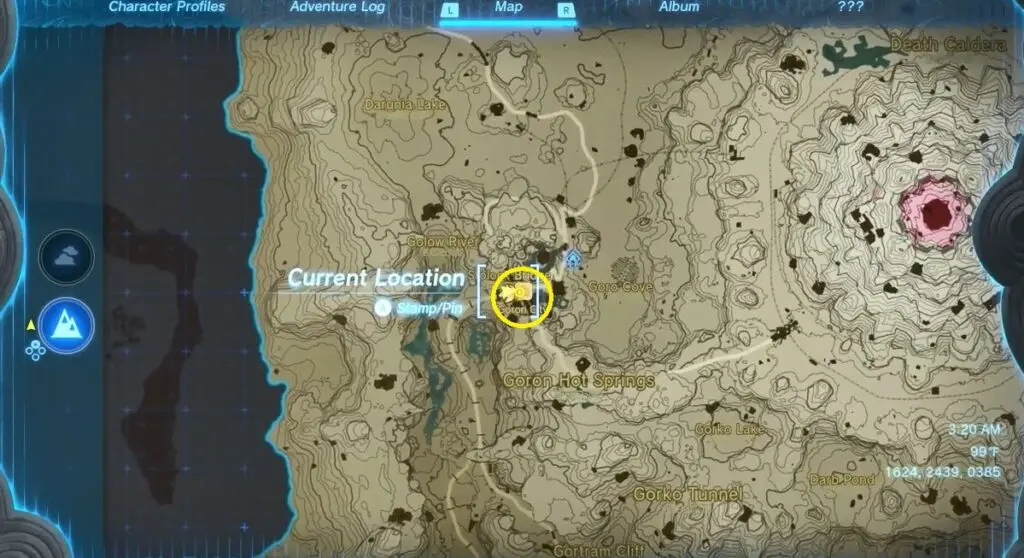
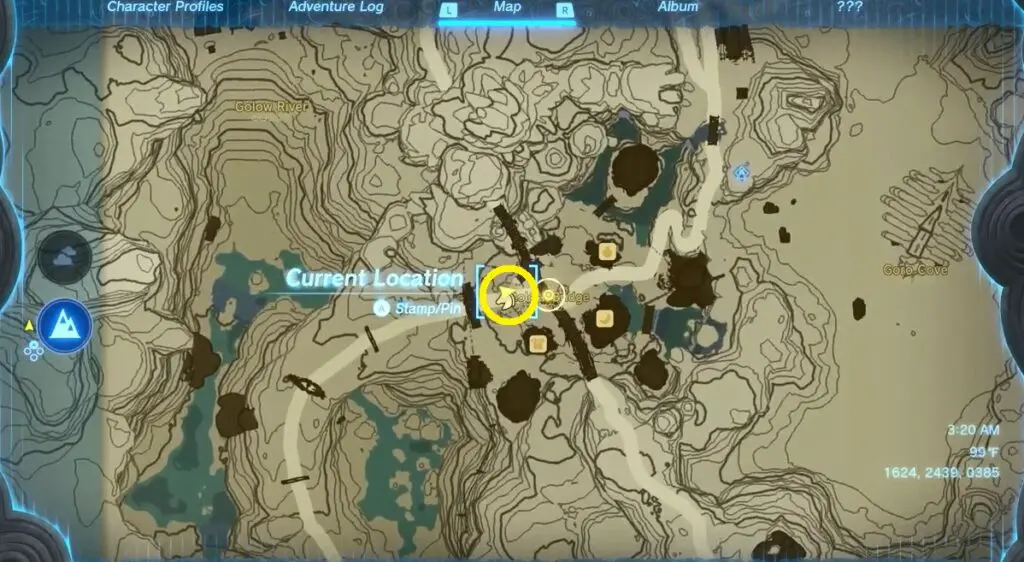
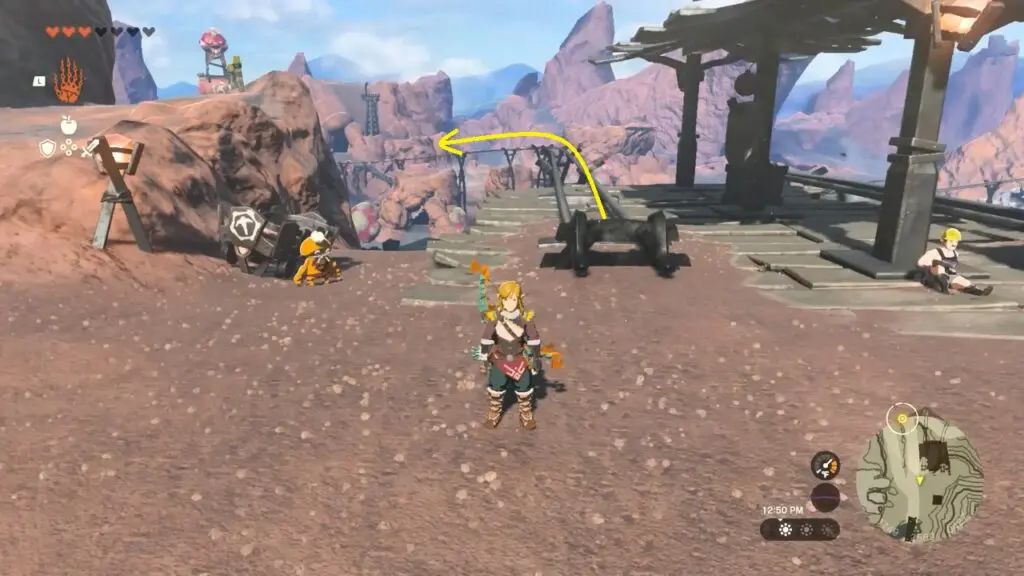
Start following the quest marker and it will take you to the path north of town. Go past Marakuguc Shrine to reach a minecart rail. Attach a fan to a minecart using Ultrahand, then place the cart on the left rail. Get into the cart and activate the fan to travel down the rail and reach YunoboCo HQ.
Note: Prior to entering the cave, acquire Fireproof armor from a nearby armor shop for 700 Rupees or prepare Fireproof elixirs through cooking.
Speak with two small guys (Offrak & Slergo) located at the entrance of the cave.

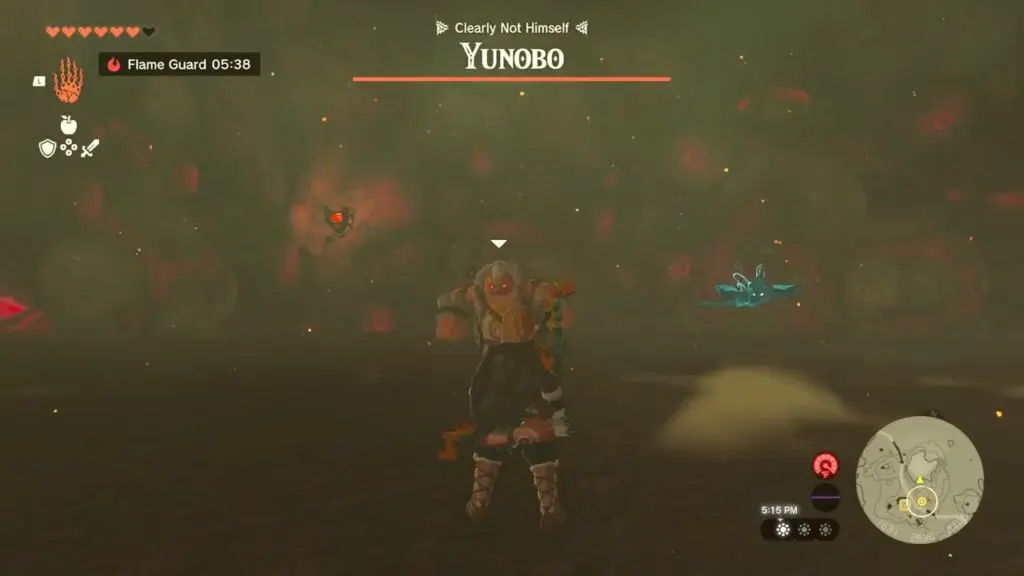
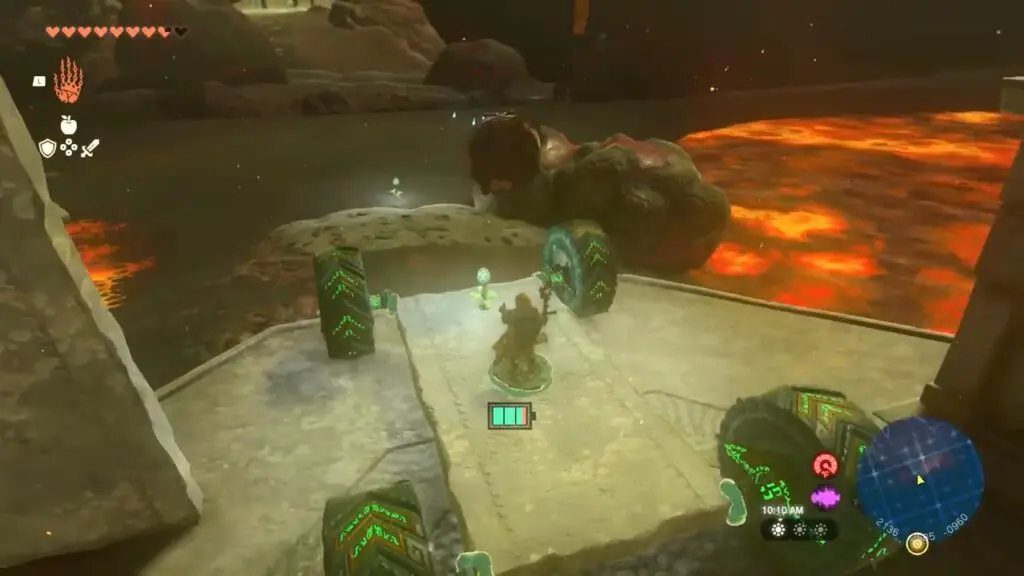
Defeat the Evil Boss
Yunobo possesses a single method of attack, which involves transforming into a rolling ball and launching himself toward you. Players can evade this attack by constantly moving to either the left or right. When he rolls past and collides with a wall, swiftly strike him to inflict damage to his mask. Repeat this process a total of three times until his evil mask gets destroyed.
Reach the Top of Death Mountain
Once you have defeated him, Yunobo will become your ally for the remainder of the quest. You have the ability to instruct Yunobo to perform fiery rolling attacks. Command him twice to make him roll over the lava rocks within the cave to break them.

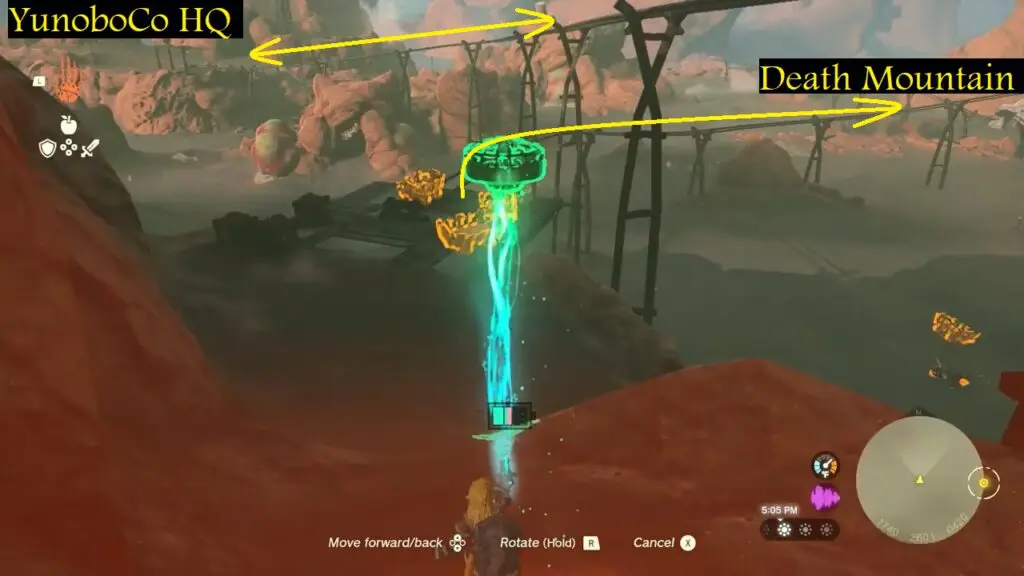
Your next objective is to reach Death Mountain after leaving the cave. Return to Goron City by following the same minecart rails you previously took.
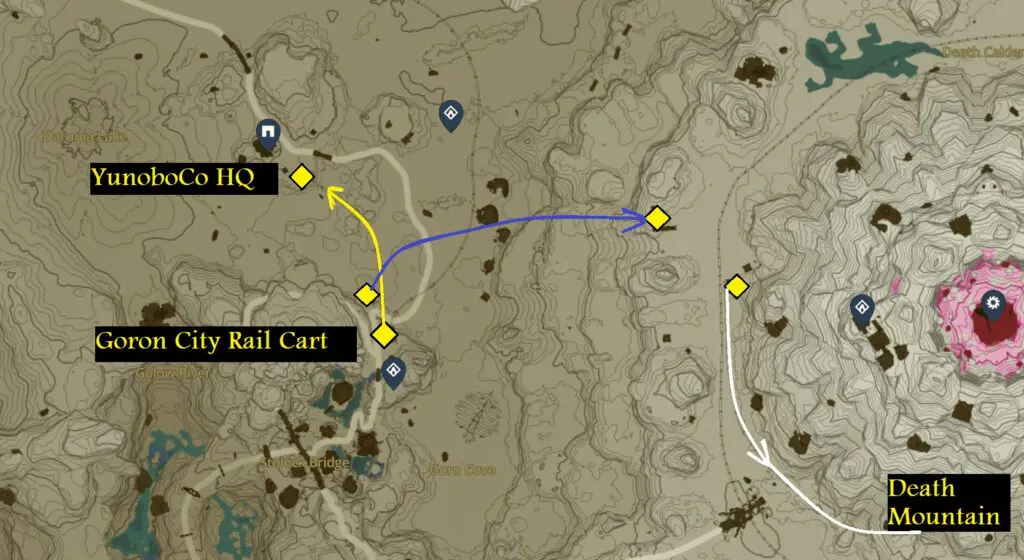
Then utilize the Ultrahand ability to bring the minecart you just rode on to the lower set of rails and ride it to the base of Death Mountain.
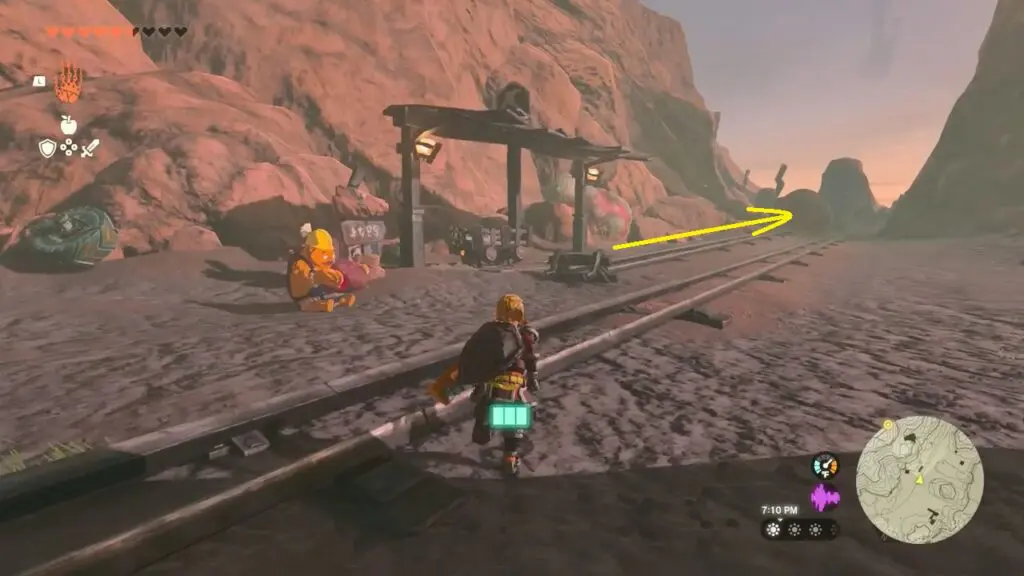
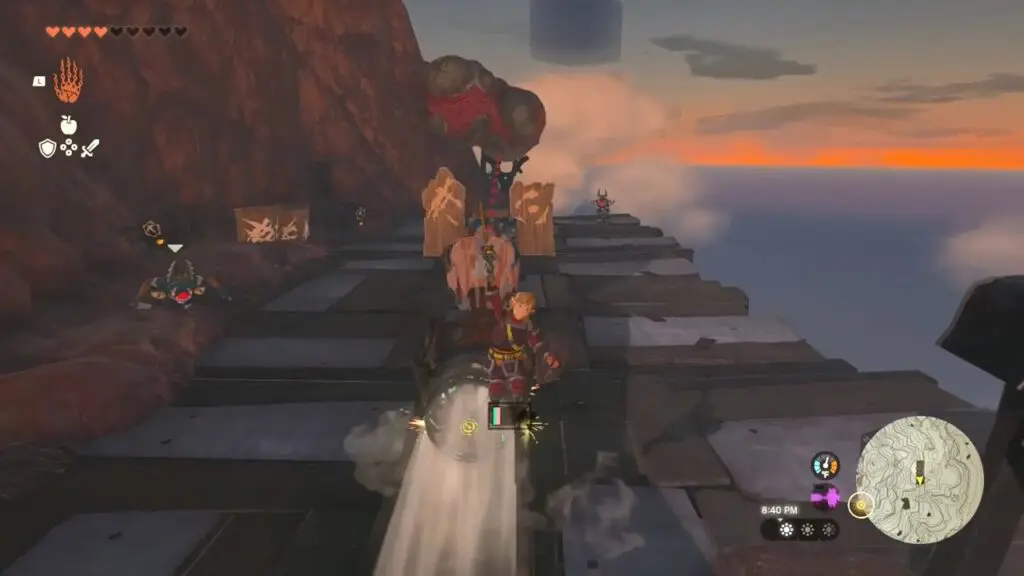
At the base of the mountain, you’ll find two rails running alongside Death Mountain’s perimeter. Ride the rail close to the mountain to gradually ascend and navigate around the mountain.
In this section, Yunobo will automatically roll in front of your cart. Utilize this attack to break through the marbled rocks blocking your path or to strike enemies while ascending the mountain.
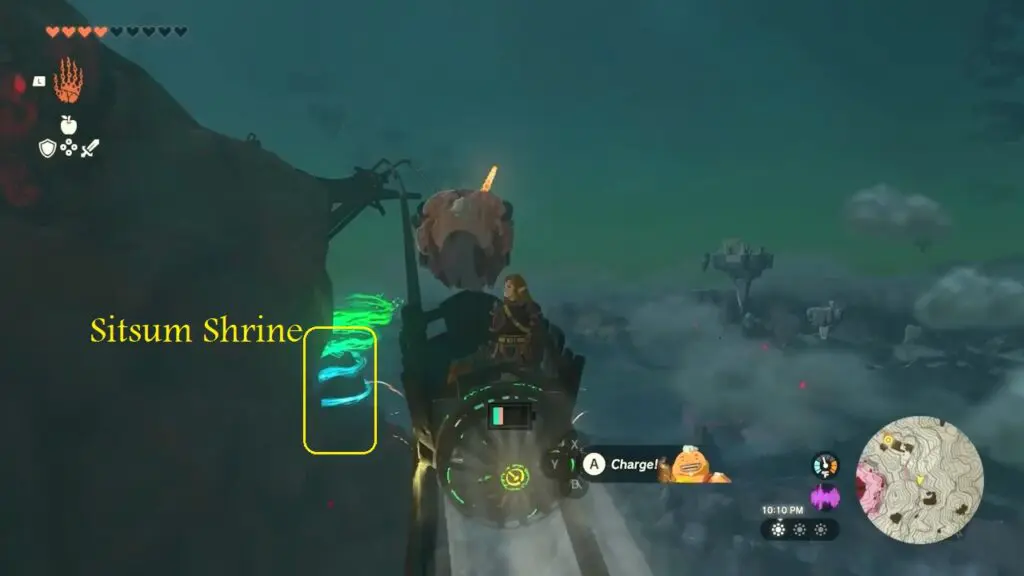
At the top, you will find Sitsum Shrine located beneath the wooden platform.
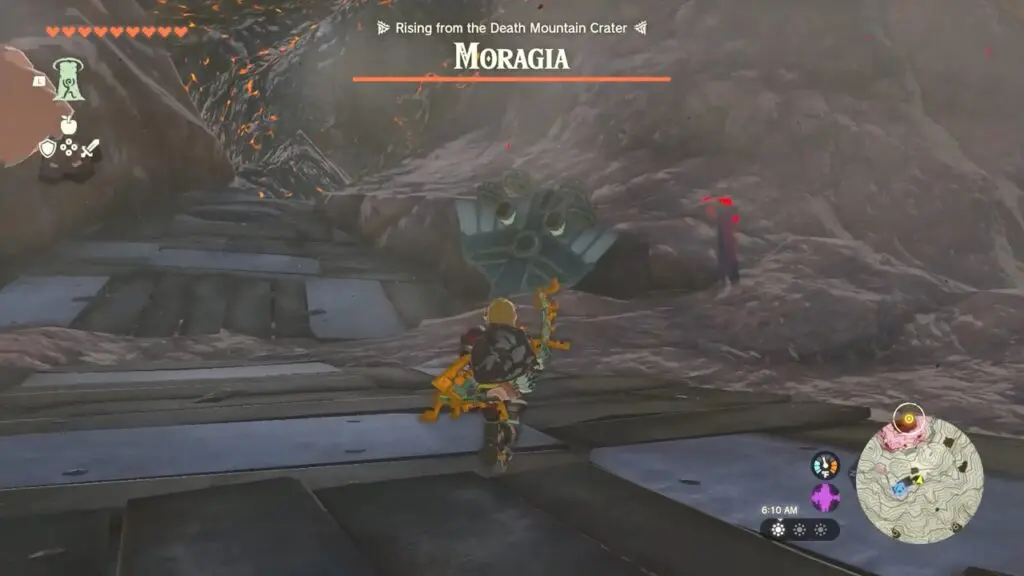
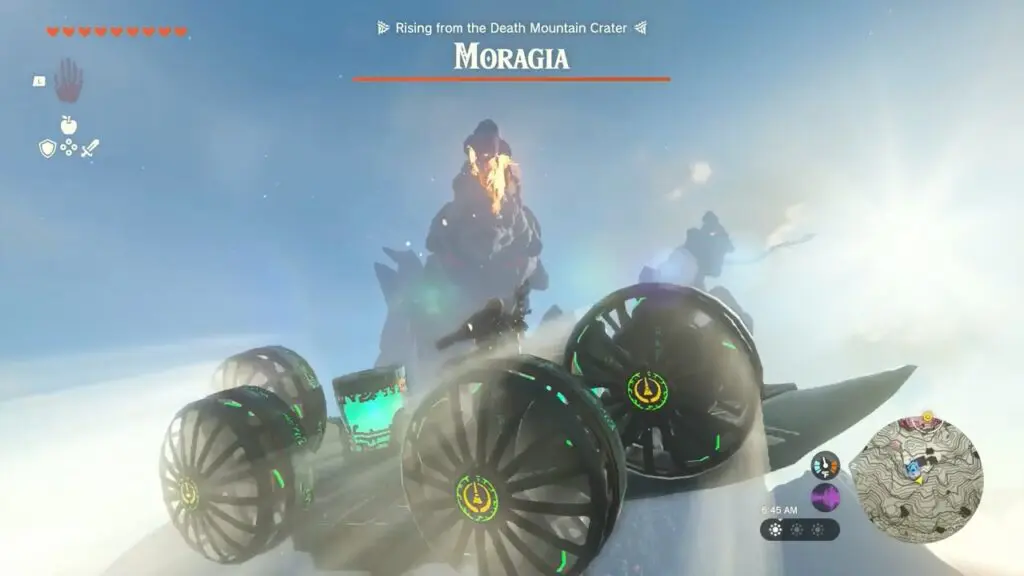
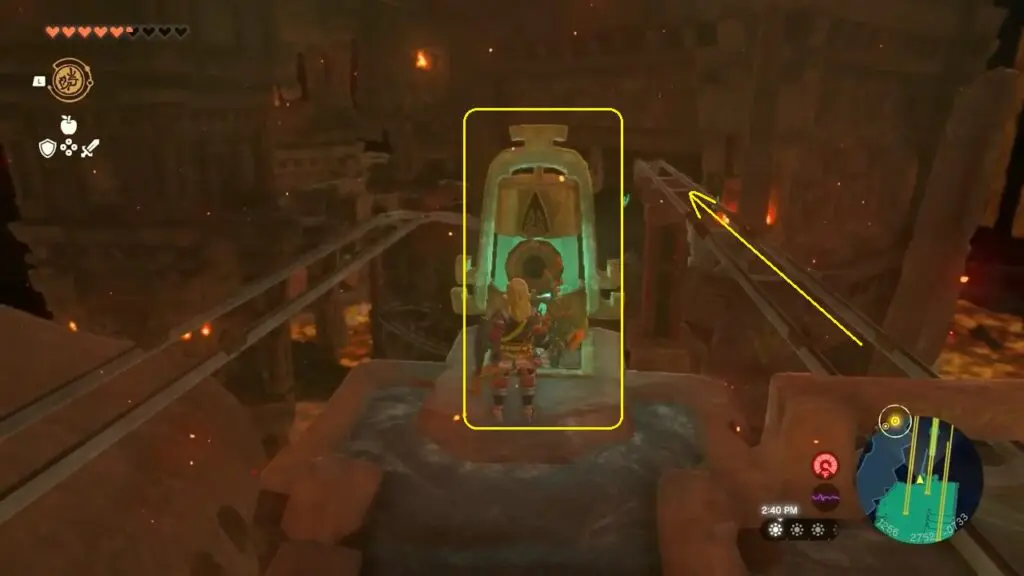
Moragia Boss Fight
Next, locate a flying machine nearby. Use Ultrahand to launch it from the wooden platform. This will initiate an aerial fight where you have to utilize Yunobo as a rocket launcher to target and destroy Moragia’s heads one by one.
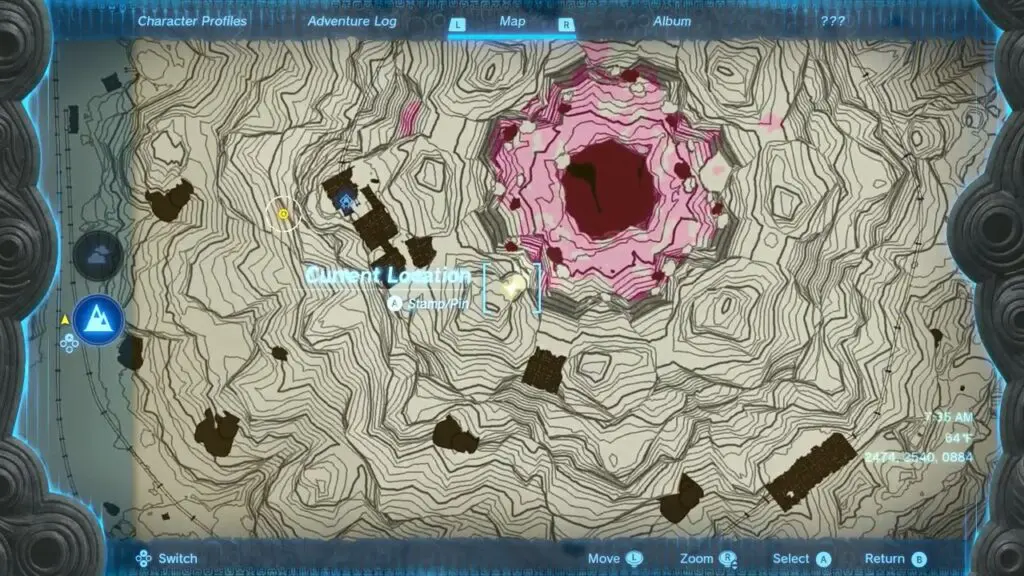
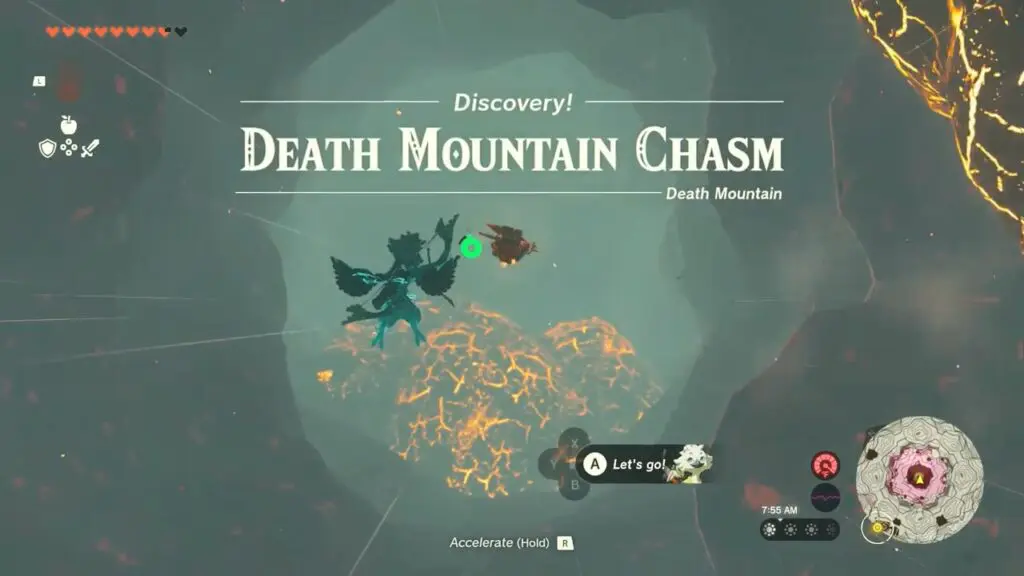
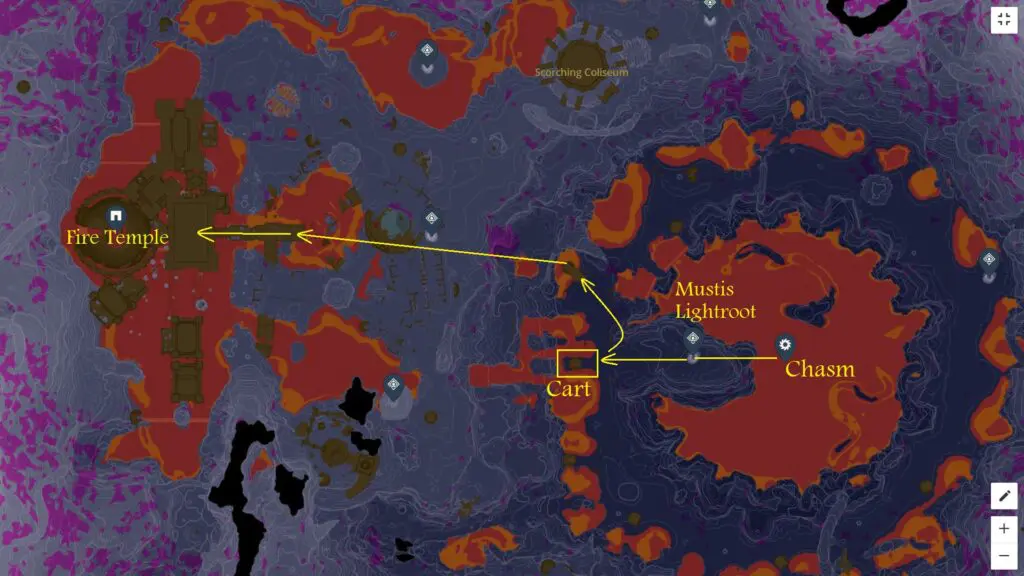
Explore The Depths
Jump and paraglide into the bottom of the Volcano Crater. Land at what looks like a yellow glowing Lightroot as marked on the map.
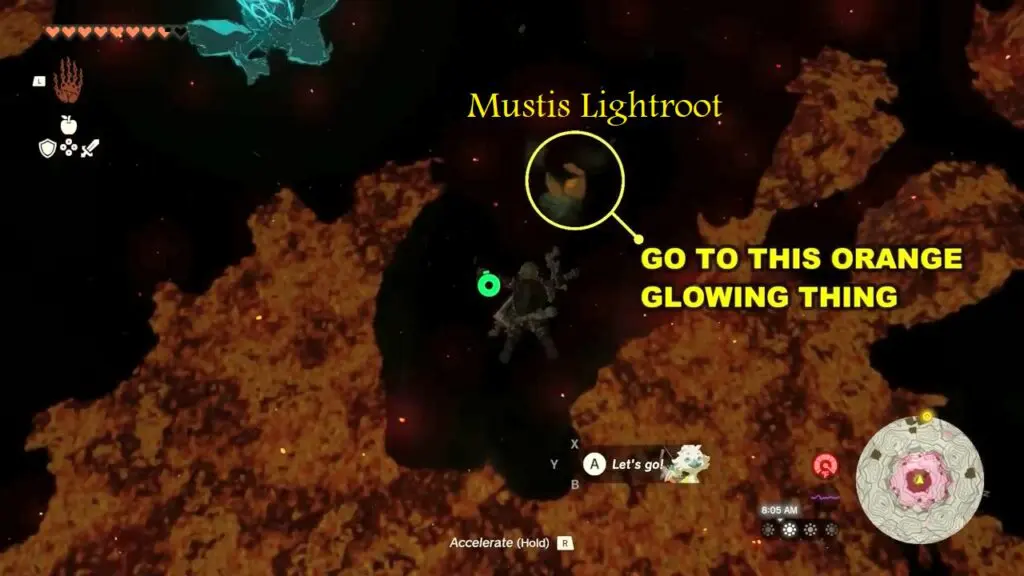
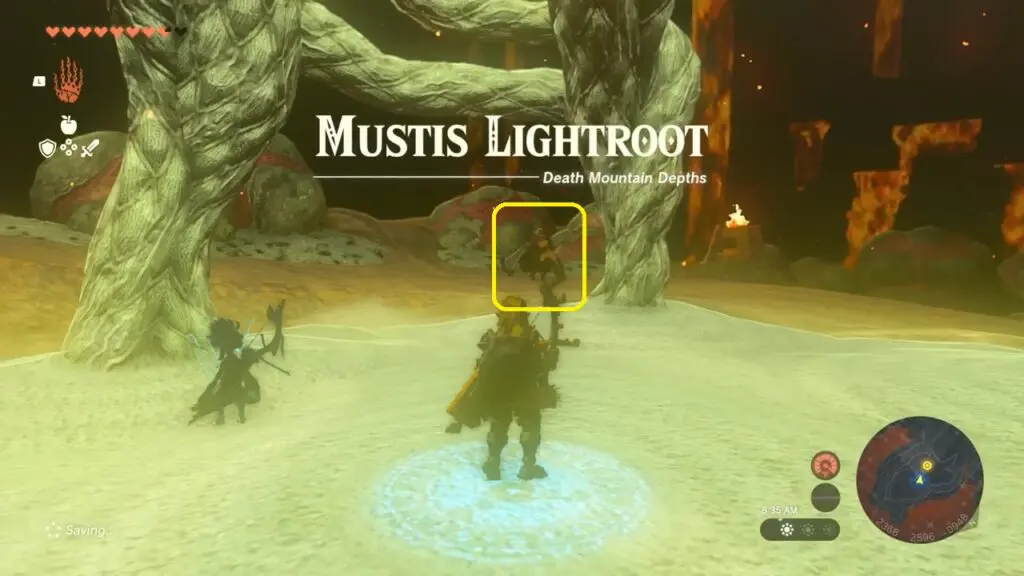
Activate the nearby Mustis Lightroot to light up your surroundings.
Speak with Yunobo, who can be found near the Lightroot. As you speak with him, you will hear a voice and a new quest marker will appear on the map.
Proceed deeper into the depths in the westward direction. To light up the area you can drop Brightbloom Seeds from your inventory and strike them to generate light. Once you reach the quest marker, you will enter the Fire Temple.
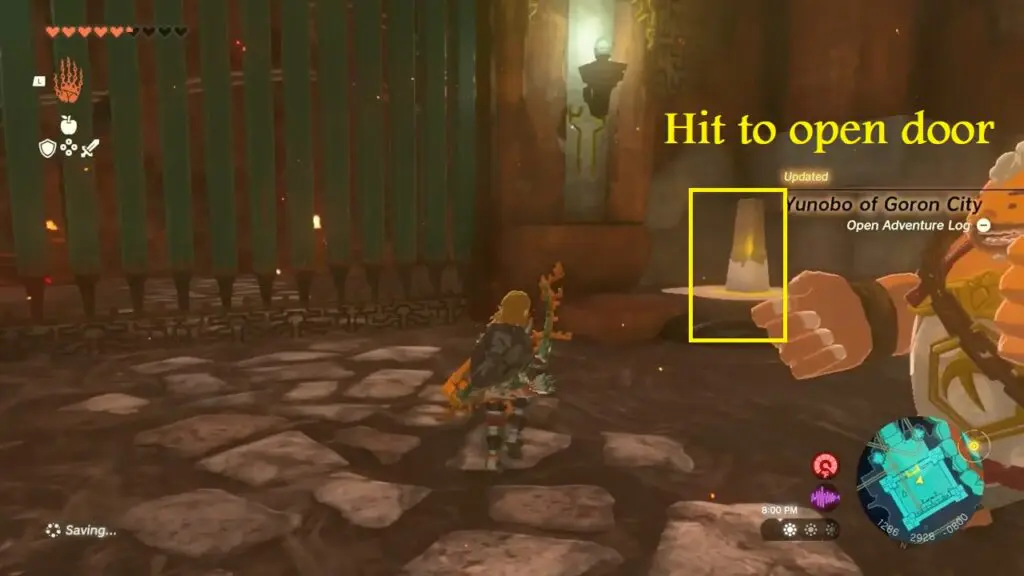
Upon reaching the Fire Temple, employ Yunobo’s ability on the giant rock blocking the entrance. Proceed inside and then interact with the green pedestal. You will hear a voice informing you that the Fire Temple Gate is locked by five padlocks scattered throughout the temple.
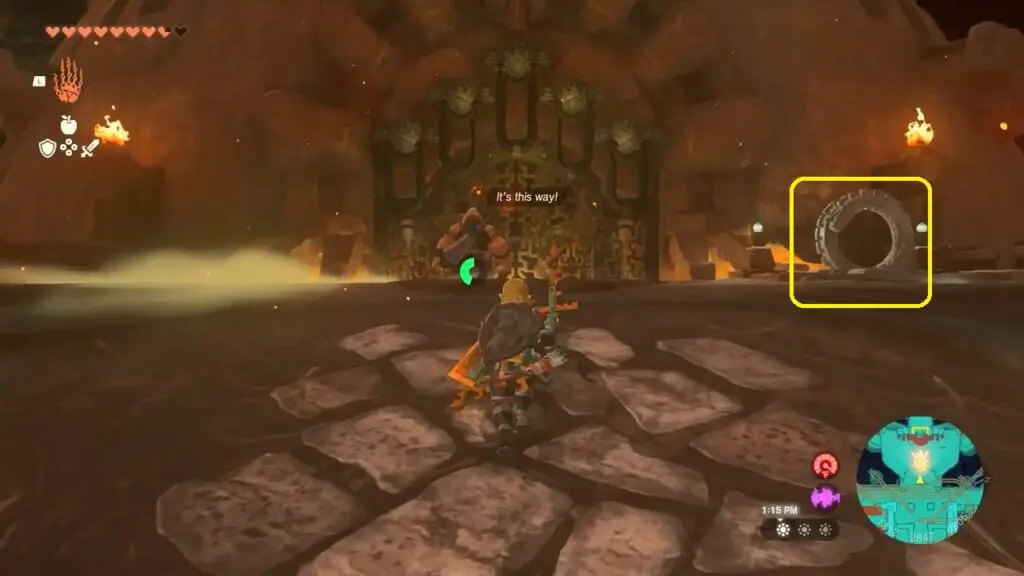
Open the 5 Padlocks in Fire Temple
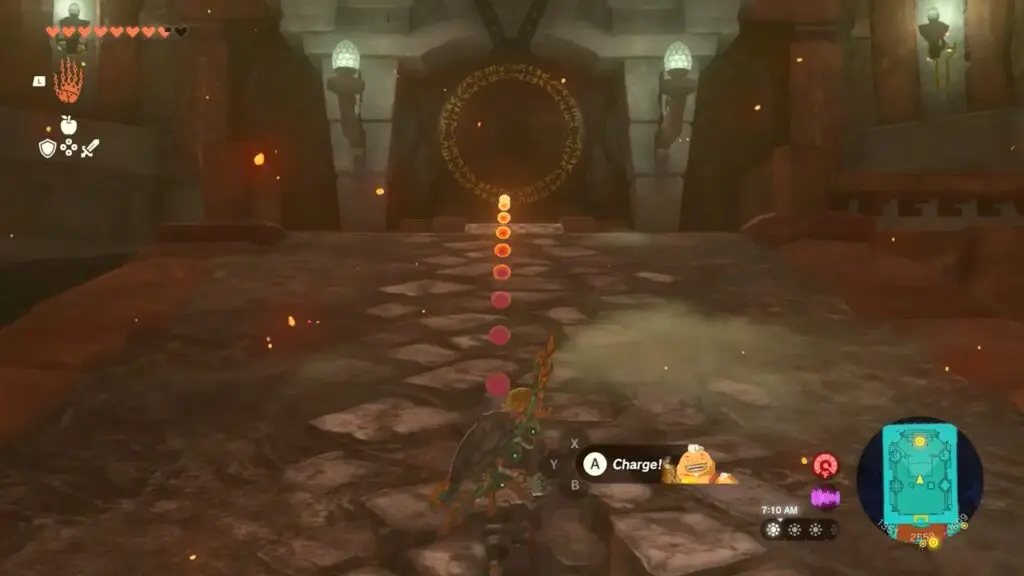
To open the fire temple you need to strike these gongs using Yunobo’s rolling attack. Our next objective is to locate and unlock all five padlocks.

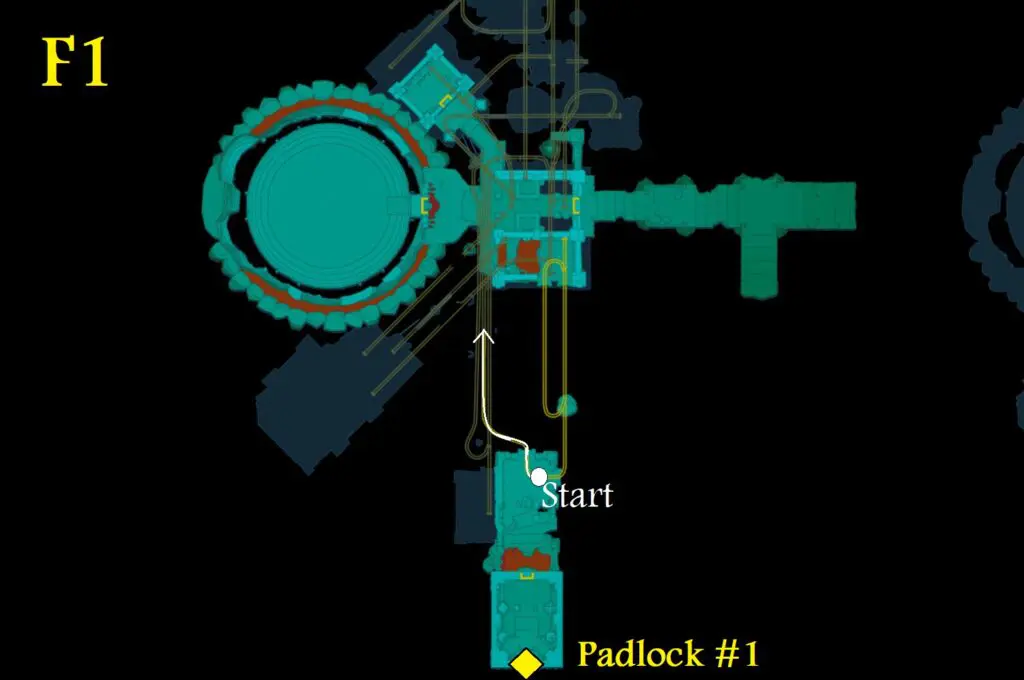
1) Padlock (F1 Level)
Proceed in the south direction on the 1F (first floor) according to the map. Leap over the floating rocks, grab the water hydrant, and hold it above the next lava pool to make rock platforms and use it to cross the lava.
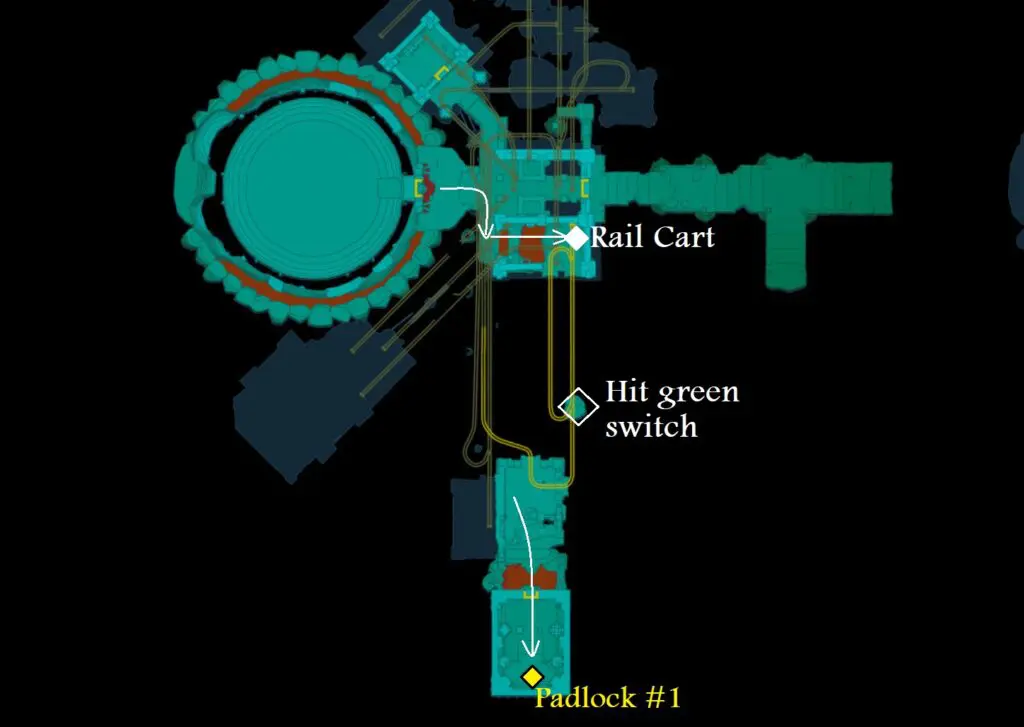
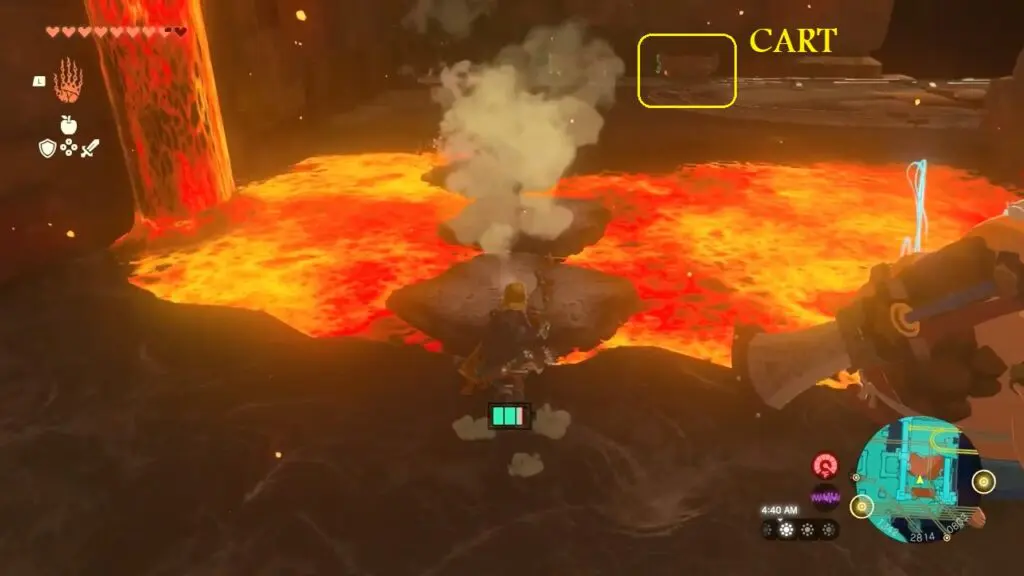
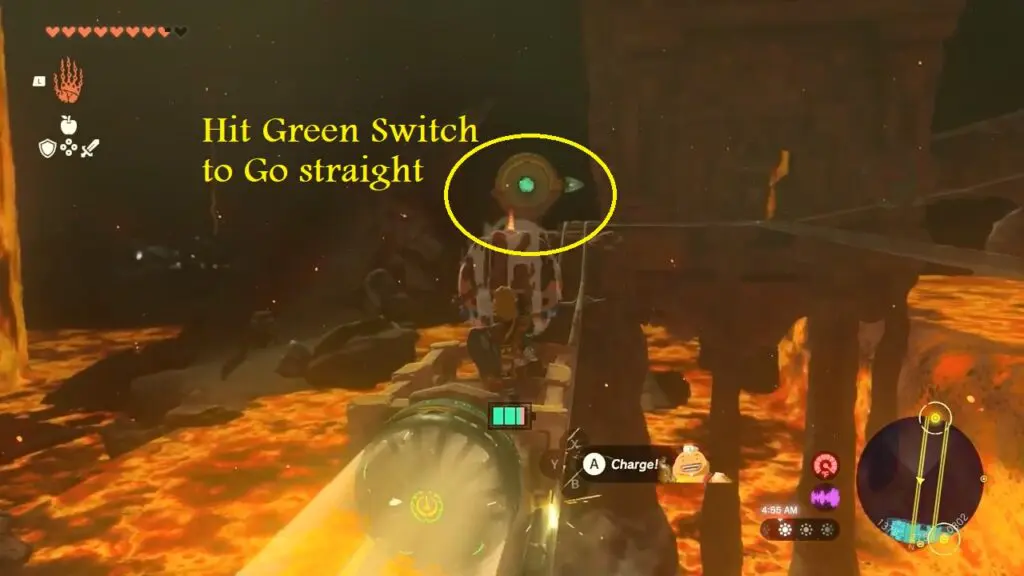
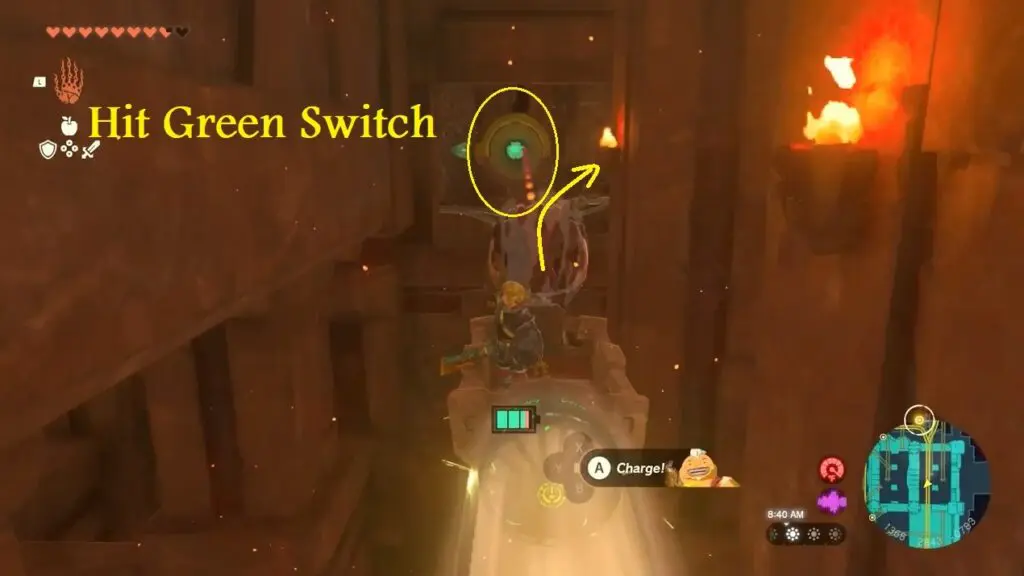
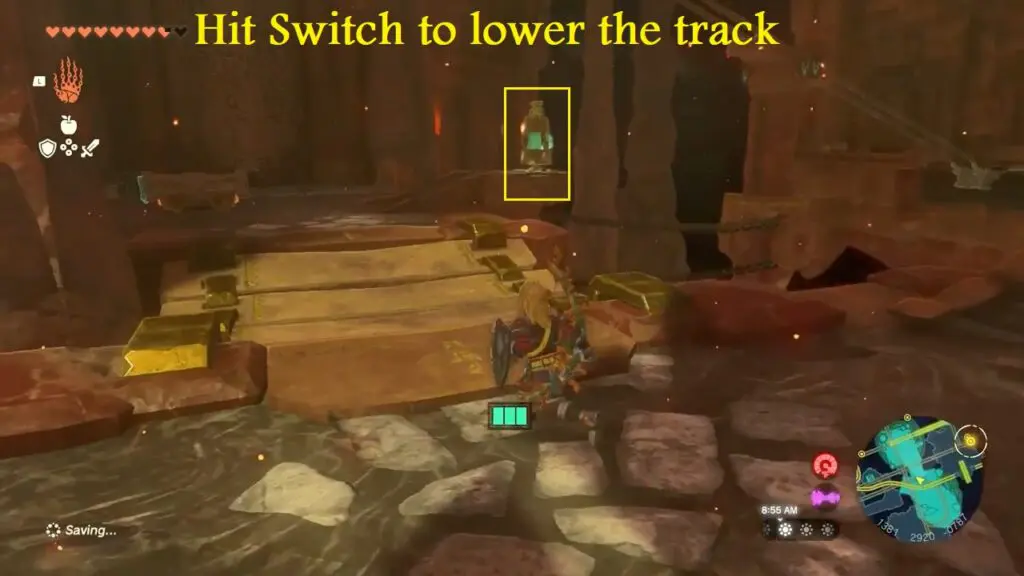
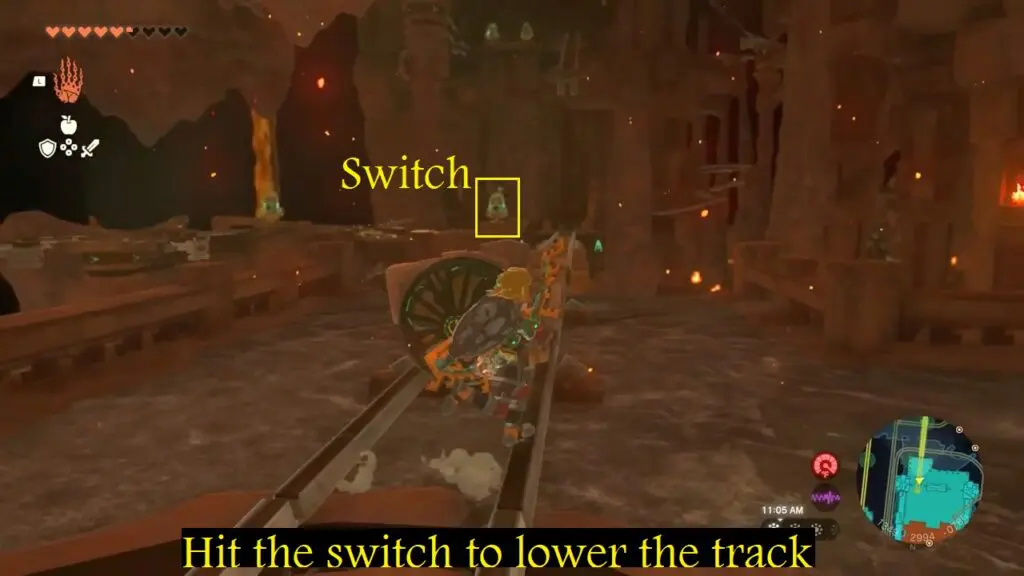
Use Ultrahand to place a cart on the tracks and activate the fan. While traveling along the rail line, launch Yunobo towards the green switch sign to alter the track’s direction.
In the following area, the cart will come to a stop. Exit the cart and descend on the left side to defeat the enemy and collect a chest.
Use a water hydrant to create a bridge in the lava and then propel Yunobo hit to break the large rock obstructing the way.
Inside the room, use Yunobo’s Charge attack to hit the first padlock.
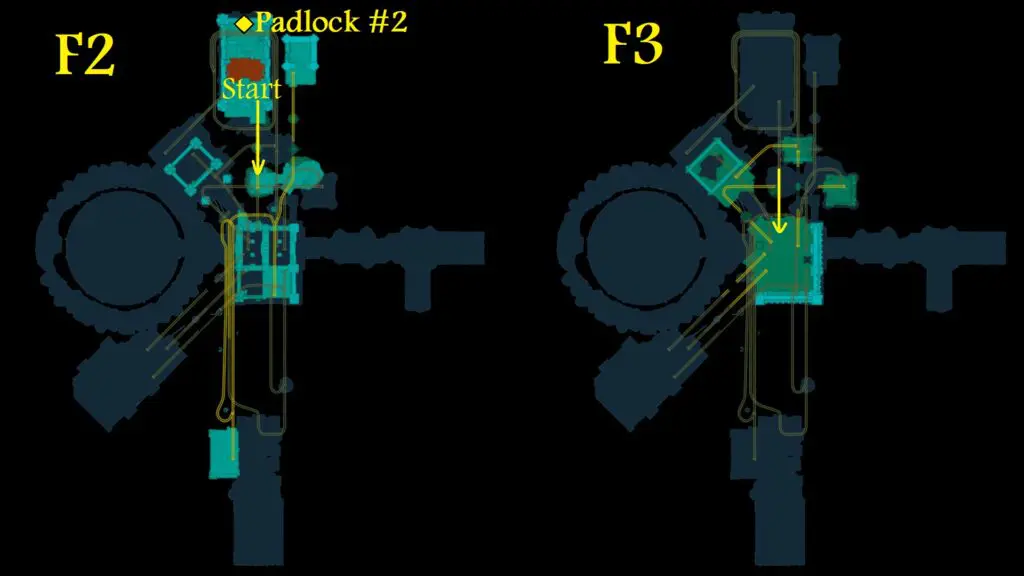
2) Padlock (F2 Level)
Return to the spot where you initially arrived by cart and strike the crystal to unlock the track and start driving.

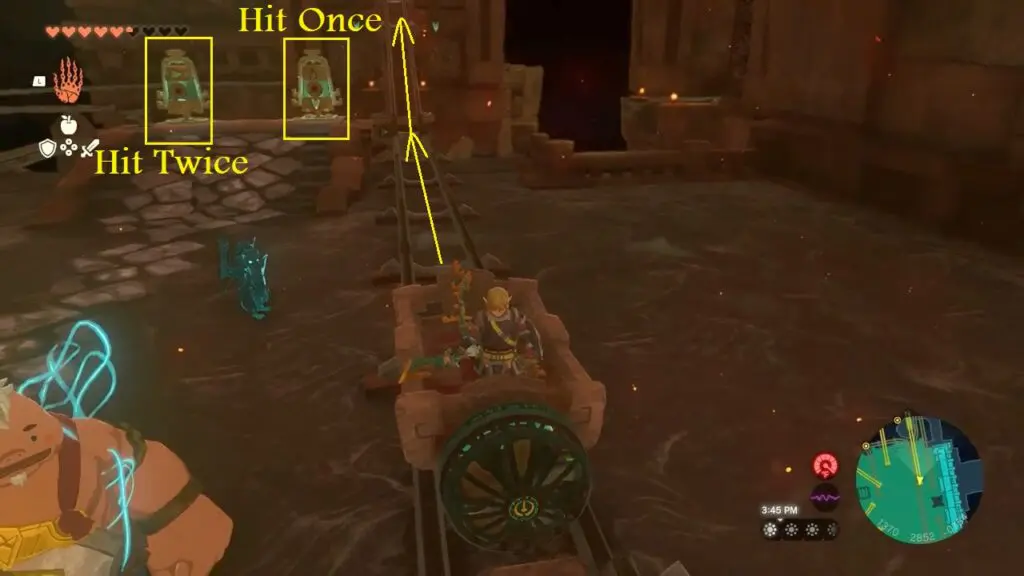
Once you reach the end of the tracks, activate the switch to reverse the cart’s direction and use it once again.
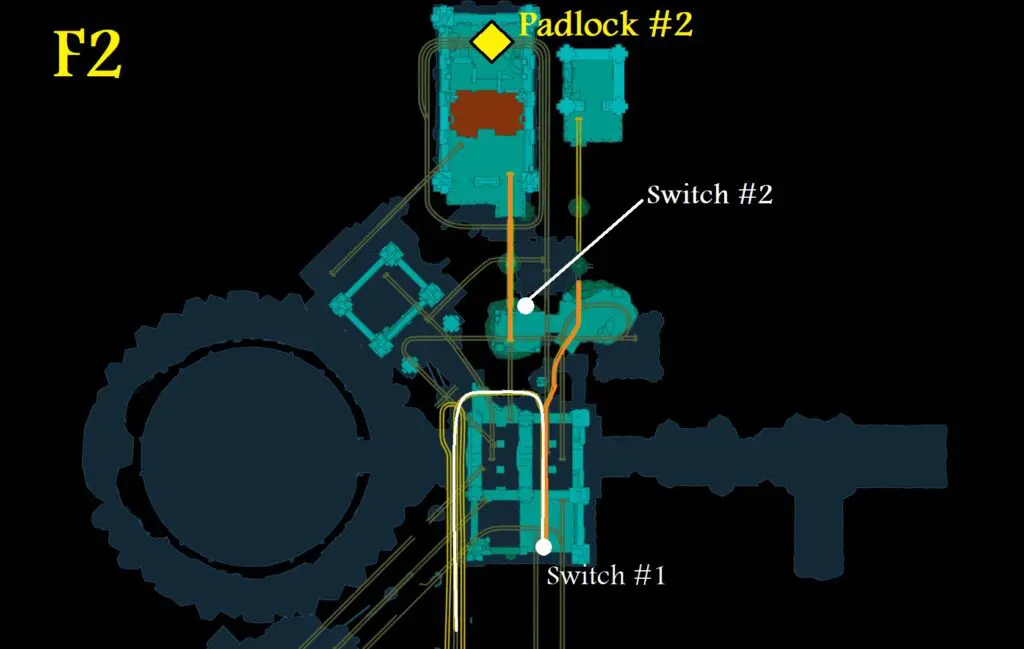

Utilize Yunobo’s Charge attack to hit the green switch sign directly ahead on the tracks. This will redirect the cart to the tracks on the right side.
In the subsequent area, hit the green bell situated on the left to lower the tracks. Drive the cart to reach the room containing the second padlock.
Cross the lava pool by employing the Recall ability and then activate the second padlock.
3) Padlock (F4 Level)
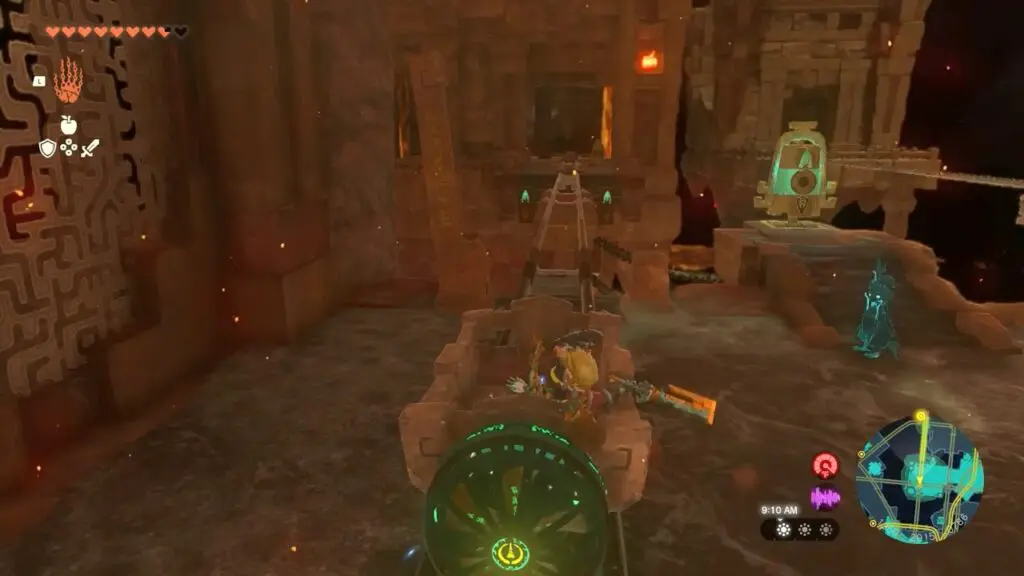
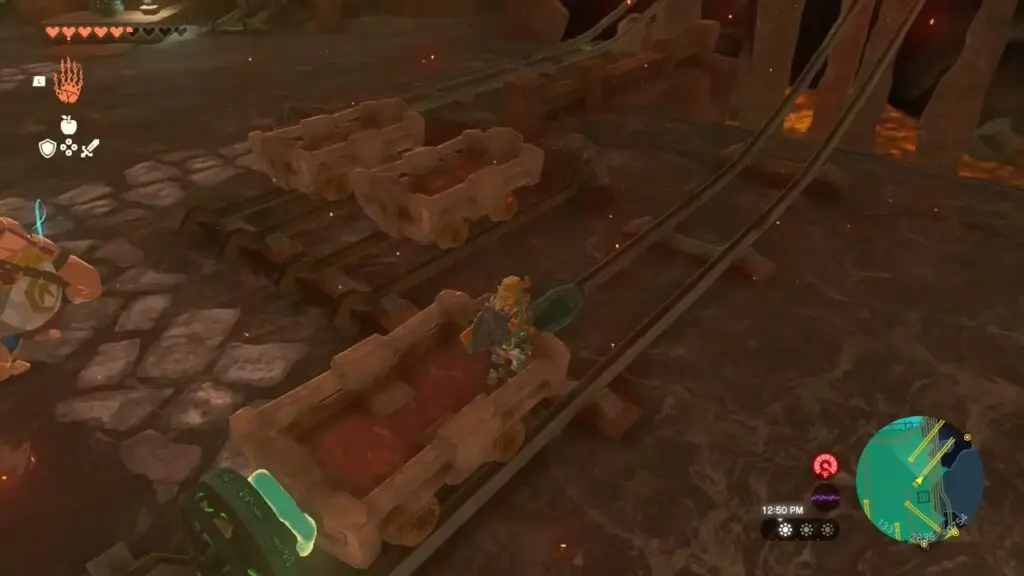
Within the room where you discover Padlock #2 on level F2, put the cart on the track. Hit the switch on the other side of the gap to raise the tracks. Drive the cart to level F3.
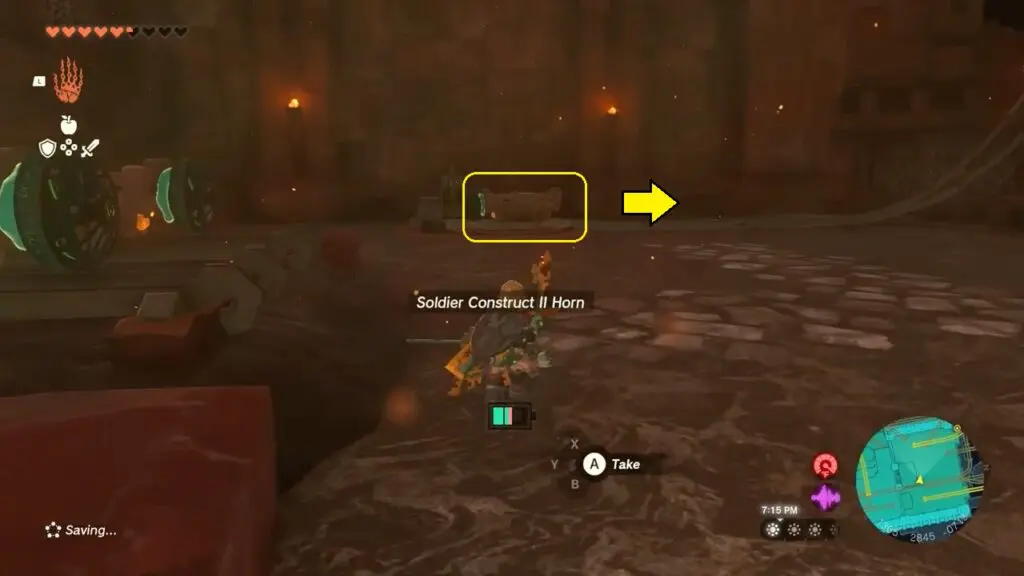
Defeat the enemy at F3 level and acquire a booster (rocket) located on the wall. Attach the booster in front of the cart, ensuring that it faces forward, and place a fan at the back.
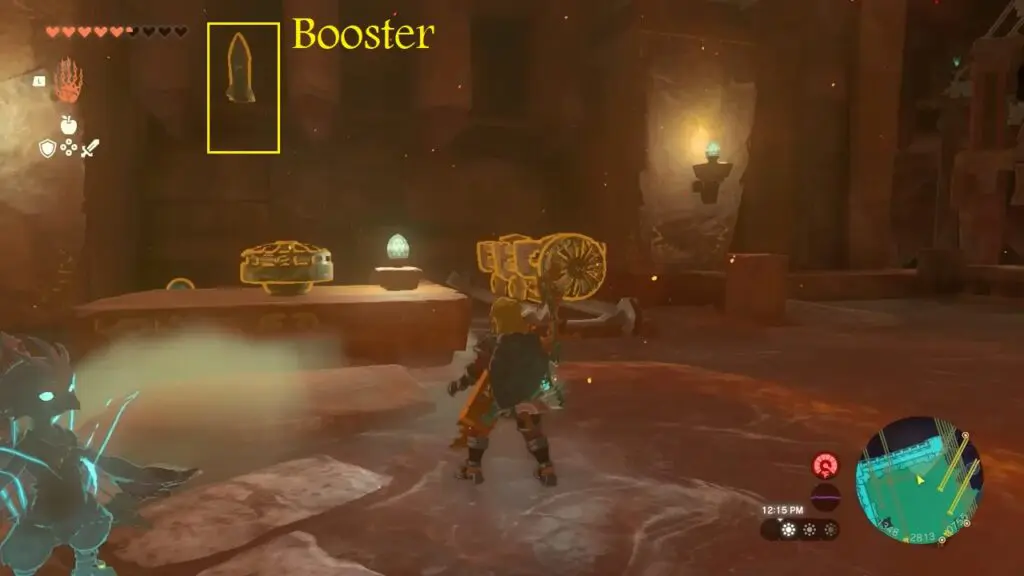

Position this modified cart onto the partially broken tracks located on the right side, specifically the tracks that ascend and head southwest according to the map. Activate the rocket, which will provide a boost, propelling you over the damaged section of the track and onto the 4th floor (F4).
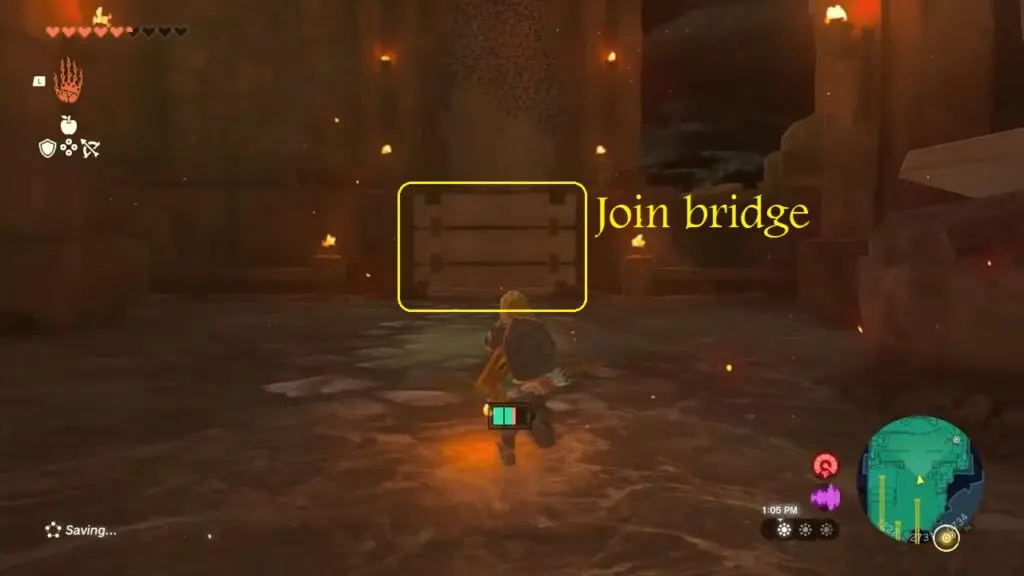
Upon reaching F4, join the bridge and utilize Yunobo’s Charge attack to propel it upwards. Yunobo will go up the floor, demolishing rocks in the process, and a box will descend.
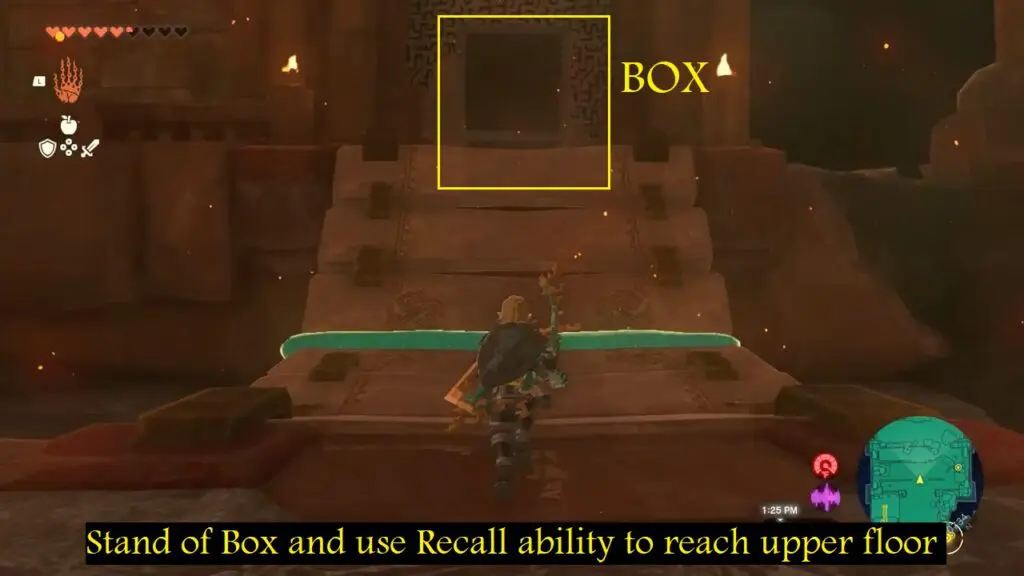
Stand on the box and employ your recall ability to reach the upper floor on F4. This room contains Padlock #3.
4) Padlock (F4 Level)
From the third Padlock location, drop back down to where the carts are. Hit the switch to lower the right tracks and then ride a cart to reach L3vel F3
Hit the two bells in the north until the right-side rail is facing up to the 4th floor in the north.
Ride a cart on those rails, it leads directly to the 4th lock.
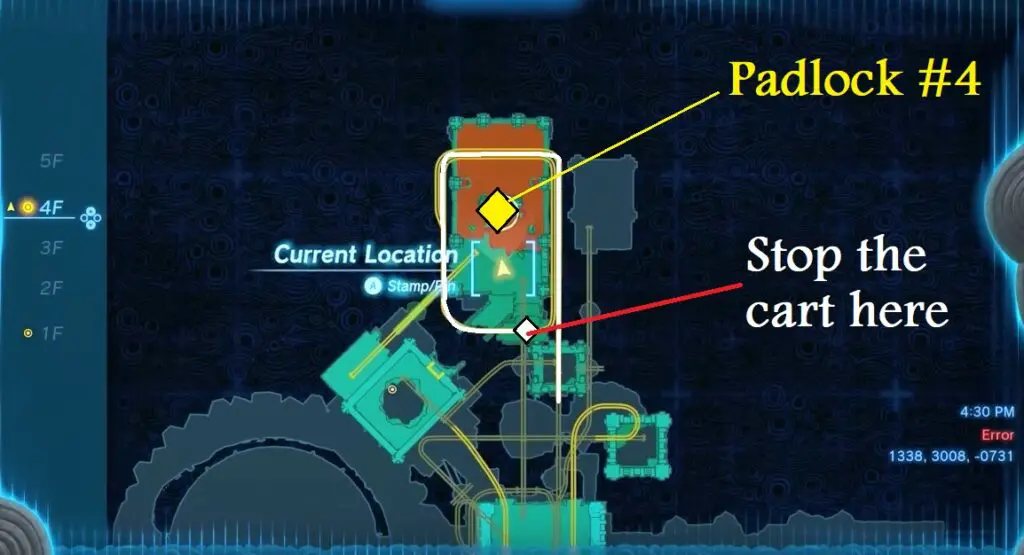
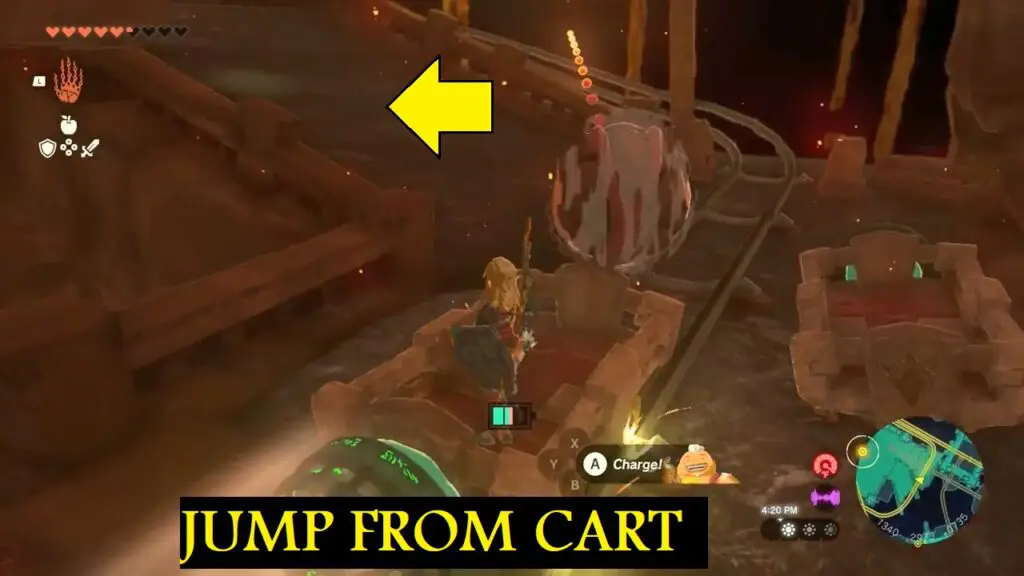
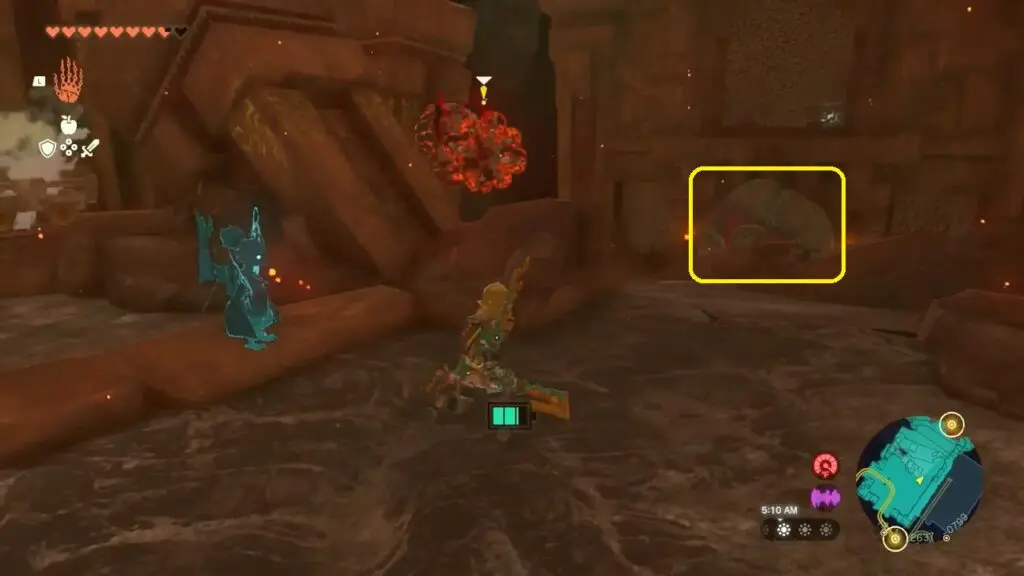
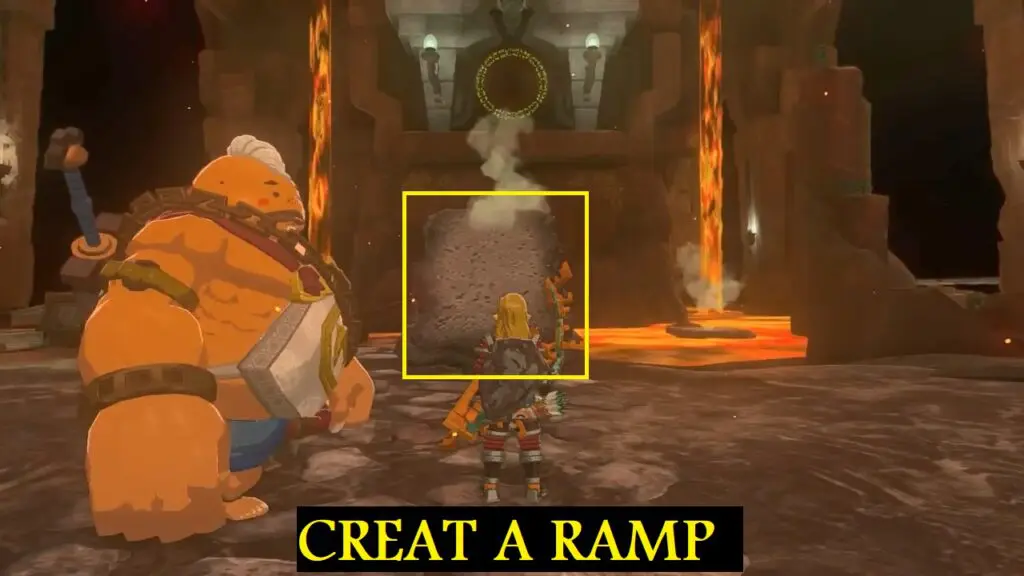
The lock is on a rock behind lava. Create a ramp as shown in the image and then Utilize Yunobo’s Charge attack to hit the padlock.
4) Padlock (F1 Level)
From the fourth Padlock location, use the ramp to destroy the red rocks on the 4th-floor northwest tower. Refer to the below image.

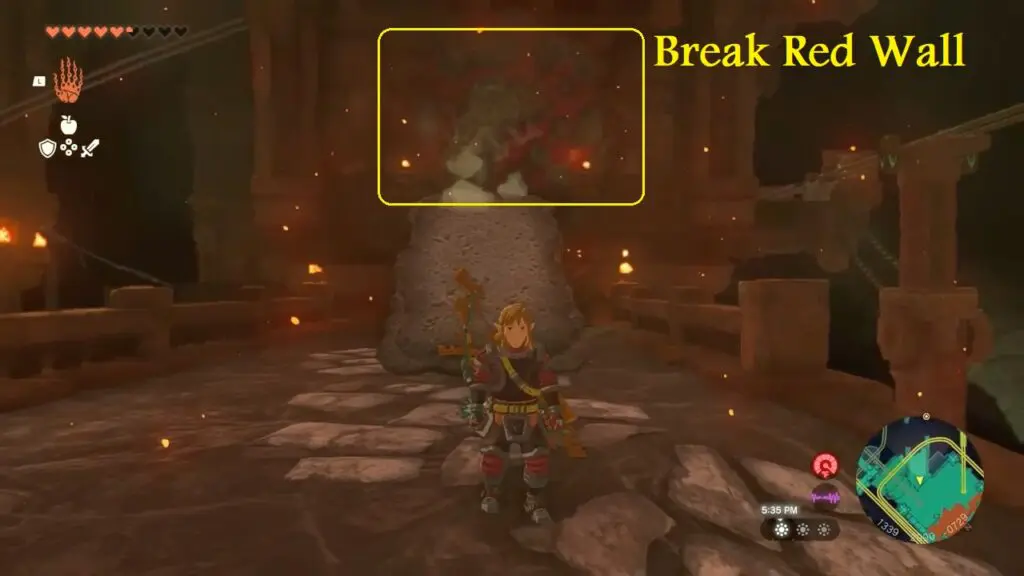
Then glide down to the northwest tower on the 3rd floor (F3)
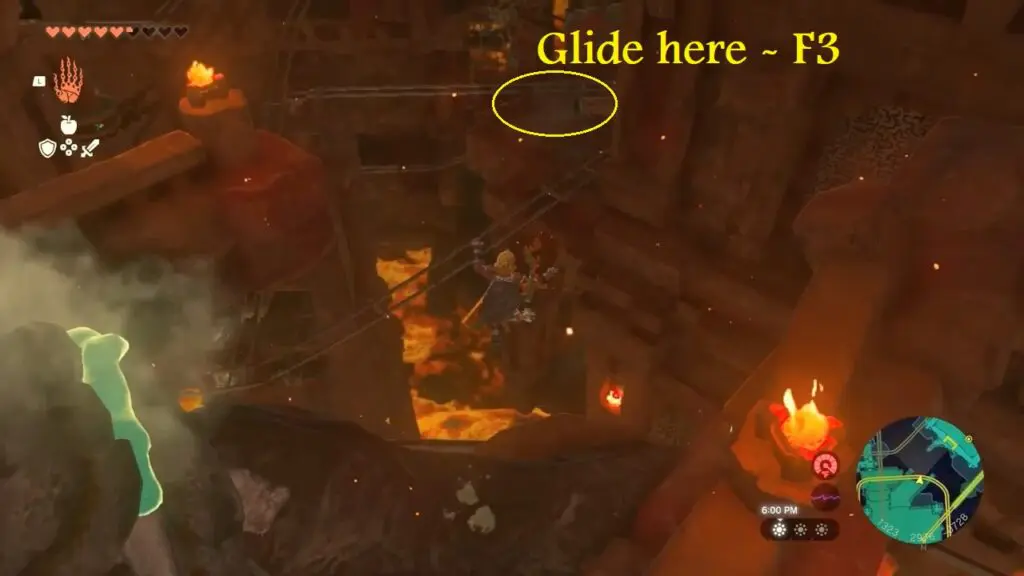
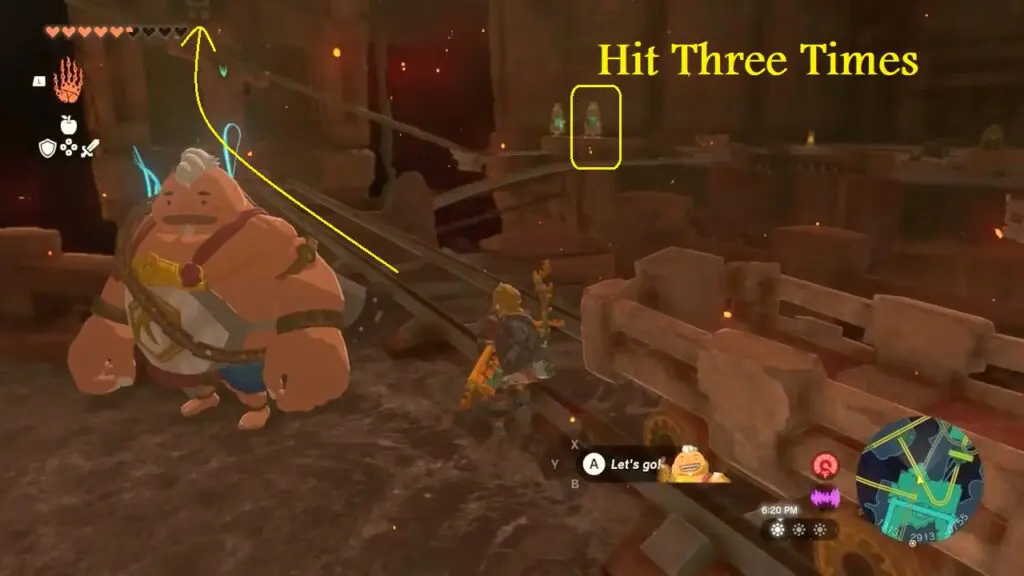
Hit the switch across the gap three times and then ride the cart to reach the 4th floor (F4)
Ride the cart of the western track to reach the F5 level. The padlock is at F1 of the same tower.
Jump and glide down to enter the F4 level (through the same opening that you created earlier).
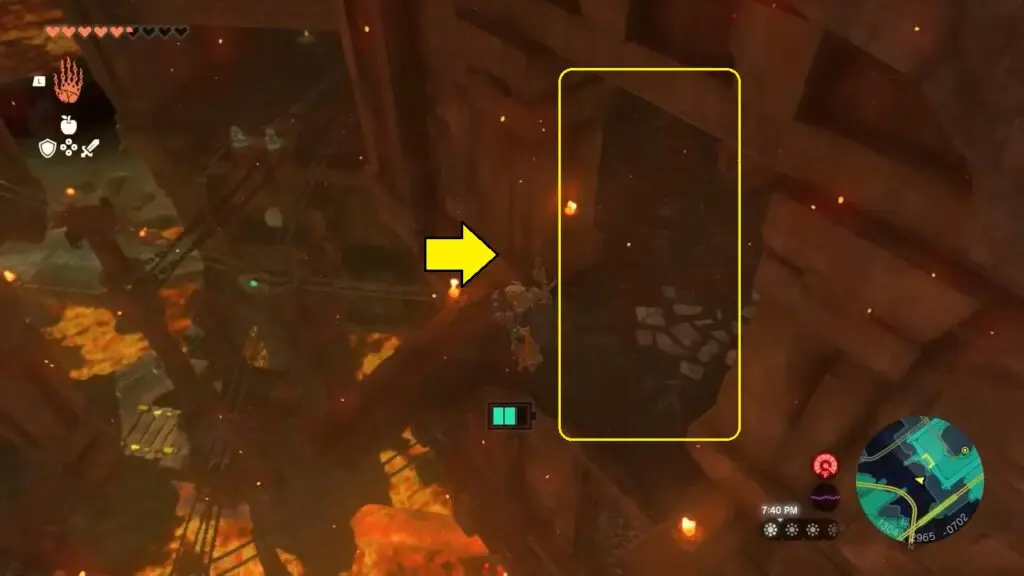
Glide down the open hole in the middle of the tower, at the bottom (1st floor) you will find the last Padlock

Marbled Gohma Boss Fight
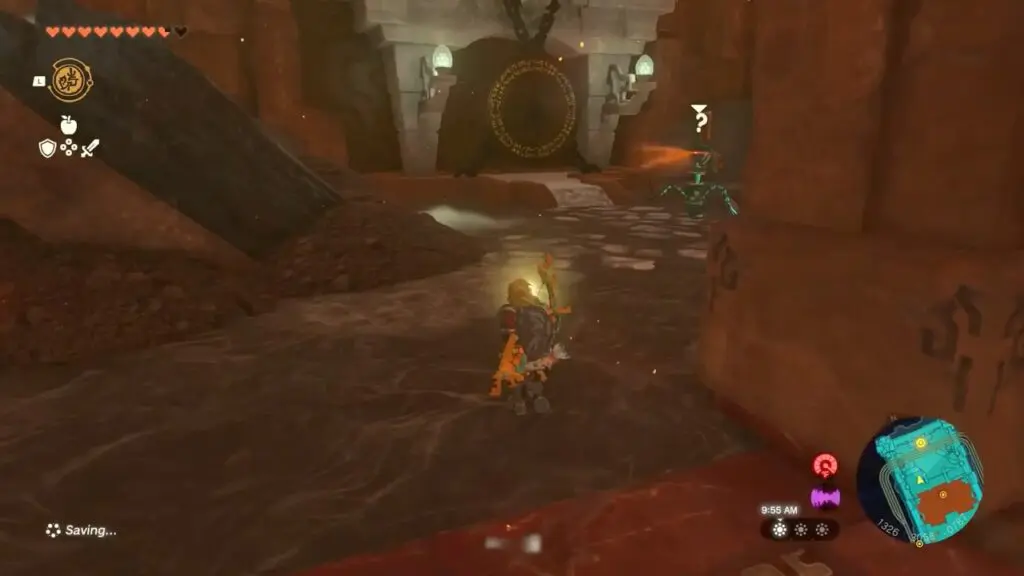
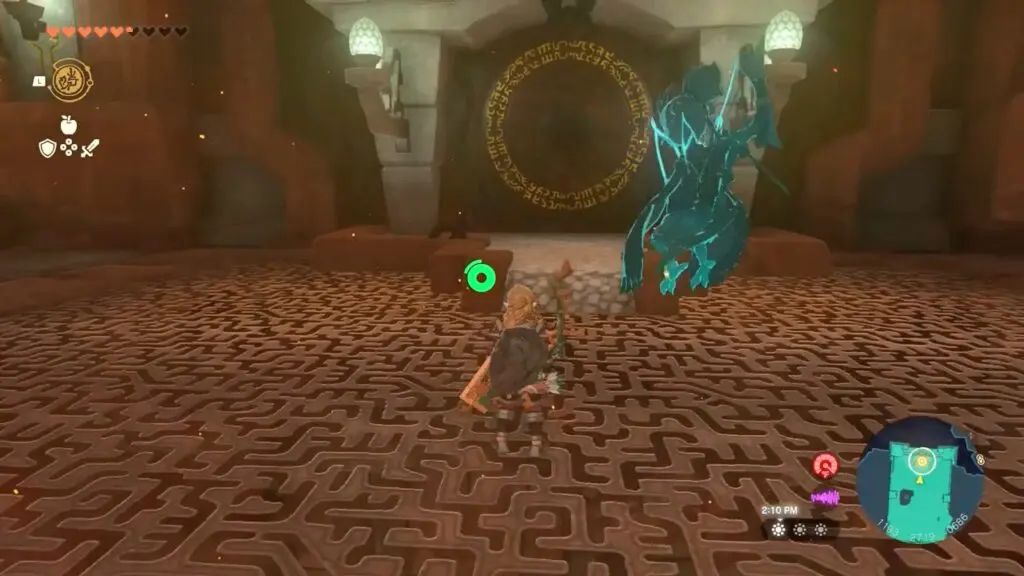
After successfully ringing all five padlocks, players should make their way back to the locked gate of the Fire Temple where they initially started.
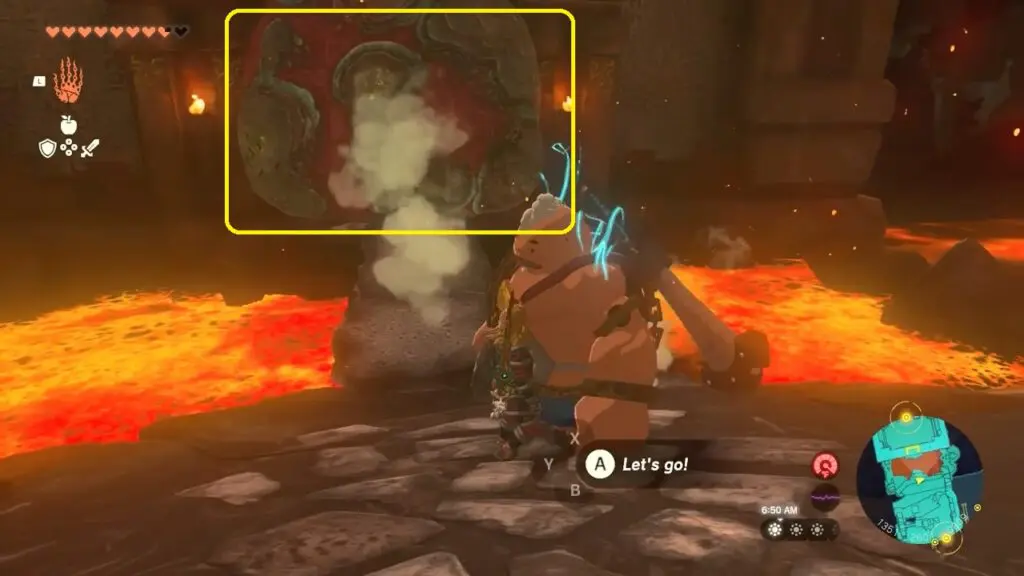
Interact with the green circle to open the gate. Enter a round room. Utilize Yunobo’s Charge attack on any wall, launching him towards the ceiling to shatter the red rocks. This will trigger the Boss fight.
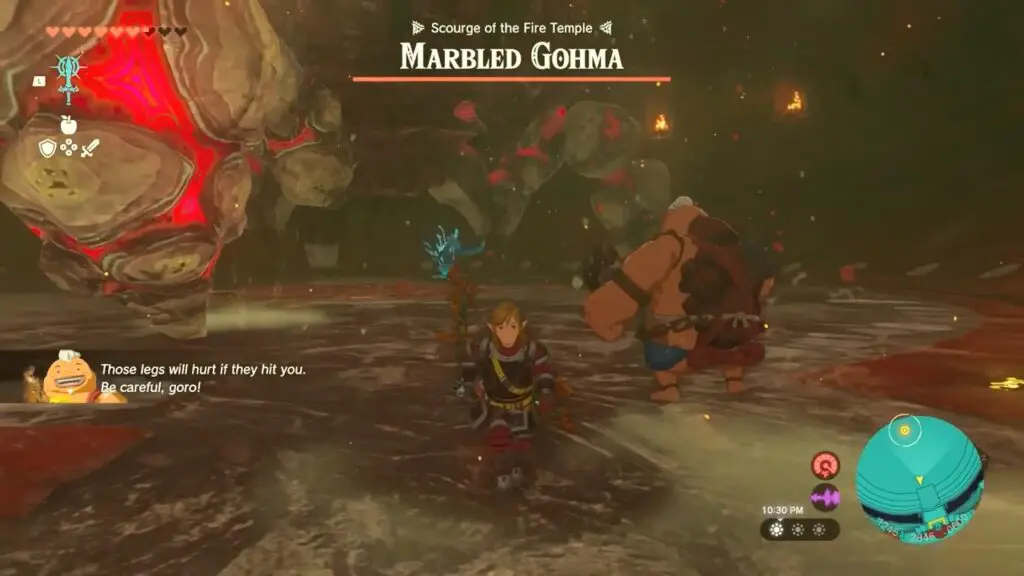
First Phase: Use Yunobo’s Charge attack to hit the boss’s leg twice consecutively. Climb on the boss and attack its eye. Avoid damage when the boss stands up.
Second Phase: Use Yunobo’s Charge attack on the walls to hit the boss in the middle. Attack its eye when it falls down. Dodge explodes rocks and aims for the boss’s eye.
Return to Goron City
Once the boss is defeated, collect the Heart Container positioned in front of you. Engage in conversation with Yunobo. Subsequently, you will be automatically transported back to Goron City.