This is the Gameplay Walkthrough of Five Nights at Freddy’s Security Breach (2021). This guide will show how you can decommission Chia in the Dumpster Driving mission in FNAF Security Breach. To be able to complete this mission, you will need to get Bowling Pass from the Fazer Blast Security Office.
Also Read: FNAF Security Breach Complete Walkthrough
Find out how to decommission Chica
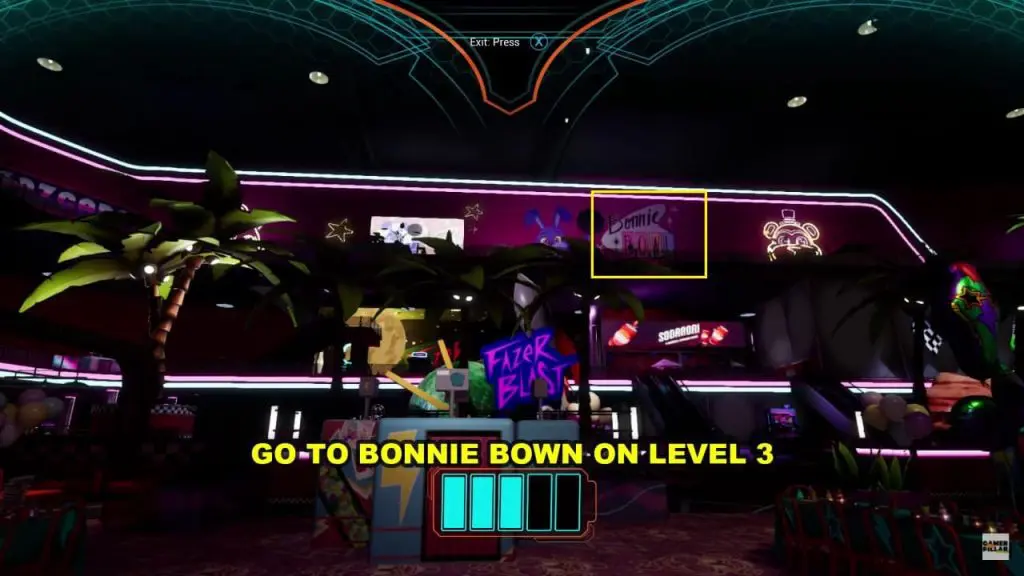
After collecting the Bowling Pass from Fazer Blast Security Office, go to the Bonnie Bowl in the Atrium Third Level using the elevator. Give the Bowling Pass to the robot at the gate of Bonnie Bowl. Refer to the below image for the location of Bonnie Bowl.
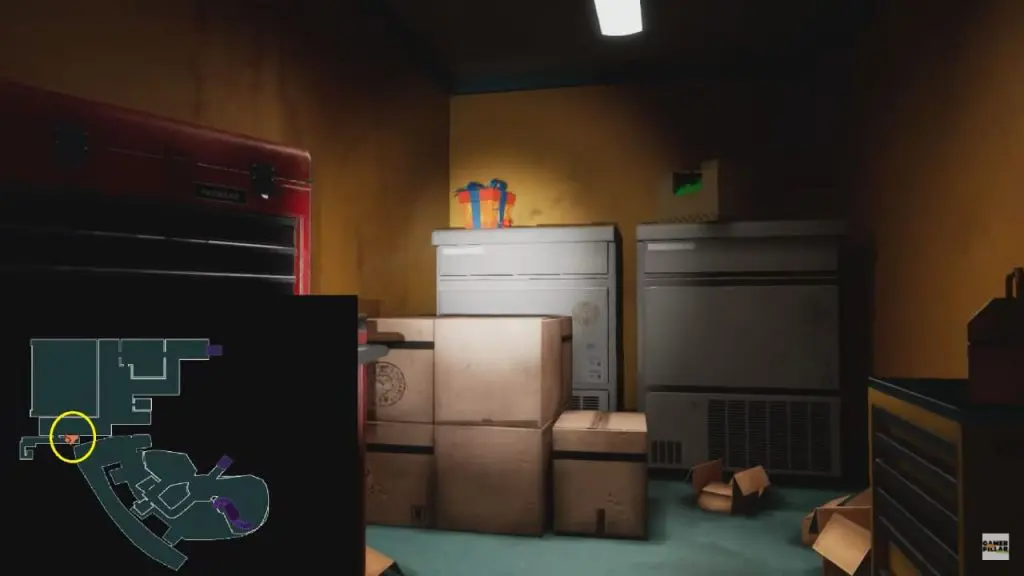
Head inside the main door, use the elevator. Inside Bonnie Bowl area, go straight in the hallway and then take left at the first garage door and save point, then again right to reach the second garage door. Look for the Ice Cream-Bonnie Bowl-Drinks counter on the left side. Go to the backroom to collect Monty’s Mystery Mix and a memo. Read the memo first. It gives you a big clue on how to proceed. I have attached images below for reference.

Use Monty Mystery Mix in Kitchen Compactor
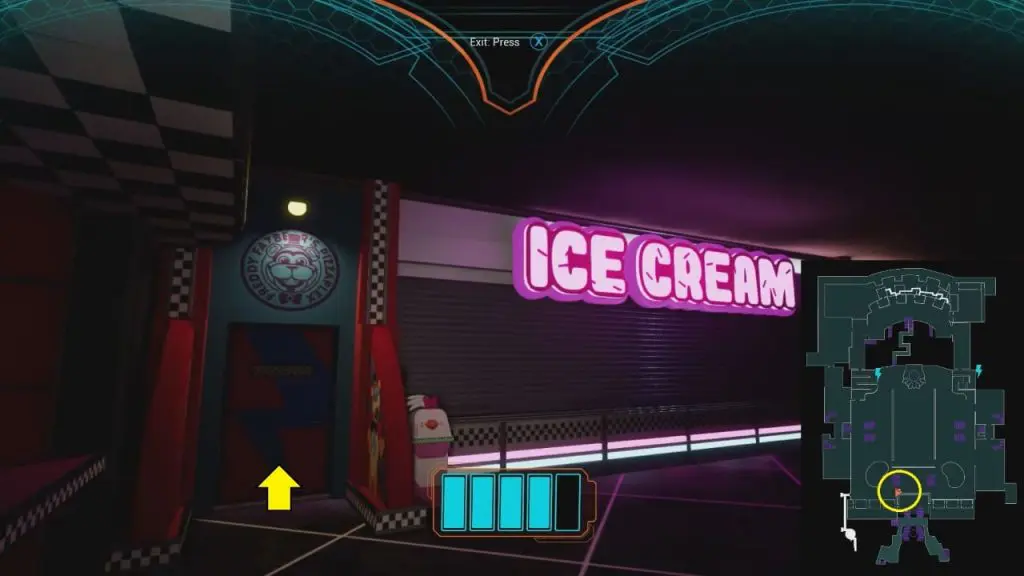
Now, your next goal is to go to the kitchen in Basement-1. Backtrack to level-1, and take the elevator behind the Icecream shop at Level-1. Using the elevator you will reach Basement-1
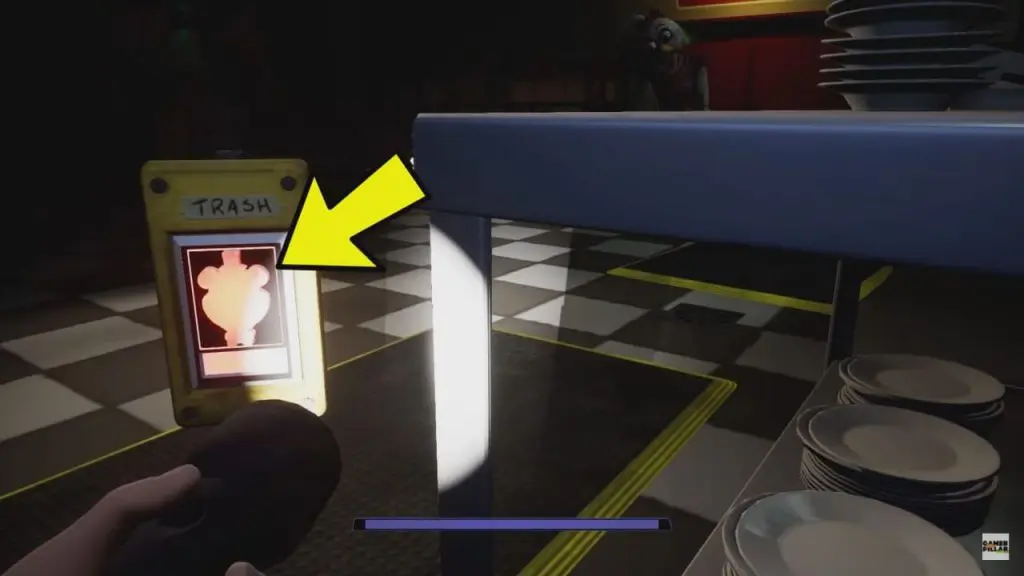
Follow the hallway and then take a right, cross two doors to reach the Trash Compactor location as marked on the map. Get out of Freddy’s suit and Place the Monty Mystery Mix in the Trash Compactor
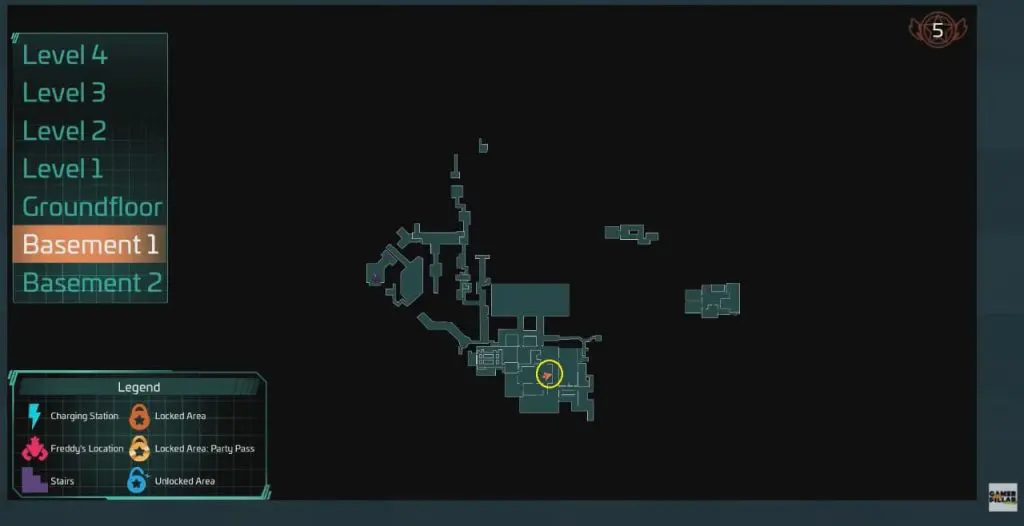
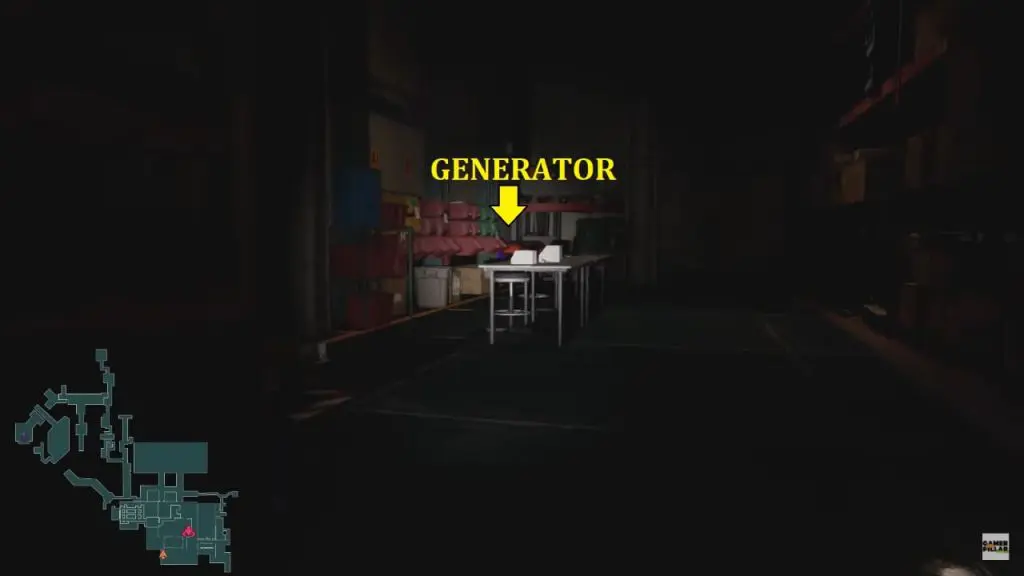
Turn on the generator for the Trash Compactor
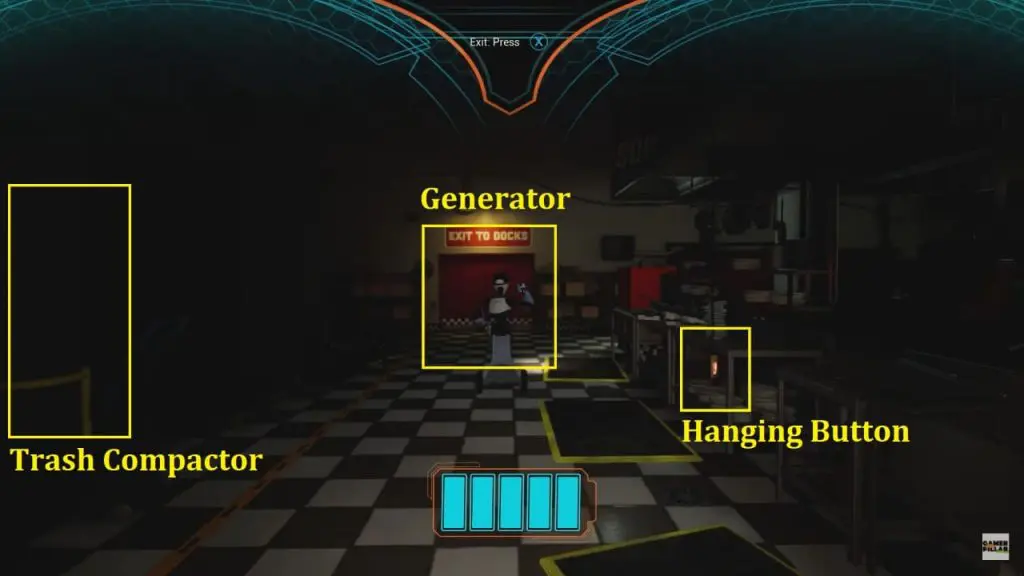
After placing the Monty Mystery Mix on Kitchen Trash Compactor your next goal is to lure Chia. Now, go to the storage room in the back-left door of the Kitchen to switch on the Generator. At this moment Chica will start chasing you. I have marked the generator location below the image.
Sprint back to the Trash Compactor in the kitchen and hide near a metal table. A cut scene starts playing where Chia starts eating the Pizza from the Trash Compactor. Press the button hanging button to crush Chia inside the Trash Compactor. Here Greg also gets pulled down along with Chica.
Get the Voicebox from Chia and Escape
Now, you are in the underground with ruined Chica. Make sure to use the nearby Save Station. Grab Chia’s Voicebox Upgrade.

Chica’s Beak – Turn the generators on (3/3)
After grabbing the voice box, follow the sewer path behind the save point, you’ll find a locked gate with a red button. You need to power on three generators inside the sewer area. You need to find a generator to turn on the power and activate this button. These are three similar gates and generators to switch on.
Generator-1
Follow the sewer path behind the save point to reach the first locked gate. Head to the hallway on the right to reach a big dump area. Keep following the left wall to find the generator-1. After activating the first generator in the large dump, Chica will reappear. Use Fazerblaster to stun Chia and sprint back through the hallway and return to the gate to escape. Refer to below image for reference.


Generator-2
After crossing the gate, carefully walk across the wooden boards. Follow the linear path to reach the second locked door with a red button. Take the left path just before the locked door to reach the generator-2. Follow the Green Powerline to locate the Generator. If Chia reappears use fazerblaster to stun her. After activating the generator-2 Sprint back through the same passage and return to the gate to escape. Refer to below images.

Generator-3
From the earlier locked gate, continue through until you reach the red door with a Save Station behind it. After passing through the second red door, you will be back in the basement. Avoid the security bots and head north. Walk up the ramp to another big area, keep heading north. You will see Chica here. Stun her and turn on the generator-3 next to her. Refer to the below images.

Escape through the door just north of the generator-3 and follow the pathway until you reach the rusty green door. Go upstairs using the green-colored staircase and enter the iron-mesh door, just opposite the recharging station.

This will take you to the kitchen with a few security bots. Pass through the red and blue door as shown in the below image. Turn left and enter the closed blue door on the right (near orange plastic drums), you should be right back to where you left Freddy. Now Backtrack tour way back to the Level-1. Refer to the below image for reference.


Upgrade Feddy in Parts and Service
From Level-1, push the button on the main stage and this will take you down to Basement-2. Enter the door with the B2 sign and sprint towards the two red doors. This will lead you to Parts and Services.


Use the computer in the middle of the room and select “Voicebox upgrade”. Head inside the protective cylinder room and follow the steps correctly to upgrade Freddy’s Voicebox. It is important that you match the color pattern correctly to complete the upgrade. Now come out of the protective room and select the “Finish Upgrade” option on the computer. This will complete the mission.

