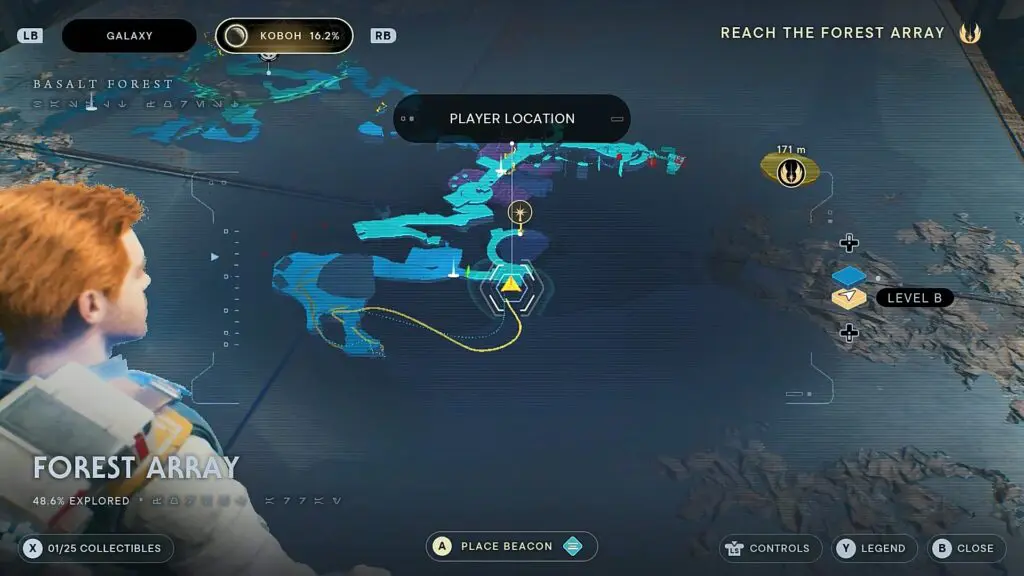
Reach the Forest Array
This guide shows how to complete the “Reach the Forest Array” objective in Star Wars Jedi: Survivor game, which released on 28th April 2023. You will get this objective as you open the forest gate. The video walkthrough is also posted below.
Also Read: Chamber of Reason Walkthrough
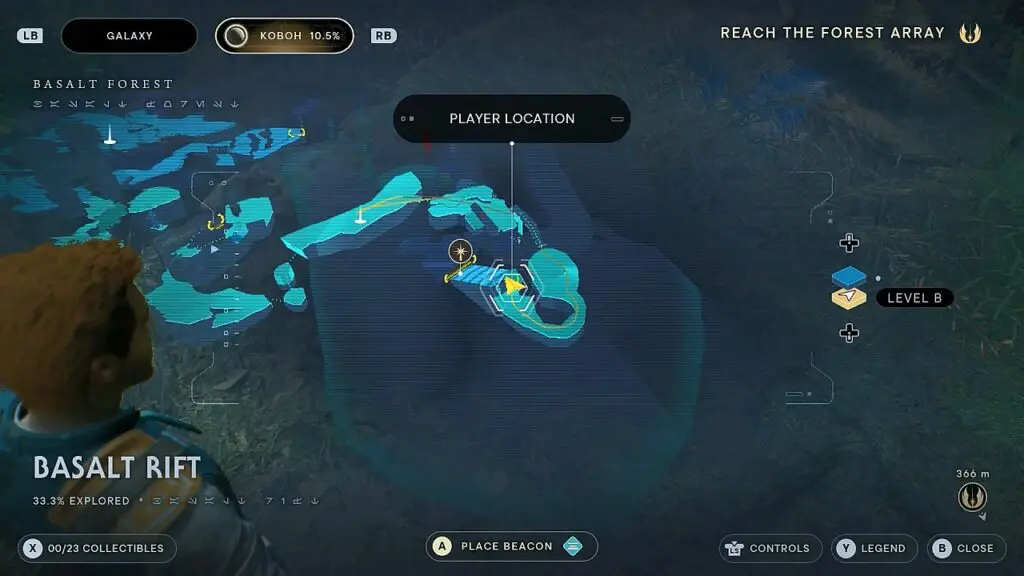
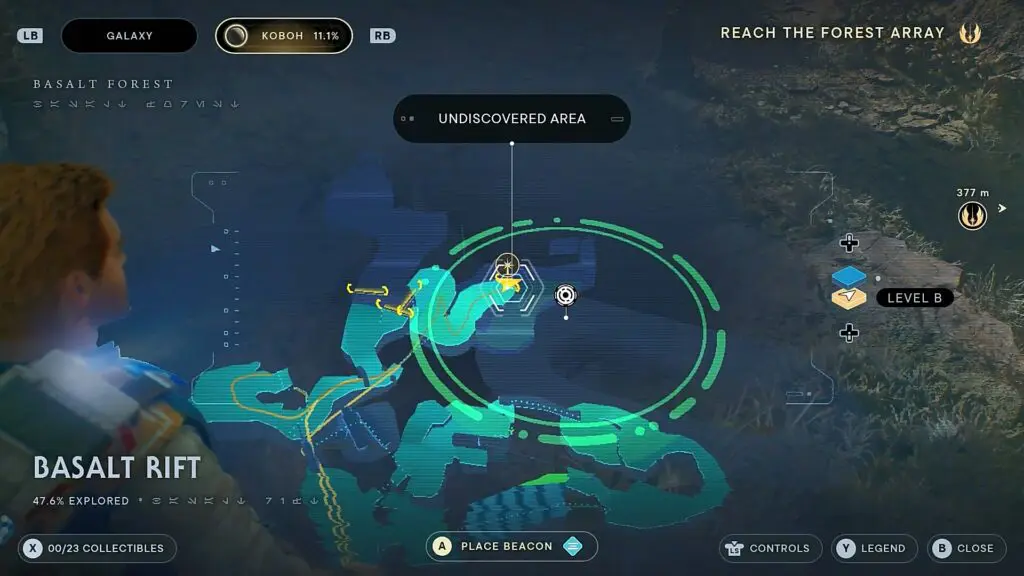
Basalt Rift
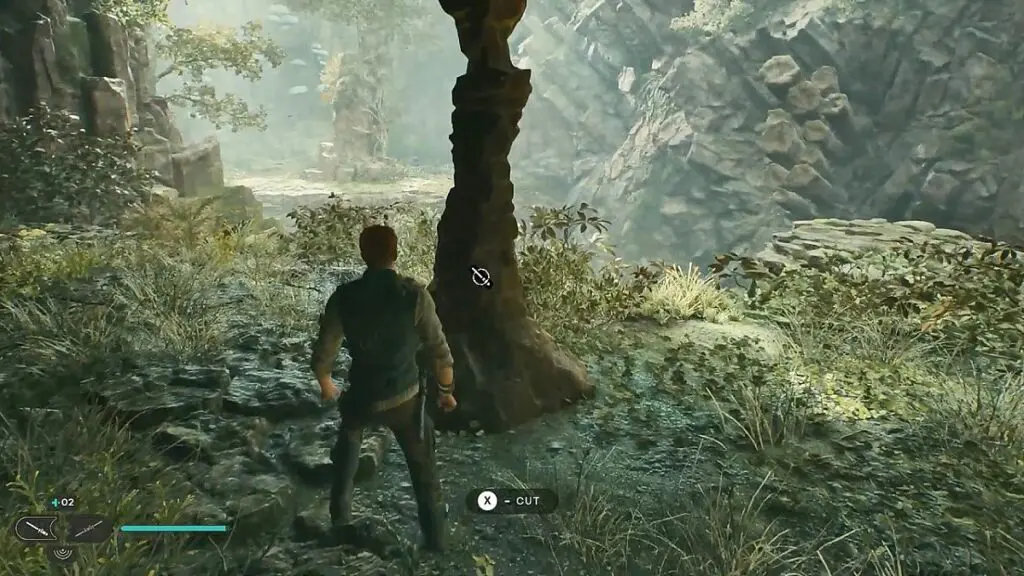
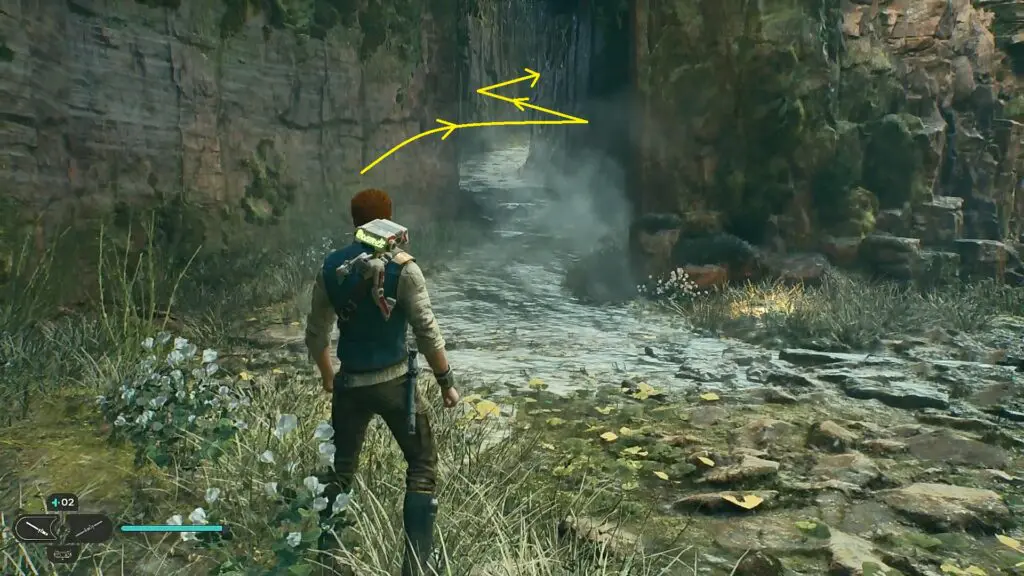
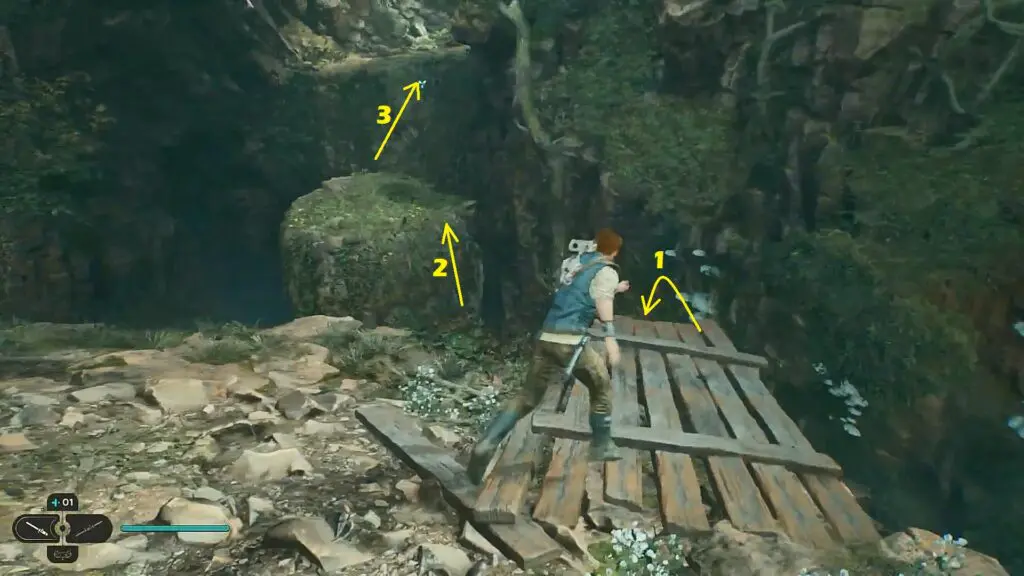
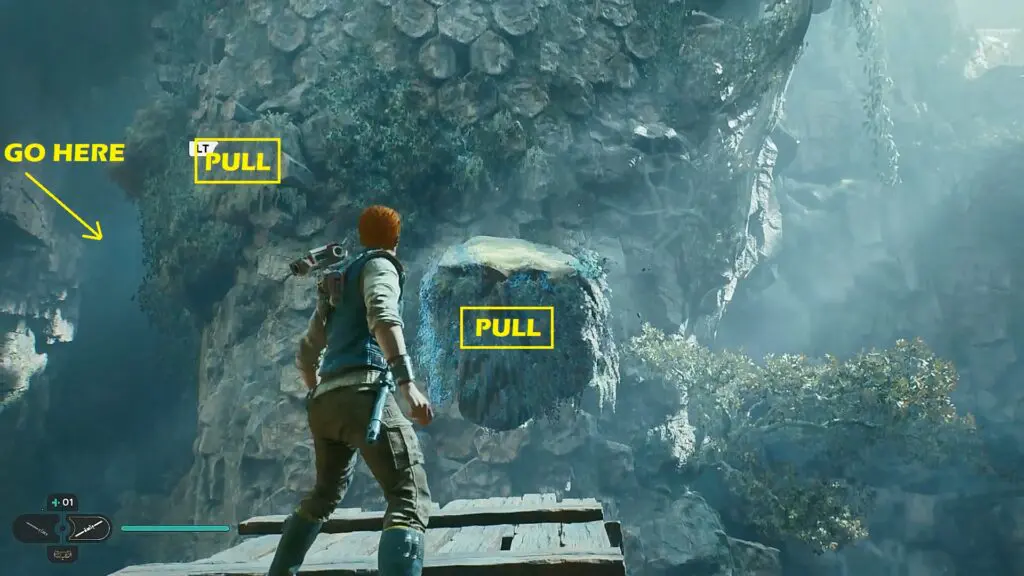
After opening the forest gate, proceed straight ahead to enter the Basalt rift. There you will find a zipline terminal, but the path of the zipline will be blocked. Run on the wall behind the waterfall on the left side. then break the pillar as shown in the picture below. This will create a path to the pedestal at the center. Go to the pedestal and push the stones inside as shown in the second picture below. This will clear the path of the zipline. Command BD to activate the zipline and take it to reach the other side.

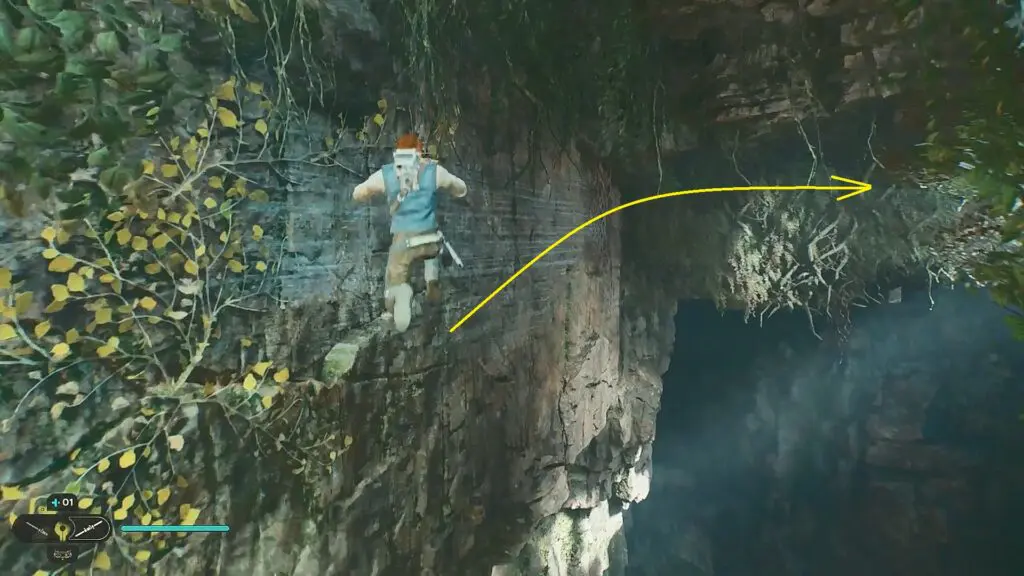
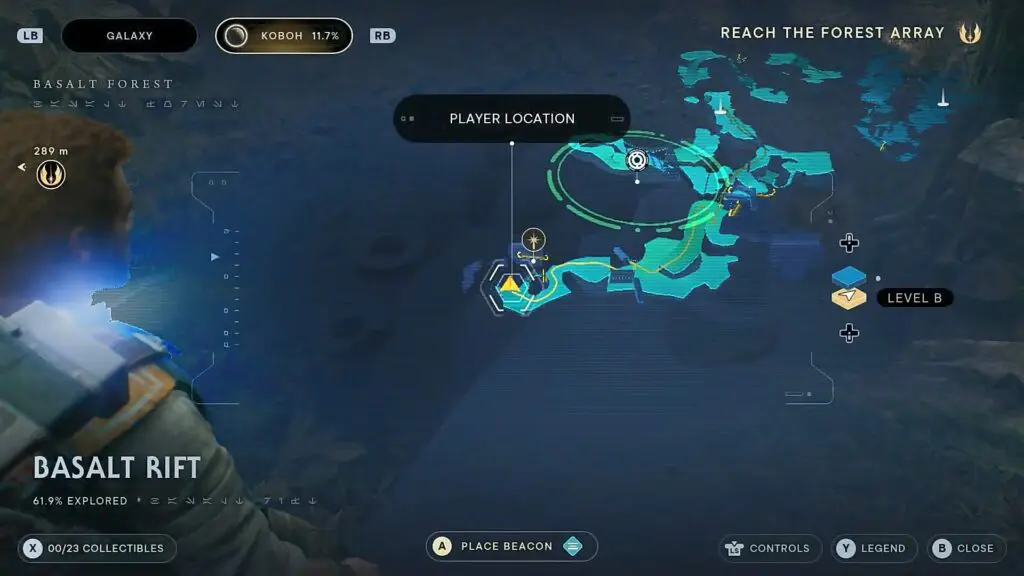
After dropping from the zipline, you will be at the location shown in the picture below. Turn right and run on the walls as shown in the second picture below to proceed ahead.
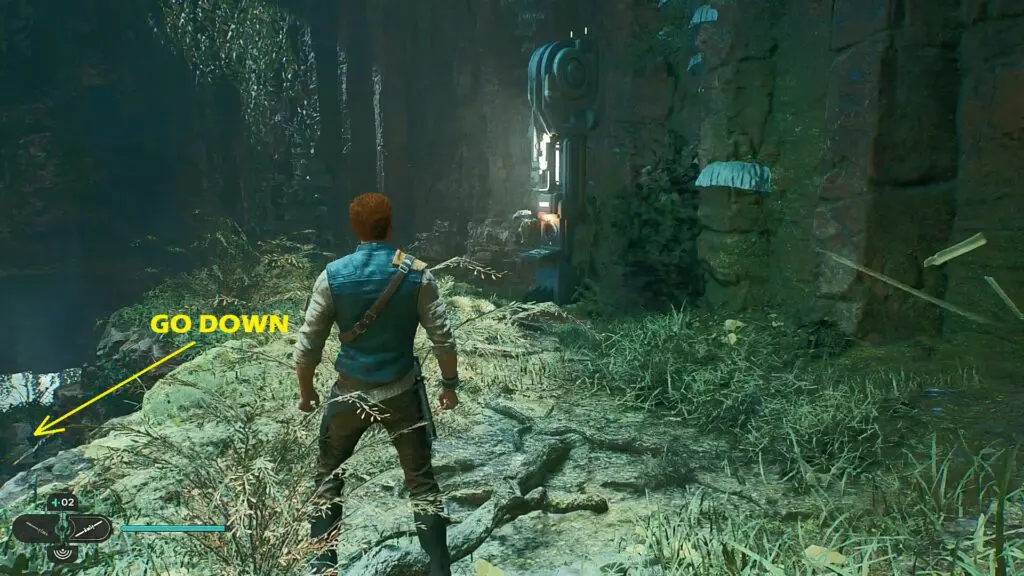
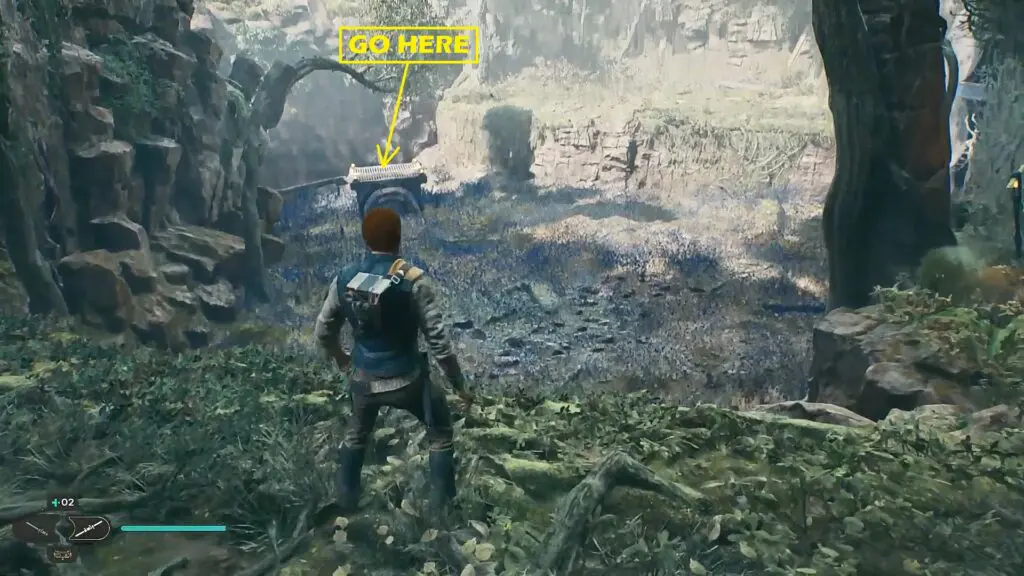
Squeeze through the walls to reach the location shown in the picture below. Then turn left and take the path going down. When you reach the edge of the ground, jump down to the surface below. then climb up the vines and then grapple to the other side as shown in the second picture below.

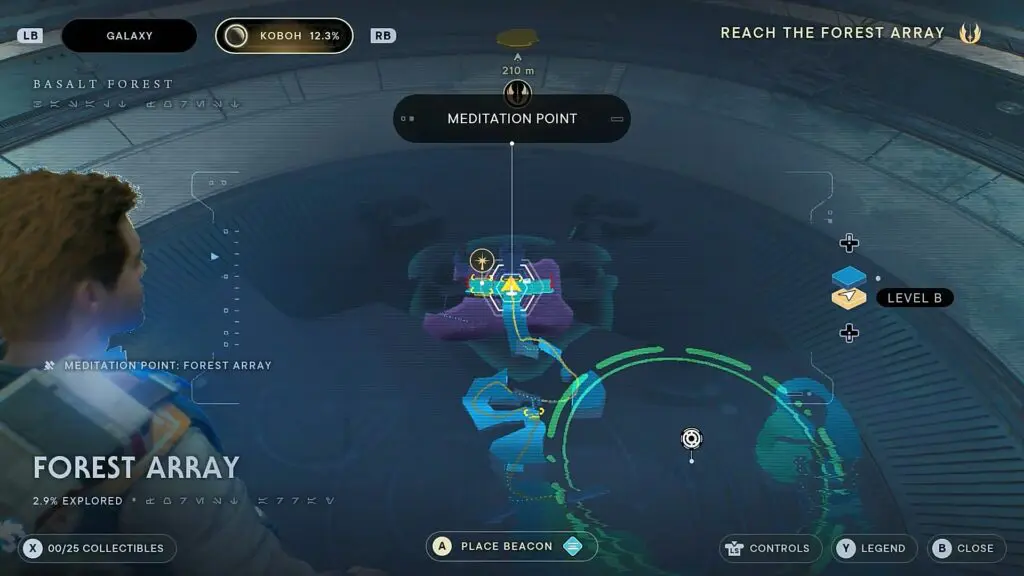
As you proceed, you will reach the Basalt Rift meditation point. Continue head, jump across the gap, and then enter the cave on the right side. Defeat the enemies inside the cave. Exit the cave from the other side to reach the location shown in the pictures below. Here, you can use the zipline terminal to open a shortcut but don’t take it. Jump down the slope instead.
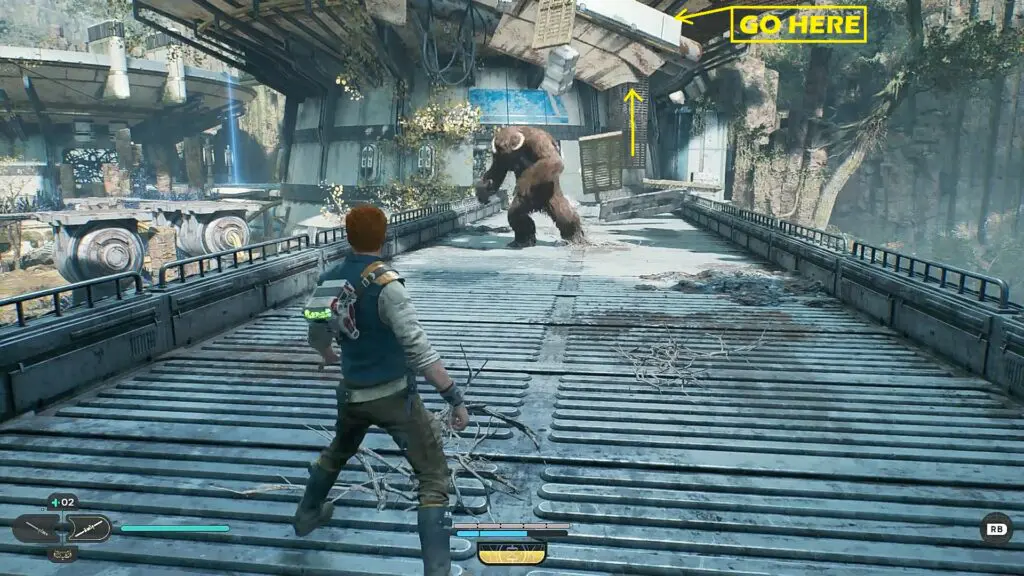
After you come down from the slope, you will be attacked by a monster as shown in the picture below. Defeat it and then go right.

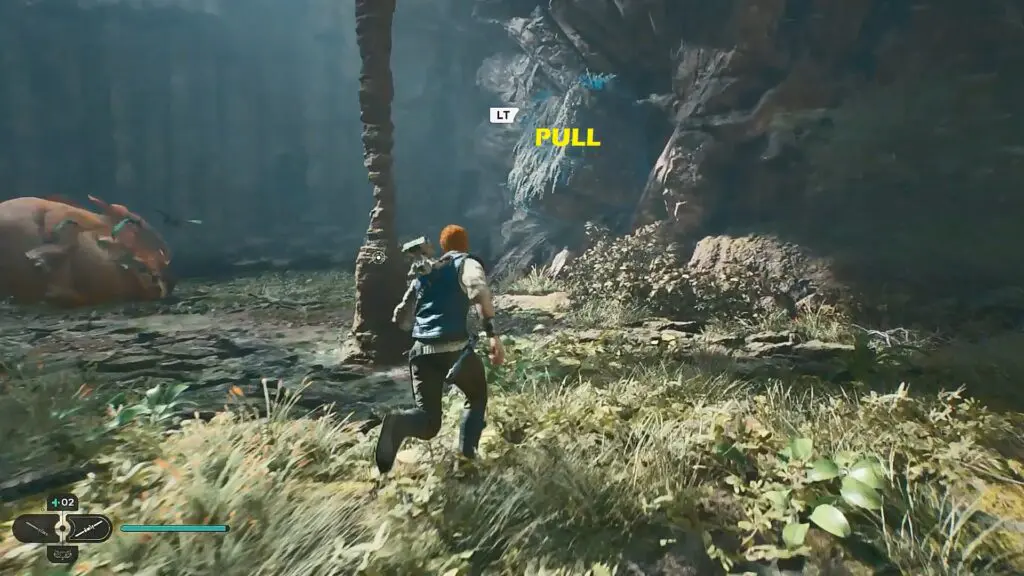
Stand at the edge of the ground and pull out the pillar from the mountain wall as shown in the picture below. Jump on the pillar and pull out another pillar as shown below. Jump on it and pull out the third pillar. Jump on the pillar. Then run on the wall ahead and grab the vines at the end as shown in the second picture below. Climb up the vines to reach the top. there you will find an NPC named TOA at the location shown in the third picture below.
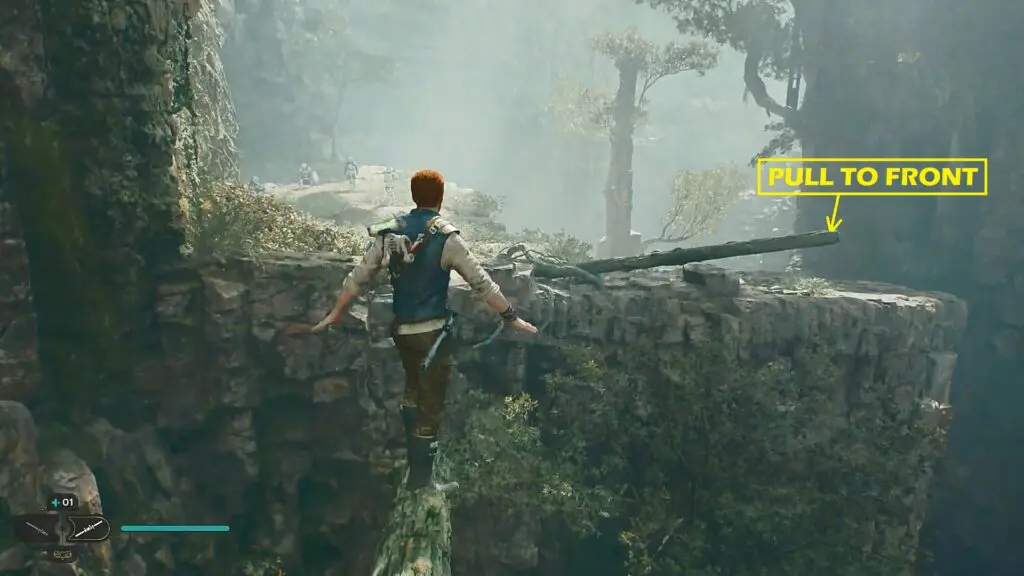
After talking to TOA, proceed ahead and go through the arch on the left side. Stand on the tree branch ahead and pull another tree branch to your front as shown in the picture below. This will help you cross the gap. Then defeat the enemies there.
Take the path going down and you will reach a giant monster at the location shown in the picture below. Pull out the pillar from the mountain wall as shown in the second picture below and climb on it. Go to its edge and pull out another pillar in front of it. Climp on the pillar. Then run on the wall and grab the vines at the end.
Climb up the vines and proceed ahead to reach the location shown in the pictures below. Grab the vines on the roof on the right side of the area. Proceed ahead and grab the vines on the wall. Then grab the beam to reach the other side. From there, make your way to the platform as shown in the second picture below. Then run on the walls and drop down to reach the Forest Array Meditation Point.
Forest Array
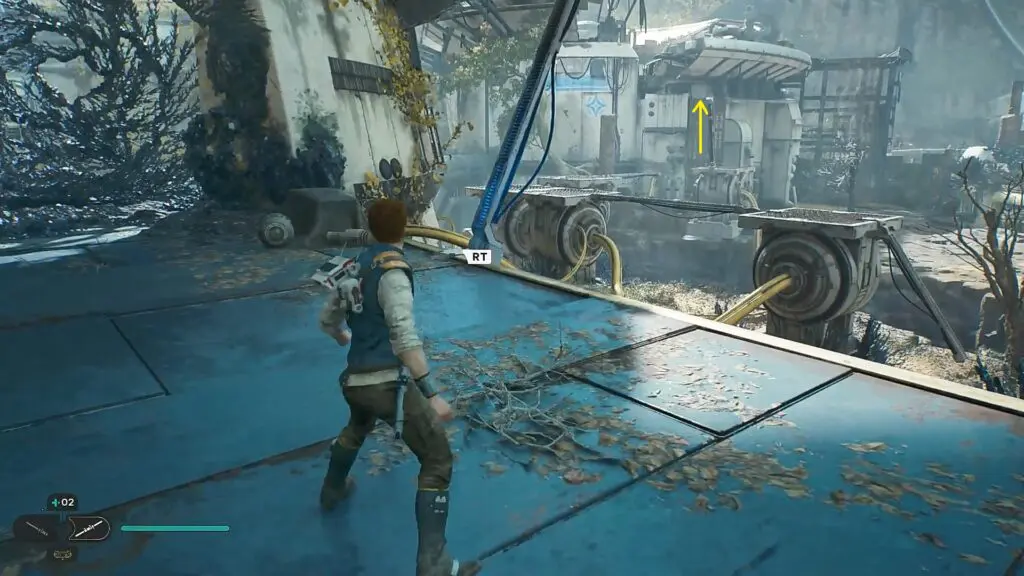
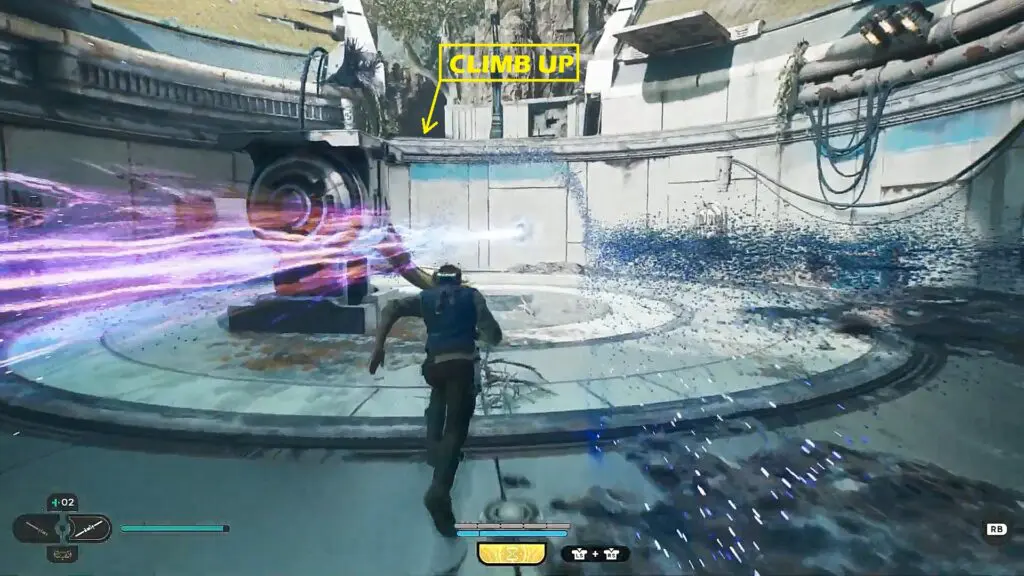
Push down the beam near the Forest Array meditation point and use it to reach the platform ahead. Continue on the platforms to the last one. Then climb up the wall grating ahead as shown in the second picture below.
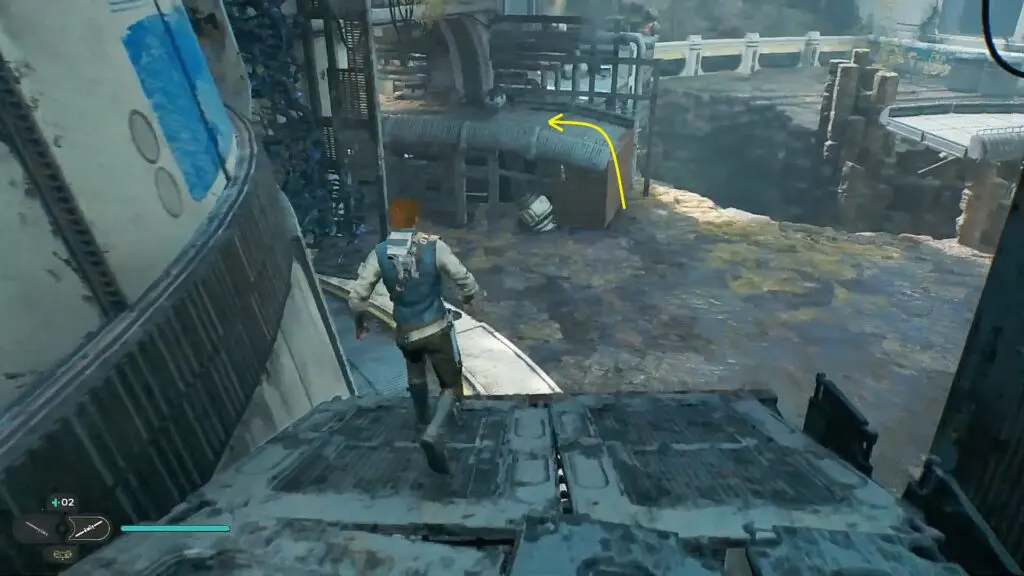
Climb to the top of the wall grating. Then grab the ledge and keep moving right. Grab another wall grating at the end and climb to the upper level. You will now see a giant bird ahead. Go left and then go down the ramp on the right side. Then jump down to the ground ahead and use the wall grating to climb up the platform as shown in the picture below. Proceed ahead and run on the wall to reach the location shown in the second picture below.
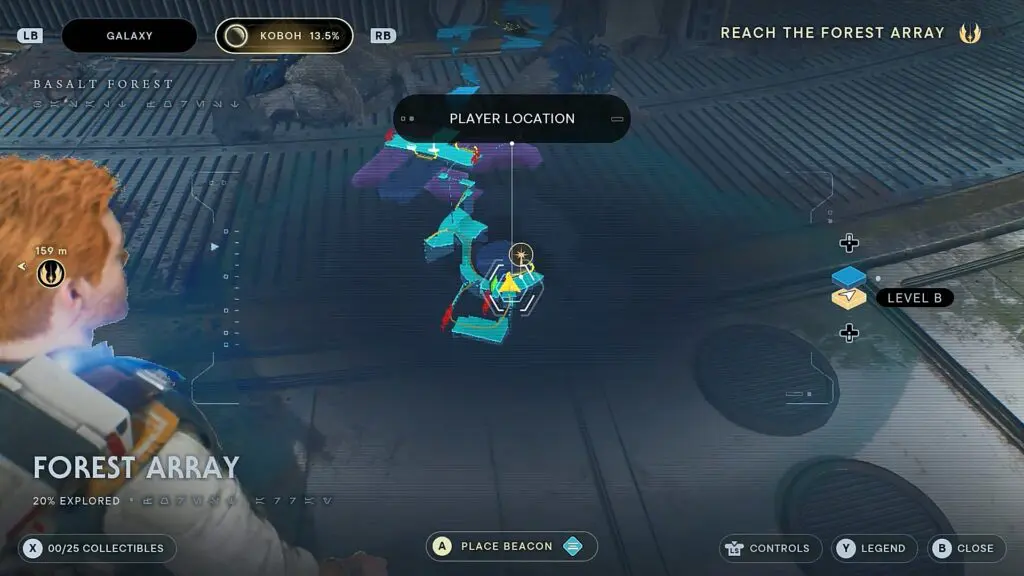
Continue ahead and you will be attacked by a giant monster as shown in the picture below. Defeat it and climb up the wall grating behind it. Then grab the grating on the roof and move ahead. When you reach the end, jump down on the broken roof as shown in the picture below.
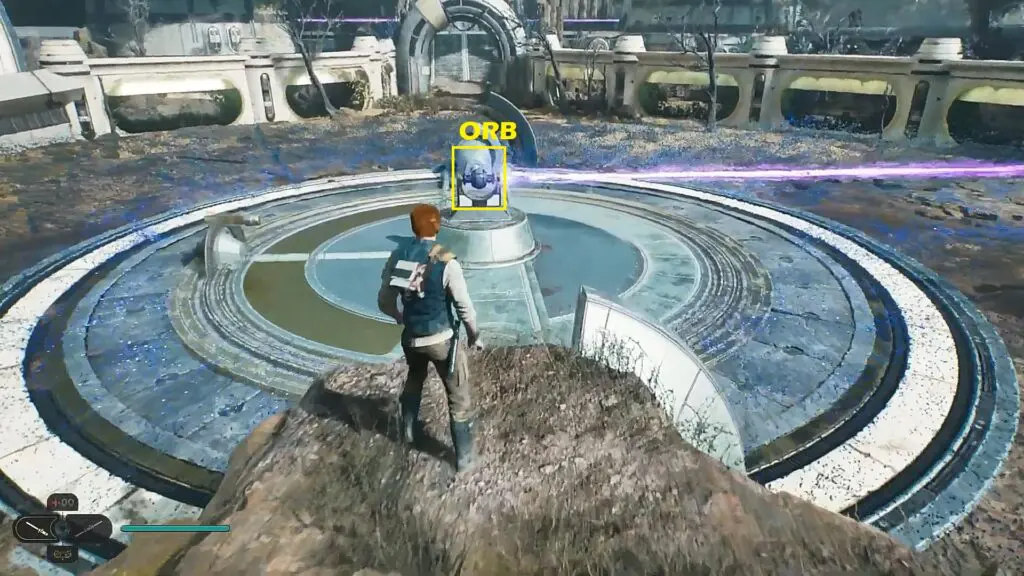
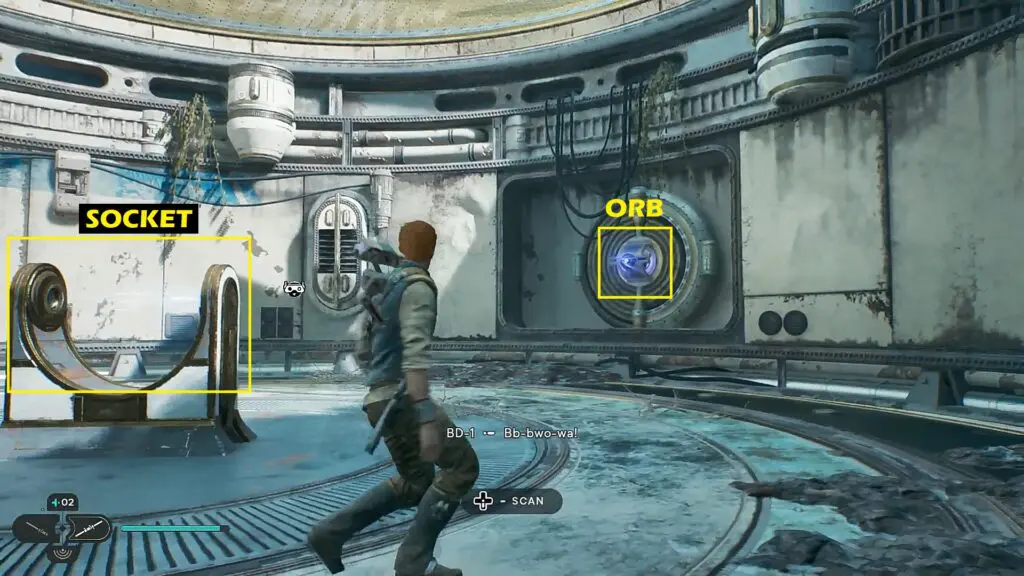
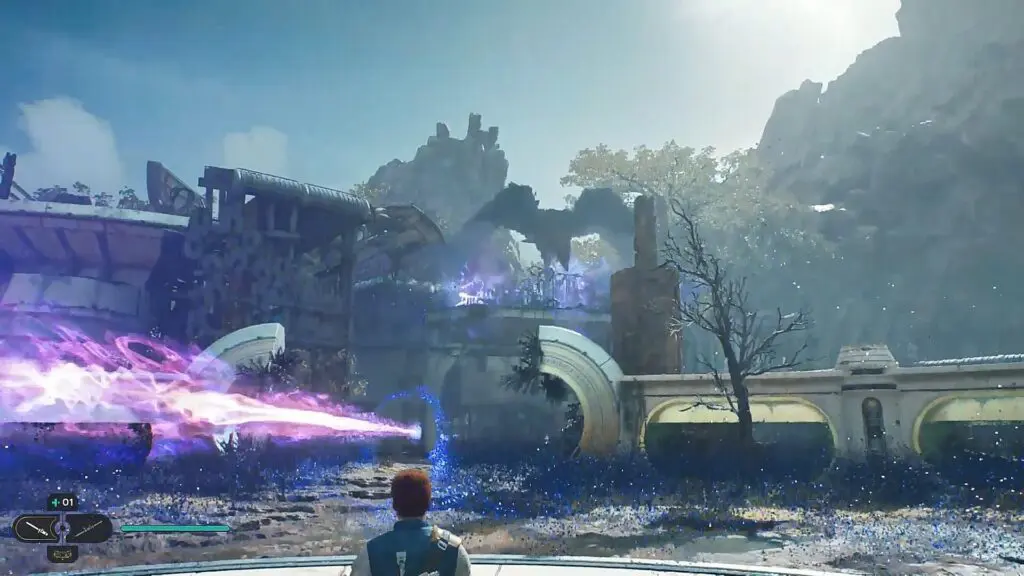
Climb up the roof and then jump at the area below. There you will find an orb and a socket. Insert the orb into the socket. This will make rays come out, clearing the path. This will lead you back to the Forest Array meditation point.
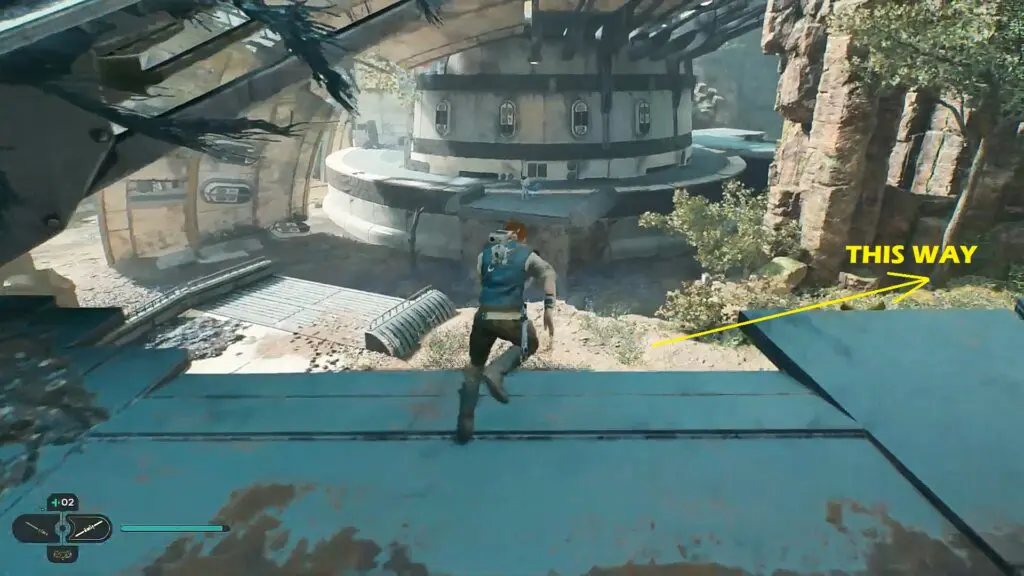
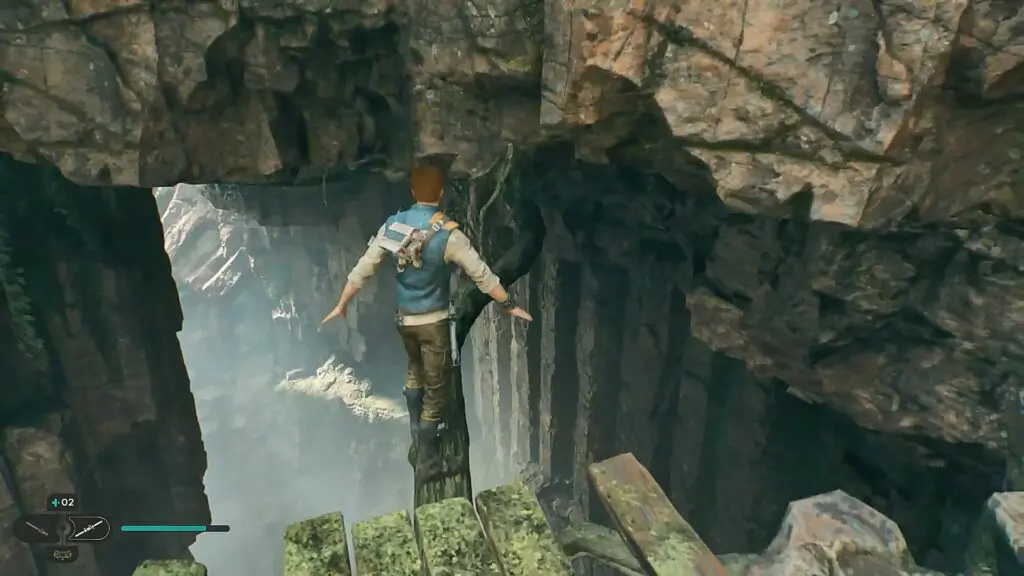
Follow the ray and it will lead you to another room. Parkour to climb to the top as shown in the picture below. Then drop down and take the path going right as shown in the second picture below.
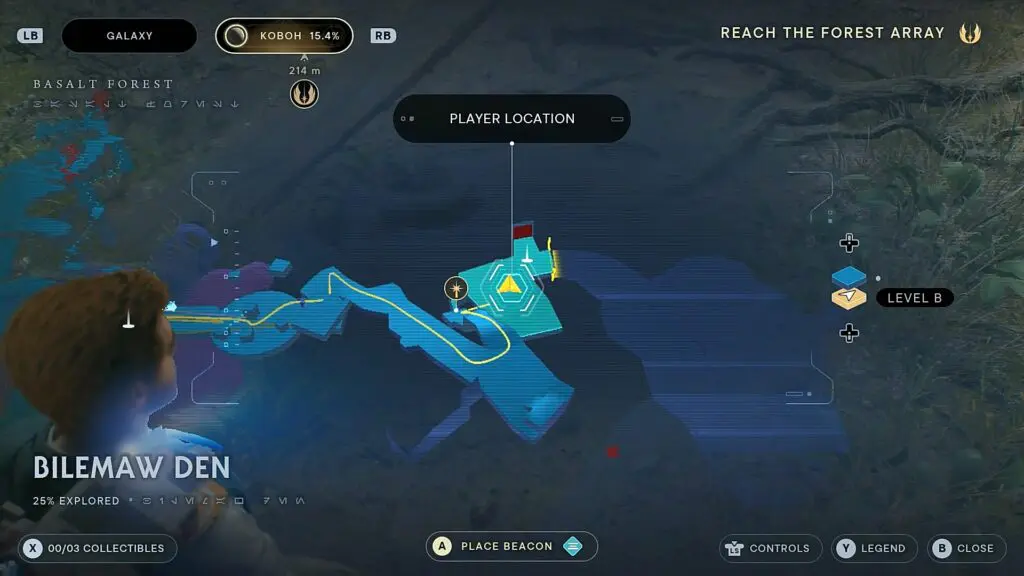
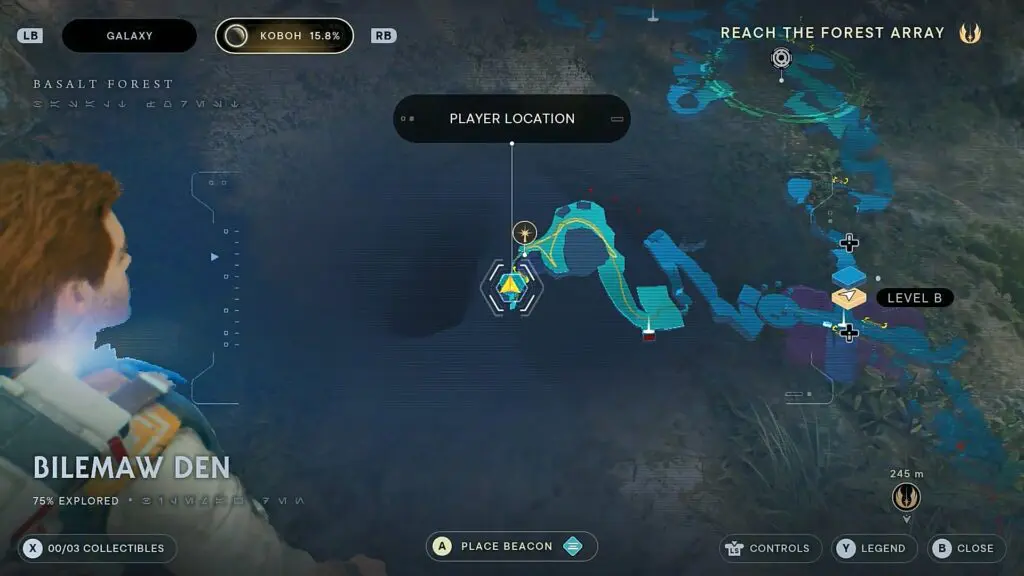
Go all the way to the top. Then turn around and take the path going down. Drop down and squeeze through the walls to reach the Bilemaw Den meditation point as shown in the picture below.
From the Bilemaw Den meditation point, take the path going up. defeat the enemies there and continue ahead. Soon you will reach a tree branch as shown in the picture below. Stand on the tree branch. Then drop down and grab it with your hand. Move ahead and climb back up on the branch. Grab the vines on the roof to move ahead. Then grab the vines on the walls and climb to the top to reach the location as shown in the second picture below.
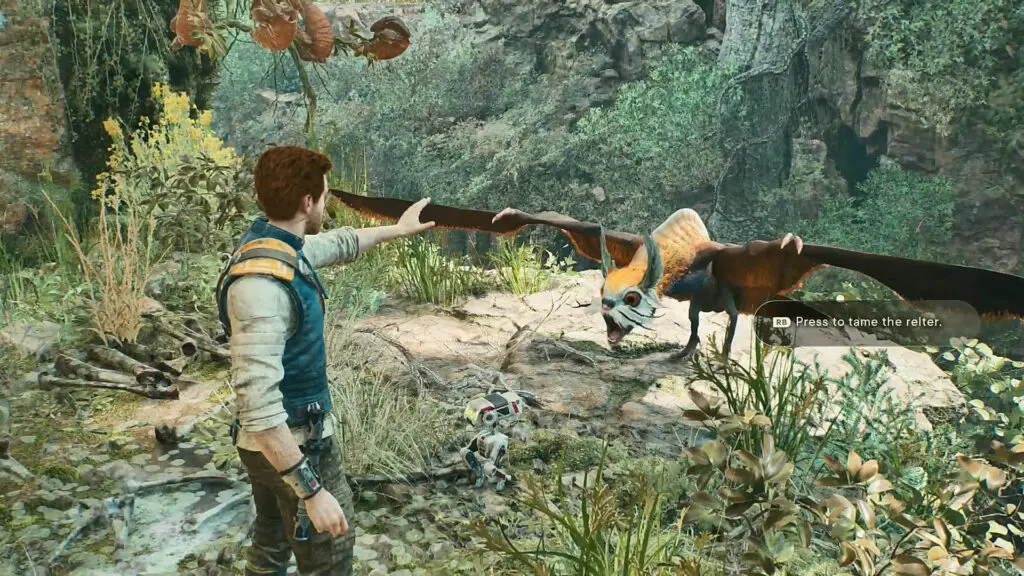
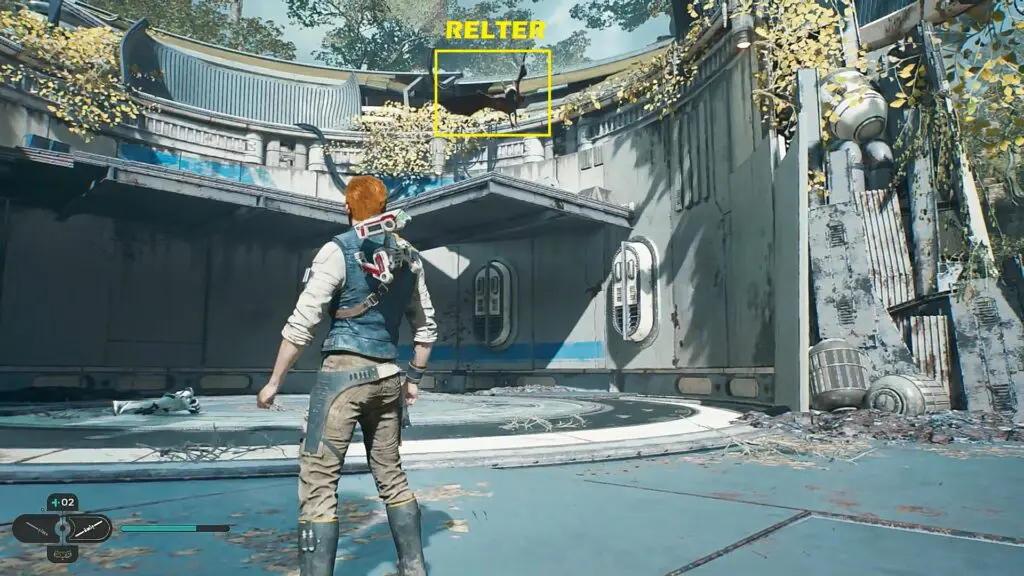
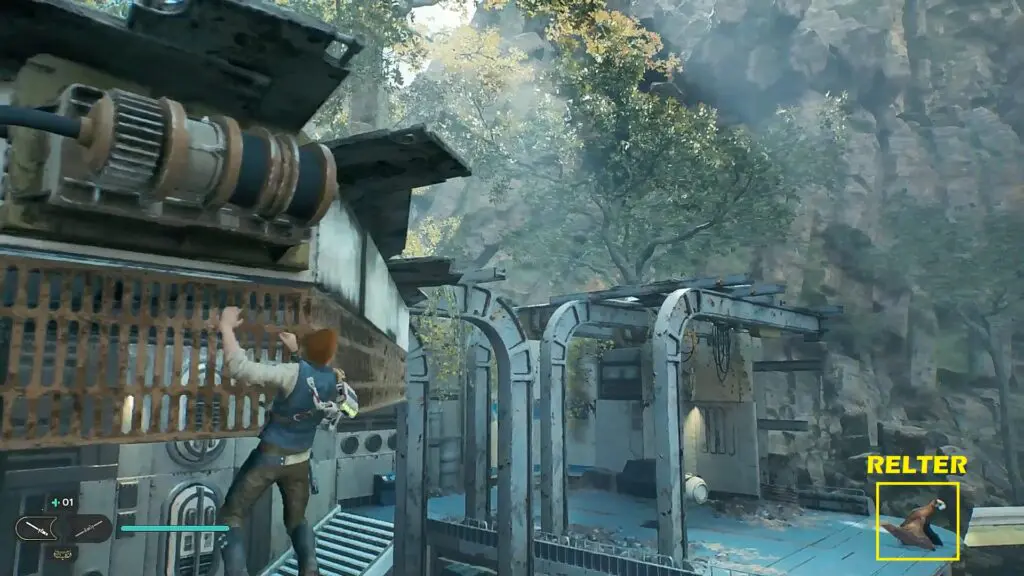
Climb up the wall ahead and you will encounter a Relter as shown in the picture below. Tame it and use it to glide between the mountains to reach the location shown in the second and third pictures below.

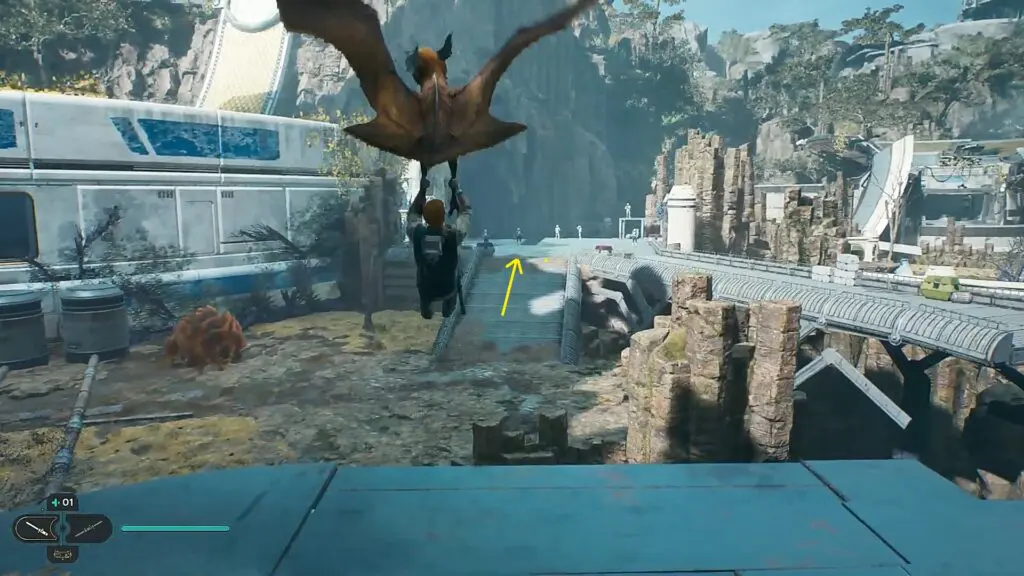
Continue ahead and defeat the enemies inside the ruined structure. Then climb to the top to reach the Relter as shown in the picture below. Use the Relter to reach the Orb Coupler as shown in the second picture below.

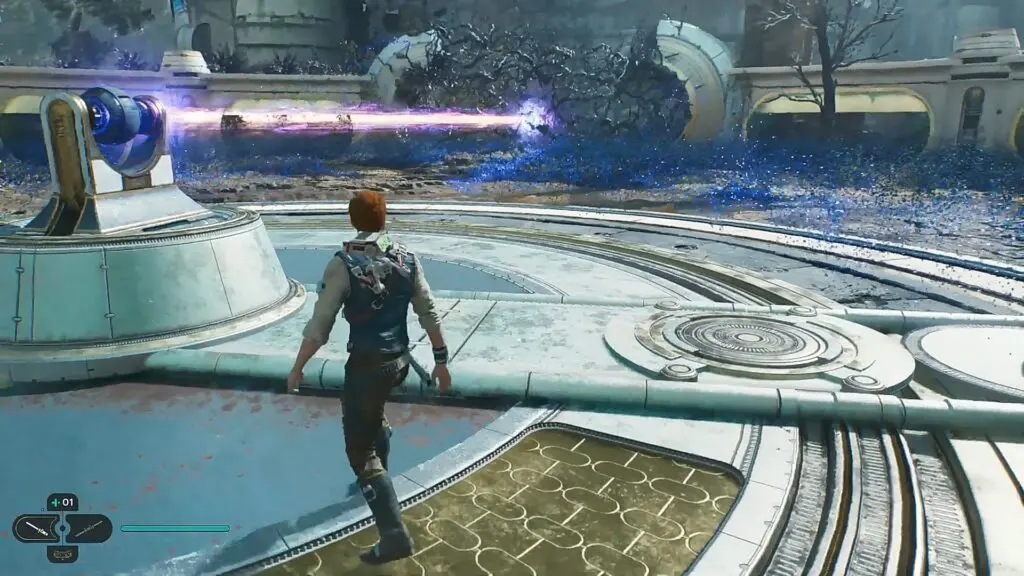
Defeat the enemies near the Orb Coupler. Hit the switch twice to make the Orb Coupler face towards the blocked path as shown in the pictures below. This will clear the blockage and free the giant bird.
Proceed ahead into the cleared path and climb up the wall grating. When you reach the top, keep moving right till the end. Then drop down and go to the Relter as shown in the pictures below. Use it to reach the enemies ahead.
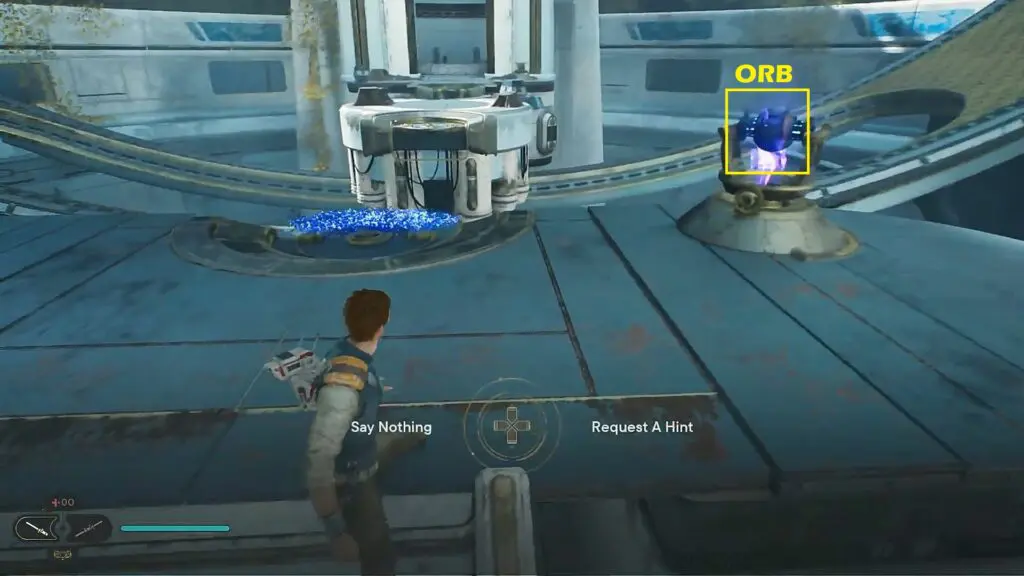
Defeat the enemies and open the gate on the right side. This will lead you to the Orb Coupler. Take out the orb from the socket as shown in the picture below. Turn around and climb up the stairs ahead. Insert the orb into the socket as shown in the second picture below. This will activate the bridge. Cross the bridge, then turn around and take out the orb from the socket. Then insert the orb into the final socket as shown in the third picture below. This will activate the final bridge. Cross the bridge and enter the building ahead (Rehabilitation Wing). Go to the top to complete the objective.