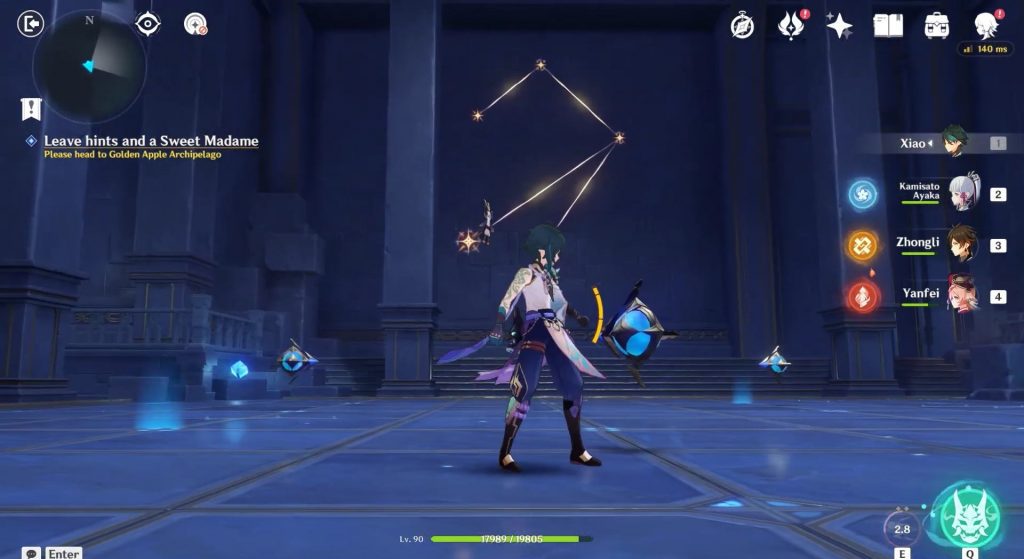
This guide shows how to get all the chests and how to solve all the Puzzles in the Mona Domain in Genshin Impact 2.8 Summertime Odyssey event, which started on 15th July 2022 and will end on 24th August 2022.
Behind Door 1
Door 1 can be recognized by the pattern drawn on it as shown in the picture below. If you don’t know how to open this door, then please check our full guide for The Ancient Azure Stars story quest.
Puzzle 1 (Exquisite Chest)
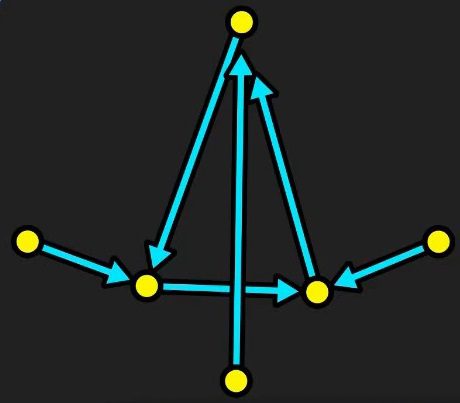
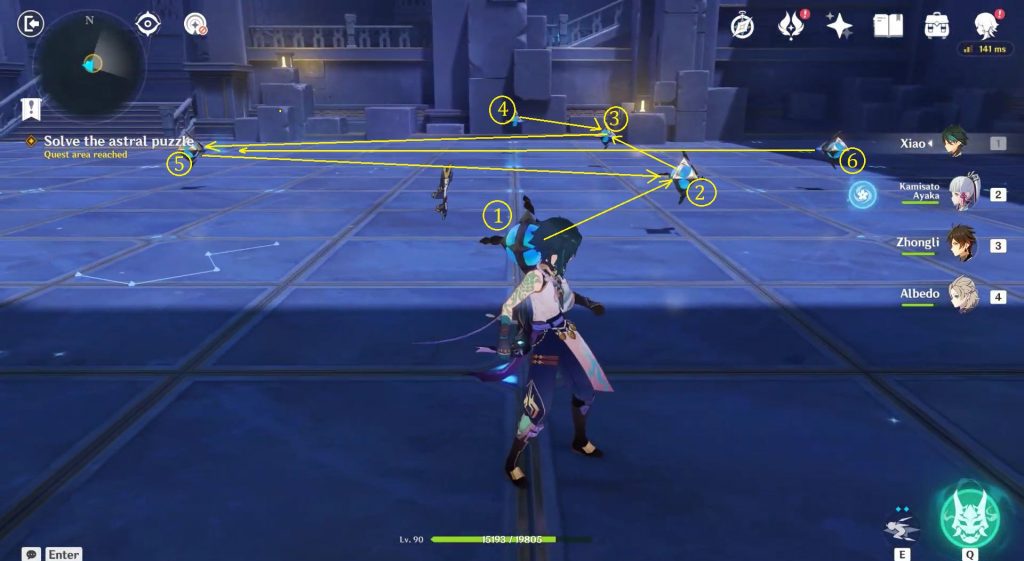
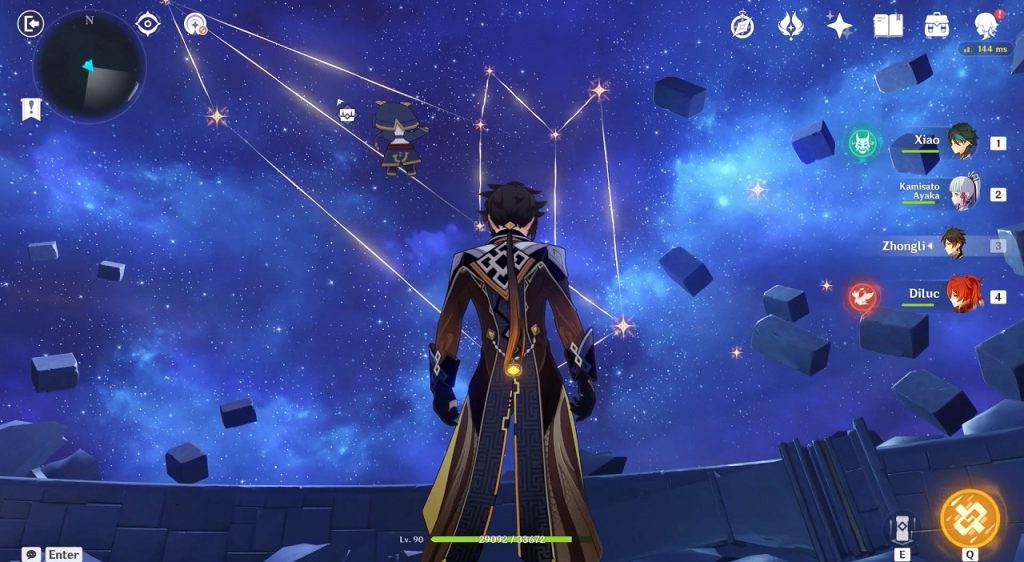
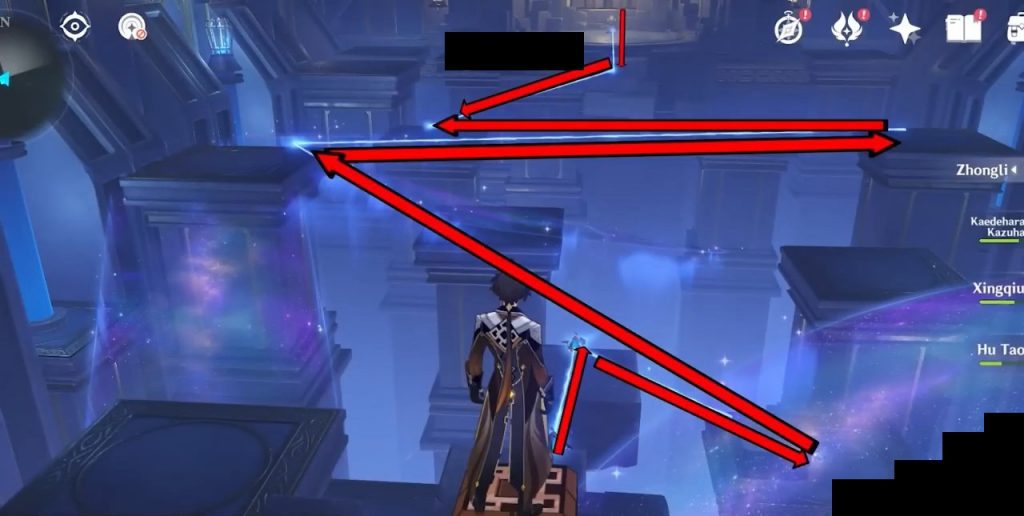
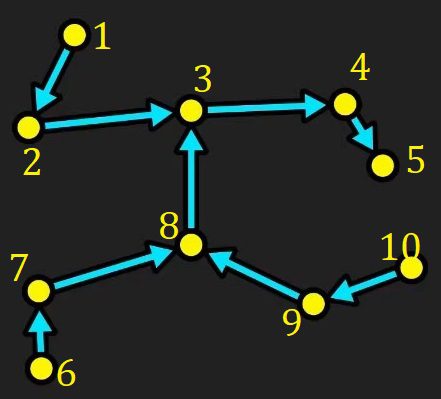
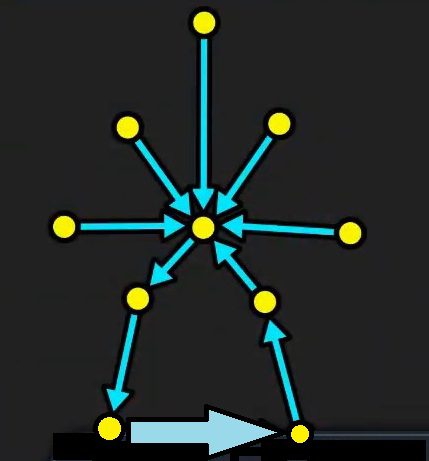
To solve the puzzle, you need to link the Star Guides in a specific pattern. The pattern that you need to form can be seen by looking up in the sky. The picture below shows the pattern for the first Astral Puzzle that you will encounter in the game. I have numbered the stars in the picture below to help you better understand the solution for this specific puzzle. On solving the puzzle, an Exquisite Chest will spawn.
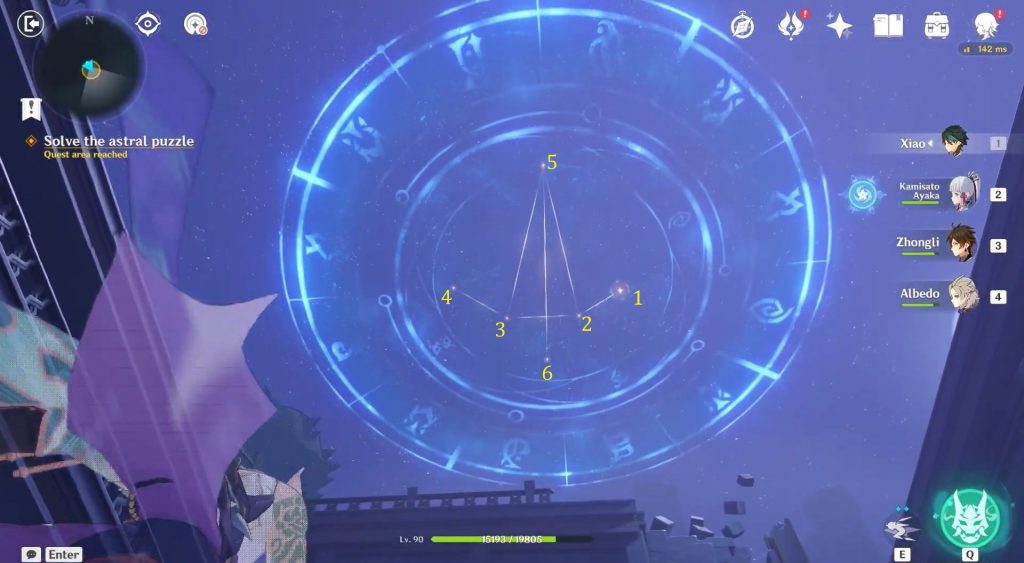
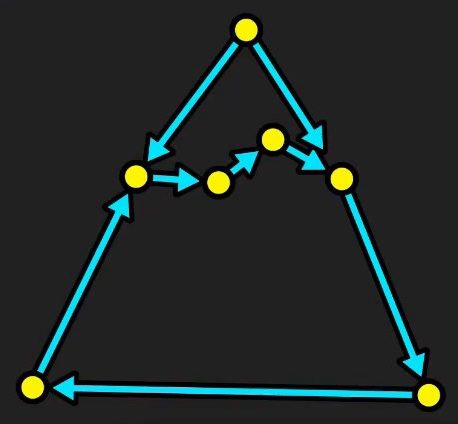
Link the star guides as shown in the picture below to solve the puzzle. I have numbered the Star guides to help you better understand the solution.
Link Star Guide #1 to Star Guide #2
Link Star Guide #2 to Star Guide #3
Link Star Guide #3 to Star Guide #5
Link Star Guide #4 to Star Guide #3
Link Star Guide #5 to Star Guide #2
Link Star Guide #6 to Star Guide #5
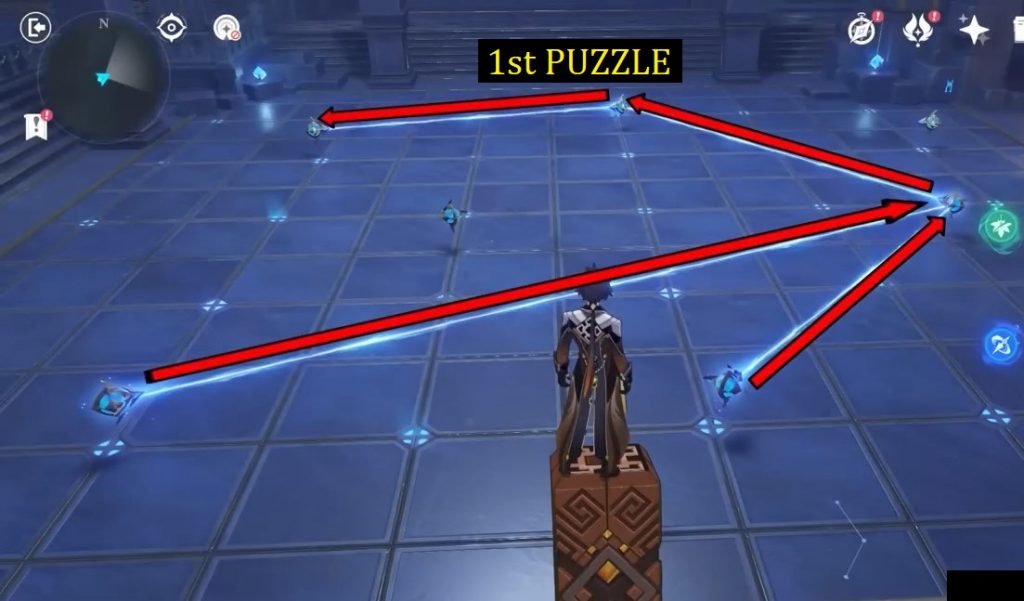
Puzzle 2 (Set of 3 Puzzles) (Exquisite Chest)
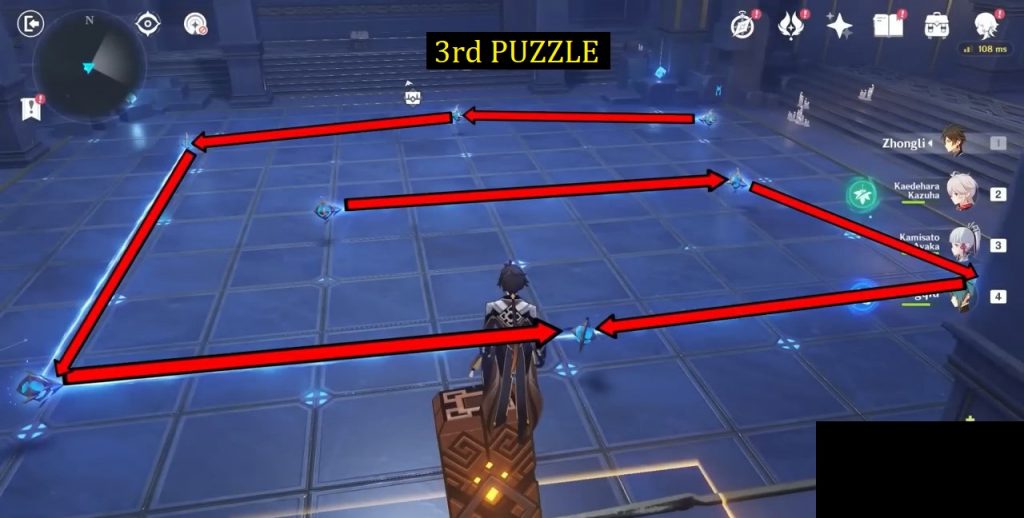
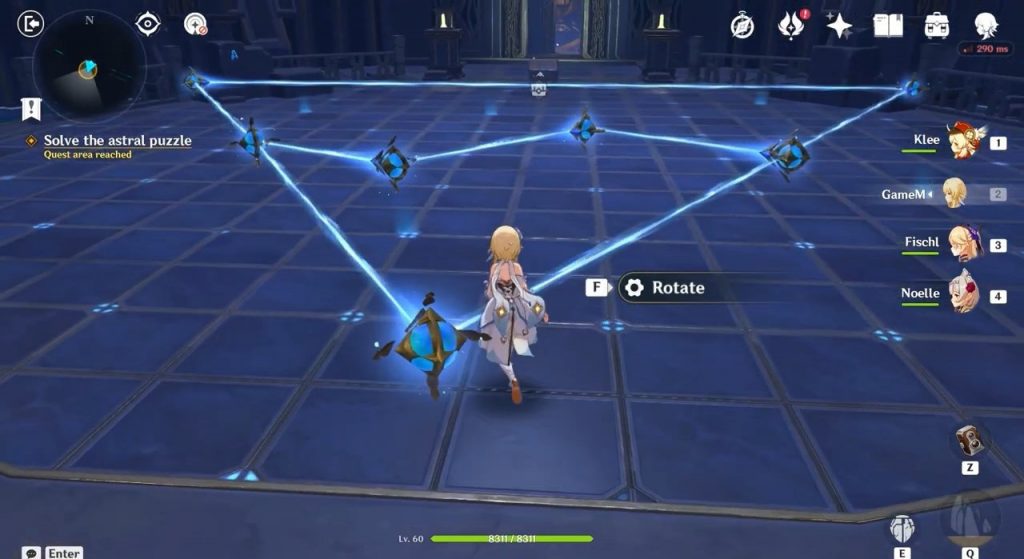
Proceed ahead until you reach an area with translucent bridges. Cross the translucent bridges to reach the next area. In the new area, you will have to solve another Astral puzzle. Input the three correct patterns that appear on the wall in order for the wall constellation to change to an arrow pattern.
1st Puzzle
2nd Puzzle
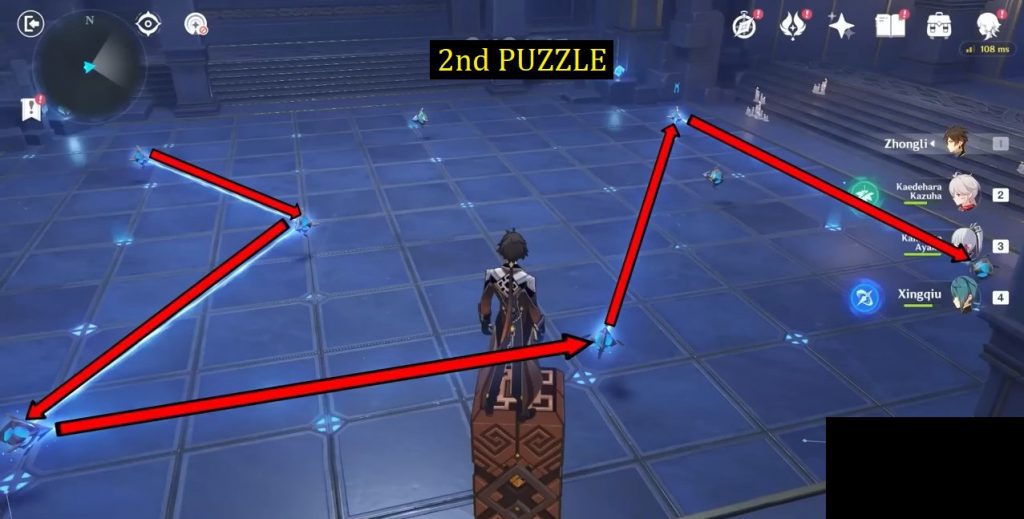
3rd Puzzle

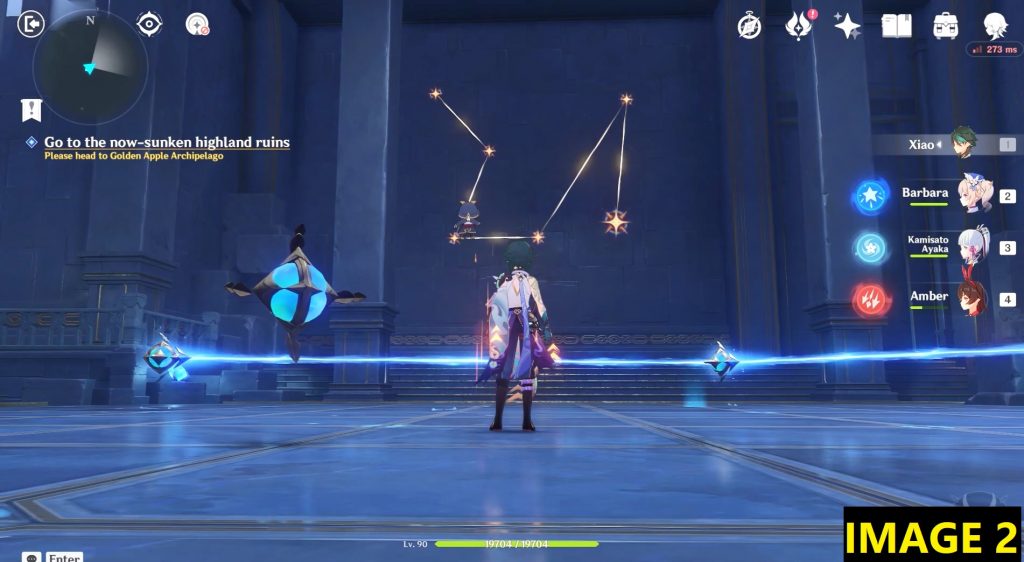
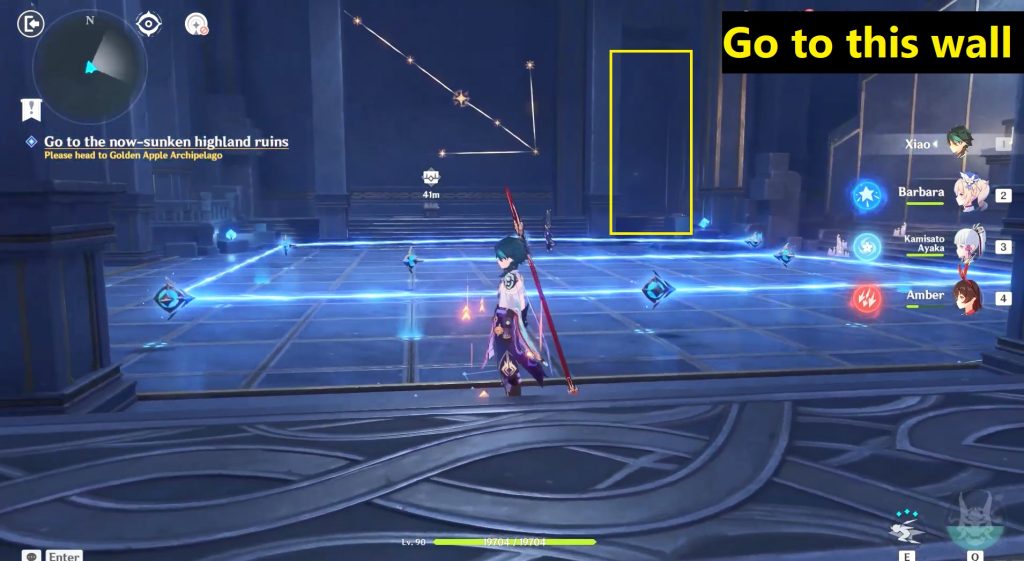
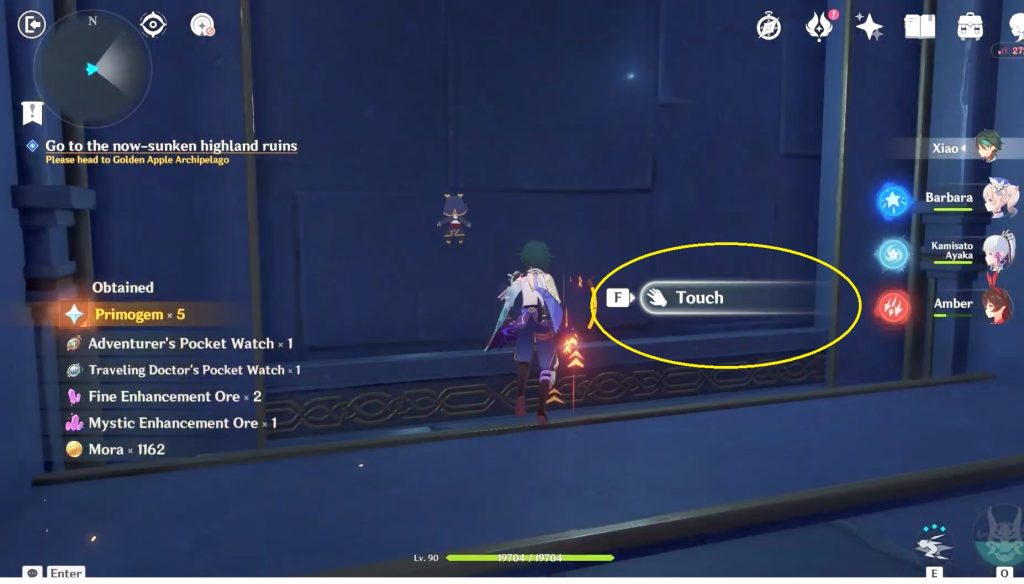
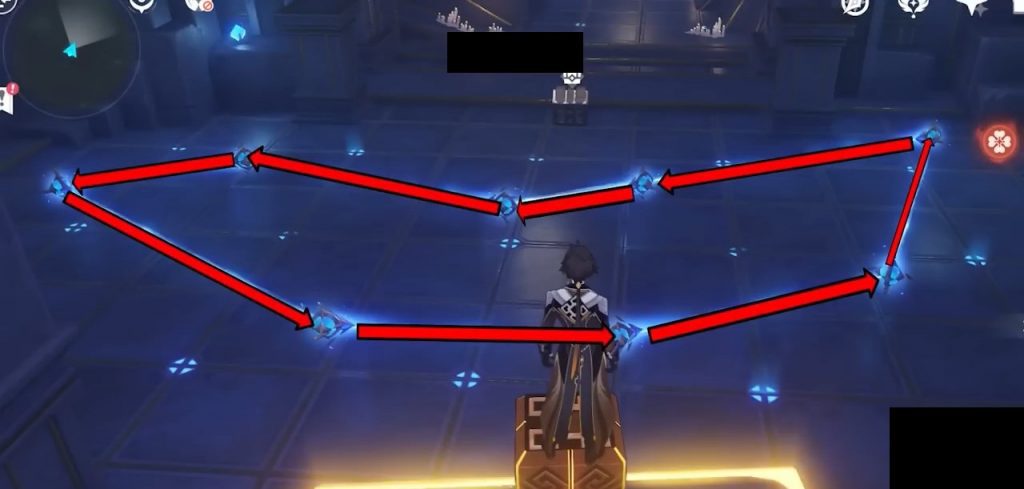
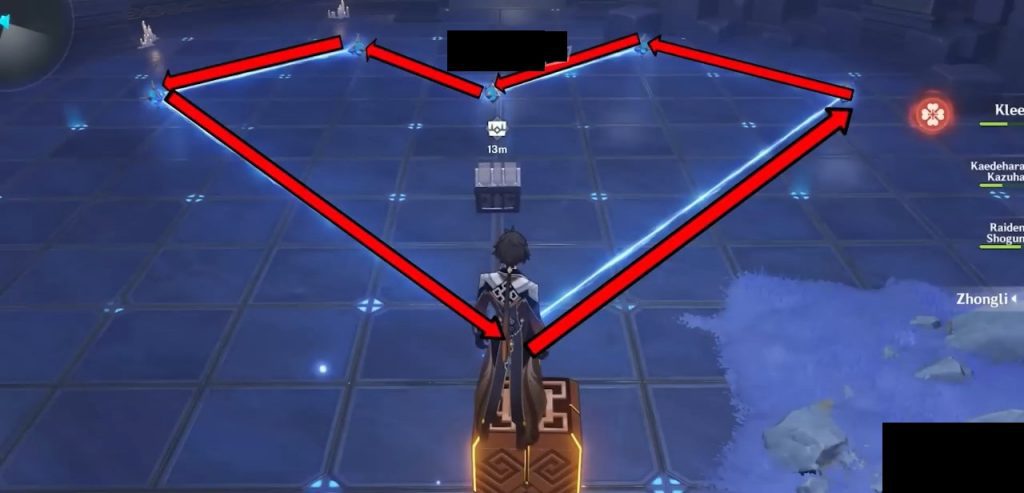
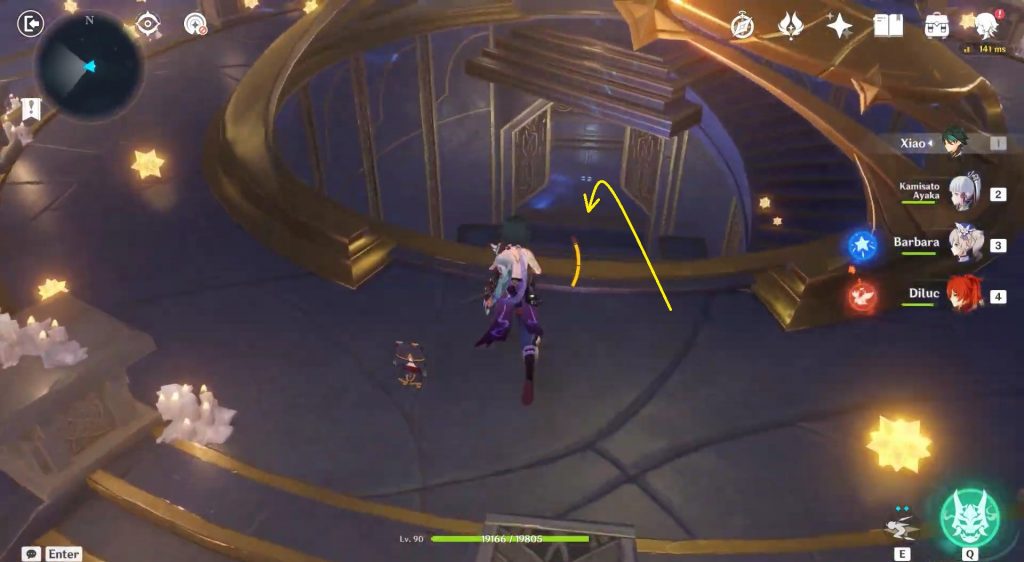
On solving the three puzzles, an exquisite chest will spawn and stars on the wall will form an arrow as shown in the picture below. Go to the wall the arrow is pointing at and touch it to reveal the next area.
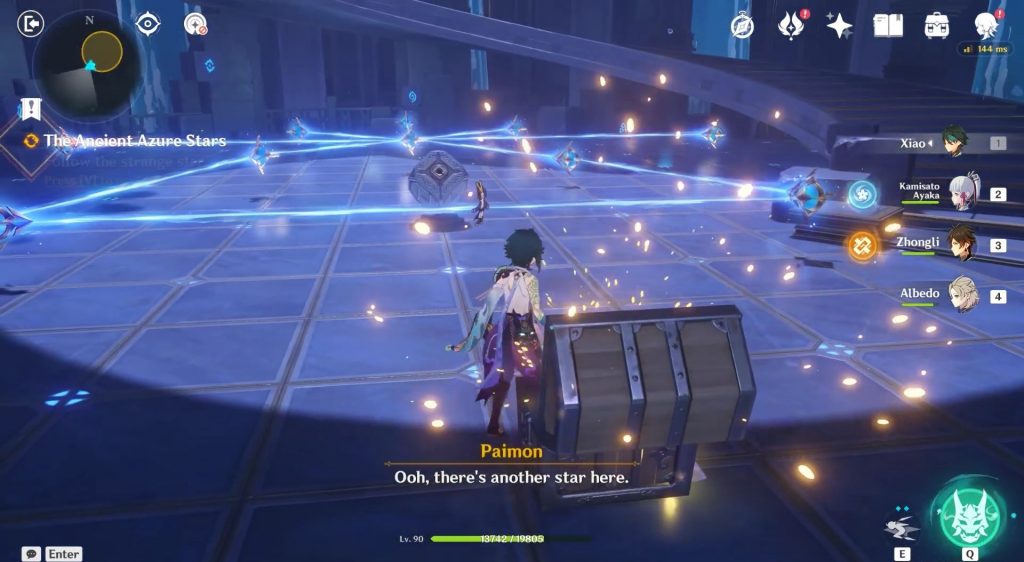
Phantasmal Conch
Proceed ahead and take the astral path up to a room with four circular switches on the floor. Here you will find a Phantasmal Conch in the corner. Click here to see the location of all 20 Phantasmal Conches.
Puzzle 3 (Switch Puzzle) (Precious Chest)
In the same room, you will see four circular switches on the floor. You will see a pattern drawn on the floor near the switches. To solve the puzzle, you need to step on the switches to form the same pattern in the sky. This can be done in 8 steps as shown in the picture below. I have named the switches A, B, C, and D for ease of explanation. On solving the puzzle, the precious chest in this room will unlock.
Step 1: Step on Switch A
Step 2: Step on Switch B
Step 3: Step on Switch C
Step 4: Step on Switch C
Step 5: Step on Switch C
Step 6: Step on Switch D
Step 7: Step on Switch D
Step 8: Step on Switch B

.
Luxurious Chest
Open the previous Precious chest and a Star will come out from it. Follow the star until you fall into Starry Realm. Complete the Challenge of the Starry Sky there. Then take the portal back and you will find the Luxurious chest in front of the pool in the Mona Domain.
Behind Door 2
Door 2 can be recognized by the pattern drawn on it as shown in the picture below. If you don’t know how to open this door, then please check our full guide for The Ancient Azure Stars story quest.

Puzzle 1 (Exquisite Chest)
Continue ahead and you will encounter an Astral Puzzle. The pattern that you need to form can be seen by looking up in the sky. The solution to the Puzzle is shown in the pictures below. On solving the puzzle, an Exquisite Chest will spawn.
Puzzle 2 (Exquisite Chest)
Continue ahead and you will encounter another Astral Puzzle. The solution to the Puzzle is shown in the picture below. On solving the puzzle, an Exquisite Chest will spawn.
Puzzle 3 (Exquisite Chest)
Continue ahead and you will encounter another Astral Puzzle. The solution to the Puzzle is shown in the picture below. On solving the puzzle, an Exquisite Chest will spawn.
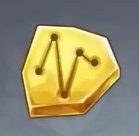
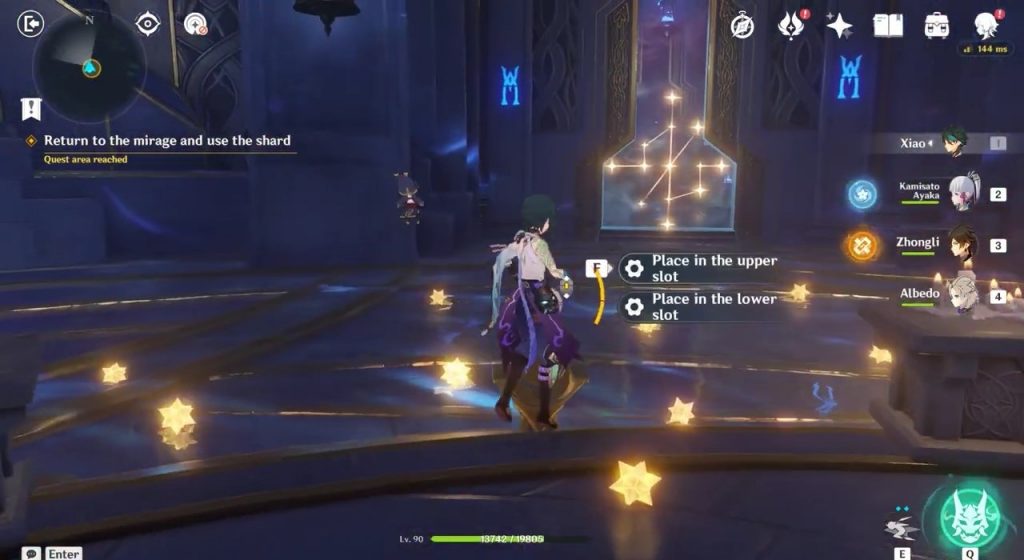
Here you will also find a projection platform in which you can insert an Asterism Shard as shown below.
Behind Door 3
Door 3 can be recognized by the pattern drawn on it as shown in the picture below. If you don’t know how to open this door, then please check our full guide for The Ancient Azure Stars story quest.
Puzzle 1 (Exquisite Chest)
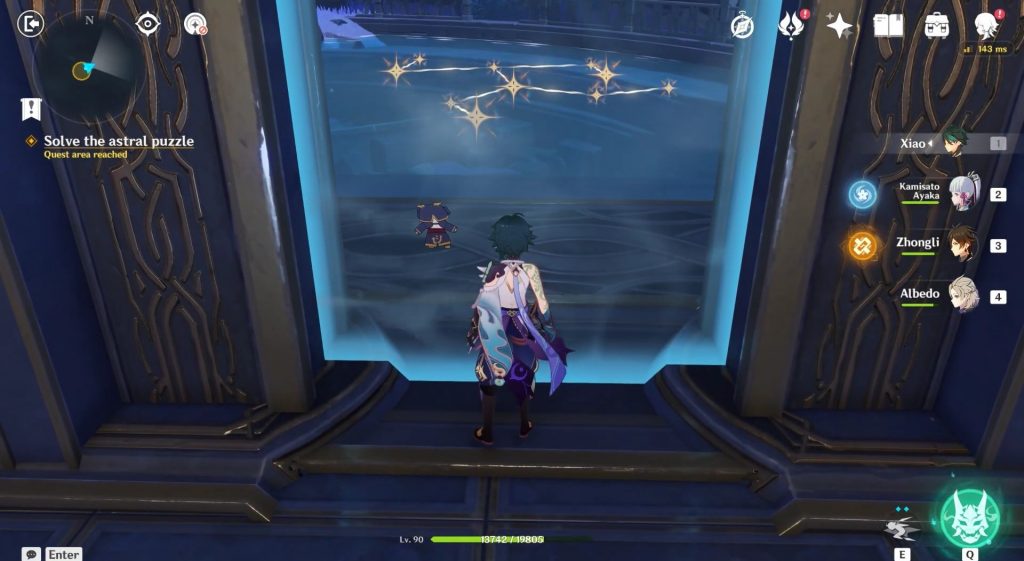
Continue ahead and you will encounter an Astral Puzzle. The pattern for this puzzle can be seen from the sealed door as shown in the first picture below. The solution for this Puzzle is shown in the second and third pictures below. On solving the puzzle, an Exquisite Chest will spawn.

Puzzle 2 (Exquisite Chest)
Continue ahead and you will encounter an Astral Puzzle. The solution to the Puzzle is shown in the picture below. On solving the puzzle, an Exquisite Chest will spawn.
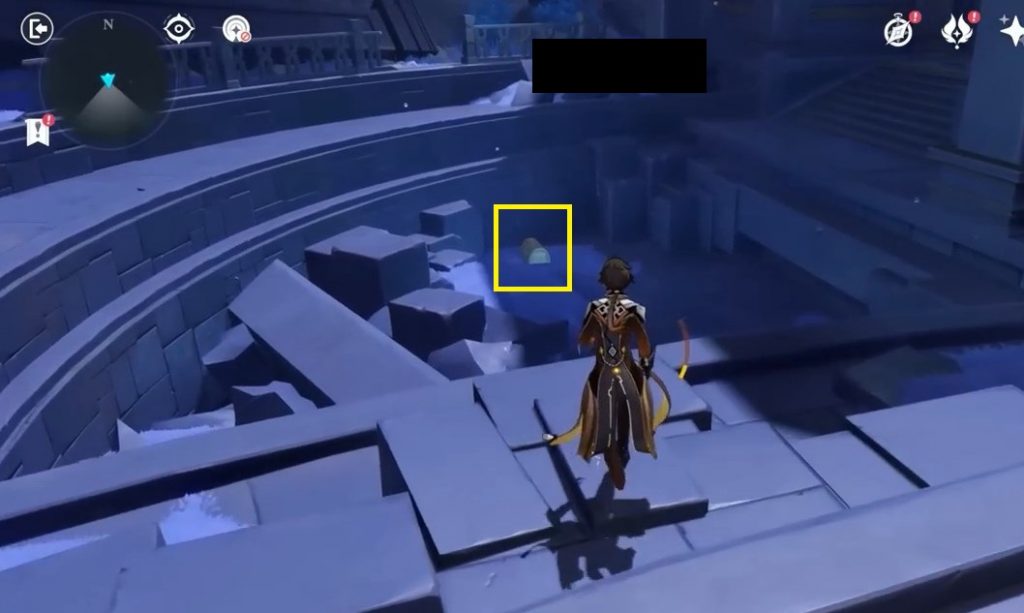
Exquisite Chest
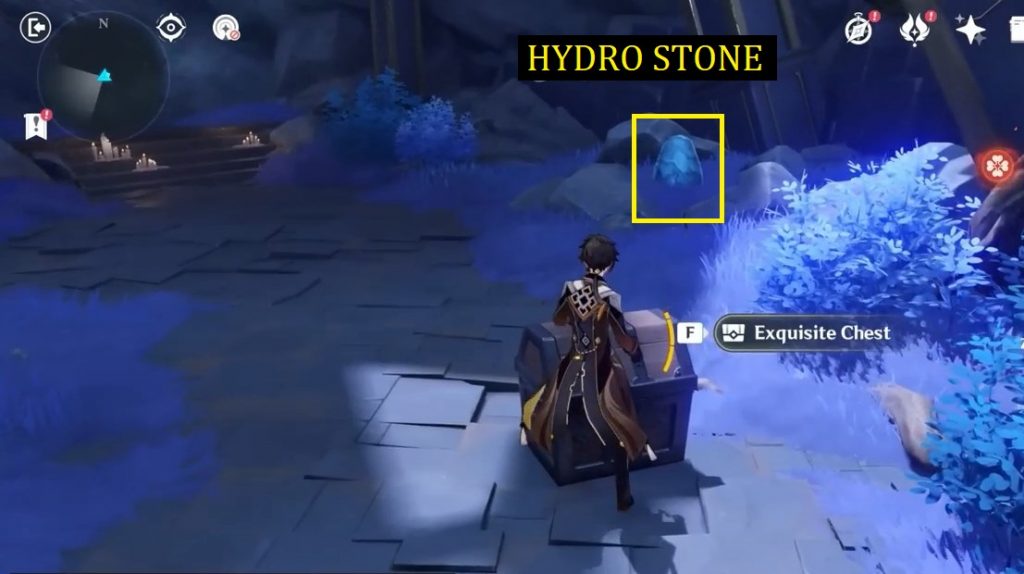
After opening the previous chest, hit the Hydro Stone nearby and then walk through the wall as shown in the pictures below.
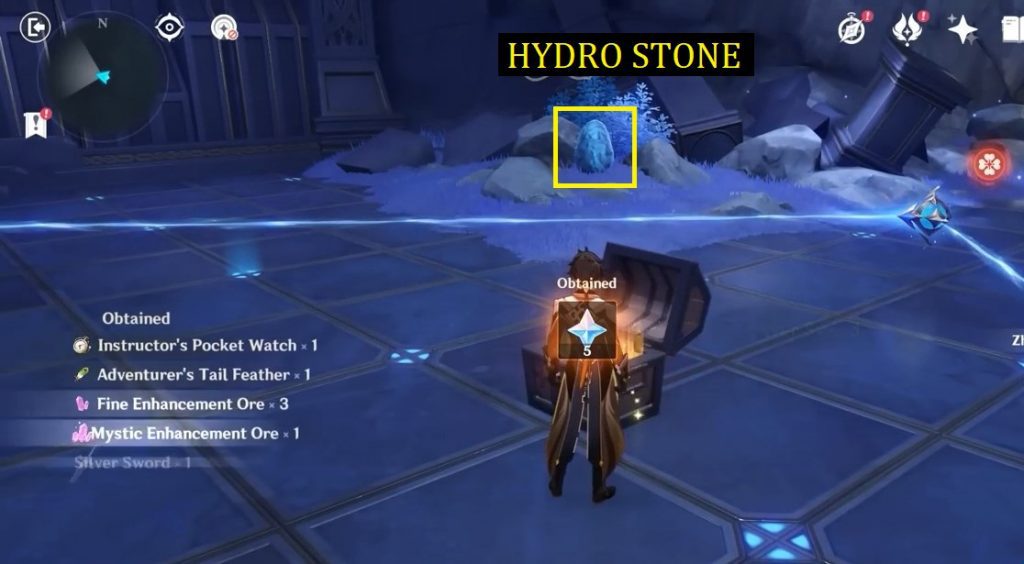
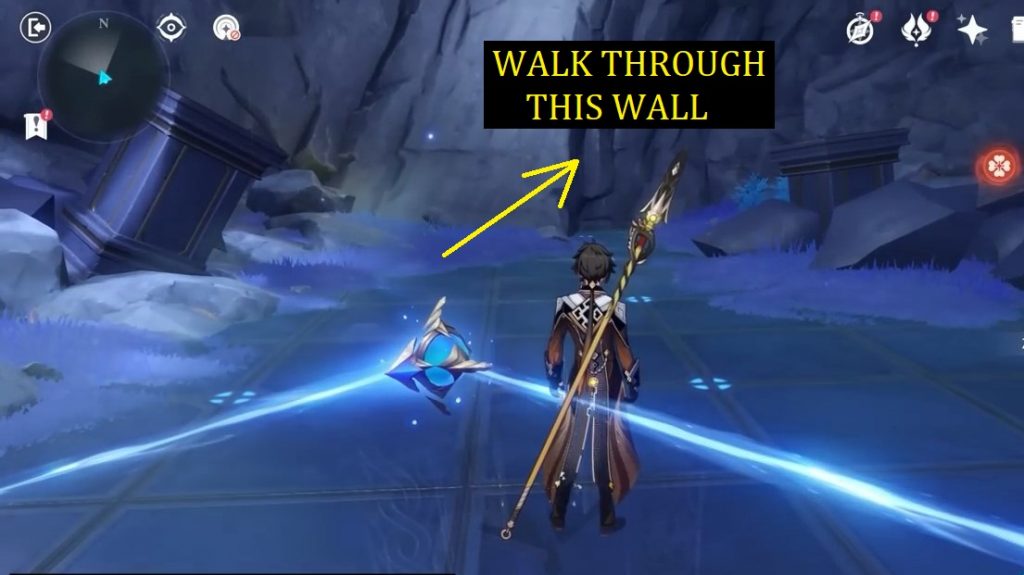
In the next area, you will see a fake Exquisite Chest that won’t open. Hit the Hydro Stone near it to make it rain inside the cave. In the rainwater, you will be able to see the reflection of the original exquisite chest as shown in the second picture below.
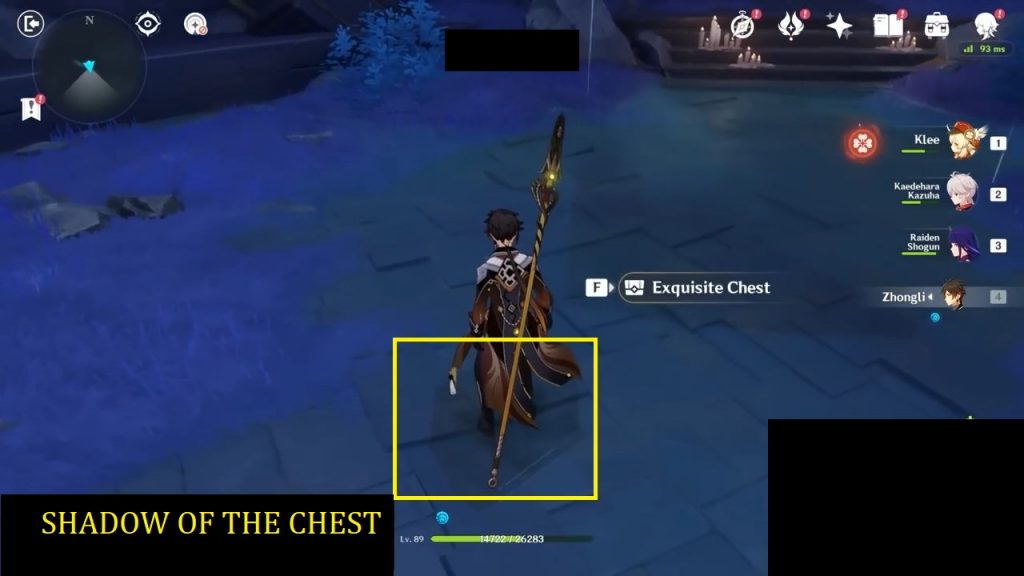
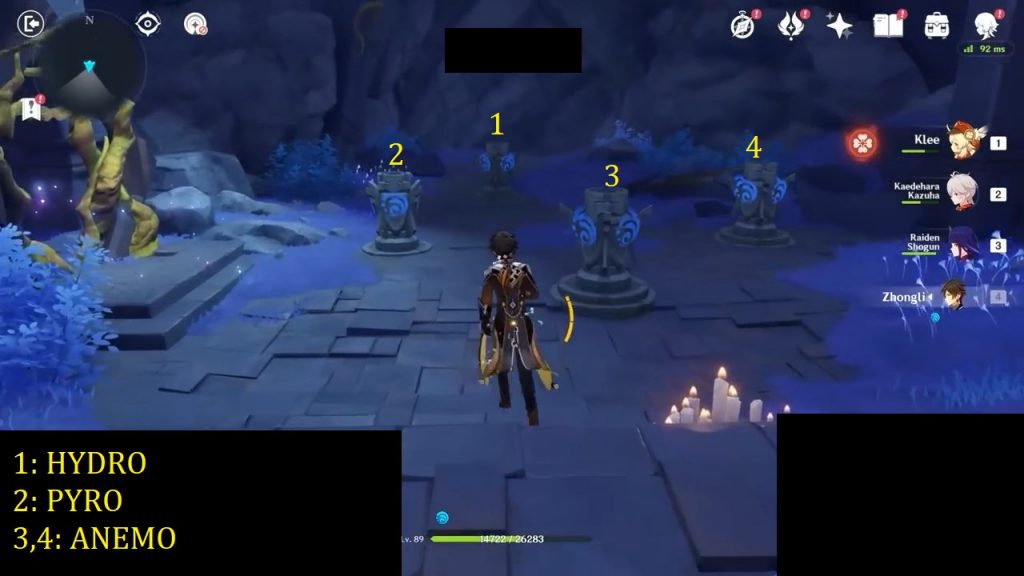
Exquisite Chest
After opening the previous chest, climb up the stairs and walk through the wall to reach the next chamber. Here you will see 4 hydro totems. Only one of these totems is actually hydro. The rest of the three totems are fake. Totem #1 in the picture below is the real hydro totem. Activate the hydro totem, which will make water fall on the ground. In the reflection on the water, you will be able to see the real elements of the other 3 totems. Totem #2 in the picture below is Pyro. Totem #3,4 are Anemo. Activating all the elemental totems will make an exquisite chest spawn.
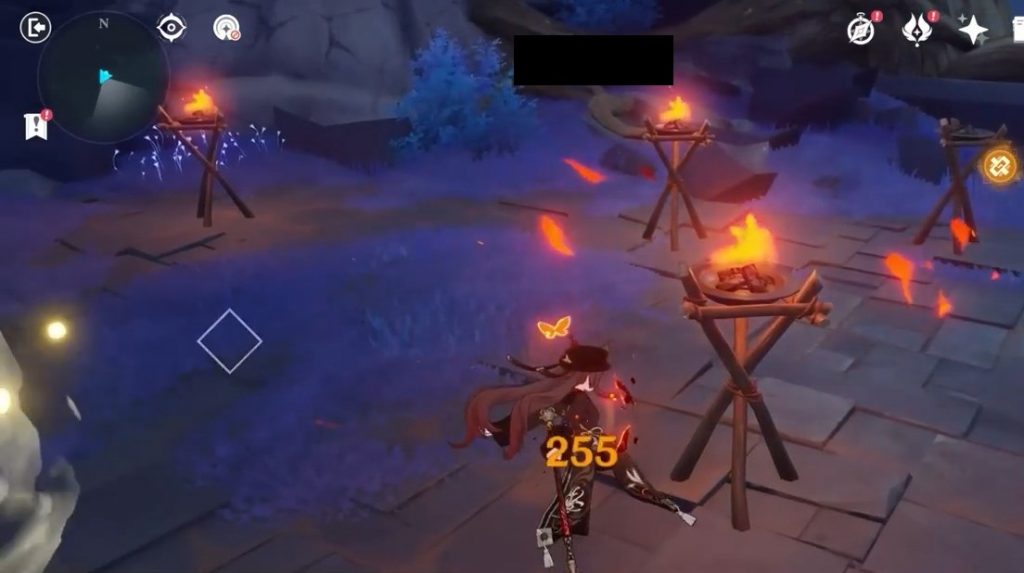
Common Chest
After opening the previous chest, continue south and walk through the wall to reach the next chamber. Here you will see a few torches. Put out the fire on torches. Then light up the three torches as shown in the picture below. This will make a common chest spawn.
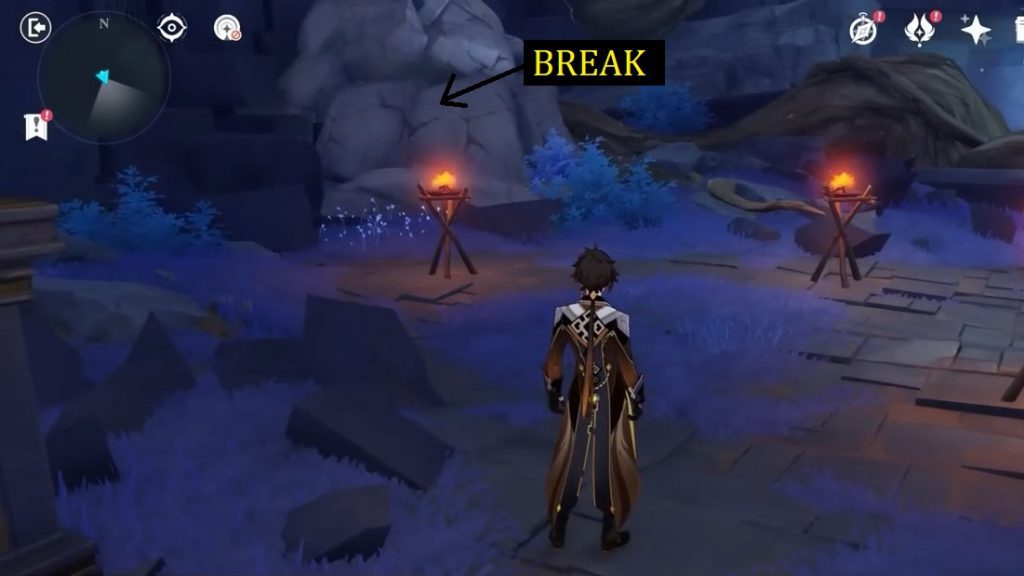
Common Chest
Break the rock in the area with the torches as shown in the picture below. This will lower the water level for the next chest. Now trace your path back and you will find a common chest as shown in the second picture below.
Behind Door 4
Door 4 can be recognized by the pattern drawn on it as shown in the picture below. If you don’t know how to open this door, then please check our full guide for The Ancient Azure Stars story quest.
Puzzle 1 (Exquisite Chest)
Continue ahead and you will encounter an Astral Puzzle. The solution to this Puzzle is shown in the pictures below. On solving the puzzle, an Exquisite Chest will spawn.
Common Chest
Interact with the mechanism at the center of the previous puzzle area. This will make an elevator spawn. Take the elevator to the top, where you will find a common chest.
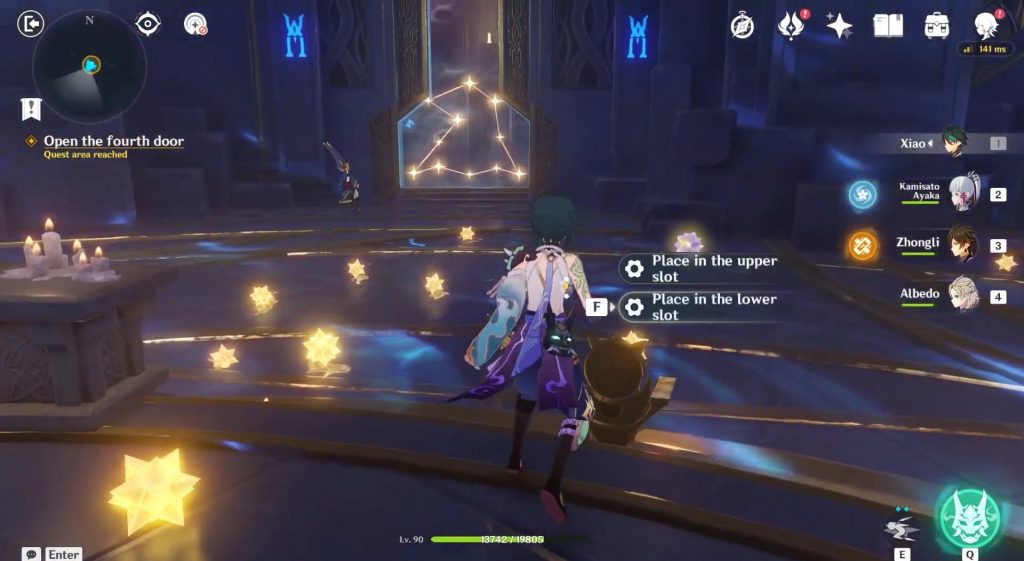
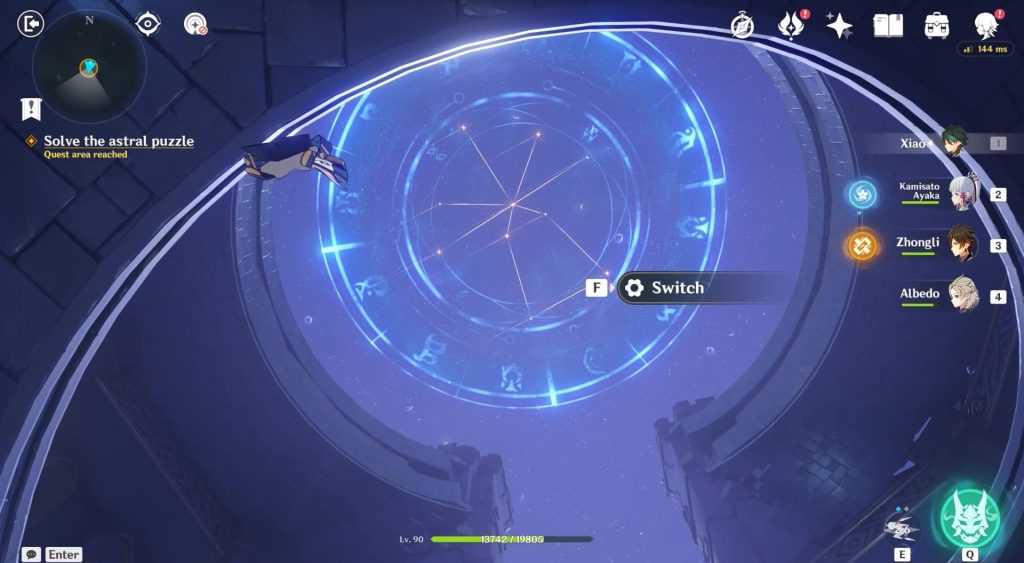
Puzzle 2 (Exquisite Chest)
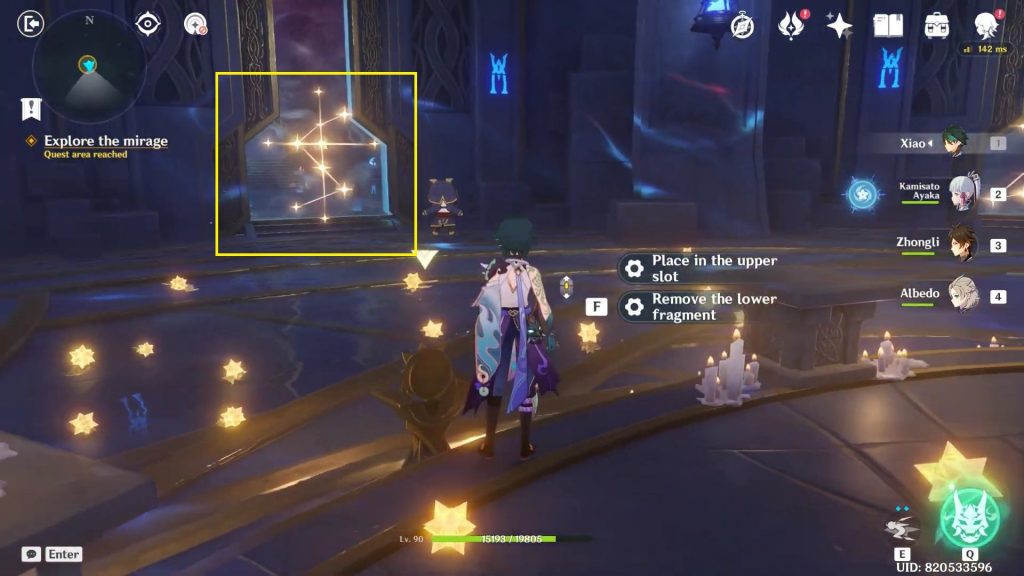
Take the elevator back down and climb up the stairs. In the next room, you will find a strange star. When you follow it, it will go up and get stuck in the ceiling. Then you will need to solve the astral puzzle as shown in the picture below. On solving the puzzle, astral stairs will emerge and you will be able to reach the strange star stuck on the ceiling. Chase the star to its destination, which will unlock the exquisite chest.

Common Chest
At the center of the previous puzzle area, you will find an elevator. Take the elevator up to get a common chest.
Common Chest
Take the elevator further up to get another common chest.
Luxurious Chest
This chest will be available only after you have completed The Ancient Azure Stars story quest. After completing the quest, jump inside the pool and enter the portal. Touch the strange ornament to reach a mirage.
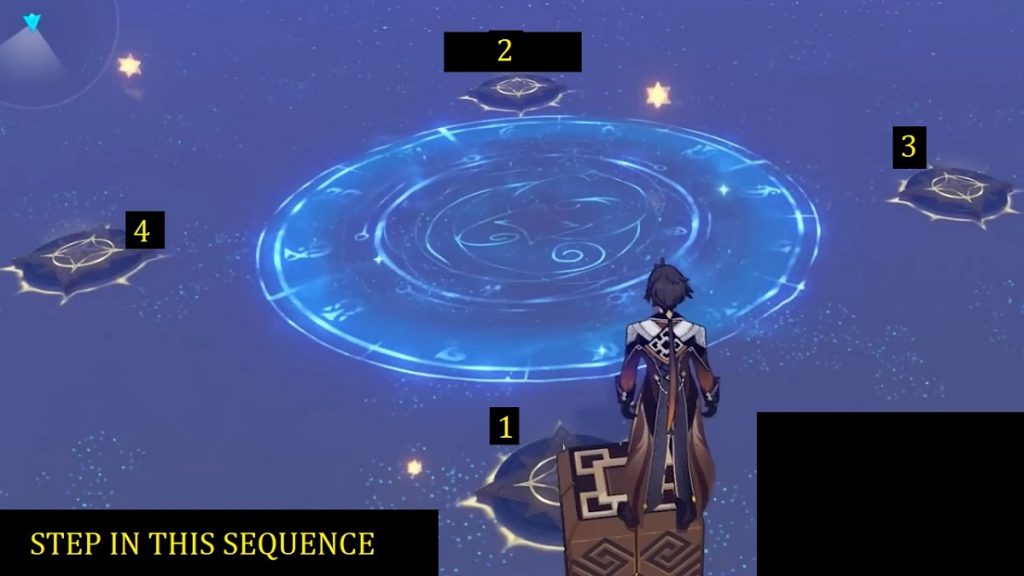
You will see four switches here and some patterns in the sky. Your objective here is to make the patterns in the sky disappear. To do so, step on the switches in the sequence shown below. After that enter the portal and you will find the Luxurious chest in front of the pool in the Mona Domain.