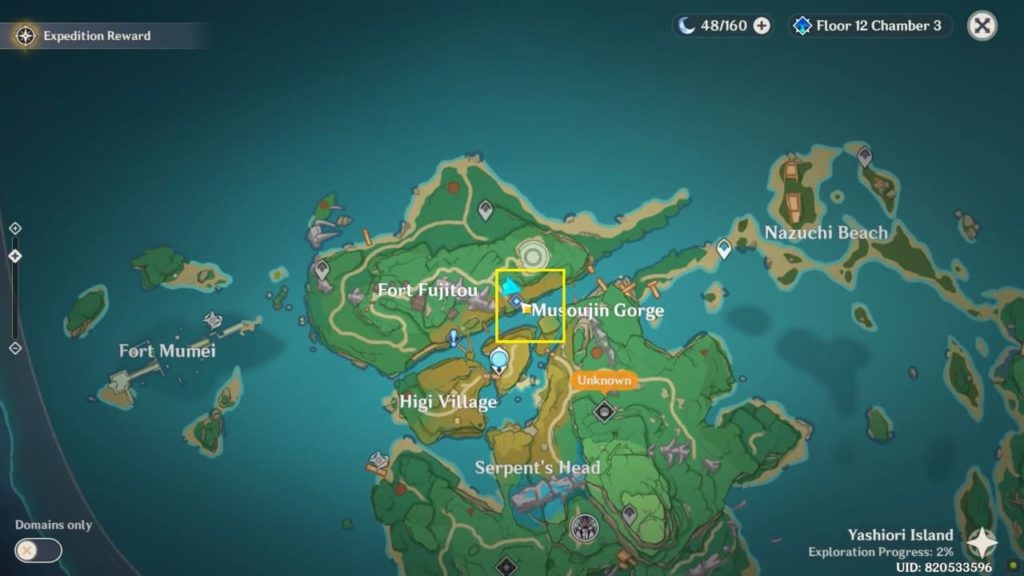
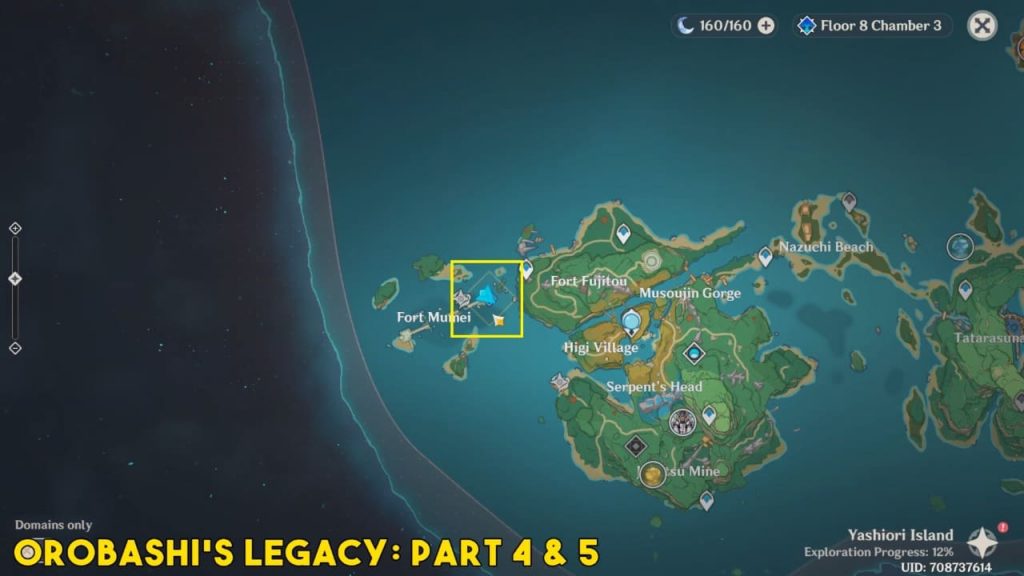
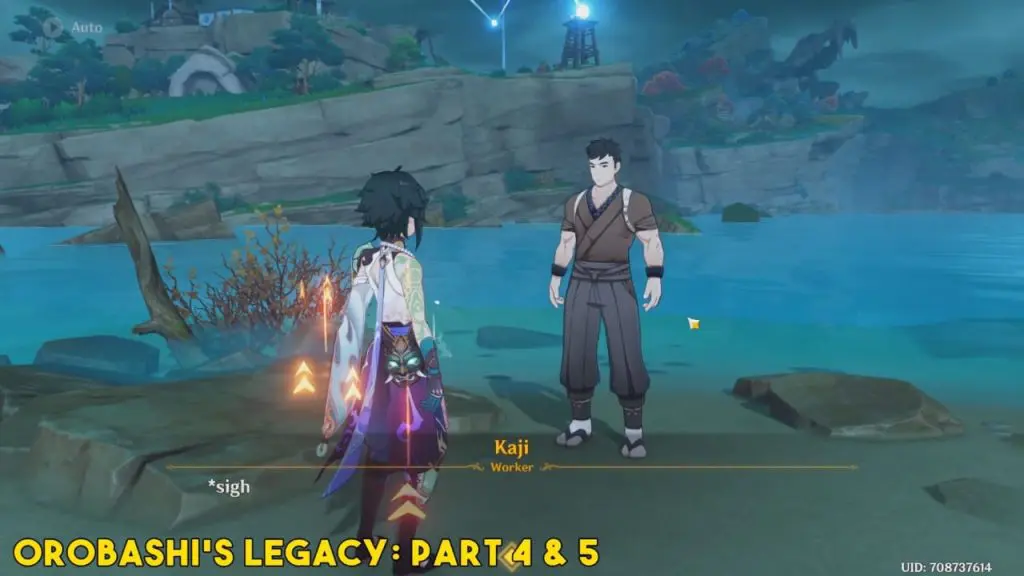
Orobashi’s Legacy is a World Quest in Inazuma. It is split into five parts and a Pro. The Orobashi’s Legacy questline is launched by speaking to a worker named Kaji at a camp between Fort Fujitou and Musoujin Gorge on Yashiori Island. I have marked the location on the map. Speaking with Kaji is basically the prologue of the entire quest chain and subsequent parts will require you to complete puzzles.
- Orobashi’s Legacy Prologue
- Orobashi’s Legacy Part I
- Orobashi’s Legacy Part II
- Orobashi’s Legacy Part III
- Orobashi’s Legacy Part IV
- Orobashi’s Legacy Part V
Orobashi’s Legacy Part I
Kaji asks for help from the travelers (you) to help him repair the ward. There are few parts missing in the ward that needs to be fixed.
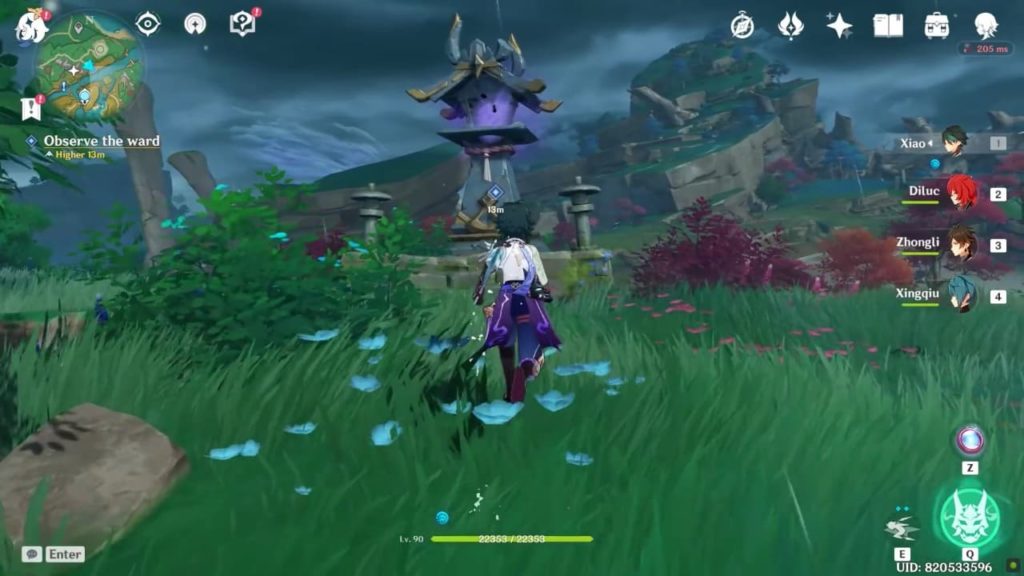
Observe the Ward
You need to investigate the ward – Narukami Pillar which is a little bit behind the point where you interact with kaji. Location is marked with the quest indicator. When you will interact with the ward, it will tell you that two critical components are needed to repair the pillar.
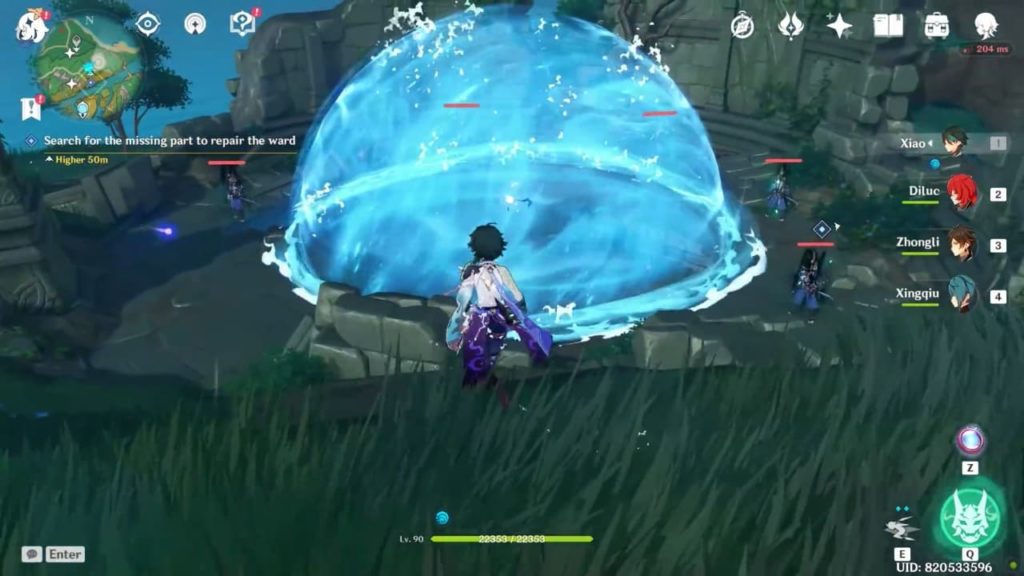
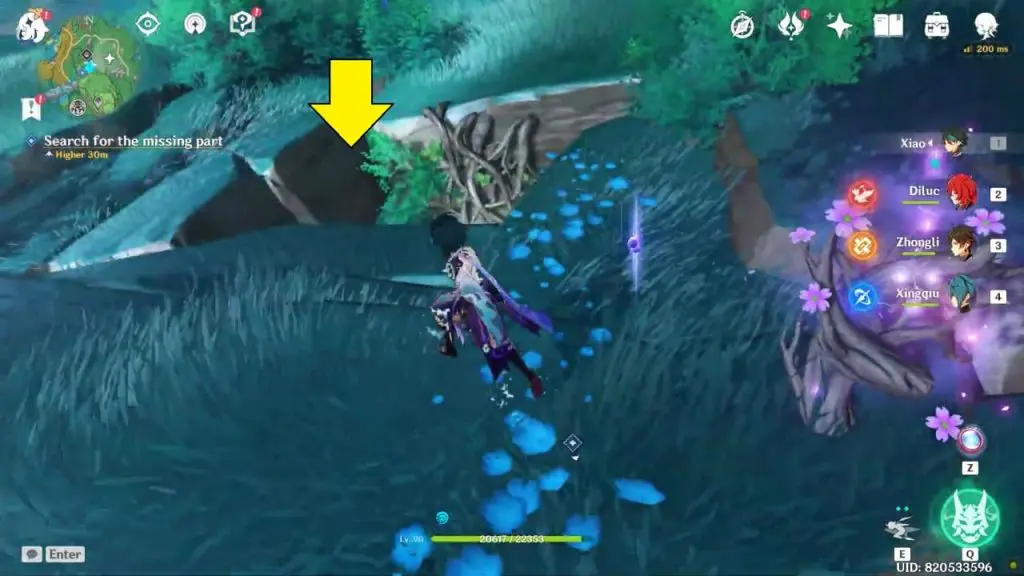
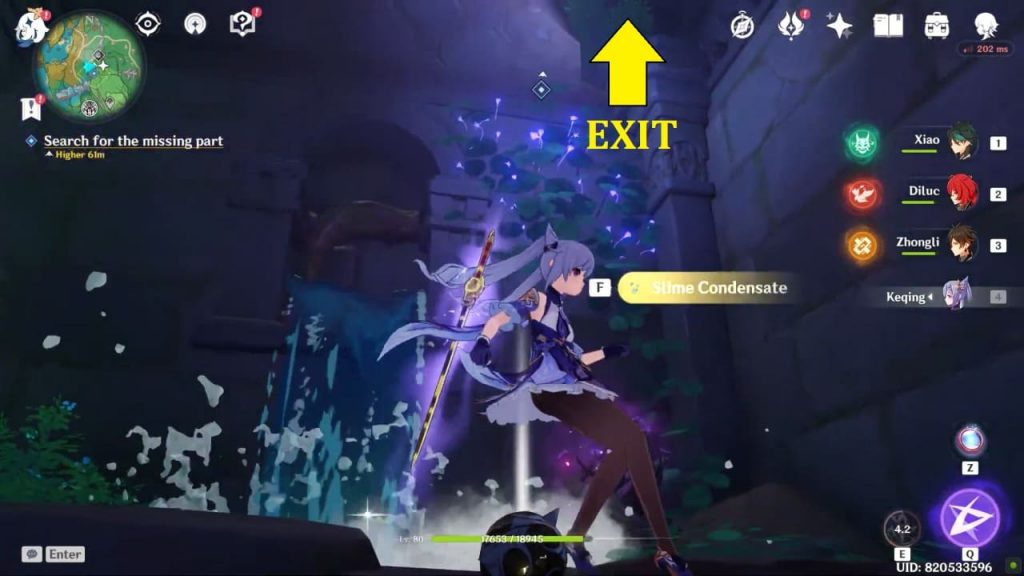
Search for the missing part to repair the ward
To search for missing parts you must use Elementary Sight to look around. While you scan the area, it will eventually bring you down to a place with a purple ball encircled by a dome and several monsters.
How to solve Orobashi’s Legacy I Puzzle
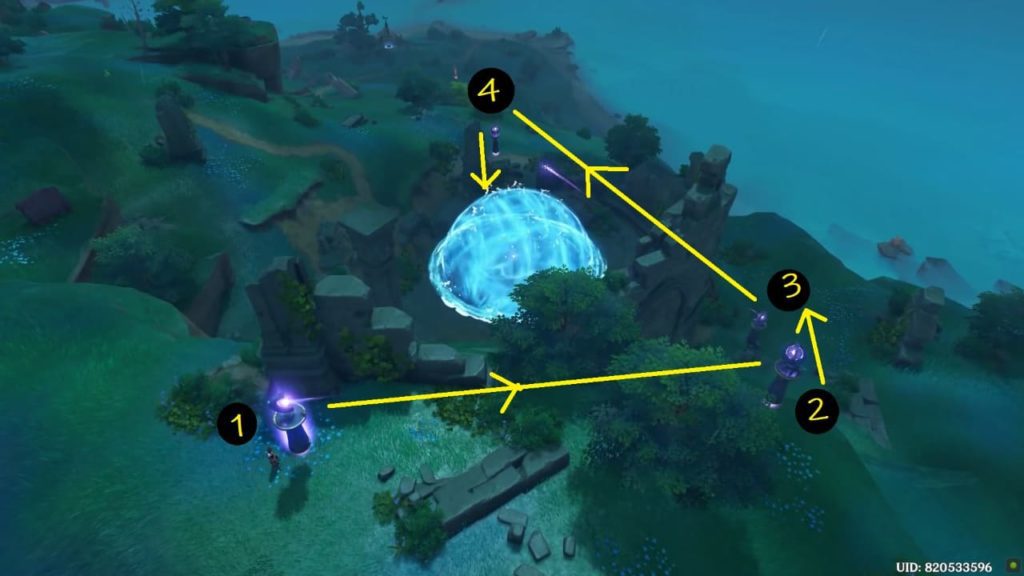
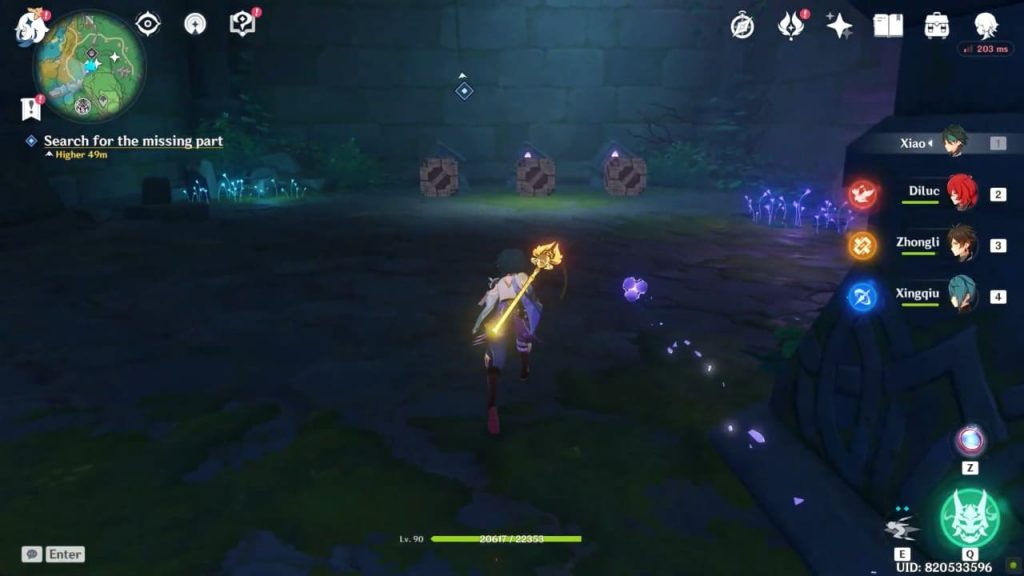
The puzzle involves making use of mechanisms called Sacred Stone Mounds and Thunderbearer Mirrors, which look like pillars with glowing purple orbs in them. When a Sacred Stone Mound is attacked, it can fire an electric current in a specific direction. Thunderbearer Mirrors can receive the current fire by a Sacred Stone Mound and fire it back in a different direction.
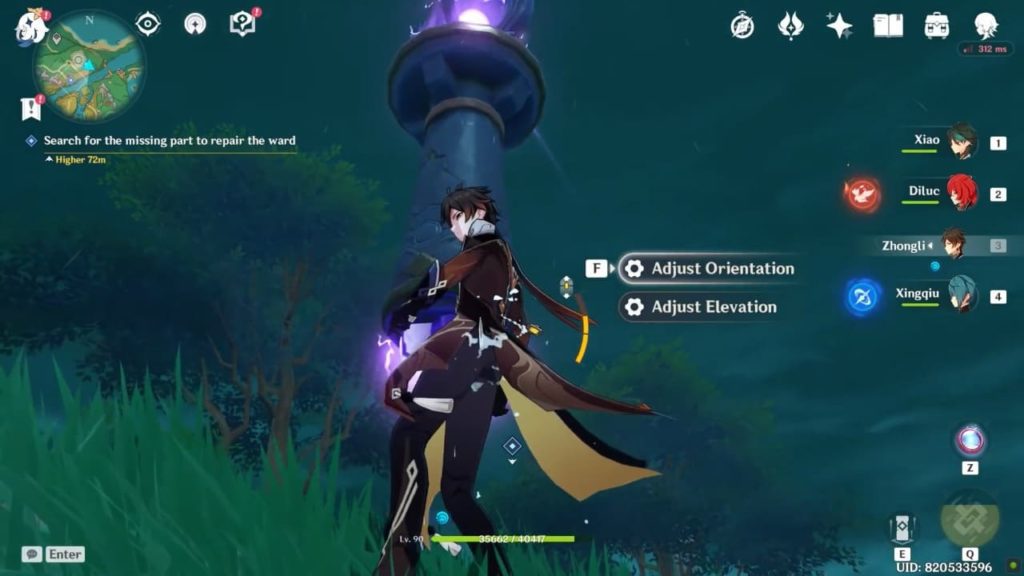
To solve the puzzle, use the Thunderbearer Mirrors to guide the beam from the Sacred Stone Mound to the dome in the center. When you approach close to each of the pillars, you can change their orientation (which direction they face) and elevation (up or down).
In the below image Sacred Stone Mound is marked 1, it needs to orient toward the marked 2 location which is Thunderbearer Mirrors. Thunderbearer Mirrors-2 needs to be oriented toward Thunderbearer Mirrors-3. Similarly, Thunderbearer Mirrors-3 needs to rotate toward Thunderbearer Mirrors-4 and finally, Thunderbearer Mirrors-5 needs to be set toward the circular dome.
Once you successfully change the pillar’s orientation and elevation, head back to “Sacred Stone Mound” which is marked as 1, and launch an attack on the Sacred Stone Mound. This will make Sacred Stone Mound fire an electric current that can receive by Thunderbearer Mirrors and direct to the central dome.
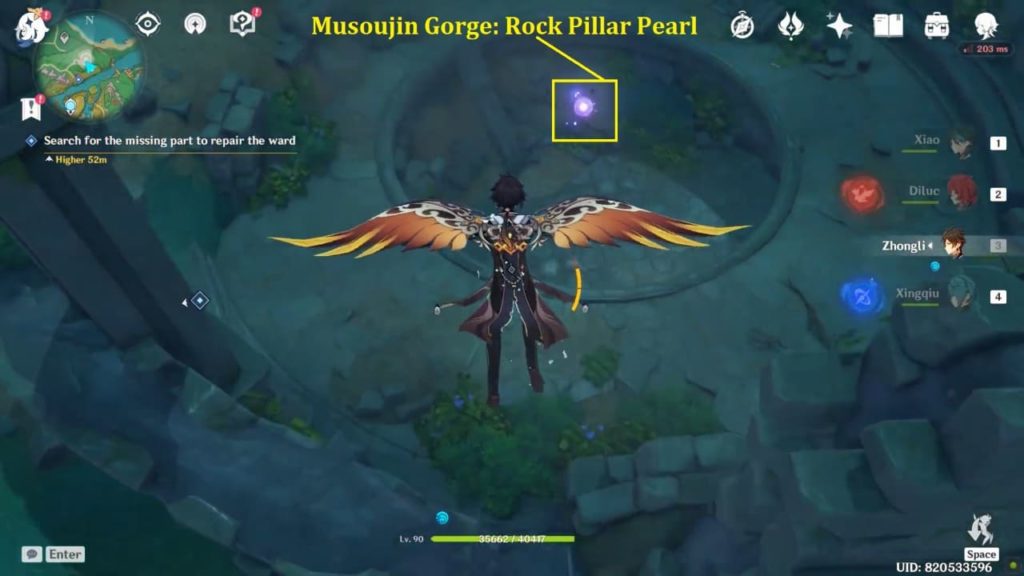
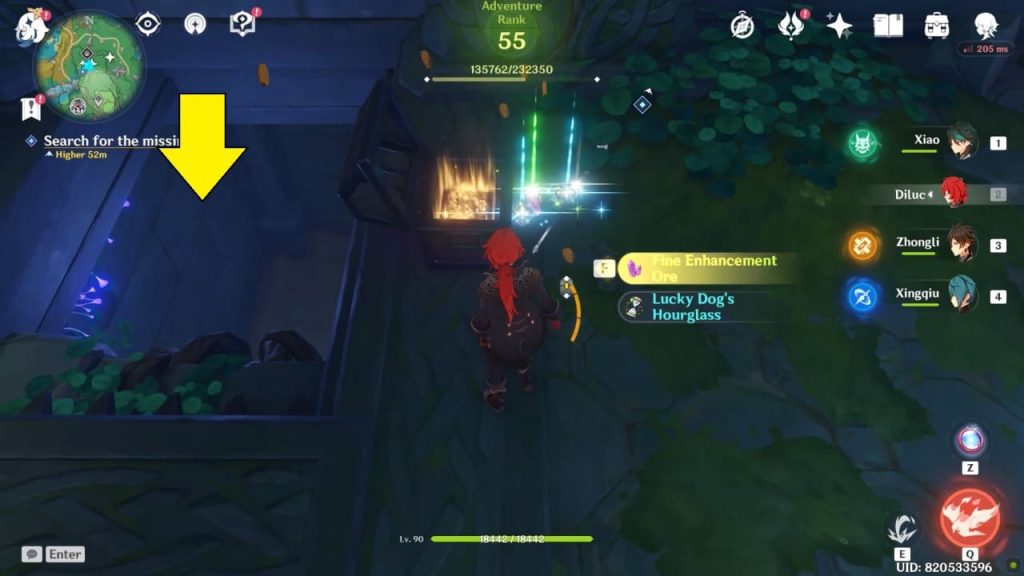
Glide down into the circle area where the dome was present earlier. Be sure to pick up the purple orb floating in the air (Musoujin Gorge: Rock Pillar Pearl) as you descend!
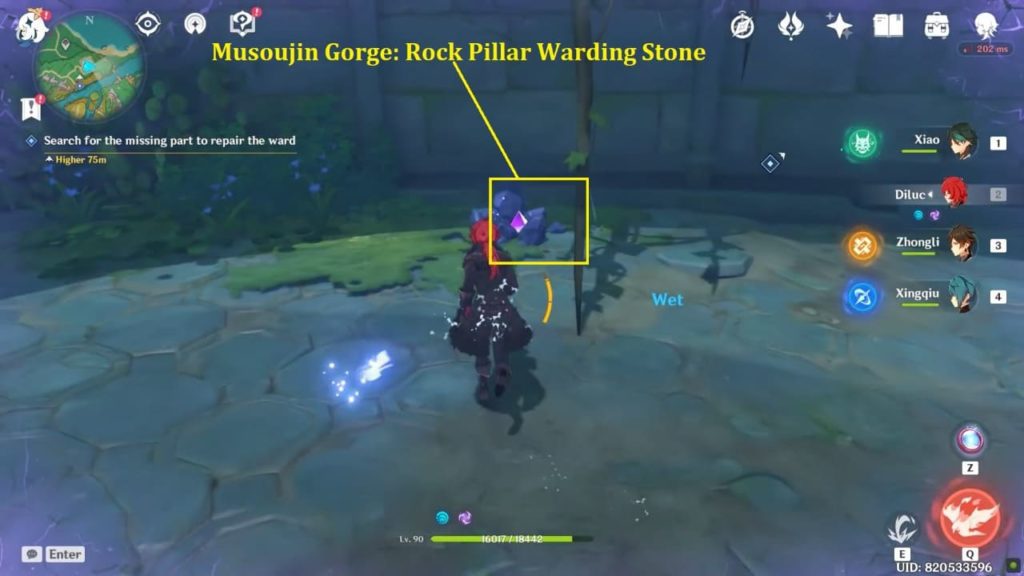
At the bottom of the pit, you’ll be stopped by another enemy, a Kairagi: Dancing Thunder, which you should defeat. To the edge of the arena, you’ll find another purple stone (Musoujin Gorge: Rock Pillar Warding Stone). Pick it up.
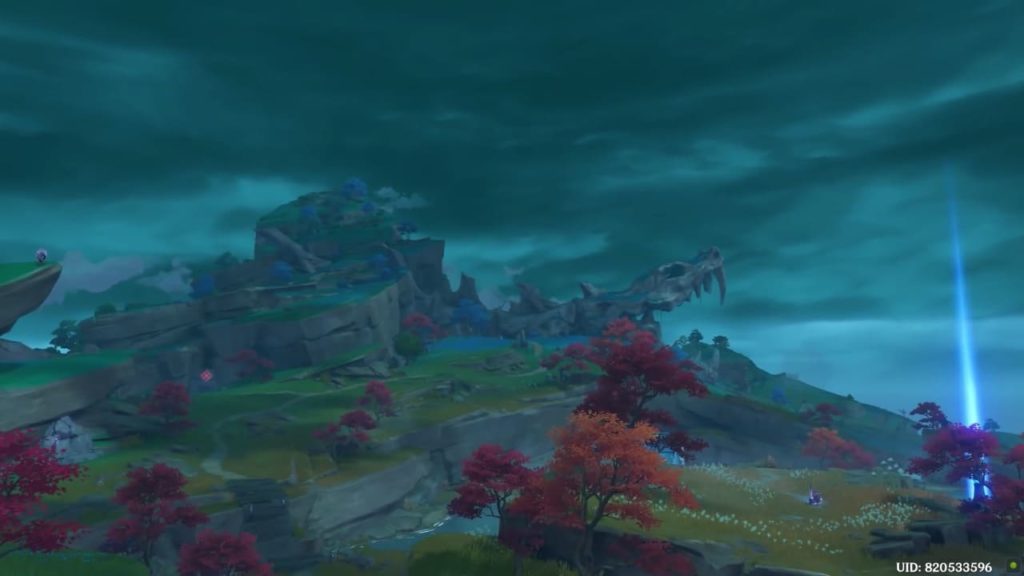
Return to the ward and deliver the two newly acquired components. As you submit it, you receive another spectacular cutscene pointing to the Serpent’s Head south of your location.
Go Back and Talk to Kaji
Return to Kaji (the location indicated by the quest indicator) and inform him that you have repaired the ward. He’ll tell you where to find the remaining two wards, which will unlock Parts II and III of the Orobashi’s Legacy quest.
ALSO READ
Araumi Cleansing Defilement Barrier Guide & Sacred Sakuna Cleansing Ritual
Hayashi of Tanuki in the Forest World Quest – Chinju Forest Destroy the Barrier Puzzle
Cleansing Defilement: Complete the Sacred Sakura Cleansing Ritual Puzzles
Sacrificial Offering: Destroy the Barrier Shrine Puzzle
Orobashi’s Legacy Part II
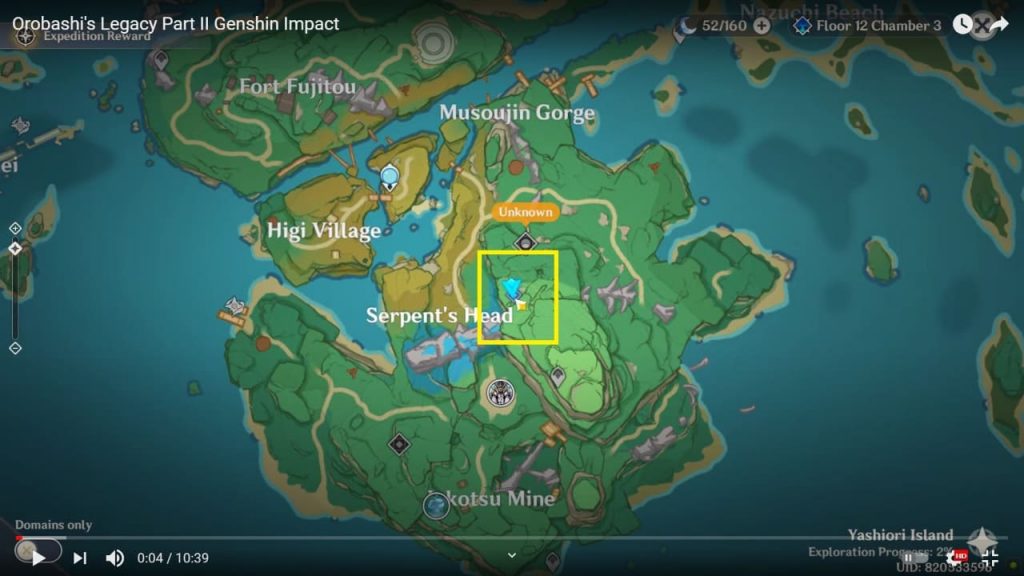
Orobashi’s Legacy II world quest is available once you have completed Orobashi’s Legacy I. Kaji will tell you where to find the second ward at the Serpent’s Head on Yashiori Island.
Search for the Ward at Serpent’s Head
Ward’s location on Yashiori Island is shown on the map as the Serpent’s Head. Location is marked with the quest indicator. The ward is guarded by another Kairagi: Dancing Thunder enemy at this location. Eliminate the enemy and interact with the ward.
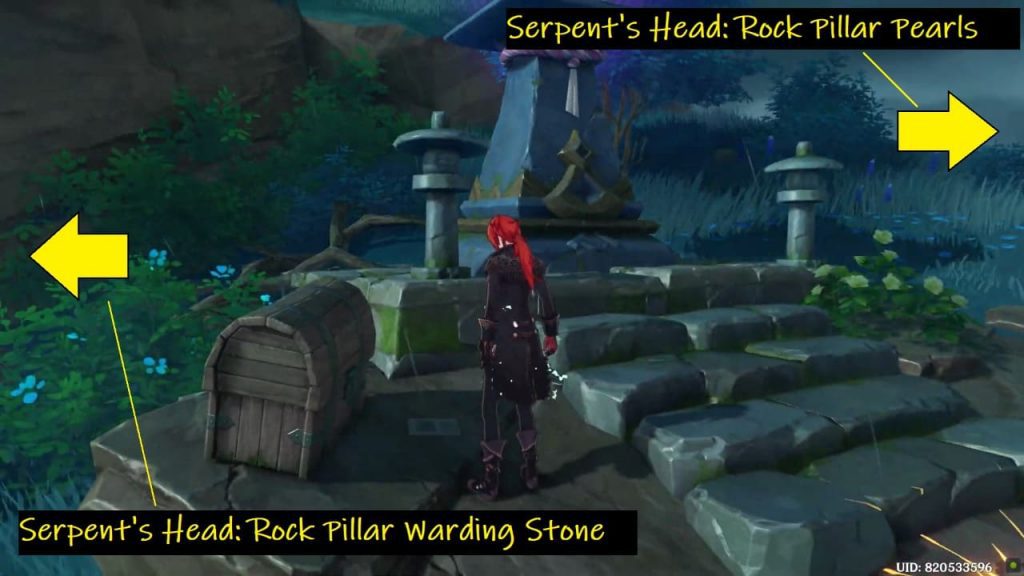
Search for the missing part
You will once again be instructed to use your elemental sight to locate two missing components for this ward and both these components are located at different locations.
#1 – Serpent’s Head: Rock Pillar Pearls
#2 – Serpent’s Head: Rock Pillar Warding Stone
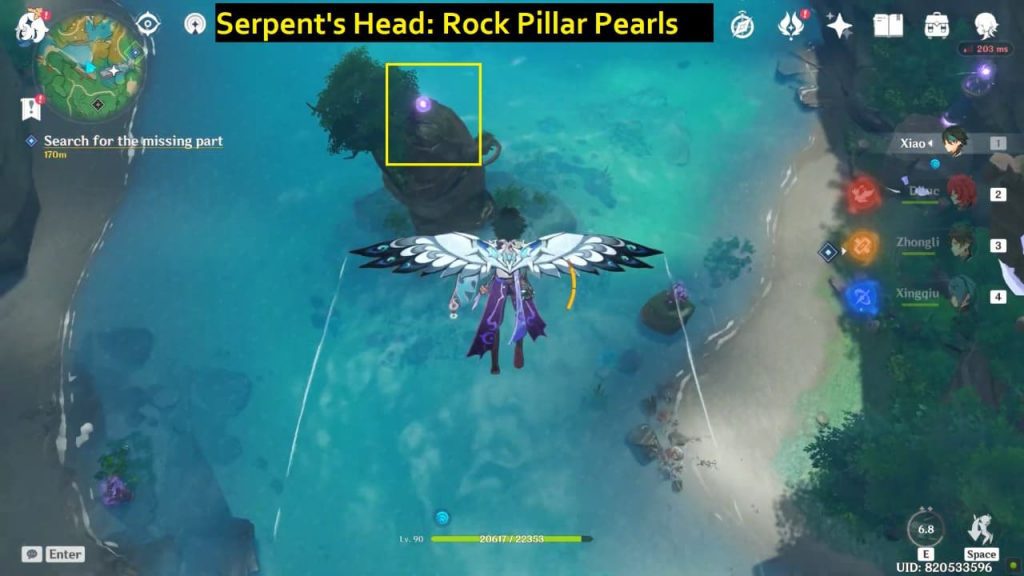
Serpent’s Head: Rock Pillar Pearls Location
Using elemental sight will lead you westward to a place with a purple ball encircled by a dome in the canyon. Here you will get another puzzle-like Orobashi’s Legacy 2.
How to solve Orobashi’s Legacy II Puzzle
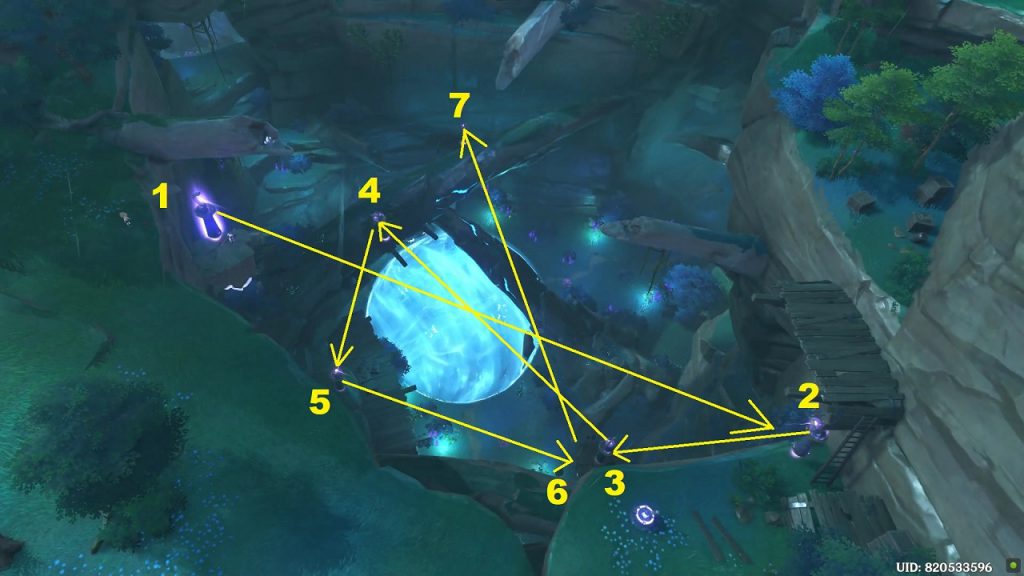
Just like the previous Orobashi’s Legacy 1 puzzle. In this puzzle, you need to redirect and orient 7 different Mounds and mirrors to guide the electric beam from top to bottom of the canyon. I below image Sacred Stone Mound is marked 1, it needs to orient toward the marked 2 location which is Thunderbearer Mirrors. Thunderbearer Mirrors-2 face toward Mirrors-3. Similarly, Mirrors-3 needs to rotate toward Mirror-4 and this goes on till the Mirror-7. Finally, Mirror-7 needs to be set toward the circular dome at the bottom of the canyon.
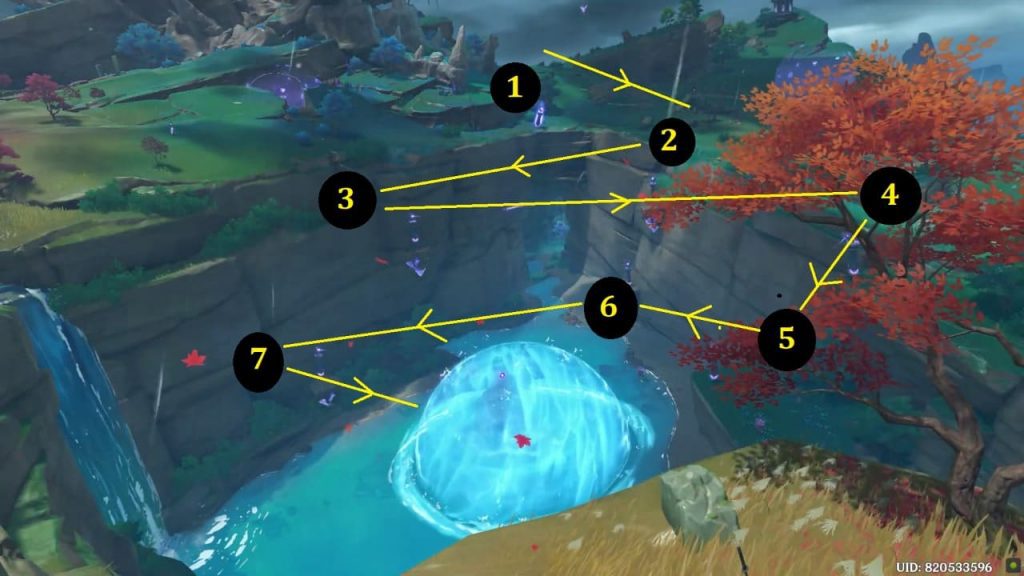
Once you successfully change the pillar’s orientation and elevation. Destroy the circular dome and collect “Serpent’s Head: Rock Pillar Pearls”.
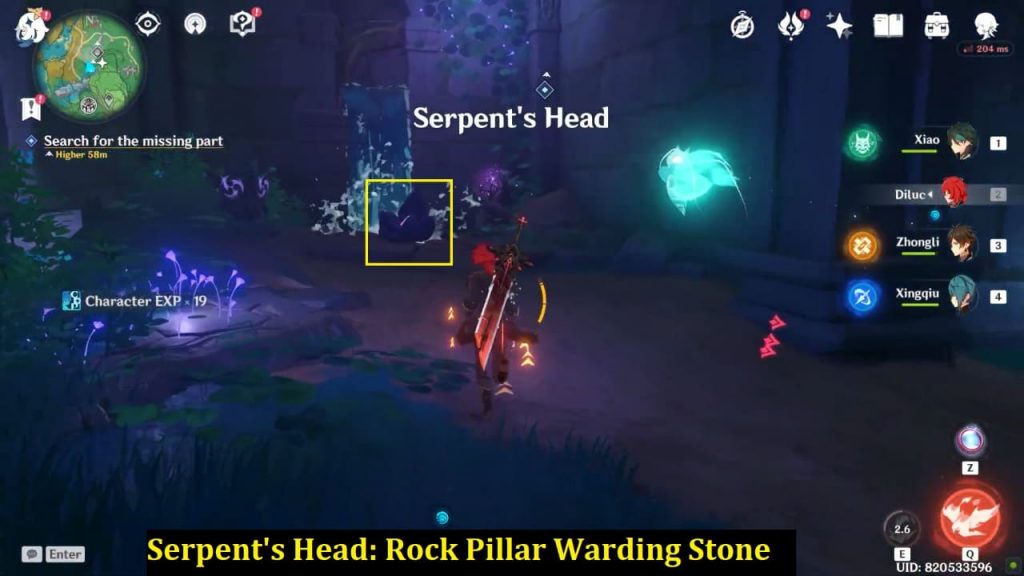
Serpent’s Head: Rock Pillar Warding Stone Location
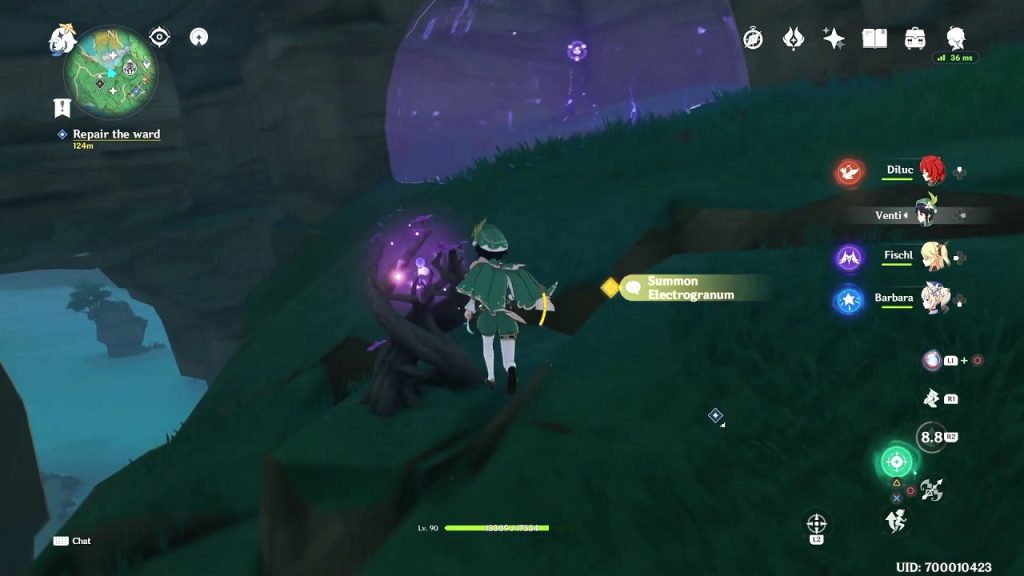
Return to the ward and use elemental sight. This time, the trail will take you east to a hole. Before entering the underground cave, you can summon an electrogranum. You’ll notice an electro barrier as you glide down, and you’ll be able to pass past it because you’ve previously summoned Electrogranum.
You’ll come up against three Ruin Destroyers, so bash them up. After the fight, the chest appeared close to yet another hole. When you drop down, you’ll be ambushed by some hydro slimes and a seelie. Follow the seelie along the tunnel, fighting off another gang of hydro slimes until you find “Serpent’s Head: Rock Pillar Warding Stone.” near a waterfall.
Activate the electro monument and utilize the electrograna’s teleportation skills to track down and lead the seelie back to its court, spawning a common chest. You can now return to the ward with both the stone and the pearl in your possession. Another cinematic will play, showing the dark skies over Yashiori Island and informing you that your next stop is Jakotsu Mine.
Orobashi’s Legacy Part III
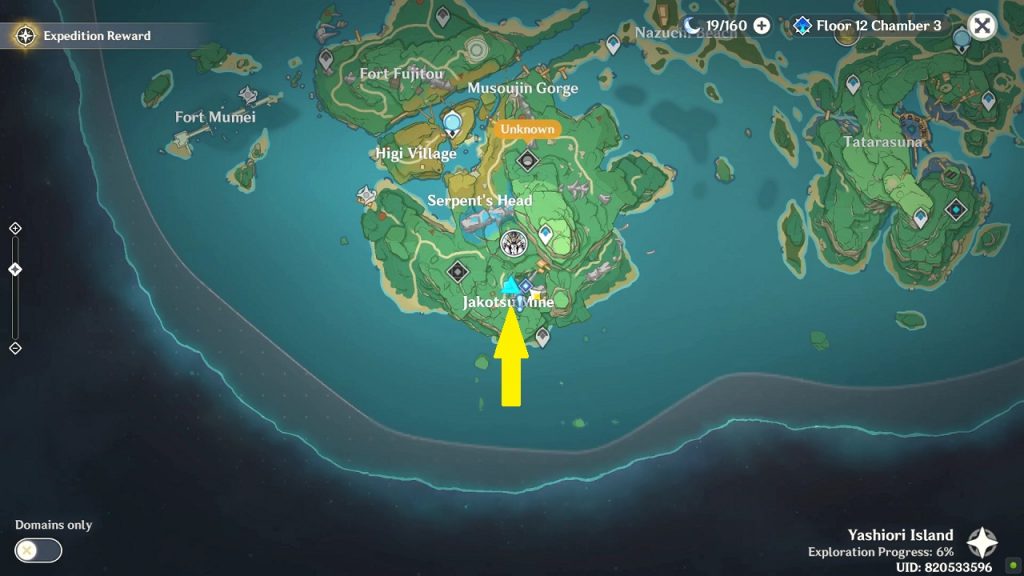
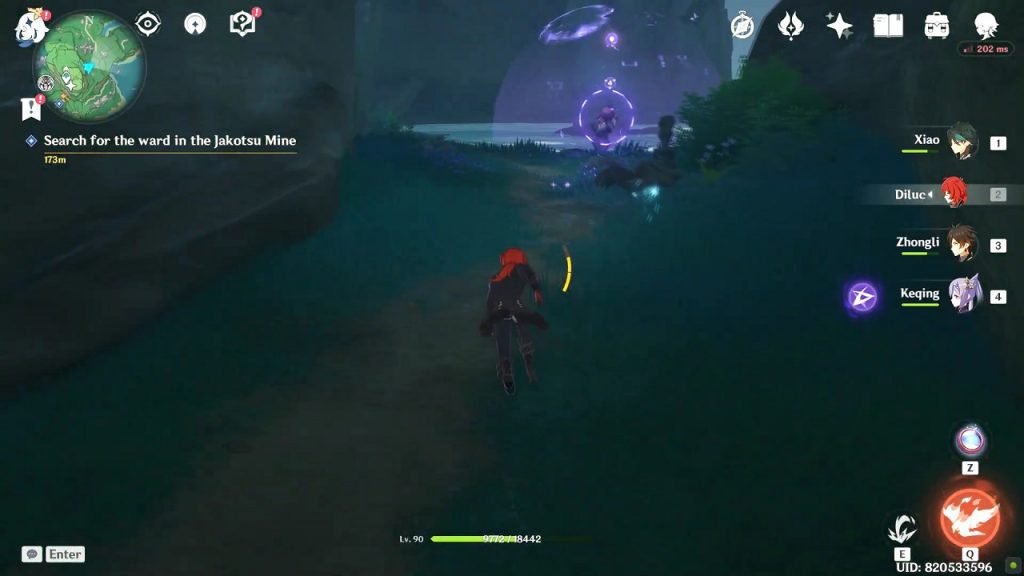
Orobashi’s Legacy Part 3 world quest starts automatically after you have completed Orobashi’s Legacy Part 1. Your first objective is to ‘Search for the ward in the Jakotsu Mine’. Jakotsu mine is at the southern portion of Yashiori Island at the location as shown in the picture below.
Orobashi’s Legacy: Destroy the Water Barrier Puzzle
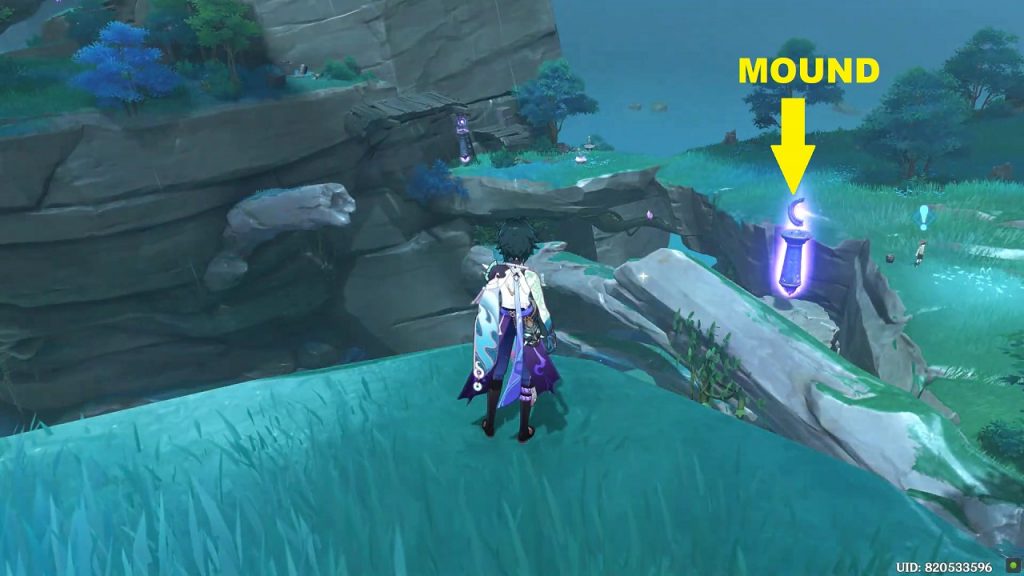
You must already be aware of the drill to solve this puzzle, but I will refresh it nonetheless. The puzzle involves making use of mechanisms called Sacred Stone Mounds and Thunderbearer Mirrors, which look like pillars with glowing purple orbs in them. When a Sacred Stone Mound is attacked, it can fire an electric current in a specific direction. Thunderbearer Mirrors can receive the current fire by a Sacred Stone Mound and fire it back in a different direction. The mound in Jakotsu mine is at the southwest potion as shown in the picture below.
Change the pillar’s orientation and elevation to face the other in the sequence as shown in the image below (Pillar number 6 is not visible in the image). Now you are ready to destroy the center dome. Go to the top of the mine and attack the Sacred Stone Mound to fire an electric current that will be received by Thunderbearer Mirrors and reflected the central dome and destroys it.
Find the missing components: Rock Pillar Pearl
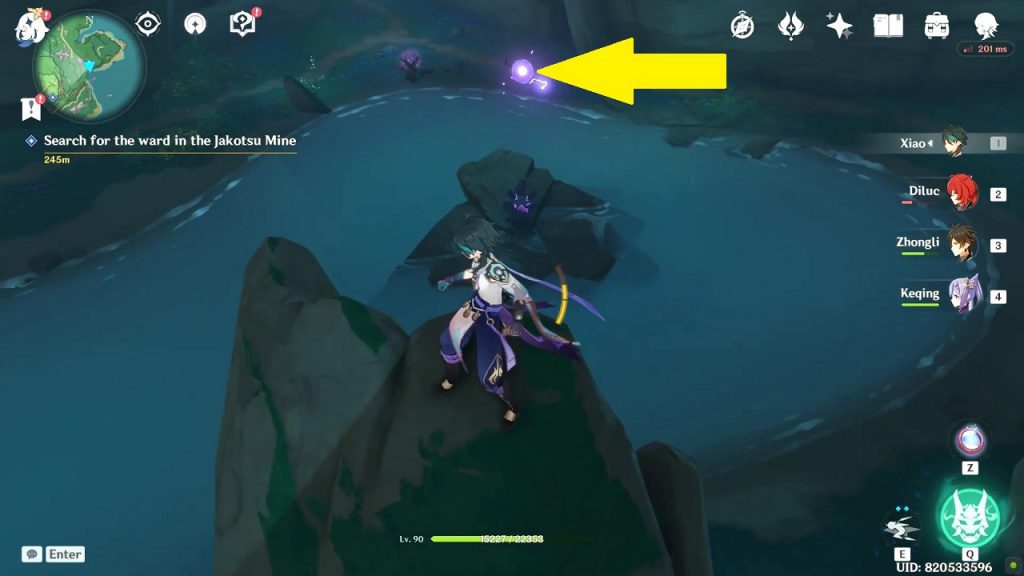
After you have destroyed the water barrier, glide down into the circle area where the dome was present earlier. Unfortunately, you won’t find the components there. To find the components, use elemental sight to trace the tracks. The tracks will lead you to a puddle of water in the cave. Keep following the tracks and after exiting the cave you will find an electrogranum dome guarded by an electro abyss mage as shown in the picture below. After defeating the mage, summon Electrogranum from the plant nearby and use it to enter the dome and disable the electro shield.
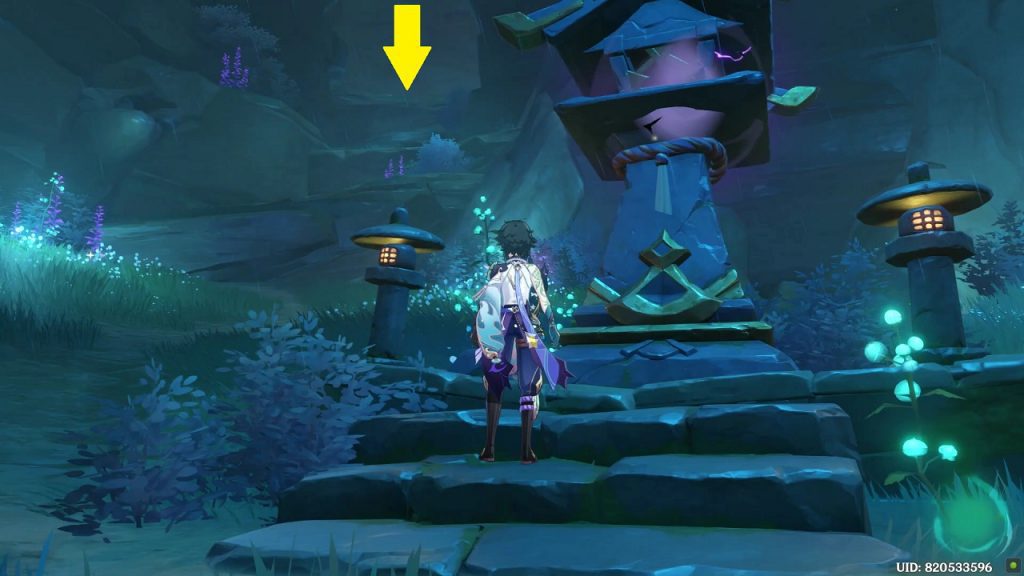
After you have disabled the electro shield and defeated the enemies, you can see the pearl above in the air. You can climb on the nearby rock and jump to get the ‘Jakotsu Mine: Rock Pillar Pearl’.
Find the missing components: Rock Pillar Warding Stone
Go back to the ward at bottom of Jakotsu mine and use elemental sight to track the other component. The tracks will lead you up the mountain as shown in the picture below.
As you reach the top, the location of Warding Stone is at the location as shown with an arrow in the picture below. Jump down and summon Electrogranum using a plant and use it to jump to the top, to the area where the Warding Stone is.
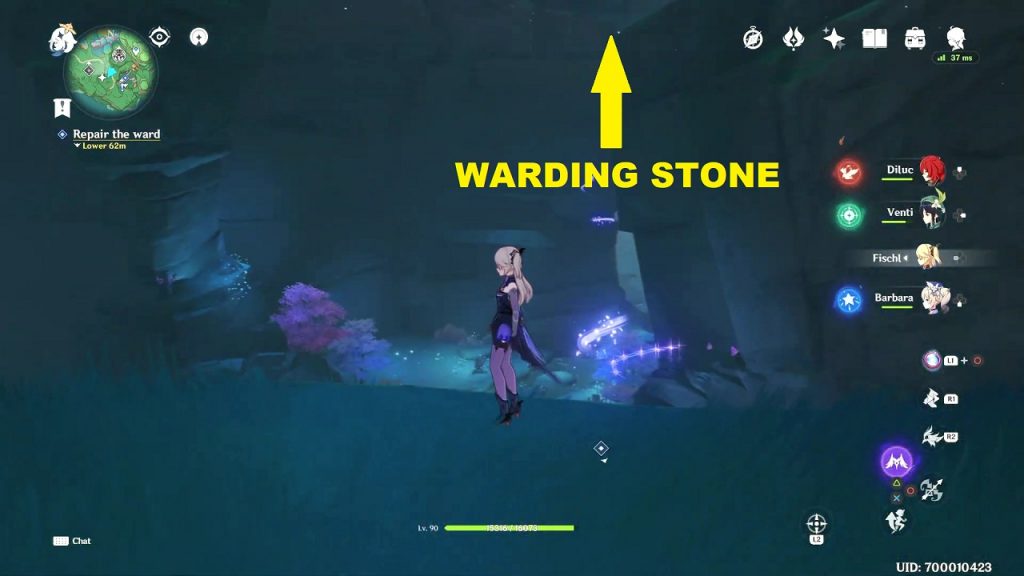
Warding stone is inside an electrogranum dome. Summon Electrogranum and use it to enter the dome to collect the ‘Jakotsu Mine: rock Pillar Pearl’.
Submit the items
Go back to the ward at bottom of Jakotsu mine and submit the two missing components: Rock Pillar Pearl & Rock Pillar Warding Stone. This will complete the quest.
Orobashi’s Legacy Part 4 & 5
Orobashi’s Legacy is a World Quest in Inazuma. It is split into five parts. This is a tutorial to complete Orobashi’s Legacy Part 4 & 5. Orobashi’s Legacy Part 4 world quest automatically starts after you have completed Orobashi’s Legacy Part 3. Your first objective is to ‘Go Back and Report to Kaji’.
Go Back and Report to Kaji
Return to Kaji and report on the result of the repairs you made to the ward. Kaji will be hanging out near Fort Mumei. Kaji will inform you that rains have stopped, clouds are cleared and the air is refreshing up. But his investigation is still not finished yet as Fort Mumei has risen up from the sea.
Note: Part IV of the quest basically tasks you with talking to Kaji again. Kaji is near Fort Mumei.
Orobashi’s Legacy Part 5
Here’s our Genshin Impact guide to help you finish Orobashi’s Legacy Part 5, complete the puzzle in Fort Mumei, and obtain the Kitain Cross Spear.
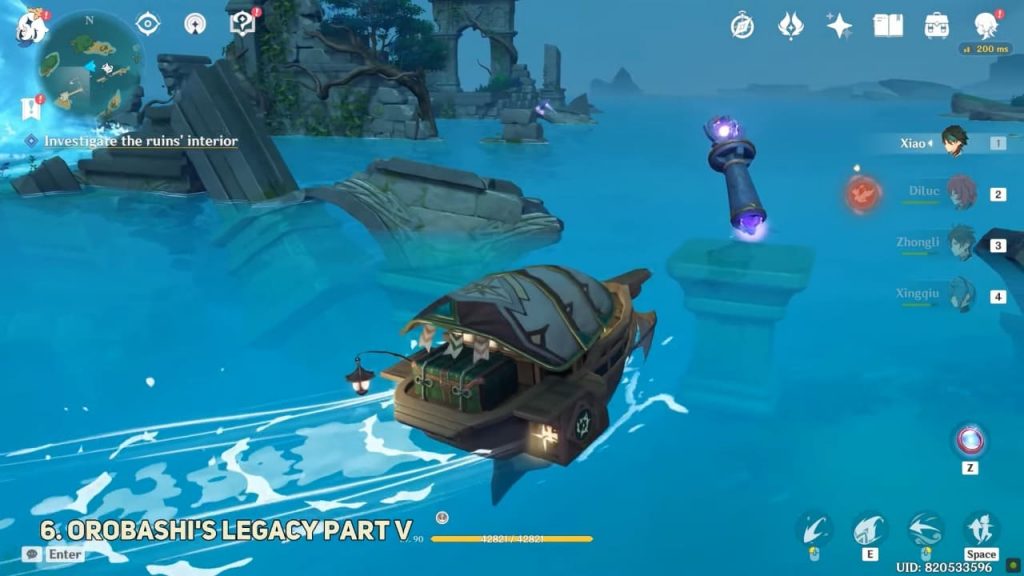
Investigate the ruin’s interior
Pillars puzzle for this one is pretty simple and similar to the previous Orobashi’s Legacy World Quest. You just have to make the bolt go around the fort in a circle before the final pillar reflects it into the center.
Here to search for missing parts you must use Elementary Sight to look around. While you approach Fort Mumei, it will eventually show you a place with a purple/whitish ball encircled by a dome.

How to solve Orobashi’s Legacy Puzzle
The puzzle involves making use of mechanisms called Sacred Stone Mounds and Thunderbearer Mirrors. When a Sacred Stone Mound is attacked, it can fire an electric current in a specific direction. Thunderbearer Mirrors can receive the current fire by a Sacred Stone Mound and fire it back in a different direction.

All the Mound and Mirrors are somewhat submerged in water. You can summon a Waverider from the Waverider waypoint which is nearby only. It’s better to sail your Waverider from time to time than swimming and losing stamina.
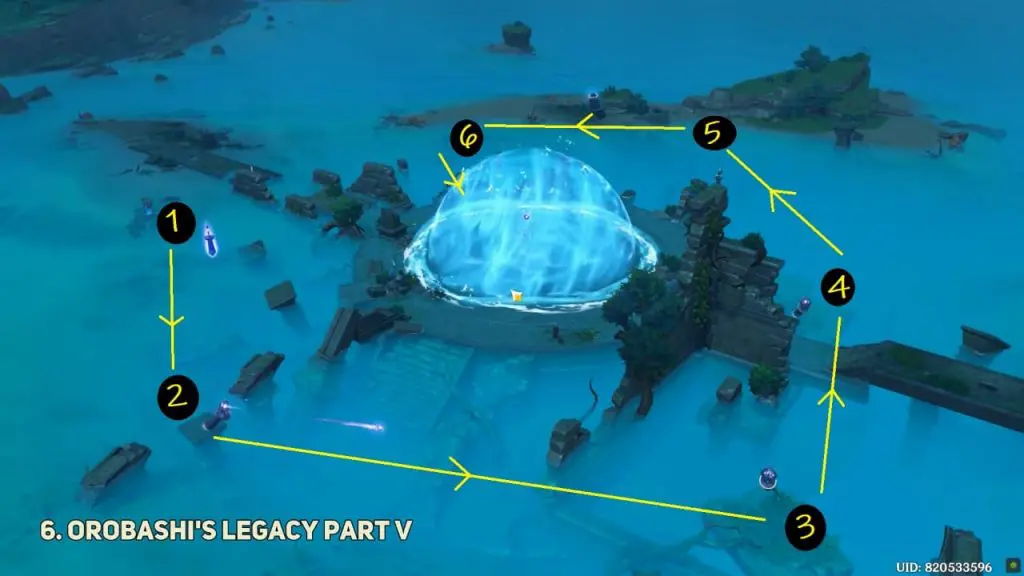
To avoid moving randomly you can start counter-clockwise. Starting with the Mound nearby fallen pillar. When you approach close to each of the pillars, you can change their orientation (which direction they face) and elevation (up or down). Keep going around Fort Mumei until you reach the last pillar and direction it toward the dome.
In the below image Sacred Stone Mound is marked 1, it needs to orient toward the marked 2 location which is Thunderbearer Mirrors. Thunderbearer Mirrors-2 needs to be oriented toward Thunderbearer Mirrors-3. Similarly, Thunderbearer Mirrors-3 needs to rotate toward Thunderbearer Mirrors-4 and finally, Thunderbearer Mirrors-5 needs to be set toward the circular dome.
Once you successfully change the pillar’s orientation and elevation as shown in the below image you are ready to destroy the center dome. Now head back to “Sacred Stone Mound” which is marked as 1 and launch an attack on the Sacred Stone Mound to fire an electric current that can receive by Thunderbearer Mirrors and direct to the central dome.
Repair the Ward
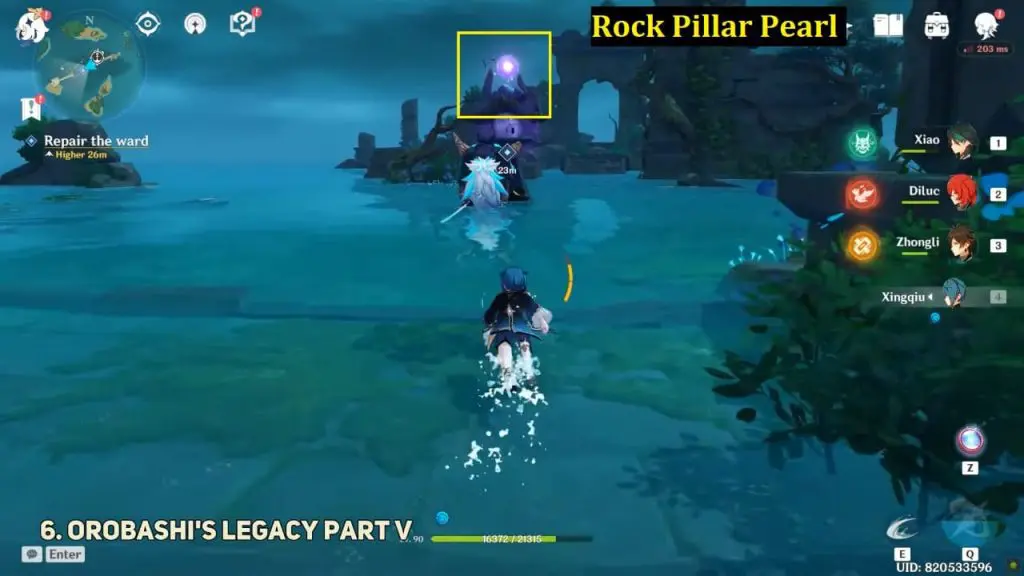
The Fort Mumei: Rock Pillar Pearl is right above the ward but you’ll have to fight the Maguu Kenki to get it. Use an elemental sight to locate the Fort Mumei: Rock Pillar Warding Stone, which should be just on the edge of the arena floating on the water.

Return to the ward and deliver the two newly acquired components. As you submit it to repair the ward. Go back and speak to Kaji to receive your quest reward, which includes the blueprint for the new craftable polearm: Kitain Cross Spear!